Embed Size (px)
Citation preview

Name Date Block
N. Berg, NNHS Biology 2017-8 Page 1 of 8
LAB: Exploring Plant & Animal Cells Background Information:
One of the first scientists to look at cells under a microscope was an English scientist by the name of Robert Hooke. He viewed and described the appearance of the outer bark of a cork oak tree under the microscope. He decided to name the tiny box-like structures that he observed “cells” because they looked like the small chambers of a monastery. By the early part of the 19th century, it was accepted that all living things are composed of cells. Cells come in a variety of shapes and sizes, and cells perform different functions. Although cells may appear outwardly different, they resemble each other because they share common structures. In this lab you will be using a light compound microscope to look at three types of cells: a human cheek cell, an onion cell, and an Elodea cell. You will observe how these cells are similar and how
they are different. The internal structures of a cell are called organelles. They are often transparent and sometimes too small to view even with aid of a microscope. Over the years biologists have developed a number of stains that help them see cells and their transparent organelles by adding color. In this lab, you will be using a yellow stain called iodine. Pre-lab Questions:
1. What three cells will you observe in this lab?
2. What tool will you use to observe cells in this lab?
3. Which stain will you use to observe transparent organelles in this lab?
Ø ALWAYS carry your microscope with two hands. Cradle the microscope “like a baby” by placing one hand under its base and the other hand on its arm.
Ø NEVER place your microscope on the edge of the lab bench
where it can be knocked off.
Ø ONLY clean your microscope lenses with lens paper that you get from your teacher.
Ø REFER to the How-To-Use a Microscope Guide if having difficulty remembering how to focus
before calling out for help. Ø ALWAYS keep a tidy lab bench. All unnecessary personal items should be stored in your bag
underneath your lab bench. Ø BE CAREFUL to avoid getting iodine on hands and clothing. Iodine will stain skin and clothing. Ø ALWAYS clean off your glass slide and cover slip with water and a paper towel and return to their
designated location at the end of the lab. Ø ALWAYS place the bag over the microscope and carefully return it to the microscope cabinet
with the arm and eyepiece facing out into the room.
LAB: Exploring Plant & Animal Cells Page 2 of 8
PROCEDURE: Check off each box as you complete each step in the procedure. PART ONE: Onion Cell Observations
o 1. Set up your light compound microscope at your lab bench. (Each person should have their own microscope unless one breaks and your teacher tells you that working with a partner is okay.)
o 2. Get a clean glass slide and cover slip.
o 3. Obtain one layer of epidermal tissue from a piece of onion (as demonstrated by your teacher).
o 4. Place the layer of tissue on the center of the glass slide. Be careful sure to lay the tissue flat.
o 5. Place a drop of water on the tissue.
o 6. Place a drop of iodine on the tissue.
o 7. Cover the tissue with the glass cover slip, by slowly lowering it over the sample starting at a 45o
angle to avoid creating air bubbles. See the figure below. If you do get some air bubbles, then you can gently tap the cover slip with your fingertip to move the air bubbles away from the center of the slide.
o 8. Place the slide on the stage of your microscope.
o 9. Align the 10x objective lens (yellow) with the center of the tissue and beam of light. Focus the image using the coarse adjustment knob. You may have to adjust the amount of light by moving the diaphragm beneath the stage. Refer to the image on the right to find what you are looking for.
o 10. Once the tissue is in focus, then slowly move the slide around to find an area where you can most easily view a single layer of onion cells. Center these cells in your field of view.
o 11. Rotate the nosepiece so that you align the 40x objective lens (blue) with the slide and beam of
light.
o 12. Using only the fine adjustment knob, focus the image. Again, you may need to adjust the amount of light to see details more easily.
o 13. Using a pencil, carefully draw the onion cells in detail and to scale in a provided circle on the
Data Sheet. Remember to label the name of the specimen and the total magnification that you are using.
o 14. Write a brief description of what you see in the box to the right of your drawing on the Data
Sheet. Estimate the width and length of a single cell and record in box.
o 15. Plant cells contain a thin, flexible cell membrane as well as a thick, rigid cell wall to hold the shape and give structure to each plant cell. Using arrows, carefully label the cell membrane and the cell wall in your drawing.
o 16. Each plant cell contains a spherical nucleus that acts as a control center inside the cell. Using
an arrow, label the nucleus in your drawing.
LAB: Exploring Plant & Animal Cells Page 3 of 8
PART TWO: Elodea Cell Observations
o 1. Set up your light compound microscope at your lab bench. (Each person should have their own microscope unless one breaks and your teacher tells you that working with a partner is okay.)
o 2. Get a clean glass slide and cover slip.
o 3. Obtain one leaf from an Elodea plant (as demonstrated by your teacher).
o 4. Place the leaf on the center of the glass slide. Be careful sure to lay the leaf flat.
o 5. Place a drop of water on the leaf.
o 6. Place a drop of iodine on the leaf.
o 7. Cover the leaf with the glass cover slip, by slowly lowering it over the drop starting at a 45o angle
to avoid creating air bubbles. See the figure below. If you do get some air bubbles, then you can gently tap the cover slip with your fingertip to move the air bubbles away from the center of the slide.
o 8. Place the slide on the stage of your microscope.
o 9. Align the 10x objective lens (yellow) with the center of the sample and beam of light. Focus the image using the coarse adjustment knob. You may have to adjust the amount of light by moving the diaphragm beneath the stage. Refer to the image on the right to find what you are looking for.
o 10. Once the leaf is in focus, then slowly move the slide around to find an area where you can most easily view a single layer of Elodea cells. Center these cells in your field of view.
o 11. Rotate the nosepiece so that you align the 40x objective lens (blue) with the slide and beam of light.
o 12. Using only the fine adjustment knob, focus the image. Again, you may need to adjust the amount
of light to see details more easily.
o 13. Using a pencil, carefully draw the Elodea cells in detail and to scale in a provided circle on the Data Sheet. Remember to label the name of the specimen and the total magnification that you are using.
o 14. Write a brief description of what you see in the box to the right of your drawing on the Data
Sheet. Estimate the width and length of a single cell and record in box.
o 15. Plant cells contain a thin, flexible cell membrane as well as a thick, rigid cell wall to hold the shape and give structure to each plant cell. Using arrows, carefully label the cell membrane and the cell wall in your drawing.
o 16. Each plant cell contains a spherical nucleus that acts as a control center inside the cell. Using
an arrow, label the nucleus in your drawing (only IF you can identify it in your picture).
o 17. Some plant cells contain small, green circular chloroplasts that are responsible for capturing sunlight to use in the process of photosynthesis. Using an arrow, label the chloroplasts in your drawing.
LAB: Exploring Plant & Animal Cells Page 4 of 8
PART THREE: Human Cheek Cell Observations
o 1. Set up your light compound microscope at your lab bench. (Each person should have their own microscope unless one breaks and your teacher tells you that working with a partner is okay.)
o 2. Get a clean glass slide and cover slip.
o 3. Place 1-2 drops of iodine in the center of the glass slide.
o 4. Using the flat side of a toothpick, gently scrape the inside lining of your cheek.
o 5. Stir the end of the toothpick into the iodine and IMMEDIATELY throw away the toothpick into the
trashcan.
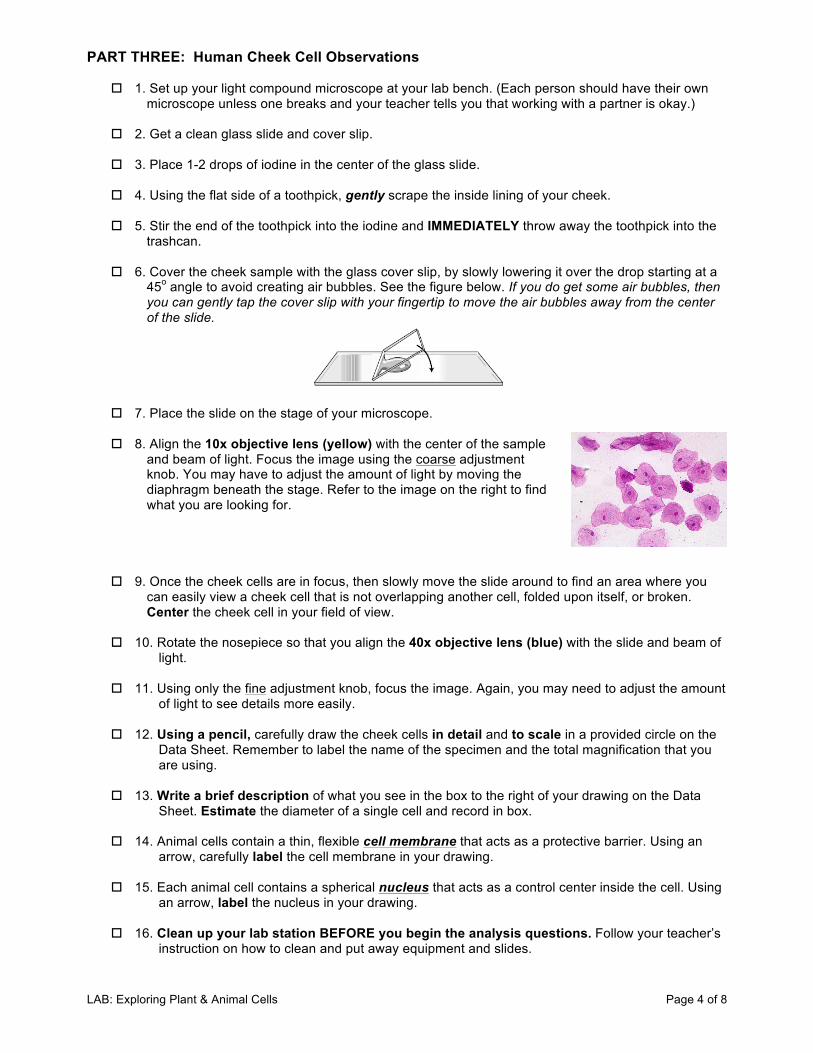
o 6. Cover the cheek sample with the glass cover slip, by slowly lowering it over the drop starting at a 45o angle to avoid creating air bubbles. See the figure below. If you do get some air bubbles, then you can gently tap the cover slip with your fingertip to move the air bubbles away from the center of the slide.
o 7. Place the slide on the stage of your microscope.
o 8. Align the 10x objective lens (yellow) with the center of the sample and beam of light. Focus the image using the coarse adjustment knob. You may have to adjust the amount of light by moving the diaphragm beneath the stage. Refer to the image on the right to find what you are looking for.
o 9. Once the cheek cells are in focus, then slowly move the slide around to find an area where you can easily view a cheek cell that is not overlapping another cell, folded upon itself, or broken. Center the cheek cell in your field of view.
o 10. Rotate the nosepiece so that you align the 40x objective lens (blue) with the slide and beam of
light.
o 11. Using only the fine adjustment knob, focus the image. Again, you may need to adjust the amount of light to see details more easily.
o 12. Using a pencil, carefully draw the cheek cells in detail and to scale in a provided circle on the
Data Sheet. Remember to label the name of the specimen and the total magnification that you are using.
o 13. Write a brief description of what you see in the box to the right of your drawing on the Data
Sheet. Estimate the diameter of a single cell and record in box.
o 14. Animal cells contain a thin, flexible cell membrane that acts as a protective barrier. Using an arrow, carefully label the cell membrane in your drawing.
o 15. Each animal cell contains a spherical nucleus that acts as a control center inside the cell. Using
an arrow, label the nucleus in your drawing.
o 16. Clean up your lab station BEFORE you begin the analysis questions. Follow your teacher’s instruction on how to clean and put away equipment and slides.
LAB: Exploring Plant & Animal Cells Page 5 of 8
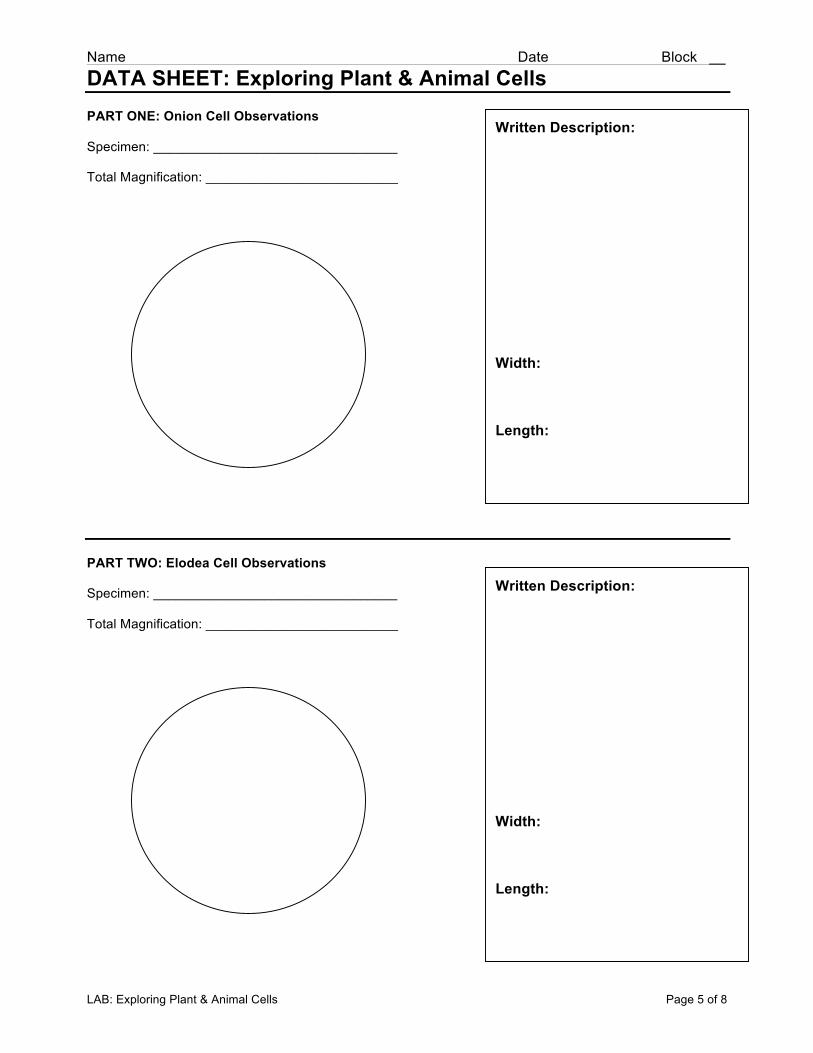
Name Date Block __ DATA SHEET: Exploring Plant & Animal Cells PART ONE: Onion Cell Observations Specimen: _________________________________ Total Magnification: __________________________ PART TWO: Elodea Cell Observations Specimen: _________________________________ Total Magnification: __________________________
Written Description: Width: Length:
Written Description: Width: Length:
LAB: Exploring Plant & Animal Cells Page 6 of 8
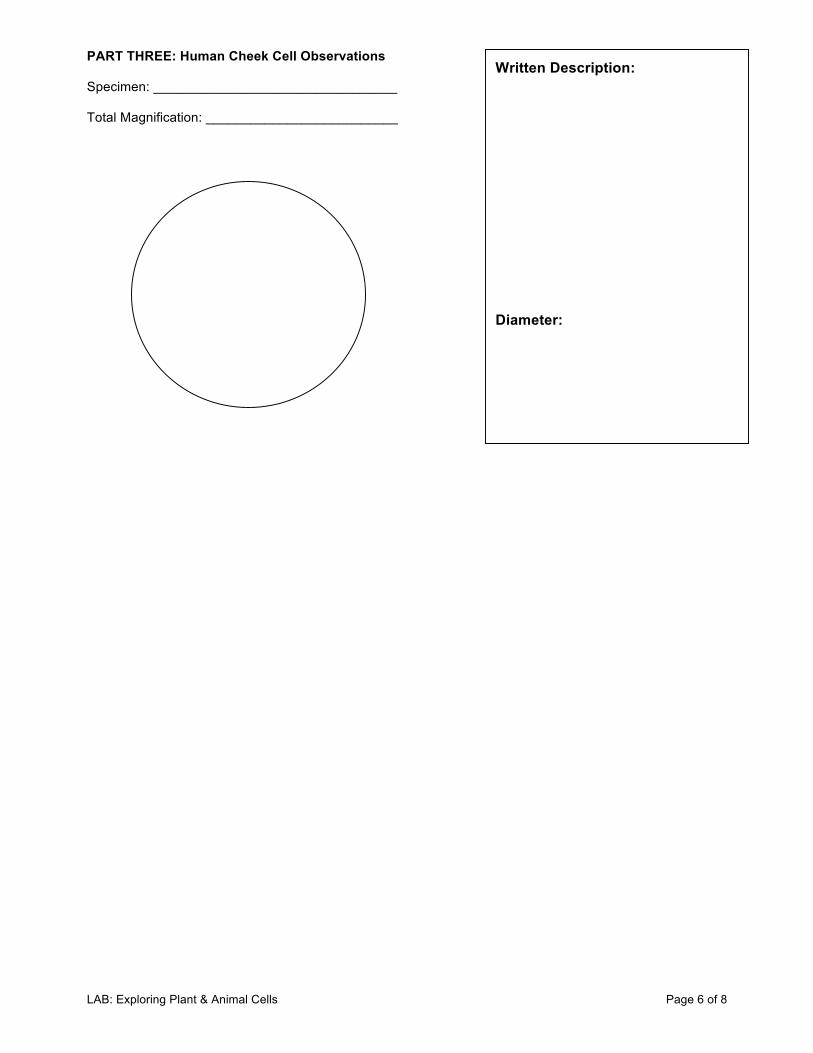
PART THREE: Human Cheek Cell Observations Specimen: _________________________________ Total Magnification: __________________________
Written Description: Diameter:

LAB: Exploring Plant & Animal Cells Page 7 of 8
POST-LAB QUESTIONS: Exploring Plant & Animal Cells Answer the following questions using complete sentences. Please write legibly. Refer back to the background information and your data sheet to help answer these questions.
1. HOW does the shape of the onion and Elodea cells differ from the cheek cells?
2. NAME two structures that you were able to see in all three cells.
3. NAME a structure that is found in the onion cell but not in the cheek cell.
4. NAME a structure that is found in the Elodea cell but not in the cheek cell.
5. WHY was it necessary to add the iodine to the cells?
6. A mitochondrion is an organelle that is responsible for carrying out cellular respiration, which is the process that supplies the cell with usable energy. Both plant cells and animal cells contain mitochondria, and yet they were not visible in the cells you viewed in this lab. Does this mean that these organelles are not found in cheek and onion cells? Why or why not? EXPLAIN your reasoning.
Energy
LAB: Exploring Plant & Animal Cells Page 8 of 8
7. On average, WHERE is the nucleus located inside a human cheek cell?
8. On average, WHERE is the nucleus located inside an onion or an Elodea cell?
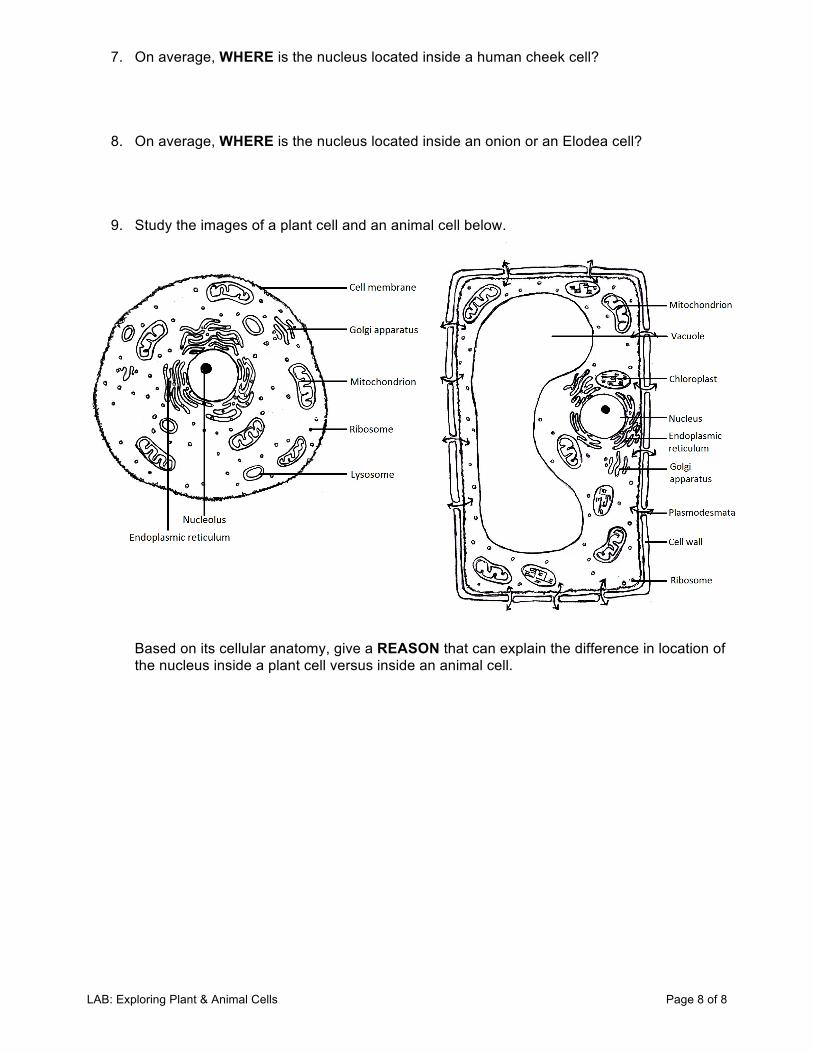
9. Study the images of a plant cell and an animal cell below.
Based on its cellular anatomy, give a REASON that can explain the difference in location of the nucleus inside a plant cell versus inside an animal cell.