Embed Size (px)
Citation preview
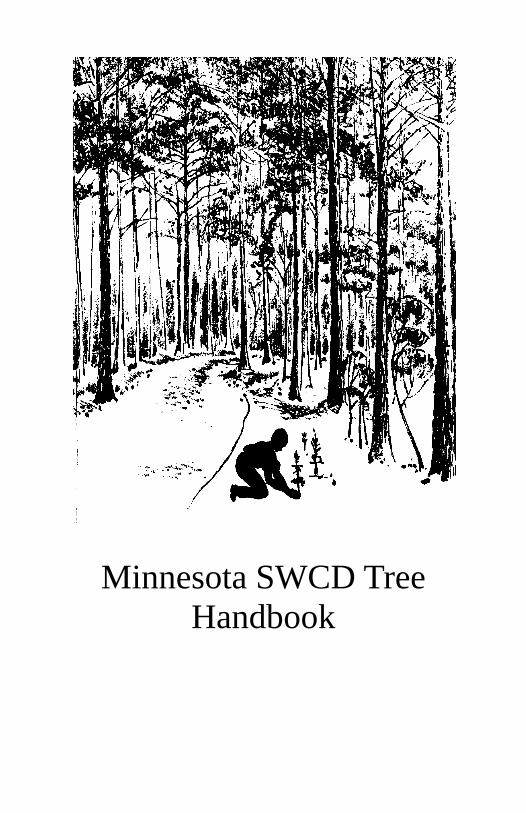
Minnesota SWCD Tree Handbook
Page i
Dear Tree Planter. . . With headlines reporting the continuing deforestation of the tropical rain forest, one may ask the question: Are America’s forests in danger of disappearing? Because people such as yourself practice reforestation, our forested acres are actually growing in size. About one-third of the United States, or 731 million acres is covered with trees. That’s about 70 percent of the forest that existed when Columbus discovered America. Almost one third of this is set aside in permanent parks and wilderness areas. Minnesotans’ have planted an average of 12 million trees annually; enough trees to cover over 15,000 acres per year. Good land stewards are planting trees for many good reasons. The results of their efforts can be seen in reduced soil erosion, improved air and water quality, healthy forest industries, enhanced wildlife habitat and generally a more attractive surrounding for us to live in. Aspen has become the most prominent tree in Minnesota’s forests. After clearcutting, aspen regenerates readily by sprouting from its root system or by drifting seeds onto disturbed sites. Most of the other major species in Minnesota need some help from tree planters to ensure that they make up a part of the new forest. The following pages will help explain how to plant and care for a tree seedling. There is a section on the general characteristics and planting requirements of the tree and shrub species commonly planted for conservation purposes in Minnesota. The professionals working in conservation throughout Minnesota thank you for planting, nurturing and wisely using one of Minnesota’s greatest treasures its renewable trees.
Page ii
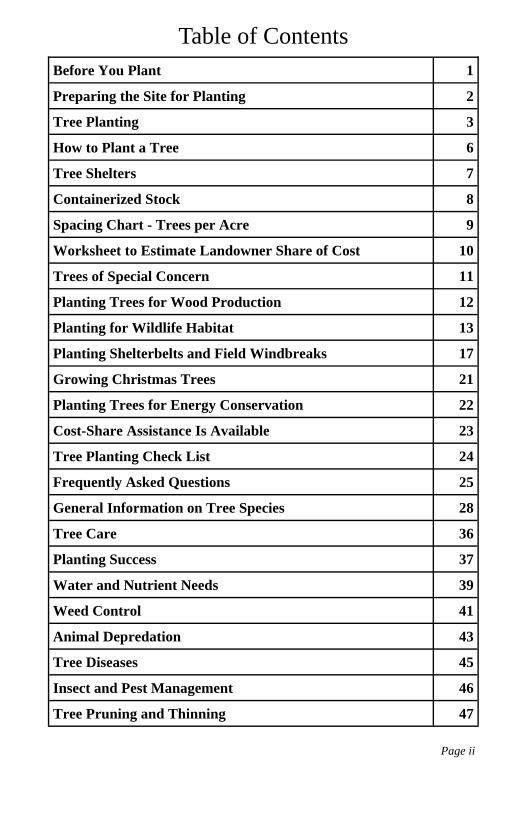
Table of Contents
Before You Plant 1
Preparing the Site for Planting 2
Tree Planting 3
How to Plant a Tree 6
Tree Shelters 7
Containerized Stock 8
Spacing Chart - Trees per Acre 9
Worksheet to Estimate Landowner Share of Cost 10
Trees of Special Concern 11
Planting Trees for Wood Production 12
Planting for Wildlife Habitat 13
Planting Shelterbelts and Field Windbreaks 17
Growing Christmas Trees 21
Planting Trees for Energy Conservation 22
Cost-Share Assistance Is Available 23
Tree Planting Check List 24
Frequently Asked Questions 25
General Information on Tree Species 28
Tree Care 36
Planting Success 37
Water and Nutrient Needs 39
Weed Control 41
Animal Depredation 43
Tree Diseases 45
Insect and Pest Management 46
Tree Pruning and Thinning 47
Selecting your site. People have a general interest in wanting to plant trees. Each year millions of trees are planted for various purposes throughout Minnesota. Most farms have areas of marginally tillable land, odd hard-to-farm corners, old retired pastures and other similar areas. All of these provide an opportunity for tree planting. In addition, any home or farmstead on an open exposed site has the need for a protective windbreak planting. The small area it takes for a properly designed windbreak will more than pay for itself in energy savings while providing much needed habitat for wildlife. Once the decision is made to dedicate an area to planting trees, the area needs to be analyzed to determine the best species suited to growing on the site. There is nothing more important than putting the right tree in the right place. Not only does the soil type need to be identified, but other factors such as water table and past agricultural practices need to be identified. When the tree species list has been narrowed down, the landowner must make the decision as to what the primary purpose of the planting will be. With this information in hand, a forester or other resource advisor can assemble a planting plan for the project, outlining step-by-step, the necessary procedures to be followed to assure a successful planting.
Order Trees Early
Every year a large number of landowners order tree and shrub seedlings in the fall or early winter. This means that the inventories in most nurseries becomes extremely limited by late winter and early spring. We urge you to order as soon as you have a planting plan to reserve your seedlings, even though you don't expect shipment until spring. Many nurseries offer Early Bird Discounts!
Before You Plant
Page 1
Preparing the Site for Planting Site preparation is one of the most important, yet most neglected aspects of tree planting. Site preparation helps eliminate weed and brush competition that can kill or greatly reduce growth of newly planted tree seedlings. As the name implies, it simply means getting the soil ready for tree planting. There are several methods that can be used for site preparation depending on the existing condition of the area. Mechanical site preparation uses some sort of equipment to remove competing vegetation from the site. Examples include plowing a furrow with a tractor, using a bulldozer with a special blade or a brush cutter. Chemical site preparation involves the application of a forestry-use labeled herbicide to competing vegetation. Chemicals can be sprayed in bands, in spots or broadcast over the entire site. Different chemicals are used in different situations. Be sure to read and follow the label before application. A combination of chemical-mechanical site preparation may be necessary in some instances. This is usually the case when a site has been mechanically cleared of existing vegetation to expose bare mineral soil. This also applies when former agricultural fields are converted back to a tree cover. Until the site is planted to trees, a cover crop can be a useful practice to reduce weed pressure and prevent soil erosion. Herbicides are then used to control competing vegetation while the tree seedlings are becoming established.
Release is a very similar activity which may be incorporated after tree planting to control weeds. The release of small seedlings can be accomplished by either chemical or mechanical methods. A well designed planting plan considers both site preparation and release methods prior to ordering the trees. Without considering control of competition, the new plantation may not survive and end up as a big expense.
Page 2
Choose Your Planting Method Trees may be planted by hand or with a tree planting machine. Usually all plantings up to 1,000 trees are more efficiently planted by hand with a planting bar. Projects using over 1,000 seedlings should consider using a planting machine pulled by a tractor. An alternative for a more natural looking woodlot is direct seeding. Discuss this option with your resource advisor. In most counties, either DNR Forestry or the Soil and Water Conservation Districts have planting bars and machines available. It is a good idea to reserve this equipment well in advance of tree delivery. Line up Your Planting Crew Tree planting is something even the beginner can attempt. Usually about 500 trees can be planted per person per day with a planting bar. A tree planting machine can plant 4,000+ trees per day and needs a crew of two or more. When it comes time to plant, family members and friends often are willing to pitch-in. There's always something for everyone to do. Even with a two-man planting machine, it is suggested that someone walk behind and tamp in each tree. If you are unable to tackle the entire project yourself, there are local vendors available for contracting part or all of the job. A list of vendor names is usually available from your forester or resource advisor. Planting Steps 1. Decide why you're planting trees and select those that fit your needs. Give careful consideration to the planting site. Picture how the trees will look when they mature and how much space each tree will occupy. 2. Planting tree seedlings in the spring provides the best results. Planting can be started as soon as the ground is free from frost and can go as long as the tree seedlings have not become moldy or broken dormancy. 3. The time between taking tree seedlings from their nursery "beds" and planting them at a permanent site is very critical. Anything that can be done to shorten this time period will increase survival chances of the tree seedlings. This means keeping the packaged seedlings in a cool, dark location and planting them as soon as possible.
Page 3
Tree Planting
Page 4
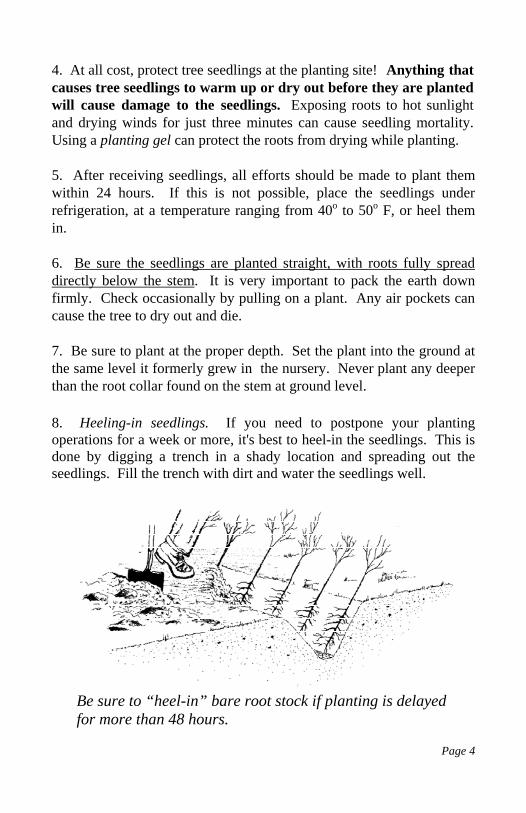
4. At all cost, protect tree seedlings at the planting site! Anything that causes tree seedlings to warm up or dry out before they are planted will cause damage to the seedlings. Exposing roots to hot sunlight and drying winds for just three minutes can cause seedling mortality. Using a planting gel can protect the roots from drying while planting. 5. After receiving seedlings, all efforts should be made to plant them within 24 hours. If this is not possible, place the seedlings under refrigeration, at a temperature ranging from 40o to 50o F, or heel them in. 6. Be sure the seedlings are planted straight, with roots fully spread directly below the stem. It is very important to pack the earth down firmly. Check occasionally by pulling on a plant. Any air pockets can cause the tree to dry out and die. 7. Be sure to plant at the proper depth. Set the plant into the ground at the same level it formerly grew in the nursery. Never plant any deeper than the root collar found on the stem at ground level. 8. Heeling-in seedlings. If you need to postpone your planting operations for a week or more, it's best to heel-in the seedlings. This is done by digging a trench in a shady location and spreading out the seedlings. Fill the trench with dirt and water the seedlings well.
Be sure to “heel-in” bare root stock if planting is delayed for more than 48 hours.
Page 5
Common Mistakes That Will Kill Seedlings
• storing seedlings in a bucket of water for more than a few minutes • planting seedling too deep or too shallow • allowing roots to curl back toward the top of the hole • not allowing proper root spread • planting in sod without good site preparation • leaving trees in boxes exposed to the sun • planting in dry soil • planting a species not adaptable to the site • planting where brush competition will crowd out the seedlings • planting seedlings where they won't receive sufficient sunlight • keeping trees in boxes more than a few days without cold storage
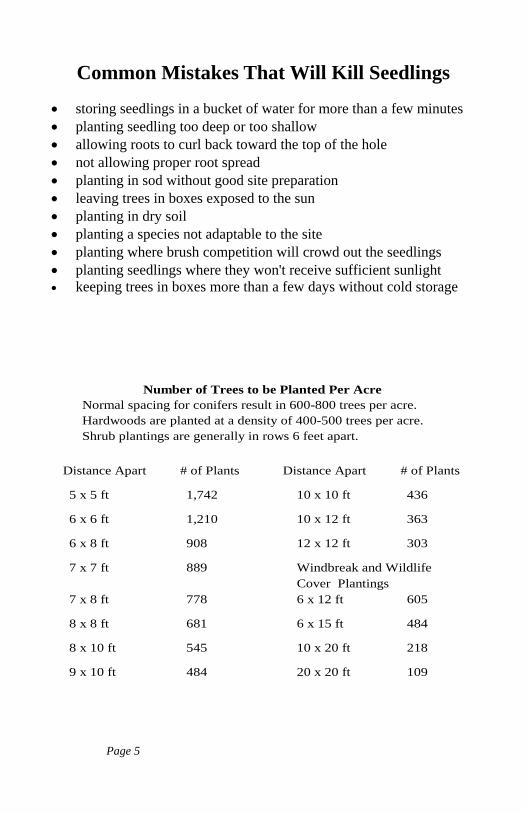
Number of Trees to be Planted Per Acre Normal spacing for conifers result in 600-800 trees per acre. Hardwoods are planted at a density of 400-500 trees per acre. Shrub plantings are generally in rows 6 feet apart.
Distance Apart # of Plants Distance Apart # of Plants
5 x 5 ft 1,742 10 x 10 ft 436
6 x 6 ft 1,210 10 x 12 ft 363
6 x 8 ft 908 12 x 12 ft 303
7 x 7 ft 889 Windbreak and Wildlife Cover Plantings
7 x 8 ft 778 6 x 12 ft 605
8 x 8 ft 681 6 x 15 ft 484
8 x 10 ft 545 10 x 20 ft 218
9 x 10 ft 484 20 x 20 ft 109
Page 6
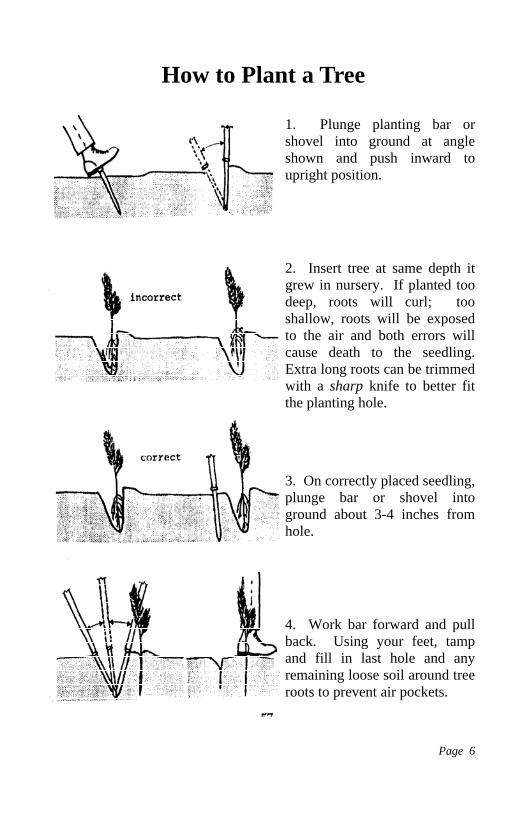
How to Plant a Tree 1. Plunge planting bar or shovel into ground at angle shown and push inward to upright position. 2. Insert tree at same depth it grew in nursery. If planted too deep, roots will curl; too shallow, roots will be exposed to the air and both errors will cause death to the seedling. Extra long roots can be trimmed with a sharp knife to better fit the planting hole. 3. On correctly placed seedling, plunge bar or shovel into ground about 3-4 inches from hole. 4. Work bar forward and pull back. Using your feet, tamp and fill in last hole and any remaining loose soil around tree roots to prevent air pockets.
Page 7
Tree Shelters Tree shelters are a new technology being used in conservation plantings to improve survival and increase growth of young seedlings. Several manufacturers are currently marketing tree shelters. A tree shelter is a plastic polymer tube approximately 3½" in diameter. The tubes are sold in various heights for use in a variety of planting situations. Each tube must be supported by a rot-resistant stake. A nylon mesh sleeve is placed over the top to prevent birds from becoming trapped in the tube. The tubes should be left on the tree. Sunlight will usually degrade them after several years, otherwise they should be cut off the tree when the stem fill the tube. The tree shelter's purpose is to provide protection from damage and to maintain an ideal growing environment until the young seedling grows out of the top of the tube. The shelter protects the seedling from animal, chemical and mechanical damages. It traps moisture from overnight higher humidities and keeps the young seedlings leaves cool and moist. This protection from damage and reduced moisture stress results in accelerated growth. Tubes taller then 30” should be vented to prevent winter damage. How many tree shelters should be used in a planting? In a typical forest regeneration planting, the most common recommendation is to use 50-150 tree shelters on the 435-680 trees planted per acre. Not every tree planted will have a shelter. The goal is to put shelters on trees that are hard to grow or those species that will become the future high quality, high value trees in the stand. The trees to be helped by tree shelters could be planted at 18-30 foot spacing. The remaining areas on the site can be filled with trees that are less valuable but easier to grow.
Cost-Share Available for Tree Shelters
Planting projects using tree shelters are eligible for cost-share funds. These funds are sometimes limited depending on the program. Ask your forester for more information.
Containerized Stock Containerized tree seedlings are started in containers, usually under greenhouse conditions, and grown through one or more flushes before they are shipped to the field. They may be shipped in the container to the field or extracted as a plug and shipped. Containerized seedlings have some advantages over bare root planting stock: 1. The planting season can be extended into early fall because the root system of each seedling is protected by a plug of soil. This infers that the stock can also be held in storage for longer periods of time making scheduling of planting jobs that much easier. 2. Planting shock is minimal when trees are removed from the container and planted. The containers are an easy way to keep roots moist and trees from drying out. 3. Seedlings at all stages of growth may be shipped and planted from the container(dormant, hardened-off or actively growing). 4. The system is nearly fool-proof in that the seedlings are buffered against poor handling and storage by the container. Being a plug also avoids some planting problems such as “J-rooting” or splitting roots at the base of the crown. Because of these inherent features of the system, survival of containerized planting stock usually runs very high. 5. Seed sources and species identification are easily maintained using containerized seedlings. Seedlings are not removed from their container until planting and the container can easily be labeled to keep sources and species information available right to the planting site. Containerized stock is easy to plant. It can be planted with the same tools used for bare root planting, such as planting bars, hoe-dads, planting dibbles, shovels or tube planters, as well as by machines. Consult a resource advisor to match the correct tool to your particular site. All planting stock should be kept moist and planted to the correct depth. The root plug should be firmed in and the top of the plug covered with native soil. This is an important step because the peat plug can act as a wick and dry the seedling out if left exposed. By covering the top with a thin layer of native soil, the plug attracts water like a sponge and becomes a water reserve for the tree seedling.
Page 8

Page 9
Planting Sketch Scale________________
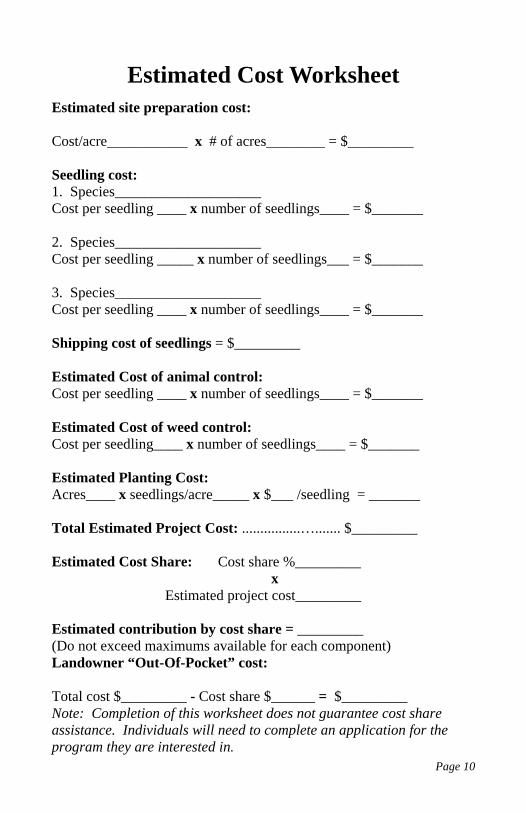
Estimated site preparation cost: Cost/acre___________ x # of acres________ = $_________ Seedling cost: 1. Species____________________ Cost per seedling ____ x number of seedlings____ = $_______ 2. Species____________________ Cost per seedling _____ x number of seedlings___ = $_______ 3. Species____________________ Cost per seedling ____ x number of seedlings____ = $_______ Shipping cost of seedlings = $_________ Estimated Cost of animal control: Cost per seedling ____ x number of seedlings____ = $_______ Estimated Cost of weed control: Cost per seedling____ x number of seedlings____ = $_______ Estimated Planting Cost: Acres____ x seedlings/acre_____ x $___ /seedling = _______ Total Estimated Project Cost: ................…....... $_________ Estimated Cost Share: Cost share %_________ x Estimated project cost_________ Estimated contribution by cost share = _________ (Do not exceed maximums available for each component) Landowner “Out-Of-Pocket” cost: Total cost $_________ - Cost share $______ = $_________ Note: Completion of this worksheet does not guarantee cost share assistance. Individuals will need to complete an application for the program they are interested in.
Estimated Cost Worksheet
Page 10

Page 11
Trees of Special Concern We are in the midst of a quiet environmental crisis. New foreign plants and animals are slowly infiltrating and changing our ecosystems. Many introduced species are more aggressive than native species and take over native habitats. They pose increasing threats to our lakes, parks, forest lands, wildlife areas, roadsides, agricultural lands and our nations native ecological balance. Human actions, intentional or accidental, are the main source of invasive species introductions. Potentially, any plant or animal species from places outside of Minnesota presents risks to our native ecosystems. The pet industry, bait dealers, recreational boating, biological supply houses, bird seed importation, grain shipments, horticultural introductions and international shipping can all bring exotic species to Minnesota. The growth of the international economy and increased trade in plants and animals have resulted in more and more accidental and deliberate releases of non-native species. Please think about the potential effects if you consider planting any of the below listed species. Ginnala or Amur maple This is a shrub that readily reproduces by seed and has the potential to be invasive in some situations. It shades out prairie plants and if cut, will sprout from the stump. Siberian elm This tree flowers early in spring before leaves unfold and the seed matures quickly. Seed is disseminated by wind, germinates readily and the seedlings grow rapidly. Siberian elm is an aggressive plant. European buckthorn This is a shrub that is still sold as an ornamental but has naturalized and is found in old fields, fence rows and in forested understories. It readily reproduces by seed and is very invasive. Norway maple This is a tree commonly planted for its varietal differences in foliage color both during the growing season and fall color season. It reproduces readily by seed and is aggressive.
Planting Trees for Wood Production In forest situations where natural regeneration of desirable species is not adequate or completely lacking, trees must be planted to start or improve the composition of the future stand. Objectives for forest plantings can include one or more of the following: 1. Produce high quality timber and improve stand composition 2. Improve wildlife habitat 3. Reforest land not suited for agriculture 4. Reduce soil and wind erosion 5. Enhance esthetics Forest plantations are a big investment usually only generating income for future generations. Therefore, it is important to develop a sound plan for planting the site, outlining all the necessary steps to ensure success. With the help of a forester or resource advisor, the landowner can identify their long-term forestry objectives and then fit the proper tree species to the site. Depending on the objectives, different planting strategies may be used. Plantings designed for optimum fiber production will have trees planted in rows to permit efficient future intensive management. The first thinnings will remove entire rows to provide more room for tree growth. Forest plantings for timber production can be modified to include several of the other listed objectives. A variety of trees can be planted in a 'naturalized' mixture. Even though they are still planted in rows, these random mixtures become more attractive to wildlife and are more aesthetically pleasing as they mature, while still producing quality timber. Planting plans for timber production usually suggest planting trees at spacings ranging from 10'x 10' for hardwoods and 6'x 8' for conifers. Exact spacing should be based on the species selected and the planned uses of the harvested materials. Some cost-share programs may be available to assist with establishing forest tree plantations.
Page 12
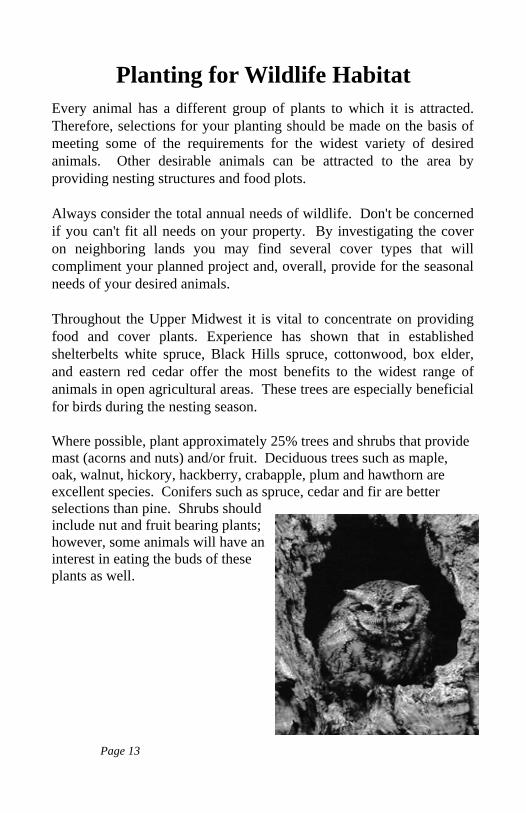
Planting for Wildlife Habitat Every animal has a different group of plants to which it is attracted. Therefore, selections for your planting should be made on the basis of meeting some of the requirements for the widest variety of desired animals. Other desirable animals can be attracted to the area by providing nesting structures and food plots. Always consider the total annual needs of wildlife. Don't be concerned if you can't fit all needs on your property. By investigating the cover on neighboring lands you may find several cover types that will compliment your planned project and, overall, provide for the seasonal needs of your desired animals. Throughout the Upper Midwest it is vital to concentrate on providing food and cover plants. Experience has shown that in established shelterbelts white spruce, Black Hills spruce, cottonwood, box elder, and eastern red cedar offer the most benefits to the widest range of animals in open agricultural areas. These trees are especially beneficial for birds during the nesting season. Where possible, plant approximately 25% trees and shrubs that provide mast (acorns and nuts) and/or fruit. Deciduous trees such as maple, oak, walnut, hickory, hackberry, crabapple, plum and hawthorn are excellent species. Conifers such as spruce, cedar and fir are better selections than pine. Shrubs should include nut and fruit bearing plants; however, some animals will have an interest in eating the buds of these plants as well.
Page 13
Page 14
For wildlife habitat, when in doubt plant: • Spruce or fir rather than pine. • Cottonwood as tall deciduous trees. • A mixture of red and white oaks, including bur oak. • Fruit and nut bearing plants also edible by humans. • Native species rather than exotics or ornamental
cultivars. • More warm season grass (prairie) than cool season grass
(brome and bluegrass). Planting a Year-long Food Supply for Wildlife The following shrubs and small trees are just a few of the species that are recommended for a general purpose wildlife cover planting. These plant varieties can survive on a wide variety of Minnesota soils and will provide a year long supply of food and cover for many birds and animals. Highbush Cranberry. This shrub ranges in size from 3 to 9 feet tall. Its tri-lobed, maple-like leaves are attached to red stalks. Its brilliant red berries provide food for wildlife as well as providing a pleasing visual sight during the winter months. Caragana. (non-native) An upright growing tall shrub used for windbreaks, erosion control, and food and cover for wildlife. A hardy shrub, it can adapt to most sites, but prefers open sunny locations. Wild Plum. Used for food and cover for wildlife. Considered a fast growing small tree growing to a height of 12 to 20 feet. It is quite hardy, does well in full or partial sunlight, and tolerates both dry and wet soils. Densely planted, it will form a thicket that is good for wildlife habitat. Crabapple. Trees with white to deep pink flowers. Fruit ranges in size and color from small yellow apples to medium-sized red crabapples. Many species of birds and animals rely on the seasonal crop of apples for food, including the cedar waxwing, purple finch, robin, red fox and cottontail rabbit. Crabapples do best in full sun to partial shade and on good, well-drained soils.
Page 15
Nanking Cherry. (non-native) A very hardy, medium sized shrub that produces showy white flowers. On occasion, severe cold winters can damage flower buds above the snowline, reducing the abundance of fruit produced. The small attractive red fruit is tart and is favored by cedar waxwings, squirrels and chipmunks. Nanking cherry will grow in sandy soil but does best in heavier soils, in full sun. Red-osier Dogwood. Native to Minnesota, this shrub has been widely planted for its red winter stems. Dogwoods prefer fertile, moist soil and full or partial sunlight. The fruits are white and ripen late in the summer but can persist into the early winter months. Evening grosbeaks, chipmunks and white-tailed deer are just a few of the many birds and animals attracted to the dogwood. This shrub will spread naturally by root suckers. Cotoneaster. (non-native) Attractive to catbirds, mockingbirds and purple finches. Pinkish flowers bloom in early spring and black fruits ripen in late summer and early fall. It is susceptible to oyster shell scale and fireblight. Juneberry. Also known as serviceberry or shadberry, this shrub is quite variable from plant to plant and is difficult to identify. All juneberries have white flowers and black-blue fruit that matures in July. Songbirds, ruffed grouse, mourning doves, skunk, beaver, fox, bear and squirrels are but a few of the many animals that eat the fruit. Many other animals browse the twigs. Juneberries like well-drained soil and full sun light although they will tolerate partial shade. Eastern redcedar. A small to medium-sized conifer tree from 40-50 feet tall. The cone of this tree is actually a berry-like fruit that birds will eat in large numbers. The foliage of redcedar provides excellent winter cover for a variety of wildlife species. The natural range for redcedar includes the southern one-third of Minnesota. Redcedar is the host for cedar-apple rust. Be wary of planting near prized apple trees or commercial apple orchards.

Page 16
Chokecherry. Native to Minnesota, this hardy shrub can attain the height of a small tree. It produces white flowers and tart, purplish fruit that can be used to make jellies and pies. Songbirds, ruffed and sharptail grouse, pheasant, raccoon, black bear, red fox, white-tailed deer, cottontail rabbit and gray squirrel feed on its fruit and twigs. It prefers rich and moist soils and will grow in full sun light or shade. Hawthorn. A dense shrub or small tree, the hawthorn has long, sharp thorns on its stems and branches. It produces showy white, sometimes pink, flowers and small, yellow to red, and apple-like fruit. The fruit often remains on the plant all winter, providing food for numerous birds and animals. The hawthorn's dense crown offers excellent nesting cover for many kinds of songbirds. It is not particular as to soil, but likes sunny sites. Establishing Wildlife Cover Plantings As with any planting, weed control is essential. Tilling, mulching, or pretreating with a herbicide is recommended around each seedling to reduce weed competition and to maximize shrub and tree survival. Cost-share funds to reimburse landowners for wildlife shrub and tree plantings are generally available.
Page 17
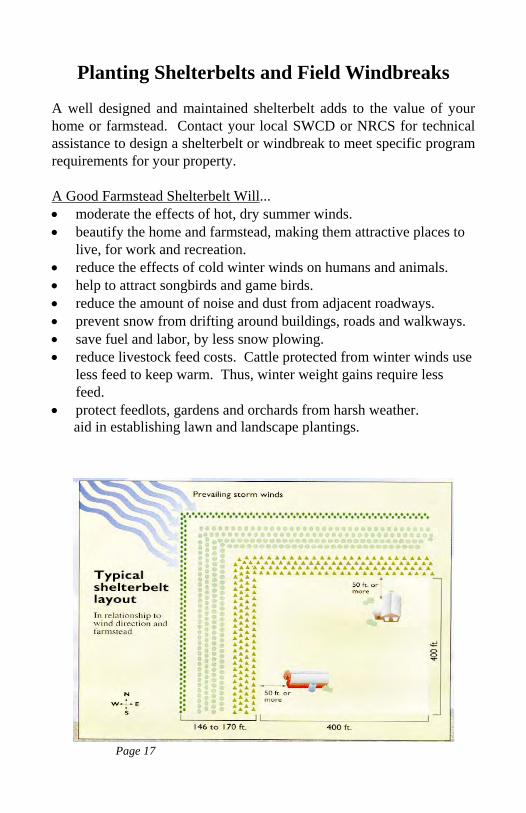
Planting Shelterbelts and Field Windbreaks
A well designed and maintained shelterbelt adds to the value of your home or farmstead. Contact your local SWCD or NRCS for technical assistance to design a shelterbelt or windbreak to meet specific program requirements for your property. A Good Farmstead Shelterbelt Will... • moderate the effects of hot, dry summer winds. • beautify the home and farmstead, making them attractive places to
live, for work and recreation. • reduce the effects of cold winter winds on humans and animals. • help to attract songbirds and game birds. • reduce the amount of noise and dust from adjacent roadways. • prevent snow from drifting around buildings, roads and walkways. • save fuel and labor, by less snow plowing. • reduce livestock feed costs. Cattle protected from winter winds use
less feed to keep warm. Thus, winter weight gains require less feed.
• protect feedlots, gardens and orchards from harsh weather. aid in establishing lawn and landscape plantings.
Page 18
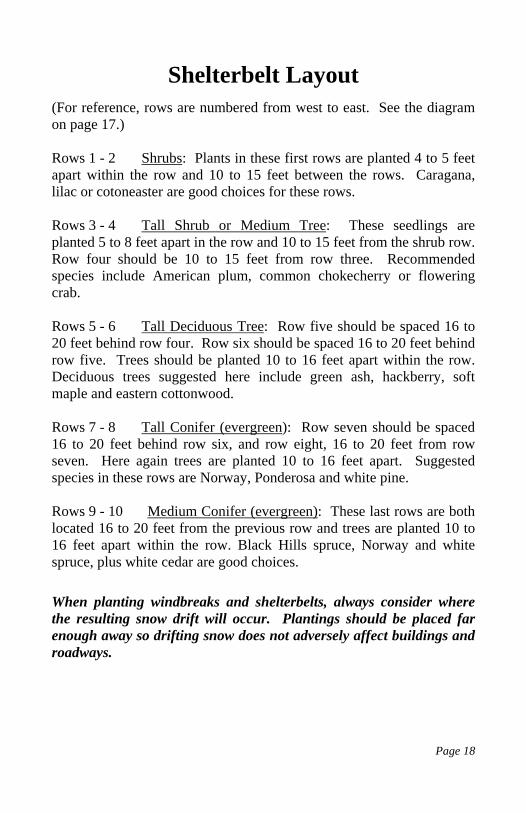
Shelterbelt Layout (For reference, rows are numbered from west to east. See the diagram on page 17.) Rows 1 - 2 Shrubs: Plants in these first rows are planted 4 to 5 feet apart within the row and 10 to 15 feet between the rows. Caragana, lilac or cotoneaster are good choices for these rows. Rows 3 - 4 Tall Shrub or Medium Tree: These seedlings are planted 5 to 8 feet apart in the row and 10 to 15 feet from the shrub row. Row four should be 10 to 15 feet from row three. Recommended species include American plum, common chokecherry or flowering crab. Rows 5 - 6 Tall Deciduous Tree: Row five should be spaced 16 to 20 feet behind row four. Row six should be spaced 16 to 20 feet behind row five. Trees should be planted 10 to 16 feet apart within the row. Deciduous trees suggested here include green ash, hackberry, soft maple and eastern cottonwood. Rows 7 - 8 Tall Conifer (evergreen): Row seven should be spaced 16 to 20 feet behind row six, and row eight, 16 to 20 feet from row seven. Here again trees are planted 10 to 16 feet apart. Suggested species in these rows are Norway, Ponderosa and white pine. Rows 9 - 10 Medium Conifer (evergreen): These last rows are both located 16 to 20 feet from the previous row and trees are planted 10 to 16 feet apart within the row. Black Hills spruce, Norway and white spruce, plus white cedar are good choices. When planting windbreaks and shelterbelts, always consider where the resulting snow drift will occur. Plantings should be placed far enough away so drifting snow does not adversely affect buildings and roadways.
Page 19
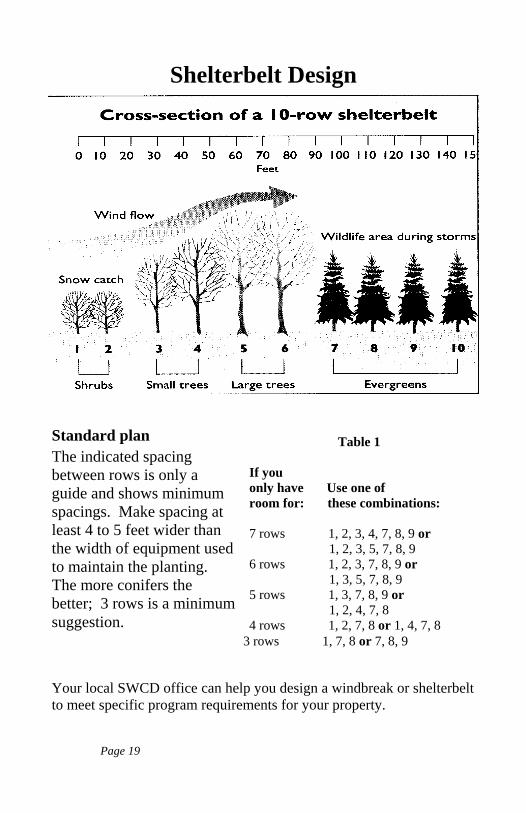
Shelterbelt Design
Standard plan The indicated spacing between rows is only a guide and shows minimum spacings. Make spacing at least 4 to 5 feet wider than the width of equipment used to maintain the planting. The more conifers the better; 3 rows is a minimum suggestion.
Table 1 If you only have Use one of room for: these combinations: 7 rows 1, 2, 3, 4, 7, 8, 9 or 1, 2, 3, 5, 7, 8, 9 6 rows 1, 2, 3, 7, 8, 9 or 1, 3, 5, 7, 8, 9 5 rows 1, 3, 7, 8, 9 or 1, 2, 4, 7, 8 4 rows 1, 2, 7, 8 or 1, 4, 7, 8
3 rows 1, 7, 8 or 7, 8, 9
Your local SWCD office can help you design a windbreak or shelterbelt to meet specific program requirements for your property.
Livestock and Field Windbreaks
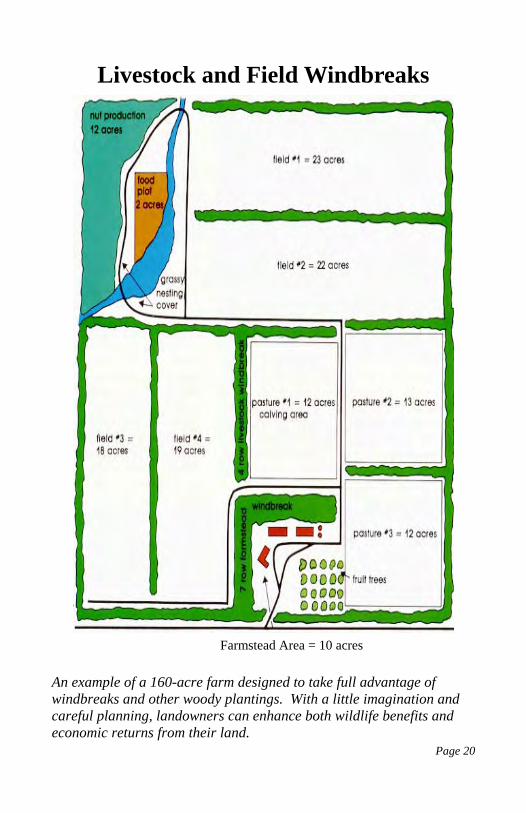
An example of a 160-acre farm designed to take full advantage of windbreaks and other woody plantings. With a little imagination and careful planning, landowners can enhance both wildlife benefits and economic returns from their land.
Farmstead Area = 10 acres
Page 20

Page 21
Growing Christmas Trees Christmas trees may be grown as a primary crop or be removed as thinnings from a tree planting established for timber. Popular trees grown in Minnesota are Scotch, Norway and white pine, Colorado and white spruce, and balsam and Fraser fir. Today's Christmas tree farmer must produce a high quality tree to compete in the Christmas tree business. Careful management and shearing of the trees will produce a well-shaped, compact tree that can generate good income. The ideal shape of a tree should resemble a cone, wide at the base and tapering uniformly to the top. A naturally grown tree usually has thin foliage, is spindly and has too much distance between the branches - a tree better left to grow to full size. After planting, trees being grown for Christmas trees must be cared for more intensely than regular conservation plantings. Weeds must be controlled to keep them from choking out the small trees. Tall weeds grow up into the trees, shading the lower branches and causing the needles to drop. Shearing begins when trees are approximately 2’ tall, generally two to three years after planting. Pine must be pruned when their new growth, or 'candles', have elongated, but before they harden off (become woody). Spruce and fir can be sheared at any time of the year. Once shearing is started it must be continued annually. Tree planters interested in growing Christmas trees should consult with their forester for more information.
Before planting, check with your State Christmas tree association about the market for Christmas trees in your area. Some mar-kets are saturated.
Page 22
Planting Trees for Energy Conservation Strategic planting for energy conservation has received much attention because of the multiple benefits provided. Owners of buildings well-shaded and sheltered by trees can see direct savings on heating and cooling bills. And whenever energy use is decreased, less fuel is burned and less air pollution is created. Just how beneficial trees are for conserving energy depends a great deal on how they are used. While the aim of a community-wide planting is to increase tree cover, the trees at each site should be located as optimally as possible. "West is Best" A building with well insulated walls and roof gains most of its unwanted summer heat through east and west facing windows. The most effective way to use trees to keep a building cooler in summer is to plant trees that shade west facing windows. "Up and Over" Cold wind leaking into a building is the biggest cause of winter heat loss. Tall, dense trees are ideally suited to direct wind up and over buildings. To achieve the greatest year-round energy savings, create a windbreak to the west and north. "Let the Sun Shine In" In the upper midwest, the owner of a typical fully air-conditioned home will spend about tens times more to heat than to cool the home. Since there is a significant amount of energy gained from the winter sun shining through south-facing windows, avoid trees south of windows. "The More the Merrier" Areas of extensive pavement and buildings become summer heat islands and windswept tundra in the winter. Increase tree canopy cover throughout the neighborhood to reduce both extremes.
Page 23
Cost-Share Assistance Is Available Several government sponsored programs are available each year to help share the expenses of planting trees and shrubs for conservation purposes. Cost-share assistance rates range from 50% to 90% of the total eligible costs of tree and shrub planting projects. Most programs will allow in-kind contributions in the form of landowner-provided labor, equipment or supplies to reduce the amount of out-of-pocket expense for the project. See page 10 for a worksheet that will assist in calculating how much a landowner might pay for a planting project. It is best to plan ahead at least one year for your tree planting project. This will provide the necessary time to meet with a forester or other conservation professional to analyze your site and prepare a plan. Cost-share programs generally have specific sign-up periods. You must complete application for the cost-share program at the county USDA Service Center or an office of the local Soil and Water Conservation District. If you are relying on cost-share assistance for your planting, do not begin the practice until you receive written approval from the office to which you’ve made application. After approval you can begin with the rest of the necessary tree planting project steps as outlined in your tree planting plan, such as: • Ordering tree seedlings • Make site preparation arrangements • Make arrangements for tree planting • Submit bills for project to agency • Make arrangements for plantation release, as needed Be sure to consult with your local forester, conservationist or other resource advisor to receive more information on any cost-share programs available for your tree planting project. Your resource advisor can help you understand the process of using the cost-share programs.
Tree Planting Check List ◊ Select a site.
◊ Request information from a forester or other land manager.
◊ Apply for a cost-share program, if applicable.
◊ Choose a tree or shrub species suited to the site, with the assistance of a land manager or forester.
◊ Order trees.
◊ Choose and complete best method of site preparation.
◊ Make arrangements for tree planting and plant trees as soon as they arrive in the spring.
◊ Monitor tree growth throughout the summer.
◊ Choose and complete fall release practice as needed.
All of these activities should be done in consultation with a professional forester or other resource advisor to assure the greatest possible chance of success.
For Additional Information Contact: The Minnesota Department of Natural Resources (DNR), Division of Forestry provides resource information, technical planning assistance, funding programs and general forestry administration. Soil and Water Conservation Districts (SWCDs) help the public locate resource information and programs, technical assistance for woodland owners and funding for various woodland management activities. The USDA Natural Resources Conservation Service (NRCS) offers cost-sharing, and technical assistance for a variety of conservation practices including windbreaks, shelterbelts, living snow fences, tree planting and timber stand improvement. The Minnesota Extension Service offers practical, research-based information on a wide range of forestry, forest products and wildlife management subjects. It provides information and formal education to the general public.
Page 24
When is the best time for weed control on a new planting? A. On old field or cropland sites, fall application of herbicides seems to be the most effective. Your plan will suggest the herbicide treatment best to control grass and weeds on your site. What's wrong with my trees, they're all turning brown? A. Call your forester, resource advisor or whoever helped you set up the planting immediately. It could be the result of many things - trees were not handled properly and dried out during the planting; you may have gopher problems; the dirt was not packed well around each seedling after planting; the seedlings may have a disease. I'm concerned about the environment and the use of herbicides in my tree planting. Is there an alternative? A. Herbicides recommended for controlling weeds are federally registered for that use and are considered by the EPA as safe, if used properly for that purpose. There are alternatives such as cultivation, mulching or fabric weed barriers. The important thing is to keep an area grass and weed free around each seedling for at least 3 feet, until the trees are freely growing. My trees just arrived and I can't plant them until next week, what should I do with them? A. Make arrangements for cold storage (40o to 50oF) or heel-in the seedlings. See page 4 for a detailed description of “heeling-in”. Storing the trees for a few days in a cold garage or fruit cellar is acceptable, but any longer will result in the seedlings rotting. Do not store seedlings in tubs of water - they will die. It's already March and I haven't done anything about setting up a tree planting project. Is it too late? A. If you want a hassle free tree planting the answer is YES! You should work on the site preparation this year and plant next spring. You can still get it done this year, however you must be willing to spend a lot of time looking for tree seedlings, working on site preparation and waiting your turn for planting equipment. It is best to wait a year. Page 25
Answers to Frequently Asked Questions
Should I have a contract with the vendor that plants my trees? A. It is always sound business practice to require a contractual agreement when you hire someone to do work for you. It is the final word to resolve disputes surrounding completion of the project. It can reduce your liability for the other party's actions. Can I plant all my seedlings in a small plot and move them later when they are bigger? A. It is best to plant the new seedlings where you want them. Every time the trees are transplanted they experience transplant shock resulting in lost growth..and it's a lot of extra work. What is the best way to plant a site - direct seeding of seeds or planting seedlings, transplants or container grown seedlings? A. Each situation is different and it is best to consult with a forester or other resource advisor to receive some advice. The estimate I received for my planting project was too expensive. Is there some means to defray these expenses? A. Yes. The first way is to apply for one of several cost-share programs available for planting trees and shrubs. These programs can cover 50% to 90% of the project costs. This leaves the owner to pay the remainder, or provide the labor or materials as in-kind contribution. Many times a landowner can provide enough labor to the project to offset their share. Your plan preparer can outline this in your project budget. The trees in the boxes have some gray stuff on them. Is that OK? A. You may just be seeing a harmless mold on the seedlings. If the box has a strong sour, fermenting odor, your trees may be starting to rot because they were not stored properly. Call your forester or resource advisor immediately for further assistance. I've ordered the trees and contracted the tree planter, but I forgot to apply for the cost-share program. Is it too late? A. Maybe not. Call the local agency office administering the cost-share program. If you haven't started actual work on the project, you may still be able to apply. It is up to the agency to decide on your eligibility. Can I mix seedlings in my tree planting? A. In most cases the answer is yes and in general, it creates a more naturalized planting.
However when planting a site for the sole purpose of timber production, it is not recommended to mix species in the rows. Some planting designs have species planted in alternating rows, like white pine and red oak or walnut, where the pine help train the hardwoods into better quality trees. Should I worry about the old box elders by my tree planting site? A. Yes. Box elders and elm are prolific seed producers. Your site preparation not only is good for the establishment of your small seedlings, but is also an excellent site for seeds to germinate. It is recommended to remove all elm and boxelder around your site if possible by cutting and chemical treatment. Dead trees can be left standing for wildlife den trees. I planted trees a few years ago, now all I see in my field is a sea of grass. What happened to my trees? A. It is important to monitor your tree planting regularly, at least every couple weeks during the first year. If it looks like weeds are beginning to grow over the small trees, contact your forester or resource advisor for further assistance on weed control measures. Mowing will help keep the grass from falling on the trees and smothering them. What kind of records do I need to keep for a cost-share program? A. It is a good idea to start a journal tracking everything you do on the project. Keep track of all time spent working on the tree planting, all bills for materials and tree purchases and receipts for all labor and/or contractors. You will need to present these to the agency administering the cost-share program to verify your costs. These records should be maintained for income tax purposes.
Page 27
Minnesota’s Bookstore has- -Woodworking for Wildlife, projects for wildlife nesting boxes and structures. 112 pages $9.95 -Landscaping for Wildlife, excellent reference for planning a landscape to attract wildlife. 144 pages $10.95 -Set Price for both books listed above $18.50 -Wild About Birds, projects for bird feeders. 288 pages $19.95 -Set Price for all three books listed above $36.95 -Traveler’s Guide to Wildlife
(not available as part of a set) 320 pages $19.95 To order call 651-297-3000 or 800-657-3757
Page 28
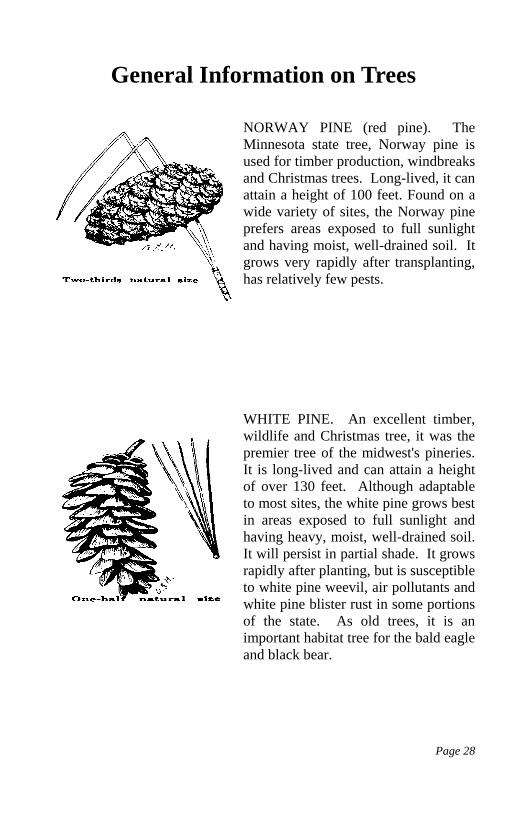
General Information on Trees NORWAY PINE (red pine). The Minnesota state tree, Norway pine is used for timber production, windbreaks and Christmas trees. Long-lived, it can attain a height of 100 feet. Found on a wide variety of sites, the Norway pine prefers areas exposed to full sunlight and having moist, well-drained soil. It grows very rapidly after transplanting, has relatively few pests. WHITE PINE. An excellent timber, wildlife and Christmas tree, it was the premier tree of the midwest's pineries. It is long-lived and can attain a height of over 130 feet. Although adaptable to most sites, the white pine grows best in areas exposed to full sunlight and having heavy, moist, well-drained soil. It will persist in partial shade. It grows rapidly after planting, but is susceptible to white pine weevil, air pollutants and white pine blister rust in some portions of the state. As old trees, it is an important habitat tree for the bald eagle and black bear.

Page 29
JACK PINE. A good tree for timber and wildlife habitat in northern Minnesota. A pioneering tree on disturbed sites, it is generally a short-lived tree, 50-70 years. On good sites it will attain a height of 70 feet. Jack pine requires full sunlight and does best on dry, sandy soils. It grows rapidly but is not used for field windbreaks. SCOTCH PINE. (non-native) Used primarily for Christmas trees and windbreaks. Moderately long-lived, it can attain a height of 30 to 70 feet. A hardy, adaptable tree, the Scotch pine likes full sunlight and dry, well-drained soil. Although some trees grow with good form for timber, a majority have such poor form that Scotch pine is not recommended for that use. WHITE SPRUCE. Excellent for timber, wildlife habitat, windbreaks and Christmas trees. Long-lived, it can attain a height of 100 feet. It grows best on medium to heavy soils and although quite tolerant of partial shade, likes full sunlight. White spruce grows rapidly, especially after the first three to five years after transplanting. Black Hills spruce, a variety of white spruce, will grow on drier sites especially in western portions of the state.
Page 30
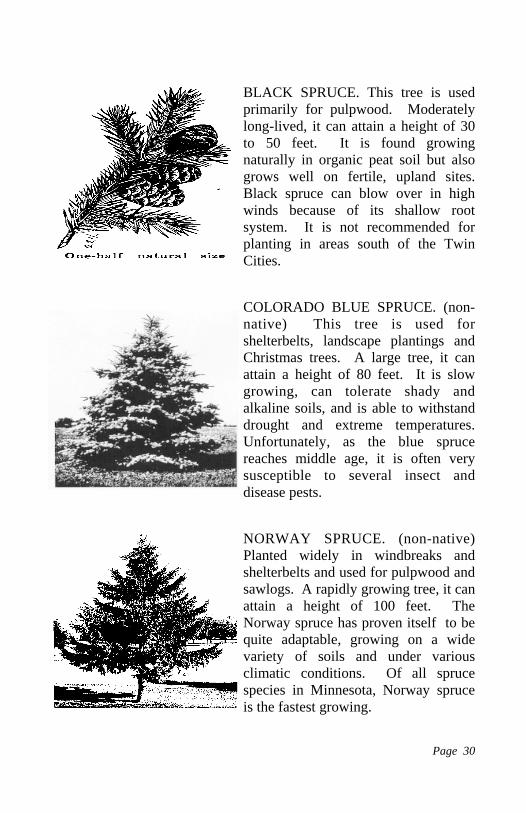
BLACK SPRUCE. This tree is used primarily for pulpwood. Moderately long-lived, it can attain a height of 30 to 50 feet. It is found growing naturally in organic peat soil but also grows well on fertile, upland sites. Black spruce can blow over in high winds because of its shallow root system. It is not recommended for planting in areas south of the Twin Cities. COLORADO BLUE SPRUCE. (non-native) This tree is used for shelterbelts, landscape plantings and Christmas trees. A large tree, it can attain a height of 80 feet. It is slow growing, can tolerate shady and alkaline soils, and is able to withstand drought and extreme temperatures. Unfortunately, as the blue spruce reaches middle age, it is often very susceptible to several insect and disease pests. NORWAY SPRUCE. (non-native) Planted widely in windbreaks and shelterbelts and used for pulpwood and sawlogs. A rapidly growing tree, it can attain a height of 100 feet. The Norway spruce has proven itself to be quite adaptable, growing on a wide variety of soils and under various climatic conditions. Of all spruce species in Minnesota, Norway spruce is the fastest growing.
Page 31
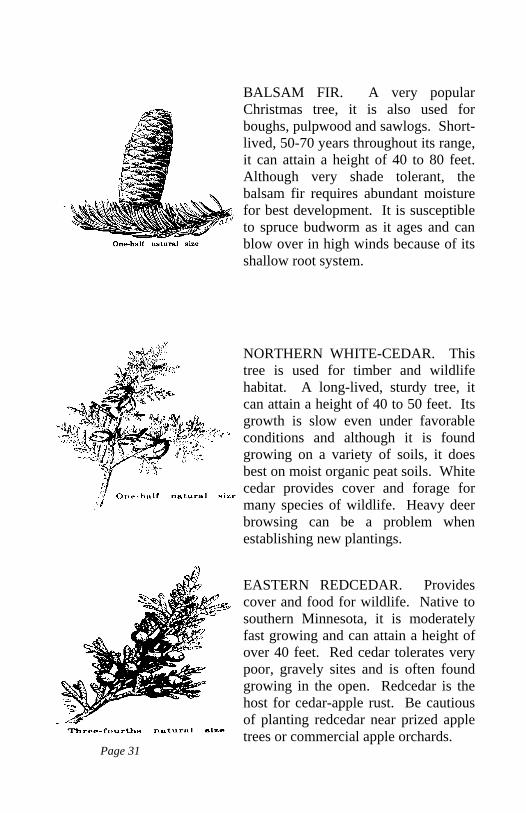
BALSAM FIR. A very popular Christmas tree, it is also used for boughs, pulpwood and sawlogs. Short-lived, 50-70 years throughout its range, it can attain a height of 40 to 80 feet. Although very shade tolerant, the balsam fir requires abundant moisture for best development. It is susceptible to spruce budworm as it ages and can blow over in high winds because of its shallow root system. NORTHERN WHITE-CEDAR. This tree is used for timber and wildlife habitat. A long-lived, sturdy tree, it can attain a height of 40 to 50 feet. Its growth is slow even under favorable conditions and although it is found growing on a variety of soils, it does best on moist organic peat soils. White cedar provides cover and forage for many species of wildlife. Heavy deer browsing can be a problem when establishing new plantings. EASTERN REDCEDAR. Provides cover and food for wildlife. Native to southern Minnesota, it is moderately fast growing and can attain a height of over 40 feet. Red cedar tolerates very poor, gravely sites and is often found growing in the open. Redcedar is the host for cedar-apple rust. Be cautious of planting redcedar near prized apple trees or commercial apple orchards.
Page 32
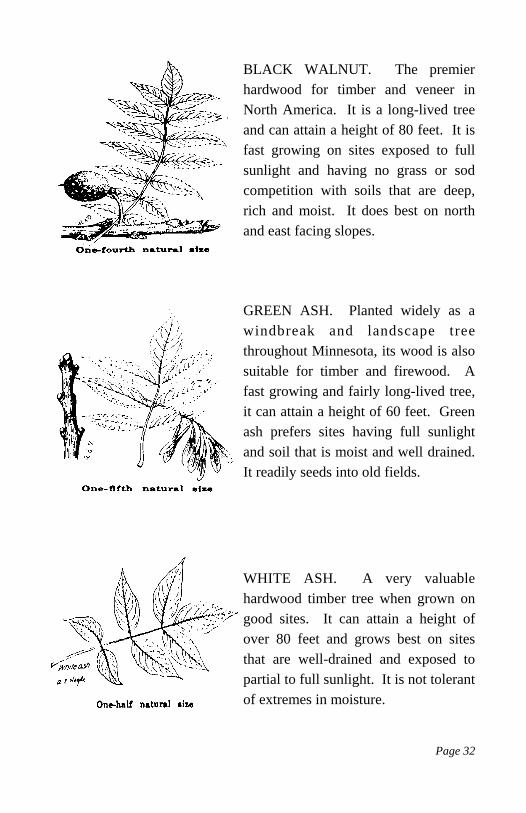
BLACK WALNUT. The premier hardwood for timber and veneer in North America. It is a long-lived tree and can attain a height of 80 feet. It is fast growing on sites exposed to full sunlight and having no grass or sod competition with soils that are deep, rich and moist. It does best on north and east facing slopes.
GREEN ASH. Planted widely as a windbreak and landscape tree throughout Minnesota, its wood is also suitable for timber and firewood. A fast growing and fairly long-lived tree, it can attain a height of 60 feet. Green ash prefers sites having full sunlight and soil that is moist and well drained. It readily seeds into old fields.
WHITE ASH. A very valuable hardwood timber tree when grown on good sites. It can attain a height of over 80 feet and grows best on sites that are well-drained and exposed to partial to full sunlight. It is not tolerant of extremes in moisture.
Page 33
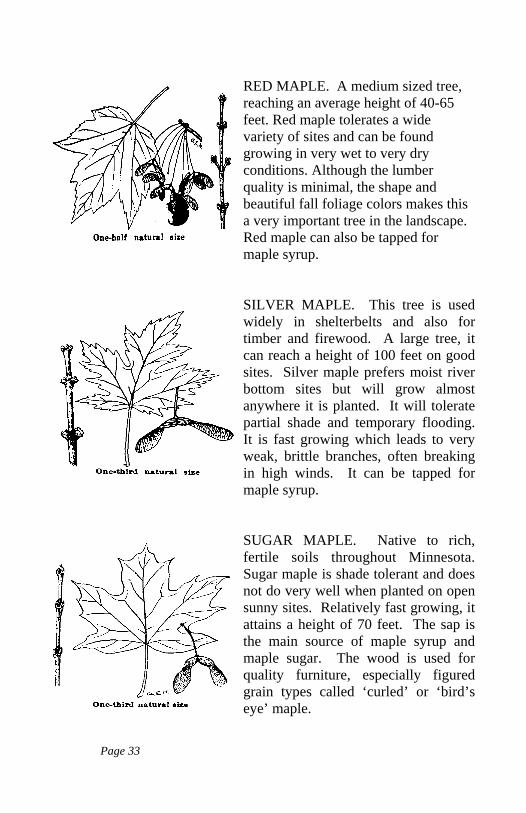
RED MAPLE. A medium sized tree, reaching an average height of 40-65 feet. Red maple tolerates a wide variety of sites and can be found growing in very wet to very dry conditions. Although the lumber quality is minimal, the shape and beautiful fall foliage colors makes this a very important tree in the landscape. Red maple can also be tapped for maple syrup. SILVER MAPLE. This tree is used widely in shelterbelts and also for timber and firewood. A large tree, it can reach a height of 100 feet on good sites. Silver maple prefers moist river bottom sites but will grow almost anywhere it is planted. It will tolerate partial shade and temporary flooding. It is fast growing which leads to very weak, brittle branches, often breaking in high winds. It can be tapped for maple syrup. SUGAR MAPLE. Native to rich, fertile soils throughout Minnesota. Sugar maple is shade tolerant and does not do very well when planted on open sunny sites. Relatively fast growing, it attains a height of 70 feet. The sap is the main source of maple syrup and maple sugar. The wood is used for quality furniture, especially figured grain types called ‘curled’ or ‘bird’s eye’ maple.
Page 34
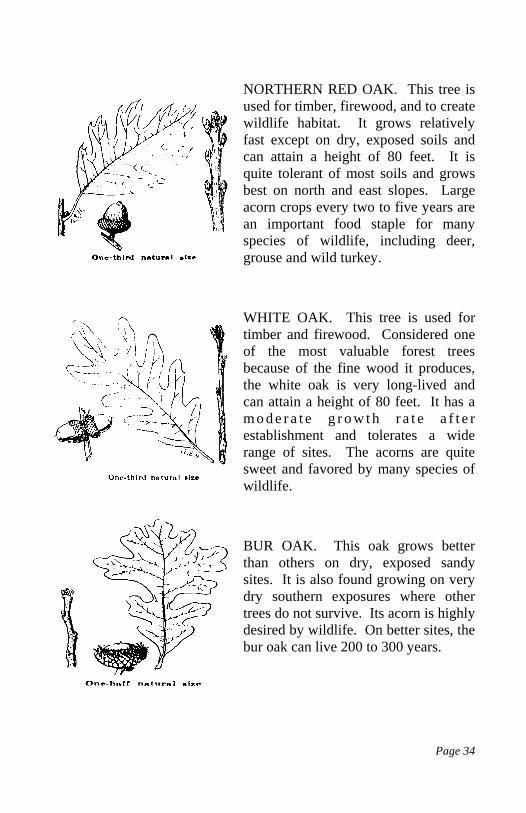
NORTHERN RED OAK. This tree is used for timber, firewood, and to create wildlife habitat. It grows relatively fast except on dry, exposed soils and can attain a height of 80 feet. It is quite tolerant of most soils and grows best on north and east slopes. Large acorn crops every two to five years are an important food staple for many species of wildlife, including deer, grouse and wild turkey. WHITE OAK. This tree is used for timber and firewood. Considered one of the most valuable forest trees because of the fine wood it produces, the white oak is very long-lived and can attain a height of 80 feet. It has a m o d e r a t e g r o w t h r a t e a f t e r establishment and tolerates a wide range of sites. The acorns are quite sweet and favored by many species of wildlife. BUR OAK. This oak grows better than others on dry, exposed sandy sites. It is also found growing on very dry southern exposures where other trees do not survive. Its acorn is highly desired by wildlife. On better sites, the bur oak can live 200 to 300 years.
Page 35
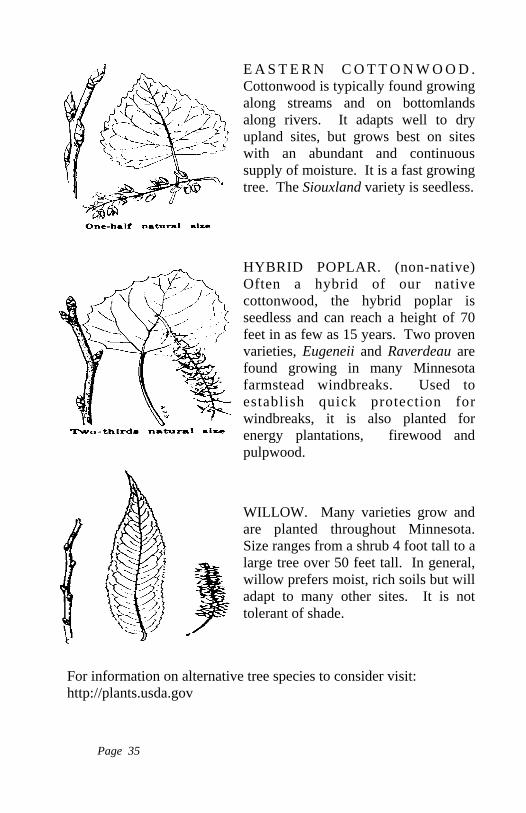
E A S T E R N C O T T O N W O O D . Cottonwood is typically found growing along streams and on bottomlands along rivers. It adapts well to dry upland sites, but grows best on sites with an abundant and continuous supply of moisture. It is a fast growing tree. The Siouxland variety is seedless. HYBRID POPLAR. (non-native) Often a hybrid of our native cottonwood, the hybrid poplar is seedless and can reach a height of 70 feet in as few as 15 years. Two proven varieties, Eugeneii and Raverdeau are found growing in many Minnesota farmstead windbreaks. Used to establish quick protection for windbreaks, it is also planted for energy plantations, firewood and pulpwood. WILLOW. Many varieties grow and are planted throughout Minnesota. Size ranges from a shrub 4 foot tall to a large tree over 50 feet tall. In general, willow prefers moist, rich soils but will adapt to many other sites. It is not tolerant of shade.
For information on alternative tree species to consider visit: http://plants.usda.gov
Page 36
Introduction To Tree Care The planting plan has been done, tree species have been selected, site prep has been finished, cost-share has been dealt with, and the tree planting project has been completed. I’m done now, right? ☺ Not exactly. Now that the tree plantation has been “born”, the “care and feeding” phase has begun! This is a really fun time in the establishment of a young forest. The trees are planted and want to grow. You get to walk through occasionally and see how things are going! The next section is intended to give you some pointers and direction on how your plantation should be growing and what you can do to help. The tree care section will cover how to measure planting success, water and nutrient needs, weed control, animal depredation, tree diseases, insect pest management, and tree pruning and thinning. It’s important to monitor and protect your investment. It’s tough to be a seedling. Animals eat and strip off bark, branches, and roots. Insects like to consume most or all of the foliage on little seedlings. Diseases are waiting to do their thing on plantations, large and small. Weeds and other competing vegetation are robbing nutrients and moisture that would maximize seedling growth. And sometimes the weather doesn’t want to cooperate either. No matter how carefully things have been planned and carried out, it’s still important to recognize that seedlings have undergone stresses in the process of moving from a nursery to their new surroundings under your care. With a little luck from Mother Nature and proper technique in handling and planting, those stresses were minimized. Your job is to monitor your plantation and keep an eye on how well the tree seedlings are adjusting and help counteract any problems they may be having. The following section should help get you started in the process known as plantation survival and follow-up.
Page 37
The first step after planting trees is to assess the planting success. This involves determining what survived and what did not. You should check the planting immediately after the job is done to make sure all trees are firmly in the ground with good soil-to-root contact (no air gaps). Why should trees be checked? 1) Ensure the survival of the trees planted. 2) Protect the investment of time and labor expended in the planting endeavor. 3) Ensure the planting plan will be accomplished. When should trees be checked? As stated earlier, the planting should be checked right after completion, then depending on the size of the planting, the purpose of the planting, and the number of trees planted. They should be checked at a minimum of once each year for the first five years. If the planting was done for wind or snow protection where it is important that each tree is in place, it is best to check more frequently. After the initial five years, the checks can be done every five years. How should trees be checked? This will depend a great deal on the size of the planting. If it is a fairly small planting each tree can be checked. In large acreage forest plantings a random sampling should be done. A number of sample plots should be taken. Make a measuring stick that is 11.8 feet long. An 11.8 foot radius of a circle will give readings on 1/100 of an acre. A very simple method is to choose a compass heading and walk a few paces. Turn and face the direction that you came from and throw your hat back over your shoulder. This is done so you cannot pick a spot that you would like to sample. Then using the hat as the center of the plot, measure with the stick, and check to see how many live seedlings are in the sample plot. The size of the planting will help determine the number of sample plots that should be taken. A usual procedure is to measure one plot for each acre of the tree planting. Take the total number of trees, divided by the number of plots taken, and then multiply by 100 to find the average number of live trees per acre estimated in the planting.
Planting Success
Page 38
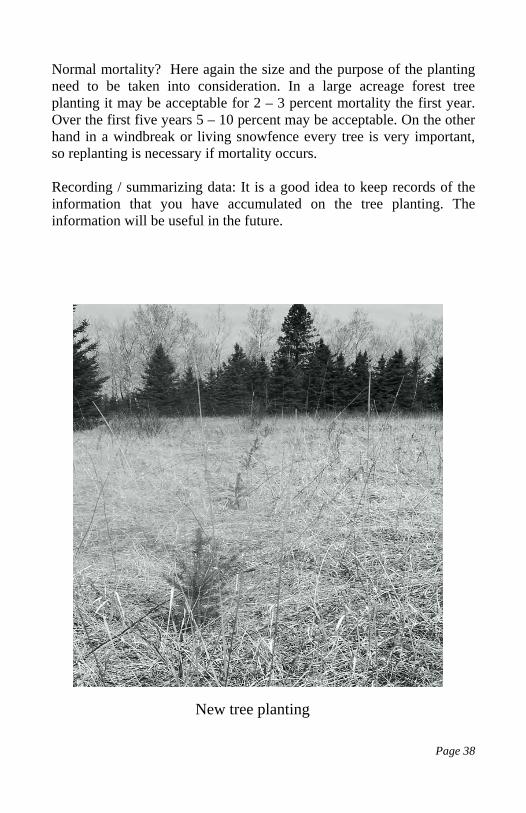
Normal mortality? Here again the size and the purpose of the planting need to be taken into consideration. In a large acreage forest tree planting it may be acceptable for 2 – 3 percent mortality the first year. Over the first five years 5 – 10 percent may be acceptable. On the other hand in a windbreak or living snowfence every tree is very important, so replanting is necessary if mortality occurs. Recording / summarizing data: It is a good idea to keep records of the information that you have accumulated on the tree planting. The information will be useful in the future. New tree planting
Page 39
Watering Trees require water, but improper watering can also cause serious damage to a tree planting. If possible, water as needed for the first few years after establishment. Check your trees every week for the first growing season. The soil under the mulch should be moist but not soggy. Here are some tree watering do’s and don’ts: 1. Over watering forces oxygen out of the soil and results in oxygen
starved roots. Newly transplanted trees need extra watering until their roots grow into the area beyond the planting hole. In general an inch of rainfall per week is adequate.
2. Water less often in late summer. Too much water late in the growing season may stimulate growth that will not have time to go dormant.
3. Avoid frequent light watering. This promotes the development of a shallow root system, which makes the tree susceptible to winter injury and summer heat stress.
4. Water with an open-end hose at a rate low enough to keep water from running off. A good rule is to water one hour per inch diameter of the tree. Tree roots extend away from the tree at least as far as the tree is tall, so place the hose at or beyond the drip line for most effective watering
Fertilizing Fertilization is probably not necessary if the growth rate and foliage color is normal for a particular variety. Newly transplanted trees may exhibit slow growth until they get re-established. Regular fertilization will help tree establishment in less then ideal planting sites such as very sandy or heavy clay soils. Fertilizing is also recommended for tree plantings that have suffered damage from insects or disease.
Water and Nutrient Needs
Page 40
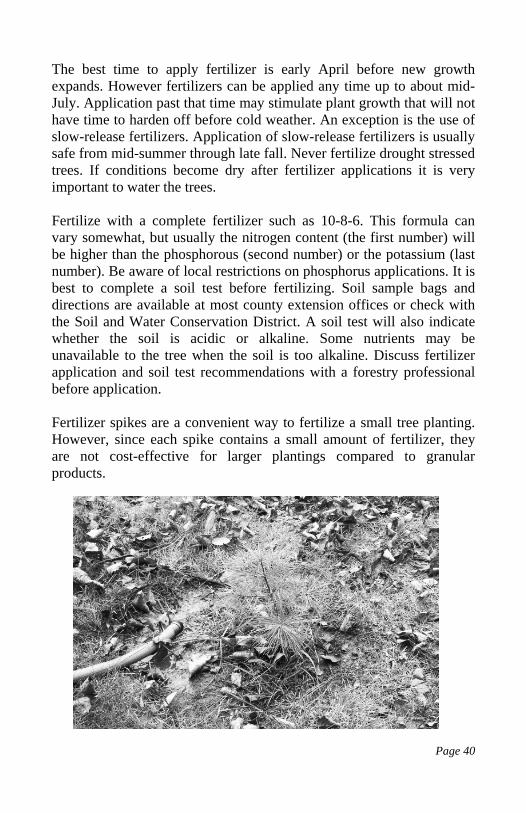
The best time to apply fertilizer is early April before new growth expands. However fertilizers can be applied any time up to about mid- July. Application past that time may stimulate plant growth that will not have time to harden off before cold weather. An exception is the use of slow-release fertilizers. Application of slow-release fertilizers is usually safe from mid-summer through late fall. Never fertilize drought stressed trees. If conditions become dry after fertilizer applications it is very important to water the trees. Fertilize with a complete fertilizer such as 10-8-6. This formula can vary somewhat, but usually the nitrogen content (the first number) will be higher than the phosphorous (second number) or the potassium (last number). Be aware of local restrictions on phosphorus applications. It is best to complete a soil test before fertilizing. Soil sample bags and directions are available at most county extension offices or check with the Soil and Water Conservation District. A soil test will also indicate whether the soil is acidic or alkaline. Some nutrients may be unavailable to the tree when the soil is too alkaline. Discuss fertilizer application and soil test recommendations with a forestry professional before application. Fertilizer spikes are a convenient way to fertilize a small tree planting. However, since each spike contains a small amount of fertilizer, they are not cost-effective for larger plantings compared to granular products.
Page 41
Weed Control
The most serious problem young tree seedlings face is competition from other plants and grasses. Some work at this stage can prevent stunted trees with slow growth rates. Unwanted vegetation competes with newly planted trees for moisture, nutrients, and growing space. Where weed competition is severe, a high percentage of trees will die the first few years. Site preparation before planting is the best way to control weeds, but several methods are available for weed control after the trees are planted. Most are eligible for cost-share assistance in the tree planting practice. Mechanical Tilling This activity either destroys the weeds or limits its food producing capability. Tilling depth should be no greater than two or three inches deep and be outside the drip line of the tree. Tilling deeper than 3 inches will damage tree roots and hinder growth. Several passes each year may be required to control weeds. Mowing Mowing should be used in conjunction with other methods of weed control such as mulching. Mowing does not help increase moisture for trees, but it can reduce future competition. To provide effective control, plantings must be mowed before seed heads mature . If weed whip trimmers are used take caution not to allow contact with tree bark. Plastic tree guards protect the tree from accidental girdling and wounding. Mulching Mulching is an effective way of providing weed control. Mulches conserve moisture and can moderate soil temperatures. Organic mulches include straw, wood chips, and grass clippings. Sawdust, grass clippings, and other fine sized mulches can prevent air and water exchange and should be used with caution. Place mulches 2 to 4 inches deep and add more as the it decompose. Keep the mulch about 6 inches away from the base of the tree. This will
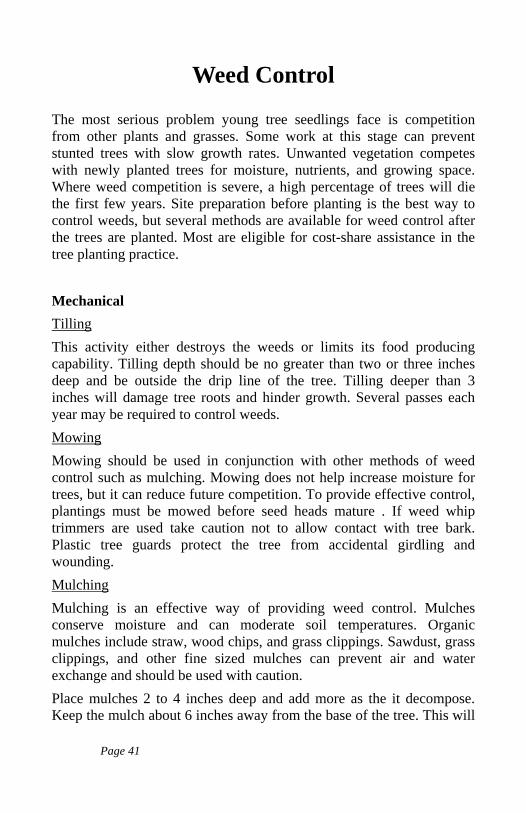
discourage mice and other small rodents from chewing on the stem under the mulch. Fabric T y p i c a l l y c a l l e d landscape fabric, this material comes in 3 foot by 3 foot squares or rolls. The fabric suppresses weeds while allowing for water and oxygen exchange. The edges of the fabric must be stapled or buried to hold it in place.
Cover Crop Cover crops planted between tree rows can reduce the spread of aggressive weeds, allow for better rain infiltration, and provide organic mulch. If the cover crop begins to compete with the trees it must be harvested. Chemical Herbicides can be used to control weeds in tree plantings. Selection will vary based on target weed type, growth stage and specie of tree. Some herbicides can be applied directly over the trees and others must be applied as a directed spray to minimize or avoid contact with trees. Special tools may be required for application such as sprayers, granular spreaders, and sponge applicators. Items to consider in herbicide weed control include soil characteristics, herbicide characteristics, depth to water table, and use patterns. Specific application for each herbicide is contained on the product label. Be sure to read and follow all label directions and consider environmental factors when choosing this very effective weed control method. For more specific information about weed control visit: www.extension.umn.edu/distribution/naturalresources/m1156.html
Page 42
Page 43
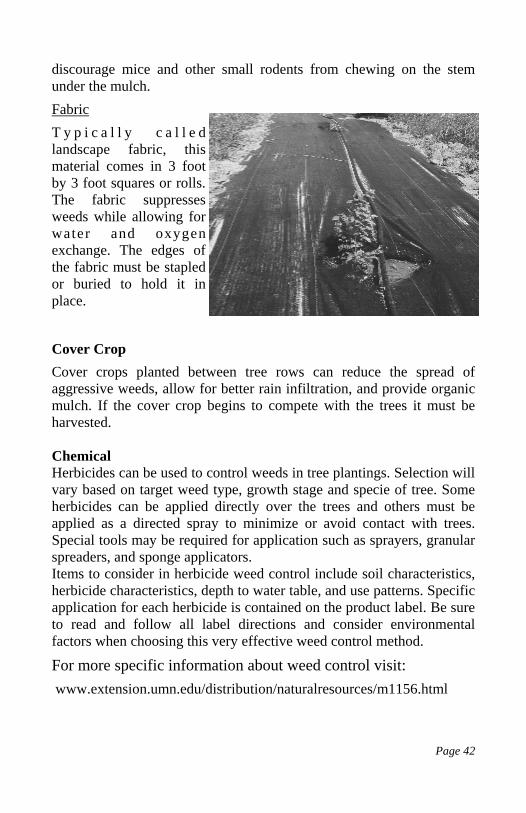
The number one animal responsible for feeding on newly planted trees in Minnesota is white tail deer. Not only do they browse on tree seedlings but as the trees get bigger damage from antler rubs can be detrimental to small tress. While there are several ways to reduce deer damage it is almost impossible to completely eliminate it. Electric fencing can be effective but is expensive and difficult to maintain. Typically the fence is seven strands and about seven feet tall. Tree shelters come in a solid tube or a mesh material and are held in place by a stake. While these options work well, they are often damaged by rubbing bucks, bears, and may require regular m a i n t e n a n c e . Add i t i ona l ly , t r ee growth inside the tubes is more easily damaged by early winter freezes and exceptionally warm early springs. Even so tree tubes provide good p r o t e c t i o n f r o m browsing deer. A homemade alternative is an 8 inch diameter 4-6 foot tall tube made from fence with 1 inch by 2 inch openings. Repellants come in two forms, smell and taste. Both are available from lawn and garden stores and are effective. Because they deteriorate with time, repellants must be reapplied often.
Animal Depredation
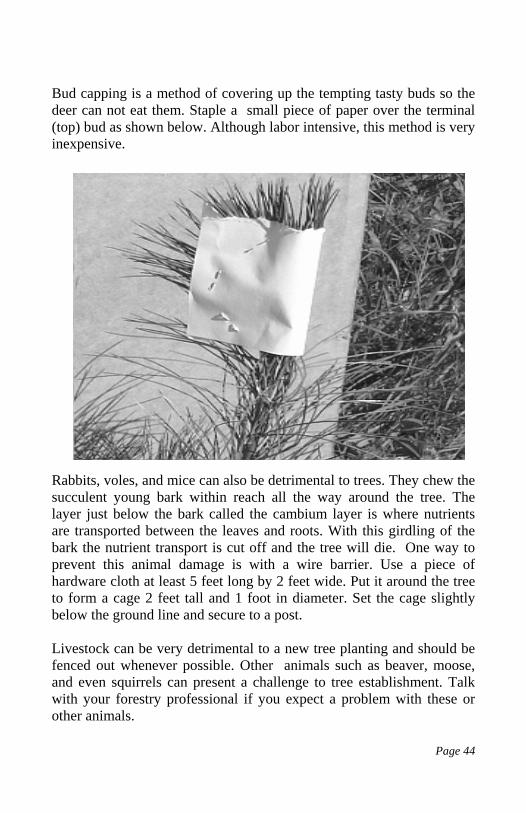
Bud capping is a method of covering up the tempting tasty buds so the deer can not eat them. Staple a small piece of paper over the terminal (top) bud as shown below. Although labor intensive, this method is very inexpensive. Rabbits, voles, and mice can also be detrimental to trees. They chew the succulent young bark within reach all the way around the tree. The layer just below the bark called the cambium layer is where nutrients are transported between the leaves and roots. With this girdling of the bark the nutrient transport is cut off and the tree will die. One way to prevent this animal damage is with a wire barrier. Use a piece of hardware cloth at least 5 feet long by 2 feet wide. Put it around the tree to form a cage 2 feet tall and 1 foot in diameter. Set the cage slightly below the ground line and secure to a post. Livestock can be very detrimental to a new tree planting and should be fenced out whenever possible. Other animals such as beaver, moose, and even squirrels can present a challenge to tree establishment. Talk with your forestry professional if you expect a problem with these or other animals. Page 44
Page 45
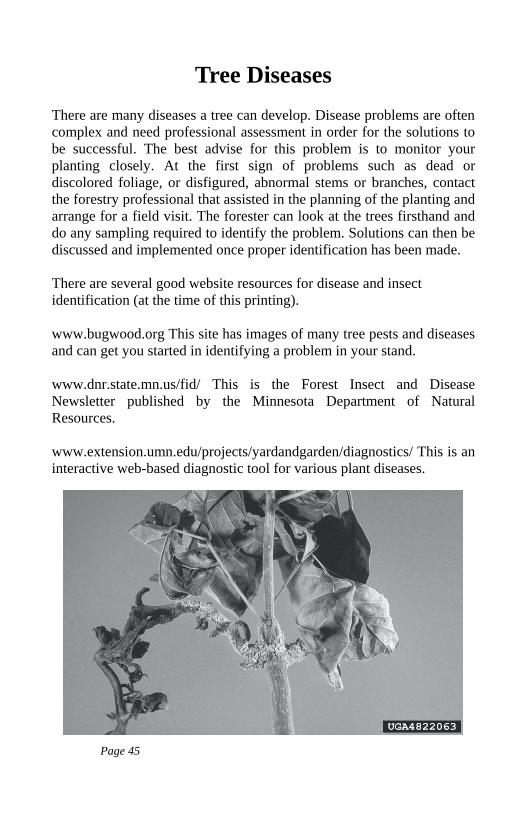
There are many diseases a tree can develop. Disease problems are often complex and need professional assessment in order for the solutions to be successful. The best advise for this problem is to monitor your planting closely. At the first sign of problems such as dead or discolored foliage, or disfigured, abnormal stems or branches, contact the forestry professional that assisted in the planning of the planting and arrange for a field visit. The forester can look at the trees firsthand and do any sampling required to identify the problem. Solutions can then be discussed and implemented once proper identification has been made. There are several good website resources for disease and insect identification (at the time of this printing). www.bugwood.org This site has images of many tree pests and diseases and can get you started in identifying a problem in your stand. www.dnr.state.mn.us/fid/ This is the Forest Insect and Disease Newsletter published by the Minnesota Department of Natural Resources. www.extension.umn.edu/projects/yardandgarden/diagnostics/ This is an interactive web-based diagnostic tool for various plant diseases.
Tree Diseases

Page 46
There are almost as many insect pests as tree diseases. Closely monitoring your planting for early signs of problems is the best defense against wide spread insect damage. Signs of insects are similar to tree diseases. Defoliation and abnormal stem or branch growth are signs of problems. Insect pests are sometimes easier to identify than diseases because inspections of the tree planting can reveal specimens for identification. Again, the forestry professional is the best place to turn for assistance with this problem. Once identified, the pest control method can be developed to meet the needs of the planting. The same resources used for tree disease identification may have information on insect identification.
Forest Tent Caterpillars
Insect Pest Management
Pruning and thinning are tools used to control diseases, develop strong tree structure, and assist a tree in getting rid of unproductive branches. A healthy stand of trees requires occasional removal of diseased or insect infected wood (see Disease and Insect Management sections to identify infected wood). That may mean part of a tree or in some cases the whole tree needs to be removed. Branches removed should be disposed of properly to prevent reinfection. If a tree is damaged such as broken branches, pruning those branches helps the tree to heal the wound left by the damage. All woody plants loose branches as a response to competition. Branches that do not produce enough, through photosynthesis, to sustain themselves, die and eventually shed. Pruning can replace this natural process and improve the strength and longevity of the tree. In general pruning should be done during the dormant season, usually the late fall to early spring before the buds begin to swell. Dead branches can be removed any time of the year. At planting, remove only diseased, dead, or broken branches. Shearing of evergreens should be done on new green growth, before the tree starts woody elongation. Prune young trees lightly. More mature trees can be pruned more heavily. Leave one-half to two-thirds of the canopy in all cases. Prune to shape young trees, but don’t cut back the leader. Remove crossing branches, branches that grow back toward the center of the tree, rubbing branches, branch stubs, suckers, and narrow weak crotches. As young trees grow, remove lower branches gradually to raise the crown, and remove branches that are too closely spaced on the trunk. Remove multiple leaders on evergreens and other trees where a single leader is desirable (timber production, shade trees). For more information refer to US Department of Agriculture, Forest Service Publication NA-FR-01-95. Thinning can be an effective tool in insect and disease control and for improving stand vigor. Consult a forestry professional for specific thinning recommendations for your tree planting.
Page 47
Tree Pruning and Thinning
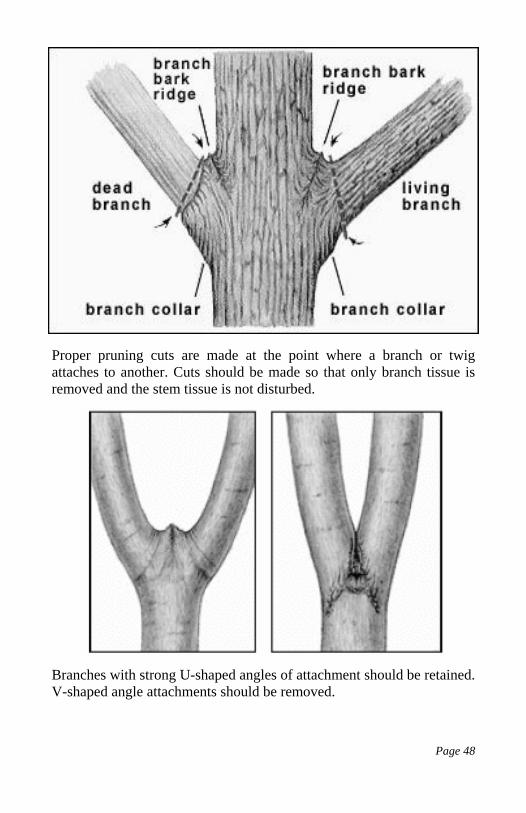
Proper pruning cuts are made at the point where a branch or twig attaches to another. Cuts should be made so that only branch tissue is removed and the stem tissue is not disturbed.
Branches with strong U-shaped angles of attachment should be retained. V-shaped angle attachments should be removed.
Page 48

Acknowledgements MN Soil and Water Conservation District Forestry Association
MN Board of Water and Soil Resources
MN Department of Natural Resources
MN Natural Resources Conservation Service
University of MN Extension Service
United States Department of Agriculture, Forest Service
Aitkin, Beltrami, Carlton, Crow Wing, Koochiching, SWCDs
This Printing Sponsored by:
MN Soil and Water Conservation District Forestry Association
The U.S. Department of Agriculture (USDA) prohibits discrimination in all its pro-grams and activities on the basis of race, color, national origin, sex, religion, age, dis-ability, political beliefs, sexual orientation, or marital or family status. (Not all prohib-ited bases apply to all programs). Persons with disabilities who require alternative means for communication of program information (Braille, large print, audiotape, etc.) should contact USDA's TARGET Center at 202-720-2600 (voice and TDD).
To file a complaint of discrimination, write USDA, Director, Office of Civil Rights, Room 326-W, Whitten Building, 14th and Independence Avenue, SW, Washington, DC 20250-9410 or call (202) 720-5964 (voice and TDD). USDA is an equal opportunity provider and employer.
This publication was printed by McGregor Printing and Graphics in McGregor, MN. All the paper used in this publication is FSC Certified.