Embed Size (px)
Citation preview

Promethean ActivInspire
Master of Arts ActivTraining
Madera Unified School District
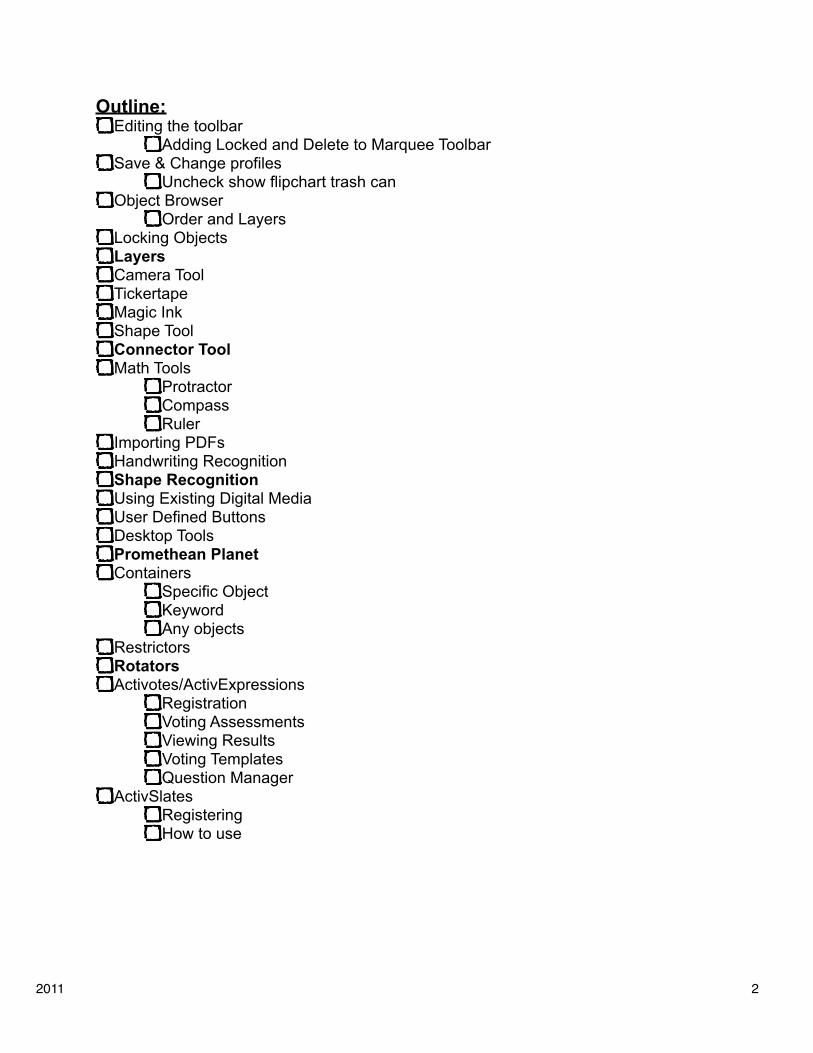
Outline:Editing the toolbar
Adding Locked and Delete to Marquee ToolbarSave & Change profiles
Uncheck show flipchart trash canObject Browser
Order and LayersLocking ObjectsLayersCamera ToolTickertapeMagic InkShape ToolConnector ToolMath Tools
ProtractorCompassRuler
Importing PDFsHandwriting RecognitionShape RecognitionUsing Existing Digital MediaUser Defined ButtonsDesktop ToolsPromethean PlanetContainers
Specific ObjectKeywordAny objects
RestrictorsRotatorsActivotes/ActivExpressions
RegistrationVoting AssessmentsViewing ResultsVoting TemplatesQuestion Manager
ActivSlatesRegisteringHow to use
2011! ! 2

Editing Profiles- Go to Main Menu > Edit > Profiles- Shortcut: Apple + U (Mac) Control + U (PC)- Click on the tool you want, then click Add
Object Browser- View the order and layer of objects on a page. - Access editing with the Popup Menu
SAVE
2011! ! 3
SAVE
SAVE AS
____________________________________________________________________________________________________________________________________________________________________________________________________________________________________________________________________________________________________________
_________________________________________________________________________________________________________________________________________________________________________________________________________________________________________________________________________________________________________

Locking Objects- You can lock or unlock selected objects so thatthey can or cannot be moved or grouped with otherobjects.
Layers
Top: pen, highlighter, magic ink
Middle: images, shapes, text objects
Bottom: Connector lines, items from other layers can be placed here
Background: backgrounds, grids, and page color
2011! ! 4
Apple
____________________________________________________________________________________________________________________________________________________________________________________________________________________________________________________________________________________________________________
__________________________________________________________________________________________________________________________________________________________________________________________________________________________________________________________________________________________________________________________________________________________________
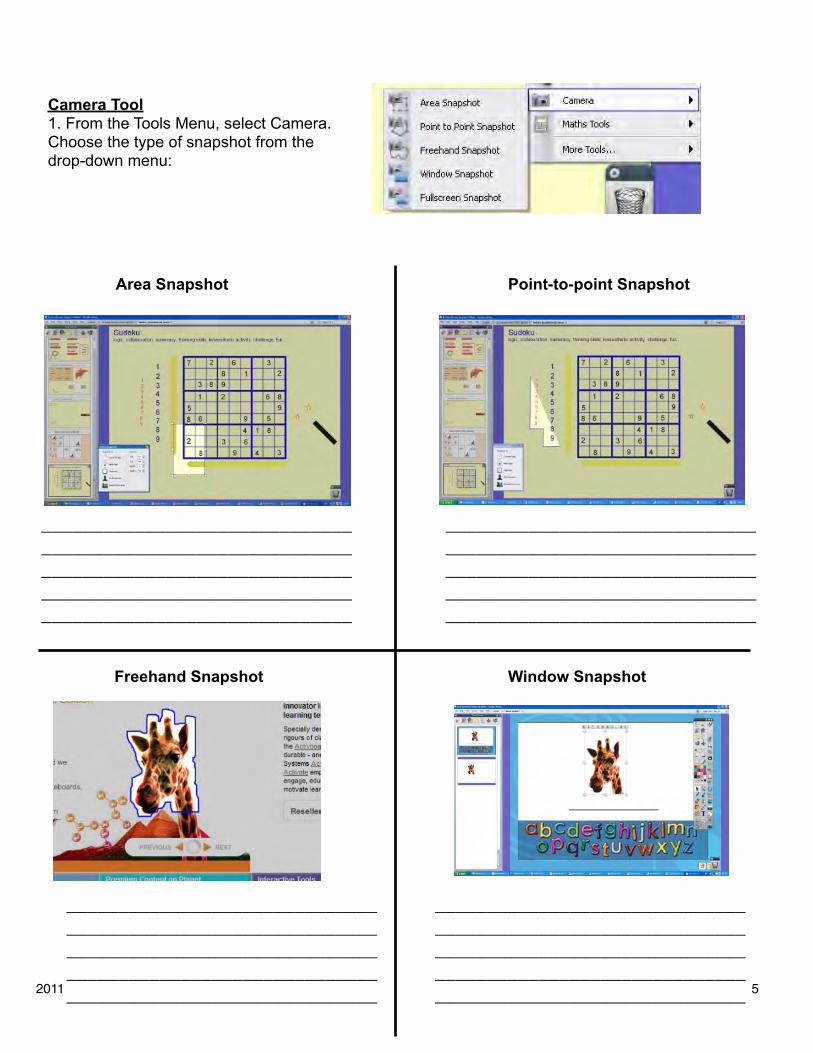
Camera Tool1. From the Tools Menu, select Camera.Choose the type of snapshot from thedrop-down menu:
2011! ! 5
Area Snapshot Point-to-point Snapshot
Freehand Snapshot Window Snapshot
______________________________________________________________________________________________________________________________________________________
______________________________________________________________________________________________________________________________________________________
______________________________________________________________________________________________________________________________________________________
______________________________________________________________________________________________________________________________________________________

2. Choose the destination for your snapshotfrom the Camera Snapshot box: Current Page – Capture the image to the current flipchart page.
New Page – Capture the image to a new page at the end of the flipchart.
Clipboard – Capture the image to the clipboard.
My Resources – Capture the image to the My Resources folder.
Shared Resources – Capture the image to the Shared Resources folder.
Tickertape
From the Tools Menu, select More Tools > Tickertape.
Three items are displayed in the 'Tickertape' Dialog Box: - The default scrolling tickertape message. - Continuous preview responds instantly to changes. - The tickertape controller.
You can:Adjust the speed with the slider.Pause or resume playback.
2011! ! 6
___________________________________________________________________________________________________________________________________________________________________________________________________

2011! ! 7
Magic Ink
Shape Tool
Provides access to the Shape Toolbox, containing a range ofpredefined shape and line objects that can be added to the flipchart page.
You can use Magic Ink to make any 'top layer' object (or part of an object) invisible.
Think of Magic Ink as a pen that can draw a'see through' annotation on the top layer.
Magic Ink allows you to punch holes through the objects on the top layer, so that you cansee the objects on the layers beneath.
__________________________________________________________________________________________________________________________________________________________________________________________________________________
____________________________________________________________________________________________________________________________________________________________________________________________________________________________________________________________________________________________________________
2011! ! 8
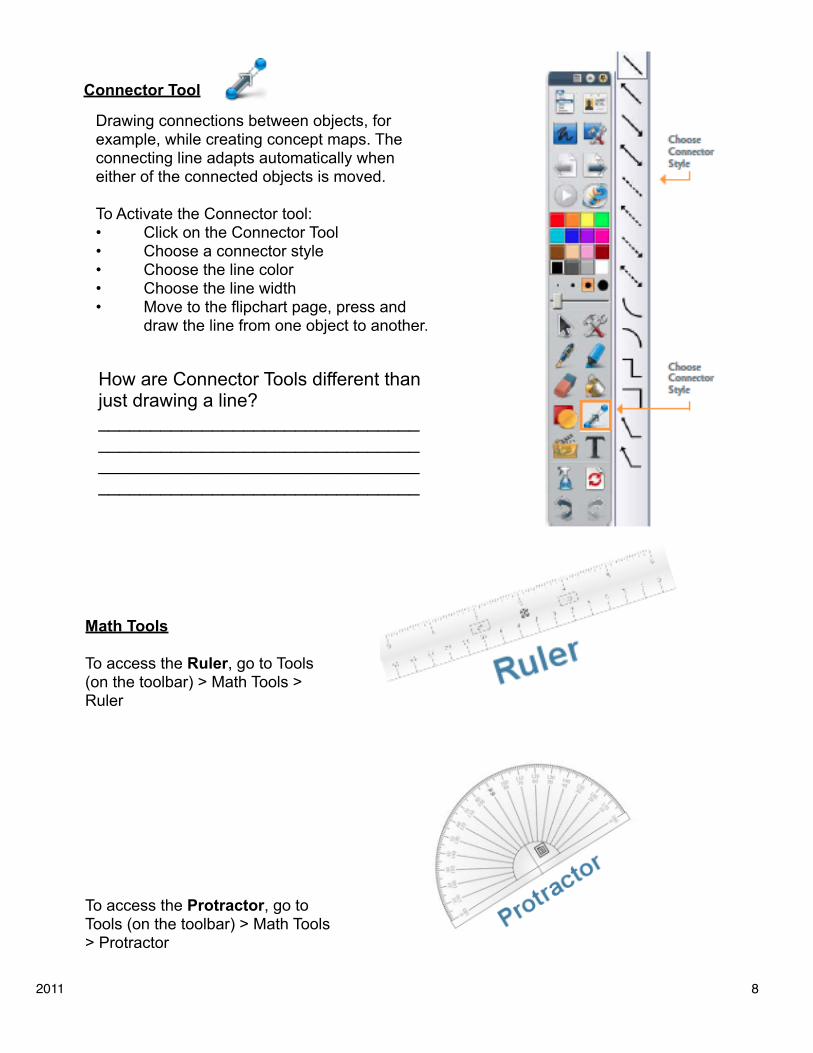
Connector Tool
Drawing connections between objects, for example, while creating concept maps. The connecting line adapts automatically when either of the connected objects is moved.
To Activate the Connector tool:• Click on the Connector Tool• Choose a connector style• Choose the line color• Choose the line width• Move to the flipchart page, press and draw the line from one object to another.
How are Connector Tools different than just drawing a line?____________________________________________________________________________________________________________________________
Math Tools
To access the Ruler, go to Tools (on the toolbar) > Math Tools > Ruler
To access the Protractor, go to Tools (on the toolbar) > Math Tools > Protractor

2011! ! 9
To access the Compass, go to Tools (on the toolbar) > Math Tools > Compass
______________________________________________________________________________________________________________________________________________________________________________
Importing PDFs
______________________________________________________________________________________________________________________________________________________________________________________________________________________________________________________________________________
Choose File > Import > PDF.
• From the “Select a PDF File” Dialog Box, navigate to the file you want to import.
• Click Open. The “Import from PDF” Dialog Box opens.
• Apply changes as desired to the options in the “Import from PDF” Dialog Box
• Page Size - Import the original page size, or change width and height as required
• Pages - Import all or a range of pages• Import To - Choose the destination. You can
choose to create a new flipchart, or add the imported page(s) to the currently active flipchart
• Click Import. ActivInspire displays a progress bar and the selected page(s) of the PDF is imported to the chosen destination.

2011! ! 10
Handwriting Recognition
The Handwriting Recognition Tool is in the Tools Menu.
• Select Handwriting Recognition• Write a word on the page. Wait for it to be converted to text.• If the word has not been converted correctly, click on the Alternatives icon for more options. Click on the correct option.
______________________________________________________________________________________________________________________________________________________________________________________________________________________________________________________________________________
Shape Recognition
Freehand drawing annotations can be converted into shape objects as you draw at the board with the ActivPen.
The Shape Recognition Tool is in the Tools Menu.
As the annotation becomes a shape object, it moves to the middle layer.
When you select the new shape, you can transform it using:
• The Marquee and Sizing Handles.• The Main Toolbox.• The Property Browser.
______________________________________________________________________________________________________________________________________________________________________________________________________________________________________________________________________________
Using existing digital media
• Annotate over a live desktop to interact with media displayed there.
• Use this feature in lessons about:• Websites• Software applications
• From the Toolbar, click on Desktop Annotate. • The desktop is displayed in between
ActivInspire’s Browser and the Main Toolbox.
______________________________________________________________________________________________________________________________________________________________________________________________________________________________________________________________________________
2011! ! 11
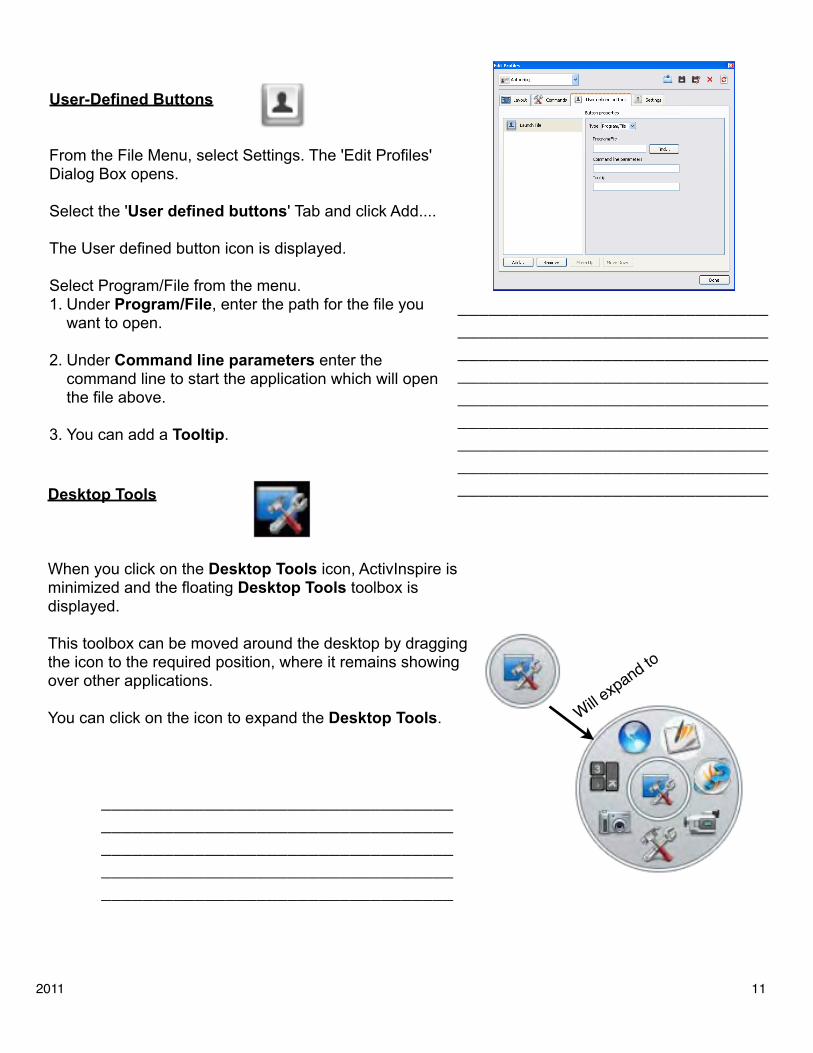
User-Defined Buttons
From the File Menu, select Settings. The 'Edit Profiles' Dialog Box opens.
Select the 'User defined buttons' Tab and click Add....
The User defined button icon is displayed.
Select Program/File from the menu.1. Under Program/File, enter the path for the file you
want to open.
2. Under Command line parameters enter the command line to start the application which will open the file above.
3. You can add a Tooltip.
______________________________________________________________________________________________________________________________________________________________________________________________________________________________________________________________________________Desktop Tools
When you click on the Desktop Tools icon, ActivInspire isminimized and the floating Desktop Tools toolbox is displayed.
This toolbox can be moved around the desktop by draggingthe icon to the required position, where it remains showingover other applications.
You can click on the icon to expand the Desktop Tools. Will expand to
____________________________________________________________________________________________________________________________________________________________________________________________________________
2011! ! 12
Containers
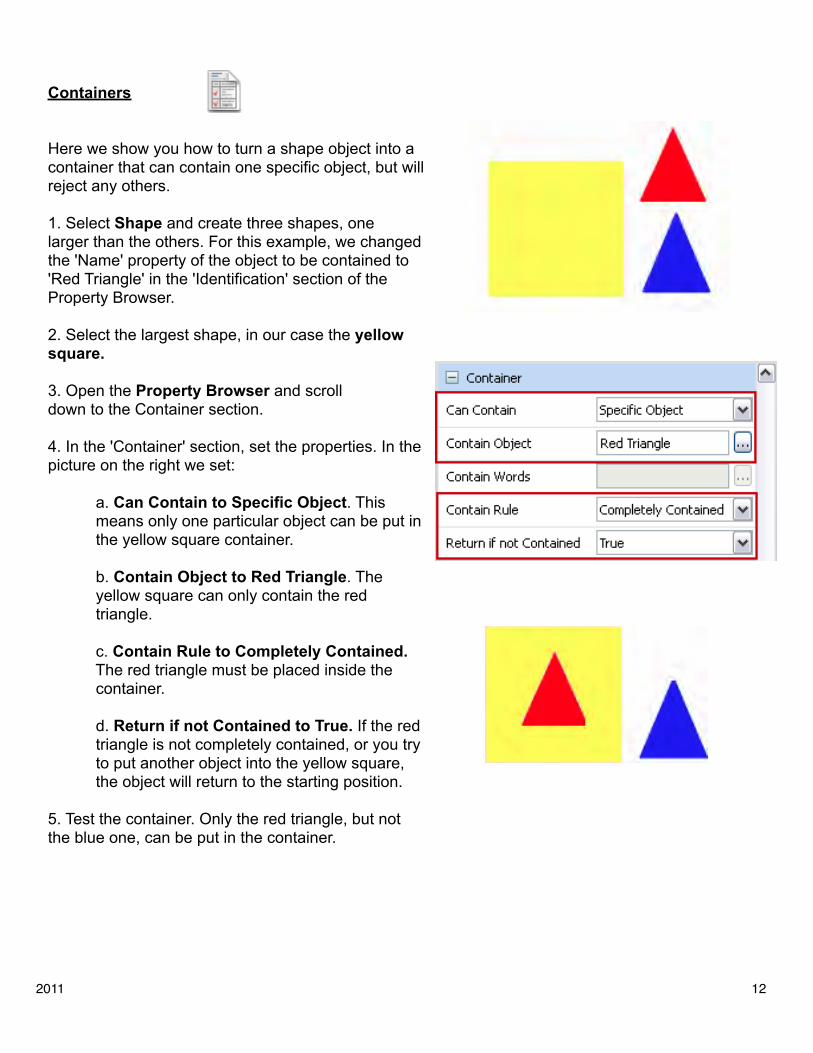
Here we show you how to turn a shape object into a container that can contain one specific object, but will reject any others.
1. Select Shape and create three shapes, onelarger than the others. For this example, we changed the 'Name' property of the object to be contained to 'Red Triangle' in the 'Identification' section of the Property Browser.
2. Select the largest shape, in our case the yellowsquare.
3. Open the Property Browser and scrolldown to the Container section.
4. In the 'Container' section, set the properties. In thepicture on the right we set:
a. Can Contain to Specific Object. This means only one particular object can be put in the yellow square container.
b. Contain Object to Red Triangle. The yellow square can only contain the red triangle.
c. Contain Rule to Completely Contained. The red triangle must be placed inside the container.
d. Return if not Contained to True. If the red triangle is not completely contained, or you try to put another object into the yellow square, the object will return to the starting position.
5. Test the container. Only the red triangle, but not the blue one, can be put in the container.
2011! ! 13
Add a reward sound
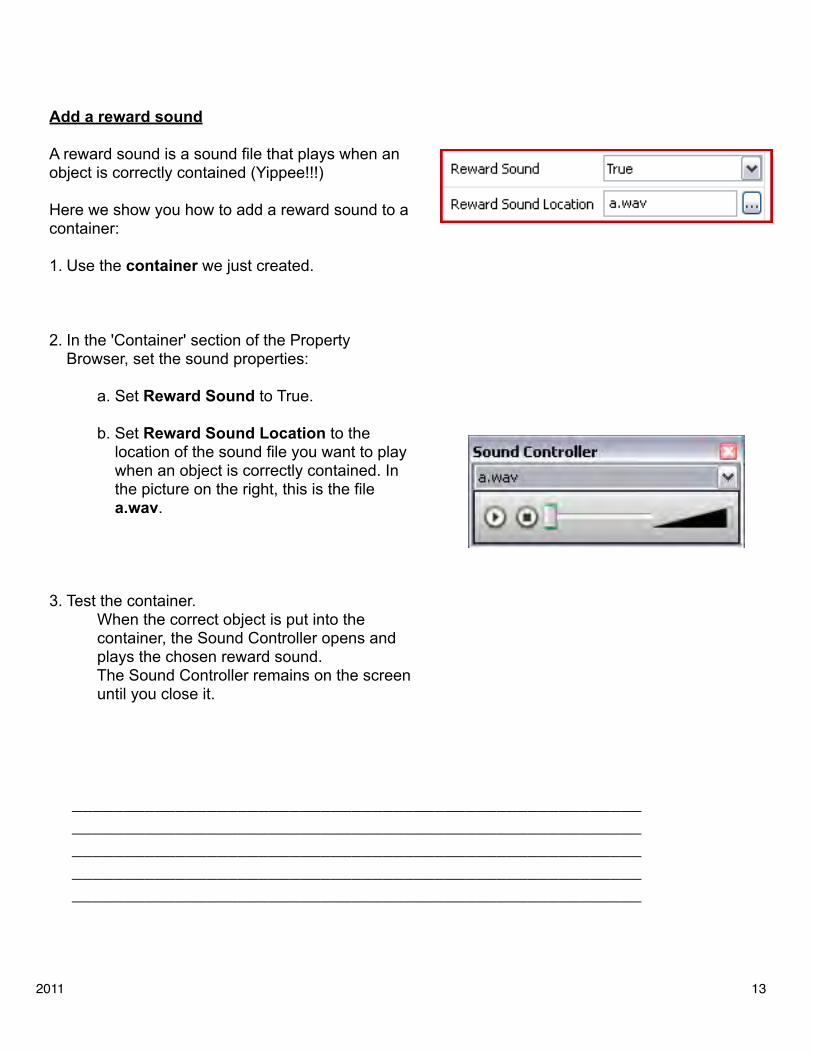
A reward sound is a sound file that plays when an object is correctly contained (Yippee!!!)
Here we show you how to add a reward sound to a container:
1. Use the container we just created.
2. In the 'Container' section of the Property Browser, set the sound properties:
a. Set Reward Sound to True.
b. Set Reward Sound Location to the location of the sound file you want to play when an object is correctly contained. In the picture on the right, this is the file a.wav.
3. Test the container. When the correct object is put into the container, the Sound Controller opens and plays the chosen reward sound. The Sound Controller remains on the screen until you close it.
___________________________________________________________________________________________________________________________________________________________________________________________________________________________________________________________________________________
2011! ! 14
Restrictors
Use restrictors to control how items can move on the page.
You can use restrictors in many different ways.
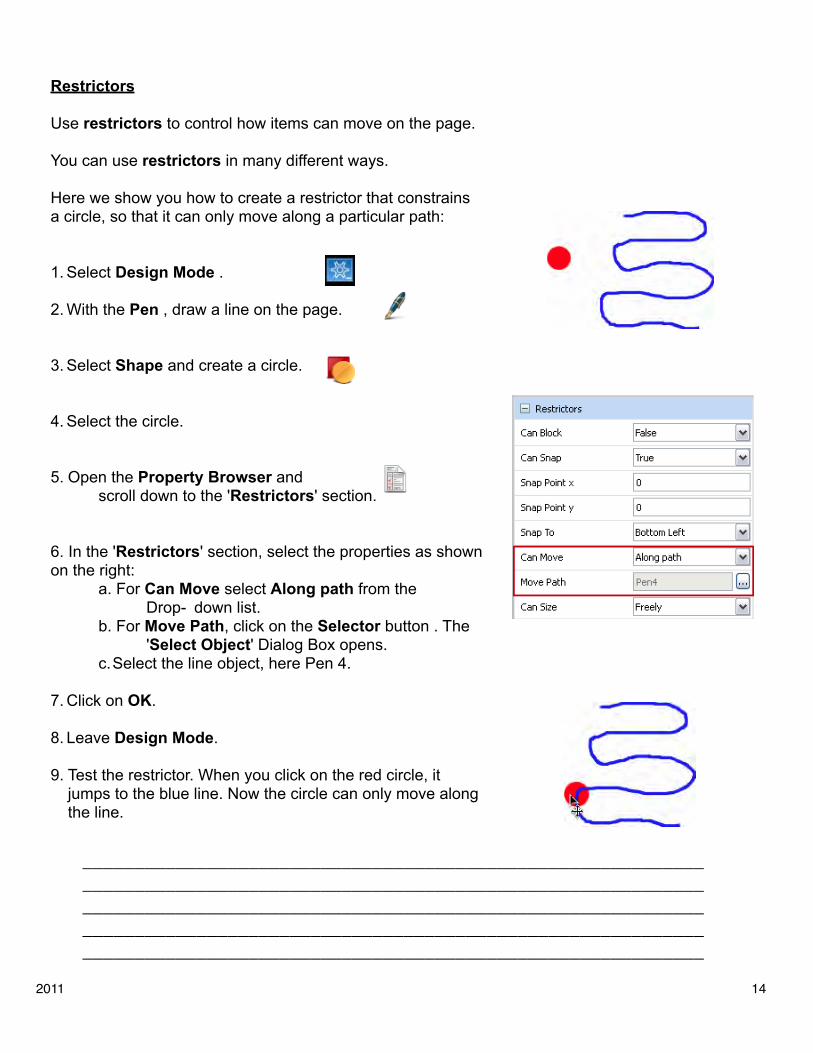
Here we show you how to create a restrictor that constrains a circle, so that it can only move along a particular path:
1. Select Design Mode .
2. With the Pen , draw a line on the page.
3. Select Shape and create a circle.
4. Select the circle.
5. Open the Property Browser and scroll down to the 'Restrictors' section.
6. In the 'Restrictors' section, select the properties as shown on the right: a. For Can Move select Along path from the Drop- down list. b. For Move Path, click on the Selector button . The 'Select Object' Dialog Box opens.
c.Select the line object, here Pen 4.
7. Click on OK.
8. Leave Design Mode.
9. Test the restrictor. When you click on the red circle, it jumps to the blue line. Now the circle can only move along the line.
____________________________________________________________________________________________________________________________________________________________________________________________________________________________________________________________________________________________________________

2011! ! 15
______________________________________________________________________________________________________________________________________________________________________________________________________________________________________________________________________________
Rotate Properties
Use rotate properties to control how items can move on the page.
1. Select Design Mode .
2. Select Shape and create a circle.
3. Use the Edit Shape Tool to edit the circle point.
4. Click of the circle so that the Marquee Handles are visible.
5. Open the Property Browser and go to the Rotate section.
6. Edit the settings here to set the shape to rotate the way you want it.

2011! ! 16
ActiVotes
Before you begin registration:
1. Distribute the ActiVote devices and ensure that they are switched ON.
2. Connect an ActivHub to your computer.
3. Start ActivInspire.
To register:
1. Open the Voting Browser and click on Device Registration.
A window like the one shown here will appear.
2. Select ActiVotes/Expressions and click on Register.
3. Enter the number of devices you want to register (or use the arrows) and click on Next.
A three letter PIN code is displayed, which must be entered on each device to be registered.
To complete the ActiVote Registration:
a. Press and hold the central Registration button on the ActiVote devices, until both the top lights are illuminated.
b. Enter the PIN code, pressing the ActiVote device keys.
___________________________________________________________________________________________________________________________________________________________________________________________________________________________________________________________________________________

2011! ! 17
______________________________________________________________________________________________________________________________________________________________________________________________________________________________________________________________________________
ActiVotes
Voting Session
At any time during your lesson, you can ask your students a question and click on ExpressPoll .
This displays the voting ‘Wonderwheel’.
How it works
1. Hover with the pen over the Wonderwheel and highlight a question style.
2. Move the pen radially and outward to show the options for the style of question you just highlighted.
3. Click to select one of the options for your question.
The picture on the right shows the Wonderwheel for ActiVote devices.
The highlighted question style is 'True/False'. This question style has four answering options. The option selected allows the possible answers, 'True', 'False' and 'Don’t know'.
These possible answers are shown in the displayed 'Voting Summary' Box.
You can set a timeout now, next to the red Stop Vote button, by entering a number or using the arrows.
When you use a timeout, you also have a Pause Vote button for extra control.