Embed Size (px)
Citation preview
8/8/2019 LV2 Tut Layer Palette
http://slidepdf.com/reader/full/lv2-tut-layer-palette 1/7
Level 2 Tutorial: Layers Palette
Tutorial #1: Using Layer Styles
1. Open CS 5 and use BRIDGE to browse a photo in your BEST OF folder
2. Add a new layer by clicking on the “post it note” icon, it will appear as a “checkerboard” thumbnail
3. Reset your Color Boxes by clicking on the MINI B/W Box and then select RED as your top color by double-clicking the black box and selecting red from the color-picker and keep white as the bottom color
8/8/2019 LV2 Tut Layer Palette
http://slidepdf.com/reader/full/lv2-tut-layer-palette 2/7
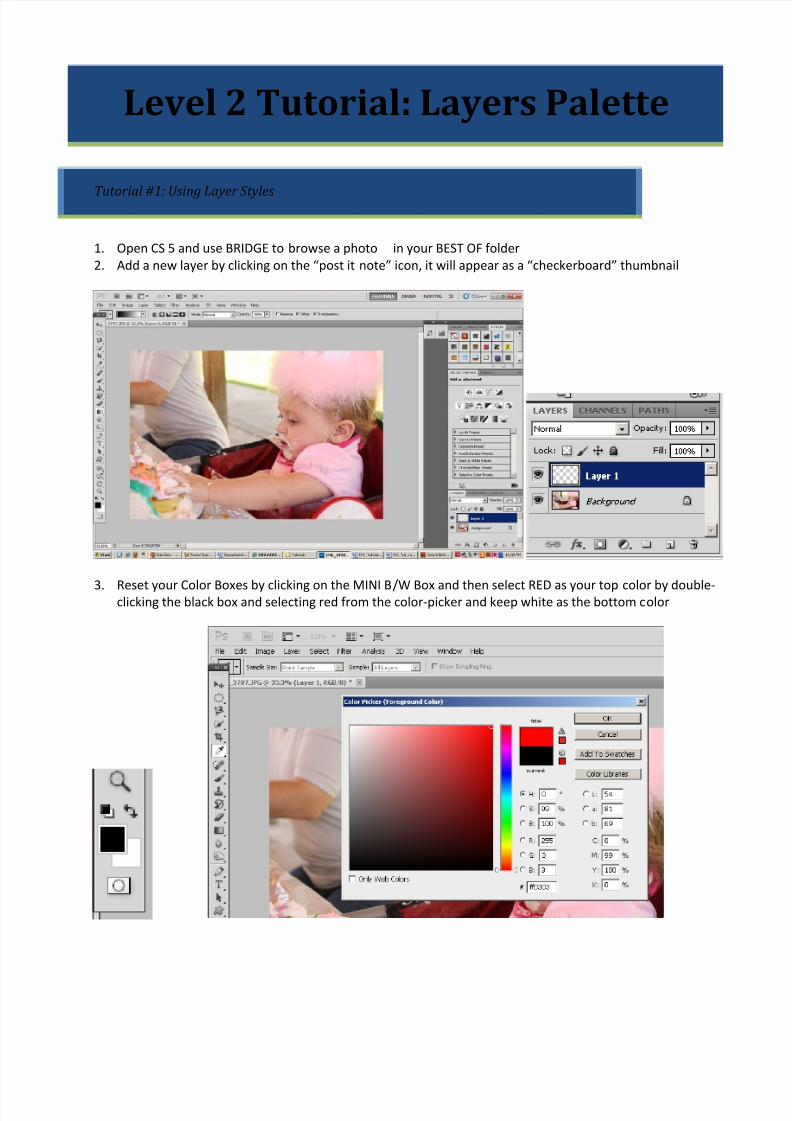
4. Make sure your LAYER 1 is selected and go to the GRADIENT tool and draw a line across the layer
5. Now, scroll through ALL the layers mode from NORMAL to all of the following below and CHOOSE ONE
that looks good to you to enhance/change the photo (I have chosen MULTIPLY )
6. Save this photo in your tutorial folder and experiment with different layer styles on 2 more photos using
this technique (you may also change your color range or use the PAINTBUCKET tool to put one WHOLE
color on the top layer). You will have 3 layer styles photos in your tutorial folder.
8/8/2019 LV2 Tut Layer Palette
http://slidepdf.com/reader/full/lv2-tut-layer-palette 3/7
Tutorial #2: Using Layer FX
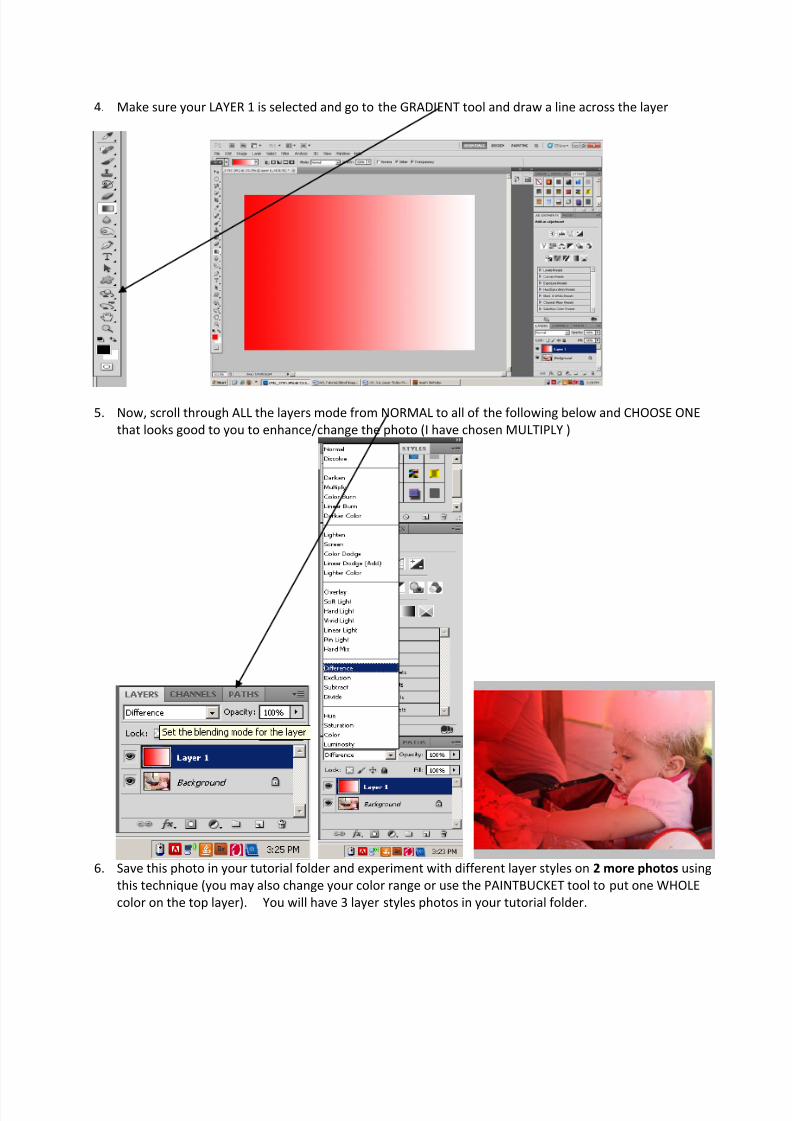
1. Open another image that you would like to put TEXT over.
2. Use the “T” tool to write some relevant text over the photograph. Notice that you have control over
FONT, COLOR and SIZE in the menu above when you click on this tool. Notice also that the text creates itsOWN LAYER.
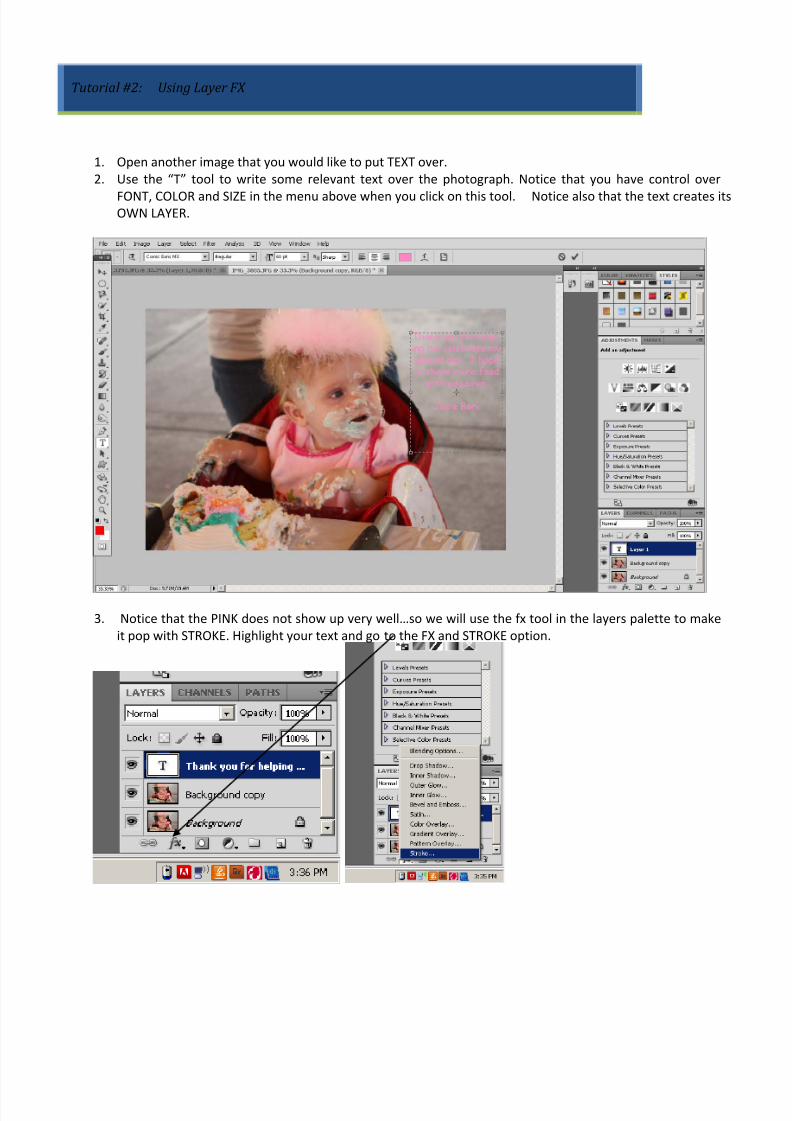
3. Notice that the PINK does not show up very well…so we will use the fx tool in the layers palette to make
it pop with STROKE. Highlight your text and go to the FX and STROKE option.
8/8/2019 LV2 Tut Layer Palette
http://slidepdf.com/reader/full/lv2-tut-layer-palette 4/7
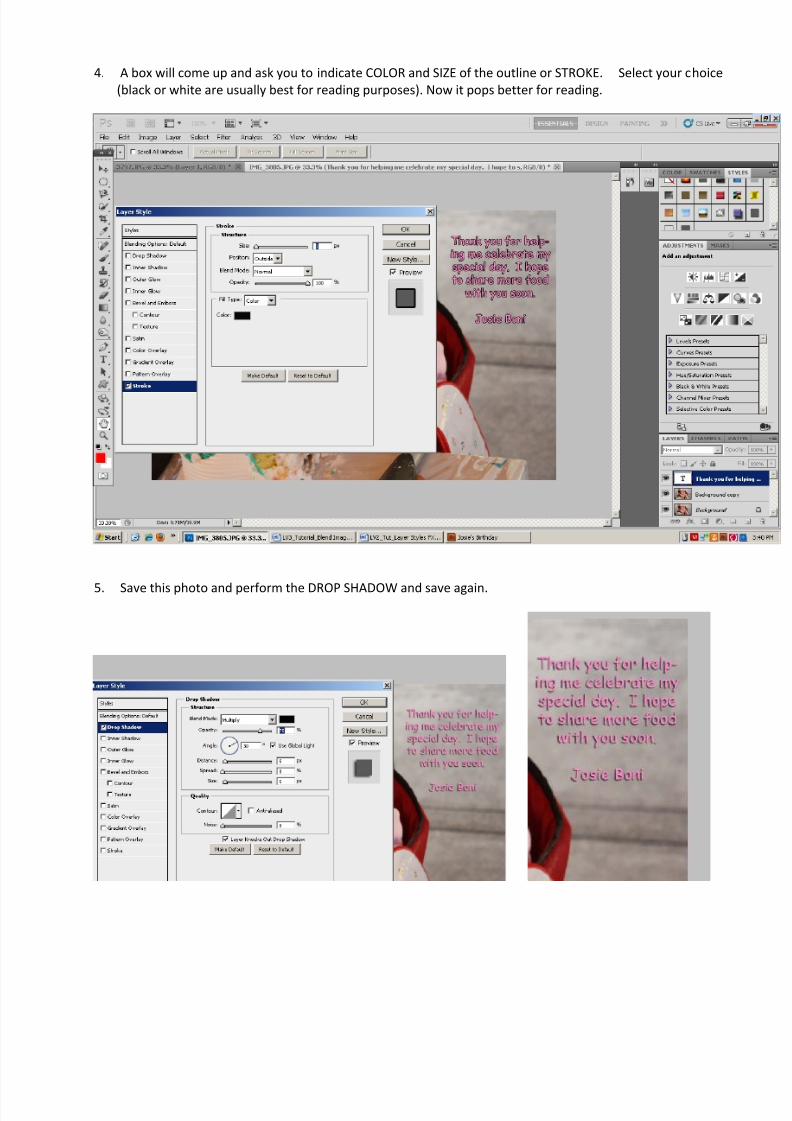
4. A box will come up and ask you to indicate COLOR and SIZE of the outline or STROKE. Select your choice
(black or white are usually best for reading purposes). Now it pops better for reading.
5. Save this photo and perform the DROP SHADOW and save again.
8/8/2019 LV2 Tut Layer Palette
http://slidepdf.com/reader/full/lv2-tut-layer-palette 5/7
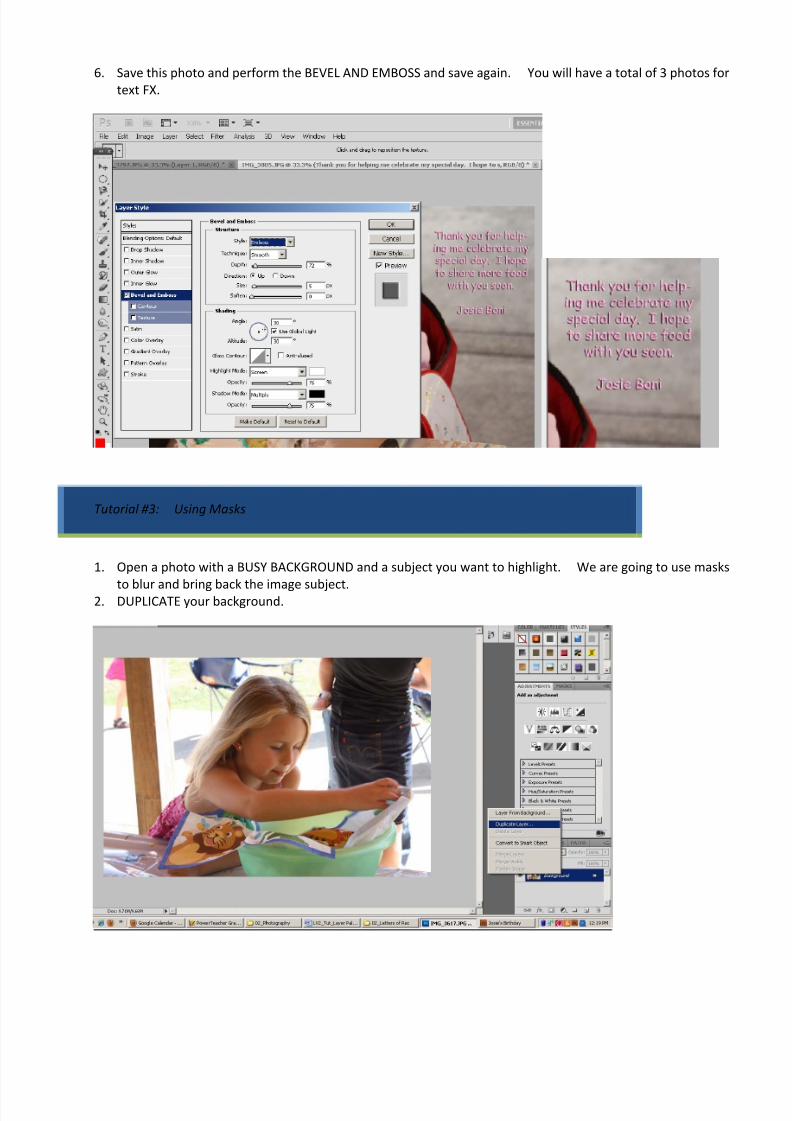
6. Save this photo and perform the BEVEL AND EMBOSS and save again. You will have a total of 3 photos for
text FX.
Tutorial #3: Using Masks
1. Open a photo with a BUSY BACKGROUND and a subject you want to highlight. We are going to use masks
to blur and bring back the image subject.2. DUPLICATE your background.
8/8/2019 LV2 Tut Layer Palette
http://slidepdf.com/reader/full/lv2-tut-layer-palette 6/7
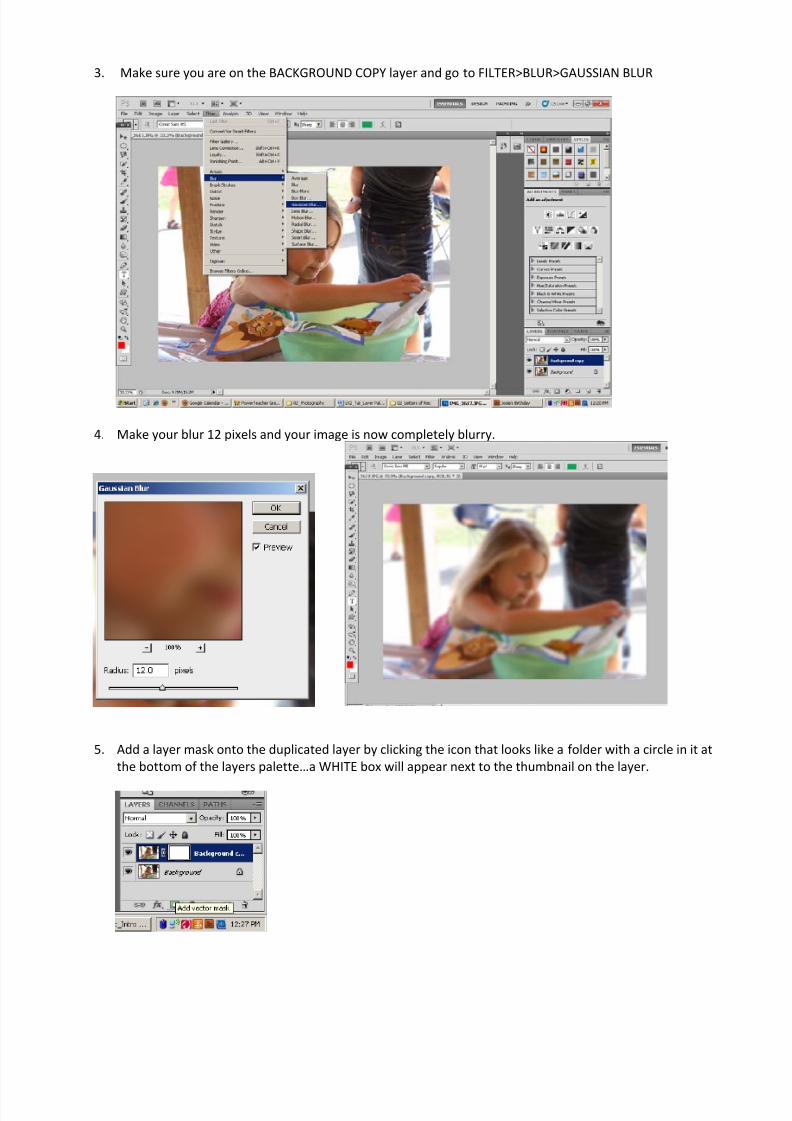
3. Make sure you are on the BACKGROUND COPY layer and go to FILTER>BLUR>GAUSSIAN BLUR
4. Make your blur 12 pixels and your image is now completely blurry.
5. Add a layer mask onto the duplicated layer by clicking the icon that looks like a folder with a circle in it at
the bottom of the layers palette…a WHITE box will appear next to the thumbnail on the layer.
8/8/2019 LV2 Tut Layer Palette
http://slidepdf.com/reader/full/lv2-tut-layer-palette 7/7
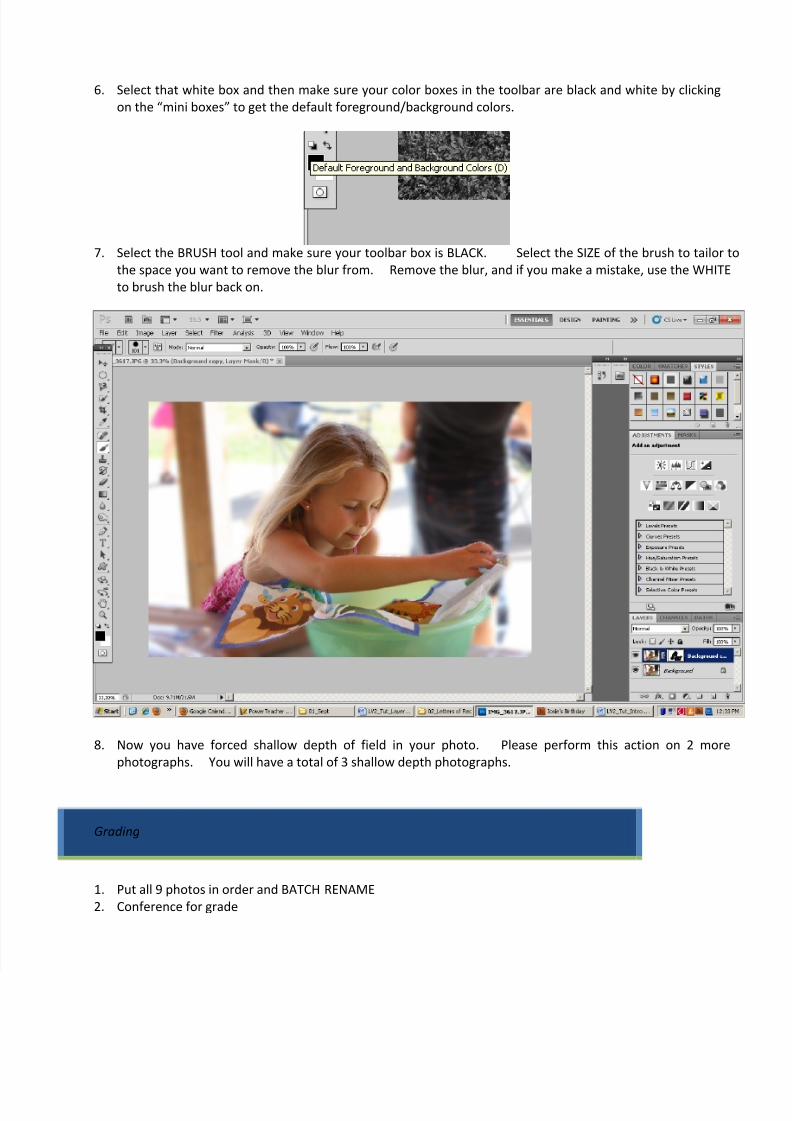
6. Select that white box and then make sure your color boxes in the toolbar are black and white by clicking
on the “mini boxes” to get the default foreground/background colors.
7. Select the BRUSH tool and make sure your toolbar box is BLACK. Select the SIZE of the brush to tailor to
the space you want to remove the blur from. Remove the blur, and if you make a mistake, use the WHITE
to brush the blur back on.
8. Now you have forced shallow depth of field in your photo. Please perform this action on 2 more
photographs. You will have a total of 3 shallow depth photographs.
Grading
1. Put all 9 photos in order and BATCH RENAME
2. Conference for grade