Embed Size (px)
DESCRIPTION
a
Citation preview
What is Android?
Android is an open source and Linux-based Operating System for mobile devices such as smartphones and tablet computers. Android was developed by the Open Handset Alliance, led by Google, and other companies.
Android offers a unified approach to application development for mobile devices which means developers need only develop for Android, and their applications should be able to run on different devices powered by Android.
The first beta version of the Android Software Development Kit (SDK) was released by Google in 2007 where as the first commercial version, Android 1.0, was released in September 2008.
On June 27, 2012, at the Google I/O conference, Google announced the next Android version, 4.1 Jelly Bean. Jelly Bean is an incremental update, with the primary aim of improving the user interface, both in terms of functionality and performance.
The source code for Android is available under free and open source software licenses. Google publishes most of the code under the Apache License version 2.0 and the rest, Linux kernel changes, under the GNU General Public License version 2.
Features of Android
Android is a powerful operating system competing with Apple 4GS and supports great features. Few of them are listed below:
Feature Description
Beautiful UI Android OS basic screen provides a beautiful and intuitive user interface.
Connectivity GSM/EDGE, IDEN, CDMA, EV-DO, UMTS, Bluetooth, Wi-Fi, LTE, NFC and WiMAX.
Storage SQLite, a lightweight relational database, is used for data storage purposes.
Media supportH.263, H.264, MPEG-4 SP, AMR, AMR-WB, AAC, HE-AAC, AAC 5.1, MP3, MIDI, Ogg Vorbis, WAV, JPEG, PNG, GIF, and BMP
Messaging SMS and MMS
Web browserBased on the open-source WebKit layout engine, coupled with Chrome's V8 JavaScript engine supporting HTML5 and CSS3.
Multi-touchAndroid has native support for multi-touch which was initially made available in handsets such as the HTC Hero.
Multi-taskingUser can jump from one task to another and same time various application can run simultaneously.
Resizable widgets
Widgets are resizable, so users can expand them to show more content or shrink them to save space
Multi-Language Supports single direction and bi-directional text.
GCMGoogle Cloud Messaging (GCM) is a service that lets developers send short message data to their users on Android devices, without needing a proprietary sync solution.
Wi-Fi DirectA technology that lets apps discover and pair directly, over a high-bandwidth peer-to-peer connection.
Android BeamA popular NFC-based technology that lets users instantly share, just by touching two NFC-enabled phones together.
Android Applications
Android applications are usually developed in the Java language using the Android Software Development Kit (Android SDK).
Once developed, Android applications can be packaged easily and sold out either through a store such as Google Play or the Amazon Appstore.
Android powers hundreds of millions of mobile devices in more than 190 countries around the world. It's the largest installed base of any mobile platform and growing fast. Every day more than 1 million new Android devices are activated worldwide.
Here we will learn how to develop and package Android application. We will start from environment setup for Android application programming and then drill down to look into various aspects of Android applications.
You can start your Android application development on either of the following operating systems:
Microsoft Windows XP or later version. Mac OS X 10.5.8 or later version with Intel chip. Linux including GNU C Library 2.7 or later.
Second point is that all the required tools to develop Android applications are freely available and can be downloaded from the Web. Following is the list of software you will need before you start your Android application programming.
Java JDK6 or latest Android SDK Eclipse IDE for Java Developers (optional) Android Development Tools (ADT) Eclipse Plugin (optional)
Last two components are optional and if you are working on Windows machine then these components make your life easy while doing Java based application development. So let us learn how to set required environment.
Step 1 - Setup Java Development Kit (JDK)
You can download the latest version of Java JDK from Oracle's Java site: http://java.oracle.com. You will find instructions for installing JDK in downloaded files, follow the given instructions to install and configure the setup. Finally set PATH and JAVA_HOME environment variables to refer to the directory that contains java and javac, typically java_install_dir/bin and java_install_dir respectively.
If you are running Windows and installed the JDK in C:\jdk1.6.0_15, you would have to put the following line in your C:\autoexec.bat file.
set PATH=C:\jdk1.6.0_15\bin;%PATH% set JAVA_HOME=C:\jdk1.6.0_15
Alternatively, you could also right-click on My Computer, select Properties, then Advanced, then Environment Variables. Then, you would update the PATH and value and JAVA_HOME, press the OK button.
Alternatively, if you use an Integrated Development Environment (IDE) Eclipse, then it will know automatically where you have installed your Java.
Step 2 - Setup Android SDK
You can download the latest version of Android SDK from Android official website : https://developer.android.com/sdk. If you are installing SDK on Windows machine, then you will find a installer_rXX-windows.exe. Just download and run this exe which will launch Android SDK Tool Setup wizard to guide you through the installation. Just follow the instructions carefully. Finally you will have Android SDK Tools installed on your machine.
If you are installing SDK either on Mac OS or Linux, check the instructions provided along with the downloaded android-sdk_rXX-macosx.zip file for Mac OS and android-sdk_rXX-linux.tgz file for Linux.
So let's launch Android SDK Manager using the option All Programs > Android SDK Tools > SDK Manager, this will give you following window:
Once you launched SDK manager, it's time to install other required packages. By default it will list down total 7 packages to be installed, but we will suggest to de-select 'Documentation for Android SDK' and
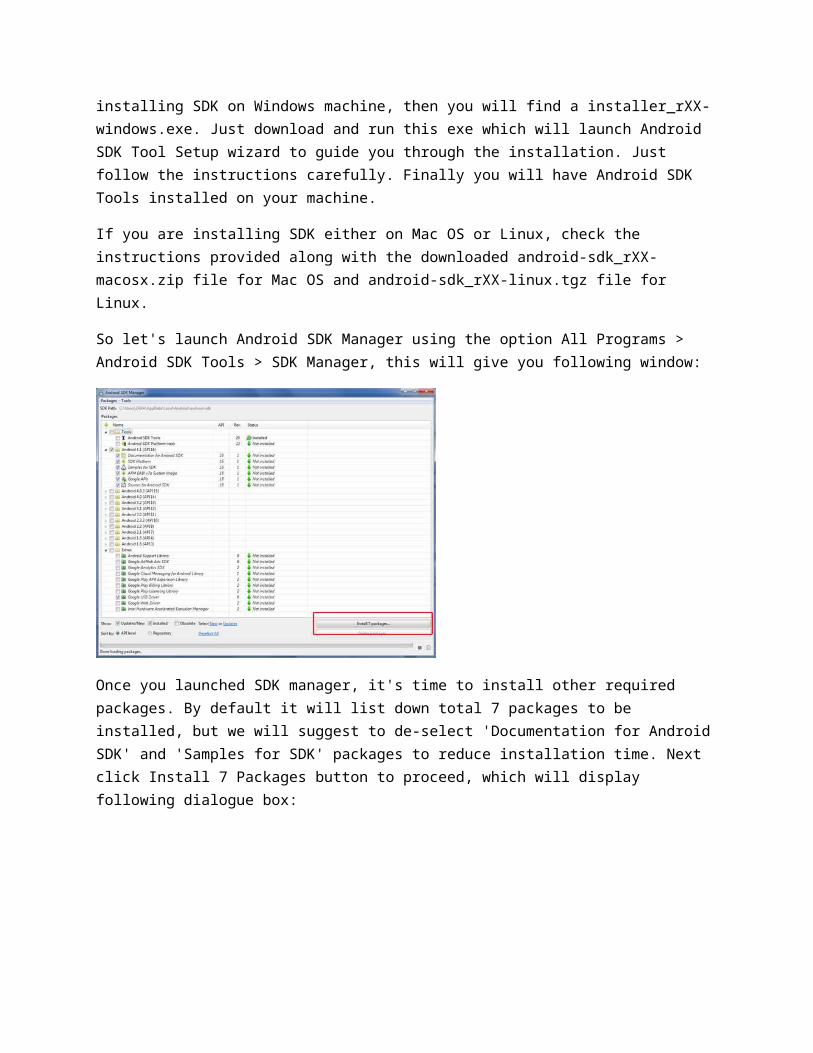
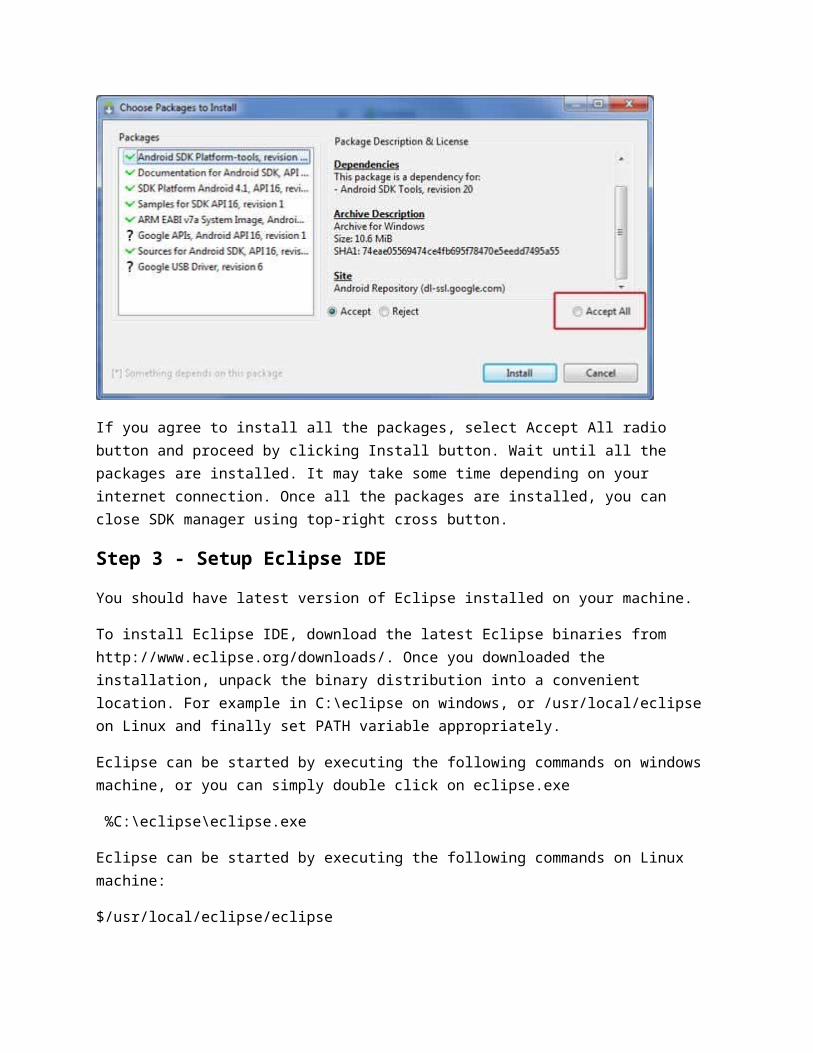
'Samples for SDK' packages to reduce installation time. Next click Install 7 Packages button to proceed, which will display following dialogue box:
If you agree to install all the packages, select Accept All radio button and proceed by clicking Install button. Wait until all the packages are installed. It may take some time depending on your internet connection. Once all the packages are installed, you can close SDK manager using top-right cross button.
Step 3 - Setup Eclipse IDE
You should have latest version of Eclipse installed on your machine.
To install Eclipse IDE, download the latest Eclipse binaries from http://www.eclipse.org/downloads/. Once you downloaded the installation, unpack the binary distribution into a convenient location. For example in C:\eclipse on windows, or /usr/local/eclipse on Linux and finally set PATH variable appropriately.
Eclipse can be started by executing the following commands on windows machine, or you can simply double click on eclipse.exe
%C:\eclipse\eclipse.exe
Eclipse can be started by executing the following commands on Linux machine:
$/usr/local/eclipse/eclipse
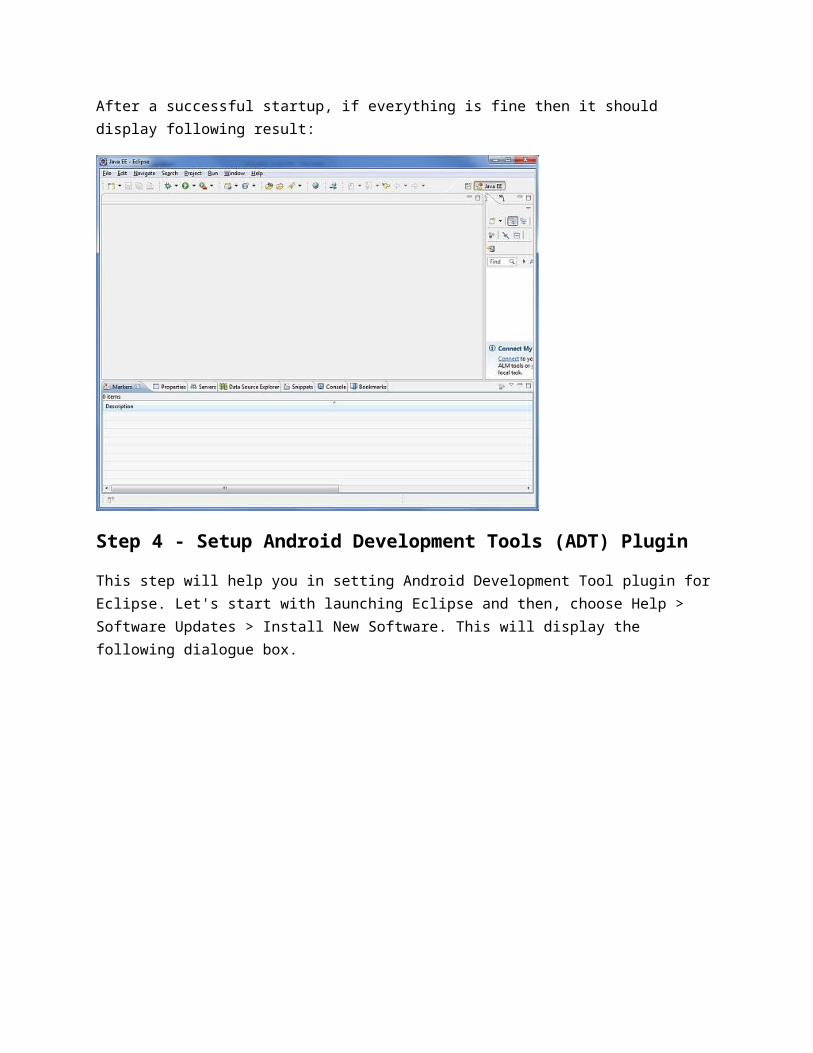
After a successful startup, if everything is fine then it should display following result:
Step 4 - Setup Android Development Tools (ADT) Plugin
This step will help you in setting Android Development Tool plugin for Eclipse. Let's start with launching Eclipse and then, choose Help > Software Updates > Install New Software. This will display the following dialogue box.
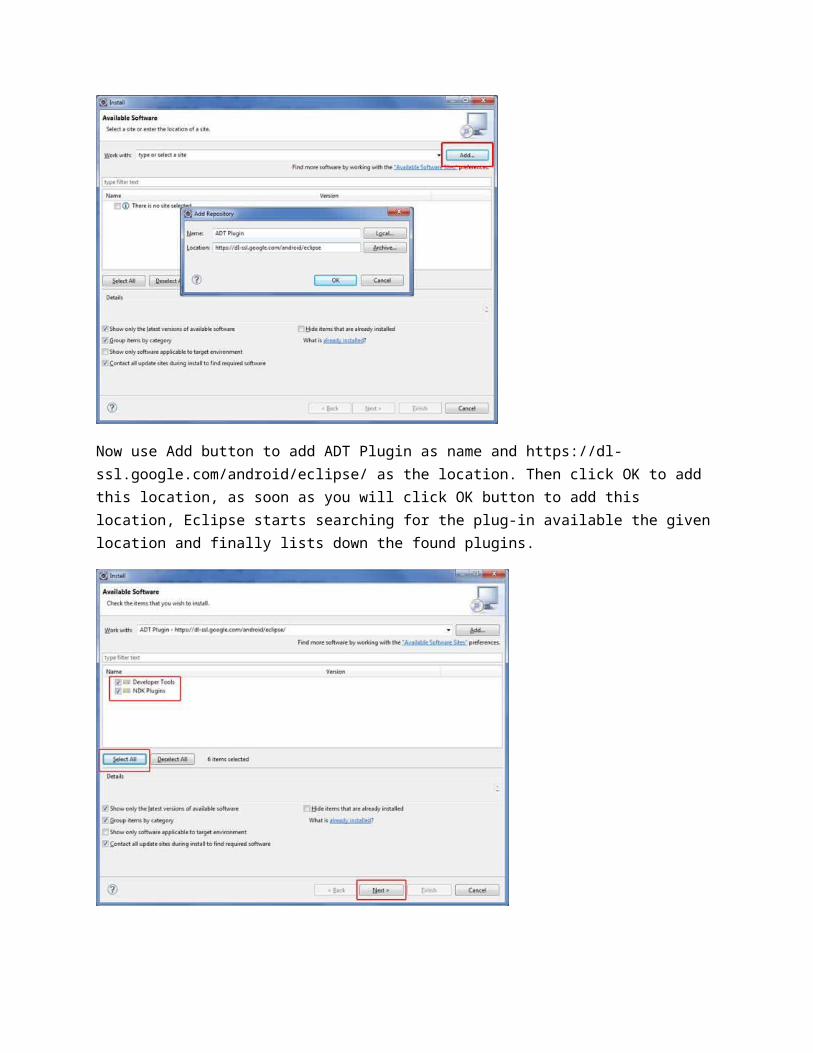
Now use Add button to add ADT Plugin as name and https://dl-ssl.google.com/android/eclipse/ as the location. Then click OK to add this location, as soon as you will click OK button to add this location, Eclipse starts searching for the plug-in available the given location and finally lists down the found plugins.
Now select all the listed plug-ins using Select All button and click Next button which will guide you ahead to install Android Development Tools and other required plugins.
Step 5 - Create Android Virtual Device
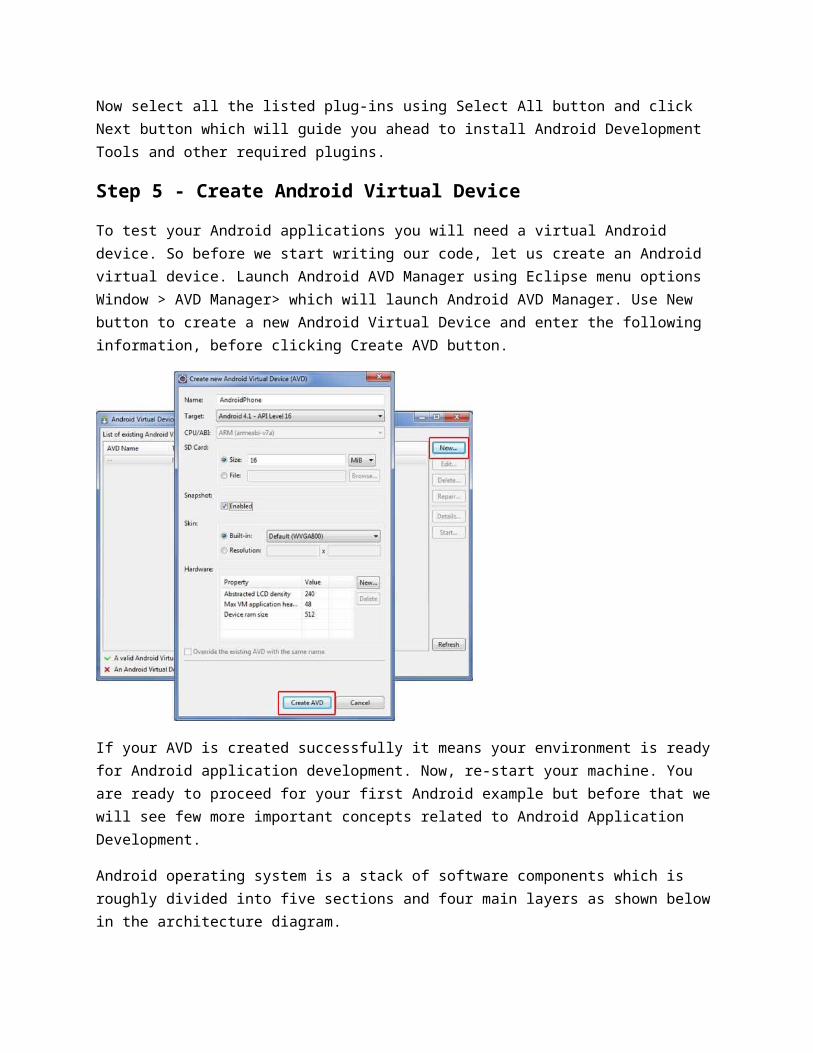
To test your Android applications you will need a virtual Android device. So before we start writing our code, let us create an Android virtual device. Launch Android AVD Manager using Eclipse menu options Window > AVD Manager> which will launch Android AVD Manager. Use New button to create a new Android Virtual Device and enter the following information, before clicking Create AVD button.
If your AVD is created successfully it means your environment is ready for Android application development. Now, re-start your machine. You are ready to proceed for your first Android example but before that we will see few more important concepts related to Android Application Development.
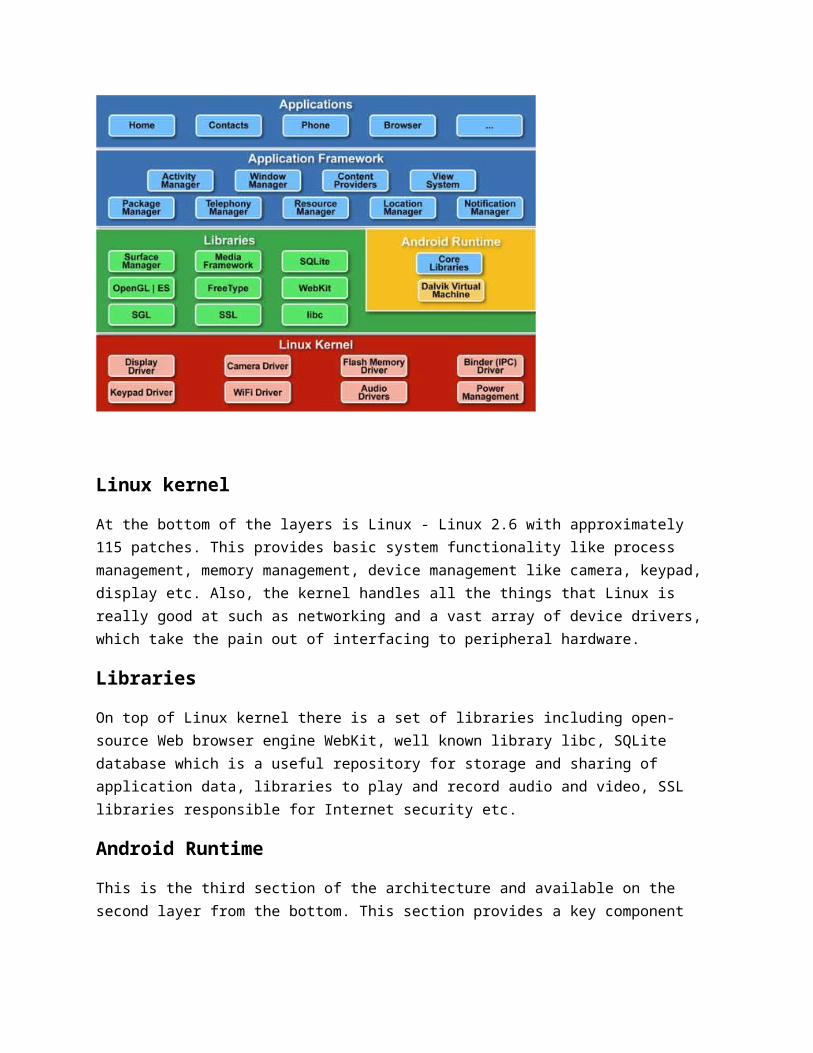
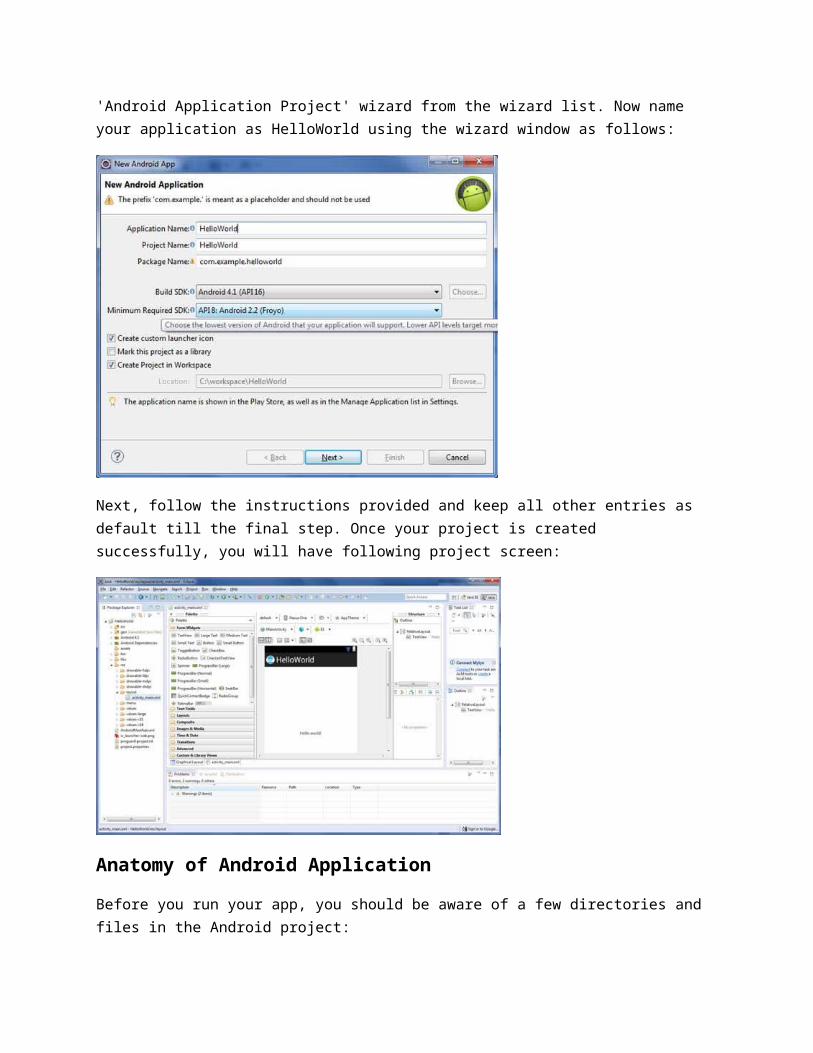
Android operating system is a stack of software components which is roughly divided into five sections and four main layers as shown below in the architecture diagram.
Linux kernel
At the bottom of the layers is Linux - Linux 2.6 with approximately 115 patches. This provides basic system functionality like process management, memory management, device management like camera, keypad, display etc. Also, the kernel handles all the things that Linux is really good at such as networking and a vast array of device drivers, which take the pain out of interfacing to peripheral hardware.
Libraries
On top of Linux kernel there is a set of libraries including open-source Web browser engine WebKit, well known library libc, SQLite database which is a useful repository for storage and sharing of application data, libraries to play and record audio and video, SSL libraries responsible for Internet security etc.
Android Runtime
This is the third section of the architecture and available on the second layer from the bottom. This section provides a key component called Dalvik Virtual Machine (DVM) which is a kind of Java Virtual Machine (JVM) specially designed and optimized for Android.
The Dalvik VM makes use of Linux core features like memory management and multi-threading, which is intrinsic in the Java language. The Dalvik VM enables every Android application to run in its own process, with its own instance of the Dalvik virtual machine.
The Android runtime also provides a set of core libraries which enable Android application developers to write Android applications using standard Java programming language.
Application Framework
The Application Framework layer provides many higher-level services to applications in the form of Java classes. Application developers are allowed to make use of these services in their applications.
Applications
You will find all the Android application at the top layer. You will write your application to be installed on this layer only. Examples of such applications are Contacts Books, Browser, Games etc.
Application components are the essential building blocks of an Android application. These components are loosely coupled by the application manifest file AndroidManifest.xml that describes each component of the application and how they interact.
There are following four main components that can be used within an Android application:
Components Description
Activities They dictate the UI and handle the user interaction to the smartphone screen
Services They handle background processing associated with an application.
Broadcast Receivers They handle communication between Android OS and applications.
Content Providers They handle data and database management issues.
Activities
An activity represents a single screen with a user interface. For example, an email application might have one activity that shows a list of new emails, another activity to compose an email, and another activity for reading emails. If an application has more than one activity, then one of them should be marked as the activity that is presented when the application is launched.
An activity is implemented as a subclass of Activity class as follows:
public class MainActivity extends Activity {
}
Services
A service is a component that runs in the background to perform long-running operations. For example, a service might play music in the background while the user is in a different application, or it might fetch data over the network without blocking user interaction with an activity.
A service is implemented as a subclass of Service class as follows:
public class MyService extends Service {
}
Broadcast Receivers
Broadcast Receivers simply respond to broadcast messages from other applications or from the system. For example, applications can also initiate broadcasts to let other applications know that some data has been downloaded to the device and is available for them to use, so this is broadcast receiver who will intercept this communication and will initiate appropriate action.
A broadcast receiver is implemented as a subclass of BroadcastReceiver class and each message is broadcasted as an Intent object.
public class MyReceiver extends BroadcastReceiver {
}
Content Providers
A content provider component supplies data from one application to others on request. Such requests are handled by the methods of the ContentResolver class. The data may be stored in the file system, the database or somewhere else entirely.
A content provider is implemented as a subclass of ContentProvider class and must implement a standard set of APIs that enable other applications to perform transactions.
public class MyContentProvider extends ContentProvider {
}
We will learn these tags in more detail later.
Additional Components
There are additional components which will be used in the construction of above mentioned entities, their logic, and wiring between them. These components are:
Components Description
Fragments Represents a behavior or a portion of user interface in an Activity.
Views UI elements that are drawn onscreen including buttons, lists forms etc.
Layouts View hierarchies that control screen format and appearance of the views.
Intents Messages that wire components together.
Resources External elements, such as strings, constants and drawables pictures.
Manifest Configuration file for the application.
Create Android Application
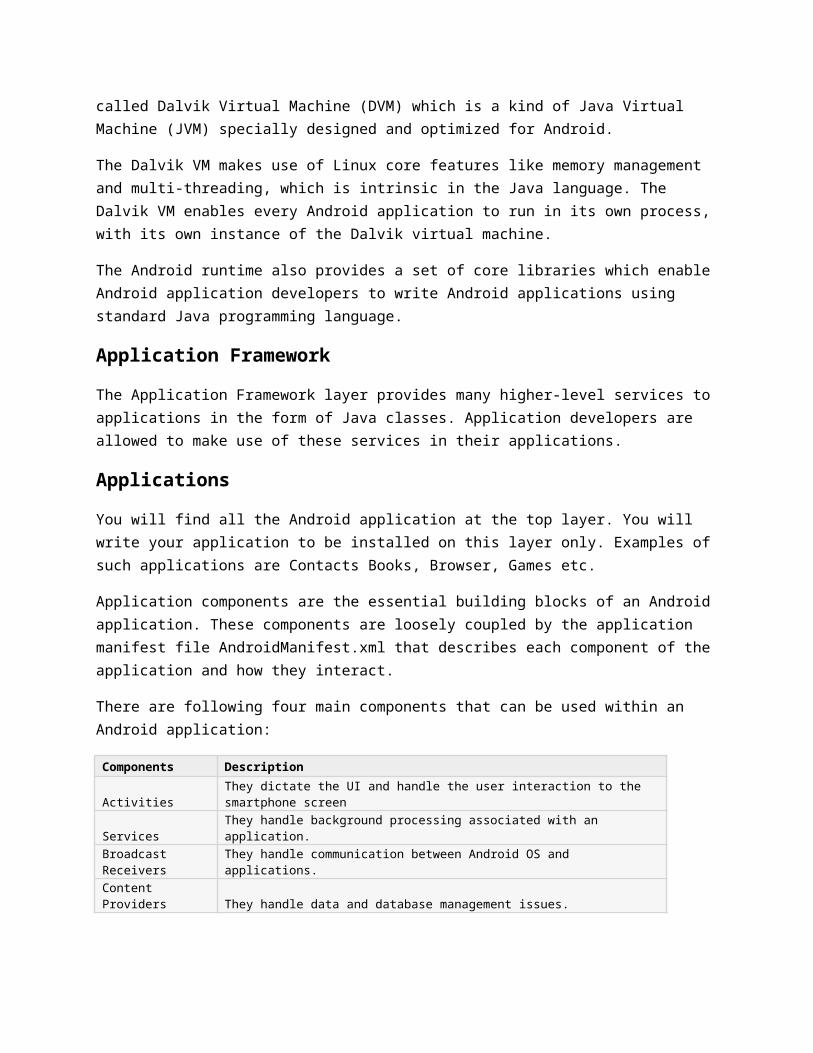
The first step is to create a simple Android Application using Eclipse IDE. Follow the option 'File' -> 'New' -> 'Project' and finally select 'Android Application Project' wizard from the wizard list. Now name your application as HelloWorld using the wizard window as follows:

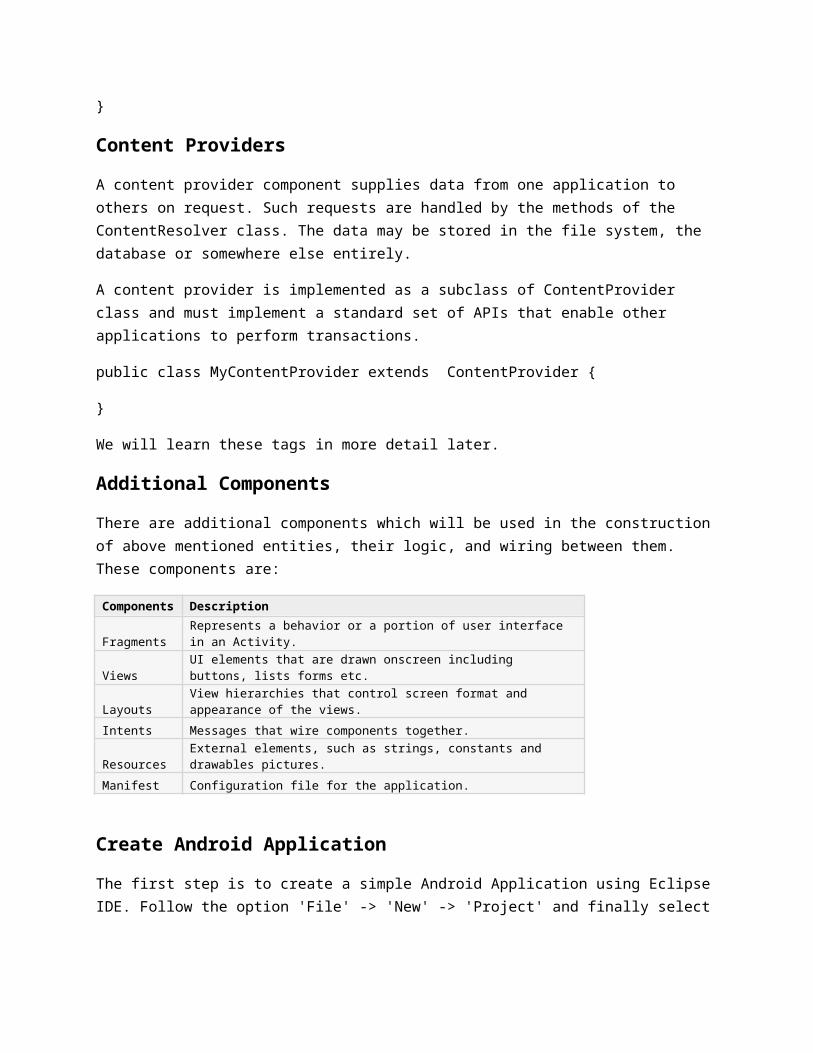
Next, follow the instructions provided and keep all other entries as default till the final step. Once your project is created successfully, you will have following project screen:
Anatomy of Android Application
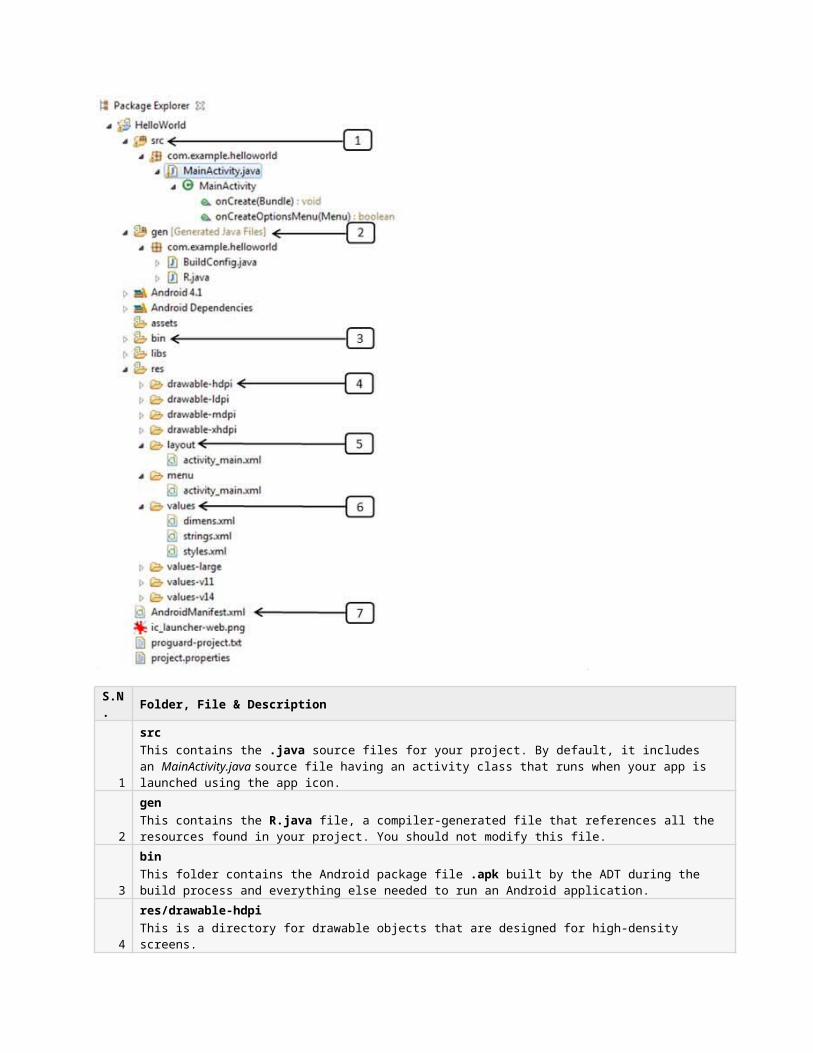
Before you run your app, you should be aware of a few directories and files in the Android project:
S.N. Folder, File & Description
1
srcThis contains the .java source files for your project. By default, it includes an MainActivity.java source file having an activity class that runs when your app is launched using the app icon.
2
genThis contains the R.java file, a compiler-generated file that references all the resources found in your project. You should not modify this file.
3
binThis folder contains the Android package file .apk built by the ADT during the build process and everything else needed to run an Android application.
4
res/drawable-hdpi
This is a directory for drawable objects that are designed for high-density screens.
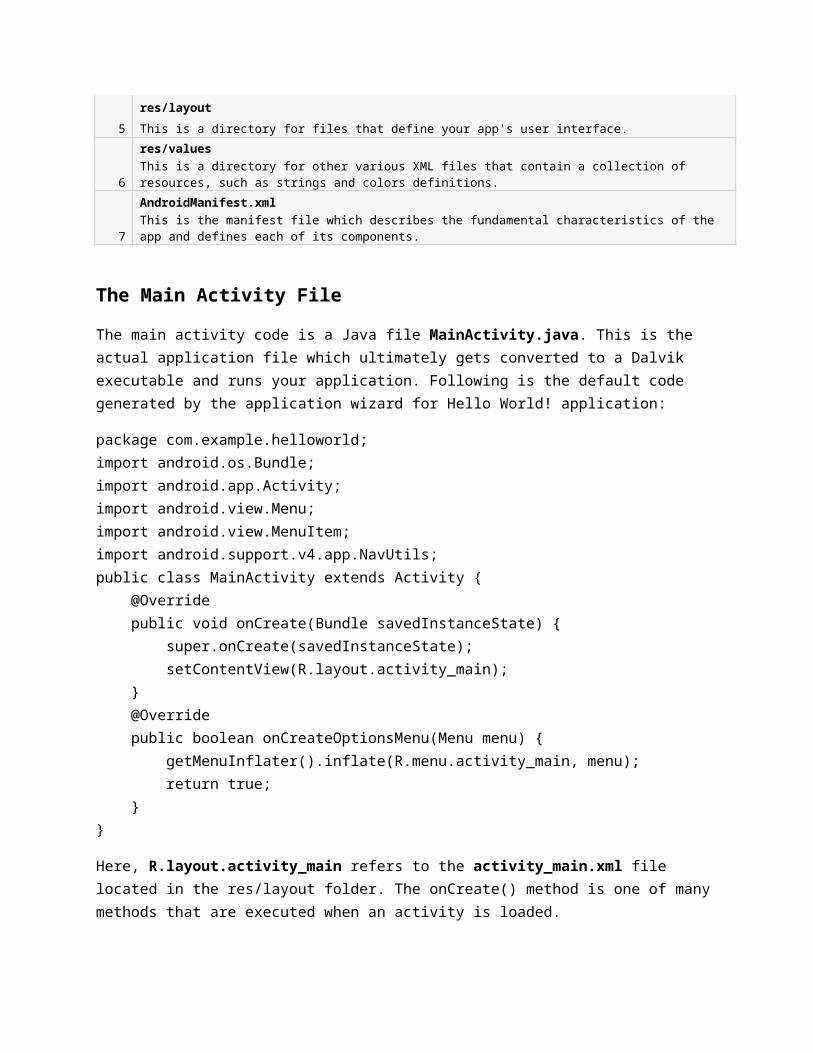
5
res/layout
This is a directory for files that define your app's user interface.
6 res/values
This is a directory for other various XML files that contain a collection of resources, such as strings and colors definitions.
7
AndroidManifest.xmlThis is the manifest file which describes the fundamental characteristics of the app and defines each of its components.
The Main Activity File
The main activity code is a Java file MainActivity.java. This is the actual application file which ultimately gets converted to a Dalvik executable and runs your application. Following is the default code generated by the application wizard for Hello World! application:
package com.example.helloworld;import android.os.Bundle;import android.app.Activity;import android.view.Menu;import android.view.MenuItem;import android.support.v4.app.NavUtils;public class MainActivity extends Activity { @Override public void onCreate(Bundle savedInstanceState) { super.onCreate(savedInstanceState); setContentView(R.layout.activity_main); } @Override public boolean onCreateOptionsMenu(Menu menu) { getMenuInflater().inflate(R.menu.activity_main, menu); return true; }}
Here, R.layout.activity_main refers to the activity_main.xml file located in the res/layout folder. The onCreate() method is one of many methods that are executed when an activity is loaded.
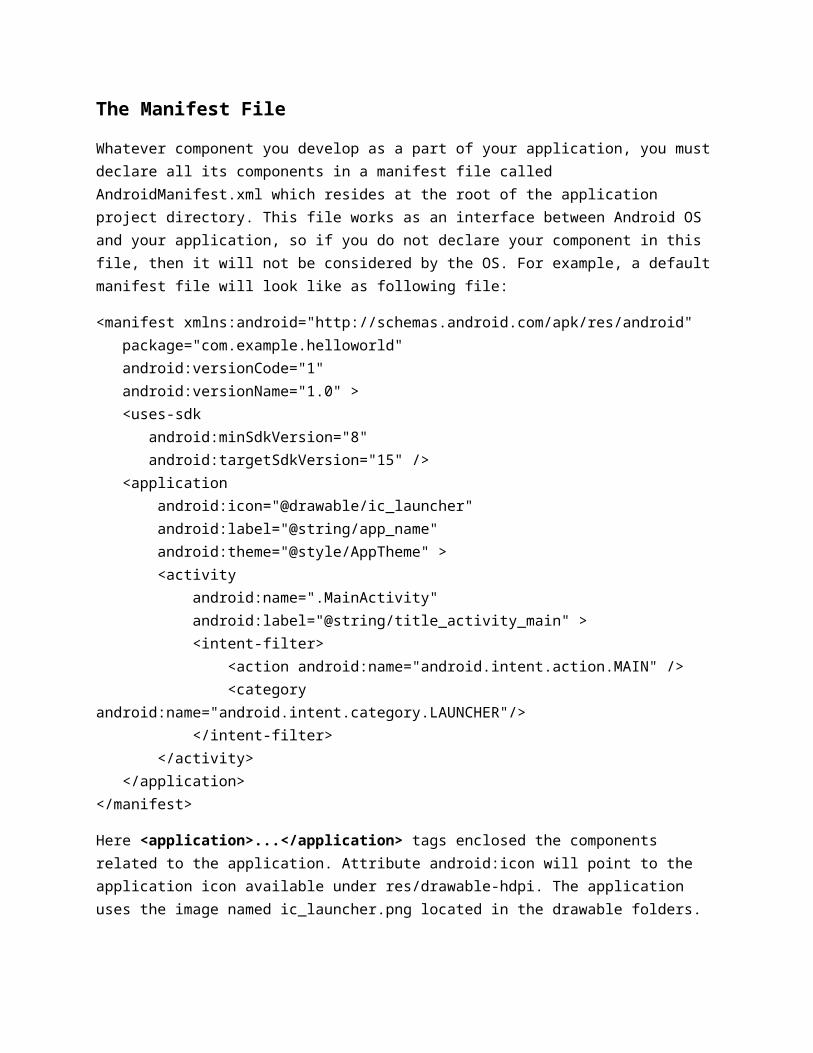
The Manifest File
Whatever component you develop as a part of your application, you must declare all its components in a manifest file called AndroidManifest.xml which resides at the root of the application project directory. This file works as an interface between Android OS and your application, so if you do not declare your component in this file, then it will not be considered by the OS. For example, a default manifest file will look like as following file:
<manifest xmlns:android="http://schemas.android.com/apk/res/android" package="com.example.helloworld"
android:versionCode="1" android:versionName="1.0" > <uses-sdk android:minSdkVersion="8" android:targetSdkVersion="15" /> <application android:icon="@drawable/ic_launcher" android:label="@string/app_name" android:theme="@style/AppTheme" > <activity android:name=".MainActivity" android:label="@string/title_activity_main" > <intent-filter> <action android:name="android.intent.action.MAIN" /> <category android:name="android.intent.category.LAUNCHER"/> </intent-filter> </activity> </application></manifest>
Here <application>...</application> tags enclosed the components related to the application. Attribute android:icon will point to the application icon available under res/drawable-hdpi. The application uses the image named ic_launcher.png located in the drawable folders.
The <activity> tag is used to specify an activity and android:name attribute specifies the fully qualified class name of the Activity subclass and the android:label attributes specifies a string to use as the label for the activity. You can specify multiple activities using <activity> tags.
The action for the intent filter is named android.intent.action.MAIN to indicate that this activity serves as the entry point for the application. The category for the intent-filter is named android.intent.category.LAUNCHER to indicate that the application can be launched from the device's launcher icon.
The @string refers to the strings.xml file explained below. Hence, @string/app_name refers to the app_name string defined in the strings.xml fi le, which is "HelloWorld". Similar way, other strings get populated in the application.
Following is the list of tags which you will use in your manifest file to specify different Android application components:
<activity>elements for activities <service> elements for services <receiver> elements for broadcast receivers <provider> elements for content providers
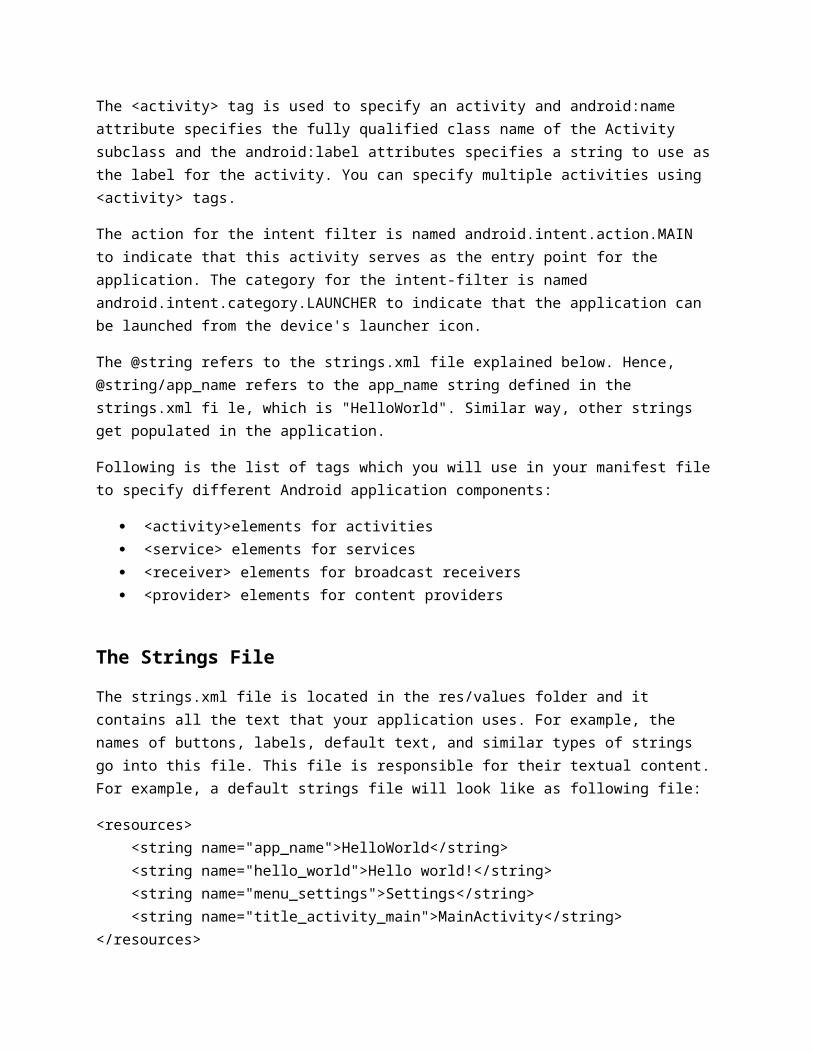
The Strings File
The strings.xml file is located in the res/values folder and it contains all the text that your application uses. For example, the names of buttons, labels, default text, and similar types of strings go into this file. This file is responsible for their textual content. For example, a default strings file will look like as following file:
<resources> <string name="app_name">HelloWorld</string> <string name="hello_world">Hello world!</string> <string name="menu_settings">Settings</string> <string name="title_activity_main">MainActivity</string></resources>
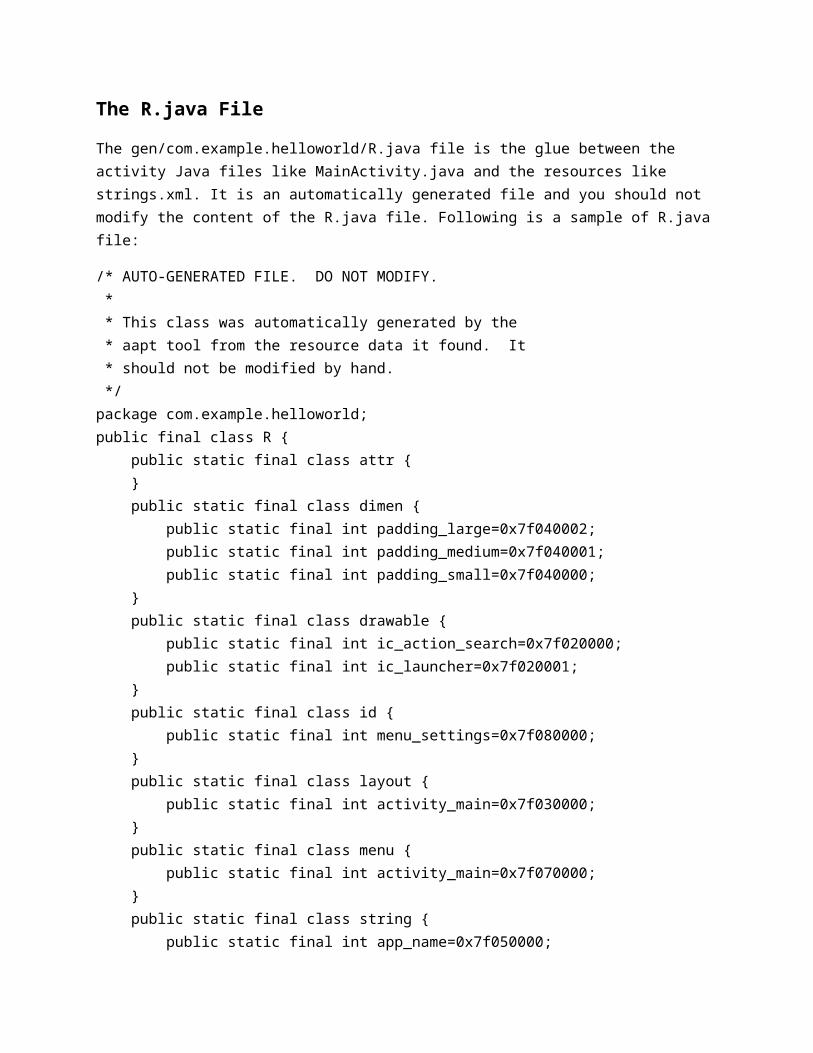
The R.java File
The gen/com.example.helloworld/R.java file is the glue between the activity Java files like MainActivity.java and the resources like strings.xml. It is an automatically generated file and you should not modify the content of the R.java file. Following is a sample of R.java file:
/* AUTO-GENERATED FILE. DO NOT MODIFY. * * This class was automatically generated by the * aapt tool from the resource data it found. It * should not be modified by hand. */package com.example.helloworld;public final class R { public static final class attr { } public static final class dimen { public static final int padding_large=0x7f040002; public static final int padding_medium=0x7f040001; public static final int padding_small=0x7f040000; } public static final class drawable { public static final int ic_action_search=0x7f020000; public static final int ic_launcher=0x7f020001; } public static final class id { public static final int menu_settings=0x7f080000;
} public static final class layout { public static final int activity_main=0x7f030000; } public static final class menu { public static final int activity_main=0x7f070000; } public static final class string { public static final int app_name=0x7f050000; public static final int hello_world=0x7f050001; public static final int menu_settings=0x7f050002; public static final int title_activity_main=0x7f050003; } public static final class style { public static final int AppTheme=0x7f060000; }}
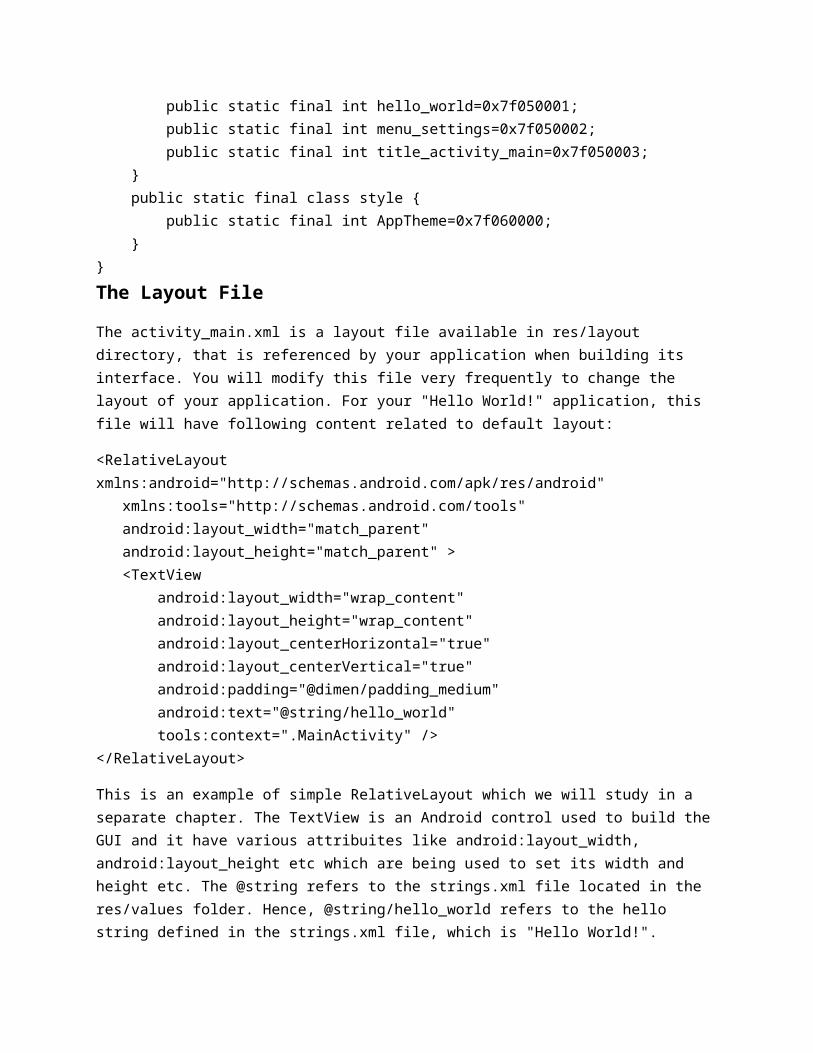
The Layout File
The activity_main.xml is a layout file available in res/layout directory, that is referenced by your application when building its interface. You will modify this file very frequently to change the layout of your application. For your "Hello World!" application, this file will have following content related to default layout:
<RelativeLayout xmlns:android="http://schemas.android.com/apk/res/android" xmlns:tools="http://schemas.android.com/tools" android:layout_width="match_parent" android:layout_height="match_parent" > <TextView android:layout_width="wrap_content" android:layout_height="wrap_content" android:layout_centerHorizontal="true" android:layout_centerVertical="true" android:padding="@dimen/padding_medium" android:text="@string/hello_world" tools:context=".MainActivity" /></RelativeLayout>
This is an example of simple RelativeLayout which we will study in a separate chapter. The TextView is an Android control used to build the GUI and it have various attribuites like android:layout_width, android:layout_height etc which are being used to set its width and height etc. The @string refers to the
strings.xml file located in the res/values folder. Hence, @string/hello_world refers to the hello string defined in the strings.xml file, which is "Hello World!".
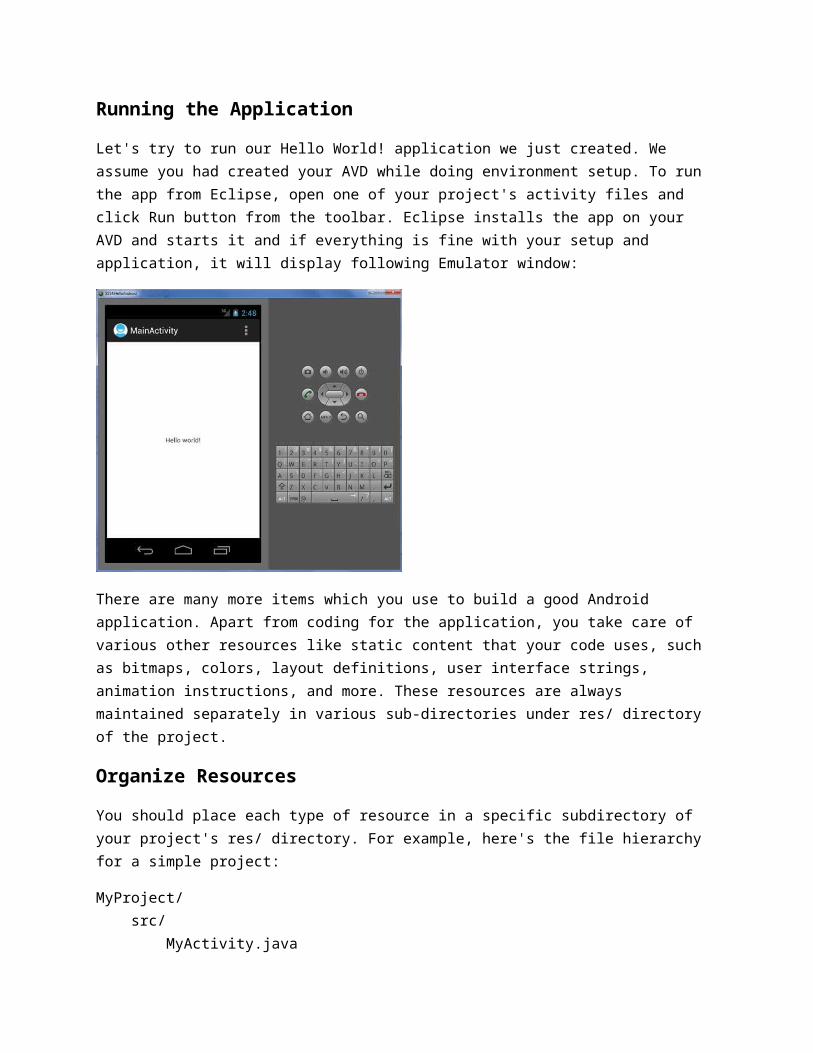
Running the Application
Let's try to run our Hello World! application we just created. We assume you had created your AVD while doing environment setup. To run the app from Eclipse, open one of your project's activity files and click Run button from the toolbar. Eclipse installs the app on your AVD and starts it and if everything is fine with your setup and application, it will display following Emulator window:
There are many more items which you use to build a good Android application. Apart from coding for the application, you take care of various other resources like static content that your code uses, such as bitmaps, colors, layout definitions, user interface strings, animation instructions, and more. These resources are always maintained separately in various sub-directories under res/ directory of the project.
Organize Resources
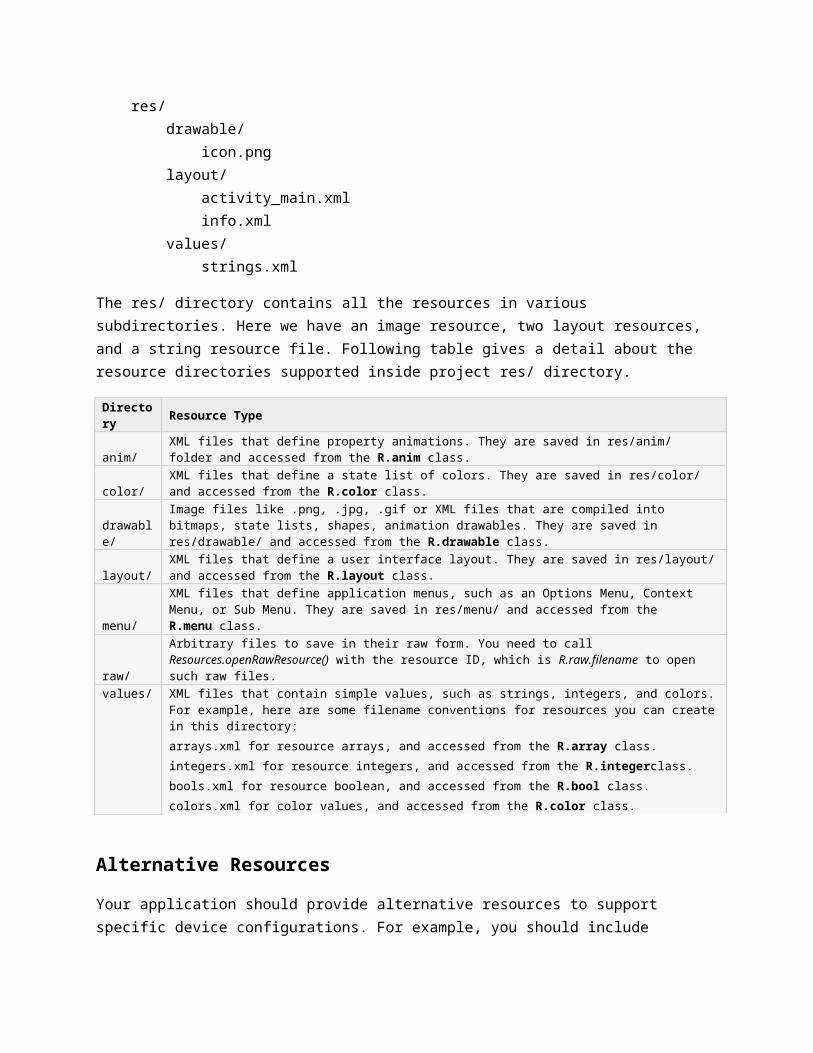
You should place each type of resource in a specific subdirectory of your project's res/ directory. For example, here's the file hierarchy for a simple project:
MyProject/ src/ MyActivity.java res/ drawable/ icon.png layout/ activity_main.xml
info.xml values/ strings.xml
The res/ directory contains all the resources in various subdirectories. Here we have an image resource, two layout resources, and a string resource file. Following table gives a detail about the resource directories supported inside project res/ directory.
Directory Resource Type
anim/XML files that define property animations. They are saved in res/anim/ folder and accessed from the R.anim class.
color/XML files that define a state list of colors. They are saved in res/color/ and accessed from the R.color class.
drawable/Image files like .png, .jpg, .gif or XML files that are compiled into bitmaps, state lists, shapes, animation drawables. They are saved in res/drawable/ and accessed from the R.drawable class.
layout/XML files that define a user interface layout. They are saved in res/layout/ and accessed from the R.layout class.
menu/XML files that define application menus, such as an Options Menu, Context Menu, or Sub Menu. They are saved in res/menu/ and accessed from the R.menu class.
raw/Arbitrary files to save in their raw form. You need to call Resources.openRawResource() with the resource ID, which is R.raw.filename to open such raw files.
values/ XML files that contain simple values, such as strings, integers, and colors. For example, here are some filename conventions for resources you can create in this directory:
arrays.xml for resource arrays, and accessed from the R.array class.
integers.xml for resource integers, and accessed from the R.integerclass.
bools.xml for resource boolean, and accessed from the R.bool class.
colors.xml for color values, and accessed from the R.color class.
Alternative Resources
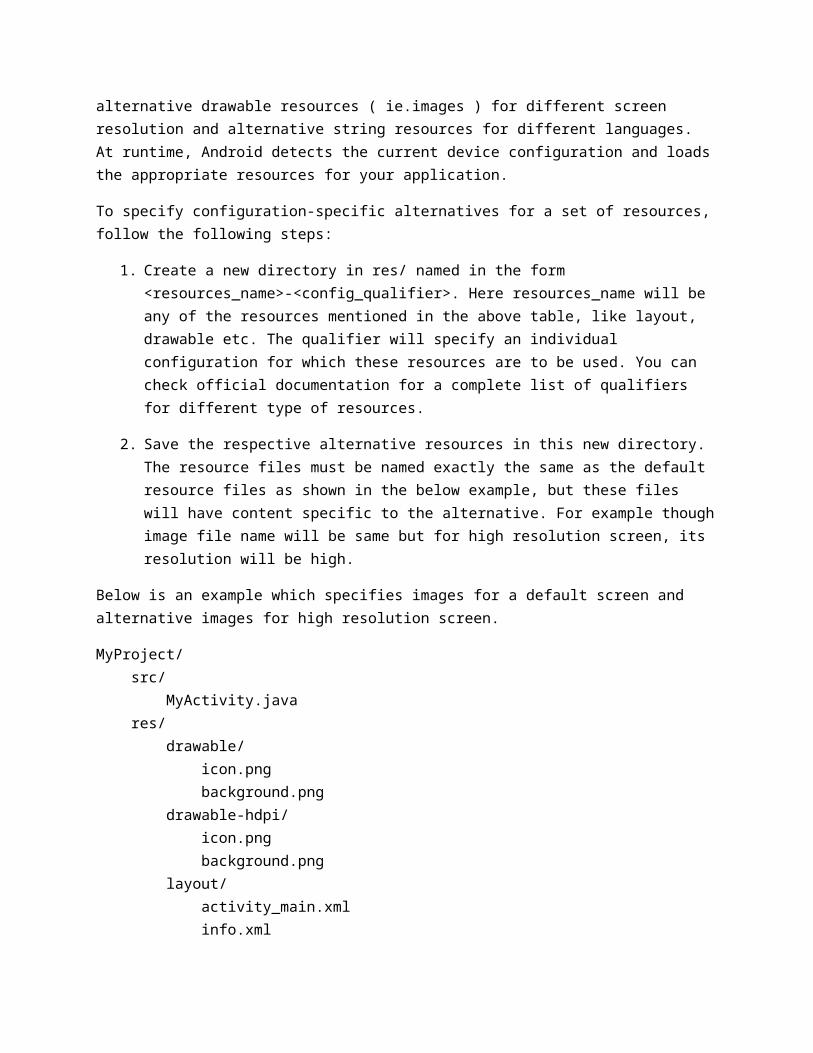
Your application should provide alternative resources to support specific device configurations. For example, you should include alternative drawable resources ( ie.images ) for different screen resolution and alternative string resources for different languages. At runtime, Android detects the current device configuration and loads the appropriate resources for your application.
To specify configuration-specific alternatives for a set of resources, follow the following steps:
1. Create a new directory in res/ named in the form <resources_name>-<config_qualifier>. Here resources_name will be any of the resources mentioned in the above table, like layout, drawable etc. The qualifier will specify an individual configuration for which these resources are to be used. You can check official documentation for a complete list of qualifiers for different type of resources.
2. Save the respective alternative resources in this new directory. The resource files must be named exactly the same as the default resource files as shown in the below example, but these files will have content specific to the alternative. For example though image file name will be same but for high resolution screen, its resolution will be high.
Below is an example which specifies images for a default screen and alternative images for high resolution screen.
MyProject/ src/ MyActivity.java res/ drawable/ icon.png background.png drawable-hdpi/ icon.png background.png layout/ activity_main.xml info.xml values/ strings.xml
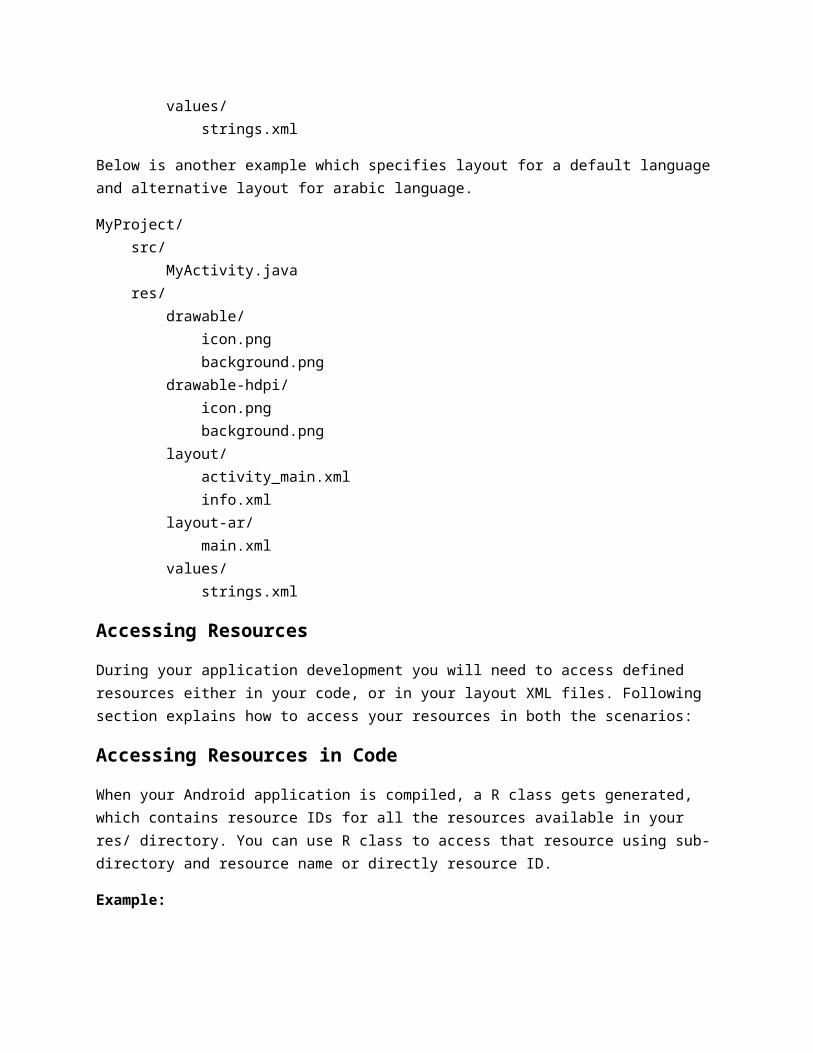
Below is another example which specifies layout for a default language and alternative layout for arabic language.
MyProject/ src/ MyActivity.java res/ drawable/ icon.png background.png drawable-hdpi/ icon.png background.png layout/ activity_main.xml info.xml layout-ar/ main.xml values/ strings.xml
Accessing Resources
During your application development you will need to access defined resources either in your code, or in your layout XML files. Following section explains how to access your resources in both the scenarios:
Accessing Resources in Code
When your Android application is compiled, a R class gets generated, which contains resource IDs for all the resources available in your res/ directory. You can use R class to access that resource using sub-directory and resource name or directly resource ID.
Example:
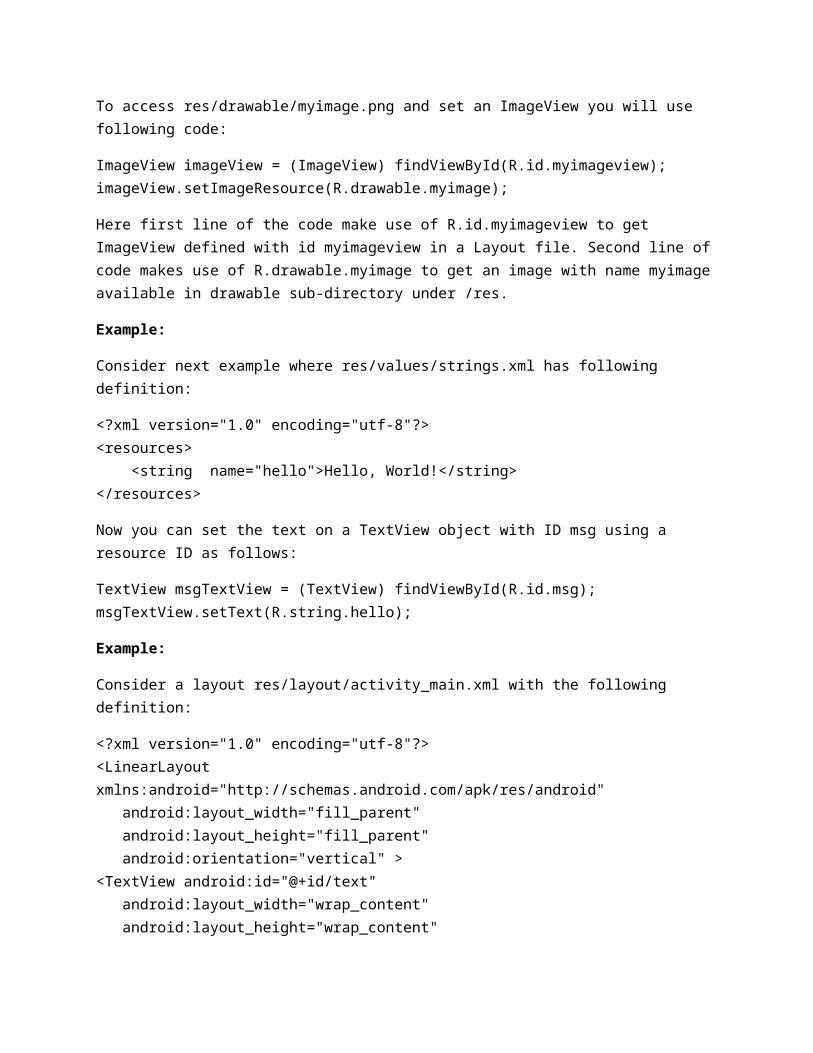
To access res/drawable/myimage.png and set an ImageView you will use following code:
ImageView imageView = (ImageView) findViewById(R.id.myimageview);imageView.setImageResource(R.drawable.myimage);
Here first line of the code make use of R.id.myimageview to get ImageView defined with id myimageview in a Layout file. Second line of code makes use of R.drawable.myimage to get an image with name myimage available in drawable sub-directory under /res.
Example:
Consider next example where res/values/strings.xml has following definition:
<?xml version="1.0" encoding="utf-8"?><resources> <string name="hello">Hello, World!</string></resources>
Now you can set the text on a TextView object with ID msg using a resource ID as follows:
TextView msgTextView = (TextView) findViewById(R.id.msg);msgTextView.setText(R.string.hello);
Example:
Consider a layout res/layout/activity_main.xml with the following definition:
<?xml version="1.0" encoding="utf-8"?><LinearLayout xmlns:android="http://schemas.android.com/apk/res/android" android:layout_width="fill_parent" android:layout_height="fill_parent" android:orientation="vertical" ><TextView android:id="@+id/text" android:layout_width="wrap_content" android:layout_height="wrap_content"
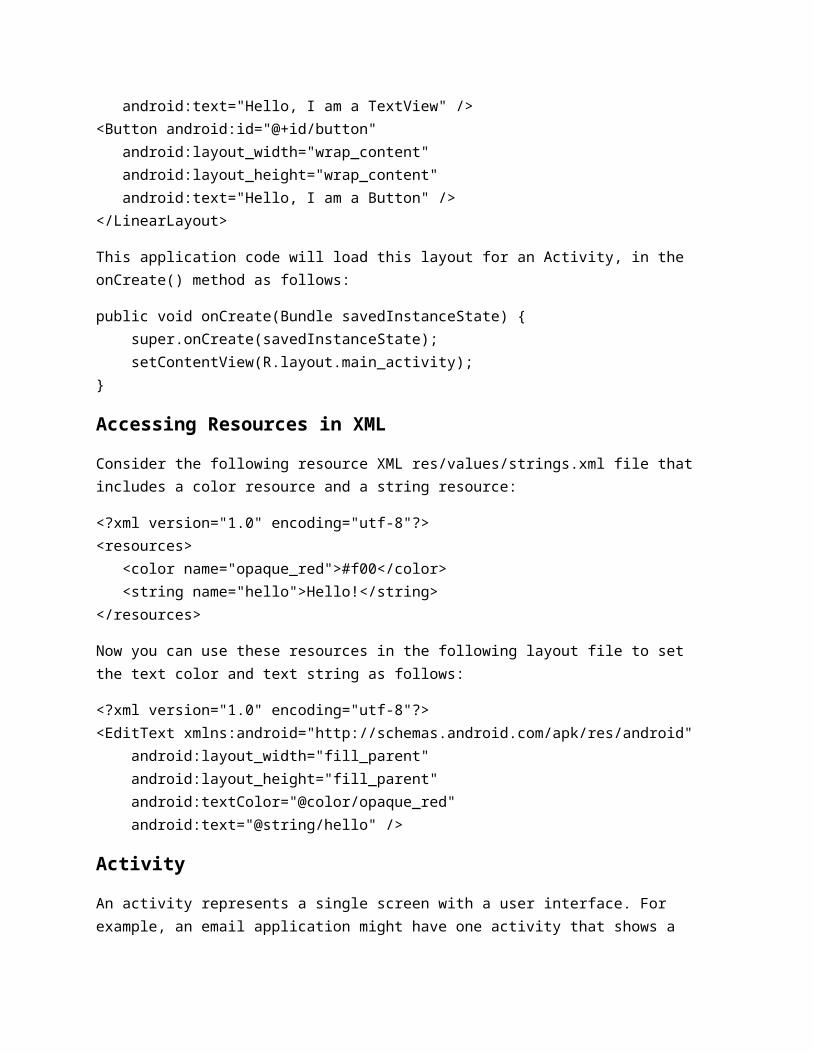
android:text="Hello, I am a TextView" /><Button android:id="@+id/button" android:layout_width="wrap_content" android:layout_height="wrap_content" android:text="Hello, I am a Button" /></LinearLayout>
This application code will load this layout for an Activity, in the onCreate() method as follows:
public void onCreate(Bundle savedInstanceState) { super.onCreate(savedInstanceState); setContentView(R.layout.main_activity);}
Accessing Resources in XML
Consider the following resource XML res/values/strings.xml file that includes a color resource and a string resource:
<?xml version="1.0" encoding="utf-8"?><resources> <color name="opaque_red">#f00</color> <string name="hello">Hello!</string></resources>
Now you can use these resources in the following layout file to set the text color and text string as follows:
<?xml version="1.0" encoding="utf-8"?><EditText xmlns:android="http://schemas.android.com/apk/res/android" android:layout_width="fill_parent" android:layout_height="fill_parent" android:textColor="@color/opaque_red" android:text="@string/hello" />
Activity
An activity represents a single screen with a user interface. For example, an email application might have one activity that shows a list of new emails, another activity to compose an email, and another activity for reading emails. If an application has more than one activity, then one of them should be marked as the activity that is presented when the application is launched.
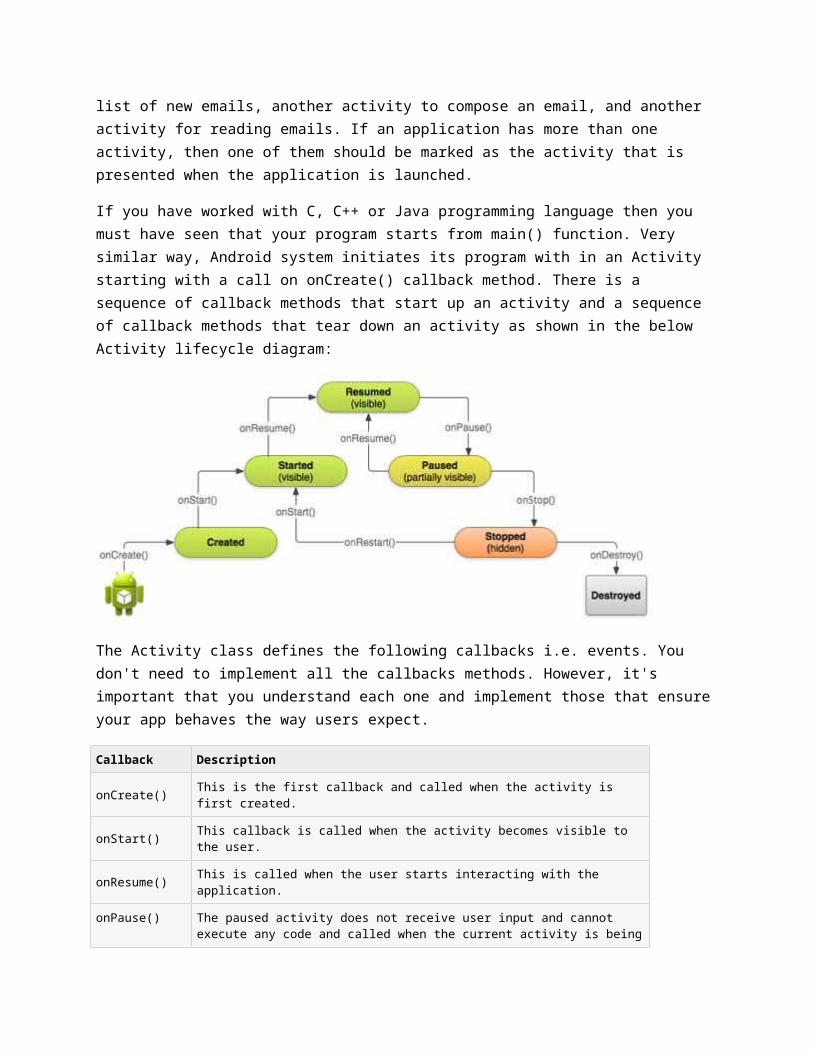
If you have worked with C, C++ or Java programming language then you must have seen that your program starts from main() function. Very similar way, Android system initiates its program with in an Activity starting with a call on onCreate() callback method. There is a sequence of callback methods that
start up an activity and a sequence of callback methods that tear down an activity as shown in the below Activity lifecycle diagram:
The Activity class defines the following callbacks i.e. events. You don't need to implement all the callbacks methods. However, it's important that you understand each one and implement those that ensure your app behaves the way users expect.
Callback Description
onCreate() This is the first callback and called when the activity is first created.
onStart() This callback is called when the activity becomes visible to the user.
onResume() This is called when the user starts interacting with the application.
onPause()The paused activity does not receive user input and cannot execute any code and called when the current activity is being paused and the previous activity is being resumed.
onStop() This callback is called when the activity is no longer visible.
onDestroy() This callback is called before the activity is destroyed by the system.
onRestart() This callback is called when the activity restarts after stopping it.
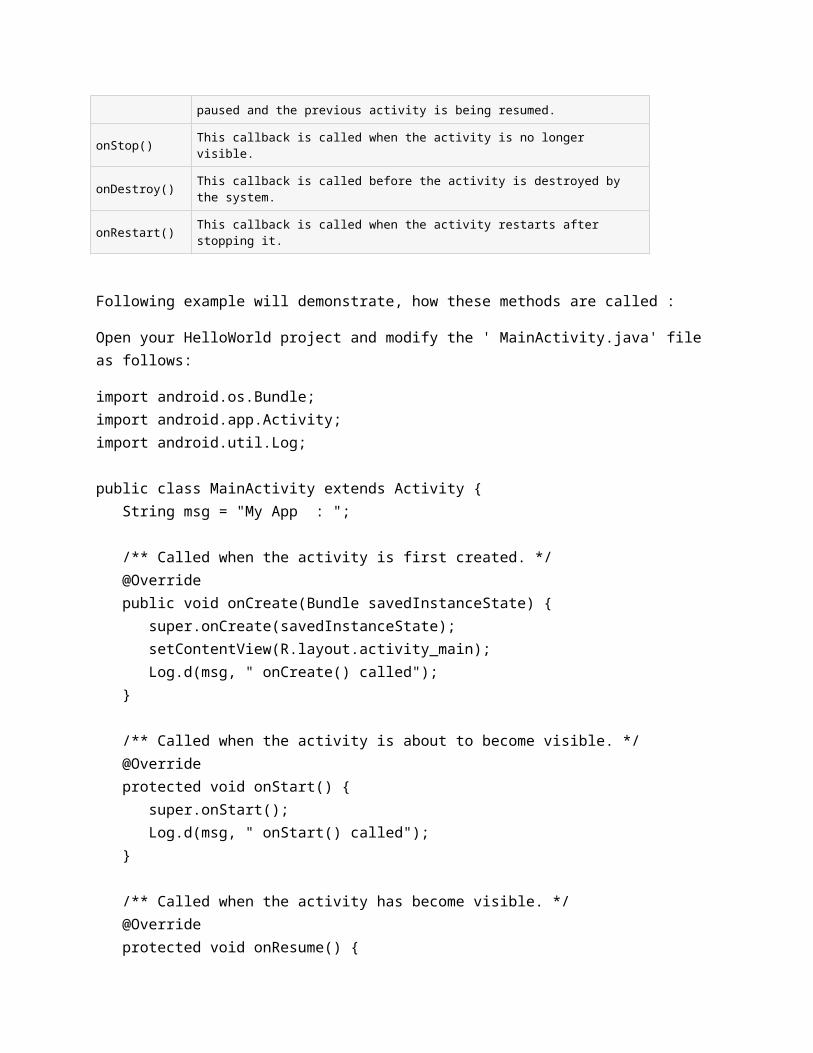
Following example will demonstrate, how these methods are called :
Open your HelloWorld project and modify the ' MainActivity.java' file as follows:
import android.os.Bundle;import android.app.Activity;import android.util.Log;
public class MainActivity extends Activity { String msg = "My App : ";
/** Called when the activity is first created. */ @Override public void onCreate(Bundle savedInstanceState) { super.onCreate(savedInstanceState); setContentView(R.layout.activity_main); Log.d(msg, " onCreate() called"); }
/** Called when the activity is about to become visible. */ @Override protected void onStart() { super.onStart(); Log.d(msg, " onStart() called"); }
/** Called when the activity has become visible. */ @Override protected void onResume() { super.onResume(); Log.d(msg, " onResume() called"); }
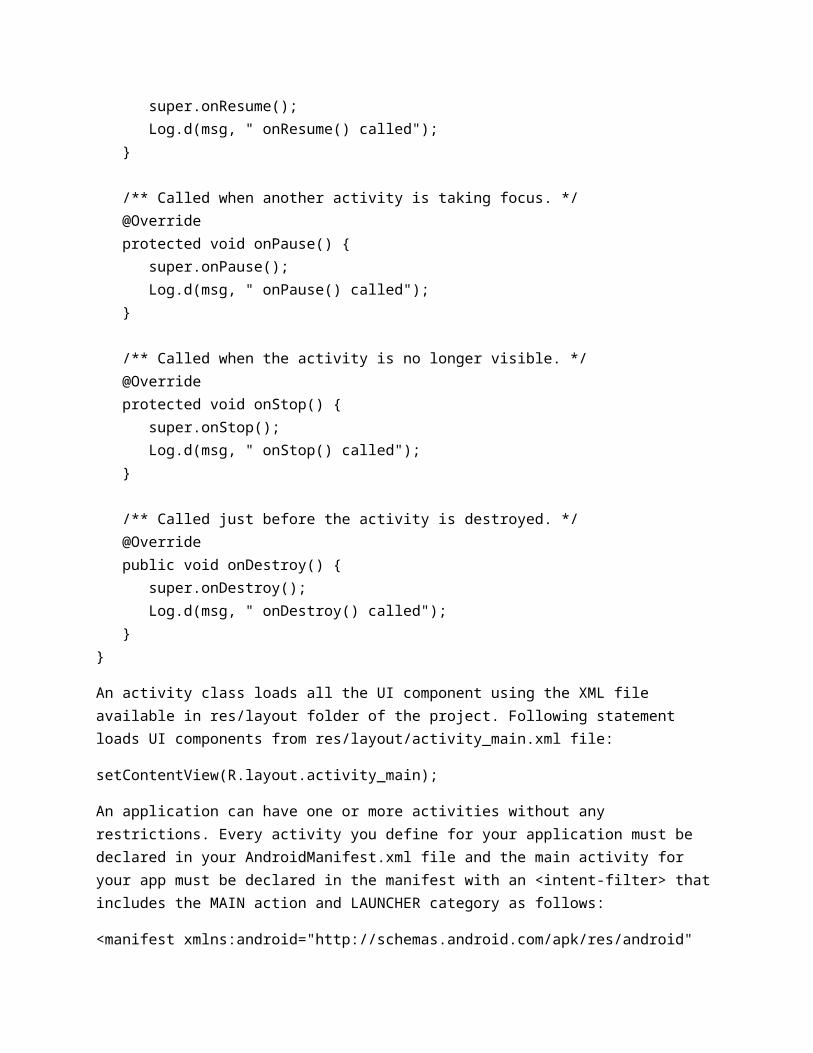
/** Called when another activity is taking focus. */ @Override protected void onPause() { super.onPause(); Log.d(msg, " onPause() called"); }
/** Called when the activity is no longer visible. */ @Override protected void onStop() { super.onStop(); Log.d(msg, " onStop() called"); }
/** Called just before the activity is destroyed. */ @Override public void onDestroy() { super.onDestroy(); Log.d(msg, " onDestroy() called");
}}
An activity class loads all the UI component using the XML file available in res/layout folder of the project. Following statement loads UI components from res/layout/activity_main.xml file:
setContentView(R.layout.activity_main);
An application can have one or more activities without any restrictions. Every activity you define for your application must be declared in your AndroidManifest.xml file and the main activity for your app must be declared in the manifest with an <intent-filter> that includes the MAIN action and LAUNCHER category as follows:
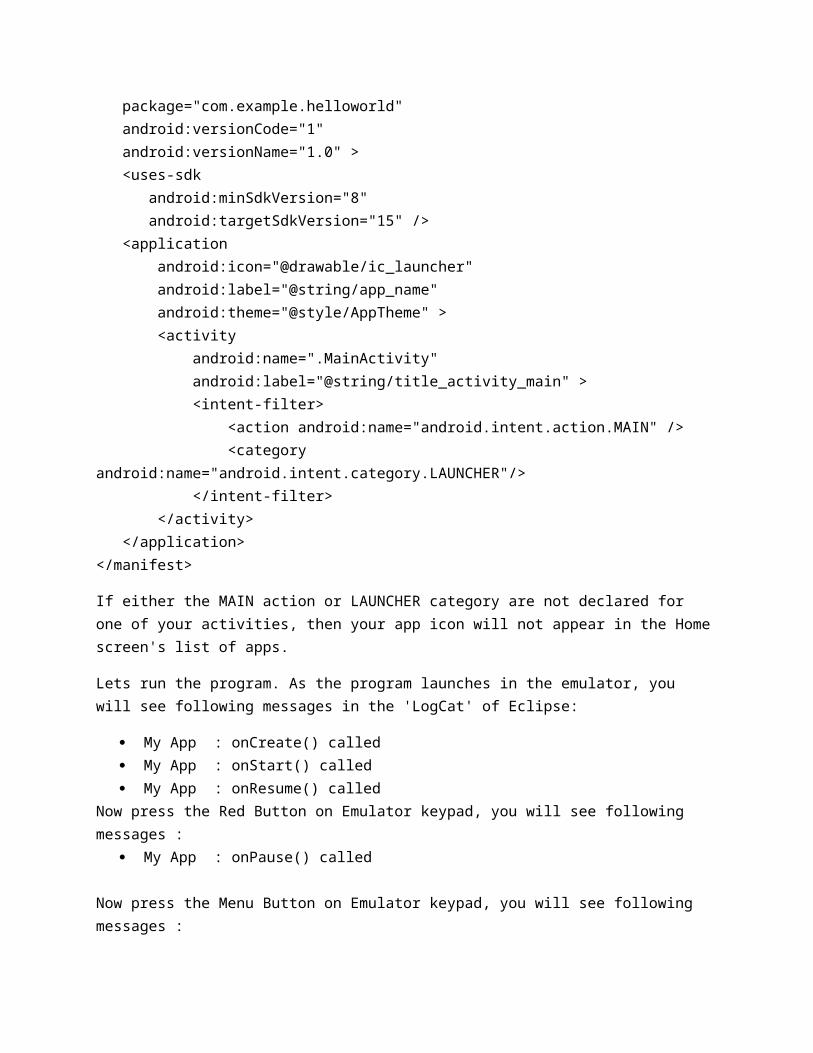
<manifest xmlns:android="http://schemas.android.com/apk/res/android" package="com.example.helloworld" android:versionCode="1" android:versionName="1.0" > <uses-sdk android:minSdkVersion="8" android:targetSdkVersion="15" /> <application android:icon="@drawable/ic_launcher" android:label="@string/app_name" android:theme="@style/AppTheme" > <activity android:name=".MainActivity" android:label="@string/title_activity_main" > <intent-filter> <action android:name="android.intent.action.MAIN" /> <category android:name="android.intent.category.LAUNCHER"/> </intent-filter> </activity> </application></manifest>
If either the MAIN action or LAUNCHER category are not declared for one of your activities, then your app icon will not appear in the Home screen's list of apps.
Lets run the program. As the program launches in the emulator, you will see following messages in the 'LogCat' of Eclipse:
My App : onCreate() called My App : onStart() called My App : onResume() called
Now press the Red Button on Emulator keypad, you will see following messages : My App : onPause() called
Now press the Menu Button on Emulator keypad, you will see following messages : My App : onStart() called My App : onResume() called
Now press the Back Button on Emulator keypad, you will see following messages : My App : onPause() called My App : onStop() called My App : onDestroy() called
Service
A service is a component that runs in the background to perform long-running operations without needing to interact with the user. For example, a service might play music in the background while the user is in a different application, or it might fetch data over the network without blocking user interaction with an activity. A service can essentially take two states:
State Description
StartedA service is started when an application component, such as an activity, starts it by calling startService(). Once started, a service can run in the background indefinitely, even if the component that started it is destroyed.
Bound
A service is bound when an application component binds to it by calling bindService(). A bound service offers a client-server interface that allows components to interact with the service, send requests, get results, and even do so across processes with interprocess communication (IPC).
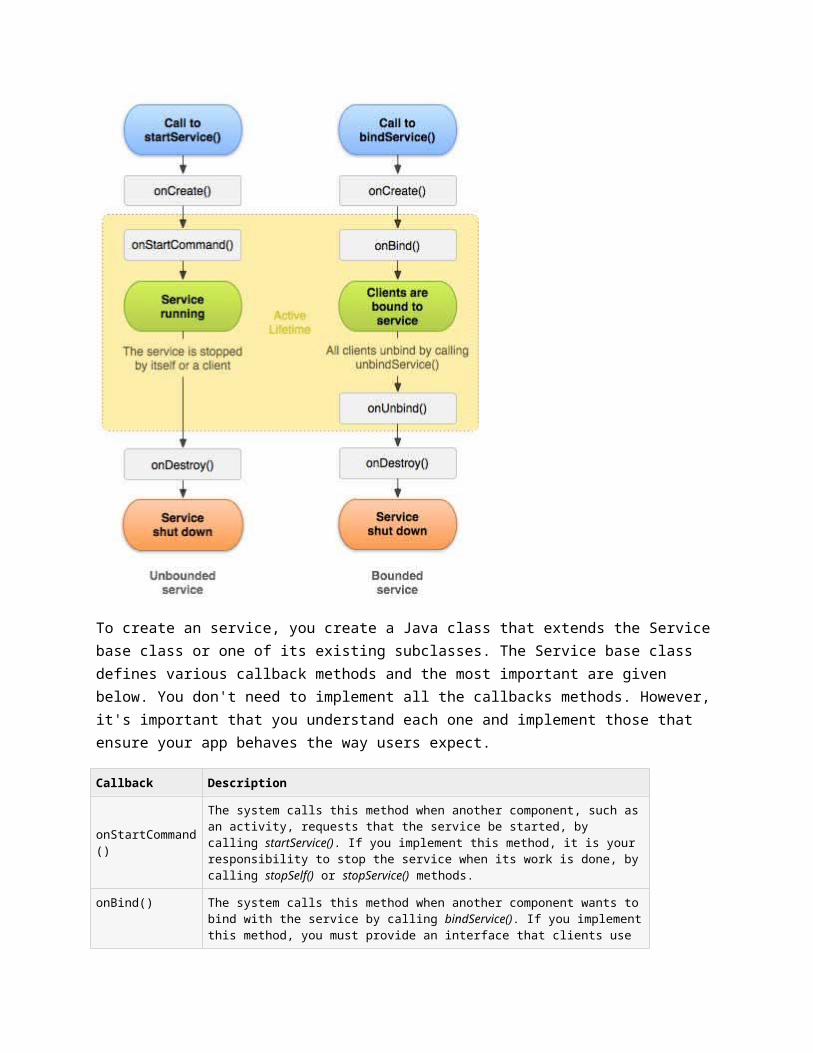
A service has lifecycle callback methods that you can implement to monitor changes in the service's state and you can perform work at the appropriate stage. The following diagram on the left shows the lifecycle when the service is created with startService() and the diagram on the right shows the lifecycle when the service is created with bindService():
To create an service, you create a Java class that extends the Service base class or one of its existing subclasses. The Service base class defines various callback methods and the most important are given below. You don't need to implement all the callbacks methods. However, it's important that you understand each one and implement those that ensure your app behaves the way users expect.
Callback Description
onStartCommand()
The system calls this method when another component, such as an activity, requests that the service be started, by calling startService(). If you implement this method, it is your responsibility to stop the service when its work is done, by calling stopSelf() or stopService() methods.
onBind()
The system calls this method when another component wants to bind with the service by calling bindService(). If you implement this method, you must provide an interface that clients use to communicate with the service, by returning an IBinder object. You must always implement this method, but if you don't want to allow binding, then you should return null.
onUnbind()The system calls this method when all clients have disconnected from a particular interface published by the service.
onRebind() The system calls this method when new clients have connected to the service,
after it had previously been notified that all had disconnected in its onUnbind(Intent).
onCreate()The system calls this method when the service is first created using onStartCommand() or onBind(). This call is required to perform one-time setup.
onDestroy()The system calls this method when the service is no longer used and is being destroyed. Your service should implement this to clean up any resources such as threads, registered listeners, receivers, etc.
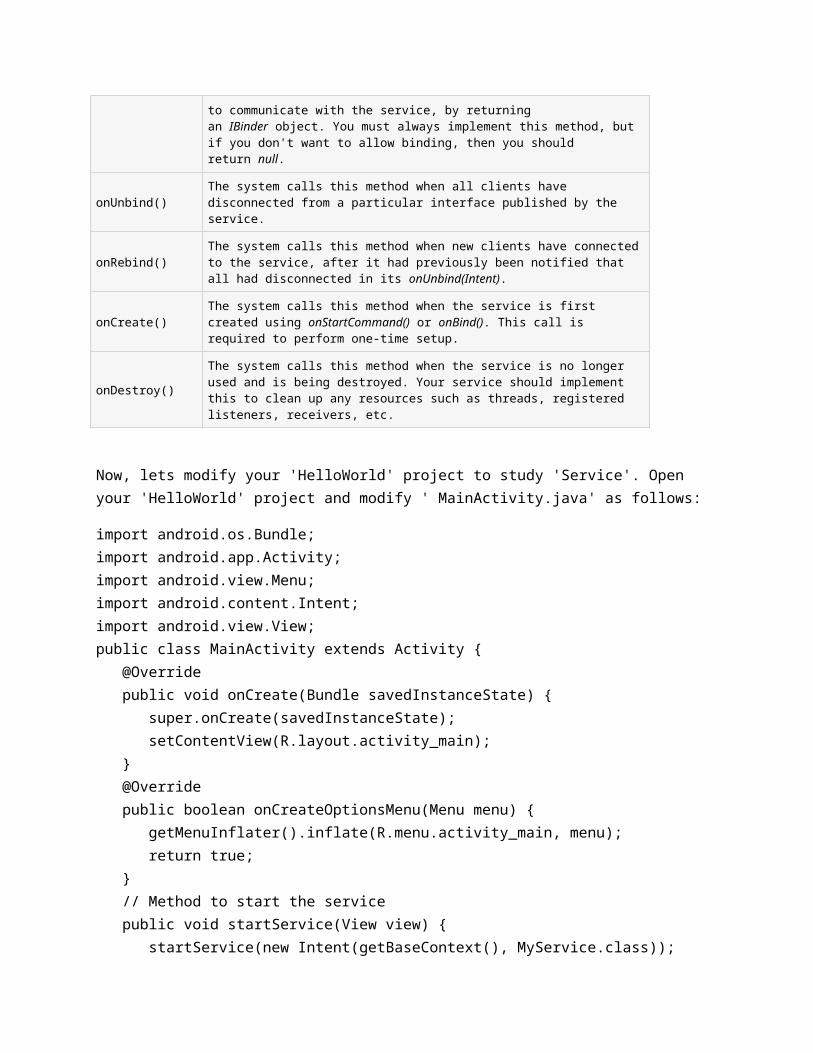
Now, lets modify your 'HelloWorld' project to study 'Service'. Open your 'HelloWorld' project and modify ' MainActivity.java' as follows:
import android.os.Bundle;import android.app.Activity;import android.view.Menu;import android.content.Intent;import android.view.View;public class MainActivity extends Activity { @Override public void onCreate(Bundle savedInstanceState) { super.onCreate(savedInstanceState); setContentView(R.layout.activity_main); } @Override public boolean onCreateOptionsMenu(Menu menu) { getMenuInflater().inflate(R.menu.activity_main, menu); return true; } // Method to start the service public void startService(View view) { startService(new Intent(getBaseContext(), MyService.class)); } // Method to stop the service public void stopService(View view) { stopService(new Intent(getBaseContext(), MyService.class)); }}
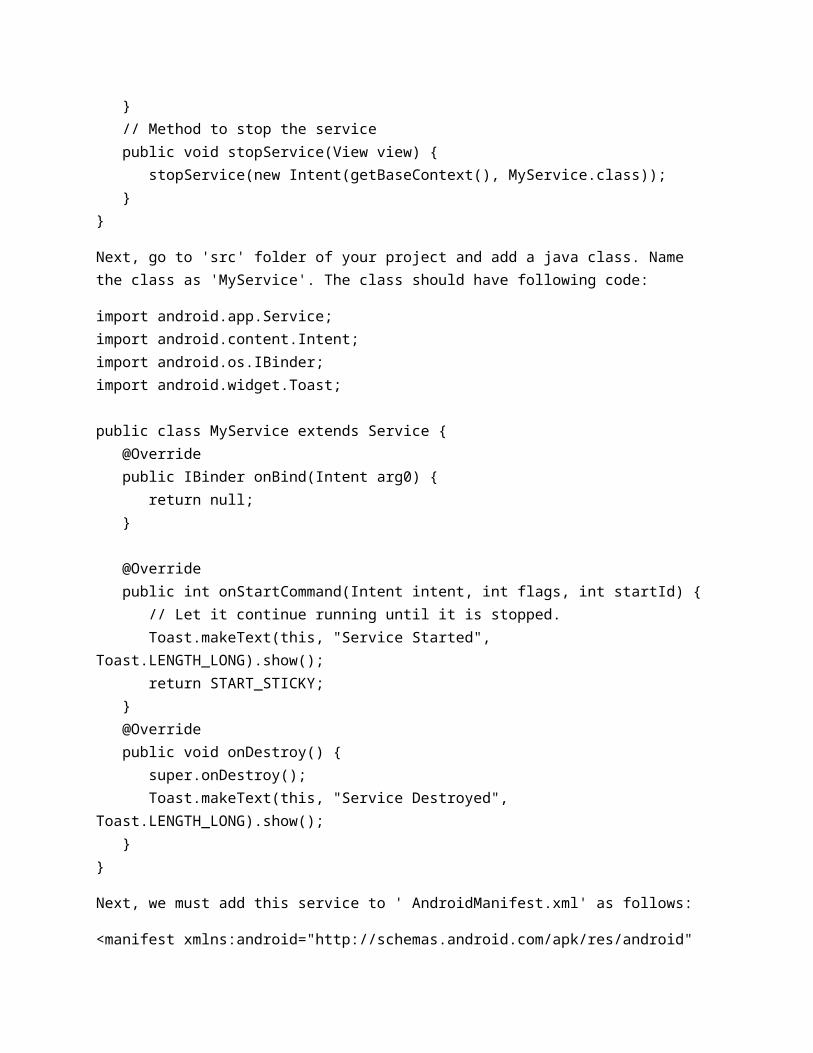
Next, go to 'src' folder of your project and add a java class. Name the class as 'MyService'. The class should have following code:
import android.app.Service;import android.content.Intent;import android.os.IBinder;
import android.widget.Toast;
public class MyService extends Service { @Override public IBinder onBind(Intent arg0) { return null; }
@Override public int onStartCommand(Intent intent, int flags, int startId) { // Let it continue running until it is stopped. Toast.makeText(this, "Service Started", Toast.LENGTH_LONG).show(); return START_STICKY; } @Override public void onDestroy() { super.onDestroy(); Toast.makeText(this, "Service Destroyed", Toast.LENGTH_LONG).show(); }}
Next, we must add this service to ' AndroidManifest.xml' as follows:
<manifest xmlns:android="http://schemas.android.com/apk/res/android" package="com.example.helloworld" android:versionCode="1" android:versionName="1.0" > <uses-sdk android:minSdkVersion="8" android:targetSdkVersion="15" /> <application android:icon="@drawable/ic_launcher" android:label="@string/app_name" android:theme="@style/AppTheme" > <activity android:name=".MainActivity" android:label="@string/title_activity_main" > <intent-filter> <action android:name="android.intent.action.MAIN" /> <category android:name="android.intent.category.LAUNCHER"/> </intent-filter> </activity>
<service android:name=".MyService" /> </application></manifest>
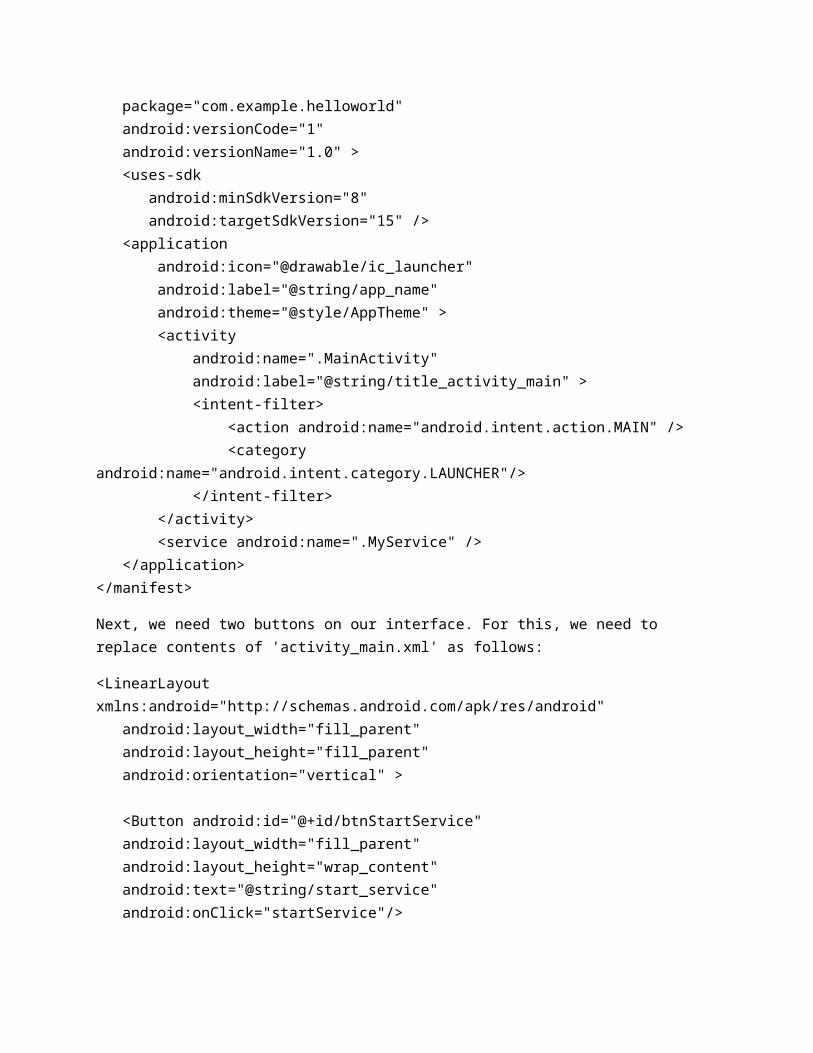
Next, we need two buttons on our interface. For this, we need to replace contents of 'activity_main.xml' as follows:
<LinearLayout xmlns:android="http://schemas.android.com/apk/res/android" android:layout_width="fill_parent" android:layout_height="fill_parent" android:orientation="vertical" >
<Button android:id="@+id/btnStartService" android:layout_width="fill_parent" android:layout_height="wrap_content" android:text="@string/start_service" android:onClick="startService"/>
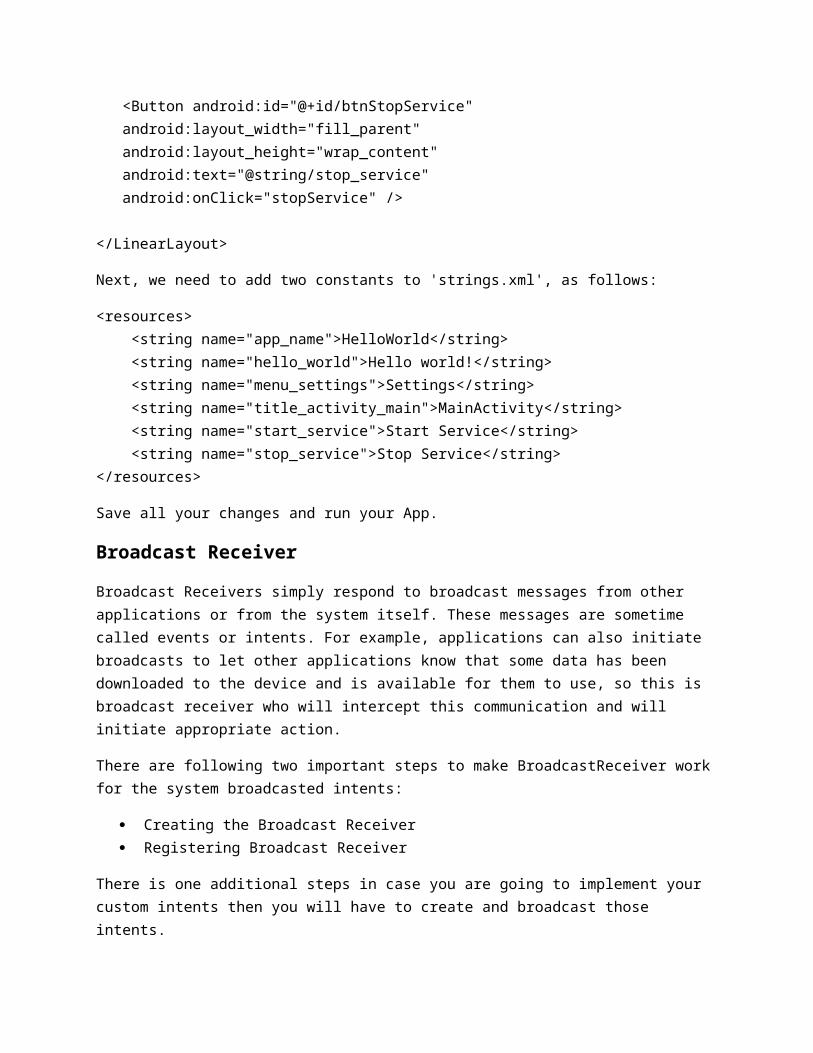
<Button android:id="@+id/btnStopService" android:layout_width="fill_parent" android:layout_height="wrap_content" android:text="@string/stop_service" android:onClick="stopService" />
</LinearLayout>
Next, we need to add two constants to 'strings.xml', as follows:
<resources> <string name="app_name">HelloWorld</string> <string name="hello_world">Hello world!</string> <string name="menu_settings">Settings</string> <string name="title_activity_main">MainActivity</string> <string name="start_service">Start Service</string> <string name="stop_service">Stop Service</string></resources>
Save all your changes and run your App.
Broadcast Receiver
Broadcast Receivers simply respond to broadcast messages from other applications or from the system itself. These messages are sometime called events or intents. For example, applications can also initiate broadcasts to let other applications know that some data has been downloaded to the device and is
available for them to use, so this is broadcast receiver who will intercept this communication and will initiate appropriate action.
There are following two important steps to make BroadcastReceiver work for the system broadcasted intents:
Creating the Broadcast Receiver Registering Broadcast Receiver
There is one additional steps in case you are going to implement your custom intents then you will have to create and broadcast those intents.
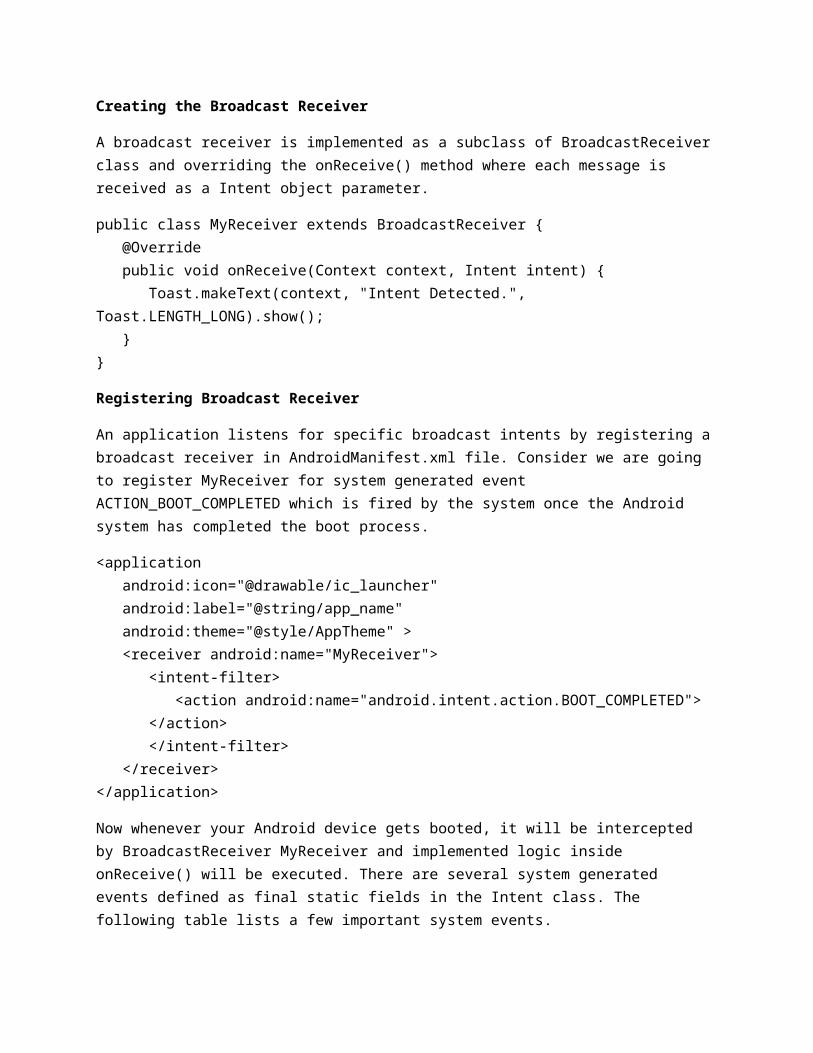
Creating the Broadcast Receiver
A broadcast receiver is implemented as a subclass of BroadcastReceiver class and overriding the onReceive() method where each message is received as a Intent object parameter.
public class MyReceiver extends BroadcastReceiver { @Override public void onReceive(Context context, Intent intent) { Toast.makeText(context, "Intent Detected.", Toast.LENGTH_LONG).show(); }}
Registering Broadcast Receiver
An application listens for specific broadcast intents by registering a broadcast receiver in AndroidManifest.xml file. Consider we are going to register MyReceiver for system generated event ACTION_BOOT_COMPLETED which is fired by the system once the Android system has completed the boot process.
<application android:icon="@drawable/ic_launcher" android:label="@string/app_name" android:theme="@style/AppTheme" > <receiver android:name="MyReceiver"> <intent-filter> <action android:name="android.intent.action.BOOT_COMPLETED"> </action> </intent-filter> </receiver></application>
Now whenever your Android device gets booted, it will be intercepted by BroadcastReceiver MyReceiver and implemented logic inside onReceive() will be executed. There are several system
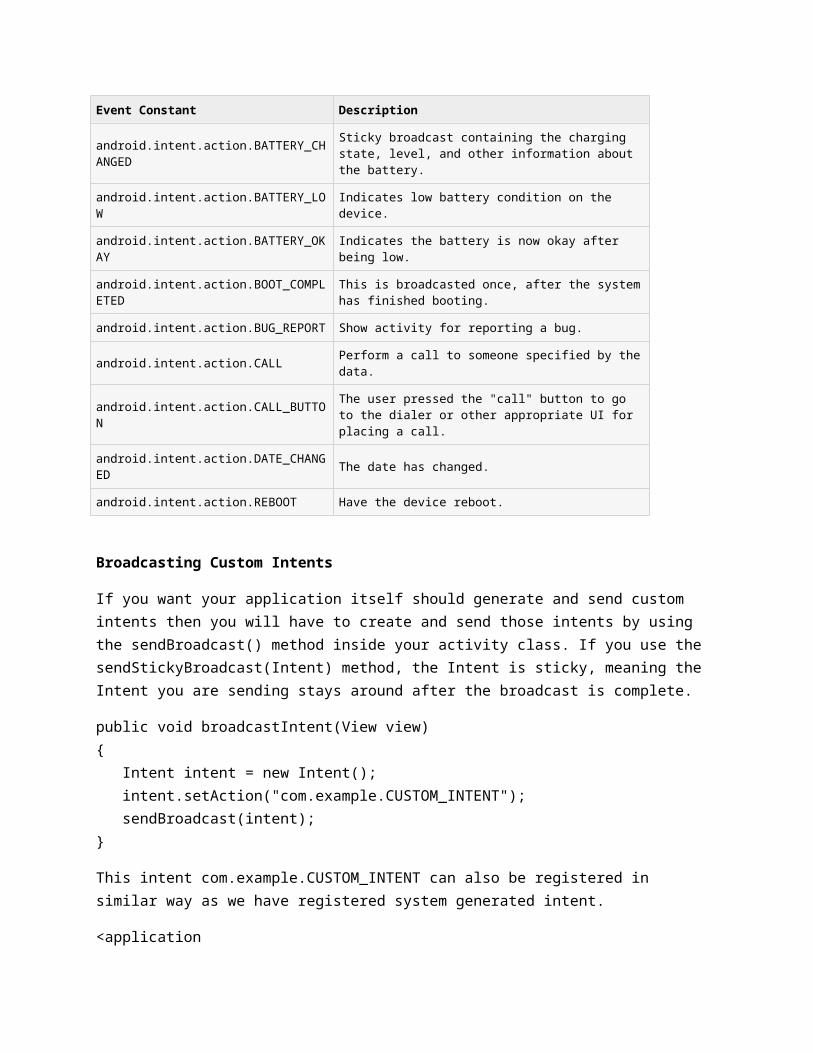
generated events defined as final static fields in the Intent class. The following table lists a few important system events.
Event Constant Description
android.intent.action.BATTERY_CHANGEDSticky broadcast containing the charging state, level, and other information about the battery.
android.intent.action.BATTERY_LOW Indicates low battery condition on the device.
android.intent.action.BATTERY_OKAY Indicates the battery is now okay after being low.
android.intent.action.BOOT_COMPLETEDThis is broadcasted once, after the system has finished booting.
android.intent.action.BUG_REPORT Show activity for reporting a bug.
android.intent.action.CALL Perform a call to someone specified by the data.
android.intent.action.CALL_BUTTONThe user pressed the "call" button to go to the dialer or other appropriate UI for placing a call.
android.intent.action.DATE_CHANGED The date has changed.
android.intent.action.REBOOT Have the device reboot.
Broadcasting Custom Intents
If you want your application itself should generate and send custom intents then you will have to create and send those intents by using the sendBroadcast() method inside your activity class. If you use the sendStickyBroadcast(Intent) method, the Intent is sticky, meaning the Intent you are sending stays around after the broadcast is complete.
public void broadcastIntent(View view){ Intent intent = new Intent(); intent.setAction("com.example.CUSTOM_INTENT"); sendBroadcast(intent);}
This intent com.example.CUSTOM_INTENT can also be registered in similar way as we have registered system generated intent.
<application android:icon="@drawable/ic_launcher" android:label="@string/app_name" android:theme="@style/AppTheme" > <receiver android:name="MyReceiver"> <intent-filter> <action android:name="com.example.CUSTOM_INTENT"> </action>
</intent-filter> </receiver></application>
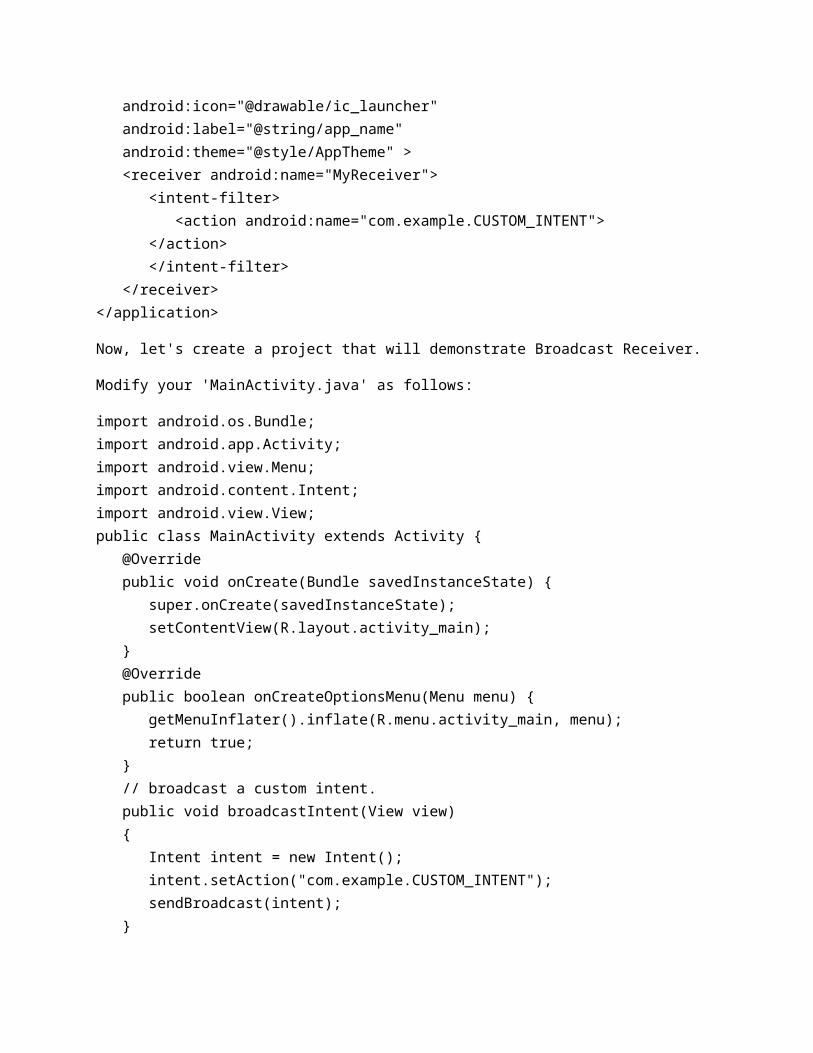
Now, let's create a project that will demonstrate Broadcast Receiver.
Modify your 'MainActivity.java' as follows:
import android.os.Bundle;import android.app.Activity;import android.view.Menu;import android.content.Intent;import android.view.View;public class MainActivity extends Activity { @Override public void onCreate(Bundle savedInstanceState) { super.onCreate(savedInstanceState); setContentView(R.layout.activity_main); } @Override public boolean onCreateOptionsMenu(Menu menu) { getMenuInflater().inflate(R.menu.activity_main, menu); return true; } // broadcast a custom intent. public void broadcastIntent(View view) { Intent intent = new Intent(); intent.setAction("com.example.CUSTOM_INTENT"); sendBroadcast(intent); }}
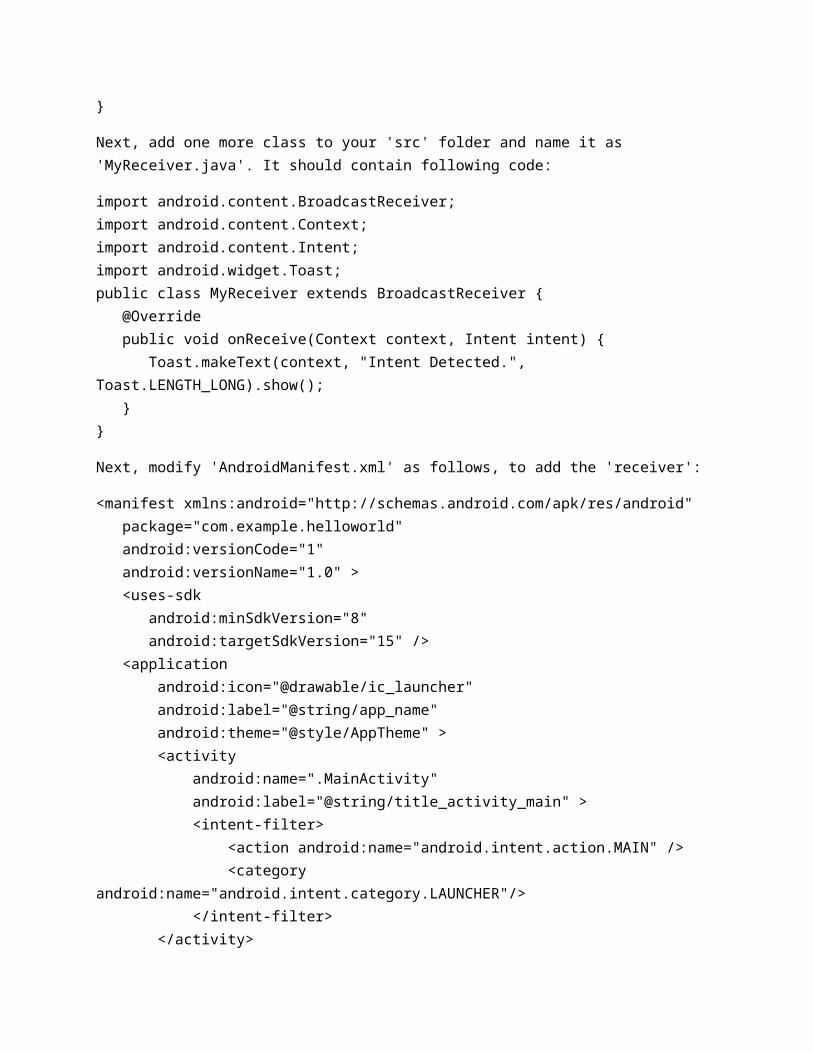
Next, add one more class to your 'src' folder and name it as 'MyReceiver.java'. It should contain following code:
import android.content.BroadcastReceiver;import android.content.Context;import android.content.Intent;import android.widget.Toast;public class MyReceiver extends BroadcastReceiver { @Override public void onReceive(Context context, Intent intent) {
Toast.makeText(context, "Intent Detected.", Toast.LENGTH_LONG).show(); }}
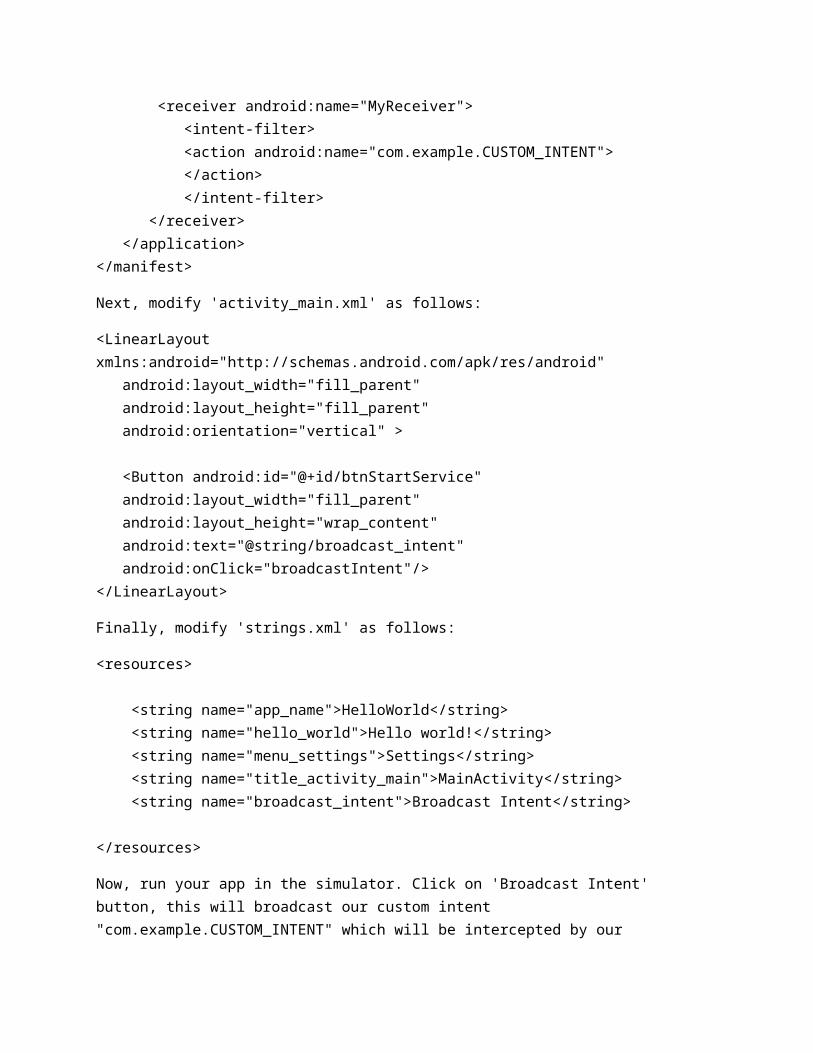
Next, modify 'AndroidManifest.xml' as follows, to add the 'receiver':
<manifest xmlns:android="http://schemas.android.com/apk/res/android" package="com.example.helloworld" android:versionCode="1" android:versionName="1.0" > <uses-sdk android:minSdkVersion="8" android:targetSdkVersion="15" /> <application android:icon="@drawable/ic_launcher" android:label="@string/app_name" android:theme="@style/AppTheme" > <activity android:name=".MainActivity" android:label="@string/title_activity_main" > <intent-filter> <action android:name="android.intent.action.MAIN" /> <category android:name="android.intent.category.LAUNCHER"/> </intent-filter> </activity> <receiver android:name="MyReceiver"> <intent-filter> <action android:name="com.example.CUSTOM_INTENT"> </action> </intent-filter> </receiver> </application></manifest>
Next, modify 'activity_main.xml' as follows:
<LinearLayout xmlns:android="http://schemas.android.com/apk/res/android" android:layout_width="fill_parent" android:layout_height="fill_parent" android:orientation="vertical" >
<Button android:id="@+id/btnStartService" android:layout_width="fill_parent"
android:layout_height="wrap_content" android:text="@string/broadcast_intent" android:onClick="broadcastIntent"/></LinearLayout>
Finally, modify 'strings.xml' as follows:
<resources>
<string name="app_name">HelloWorld</string> <string name="hello_world">Hello world!</string> <string name="menu_settings">Settings</string> <string name="title_activity_main">MainActivity</string> <string name="broadcast_intent">Broadcast Intent</string>
</resources>
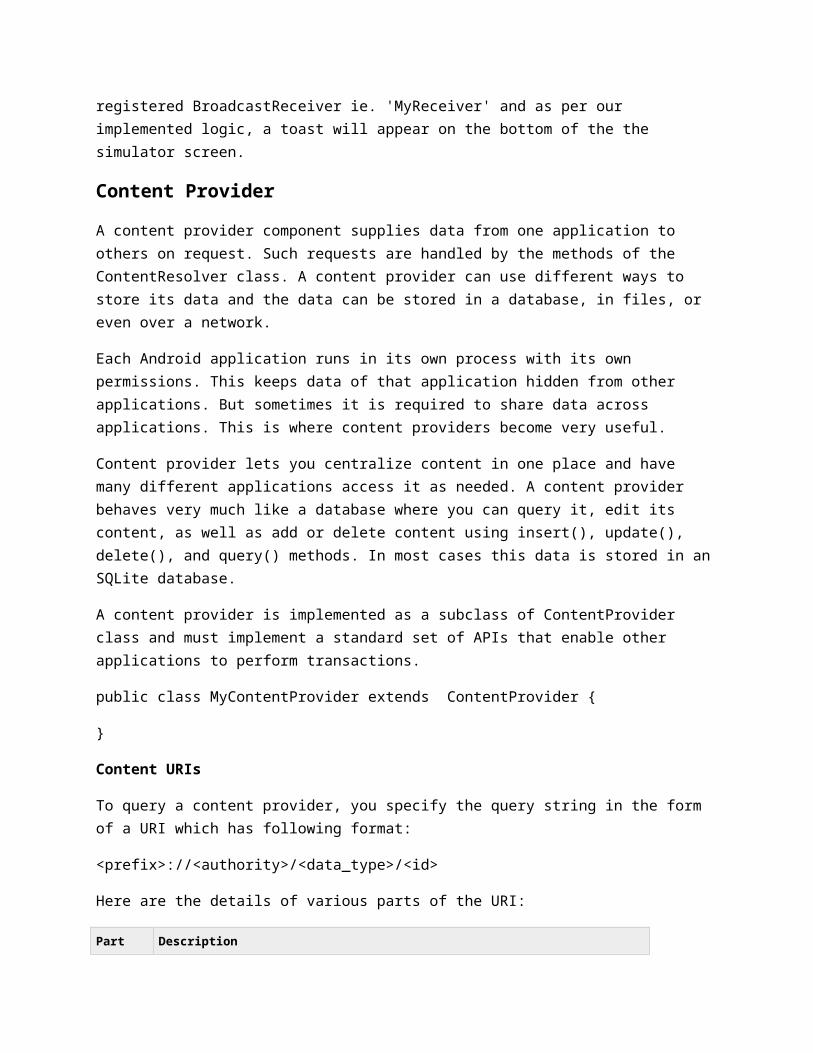
Now, run your app in the simulator. Click on 'Broadcast Intent' button, this will broadcast our custom intent "com.example.CUSTOM_INTENT" which will be intercepted by our registered BroadcastReceiver ie. 'MyReceiver' and as per our implemented logic, a toast will appear on the bottom of the the simulator screen.
Content Provider
A content provider component supplies data from one application to others on request. Such requests are handled by the methods of the ContentResolver class. A content provider can use different ways to store its data and the data can be stored in a database, in files, or even over a network.
Each Android application runs in its own process with its own permissions. This keeps data of that application hidden from other applications. But sometimes it is required to share data across applications. This is where content providers become very useful.
Content provider lets you centralize content in one place and have many different applications access it as needed. A content provider behaves very much like a database where you can query it, edit its content, as well as add or delete content using insert(), update(), delete(), and query() methods. In most cases this data is stored in an SQLite database.
A content provider is implemented as a subclass of ContentProvider class and must implement a standard set of APIs that enable other applications to perform transactions.
public class MyContentProvider extends ContentProvider {
}
Content URIs
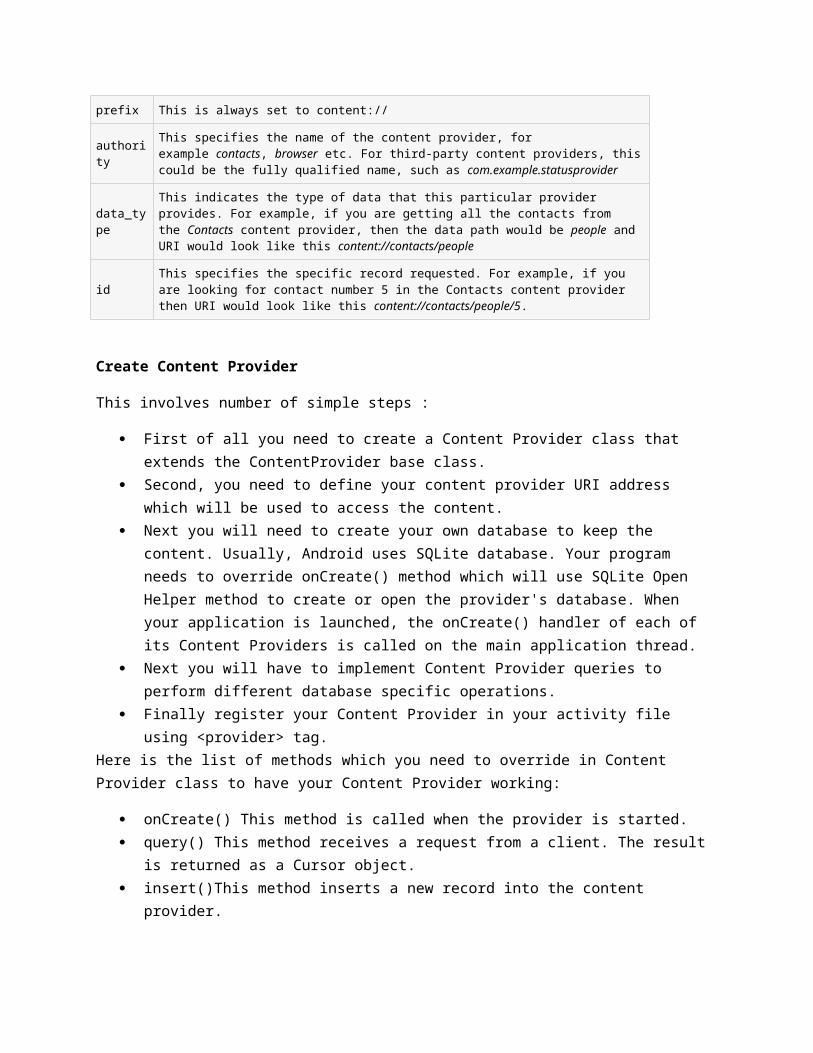
To query a content provider, you specify the query string in the form of a URI which has following format:
<prefix>://<authority>/<data_type>/<id>
Here are the details of various parts of the URI:
Part Description
prefix This is always set to content://
authorityThis specifies the name of the content provider, for example contacts, browser etc. For third-party content providers, this could be the fully qualified name, such as com.example.statusprovider
data_typeThis indicates the type of data that this particular provider provides. For example, if you are getting all the contacts from the Contacts content provider, then the data path would be people and URI would look like this content://contacts/people
idThis specifies the specific record requested. For example, if you are looking for contact number 5 in the Contacts content provider then URI would look like this content://contacts/people/5.
Create Content Provider
This involves number of simple steps :
First of all you need to create a Content Provider class that extends the ContentProvider base class.
Second, you need to define your content provider URI address which will be used to access the content.
Next you will need to create your own database to keep the content. Usually, Android uses SQLite database. Your program needs to override onCreate() method which will use SQLite Open Helper method to create or open the provider's database. When your application is launched, the onCreate() handler of each of its Content Providers is called on the main application thread.
Next you will have to implement Content Provider queries to perform different database specific operations.
Finally register your Content Provider in your activity file using <provider> tag.Here is the list of methods which you need to override in Content Provider class to have your Content Provider working:
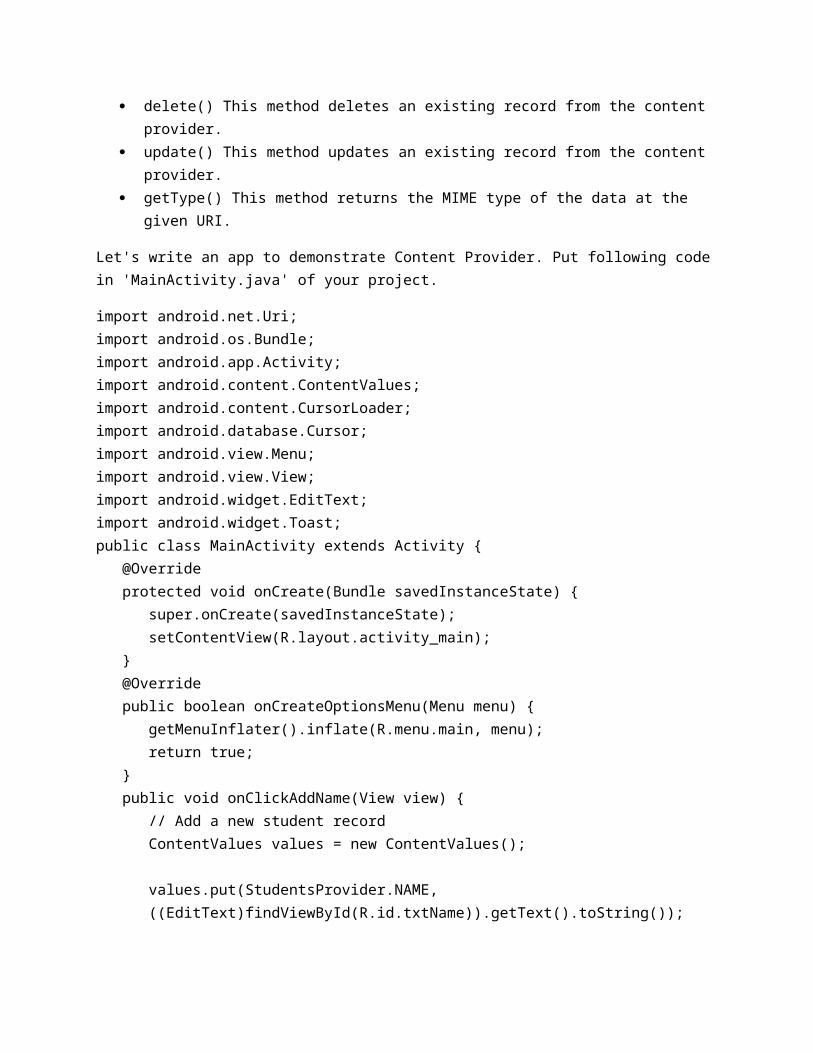
onCreate() This method is called when the provider is started. query() This method receives a request from a client. The result is returned as a Cursor object. insert()This method inserts a new record into the content provider. delete() This method deletes an existing record from the content provider. update() This method updates an existing record from the content provider. getType() This method returns the MIME type of the data at the given URI.
Let's write an app to demonstrate Content Provider. Put following code in 'MainActivity.java' of your project.
import android.net.Uri;import android.os.Bundle;import android.app.Activity;import android.content.ContentValues;import android.content.CursorLoader;import android.database.Cursor;import android.view.Menu;import android.view.View;import android.widget.EditText;import android.widget.Toast;public class MainActivity extends Activity { @Override protected void onCreate(Bundle savedInstanceState) { super.onCreate(savedInstanceState); setContentView(R.layout.activity_main); } @Override public boolean onCreateOptionsMenu(Menu menu) { getMenuInflater().inflate(R.menu.main, menu); return true; } public void onClickAddName(View view) { // Add a new student record ContentValues values = new ContentValues();
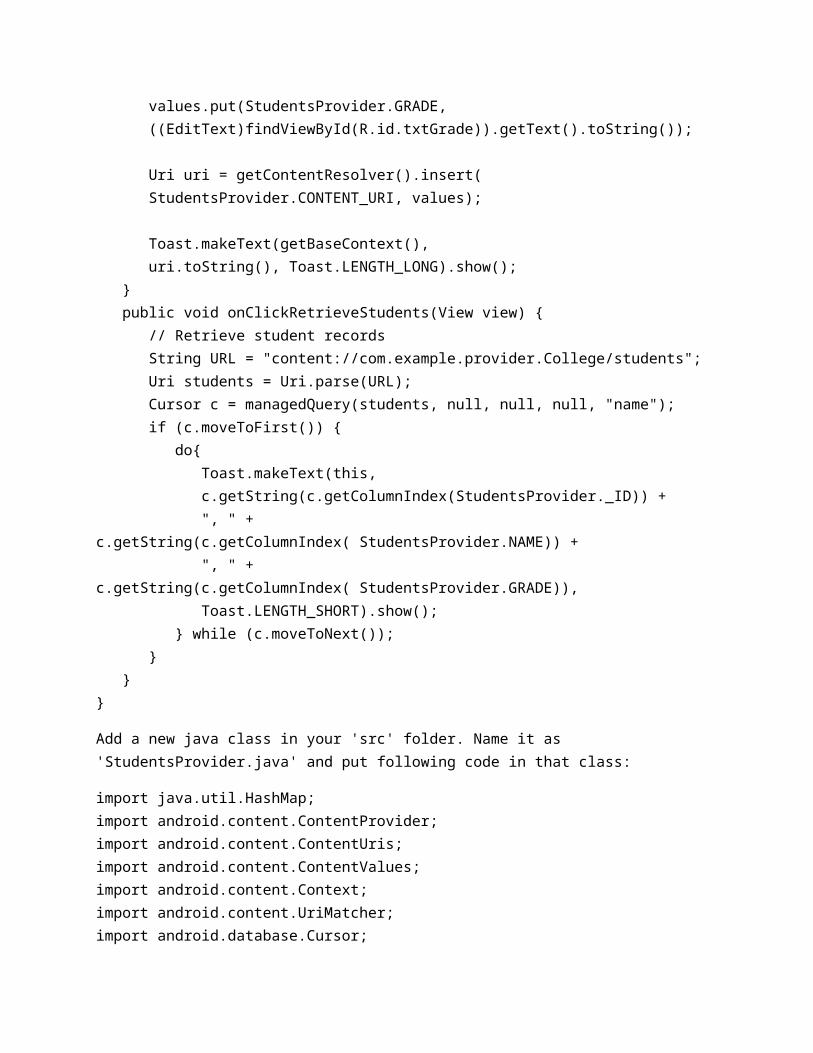
values.put(StudentsProvider.NAME, ((EditText)findViewById(R.id.txtName)).getText().toString()); values.put(StudentsProvider.GRADE, ((EditText)findViewById(R.id.txtGrade)).getText().toString());
Uri uri = getContentResolver().insert( StudentsProvider.CONTENT_URI, values); Toast.makeText(getBaseContext(), uri.toString(), Toast.LENGTH_LONG).show(); } public void onClickRetrieveStudents(View view) { // Retrieve student records
String URL = "content://com.example.provider.College/students"; Uri students = Uri.parse(URL); Cursor c = managedQuery(students, null, null, null, "name"); if (c.moveToFirst()) { do{ Toast.makeText(this, c.getString(c.getColumnIndex(StudentsProvider._ID)) + ", " + c.getString(c.getColumnIndex( StudentsProvider.NAME)) + ", " + c.getString(c.getColumnIndex( StudentsProvider.GRADE)), Toast.LENGTH_SHORT).show(); } while (c.moveToNext()); } }}
Add a new java class in your 'src' folder. Name it as 'StudentsProvider.java' and put following code in that class:
import java.util.HashMap;import android.content.ContentProvider;import android.content.ContentUris;import android.content.ContentValues;import android.content.Context;import android.content.UriMatcher;import android.database.Cursor;import android.database.SQLException;import android.database.sqlite.SQLiteDatabase;import android.database.sqlite.SQLiteOpenHelper;import android.database.sqlite.SQLiteQueryBuilder;import android.net.Uri;import android.text.TextUtils;
public class StudentsProvider extends ContentProvider {
static final String PROVIDER_NAME = "com.example.provider.College"; static final String URL = "content://" + PROVIDER_NAME + "/students"; static final Uri CONTENT_URI = Uri.parse(URL);
static final String _ID = "_id"; static final String NAME = "name"; static final String GRADE = "grade";
private static HashMap<String, String> STUDENTS_PROJECTION_MAP;
static final int STUDENTS = 1; static final int STUDENT_ID = 2;
static final UriMatcher uriMatcher; static{ uriMatcher = new UriMatcher(UriMatcher.NO_MATCH); uriMatcher.addURI(PROVIDER_NAME, "students", STUDENTS); uriMatcher.addURI(PROVIDER_NAME, "students/#", STUDENT_ID); }
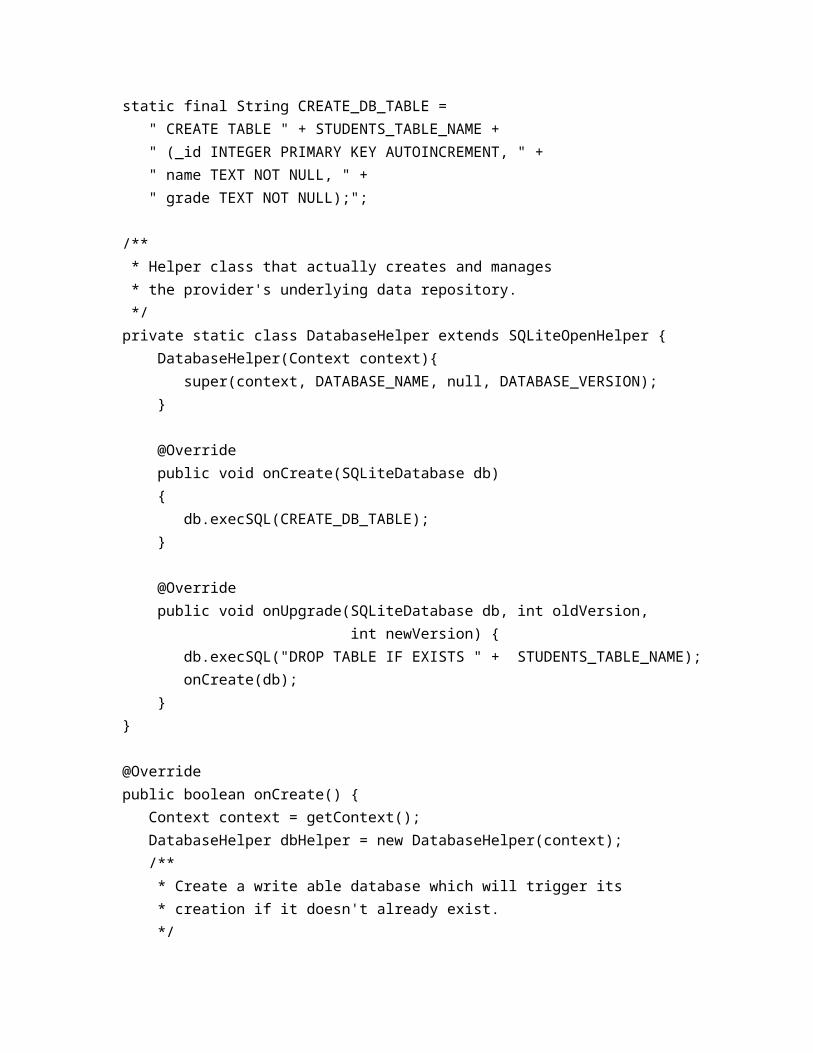
/** * Database specific constant declarations */ private SQLiteDatabase db; static final String DATABASE_NAME = "College"; static final String STUDENTS_TABLE_NAME = "students"; static final int DATABASE_VERSION = 1; static final String CREATE_DB_TABLE = " CREATE TABLE " + STUDENTS_TABLE_NAME + " (_id INTEGER PRIMARY KEY AUTOINCREMENT, " + " name TEXT NOT NULL, " + " grade TEXT NOT NULL);";
/** * Helper class that actually creates and manages * the provider's underlying data repository. */ private static class DatabaseHelper extends SQLiteOpenHelper { DatabaseHelper(Context context){ super(context, DATABASE_NAME, null, DATABASE_VERSION); }
@Override public void onCreate(SQLiteDatabase db) { db.execSQL(CREATE_DB_TABLE); } @Override public void onUpgrade(SQLiteDatabase db, int oldVersion,
int newVersion) { db.execSQL("DROP TABLE IF EXISTS " + STUDENTS_TABLE_NAME); onCreate(db); } }
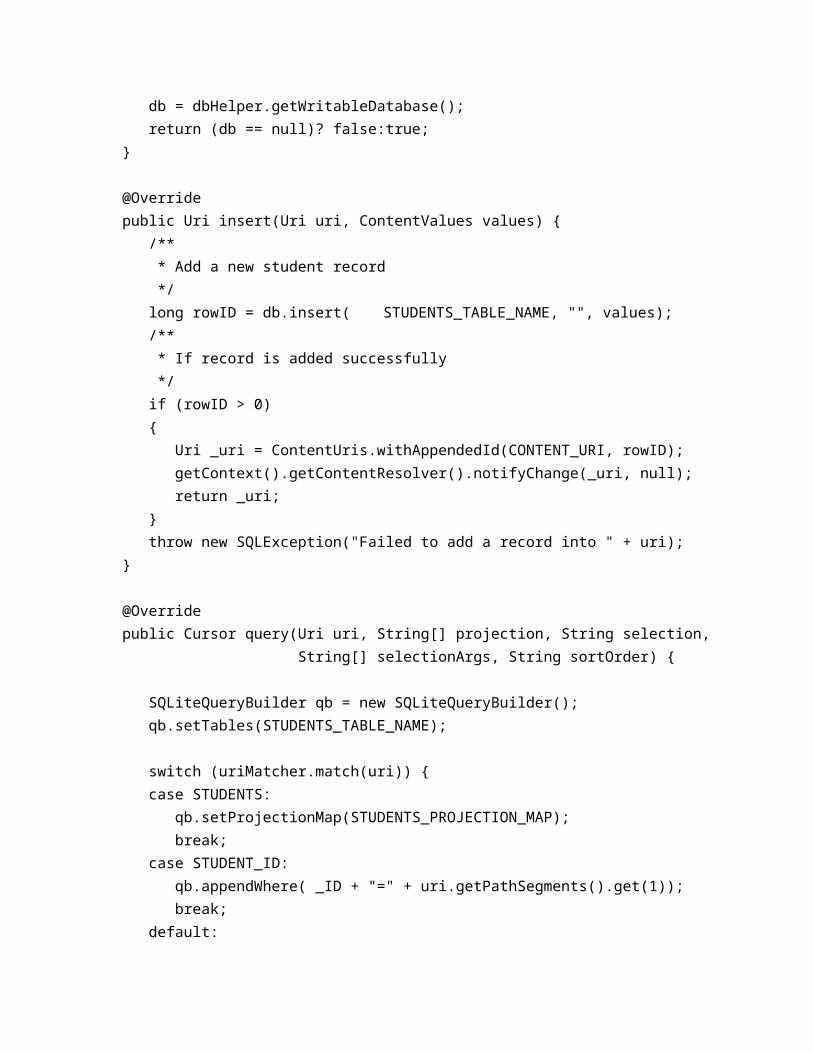
@Override public boolean onCreate() { Context context = getContext(); DatabaseHelper dbHelper = new DatabaseHelper(context); /** * Create a write able database which will trigger its * creation if it doesn't already exist. */ db = dbHelper.getWritableDatabase(); return (db == null)? false:true; }
@Override public Uri insert(Uri uri, ContentValues values) { /** * Add a new student record */ long rowID = db.insert( STUDENTS_TABLE_NAME, "", values); /** * If record is added successfully */ if (rowID > 0) { Uri _uri = ContentUris.withAppendedId(CONTENT_URI, rowID); getContext().getContentResolver().notifyChange(_uri, null); return _uri; } throw new SQLException("Failed to add a record into " + uri); }
@Override public Cursor query(Uri uri, String[] projection, String selection, String[] selectionArgs, String sortOrder) { SQLiteQueryBuilder qb = new SQLiteQueryBuilder(); qb.setTables(STUDENTS_TABLE_NAME);
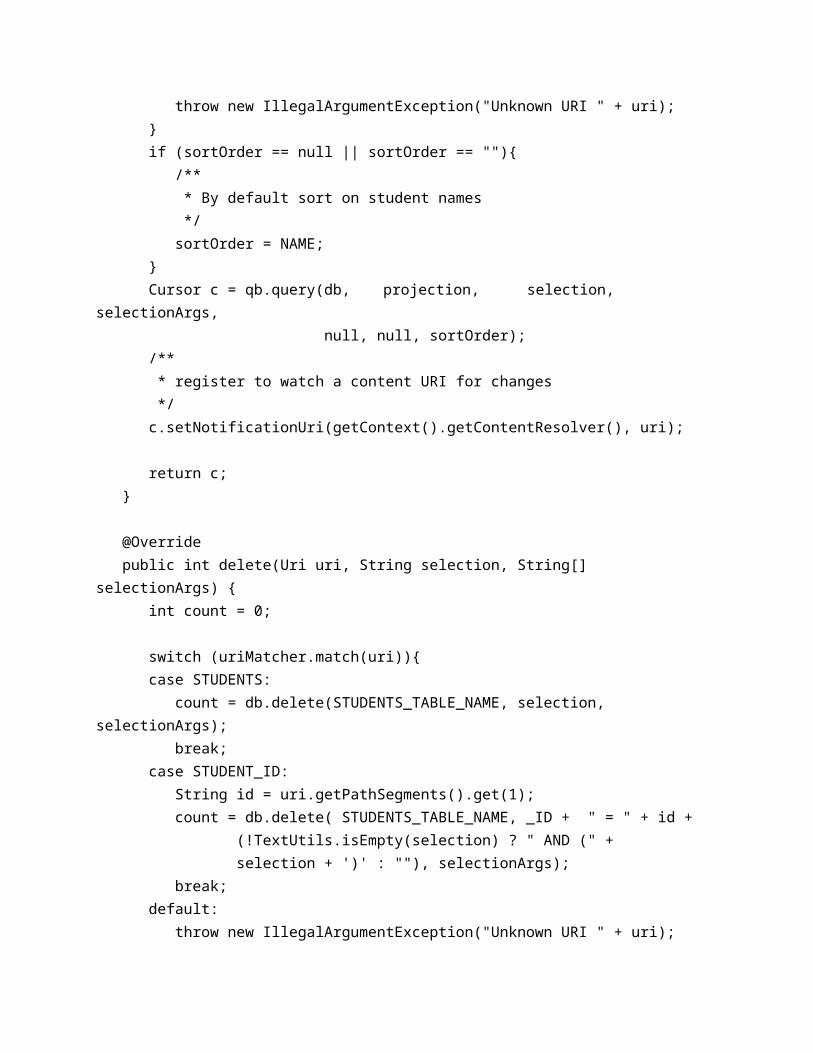
switch (uriMatcher.match(uri)) { case STUDENTS: qb.setProjectionMap(STUDENTS_PROJECTION_MAP); break; case STUDENT_ID: qb.appendWhere( _ID + "=" + uri.getPathSegments().get(1)); break; default: throw new IllegalArgumentException("Unknown URI " + uri); } if (sortOrder == null || sortOrder == ""){ /** * By default sort on student names */ sortOrder = NAME; } Cursor c = qb.query(db, projection, selection, selectionArgs, null, null, sortOrder); /** * register to watch a content URI for changes */ c.setNotificationUri(getContext().getContentResolver(), uri);
return c; }
@Override public int delete(Uri uri, String selection, String[] selectionArgs) { int count = 0;
switch (uriMatcher.match(uri)){ case STUDENTS: count = db.delete(STUDENTS_TABLE_NAME, selection, selectionArgs); break; case STUDENT_ID: String id = uri.getPathSegments().get(1); count = db.delete( STUDENTS_TABLE_NAME, _ID + " = " + id + (!TextUtils.isEmpty(selection) ? " AND (" + selection + ')' : ""), selectionArgs); break; default:
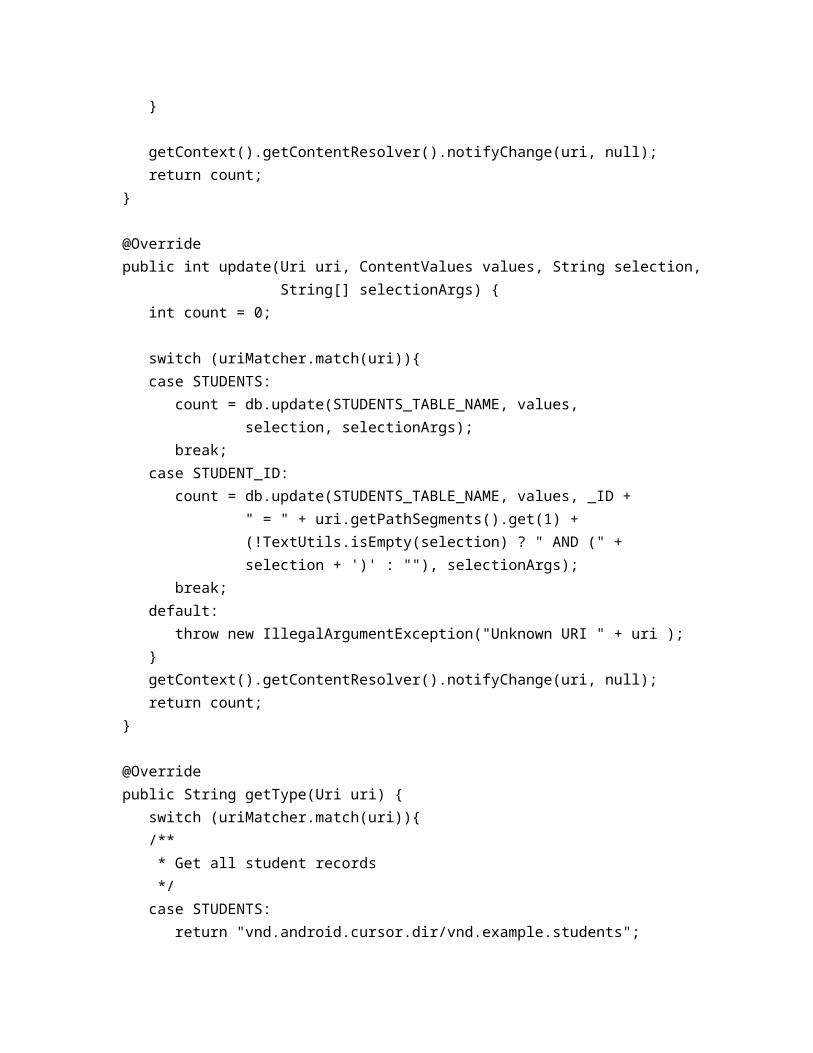
throw new IllegalArgumentException("Unknown URI " + uri); } getContext().getContentResolver().notifyChange(uri, null); return count; }
@Override public int update(Uri uri, ContentValues values, String selection, String[] selectionArgs) { int count = 0; switch (uriMatcher.match(uri)){ case STUDENTS: count = db.update(STUDENTS_TABLE_NAME, values, selection, selectionArgs); break; case STUDENT_ID: count = db.update(STUDENTS_TABLE_NAME, values, _ID + " = " + uri.getPathSegments().get(1) + (!TextUtils.isEmpty(selection) ? " AND (" + selection + ')' : ""), selectionArgs); break; default: throw new IllegalArgumentException("Unknown URI " + uri ); } getContext().getContentResolver().notifyChange(uri, null); return count; }
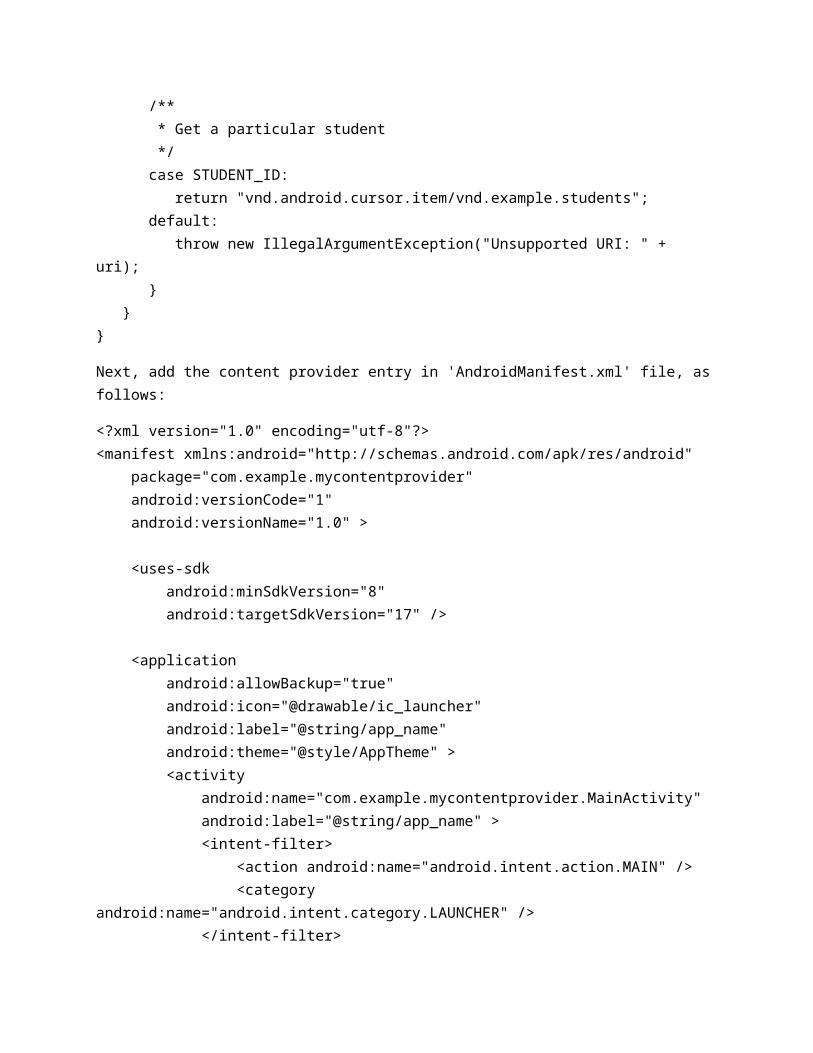
@Override public String getType(Uri uri) { switch (uriMatcher.match(uri)){ /** * Get all student records */ case STUDENTS: return "vnd.android.cursor.dir/vnd.example.students"; /** * Get a particular student */ case STUDENT_ID:
return "vnd.android.cursor.item/vnd.example.students"; default: throw new IllegalArgumentException("Unsupported URI: " + uri); } }}
Next, add the content provider entry in 'AndroidManifest.xml' file, as follows:
<?xml version="1.0" encoding="utf-8"?><manifest xmlns:android="http://schemas.android.com/apk/res/android" package="com.example.mycontentprovider" android:versionCode="1" android:versionName="1.0" >
<uses-sdk android:minSdkVersion="8" android:targetSdkVersion="17" />
<application android:allowBackup="true" android:icon="@drawable/ic_launcher" android:label="@string/app_name" android:theme="@style/AppTheme" > <activity android:name="com.example.mycontentprovider.MainActivity" android:label="@string/app_name" > <intent-filter> <action android:name="android.intent.action.MAIN" /> <category android:name="android.intent.category.LAUNCHER" /> </intent-filter> </activity> <provider android:name="StudentsProvider" android:authorities="com.example.provider.College"> </provider> </application></manifest>
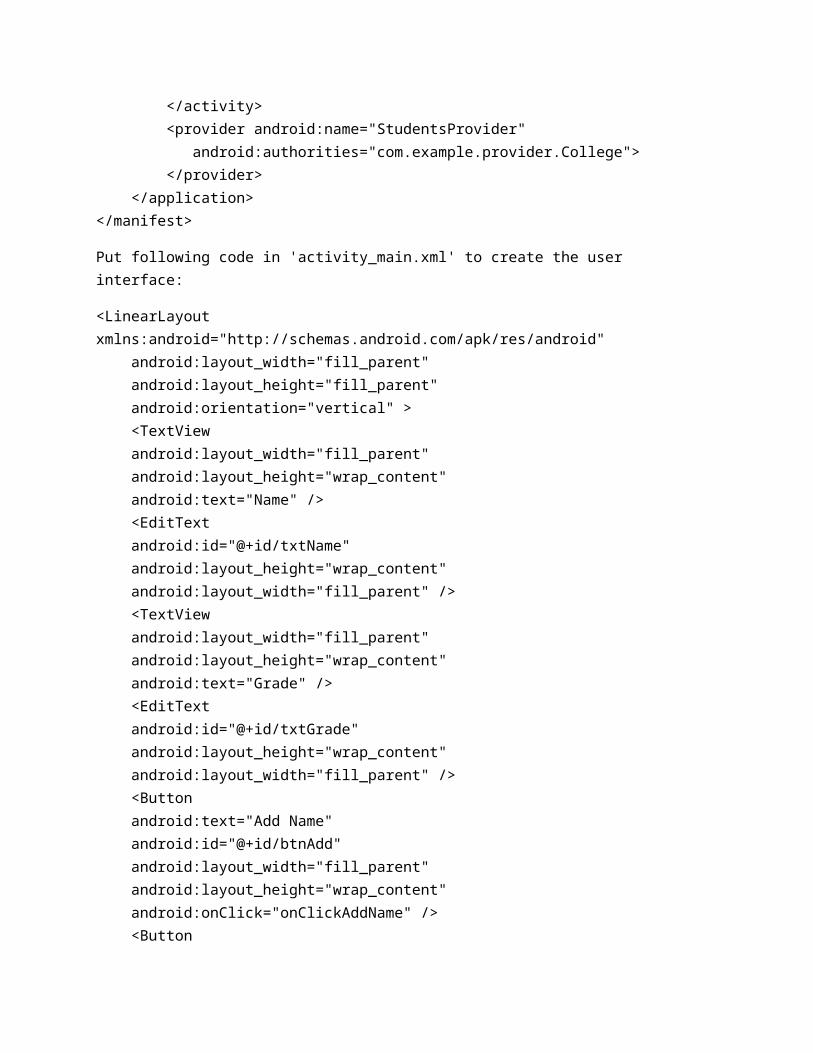
Put following code in 'activity_main.xml' to create the user interface:
<LinearLayout xmlns:android="http://schemas.android.com/apk/res/android" android:layout_width="fill_parent" android:layout_height="fill_parent"
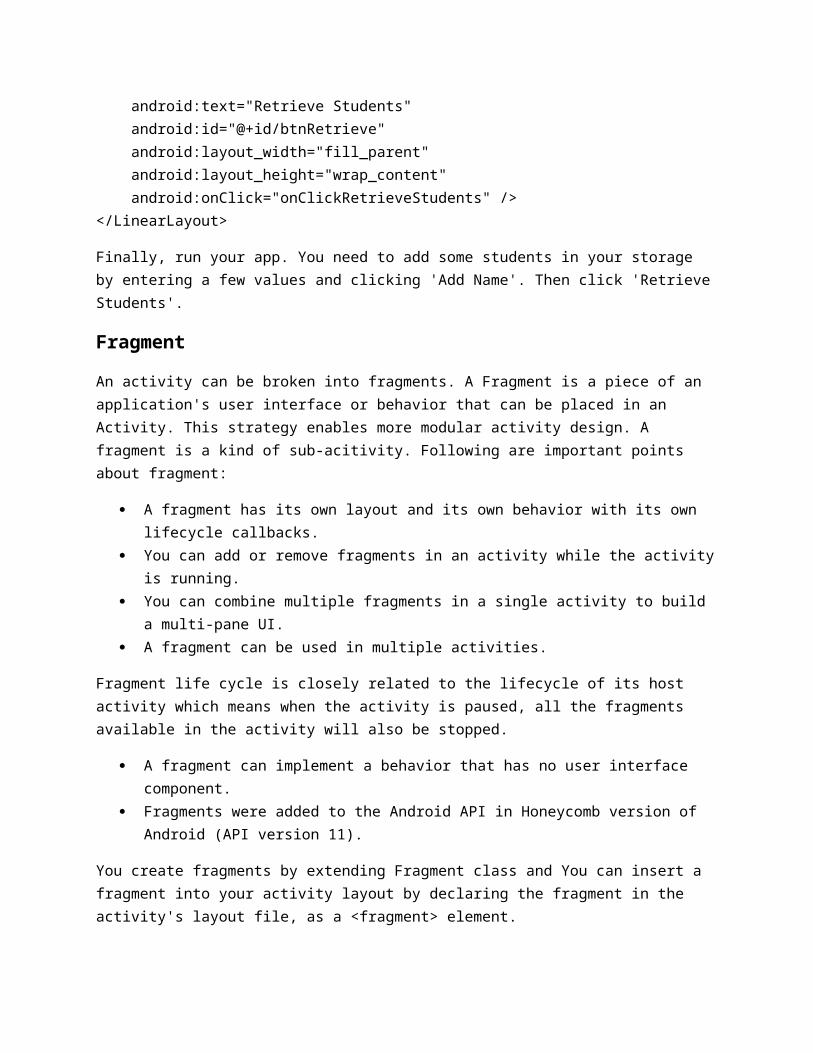
android:orientation="vertical" > <TextView android:layout_width="fill_parent" android:layout_height="wrap_content" android:text="Name" /> <EditText android:id="@+id/txtName" android:layout_height="wrap_content" android:layout_width="fill_parent" /> <TextView android:layout_width="fill_parent" android:layout_height="wrap_content" android:text="Grade" /> <EditText android:id="@+id/txtGrade" android:layout_height="wrap_content" android:layout_width="fill_parent" /> <Button android:text="Add Name" android:id="@+id/btnAdd" android:layout_width="fill_parent" android:layout_height="wrap_content" android:onClick="onClickAddName" /> <Button android:text="Retrieve Students" android:id="@+id/btnRetrieve" android:layout_width="fill_parent" android:layout_height="wrap_content" android:onClick="onClickRetrieveStudents" /></LinearLayout>
Finally, run your app. You need to add some students in your storage by entering a few values and clicking 'Add Name'. Then click 'Retrieve Students'.
Fragment
An activity can be broken into fragments. A Fragment is a piece of an application's user interface or behavior that can be placed in an Activity. This strategy enables more modular activity design. A fragment is a kind of sub-acitivity. Following are important points about fragment:
A fragment has its own layout and its own behavior with its own lifecycle callbacks. You can add or remove fragments in an activity while the activity is running. You can combine multiple fragments in a single activity to build a multi-pane UI.
A fragment can be used in multiple activities.
Fragment life cycle is closely related to the lifecycle of its host activity which means when the activity is paused, all the fragments available in the activity will also be stopped.
A fragment can implement a behavior that has no user interface component. Fragments were added to the Android API in Honeycomb version of Android (API version 11).
You create fragments by extending Fragment class and You can insert a fragment into your activity layout by declaring the fragment in the activity's layout file, as a <fragment> element.
Prior to fragment introduction, we had a limitation because we can show only a single activity on the screen at one given point in time. So we were not able to divide device screen and control different parts separately. But with the introduction of fragment we got more flexibility and removed the limitation of having a single activity on the screen at a time. Now we can have a single activity but each activity can comprise of multiple fragments which will have their own layout, events and complete lifecycle.
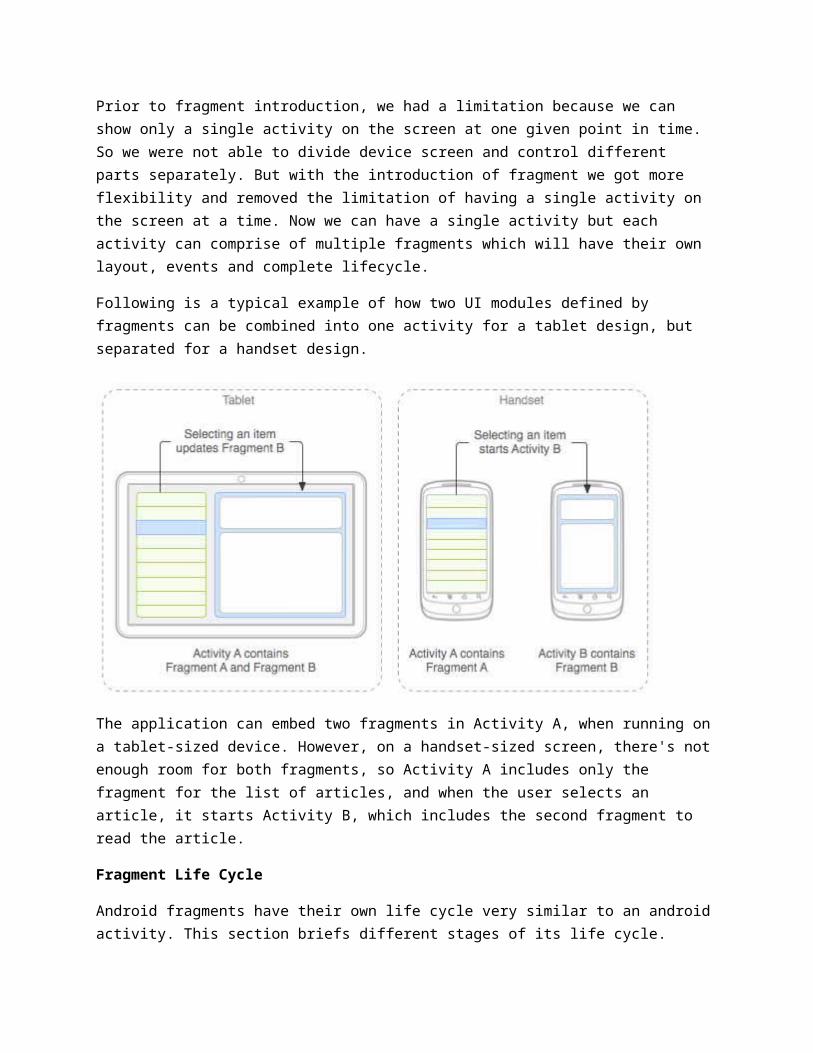
Following is a typical example of how two UI modules defined by fragments can be combined into one activity for a tablet design, but separated for a handset design.
The application can embed two fragments in Activity A, when running on a tablet-sized device. However, on a handset-sized screen, there's not enough room for both fragments, so Activity A includes only the fragment for the list of articles, and when the user selects an article, it starts Activity B, which includes the second fragment to read the article.
Fragment Life Cycle

Android fragments have their own life cycle very similar to an android activity. This section briefs different stages of its life cycle.
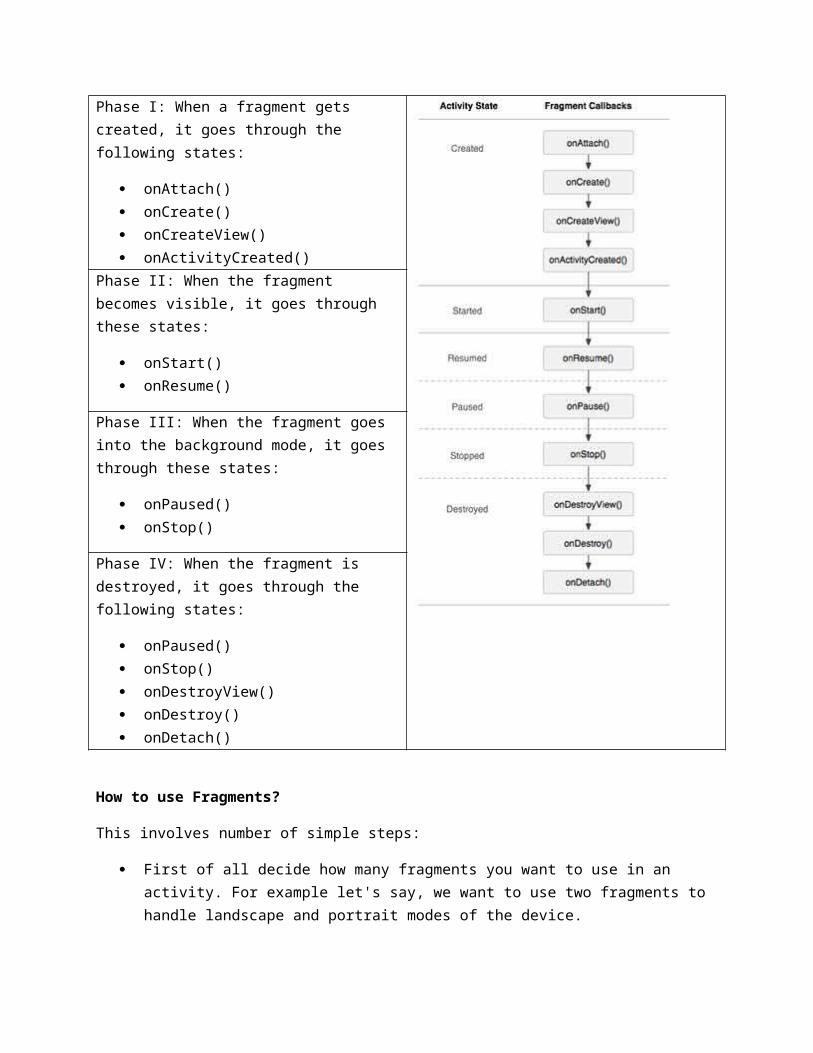
Phase I: When a fragment gets created, it goes through the following states:
onAttach() onCreate() onCreateView() onActivityCreated()
Phase II: When the fragment becomes visible, it goes through these states:
onStart() onResume()
Phase III: When the fragment goes into the background mode, it goes through these states:
onPaused() onStop()
Phase IV: When the fragment is destroyed, it goes through the following states:
onPaused() onStop() onDestroyView() onDestroy() onDetach()
How to use Fragments?
This involves number of simple steps:
First of all decide how many fragments you want to use in an activity. For example let's say, we want to use two fragments to handle landscape and portrait modes of the device.
Next based on number of fragments, create classes which will extend the Fragment class. The Fragment class has above mentioned callback functions. You can override any of the functions based on your requirements.
Corresponding to each fragment, you will need to create layout files in XML file. These files will have layout for the defined fragments.
Finally modify activity file to define the actual logic of replacing fragments based on your requirement.
Here is the list of important methods which you can override in your fragment class:
onCreate() The system calls this when creating the fragment. You should initialize essential components of the fragment that you want to retain when the fragment is paused or stopped, then resumed.
onCreateView() The system calls this callback when it's time for the fragment to draw its user interface for the first time. To draw a UI for your fragment, you must return a View component from this method that is the root of your fragment's layout. You can return null if the fragment does not provide a UI.
onPause() The system calls this method as the first indication that the user is leaving the fragment. This is usually where you should commit any changes that should be persisted beyond the current user session.
Let's create an app to demonstrate the use of fragments. Put following code in ' MainActivity.java' of your project:import android.os.Bundle;import android.app.Activity;import android.app.FragmentManager;import android.app.FragmentTransaction;import android.content.res.Configuration;import android.view.WindowManager;
public class MainActivity extends Activity {
@Override protected void onCreate(Bundle savedInstanceState) { super.onCreate(savedInstanceState);
Configuration config = getResources().getConfiguration();
FragmentManager fragmentManager = getFragmentManager(); FragmentTransaction fragmentTransaction = fragmentManager.beginTransaction();
/** * Check the device orientation and act accordingly */ if (config.orientation == Configuration.ORIENTATION_LANDSCAPE) { /** * Landscape mode of the device
*/ LM_Fragment ls_fragment = new LM_Fragment(); fragmentTransaction.replace(android.R.id.content, ls_fragment); }else{ /** * Portrait mode of the device */ PM_Fragment pm_fragment = new PM_Fragment(); fragmentTransaction.replace(android.R.id.content, pm_fragment); } fragmentTransaction.commit(); }}Add a new class in your 'src' folder and name it as 'LM_Fragement.java'. Put following code in this file:import android.app.Fragment;import android.os.Bundle;import android.view.LayoutInflater;import android.view.View;import android.view.ViewGroup;public class LM_Fragment extends Fragment{ @Override public View onCreateView(LayoutInflater inflater, ViewGroup container, Bundle savedInstanceState) { /** * Inflate the layout for this fragment */ return inflater.inflate( R.layout.lm_fragment, container, false); }}Add one more new class in your 'src' folder and name it as 'PM_Fragement.java'. Put following code in this file:import android.app.Fragment;import android.os.Bundle;import android.view.LayoutInflater;import android.view.View;import android.view.ViewGroup;
public class PM_Fragment extends Fragment{ @Override public View onCreateView(LayoutInflater inflater, ViewGroup container, Bundle savedInstanceState) {
/** * Inflate the layout for this fragment */ return inflater.inflate( R.layout.pm_fragment, container, false); }}Create two layout files 'lm_fragement.xml' and 'pm_fragment.xml' under res/layout directory.Following is the content of lm_fragement.xml file:<?xml version="1.0" encoding="utf-8"?> <LinearLayout xmlns:android="http://schemas.android.com/apk/res/android" android:orientation="vertical" android:layout_width="fill_parent" android:layout_height="fill_parent" android:background="#7bae16"> <TextView android:layout_width="fill_parent" android:layout_height="wrap_content" android:text="@string/landscape_message" android:textColor="#000000" android:textSize="20px" /><!-- More GUI components go here --></LinearLayout>Following is the content of pm_fragment.xml file:<?xml version="1.0" encoding="utf-8"?> <LinearLayout xmlns:android="http://schemas.android.com/apk/res/android" android:orientation="horizontal" android:layout_width="fill_parent" android:layout_height="fill_parent" android:background="#666666"> <TextView android:layout_width="fill_parent" android:layout_height="wrap_content" android:text="@string/portrait_message" android:textColor="#000000" android:textSize="20px" /><!-- More GUI components go here --></LinearLayout>
Following will be the content of res/layout/activity_main.xml file which includes your fragments:<?xml version="1.0" encoding="utf-8"?><LinearLayout xmlns:android="http://schemas.android.com/apk/res/android" xmlns:tools="http://schemas.android.com/tools" android:layout_width="fill_parent" android:layout_height="fill_parent" android:orientation="horizontal">
<fragment android:name="com.example.fragments" android:id="@+id/lm_fragment" android:layout_weight="1" android:layout_width="0dp" android:layout_height="match_parent" /> <fragment android:name="com.example.fragments" android:id="@+id/pm_fragment" android:layout_weight="2" android:layout_width="0dp" android:layout_height="match_parent" />
</LinearLayout>Add following values in your 'strings.xml' file:<string name="landscape_message">This is Landscape mode fragment </string> <string name="portrait_message">This is Portrait mode fragment </string>
Fragments require minimum API version to be 11, so make sure that the respective entry in your 'AndroidManifest.xml' looks as follows:<uses-sdk android:minSdkVersion="11" android:targetSdkVersion="15" />
Now, you can run your app. It will display the portrait mode to start with. Use CTRL + F11 to change the display mode.
Intents
An Android Intent is an object carrying an intent i.e. message from one component to another component with-in the application or outside the application. The intents can communicate messages among any of the three core components of an application - activities, services, and broadcast receivers.
For example, let's assume that you have an Activity that needs to launch an email client and send an email using your Android device. For this purpose, your Activity would send an ACTION_SEND along with appropriate chooser, to the Android Intent Resolver. The specified chooser gives the proper interface for the Resolver to pick how to send your email data.
For example, assume that you have an Activity that needs to open URL in a web browser on your Android device. For this purpose, your Activity will send ACTION_WEB_SEARCH Intent to the Android Intent Resolver to open given URL in the web browser. The Intent Resolver parses through a list of Activities and chooses the one that would best match your Intent, in this case, the Web Browser Activity. The Intent Resolver then passes your web page to the web browser and starts the Web Browser Activity.
There are separate mechanisms for delivering intents to each type of component - activities, services, and broadcast receivers.
S.N. Method & Description
1Context.startActivity() The Intent object is passed to this method to launch a new activity or get an existing activity to do something new.
2Context.startService() The Intent object is passed to this method to initiate a service or deliver new instructions to an ongoing service.
3Context.sendBroadcast() The Intent object is passed to this method to deliver the message to all interested broadcast receivers.
Intent Objects
An Intent object is a bundle of information which is used by the component that receives the intent plus information used by the Android system.
An Intent object can contain the following components based on what it is communicating or going to perform:
Action
This is mandatory part of the Intent object and is a string naming the action to be performed — or, in the case of broadcast intents, the action that took place and is being reported. The action largely determines how the rest of the intent object is structured . The Intent class defines a number of action constants corresponding to different intents. Below is a list of Android Intent Standard Actions.
S.N. Activity Action Intent & Description
1ACTION_ALL_APPS List all the applications available on the device.
2ACTION_ANSWER Handle an incoming phone call.
3ACTION_ATTACH_DATA Used to indicate that some piece of data should be attached to some other place
4ACTION_BATTERY_CHANGED This is a sticky broadcast containing the charging state, level, and other information about the battery.
5ACTION_BATTERY_LOW This broadcast corresponds to the "Low battery warning" system dialog.
6ACTION_BATTERY_OKAY This will be sent after ACTION_BATTERY_LOW once the battery has gone back up to an okay state.
7ACTION_BOOT_COMPLETED This is broadcast once, after the system has finished booting.
8ACTION_BUG_REPORT Show activity for reporting a bug.
9ACTION_CALL Perform a call to someone specified by the data.
10ACTION_CALL_BUTTON The user pressed the "call" button to go to the dialer or other appropriate UI for placing a call.
11ACTION_CAMERA_BUTTON The "Camera Button" was pressed.
12ACTION_CHOOSER Display an activity chooser, allowing the user to pick what they want to before proceeding.
13ACTION_CONFIGURATION_CHANGED The current device Configuration (orientation, locale, etc) has changed.
14ACTION_DATE_CHANGED The date has changed.
15ACTION_DEFAULT A synonym for ACTION_VIEW, the "standard" action that is performed on a piece of data.
16ACTION_DELETE Delete the given data from its container.
17ACTION_DEVICE_STORAGE_LOW A sticky broadcast that indicates low memory condition on the device.
18ACTION_DEVICE_STORAGE_OK Indicates low memory condition on the device no longer exists.
19ACTION_DIAL Dial a number as specified by the data.
20ACTION_DOCK_EVENT A sticky broadcast for changes in the physical docking state of the device.
21ACTION_DREAMING_STARTED Sent after the system starts dreaming.
22 ACTION_DREAMING_STOPPED
Sent after the system stops dreaming.
23ACTION_EDIT Provide explicit editable access to the given data.
24ACTION_FACTORY_TEST Main entry point for factory tests.
25ACTION_GET_CONTENT Allow the user to select a particular kind of data and return it.
26ACTION_GTALK_SERVICE_CONNECTED A GTalk connection has been established.
27ACTION_GTALK_SERVICE_DISCONNECTED A GTalk connection has been disconnected.
28ACTION_HEADSET_PLUG Wired Headset plugged in or unplugged.
29ACTION_INPUT_METHOD_CHANGED An input method has been changed.
30ACTION_INSERT Insert an empty item into the given container.
31ACTION_INSERT_OR_EDIT Pick an existing item, or insert a new item, and then edit it.
32ACTION_INSTALL_PACKAGE Launch application installer.
33ACTION_LOCALE_CHANGED The current device's locale has changed.
34ACTION_MAIN Start as a main entry point, does not expect to receive data.
35ACTION_MEDIA_BUTTON The "Media Button" was pressed.
36ACTION_MEDIA_CHECKING External media is present, and being disk-checked.
37ACTION_MEDIA_EJECT User has expressed the desire to remove the external storage media.
38ACTION_MEDIA_REMOVED External media has been removed.
39ACTION_NEW_OUTGOING_CALL An outgoing call is about to be placed.
40ACTION_PASTE Create a new item in the given container, initializing it from the current contents of the clipboard.
41ACTION_POWER_CONNECTED External power has been connected to the device.
42ACTION_REBOOT Have the device reboot. This is only for use by system code.
43ACTION_RUN Run the data, whatever that means.
44 ACTION_SCREEN_OFF
Sent after the screen turns off.
45ACTION_SCREEN_ON Sent after the screen turns on.
46ACTION_SEARCH Perform a search.
47ACTION_SEND Deliver some data to someone else.
48ACTION_SENDTO Send a message to someone specified by the data.
49ACTION_SEND_MULTIPLE Deliver multiple data to someone else.
50ACTION_SET_WALLPAPER Show settings for choosing wallpaper.
51ACTION_SHUTDOWN Device is shutting down.
52ACTION_SYNC Perform a data synchronization.
53ACTION_TIMEZONE_CHANGED The timezone has changed.
54ACTION_TIME_CHANGED The time was set.
55ACTION_VIEW Display the data to the user.
56ACTION_VOICE_COMMAND Start Voice Command.
57ACTION_WALLPAPER_CHANGED The current system wallpaper has changed.
58ACTION_WEB_SEARCH Perform a web search.
The action in an Intent object can be set by the setAction() method and read by getAction().
Data
The URI of the data to be acted on and the MIME type of that data. For example, if the action field is ACTION_EDIT, the data field would contain the URI of the document to be displayed for editing.
The setData() method specifies data only as a URI, setType() specifies it only as a MIME type, and setDataAndType() specifies it as both a URI and a MIME type. The URI is read by getData() and the type by getType().
Some examples of action/data pairs are:
S.N. Action/Data Pair & Description
1ACTION_VIEW content://contacts/people/1 Display information about the person whose identifier is "1".
2ACTION_DIAL content://contacts/people/1 Display the phone dialer with the person filled in.
3ACTION_VIEW tel:123 Display the phone dialer with the given number filled in.
4ACTION_DIAL tel:123 Display the phone dialer with the given number filled in.
5ACTION_EDIT content://contacts/people/1 Edit information about the person whose identifier is "1".
6ACTION_VIEW content://contacts/people/ Display a list of people, which the user can browse through.
Category
The category is an optional part of Intent object and it's a string containing additional information about the kind of component that should handle the intent. The addCategory() method places a category in an Intent object, removeCategory() deletes a category previously added, and getCategories() gets the set of all categories currently in the object. Below is a list of Android Intent Standard Categories.
S.N. Categories & Description
1CATEGORY_APP_BROWSER Used with ACTION_MAIN to launch the browser application.
2CATEGORY_APP_CALCULATOR Used with ACTION_MAIN to launch the calculator application.
3CATEGORY_APP_CALENDAR Used with ACTION_MAIN to launch the calendar application.
4CATEGORY_APP_CONTACTS Used with ACTION_MAIN to launch the contacts application.
5CATEGORY_APP_EMAIL Used with ACTION_MAIN to launch the email application.
6CATEGORY_APP_GALLERY Used with ACTION_MAIN to launch the gallery application.
7CATEGORY_APP_MAPS Used with ACTION_MAIN to launch the maps application.
8CATEGORY_APP_MARKET This activity allows the user to browse and download new applications.
9CATEGORY_APP_MESSAGING Used with ACTION_MAIN to launch the messaging application.
10CATEGORY_APP_MUSIC Used with ACTION_MAIN to launch the music application.
11CATEGORY_BROWSABLE Activities that can be safely invoked from a browser must support this category.
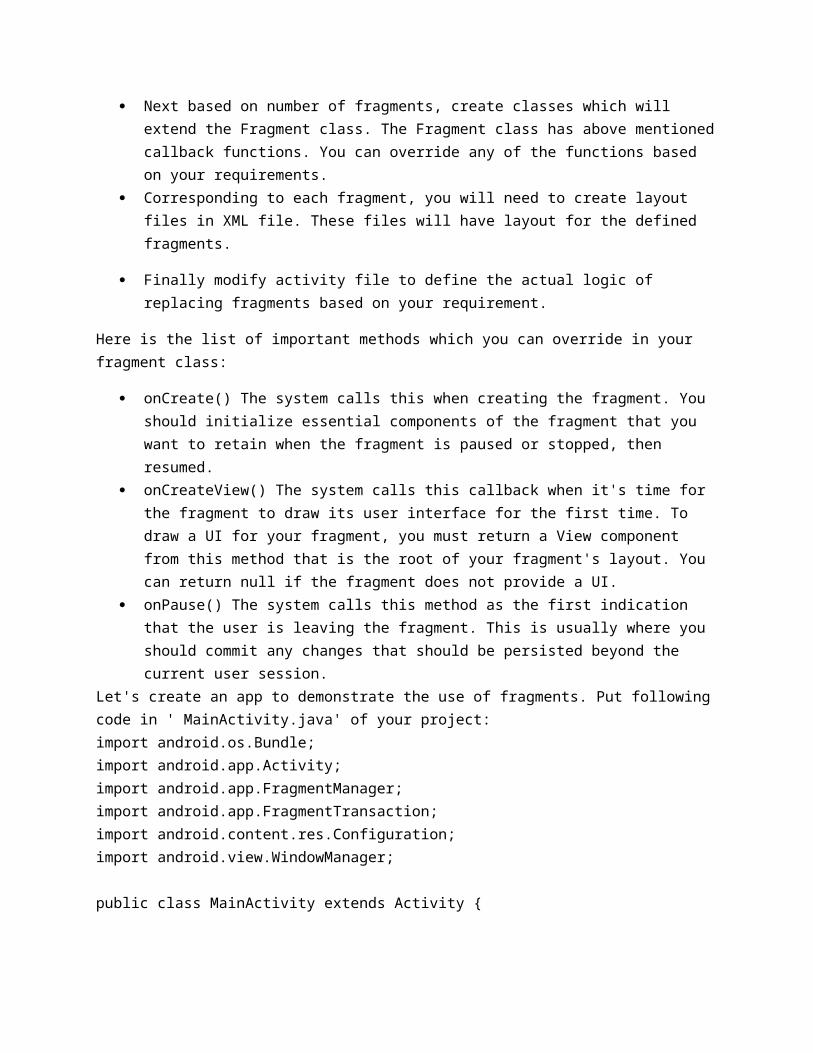
12CATEGORY_CAR_DOCK An activity to run when device is inserted into a car dock.
13CATEGORY_CAR_MODE Used to indicate that the activity can be used in a car environment.
14CATEGORY_DEFAULT Set if the activity should be an option for the default action (center press) to perform on a piece of data.
15CATEGORY_DESK_DOCK An activity to run when device is inserted into a car dock.
16CATEGORY_DEVELOPMENT_PREFERENCE This activity is a development preference panel.
17CATEGORY_EMBED Capable of running inside a parent activity container.
18CATEGORY_FRAMEWORK_INSTRUMENTATION_TEST To be used as code under test for framework instrumentation tests.
19CATEGORY_HE_DESK_DOCK An activity to run when device is inserted into a digital (high end) dock.
20CATEGORY_HOME This is the home activity, that is the first activity that is displayed when the device boots.
21CATEGORY_INFO Provides information about the package it is in.
22CATEGORY_LAUNCHER Should be displayed in the top-level launcher.
23CATEGORY_LE_DESK_DOCK An activity to run when device is inserted into a analog (low end) dock.
24CATEGORY_MONKEY This activity may be exercised by the monkey or other automated test tools.
25CATEGORY_OPENABLE Used to indicate that a GET_CONTENT intent only wants URIs that can be opened with ContentResolver.openInputStream.
26CATEGORY_PREFERENCE This activity is a preference panel.
27CATEGORY_TAB Intended to be used as a tab inside of a containing TabActivity.
28CATEGORY_TEST To be used as a test (not part of the normal user experience).
29CATEGORY_UNIT_TEST To be used as a unit test (run through the Test Harness).
You can check detail on Intent Filters in below section to understand how do we use categories to choose appropriate activity corresponding to an Intent.
Extras
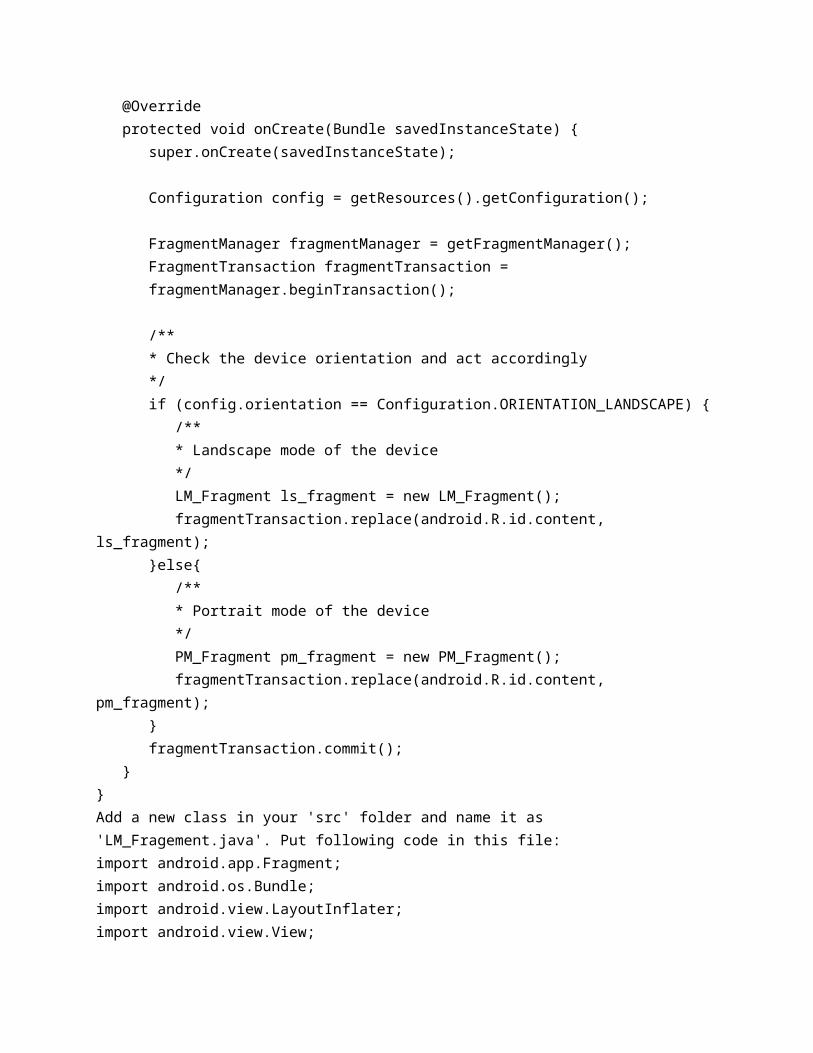
This will be in key-value pairs for additional information that should be delivered to the component handling the intent. The extras can be set and read using the putExtras() and getExtras() methods respectively. Below is a list of Android Intent Standard Extra Data.
S.N. Extra Data & Description
1EXTRA_ALARM_COUNT Used as an int extra field in AlarmManager intents to tell the application being invoked how many pending alarms are being delievered with the intent.
2EXTRA_ALLOW_MULTIPLE Used to indicate that a ACTION_GET_CONTENT intent can allow the user to select and return multiple items.
3EXTRA_ALLOW_REPLACE Used as a boolean extra field with ACTION_INSTALL_PACKAGE to install a package.
4EXTRA_BCC A String[] holding e-mail addresses that should be blind carbon copied.
5EXTRA_CC A String[] holding e-mail addresses that should be carbon copied.
6EXTRA_CHANGED_COMPONENT_NAME_LIST This field is part of ACTION_PACKAGE_CHANGED, and contains a string array of all of the components that have changed.
7EXTRA_DATA_REMOVED Used as a boolean extra field in ACTION_PACKAGE_REMOVED intents to indicate whether this represents a full uninstall or a partial uninstall
8EXTRA_DOCK_STATE Used as an int extra field in ACTION_DOCK_EVENT intents to request the dock state.
9EXTRA_DOCK_STATE_CAR Used as an int value for EXTRA_DOCK_STATE to represent that the phone is in a car dock.
10EXTRA_DOCK_STATE_DESK Used as an int value for EXTRA_DOCK_STATE to represent that the phone is in a desk dock.
11EXTRA_EMAIL A String[] holding e-mail addresses that should be delivered to.
12EXTRA_HTML_TEXT A constant String that is associated with the Intent, used with ACTION_SEND to supply an alternative to EXTRA_TEXT as HTML formatted text.
13EXTRA_INTENT An Intent describing the choices you would like shown with ACTION_PICK_ACTIVITY.
14EXTRA_KEY_EVENT A KeyEvent object containing the event that triggered the creation of the Intent it is in.
15EXTRA_LOCAL_ONLY Used to indicate that a ACTION_GET_CONTENT intent should only return data that is on the local device.
16EXTRA_ORIGINATING_URI Used as a URI extra field with ACTION_INSTALL_PACKAGE and ACTION_VIEW to indicate the URI from which the local APK in the Intent data field originated from.
17 EXTRA_PHONE_NUMBER A String holding the phone number originally entered in ACTION_NEW_OUTGOING_CALL, or
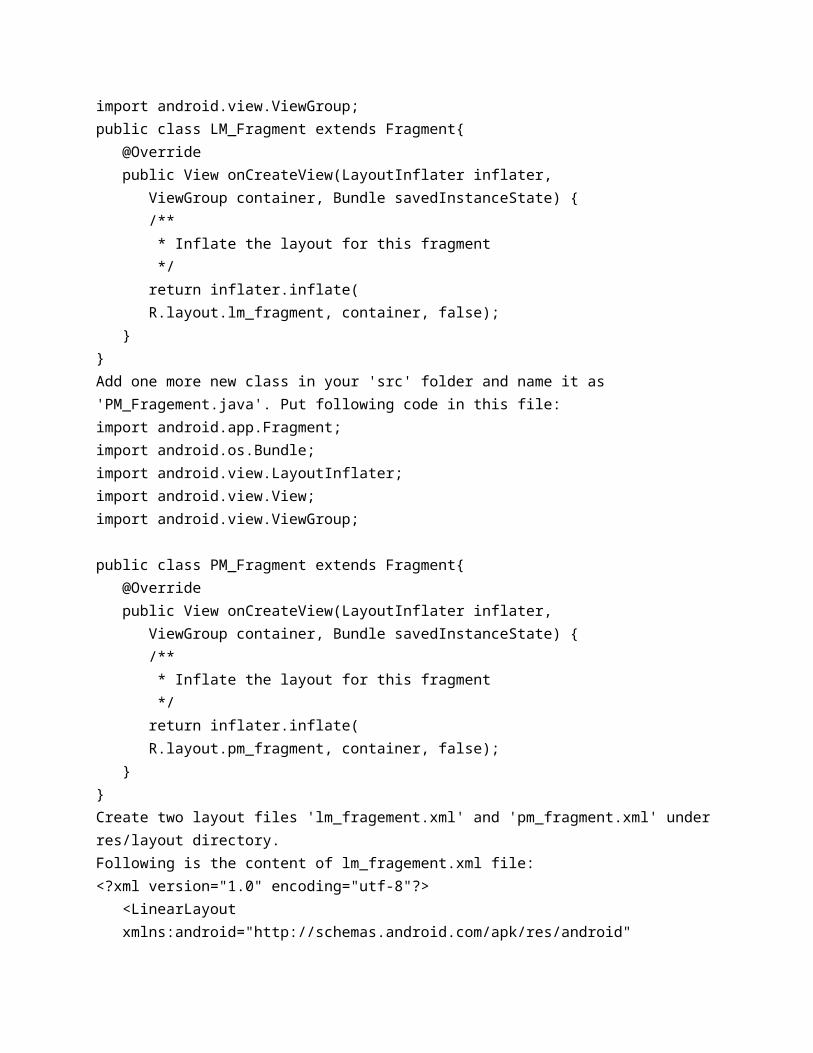
the actual number to call in a ACTION_CALL.
18EXTRA_SHORTCUT_ICON The name of the extra used to define the icon, as a Bitmap, of a shortcut.
19EXTRA_SHORTCUT_INTENT The name of the extra used to define the Intent of a shortcut.
20EXTRA_SHORTCUT_NAME The name of the extra used to define the name of a shortcut.
21EXTRA_STREAM URI holding a stream of data associated with the Intent, used with ACTION_SEND to supply the data being sent.
22EXTRA_SUBJECT A constant string holding the desired subject line of a message.
23EXTRA_TEMPLATE The initial data to place in a newly created record. Use with ACTION_INSERT.
24EXTRA_TEXT A constant CharSequence that is associated with the Intent, used with ACTION_SEND to supply the literal data to be sent.
25EXTRA_TITLE A CharSequence dialog title to provide to the user when used with a ACTION_CHOOSER.
26EXTRA_UID Used as an int extra field in ACTION_UID_REMOVED intents to supply the uid the package had been assigned.
Flags
These flags are optional part of Intent object and instruct the Android system how to launch an activity, and how to treat it after it's launched etc.
Component Name
This optional field is an android ComponentName object representing either Activity, Service or BroadcastReceiver class. If it is set, the Intent object is delivered to an instance of the designated class otherwise Android uses other information in the Intent object to locate a suitable target.
The component name is set by setComponent(), setClass(), or setClassName() and read by getComponent().
Types of Intents
There are following two types of intents supported by Android till version 4.1
Explicit Intents
These intents designate the target component by its name and they are typically used for application-internal messages - such as an activity starting a subordinate service or launching a sister activity. For example:
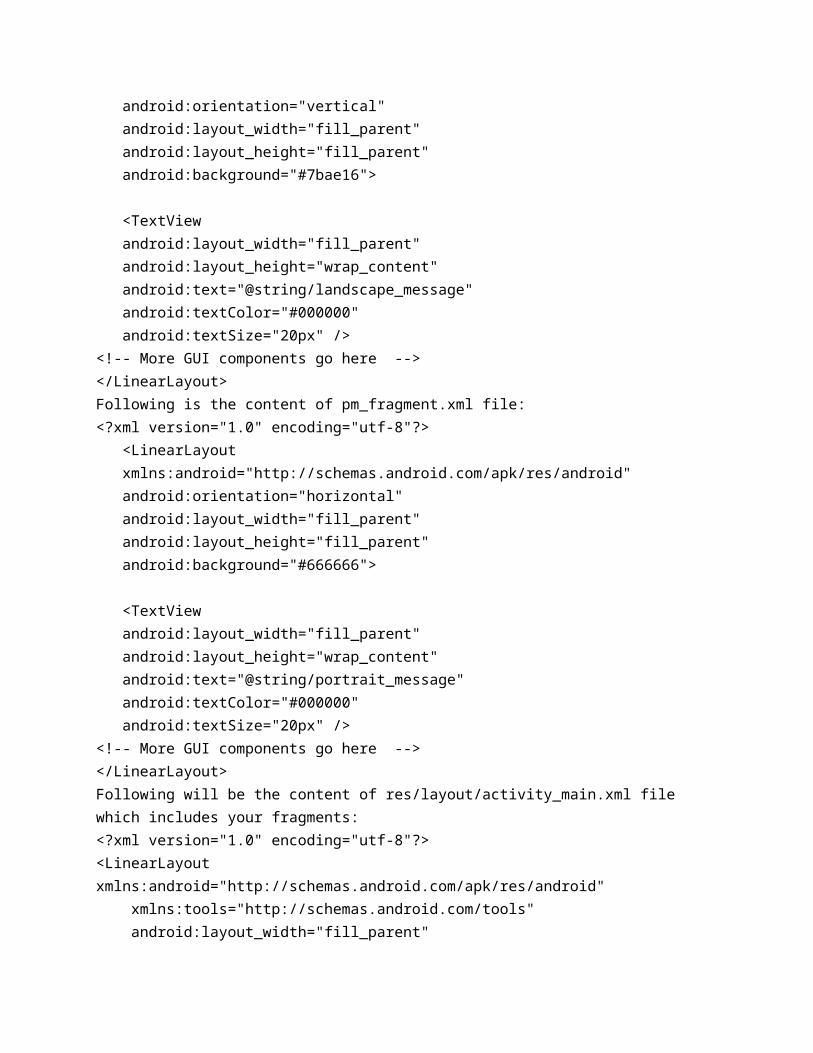
// Explicit Intent by specifying its class nameIntent i = new Intent(this, TargetActivity.class);i.putExtra("Key1", "ABC");i.putExtra("Key2", "123");// Starts TargetActivitystartActivity(i);
Implicit Intents
These intents do not name a target and the field for the component name is left blank. Implicit intents are often used to activate components in other applications. For example:
// Implicit Intent by specifying a URIIntent i = new Intent(Intent.ACTION_VIEW, Uri.parse("http://www.example.com"));// Starts Implicit ActivitystartActivity(i);
The target component which receives the intent can use the getExtras() method to get the extra data sent by the source component. For example:
// Get bundle object at appropriate place in your codeBundle extras = getIntent().getExtras();// Extract data using passed keysString value1 = extras.getString("Key1");String value2 = extras.getString("Key2");
Now, let's create an App to demonstrate Android Intents. Put following code in your project's 'MainActivity.java':
import android.net.Uri;import android.os.Bundle;import android.app.Activity;import android.content.Intent;import android.view.Menu;import android.view.View;import android.widget.Button;
public class MainActivity extends Activity {
@Override protected void onCreate(Bundle savedInstanceState) { super.onCreate(savedInstanceState); setContentView(R.layout.activity_main);
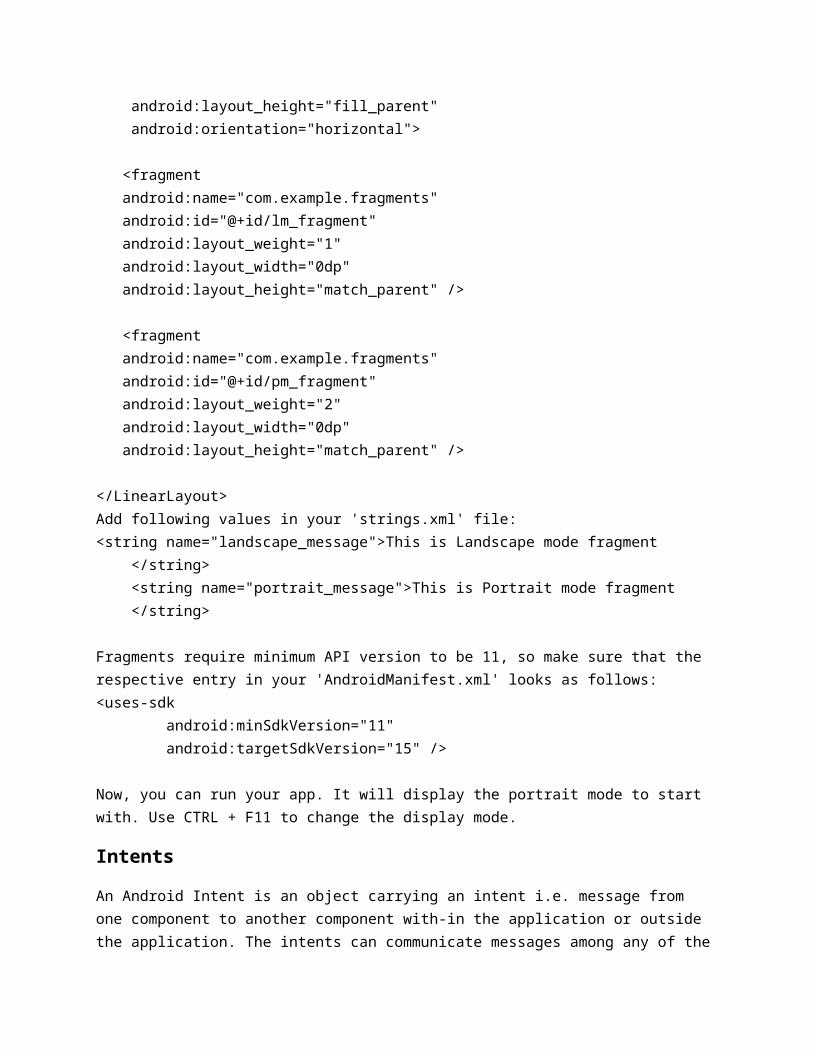
Button startBrowser = (Button) findViewById(R.id.start_browser); startBrowser.setOnClickListener(new View.OnClickListener() { public void onClick(View view) { Intent i = new Intent(android.content.Intent.ACTION_VIEW, Uri.parse("http://www.example.com")); startActivity(i); } }); Button startPhone = (Button) findViewById(R.id.start_phone); startPhone.setOnClickListener(new View.OnClickListener() { public void onClick(View view) { Intent i = new Intent(android.content.Intent.ACTION_VIEW, Uri.parse("tel:9510300000")); startActivity(i); } }); } @Override public boolean onCreateOptionsMenu(Menu menu) { // Inflate the menu; this adds items to the action // bar if it is present. getMenuInflater().inflate(R.menu.activity_main, menu); return true; }}
Next, put following code in 'activity_main.xml' :
<LinearLayout xmlns:android="http://schemas.android.com/apk/res/android" android:layout_width="fill_parent" android:layout_height="fill_parent" android:orientation="vertical" >
<Button android:id="@+id/start_browser" android:layout_width="fill_parent" android:layout_height="wrap_content" android:text="@string/start_browser"/> <Button android:id="@+id/start_phone" android:layout_width="fill_parent" android:layout_height="wrap_content" android:text="@string/start_phone" />
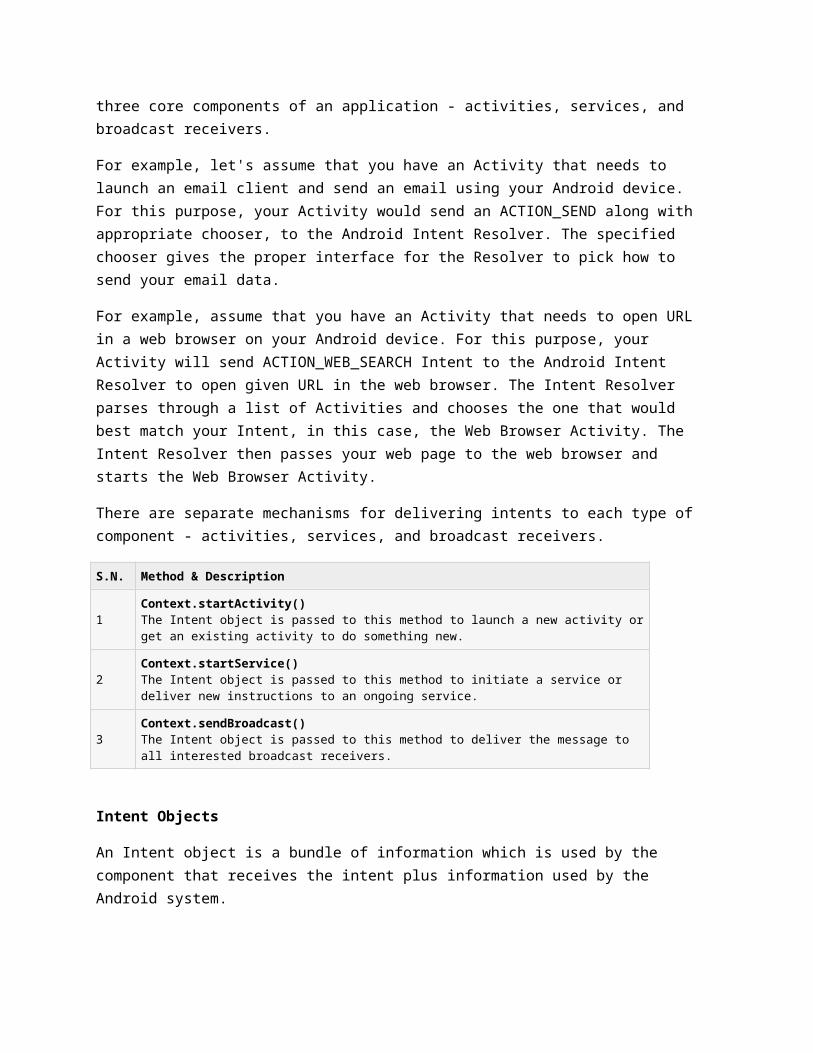
</LinearLayout>
Add, following lines to 'strings.xml' :<string name="start_browser">Start Browser</string> <string name="start_phone">Start Phone</string>
We don't need to change 'AndroidManifest.xml'. Save all your files and run your app.
Intent Filters
We have studied how an Intent is used to call another activity. Android OS uses filters to pinpoint the set of Activities, Services, and Broadcast receivers that can handle the Intent with help of specified set of action, categories, data scheme associated with an Intent. You will use <intent-filter> element in the manifest file to list down actions, categories and data types associated with any activity, service, or broadcast receiver.
Following is an example of a part of AndroidManifest.xml file to specify an activity com.example.intentdemo.CustomActivity which can be invoked by either of the two mentioned actions, one category, and one data:
<activity android:name=".CustomActivity" android:label="@string/app_name"> <intent-filter> <action android:name="android.intent.action.VIEW" /> <action android:name="com.example.intentdemo.LAUNCH" /> <category android:name="android.intent.category.DEFAULT" /> <data android:scheme="http" /> </intent-filter></activity>
Once this activity is defined along with above mentioned filters, other activities will be able to invoke this activity using either the android.intent.action.VIEW, or using the com.example.intentdemo.LAUNCH action provided their category is android.intent.category.DEFAULT.
The <data> element specifies the data type expected by the activity to be called and for above example our custom activity expects the data to start with the "http://"
There may be a situation that an intent can pass through the filters of more than one activity or service, the user may be asked which component to activate. An exception is raised if no target can be found.
There are following tests that Android checks before invoking an activity:
A filter <intent-filter> may list more than one action as shown above but this list cannot be empty; a filter must contain at least one <action> element, otherwise it will block all intents. If
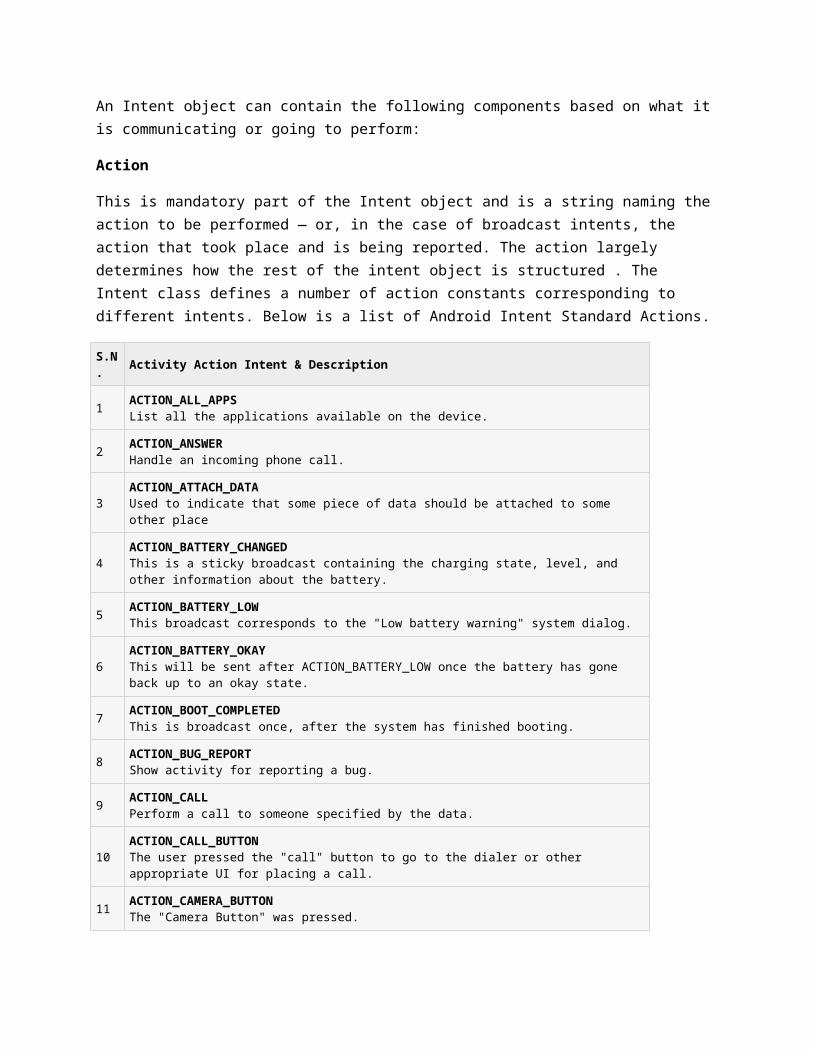
more than one actions are mentioned then Android tries to match one of the mentioned actions before invoking the activity.
A filter <intent-filter> may list zero, one or more than one categories. if there is no category mentioned then Android always pass this test but if more than one categories are mentioned then for an intent to pass the category test, every category in the Intent object must match a category in the filter.
Each <data> element can specify a URI and a data type (MIME media type). There are separate attributes like scheme, host, port, and path for each part of the URI. An Intent object that contains both a URI and a data type passes the data type part of the test only if its type matches a type listed in the filter.
Now, let's modify above app to study, how Android resolves conflict if one intent is invoking two activities defined in it, next how to invoke a custom activity using a filter and third one is an exception case if Android does not find appropriate activity defined for an intent.
Put following code in 'MainActivity.java' :
import android.net.Uri;import android.os.Bundle;import android.app.Activity;import android.content.Intent;import android.view.Menu;import android.view.View;import android.widget.Button;
public class MainActivity extends Activity { @Override protected void onCreate(Bundle savedInstanceState) { super.onCreate(savedInstanceState); setContentView(R.layout.activity_main);
// First intent to use ACTION_VIEW action with correct data Button startBrowser_a = (Button) findViewById(R.id.start_browser_a); startBrowser_a.setOnClickListener(new View.OnClickListener() { public void onClick(View view) { Intent i = new Intent(android.content.Intent.ACTION_VIEW, Uri.parse("http://www.redlojik.com")); startActivity(i); } });
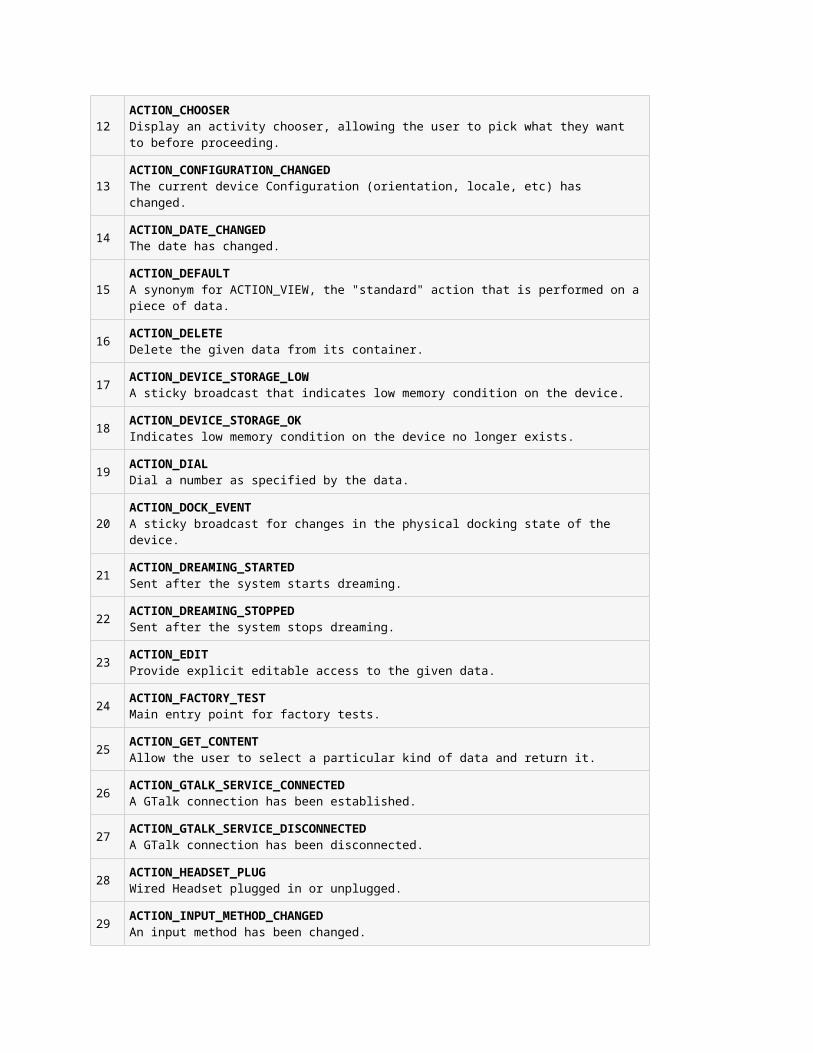
// Second intent to use LAUNCH action with correct data Button startBrowser_b = (Button) findViewById(R.id.start_browser_b); startBrowser_b.setOnClickListener(new View.OnClickListener() { public void onClick(View view) { Intent i = new Intent("com.example.myintent.LAUNCH", Uri.parse("http://www.redlojik.com")); startActivity(i); } });
// Third intent to use LAUNCH action with incorrect data Button startBrowser_c = (Button) findViewById(R.id.start_browser_c); startBrowser_c.setOnClickListener(new View.OnClickListener() { public void onClick(View view) { Intent i = new Intent("com.example.myintent.LAUNCH", Uri.parse("https://www.redlojik.com")); startActivity(i); } }); }
@Override public boolean onCreateOptionsMenu(Menu menu) { // Inflate the menu; this adds items to the // action bar if it is present. getMenuInflater().inflate(R.menu.activity_main, menu); return true; } }
Next, create a new class under 'src' folder and name it as 'CustomActivity.java'. Put following code in this class:import android.app.Activity;import android.net.Uri;import android.os.Bundle;import android.widget.TextView;
public class CustomActivity extends Activity { @Override public void onCreate(Bundle savedInstanceState) { super.onCreate(savedInstanceState);
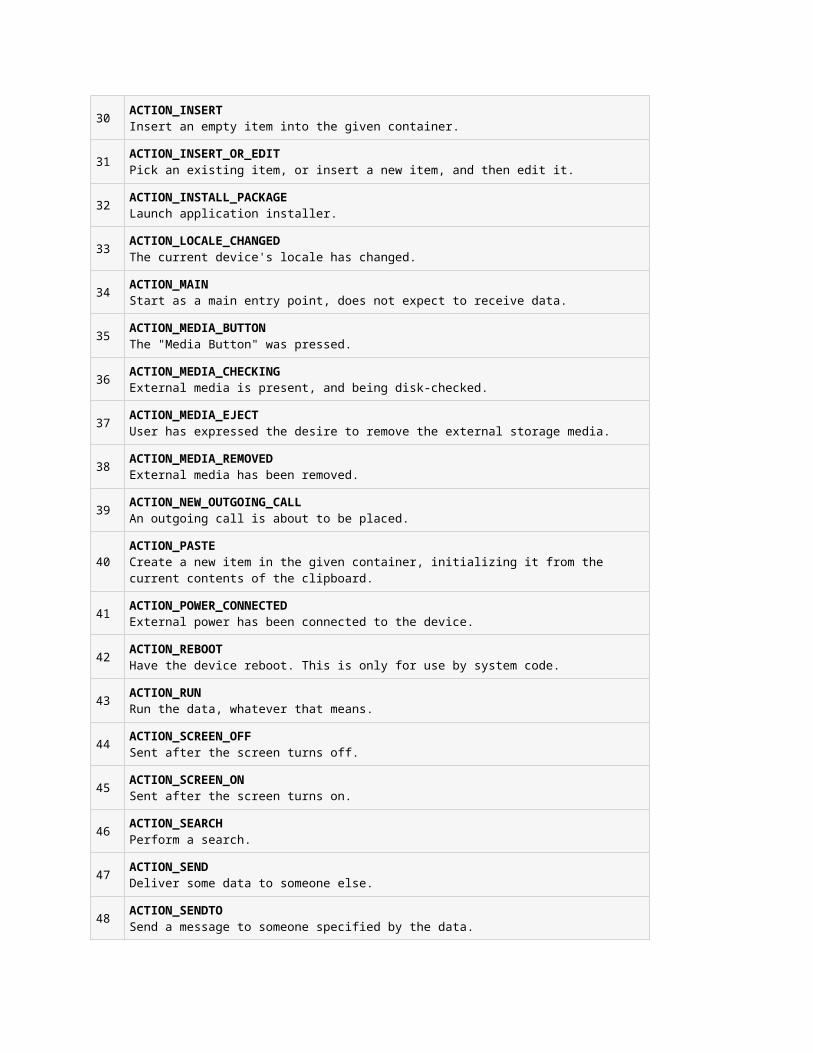
setContentView(R.layout.custom_view);
TextView label = (TextView) findViewById(R.id.show_data);
Uri url = getIntent().getData(); label.setText(url.toString()); }}
Modify the code of 'activity_main.xml' as follows:
<LinearLayout xmlns:android="http://schemas.android.com/apk/res/android" android:layout_width="fill_parent" android:layout_height="fill_parent" android:orientation="vertical" >
<Button android:id="@+id/start_browser_a" android:layout_width="fill_parent" android:layout_height="wrap_content" android:text="@string/start_browser_a"/>
<Button android:id="@+id/start_browser_b" android:layout_width="fill_parent" android:layout_height="wrap_content" android:text="@string/start_browser_b"/> <Button android:id="@+id/start_browser_c" android:layout_width="fill_parent" android:layout_height="wrap_content" android:text="@string/start_browser_c"/></LinearLayout>
Add, a new xml file to res/layout folder and name it as 'custom_view.xml'. Put following code in this file:
<?xml version="1.0" encoding="utf-8"?><LinearLayout xmlns:android="http://schemas.android.com/apk/res/android" android:orientation="vertical" android:layout_width="fill_parent" android:layout_height="fill_parent" > <TextView android:id="@+id/show_data" android:layout_width="fill_parent" android:layout_height="400dp"/>
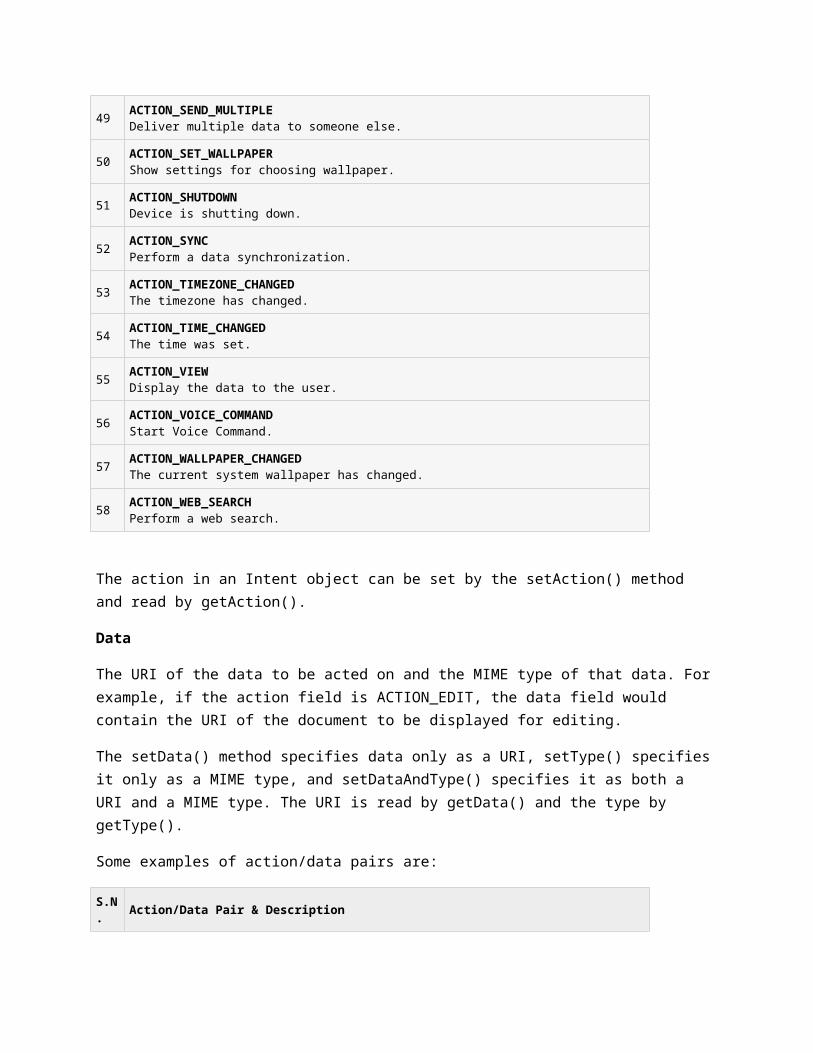
</LinearLayout>
Modify 'strings.xml' to contain following entries:
<string name="start_browser_a">Start Browser with VIEW action</string> <string name="start_browser_b">Start Browser with LAUNCH action</string> <string name="start_browser_c">Exception Condition</string>
Next, add following activity to 'AndroidManifest.xml' :
<activity android:name=".CustomActivity" android:label="@string/app_name"> <intent-filter> <action android:name="android.intent.action.VIEW" /> <action android:name="com.example.myintent.LAUNCH" /> <category android:name="android.intent.category.DEFAULT" /> <data android:scheme="http" /> </intent-filter> </activity>
Observations:
First Button "Start Browser with VIEW Action" : Here we have defined our custom activity with a filter "android.intent.action.VIEW", and there is already one default activity against VIEW action defined by Android which is launching web browser. So android displays two options to select the activity you want to launch.
If you select Browser, then Android will launch web browser and open redlojik.com website but if you select MyIntent option then Android will launch CustomActivity which does nothing but just capture passed data and display in a text view.
Second Button "Start Browser with LAUNCH Action" : Here Android applies filter to choose define activity and it simply launches your custom activity and again it displays the captured data.
Third Button "Exception Condition" : Here Android tries to find out a valid filter for the given intent but it does not find a valid activity defined because this time we have used data as 'https' instead of 'http' though we are giving a correct action, so Android raises an exception and allows you to 'Force Close' the app.
Location API
Android location APIs make it easy for you to build location-aware applications, without needing to focus on the details of the underlying location technology. This becomes possible with the help of Google Play services, which facilitates adding location awareness to your app with automated location tracking, geo-fencing, and activity recognition.
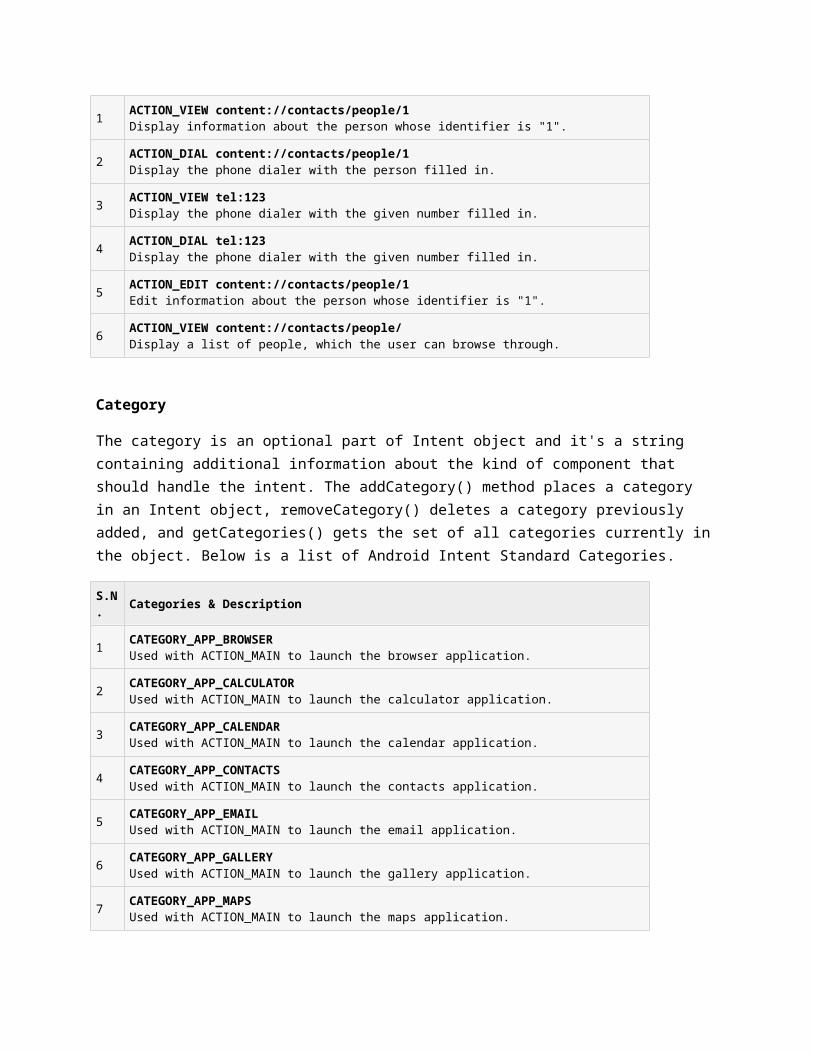
Here, we will study, how to use Location Services in your app to get the current location, get periodic location updates, look up addresses etc.
The Location Object
The Location object represents a geographic location which can consist of a latitude, longitude, timestamp, and other information such as bearing, altitude and velocity. There are following important methods which you can use with Location object to get location specific information:
S.N. Method & Description
1float distanceTo(Location dest) Returns the approximate distance in meters between this location and the given location.
2float getAccuracy() Get the estimated accuracy of this location, in meters.
3double getAltitude() Get the altitude if available, in meters above sea level.
4float getBearing() Get the bearing, in degrees.
5double getLatitude() Get the latitude, in degrees.
6double getLongitude() Get the longitude, in degrees.
7float getSpeed() Get the speed if it is available, in meters/second over ground.
8boolean hasAccuracy() True if this location has an accuracy.
9boolean hasAltitude() True if this location has an altitude.
10boolean hasBearing() True if this location has a bearing.
11boolean hasSpeed() True if this location has a speed.
12void reset() Clears the contents of the location.
13void setAccuracy(float accuracy) Set the estimated accuracy of this location, meters.
14void setAltitude(double altitude) Set the altitude, in meters above sea level.
15void setBearing(float bearing) Set the bearing, in degrees.
16void setLatitude(double latitude) Set the latitude, in degrees.
17void setLongitude(double longitude) Set the longitude, in degrees.
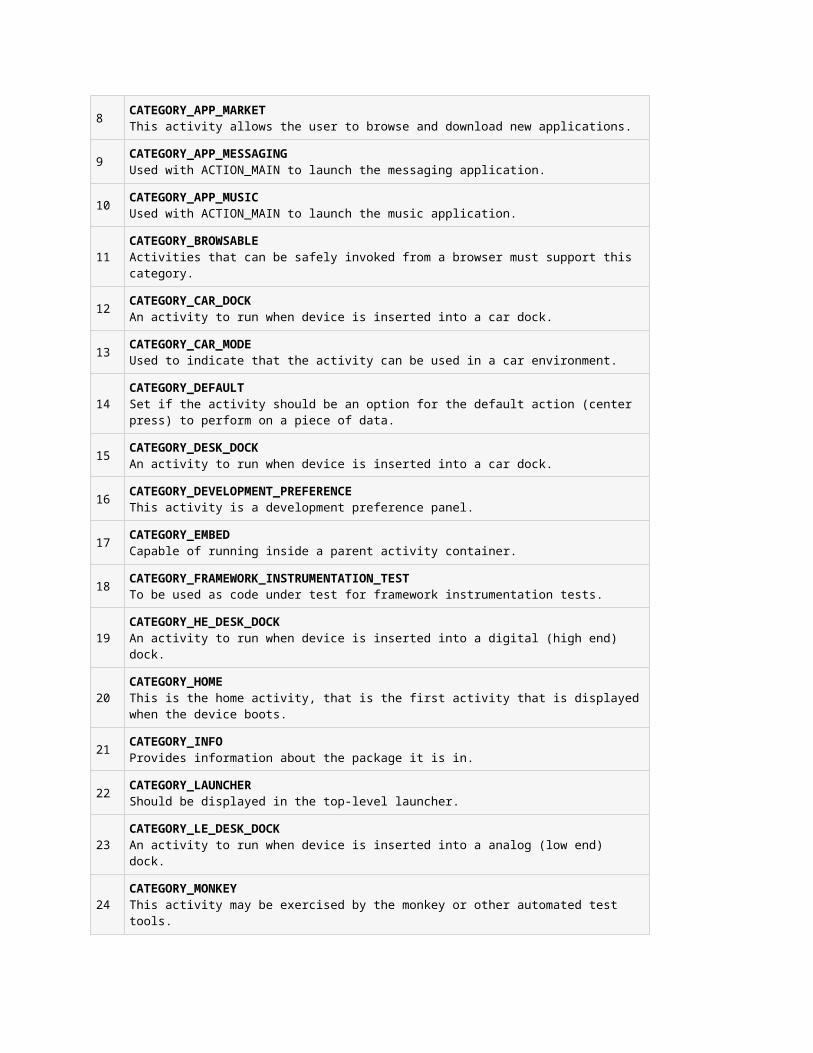
18void setSpeed(float speed) Set the speed, in meters/second over ground.
19String toString() Returns a string containing a concise, human-readable description of this object.
Get the Current Location
To get the current location, create a location client which is LocationClient object, connect it to Location Services using connect() method, and then call its getLastLocation() method. This method returns the most recent location in the form of Location object that contains latitude and longitude coordinates and other information as explained above. To have location based functionality in your activity, you will have to implement two interfaces:
GooglePlayServicesClient.ConnectionCallbacks GooglePlayServicesClient.OnConnectionFailedListener
These interfaces provide following important callback methods, which you need to implement in your activity class:
S.N. Callback Methods & Description
1abstract void onConnected(Bundle connectionHint) This callback method is called when location service is connected to the location client successfully. You will use connect() method to connect to the location client.
2abstract void onDisconnected() This callback method is called when the client is disconnected. You will use disconnect()method to disconnect from the location client.
3abstract void onConnectionFailed(ConnectionResult result) This callback method is called when there was an error connecting the client to the service.
NOTE : You should create the location client in onCreate() method of your activity class, then connect it in onStart(), so that Location Services maintains the current location while your activity is fully visible. You should disconnect the client in onStop() method, so that when your app is not visible, Location Services is not maintaining the current location. This helps in saving battery power up-to a large extent.
Get the Updated Location
If you are willing to have location updates, then apart from above mentioned interfaces, you will need to implement LocationListener interface as well. This interface provide following callback method, which you need to implement in your activity class:
S.N. Callback Method & Description
1abstract void onLocationChanged(Location location) This callback method is used for receiving notifications from the LocationClient when the location has changed.
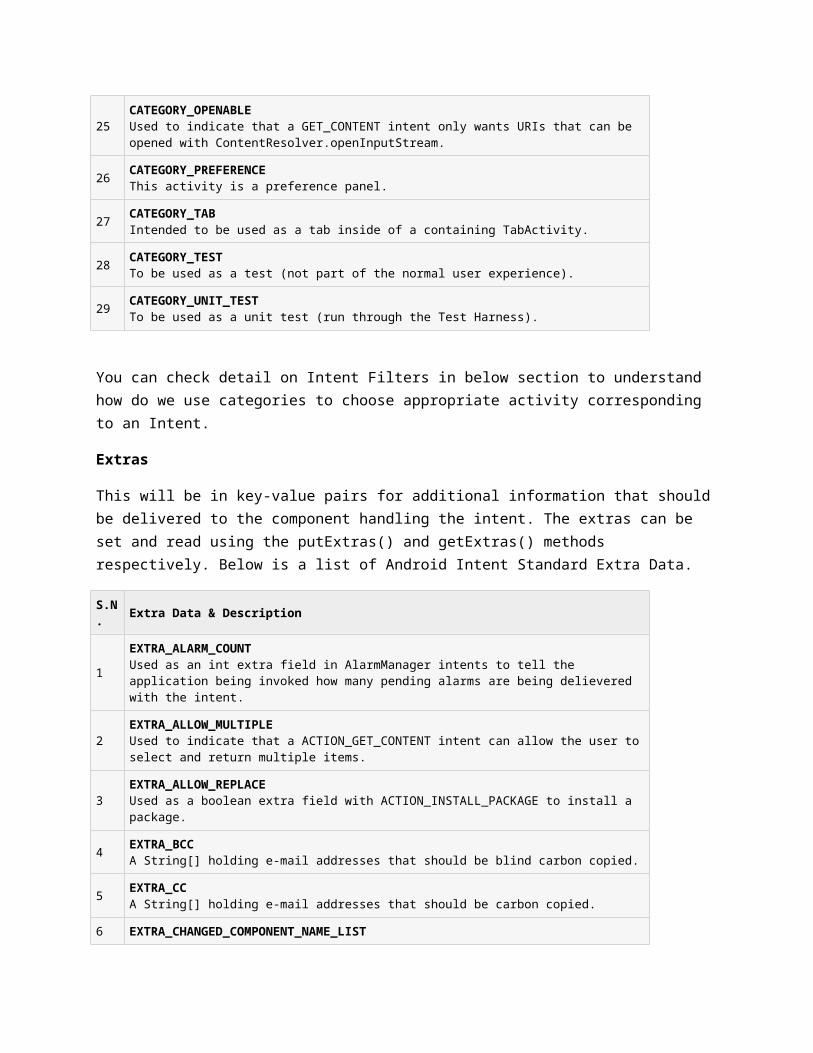
Location Quality of Service
The LocationRequest object is used to request a quality of service (QoS) for location updates from the LocationClient. There are following useful setter methods which you can use to handle QoS. There are equivalent getter methods available which you can check in Android official documentation.
S.N. Method & Description
1setExpirationDuration(long millis) Set the duration of this request, in milliseconds.
2setExpirationTime(long millis) Set the request expiration time, in millisecond since boot.
3setFastestInterval(long millis) Explicitly set the fastest interval for location updates, in milliseconds.
4setInterval(long millis) Set the desired interval for active location updates, in milliseconds.
5setNumUpdates(int numUpdates) Set the number of location updates.
6setPriority(int priority) Set the priority of the request.
For example, if your application wants high accuracy location it should create a location request with setPriority(int) set to PRIORITY_HIGH_ACCURACY and setInterval(long) to 5 seconds. You can also use bigger interval and/or other priorities like PRIORITY_LOW_POWER for to request "city" level accuracy or PRIORITY_BALANCED_POWER_ACCURACY for "block" level accuracy.
NOTE : Activities should strongly consider removing all location request when entering the background (for example at onPause()), or at least swap the request to a larger interval and lower quality to save power consumption.
Displaying a Location Address
Once you have Location object, you can use Geocoder.getFromLocation() method to get an address for a given latitude and longitude. This method is synchronous, and may take a long time to do its work, so you should call the method from the doInBackground() method of an AsyncTask class.
The AsyncTask must be subclassed to be used and the subclass will override doInBackground(Params...) method to perform a task in the background and onPostExecute(Result) method is invoked on the UI thread after the background computation finishes and at the time to display the result. There is one more important method available in AyncTask which is execute(Params... params), this method executes the task with the specified parameters.
Let's create an app to see in practical how to to use Location Services in your app to get the current location and its equivalent addresses etc.
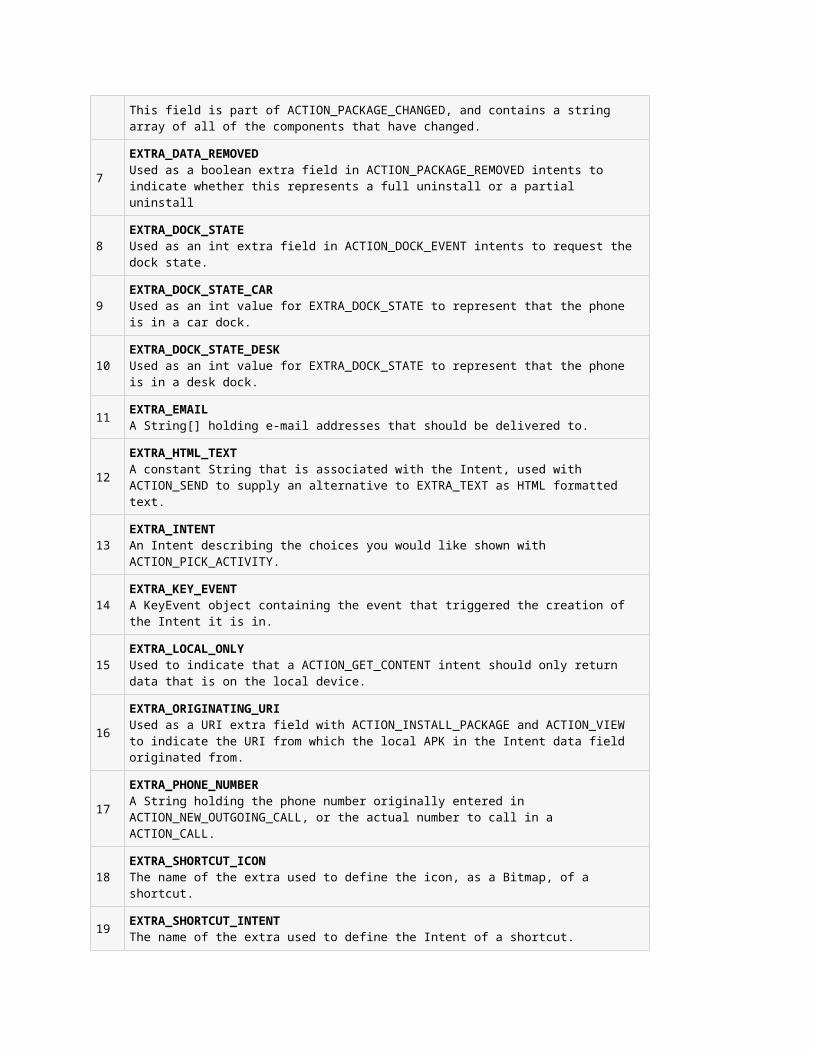
Caution : You will need actual Mobile device equipped with latest Android OS, otherwise you will have to struggle with emulator which may not work.
Install the Google Play Services SDK
Before you proceed to have location support in your Android Applications, you neet to setup Google Play Services SDK using following simple steps:
1. Launch the SDK Manager (From Eclipse (with ADT), select Window > Android SDK Manager)
2. Search for Google Play services option from the given package list under Extra and if its not installed, then install it. The Google Play services SDK is saved in your Android SDK environment at <android-sdk>/extras/google/google_play_services/.
3. If you are using Eclipse, import the library project into your workspace. Click File > Import, select Android > Existing Android Code into Workspace, and browse to <android-sdk>/extras/google/google_play_services/libproject/, to import it.
Create a new Android Application Project in Eclipse. Name it as 'LBSDemo'. While creating this project, make sure you Target SDK and Compile With the latest version of Android SDK to use higher levels of APIs.
Let's add Google Play Service reference in the project. Right click on the project and select Build Path > Configure Build Path > Android > and then scroll right to the bottom. Click Add button which will show google-play-service_lib option to be added, just double click on it, which will add required library reference.

Put following code in 'MainActivity.java' :
import java.io.IOException;import java.util.List;import java.util.Locale;
import com.google.android.gms.common.ConnectionResult;import com.google.android.gms.common.GooglePlayServicesClient;import com.google.android.gms.location.LocationClient;
import android.content.Context;import android.location.Address;import android.location.Geocoder;import android.location.Location;import android.os.AsyncTask;import android.os.Bundle;import android.support.v4.app.FragmentActivity;
import android.util.Log;import android.view.View;import android.widget.Button;import android.widget.TextView;import android.widget.Toast;
public class MainActivity extends FragmentActivity implements GooglePlayServicesClient.ConnectionCallbacks, GooglePlayServicesClient.OnConnectionFailedListener{ LocationClient mLocationClient; private TextView addressLabel; private TextView locationLabel; private Button getLocationBtn; private Button disconnectBtn; private Button connectBtn;
@Override protected void onCreate(Bundle savedInstanceState) { super.onCreate(savedInstanceState); setContentView(R.layout.activity_main);
locationLabel = (TextView) findViewById(R.id.locationLabel); addressLabel = (TextView) findViewById(R.id.addressLabel); getLocationBtn = (Button) findViewById(R.id.getLocation);
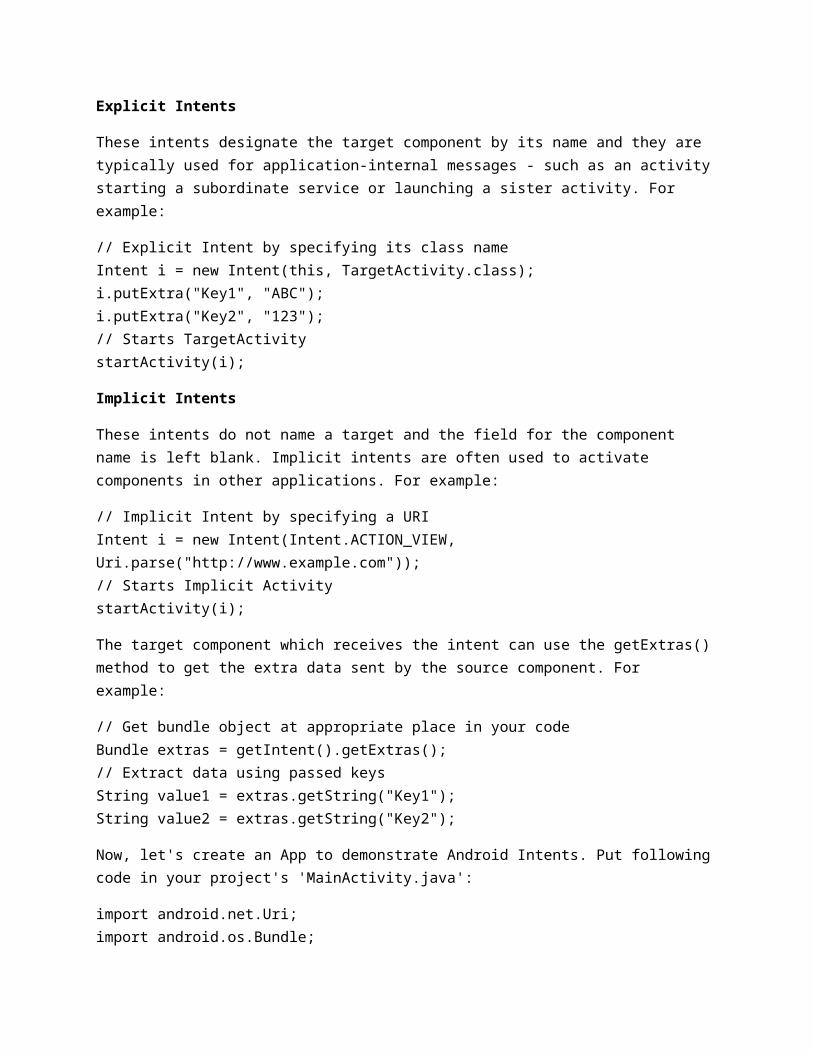
getLocationBtn.setOnClickListener(new View.OnClickListener() { public void onClick(View view) { displayCurrentLocation(); } }); disconnectBtn = (Button) findViewById(R.id.disconnect); disconnectBtn.setOnClickListener(new View.OnClickListener() { public void onClick(View view) { mLocationClient.disconnect(); locationLabel.setText("Got disconnected...."); } }); connectBtn = (Button) findViewById(R.id.connect); connectBtn.setOnClickListener(new View.OnClickListener() { public void onClick(View view) { mLocationClient.connect(); locationLabel.setText("Got connected...."); } }); // Create the LocationRequest object mLocationClient = new LocationClient(this, this, this); } @Override protected void onStart() { super.onStart(); // Connect the client. mLocationClient.connect(); locationLabel.setText("Got connected...."); } @Override protected void onStop() { // Disconnect the client. mLocationClient.disconnect(); super.onStop(); locationLabel.setText("Got disconnected...."); } @Override public void onConnected(Bundle dataBundle) { // Display the connection status Toast.makeText(this, "Connected", Toast.LENGTH_SHORT).show(); }
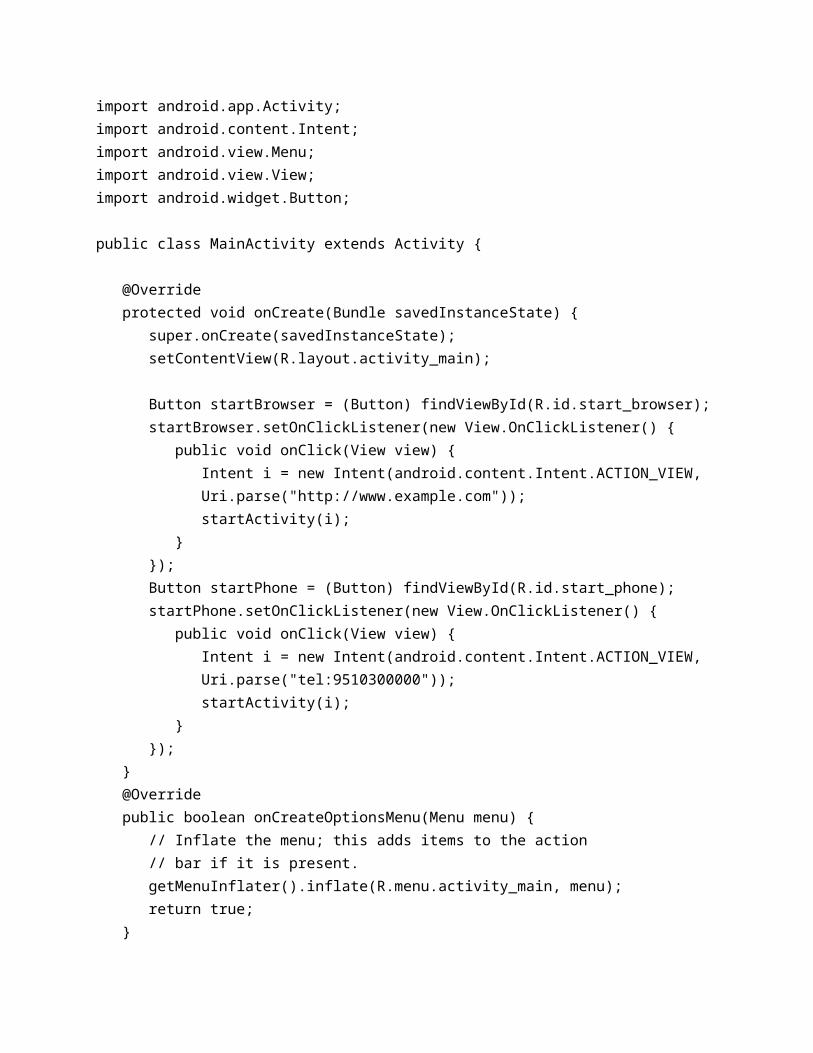
@Override public void onDisconnected() { // Display the connection status Toast.makeText(this, "Disconnected. Please re-connect.", Toast.LENGTH_SHORT).show(); } @Override public void onConnectionFailed(ConnectionResult connectionResult) { // Display the error code on failure Toast.makeText(this, "Connection Failure : " + connectionResult.getErrorCode(), Toast.LENGTH_SHORT).show(); } public void displayCurrentLocation() { // Get the current location's latitude & longitude Location currentLocation = mLocationClient.getLastLocation(); String msg = "Current Location: " + Double.toString(currentLocation.getLatitude()) + "," + Double.toString(currentLocation.getLongitude()); // Display the current location in the UI locationLabel.setText(msg); // To display the current address in the UI (new GetAddressTask(this)).execute(currentLocation); } /* * Following is a subclass of AsyncTask which has been used to get * address corresponding to the given latitude & longitude. */ private class GetAddressTask extends AsyncTask<Location, Void, String>{ Context mContext; public GetAddressTask(Context context) { super(); mContext = context; }
/* * When the task finishes, onPostExecute() displays the address. */ @Override protected void onPostExecute(String address) { // Display the current address in the UI addressLabel.setText(address); }
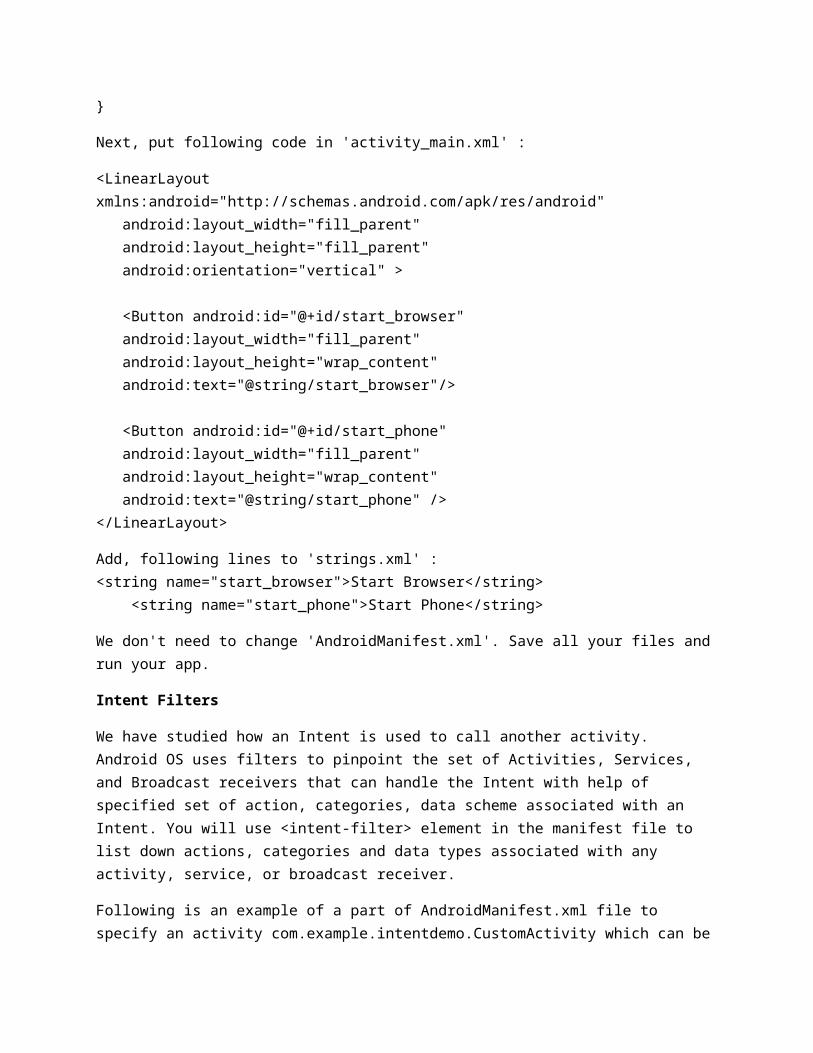
@Override protected String doInBackground(Location... params) { Geocoder geocoder = new Geocoder(mContext, Locale.getDefault()); // Get the current location from the input parameter list Location loc = params[0]; // Create a list to contain the result address List<Address> addresses = null; try { addresses = geocoder.getFromLocation(loc.getLatitude(), loc.getLongitude(), 1); } catch (IOException e1) { Log.e("LocationSampleActivity", "IO Exception in getFromLocation()"); e1.printStackTrace(); return ("IO Exception trying to get address"); } catch (IllegalArgumentException e2) { // Error message to post in the log String errorString = "Illegal arguments " + Double.toString(loc.getLatitude()) + " , " + Double.toString(loc.getLongitude()) + " passed to address service"; Log.e("LocationSampleActivity", errorString); e2.printStackTrace(); return errorString; } // If the reverse geocode returned an address if (addresses != null && addresses.size() > 0) { // Get the first address Address address = addresses.get(0); /* * Format the first line of address (if available), * city, and country name. * If there's a street address, add it */ String addressText = String.format("%s, %s, %s", address.getMaxAddressLineIndex() > 0 ? address.getAddressLine(0) : "", address.getLocality(), address.getCountryName()); // Return the text return addressText; } else { return "No address found"; } } }// AsyncTask class}
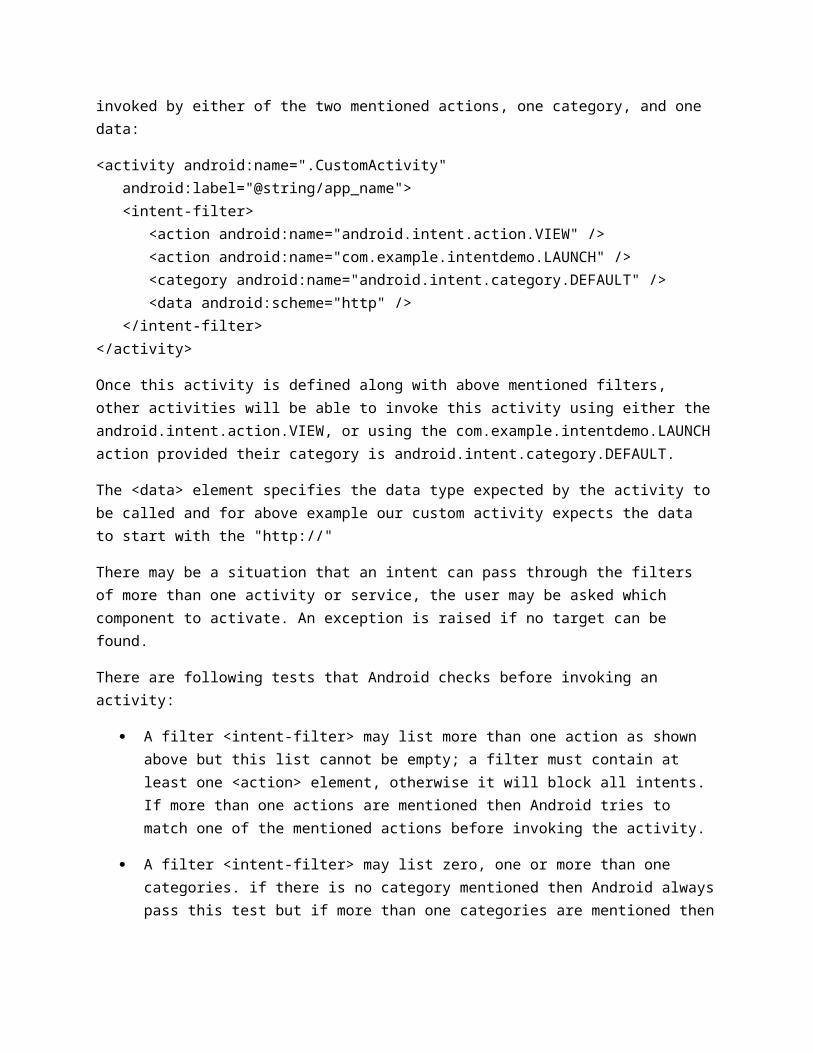
Put following code in 'activity_main.xml' :
<LinearLayout xmlns:android="http://schemas.android.com/apk/res/android" android:layout_width="fill_parent" android:layout_height="fill_parent" android:orientation="vertical" >
<Button android:id="@+id/getLocation" android:layout_width="fill_parent" android:layout_height="wrap_content" android:text="@string/get_location"/>
<Button android:id="@+id/disconnect" android:layout_width="fill_parent" android:layout_height="wrap_content" android:text="@string/disconnect"/> <Button android:id="@+id/connect" android:layout_width="fill_parent" android:layout_height="wrap_content" android:text="@string/connect"/> <TextView android:id="@+id/locationLabel" android:layout_width="wrap_content" android:layout_height="wrap_content"/> <TextView android:id="@+id/addressLabel" android:layout_width="wrap_content" android:layout_height="wrap_content"/></LinearLayout>
Add following entries to 'strings.xml' :
<string name="get_location">Get Location</string> <string name="disconnect">Disconnect Service</string> <string name="connect">Connect Service</string>
Put following code to your 'AndroidManifest.xml' :
<?xml version="1.0" encoding="utf-8"?><manifest xmlns:android="http://schemas.android.com/apk/res/android"
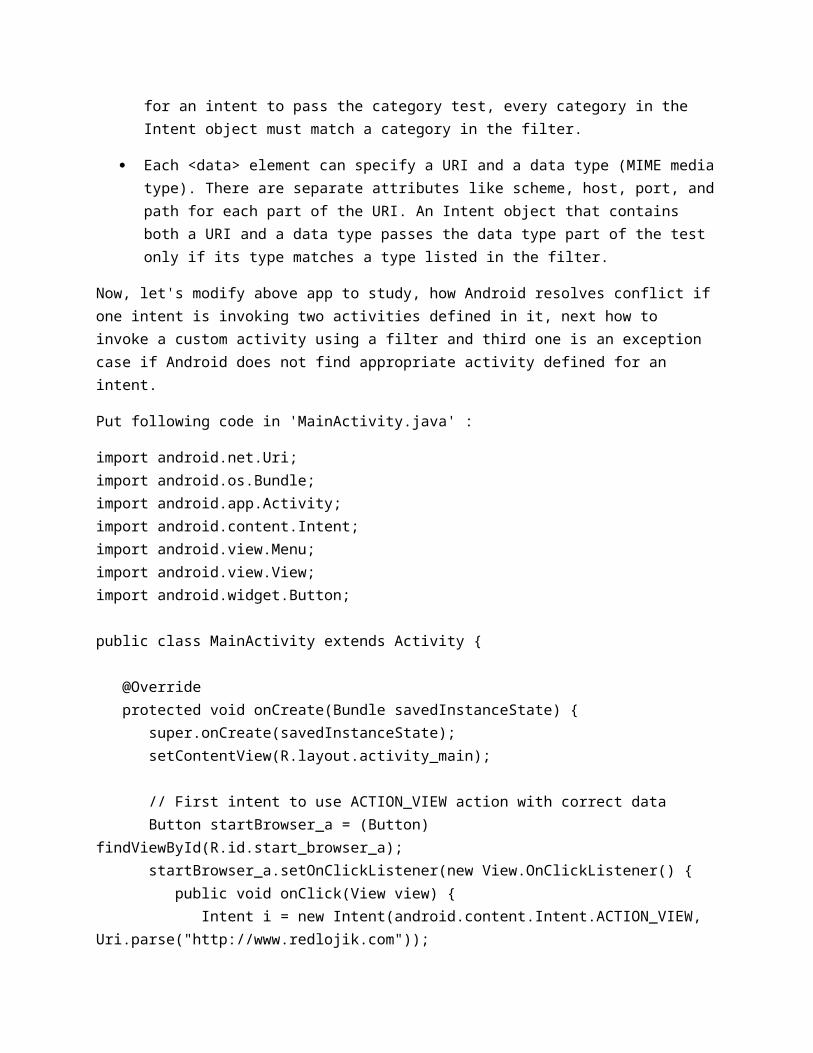
package="com.example.lbsdemo" android:versionCode="1" android:versionName="1.0" >
<uses-sdk android:minSdkVersion="14" android:targetSdkVersion="17" /> <uses-permission android:name="android.permission.ACCESS_COARSE_LOCATION"/>
<application android:allowBackup="true" android:icon="@drawable/ic_launcher" android:label="@string/app_name" android:theme="@style/AppTheme" > <meta-data android:name="com.google.android.gms.version" android:value="@integer/google_play_services_version" /> <activity android:name="com.example.lbsdemo.MainActivity" android:label="@string/app_name" > <intent-filter> <action android:name="android.intent.action.MAIN" />
<category android:name="android.intent.category.LAUNCHER" /> </intent-filter> </activity> </application></manifest>
Now, run your app. If it doesn't run properly on emulator then connect your android phone to the computer and then run the app on your android phone.
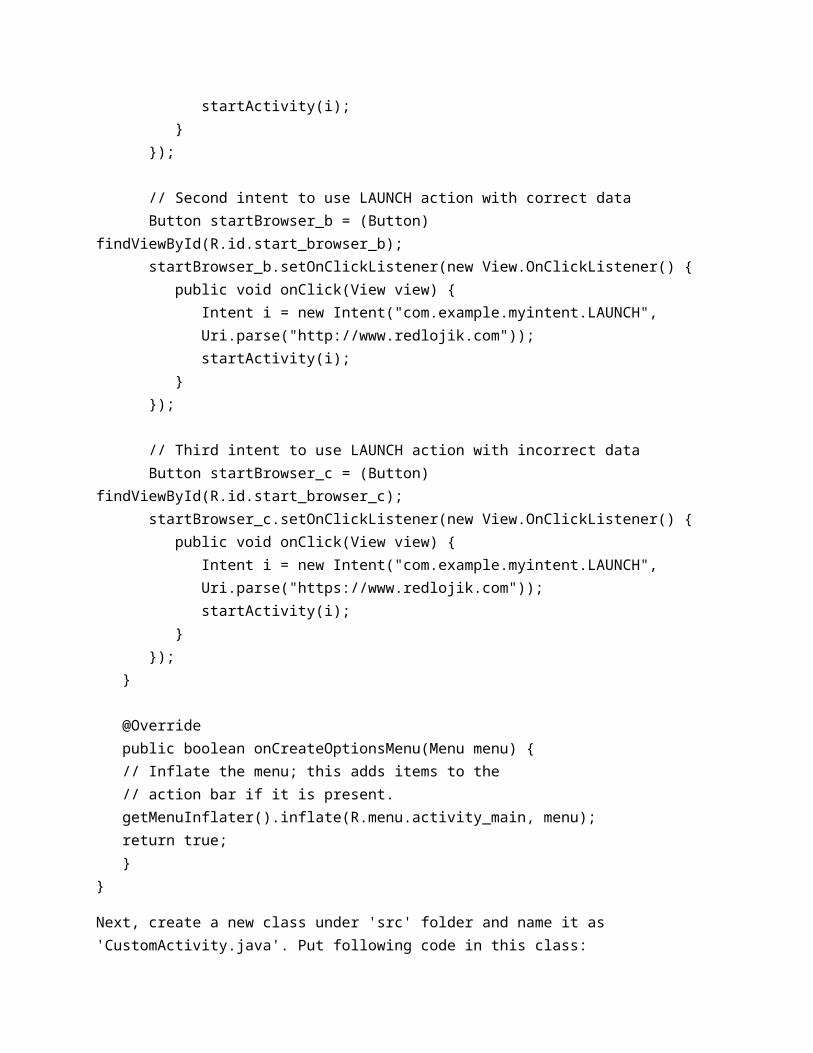
Send Email
We have learnt Android Intent, which is an object carrying an intent ie. message from one component to another component with-in the application or outside the application.
To send email from your Android app, you will have to write an Activity that needs to launch an email client and sends an email using your Android device. For this purpose, your Activity will send an ACTION_SEND along with appropriate data load, to the Android Intent Resolver. The specified chooser gives the proper interface for the user to pick how to send your email data.
Intent Object - Action to send Email
You will use ACTION_SEND action to launch an email client installed on your Android device. Following is simple syntax to create an intent with ACTION_SEND action
Intent emailIntent = new Intent(Intent.ACTION_SEND);
Intent Object - Data/Type to send Email
To send an email you need to specify mailto: as URI using setData() method and data type will be to text/plain using setType() method as follows:
emailIntent.setData(Uri.parse("mailto:"));emailIntent.setType("text/plain");
Intent Object - Extra to send Email
Android has built-in support to add TO, SUBJECT, CC, TEXT etc. fields which can be attached to the intent before sending the intent to a target email client. You can use following extra fields in your email:
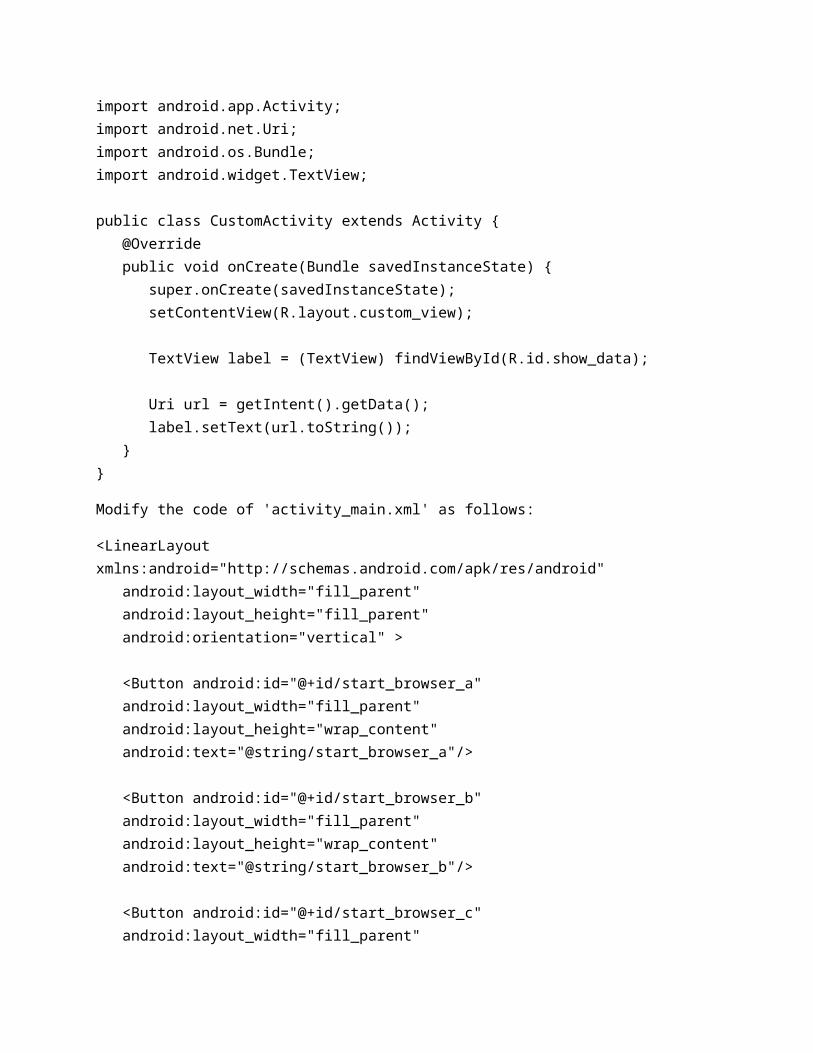
S.N. Extra Data & Description
1EXTRA_BCC A String[] holding e-mail addresses that should be blind carbon copied.
2EXTRA_CC A String[] holding e-mail addresses that should be carbon copied.
3EXTRA_EMAIL A String[] holding e-mail addresses that should be delivered to.
4EXTRA_HTML_TEXT A constant String that is associated with the Intent, used with ACTION_SEND to supply an alternative to EXTRA_TEXT as HTML formatted text.
5EXTRA_SUBJECT A constant string holding the desired subject line of a message.
6EXTRA_TEXT A constant CharSequence that is associated with the Intent, used with ACTION_SEND to supply the literal data to be sent.
7EXTRA_TITLE A CharSequence dialog title to provide to the user when used with a ACTION_CHOOSER.
Here is an example showing you how to assign extra data to your intent:
emailIntent.putExtra(Intent.EXTRA_EMAIL , new String[]{"[email protected]"});emailIntent.putExtra(Intent.EXTRA_SUBJECT, "subject of email");emailIntent.putExtra(Intent.EXTRA_TEXT , "body of email");
Let's create an app to demonstrate email sending. Create a new app in eclipse and name it as 'SendEmailDemo'. Put following code in your 'MainActivity.java' :
import android.net.Uri;import android.os.Bundle;import android.app.Activity;import android.content.Intent;import android.util.Log;import android.view.Menu;import android.view.View;import android.widget.Button;import android.widget.Toast;
public class MainActivity extends Activity {
@Override protected void onCreate(Bundle savedInstanceState) { super.onCreate(savedInstanceState); setContentView(R.layout.activity_main);
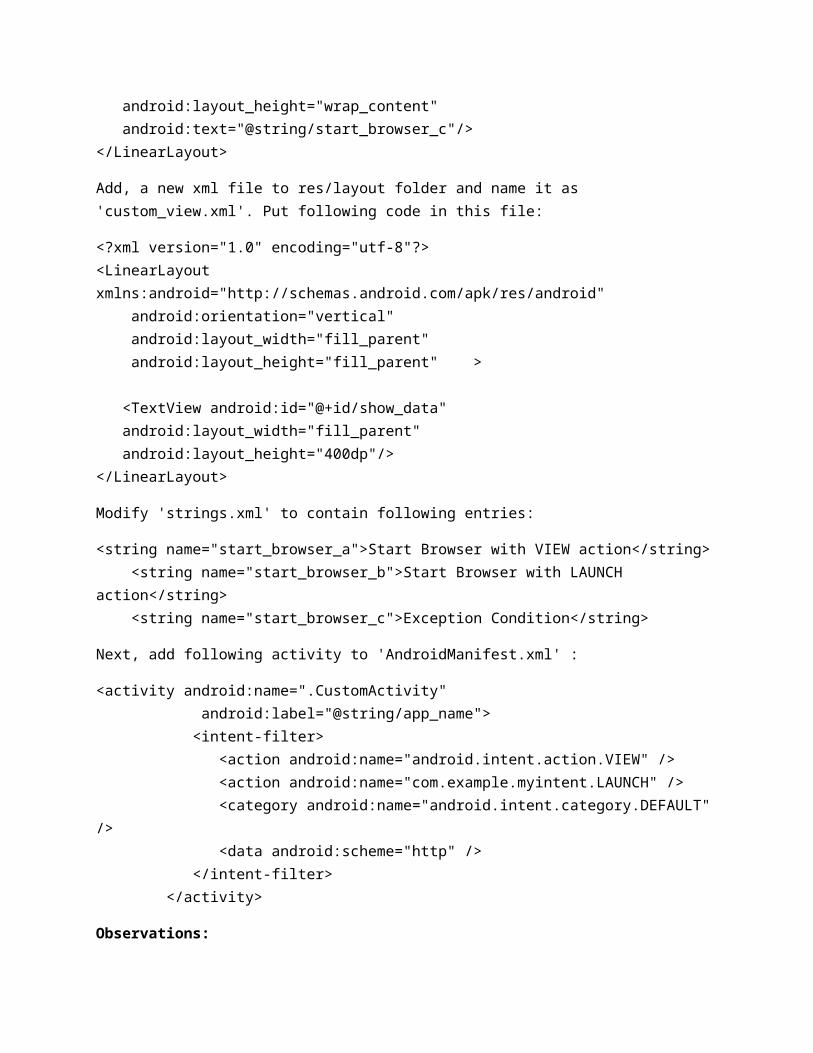
Button startBtn = (Button) findViewById(R.id.sendEmail); startBtn.setOnClickListener(new View.OnClickListener() { public void onClick(View view) { sendEmail(); } });
} protected void sendEmail() { Log.i("Send email", "");
String[] TO = {"[email protected]"}; String[] CC = {"[email protected]"}; Intent emailIntent = new Intent(Intent.ACTION_SEND); emailIntent.setData(Uri.parse("mailto:")); emailIntent.setType("text/plain");
emailIntent.putExtra(Intent.EXTRA_EMAIL, TO); emailIntent.putExtra(Intent.EXTRA_CC, CC); emailIntent.putExtra(Intent.EXTRA_SUBJECT, "Your subject"); emailIntent.putExtra(Intent.EXTRA_TEXT, "Email message goes here");
try { startActivity(Intent.createChooser(emailIntent, "Send mail...")); finish(); Log.i("Finished sending email...", ""); } catch (android.content.ActivityNotFoundException ex) { Toast.makeText(MainActivity.this, "There is no email client installed.", Toast.LENGTH_SHORT).show(); } } @Override public boolean onCreateOptionsMenu(Menu menu) { // Inflate the menu; this adds items to the action bar if it is present. getMenuInflater().inflate(R.menu.main, menu); return true; }}
Put following code in 'activity_main.xml' :
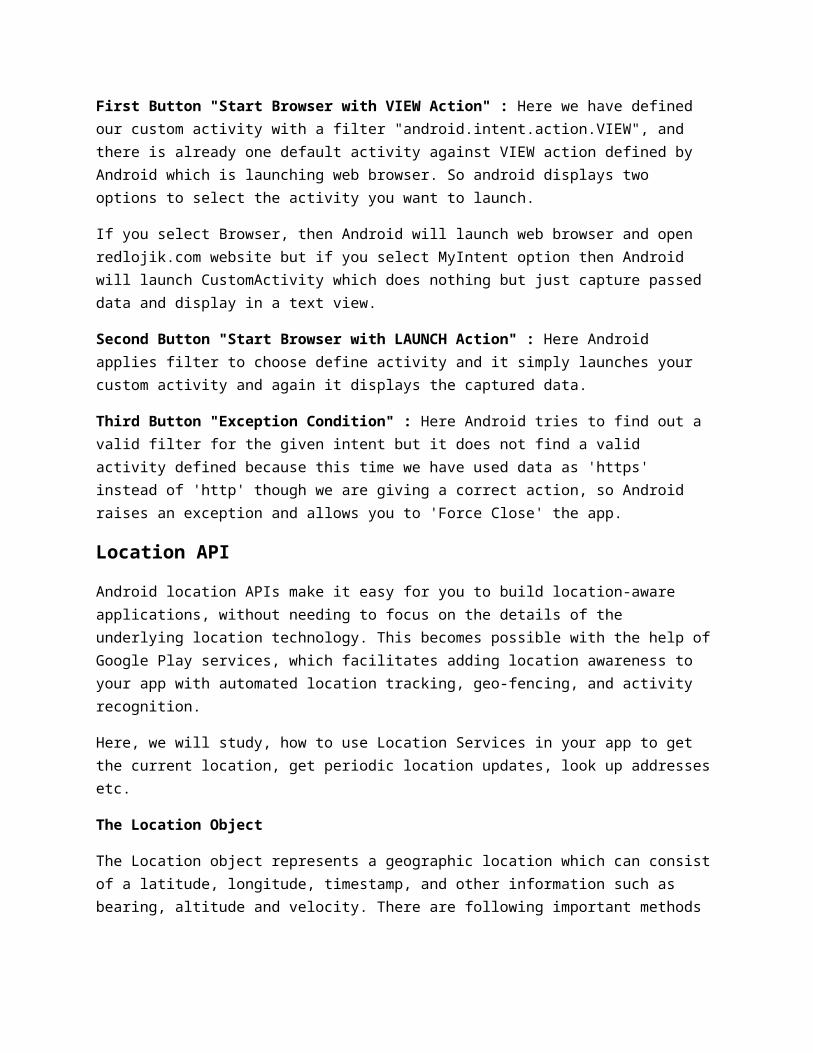
<LinearLayout xmlns:android="http://schemas.android.com/apk/res/android" android:layout_width="fill_parent" android:layout_height="fill_parent" android:orientation="vertical" >
<Button android:id="@+id/sendEmail" android:layout_width="fill_parent" android:layout_height="wrap_content" android:text="@string/compose_email"/></LinearLayout>
Add following entry to your 'strings.xml' :
<string name="compose_email">Compose Email</string>
There is no change / modification to your default 'AndroidManifest.xml'. Run your app.
Sending SMS
There are following two ways to send SMS using Android device:
Using SmsManager to send SMS Using Built-in Intent to send SMS
Using SmsManager to send SMS
The SmsManager manages SMS operations such as sending data to the given mobile device. You can create this object by calling the static method SmsManager.getDefault() as follows:
SmsManager smsManager = SmsManager.getDefault();
Once you have SmsManager object, you can use sendDataMessage() method to send SMS at the specified mobile number as below:
smsManager.sendTextMessage("phoneNo", null, "SMS text", null, null);
Apart from the above method, there are few other important functions available in SmsManager class. These methods are listed below:
S.N. Method & Description
1ArrayList<String> divideMessage(String text) This method divides a message text into several fragments, none bigger than the maximum SMS message size.
2static SmsManager getDefault() This method is used to get the default instance of the SmsManager
3 void sendDataMessage(String destinationAddress, String scAddress, short
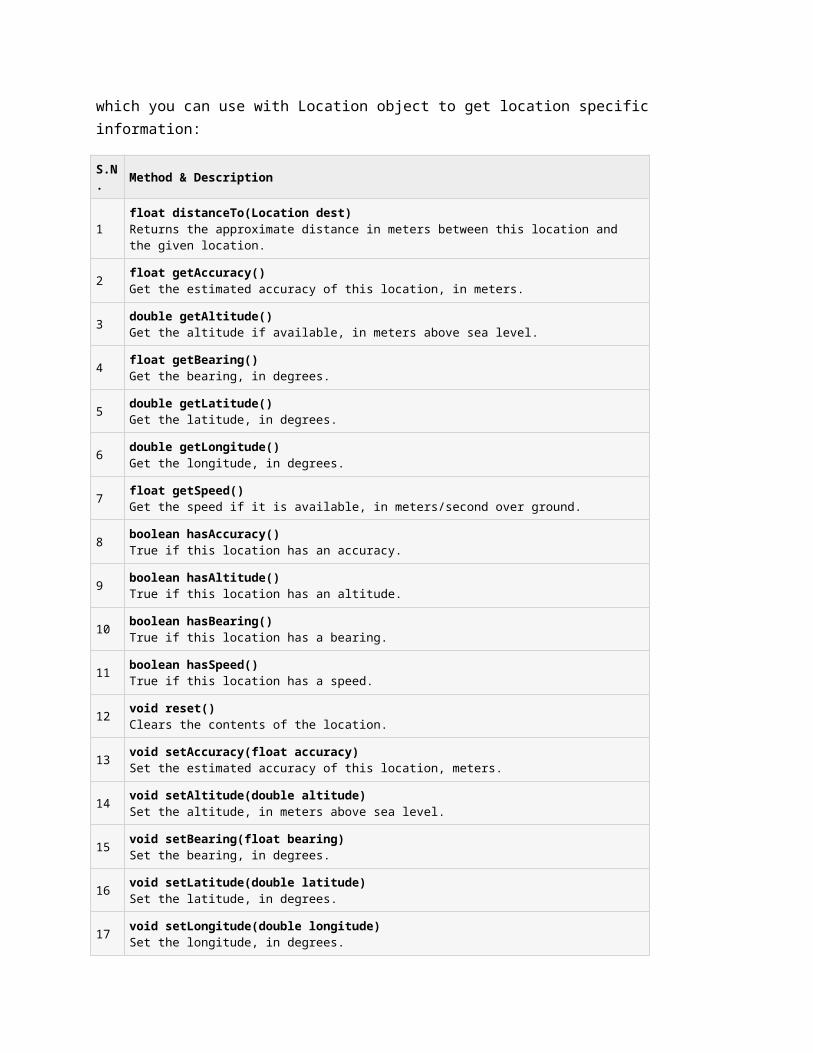
destinationPort, byte[] data, PendingIntent sentIntent, PendingIntent deliveryIntent) This method is used to send a data based SMS to a specific application port.
4
void sendMultipartTextMessage(String destinationAddress, String scAddress, ArrayList<String> parts, ArrayList<PendingIntent> sentIntents, ArrayList<PendingIntent> deliveryIntents) Send a multi-part text based SMS.
5void sendTextMessage(String destinationAddress, String scAddress, String text, PendingIntent sentIntent, PendingIntent deliveryIntent) Send a text based SMS.
Let's create an app to study in practical how to use SmsManager object to send an SMS to the given mobile number. Put following code in your 'MainActivity.java' :
import android.os.Bundle;import android.app.Activity;import android.telephony.SmsManager;import android.util.Log;import android.view.Menu;import android.view.View;import android.widget.Button;import android.widget.EditText;import android.widget.Toast;
public class MainActivity extends Activity {
Button sendBtn; EditText txtphoneNo; EditText txtMessage;
@Override protected void onCreate(Bundle savedInstanceState) { super.onCreate(savedInstanceState); setContentView(R.layout.activity_main);
sendBtn = (Button) findViewById(R.id.btnSendSMS); txtphoneNo = (EditText) findViewById(R.id.editTextPhoneNo); txtMessage = (EditText) findViewById(R.id.editTextSMS);
sendBtn.setOnClickListener(new View.OnClickListener() { public void onClick(View view) { sendSMSMessage(); } });
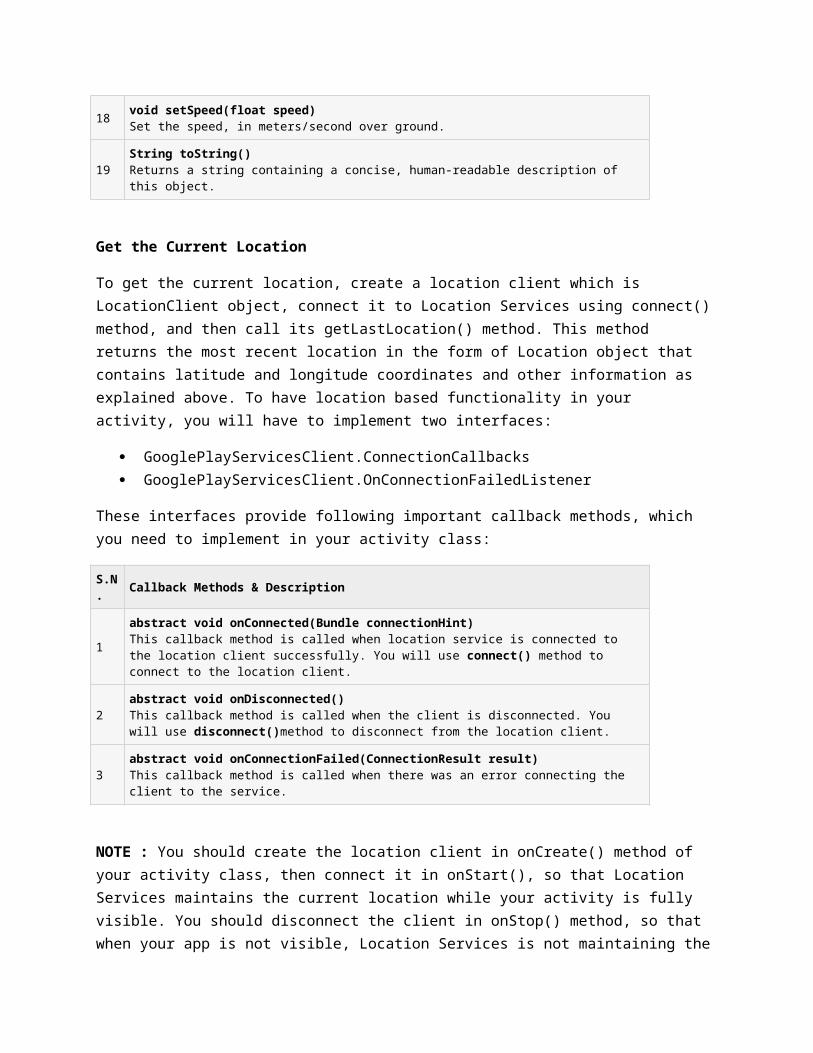
} protected void sendSMSMessage() { Log.i("Send SMS", "");
String phoneNo = txtphoneNo.getText().toString(); String message = txtMessage.getText().toString();
try { SmsManager smsManager = SmsManager.getDefault(); smsManager.sendTextMessage(phoneNo, null, message, null, null); Toast.makeText(getApplicationContext(), "SMS sent.", Toast.LENGTH_LONG).show(); } catch (Exception e) { Toast.makeText(getApplicationContext(), "SMS faild, please try again.", Toast.LENGTH_LONG).show(); e.printStackTrace(); } } @Override public boolean onCreateOptionsMenu(Menu menu) { // Inflate the menu; this adds items to the action bar if it is present. getMenuInflater().inflate(R.menu.main, menu); return true; }}
Modify your 'activity_main.xml' as follows:
<LinearLayout xmlns:android="http://schemas.android.com/apk/res/android"android:layout_width="fill_parent"android:layout_height="fill_parent"android:orientation="vertical" >
<TextView android:id="@+id/textViewPhoneNo" android:layout_width="wrap_content" android:layout_height="wrap_content" android:text="@string/phone_label" />
<EditText
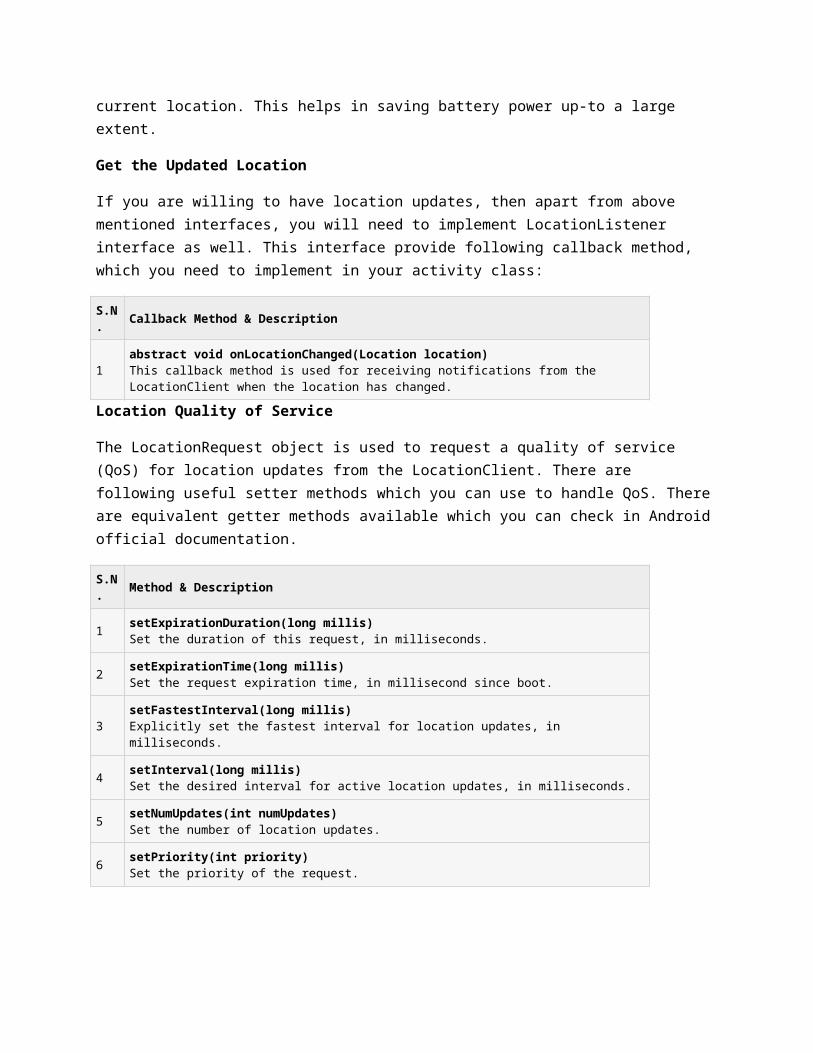
android:id="@+id/editTextPhoneNo" android:layout_width="fill_parent" android:layout_height="wrap_content" android:inputType="phone"/>
<TextView android:id="@+id/textViewMessage" android:layout_width="wrap_content" android:layout_height="wrap_content" android:text="@string/sms_label" />
<EditText android:id="@+id/editTextSMS" android:layout_width="fill_parent" android:layout_height="wrap_content" android:inputType="textMultiLine"/>
<Button android:id="@+id/btnSendSMS" android:layout_width="fill_parent" android:layout_height="wrap_content" android:text="@string/send_sms_label"/></LinearLayout>
Add following entries to your 'strings.xml' :
<string name="phone_label">Enter Phone Number:</string> <string name="sms_label">Enter SMS Message:</string> <string name="send_sms_label">Send SMS</string>
Put following code in 'AndroidManifest.xml' :
<?xml version="1.0" encoding="utf-8"?><manifest xmlns:android="http://schemas.android.com/apk/res/android" package="com.example.sendsmsdemo" android:versionCode="1" android:versionName="1.0" >
<uses-sdk android:minSdkVersion="8" android:targetSdkVersion="17" /> <uses-permission android:name="android.permission.SEND_SMS" />
<application
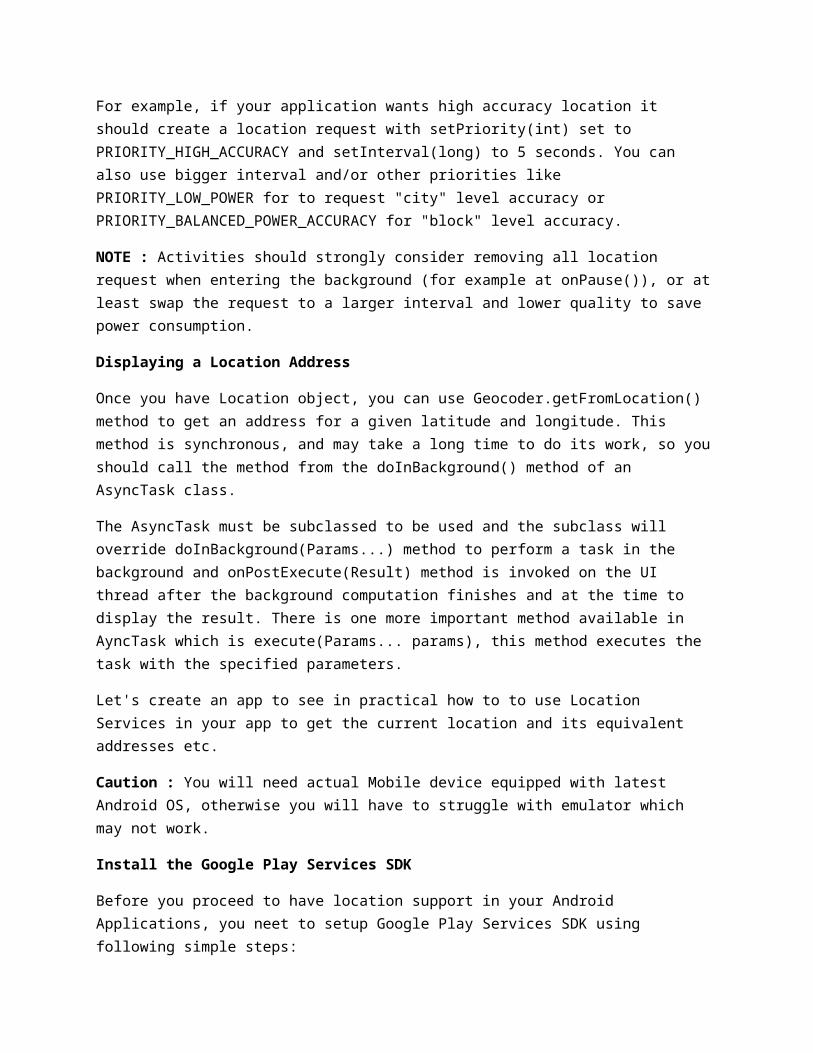
android:allowBackup="true" android:icon="@drawable/ic_launcher" android:label="@string/app_name" android:theme="@style/AppTheme" > <activity android:name="com.example.sendsmsdemo.MainActivity" android:label="@string/app_name" > <intent-filter> <action android:name="android.intent.action.MAIN" />
<category android:name="android.intent.category.LAUNCHER" /> </intent-filter> </activity> </application></manifest>
Run your app. If you want to send SMS to many numbers, accept those numbers separated by comma and then inside your program you will have to parse them into an array string and finally you can use a loop to send message to all the given numbers.
Using Built-in Intent to send SMS
You can use Android Intent to send SMS by calling built-in SMS functionality of the Android. Below section explains different parts of our Intent object required to send an SMS.
Intent Object - Action to send SMS
You will use ACTION_VIEW action to launch an SMS client installed on your Android device. Following is simple syntax to create an intent with ACTION_VIEW action
Intent smsIntent = new Intent(Intent.ACTION_VIEW);
Intent Object - Data/Type to send SMS
To send an SMS you need to specify smsto: as URI using setData() method and data type will be to vnd.android-dir/mms-sms using setType() method as follows:
smsIntent.setData(Uri.parse("smsto:"));smsIntent.setType("vnd.android-dir/mms-sms");
Intent Object - Extra to send SMS
Android has built-in support to add phone number and text message to send an SMS as follows:
smsIntent.putExtra("address" , new String("0123456789;9876543210"));smsIntent.putExtra("sms_body" , "Some Message");
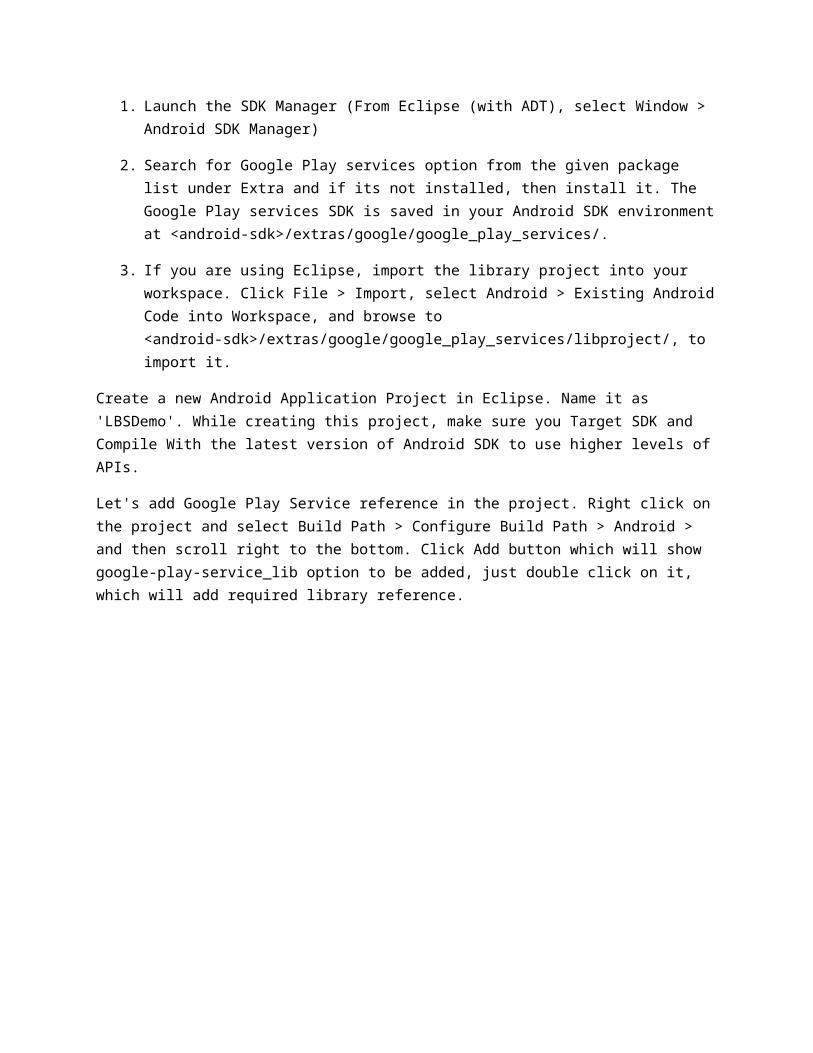
Here address and sms_body are case sensitive and should be specified in small characters only. You can specify more than one number in single string but separated by semi-colon (;).
Let’s create an app to demonstrate using built-in intent to send SMS. Put following code in ‘MainActivity.java’ :
import android.net.Uri;import android.os.Bundle;import android.app.Activity;import android.content.Intent;import android.util.Log;import android.view.Menu;import android.view.View;import android.widget.Button;import android.widget.Toast;
public class MainActivity extends Activity {
@Override protected void onCreate(Bundle savedInstanceState) { super.onCreate(savedInstanceState); setContentView(R.layout.activity_main);
Button startBtn = (Button) findViewById(R.id.sendSMS); startBtn.setOnClickListener(new View.OnClickListener() { public void onClick(View view) { sendSMS(); } });
} protected void sendSMS() { Log.i("Send SMS", "");
Intent smsIntent = new Intent(Intent.ACTION_VIEW); smsIntent.setData(Uri.parse("smsto:")); smsIntent.setType("vnd.android-dir/mms-sms");
smsIntent.putExtra("address" , new String ("0123456789")); smsIntent.putExtra("sms_body" , "Test SMS to Angilla"); try { startActivity(smsIntent);
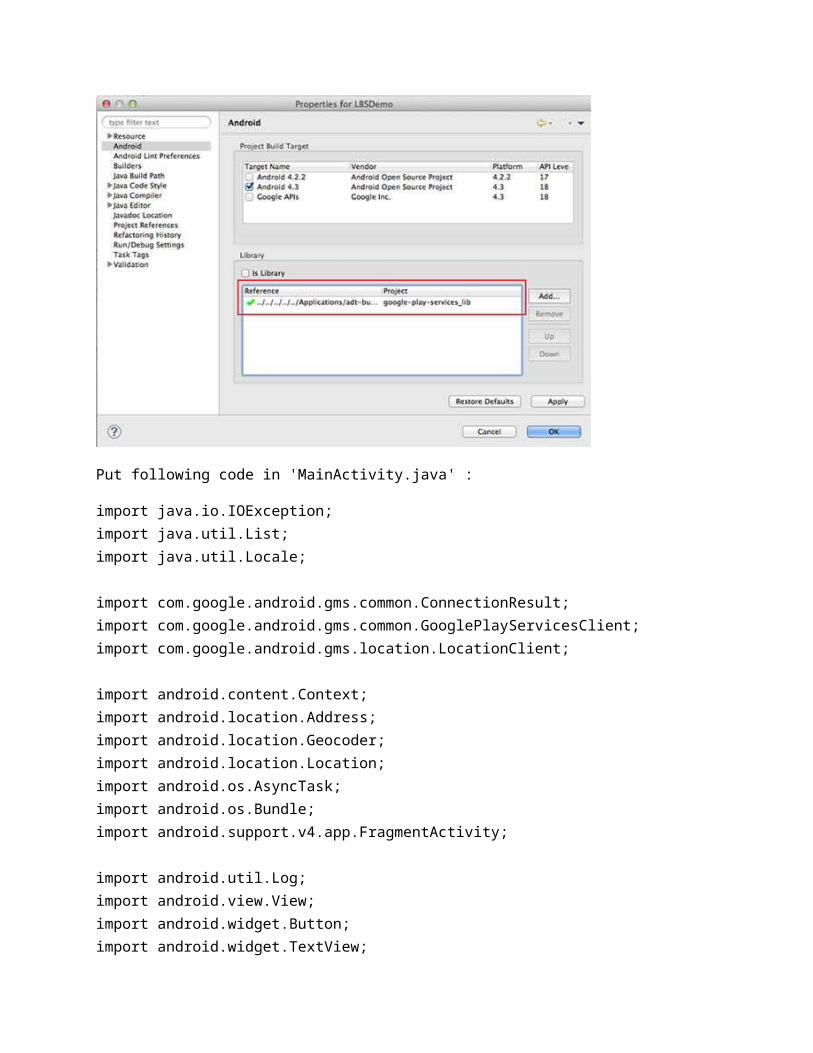
finish(); Log.i("Finished sending SMS...", ""); } catch (android.content.ActivityNotFoundException ex) { Toast.makeText(MainActivity.this, "SMS faild, please try again later.", Toast.LENGTH_SHORT).show(); } } @Override public boolean onCreateOptionsMenu(Menu menu) { // Inflate the menu; this adds items to the action bar if it is present. getMenuInflater().inflate(R.menu.main, menu); return true; }}
Next, put following code in ‘activity_main.xml’ :
<LinearLayout xmlns:android="http://schemas.android.com/apk/res/android" android:layout_width="fill_parent" android:layout_height="fill_parent" android:orientation="vertical" >
<Button android:id="@+id/sendSMS" android:layout_width="fill_parent" android:layout_height="wrap_content" android:text="@string/compose_sms"/></LinearLayout>
Add following entry to ‘strings.xml’ :
<string name="compose_sms">Compose SMS</string>
There is no change to the default ‘AndroidManifest.xml’. Run your app.
Making a Phone Call
You can use Android Intent to make phone call by calling built-in Phone Call functionality of the Android. Following section explains different parts of our Intent object required to make a call.
Intent Object - Action to make Phone Call
You will use ACTION_CALL action to trigger built-in phone call functionality available in Android device. Following is simple syntax to create intent with ACTION_CALL action
Intent phoneIntent = new Intent(Intent.ACTION_CALL);
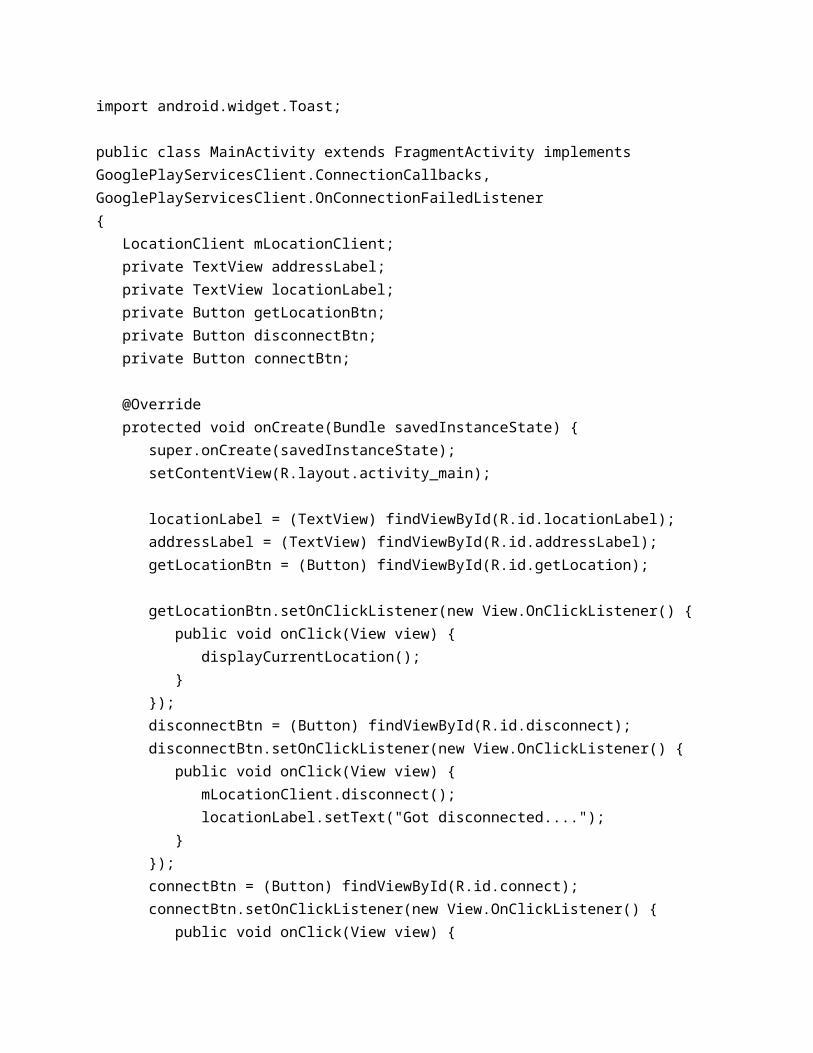
You can use ACTION_DIAL action instead of ACTION_CALL, in that case you will have option to modify hardcoded phone number before making a call instead of making a direct call.
Intent Object - Data/Type to make Phone Call
To make a phone call at a given number 91-800-001-0101, you need to specify tel: as URI using setData() method as follows:
phoneIntent.setData(Uri.parse("tel:91-800-001-0101"));
The interesting point is that, to make a phone call, you do not need to specify any extra data or data type.
Let’s create an app to demonstrate a Phone Call. Create new project in eclipse and name it as ‘PhoneCallDemo’. Put following code in ‘MainActivity.java’ :import android.net.Uri;import android.os.Bundle;import android.app.Activity;import android.content.Intent;import android.util.Log;import android.view.Menu;import android.view.View;import android.widget.Button;import android.widget.Toast;
public class MainActivity extends Activity {
@Override protected void onCreate(Bundle savedInstanceState) { super.onCreate(savedInstanceState); setContentView(R.layout.activity_main);
Button startBtn = (Button) findViewById(R.id.makeCall); startBtn.setOnClickListener(new View.OnClickListener() { public void onClick(View view) { makeCall(); } }); } protected void makeCall() { Log.i("Make call", "");
Intent phoneIntent = new Intent(Intent.ACTION_CALL);
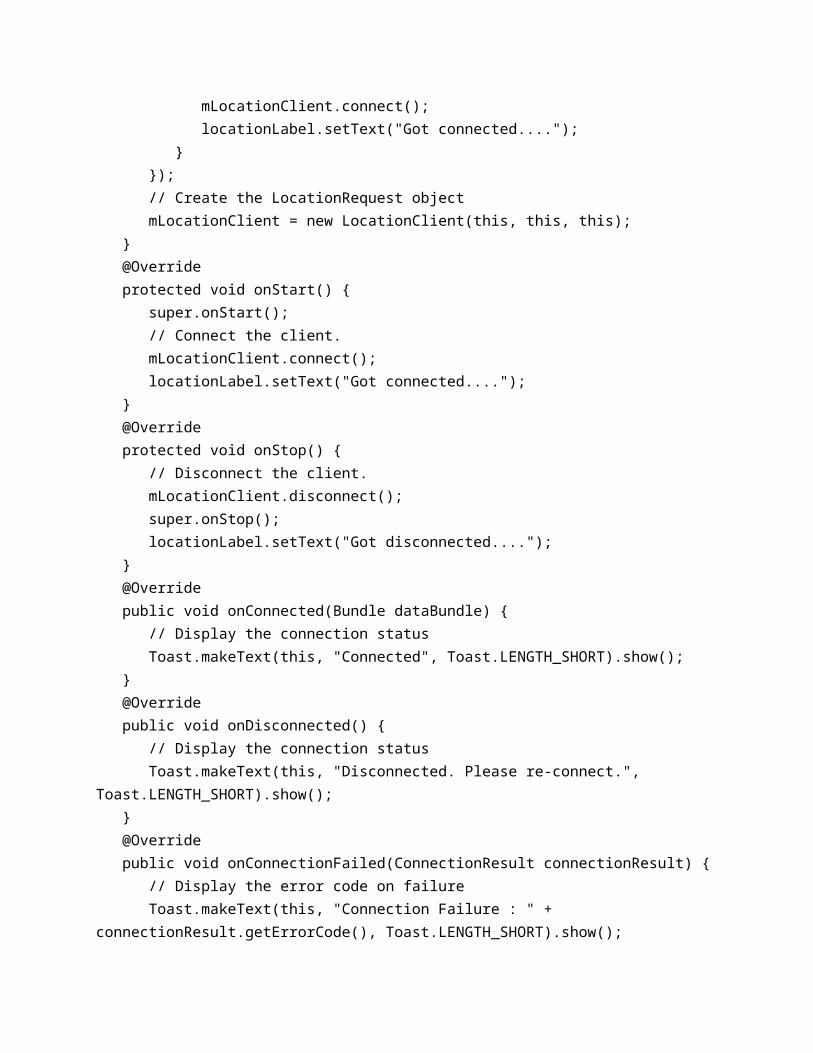
phoneIntent.setData(Uri.parse("tel:9867010106"));
try { startActivity(phoneIntent); finish(); Log.i("Finished making a call...", ""); } catch (android.content.ActivityNotFoundException ex) { Toast.makeText(MainActivity.this, "Call failed, please try again later.", Toast.LENGTH_SHORT).show(); } } @Override public boolean onCreateOptionsMenu(Menu menu) { // Inflate the menu; this adds items to the action bar if it is present. getMenuInflater().inflate(R.menu.main, menu); return true; }}
Put following code in 'activity_main.xml' :
<LinearLayout xmlns:android="http://schemas.android.com/apk/res/android" android:layout_width="fill_parent" android:layout_height="fill_parent" android:orientation="vertical" >
<Button android:id="@+id/makeCall" android:layout_width="fill_parent" android:layout_height="wrap_content" android:text="@string/make_call"/></LinearLayout>
Add following entry to ‘strings.xml’ :
<string name="make_call">Make a Call</string>
You need to add permission to make a call to ‘AndroidManifest.xml’. Put following code to ‘AndroidManifest.xml’ :
<?xml version="1.0" encoding="utf-8"?><manifest xmlns:android="http://schemas.android.com/apk/res/android" package="com.example.phonecalldemo" android:versionCode="1" android:versionName="1.0" >
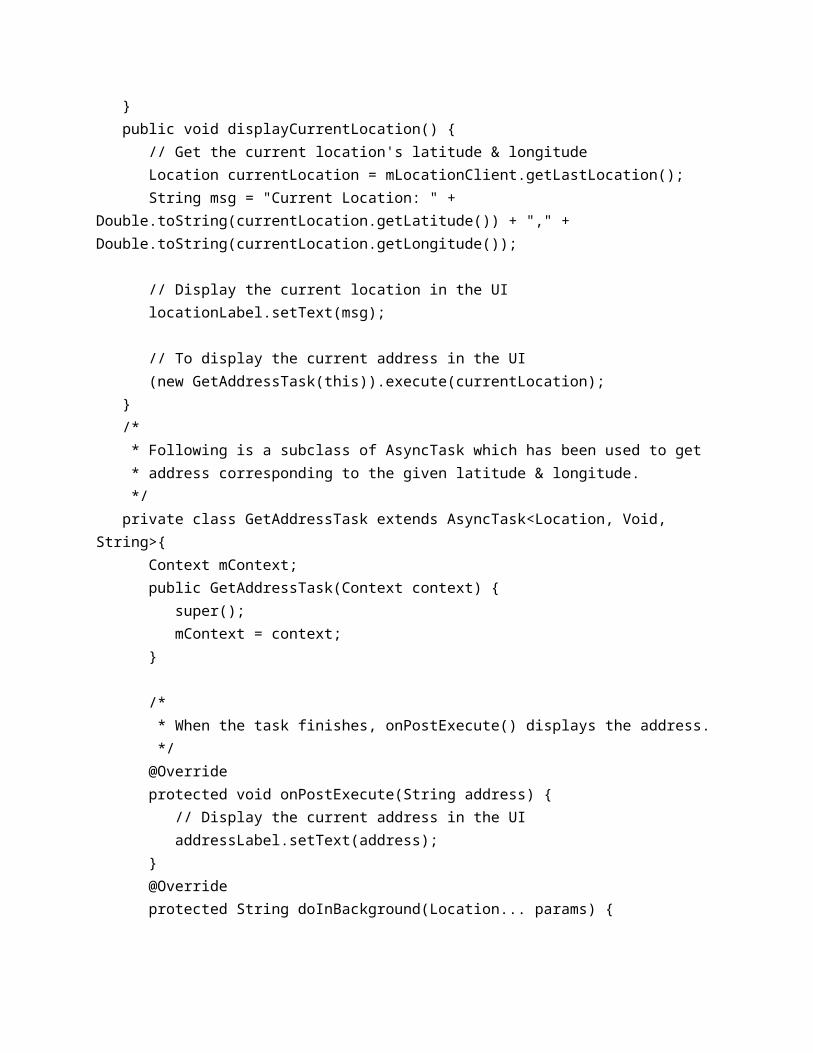
<uses-sdk android:minSdkVersion="8" android:targetSdkVersion="18" /><uses-permission android:name="android.permission.CALL_PHONE"/>
<application android:allowBackup="true" android:icon="@drawable/ic_launcher" android:label="@string/app_name" android:theme="@style/AppTheme" ><activity android:name="com.example.phonecalldemo.MainActivity" android:label="@string/app_name" ><intent-filter><action android:name="android.intent.action.MAIN" />
<category android:name="android.intent.category.LAUNCHER" /></intent-filter></activity></application></manifest>
Now, run your app.
Publishing your App
Android application publishing is a process that makes your Android applications available to users. Infact, publishing is the last phase of the Android application development process.
Once you developed and fully tested your Android Application, you can start selling or distributing free using Google Play (A famous Android marketplace). You can also release your applications by sending them directly to users or by letting users download them from your own website.
You can check a detailed publishing process at Android official website, but we will discuss simple steps to launch your application on Google Play. Here is a simplified check list which will help you in launching your Android application:
Step Activity
1Regression Testing Before you publish your application, you need to make sure that its meeting the basic quality expectations for all Android apps, on all of the devices that you are targeting. So perform all the required testing on different devices including phone and tablets.
2
Application Rating When you will publish your application at Google Play, you will have to specify a content rating for your app, which informs Google Play users of its maturity level. Currently available ratings are (a) Everyone (b) Low maturity (c) Medium maturity (d) High maturity.
3Targeted Regions Google Play lets you control what countries and territories where your application will be sold. Accordingly you must take care of setting up time zone, localization or any other specific requirement as per the targeted region.
4
Application Size Currently, the maximum size for an APK published on Google Play is 50 MB. If your app exceeds that size, or if you want to offer a secondary download, you can use APK Expansion Files, which Google Play will host for free on its server infrastructure and automatically handle the download to devices.
5SDK and Screen Compatibility It is important to make sure that your app is designed to run properly on the Android platform versions and device screen sizes that you want to target.
6Application Pricing Deciding whether your app will be free or paid is important because, on Google Play, free apps must remain free. If you want to sell your application then you will have to specify its price in different currencies.
7Promotional Content It is a good marketing practice to supply a variety of high-quality graphic assets to showcase your app or brand. After you publish, these appear on your product details page, in store listings and search results, and elsewhere.
8Build and Upload release-ready APK The release-ready APK is what you you will upload to the Developer Console and distribute to users. You can check complete detail on how to create a release-ready version of your app: http://developer.android.com/tools/publishing/preparing.html
9
Finalize Application Detail Google Play gives you a variety of ways to promote your app and engage with users on your product details page, from colorful graphics, screenshots, and videos to localized descriptions, release details, and links to your other apps. So you can decorate your application page and provide as much clear crisp detail as you can provide.
Export Android Application
You will need to export your application as an APK (Android Package) file before you upload it to Google Play marketplace.
To export an application, just open that application project in Eclipse and select File->Export from your Eclipse and follow the simple steps to export your application:
Next select, Export Android Application option as shown in the above screen shot and then click Next and again Next so that you get following screen where you will choose 'Create new keystore' to store your application.
Decide a password to protect your application and click on Next button once again. It will display following screen to let you create a key for your application:
Once you filled up all the information, click Next button and finally it will ask you a location where Application will be exported:
Finally, you click on Finish button to generate your Android Application Package File which can be uploaded at Google Play marketplace.
Google Play Registration
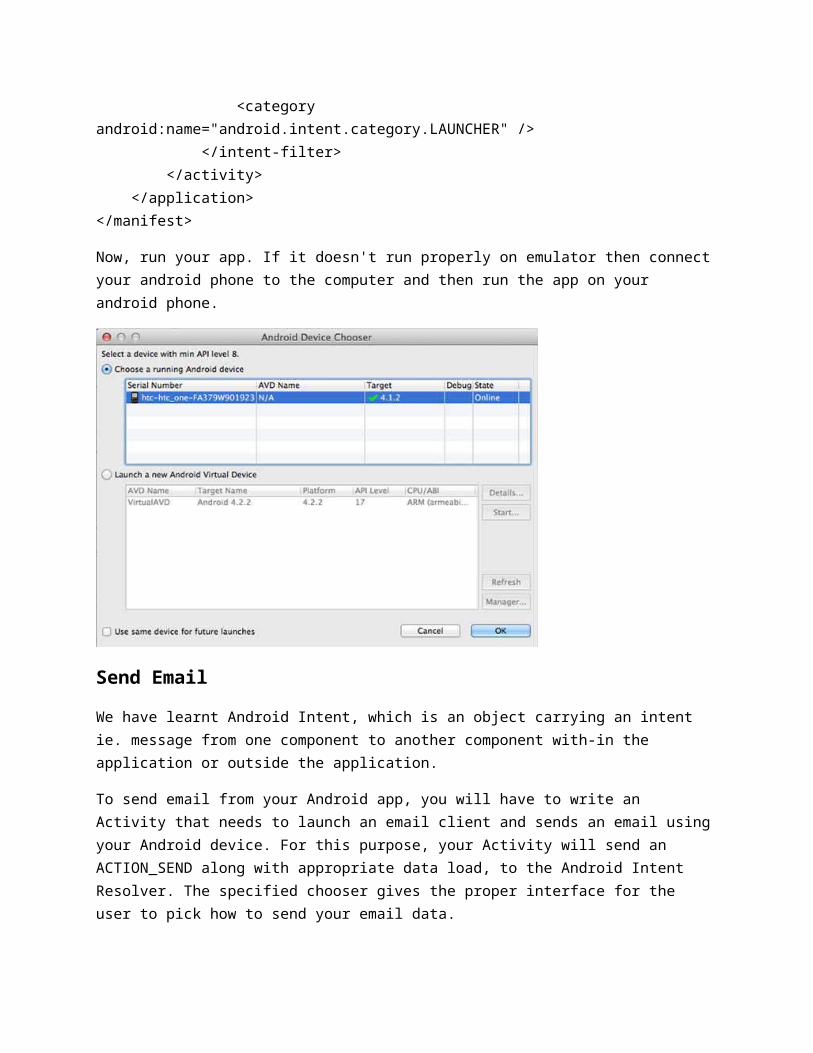
The most important step is to register with Google Play using Google Play Marketplace. You can use your existing google ID if you have any otherwise you can create a new Google ID and then register with the marketplace.
You can use Continue to payment button to proceed to make a payment of $25 as a registration fee and finally to complete your account detail.
Once you are a registered user at Google Play, you can upload release-ready APK for your application and finally you will complete application detail using application detail page as mentioned in step 9 of the above mentioned checklist.
Understanding 'activity_main.xml' (User Interface Layout)
The basic building block for user interface is a View object which is created from the View class and occupies a rectangular area on the screen. View object is responsible for drawing and event handling. View is the base class for widgets, which are used to create interactive UI components like buttons, text fields, etc.
The ViewGroup is a subclass of View and provides invisible container that can hold other Views or other ViewGroups and define their layout properties.
At third level we have different layouts which are subclasses of ViewGroup class. A typical layout defines the visual structure for an Android user interface and can be created either at run time using View/ViewGroup objects or you can declare your layout using simple XML file activity_main.xml which is located in the res/layout folder of your project.
A layout may contain any type of widgets such as buttons, labels, textboxes, and so on.
Once you create a view in 'activity_main.xml', you can load the layout from 'onCreate()' method of 'MainActivity.java' as follows:
public void onCreate(Bundle savedInstanceState) { super.onCreate(savedInstanceState); setContentView(R.layout.activity_main);}
Android Layout Types
There are number of Layouts provided by Android which you will use in almost all the Android applications to provide different view, look and feel.
S.N. Layout & Description
1Linear LayoutLinearLayout is a view group that aligns all children in a single direction, vertically or horizontally.
2 Relative Layout

RelativeLayout is a view group that displays child views in relative positions.
3Table LayoutTableLayout is a view that groups views into rows and columns.
4Absolute LayoutAbsoluteLayout enables you to specify the exact location of its children.
5Frame LayoutThe FrameLayout is a placeholder on screen that you can use to display a single view.
6List ViewListView is a view group that displays a list of scrollable items.
7Grid ViewGridView is a ViewGroup that displays items in a two-dimensional, scrollable grid.
Layout Attributes
Each layout has a set of attributes which define the visual properties of that layout. There are few common attributes among all the layouts and there are other attributes which are specific to a layout. Following are common attributes and can be applied to all the layouts:
Attribute Description
android:id ID which uniquely identifies the view.
android:layout_width Width of the layout.
android:layout_height Height of the layout
android:layout_marginTop Extra space on the top side of the layout.
android:layout_marginBottom
Extra space on the bottom side of the layout.
android:layout_marginLeft Extra space on the left side of the layout.
android:layout_marginRight Extra space on the right side of the layout.
android:layout_gravity This specifies how child Views are positioned.
android:layout_weightThis specifies how much of the extra space in the layout should be allocated to the View.
android:layout_x X-coordinate of the layout.
android:layout_y Y-coordinate of the layout.
android:paddingLeft Left padding filled for the layout.
android:paddingRight Right padding filled for the layout.
android:paddingTop Top padding filled for the layout.
android:paddingBottom Bottom padding filled for the layout.
Dimensions can be specified in terms of dp (Density-independent Pixels), sp ( Scale-independent Pixels), pt ( Points which is 1/72 of an inch), px( Pixels), mm ( Millimeters) and finally in (inches).
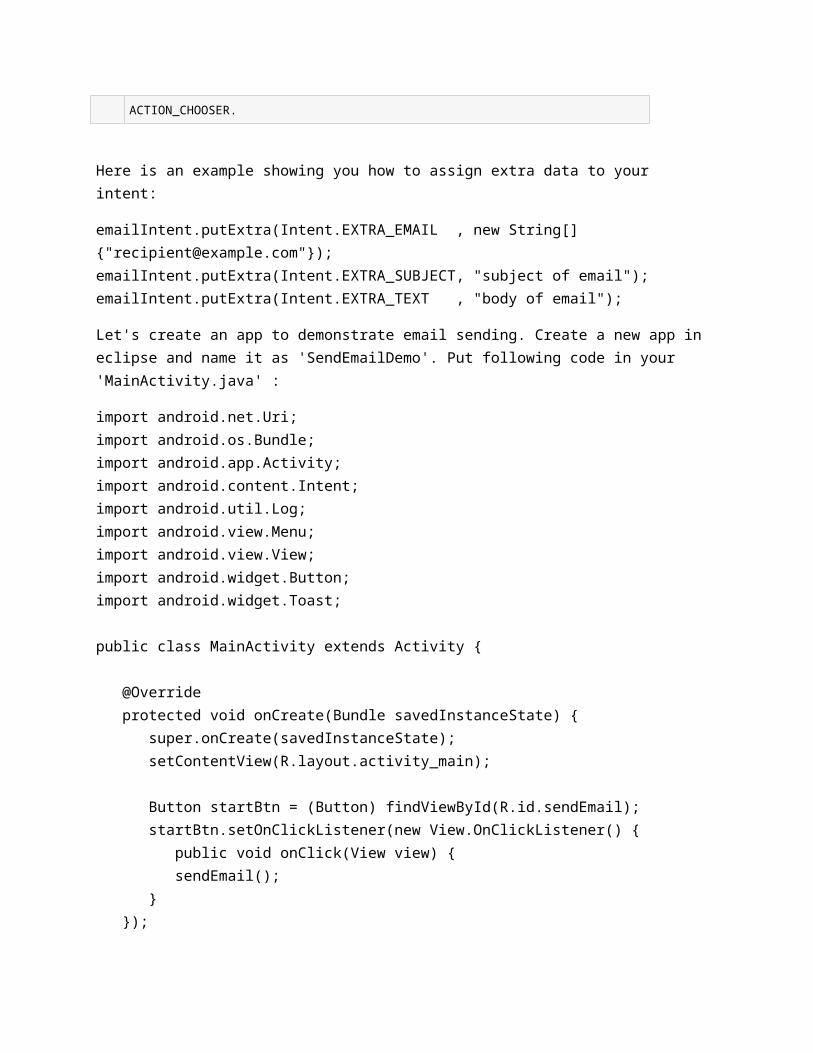
You can specify width and height with exact measurements but more often, you will use one of these constants to set the width or height:
android:layout_width=wrap_content tells your view to size itself to the dimensions required by its content.
android:layout_width=fill_parent tells your view to become as big as its parent view.
Gravity attribute plays important role in positioning the view object and it can take one or more (separated by '|') of the following constant values.
Constant Value Description
top 0x30 Push object to the top of its container, not changing its size.
bottom 0x50 Push object to the bottom of its container, not changing its size.
left 0x03 Push object to the left of its container, not changing its size.
right 0x05 Push object to the right of its container, not changing its size.
center_vertical 0x10Place object in the vertical center of its container, not changing its size.
fill_vertical 0x70Grow the vertical size of the object if needed so it completely fills its container.
center_horizontal
0x01Place object in the horizontal center of its container, not changing its size.
fill_horizontal 0x07Grow the horizontal size of the object if needed so it completely fills its container.
center 0x11Place the object in the center of its container in both the vertical and horizontal axis, not changing its size.
fill 0x77Grow the horizontal and vertical size of the object if needed so it completely fills its container.
clip_vertical 0x80
Additional option that can be set to have the top and/or bottom edges of the child clipped to its container's bounds. The clip will be based on the vertical gravity: a top gravity will clip the bottom edge, a bottom gravity will clip the top edge, and neither will clip both edges.
clip_horizontal 0x08
Additional option that can be set to have the left and/or right edges of the child clipped to its container's bounds. The clip will be based on the horizontal gravity: a left gravity will clip the right edge, a right gravity will clip the left edge, and neither will clip both edges.
start0x00800003
Push object to the beginning of its container, not changing its size.
end0x00800005
Push object to the end of its container, not changing its size.
View Identification
A view object may have a unique ID assigned to it which will identify the View uniquely within the tree. The syntax for an ID, inside an XML tag is:
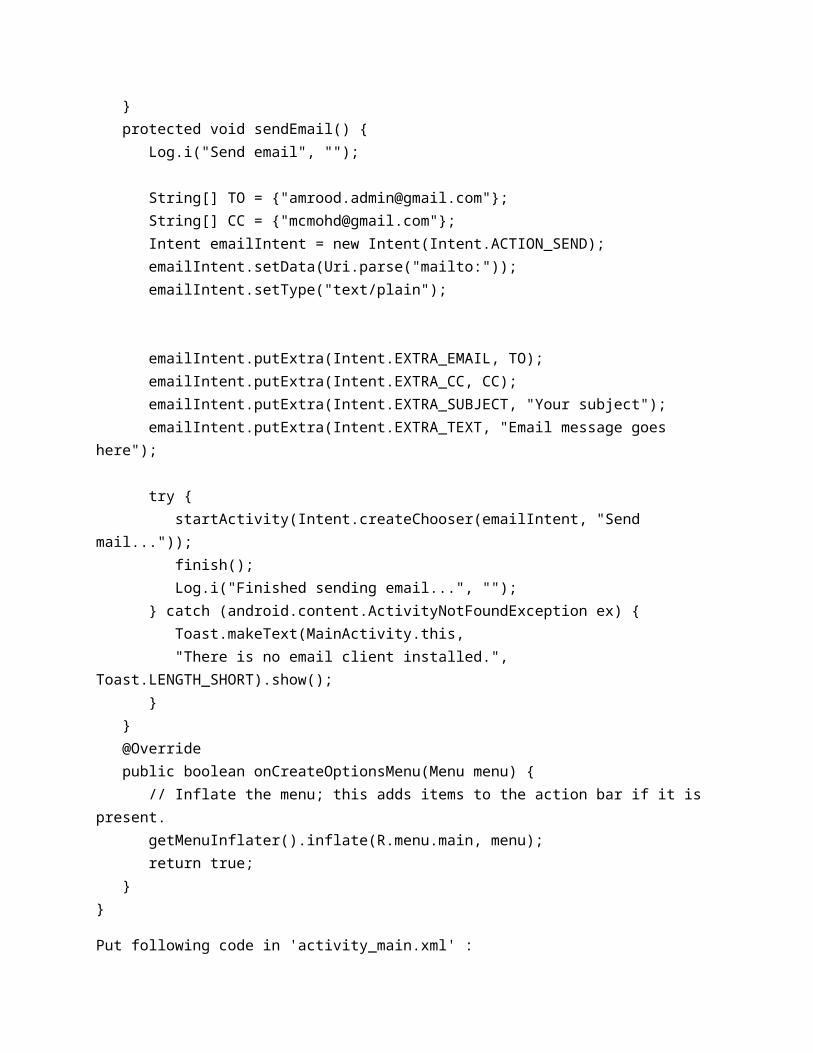
android:id="@+id/my_button"
Following is a brief description of @ and + signs:
The at-symbol (@) at the beginning of the string indicates that the XML parser should parse and expand the rest of the ID string and identify it as an ID resource.
The plus-symbol (+) means that this is a new resource name that must be created and added to our resources. To create an instance of the view object and capture it from the layout, use the following:
Button myButton = (Button) findViewById(R.id.my_button);
LinearLayout
Android LinearLayout is a view group that aligns all children in a single direction, vertically or horizontally.
LinearLayout Attributes
Following are the important attributes specific to LinearLayout:
Attribute Description
android:id This is the ID which uniquely identifies the layout.
android:baselineAligned
This must be a boolean value, either "true" or "false" and prevents the layout from aligning its children's baselines.
android:dividerThis is drawable to use as a vertical divider between buttons. You use a color value, in the form of "#rgb", "#argb", "#rrggbb", or "#aarrggbb".
android:gravityThis specifies how an object should position its content, on both the X and Y axes. Possible values are top, bottom, left, right, center, center_vertical, center_horizontal etc.
android:orientationThis specifies the direction of arrangement and you will use "horizontal" for a row, "vertical" for a column. The default is horizontal.
Let's try the LinearLayout in our app. Put following code in 'activity_main.xml' :
<?xml version="1.0" encoding="utf-8"?><LinearLayout xmlns:android="http://schemas.android.com/apk/res/android" android:layout_width="fill_parent" android:layout_height="fill_parent" android:orientation="vertical" >
<Button android:id="@+id/btnStartService" android:layout_width="150px" android:layout_height="wrap_content"
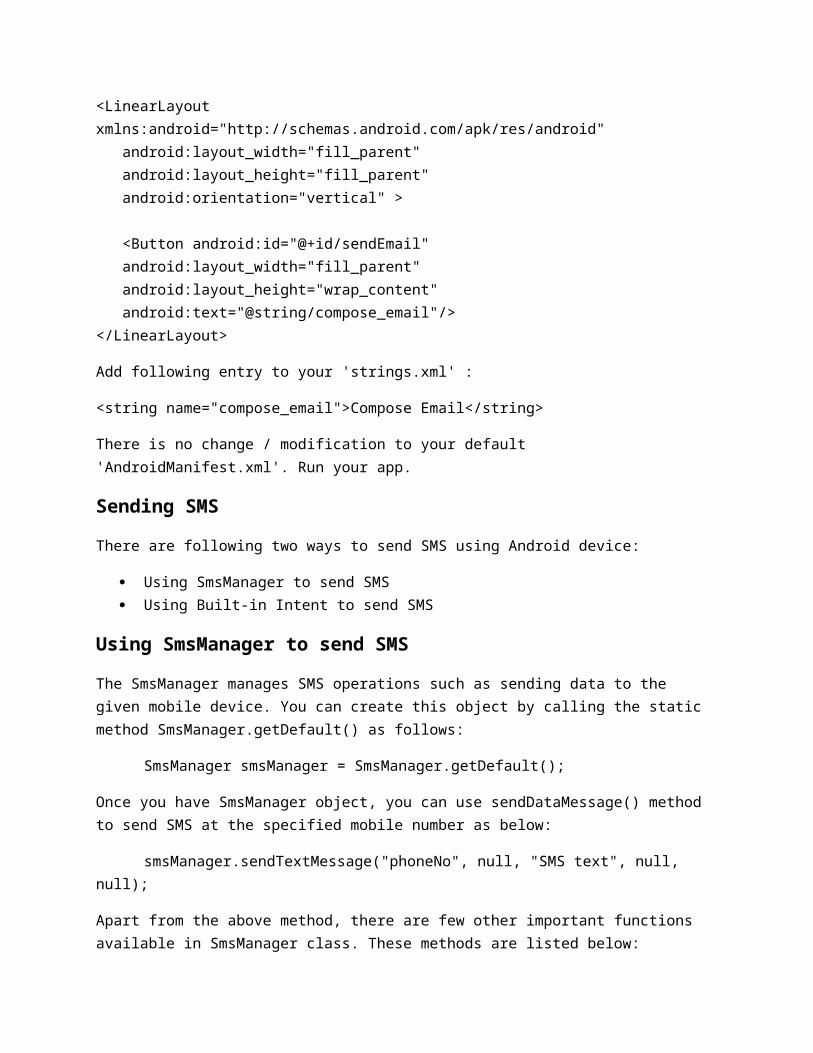
android:text="@string/start_service" <Button android:id="@+id/btnPauseService" android:layout_width="150px" android:layout_height="wrap_content" android:text="@string/pause_service"
<Button android:id="@+id/btnStopService" android:layout_width="150px" android:layout_height="wrap_content" android:text="@string/stop_service"</LinearLayout>
Add following entries to 'strings.xml' :
<string name="start_service">Start</string><string name="pause_service">Pause</string><string name="stop_service">Stop</string>
Run your app. You will see the three buttons aligned vertically. Now make following change in 'activity_main.xml' :
android:orientation="horizontal"
Run your app again. You will see the three buttons aligned horizontally.
RelativeLayout
Android RelativeLayout enables you to specify how child views are positioned relative to each other. The position of each view can be specified as relative to sibling elements or relative to the parent.
RelativeLayout Attributes
Following are the important attributes specific to RelativeLayout:
Attribute Description
android:id This is the ID which uniquely identifies the layout.
android:gravityThis specifies how an object should position its content, on both the X and Y axes. Possible values are top, bottom, left, right, center, center_vertical, center_horizontal etc.
android:ignoreGravity This indicates which view should not be affected by gravity.
Using RelativeLayout, you can align two elements by right border, or make one below another, centered in the screen, centered left, and so on. By default, all child views are drawn at the top-left of the layout,
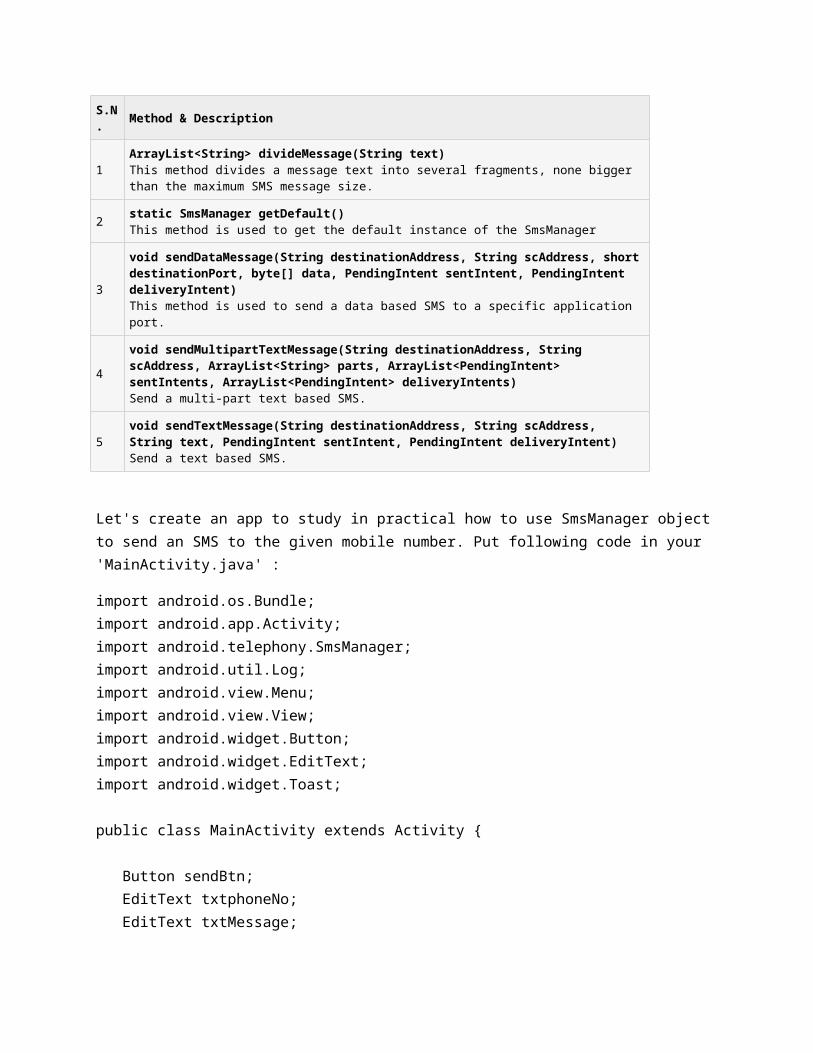
so you must define the position of each view using the various layout properties available from RelativeLayout.LayoutParams and few of the important attributes are given below:
Attribute Description
android:layout_abovePositions the bottom edge of this view above the given anchor view ID and must be a reference to another resource, in the form "@[+][package:]type:name"
android:layout_alignBottomMakes the bottom edge of this view match the bottom edge of the given anchor view ID and must be a reference to another resource, in the form "@[+][package:]type:name".
android:layout_alignLeftMakes the left edge of this view match the left edge of the given anchor view ID and must be a reference to another resource, in the form "@[+][package:]type:name".
android:layout_alignParentBottom
If true, makes the bottom edge of this view match the bottom edge of the parent. Must be a boolean value, either "true" or "false".
android:layout_alignParentEndIf true, makes the end edge of this view match the end edge of the parent. Must be a boolean value, either "true" or "false".
android:layout_alignParentLeftIf true, makes the left edge of this view match the left edge of the parent. Must be a boolean value, either "true" or "false".
android:layout_alignParentRightIf true, makes the right edge of this view match the right edge of the parent. Must be a boolean value, either "true" or "false".
android:layout_alignParentStartIf true, makes the start edge of this view match the start edge of the parent. Must be a boolean value, either "true" or "false".
android:layout_alignParentTopIf true, makes the top edge of this view match the top edge of the parent. Must be a boolean value, either "true" or "false".
android:layout_alignRightMakes the right edge of this view match the right edge of the given anchor view ID and must be a reference to another resource, in the form "@[+][package:]type:name".
android:layout_alignStartMakes the start edge of this view match the start edge of the given anchor view ID and must be a reference to another resource, in the form "@[+][package:]type:name".
android:layout_alignTopMakes the top edge of this view match the top edge of the given anchor view ID and must be a reference to another resource, in the form "@[+][package:]type:name".
android:layout_belowPositions the top edge of this view below the given anchor view ID and must be a reference to another resource, in the form "@[+][package:]type:name".
android:layout_centerHorizontalIf true, centers this child horizontally within its parent. Must be a boolean value, either "true" or "false".
android:layout_centerInParentIf true, centers this child horizontally and vertically within its parent. Must be a boolean value, either "true" or "false".
android:layout_centerVerticalIf true, centers this child vertically within its parent. Must be a boolean value, either "true" or "false".
android:layout_toEndOfPositions the start edge of this view to the end of the given anchor view ID and must be a reference to another resource, in the form "@[+][package:]type:name".
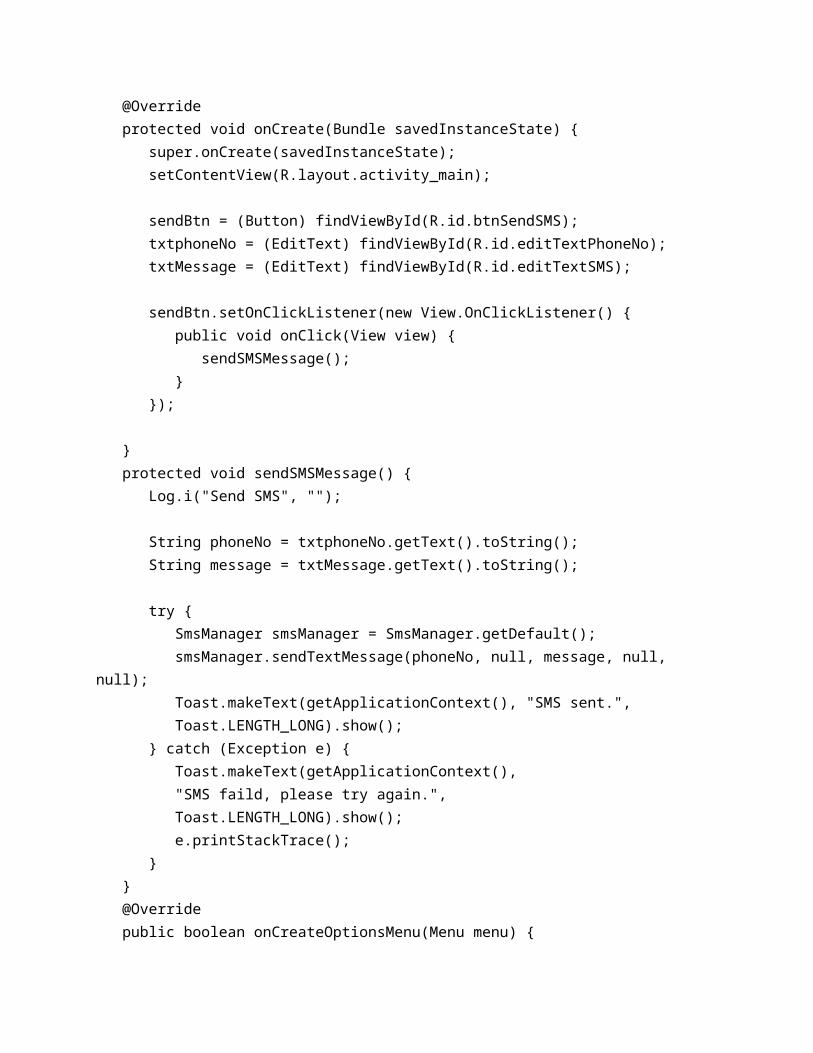
android:layout_toLeftOfPositions the right edge of this view to the left of the given anchor view ID and must be a reference to another resource, in the form "@[+][package:]type:name".
android:layout_toRightOfPositions the left edge of this view to the right of the given anchor view ID and must be a reference to another resource, in the form "@[+][package:]type:name".
android:layout_toStartOfPositions the end edge of this view to the start of the given anchor view ID and must be a reference to another resource, in the form "@[+][package:]type:name".
Let's try RelativeLayout in our app. Put following code in 'MainActivity.java' :
import java.text.SimpleDateFormat;import java.util.Calendar;import java.util.Date;
import android.os.Bundle;import android.app.Activity;import android.text.format.DateFormat;import android.view.Menu;import android.widget.TextView;
public class MainActivity extends Activity {
@Override protected void onCreate(Bundle savedInstanceState) { super.onCreate(savedInstanceState); setContentView(R.layout.activity_main); SimpleDateFormat dateFormat = new SimpleDateFormat("yyyy/MM/dd"); Date date = new Date(); String nowDate = dateFormat.format(date); TextView dateView = (TextView)findViewById(R.id.dates); dateView.setText(nowDate); SimpleDateFormat timeFormat = new SimpleDateFormat("HH:mm:ss"); String nowTime = timeFormat.format(date); TextView timeView = (TextView)findViewById(R.id.times); timeView.setText(nowTime); }
@Override public boolean onCreateOptionsMenu(Menu menu) {
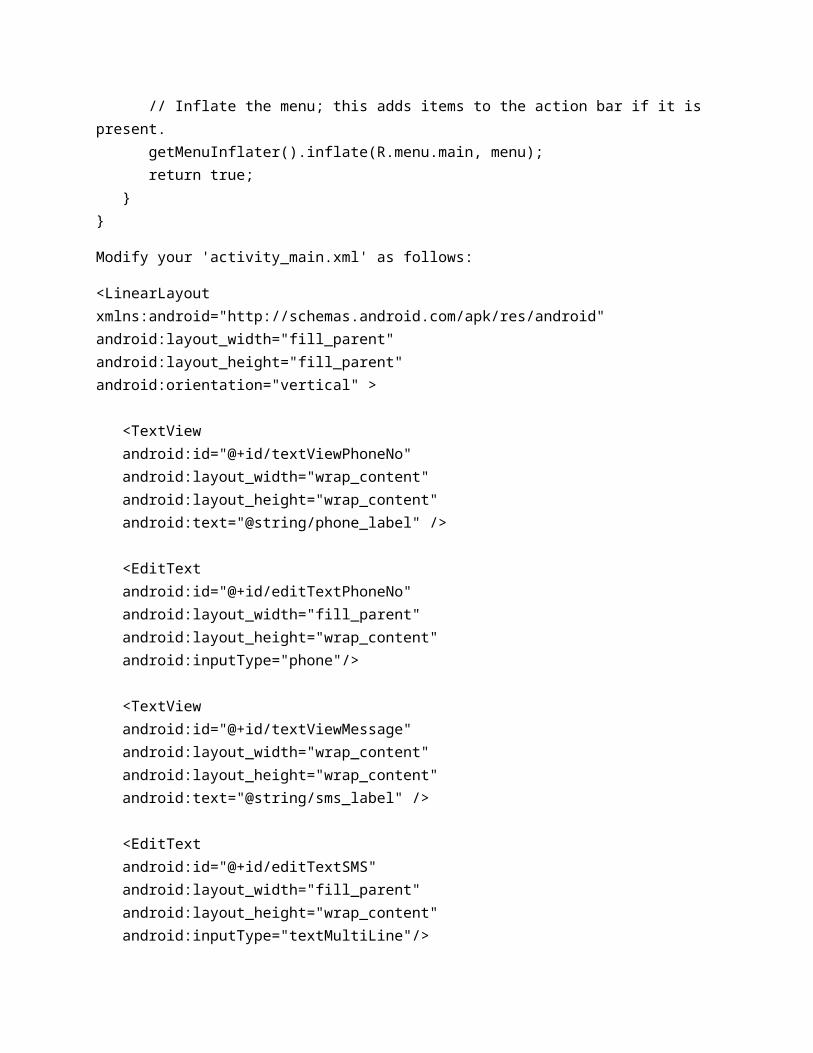
// Inflate the menu; getMenuInflater().inflate(R.menu.main, menu); return true; } }
Put following code in 'activity_main.xml' to define your layout :
<RelativeLayout xmlns:android="http://schemas.android.com/apk/res/android" android:layout_width="fill_parent" android:layout_height="fill_parent" android:paddingLeft="16dp" android:paddingRight="16dp" > <EditText android:id="@+id/name" android:layout_width="fill_parent" android:layout_height="wrap_content" android:hint="@string/reminder" /> <TextView android:id="@+id/dates" android:layout_width="0dp" android:layout_height="wrap_content" android:layout_below="@id/name" android:layout_alignParentLeft="true" android:layout_toLeftOf="@+id/times" /> <TextView android:id="@id/times" android:layout_width="96dp" android:layout_height="wrap_content" android:layout_below="@id/name" android:layout_alignParentRight="true" /> <Button android:layout_width="96dp" android:layout_height="wrap_content" android:layout_below="@id/times" android:layout_centerInParent="true" android:text="@string/done" /></RelativeLayout>
Add following entries to 'strings.xml' :
<string name="reminder">Enter your name</string><string name="done">Done</string>
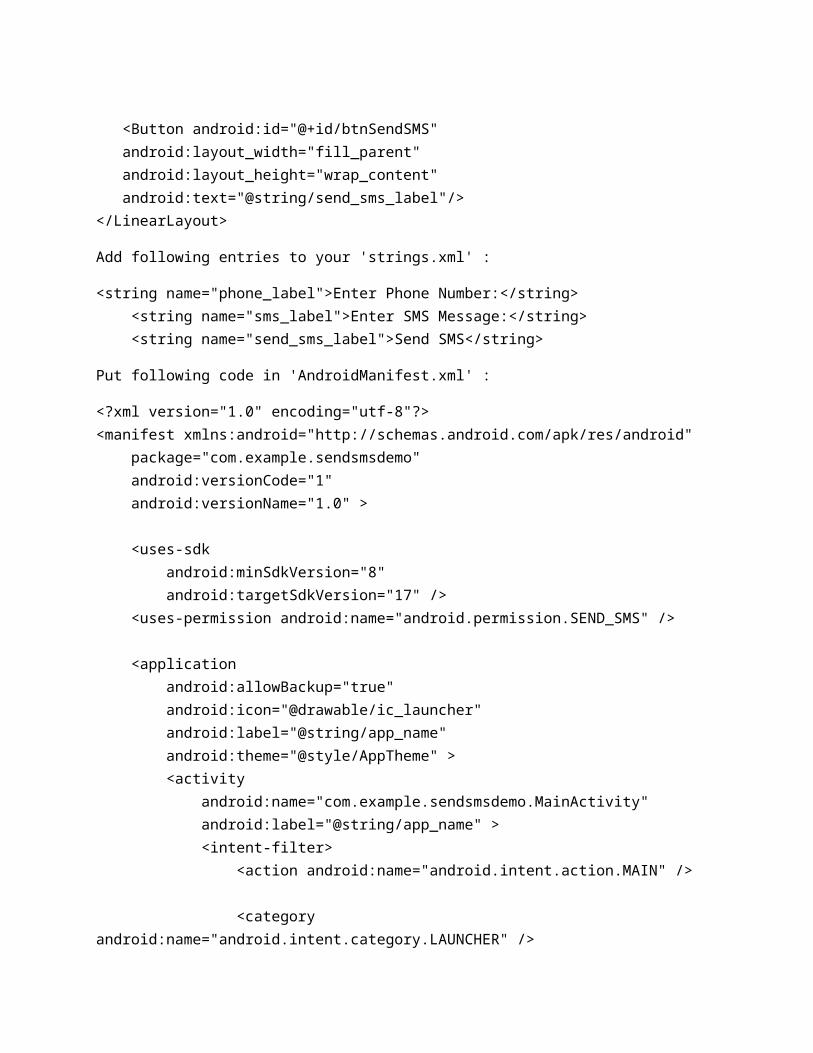
Now, run your app.
TableLayout
Android TableLayout groups views into rows and columns. You will use the <TableRow> element to build a row in the table. Each row has zero or more cells; each cell can hold one View object.
TableLayout containers do not display border lines for their rows, columns, or cells.
TableLayout Attributes
Following are the important attributes specific to TableLayout:
Attribute Description
android:id This is the ID which uniquely identifies the layout.
android:collapseColumnsThe zero-based index of the columns to shrink. The column indices must be separated by a comma: 1, 2, 5.
android:stretchColumnsThe zero-based index of the columns to stretch. The column indices must be separated by a comma: 1, 2, 5.
Let's try TableLayout in our app. Put following code in 'activity_main.xml' to define your layout :
<TableLayout xmlns:android="http://schemas.android.com/apk/res/android" android:layout_width="fill_parent" android:layout_height="fill_parent"> <TableRow> <Button android:id="@+id/backbutton" android:text="Back" android:layout_width="wrap_content" android:layout_height="wrap_content" /> </TableRow> <TableRow> <TextView android:text="First Name" android:layout_width="wrap_content" android:layout_height="wrap_content" android:layout_column="1" /> <EditText android:width="100px" android:layout_width="wrap_content" android:layout_height="wrap_content" /> </TableRow>
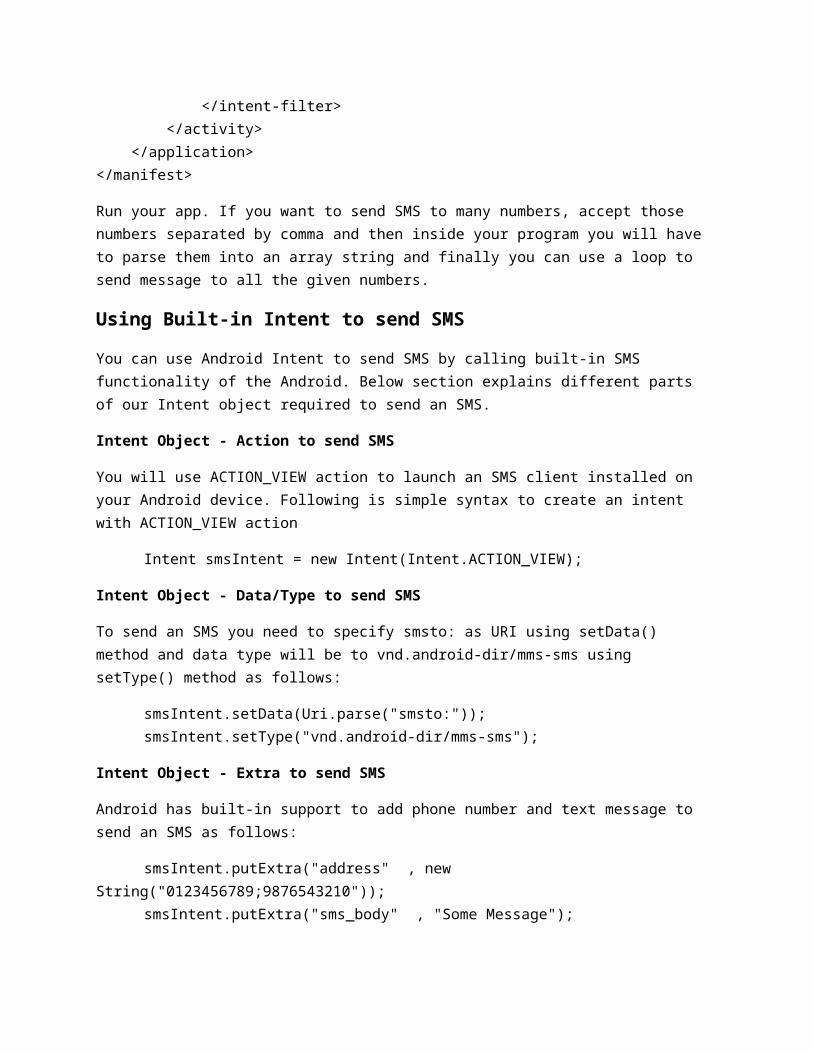
<TableRow> <TextView android:text="Last Name" android:layout_width="wrap_content" android:layout_height="wrap_content" android:layout_column="1" /> <EditText android:width="100px" android:layout_width="wrap_content" android:layout_height="wrap_content" /> </TableRow></TableLayout>
Now, run your app.
AbsoluteLayout
An Absolute Layout lets you specify exact locations (x/y coordinates) of its children. Absolute layouts are less flexible and harder to maintain than other types of layouts without absolute positioning.
AbsoluteLayout Attributes
Following are the important attributes specific to AbsoluteLayout:
Attribute Description
android:id This is the ID which uniquely identifies the layout.
android:layout_x This specifies the x-coordinate of the view.
android:layout_y This specifies the y-coordinate of the view.
Lets try AbsoluteLayout in our app. Put following code in 'activity_main.xml' to define your layout :
<AbsoluteLayout xmlns:android="http://schemas.android.com/apk/res/android" android:layout_width="fill_parent" android:layout_height="fill_parent"> <Button android:layout_width="100dp" android:layout_height="wrap_content" android:text="OK" android:layout_x="50px" android:layout_y="361px" /> <Button android:layout_width="100dp"
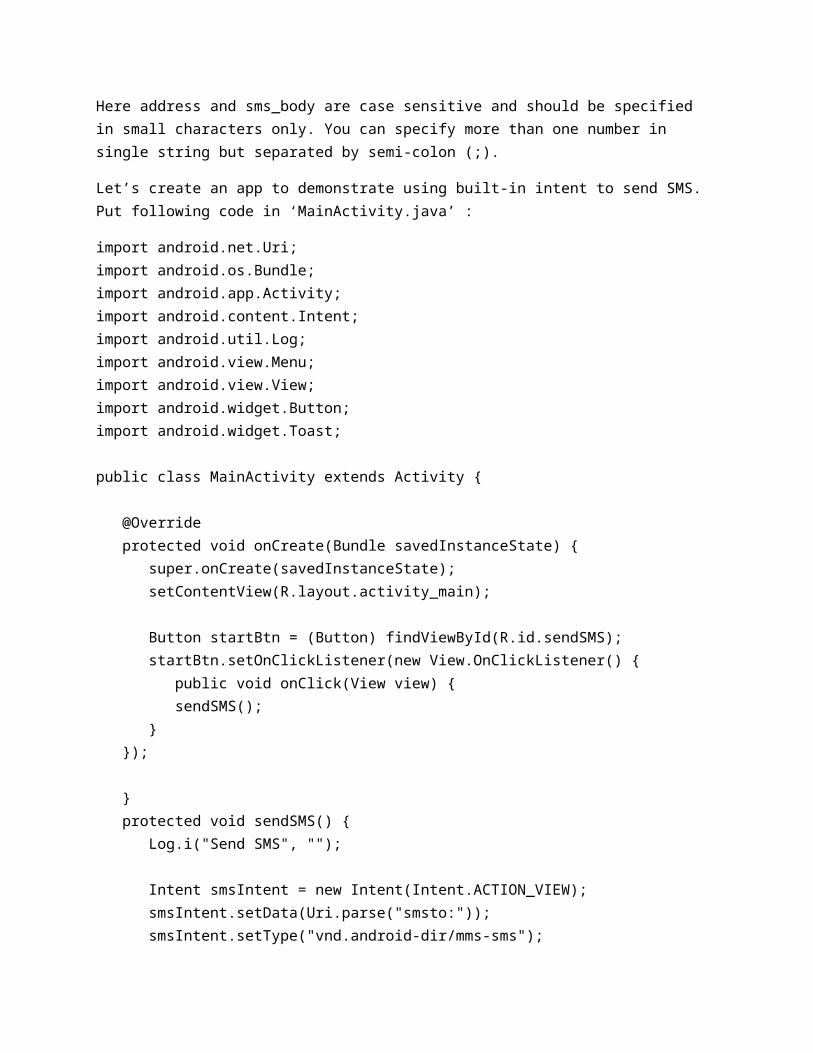
android:layout_height="wrap_content" android:text="Cancel" android:layout_x="225px" android:layout_y="361px" /></AbsoluteLayout>
Now run your app and observe that two buttons appear at exact positions specified by us.
FrameLayout
Frame Layout is designed to block out an area on the screen to display a single item. Generally, FrameLayout should be used to hold a single child view, because it can be difficult to organize child views in a way that's scalable to different screen sizes without the children overlapping each other.
You can, however, add multiple children to a FrameLayout and control their position within the FrameLayout by assigning gravity to each child, using the android:layout_gravity attribute.
FrameLayout Attributes
Following are the important attributes specific to FrameLayout:
Attribute Description
android:id This is the ID which uniquely identifies the layout.
android:foregroundThis defines the drawable to draw over the content and possible values may be a color value, in the form of "#rgb", "#argb", "#rrggbb", or "#aarrggbb".
android:foregroundGravityDefines the gravity to apply to the foreground drawable. The gravity defaults to fill. Possible values are top, bottom, left, right, center, center_vertical, center_horizontal etc.
android:measureAllChildren
Determines whether to measure all children or just those in the VISIBLE or INVISIBLE state when measuring. Defaults to false.
Let's try FrameLayout in our app. Put following code in 'activity_main.xml' to define your layout :
<FrameLayout xmlns:android="http://schemas.android.com/apk/res/android" android:layout_width="fill_parent" android:layout_height="fill_parent"> <ImageView android:src="@drawable/ic_launcher" android:scaleType="fitCenter" android:layout_height="250px" android:layout_width="250px"/>
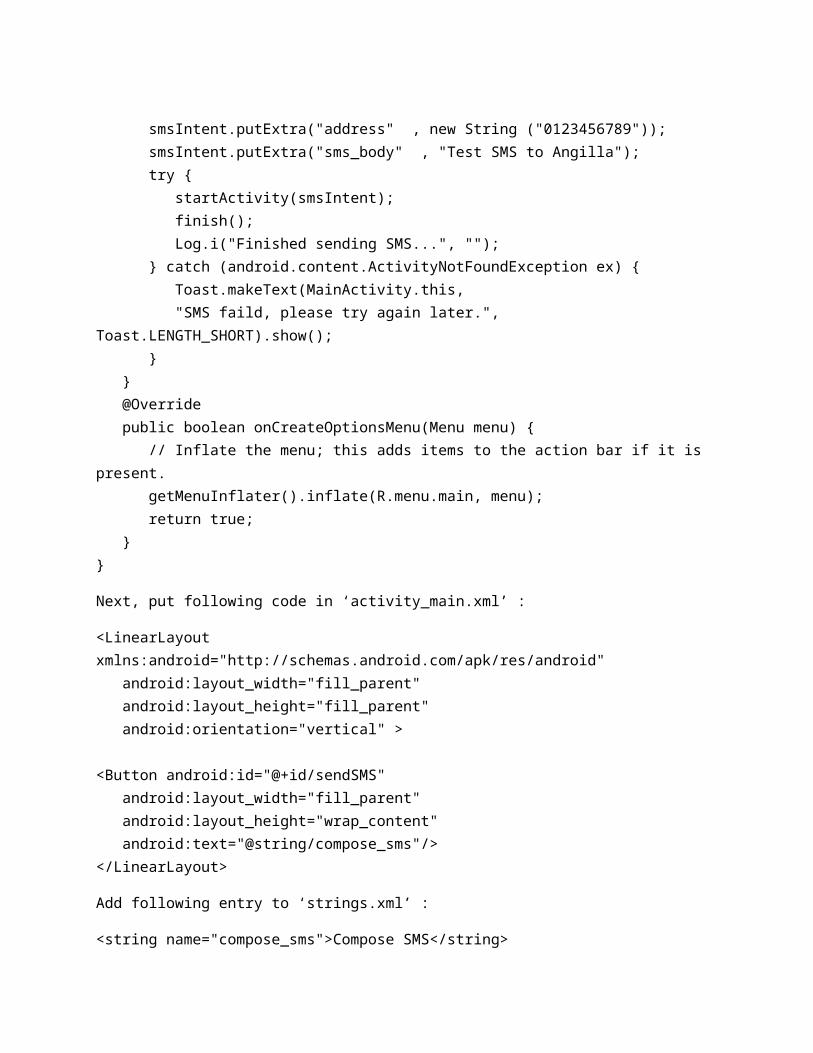
<TextView android:text="Frame Demo" android:textSize="30px" android:textStyle="bold" android:layout_height="fill_parent" android:layout_width="fill_parent" android:gravity="center"/></FrameLayout>
Now, run your app.
ListView
Android ListView is a view which groups several items and display them in vertical scrollable list. The list items are automatically inserted to the list using an Adapter that pulls content from a source such as an array or database.
An adapter actually bridges between UI components and the data source that fill data into UI Component. Adapter can be used to supply the data to like spinner, list view, grid view etc.
The ListView and GridView are subclasses of AdapterView and they can be populated by binding them to an Adapter, which retrieves data from an external source and creates a View that represents each data entry.
Android provides several subclasses of Adapter that are useful for retrieving different kinds of data and building views for an AdapterView ( ie. ListView or GridView). The two most common adapters are ArrayAdapter and SimpleCursorAdapter. We will see separate examples for both the adapters.
ListView Attributes
Following are the important attributes specific to ListView:
Attribute Description
android:id This is the ID which uniquely identifies the layout.
android:divider This is drawable or color to draw between list items. .
android:dividerHeightThis specifies height of the divider. This could be in px, dp, sp, in, or mm.
android:entriesSpecifies the reference to an array resource that will populate the ListView.
android:footerDividersEnabledWhen set to false, the ListView will not draw the divider before each footer view. The default value is true.
android:headerDividersEnabled
When set to false, the ListView will not draw the divider after each header view. The default value is true.
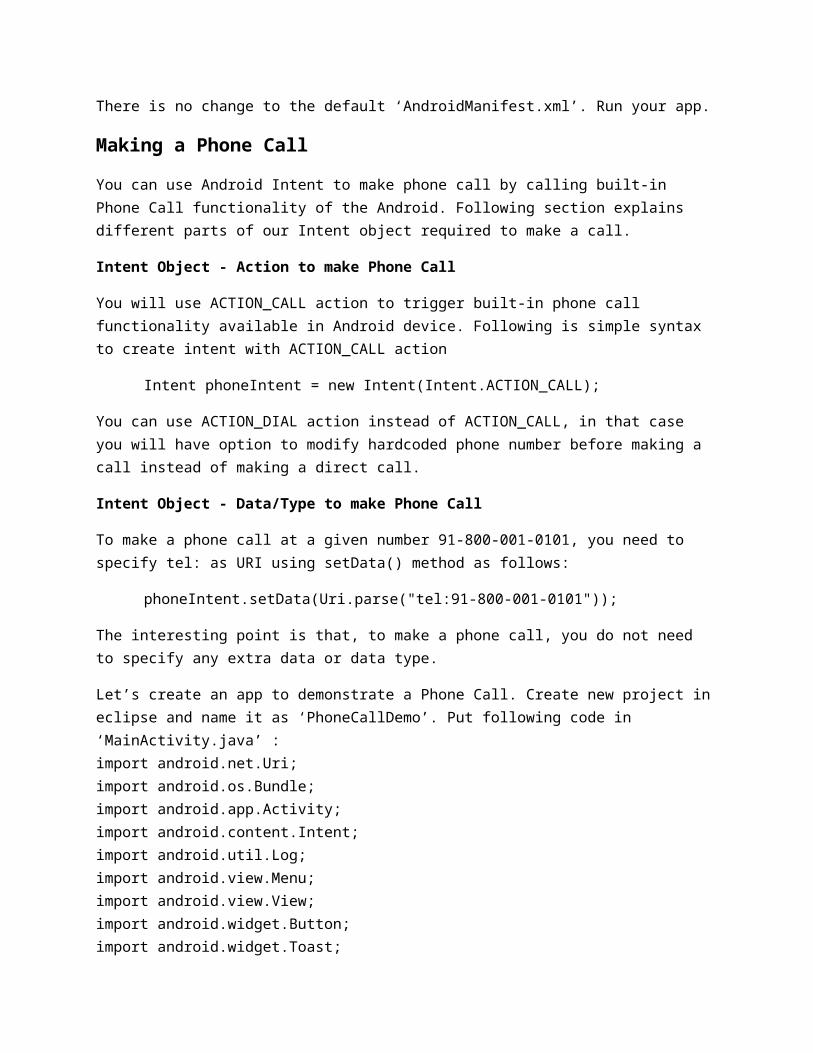
ArrayAdapter
You can use this adapter when your data source is an array. By default, ArrayAdapter creates a view for each array item by calling toString() on each item and placing the contents in a TextView. Consider you have an array of strings you want to display in a ListView, initialize a new ArrayAdapter using a constructor to specify the layout for each string and the string array:
ArrayAdapter adapter = new ArrayAdapter<String>(this, R.layout.ListView, StringArray);
Here are arguments for this constructor:
First argument this is the application context. Most of the case, keep it this. Second argument will be layout defined in XML file and having TextView for each string in the
array. Final argument is an array of strings which will be populated in the text view.
Once you have array adaptor created, then simply call setAdapter() on your ListView object as follows:
ListView listView = (ListView) findViewById(R.id.listview);listView.setAdapter(adapter);
You will define your list view under res/layout directory in an XML file.
Let's try ListView in our app. Put following code in 'MainActivity.java' :
import android.os.Bundle;import android.app.Activity;import android.view.Menu;import android.widget.ArrayAdapter;import android.widget.ListView;
public class MainActivity extends Activity {
// Array of strings... String[] countryArray = {"India", "Pakistan", "USA", "UK"};
@Override protected void onCreate(Bundle savedInstanceState) { super.onCreate(savedInstanceState); setContentView(R.layout.activity_main); ArrayAdapter adapter = new ArrayAdapter<String>(this, R.layout.activity_listview, countryArray); ListView listView = (ListView) findViewById(R.id.country_list); listView.setAdapter(adapter);
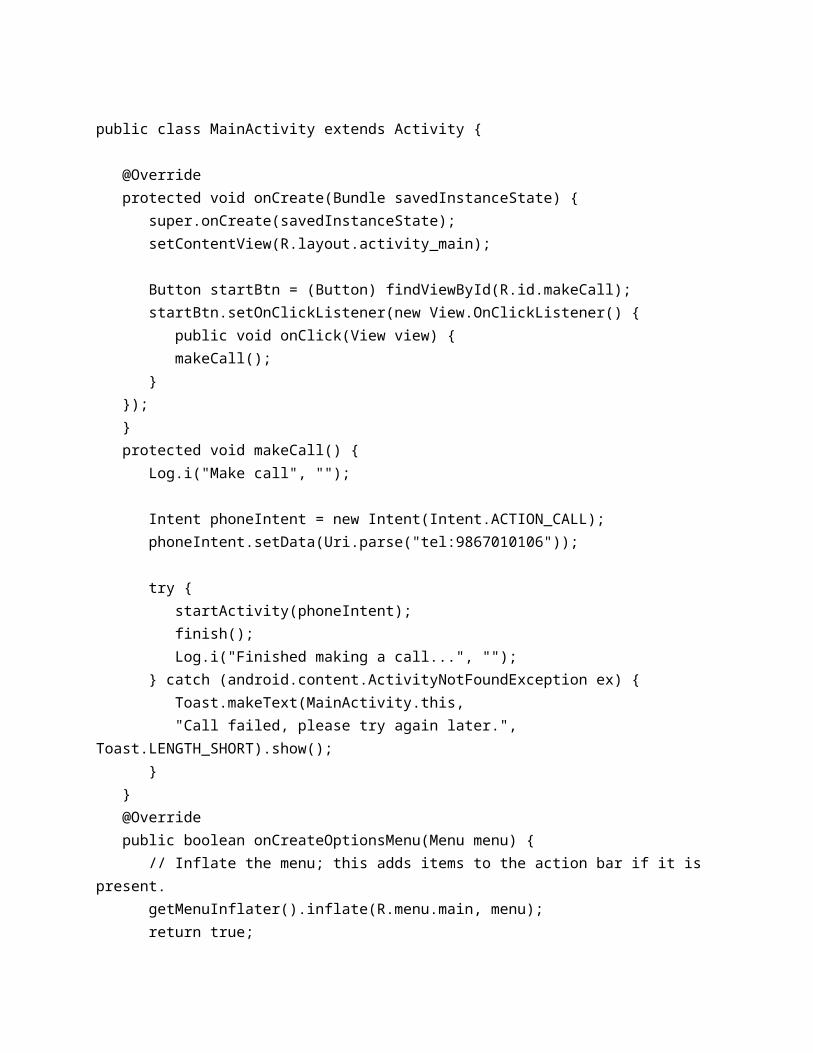
}}
Next, put following code in 'activity_main.xml' :
<LinearLayout xmlns:android="http://schemas.android.com/apk/res/android"xmlns:tools="http://schemas.android.com/tools"android:layout_width="match_parent"android:layout_height="match_parent"android:orientation="vertical"tools:context=".ListActivity" > <ListView android:id="@+id/country_list" android:layout_width="match_parent" android:layout_height="wrap_content" > </ListView></LinearLayout>
Add a new xml file to res\layout folder and name it as 'activity_listview.xml'. Put following code to this file :
<?xml version="1.0" encoding="utf-8"?><!-- Single List Item Design --><TextView xmlns:android="http://schemas.android.com/apk/res/android" android:id="@+id/label" android:layout_width="fill_parent" android:layout_height="fill_parent" android:padding="10dip" android:textSize="16dip" android:textStyle="bold" ></TextView>
Now, run your app.
SimpleCursorAdapter
You can use this adapter when your data source is a database Cursor. When using SimpleCursorAdapter, you must specify a layout to use for each row in the Cursor and which columns in the Cursor should be inserted into which views of the layout.
For example, if you want to create a list of people's names and phone numbers, you can perform a query that returns a Cursor containing a row for each person and columns for the names and numbers.
You then create a string array specifying which columns from the Cursor you want in the layout for each result and an integer array specifying the corresponding views that each column should be placed:
String[] fromColumns = {ContactsContract.Data.DISPLAY_NAME, ContactsContract.CommonDataKinds.Phone.NUMBER};
int[] toViews = {R.id.display_name, R.id.phone_number};
When you instantiate the SimpleCursorAdapter, pass the layout to use for each result, the Cursor containing the results, and these two arrays:
SimpleCursorAdapter adapter = new SimpleCursorAdapter(this, R.layout.person_name_and_number, cursor, fromColumns, toViews, 0);
ListView listView = getListView();
listView.setAdapter(adapter);
The SimpleCursorAdapter then creates a view for each row in the Cursor using the provided layout by inserting each fromColumns item into the corresponding 'toViews' view.
GridView Explaination


![[TUT]MTK Android (Sp Flash Tool ) Tutorial - Xda-Developers](https://img.pdfslide.us/doc/110x75/552b69da550346a1478b466a/tutmtk-android-sp-flash-tool-tutorial-xda-developers.jpg)


![[Tut]How to Crack WPA_2-PSK W_ BT4 [Tut]](https://img.pdfslide.us/doc/110x75/577d28121a28ab4e1ea52a3b/tuthow-to-crack-wpa2-psk-w-bt4-tut.jpg)