Embed Size (px)
Citation preview

8/7/2019 Lokring Service Connector Instructions
http://slidepdf.com/reader/full/lokring-service-connector-instructions 1/14
LOKRINGLOKRINGTUBING CONNECTORSTUBING CONNECTORS
A HIGHLY RELIABLE METHOD FOR JOININGMETALLIC TUBING
8/7/2019 Lokring Service Connector Instructions
http://slidepdf.com/reader/full/lokring-service-connector-instructions 2/14
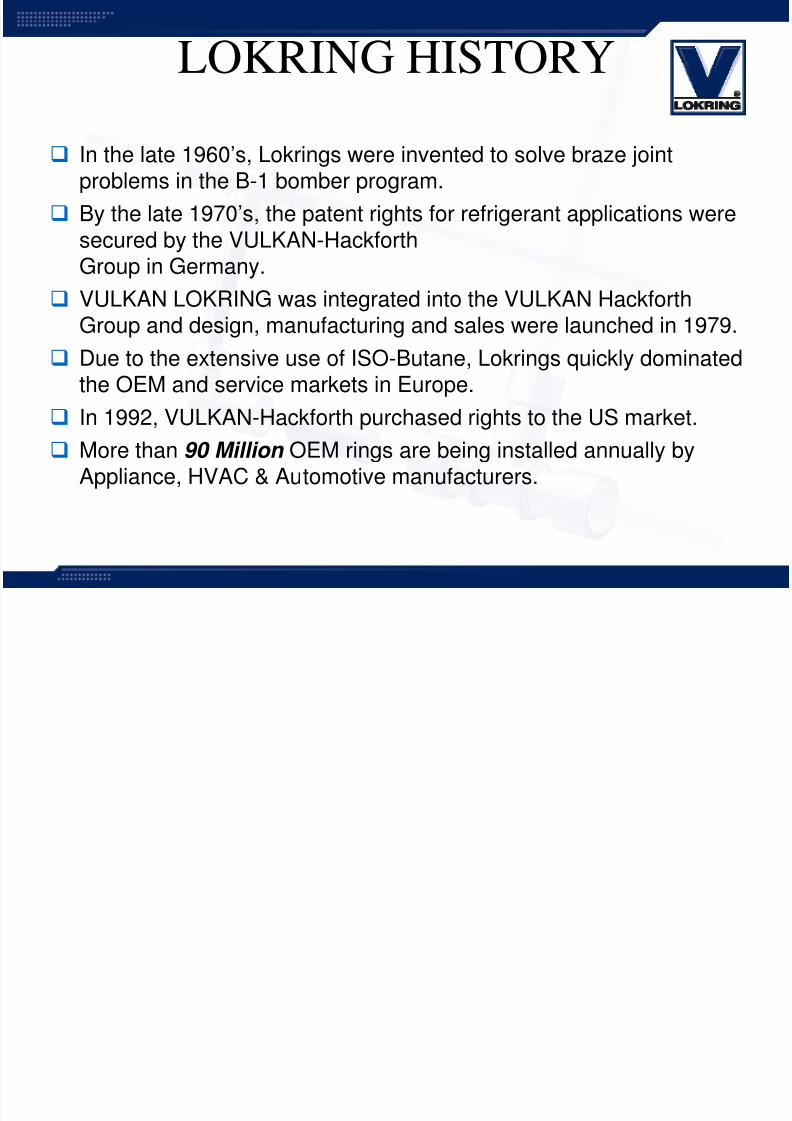
LOKRING HISTORY
In the late 1960’s, Lokrings were invented to solve braze jointproblems in the B-1 bomber program.
By the late 1970’s, the patent rights for refrigerant applications weresecured by the VULKAN-HackforthGroup in Germany.
VULKAN LOKRING was integrated into the VULKAN HackforthGroup and design, manufacturing and sales were launched in 1979.
Due to the extensive use of ISO-Butane, Lokrings quickly dominatedthe OEM and service markets in Europe.
In 1992, VULKAN-Hackforth purchased rights to the US market.
More than 90 Million OEM rings are being installed annually byAppliance, HVAC & Automotive manufacturers.
8/7/2019 Lokring Service Connector Instructions
http://slidepdf.com/reader/full/lokring-service-connector-instructions 3/14
Speed and Ease of Installation
The LOKRING Tube Connection allows a fast and
reliable connection of tubes, even of differentmaterial. This tube connection system is a cold,clean method that eliminates the need for Brazing.
Field reports indicate a Labor savings of between30% and 50% on various Ductless System
Installations and also eliminates the need fornitrogen flow during installs.
8/7/2019 Lokring Service Connector Instructions
http://slidepdf.com/reader/full/lokring-service-connector-instructions 4/14
Lokring Basics
1. Clean tube ends with abrasive mat or fine emery cloth & debur asnecessary.
2. Apply stabilization inserts if required.3. Place the ring (chamfered edge facing tube end) over the tube if
not pre-mounted on the Lokring body.
4. Apply sufficient Lokprep to tube. (1 to 2 beads completely around
the tube end depending on size. ( 1 bead ½ inch and under 2beads over ½ inch.)
5. Place Lokring over tube to internal stop and rotate tube or Lokringto distribute Lokprep.
6. Using appropriate jaws and Lokring assembly tool, push the 1st
ring onto the Lokring body until fully seated to stop.
7. Repeat steps 3 thru 6 for second side of Lokring connector.
8. Allow Lokprep a minimum of 10 minutes set up time before
applying stress, vacuum or pressure to the connection. (Note intemperatures below 55 F allow 30 minutes)
8/7/2019 Lokring Service Connector Instructions
http://slidepdf.com/reader/full/lokring-service-connector-instructions 5/14
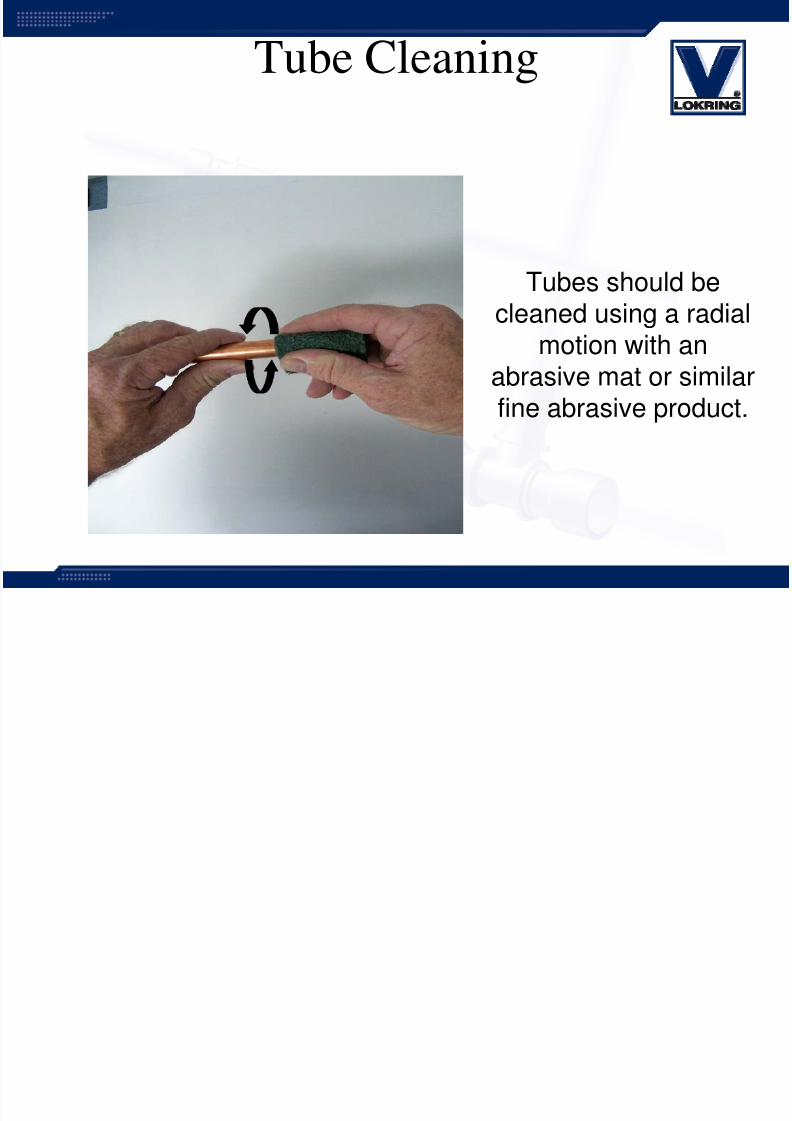
Tube Cleaning
Tubes should be
cleaned using a radialmotion with an
abrasive mat or similar
fine abrasive product.
8/7/2019 Lokring Service Connector Instructions
http://slidepdf.com/reader/full/lokring-service-connector-instructions 6/14
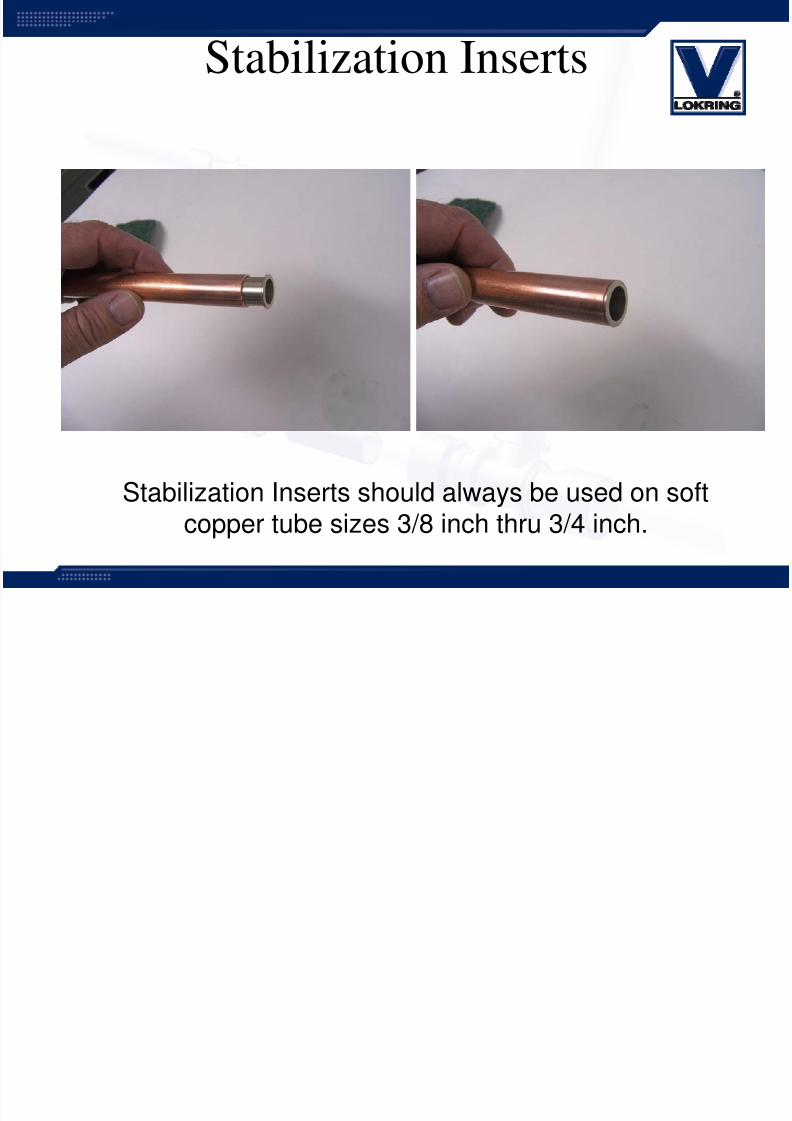
Stabilization Inserts
Stabilization Inserts should always be used on soft
copper tube sizes 3/8 inch thru 3/4 inch.
8/7/2019 Lokring Service Connector Instructions
http://slidepdf.com/reader/full/lokring-service-connector-instructions 7/14
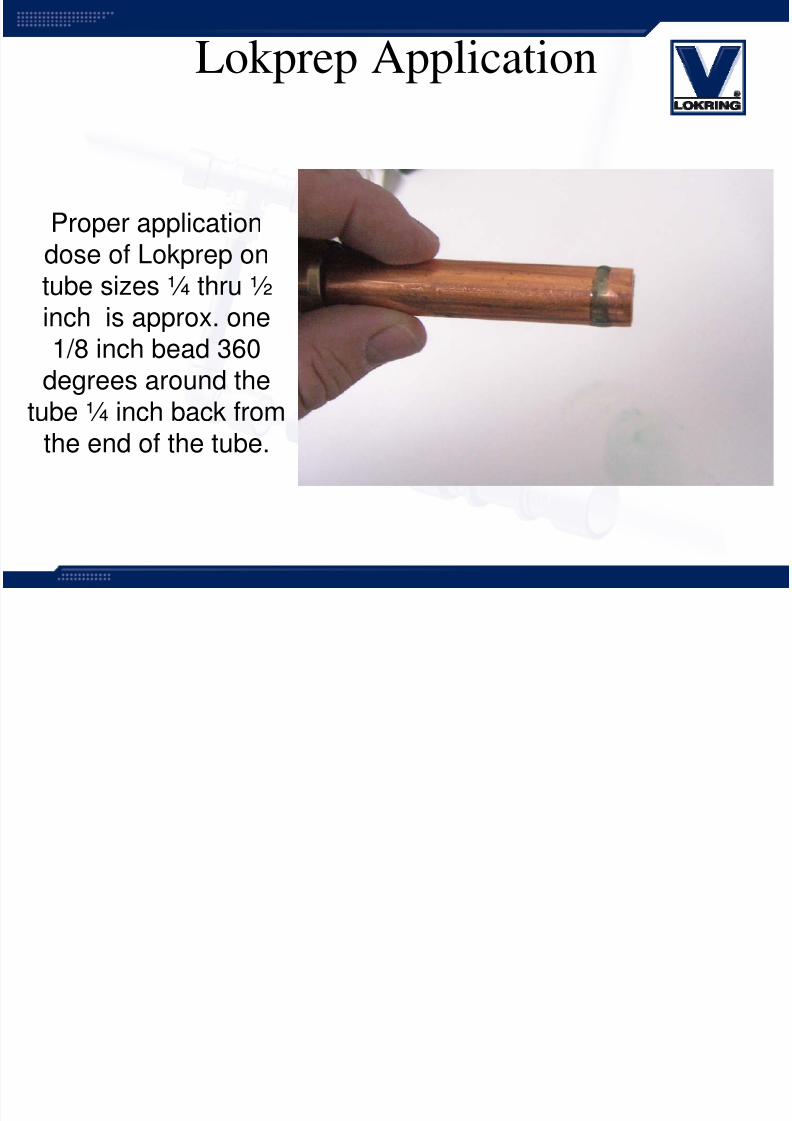
Lokprep Application
Proper applicationdose of Lokprep ontube sizes ¼ thru ½
inch is approx. one1/8 inch bead 360
degrees around the
tube ¼ inch back fromthe end of the tube.
8/7/2019 Lokring Service Connector Instructions
http://slidepdf.com/reader/full/lokring-service-connector-instructions 8/14
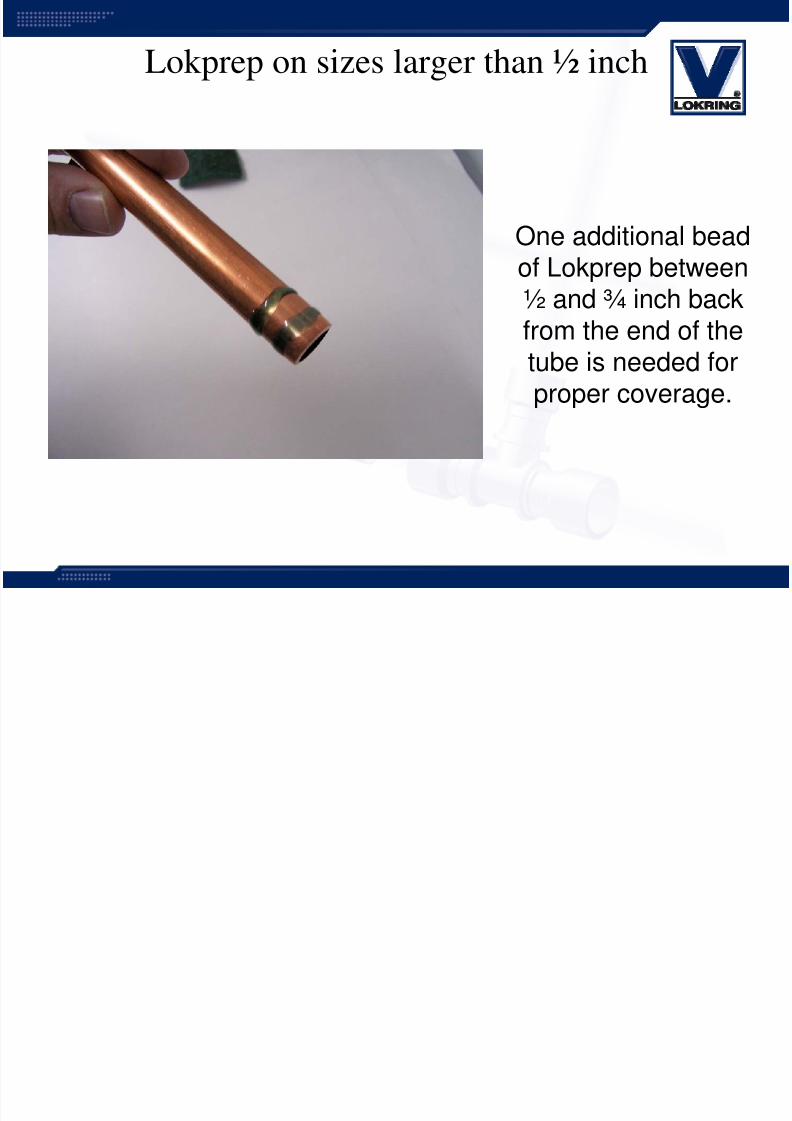
Lokprep on sizes larger than ½ inch
One additional beadof Lokprep between
½ and ¾ inch backfrom the end of thetube is needed forproper coverage.
8/7/2019 Lokring Service Connector Instructions
http://slidepdf.com/reader/full/lokring-service-connector-instructions 9/14
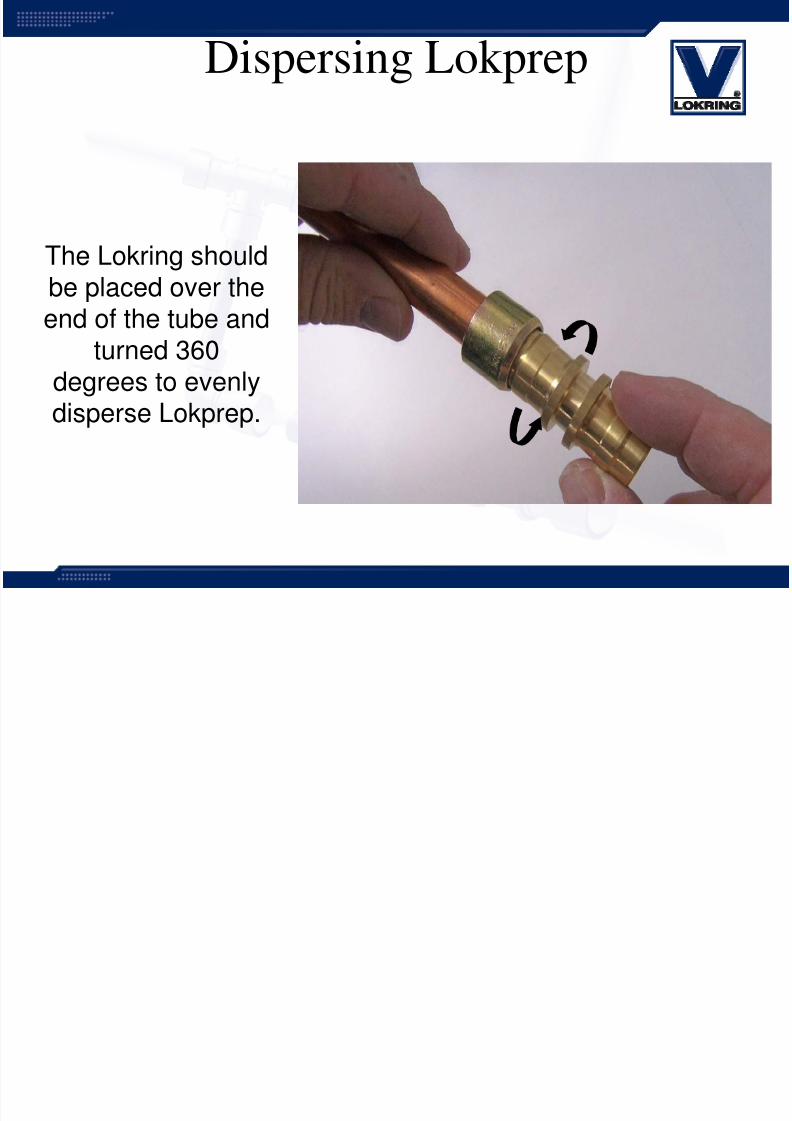
Dispersing Lokprep
The Lokring shouldbe placed over the
end of the tube andturned 360
degrees to evenly
disperse Lokprep.

8/7/2019 Lokring Service Connector Instructions
http://slidepdf.com/reader/full/lokring-service-connector-instructions 10/14
Visual Aid for Proper Tube Insertion
1. Remove ring fromLokring body.
2. Place ring overtube chamferedside toward tubeend.
3. Place Lokring bodyover tube end untilfully seat againstinternal stop andmark tube.
4. After completingconnection, marksaligning withLokring body endindicate tube iscorrectly inserted.
1 2
3 4

8/7/2019 Lokring Service Connector Instructions
http://slidepdf.com/reader/full/lokring-service-connector-instructions 11/14
Tube must beinserted fully to
Lokring internal stop.
Wrong
Correct
8/7/2019 Lokring Service Connector Instructions
http://slidepdf.com/reader/full/lokring-service-connector-instructions 12/14
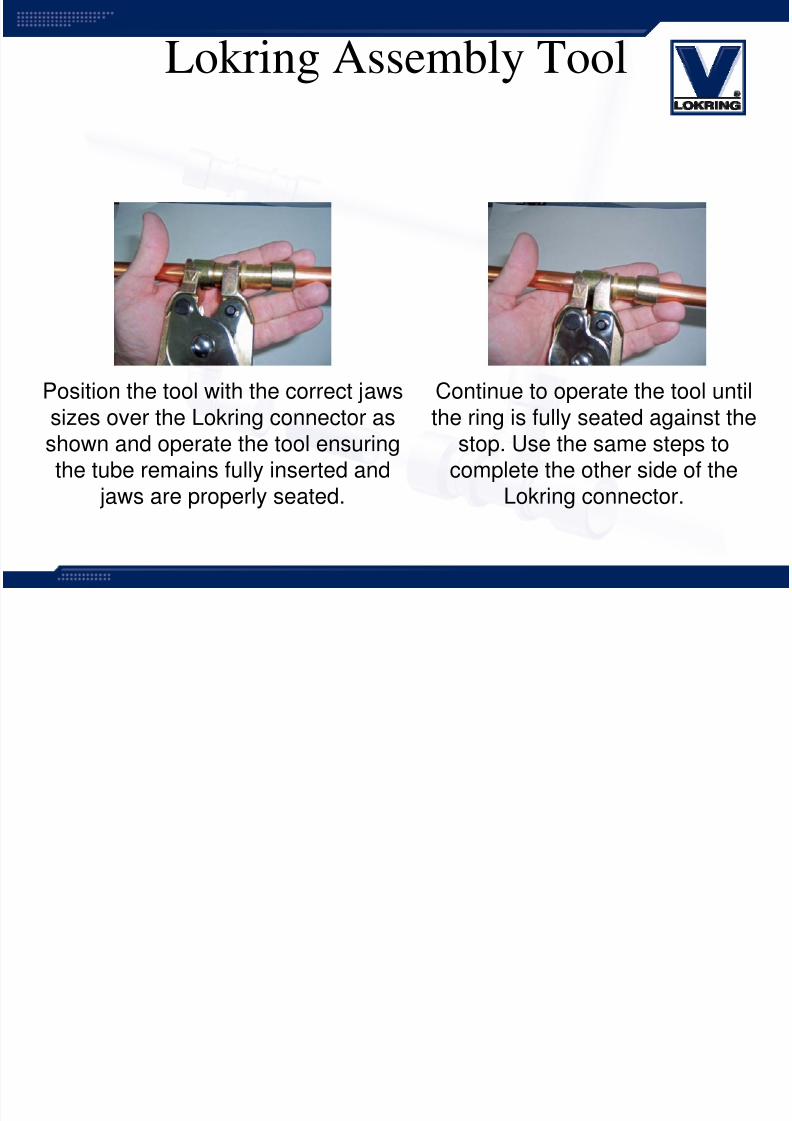
Lokring Assembly Tool
Position the tool with the correct jaws
sizes over the Lokring connector asshown and operate the tool ensuringthe tube remains fully inserted and
jaws are properly seated.
Continue to operate the tool until
the ring is fully seated against thestop. Use the same steps to
complete the other side of theLokring connector.
8/7/2019 Lokring Service Connector Instructions
http://slidepdf.com/reader/full/lokring-service-connector-instructions 13/14
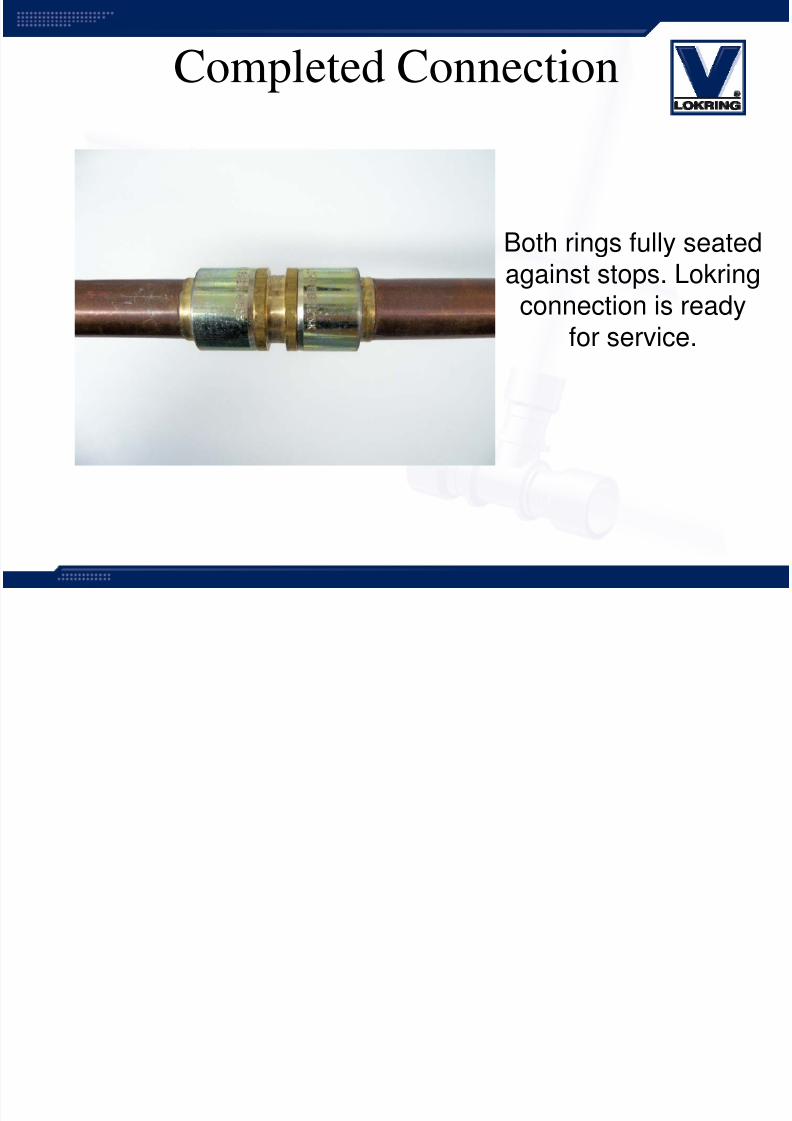
Completed Connection
Both rings fully seatedagainst stops. Lokring
connection is readyfor service.
8/7/2019 Lokring Service Connector Instructions
http://slidepdf.com/reader/full/lokring-service-connector-instructions 14/14
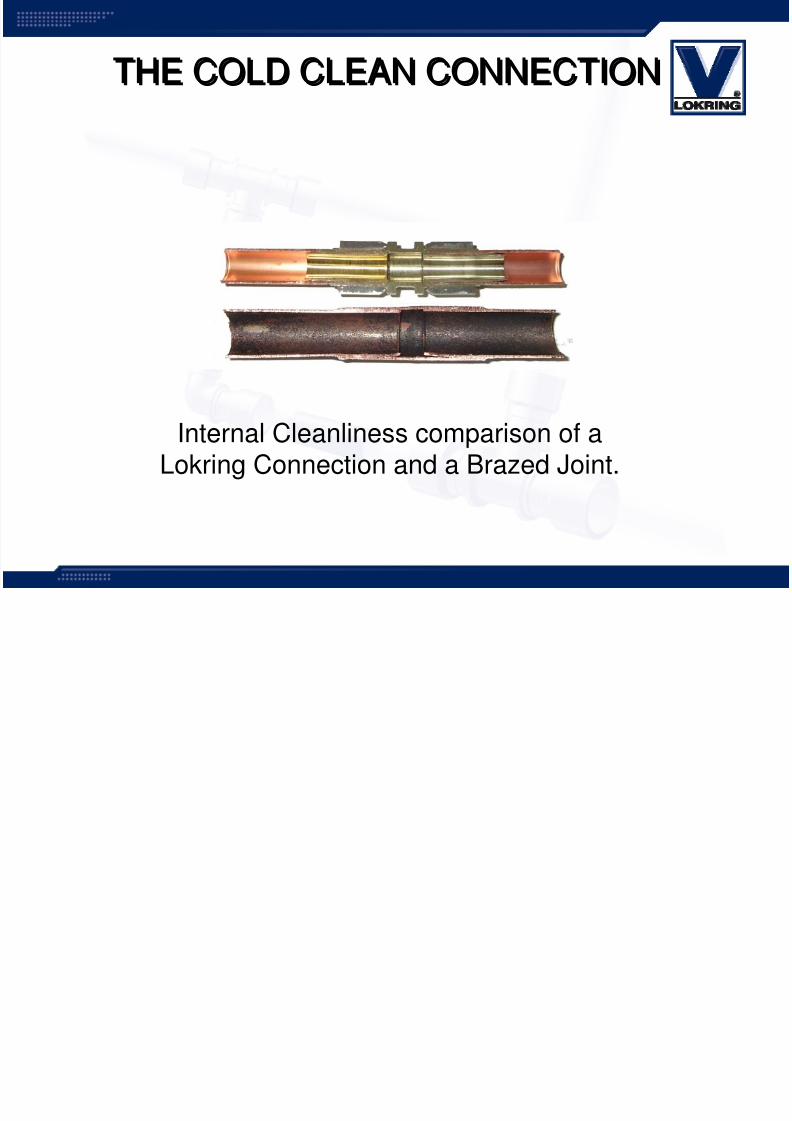
THE COLD CLEAN CONNECTIONTHE COLD CLEAN CONNECTION
Internal Cleanliness comparison of aLokring Connection and a Brazed Joint.


![[ Die LOKRING Rohrverbindung ] - Autoklimaanlage · Die LOKRING-Rohrverbindung ist durch Patente und Patentan- meldungen weltweit geschützt. Wichtig Die LOKRING-Gesellschaften liefern](https://img.pdfslide.us/doc/110x75/5ec6e930d3f1fa60cb7e77f8/-die-lokring-rohrverbindung-die-lokring-rohrverbindung-ist-durch-patente-und.jpg)