Embed Size (px)
Citation preview
EdGrants Front Office User Guide: Applying for a Grant
1
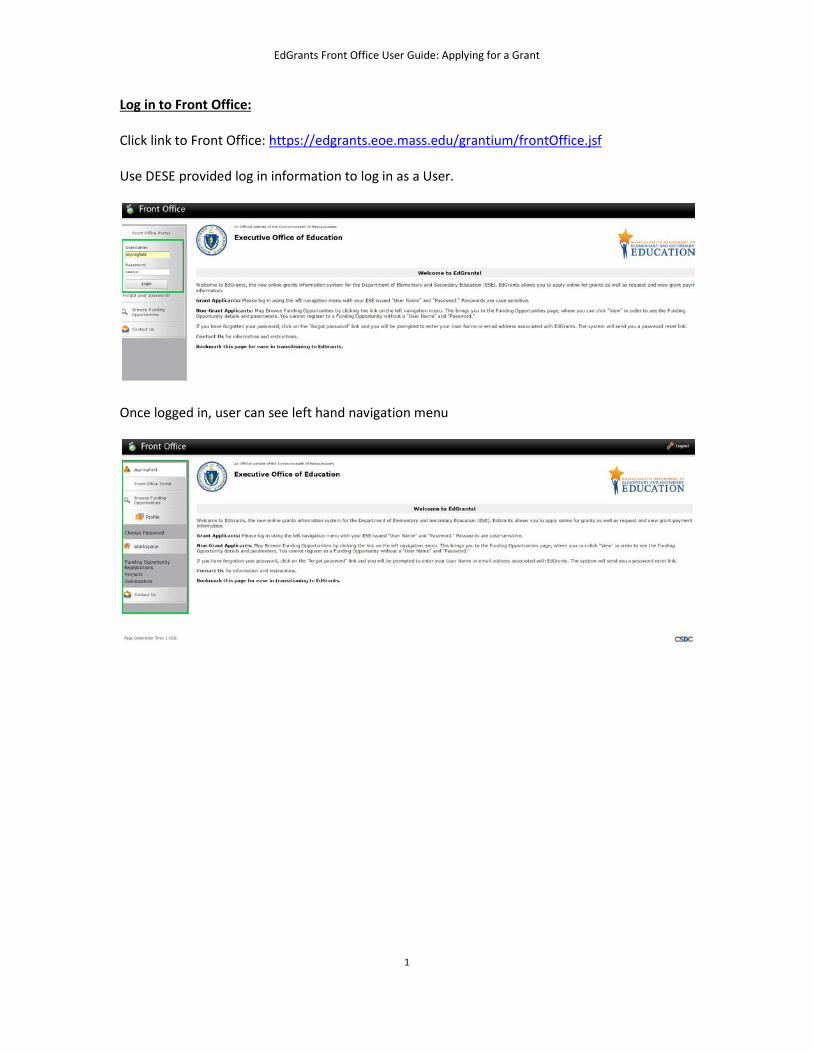
Log in to Front Office: Click link to Front Office: https://edgrants.eoe.mass.edu/grantium/frontOffice.jsf Use DESE provided log in information to log in as a User.
Once logged in, user can see left hand navigation menu
EdGrants Front Office User Guide: Applying for a Grant
2
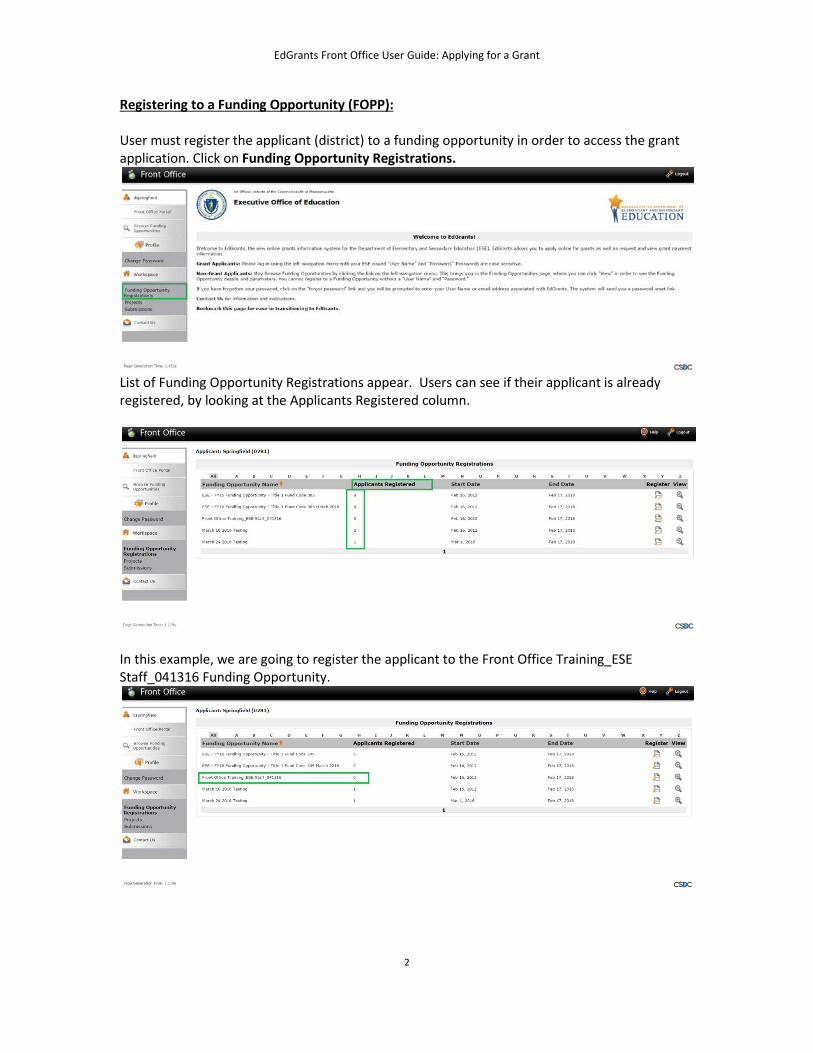
Registering to a Funding Opportunity (FOPP): User must register the applicant (district) to a funding opportunity in order to access the grant application. Click on Funding Opportunity Registrations.
List of Funding Opportunity Registrations appear. Users can see if their applicant is already registered, by looking at the Applicants Registered column.
In this example, we are going to register the applicant to the Front Office Training_ESE Staff_041316 Funding Opportunity.
EdGrants Front Office User Guide: Applying for a Grant
3
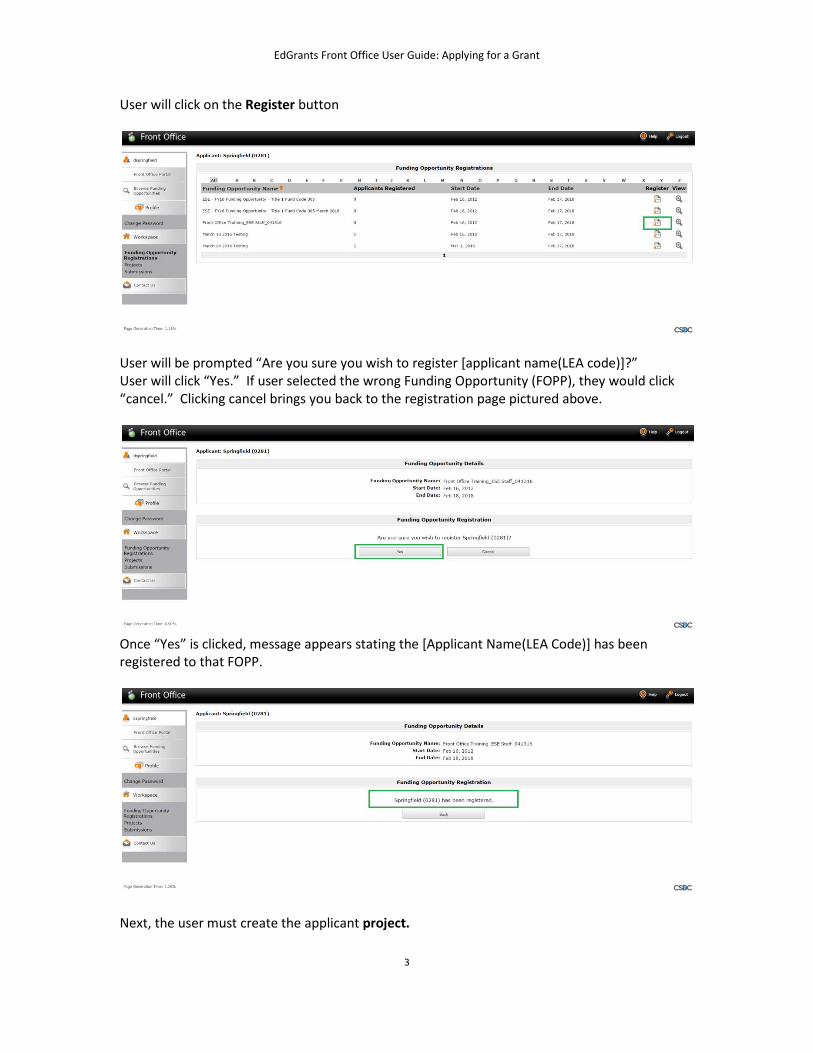
User will click on the Register button
User will be prompted “Are you sure you wish to register [applicant name(LEA code)]?” User will click “Yes.” If user selected the wrong Funding Opportunity (FOPP), they would click “cancel.” Clicking cancel brings you back to the registration page pictured above.
Once “Yes” is clicked, message appears stating the [Applicant Name(LEA Code)] has been registered to that FOPP.
Next, the user must create the applicant project.
EdGrants Front Office User Guide: Applying for a Grant
4
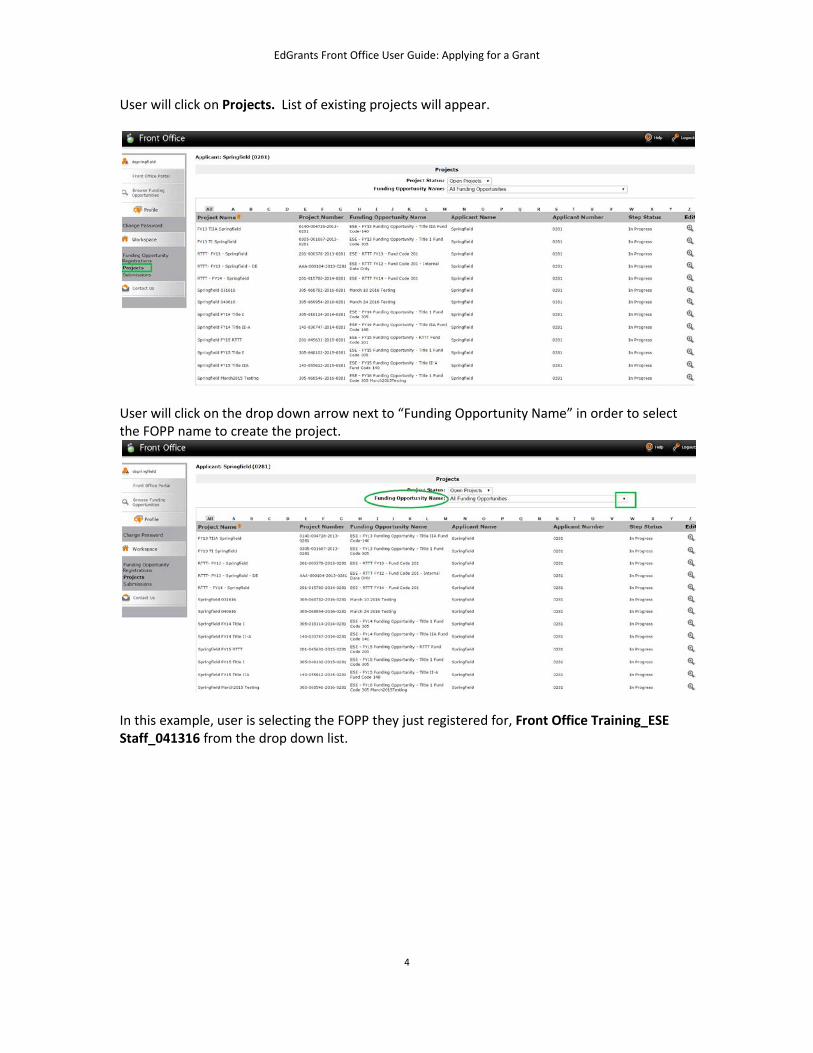
User will click on Projects. List of existing projects will appear.
User will click on the drop down arrow next to “Funding Opportunity Name” in order to select the FOPP name to create the project.
In this example, user is selecting the FOPP they just registered for, Front Office Training_ESE Staff_041316 from the drop down list.
EdGrants Front Office User Guide: Applying for a Grant
5
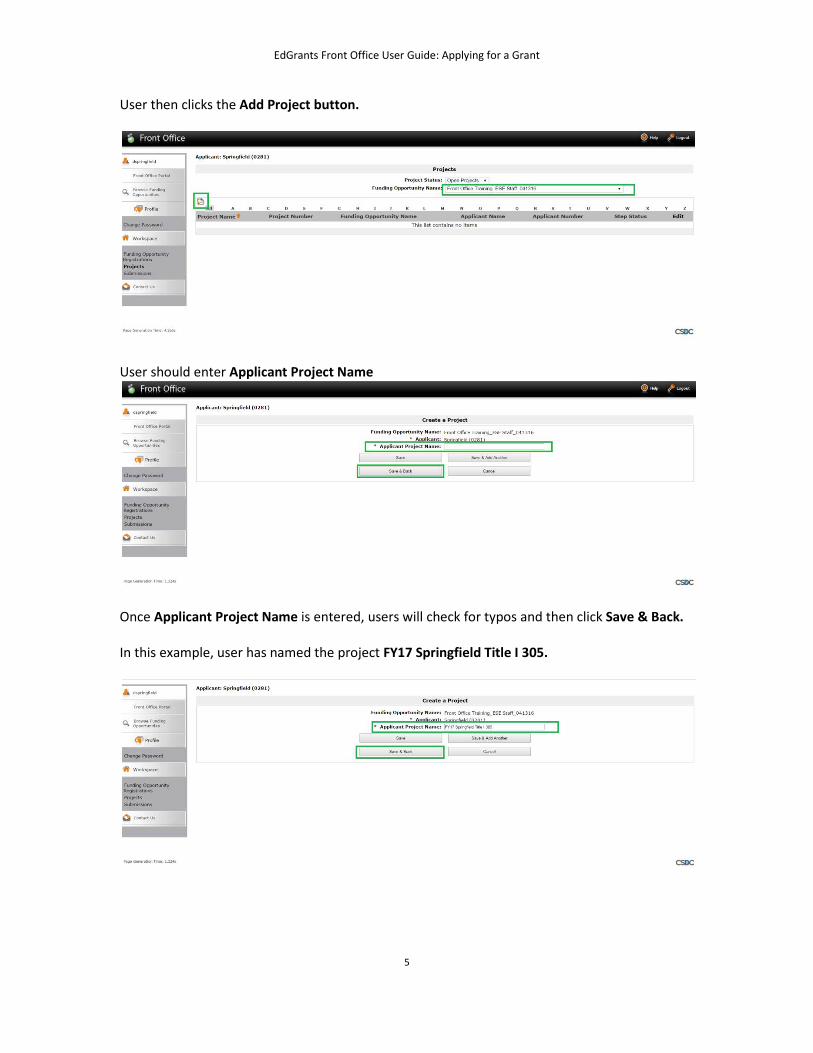
User then clicks the Add Project button.
User should enter Applicant Project Name
Once Applicant Project Name is entered, users will check for typos and then click Save & Back. In this example, user has named the project FY17 Springfield Title I 305.
EdGrants Front Office User Guide: Applying for a Grant
6
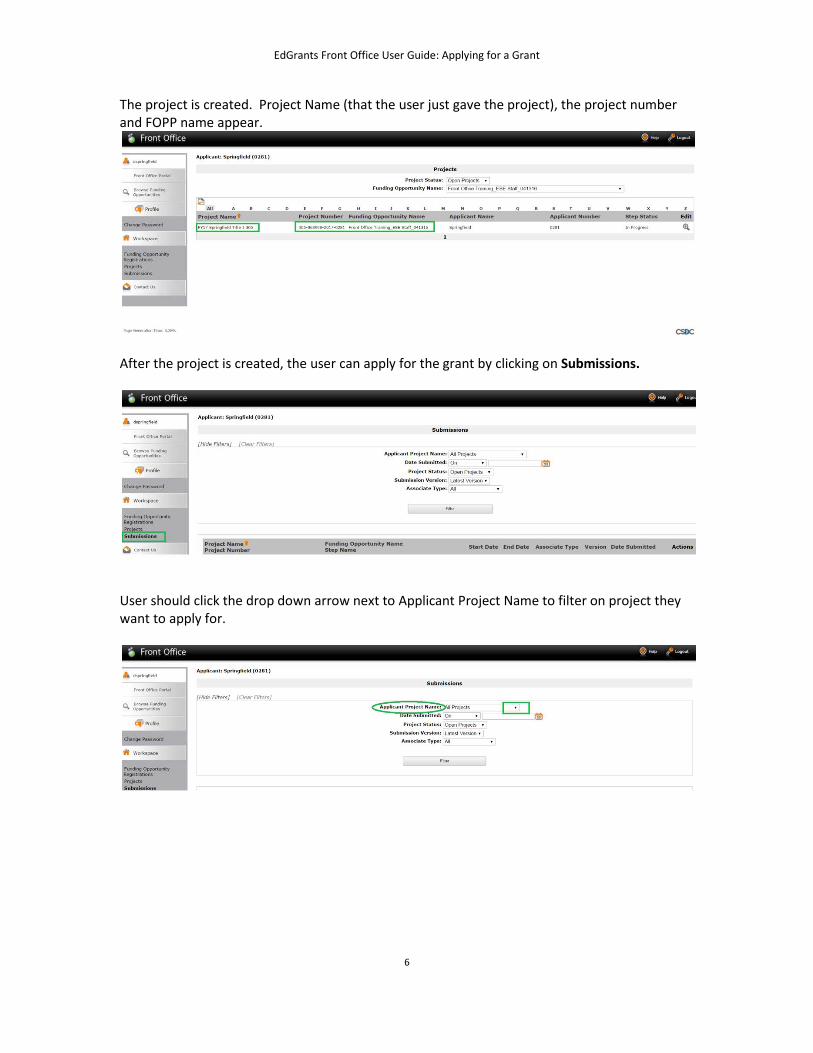
The project is created. Project Name (that the user just gave the project), the project number and FOPP name appear.
After the project is created, the user can apply for the grant by clicking on Submissions.
User should click the drop down arrow next to Applicant Project Name to filter on project they want to apply for.
EdGrants Front Office User Guide: Applying for a Grant
7
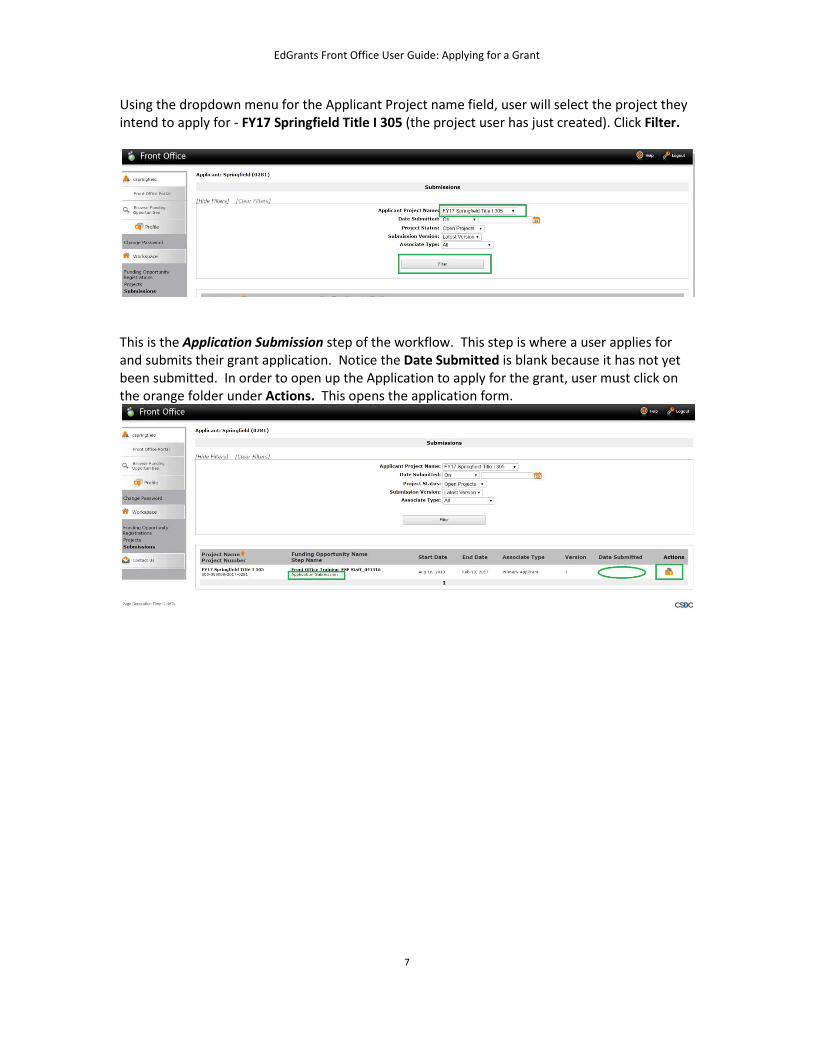
Using the dropdown menu for the Applicant Project name field, user will select the project they intend to apply for - FY17 Springfield Title I 305 (the project user has just created). Click Filter.
This is the Application Submission step of the workflow. This step is where a user applies for and submits their grant application. Notice the Date Submitted is blank because it has not yet been submitted. In order to open up the Application to apply for the grant, user must click on the orange folder under Actions. This opens the application form.
EdGrants Front Office User Guide: Applying for a Grant
8
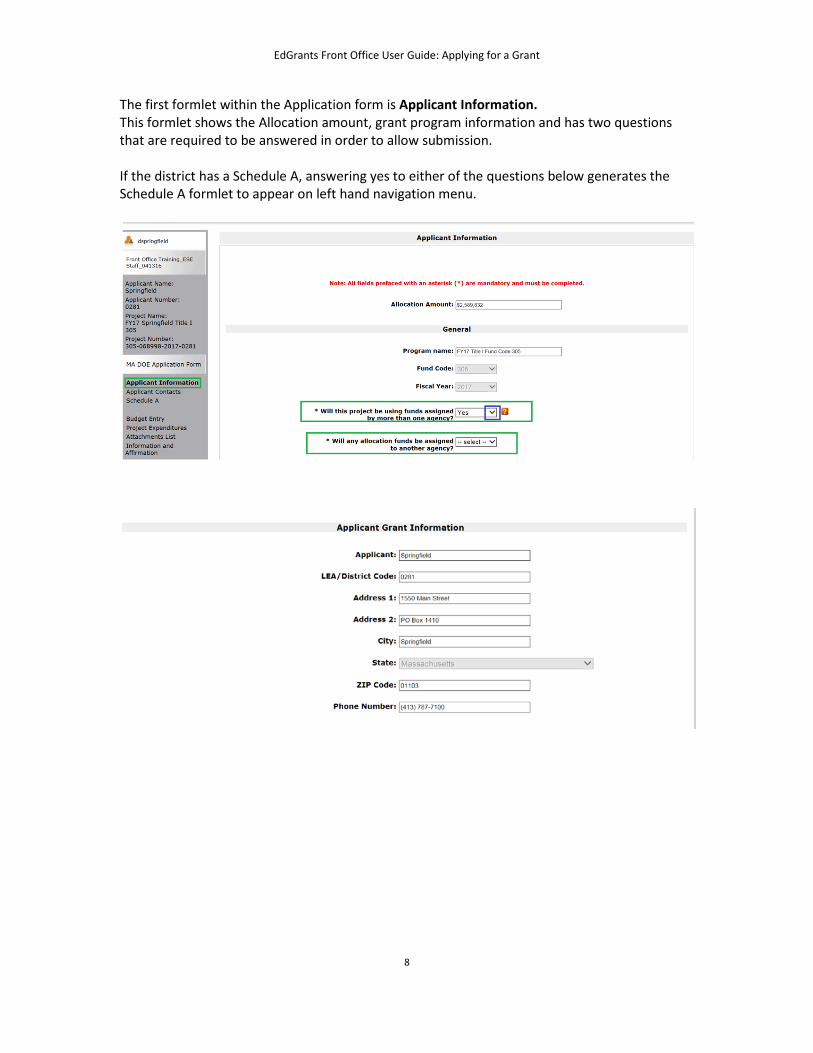
The first formlet within the Application form is Applicant Information. This formlet shows the Allocation amount, grant program information and has two questions that are required to be answered in order to allow submission. If the district has a Schedule A, answering yes to either of the questions below generates the Schedule A formlet to appear on left hand navigation menu.
EdGrants Front Office User Guide: Applying for a Grant
9
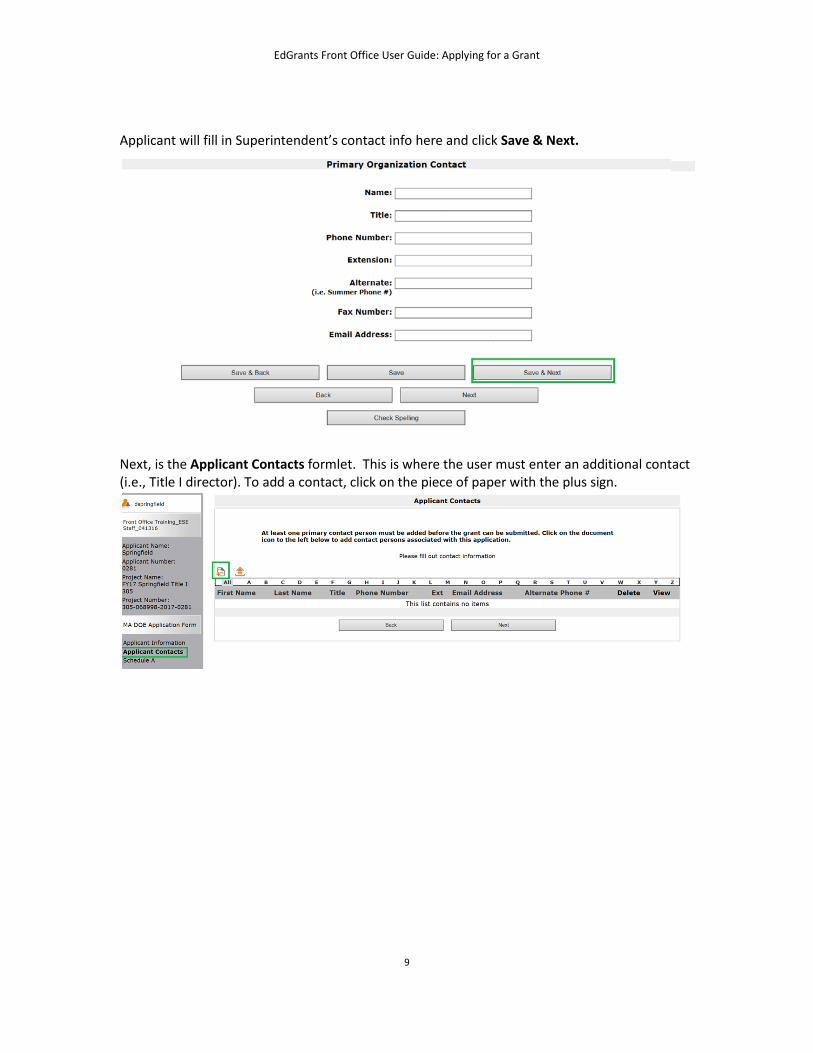
Applicant will fill in Superintendent’s contact info here and click Save & Next.
Next, is the Applicant Contacts formlet. This is where the user must enter an additional contact (i.e., Title I director). To add a contact, click on the piece of paper with the plus sign.
EdGrants Front Office User Guide: Applying for a Grant
10
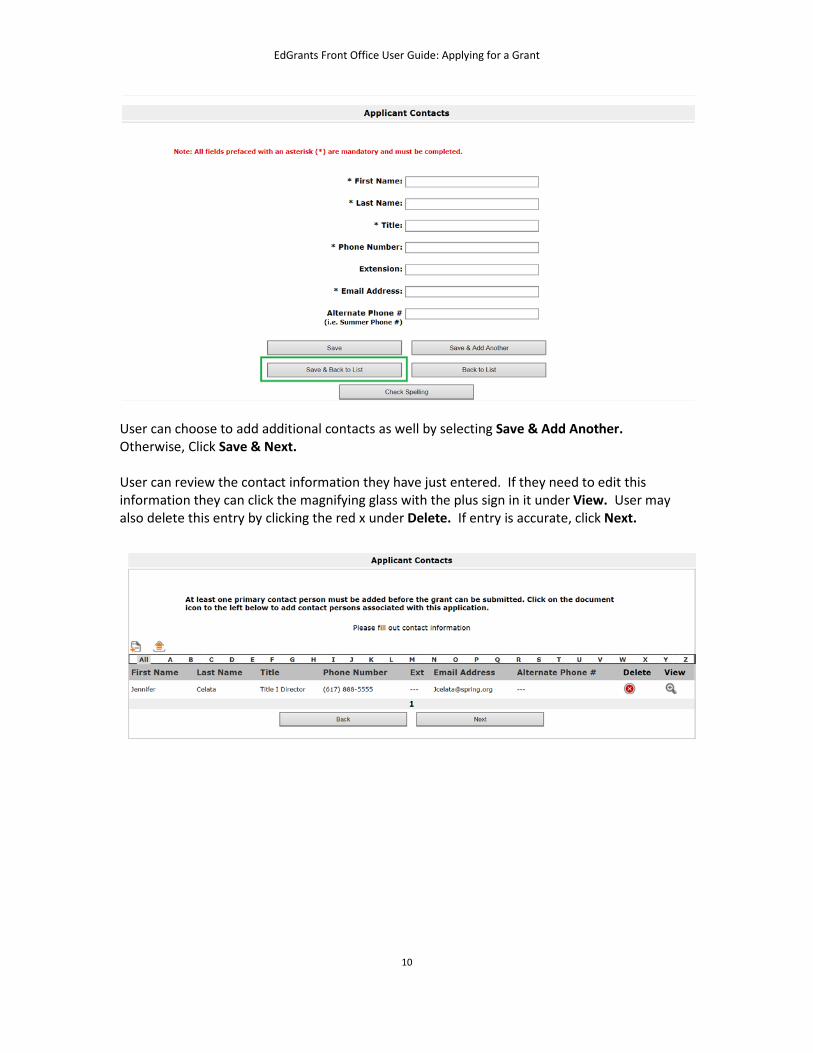
User can choose to add additional contacts as well by selecting Save & Add Another. Otherwise, Click Save & Next. User can review the contact information they have just entered. If they need to edit this information they can click the magnifying glass with the plus sign in it under View. User may also delete this entry by clicking the red x under Delete. If entry is accurate, click Next.
EdGrants Front Office User Guide: Applying for a Grant
11
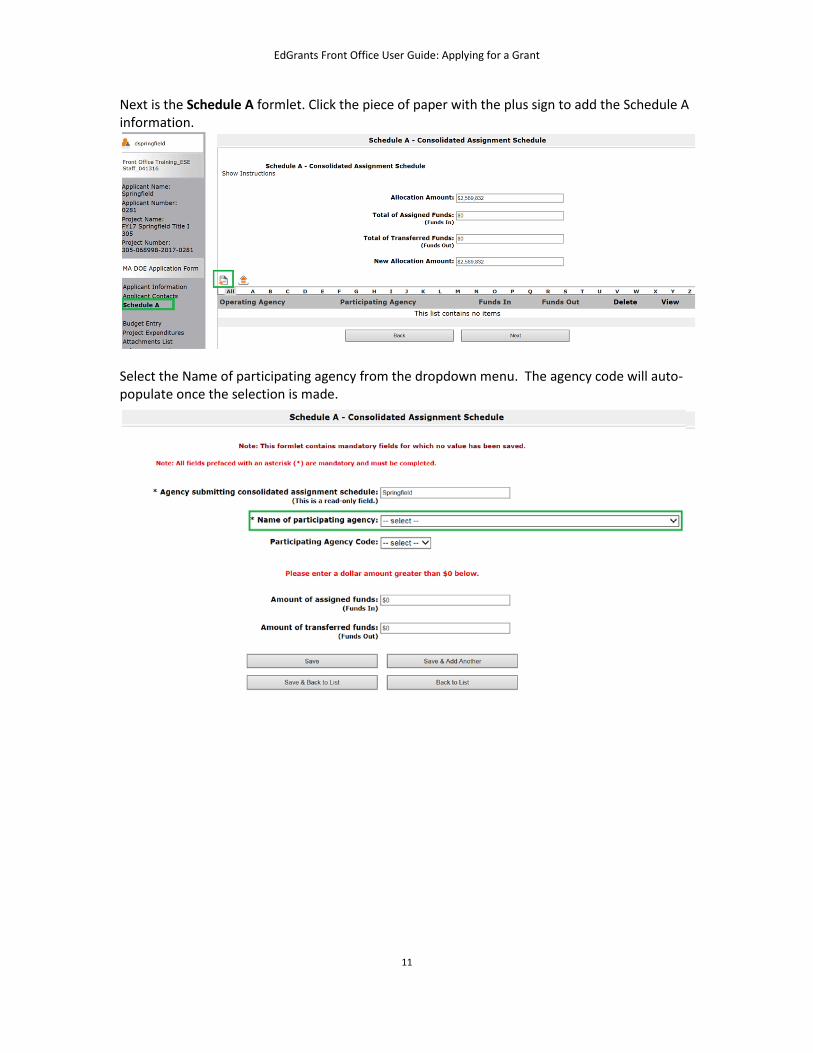
Next is the Schedule A formlet. Click the piece of paper with the plus sign to add the Schedule A information.
Select the Name of participating agency from the dropdown menu. The agency code will auto-populate once the selection is made.
EdGrants Front Office User Guide: Applying for a Grant
12
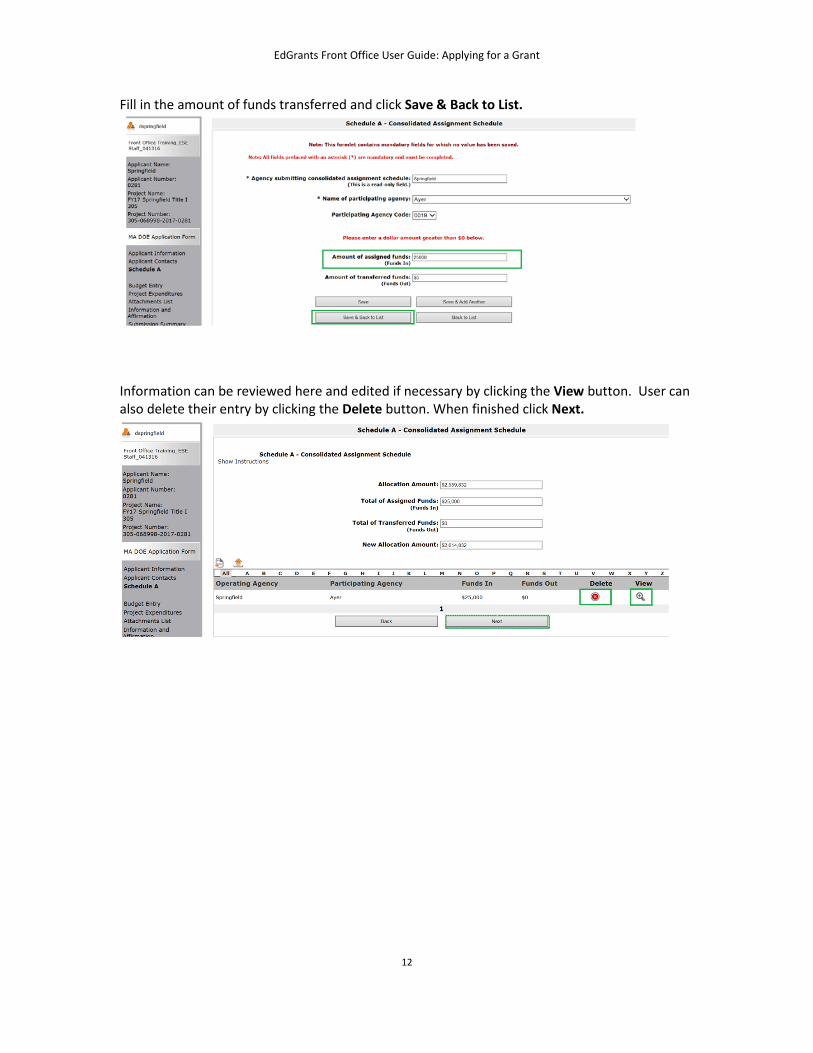
Fill in the amount of funds transferred and click Save & Back to List.
Information can be reviewed here and edited if necessary by clicking the View button. User can also delete their entry by clicking the Delete button. When finished click Next.
EdGrants Front Office User Guide: Applying for a Grant
13
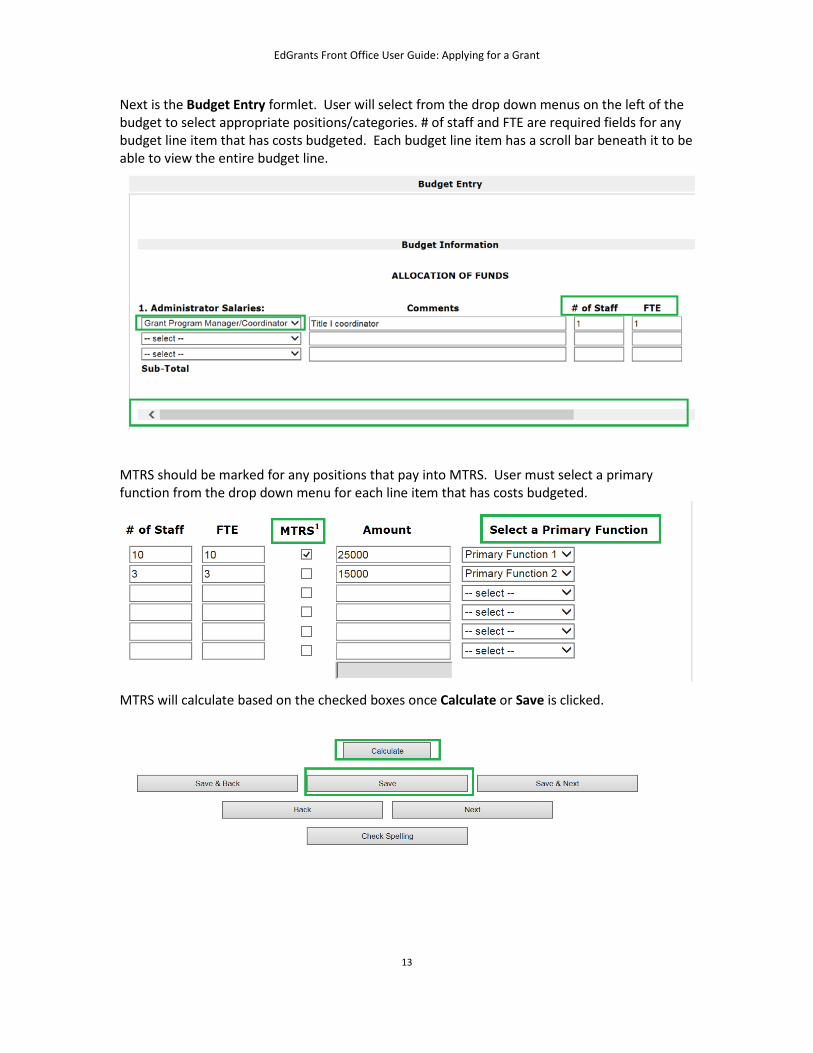
Next is the Budget Entry formlet. User will select from the drop down menus on the left of the budget to select appropriate positions/categories. # of staff and FTE are required fields for any budget line item that has costs budgeted. Each budget line item has a scroll bar beneath it to be able to view the entire budget line.
MTRS should be marked for any positions that pay into MTRS. User must select a primary function from the drop down menu for each line item that has costs budgeted.
MTRS will calculate based on the checked boxes once Calculate or Save is clicked.
EdGrants Front Office User Guide: Applying for a Grant
14
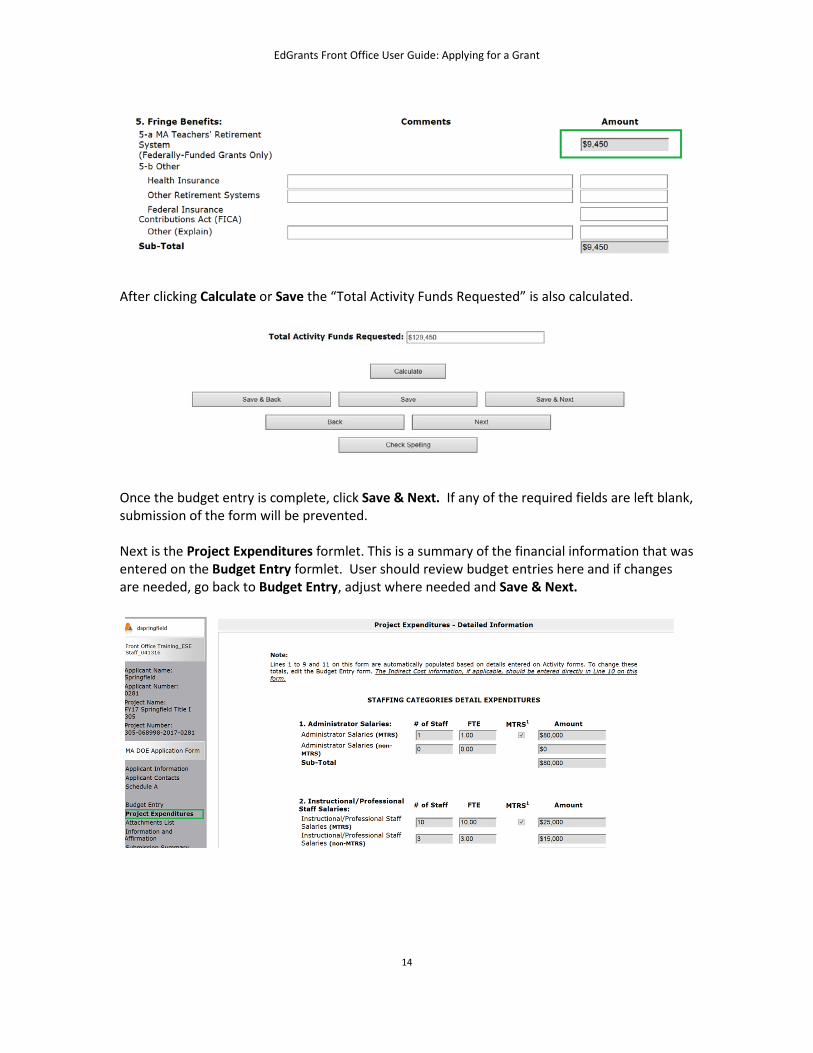
After clicking Calculate or Save the “Total Activity Funds Requested” is also calculated.
Once the budget entry is complete, click Save & Next. If any of the required fields are left blank, submission of the form will be prevented. Next is the Project Expenditures formlet. This is a summary of the financial information that was entered on the Budget Entry formlet. User should review budget entries here and if changes are needed, go back to Budget Entry, adjust where needed and Save & Next.
EdGrants Front Office User Guide: Applying for a Grant
15
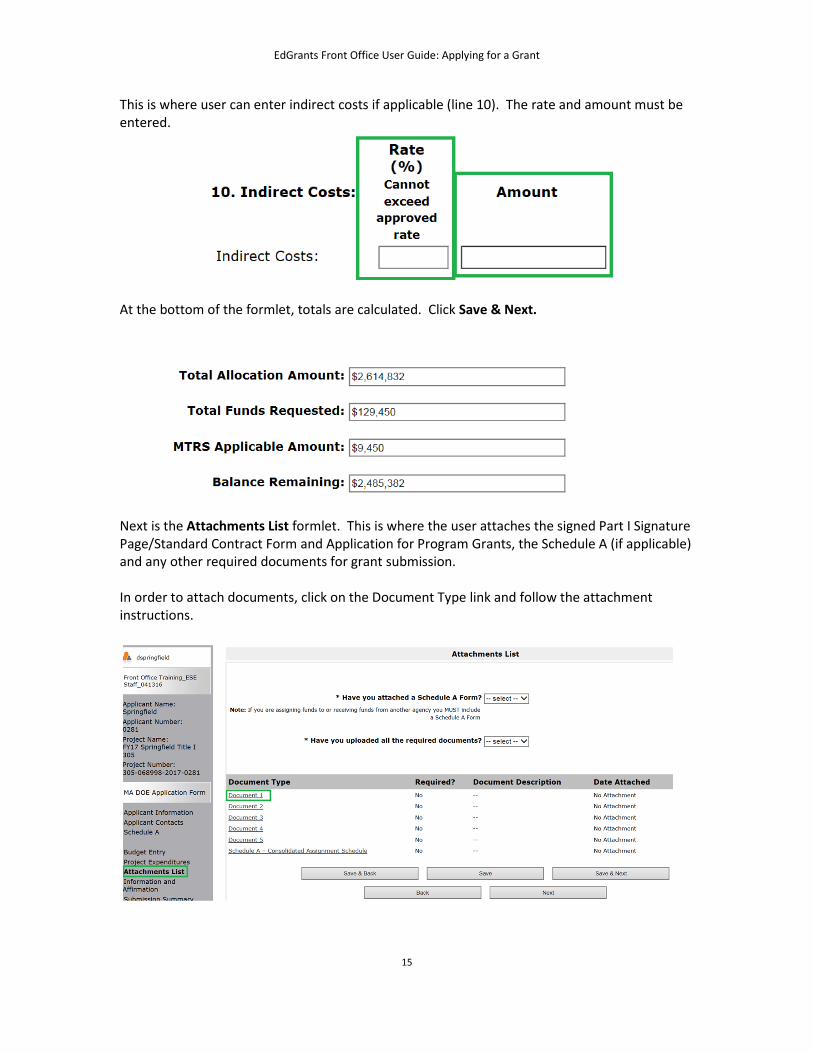
This is where user can enter indirect costs if applicable (line 10). The rate and amount must be entered.
At the bottom of the formlet, totals are calculated. Click Save & Next.
Next is the Attachments List formlet. This is where the user attaches the signed Part I Signature Page/Standard Contract Form and Application for Program Grants, the Schedule A (if applicable) and any other required documents for grant submission. In order to attach documents, click on the Document Type link and follow the attachment instructions.
EdGrants Front Office User Guide: Applying for a Grant
16
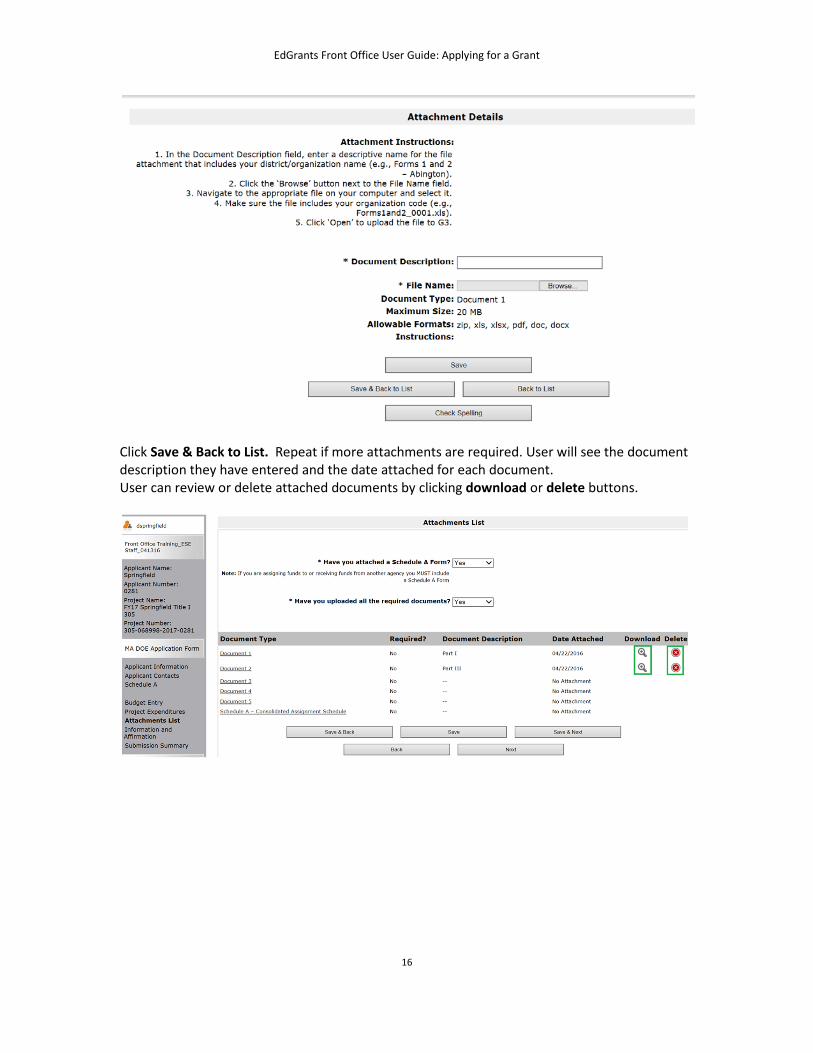
Click Save & Back to List. Repeat if more attachments are required. User will see the document description they have entered and the date attached for each document. User can review or delete attached documents by clicking download or delete buttons.
EdGrants Front Office User Guide: Applying for a Grant
17
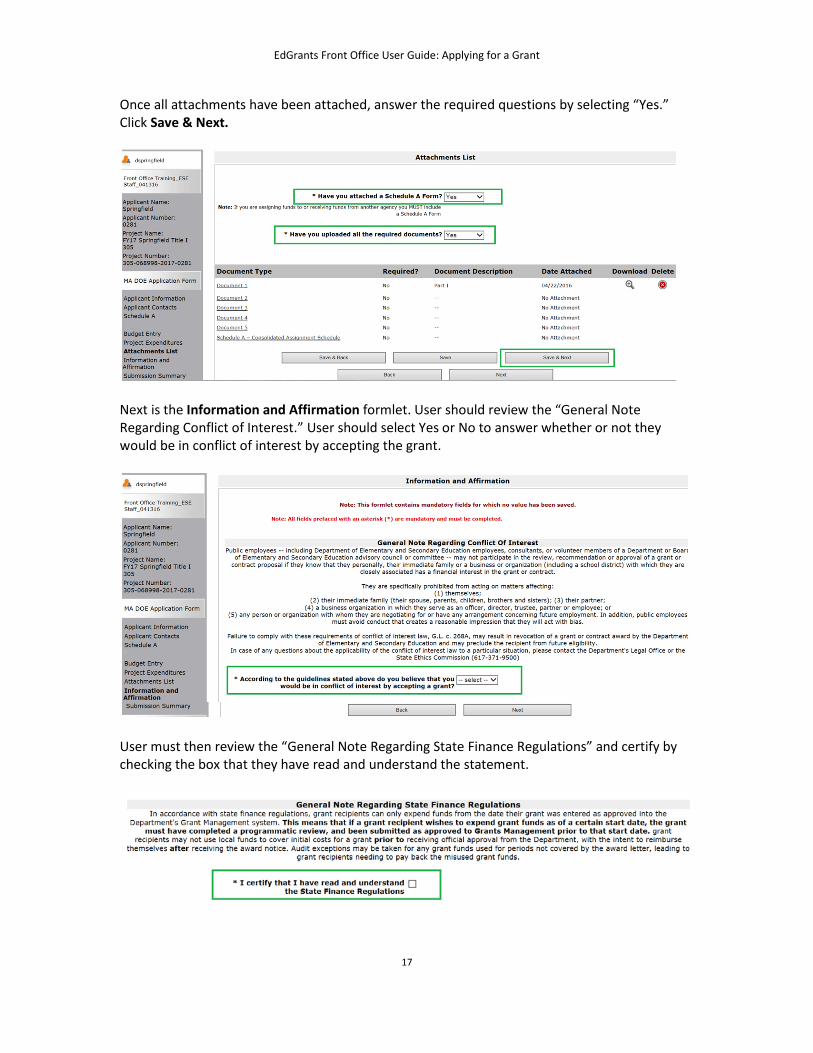
Once all attachments have been attached, answer the required questions by selecting “Yes.” Click Save & Next.
Next is the Information and Affirmation formlet. User should review the “General Note Regarding Conflict of Interest.” User should select Yes or No to answer whether or not they would be in conflict of interest by accepting the grant.
User must then review the “General Note Regarding State Finance Regulations” and certify by checking the box that they have read and understand the statement.
EdGrants Front Office User Guide: Applying for a Grant
18
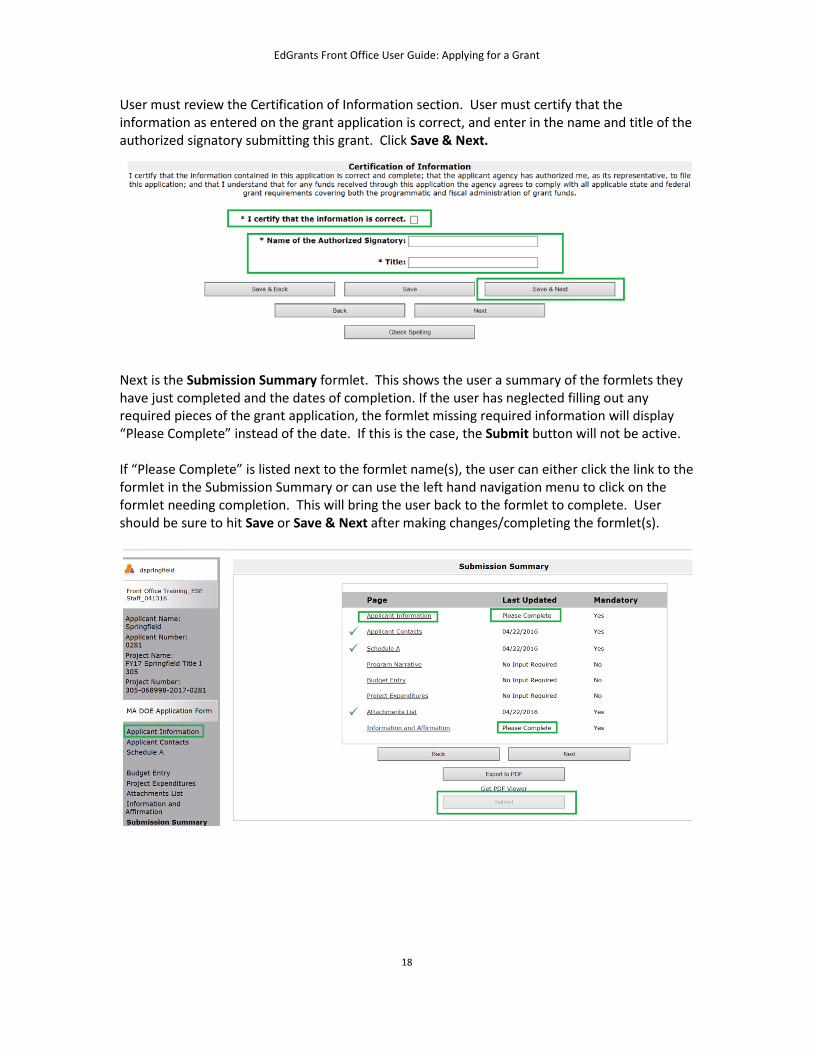
User must review the Certification of Information section. User must certify that the information as entered on the grant application is correct, and enter in the name and title of the authorized signatory submitting this grant. Click Save & Next.
Next is the Submission Summary formlet. This shows the user a summary of the formlets they have just completed and the dates of completion. If the user has neglected filling out any required pieces of the grant application, the formlet missing required information will display “Please Complete” instead of the date. If this is the case, the Submit button will not be active. If “Please Complete” is listed next to the formlet name(s), the user can either click the link to the formlet in the Submission Summary or can use the left hand navigation menu to click on the formlet needing completion. This will bring the user back to the formlet to complete. User should be sure to hit Save or Save & Next after making changes/completing the formlet(s).
EdGrants Front Office User Guide: Applying for a Grant
19
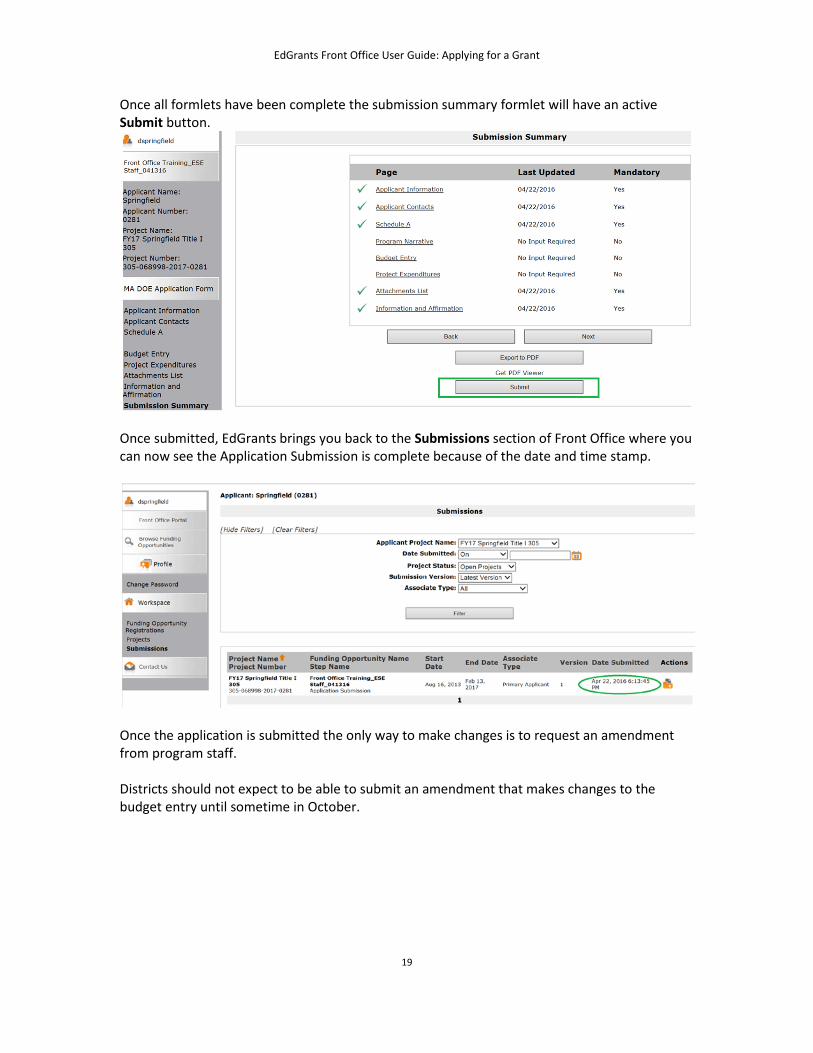
Once all formlets have been complete the submission summary formlet will have an active Submit button.
Once submitted, EdGrants brings you back to the Submissions section of Front Office where you can now see the Application Submission is complete because of the date and time stamp.
Once the application is submitted the only way to make changes is to request an amendment from program staff. Districts should not expect to be able to submit an amendment that makes changes to the budget entry until sometime in October.
EdGrants Front Office User Guide: Applying for a Grant
20
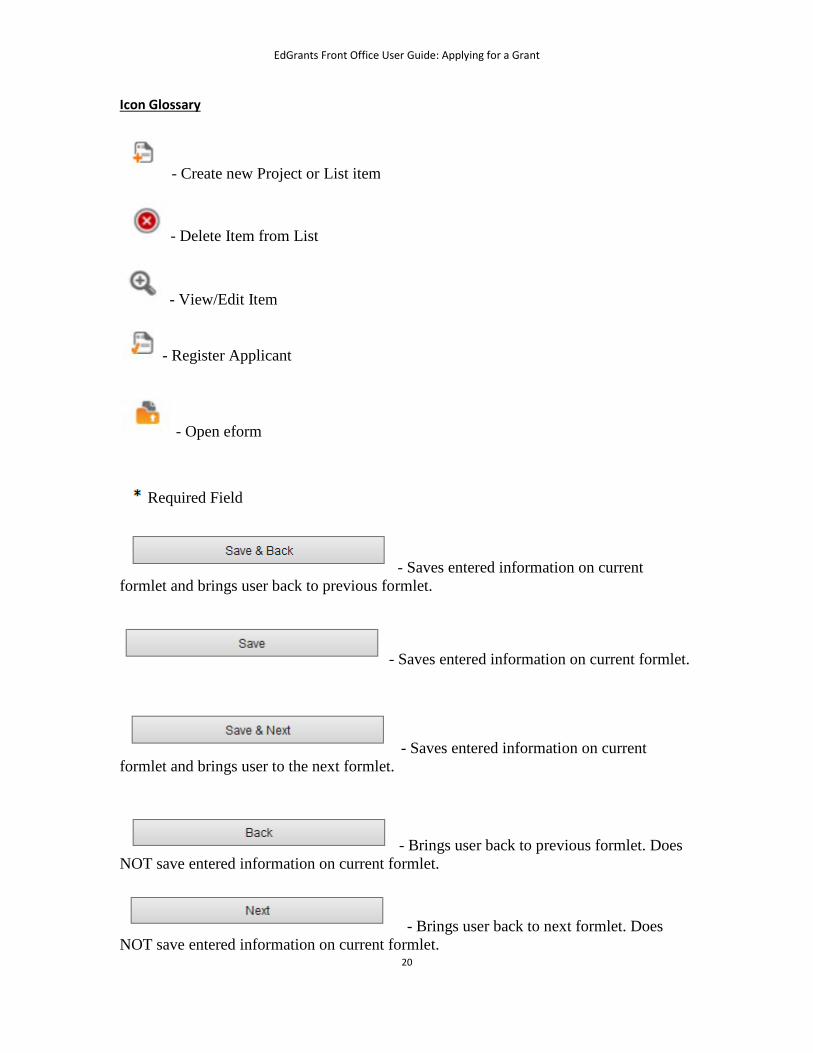
Icon Glossary
- Create new Project or List item
- Delete Item from List
- View/Edit Item
- Register Applicant
- Open eform
Required Field
- Saves entered information on current formlet and brings user back to previous formlet.
- Saves entered information on current formlet.
- Saves entered information on current formlet and brings user to the next formlet.
- Brings user back to previous formlet. Does NOT save entered information on current formlet.
- Brings user back to next formlet. Does NOT save entered information on current formlet.

EdGrants Front Office User Guide: Applying for a Grant
21
- Active Submit Button; will allow user to submit entry.
- Inactive Submit Button; will not allow user to submit entry. User should review error message to determine what is missing