Embed Size (px)
Citation preview
| Installation | Installing USB driver |
Installation
1. Click the Frame Manager icon to run the setup file.
2. Click Next.
3. Select I agree to the terms of this license agreement and click Next.
4. Click Next.
Install the Application first before connecting the Digital Photo Frame to a PC. To Install the Frame Manager Software and USB Secondary Display -
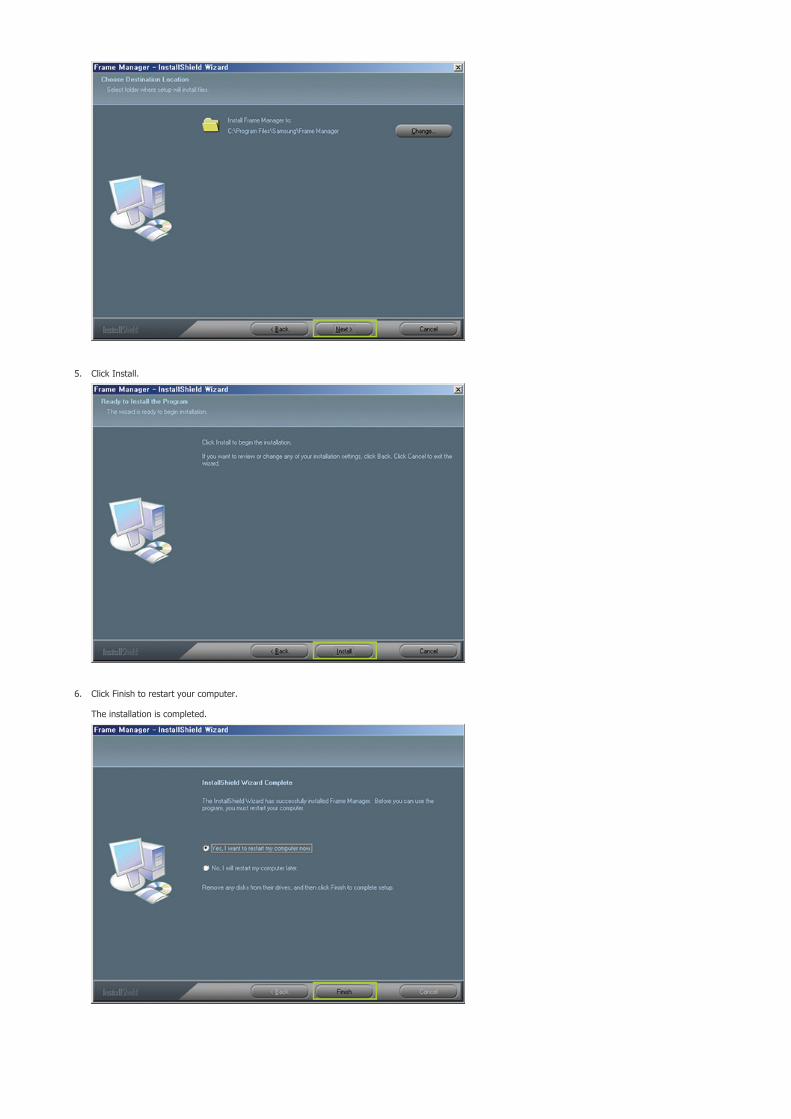
5. Click Install.
6. Click Finish to restart your computer.
The installation is completed.
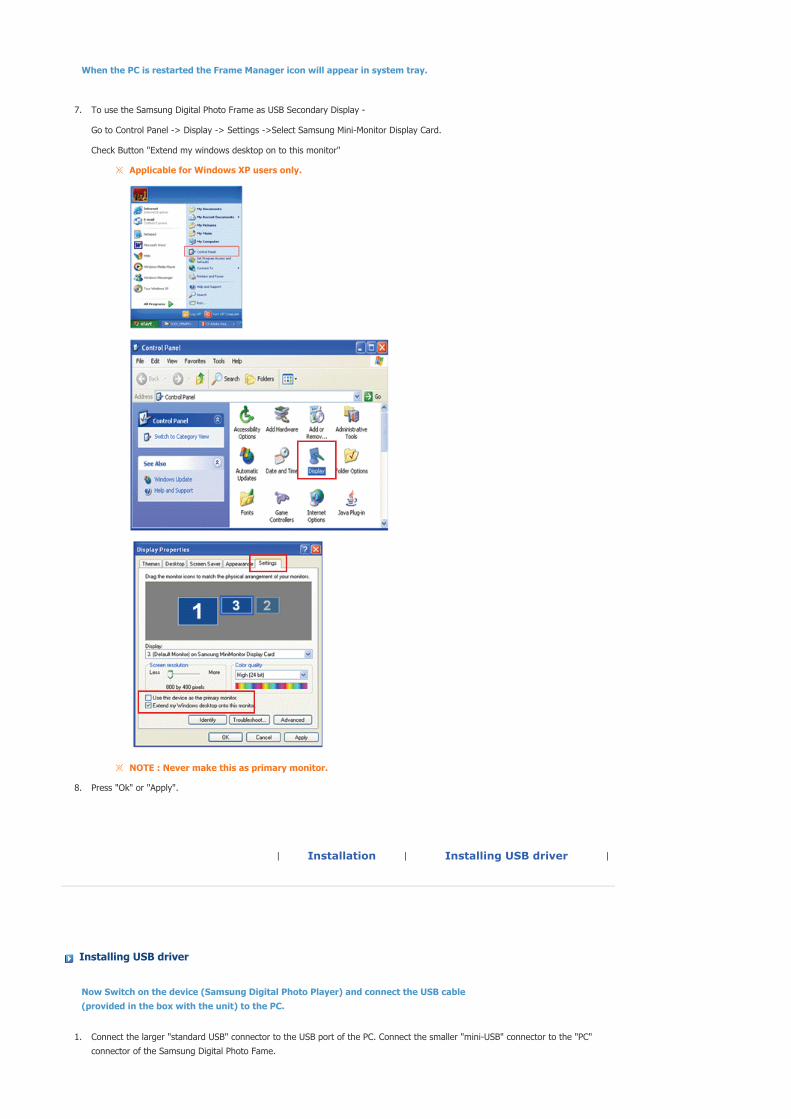
7. To use the Samsung Digital Photo Frame as USB Secondary Display -
Go to Control Panel -> Display -> Settings ->Select Samsung Mini-Monitor Display Card.
Check Button "Extend my windows desktop on to this monitor"
8. Press "Ok" or "Apply".
When the PC is restarted the Frame Manager icon will appear in system tray.
Applicable for Windows XP users only.
NOTE : Never make this as primary monitor.
| Installation | Installing USB driver |
Installing USB driver
1. Connect the larger "standard USB" connector to the USB port of the PC. Connect the smaller "mini-USB" connector to the "PC"
connector of the Samsung Digital Photo Fame.
Now Switch on the device (Samsung Digital Photo Player) and connect the USB cable (provided in the box with the unit) to the PC.
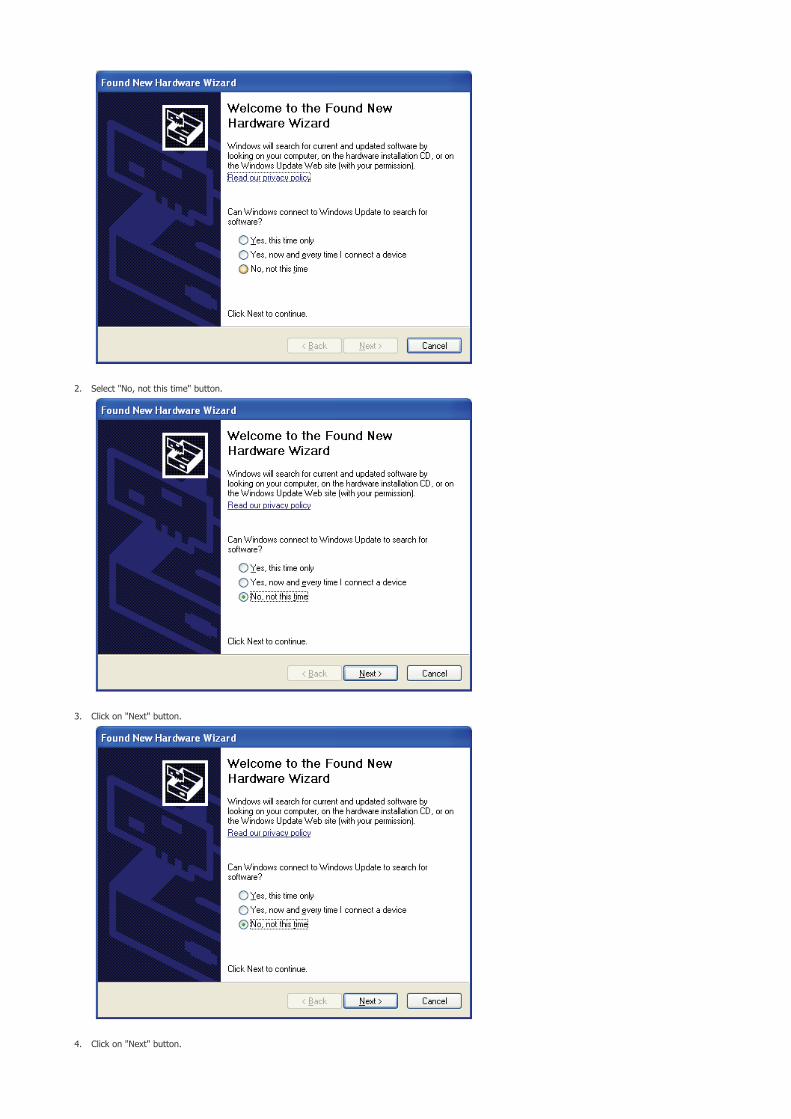
2. Select "No, not this time" button.
3. Click on "Next" button.
4. Click on "Next" button.

5. Select "Install from a list of specific location (Advanced)".
Click on Next button.
6. Select "Search for the best driver in these locations" option.
Check "Include this location in the search:"
Now click on "Browse" button to select the directory where the Frame Manger software is installed. (Refer to Frame Manager Installation step 3).
7. Now press "Next" button.
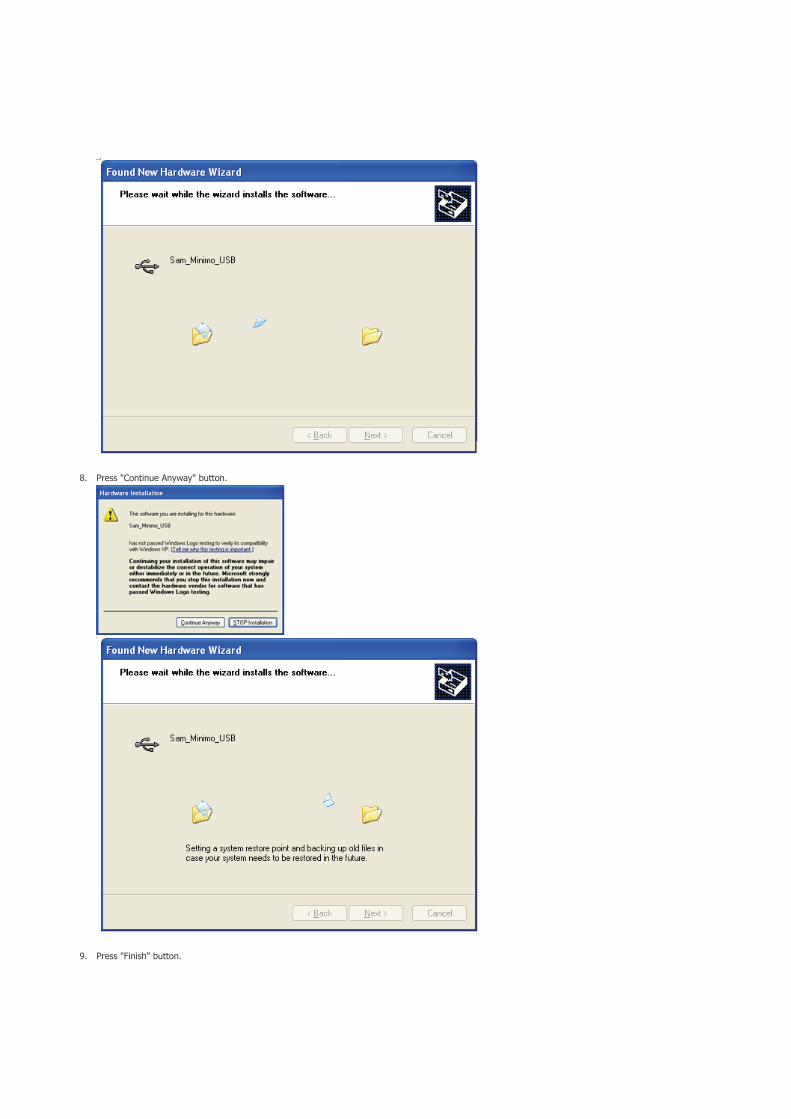
8. Press "Continue Anyway" button.
9. Press "Finish" button.
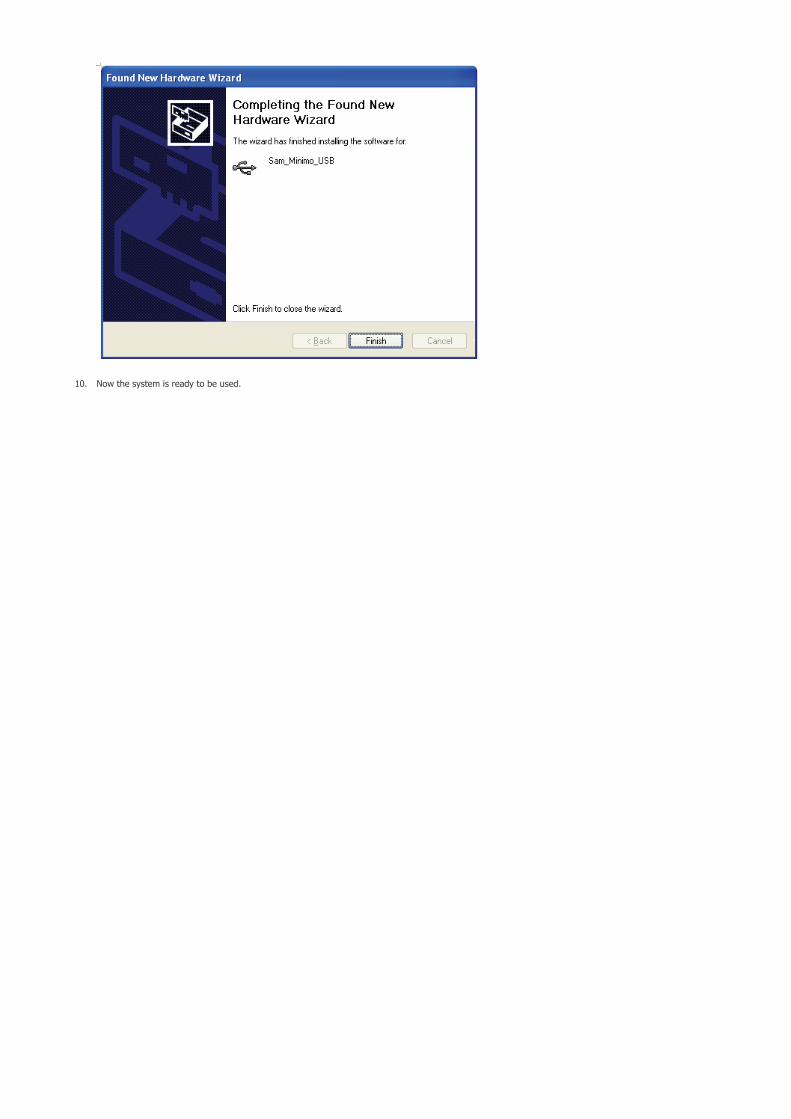
10. Now the system is ready to be used.
| Windows XP | Windows Vista | :::Windos XP
The Default Mode of the Samsung Digital Photo Frame is a Photo Album. To use the Digital Photo Frame as a secondary USB Monitor or USB Mass-storage device, follow the instructions below.
How To Use Digital Photo Frame As Mini-Monitor
If USB cable is not connected and Digital Photo Frame is switched on, it starts working as a Photo Album.
To use the Samsung Digital Photo Frame device as a secondary USB Monitor, first install the frame Manger on the Windows XP computer. (Follow the Frame Manger Installation Guide for installation).
Use the USB cable to connect the computer’s USB port to the Digital Photo Frame’s USB port.
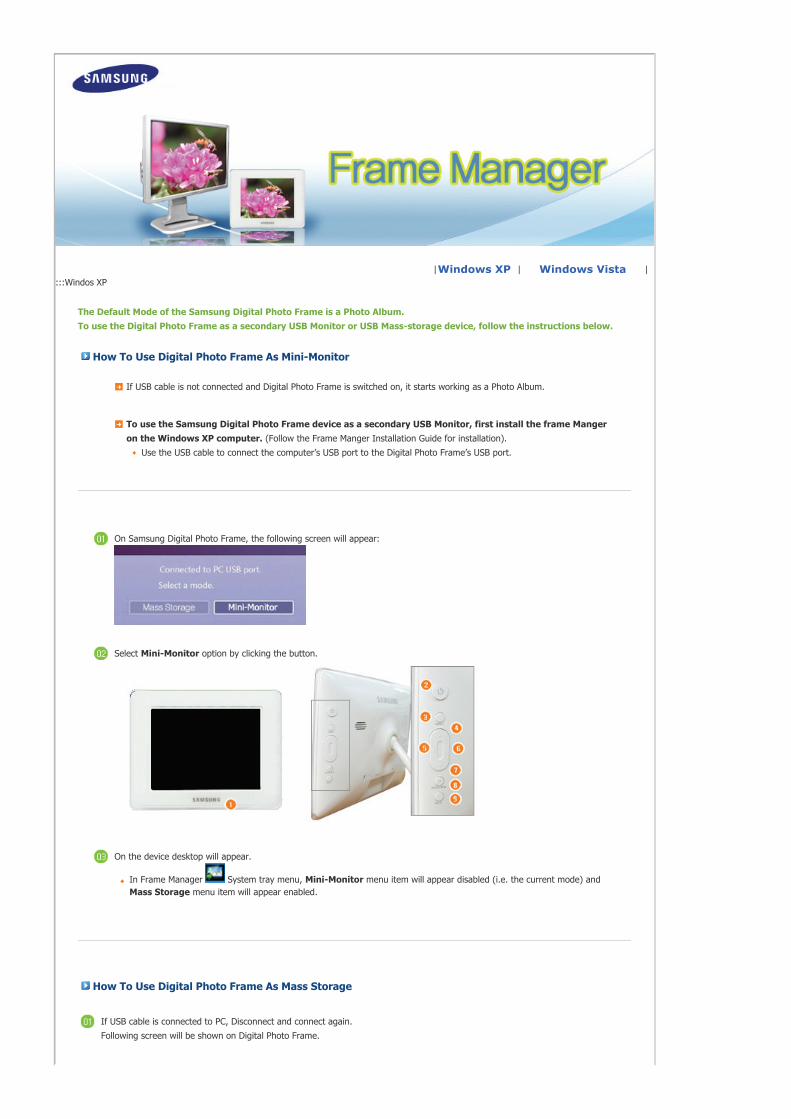
On Samsung Digital Photo Frame, the following screen will appear:
Select Mini-Monitor option by clicking the button.
On the device desktop will appear.
In Frame Manager System tray menu, Mini-Monitor menu item will appear disabled (i.e. the current mode) and Mass Storage menu item will appear enabled.
How To Use Digital Photo Frame As Mass Storage
If USB cable is connected to PC, Disconnect and connect again.
Following screen will be shown on Digital Photo Frame.
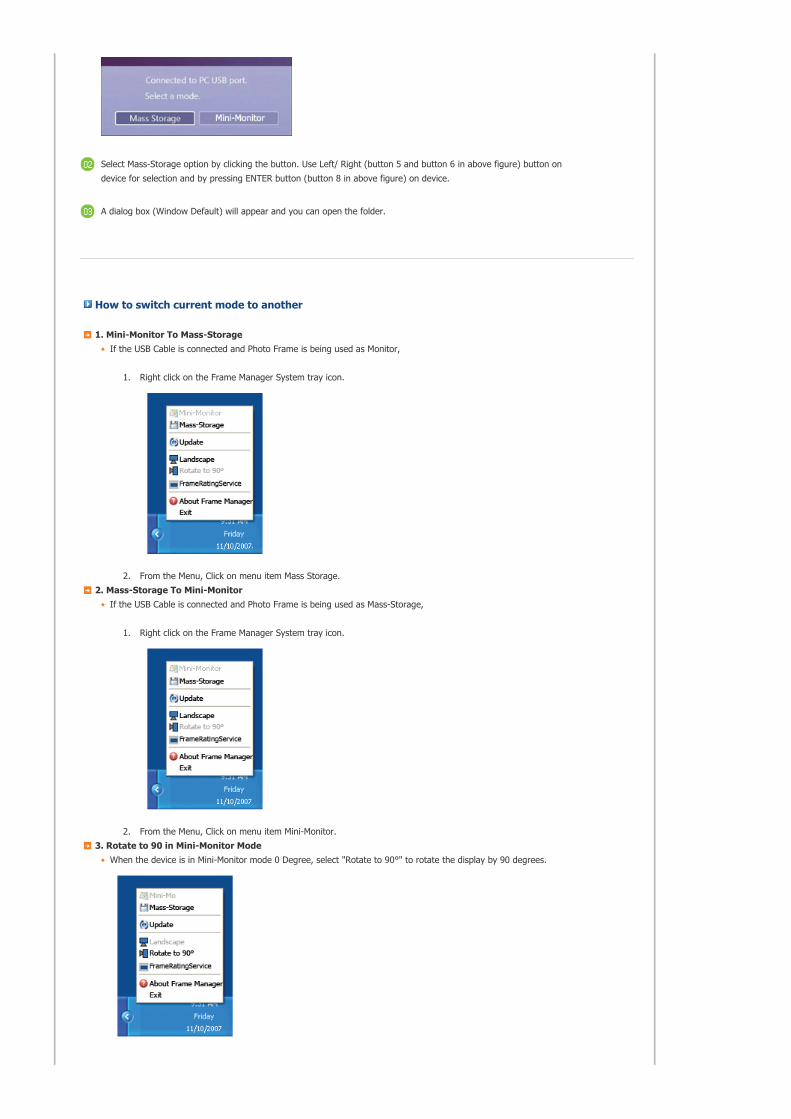
Select Mass-Storage option by clicking the button. Use Left/ Right (button 5 and button 6 in above figure) button on
device for selection and by pressing ENTER button (button 8 in above figure) on device.
A dialog box (Window Default) will appear and you can open the folder.
How to switch current mode to another
1. Mini-Monitor To Mass-Storage
If the USB Cable is connected and Photo Frame is being used as Monitor,
1. Right click on the Frame Manager System tray icon.
2. From the Menu, Click on menu item Mass Storage.
2. Mass-Storage To Mini-Monitor
If the USB Cable is connected and Photo Frame is being used as Mass-Storage,
1. Right click on the Frame Manager System tray icon.
2. From the Menu, Click on menu item Mini-Monitor.
3. Rotate to 90 in Mini-Monitor Mode
When the device is in Mini-Monitor mode 0 Degree, select "Rotate to 90°" to rotate the display by 90 degrees.
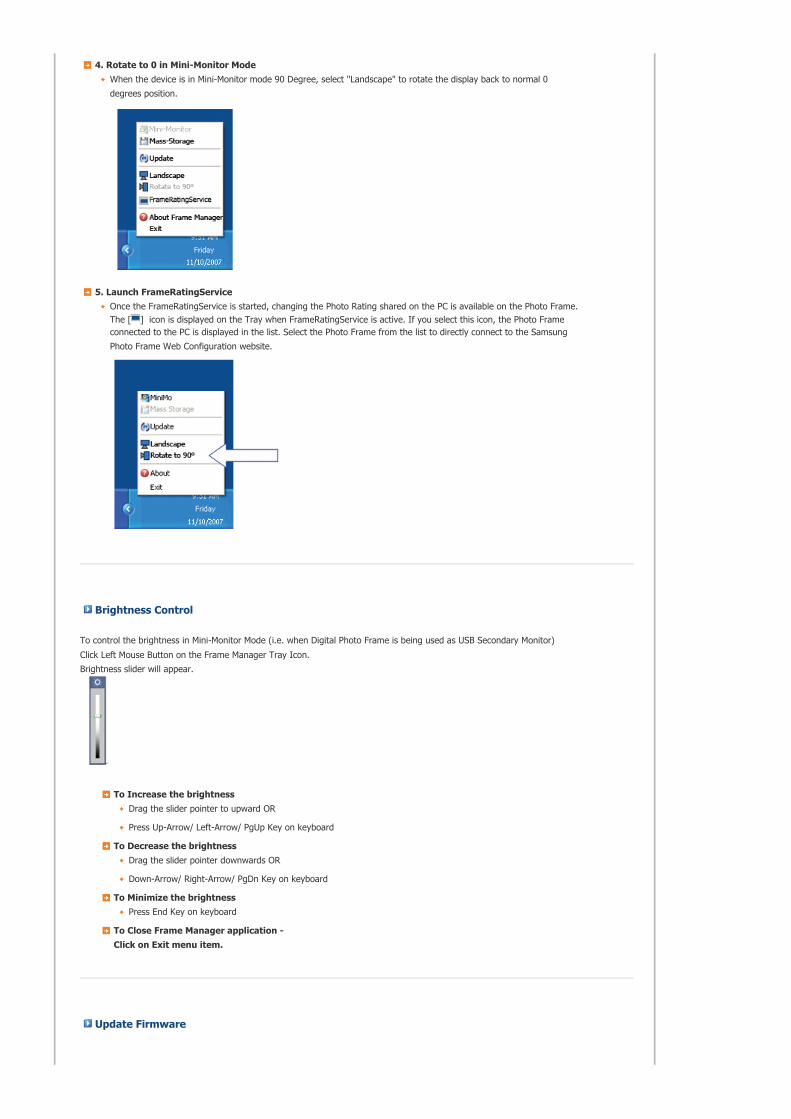
4. Rotate to 0 in Mini-Monitor Mode
When the device is in Mini-Monitor mode 90 Degree, select "Landscape" to rotate the display back to normal 0
degrees position.
5. Launch FrameRatingService
Once the FrameRatingService is started, changing the Photo Rating shared on the PC is available on the Photo Frame. The [ ] icon is displayed on the Tray when FrameRatingService is active. If you select this icon, the Photo Frame connected to the PC is displayed in the list. Select the Photo Frame from the list to directly connect to the Samsung
Photo Frame Web Configuration website.
Brightness Control
To control the brightness in Mini-Monitor Mode (i.e. when Digital Photo Frame is being used as USB Secondary Monitor)
Click Left Mouse Button on the Frame Manager Tray Icon.
Brightness slider will appear.
To Increase the brightness
Drag the slider pointer to upward OR
Press Up-Arrow/ Left-Arrow/ PgUp Key on keyboard
To Decrease the brightness
Drag the slider pointer downwards OR
Down-Arrow/ Right-Arrow/ PgDn Key on keyboard
To Minimize the brightness
Press End Key on keyboard
To Close Frame Manager application - Click on Exit menu item.
Update Firmware
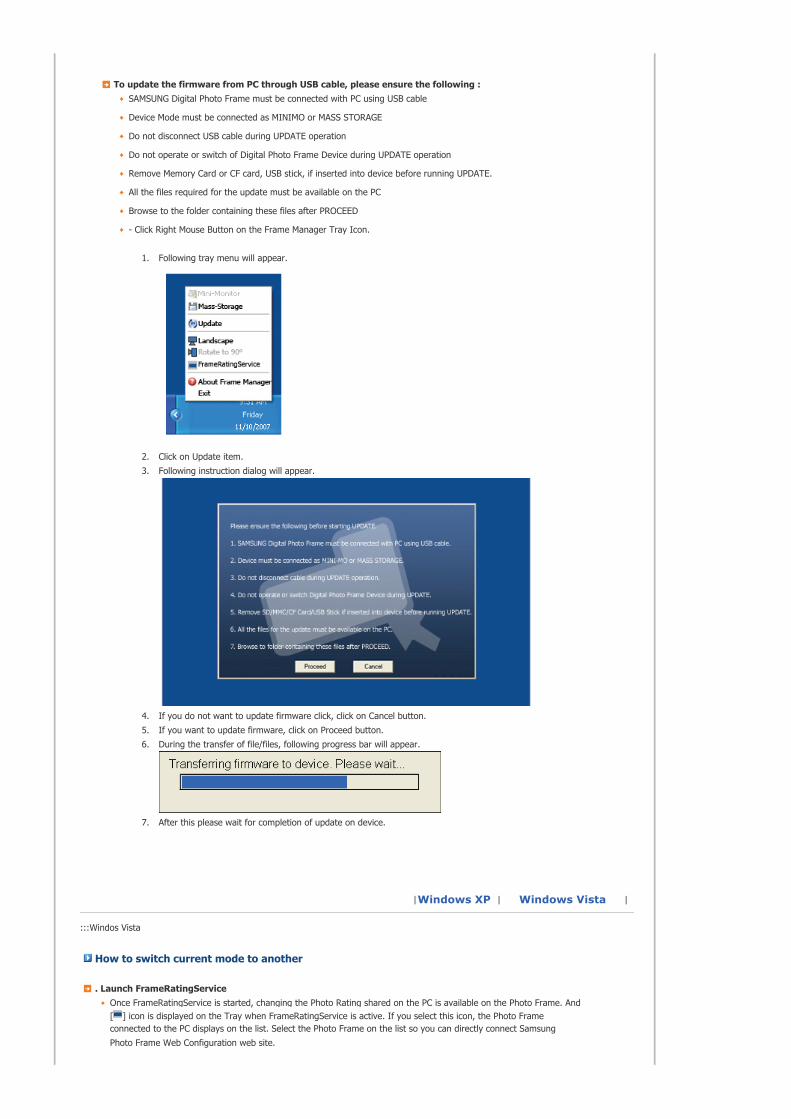
To update the firmware from PC through USB cable, please ensure the following : SAMSUNG Digital Photo Frame must be connected with PC using USB cable
Device Mode must be connected as MINIMO or MASS STORAGE
Do not disconnect USB cable during UPDATE operation
Do not operate or switch of Digital Photo Frame Device during UPDATE operation
Remove Memory Card or CF card, USB stick, if inserted into device before running UPDATE.
All the files required for the update must be available on the PC
Browse to the folder containing these files after PROCEED
- Click Right Mouse Button on the Frame Manager Tray Icon.
1. Following tray menu will appear.
2. Click on Update item.
3. Following instruction dialog will appear.
4. If you do not want to update firmware click, click on Cancel button.
5. If you want to update firmware, click on Proceed button.
6. During the transfer of file/files, following progress bar will appear.
7. After this please wait for completion of update on device.
| Windows XP | Windows Vista |
:::Windos Vista
How to switch current mode to another
. Launch FrameRatingService
Once FrameRatingService is started, changing the Photo Rating shared on the PC is available on the Photo Frame. And [ ] icon is displayed on the Tray when FrameRatingService is active. If you select this icon, the Photo Frame connected to the PC displays on the list. Select the Photo Frame on the list so you can directly connect Samsung
Photo Frame Web Configuration web site.

Update Firmware
To update the firmware from PC through USB cable, please ensure the following : SAMSUNG Digital Photo Frame must be connected with PC using USB cable
Device Mode must be connected as MINIMO or MASS STORAGE
Do not disconnect USB cable during UPDATE operation
Do not operate or switch of Digital Photo Frame Device during UPDATE operation
Remove Memory Card or CF card, USB stick, if inserted into device before running UPDATE.
All the files required for the update must be available on the PC
Browse to the folder containing these files after PROCEED
- Click Right Mouse Button on the Frame Manager Tray Icon.
1. Following tray menu will appear.
2. Click on Update item.
3. Following instruction dialog will appear.
4. If you do not want to update firmware click, click on Cancel button.
5. If you want to update firmware, click on Proceed button.
6. During the transfer of file/files, following progress bar will appear.
7. After this please wait for completion of update on device.