Embed Size (px)
Citation preview
Implementation and Design of a
Physical Science Program for
4th and 5th Level Students
Part 2
By Dr. Katherine Rader
Country Montessori School in Poway
June 2012
Revised February 2017
Special Credit: Editing & Kit Design
(Ms. Vicki Rehkopf & Mr. Rexford Hill) Submitted to the Montessori Center For Teacher Education in San
Diego, CA, in Partial Fulfillment of the A.M.S.-Elementary Certificate
June 2012

AUTHOR’S NOTE When I first began teaching as an assistant with Ms. Rehkopf, the Upper Elementary Lead, she
put me in charge of improving the Physical Sciences Program for 4th and 5th Level students. In
parallel, Ms. Rehkopf taught the Life Sciences. Since we did not have a complete Physical
Science Manual for Upper Elementary or science kits at that time, my Year Long Project focused
on creating a more cohesive program for the Physical Sciences. I could not have completed this
without the aid of my husband Mr. Rexford Hill, a computer and electrical engineer. Since then
Ms. Rehkopf and I have revised the program and mixed it up so that we each teach parts of
Physical and Life Sciences. Additionally, we have been expanding our science curriculum to
include many more Engineering Units and coding. (Feb. 2017).
Implementation of a Physical Science Program
TABLE OF CONTENTS
Part 1 1. INTRODUCTION
2. 4TH & 5TH LEVEL SCOPE & SEQUENCE
3. SAFETY FIRST
4. MEASUREMENT
5. ELECTRICITY & MAGNETISM
6. WEATHER
Part 2 7. THE STORY OF THE UNIVERSE
8. PHYSICAL VS. CHEMICAL CHANGES
9. DISCOVERING DENSITY
10. THE STORY OF THE ELEMENTS
11. ROCKS AND MINERALS
12. SCIENCE FAIR
13. ADDENDUM- HANDS-ON-SCIENCE

Big Bang

Story of the Universe
TABLE OF CONTENTS
1. Great Lesson: Birth of the Universe
2. Electromagnetic Spectrum
3. Stars/ Birth of our Solar System
4. Orbits
Return to Main Table of Contents
Great Lesson: Story of the Birth of the Universe
Great Lesson: Story of the Birth of the Solar System
Resources:
The First Three Minutes by Nobel Prize Winner Steven Weinberg
Universe The Definitive Visual Guide by Smithsonian Institute
Science Photo Cards Our Solar System and Beyond by Creative
Teaching Press
14 Laminated Photos of different Galaxies printed from the
internet.
“The Creation of the Solar System” from The Mind of Mankind by
DL Hamilton
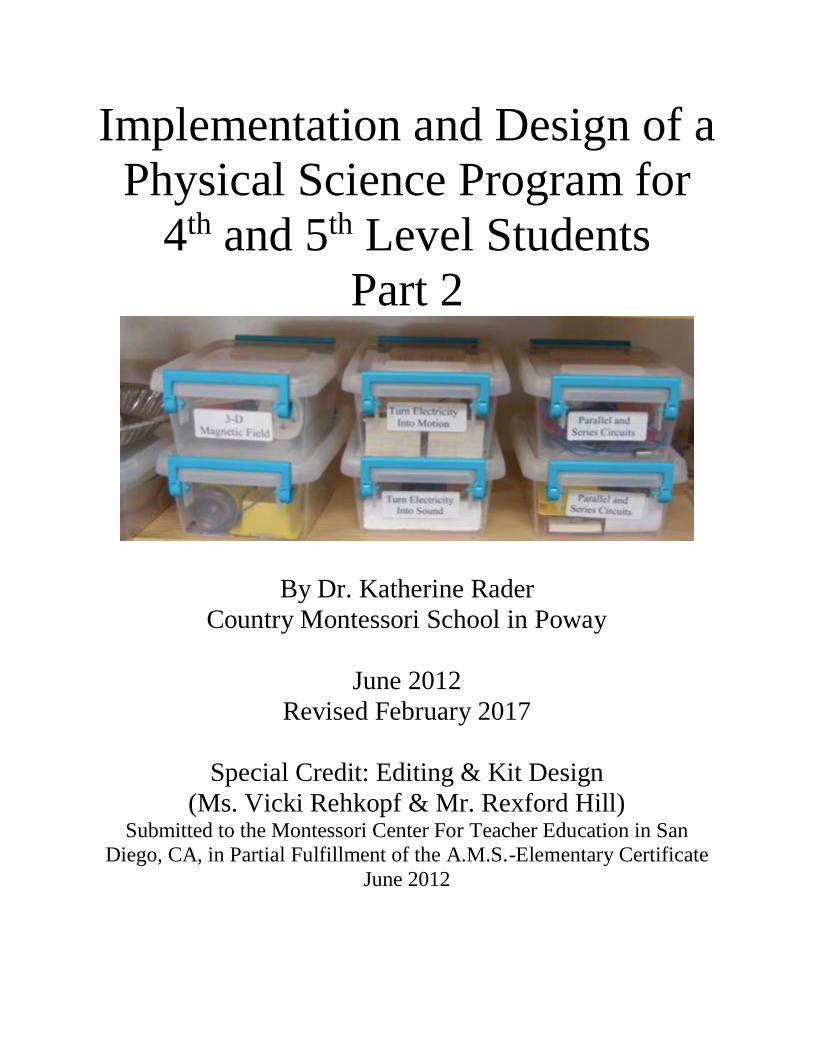
Glass marbles and beads to represent neutrons, protons, and
electrons. White felt drawn with Bohr’s model rings.
We use the photos, the balloon model of the expanding universe and
glass marbles and beads as visual aids as we tell the Great Lesson.
FYI: We cover States of Matter from the chemistry unit before
telling this story. Students must also be familiar with graphing and
range this was covered in 4th Level and spiraled into 5th level at the
beginning of the year.
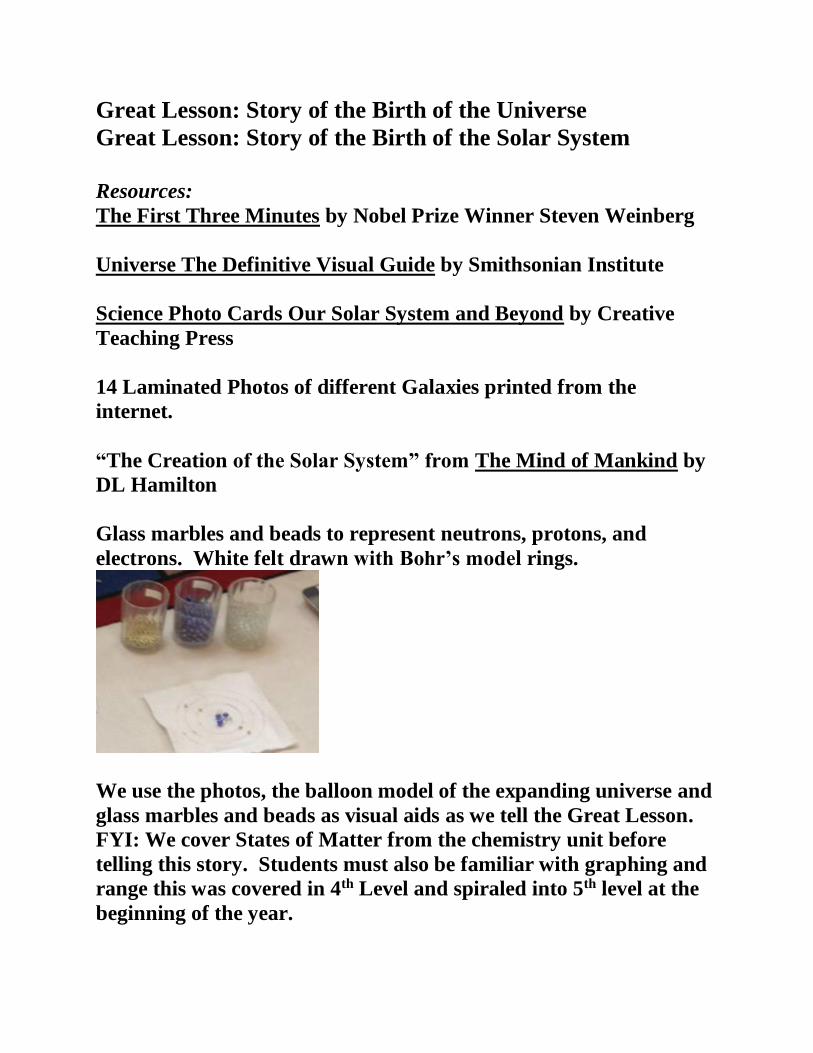
Contents:
Balloons
Bicycle pump
Bicycle tire valve
Flexible measuring tape
Expanding Universe Experiment follows the procedure at the following web site.
http://www.exo.net/~pauld/activities/astronomy/universalballoon.html
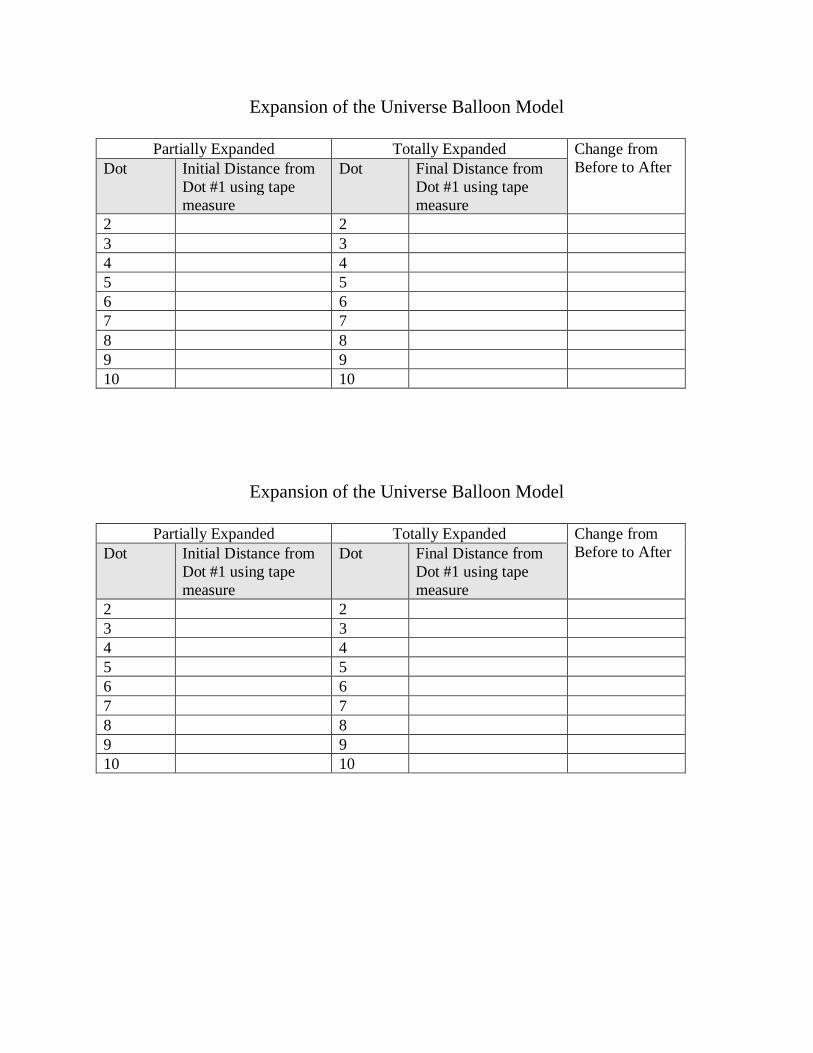
Expansion of the Universe Balloon Model
Partially Expanded Totally Expanded Change from
Before to After Dot Initial Distance from
Dot #1 using tape
measure
Dot Final Distance from
Dot #1 using tape
measure
2 2
3 3
4 4
5 5
6 6
7 7
8 8
9 9
10 10
Expansion of the Universe Balloon Model
Partially Expanded Totally Expanded Change from
Before to After Dot Initial Distance from
Dot #1 using tape
measure
Dot Final Distance from
Dot #1 using tape
measure
2 2
3 3
4 4
5 5
6 6
7 7
8 8
9 9
10 10

Graph paper to graph data.
Return to Story of Universe Table of Contents
Return to Main Table of Contents

Electromagnetic Spectrum
Students learn that scientists study the starts by studying the
unique electromagnetic spectrums of the stars and galaxies.
Students study a print out of the electromagnetic spectrum. They
use the spectroscope and prism diffraction glasses along with the
wavelength and spectrum Demonstrator (NASCO) to explore
the visible spectrum and splitting of light. The students can take
the spectroscope and prisms of various shapes off the shelves to
further explore this phenomenon.
Students use the ETC Press “Novas and Supernovas” Exercise
to identify Mystery star spectra.
Students learn about wavelength and amplitude. At the end of
the unit, we do a demonstration with springs (wave
demonstrator: NASCO).
Return to Story of Universe Table of Contents
Return to Main Table of Contents

Stars/ Birth of Our Solar System
Students “Explore How a Protostar becomes a Star”. This lesson
is from the North American Montessori Album Matter and
Astronomy 6-9
We take notes and use the animations and interactive websites
on stars from classzone.com including a Star’s Life (see weather
section for information on how to access it.)
They also use a print out of ES2803 Peak emission Wavelength
and Temperature from classzone.com along with Student
Exploration: Star Spectra from Gizmos to look at classes of stars
and learn that our sun is a medium sized yellow class G star.
https://el-gizmos.s3.amazonaws.com/materials/StarSpectraSE.pdf
We read parts of the “Creation of the Solar System” by
Hamilton.
Return to Story of Universe Table of Contents
Return to Main Table of Contents

Orbits
Students explore the relationship between gravity and orbits.
Circular Motion
Contents:
Steel ball
Plastic ring
Gravity and Orbits: Investigating the Period of Revolution
Contents:
Styrofoam ball
Narrow tubing
Fishing line
Clear plastic tube
Washers (for weights)
(Students fill out table and graph
data.)
Note: these kits are from WARD'S Gravity and Orbits
Lab Activity | Ward's Science

Preferential Rusting Experiment

Physical vs. Chemical Change Experiments
TABLE OF CONTENTS
1. Author’s Note
2. Rusting
3. Physical vs. Chemical Change Lab
4. Study of Matter
5. Kitchen Chemistry
Return to Main Table of Contents

Author’s Note:
I am providing a brief overview of this unit with some examples. I will
not go into as great a detail as I have done with the other sections. Most
elementary classes will not have the resources and time to cover what
we do. Both the Physical vs. Chemical Change Lab and Kitchen
Chemistry Lab are for 5th levels only and are run by two teachers while
the rest of the class is on a field trip. We call it an “in-house” field trip.
There are multiple labs over 3 hours total for each “in-house” field trip.
Plus, there is another 45 minutes the next day to analyze and discuss the
experiments. Both “in house” field trip has labs that require working
with flame/ alcohol lamps with full safety gear including Plexiglas
shields that we built and face shields. Having had previous lab training
and experience, I was able to train our assistant. We work together to
keep this lab as safe as possible for the students. The students also sign
a Safety Agreement that outlines the expectations.
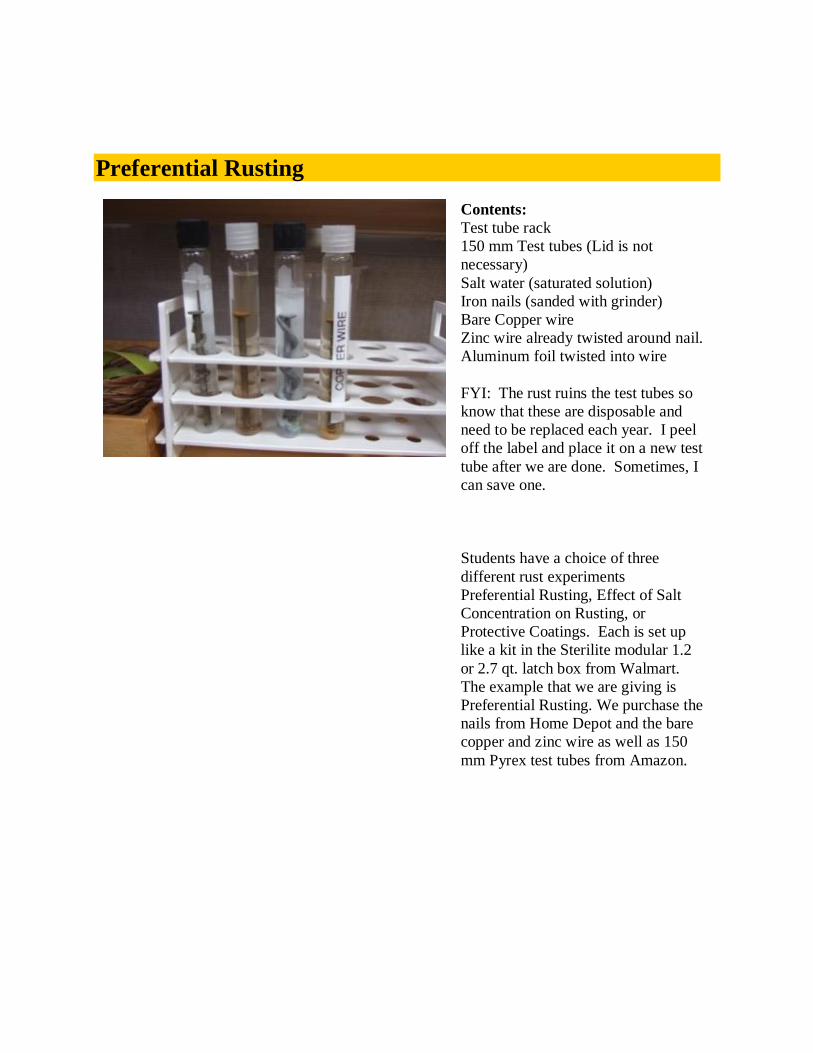
Preferential Rusting
Contents:
Test tube rack
150 mm Test tubes (Lid is not
necessary)
Salt water (saturated solution)
Iron nails (sanded with grinder)
Bare Copper wire
Zinc wire already twisted around nail.
Aluminum foil twisted into wire
FYI: The rust ruins the test tubes so
know that these are disposable and
need to be replaced each year. I peel
off the label and place it on a new test
tube after we are done. Sometimes, I
can save one.
Students have a choice of three
different rust experiments
Preferential Rusting, Effect of Salt
Concentration on Rusting, or
Protective Coatings. Each is set up
like a kit in the Sterilite modular 1.2
or 2.7 qt. latch box from Walmart.
The example that we are giving is
Preferential Rusting. We purchase the
nails from Home Depot and the bare
copper and zinc wire as well as 150
mm Pyrex test tubes from Amazon.

Preferential Rusting Experiment.
Set up the experiment pictured below.
Aim- to see how different metals affect the rate of rusting of iron.
Materials/Apparatus:
-Zinc wire 1/8th inch diameter
-Copper wire (Bare wire)
-Aluminum wire foil.
-4 iron nails (pre-sanded with grinder)
-4 test tubes
-test tube holder
-Saturated salt solution (~100 g. NaCl to a quarter of a liter or cup of water)
Method-In the first test tube, place a plain iron nail. This will be the control. It will show us
what would happen to the nail without any intervention. Roll aluminum foil into a strip. Wrap
the aluminum foil strip on a nail. Place it in the second test tube. Wrap the copper ribbon around
a nail as pictured and place it in the third tube. Wrap the zinc ribbon on another nail as shown
and place it in the fourth tube. Fill each tube with saturated salt water and leave standing for 4
days. The set up should look like this.
Nail Nail Nail Nail
+ aluminum + copper + zinc

Preferential Rusting Experiment.
Discussion: Discuss results.
Compare the rusting in each test tube. What can you say?
Is there any rusting in the tube with zinc ribbon? Explain. What is the white precipitate at the
bottom of the tube?
Investigate what a sacrificial anode is. “Different metals react with the salty water at different
rates. Aluminum reacts faster than iron, so it rusts in preference to iron. As it does so it provides
the iron with extra electrons which protect it from being corroded; it is a sacrificial anode (Green
Planet Solar Energy Nail Rusting Exp.).”
Define sacrificial anode:
Where is a sacrificial anode likely to be used?

Preferential Rusting Experiment.
Nail Nail Nail Nail
+ aluminum + zinc + copper
Return to Physical Vs. Chemical Changes Table of Contents
Return to Main Table of Contents

Physical vs. Chemical Change Labs
Students are in two groups.
1. Group A: FeS experiment
2. Group B: Extracts perfumes.
Iron Sulfur Experiment
I use the FeS handouts that were part of our Upper Elementary training. The students
mix Fe filings and Sulfur powder and use a magnet to separate the two. Then they
heat the mixture over an alcohol burner. You can find a similar procedure online.
Iron & Sulfur Lab
www.chsd.us/~mbendele/7th%20physical%20science/sulfur%20&%20iron%20lab.doc
Sulfur and Iron Lab. Background Information: *
Prior to doing the experiment, we use plastic interlocking blocks of different colors to
determine a mixture versus a pure compound based on ratios. The elements in a pure
compound are in fixed ratios. Students have had ratio math lessons prior to this.
FYI: We use a Scout Pro electronic analytical balance and weigh boats to measure the iron
filings and sulfur powder. Since we do not have a ventilation hood, we do this experiment
outside as seen in the video from the “Hands On Science” presentation. The students
practice handling test tubes with the test tube clamp prior to actually doing the experiment.
Students wear full safety gear. Students work behind handmade Plexiglas shields on a
metal camping table.
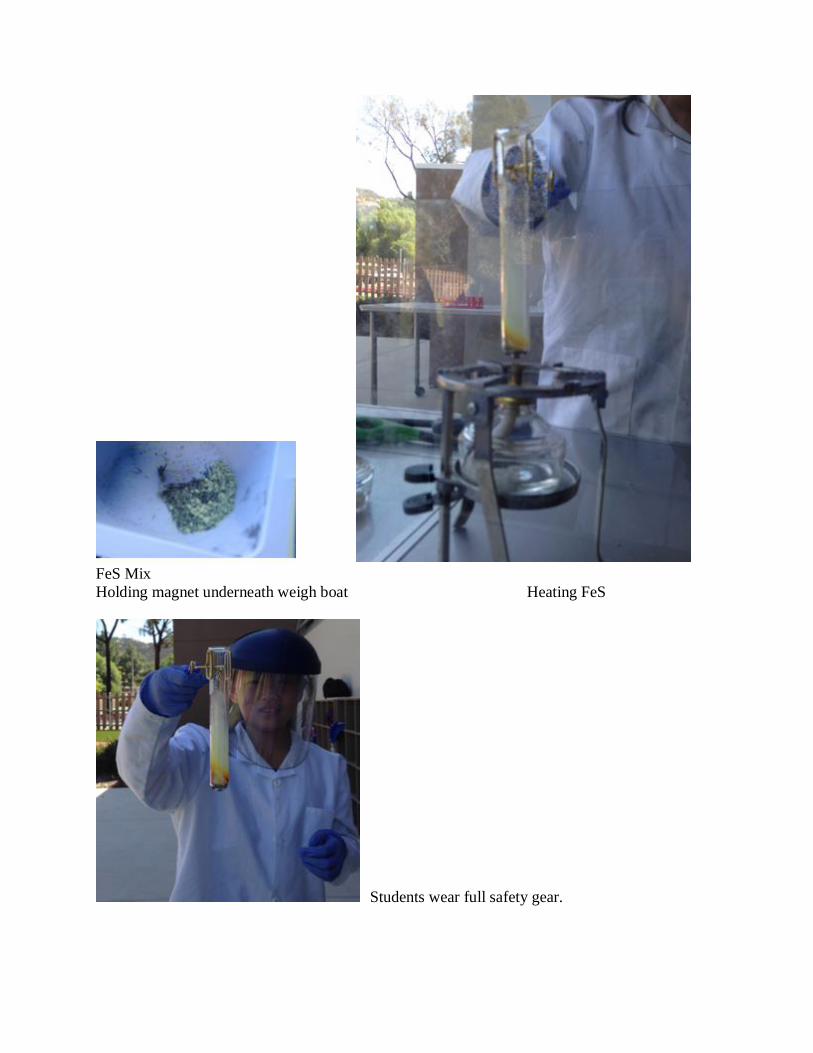
FeS Mix
Holding magnet underneath weigh boat Heating FeS
Students wear full safety gear.

Extracting Perfumes Experiment
Students add one plant specimen to 75% proof Everclear Grain Alcohol in small vials. The
specimens can be flowers: lavender or rose; peels: lemon or orange; or spices: cardamom,
cinnamon bark, vanilla beans, or cloves. They work in groups and only add one specimen per
vial. They get to add any combination of items to one amber 2 oz glass bottle with glass
eyedropper (Amazon). In December, they get to wrap the bottle as a gift. Students smell the
perfume safely. Although they usually do not prefer to wear the perfume, we instruct them that
they can put one drop on their wrist.
FYI: Students wear full safety gear when making perfume. It is now illegal to purchase
75% proof alcohol in many states. So purchase the highest proof that is legal.
Adding alcohol to amber bottle Smelling Scent Safely
Return to Physical Vs. Chemical Changes Table of Contents
Return to Main Table of Contents

Study of Matter
A brief study of matter is necessary before we go into the science of chemistry, weather, etc.
(Reference: Annenberg Learner Essential Science for Teachers: Physical Science)
1. Matter vs. Non Matter
2. States of Matter
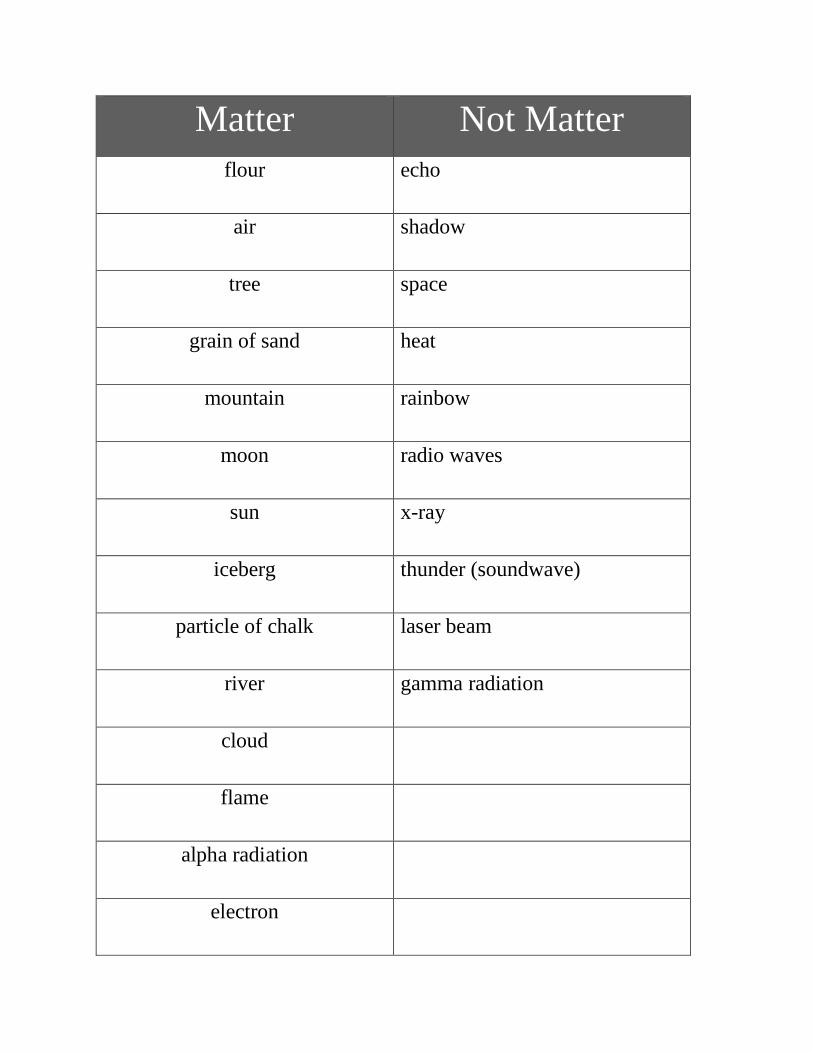
Matter Not Matter
flour echo
air shadow
tree space
grain of sand heat
mountain rainbow
moon radio waves
sun x-ray
iceberg thunder (soundwave)
particle of chalk laser beam
river gamma radiation
cloud
flame
alpha radiation
electron

Matter Not Matter
echo iceberg
shadow heat
flour particle of chalk
air river
tree cloud
grain of sand radio waves
mountain x-ray
space thunder (sound wave)
moon flame
rainbow alpha radiation
sun laser beam
electron gamma radiation

States of Matter
Solids Liquids Gases
Holds Together
Strong and Sturdy
Hard
Holds Shape
Easily Divided
Take Shape of
Container
Can Change
Volume
Students squeeze a solid block, water in a zip lock bag. They squeeze air in a large 60 ml syringe
with the plastic end ground down and of course without a needle by putting their palm on one
end to block the air and squeezing the plunger. The air is compressible. Then students suck up
water into the syringe and try squeezing the plunger while blocking the hole with their palm.
The teacher should assist with this and students should wear goggles so as not to get sprayed in
the eye if a student’s hand should slip. (Reference: Annenberg Learner Essential Science for
Teachers: Physical Science)

States of Matter Teacher prepares the ingredients for Oobleck. Students make it and observe its properties. They
place it in a glass beaker for 10 minutes to see what happens. Finally, they decide if it is a liquid
or solid and do research on how scientists classify this substance.
Mystery
Substance
Holds Together
Strong and
Sturdy
Hard
Holds Shape
Easily Divided
Take Shape of
Container
Can Change
Volume
Jefferson Lab Hands-On Activities has the directions for making Oobleck.
http://education.jlab.org/beamsactivity/6thgrade/oobleck/overview.html
Return to Physical Vs. Chemical Changes Table of Contents
Return to Main Table of Contents

Kitchen Chemistry
Students explore “Chemical and Physical Changes in Your Kitchen.”
[PDF]Chemical and Physical Changes in Your Kitchen - UGA Extension
extension.uga.edu/k12/science-behind-our-food/.../chemphyschangesinkitchen.pdf
Chemical and Physical Changes in Your Kitchen. Annotation. This lab helps students to
understand the difference between chemical and physical changes.
Students look at What is a mixture and what methods can be used to easily/ physically separate a
mixture into pure elements or compounds.
They also explore conservation of mass through 3 experiments: “Mixing Alcohol and
Water”, “Yeast Fermentation”, and “Making Soda”.
After they complete the experiments, they fill out the following work sheet based on their entire
chemistry unit.
Return to Physical Vs. Chemical Changes Table of Contents
Return to Main Table of Contents

Experiment
Describe what was
done at each task
Observed Effect
Physical or
Chemical Change
Rust
Expose a nail to water
Expose a nail
wrapped in zinc to
water
Soda
Dissolve sugar in
H2O.
Dissolve CO2 in
water.
Sand/ Water
Add sand to water.
Filter sand from
water.
Alcohol
Add alcohol and
water.
Add alcohol to paper.
Add cloves to alcohol.
Boil Alcohol and
H2O.
Ferment
Dissolve yeast in
warm water, sugar
FeS
Heat iron and sulfur.

Station
Describe what was
done to change the
food at each task
Observed Effect
Physical or
Chemical Change
Ex
Ex. Mash Cooked
Potatoes
Ex. Smoother consistency, tastes
the same
Ex. Physical
1
Melt marshmallow
Burn marshmallow
Rip marshmallow
2
Melt ice
Boil water
Evaporate water
3
Dissolve salt in water
Dissolve Alka-Seltzer
in water
4
Melt chocolate
Burn chocolate
Students do get to taste food and make S’mores. They do not taste
Alka-Seltzer.

Mixing Alcohol and Water Experiment
Students do not taste.

Yeast Fermentation Experiment
Students do not taste.

Making Soda Experiment
Teacher dissolves carbon dioxide in water using Soda Siphon and carbon dioxide cartridges.
A very small amount is distributed to a Dixie cup.
Students do get to taste. Return to Physical Vs. Chemical Changes Table of Contents
Return to Main Table of Contents


Discovering Density
TABLE OF CONTENTS
1. Volume Displacement
2. Intrinsic vs. Extrinsic Property of Matter
3. Sinking and Rising
4. Archimedes
5. Equal Mass Density Experiment
6. Density Column
7. Density Cube Labs
Return to Main Table of Contents
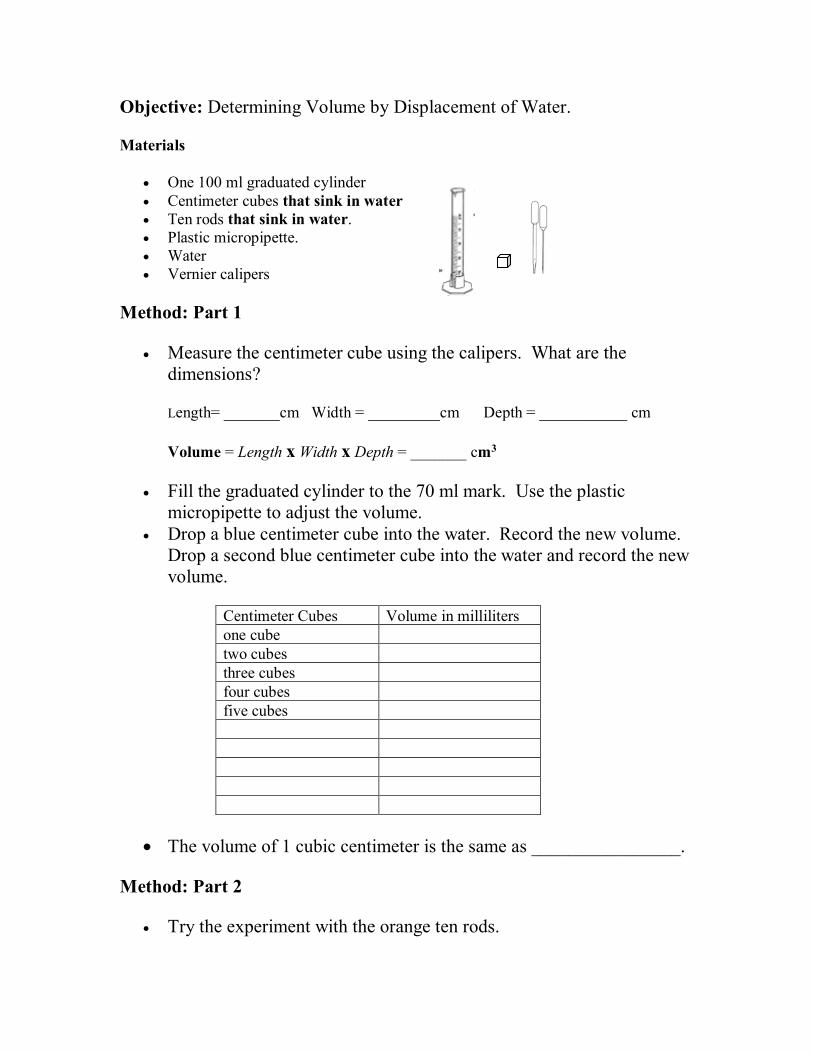
Objective: Determining Volume by Displacement of Water.
Materials
• One 100 ml graduated cylinder
• Centimeter cubes that sink in water
• Ten rods that sink in water.
• Plastic micropipette.
• Water
• Vernier calipers
Method: Part 1
• Measure the centimeter cube using the calipers. What are the
dimensions?
Length= _______cm Width = _________cm Depth = ___________ cm
Volume = Length x Width x Depth = _______ cm3
• Fill the graduated cylinder to the 70 ml mark. Use the plastic
micropipette to adjust the volume.
• Drop a blue centimeter cube into the water. Record the new volume.
Drop a second blue centimeter cube into the water and record the new
volume.
Centimeter Cubes Volume in milliliters
one cube
two cubes
three cubes
four cubes
five cubes
• The volume of 1 cubic centimeter is the same as ________________.
Method: Part 2
• Try the experiment with the orange ten rods.

Intrinsic or Characteristic Properties do not change with size or amount of the
material.
Examples:
Extrinsic Properties are dependent on the size of the sample. This means they
will change if the size of the sample is changed.
Examples:
Matter: anything that
________________________________________________________

Intrinsic or Characteristic Properties do not change with size or amount of the material.
Example Given by actual student teams:
Type of material State of Matter
Atomic structure Reactivity
Color Taste
Flammability Texture
Conductivity of electricity Conductivity of sound
Melting point Conductivity of light
Extrinsic Properties are dependent on the size of the sample. This means they will change if
the size of the sample is changed.
Examples:
Position in space time
Time to complete melting
Gravitational pull Speed
Weight/ mass Volume
Matter: anything that ________takes up space and has mass______________________
Liquid Plasma
Solid BEC (Bose Einstein
condensate)
Gas

Sinking and Rising
Contents:
Digital scale
Water bucket
Samples: foam, wax, wood, plastic, metal
Is there an intrinsic or extrinsic property of matter that causes rising or
sinking? Ask the students to design an experiment or way to test this.
(Resource: Annenberg Learner Essential Science for Teachers: Physical Science)
Return to Discovering Density Table of Contents
Return to Main Table of Contents

Sinking and Rising
Purpose: To determine what intrinsic or extrinsic property of matter
causes rising or sinking.
[define: matter, intrinsic, extrinsic]
Materials: Various objects, water, clear container to test rising and
sinking, analytical balance.
Background: Objects rise or sink in water. There must be some special
property that causes it. What properties should we test?
Intrinsic Extrinsic
Procedure: Hold object under the water. Observe and record does it
rise or sink?

Sinking and Rising
Students will suggest that we test density, types of materials, weight/ mass, shape,
volume, or size place each in the correct category.
Intrinsic Extrinsic
Density Weight/ mass
Types of Material Shape
Color Volume
Size

Sinking and Rising

Archimedes
Contents:
Overflow can
Scales
Density blocks
Iron
Brass
Aluminum
Lead
Graduated cylinder
Measuring cup
Tray
FYI: We replaced this with the “equal mass set” to
quantitatively measure density as it is easier.
Return to Discovering Density Table of Contents
Return to Main Table of Contents

Equal Mass Density Experiment
Purpose: To calculate densities of objects and predict whether the item will sink or rise
in water.
Background: Objects will rise if they are less dense than the liquid in which they are
immersed (completely covered by the liquid). Water has a density of 1.0g/ml.
Prediction: We predict that object will rise if their density is less than 1.0 g/ml.
Materials: Overflow can or graduated cylinder. Equal Mass Set. Water.
Procedure:
1. Immerse these specimens, one by one, into water so that the water is displaced
into another vessel. This works best using an overflow can or a graduated
cylinder.
2. Measure the amount of water displaced each time.
FYI: A graduated cylinder must be used for the smallest and largest cylinders.

Equal Mass Density Experiment

Density Column
Contents:
(SchoAR Chemistry Density Column
Demonstration Kit)
250ml Graduated cylinder
Measuring cylinders/beakers
Samples:
Ethanol + blue food coloring
Vegetable oil
Water + red food coloring
Soap
Corn syrup
Relate to layers of the Atmosphere
Montessori Material.
Return to Discovering Density Table of Contents
Return to Main Table of Contents

Objective: Identify the material by computing the density.
Materials
• Four density cubes made of metal
• analytical electronic balance
• Calipers
Method: Part 1
• Weigh the cubes using the electronic balance.
• Measure the sides of the cubes using the calipers. What are the dimensions?
Length= _______cm Width = _________cm Depth = ___________ cm
Volume = Length x Width x Depth = _______ cm3
Density Cubes Mass in grams Volume in milliliters Density in g/ml
Silver cube
Black cube
Gold cube
Copper cube
• How are these cubes similar? _____________________________.
• How are the cubes different? _____________________________ .
Method: Part 2
• Can you determine which of these is an alloy? An alloy is made of two or
more elements. (Hint: Check the periodic table.)
Fill out the Table below. List identifying characteristics and approximate densities for
materials in this set. Materials are Copper, Brass, Steel, and Aluminum.
Characteristics Material Density (g/ml)
Silver cube
Black cube
Gold cube
Copper cube
Metals
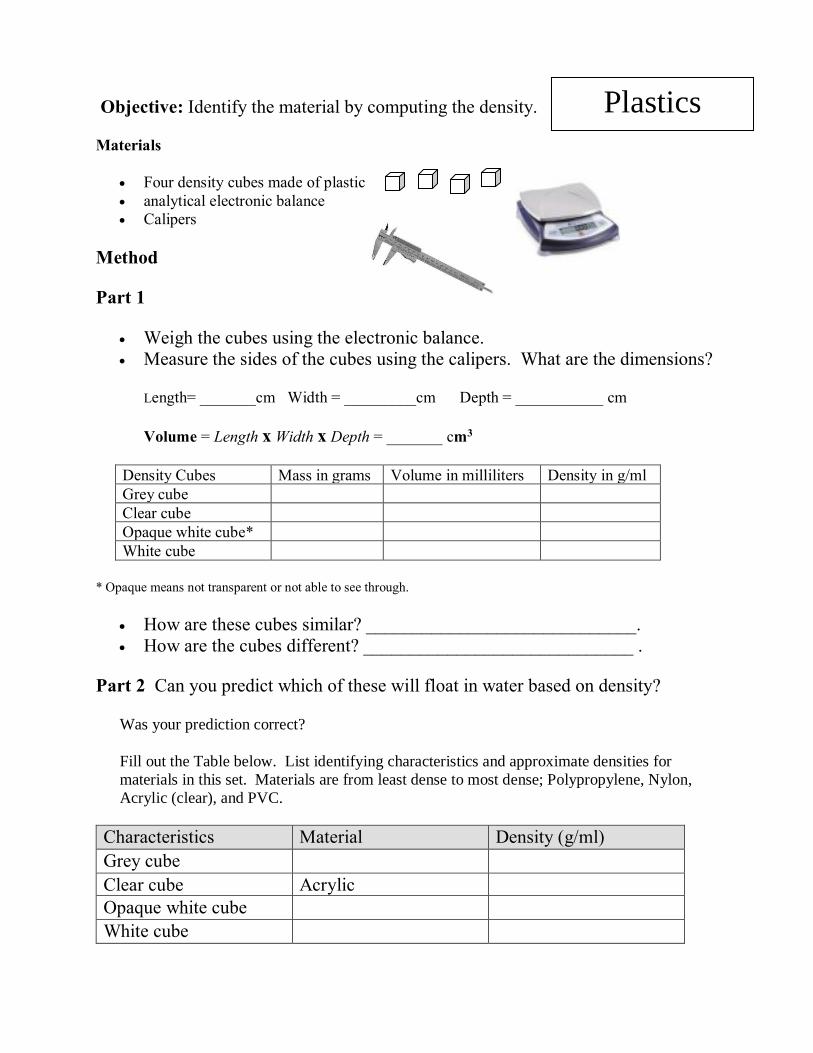
Objective: Identify the material by computing the density.
Materials
• Four density cubes made of plastic
• analytical electronic balance
• Calipers
Method
Part 1
• Weigh the cubes using the electronic balance.
• Measure the sides of the cubes using the calipers. What are the dimensions?
Length= _______cm Width = _________cm Depth = ___________ cm
Volume = Length x Width x Depth = _______ cm3
Density Cubes Mass in grams Volume in milliliters Density in g/ml
Grey cube
Clear cube
Opaque white cube*
White cube
* Opaque means not transparent or not able to see through.
• How are these cubes similar? _____________________________.
• How are the cubes different? _____________________________ .
Part 2 Can you predict which of these will float in water based on density?
Was your prediction correct?
Fill out the Table below. List identifying characteristics and approximate densities for
materials in this set. Materials are from least dense to most dense; Polypropylene, Nylon,
Acrylic (clear), and PVC.
Characteristics Material Density (g/ml)
Grey cube
Clear cube Acrylic
Opaque white cube
White cube
Plastics

Objective: Identify the material by computing the density.
Materials
• Four density cubes made of wood
• analytical electronic balance
• Calipers
Method: Part 1
• Weigh the cubes using the electronic balance.
• Measure the sides of the cubes using the calipers. What are the dimensions?
Length= _______cm Width = _________cm Depth = ___________ cm
Volume = Length x Width x Depth = _______ cm3
Density Cubes Mass in grams Volume in milliliters Density in g/ml
Thin Grained Cube
Thick Grain- Pine Smell
Thick Grained Cube
Dark Wood Cube
• How are these cubes similar? _____________________________.
• How are the cubes different? _____________________________ .
Part 2 Can you predict which of these will sink or rise in water based on density?
Was your prediction correct?
Fill out the Table below. List identifying characteristics and approximate densities for
materials in this set. Materials are from least dense to most dense; Pine and Popular are
about the same and the least dense, Oak, then Lignum Vitae (the densest).
Characteristics Material Density (g/ml)
Thin Grained Cube
Thick Grain- Pine Smell
Thick Grained Cube
Dark Wood Cube
Wood

Periodic Table Blocks

Story of the Elements
TABLE OF CONTENTS
1. Shelf Material
2. Periodic Table Study
3. Element Study
4. Storyboard for Elements of a Smart Phone
Return to Main Table of Contents

Shelf Materials:
ScholAR Chemistry Periodic Puzzle;
Theodore Gray: The Elements; In Print-
Atom Model; Periodic Symbol Match;
periodic table placemats, three part cards,
felt Bohr’s Model and beads/marbles to
represent electrons, protons, and neutrons;
cubes for Daqri 4d elements App;

Study of the Periodic Table:
Using the website, Annenberg Learner Interactive Periodic Table, we begin our study of the
Periodic Table. We work our way through “Atomic Basics”, “It’s Elementary”, and “What’s in
the Box”. The students use the interactives. They also watch Hunting the Elements.
We then use worksheets to go through the groups of the Periodic Table and label them on a blank
chart. Next we work through worksheets on families and the “Stuff Our Word is Made Of” from
The Atom published by Mark Twain Media, Inc.
Return to Story of Elements Table of Contents
Return to Main Table of Contents
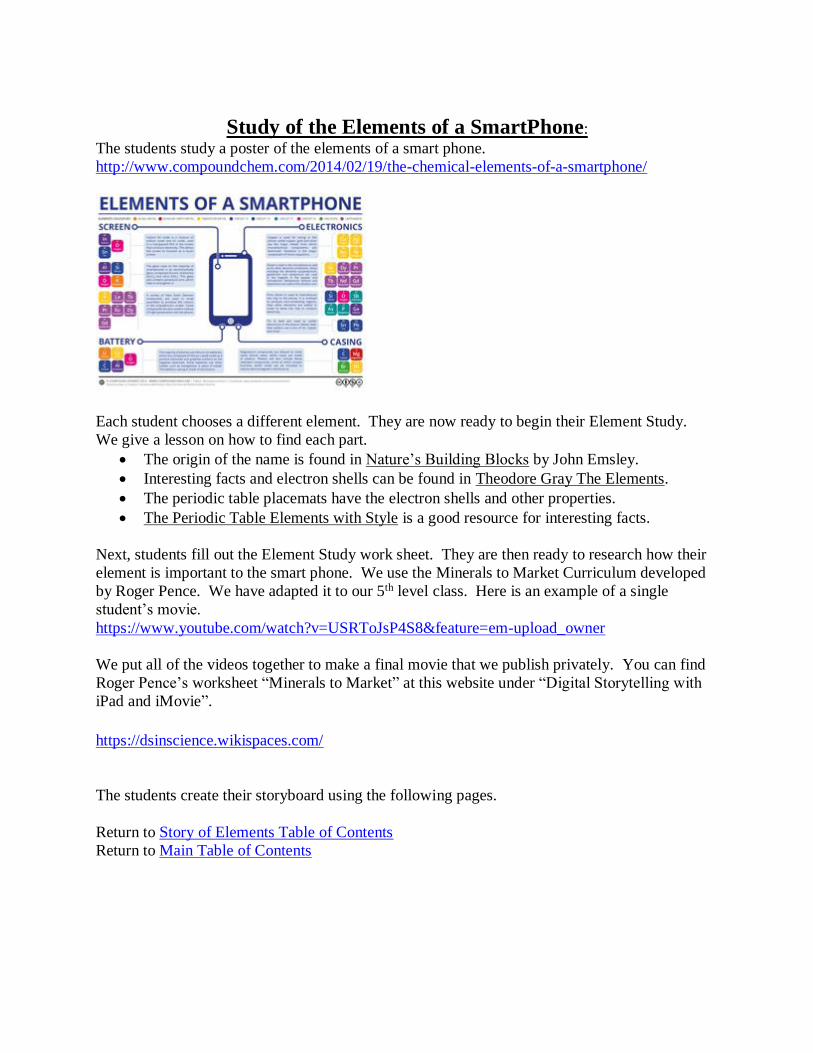
Study of the Elements of a SmartPhone:
The students study a poster of the elements of a smart phone.
http://www.compoundchem.com/2014/02/19/the-chemical-elements-of-a-smartphone/
Each student chooses a different element. They are now ready to begin their Element Study.
We give a lesson on how to find each part.
• The origin of the name is found in Nature’s Building Blocks by John Emsley.
• Interesting facts and electron shells can be found in Theodore Gray The Elements.
• The periodic table placemats have the electron shells and other properties.
• The Periodic Table Elements with Style is a good resource for interesting facts.
Next, students fill out the Element Study work sheet. They are then ready to research how their
element is important to the smart phone. We use the Minerals to Market Curriculum developed
by Roger Pence. We have adapted it to our 5th level class. Here is an example of a single
student’s movie.
https://www.youtube.com/watch?v=USRToJsP4S8&feature=em-upload_owner
We put all of the videos together to make a final movie that we publish privately. You can find
Roger Pence’s worksheet “Minerals to Market” at this website under “Digital Storytelling with
iPad and iMovie”.
https://dsinscience.wikispaces.com/
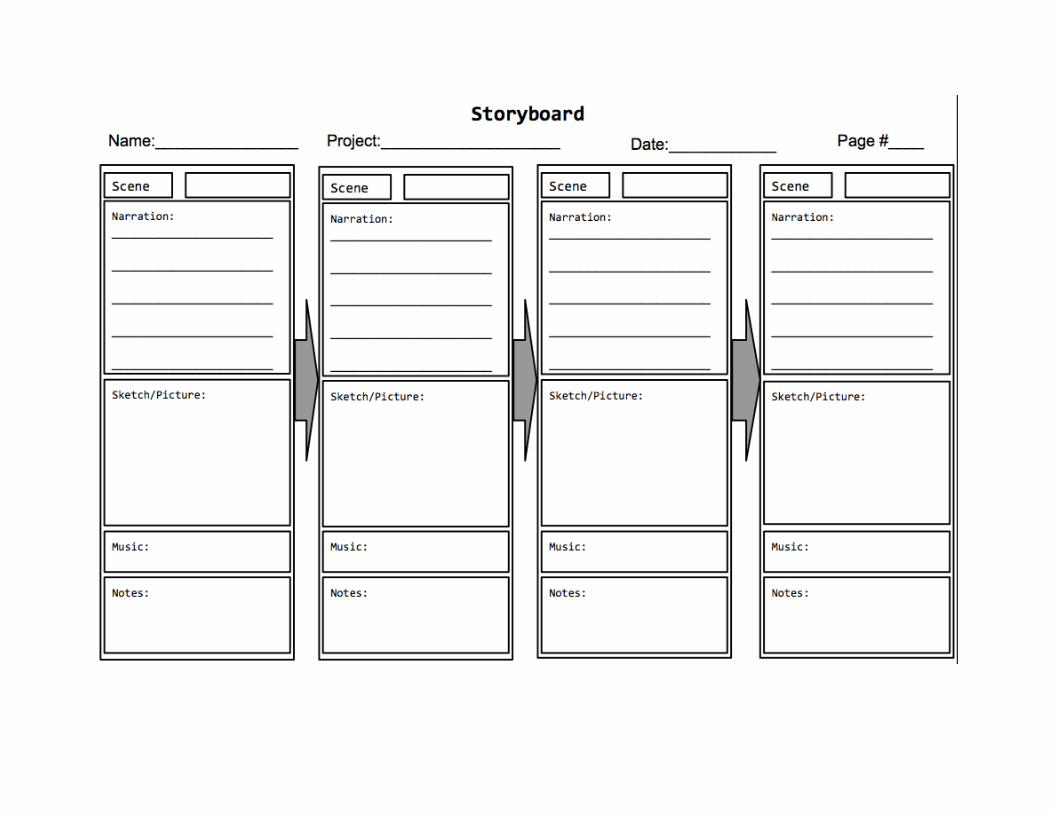
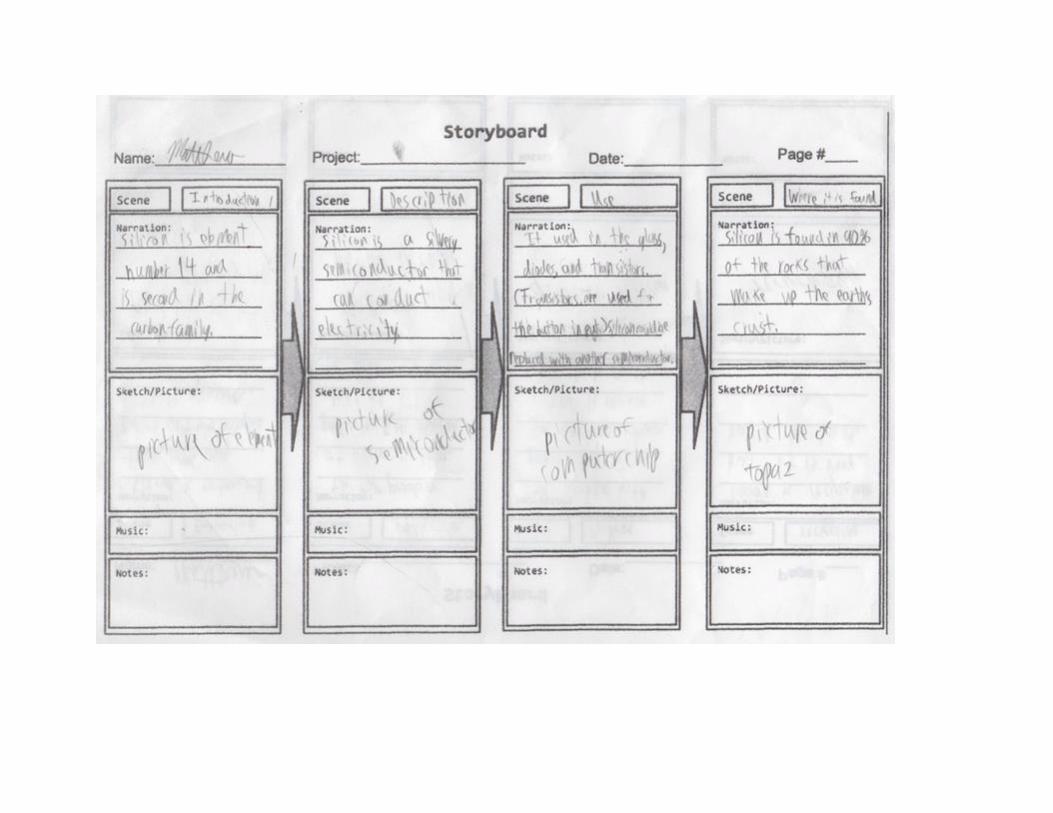
The students create their storyboard using the following pages.
Return to Story of Elements Table of Contents
Return to Main Table of Contents

Element Study
Fill out this facsimile of your element entry on the periodic table.
Where does the element’s name come from?
__________________________________________________________
To what family does the element belong?
__________________________________________________________
What interesting facts did you find out about your element?
__________________________________________________________
__________________________________________________________
__________________________________________________________
Name
V
alen
ce S
hell
s

__________________________________________________________
__________________________________________________________
Writing a Storyboard: The Elements
General rules:
1. Eight scenes. The outline below should give you eight scenes.
2. One sentence per scene, or two short sentences per scene.
3. Think of a picture that reinforces the idea of the sentence.
4. Vary your sentence structure to make it interesting for the audience.
Outline:
1. Introduction (picture of element highlighted on the periodic table)
a. Name the element,
b. Give its atomic number
c. Give position and name of family on the periodic table (lanthanides, actinides,
transition metals, etc.)
2. Characteristics (picture of the element),
a. Brief description of its appearance. [silvery metal, gold metal, black non metal]
b. Include at least one chemical/ physical properties [highly reactive, heavy, morphs into
many forms]
3. Audience hook: Importance/ Use (picture of where it is found in smartphone)
a. Why your element is important to the manufacture of the smartphone?
b. Without it, could we still build smartphones?
4. Rocks containing your element (picture of rocks, volcanoes, etc.)
a. What kinds of rocks is it found in? Igneous, metamorphic, sedimentary?
b. Are other important elements found with your element?
5. Is it hard to extract? (picture of mining equipment)
a. Name its ores or state if it is found by itself.
b. Is it extracted chemically and/or by heating or melting?
6. Major producers (map of producers or the country that produces most of it)
a. State if it’s rare and expensive, or common.
b. State which countries have reserves (rocks) that contain your element?
c. Which countries actually extract and refine the element?
7. Possible problems with taking the mineral from ores to market.
a. Is your element a conflict element; meaning is there a problem with its mining or
extraction [pollution, poor working conditions, danger]?
8. Recycling (picture of broken cell phone/picture of recycling logo/chart)
a. Can your element be recycled from an old smartphone or something else?
b. . Is recycling cheaper than mining ore to extract your element?
c. Is it recycled today, or are there plans to start recycling it?
9. Conclusion (picture of the element again, picture of people using a smartphone)
a. Pick the most important thing from your storyboard and make sure the audience hears
it again.
b. Let the audience know what they can do to help [Recycle, inform].


Return to Story of Elements Table of Contents
Return to Main Table of Contents

Sample Rocks under Long Wave UV Light to test for fluorescence.

Rocks and Minerals
TABLE OF CONTENTS
1. Mineral Identification
2. Fluorescent Rocks and Minerals
3. Other Stations
4. Know Wonder Learn
Return to Main Table of Contents

Mineral Identification
Students Choose a mineral and attempt to identify it.
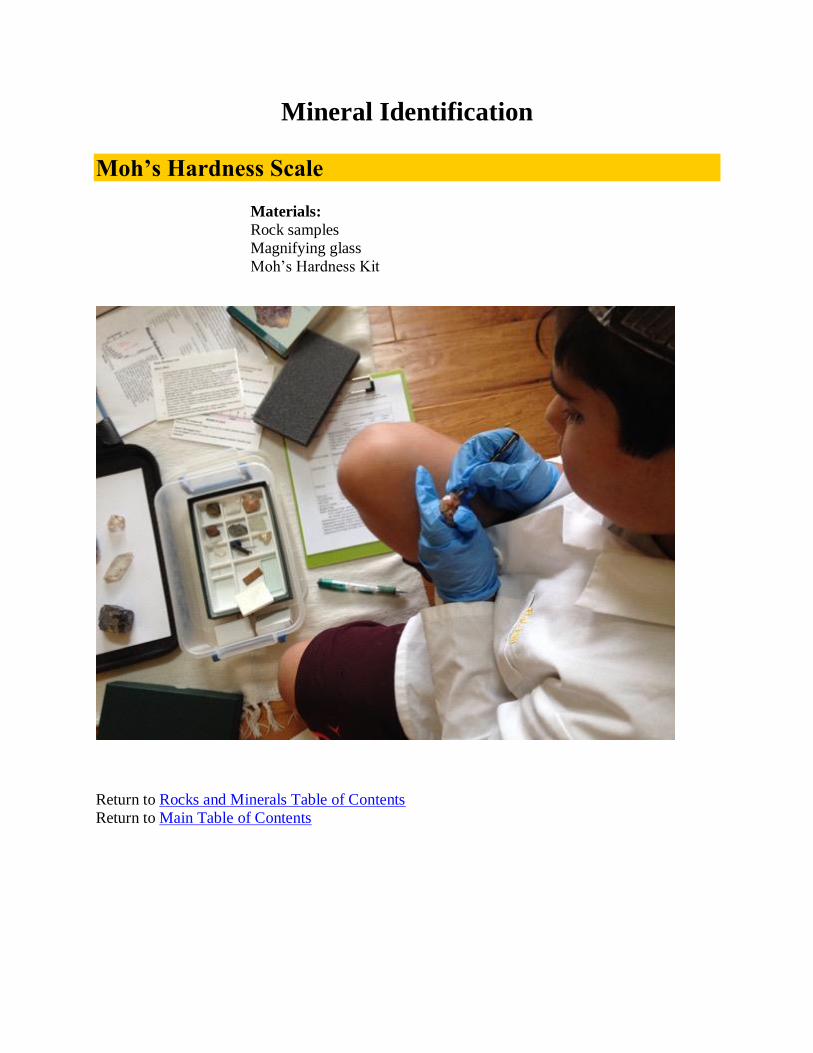
Mineral Identification
Moh’s Hardness Scale
Return to Rocks and Minerals Table of Contents
Return to Main Table of Contents
Materials:
Rock samples
Magnifying glass
Moh’s Hardness Kit

Identify common rock-forming minerals (including quartz, calcite, feldspar, mica, and
hornblende) and ore minerals by using a table of diagnostic properties.
THE UNKNOWN MINERAL__________________________________
COLOR
LUSTER(the way
light reflects off the
mineral)
metallic
non metallic
glassy
adamantine (brilliant)
pearly
waxy
dull
resinous
earthy
HARDNESS MOH’S HARDNESS TEST
Will a fingernail (2.5) scratch the rock/mineral? y/n
Will a copper strip (3.5) scratch the rock/mineral? y/n
Will a steel nail scratch the rock/mineral (5.5)? y/n
Will the rock/mineral scratch a window glass (6.5)? y/n
Will __________________ scratch the rock/mineral? y/n
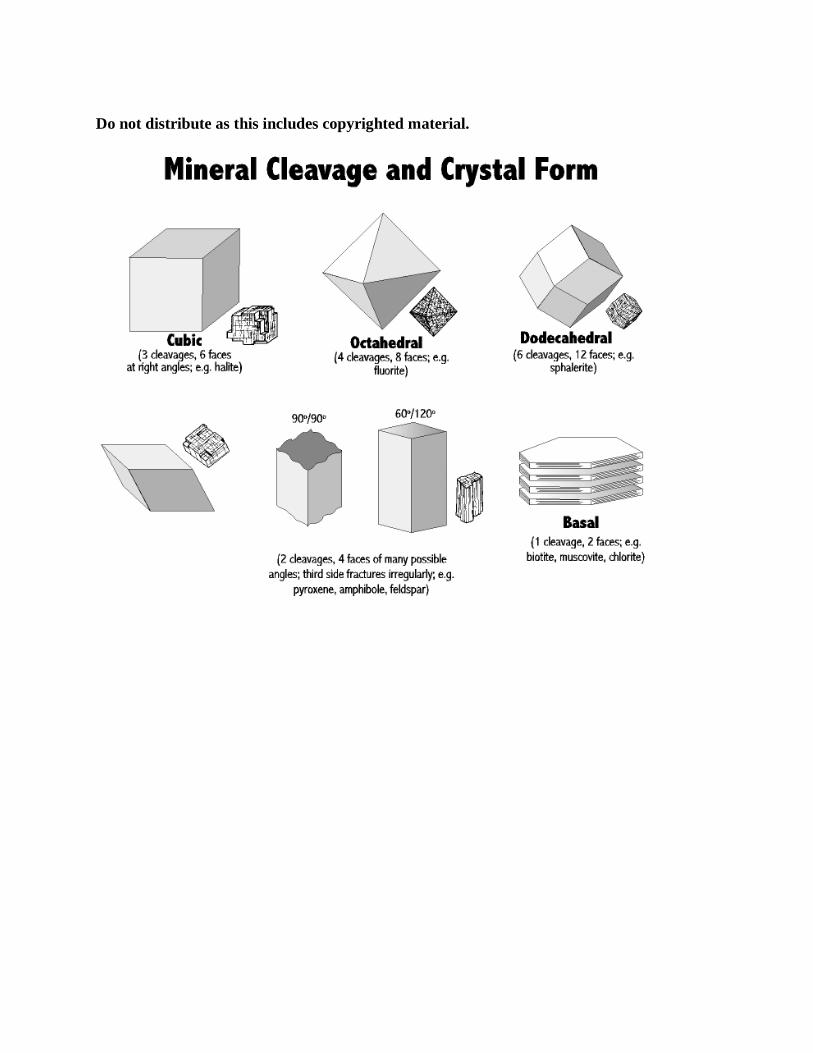
CRYSTAL FORM Shapeless Well-formed crystal
cubic hexagonal prism pyramid cap
rhombic
CLEAVAGE Good cleavage flat planes Poor cleavage or None
1 direction 2 directions Fracture is splintery,
rough, smooth, crumbly 3 directions 4 directions
6 directions Other
STREAK Color of the powdered form on a streak plate.
Black Gray Red-
brown
Yellow-
brown
SPECIAL
PROPERTIES
Fluorescence Magnetism Radioactivity
Chemical Reaction Optical Properties

SPECIFIC
GRAVITY (heft)
Specific Gravity is the density.
Helpful Tips:
Moh’s Hardness Test: After scratching the sample, brush off the shavings.
If the sample is smooth then it wasn’t scratched. If you find a groove, then the
sample was scratched.
Fluorescence: To test fluorescence, put sample under U.V. light.
Magnetism: Use the magnet to test the sample’s magnetic properties.
Chemical Reaction: Put the sample in vinegar. Look for lots of bubbles.
Optical Properties: Is it transparent (clear)? If clear, does it magnify? Or is it translucent
(lets light through, but not clear)? Or is it opaque (blocks light)?

Do not distribute as this includes copyrighted material.
Color may be used but is not always a good identifier due to many minerals
having the same color or the same minerals having multiple colors. This is true
with quartz. Due to the amount of trace elements in a quartz sample the colors that
can be found range from red to purple and even clear. So as one can see color
would not be useful to identify a quartz sample.
Color- Most minerals cannot be identified by color alone, many have the same color and others
have many colors.
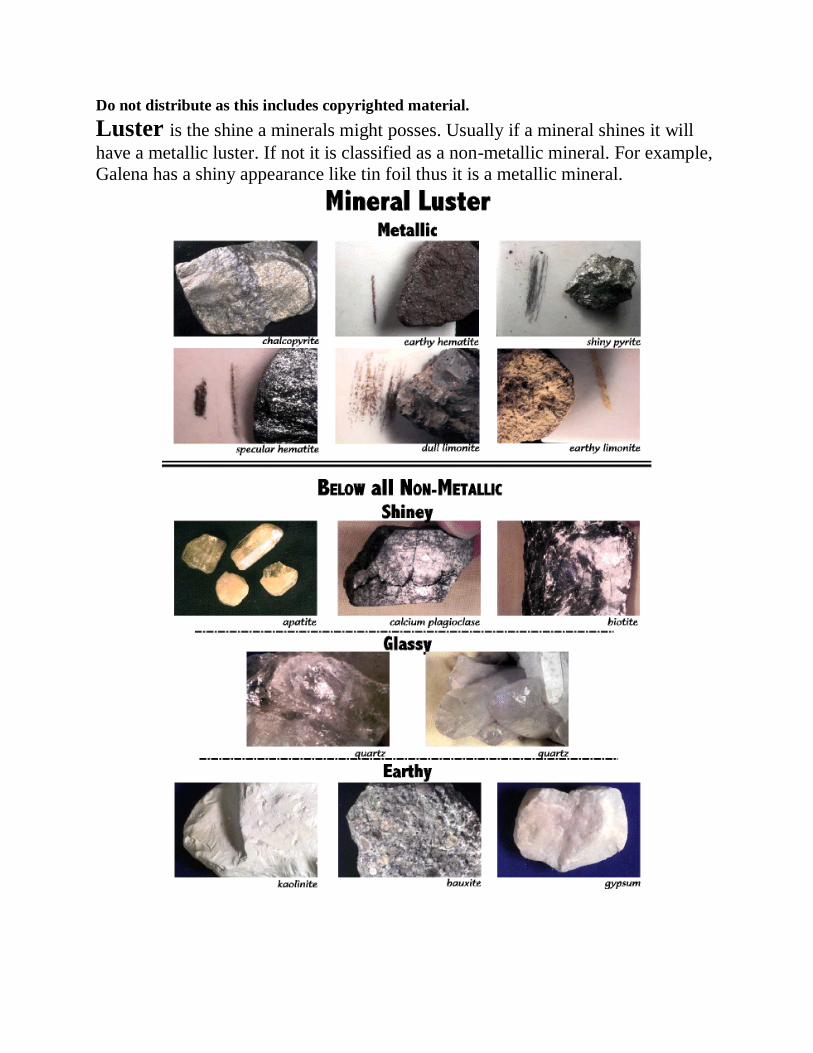
Do not distribute as this includes copyrighted material.
Luster is the shine a minerals might posses. Usually if a mineral shines it will
have a metallic luster. If not it is classified as a non-metallic mineral. For example,
Galena has a shiny appearance like tin foil thus it is a metallic mineral.
Do not distribute as this includes copyrighted material.
Streak is the powder or residue left after a mineral has been scratched on a
streak plate. Note: the color of the powder does not always resemble the color of
the mineral. For example, Galena is a shiny sliver but will leave a dark gray streak.
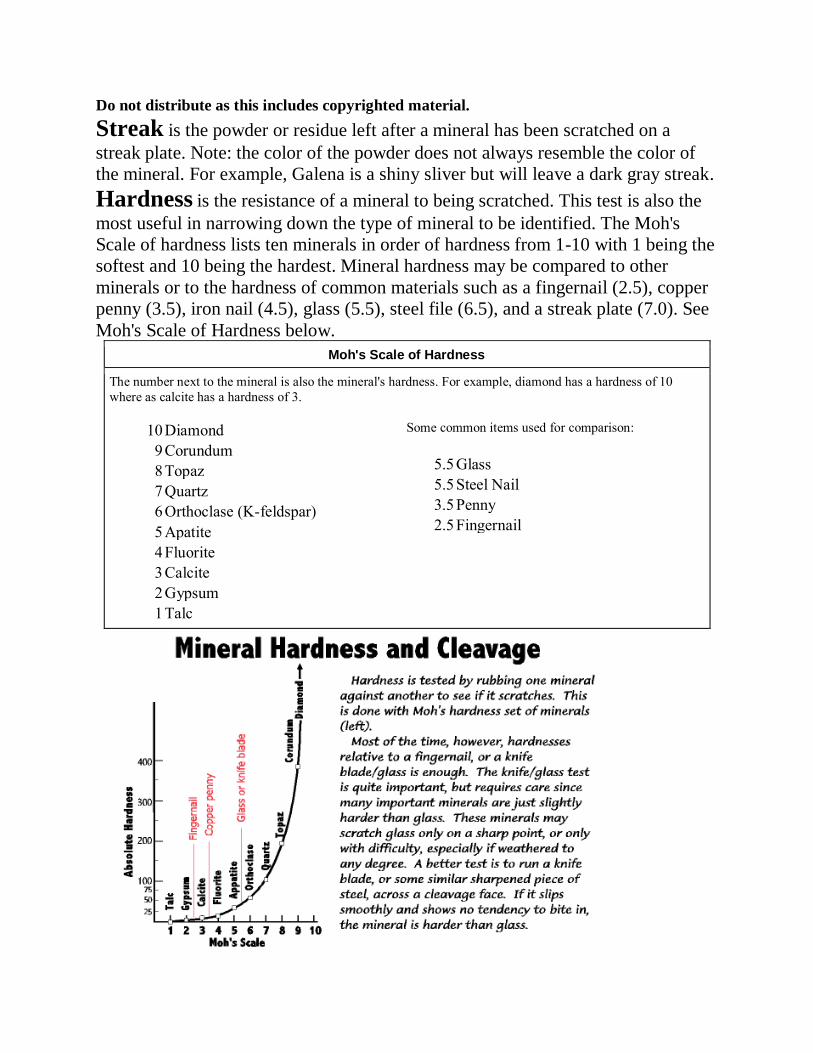
Hardness is the resistance of a mineral to being scratched. This test is also the
most useful in narrowing down the type of mineral to be identified. The Moh's
Scale of hardness lists ten minerals in order of hardness from 1-10 with 1 being the
softest and 10 being the hardest. Mineral hardness may be compared to other
minerals or to the hardness of common materials such as a fingernail (2.5), copper
penny (3.5), iron nail (4.5), glass (5.5), steel file (6.5), and a streak plate (7.0). See
Moh's Scale of Hardness below.
Moh's Scale of Hardness
The number next to the mineral is also the mineral's hardness. For example, diamond has a hardness of 10
where as calcite has a hardness of 3.
10 Diamond
9 Corundum
8 Topaz
7 Quartz
6 Orthoclase (K-feldspar)
5 Apatite
4 Fluorite
3 Calcite
2 Gypsum
1 Talc
Some common items used for comparison:
5.5 Glass
5.5 Steel Nail
3.5 Penny
2.5 Fingernail

Do not distribute as this includes copyrighted material.
Cleavage or fracture is how the mineral will break apart. If the mineral
break apart in similar pieces it is said to have good cleavage. And if the mineral
breaks like a piece of glass with uneven, jagged edges it would be classified as
fracture. An example of a mineral with good cleavage would be Galena. If Galena
breaks it breaks into cubes called “cubic cleavage”. There are other forms of
cleavage, refer to your text to research them. An example of fracture would be
Quartz. If Quartz were to split it would break in all different shapes and sizes. Due
to this Quartz is said to have good fracture.
Do not distribute as this includes copyrighted material.

Magnetism may be used to identify if a sample has iron (Fe) properties. The
strongest attraction to a magnet will be found in the mineral magnetite.
Lodestone:
The magnetism of this
magnetic variety of Magnetite
is clearly visible

Crustal Abundances of Minerals
Fluorescent Rocks and Minerals: Station 2
Black Light, Cardboard Box, Glow Rocks Adventure Guide.
http://www.discoverwithdrcool.com/glow-rocks-fluorescent--science-kit
Other Stations
Students Rotate through Stations over several days. This is to prepare them for the field trip to
the Gemology Institute of America, Carlsbad, CA.
https://www.gia.edu/gem-education/carlsbad
Station 3: Making discoveries about Large Salt Crystals (Searles Lake) LA, Mojave Desert
Station 4: Stereo Microscope: View collection of rocks and minerals under scope.
Station 5: Matching Common Household Minerals with Cards and actual mineral specimens.
Station 6: Sedimentary Rock Science Kit. Match with directions. Station 7: Viewing rock and minerals collections
Return to Rocks and Minerals Table of Contents
Return to Main Table of Contents
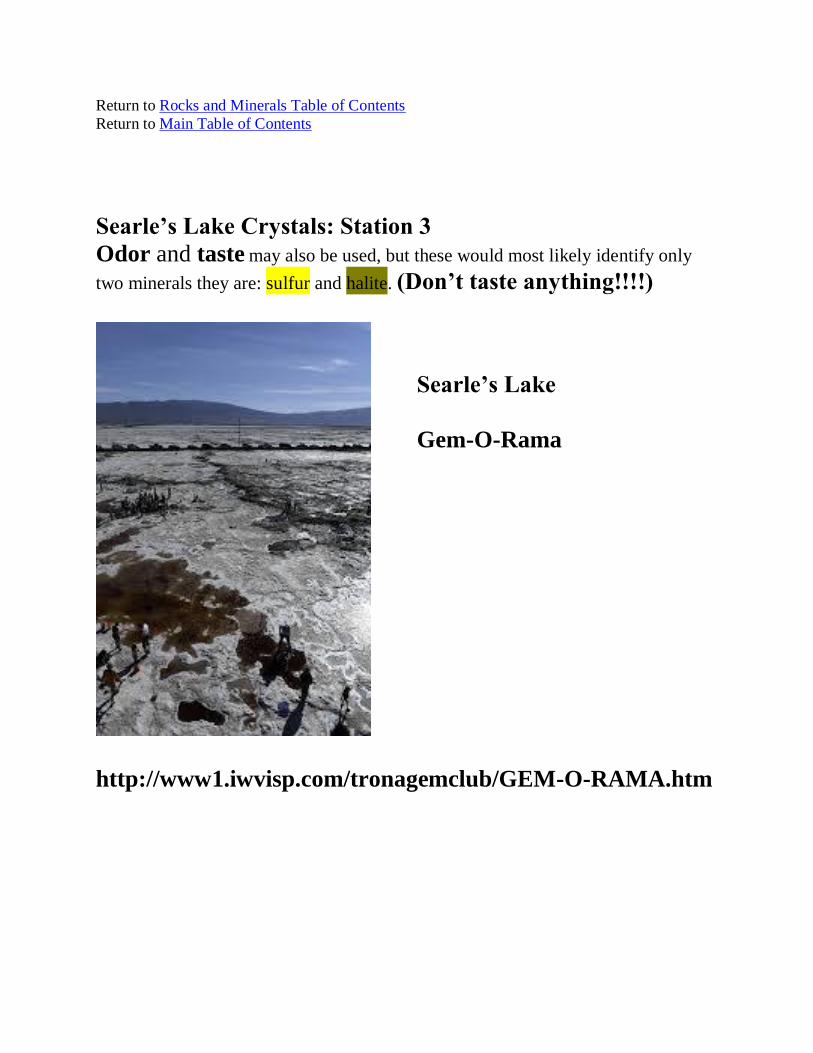
Searle’s Lake Crystals: Station 3
Odor and taste may also be used, but these would most likely identify only
two minerals they are: sulfur and halite. (Don’t taste anything!!!!)
http://www1.iwvisp.com/tronagemclub/GEM-O-RAMA.htm
Searle’s Lake
Gem-O-Rama

Station 5: Matching Common Household Minerals with Cards. On the front of the card, you place the mineral information. On the other side, glue a real-life
example. Put a sample of gypsum in a basket of other minerals. (Ref: DK Nature Activities:
Rocks and Fossil Hunter)
Station 6: Sedimentary Rock Science Kit + Identification Key. http://csmres.jmu.edu/geollab/Fichter/SedRx/basickey.html
Return to Rocks and Minerals Table of Contents
Return to Main Table of Contents

Know: What did I notice? Learned: What did I learn? Wonder: What I want to know?
Some rocks can glow from
ultraviolet light.
If you hold a rock in regular light it
does not glow, but if you put it under
the [UV] light it glows.
Why do the rocks glow?
We saw there are many types of
rocks.
Magnetite is magnetic. Plagioclase is
found more than any other rock on the
earth’s crust.
How are they magnetic?
We know that there is salt powder
on the salt crystals. They even
come from the mountains.
Salt can form on the rocks. Do not taste
anything. They can come in a lot of
shapes. The larger the specimen, the
more salt is formed.
We know that all rocks are
interesting with their interesting
appearance.
We learned that all rocks have
different appearances. There are many
types of rocks like gemstones,
minerals, etc.
We wonder if any kinds of rocks will
be worth millions of dollars some
day?
They glow because of their
fluorescent coating.
That fluorescent rocks glow. How do scientists classify rocks and
minerals apart?
Pyrite is fool’s gold. UV light is a form of energy. What is the difference between rocks
and minerals?
Fluorescent light was discovered in
1800 by Sir George Stokes.
What makes fluorescent rocks glow?
Microscopes are a very good scientific
tool.
What do they use fluorescent rocks
for?
Plagioclase is the most abundant rock. What is an ultraviolet light?
Why does pyrite look like gold?

How are these rocks magnetic?
Know Learned What I want to know?
It’s small. It can be scratched by a fingernail and
copper.
What is its name?
It’s blue. It will scratch a glass and a nail. What makes it blue?
It’s sparkly. Its streak is blue. What is it made out of?
It shines in the light. Crystals are made up of atoms and
molecules.
What happens if you put it in
vinegar?
The purple one is amethyst. Gold has been used for thousands of
years.
How did it form?
Some are smooth. Only a few rocks are magnetic. Why does it look like a broccoli?
Some things look bumpy, but aren’t. Why is it white on the bottom?
What makes rocks shine & sparkle?
What gives rocks different textures?
What gives rocks color?
Why is pyrite called fool’s gold?
Why is the okenite furry?
The white powder is salt. The rocks are sulfur and halite. How did they get their shape? Form?
They are from a lake. Some rocks glow purple and others
orange.
What makes them glow? How/ why
is UV light bad for your eyes.
Visible light is in the middle of the
spectrum.
Some rocks don’t glow.
UV light is bad for your eyes.

5th Level Science Project

Thermal Conductivity
Preparing for Science Fair:
Metal Transfer Heat Conductivity Apparatus from NASCO. Students from 5th level mentor 4th
level students while doing this lab (two groups of two at a time). Students learn how this
experiment can be turned into a science fair project. They then do their own project.
Return to Main Table of Contents
Contents:
Stand with clamps
Glass bowl with hot
water
Thermometer
Digital timer
Metal samples with
attached thermometers
Steel
Copper
Brass
Zinc

The Science Fair involves 3rd, 4th, and 5th level students. We have judges who are scientists, engineers, and science teachers; many are
from outside the school. Over the years, we have streamlined the process to follow the guidelines of our local Science Fairs.


Addendum Hands On Science
TABLE OF CONTENTS
1. Cross Curricula
2. Food Chains
3. Anatomy
4. Games
5. Technology and Engineering
Return to Main Table of Contents
Author’s Note:
This Addendum includes slides, lists of resources, and
procedures, from the Hands-On-Science Presentation that are
part of our Life Science and Engineering. We do not include the
entire scope of our curriculum here.

Cross Curricula
History/ Anatomy: Making Anatomy/ Art: Sculpting Skull
Lucy’s Skeleton for Early Man for El Dia de los Muertos
Presentation
Geometry/Anatomy: Paula, a physical therapist, shows students
how to use a goniometer to measure angles of joints.
Return to Addendum
Return to Main Table of Contents

RANGE OF MOTION CHART
JOINT NORMAL STUDENT
Elbow flexion 145 degrees
Elbow extension 0 degrees
Knee extension 0 degrees
Knee flexion 135 degrees
Ankle dorsiflexion 20 degrees
Ankle plantar flexion 45 degrees
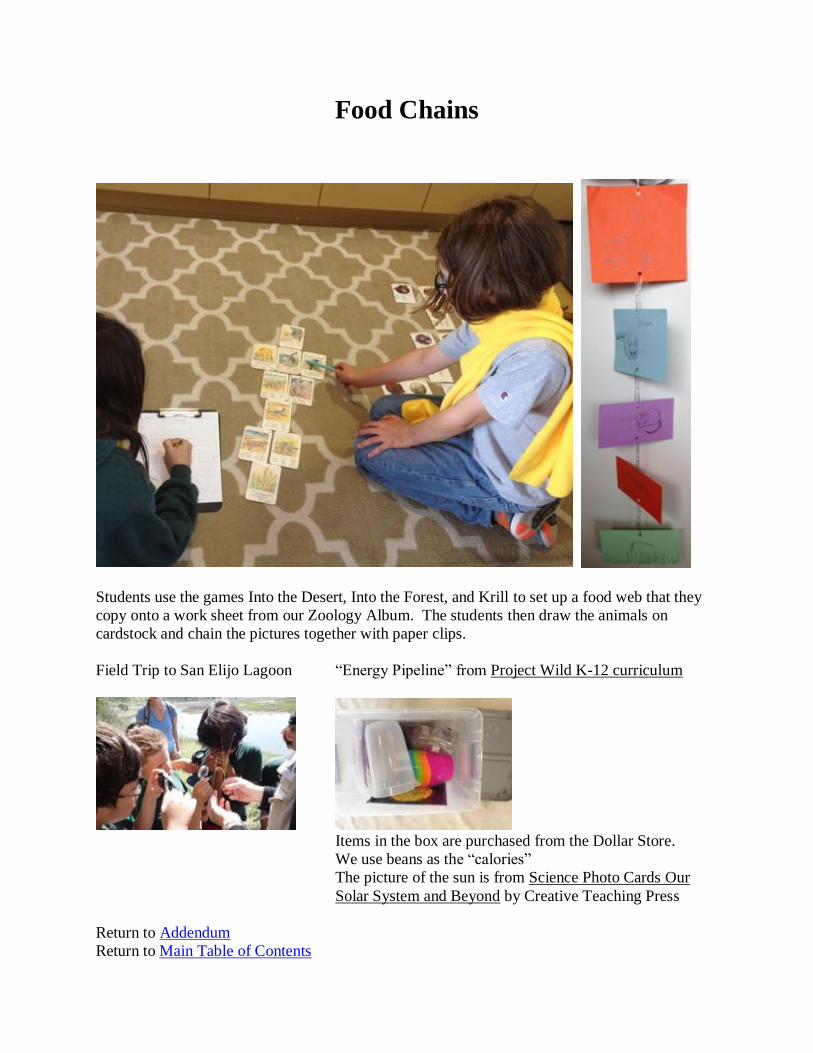
Food Chains
Students use the games Into the Desert, Into the Forest, and Krill to set up a food web that they
copy onto a work sheet from our Zoology Album. The students then draw the animals on
cardstock and chain the pictures together with paper clips.
Field Trip to San Elijo Lagoon “Energy Pipeline” from Project Wild K-12 curriculum
Items in the box are purchased from the Dollar Store.
We use beans as the “calories”
The picture of the sun is from Science Photo Cards Our
Solar System and Beyond by Creative Teaching Press
Return to Addendum
Return to Main Table of Contents

Anatomy
Brain Hat from Salk Institute 3 Part Cards: Systems: Montessori Research&Development
Digestion Activity (cards below) Digestion Experiment (procedure below)
Return to Addendum
Return to Main Table of Contents
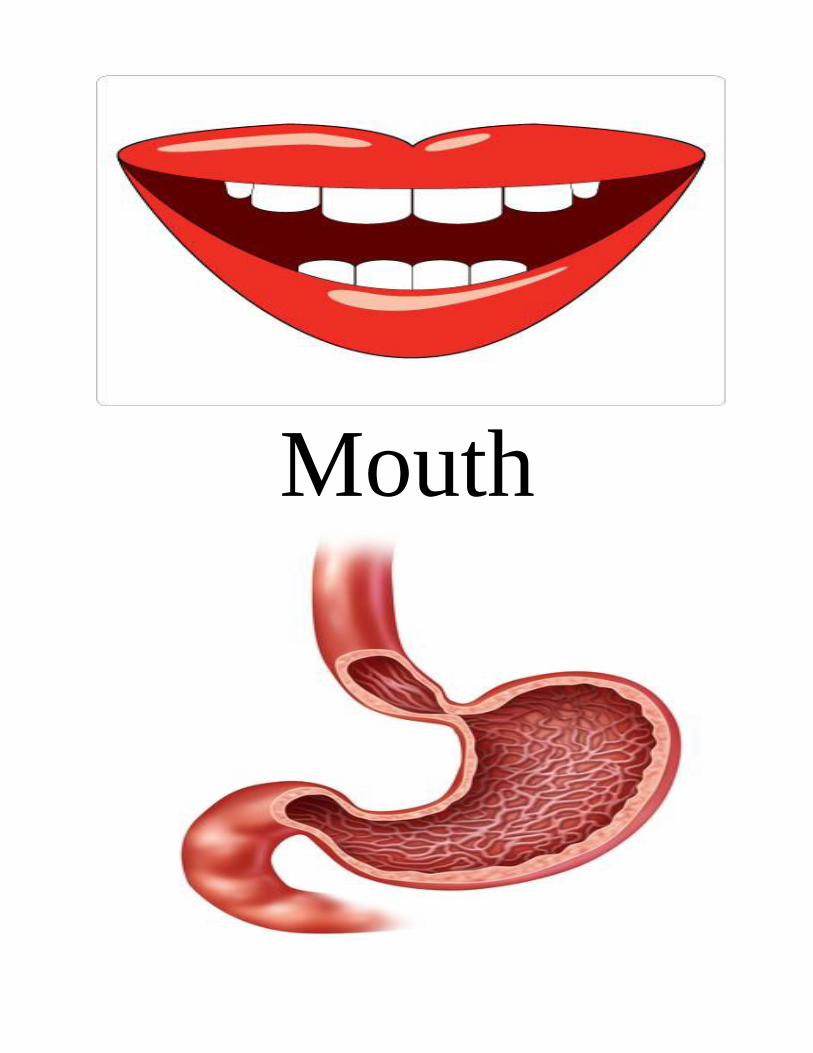
Mouth

Stomach
Large Intestine

Small Intestine

Esophagus
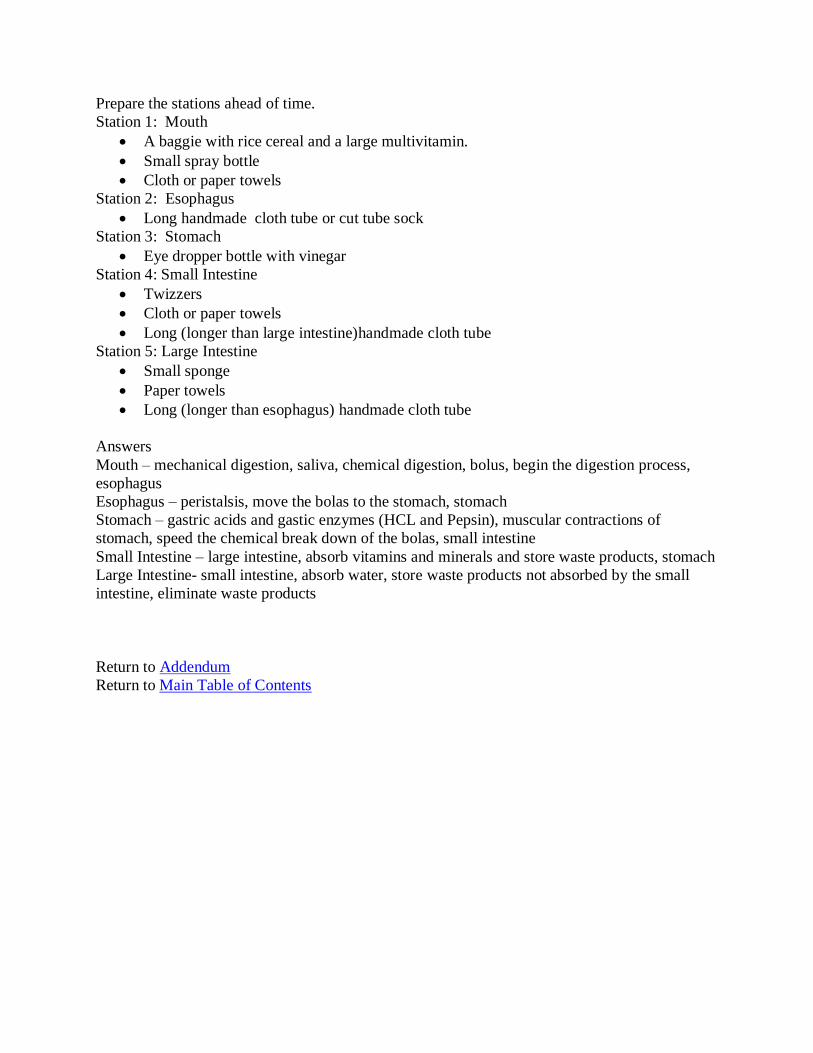
Prepare the stations ahead of time.
Station 1: Mouth
• A baggie with rice cereal and a large multivitamin.
• Small spray bottle
• Cloth or paper towels
Station 2: Esophagus
• Long handmade cloth tube or cut tube sock
Station 3: Stomach
• Eye dropper bottle with vinegar
Station 4: Small Intestine
• Twizzers
• Cloth or paper towels
• Long (longer than large intestine)handmade cloth tube
Station 5: Large Intestine
• Small sponge
• Paper towels
• Long (longer than esophagus) handmade cloth tube
Answers
Mouth – mechanical digestion, saliva, chemical digestion, bolus, begin the digestion process,
esophagus
Esophagus – peristalsis, move the bolas to the stomach, stomach
Stomach – gastric acids and gastic enzymes (HCL and Pepsin), muscular contractions of
stomach, speed the chemical break down of the bolas, small intestine
Small Intestine – large intestine, absorb vitamins and minerals and store waste products, stomach
Large Intestine- small intestine, absorb water, store waste products not absorbed by the small
intestine, eliminate waste products
Return to Addendum
Return to Main Table of Contents

Which organ am I? ______________________________________.
With the bag closed, use your fingers or fist to crush the food.
What kind of digestion does this represent?
_____________________________________________________.
Open the bag and spray some water onto the food.
What does the water represent?
_____________________________________________________.
What kind of digestion does this represent?
_____________________________________________________.
What is the chewed food called?
_____________________________________________________.
Close the bag and pass it on to the ________________________.
What are my primary jobs in the human body?
______________________________________________________.
Which organ delivers food to me?
______________________________________________________.

Which organ am I?___________________________________________.
Squeeze the bag back and forth gently for several seconds.
Push the bag through the sock.
What does this action represent?
_________________________________________________________.
Close the bag and pass it on to the ________________________.
What is my primary job in the human body?
______________________________________________________.
Which organ delivers food to me?
______________________________________________________.
What organ am I? _______________________________________.
Open the bag and add several drops of acetic acid (vinegar) on the food.
What is normally present in this organ/what does the vinegar represent?
______________________________________________________.
Close the bag and squeeze it gently for several seconds.
What does this action represent? __________________________.
Close the bag and pass it on to the ________________________.
What are my primary jobs in the human body?
______________________________________________________.
Which organ delivers food to me?
______________________________________________________.

What organ am I? _______________________________________.
Squeeze it gently for several seconds.
Open the bag and remove the vitamin.
Close the bag and insert in cloth tube. Push through to end.
Pass it on to the ________________________.
What are my primary jobs in the human body?
______________________________________________________.
Which organ delivers food to me?
______________________________________________________.
What organ am I? _______________________________________.
Open the bag and use the sponge to soak up as much of the liquid as possible.
Close the bag and insert in cloth tube. Push through to end.
What are my primary jobs in the human body?
______________________________________________________.
Which organ delivers food to me?
______________________________________________________.
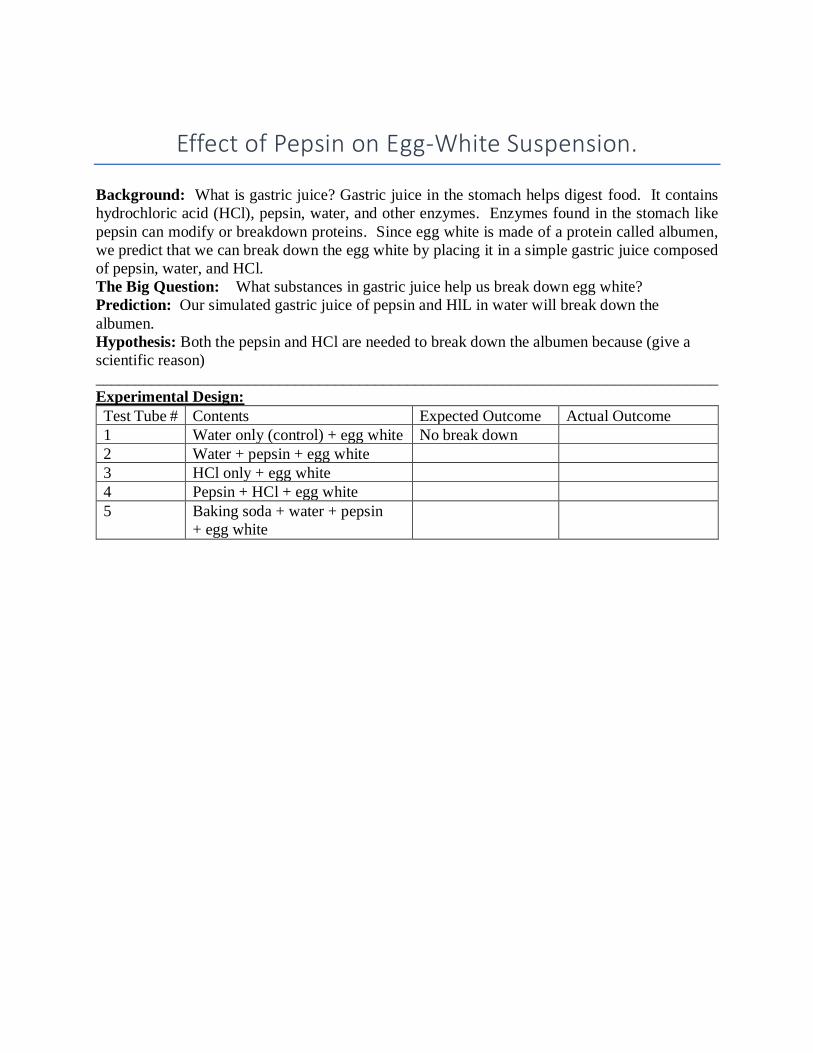
Effect of Pepsin on Egg-White Suspension.
Background: What is gastric juice? Gastric juice in the stomach helps digest food. It contains
hydrochloric acid (HCl), pepsin, water, and other enzymes. Enzymes found in the stomach like
pepsin can modify or breakdown proteins. Since egg white is made of a protein called albumen,
we predict that we can break down the egg white by placing it in a simple gastric juice composed
of pepsin, water, and HCl.
The Big Question: What substances in gastric juice help us break down egg white?
Prediction: Our simulated gastric juice of pepsin and HlL in water will break down the
albumen.
Hypothesis: Both the pepsin and HCl are needed to break down the albumen because (give a
scientific reason)
______________________________________________________________________________
Experimental Design:
Test Tube # Contents Expected Outcome Actual Outcome
1 Water only (control) + egg white No break down
2 Water + pepsin + egg white
3 HCl only + egg white
4 Pepsin + HCl + egg white
5 Baking soda + water + pepsin
+ egg white

Effect of Pepsin on Egg-White Suspension.
For the Teacher:
Prerequisites: Students watch Bill Nye The Science Guy Digestion and Human Body in Action
Digestive & Excretory Systems. Note: When the students watch the Human Body in Action video,
skip over the Busy Body experiment on Pepsin so that you don’t give away the conclusion.
Materials: (see list)
Procedure: (Note: depending on your student’s level and time; you can provide the
procedure or you just write it on the board and they follow it.)
Step 1) Cut egg white and tie string to egg pieces.
Step 2) in tube #1; 10 mls of distilled water
Step 3) in beaker A; Pipette 25 mls of water, add 1.5g of pepsin (6% solution of pepsin in H2O)
Step 4) in tube # 2; 10 mls of step 3 solution into test tube 2
Step 5) in tube # 3; 10 mls of 0.1 normal HCL into test tube 3
Step 6) in beaker B; 25 mls of 0.1 normal HCL + 1.5 g of pepsin (6% solution of pepsin in 0.1
N HCl)
Step 7) in tube #4; 10 mls of step 6 solution in test tube 4
Step 8) in beaker C; 25 mls of water + 1.5 g of pepsin + 0.3 g of baking soda (6% pepsin in
NaHCO3)
Step 9) in tube #5; 10 mls of step 8 solution
Step 10) Suspend egg whites in test tubes
Step 11) Leave at room temperature for several days. Observe each day.
*Dispose of excess solutions properly. Because it is diluted it can be put down the drain.
Materials List
• Safety Goggles
• Lab coat or apron
• Gloves
• 10 ml, 25 ml pipettes and pipette
pump
• 0.1 N Hydrochloric Acid (HCl)
• Distilled Water
• 5 Test tubes labeled 1-5
• Test tube rack
• 3 Beakers labeled A,B,C
• 10 stirring sticks
• Pepsin powder
• Baking Soda
• Thread
• Four cubes of egg whites

Games
Game Source
Rocks & Minerals Rocks & Minerals Bingo Quizmo Amazon
Adventure Earth Lakeshore
Food Chains Krill Ampersand Press
Into the Desert Ampersand Press
Into the Forest Ampersand Press
Compost Gin Acorn Naturalist
King of the Jungle Lakeshore
Physical Science Power Surge Lakeshore
Solar System Wiebe-Carlson
Anatomy Skeleton’s in the Closet Learning Resources/ Amazon
Systems of the Human Body NASCO
Return to Addendum
Return to Main Table of Contents

Technology and Engineering
Anatomy Apps
DAQRI Anatomy I- Cell
Other Anatomy Apps:
• AnatronicaPro (Peels away all systems)
• MB Anatomy (skeletal muscular)
Physical Science Apps, Interactive Websites, Digital Story Telling
See “Story of Universe”, “Weather”, “Story of Elements”.
Engineering Kits:
Marshmallow and toothpick towers
Lakeshore STEM Learning Labs:
• Don’t Lose Your Marbles
• Real Word STEM-Challenge Kit
Engineering is Elementary Curriculum Units:
• Insects: Designing a Hand Pollinator
• Human Body: Designing Knee Braces
• Magnetism: Designing MagLev Systems
Programming Robots
MBOT MAKE BLOCK
Return to Addendum
Return to Main Table of Contents