Embed Size (px)
Citation preview
Page 1 of 22
Hydraulic Steering Install
Disclaimer: The following is a tutorial on how to install hydraulic steering in a center console boat. I am not a mechanic. I am not a photographer. I am a guy who had a steering problem. Now I’m a guy who doesn’t have a steering problem. This is how I did it. It’s not the only way to do it. It’s just the way I did it. If you have decent mechanical skills, you can probably do it too.
My Setup
My boat is a 2007 19’ Triumph Center Console (190 bay) with a Suzuki DF-140 hp motor. My steering cable seized and not in the usual place. Instead of being seized inside the tube at the motor, it happened somewhere along the length of the cable. I don’t have enough room inside the splash well at the transom to remove it without taking the motor off or at least lifting it up. When I looked at the options the idea of going hydraulic looked good to me. I purchased the following parts based on the model of my boat and motor.
Baystar Hydraulic Steering Kit part # HC4645H
Spacer kit part # HO5090
Back plate Kit (helm adaptor) part # HA5418
All of this can be installed with basic tools (hand tools and a drill). I’d say plan on a full day and maybe part of the next. You’ll need a second person for some of the installation. If you’re organized and have a helper you can do it in a day.
The Challenges
As I looked at this project I saw 2 challenges. The first is to remove the old steering. As I stated above, I couldn’t remove the old cable without removing the motor or at least hoisting it up. Since I didn’t have a hoist, my choice was to cut it out.
The second challenge was to get the new hoses pulled from the center console to the transom. Fortunately, I’ve seen the data cable guys pull miles of cable at work, so that didn’t’ seem like an insurmountable task.
Page 2 of 22
The Project
Get yourself organized and layout the parts and become familiar with everything.
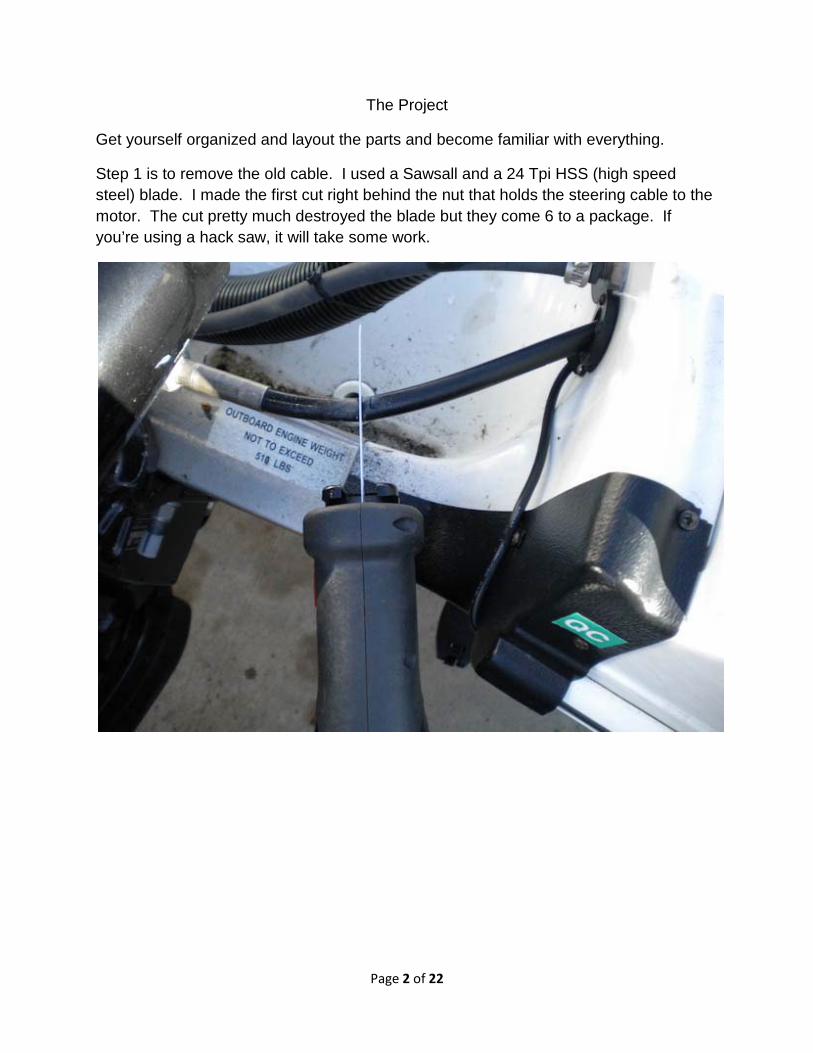
Step 1 is to remove the old cable. I used a Sawsall and a 24 Tpi HSS (high speed steel) blade. I made the first cut right behind the nut that holds the steering cable to the motor. The cut pretty much destroyed the blade but they come 6 to a package. If you’re using a hack saw, it will take some work.
Page 3 of 22
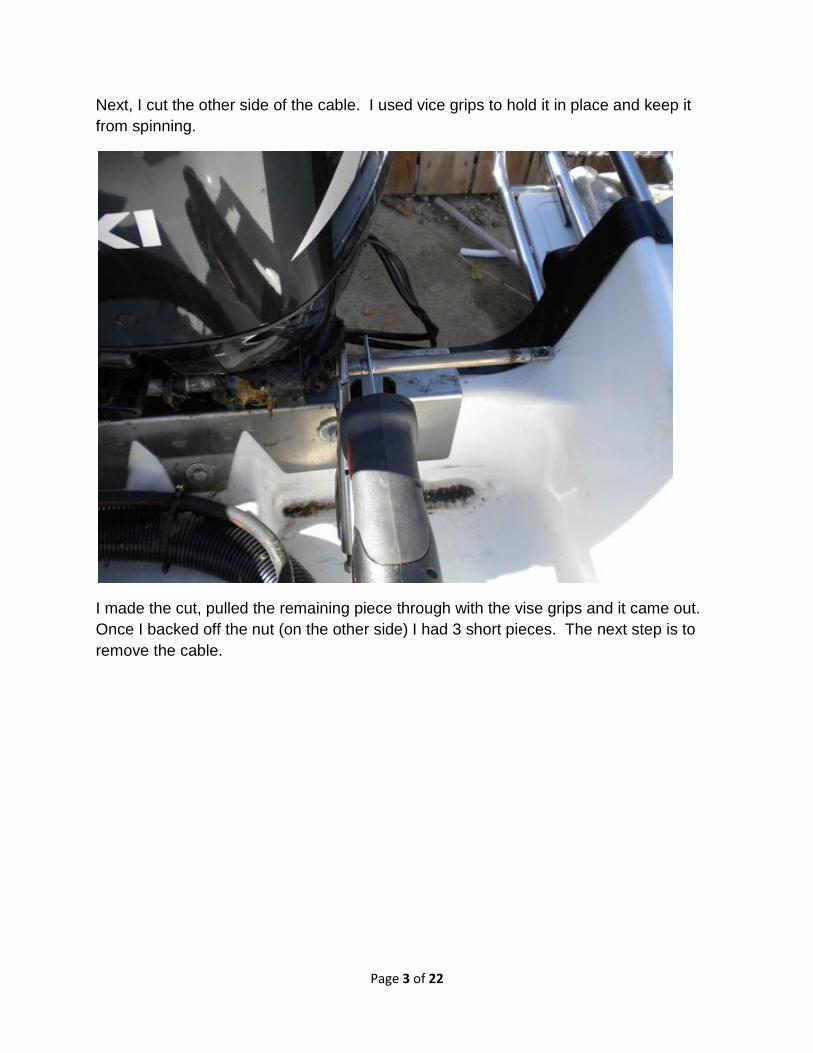
Next, I cut the other side of the cable. I used vice grips to hold it in place and keep it from spinning.
I made the cut, pulled the remaining piece through with the vise grips and it came out. Once I backed off the nut (on the other side) I had 3 short pieces. The next step is to remove the cable.
Page 4 of 22
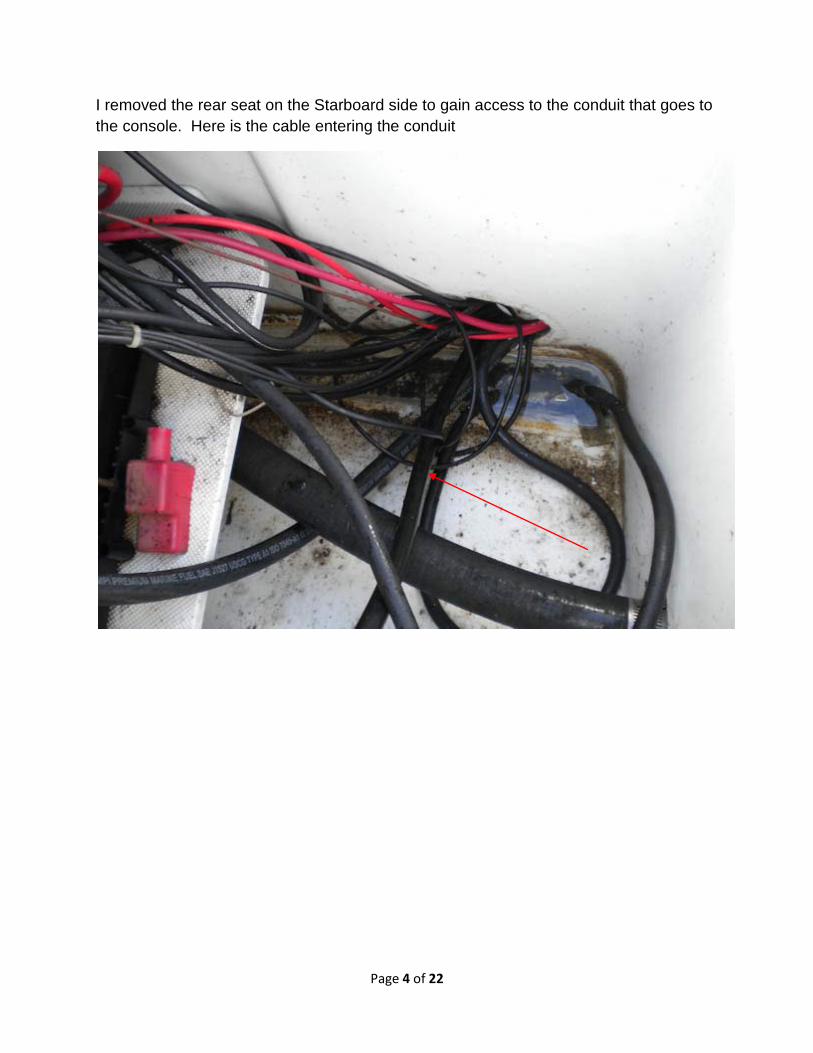
I removed the rear seat on the Starboard side to gain access to the conduit that goes to the console. Here is the cable entering the conduit
Page 5 of 22
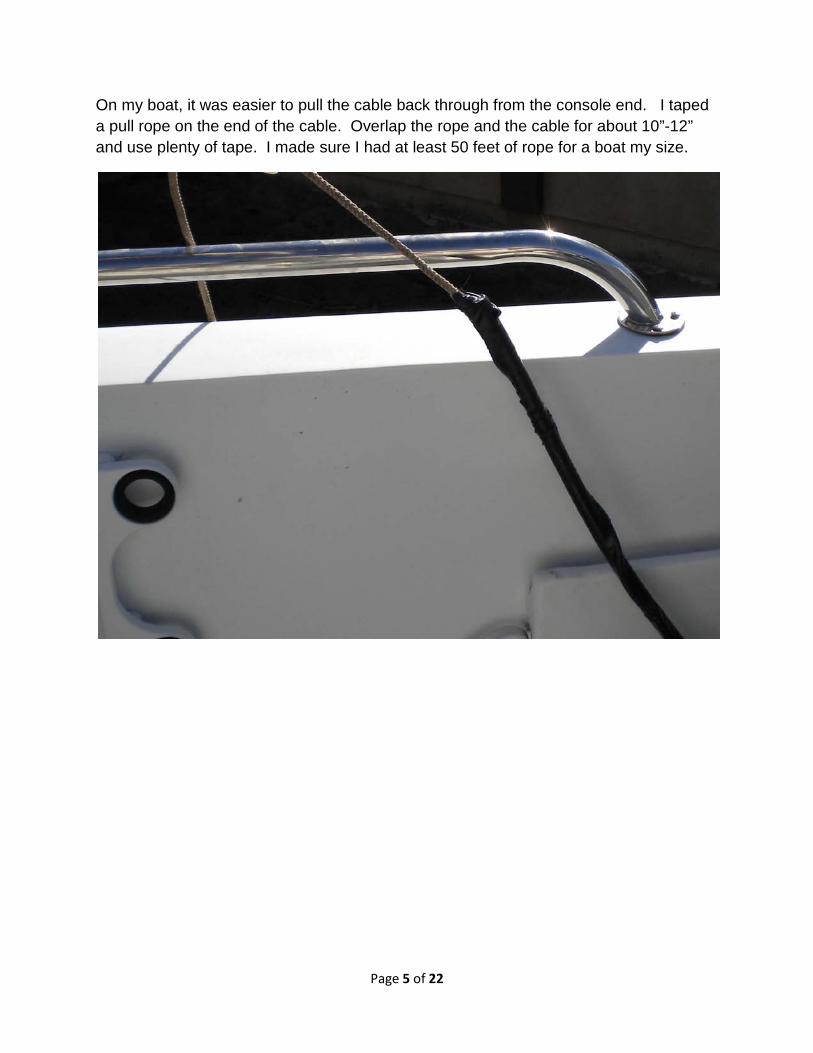
On my boat, it was easier to pull the cable back through from the console end. I taped a pull rope on the end of the cable. Overlap the rope and the cable for about 10”-12” and use plenty of tape. I made sure I had at least 50 feet of rope for a boat my size.
Page 6 of 22
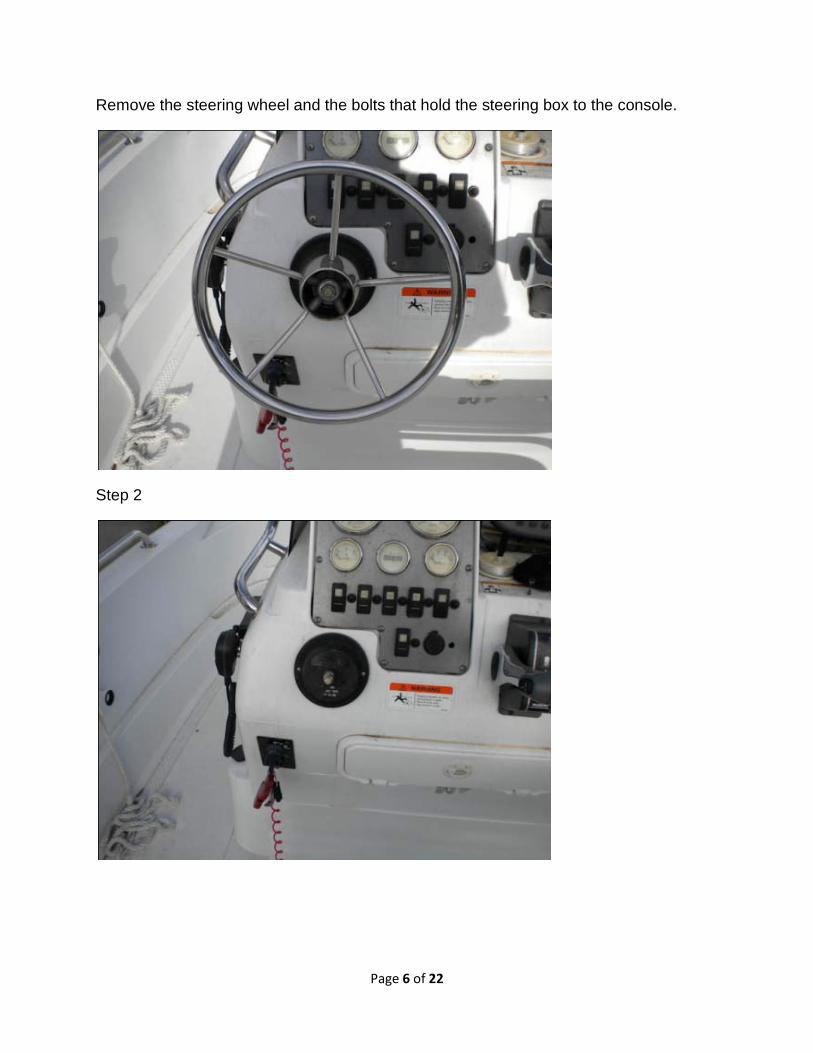
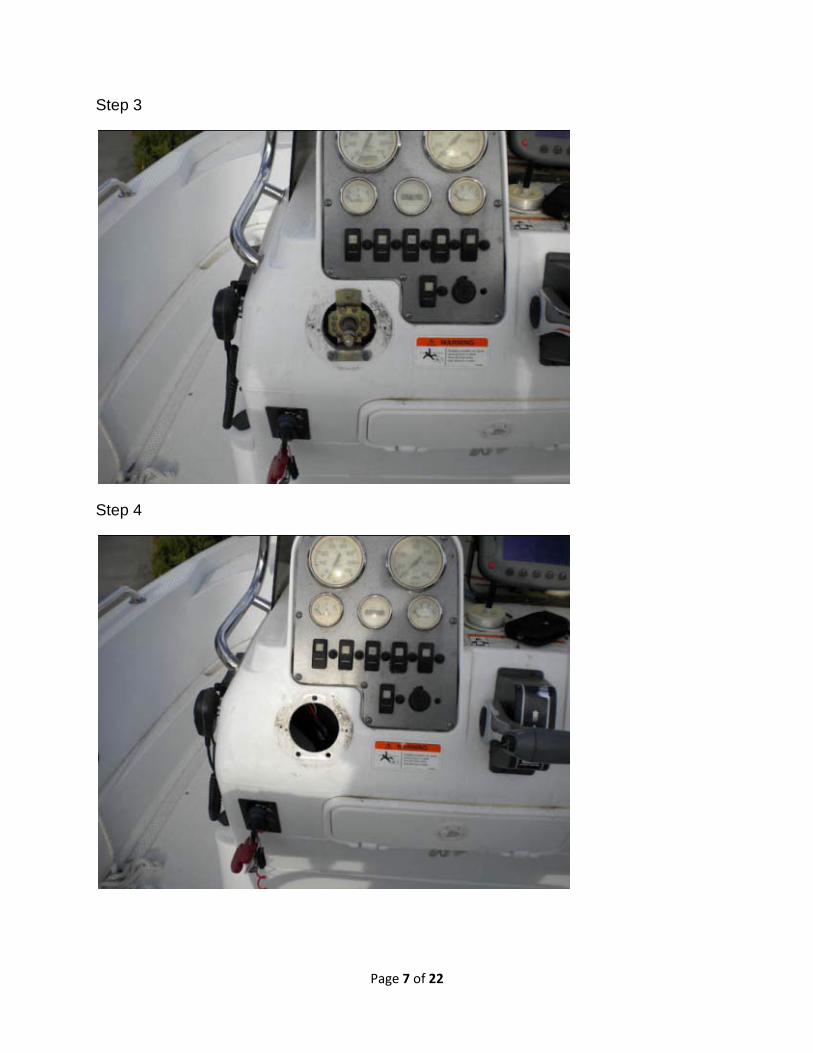
Remove the steering wheel and the bolts that hold the steering box to the console.
Step 2
Page 7 of 22
Step 3
Step 4
Page 8 of 22
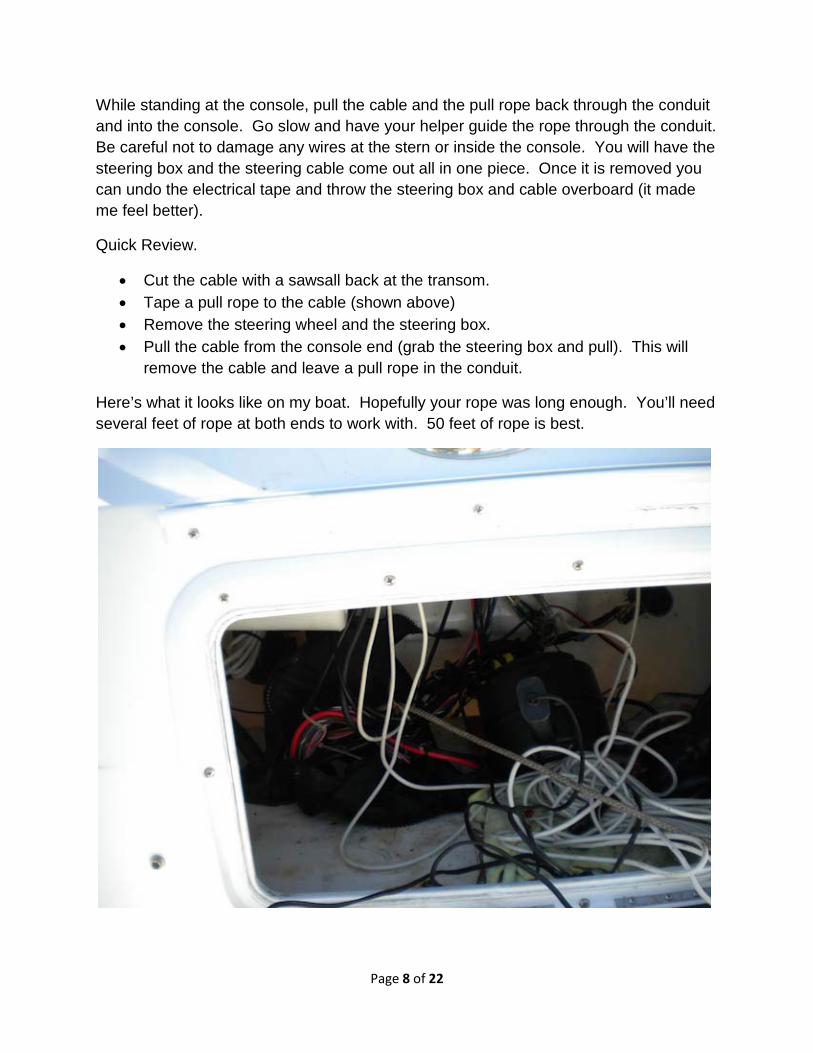
While standing at the console, pull the cable and the pull rope back through the conduit and into the console. Go slow and have your helper guide the rope through the conduit. Be careful not to damage any wires at the stern or inside the console. You will have the steering box and the steering cable come out all in one piece. Once it is removed you can undo the electrical tape and throw the steering box and cable overboard (it made me feel better).
Quick Review.
• Cut the cable with a sawsall back at the transom. • Tape a pull rope to the cable (shown above) • Remove the steering wheel and the steering box. • Pull the cable from the console end (grab the steering box and pull). This will
remove the cable and leave a pull rope in the conduit.
Here’s what it looks like on my boat. Hopefully your rope was long enough. You’ll need several feet of rope at both ends to work with. 50 feet of rope is best.
Page 9 of 22
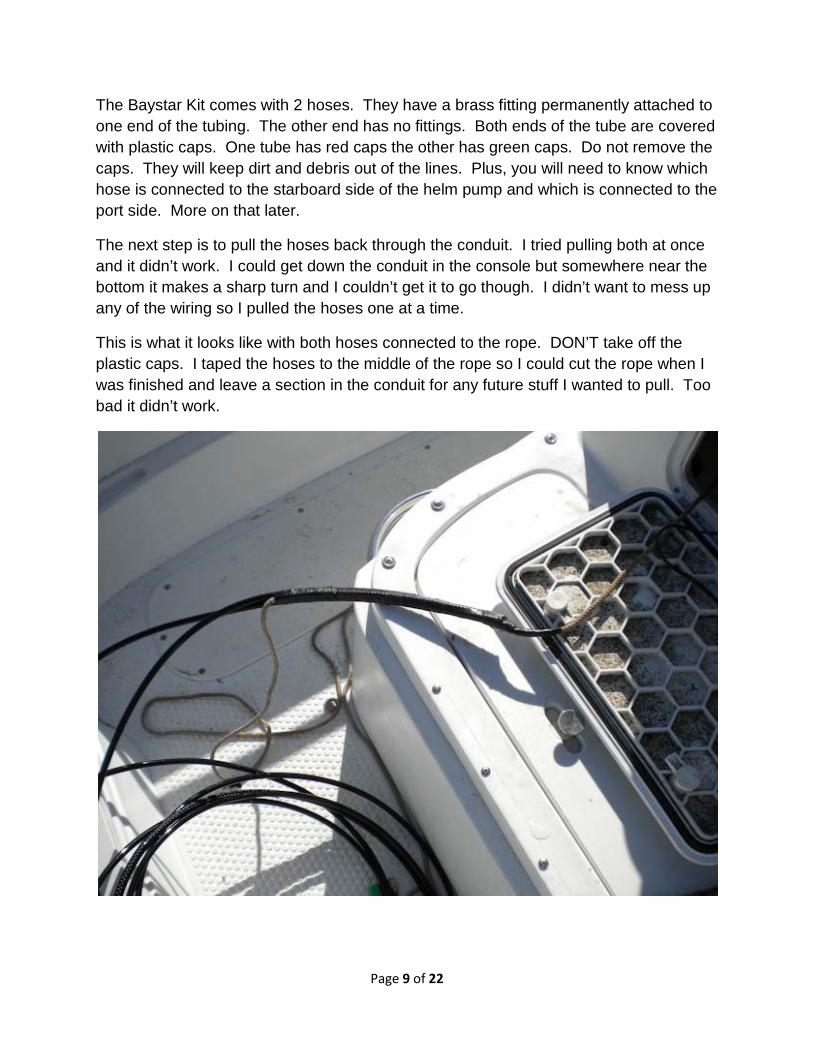
The Baystar Kit comes with 2 hoses. They have a brass fitting permanently attached to one end of the tubing. The other end has no fittings. Both ends of the tube are covered with plastic caps. One tube has red caps the other has green caps. Do not remove the caps. They will keep dirt and debris out of the lines. Plus, you will need to know which hose is connected to the starboard side of the helm pump and which is connected to the port side. More on that later.
The next step is to pull the hoses back through the conduit. I tried pulling both at once and it didn’t work. I could get down the conduit in the console but somewhere near the bottom it makes a sharp turn and I couldn’t get it to go though. I didn’t want to mess up any of the wiring so I pulled the hoses one at a time.
This is what it looks like with both hoses connected to the rope. DON’T take off the plastic caps. I taped the hoses to the middle of the rope so I could cut the rope when I was finished and leave a section in the conduit for any future stuff I wanted to pull. Too bad it didn’t work.
Page 10 of 22
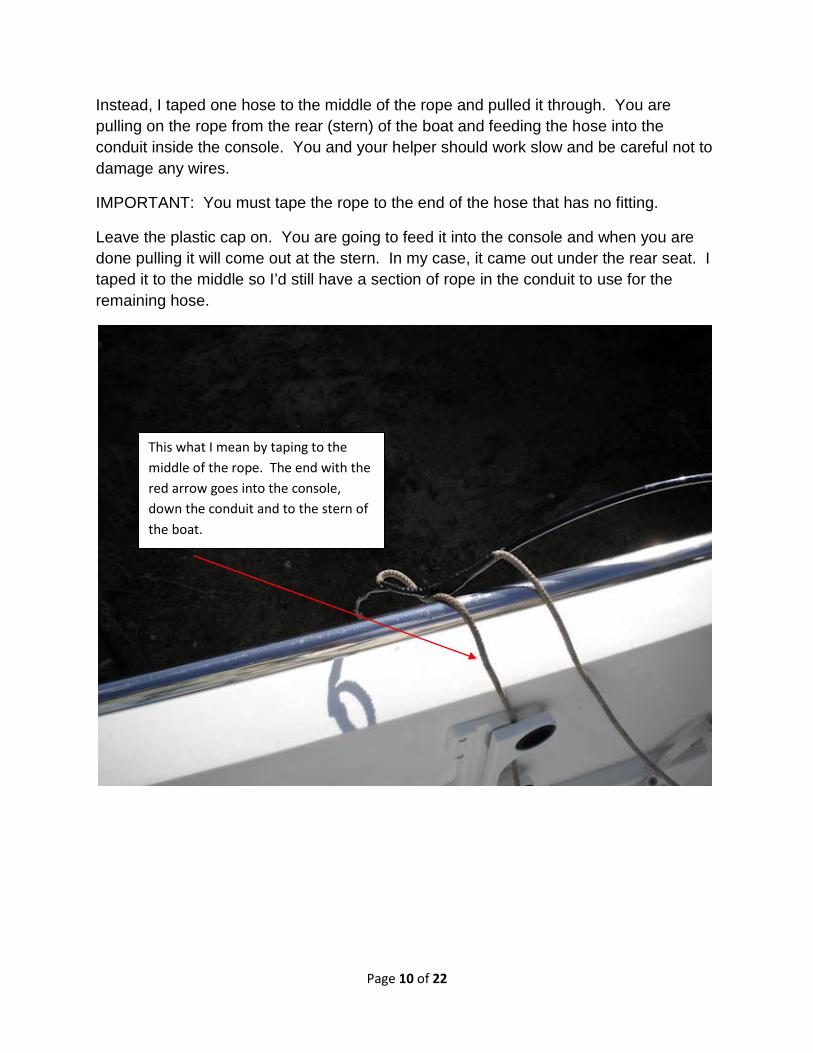
Instead, I taped one hose to the middle of the rope and pulled it through. You are pulling on the rope from the rear (stern) of the boat and feeding the hose into the conduit inside the console. You and your helper should work slow and be careful not to damage any wires.
IMPORTANT: You must tape the rope to the end of the hose that has no fitting.
Leave the plastic cap on. You are going to feed it into the console and when you are done pulling it will come out at the stern. In my case, it came out under the rear seat. I taped it to the middle so I’d still have a section of rope in the conduit to use for the remaining hose.
This what I mean by taping to the middle of the rope. The end with the red arrow goes into the console, down the conduit and to the stern of the boat.
Page 11 of 22
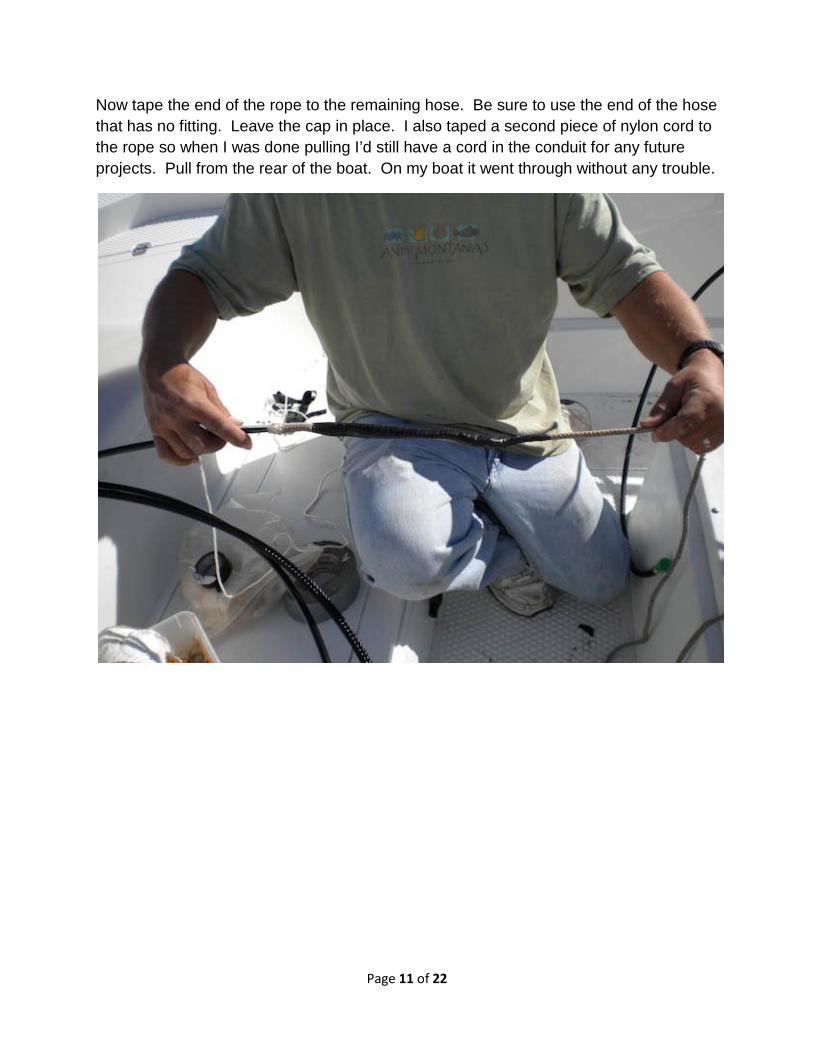
Now tape the end of the rope to the remaining hose. Be sure to use the end of the hose that has no fitting. Leave the cap in place. I also taped a second piece of nylon cord to the rope so when I was done pulling I’d still have a cord in the conduit for any future projects. Pull from the rear of the boat. On my boat it went through without any trouble.
Page 12 of 22
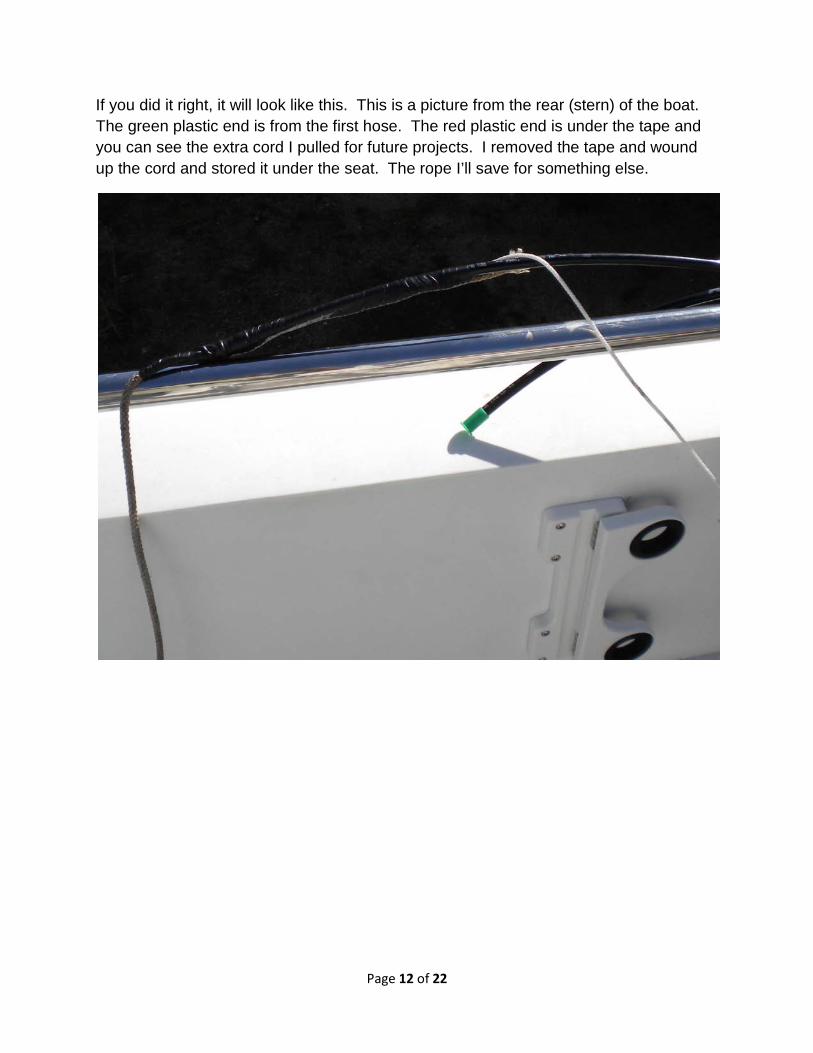
If you did it right, it will look like this. This is a picture from the rear (stern) of the boat. The green plastic end is from the first hose. The red plastic end is under the tape and you can see the extra cord I pulled for future projects. I removed the tape and wound up the cord and stored it under the seat. The rope I’ll save for something else.
Page 13 of 22
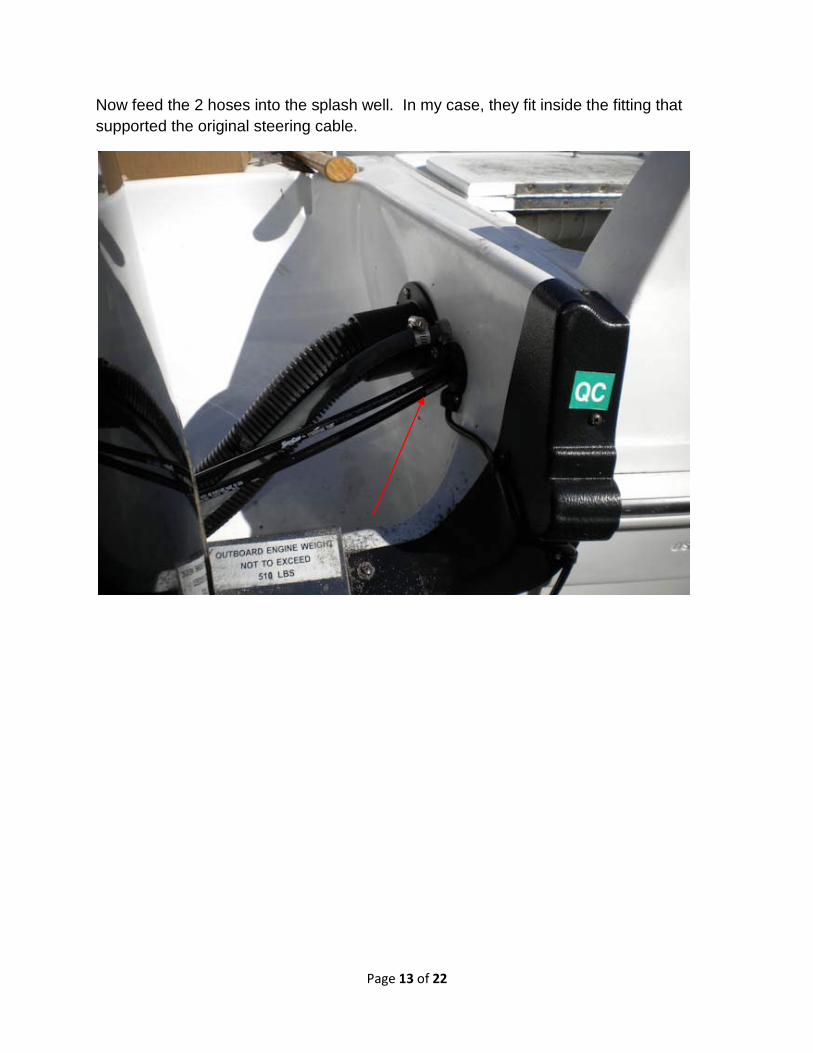
Now feed the 2 hoses into the splash well. In my case, they fit inside the fitting that supported the original steering cable.
Page 14 of 22
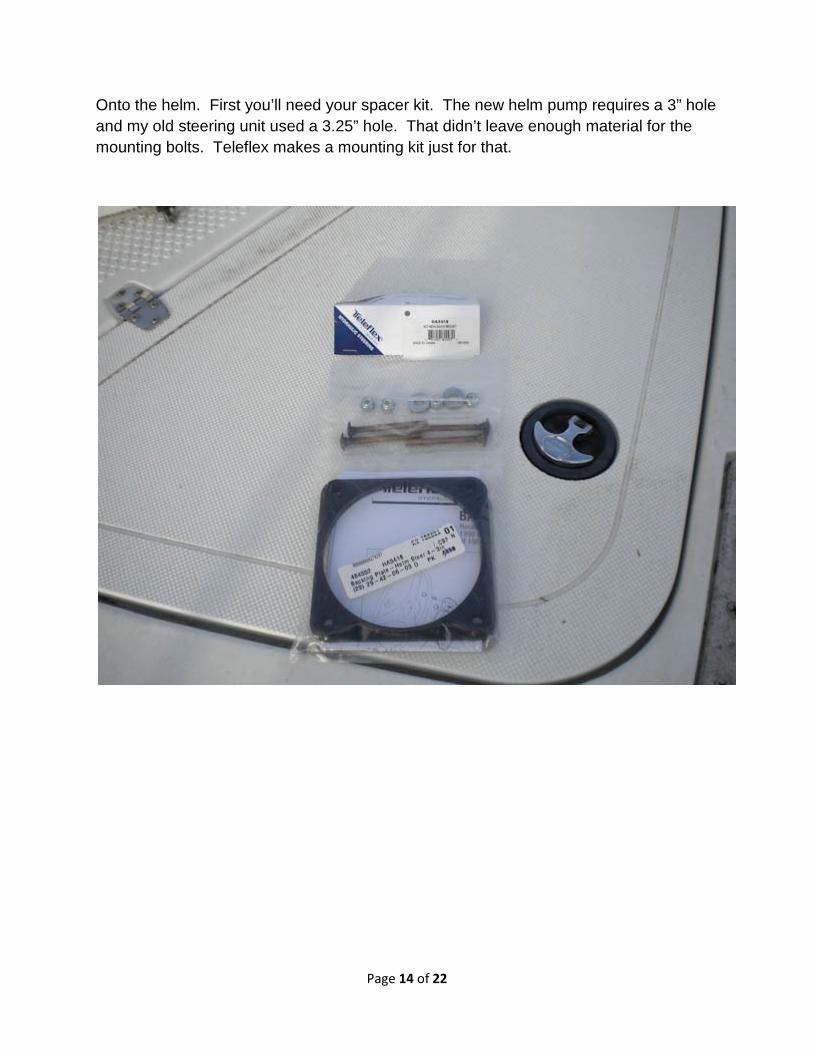
Onto the helm. First you’ll need your spacer kit. The new helm pump requires a 3” hole and my old steering unit used a 3.25” hole. That didn’t leave enough material for the mounting bolts. Teleflex makes a mounting kit just for that.
Page 15 of 22
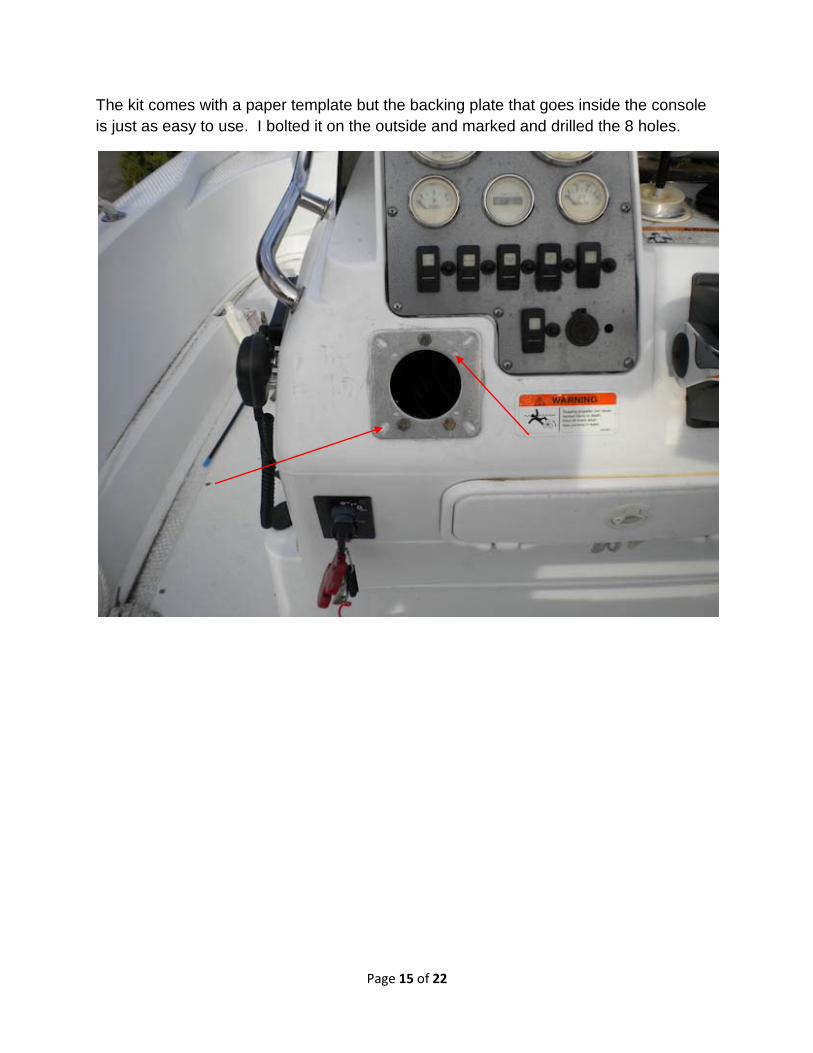
The kit comes with a paper template but the backing plate that goes inside the console is just as easy to use. I bolted it on the outside and marked and drilled the 8 holes.
Page 16 of 22
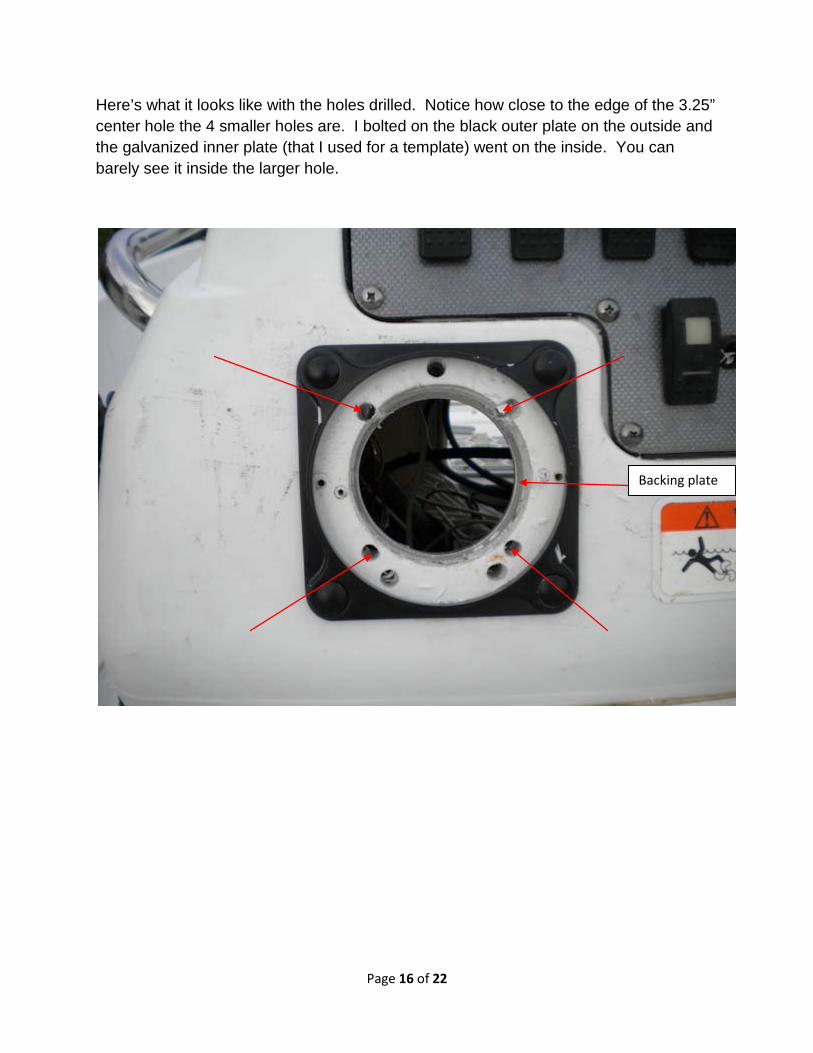
Here’s what it looks like with the holes drilled. Notice how close to the edge of the 3.25” center hole the 4 smaller holes are. I bolted on the black outer plate on the outside and the galvanized inner plate (that I used for a template) went on the inside. You can barely see it inside the larger hole.
Backing plate
Page 17 of 22
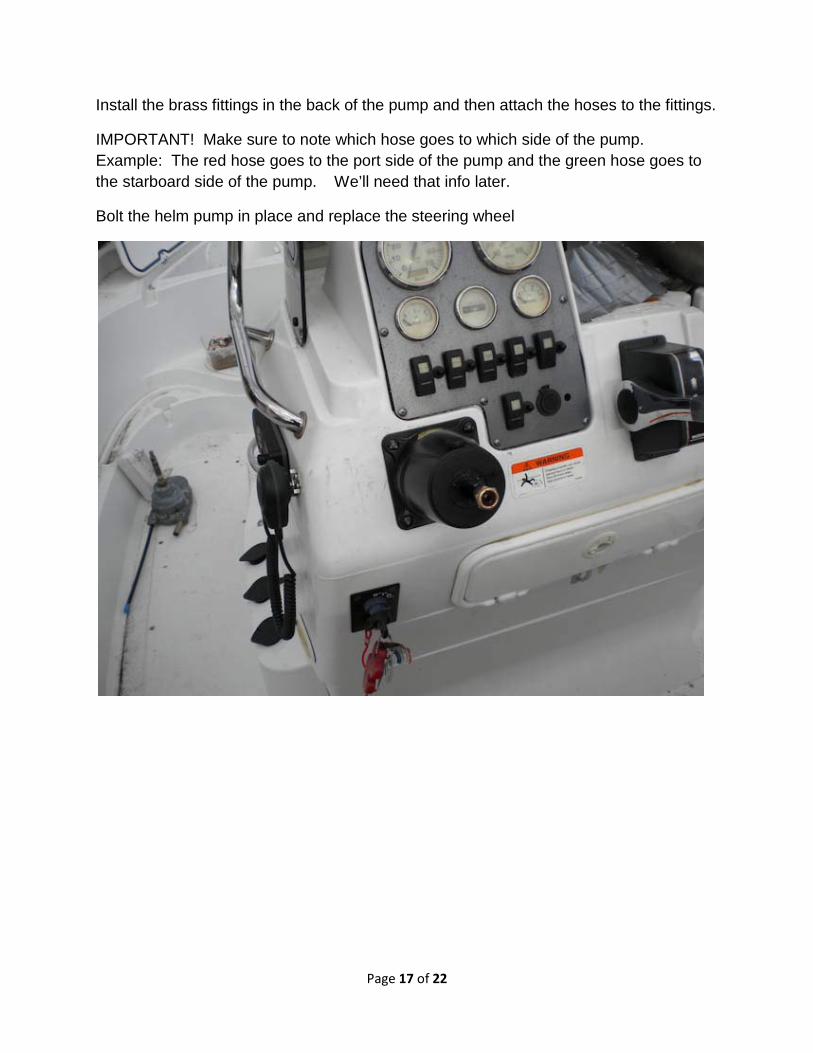
Install the brass fittings in the back of the pump and then attach the hoses to the fittings.
IMPORTANT! Make sure to note which hose goes to which side of the pump. Example: The red hose goes to the port side of the pump and the green hose goes to the starboard side of the pump. We’ll need that info later.
Bolt the helm pump in place and replace the steering wheel
Page 18 of 22
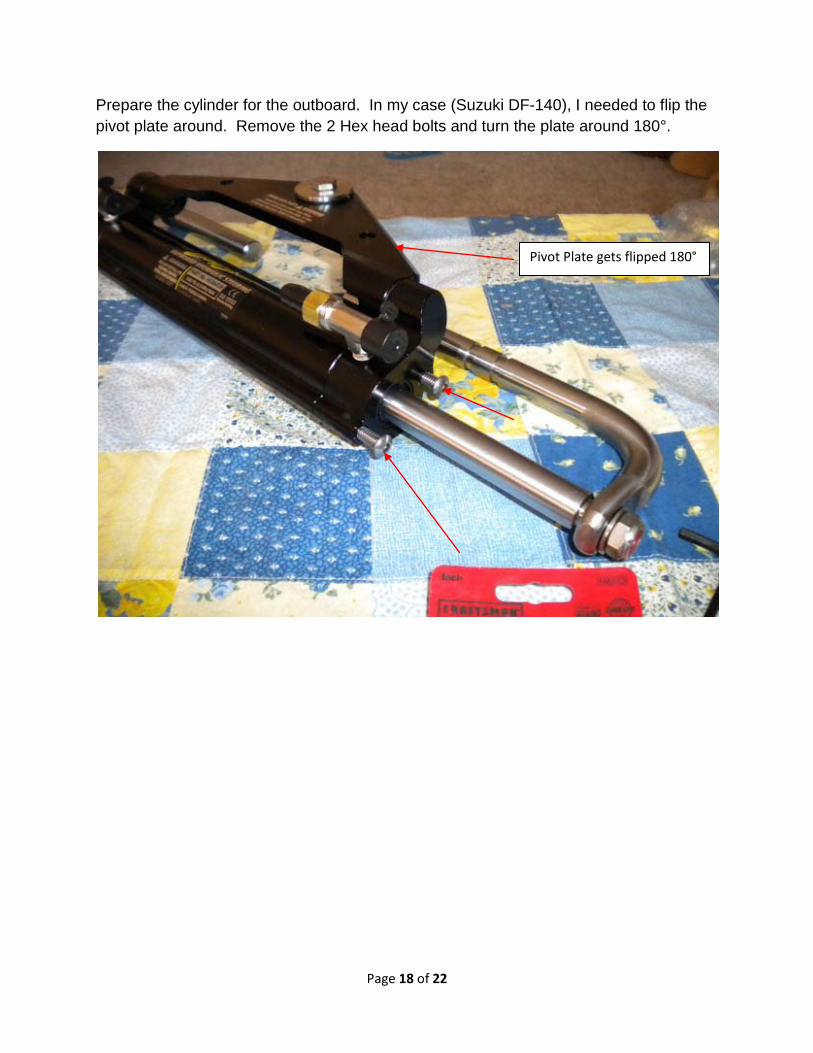
Prepare the cylinder for the outboard. In my case (Suzuki DF-140), I needed to flip the pivot plate around. Remove the 2 Hex head bolts and turn the plate around 180°.
Pivot Plate gets flipped 180°
Page 19 of 22
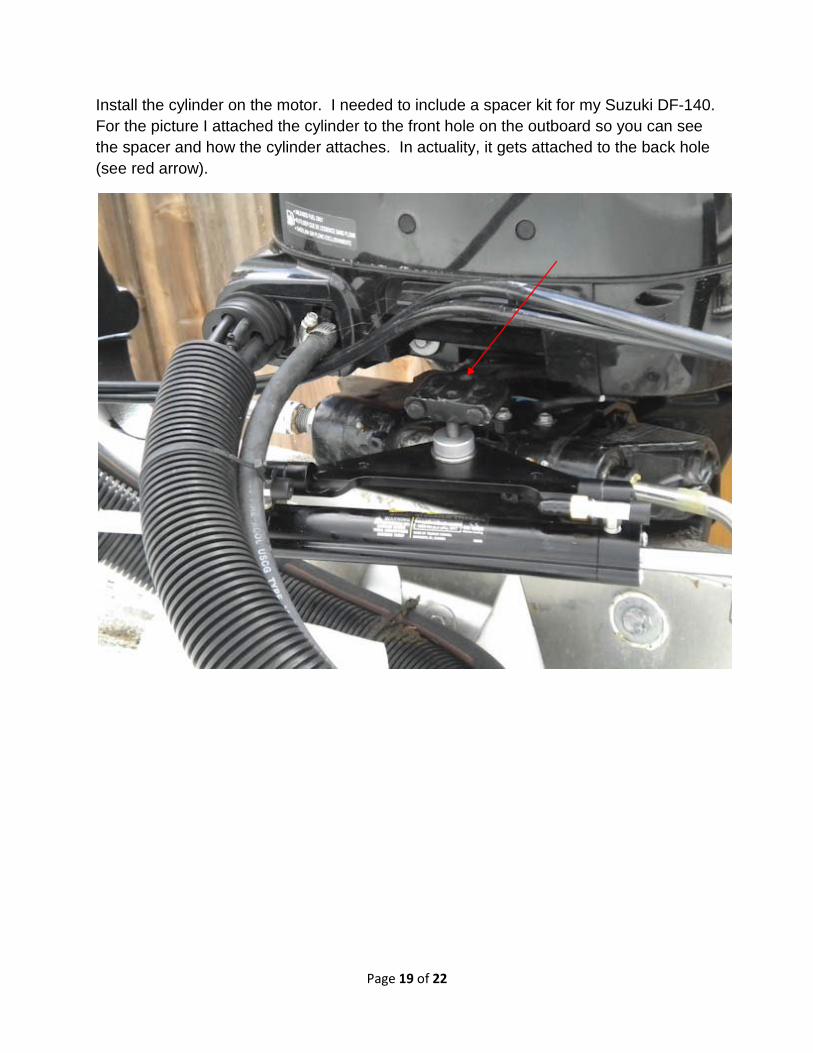
Install the cylinder on the motor. I needed to include a spacer kit for my Suzuki DF-140. For the picture I attached the cylinder to the front hole on the outboard so you can see the spacer and how the cylinder attaches. In actuality, it gets attached to the back hole (see red arrow).
Page 20 of 22
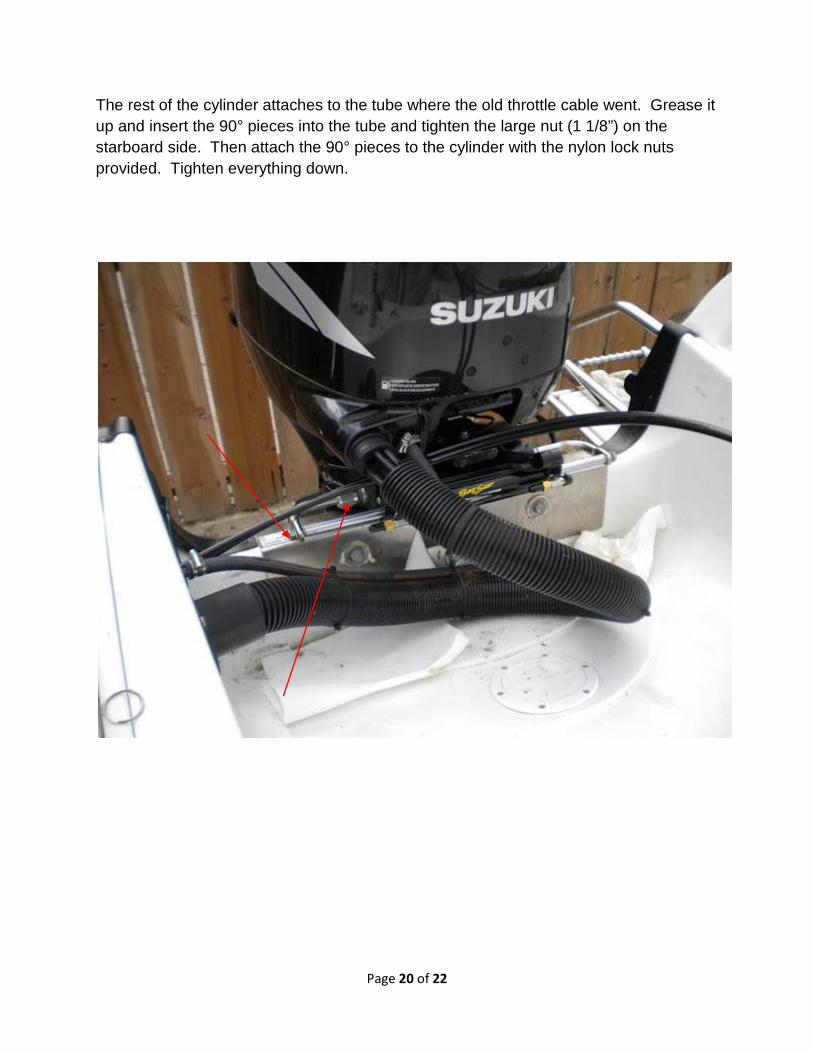
The rest of the cylinder attaches to the tube where the old throttle cable went. Grease it up and insert the 90° pieces into the tube and tighten the large nut (1 1/8”) on the starboard side. Then attach the 90° pieces to the cylinder with the nylon lock nuts provided. Tighten everything down.
Page 21 of 22
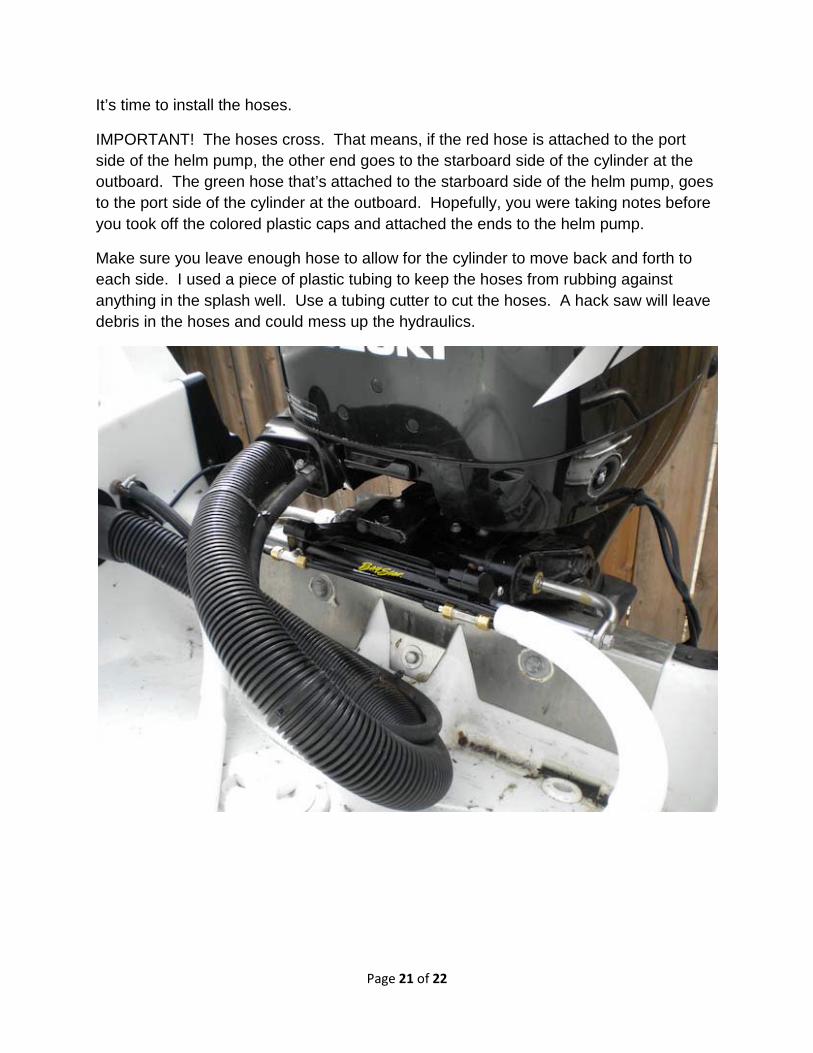
It’s time to install the hoses.
IMPORTANT! The hoses cross. That means, if the red hose is attached to the port side of the helm pump, the other end goes to the starboard side of the cylinder at the outboard. The green hose that’s attached to the starboard side of the helm pump, goes to the port side of the cylinder at the outboard. Hopefully, you were taking notes before you took off the colored plastic caps and attached the ends to the helm pump.
Make sure you leave enough hose to allow for the cylinder to move back and forth to each side. I used a piece of plastic tubing to keep the hoses from rubbing against anything in the splash well. Use a tubing cutter to cut the hoses. A hack saw will leave debris in the hoses and could mess up the hydraulics.
Page 22 of 22
Fill the Helm pump with fluid (provided in the kit) and bleed the system as described in the instructions. Check to make sure everything is working and the motor is turning in the right direction.
Adding hydraulic steering made a world of difference on my motor. I can steer with 1 finger under all conditions. A big improvement over the 2 handed grind that it used to take to crank the wheel with cable steering.
For me it was well worth the time and money. Hopefully this tutorial will make things easier for you. Good luck and be safe on the water.
mick