Embed Size (px)
Citation preview
Hudl User Guide
4 Unboxing In the box
5 Controls and Connections
6 Charging
7 First use
9 Unlocking Security, Sleeping Switching off
10 Child safety
11 How does the touchscreen work?
12 Entering text or numbers
13 Gesture typing Correcting text
14 Voice typing
15 Zoom
16 Panning
17 Quick settings
18 Home screen
20 Home screen apps
21 Home screen wallpaper
22 Apps
23 Launching an app Moving home page apps
24 Getting more apps
25 Adding or removing Home screen apps
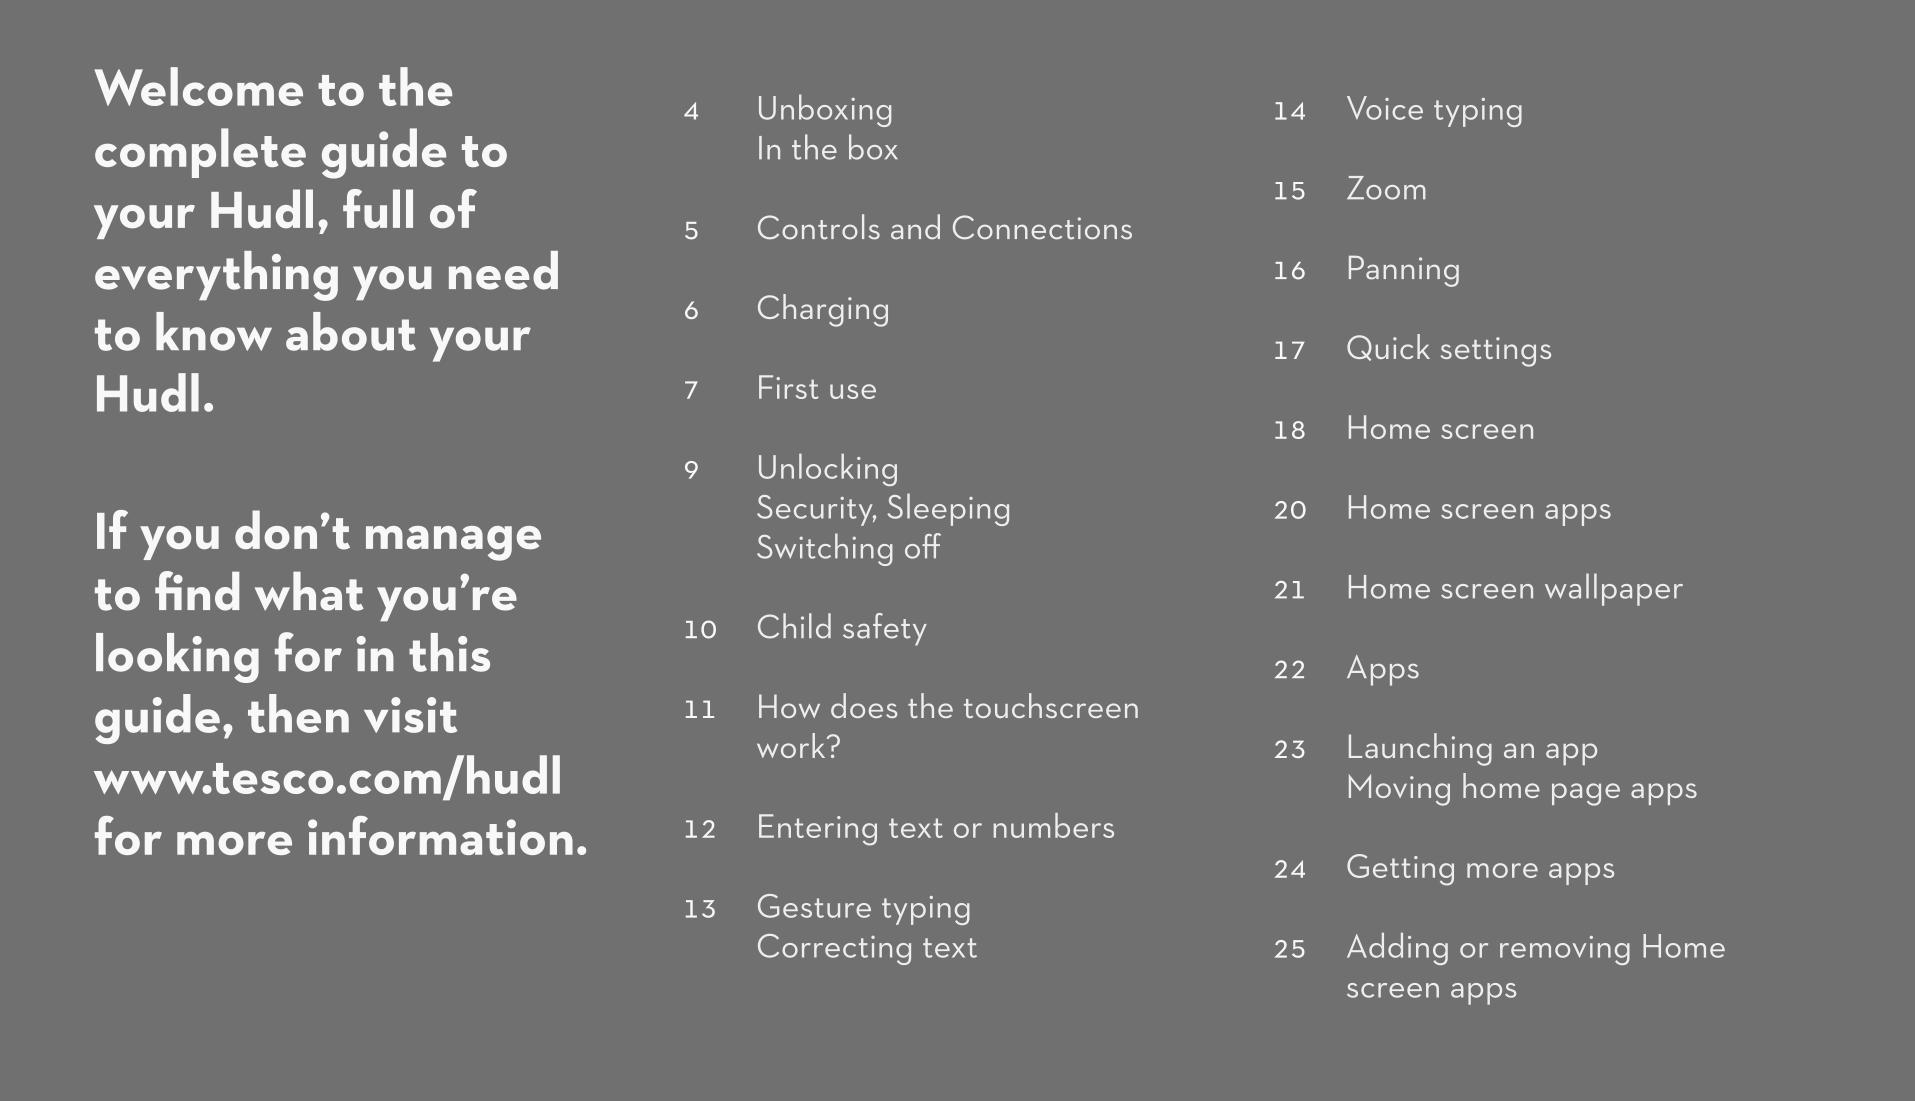
Welcome to the complete guide to your Hudl, full of everything you need to know about your Hudl.
If you don’t manage to find what you’re looking for in this guide, then visit www.tesco.com/hudl for more information.
2
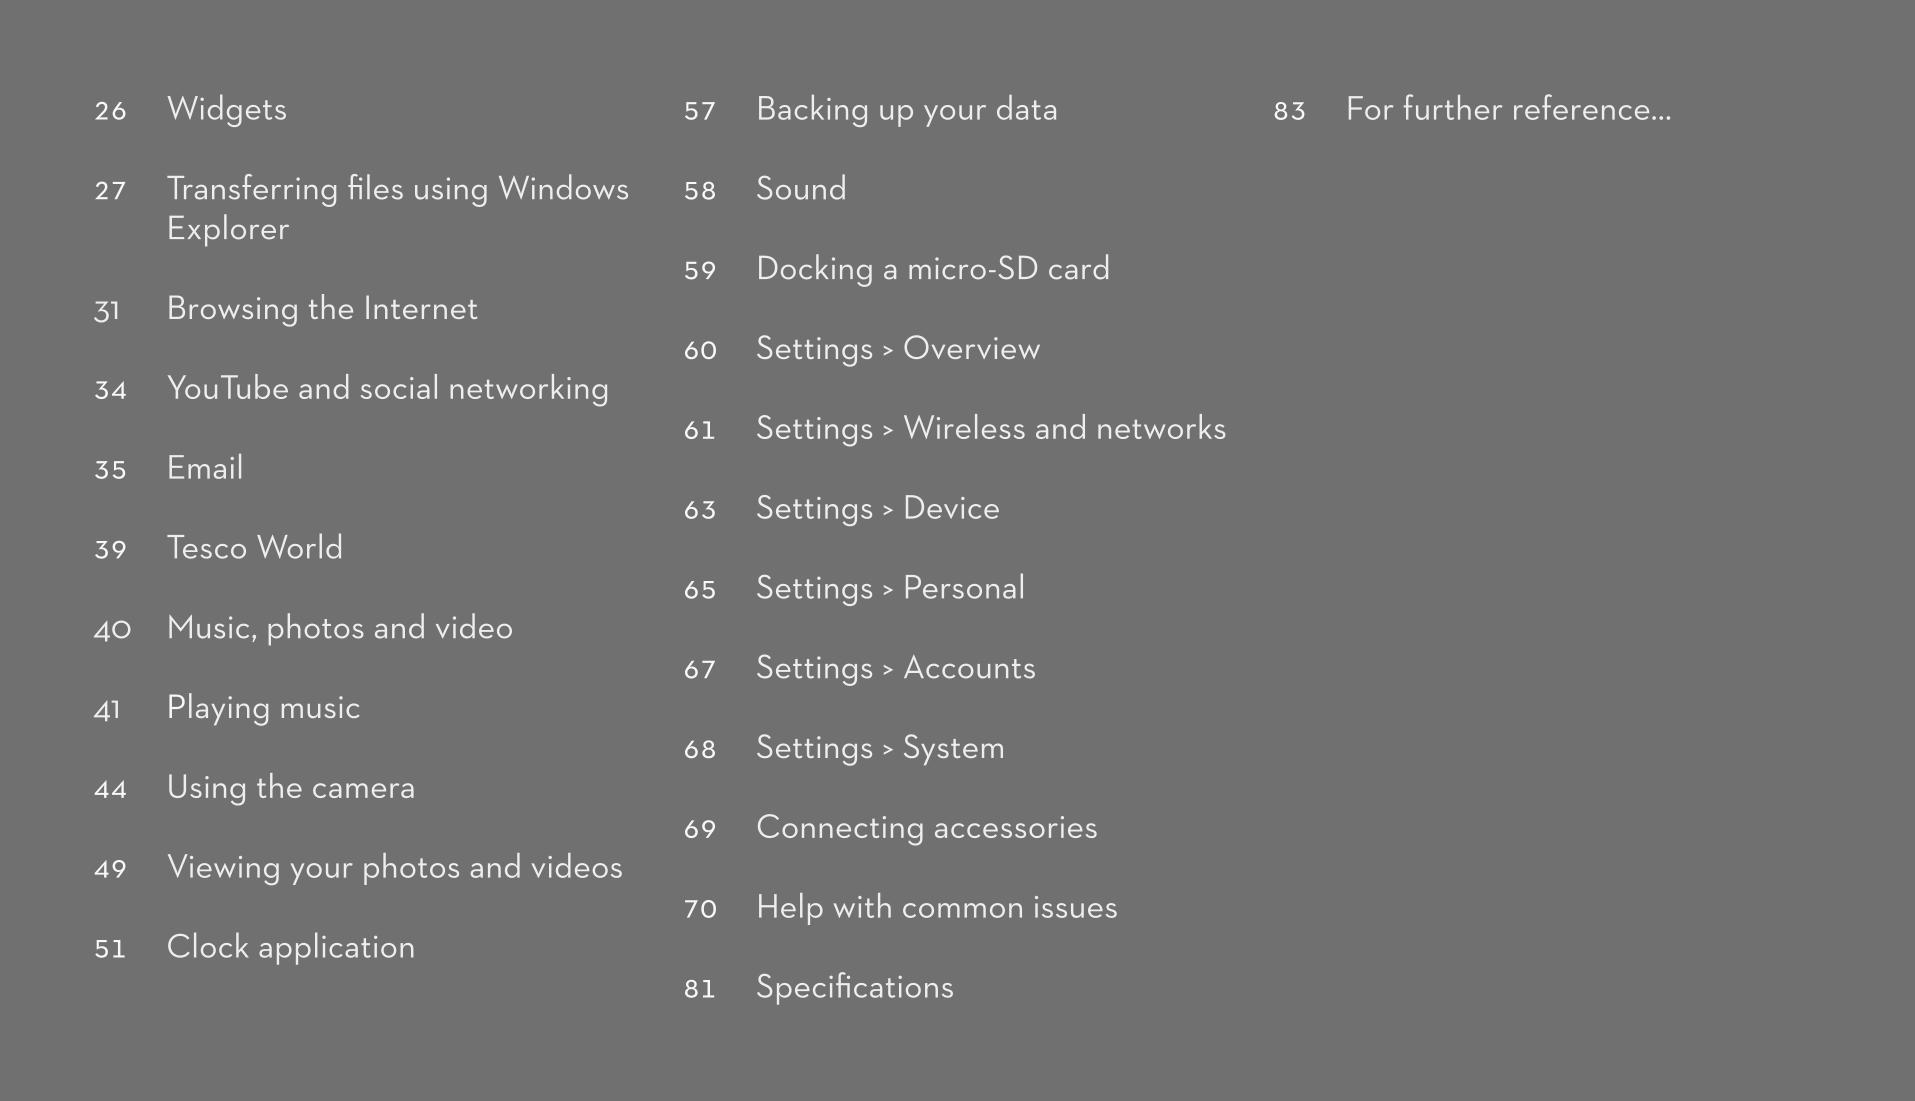
26 Widgets
27 Transferring files using Windows Explorer
31 Browsing the Internet
34 YouTube and social networking
35 Email
39 Tesco World
40 Music, photos and video
41 Playing music
44 Using the camera
49 Viewing your photos and videos
51 Clock application
57 Backing up your data
58 Sound
59 Docking a micro-SD card
60 Settings > Overview
61 Settings > Wireless and networks
63 Settings > Device
65 Settings > Personal
67 Settings > Accounts
68 Settings > System
69 Connecting accessories
70 Help with common issues
81 Specifications
83 For further reference…
3
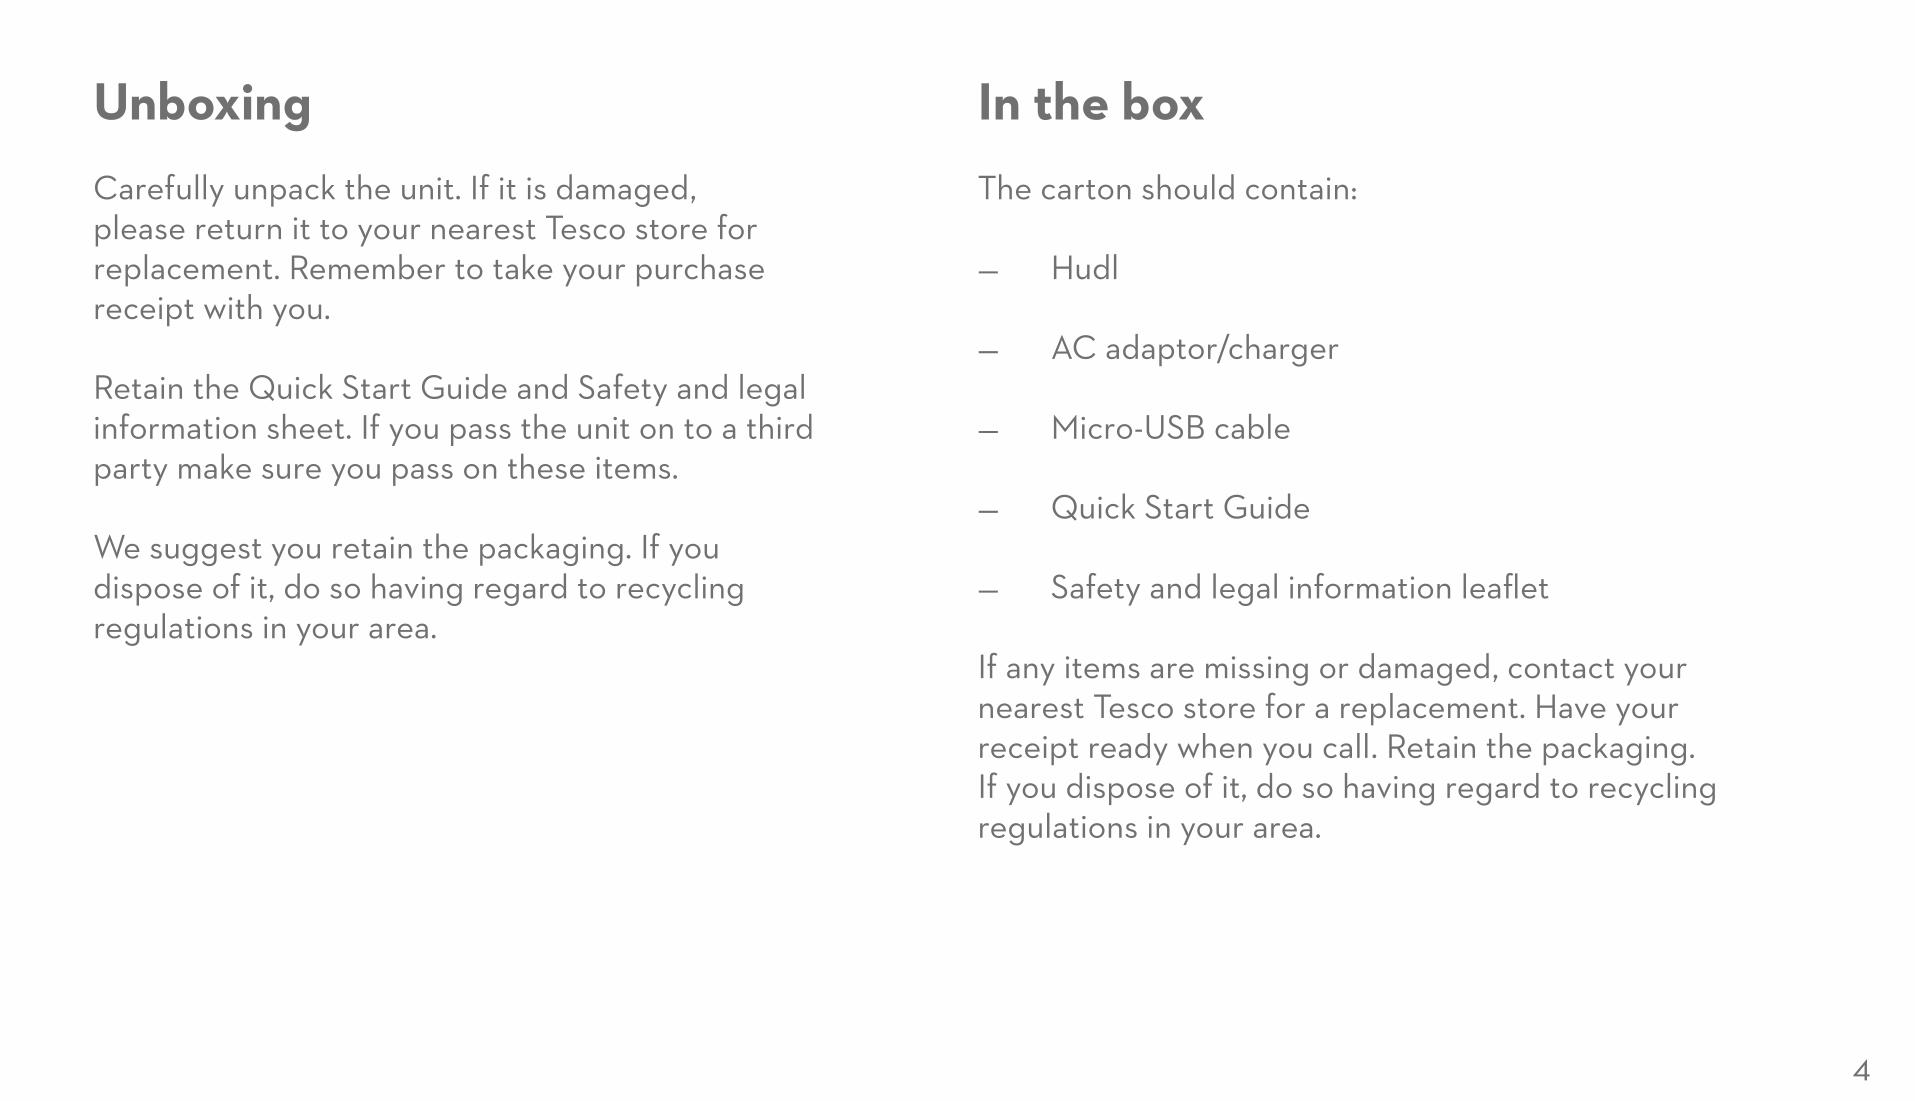
UnboxingCarefully unpack the unit. If it is damaged, please return it to your nearest Tesco store for replacement. Remember to take your purchase receipt with you.
Retain the Quick Start Guide and Safety and legal information sheet. If you pass the unit on to a third party make sure you pass on these items.
We suggest you retain the packaging. If you dispose of it, do so having regard to recycling regulations in your area.
In the boxThe carton should contain:
— Hudl
— AC adaptor/charger
— Micro-USB cable
— Quick Start Guide
— Safety and legal information leaflet
If any items are missing or damaged, contact your nearest Tesco store for a replacement. Have your receipt ready when you call. Retain the packaging. If you dispose of it, do so having regard to recycling regulations in your area.
4
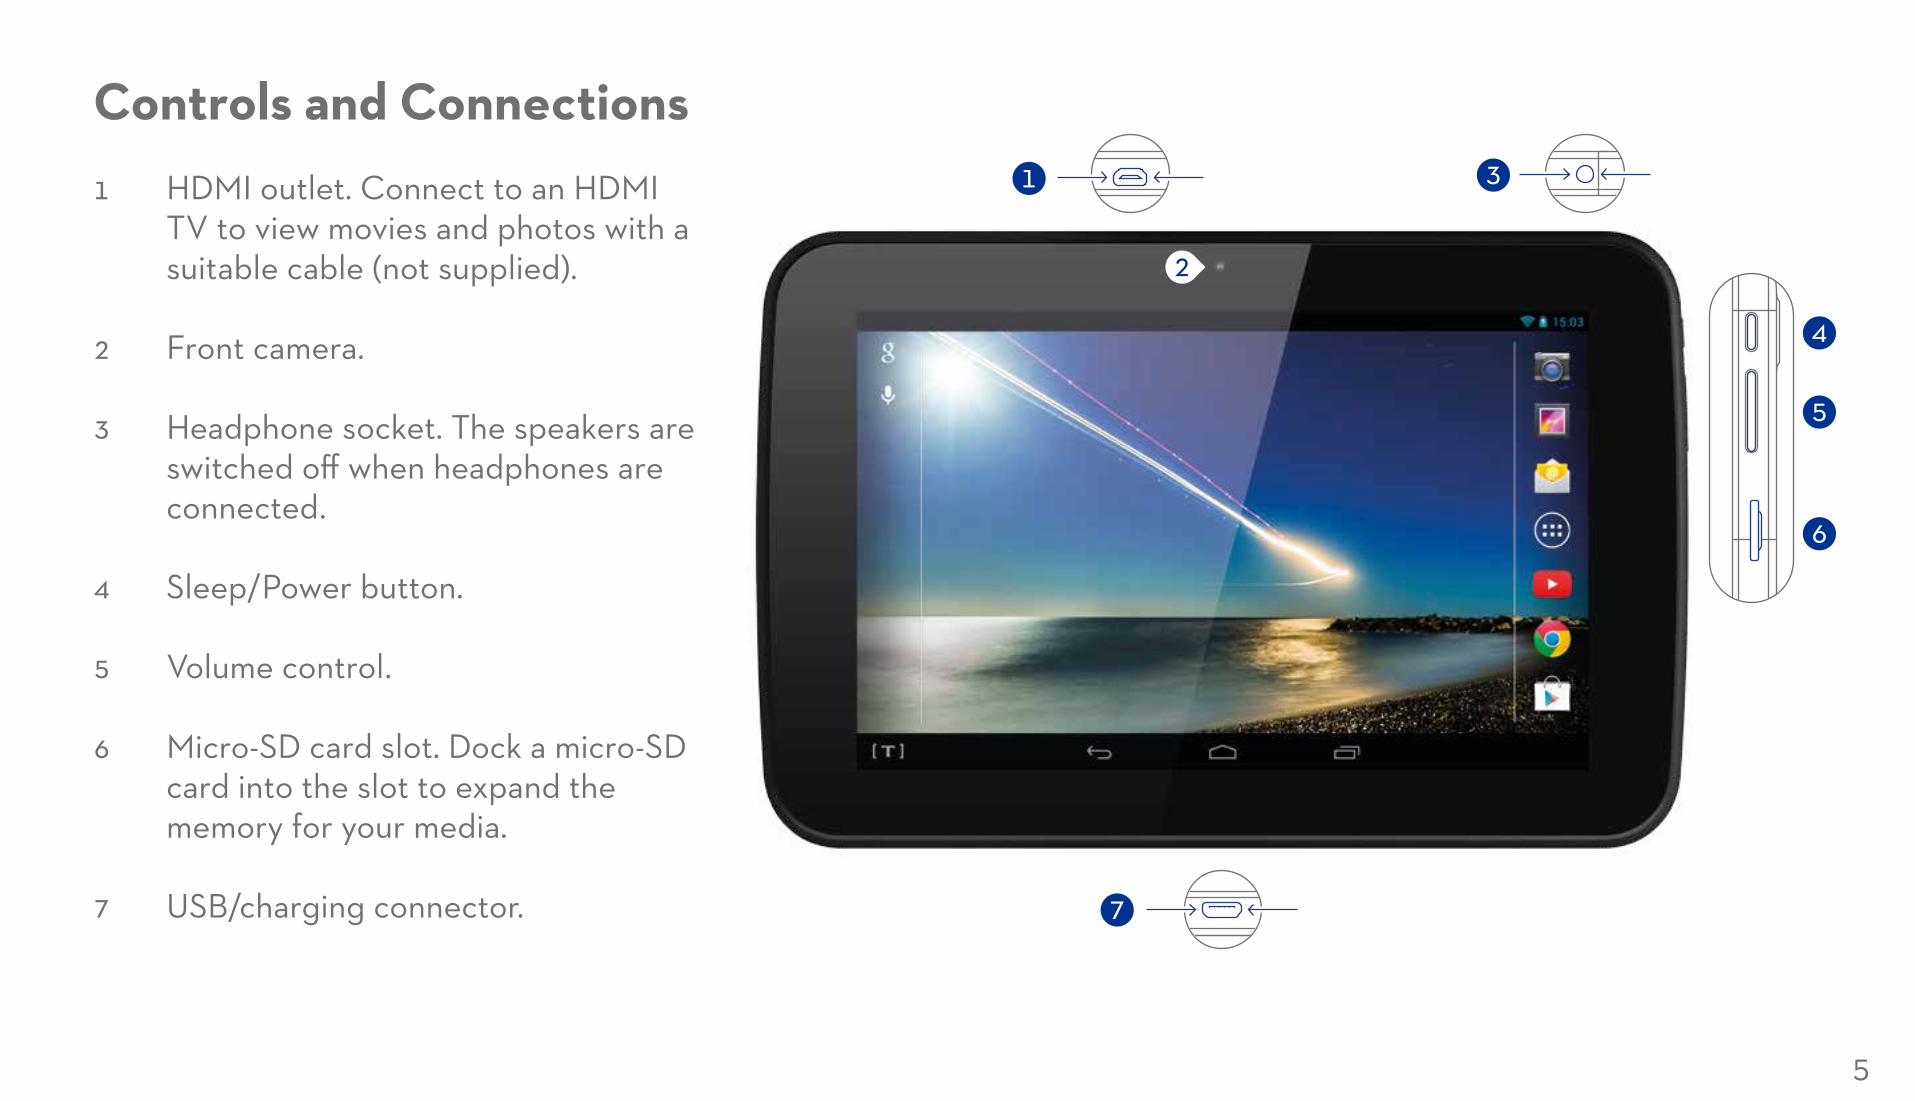
Controls and Connections1 HDMI outlet. Connect to an HDMI
TV to view movies and photos with a suitable cable (not supplied).
2 Front camera.
3 Headphone socket. The speakers are switched off when headphones are connected.
4 Sleep/Power button.
5 Volume control.
6 Micro-SD card slot. Dock a micro-SD card into the slot to expand the memory for your media.
7 USB/charging connector.
1 3
4
5
6
7
2
5
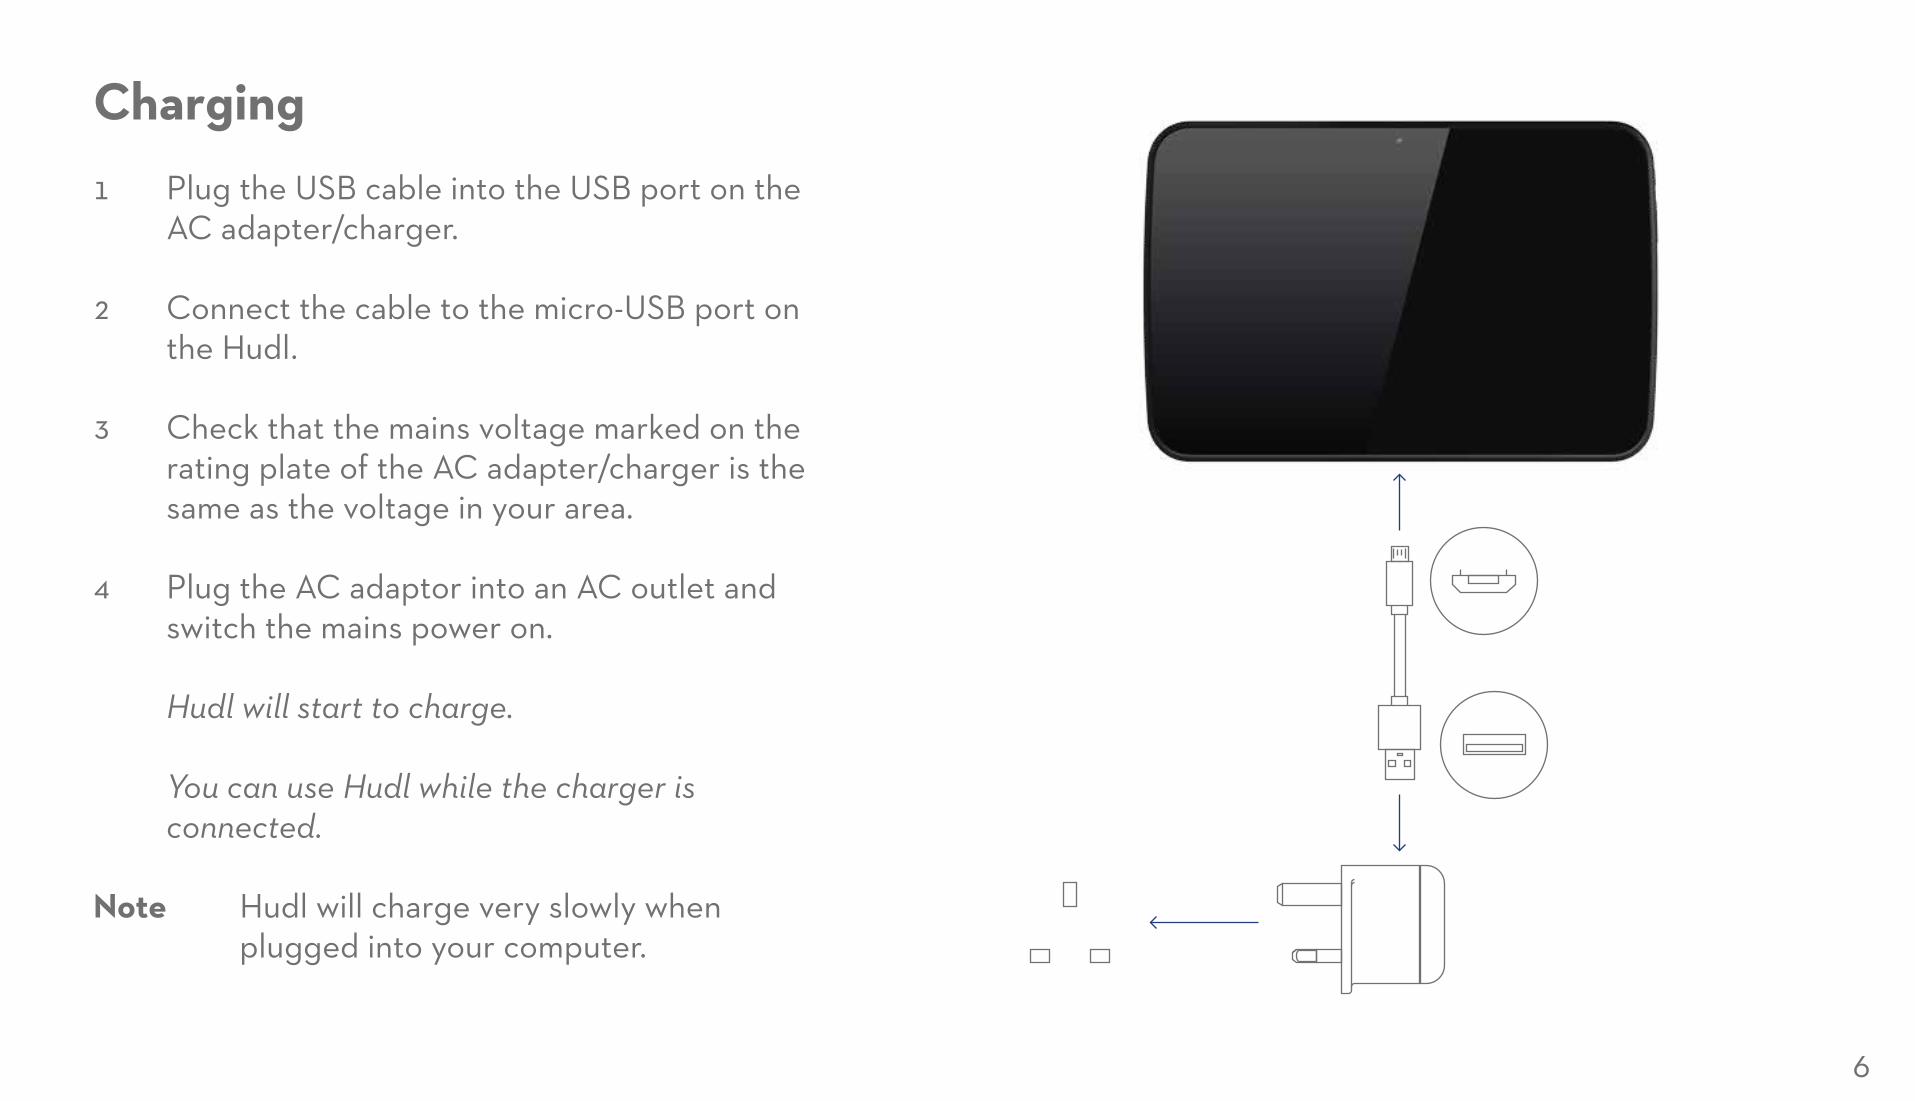
Charging1 Plug the USB cable into the USB port on the
AC adapter/charger.
2 Connect the cable to the micro-USB port on the Hudl.
3 Check that the mains voltage marked on the rating plate of the AC adapter/charger is the same as the voltage in your area.
4 Plug the AC adaptor into an AC outlet and switch the mains power on.
Hudl will start to charge.
You can use Hudl while the charger is connected.
Note Hudl will charge very slowly when plugged into your computer.
6
First useWhen you first turn on your Hudl, you will be guided through the set up process. This will help get you started and ensure the software on your Hudl is up to date.
The setup process explained.
1 Turn on your Hudl by holding down the smaller of the two buttons on the side of your Hudl until the star appears.
Be aware you may need to hold down the power button for a few seconds.
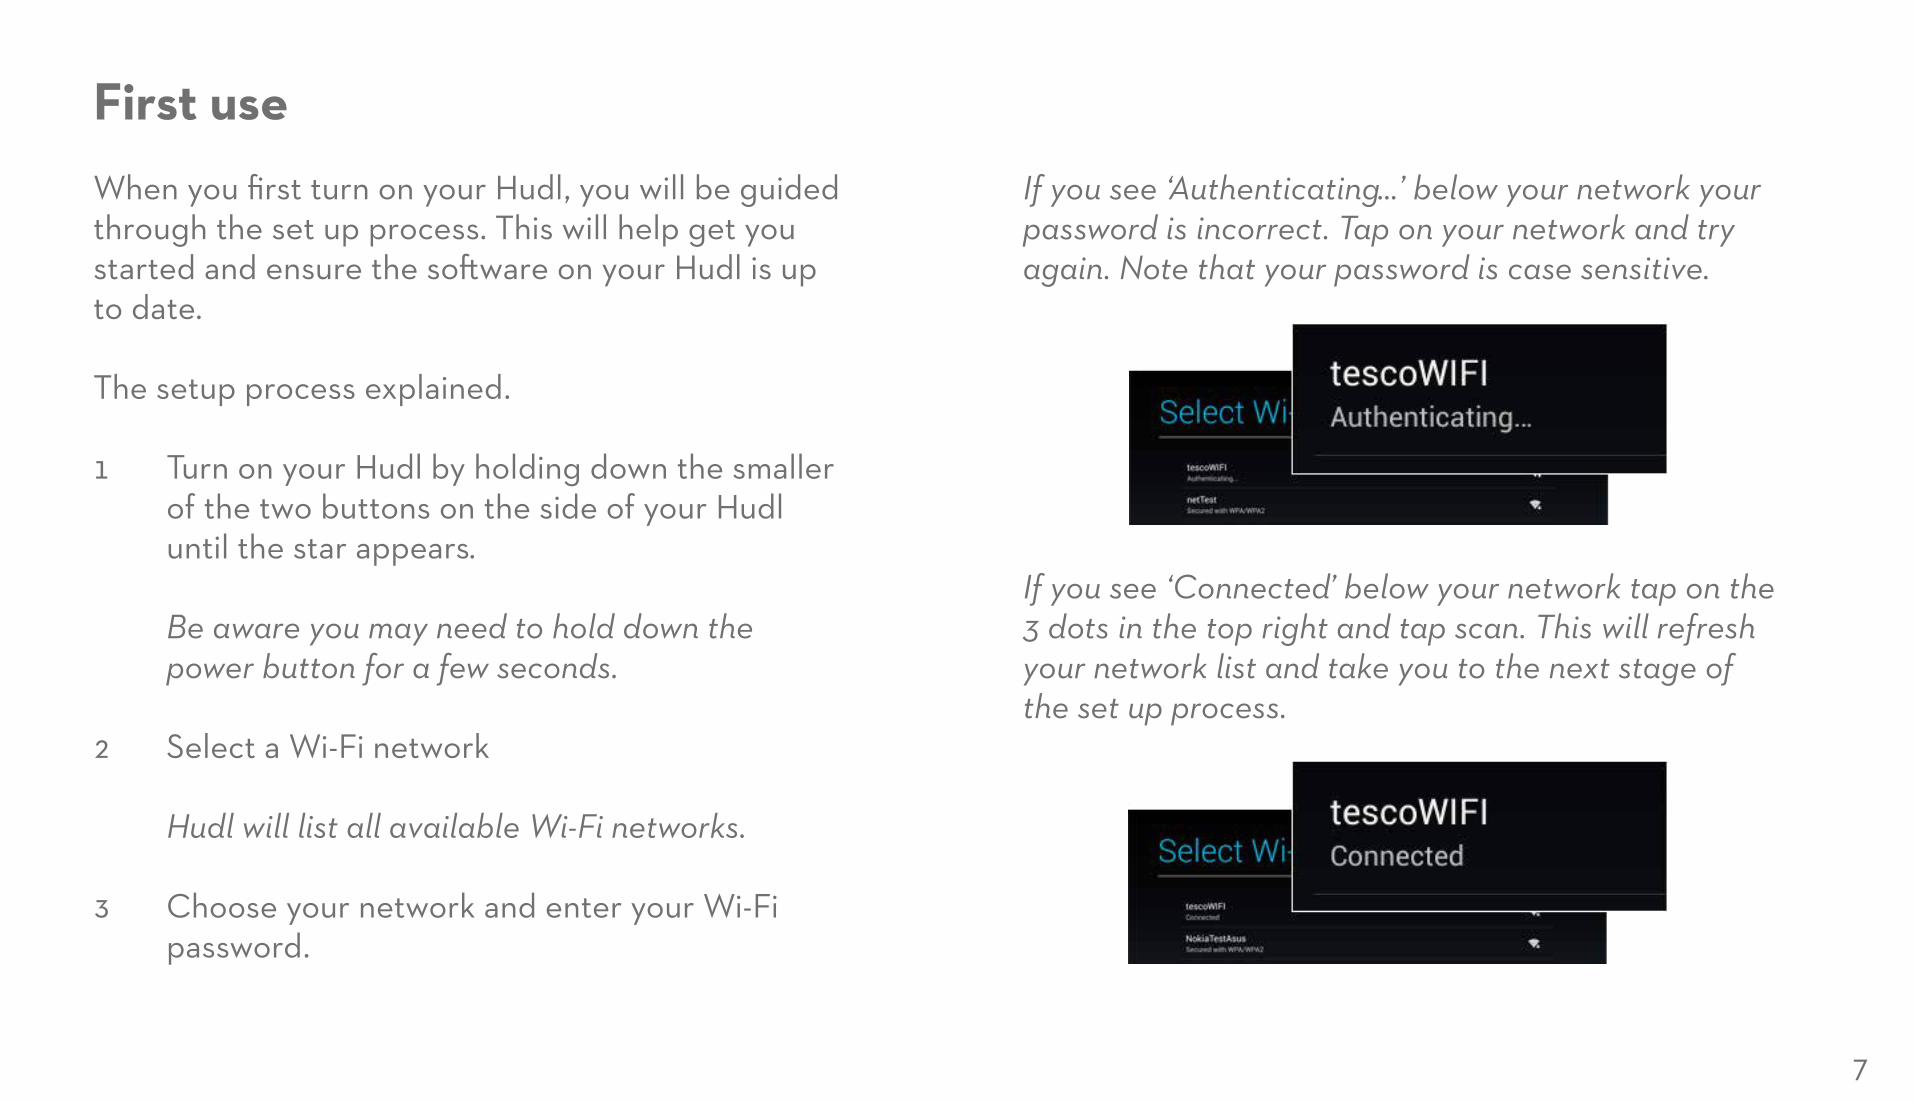
2 Select a Wi-Fi network Hudl will list all available Wi-Fi networks.
3 Choose your network and enter your Wi-Fi password.
If you see ‘Authenticating...’ below your network your password is incorrect. Tap on your network and try again. Note that your password is case sensitive.
If you see ‘Connected’ below your network tap on the 3 dots in the top right and tap scan. This will refresh your network list and take you to the next stage of the set up process.
7
12 Set up complete
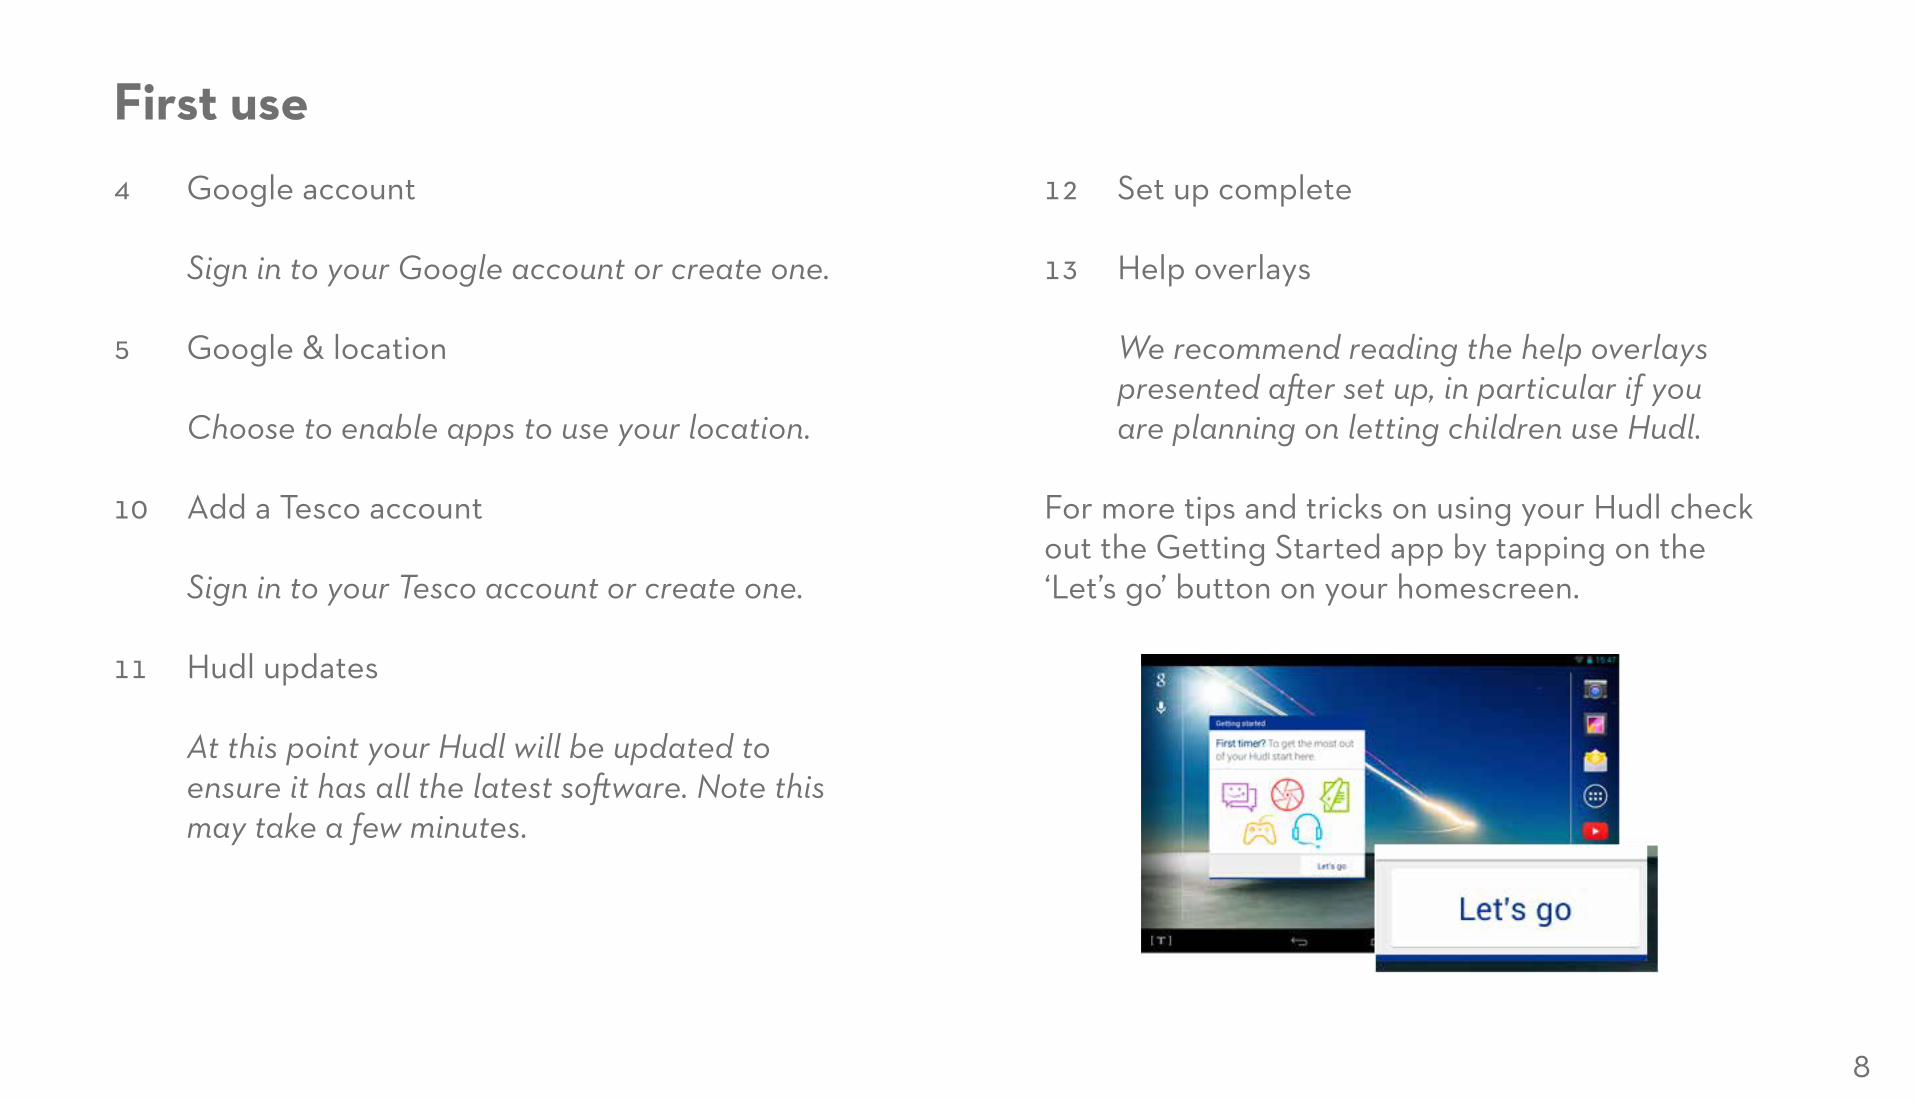
13 Help overlays
We recommend reading the help overlays presented after set up, in particular if you are planning on letting children use Hudl.
For more tips and tricks on using your Hudl check out the Getting Started app by tapping on the ‘Let’s go’ button on your homescreen.
First use4 Google account
Sign in to your Google account or create one.
5 Google & location Choose to enable apps to use your location.
10 Add a Tesco account
Sign in to your Tesco account or create one.
11 Hudl updates
At this point your Hudl will be updated to ensure it has all the latest software. Note this may take a few minutes.
8

Unlocking— Touch the lock icon and
slide the circle across to the unlock icon.
Hudl will unlock and the display will show the last screen you used.
SecurityYou can set a security setting to protect Hudl from unauthorised access. Choose from face recognition, a password, a pin, or a pattern. Once you have familiarised yourself with the operation of Hudl, refer to Personal > Security > Screen Security in the security settings section of these guides on for more details about setting up security.
SleepingWhen set to sleep, Hudl will start up again quickly when needed.
— Press the Sleep/Power button briefly to put the tablet into sleep mode.
Switching offIf the power is switched off completely, Hudl will save battery power, but will take longer to start up.
1 Press and hold the Sleep/Power button to switch off.
2 Choose Power off to switch off and save power.
3 Choose Aeroplane mode to keep running, but switch off wireless network and bluetooth communication.
4 Choose Silent mode to keep running, but with the sound muted,
9
4 Be sure
Set up a separate profile for your children, then secure your own with a password or PIN.
5 Filter content
Make sure you set content filters for apps like Google Play and YouTube.
6 Search safe
Set Google’s SafeSearch to a low maturity rating.
Child safetyIf you plan on sharing your Hudl with a child, we recommend you take a few precautions to ensure they stay safe while using the web and acessing apps unsupervised.
1 Try an app
Consider using one of the many parental control apps that are available on Google Play.
2 Be aware
Familiarise yourself with the maturity ratings used for movies, television, apps and games.
3 Play safe
Set a password for buying content and making in app purchases from Google Play.
10
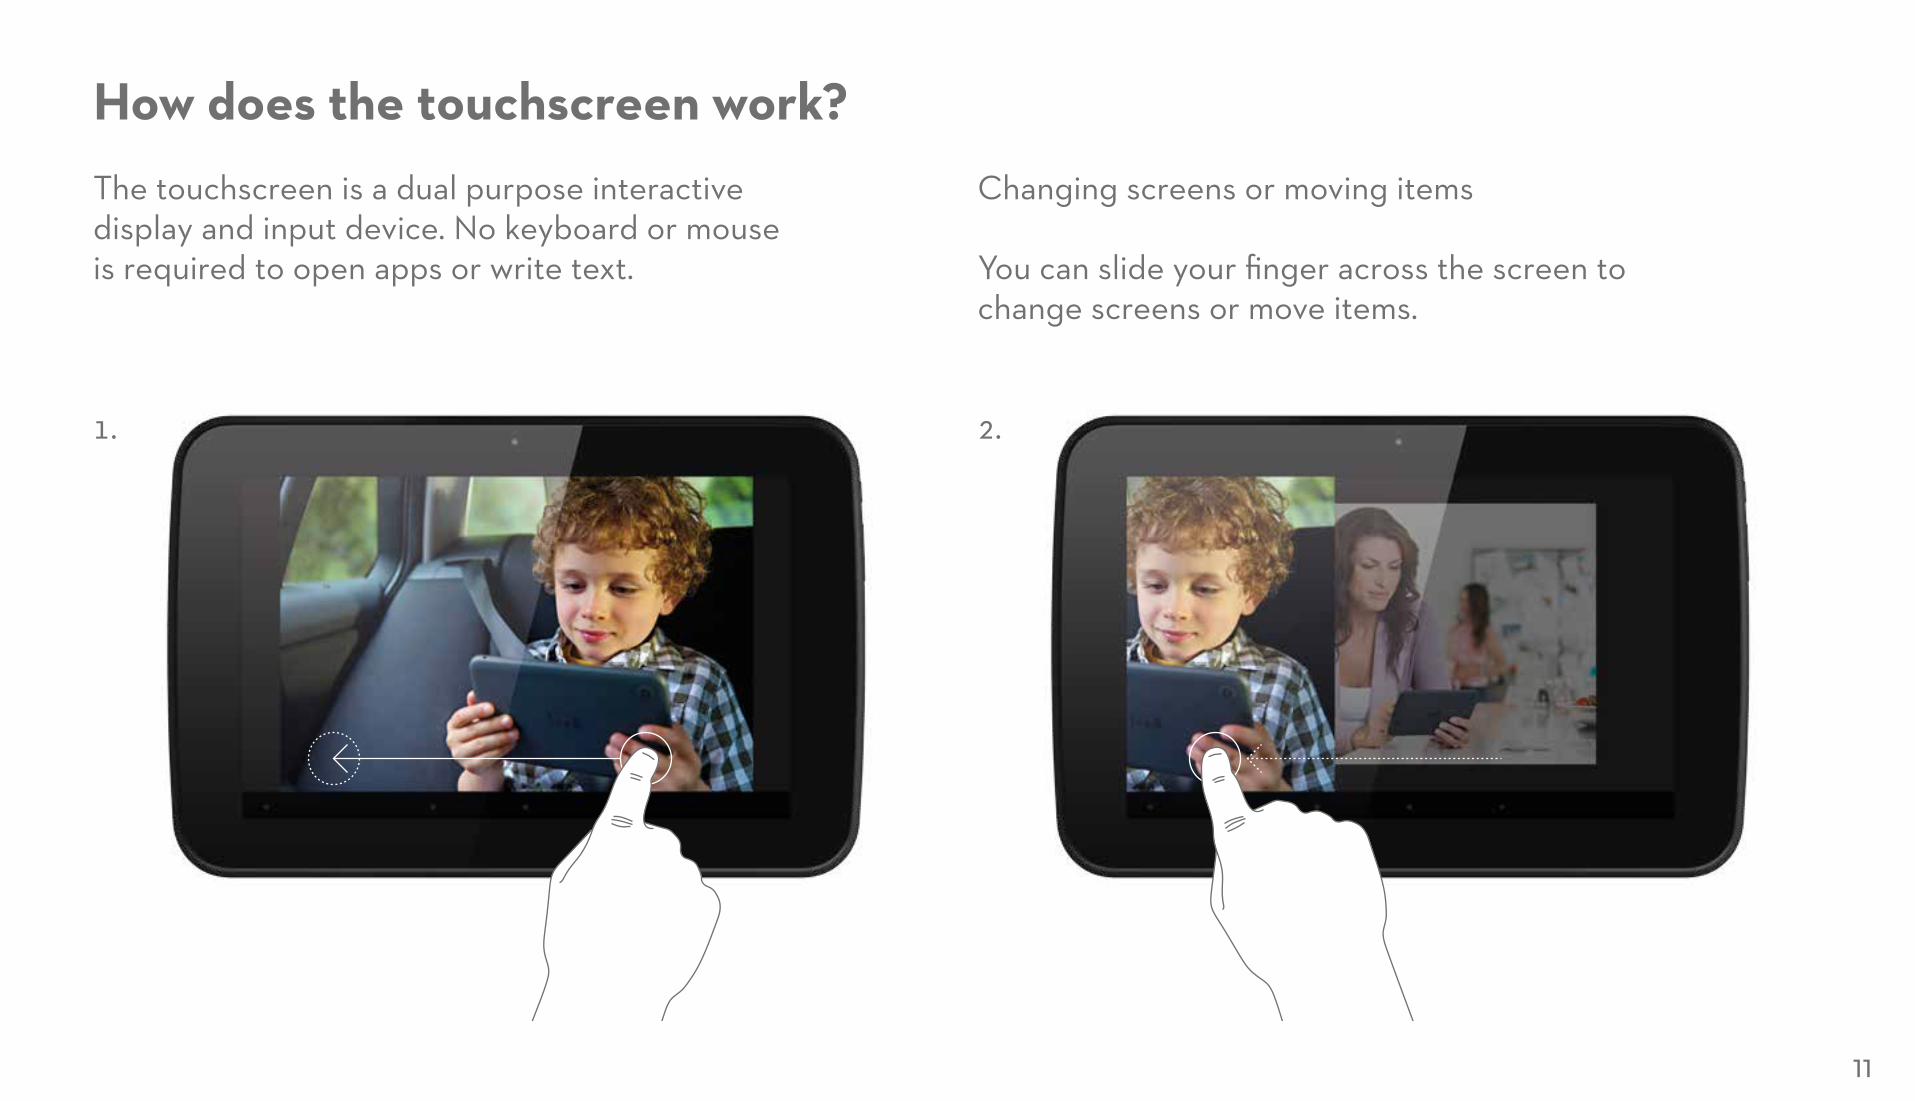
How does the touchscreen work?The touchscreen is a dual purpose interactive display and input device. No keyboard or mouse is required to open apps or write text.
1. 2.
Changing screens or moving items
You can slide your finger across the screen to change screens or move items.
11
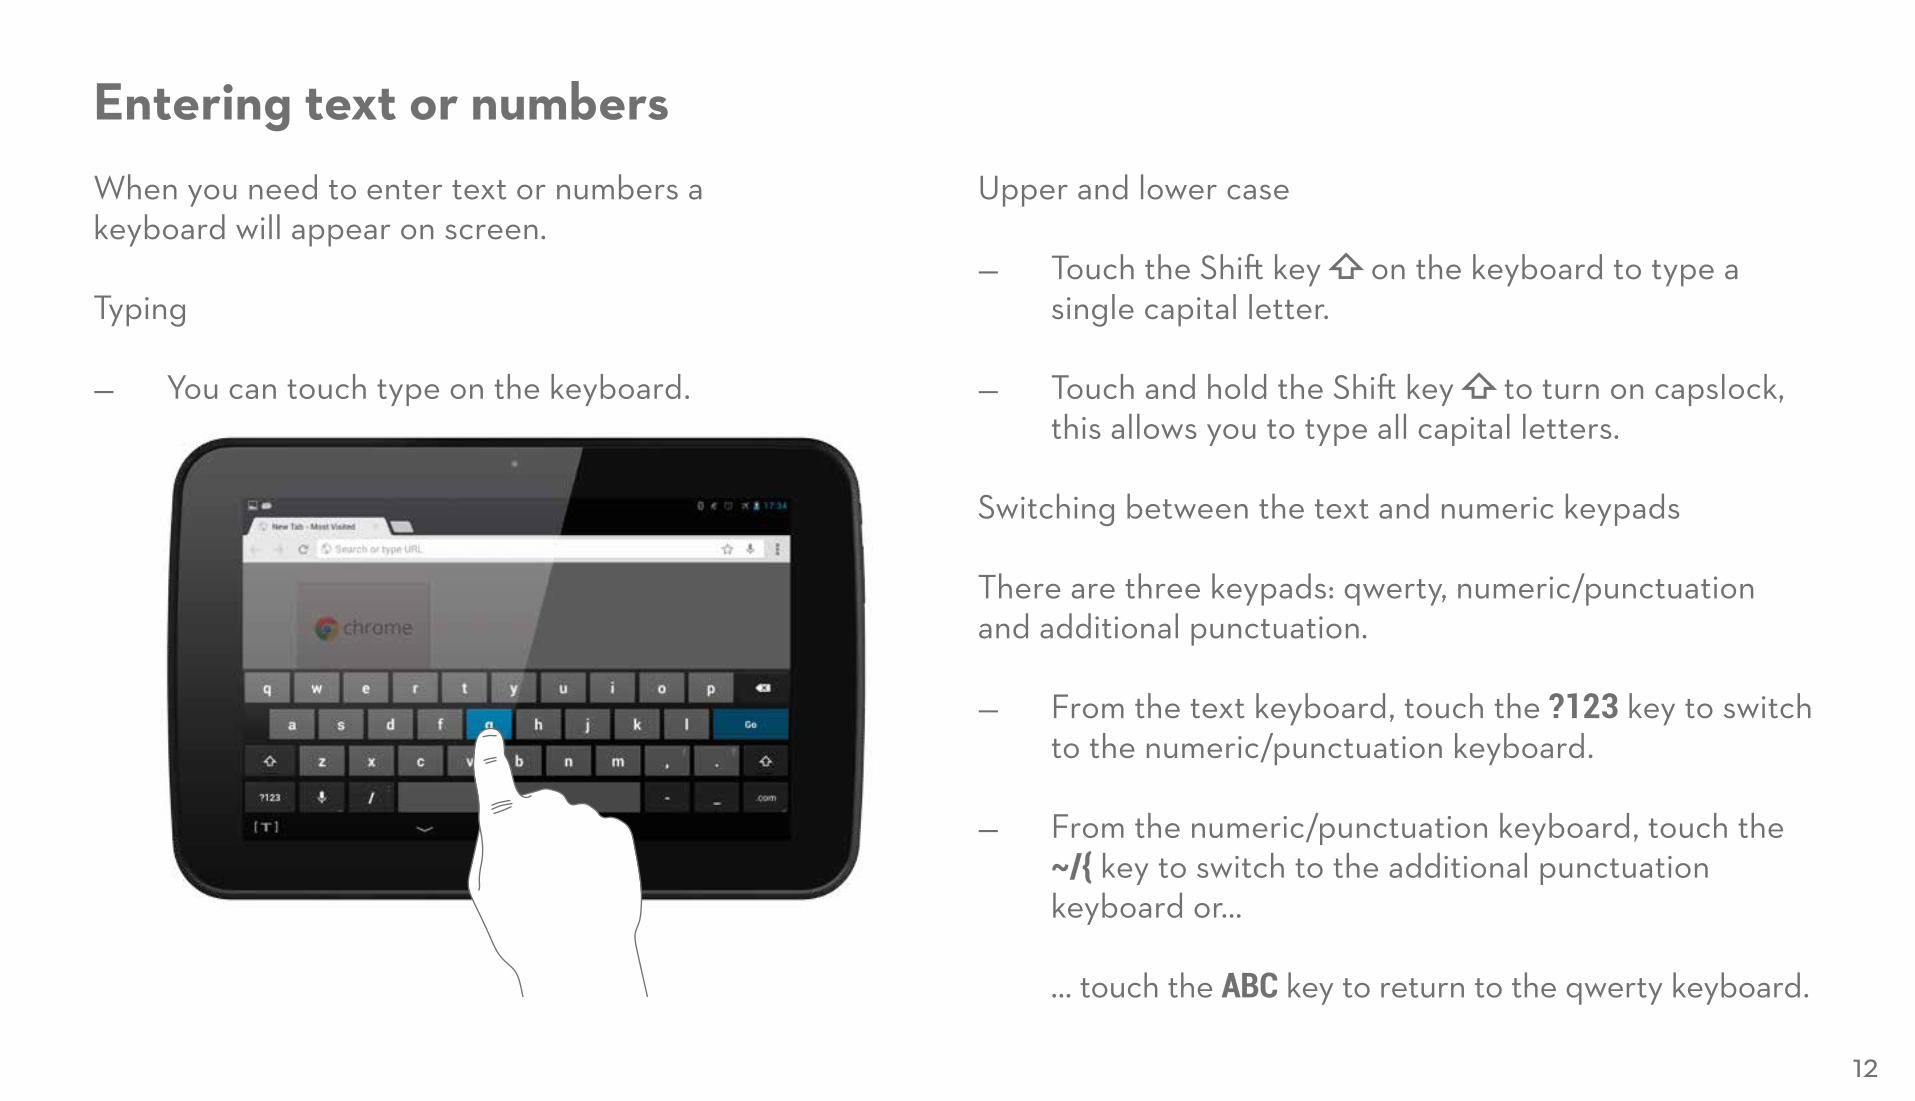
Entering text or numbersWhen you need to enter text or numbers a keyboard will appear on screen.
Typing
— You can touch type on the keyboard.
Upper and lower case
— Touch the Shift key on the keyboard to type a single capital letter.
— Touch and hold the Shift key to turn on capslock, this allows you to type all capital letters.
Switching between the text and numeric keypads
There are three keypads: qwerty, numeric/punctuation and additional punctuation.
— From the text keyboard, touch the ?123 key to switch to the numeric/punctuation keyboard.
— From the numeric/punctuation keyboard, touch the ~/{ key to switch to the additional punctuation keyboard or…
… touch the ABC key to return to the qwerty keyboard.
12
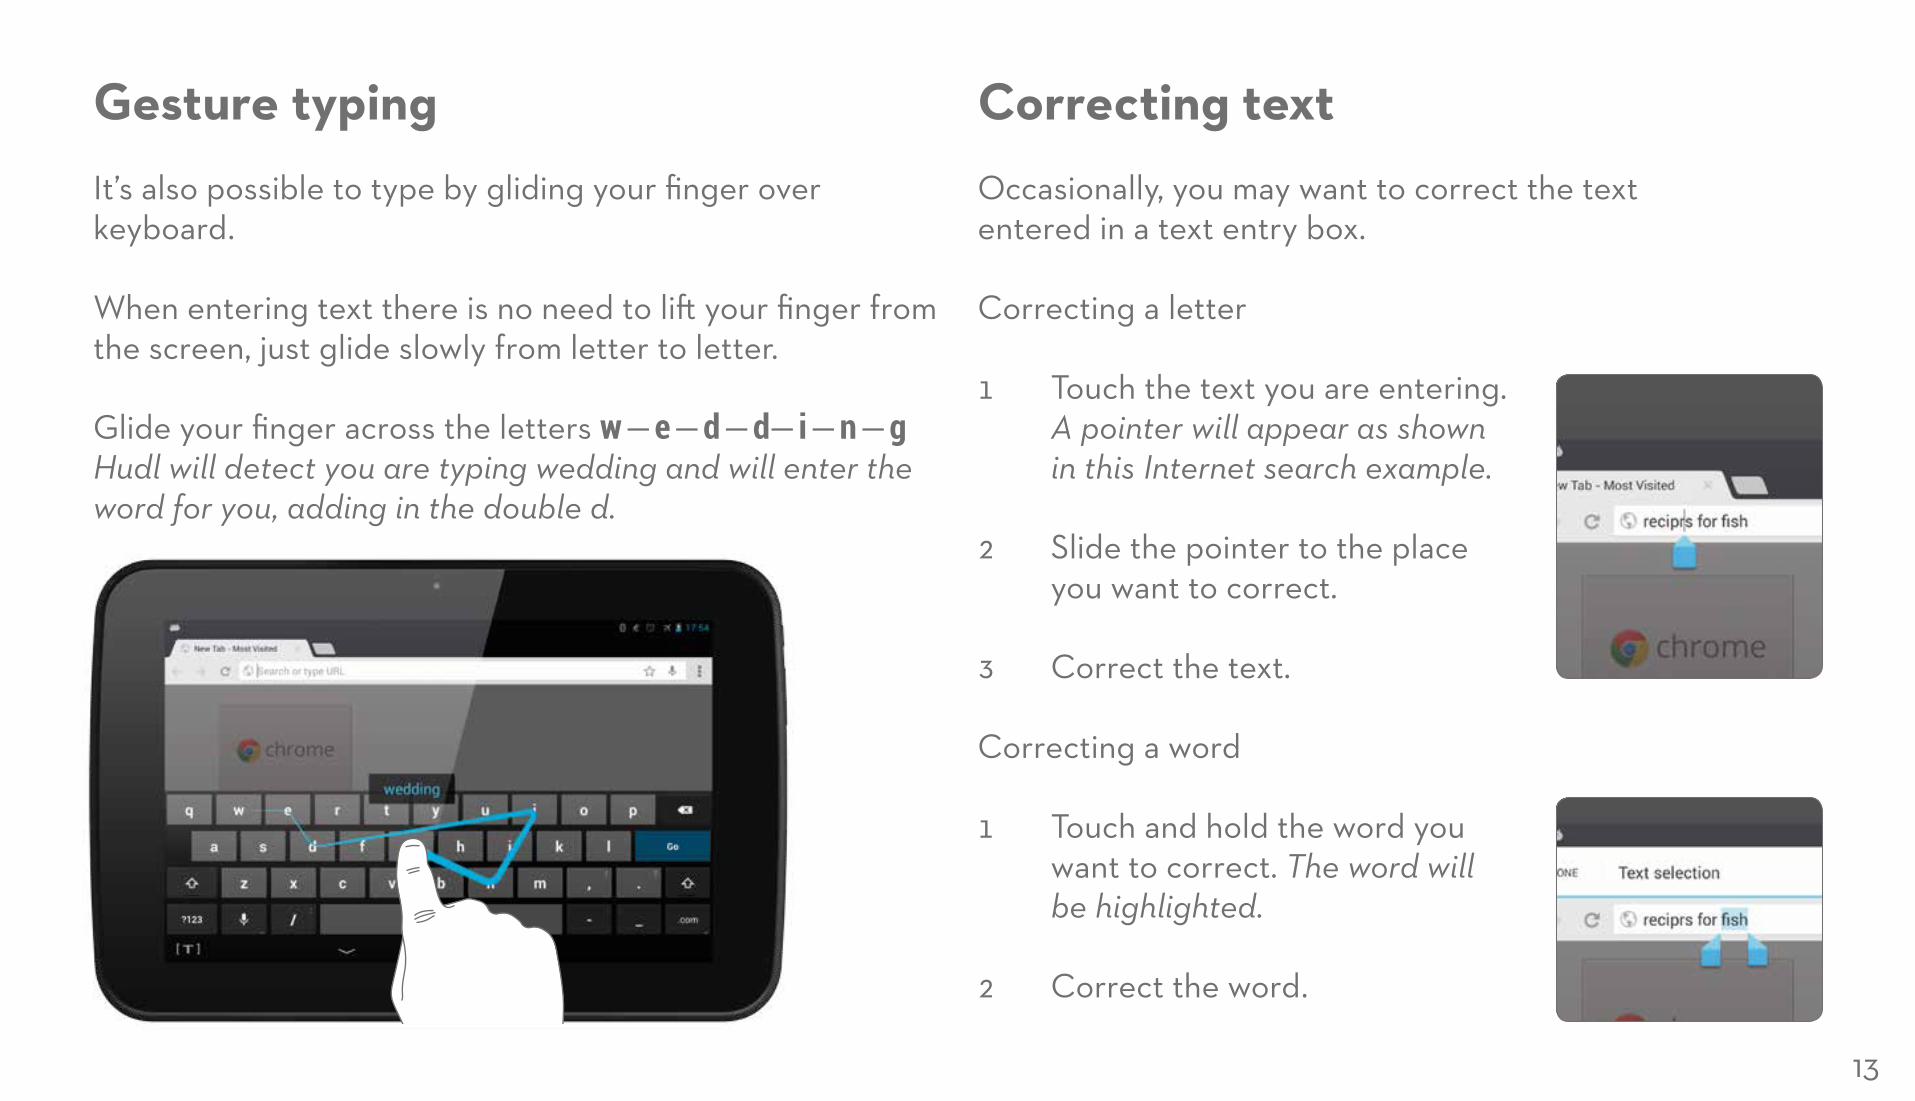
Gesture typingIt’s also possible to type by gliding your finger over keyboard.
When entering text there is no need to lift your finger from the screen, just glide slowly from letter to letter.
Glide your finger across the letters w — e — d — d— i — n — g Hudl will detect you are typing wedding and will enter the word for you, adding in the double d.
Correcting textOccasionally, you may want to correct the text entered in a text entry box.
Correcting a letter
1 Touch the text you are entering. A pointer will appear as shown in this Internet search example.
2 Slide the pointer to the place you want to correct.
3 Correct the text.
Correcting a word
1 Touch and hold the word you want to correct. The word will be highlighted.
2 Correct the word.
13
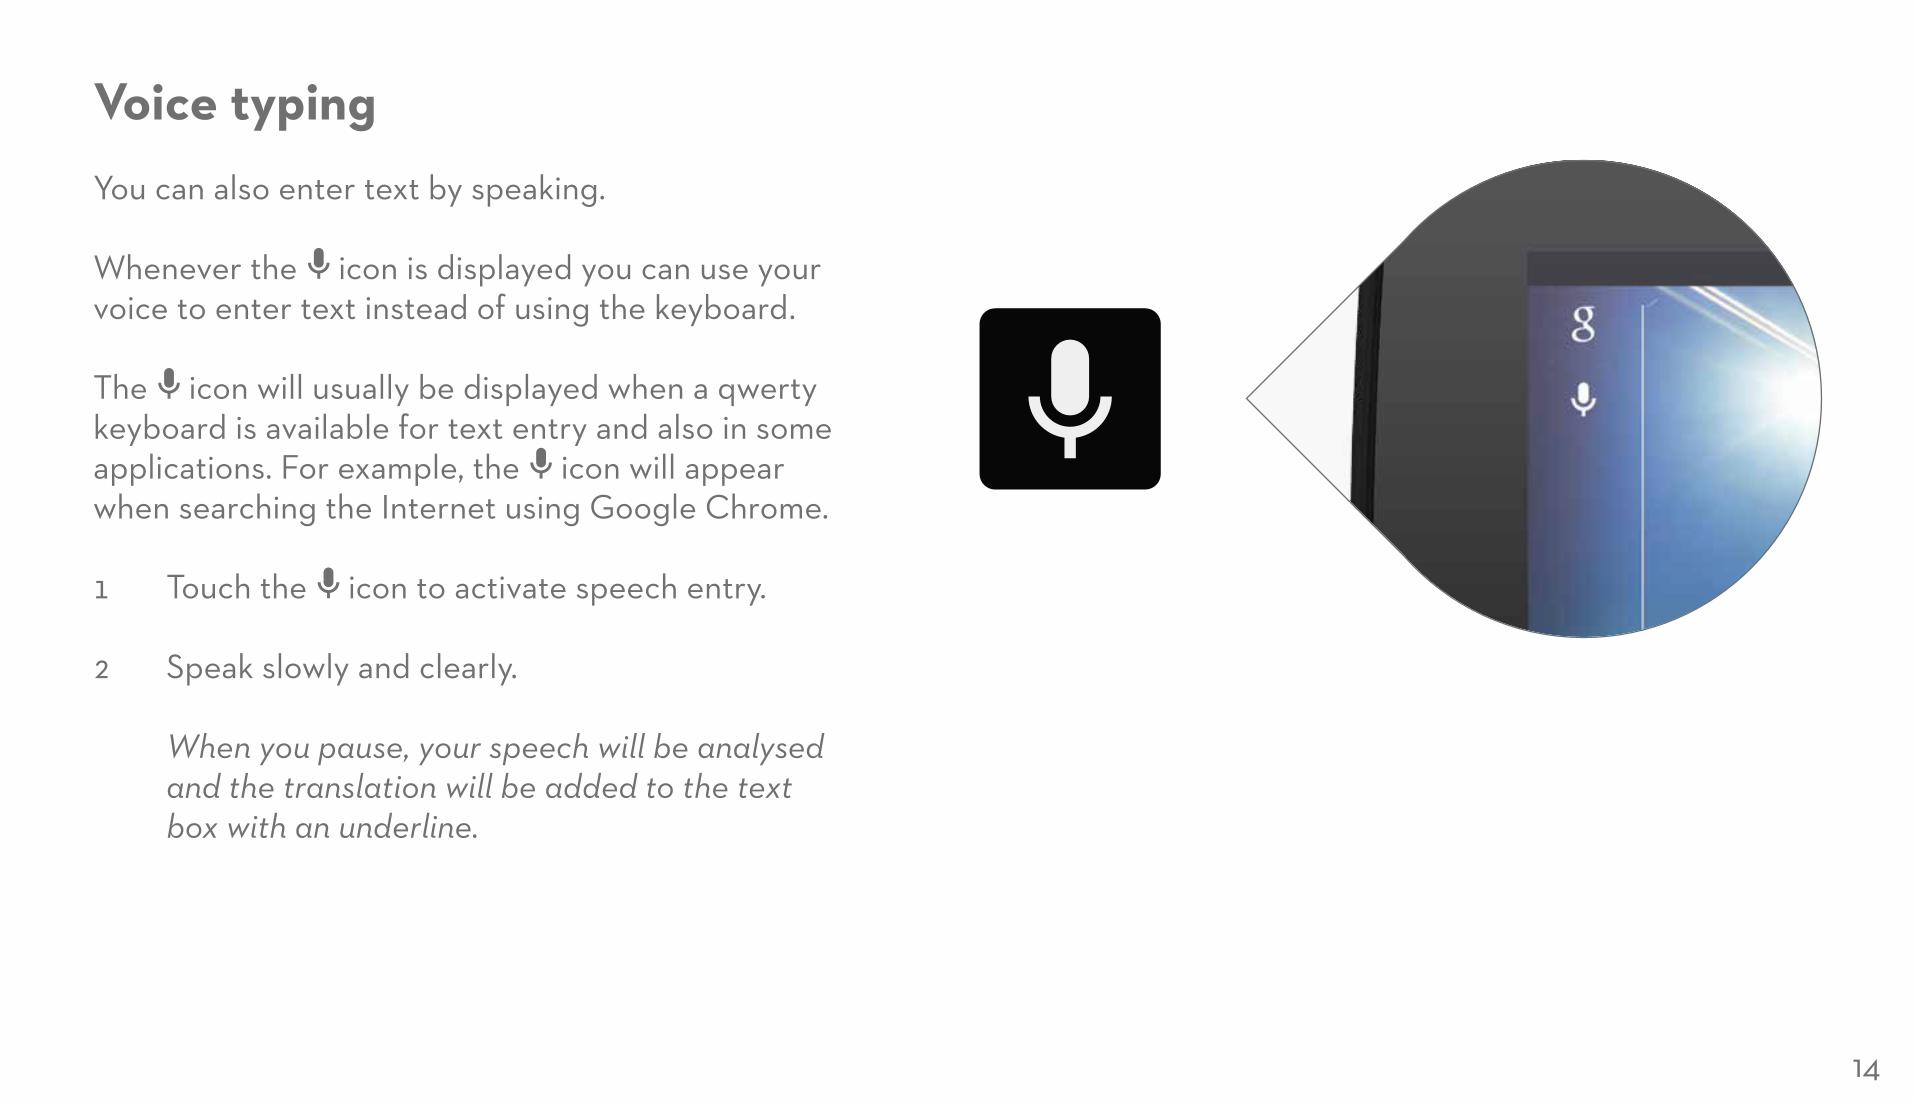
Voice typingYou can also enter text by speaking.
Whenever the icon is displayed you can use your voice to enter text instead of using the keyboard.
The icon will usually be displayed when a qwerty keyboard is available for text entry and also in some applications. For example, the icon will appear when searching the Internet using Google Chrome.
1 Touch the icon to activate speech entry.
2 Speak slowly and clearly. When you pause, your speech will be analysed and the translation will be added to the text box with an underline.
14
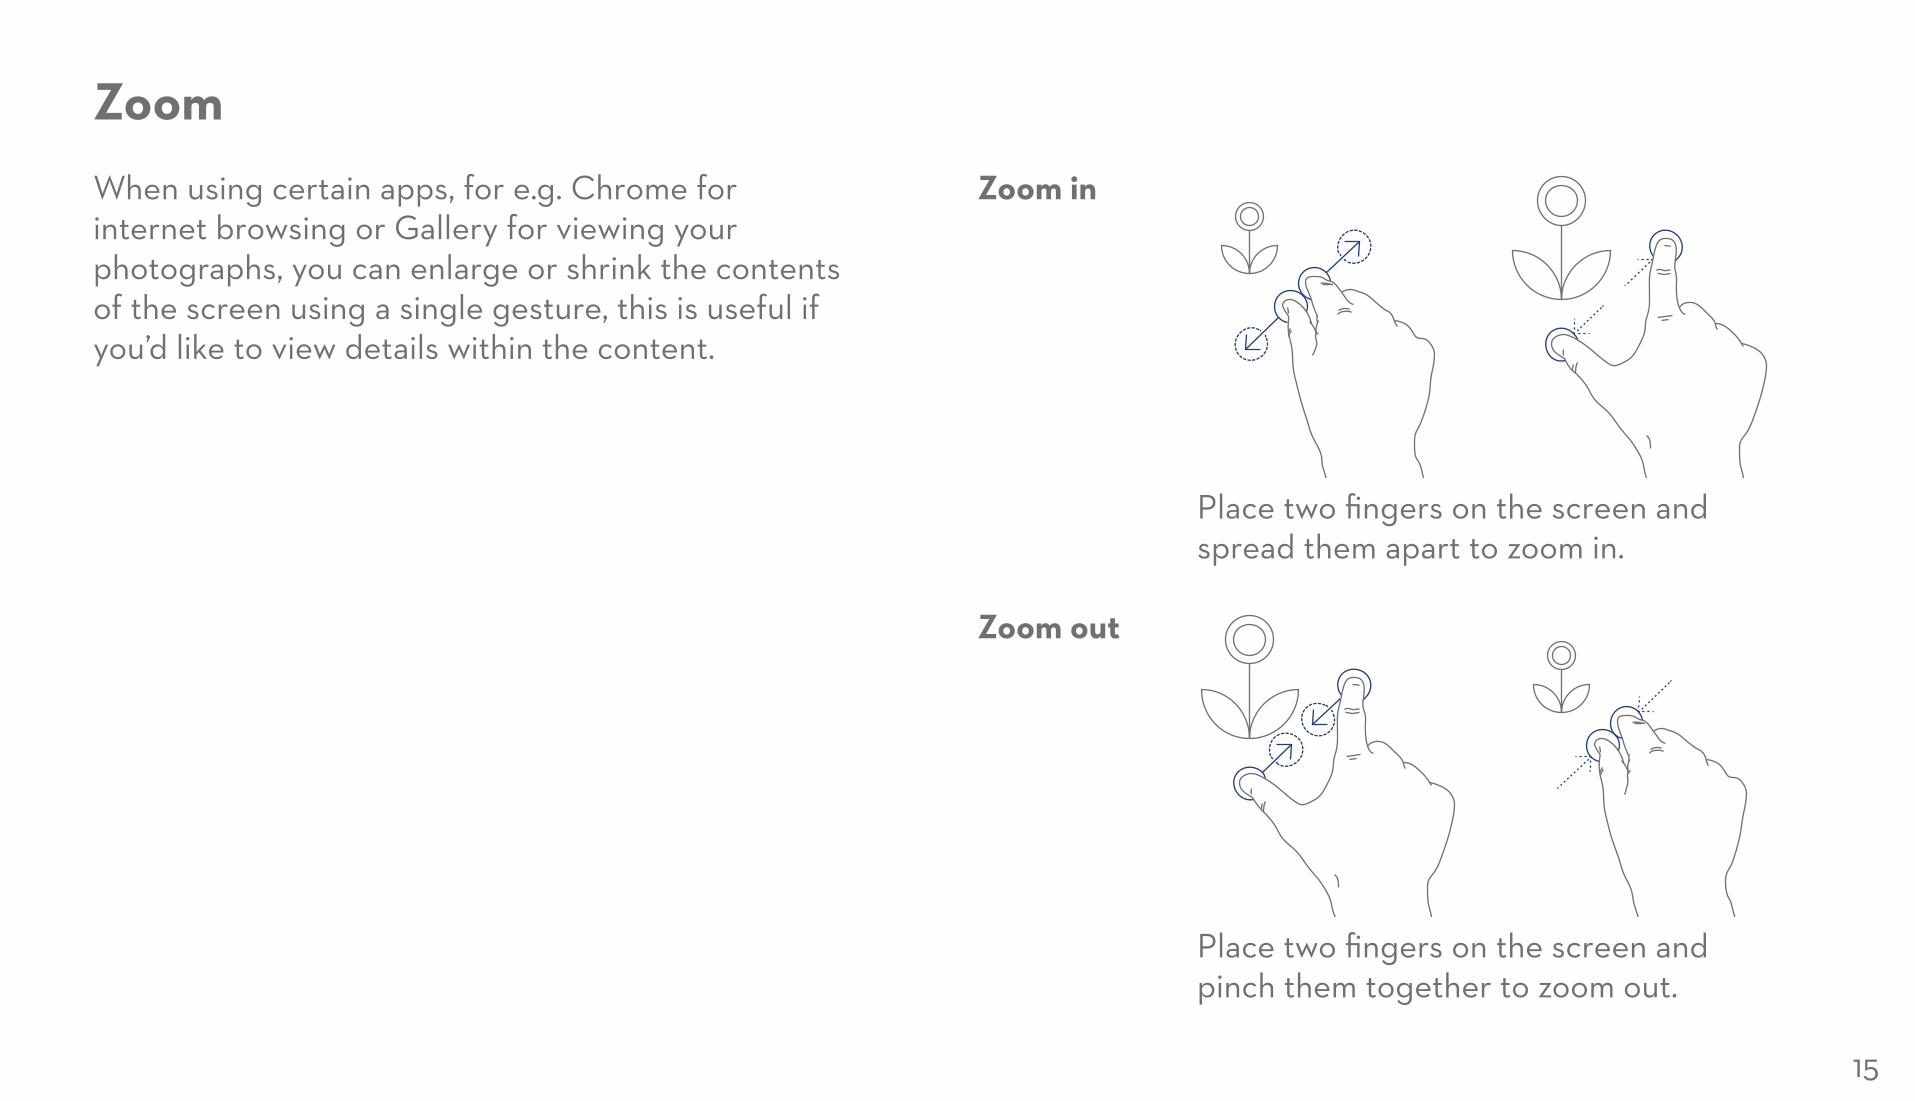
ZoomWhen using certain apps, for e.g. Chrome for internet browsing or Gallery for viewing your photographs, you can enlarge or shrink the contents of the screen using a single gesture, this is useful if you’d like to view details within the content.
Zoom in
Place two fingers on the screen and spread them apart to zoom in.
Zoom out
Place two fingers on the screen and pinch them together to zoom out.
15
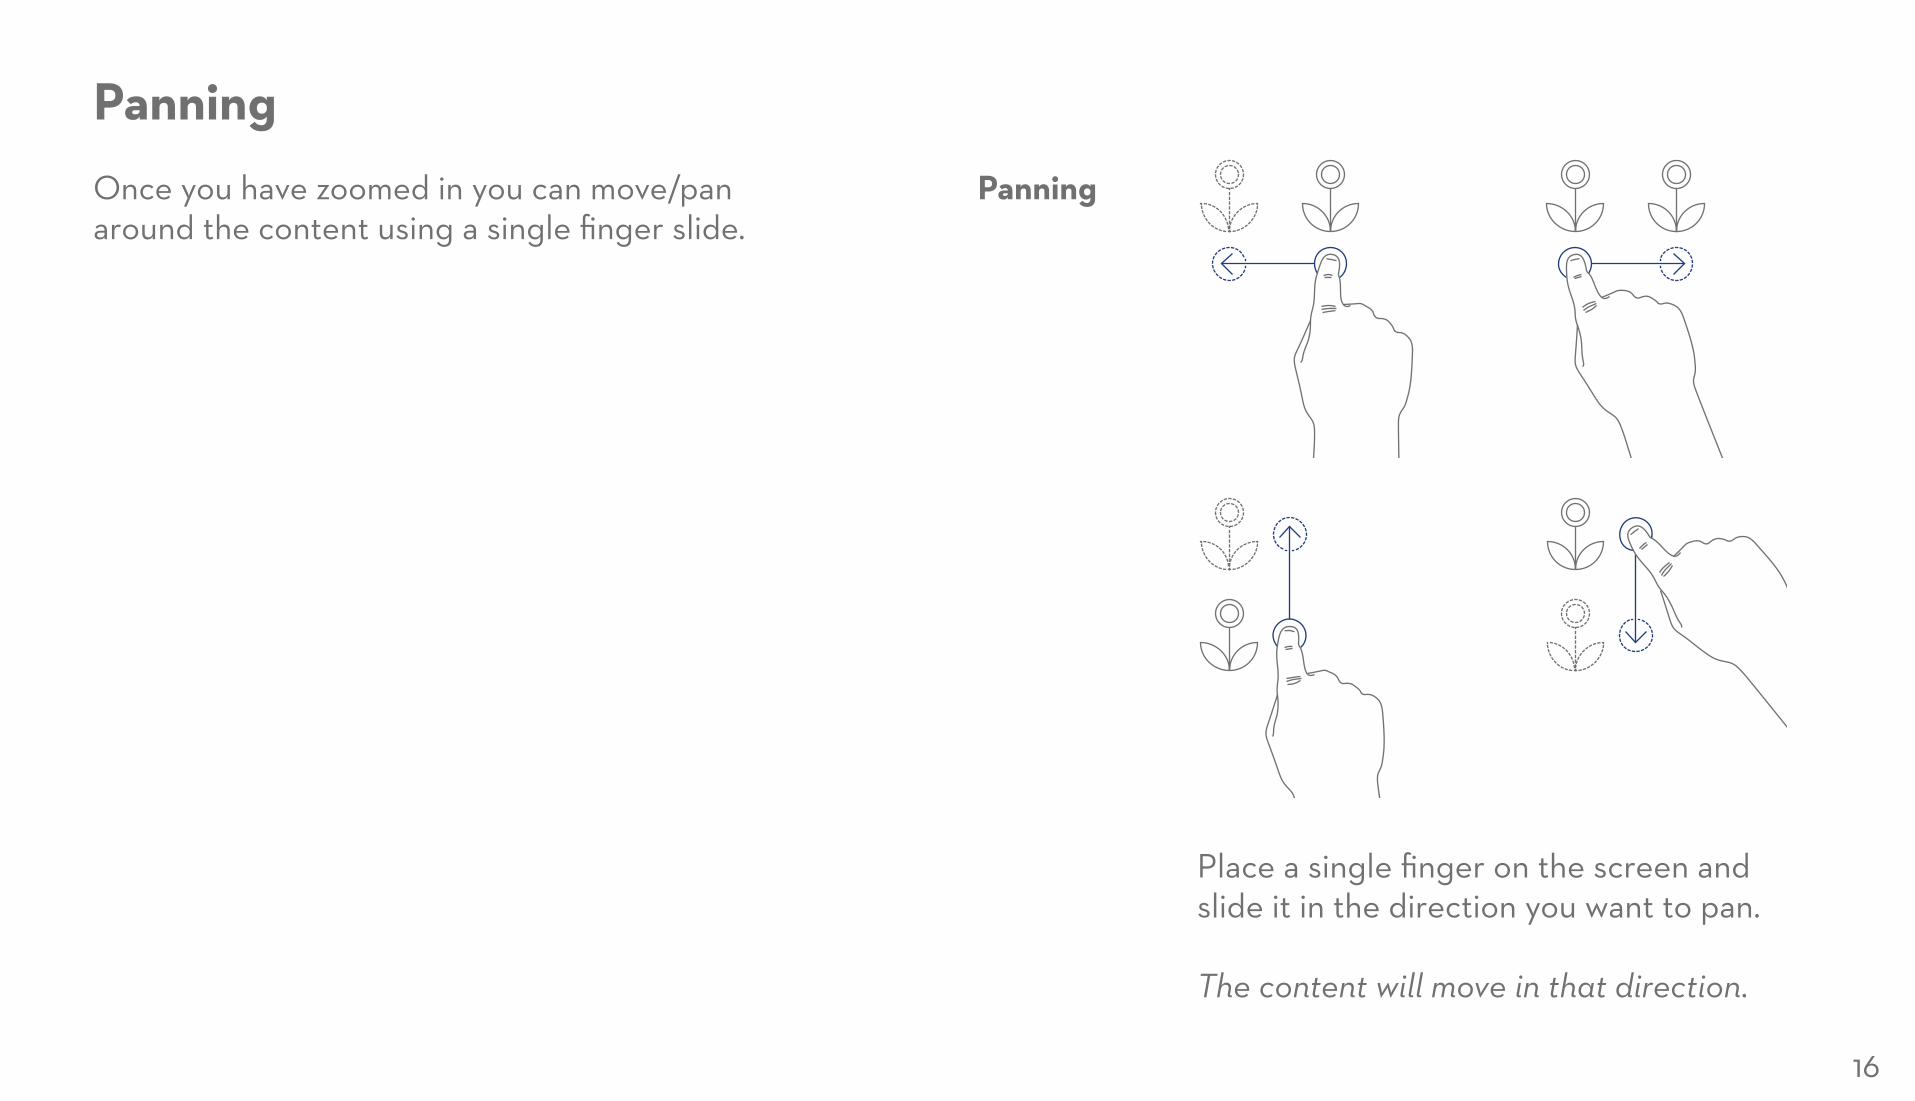
PanningOnce you have zoomed in you can move/pan around the content using a single finger slide.
Panning
Place a single finger on the screen and slide it in the direction you want to pan. The content will move in that direction.
16
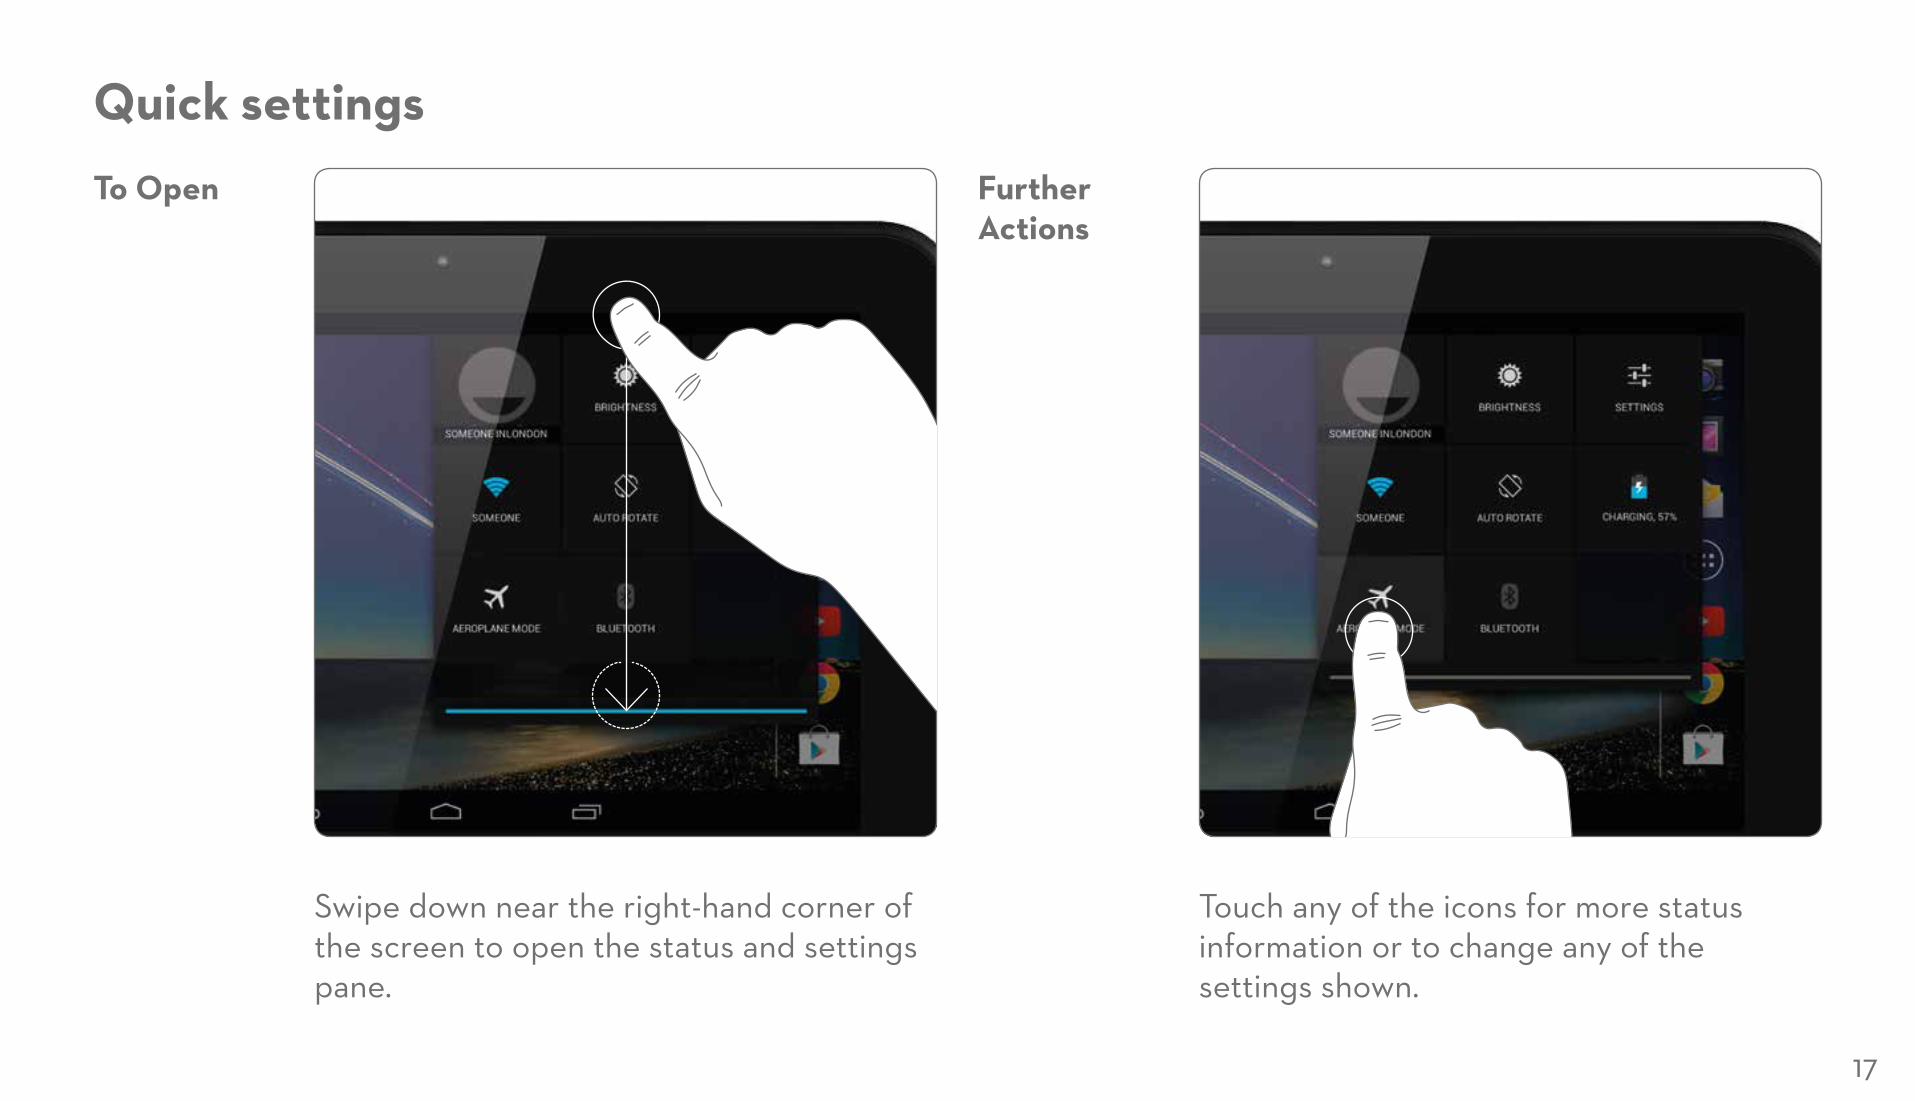
Quick settings
Swipe down near the right-hand corner of the screen to open the status and settings pane.
Touch any of the icons for more status information or to change any of the settings shown.
Further Actions
To Open
17
Home screen
Quick Access Area
Status Area
Quick Access Area
Google Search
Google Voice Search
All Apps
Go HomeGo BackEnter Tesco World Show Active Apps
18
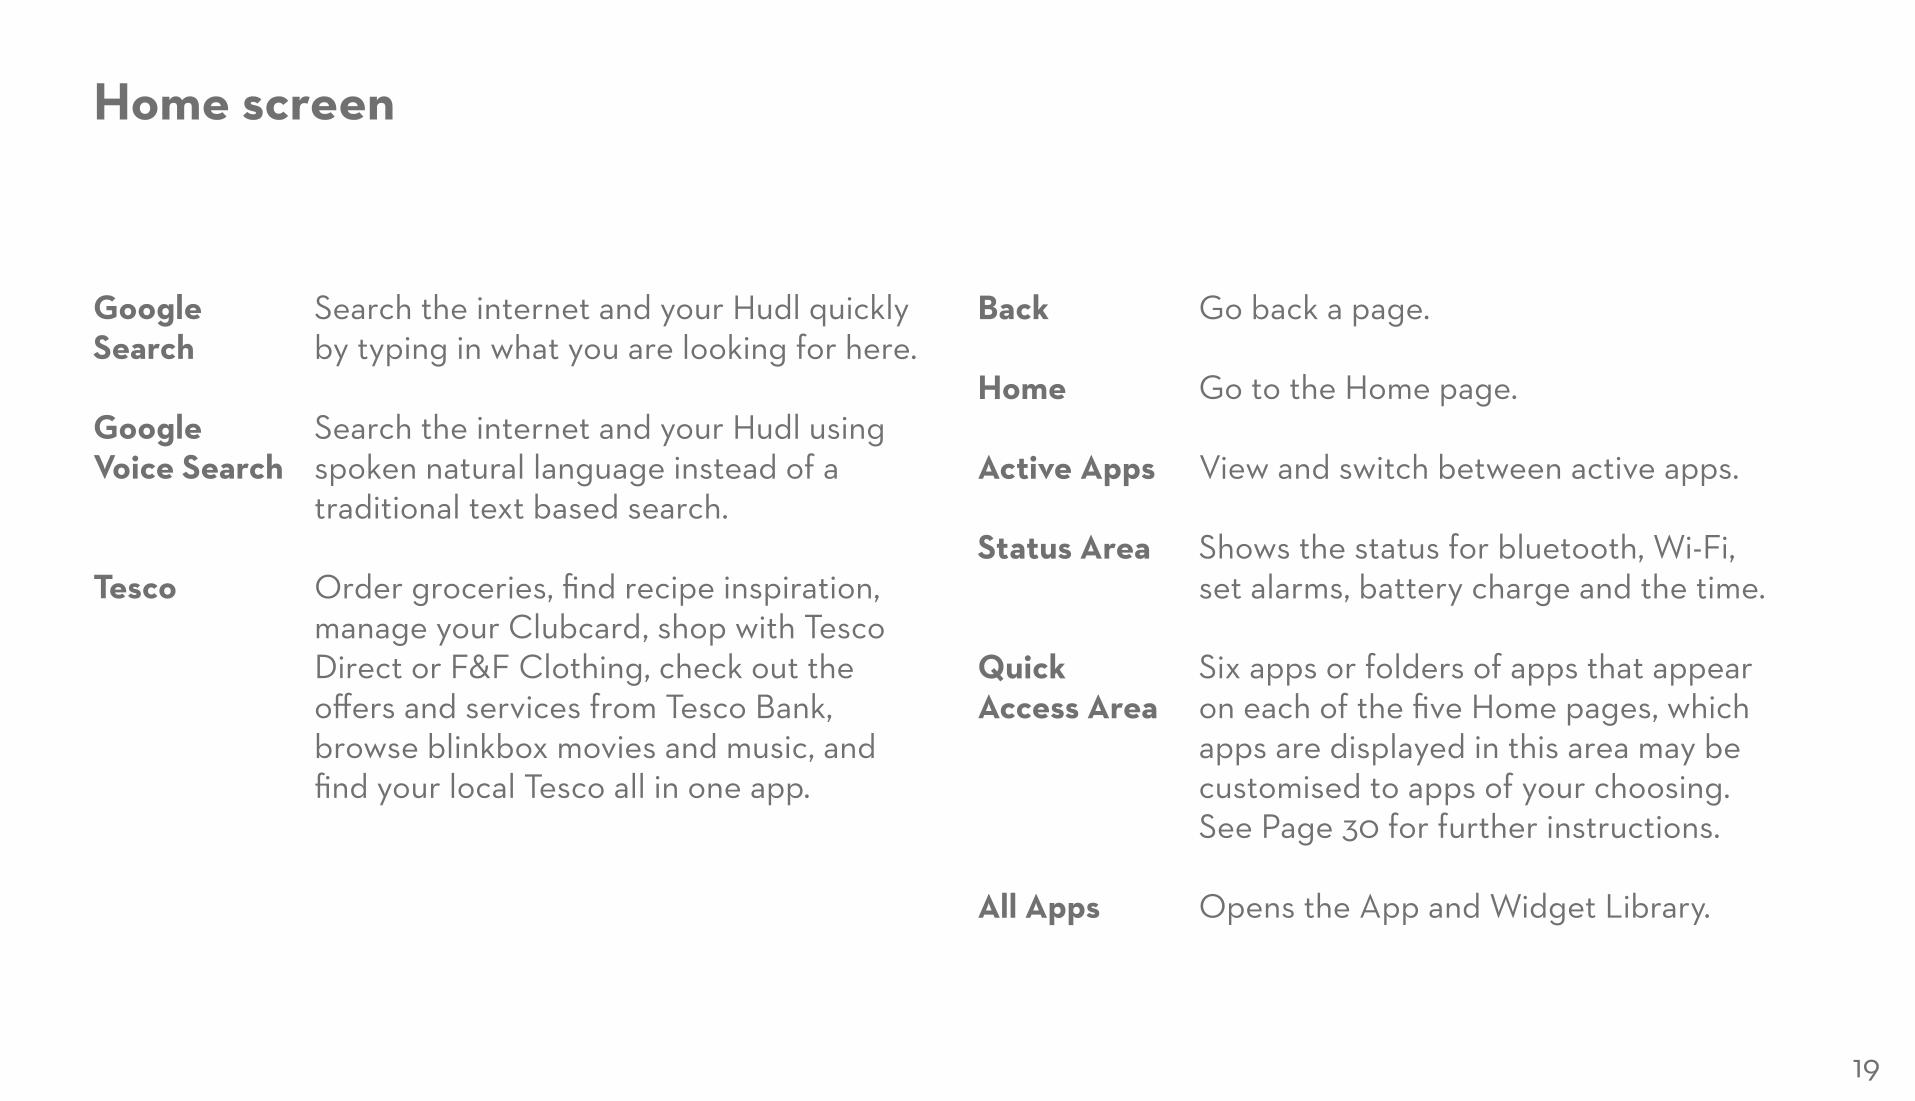
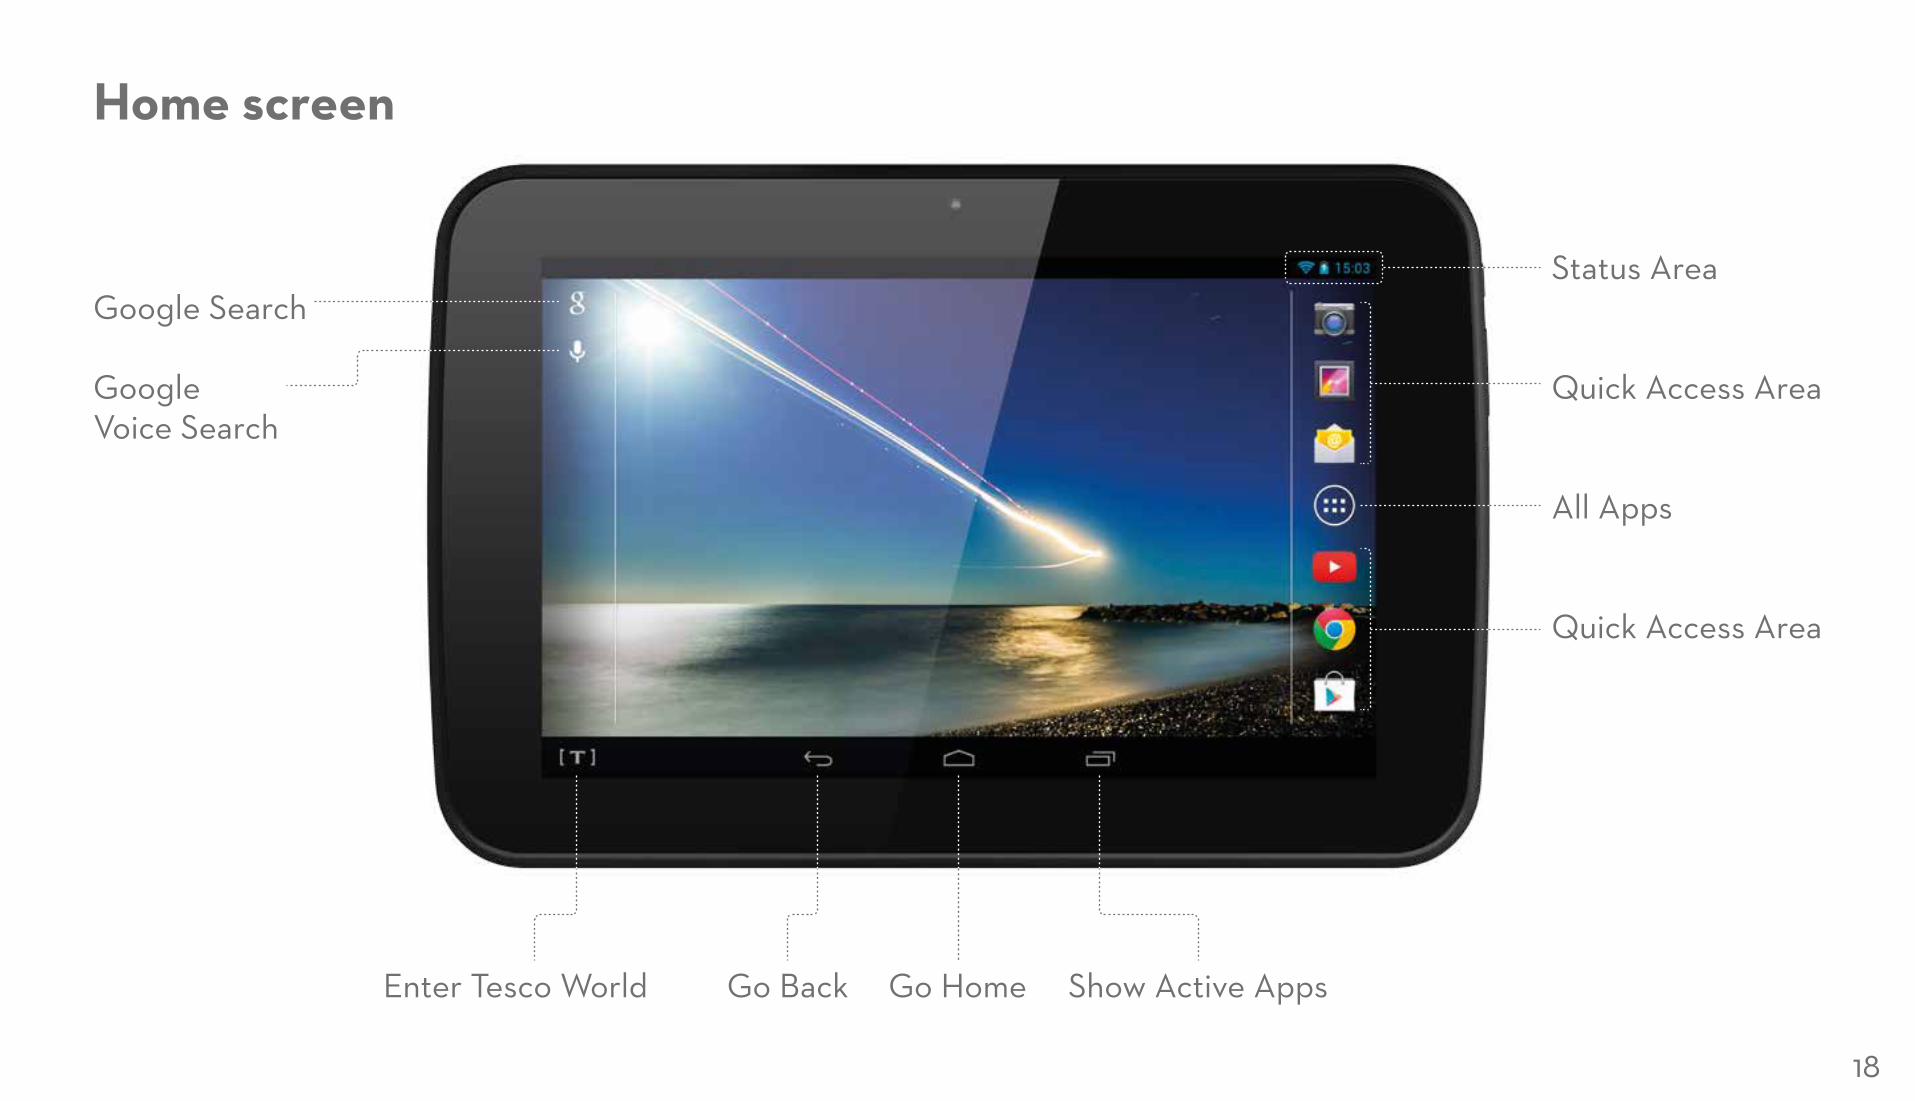
Home screen
Google Search
Google Voice Search
Tesco
Search the internet and your Hudl quickly by typing in what you are looking for here.
Search the internet and your Hudl using spoken natural language instead of a traditional text based search.
Order groceries, find recipe inspiration, manage your Clubcard, shop with Tesco Direct or F&F Clothing, check out the offers and services from Tesco Bank, browse blinkbox movies and music, and find your local Tesco all in one app.
Go back a page.
Go to the Home page.
View and switch between active apps.
Shows the status for bluetooth, Wi-Fi, set alarms, battery charge and the time.
Six apps or folders of apps that appear on each of the five Home pages, which apps are displayed in this area may be customised to apps of your choosing. See Page 30 for further instructions.
Opens the App and Widget Library.
Back
Home
Active Apps
Status Area
Quick Access Area
All Apps
19

Home screen appsHudl comes with a selection of useful apps pre-installed. These can be accessed by touching the All Apps icon.
The Quick Access Area, on the Home page, features six apps that we think you may find useful and enjoyable.
Touch the Camera app to take a photo. See page 46 to learn more about taking photos with the camera app.
Touch the Gallery app to view your photos. See page 62 for more details of viewing photos in the photo gallery.
Touch the Email app to send and receive email. See page 39 to find out how to set up an email account and use Hudl to keep in touch via email.
Touch to see your app and widget library. See page 29 to understand more about customising your Home page and installing, removing and managing apps.
Touch to launch YouTube and browse for your favourite videos online.
Touch Google Chrome to search and browse the Internet.
Touch Google Play to visit the store.
20
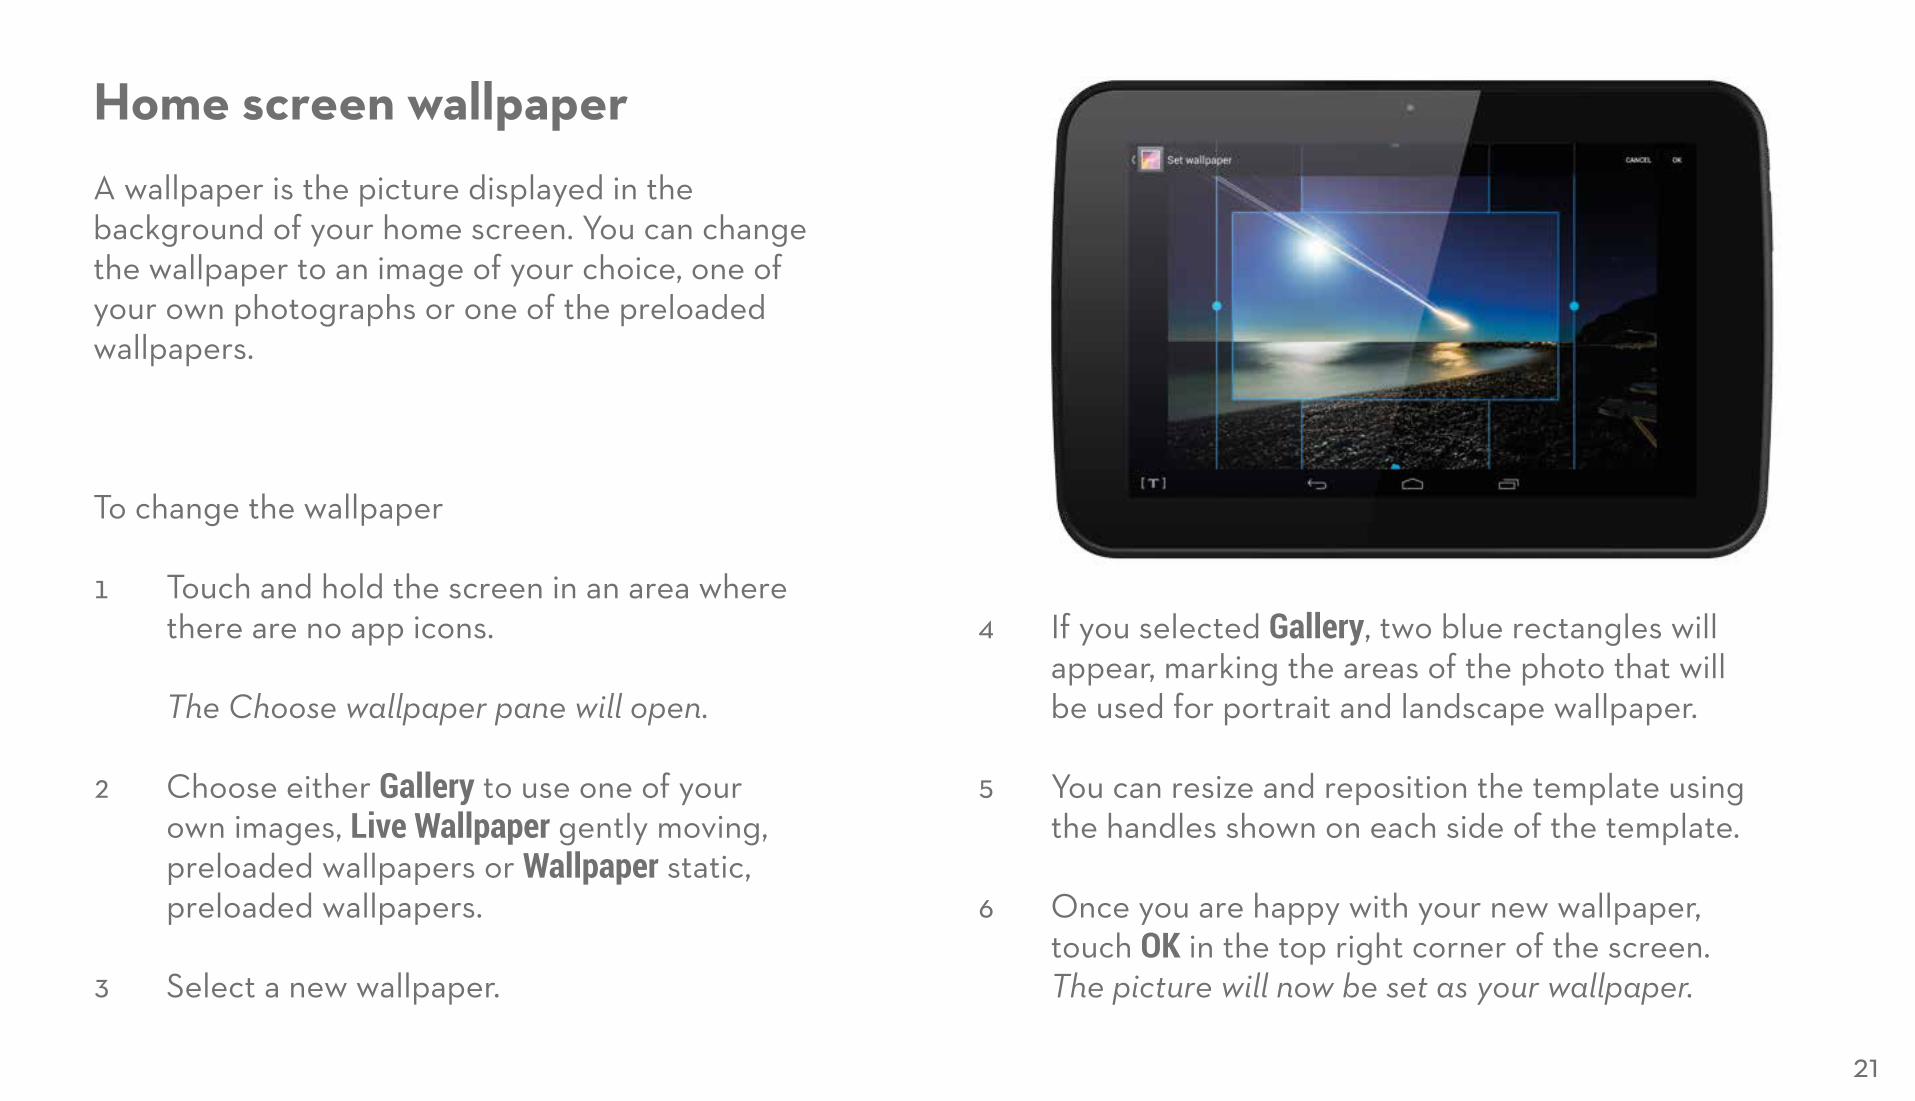
Home screen wallpaperA wallpaper is the picture displayed in the background of your home screen. You can change the wallpaper to an image of your choice, one of your own photographs or one of the preloaded wallpapers.
To change the wallpaper
1 Touch and hold the screen in an area where there are no app icons. The Choose wallpaper pane will open.
2 Choose either Gallery to use one of your own images, Live Wallpaper gently moving, preloaded wallpapers or Wallpaper static, preloaded wallpapers.
3 Select a new wallpaper.
4 If you selected Gallery, two blue rectangles will appear, marking the areas of the photo that will be used for portrait and landscape wallpaper.
5 You can resize and reposition the template using the handles shown on each side of the template.
6 Once you are happy with your new wallpaper, touch OK in the top right corner of the screen. The picture will now be set as your wallpaper.
21
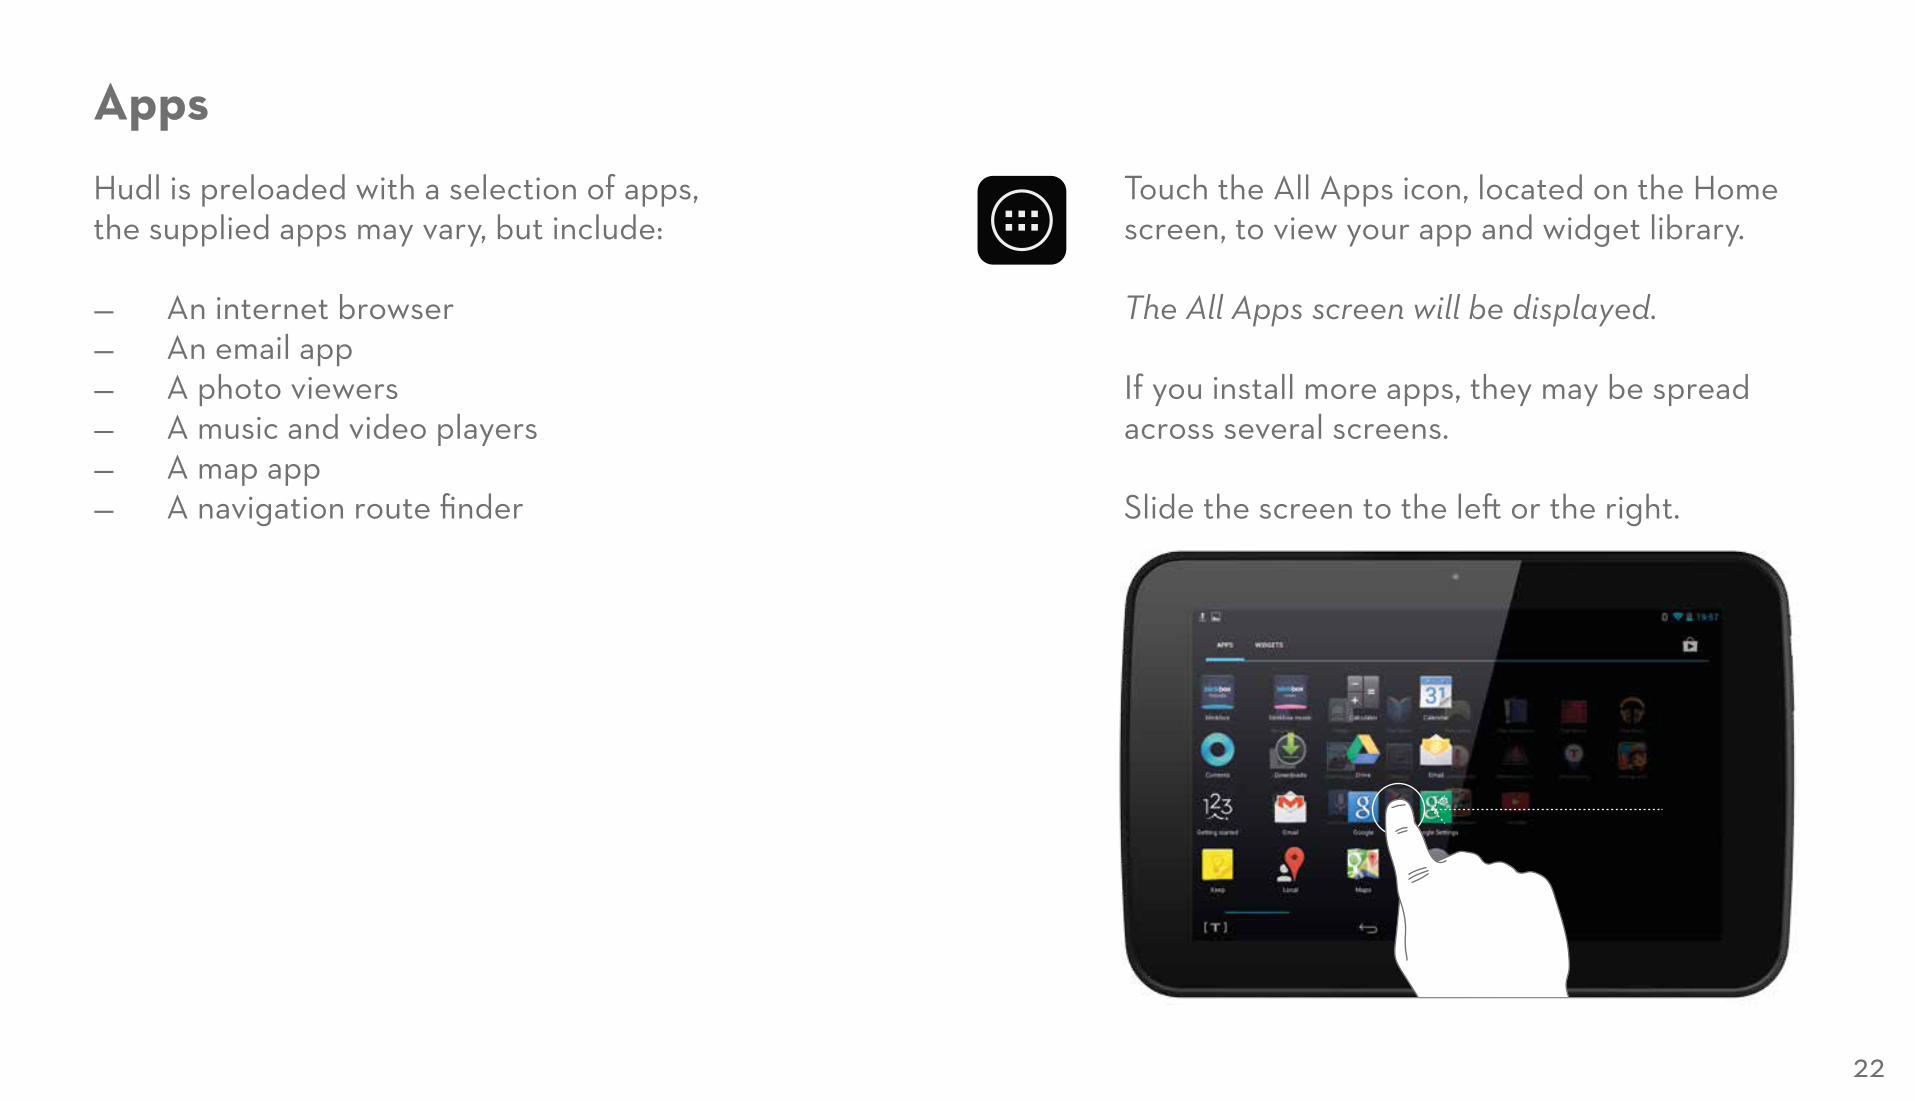
AppsHudl is preloaded with a selection of apps, the supplied apps may vary, but include:
— An internet browser — An email app — A photo viewers — A music and video players — A map app — A navigation route finder
Touch the All Apps icon, located on the Home screen, to view your app and widget library. The All Apps screen will be displayed.
If you install more apps, they may be spread across several screens.
Slide the screen to the left or the right.
22
Launching an appTo launch an app
1 Touch the app icon on the screen. The app will launch.
2 Apps normally have interactive on screen instructions that will help you understand how to use the app.
Moving home screen appsIf you want to change the position of an app on the Home screen
1 Touch and hold the app icon.
2 Drag the app to a new position. If you drag an app beyond the Home page, another page will be revealed.
23
Getting more appsEach person will have different requirements and uses for their Hudl. To personalise your Hudl with the apps you want you can visit the Google Play store online and browse for more apps.
Note You can only visit the Google Play store if you have an active Wi-Fi connection.
Touch the Google Play app icon on the Home page. You will be asked to sign in with a Google account. If you don’t have a Google account you can select the option to set one up (there is currently no charge to set up a Google account).
Once your account is set up you can go straight to the shop and choose a category to browse.
Remember to fully explore the pages by dragging pages up, down and sideways. The category index will often be found by scrolling the pages to the right.
There are often free apps available if you touch the Top Free tab at the top of the page.
24
Adding or removing Home screen appsYou may want to add your regularly used apps from the All Apps screen to your Home screen for quick access.
To add an app to your Home apps
1 Navigate to the All Apps screen.
2 Touch and hold the app icon you want to add to your Home page. The app will be added to your Home screen.
Removing apps from the Home screen:
1 Touch and hold the app icon.
2 Drag the icon over the × that appears at the top left of the screen. The icon will be removed from the Home screen, but will remain on your tablet.
Permanently removing an app
— Refer to the instructions under ‘Device settings > Device > Apps’ on page 69 to completely uninstall an app.
25
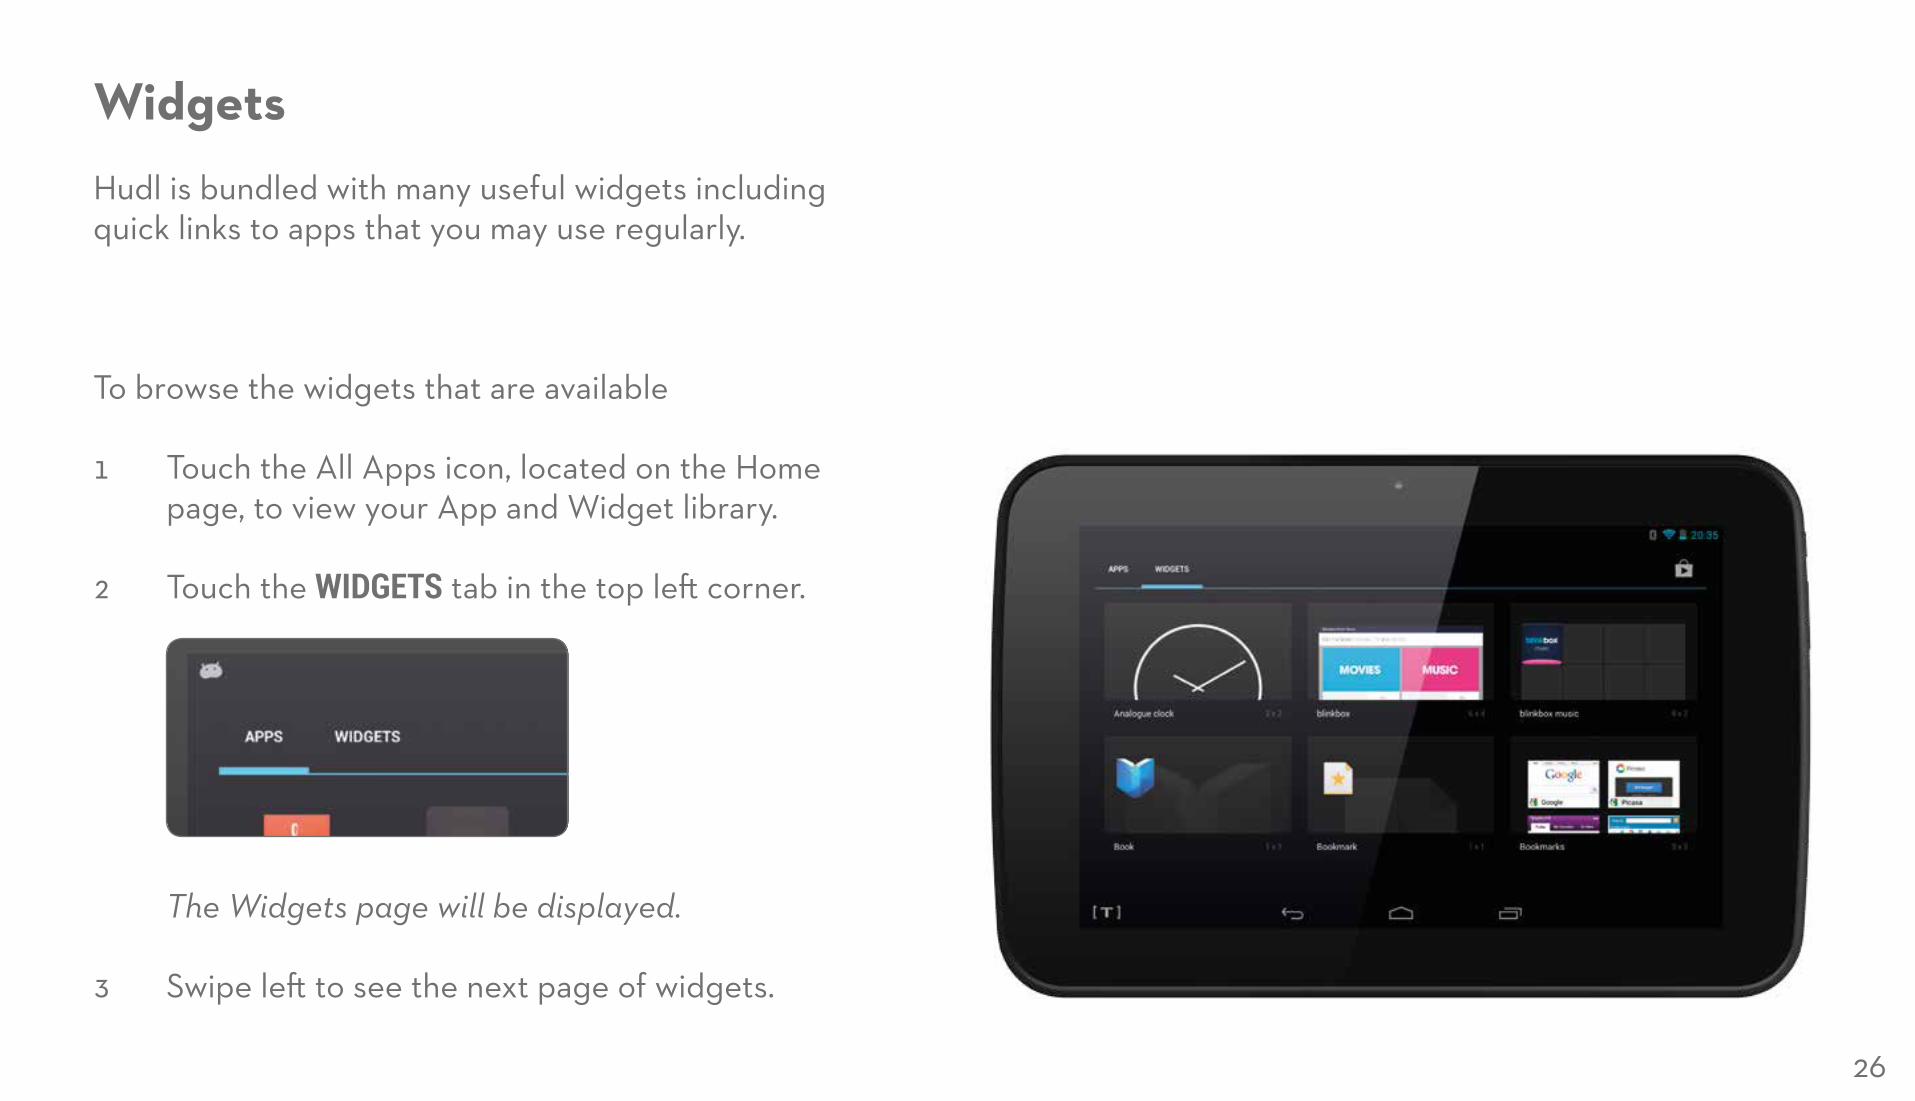
WidgetsHudl is bundled with many useful widgets including quick links to apps that you may use regularly.
To browse the widgets that are available
1 Touch the All Apps icon, located on the Home page, to view your App and Widget library.
2 Touch the WIDGETS tab in the top left corner. The Widgets page will be displayed.
3 Swipe left to see the next page of widgets.
26

WidgetsAdding a widget to your Home screen
If you find one or more widgets that you like, you can add them to your home page.
1 Navigate to widget you want to add.
2 Touch and hold the widget. You will be taken to the Home screen where you can choose the widgets new position. The widget is now in place and functioning on the Home screen.
Moving widgets around your Home screen
1 Touch and hold the widget.
2 Drag the widget to a new position.
Note If you drag a widget beyond the Home screen, another page will be revealed.
Removing widgets from your Home screen
1 Touch and hold the widget.
2 Drag the widget to the × that appears at the top left of the screen. The widget will be removed from the Home screen.
27
28
Transferring files using Windows ExplorerFor users familiar with computer file transfer, Windows Explorer can be used to transfer media files or folders to or from your Hudl. Windows Explorer is also used to transfer other files such as documents, spreadsheets and ebooks.
1 Switch on the computer.
2 Open a file browser on your computer. In Windows XP, navigate to ‘My Computer’ (Click Start>My Computer). In Windows 7, navigate to ‘Computer’ (Click the Windows logo> Computer)
3 Connect the USB cable (supplied) to your Hudl.
4 Connect the other end of the cable to a convenient USB port on your computer.
5 On your computer, browse to the list of drives. You will see your Hudl in the drive list.
Note When a micro-SD card is in your Hudl, this will appear as a separate drive. Double click to open the Hudl drive and you will see a group of folders.
Some of these hold media and other data such as:
a Music (for uploading music).
b Pictures (for digital photos).
c Movies (for videos and movies).
7 DCIM (for photos and videos taken on your Hudl.
8 Open a second window of ‘My Computer’.
29
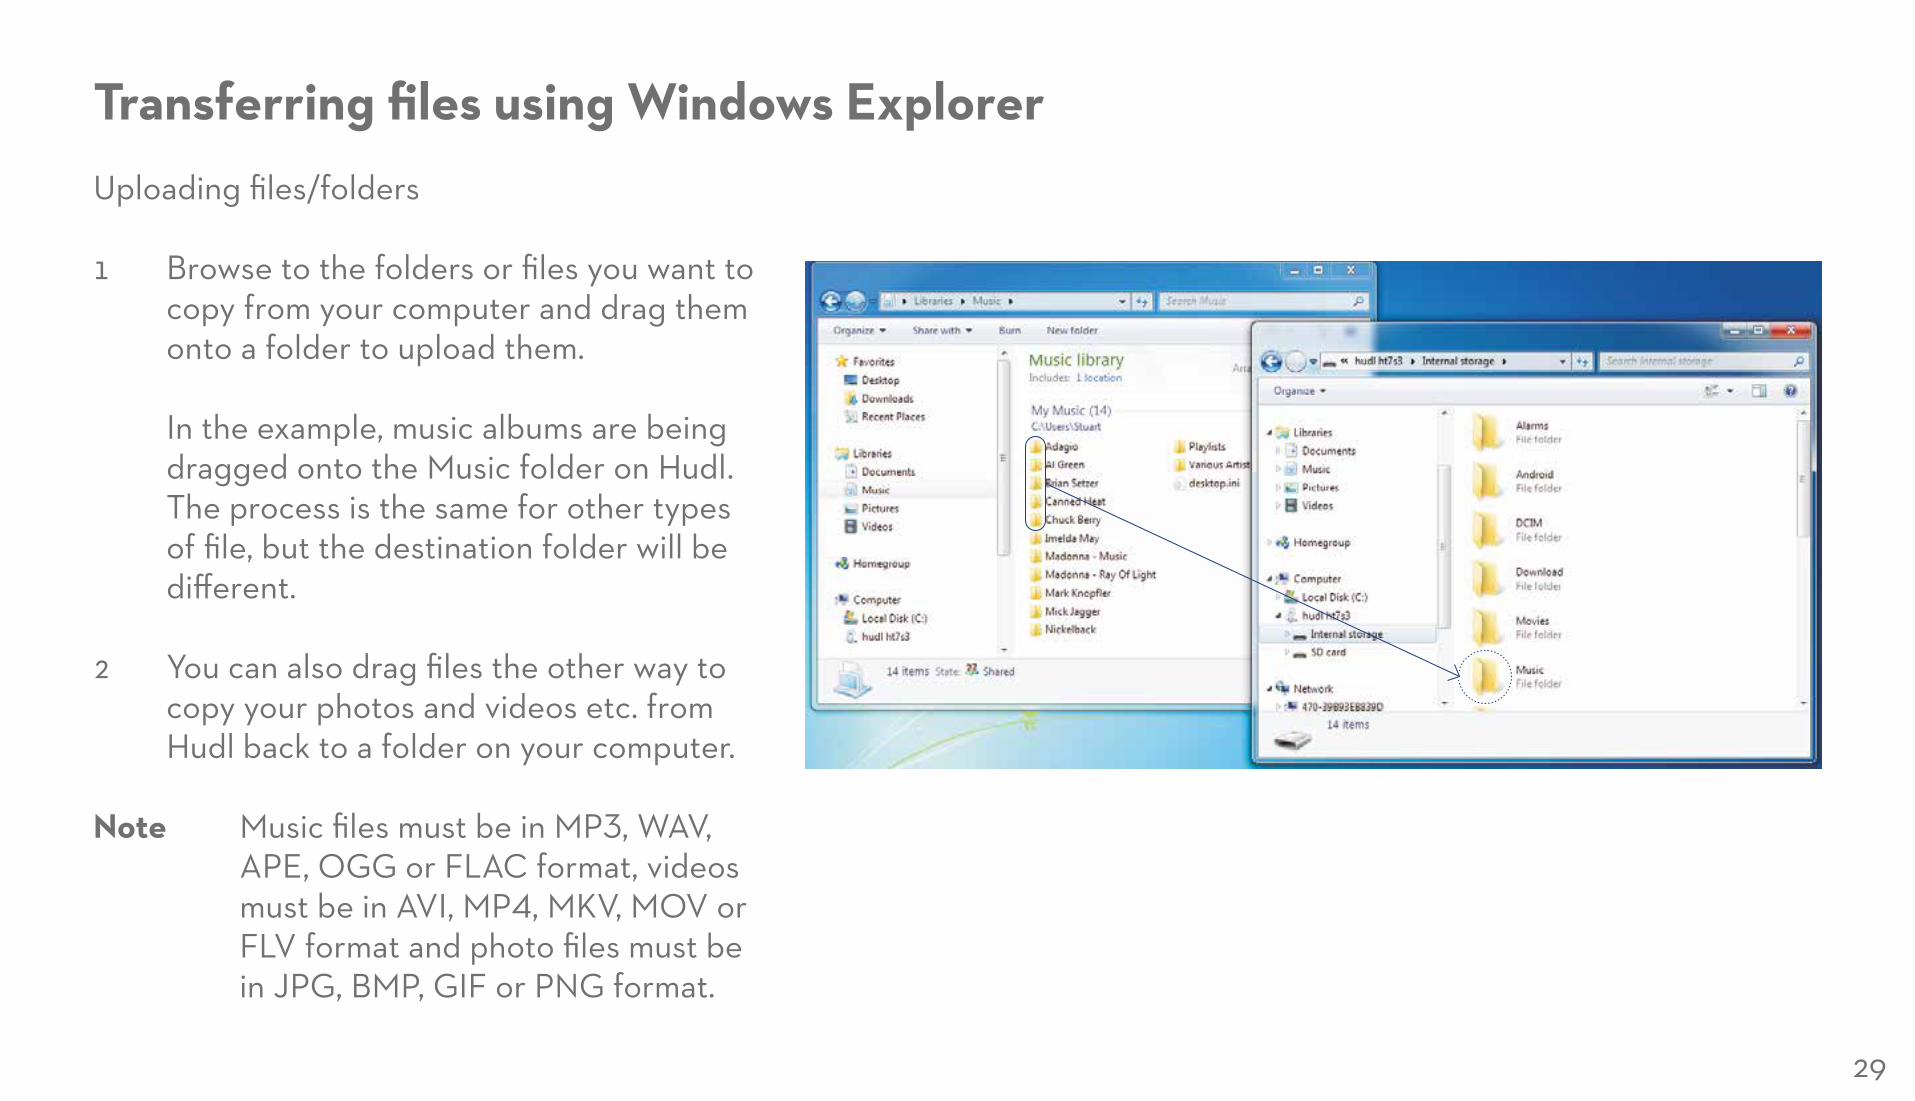
Transferring files using Windows ExplorerUploading files/folders
1 Browse to the folders or files you want to copy from your computer and drag them onto a folder to upload them. In the example, music albums are being dragged onto the Music folder on Hudl. The process is the same for other types of file, but the destination folder will be different.
2 You can also drag files the other way to copy your photos and videos etc. from Hudl back to a folder on your computer.
Note Music files must be in MP3, WAV, APE, OGG or FLAC format, videos must be in AVI, MP4, MKV, MOV or FLV format and photo files must be in JPG, BMP, GIF or PNG format.

30
Transferring files using Windows ExplorerManaging folders and files from your computer
1 You can create new folders on Hudl to organise your documents, spreadsheets etc., just as you would on your computer. Once you have created the folders you need you can copy your files to them.
2 You can also delete files or move files between the internal memory and a docked micro-SD card.
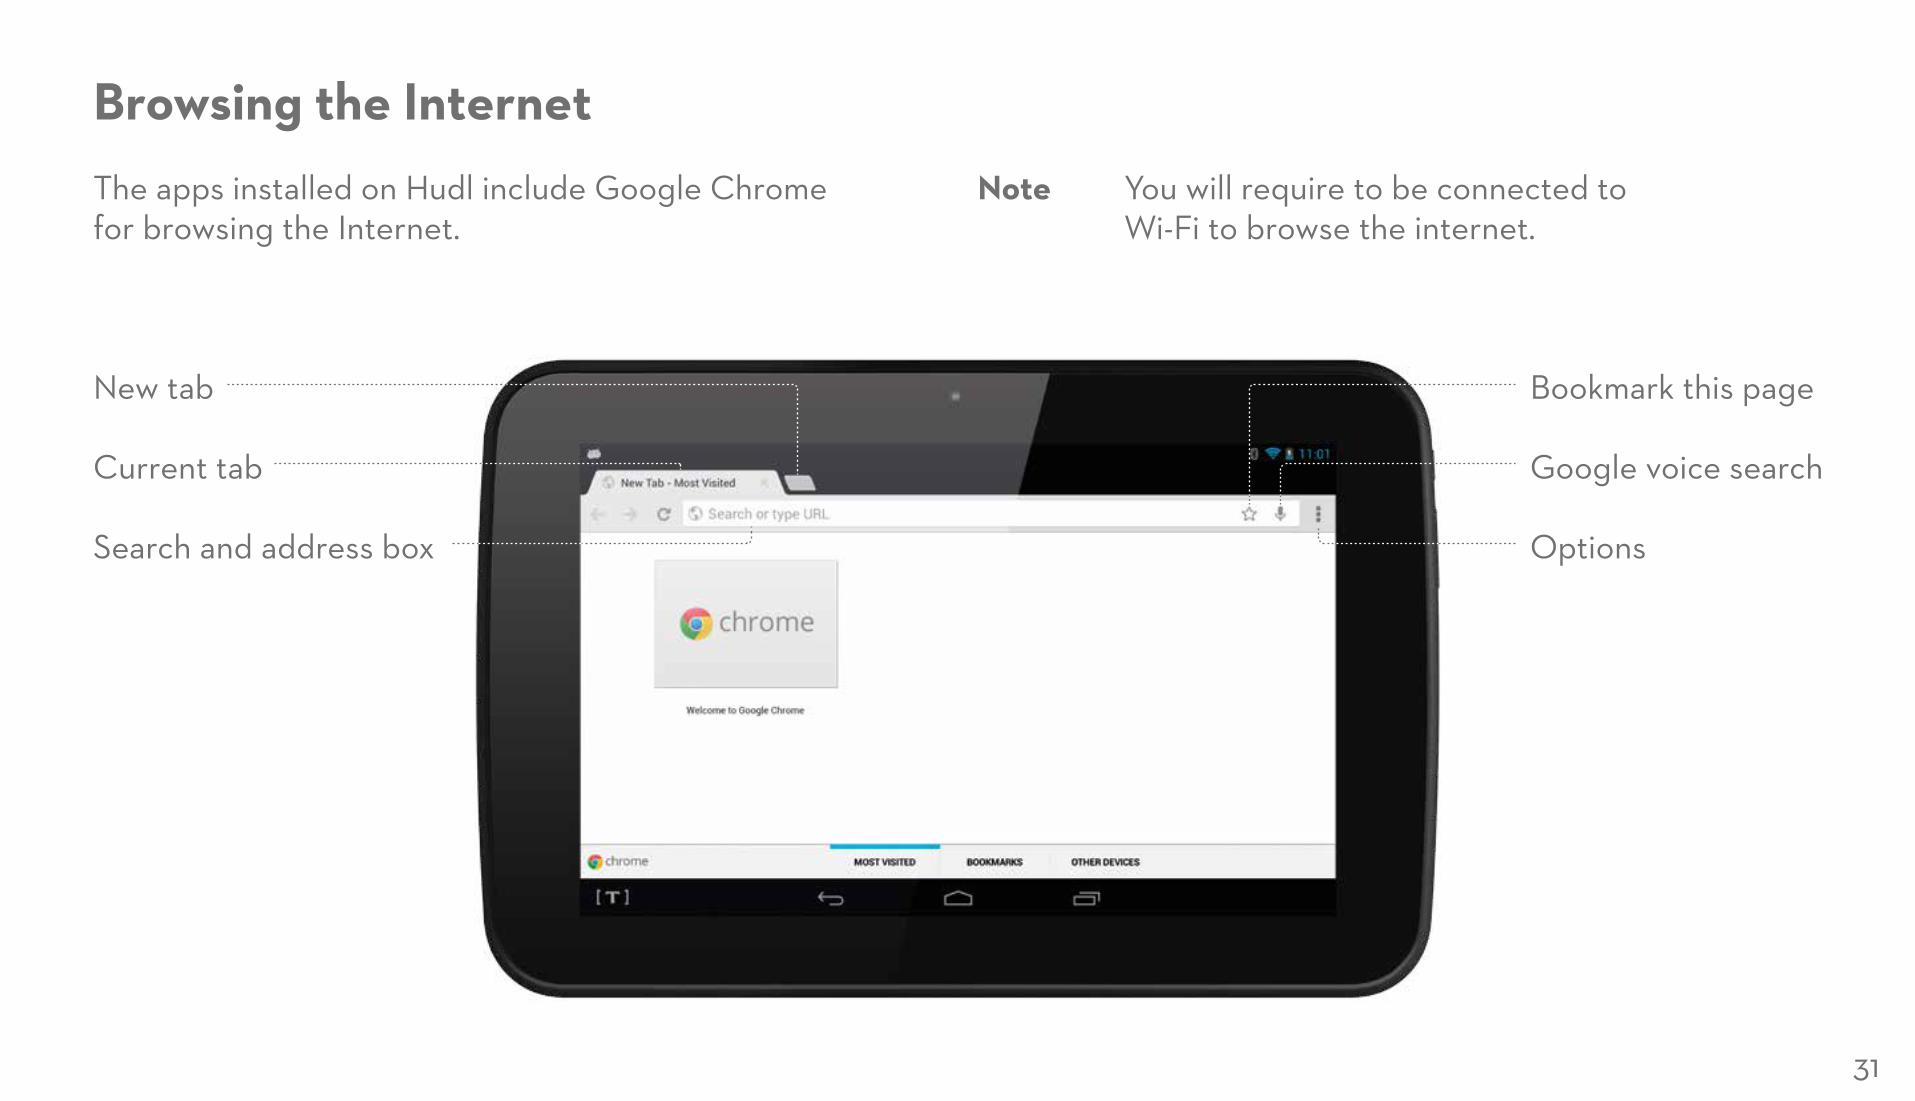
Browsing the InternetThe apps installed on Hudl include Google Chrome for browsing the Internet.
Note You will require to be connected to Wi-Fi to browse the internet.
Current tab
New tab Bookmark this page
Google voice search
OptionsSearch and address box
31
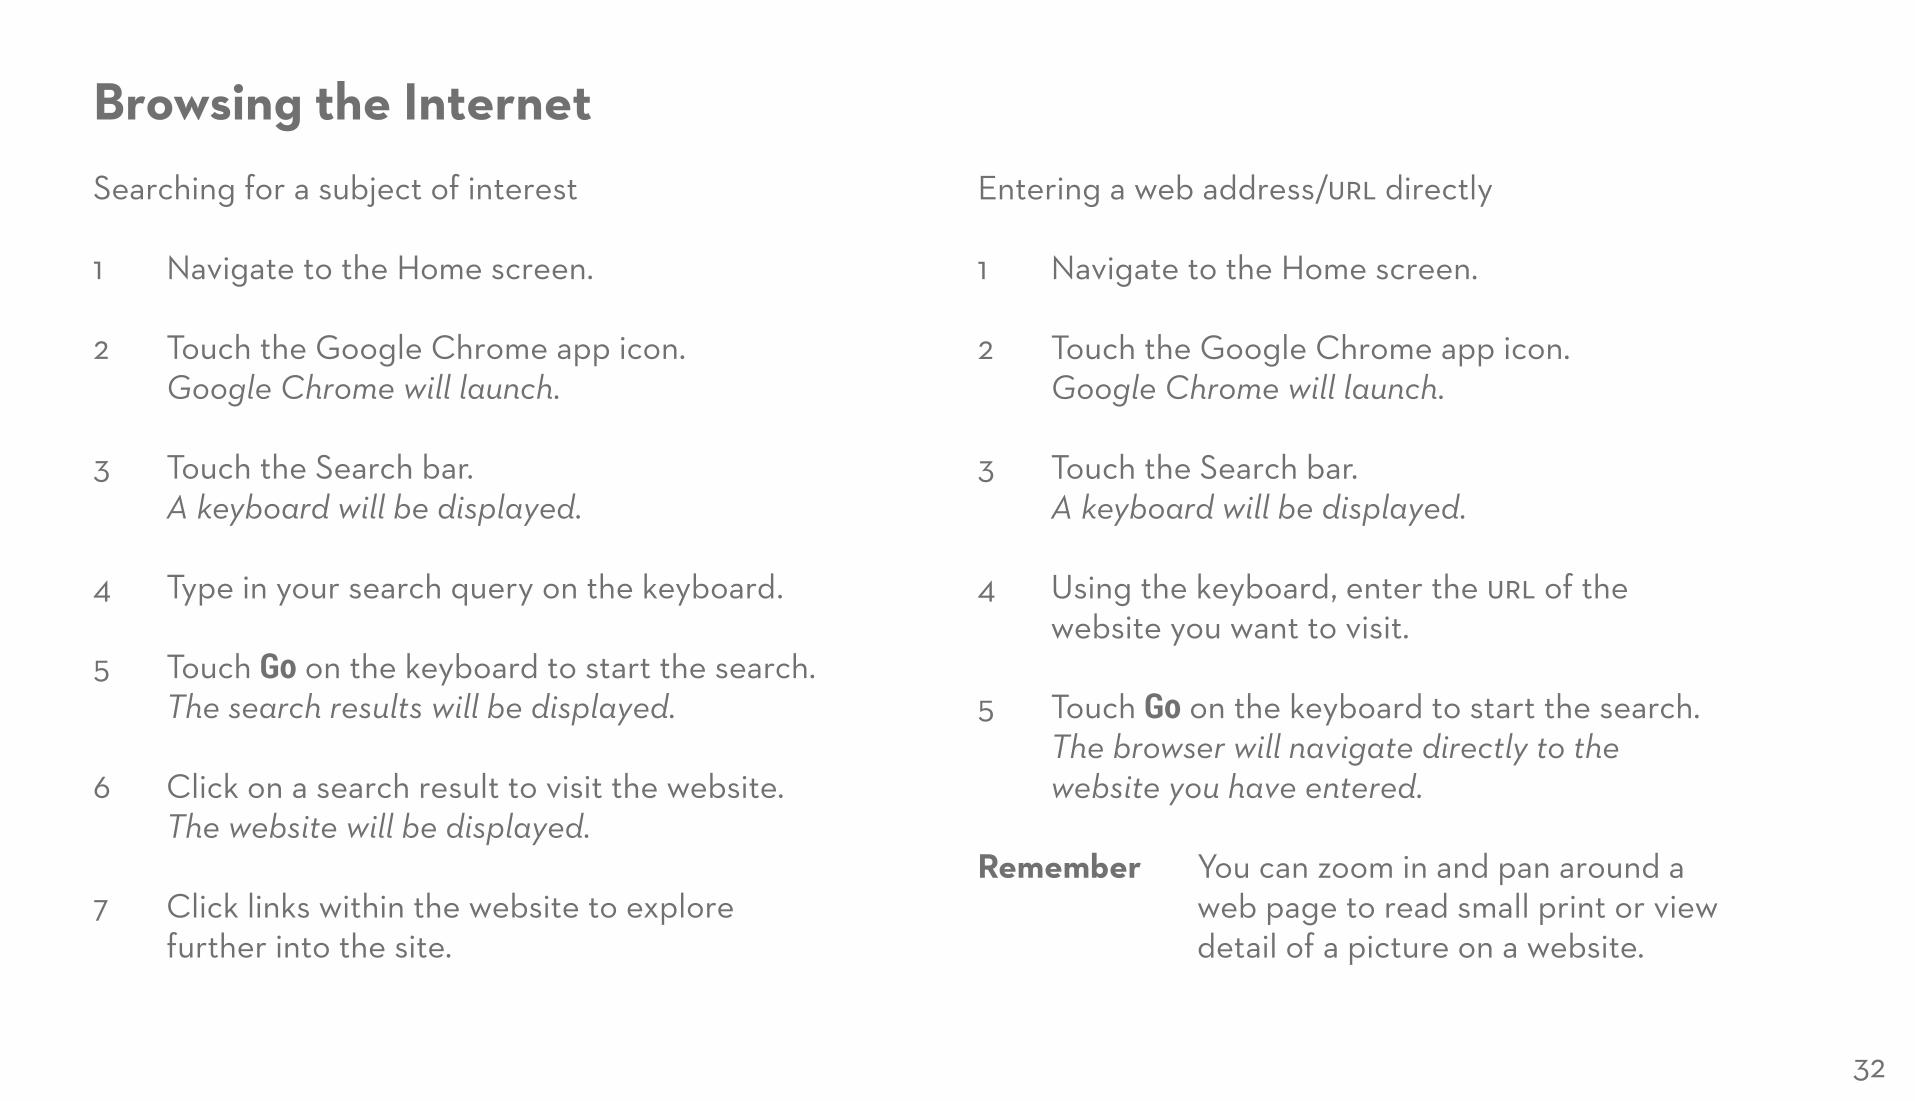
Browsing the InternetSearching for a subject of interest
1 Navigate to the Home screen.
2 Touch the Google Chrome app icon. Google Chrome will launch.
3 Touch the Search bar. A keyboard will be displayed.
4 Type in your search query on the keyboard.
5 Touch Go on the keyboard to start the search. The search results will be displayed.
6 Click on a search result to visit the website. The website will be displayed.
7 Click links within the website to explore further into the site.
Entering a web address/url directly
1 Navigate to the Home screen.
2 Touch the Google Chrome app icon. Google Chrome will launch.
3 Touch the Search bar. A keyboard will be displayed.
4 Using the keyboard, enter the url of the website you want to visit.
5 Touch Go on the keyboard to start the search. The browser will navigate directly to the website you have entered.
Remember You can zoom in and pan around a web page to read small print or view detail of a picture on a website.
32
Browsing the InternetStepping back through your browsing history
— To step back through pages you have recently visited, touch Back in the toolbar at the bottom of the screen. The browser will step back through your recent browsing history one page at a time.
Managing multiple web pages/tabs The browser includes a tab feature to allow multiple web pages to be open at once.
1 To open another browser window, touch the New page tab visible in the browser header bar. Another page will open.
2 You can now run a separate, new search without affecting the results of your current search.
When multiple search tabs are open
3 You can switch between active pages by touching the tabs at the top of the screen.
4 You can close a page by pressing the × next to the address in the tab.
33
YouTube and social networkingYouTube
Hudl is bundled with a YouTube app. This allows you to search for video content and also to upload content you film.
Social networking
You can browse to your favourite social networking websites by launching Google Chrome, navigating to the site of your choice and creating or logging in to your account.
Some social networking sites may also have apps available. Check by visiting the Google Play store and searching for the app you want.
34
EmailTo use email you will need to set up your email account on Hudl.
Once your email account is set up you can send and receive email to the contacts you choose.
You can set up and use one or more email accounts from Hudl.
You will always need to have a Wi-Fi connection to set up or use email.
35

EmailI already have an email account
Most users will have an existing email account when setting up an Internet connection at home.
If this is not the case you may also have created a Google identity for the Google Play store which comes with a ‘gmail.com’ email address.
Either of the above email addresses will be suitable to set up an email account.
You will need to know the email address and login password for your account before starting.
I don’t have an email account
If you don’t have an email account, you can browse the Internet to find a suitable email service provider and set up an account. Once you have set up your email account you will have an email address and login password.
You can then follow the instructions to set email up on Hudl.
36
Setting up an email account1 From the Home Page.
2 Touch the Email app icon.
3 If an email account has not been set up yet, the Account setup screen will appear.
4 Enter your email address as requested. Ensure that all characters are entered correctly and that you are not using capital letters.
5 Press Next on the keyboard when you are ready. The cursor will move to the Password line.
6 Enter the password. Make sure that capital letters and numbers are entered correctly.
7 Press Done on the keyboard. You can now touch Manual setup to choose to set up your email account manually or touch Next to set the account up automatically.
8 For automatic setup, touch Next. Hudl will now check the settings. If the server settings are correct, you will see the Account options screen.
9 Set the options as you want them.
10 Touch Next to continue. If the outgoing server settings are correct an options screen for the new account will appear.
11 Set the options as you would like them and touch Next when you are ready. The final setup screen is shown with options you can choose for account naming.
12 Correct these details if necessary and touch Next when you are ready. You will be taken to the Email app screen that displays messages in your Inbox and where you compose new messages.
37
EmailIf your login or server settings are found to be incorrect
1 Check and re-enter the details you have used when prompted. If you receive the same message a second time, there is no point to continue setting up the account as your login details may not be right.
2 Make a note of the information reported as incorrect, then contact your email service provider and ask them to send you login or server details that will enable you to set up your account. If the problem reported is server setup, you may find these details on your email service provider’s website.
38
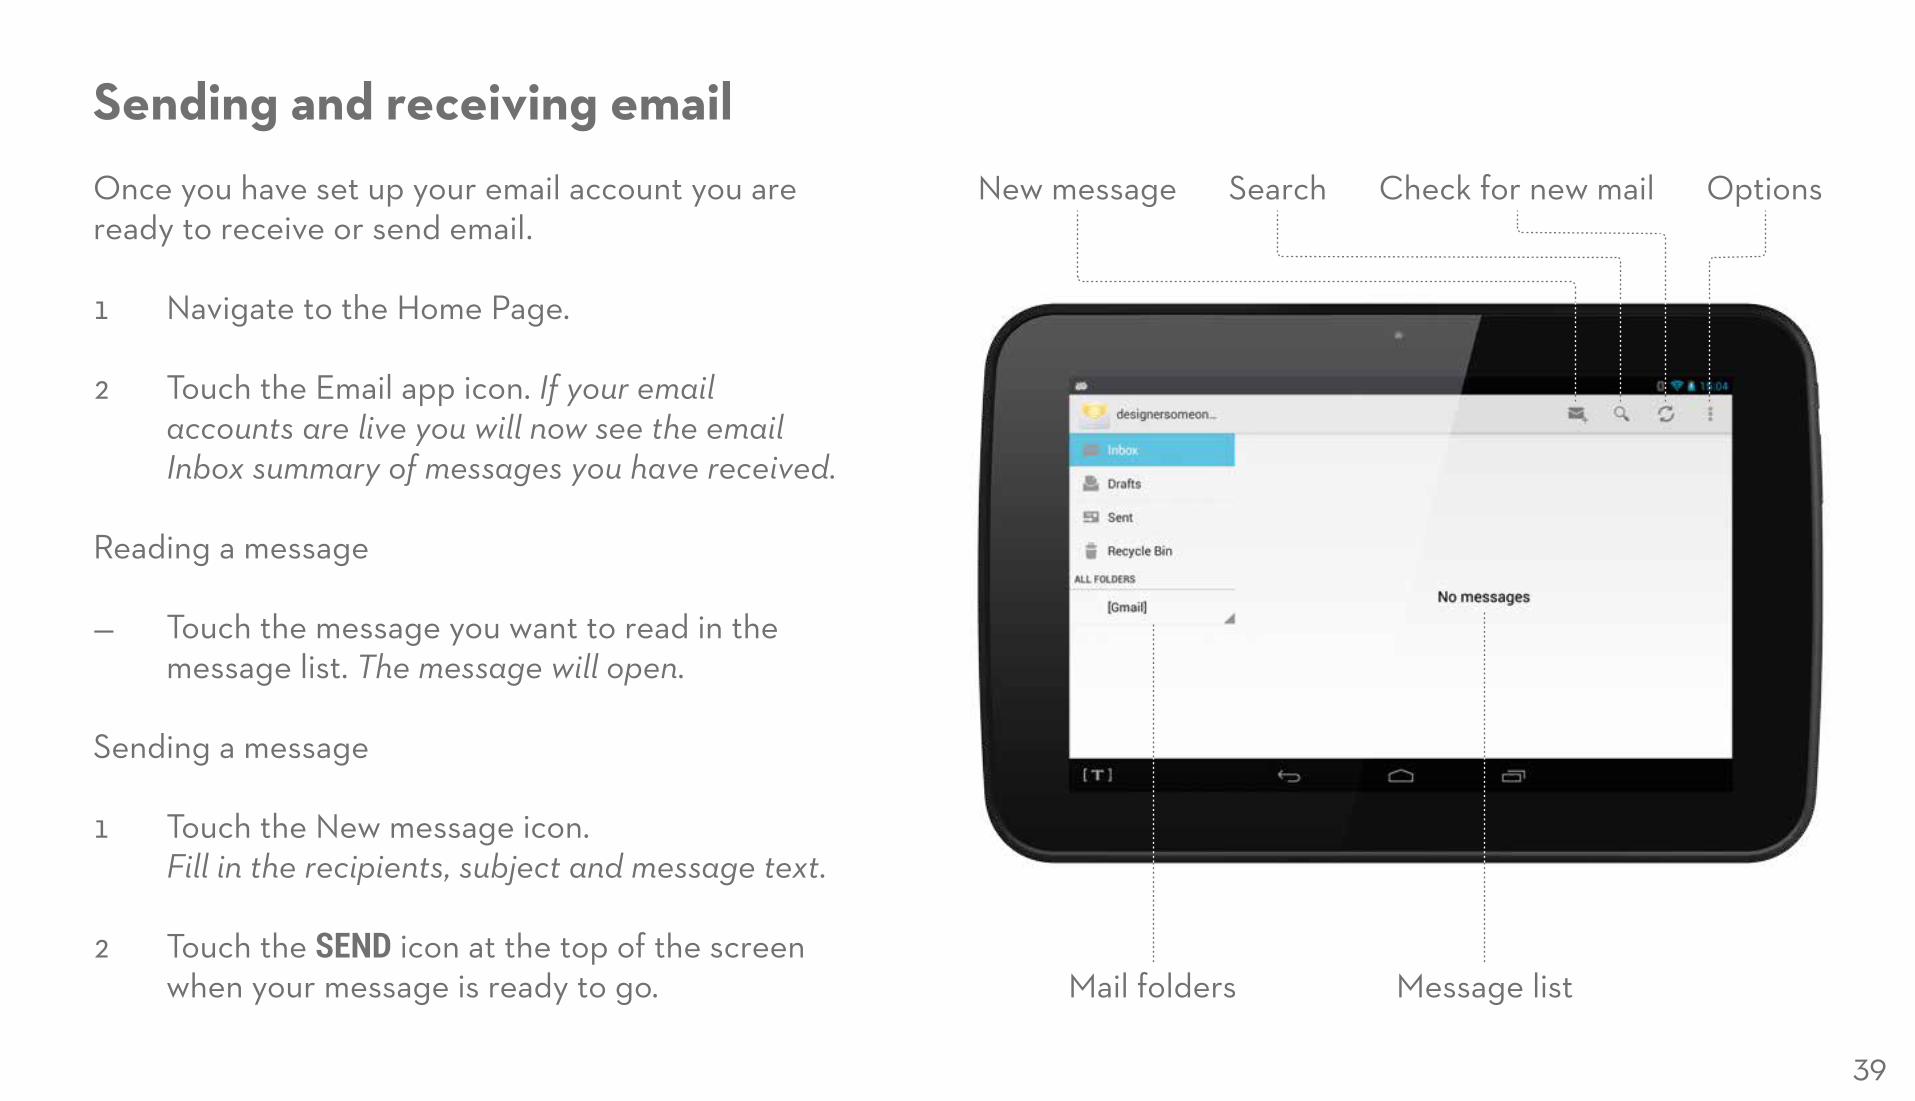
Sending and receiving emailOnce you have set up your email account you are ready to receive or send email.
1 Navigate to the Home Page.
2 Touch the Email app icon. If your email accounts are live you will now see the email Inbox summary of messages you have received.
Reading a message
— Touch the message you want to read in the message list. The message will open.
Sending a message
1 Touch the New message icon. Fill in the recipients, subject and message text.
2 Touch the SEND icon at the top of the screen when your message is ready to go.
Check for new mailSearchNew message
Mail folders Message list
Options
39
EmailSetting up your email app
1 Touch the email settings icon to access email settings.
2 Follow the screen prompts to open general email settings or email settings for a specific email account.
3 Each setting includes a brief explanation of what you can change.
Manual send and receive
Your email app will automatically check for new email on a regular basis. The factory setting is 15 minutes. You can change this time in your email settings if required. You can also check for new email manually at any time.
— Touch the Send and Receive icon . The Email app will check for email.
40
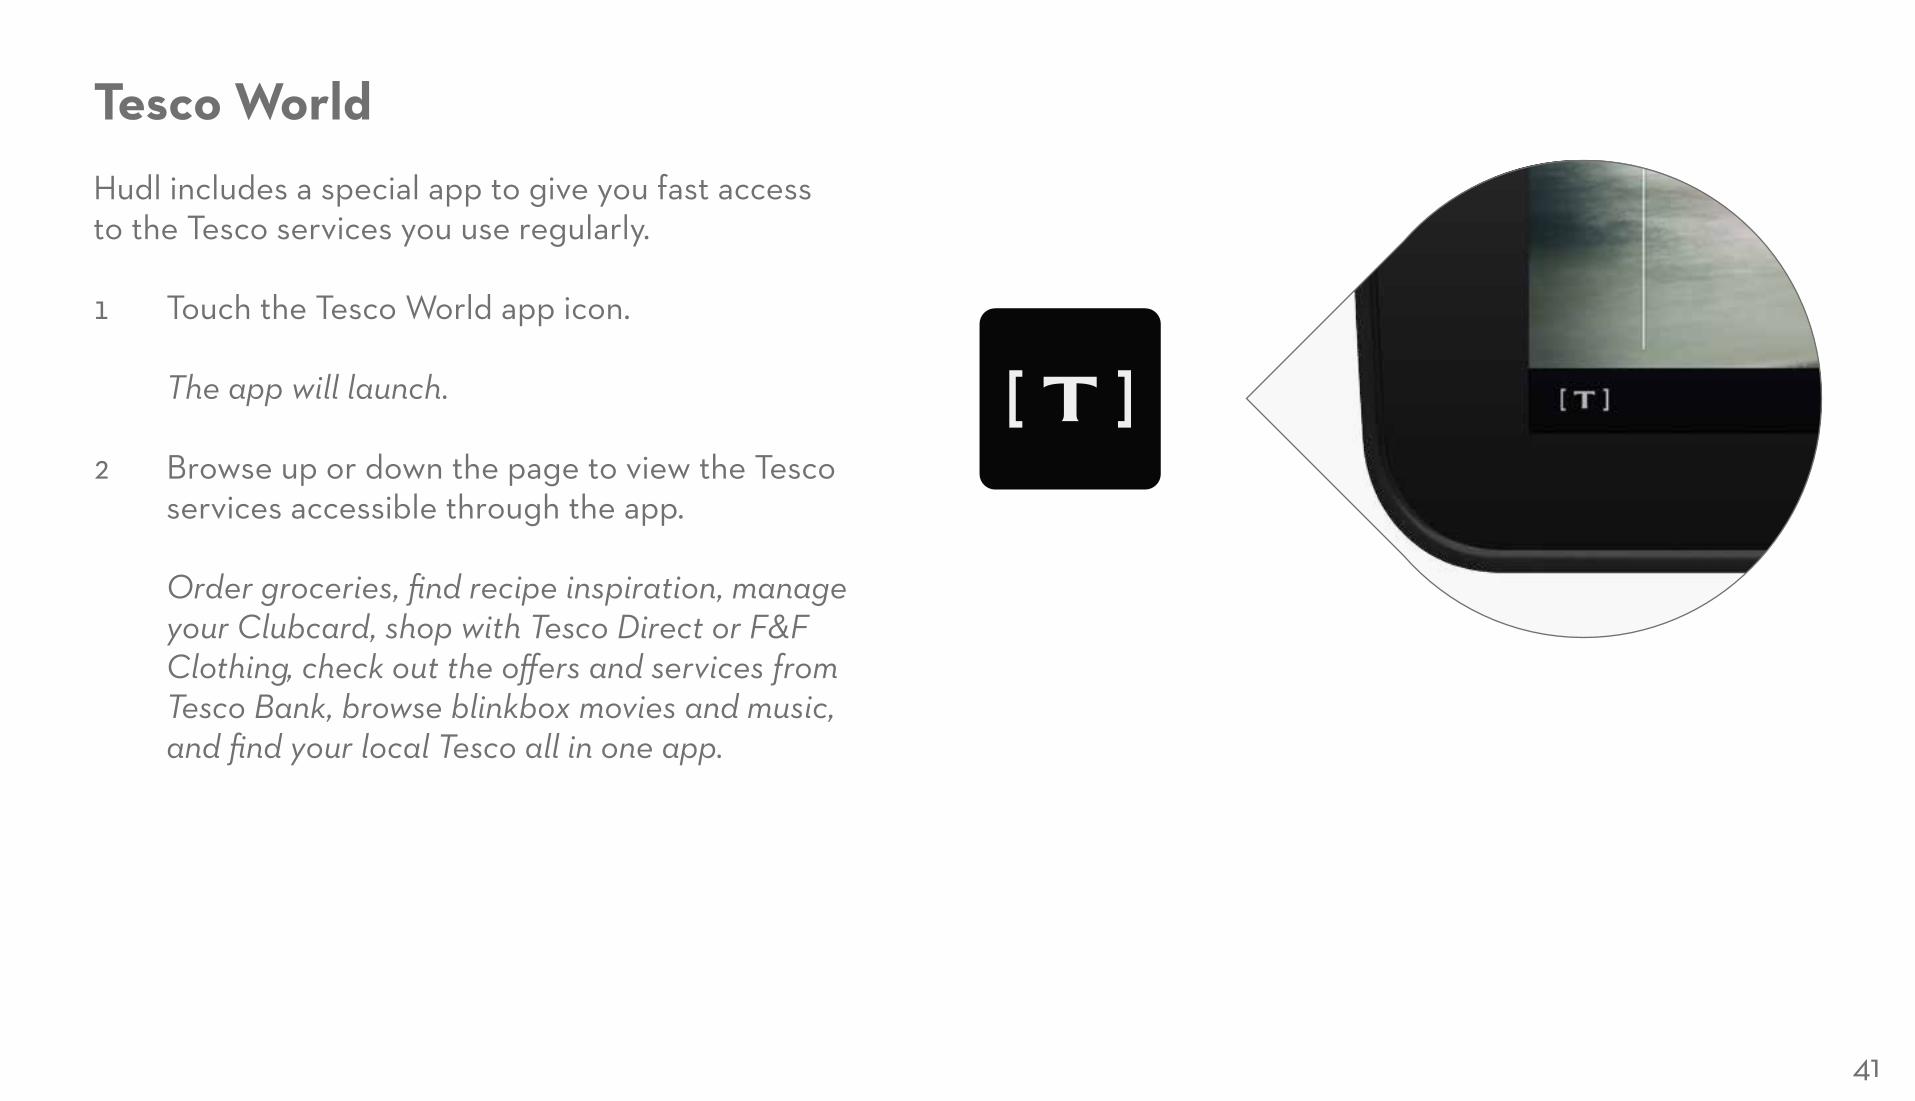
Tesco WorldHudl includes a special app to give you fast access to the Tesco services you use regularly.
1 Touch the Tesco World app icon. The app will launch.
2 Browse up or down the page to view the Tesco services accessible through the app. Order groceries, find recipe inspiration, manage your Clubcard, shop with Tesco Direct or F&F Clothing, check out the offers and services from Tesco Bank, browse blinkbox movies and music, and find your local Tesco all in one app.
41
42
Music, photos and videoYou can play compatible music files, browse digital photos and watch video files on your Hudl.
You can choose to buy music or movie files from an online store, you can transfer compatible files from your computer or you can dock a micro-SD card pre-loaded with files.
43
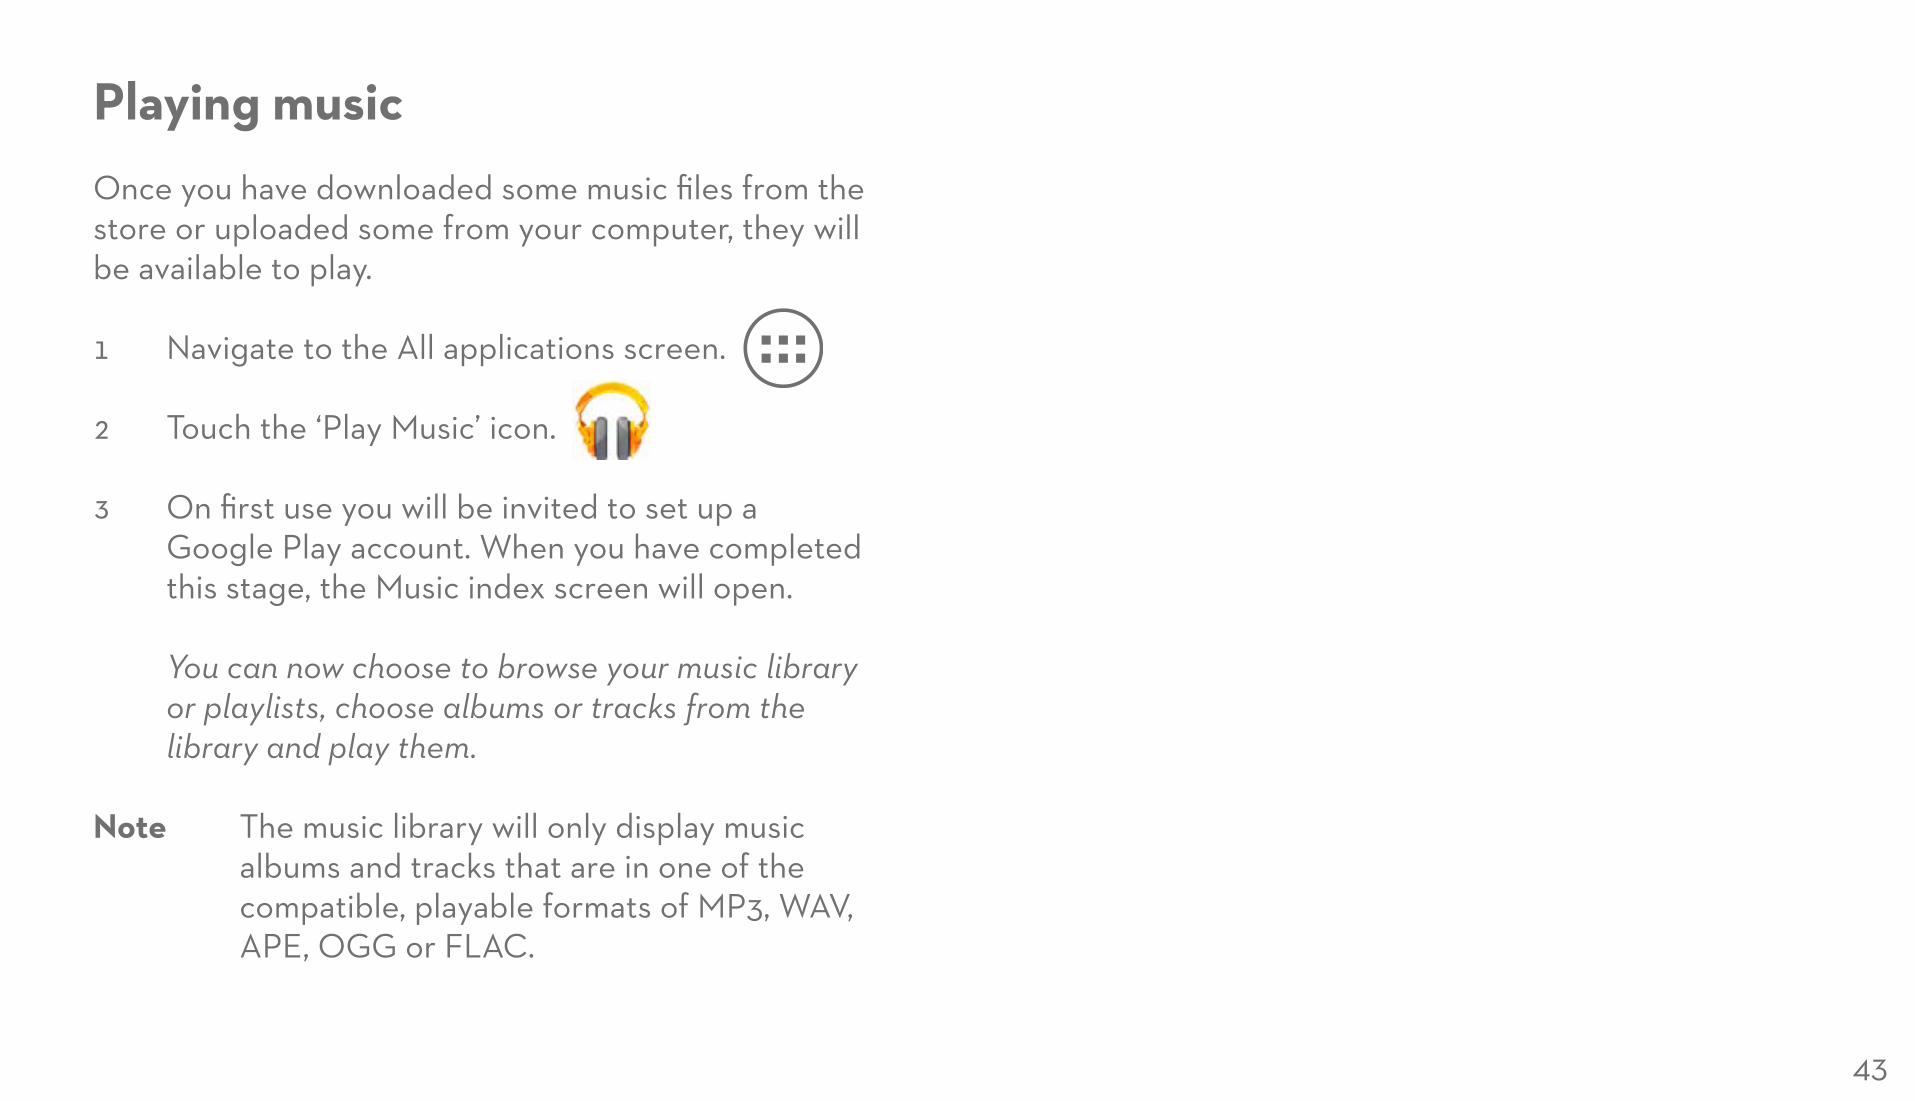
Playing musicOnce you have downloaded some music files from the store or uploaded some from your computer, they will be available to play.
1 Navigate to the All applications screen.
2 Touch the ‘Play Music’ icon.
3 On first use you will be invited to set up a Google Play account. When you have completed this stage, the Music index screen will open. You can now choose to browse your music library or playlists, choose albums or tracks from the library and play them.
Note The music library will only display music albums and tracks that are in one of the compatible, playable formats of MP3, WAV, APE, OGG or FLAC.
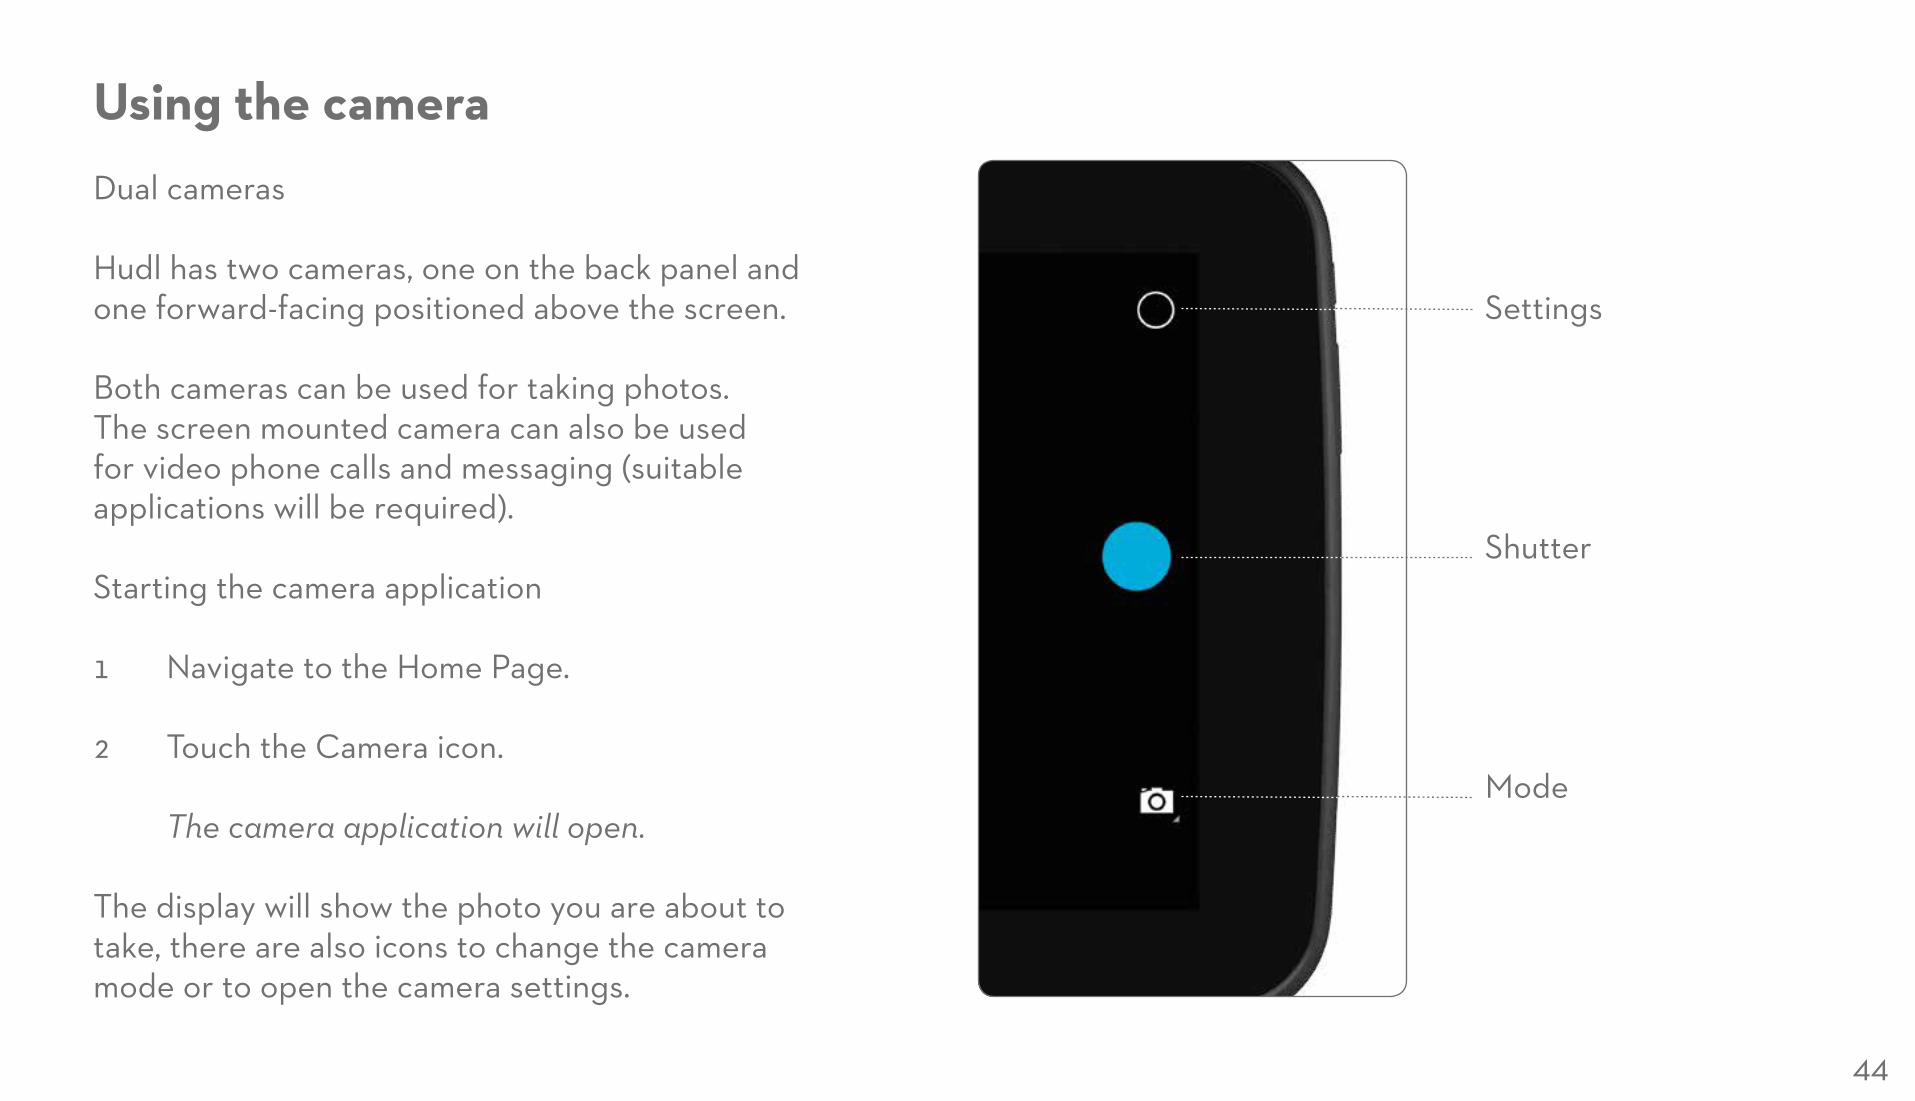
Using the cameraDual cameras
Hudl has two cameras, one on the back panel and one forward-facing positioned above the screen.
Both cameras can be used for taking photos. The screen mounted camera can also be used for video phone calls and messaging (suitable applications will be required).
Starting the camera application
1 Navigate to the Home Page.
2 Touch the Camera icon. The camera application will open.
The display will show the photo you are about to take, there are also icons to change the camera mode or to open the camera settings.
Settings
Shutter
Mode
44
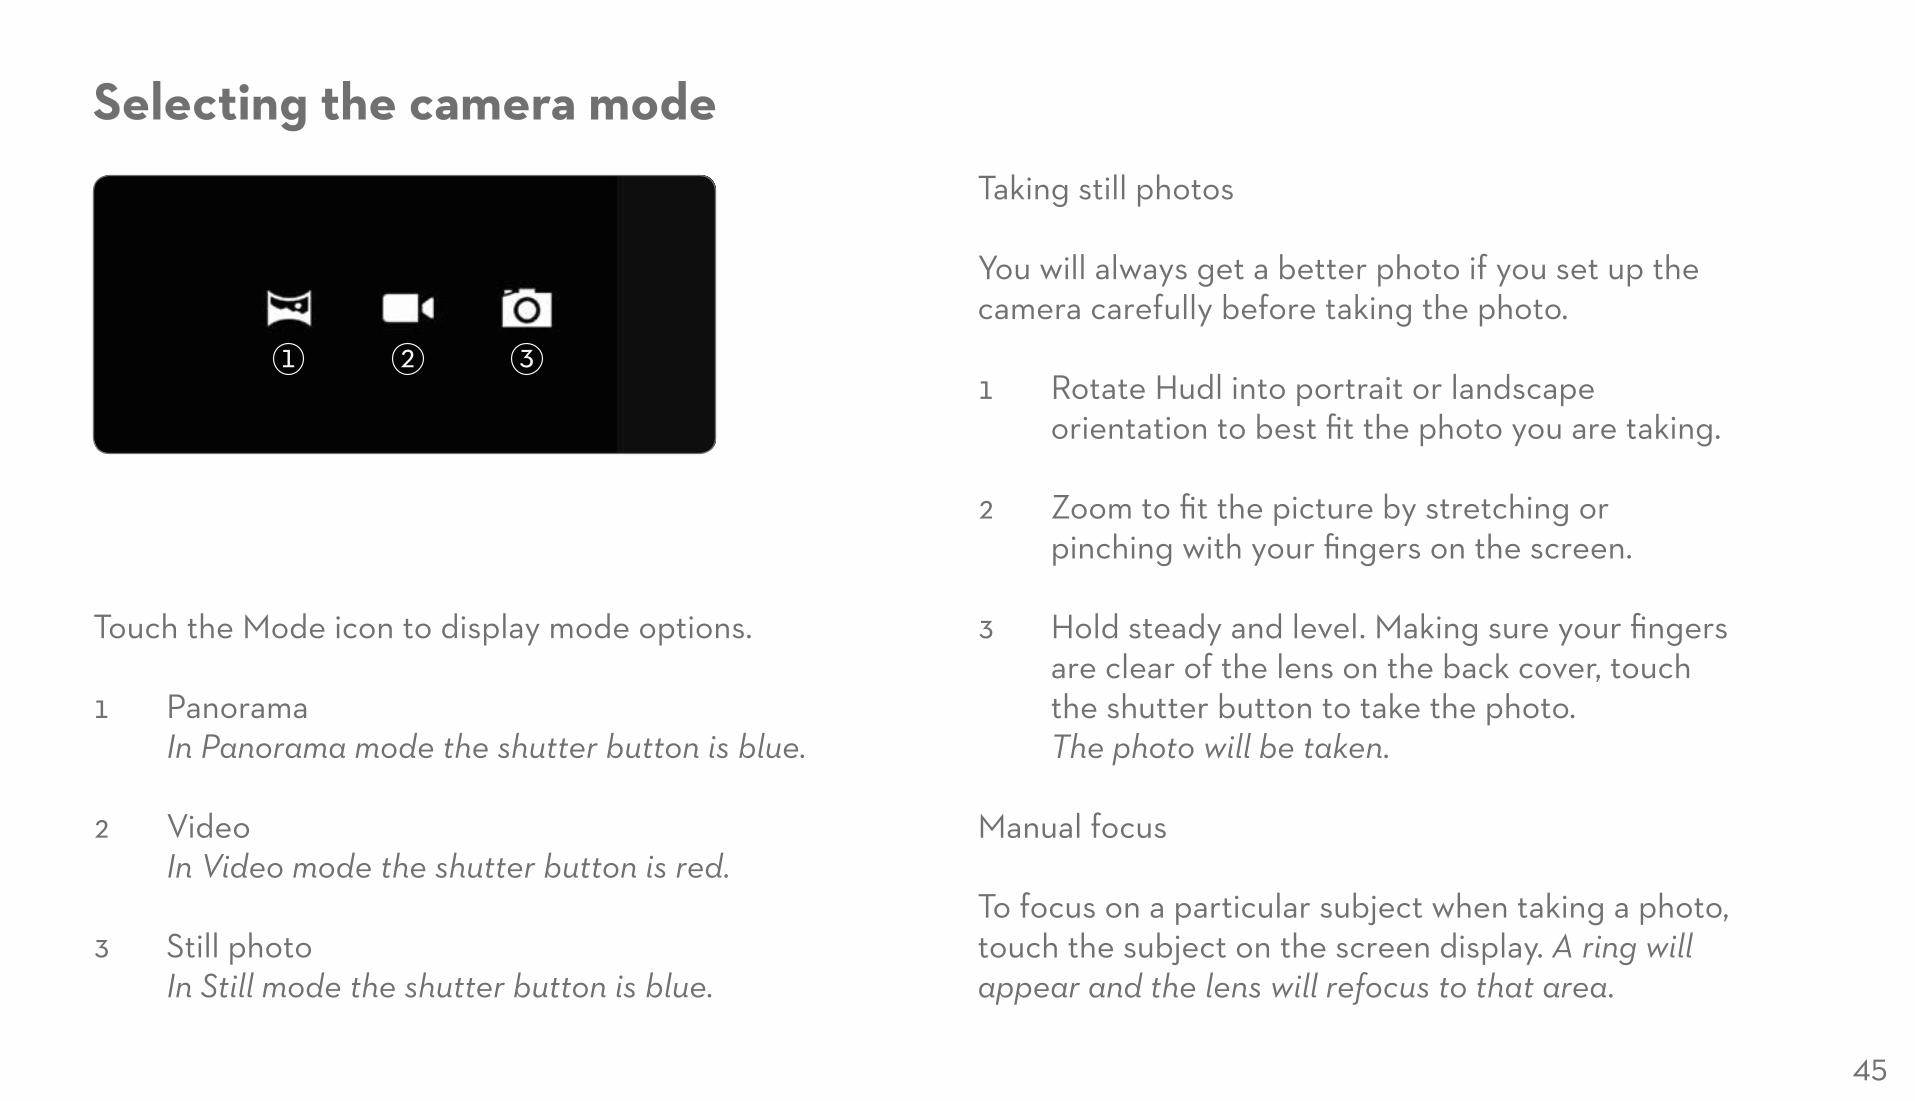
Selecting the camera mode
Touch the Mode icon to display mode options.
1 Panorama In Panorama mode the shutter button is blue.
2 Video In Video mode the shutter button is red.
3 Still photo In Still mode the shutter button is blue.
Taking still photos
You will always get a better photo if you set up the camera carefully before taking the photo.
1 Rotate Hudl into portrait or landscape orientation to best fit the photo you are taking.
2 Zoom to fit the picture by stretching or pinching with your fingers on the screen.
3 Hold steady and level. Making sure your fingers are clear of the lens on the back cover, touch the shutter button to take the photo. The photo will be taken.
Manual focus
To focus on a particular subject when taking a photo, touch the subject on the screen display. A ring will appear and the lens will refocus to that area.
45

Changing camera settingsTouch the Camera settings icon .
1 Camera Selector Touch the camera selector icon to switch from the back camera to the screen camera. The screen view will switch between cameras.
2 Exposure Touch the Exposure icon to change the exposure settings.
3 Settings Touch the Settings icon to choose a Storage location or to change the Picture size.
Note Choosing a larger picture size will increase the quality of your pictures. Choosing a smaller picture size will allow you to store more pictures on your Hudl or a docked micro-SD card.
4 White Balance Touch the White balance icon. The white balance options will be displayed. Choose from cloudy, sunny, automatic, indoor fluorescent or indoor tungsten bulb. Automatic is the recommended setting.
46
47
Using the cameraTaking a panorama photo
A Panorama photo will capture a very wide angle, allowing you to swing the camera slowly as the photo is composed.
Open the camera application.
2 Touch the Panorama mode icon.
3 Set the camera view at the left of the image you want to capture.
4 When you are ready to take the photo, press the shutter button.
5 Holding steadily at a constant height, watch the screen and rotate your position slowly and steadily to the right to capture the panorama.
Note If you move too quickly, a red border will appear around the screen with the legend ‘too fast’. Adjust your speed accordingly. The panorama indicator will show when the full panorama has been captured.
48
Using the cameraMaking a video
1 Open the camera application.
2 Set to Video mode. The shutter button will change to red.
3 Zoom to fit the picture by stretching or pinching with your fingers on the screen.
4 Hold steady and level. Making sure your fingers are clear of the lens on the back cover, touch the shutter button to start recording. Video and sound will start recording.
5 Touch the shutter button again to stop recording.
You can also change settings for videos.
The Camera selector and White balance settings are set in the same way as a still photo.
— Touch the Settings icon to choose a Storage location or to set up time lapse recording.
Time-lapse recording
If time-lapse recording is set, the camera will repeatedly take a still photo at a time interval that you choose.
1 From Settings, set the time-lapse option to
2 Now select a time interval for your time-lapse.
3 When you are ready to go, touch the shutter. Photos will be taken at the interval you set.
49
Viewing your photos and videosYou can use the Gallery app to watch photos and videos filmed with the camera or copied from your computer.
1 Touch the ‘Gallery’ icon. The Gallery screen will open. The screen will show you albums available including photos and videos taken by the built-in camera, those in the internal memory and those on a micro-SD card (when fitted).
2 Touch an album to browse photos and videos stored in the album.
3 The photos will be displayed as a screen of thumbnails. If there are several screens of thumbnails you can slide them across to browse them. Videos will be identified by a Play icon in the centre of the image.
Viewing photos or videos full-screen
— Touch a thumbnail to view a photo or video full-screen. You can browse the photos or videos in the album by sliding them to the left or right.
Playing a video
— Press the Play icon in the centre of the image to start a video playing.
50
Viewing your photos and videosPhoto toolbar
— Touch a full-screen photo or video to reveal a toolbar at the top of the screen and a hot-link photo edit icon at bottom left.
Sharing photos and videos
— Touch the share icon in the toolbar to share this photo or video with friends. From the share pane you can choose to email the photo/video or to share it via social networking.
Additional options
— Touch the settings icon in the toolbar to see additional options. From the drop-down menu you can delete a photo, start a slideshow, edit a photo, rotate a photo on-screen or crop a photo.
Some additional options are also available for videos.
51
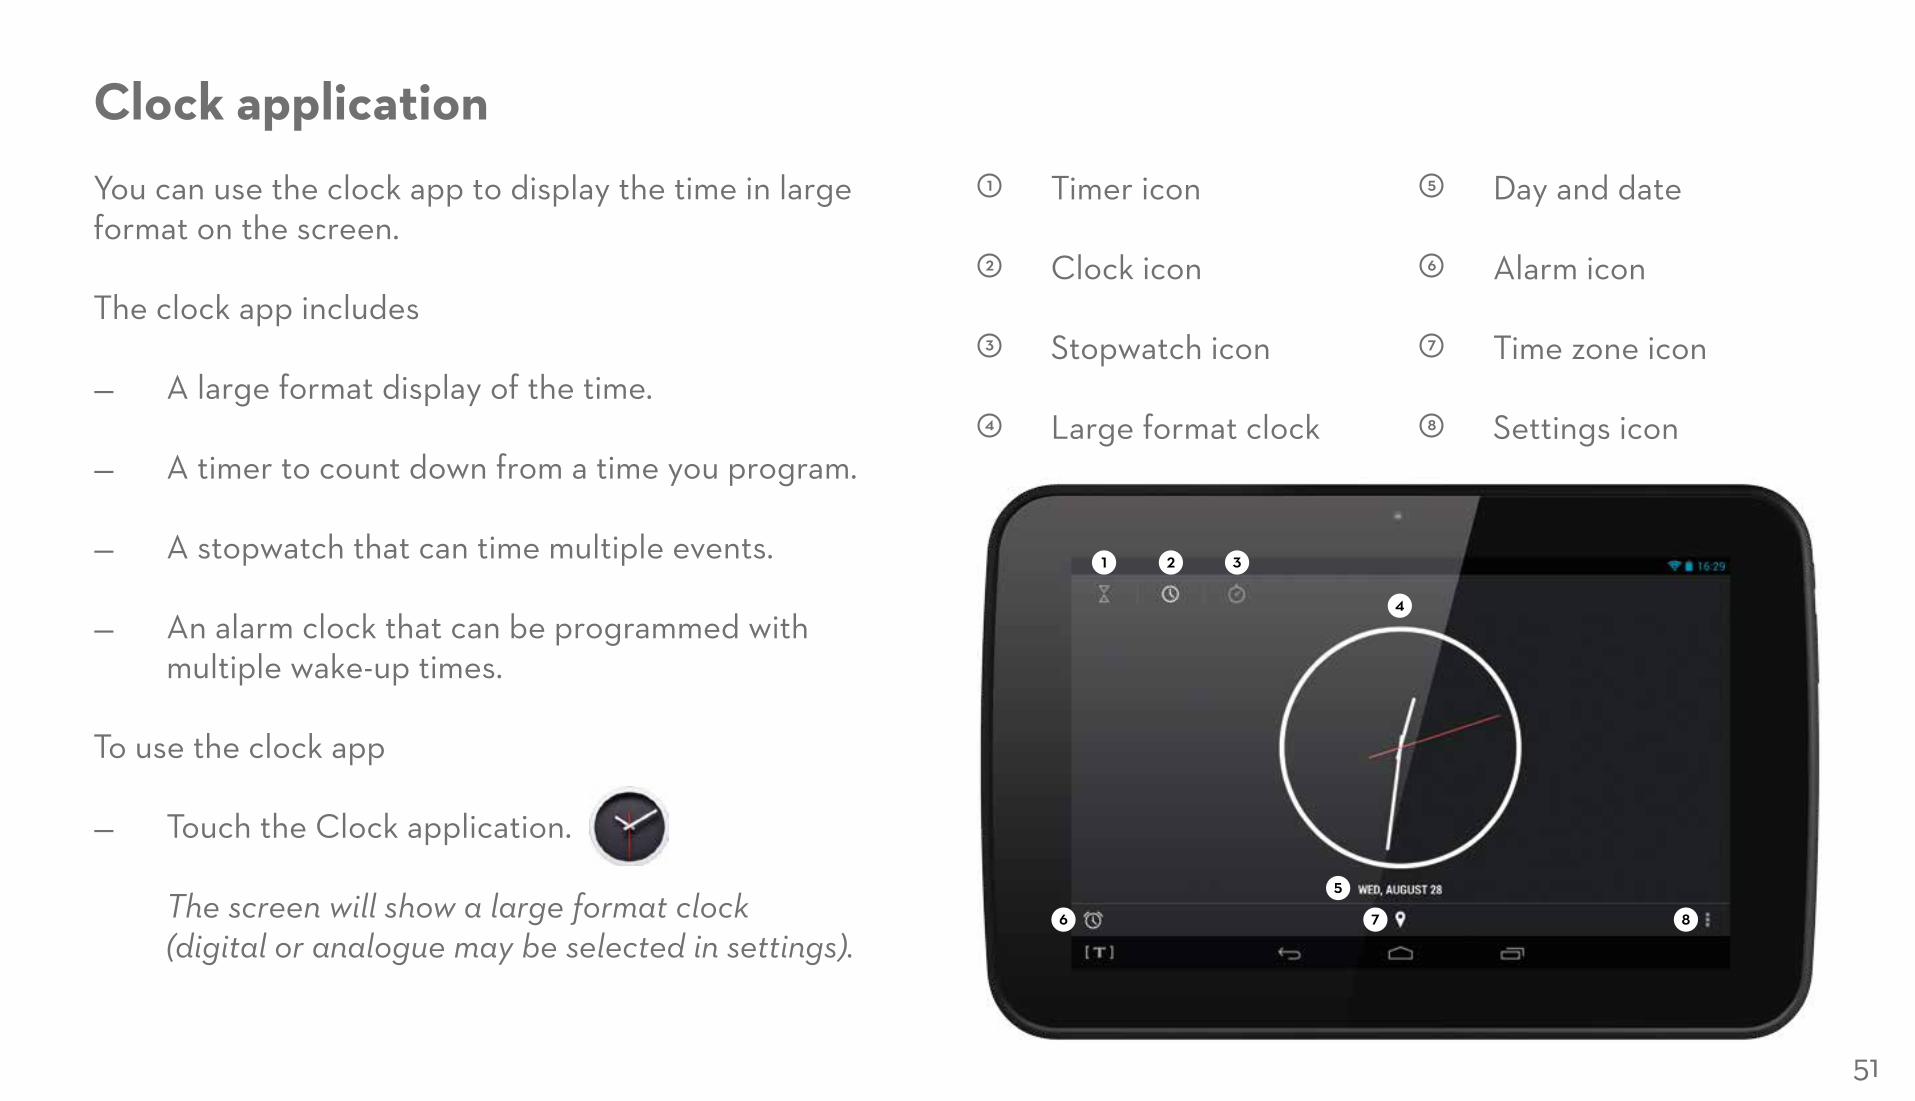
Clock applicationYou can use the clock app to display the time in large format on the screen.
The clock app includes
— A large format display of the time.
— A timer to count down from a time you program.
— A stopwatch that can time multiple events.
— An alarm clock that can be programmed with multiple wake-up times.
To use the clock app
— Touch the Clock application. The screen will show a large format clock (digital or analogue may be selected in settings).
Timer icon
Clock icon
Stopwatch icon
Large format clock
Day and date
Alarm icon
Time zone icon
Settings icon
1 5
2 6
3 7
4 8
1
6
2
7
3
8
4
5
52
Clock applicationClock application during sleep
The clock application will continue to run whilst Hudl sleeps.
When your Hudl is battery powered, the display will switch off and conserve battery life. If the charger is connected, the display will stay lit so you can continue to see the clock display.
Clock application settings
You can personalise the appearance and other settings for the clock application.
— Touch to customise your clock settings. The clock settings screen will open. Choose from digital or analogue clock displays, set your time zone and set up the alarm to your preferences.
53
Clock applicationUsing the timer
1 Touch the Timer icon on the clock display.
2 Enter the time you want with the numeric keys that are displayed.
3 Touch START to start the timer. The timer will start to countdown. When the time has elapsed, the alarm will beep to alert you.
Using the Stopwatch
1 Touch the Stopwatch icon on the clock display.
2 Touch START to start the stopwatch. The stopwatch will start.
3 Touch STOP at any time to stop the stopwatch. The stopwatch will pause.
4 Touch START again if you want to re-start the stopwatch.
Multiple stopwatch events:
— Touch the Event icon to stop the stopwatch and begin timing a second event. The time for the first event will be displayed, and the timer will begin to time the second event immediately.

54
Exit the alarm screen
Alarm 1 time
Alarm 2 time
New alarm time
Activate alarm
Expand alarm settings
1 4
2 5
3 6
1
52
3
4
6
Clock applicationUsing the alarms
1 Launch the clock application.
2 Touch the alarm icon on the clock display. The Alarms pane will open. Alarms that are currently set will be displayed.
In the example shown there are two alarms set.
The alarms will still sound if you are using other applications on your Hudl, so you can use the alarm to remind you of appointments, meetings etc. while you are working.
55
Clock applicationAdding an alarm setting
1 Touch the New alarm icon to add another alarm setting. A number pad will be displayed.
2 Enter the alarm time using the number pad.
3 Touch OK when you’re ready. The expanded alarm settings will be displayed.
4 Touch Label to type in a name for this alarm.
5 Touch REPEAT to set when you want the alarm to sound. The default is every day. You can touch days to remove them from the repeat list.
6 Touch the Alarm tone icon to choose a tone for this alarm.
7 Touch to close the detail view for this alarm when you have finished.
56
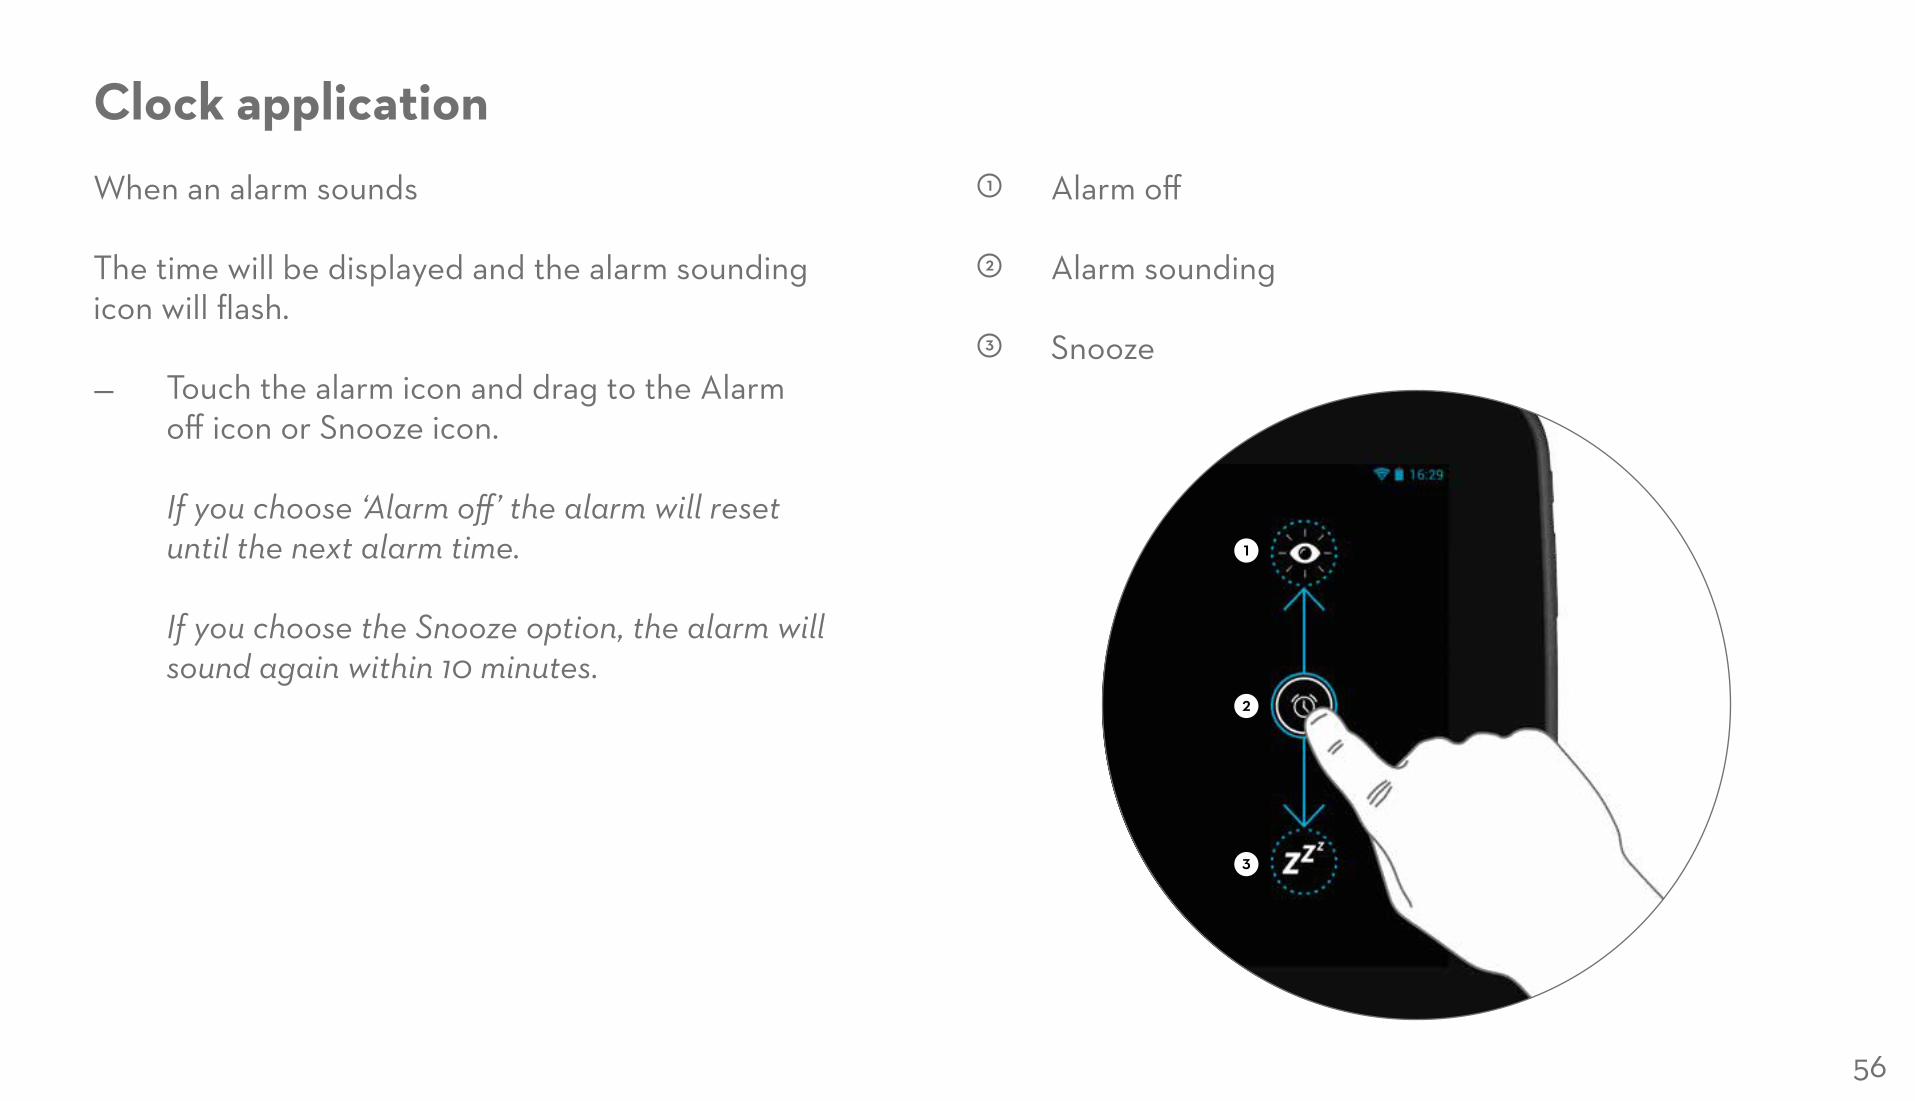
Clock applicationWhen an alarm sounds
The time will be displayed and the alarm sounding icon will flash.
— Touch the alarm icon and drag to the Alarm off icon or Snooze icon. If you choose ‘Alarm off’ the alarm will reset until the next alarm time. If you choose the Snooze option, the alarm will sound again within 10 minutes.
Alarm off
Alarm sounding
Snooze
1
2
3
1
2
3
57
Backing up your dataData loss
Your data may be valuable to you. Always keep a backup copy of critical data such as photos, videos and documents.
You can back up your data using an online cloud-based service or by periodically copying critical files to your computer.
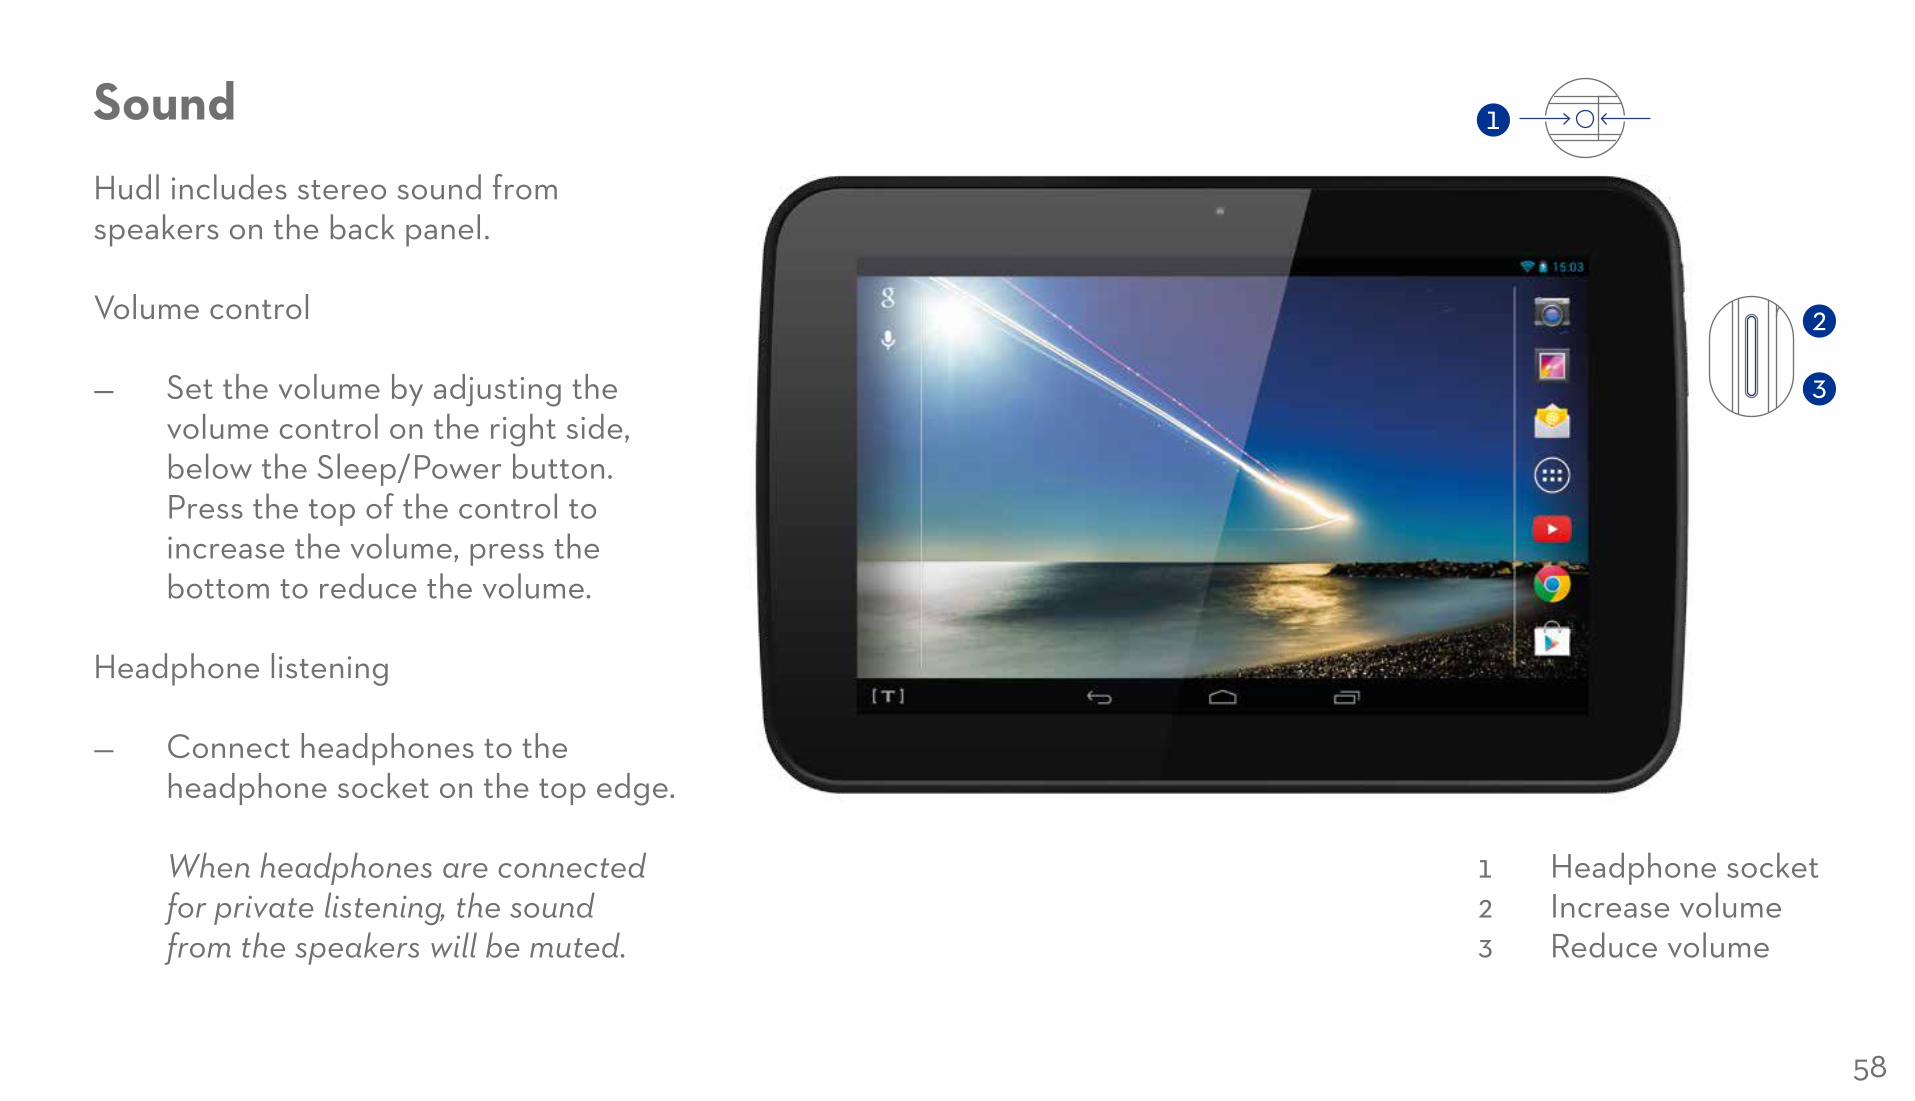
SoundHudl includes stereo sound from speakers on the back panel.
Volume control
— Set the volume by adjusting the volume control on the right side, below the Sleep/Power button. Press the top of the control to increase the volume, press the bottom to reduce the volume.
Headphone listening
— Connect headphones to the headphone socket on the top edge.
When headphones are connected for private listening, the sound from the speakers will be muted.
1
2
3
1 Headphone socket 2 Increase volume 3 Reduce volume
58
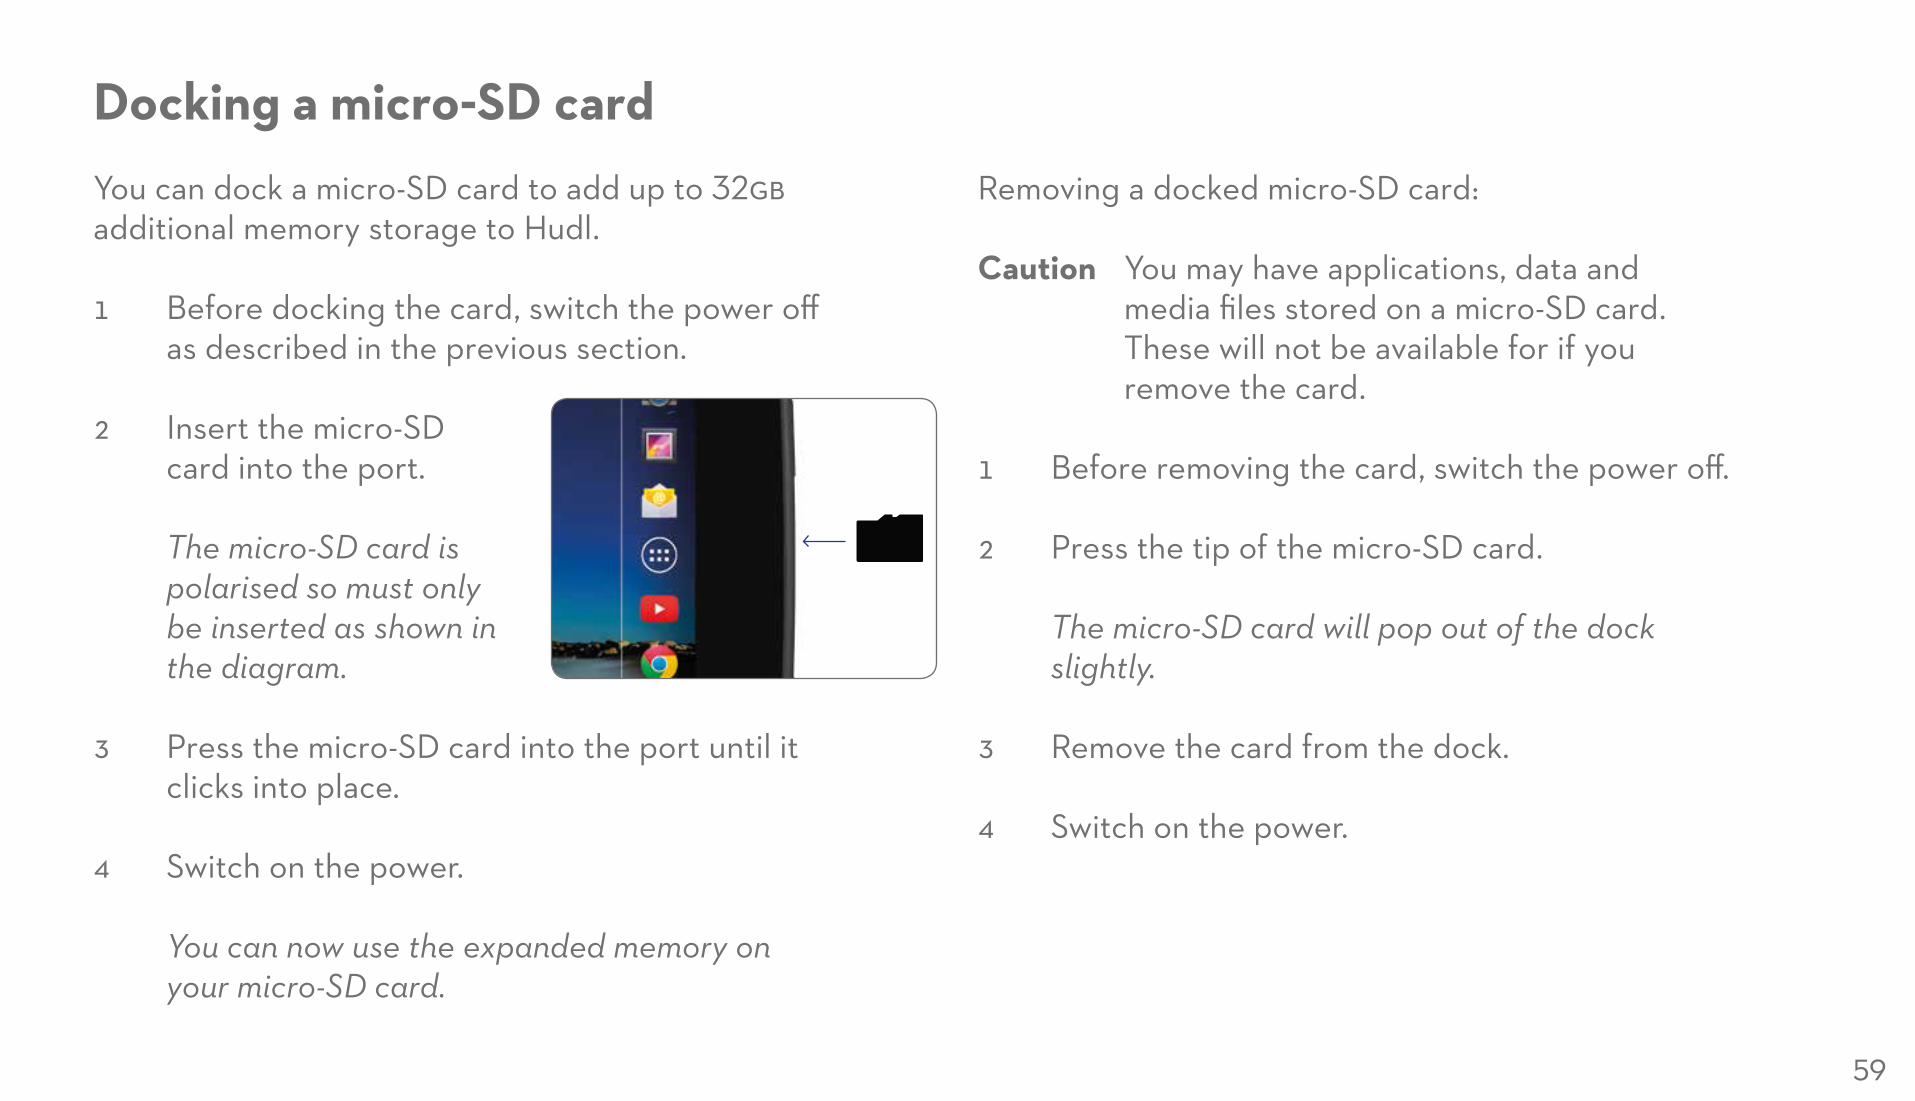
Docking a micro-SD cardYou can dock a micro-SD card to add up to 32gb additional memory storage to Hudl.
1 Before docking the card, switch the power off as described in the previous section.
2 Insert the micro-SD card into the port. The micro-SD card is polarised so must only be inserted as shown in the diagram.
3 Press the micro-SD card into the port until it clicks into place.
4 Switch on the power.
You can now use the expanded memory on your micro-SD card.
Removing a docked micro-SD card:
Caution You may have applications, data and media files stored on a micro-SD card. These will not be available for if you remove the card.
1 Before removing the card, switch the power off.
2 Press the tip of the micro-SD card.
The micro-SD card will pop out of the dock slightly.
3 Remove the card from the dock.
4 Switch on the power.
59
60
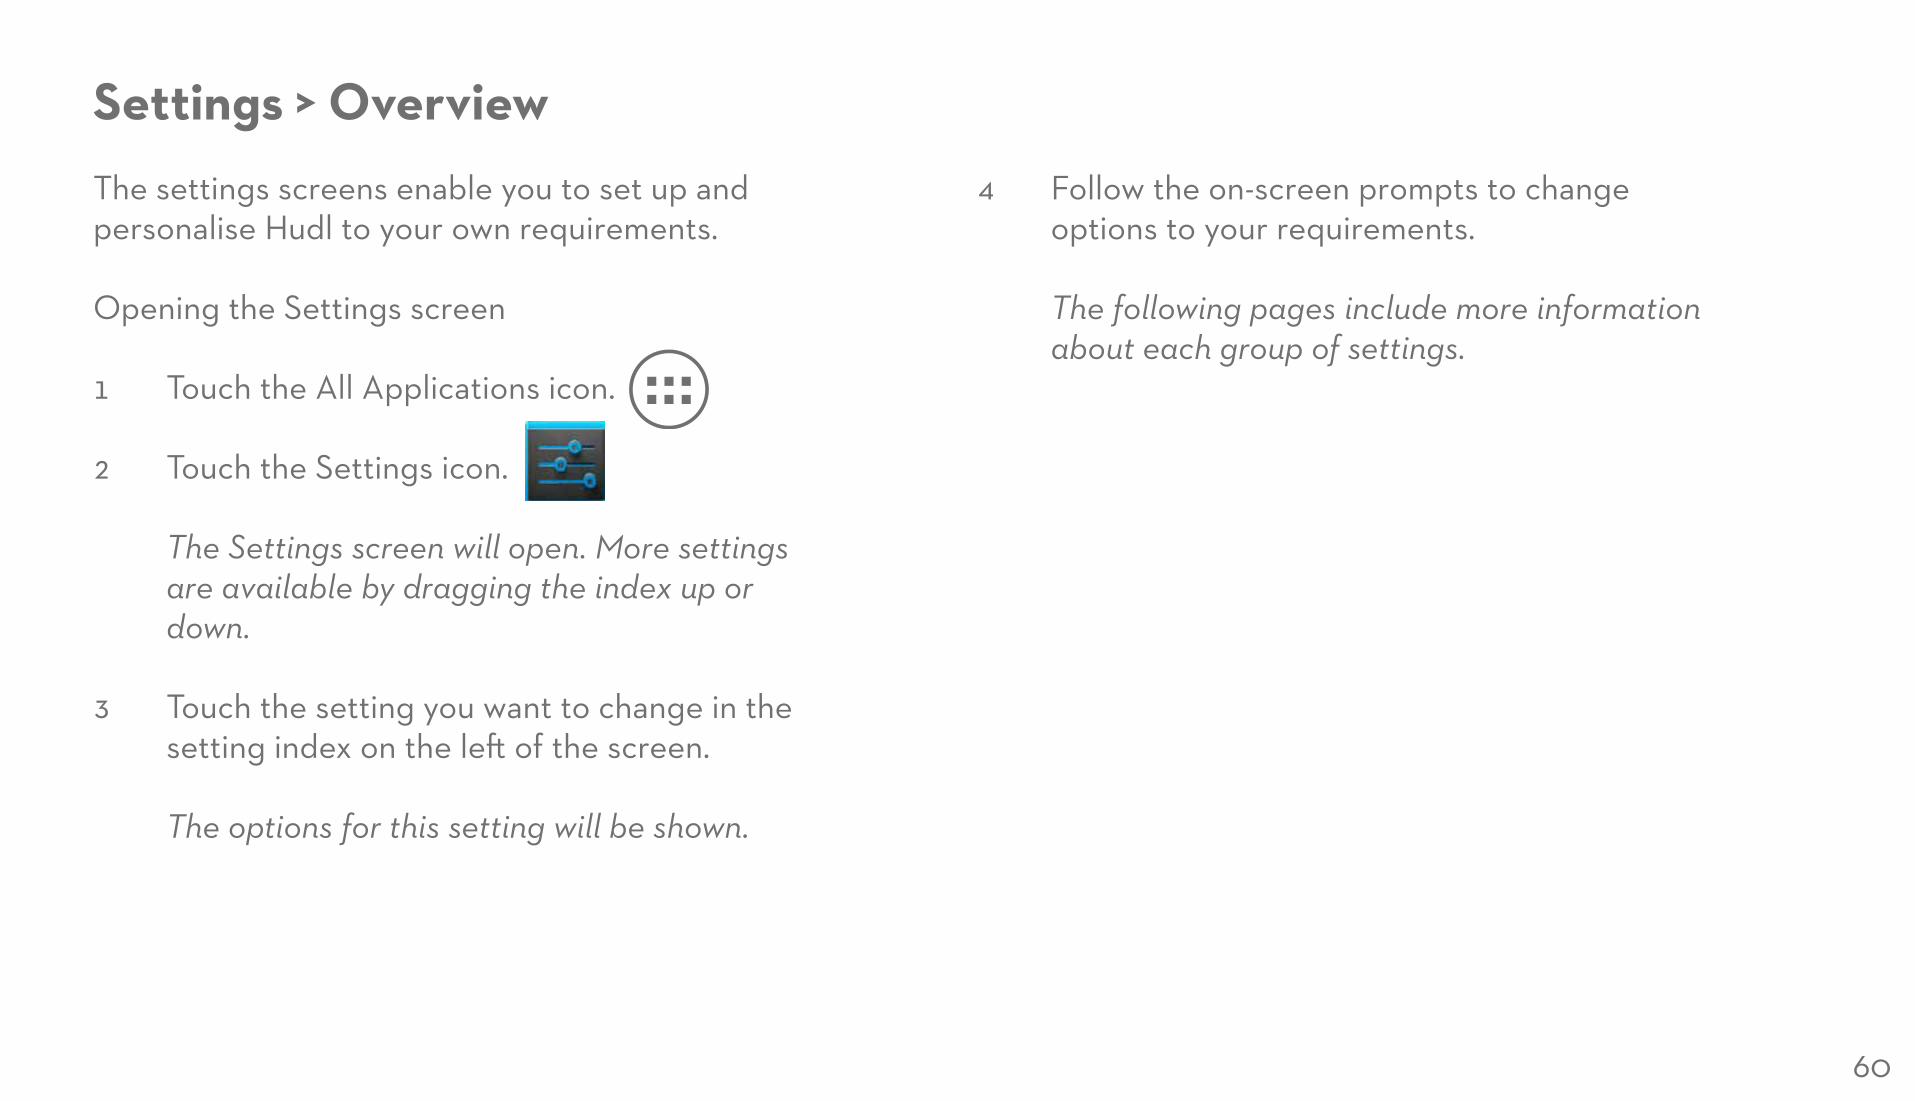
Settings > OverviewThe settings screens enable you to set up and personalise Hudl to your own requirements.
Opening the Settings screen
1 Touch the All Applications icon.
2 Touch the Settings icon. The Settings screen will open. More settings are available by dragging the index up or down.
3 Touch the setting you want to change in the setting index on the left of the screen. The options for this setting will be shown.
4 Follow the on-screen prompts to change options to your requirements. The following pages include more information about each group of settings.
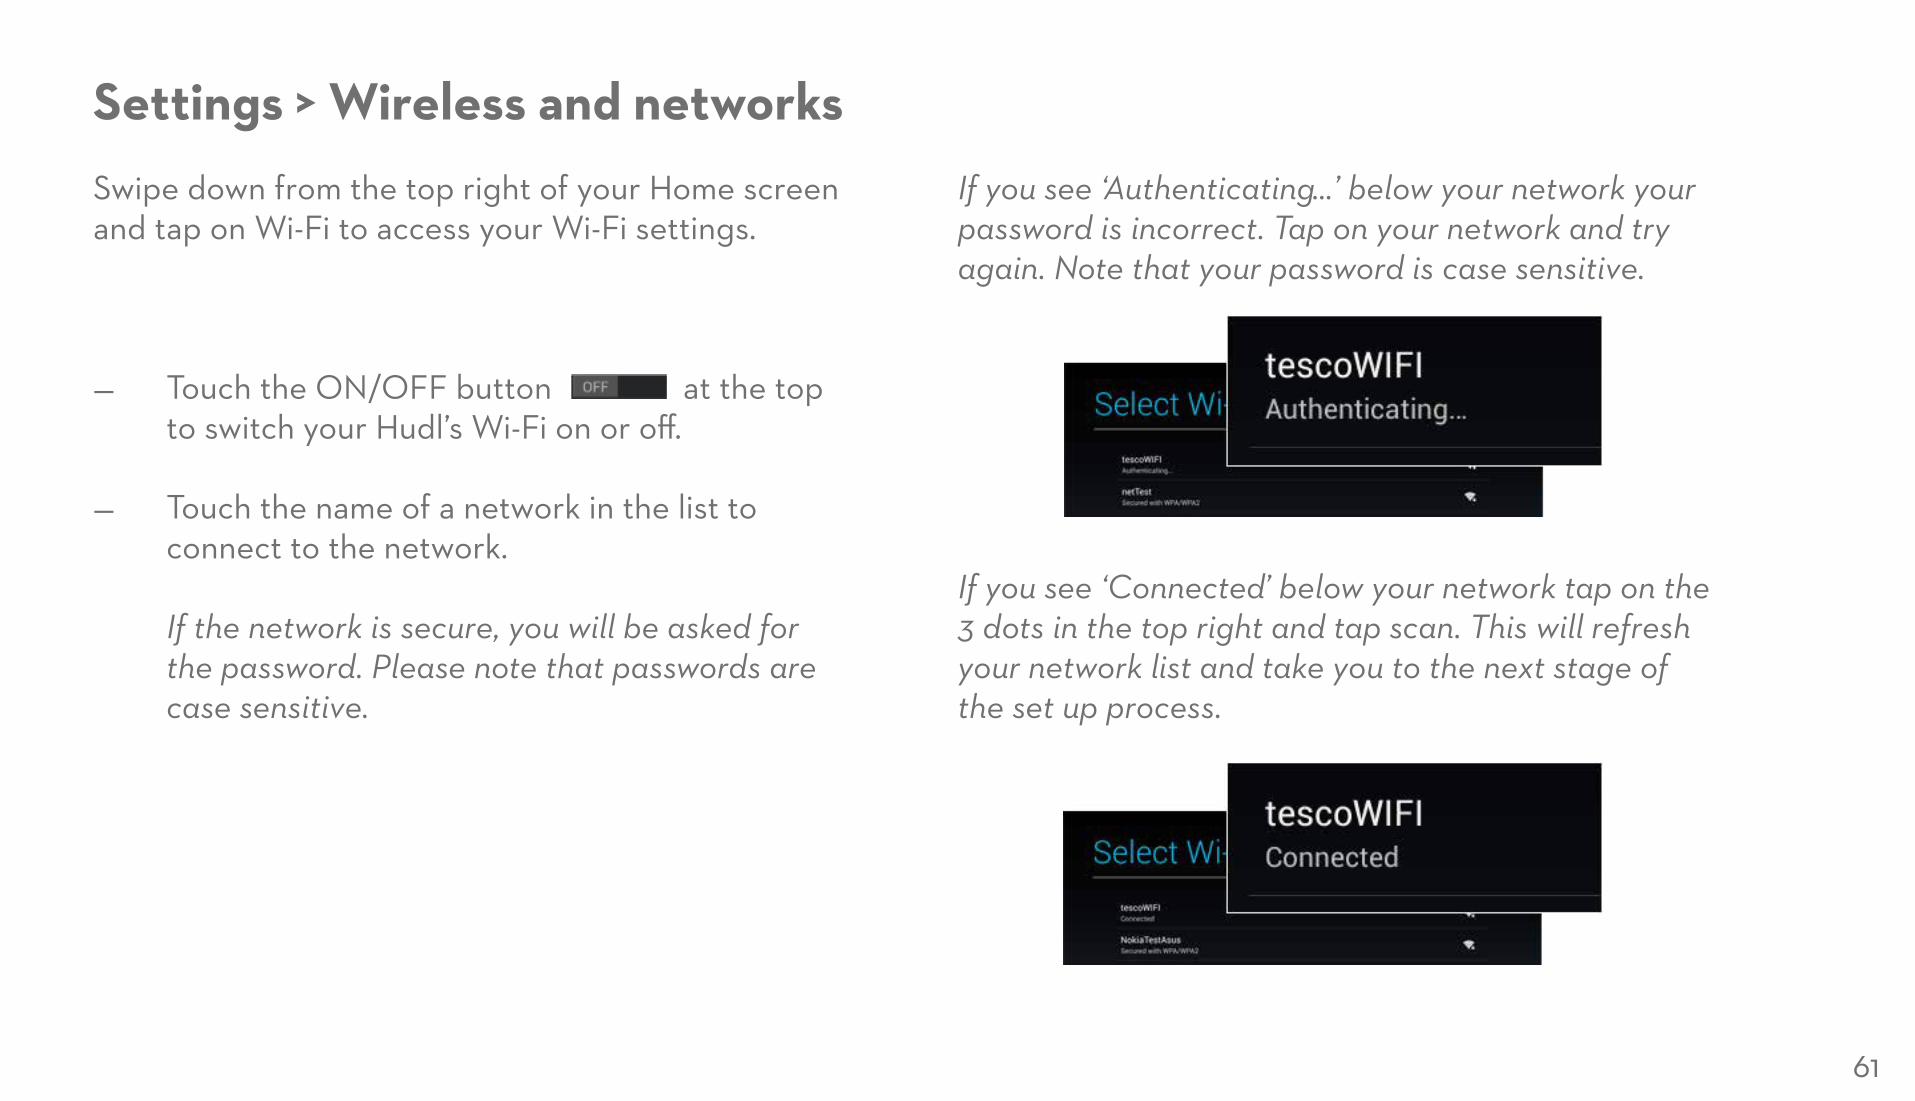
If you see ‘Authenticating...’ below your network your password is incorrect. Tap on your network and try again. Note that your password is case sensitive.
If you see ‘Connected’ below your network tap on the 3 dots in the top right and tap scan. This will refresh your network list and take you to the next stage of the set up process.
61
Settings > Wireless and networksSwipe down from the top right of your Home screen and tap on Wi-Fi to access your Wi-Fi settings.
— Touch the ON/OFF button at the top to switch your Hudl’s Wi-Fi on or off.
— Touch the name of a network in the list to connect to the network. If the network is secure, you will be asked for the password. Please note that passwords are case sensitive.
62
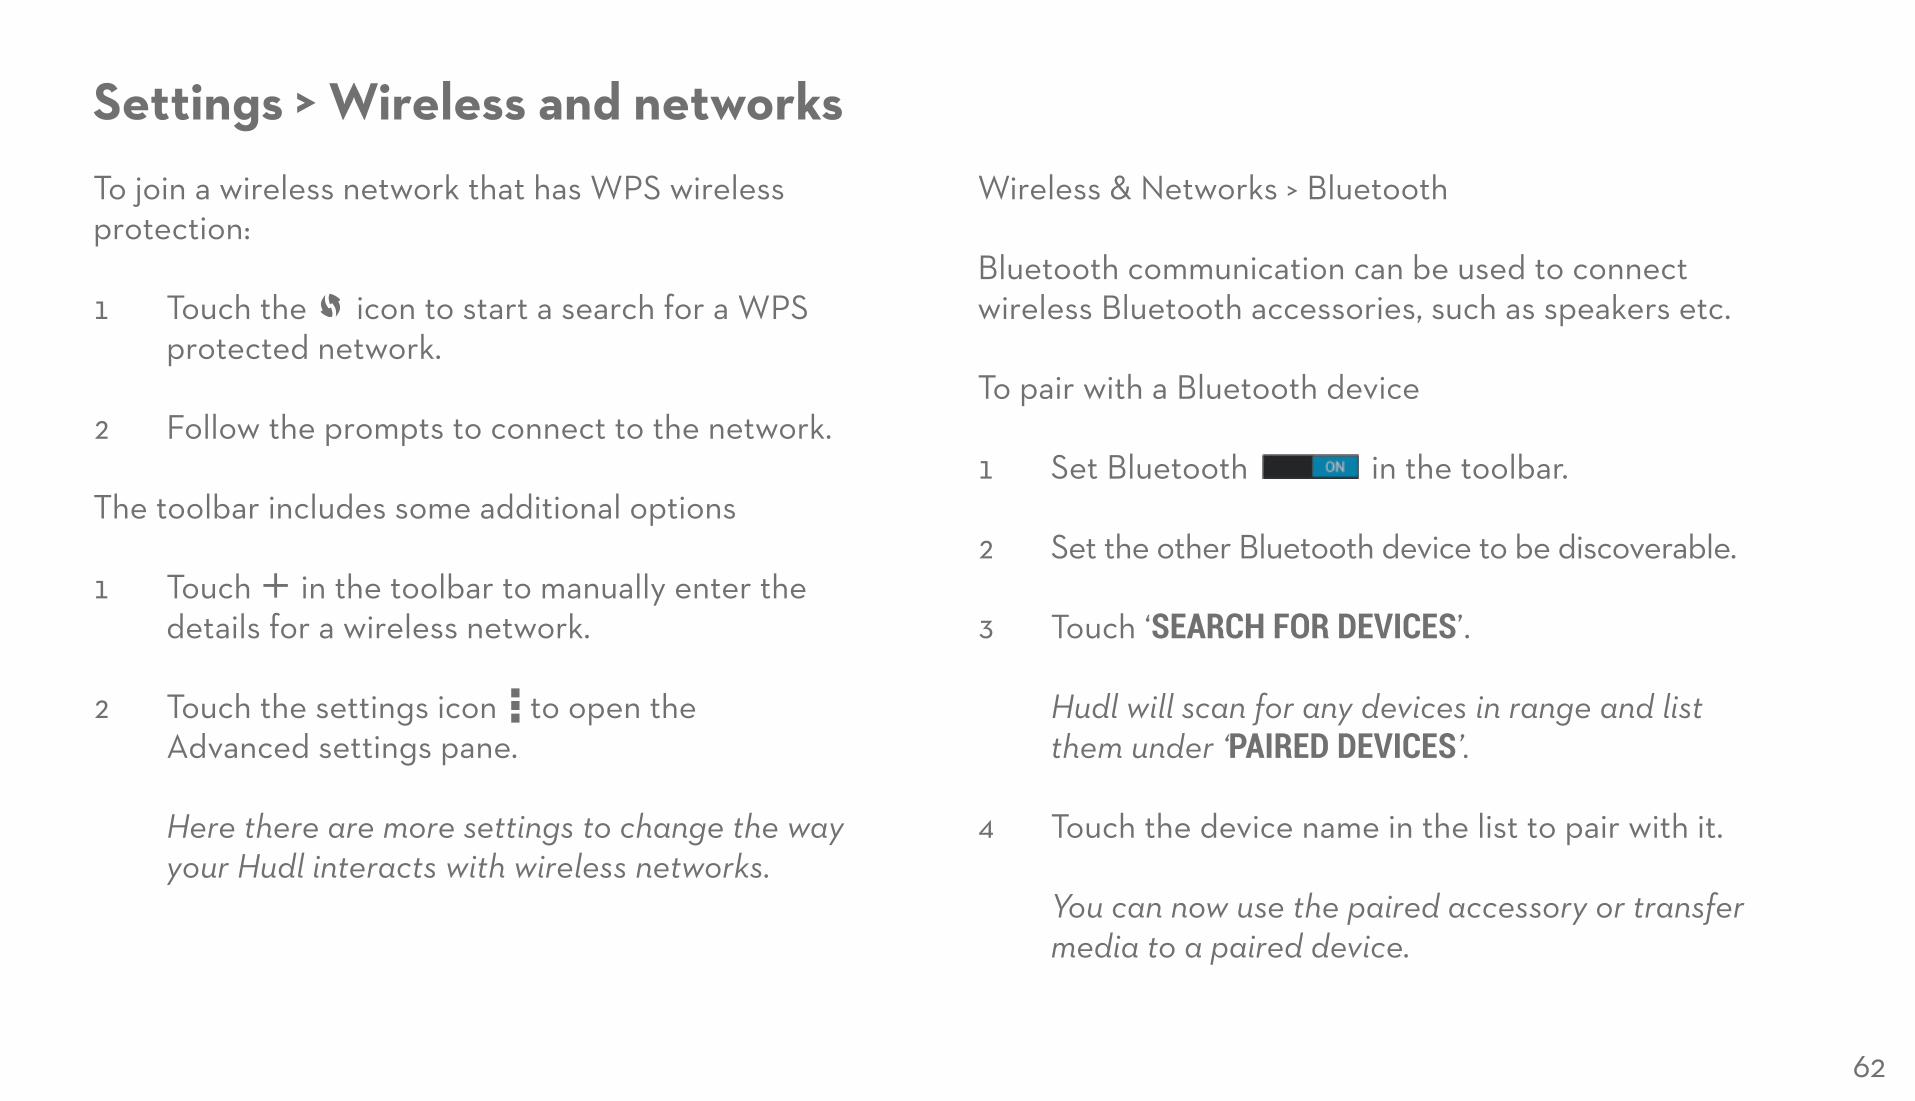
Settings > Wireless and networksWireless & Networks > Bluetooth
Bluetooth communication can be used to connect wireless Bluetooth accessories, such as speakers etc.
To pair with a Bluetooth device
1 Set Bluetooth in the toolbar.
2 Set the other Bluetooth device to be discoverable.
3 Touch ‘SEARCH FOR DEVICES’. Hudl will scan for any devices in range and list them under ‘PAIRED DEVICES’.
4 Touch the device name in the list to pair with it. You can now use the paired accessory or transfer media to a paired device.
To join a wireless network that has WPS wireless protection:
1 Touch the icon to start a search for a WPS protected network.
2 Follow the prompts to connect to the network.
The toolbar includes some additional options
1 Touch in the toolbar to manually enter the details for a wireless network.
2 Touch the settings icon to open the Advanced settings pane. Here there are more settings to change the way your Hudl interacts with wireless networks.
63
Device settings > DeviceDevice > Sound
Touch this option to set up sound volumes and to enable/ disable system sounds.
Device > Display
— Touch this option to change the display settings. On this screen you can set the brightness, change the background wallpaper, set the auto-sleep time or change the default font size. You can also enable connectivity for a wireless display.
Device > HDMI
— Touch this option to change the settings for a connected HDMI TV or monitor. These settings will not affect the main display.
Device > Storage
— Touch to view a breakdown of the usage of internal memory and a docked micro-SD card (when fitted). DEVICE > Storage > SD CARD > Unmount SD card
— Navigate to this option if you want to remove the SD card. Once the card has been unmounted you can safely remove it.
Device > Battery
— Touch to see the charge status of the battery. An estimate of battery life remaining and an illustration of battery usage are also displayed.
— Touch one of the items to view detail.
64
Settings > DeviceDevice > Apps
— Touch this option to view a breakdown of the Applications installed, and the memory space that they occupy. Touch one of the apps to see more information about the app and also any settings that may be changed.
Device > Users
— Touch to view a list of registered users.
— Touch ADD USER to add a new user. Each user can personalise their apps, wallpaper and data. If multiple users are set, you can choose your user name as you switch on.

65
Settings > PersonalPersonal > Location Access
— Touch this option to enable or disable notification of your location to Google. Location details are used in navigation apps or to improve search results and other services that depend on location.
Personal > Security
This section of settings enables you to set your security preferences.
Personal > Security > Screen Security
— Touch this tab to enable/disable a security method that will be needed to unlock the screen when switched on. You can choose your method of security and enter the details.
Caution Don’t forget to make a note of the security you put in place!
Personal > Language & Input
— Touch this tab to change language, spelling and keyboard options. You can also enable/disable speech-to-text.
66
Settings > PersonalPersonal > Backup & Reset
— Touch this tab to change options for backup and restore of your application data, also to erase all personal data.
Personal > Backup & Reset > Backup & Restore
If you check the Back up my data option, your application data, Wi-Fi passwords and settings will be backed up to Google’s servers.
You can also choose to restore application data.
Personal > Backup & Reset > Personal Data
— Touch the Factory data reset tab to erase all data from the internal memory. This will include: Google accounts, System and app data and settings, downloaded apps, music and photos.
Caution This operation cannot be undone.
67
Settings > AccountsAccounts > Email
— Touch this tab to change settings for the email accounts you use.
Accounts > Google
— Touch this tab to change settings for the Google accounts you use.
Accounts > + Add Account
— Touch this tab to create a new account. The next pane will enable you to choose the type of account you want to set up.
— Follow the screen prompts to set up the account of your choice.

68
Settings > SystemSystem > Date & Time
— Touch this tab to set the time or to choose manual time setting and set the clock.
System > Accessibility
— Touch this tab to personalise accessibility settings to make Hudl easier to use.
System > About Tablet
— Touch to open a screen which will display information about the hardware and firmware. From this screen you can also check for firmware updates.
69
Connecting accessoriesHDMI display port. You can connect a TV or display monitor to the HDMI port.
You will need a cable (not supplied), terminated with a micro-HDMI connector at one end and a connector suitable for your TV at the other.
1 Connect the micro-HDMI cable to the port on the top of Hudl.
2 Connect the other end of the cable to the TV/monitor. The TV/Monitor should auto-select the signal from Hudl and switch to display the screen content. If not, you will need to select the correct input manually.
Caution To avoid damage and tripping, take care to keep the HDMI cable away from walkways, children and pets when the cable is connected.
HDMI settings
If necessary, you can customise the HDMI settings to best match your TV. Refer to Device Settings > Device > HDMI on page 68 for more information.
Bluetooth accessories
You can also connect compatible Bluetooth accessories such as speakers, keyboards and mice.
1 Check that the accessory is suitable for use with an Android tablet. You will need to pair the accessory with Hudl before using it.
2 Refer to Device Settings > Wireless & Networks > Bluetooth on page 74 for more information about Bluetooth pairing.
70
HudlHelp with
common issues
71
1 My Hudl was connected to Wi-Fi, but no longer seems to connect
2 My Hudl is connected to Wi-Fi but I can’t seem to access the Internet
3 My Hudl keeps losing its Wi-Fi connection
4 I can’t connect my Hudl to a BT Wi-Fi router
5 My Hudl’s screen is freezing from time to time
6 My Hudl doesn’t seem to be responding
7 I’m having trouble with some of the apps on my Hudl
8 I want to make sure that my Hudl has the latest software
9 I can’t access the files I have stored on my micro-SD card
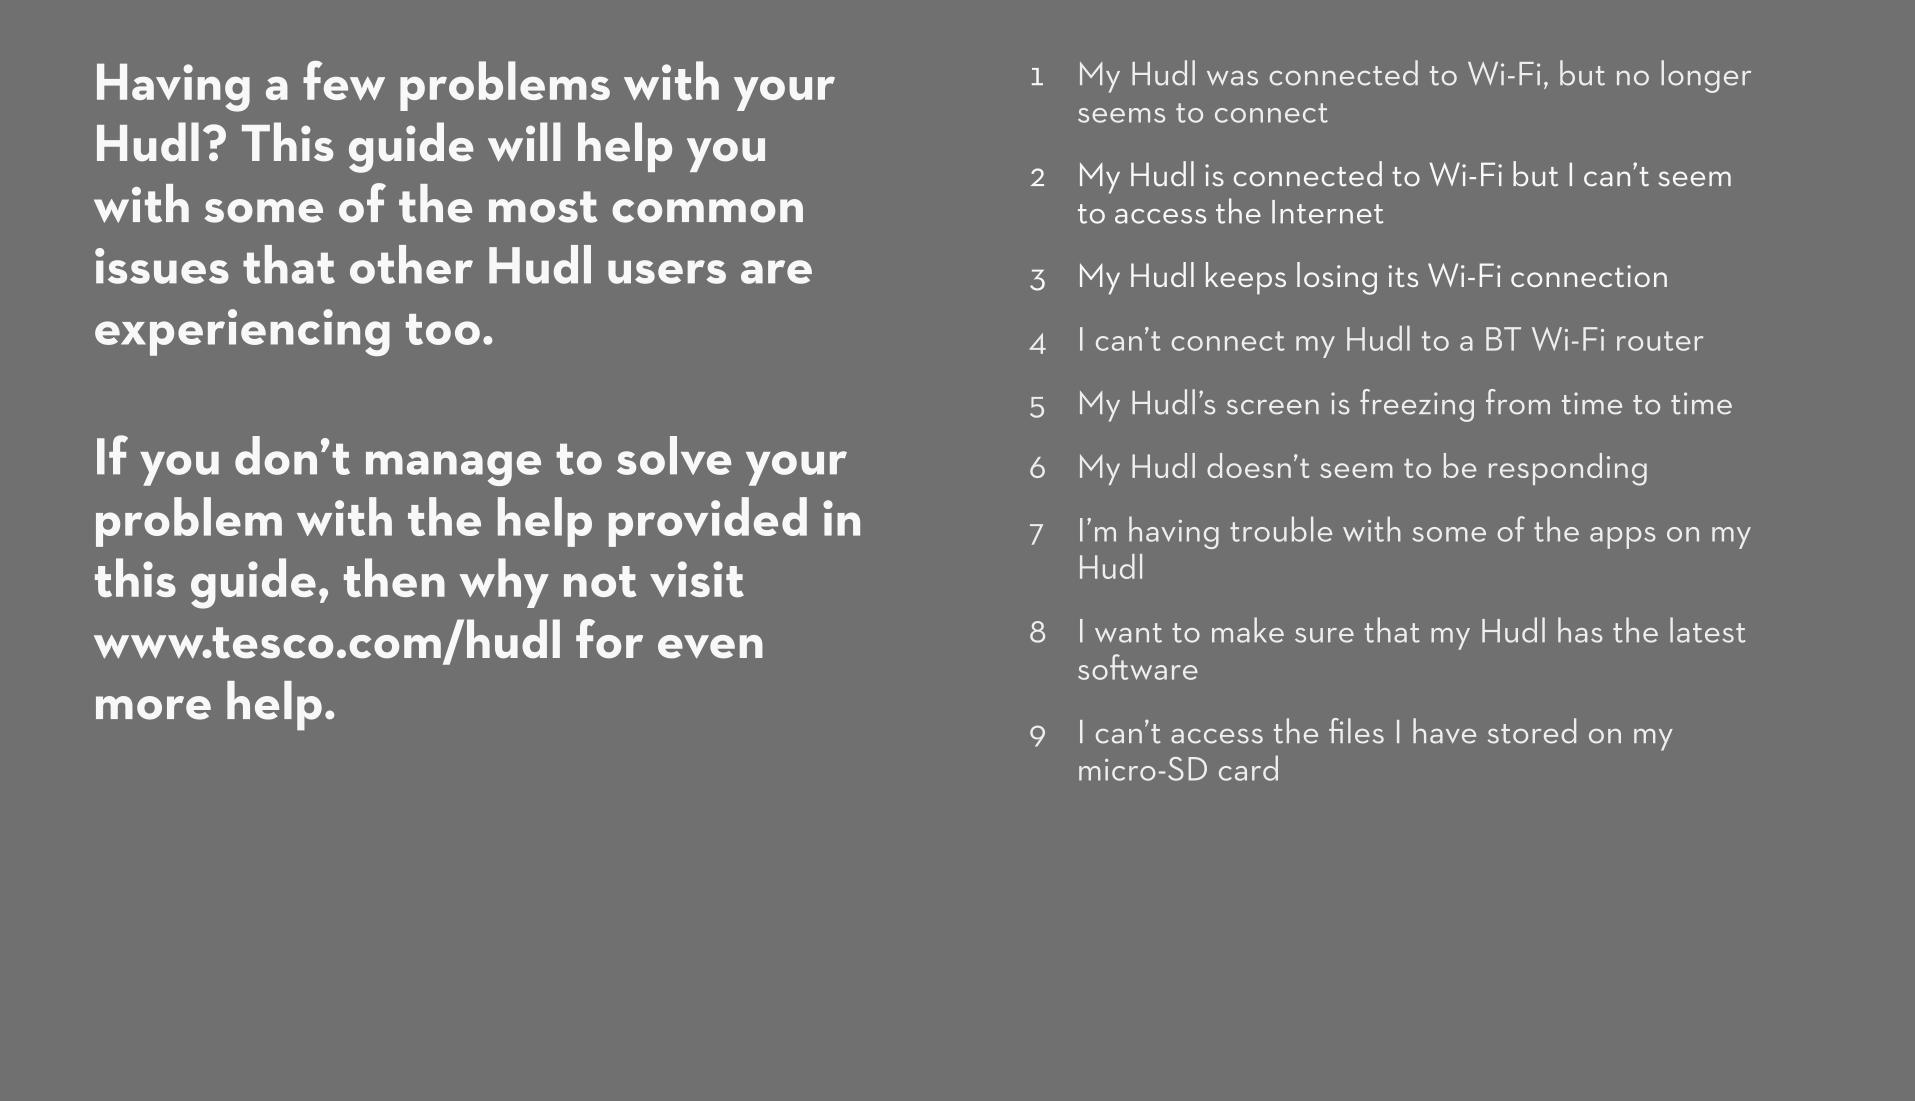
Having a few problems with your Hudl? This guide will help you with some of the most common issues that other Hudl users are experiencing too.
If you don’t manage to solve your problem with the help provided in this guide, then why not visit www.tesco.com/hudl for even more help.
72
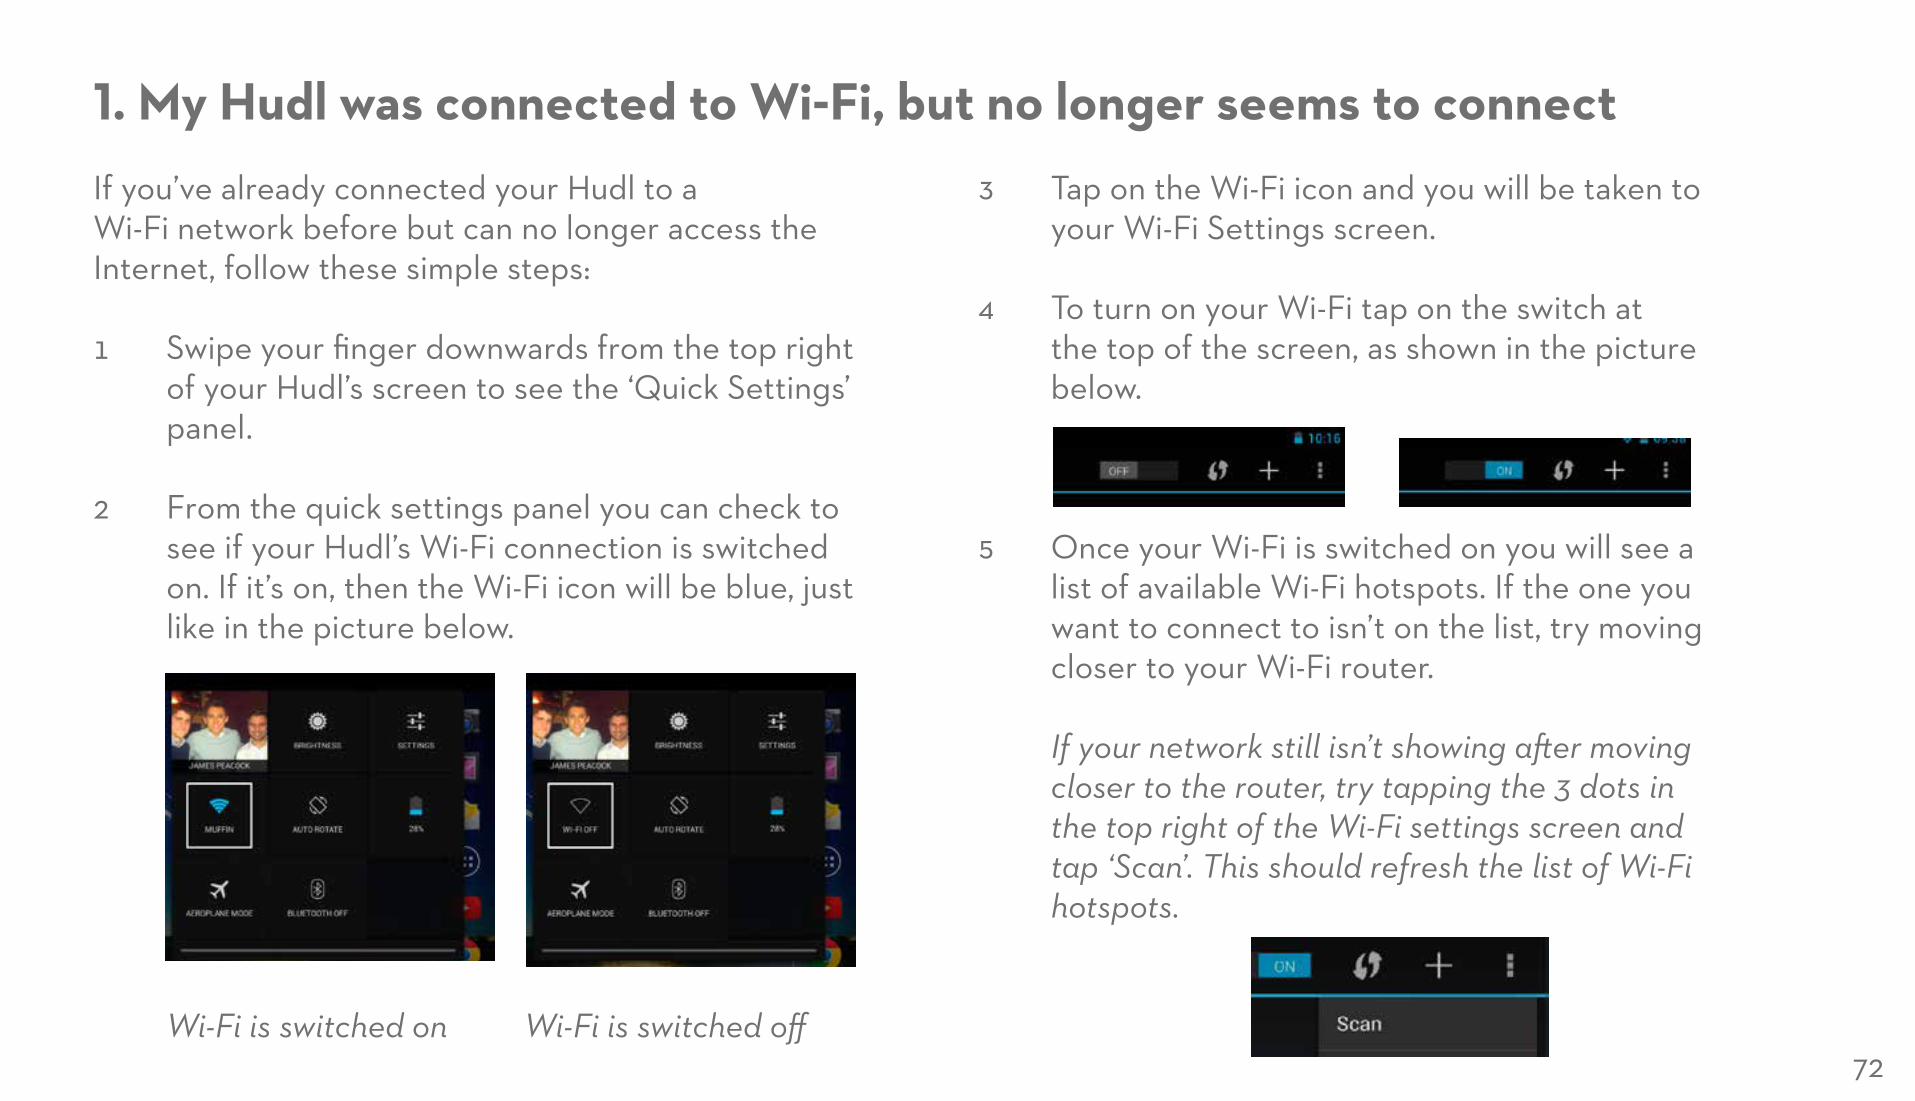
If you’ve already connected your Hudl to a Wi-Fi network before but can no longer access the Internet, follow these simple steps:
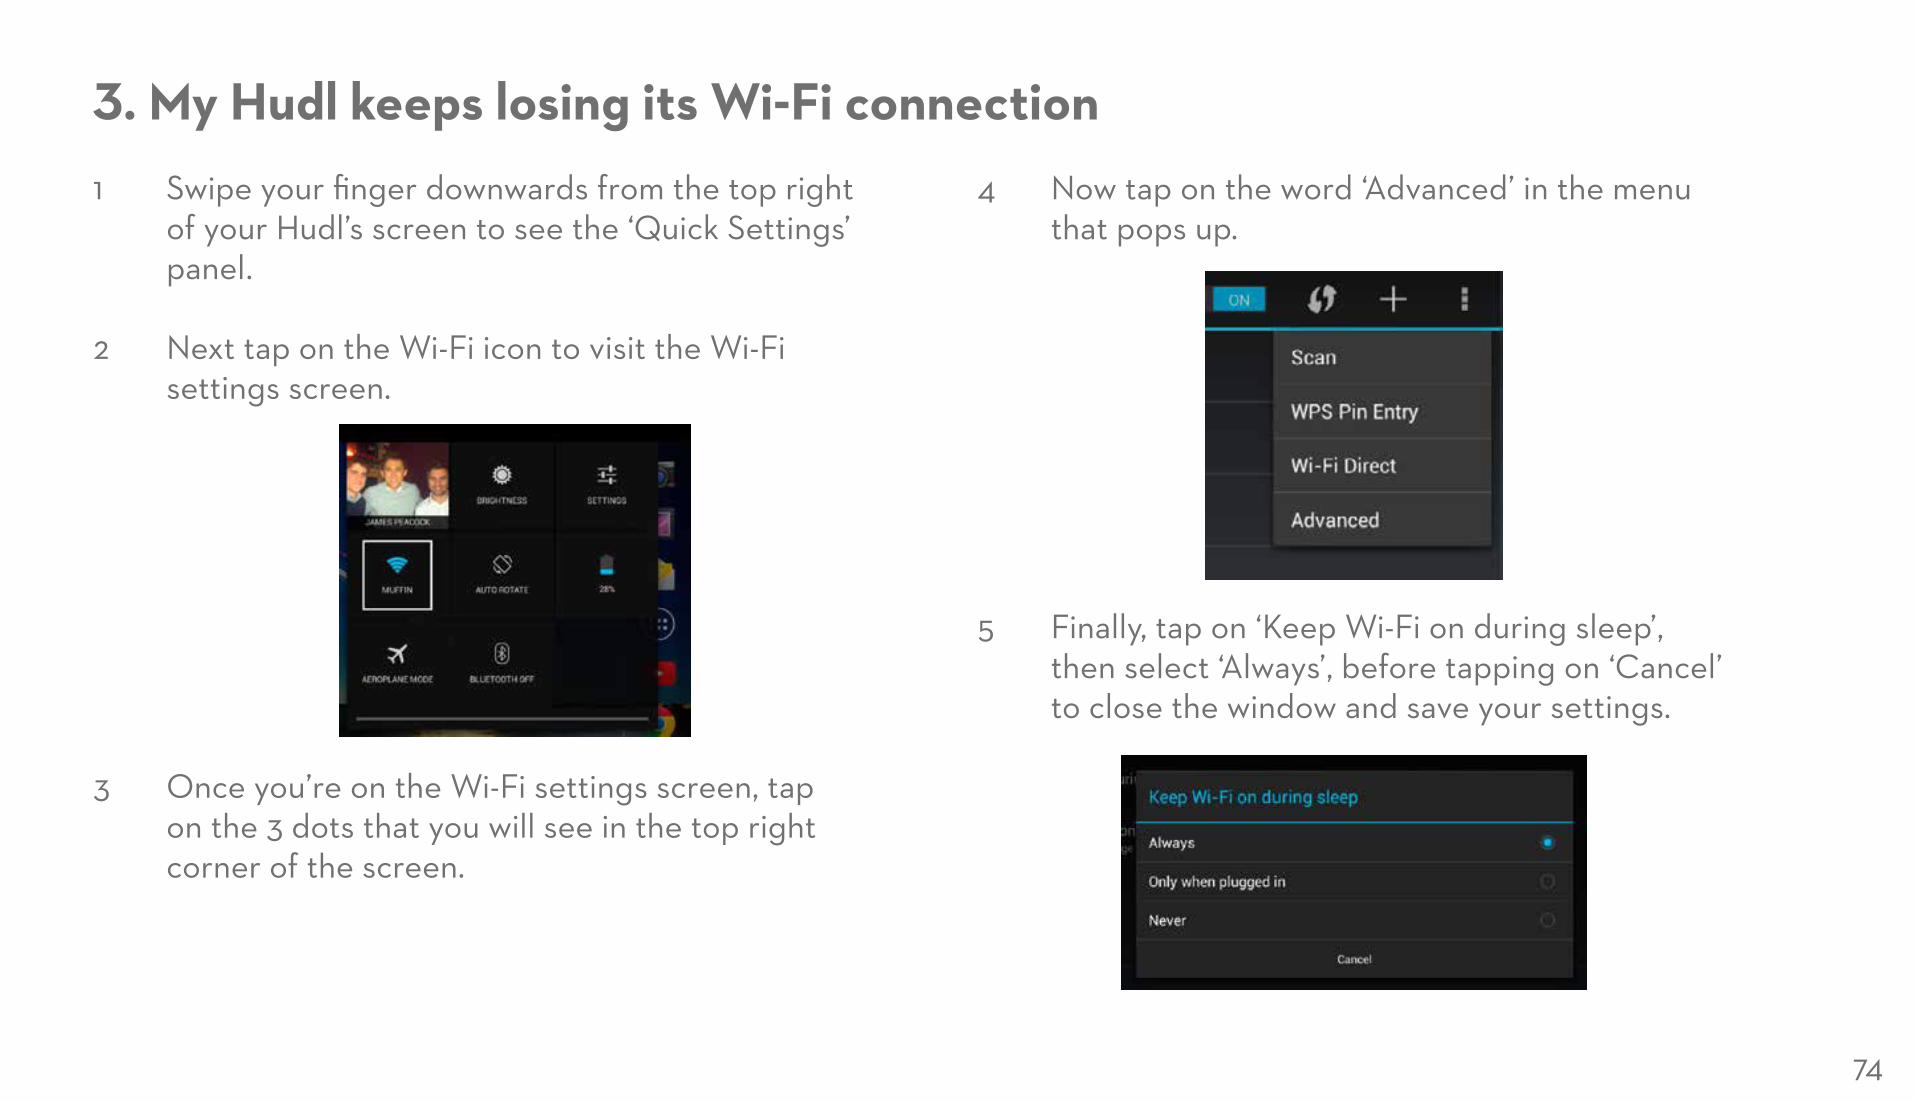
1 Swipe your finger downwards from the top right of your Hudl’s screen to see the ‘Quick Settings’ panel.
2 From the quick settings panel you can check to see if your Hudl’s Wi-Fi connection is switched on. If it’s on, then the Wi-Fi icon will be blue, just like in the picture below.
Wi-Fi is switched on Wi-Fi is switched off
1. My Hudl was connected to Wi-Fi, but no longer seems to connect3 Tap on the Wi-Fi icon and you will be taken to
your Wi-Fi Settings screen.
4 To turn on your Wi-Fi tap on the switch at the top of the screen, as shown in the picture below.
5 Once your Wi-Fi is switched on you will see a list of available Wi-Fi hotspots. If the one you want to connect to isn’t on the list, try moving closer to your Wi-Fi router. If your network still isn’t showing after moving closer to the router, try tapping the 3 dots in the top right of the Wi-Fi settings screen and tap ‘Scan’. This should refresh the list of Wi-Fi hotspots.
73
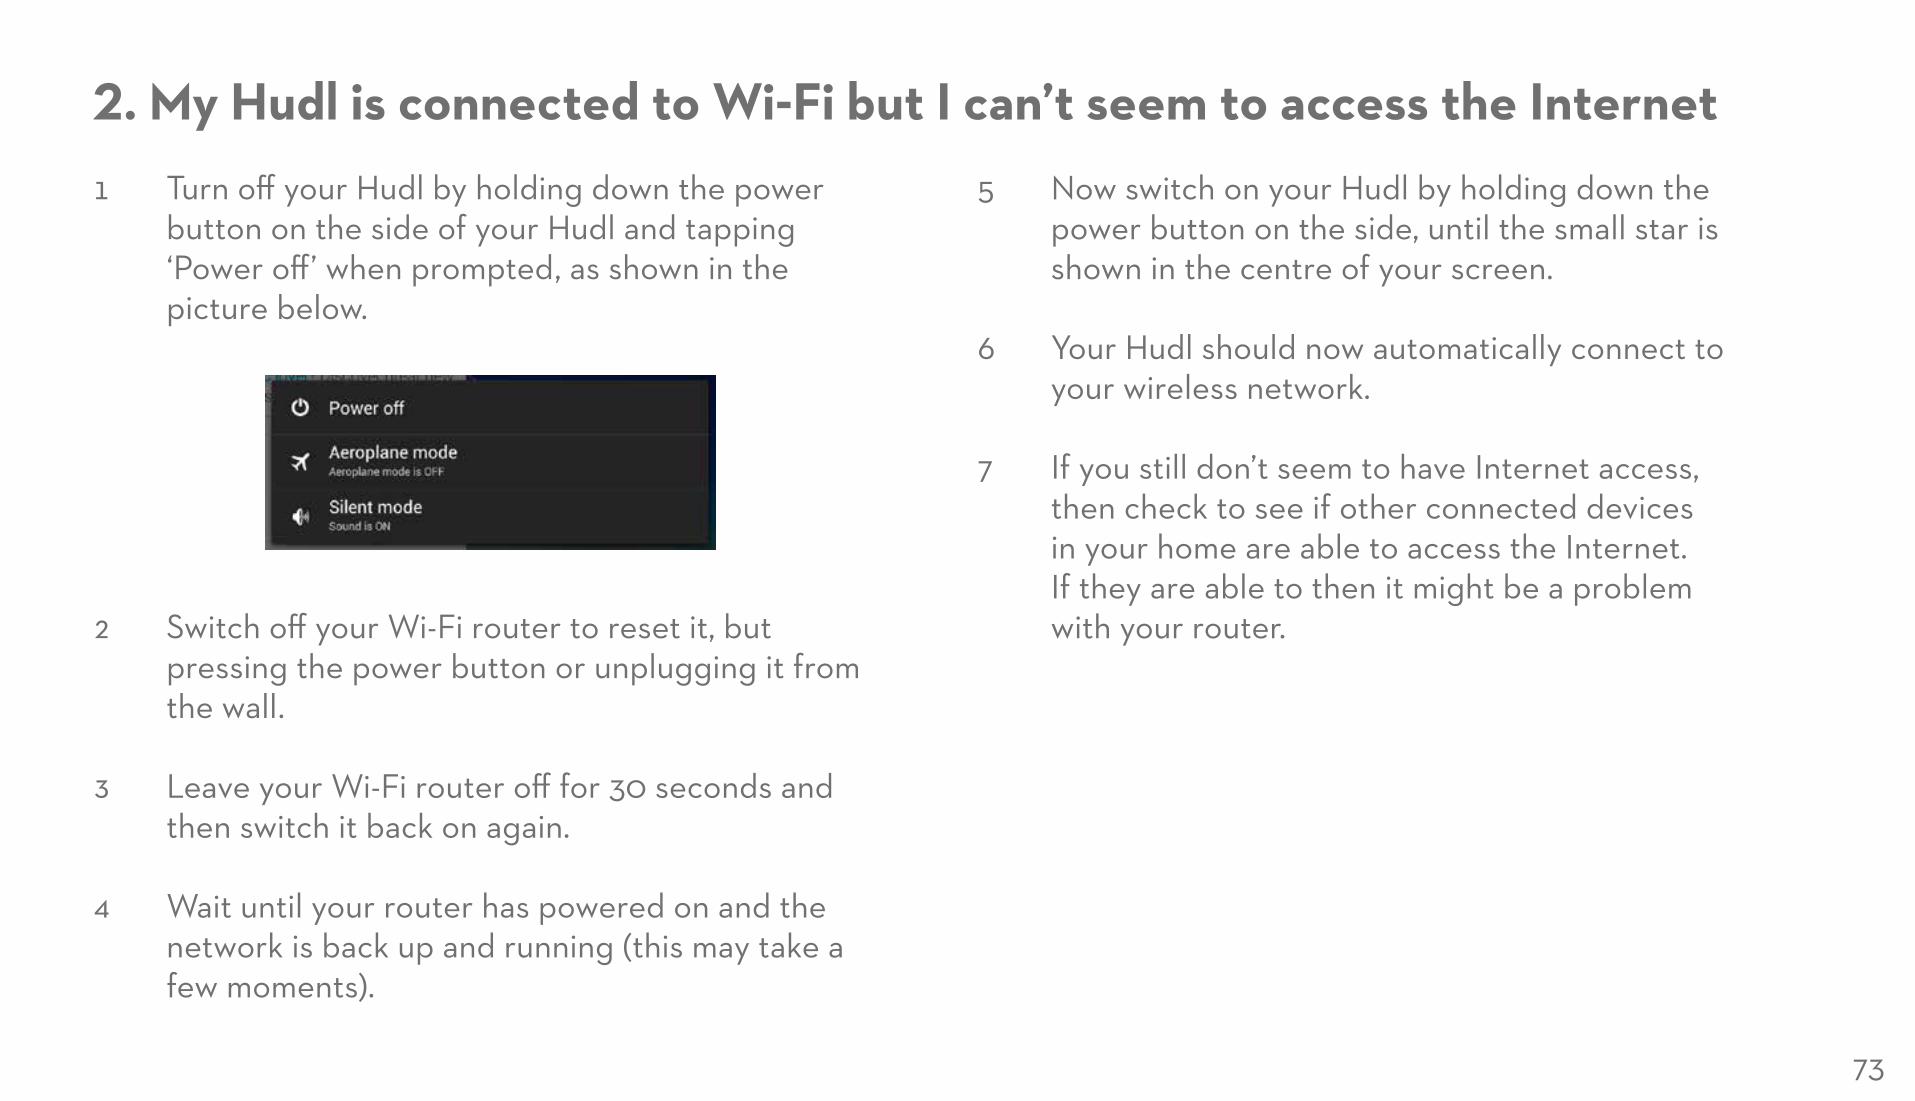
2. My Hudl is connected to Wi-Fi but I can’t seem to access the Internet1 Turn off your Hudl by holding down the power
button on the side of your Hudl and tapping ‘Power off’ when prompted, as shown in the picture below.
2 Switch off your Wi-Fi router to reset it, but pressing the power button or unplugging it from the wall.
3 Leave your Wi-Fi router off for 30 seconds and then switch it back on again.
4 Wait until your router has powered on and the network is back up and running (this may take a few moments).
5 Now switch on your Hudl by holding down the power button on the side, until the small star is shown in the centre of your screen.
6 Your Hudl should now automatically connect to your wireless network.
7 If you still don’t seem to have Internet access, then check to see if other connected devices in your home are able to access the Internet. If they are able to then it might be a problem with your router.
74
3. My Hudl keeps losing its Wi-Fi connection1 Swipe your finger downwards from the top right
of your Hudl’s screen to see the ‘Quick Settings’ panel.
2 Next tap on the Wi-Fi icon to visit the Wi-Fi settings screen.
3 Once you’re on the Wi-Fi settings screen, tap on the 3 dots that you will see in the top right corner of the screen.
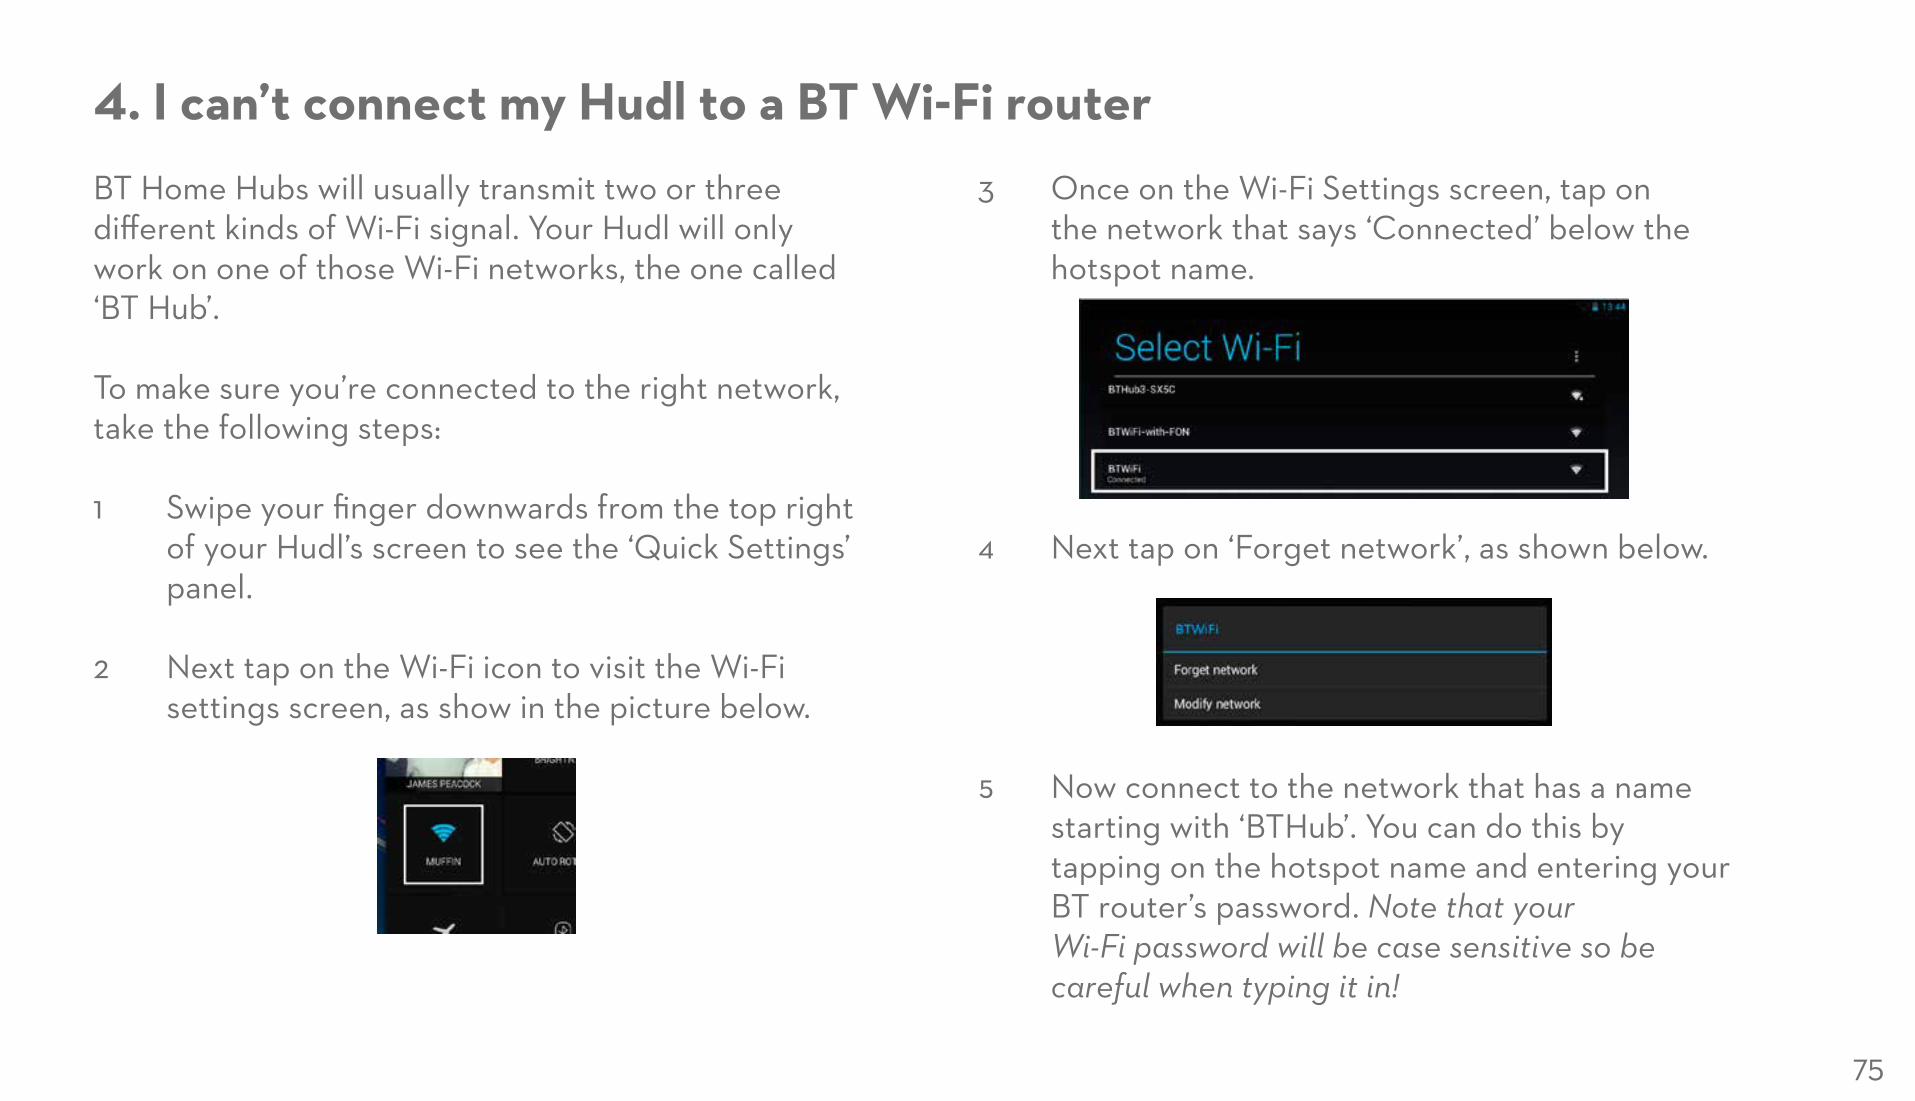
4 Now tap on the word ‘Advanced’ in the menu that pops up.
5 Finally, tap on ‘Keep Wi-Fi on during sleep’, then select ‘Always’, before tapping on ‘Cancel’ to close the window and save your settings.
75
4. I can’t connect my Hudl to a BT Wi-Fi routerBT Home Hubs will usually transmit two or three different kinds of Wi-Fi signal. Your Hudl will only work on one of those Wi-Fi networks, the one called ‘BT Hub’.
To make sure you’re connected to the right network, take the following steps:
1 Swipe your finger downwards from the top right of your Hudl’s screen to see the ‘Quick Settings’ panel.
2 Next tap on the Wi-Fi icon to visit the Wi-Fi settings screen, as show in the picture below.
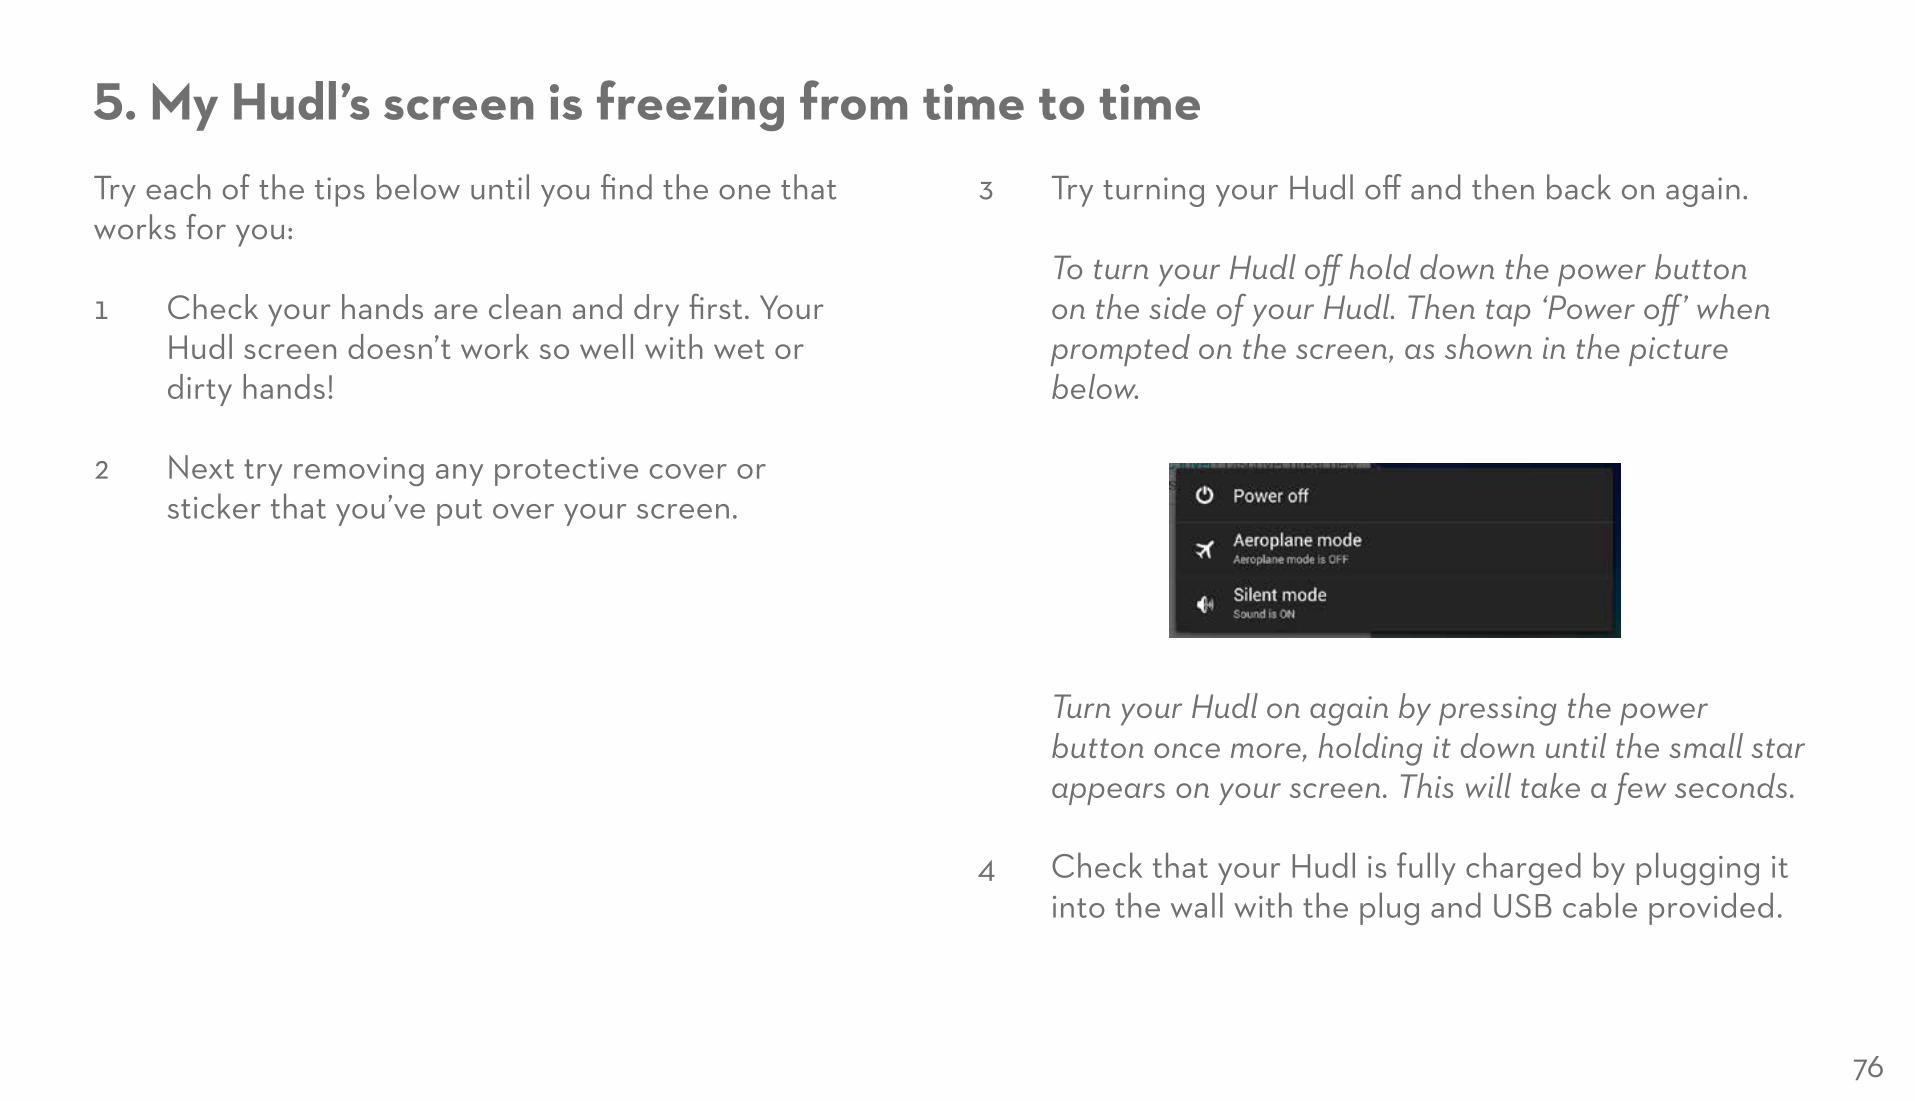
3 Once on the Wi-Fi Settings screen, tap on the network that says ‘Connected’ below the hotspot name.
4 Next tap on ‘Forget network’, as shown below.
5 Now connect to the network that has a name starting with ‘BTHub’. You can do this by tapping on the hotspot name and entering your BT router’s password. Note that your Wi-Fi password will be case sensitive so be careful when typing it in!
76
5. My Hudl’s screen is freezing from time to timeTry each of the tips below until you find the one that works for you:
1 Check your hands are clean and dry first. Your Hudl screen doesn’t work so well with wet or dirty hands!
2 Next try removing any protective cover or sticker that you’ve put over your screen.
3 Try turning your Hudl off and then back on again.
To turn your Hudl off hold down the power button on the side of your Hudl. Then tap ‘Power off’ when prompted on the screen, as shown in the picture below.
Turn your Hudl on again by pressing the power button once more, holding it down until the small star appears on your screen. This will take a few seconds.
4 Check that your Hudl is fully charged by plugging it into the wall with the plug and USB cable provided.
77
6. My Hudl doesn’t seem to be respondingMy screen is occasionally flickering and/or changing brightness without me touching it.
1 Check that your Hudl is fully charged by plugging it into the wall with the plug and USB cable provided.
2 Turn your Hudl off and then back on again.
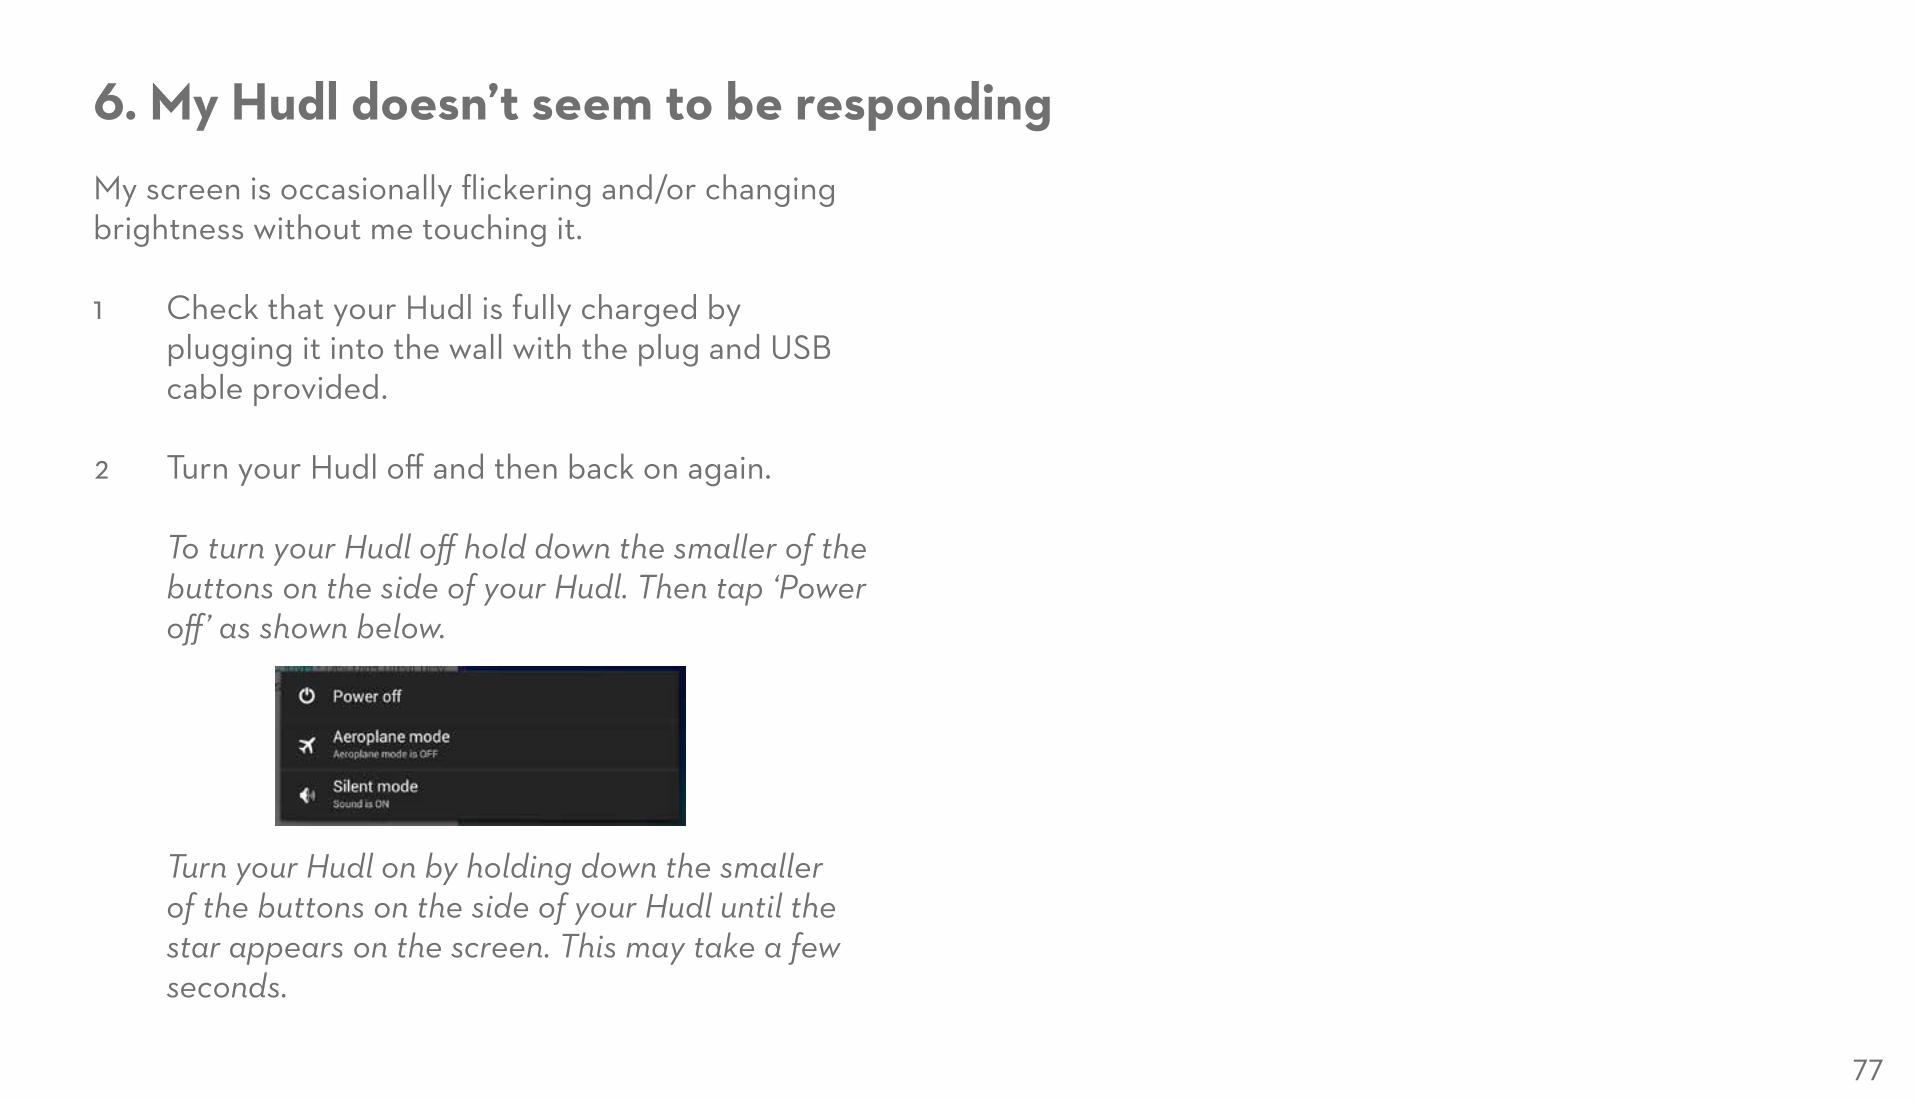
To turn your Hudl off hold down the smaller of the buttons on the side of your Hudl. Then tap ‘Power off’ as shown below.
Turn your Hudl on by holding down the smaller of the buttons on the side of your Hudl until the star appears on the screen. This may take a few seconds.
78
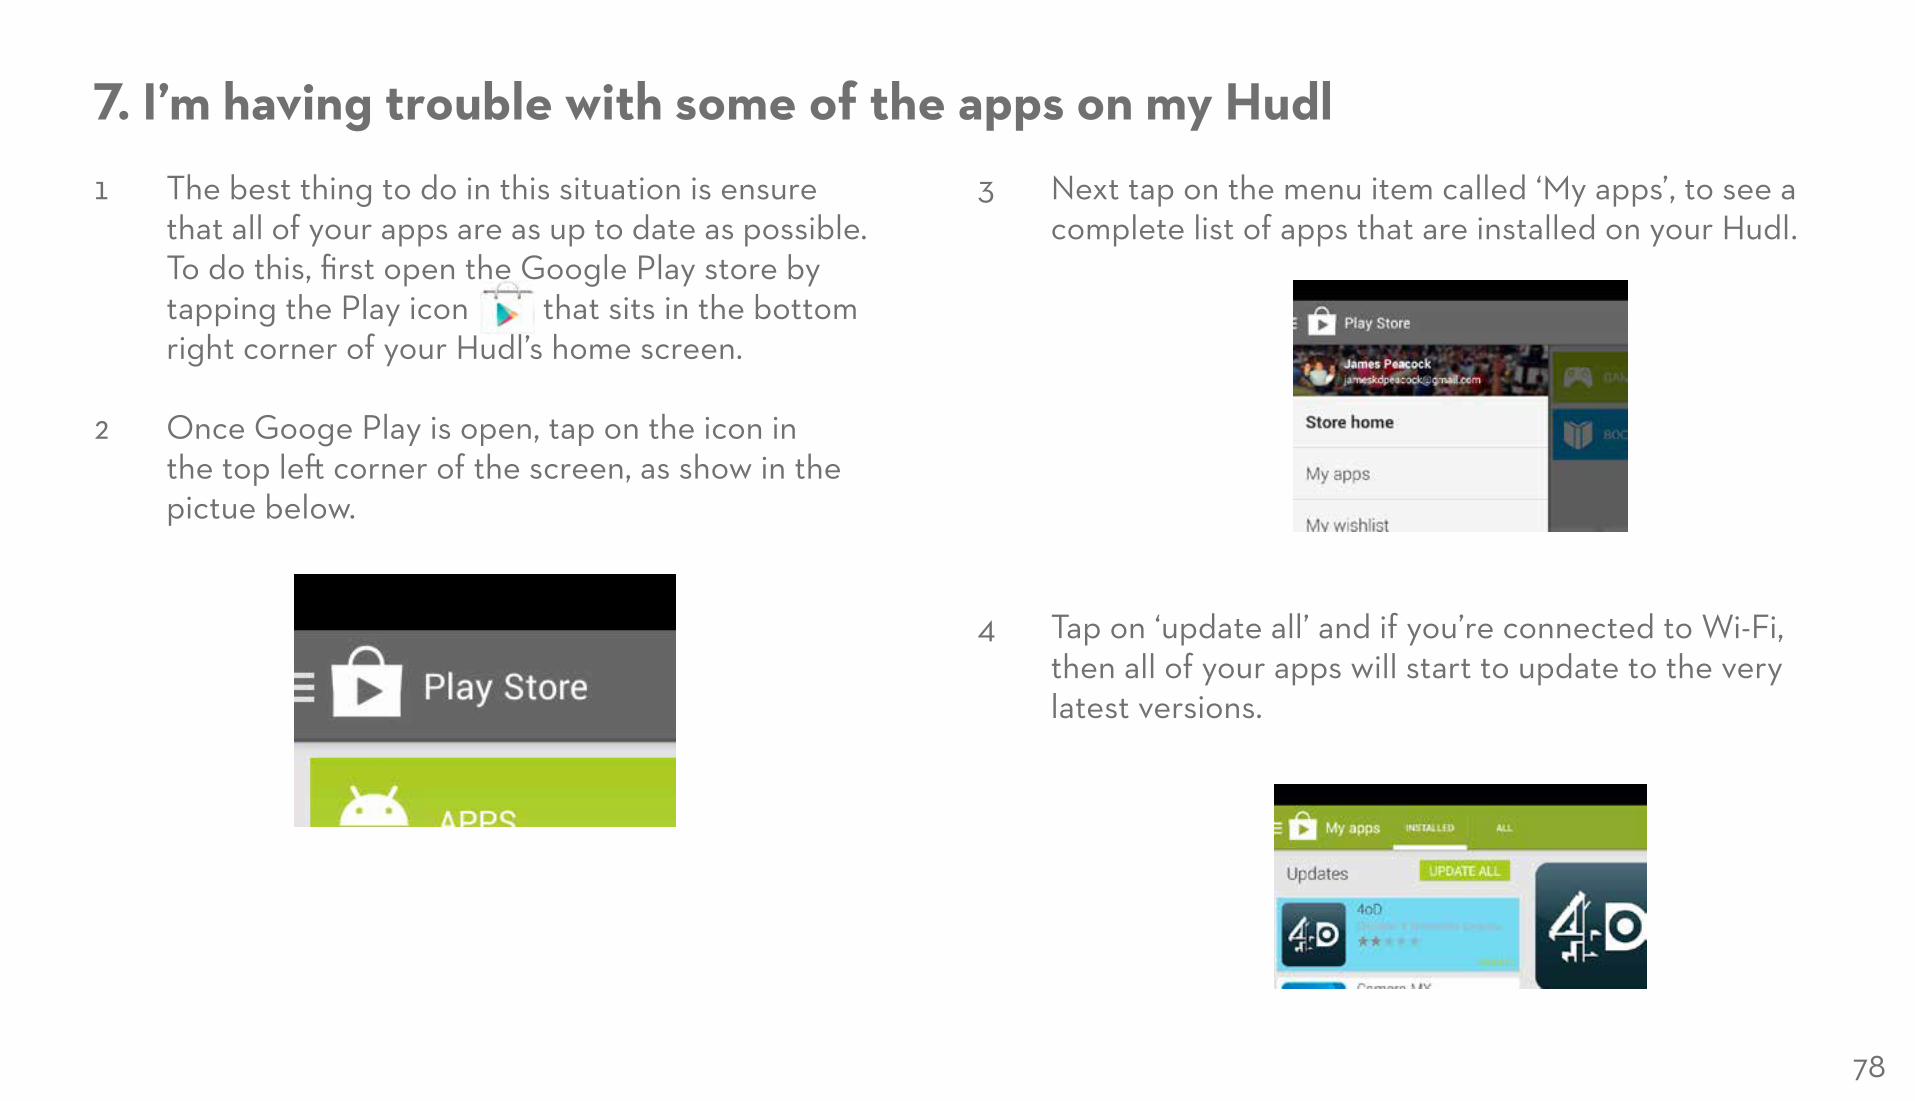
7. I’m having trouble with some of the apps on my Hudl1 The best thing to do in this situation is ensure
that all of your apps are as up to date as possible.To do this, first open the Google Play store by tapping the Play icon that sits in the bottom right corner of your Hudl’s home screen.
2 Once Googe Play is open, tap on the icon in the top left corner of the screen, as show in the pictue below.
3 Next tap on the menu item called ‘My apps’, to see a complete list of apps that are installed on your Hudl.
4 Tap on ‘update all’ and if you’re connected to Wi-Fi, then all of your apps will start to update to the very latest versions.
79
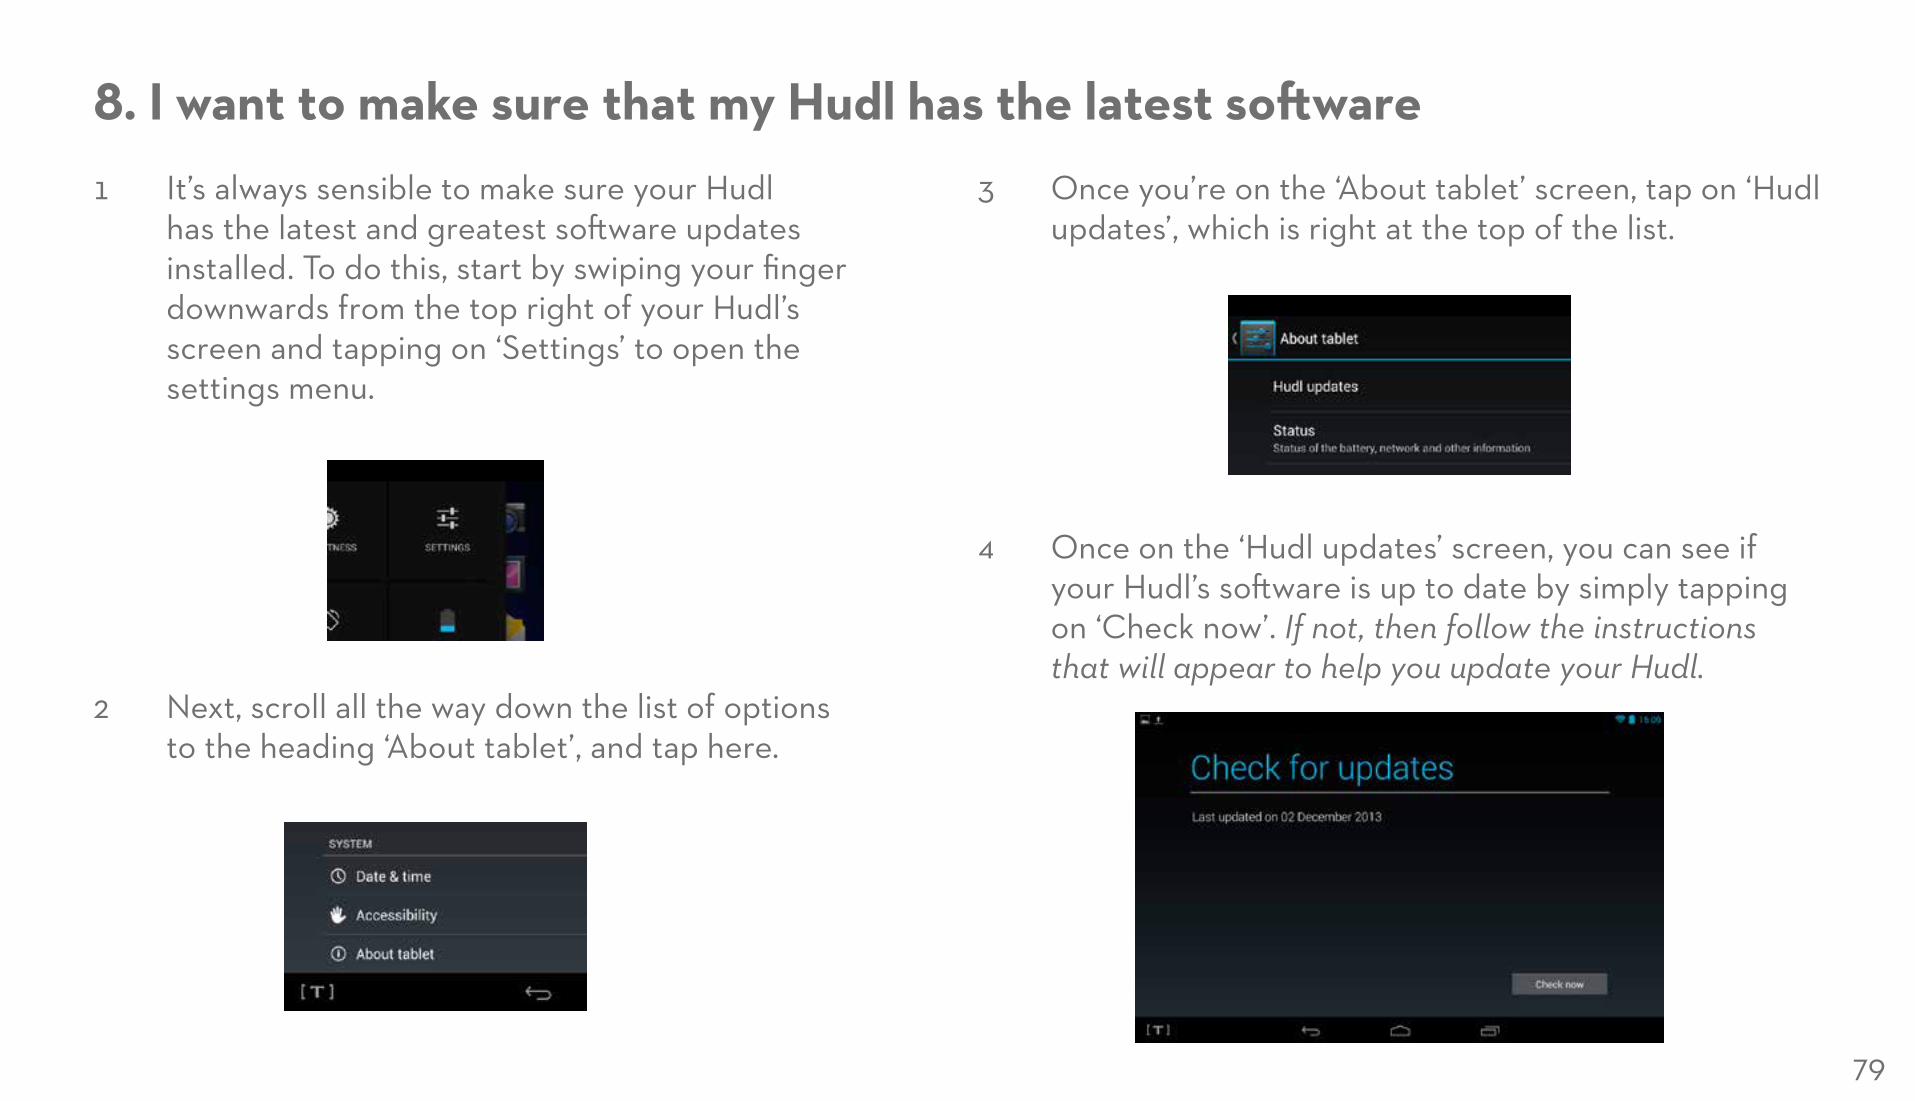
8. I want to make sure that my Hudl has the latest software1 It’s always sensible to make sure your Hudl
has the latest and greatest software updates installed. To do this, start by swiping your finger downwards from the top right of your Hudl’s screen and tapping on ‘Settings’ to open the settings menu.
2 Next, scroll all the way down the list of options to the heading ‘About tablet’, and tap here.
3 Once you’re on the ‘About tablet’ screen, tap on ‘Hudl updates’, which is right at the top of the list.
4 Once on the ‘Hudl updates’ screen, you can see if your Hudl’s software is up to date by simply tapping on ‘Check now’. If not, then follow the instructions that will appear to help you update your Hudl.
80
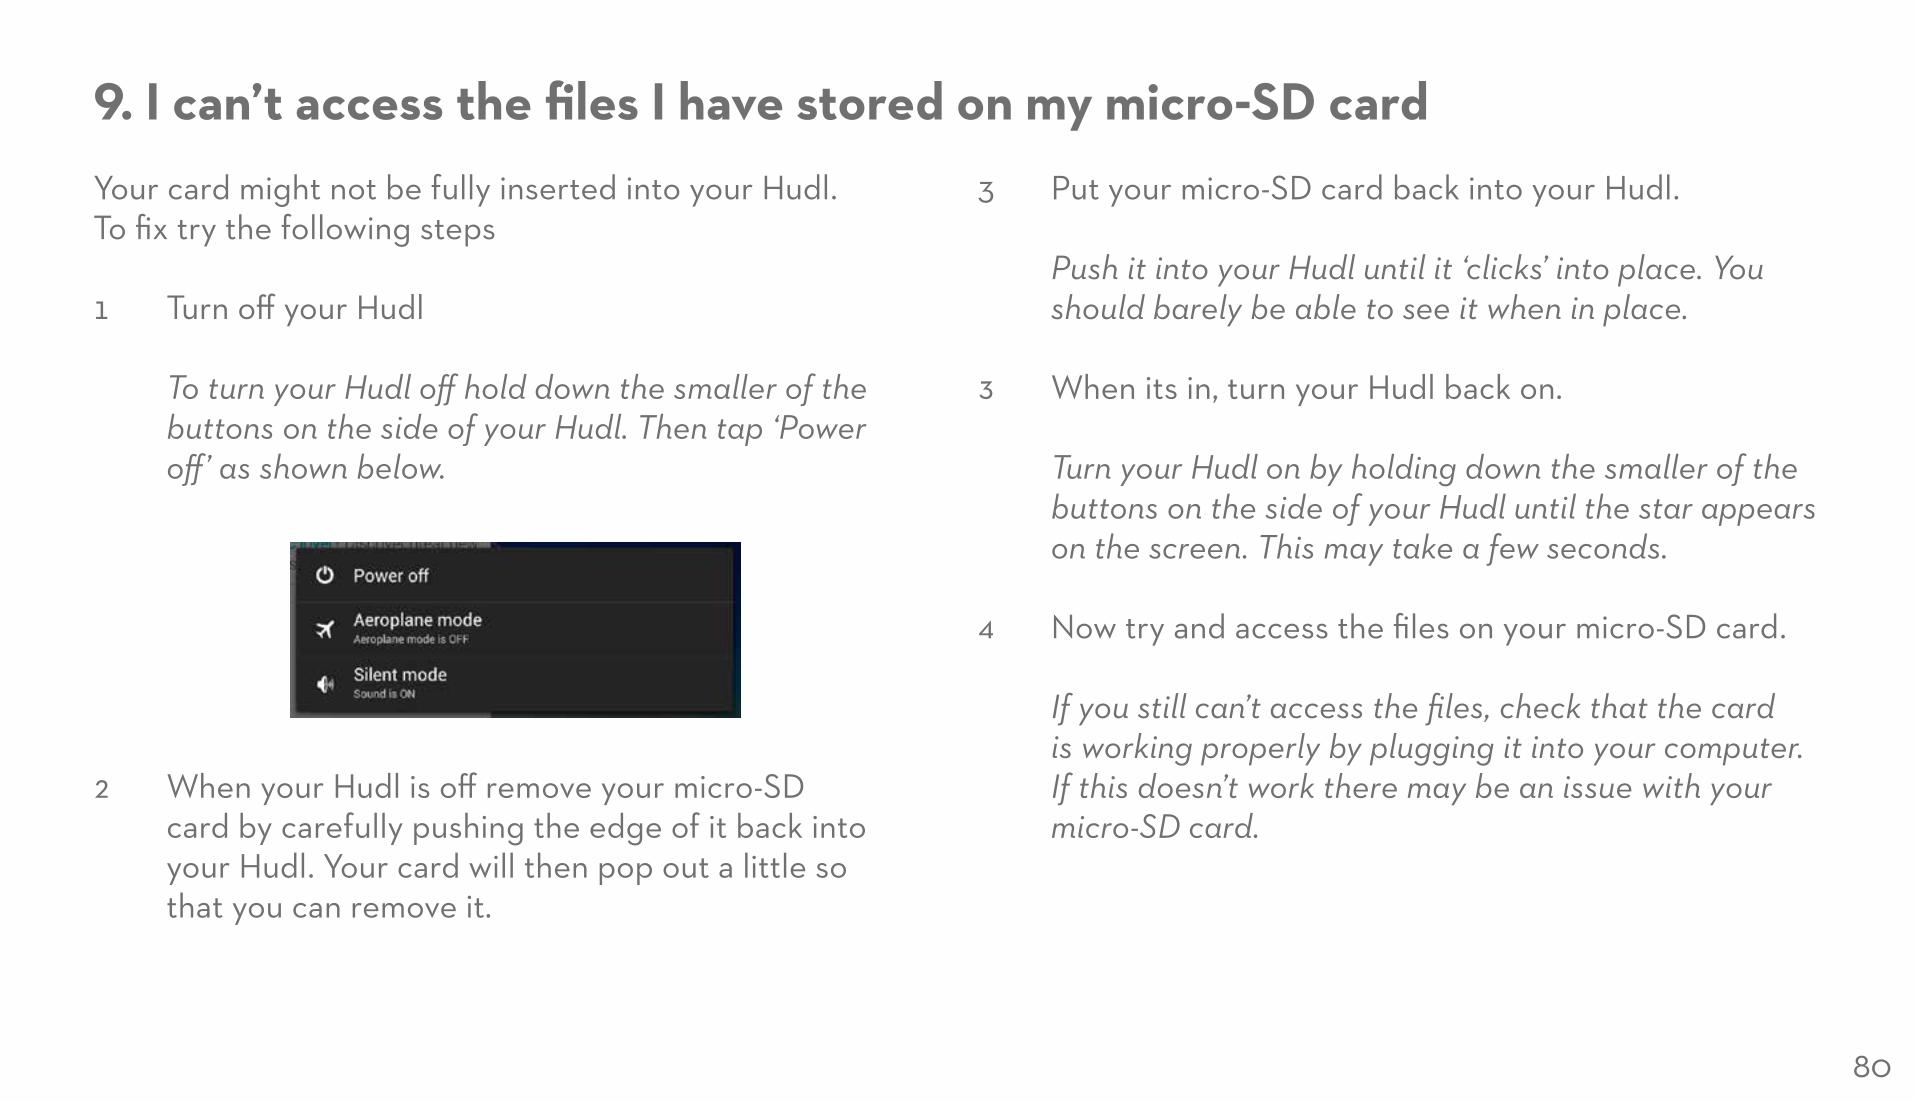
9. I can’t access the files I have stored on my micro-SD cardYour card might not be fully inserted into your Hudl. To fix try the following steps
1 Turn off your Hudl
To turn your Hudl off hold down the smaller of the buttons on the side of your Hudl. Then tap ‘Power off’ as shown below.
2 When your Hudl is off remove your micro-SD card by carefully pushing the edge of it back into your Hudl. Your card will then pop out a little so that you can remove it.
3 Put your micro-SD card back into your Hudl.
Push it into your Hudl until it ‘clicks’ into place. You should barely be able to see it when in place.
3 When its in, turn your Hudl back on.
Turn your Hudl on by holding down the smaller of the buttons on the side of your Hudl until the star appears on the screen. This may take a few seconds.
4 Now try and access the files on your micro-SD card.
If you still can’t access the files, check that the card is working properly by plugging it into your computer. If this doesn’t work there may be an issue with your micro-SD card.
81
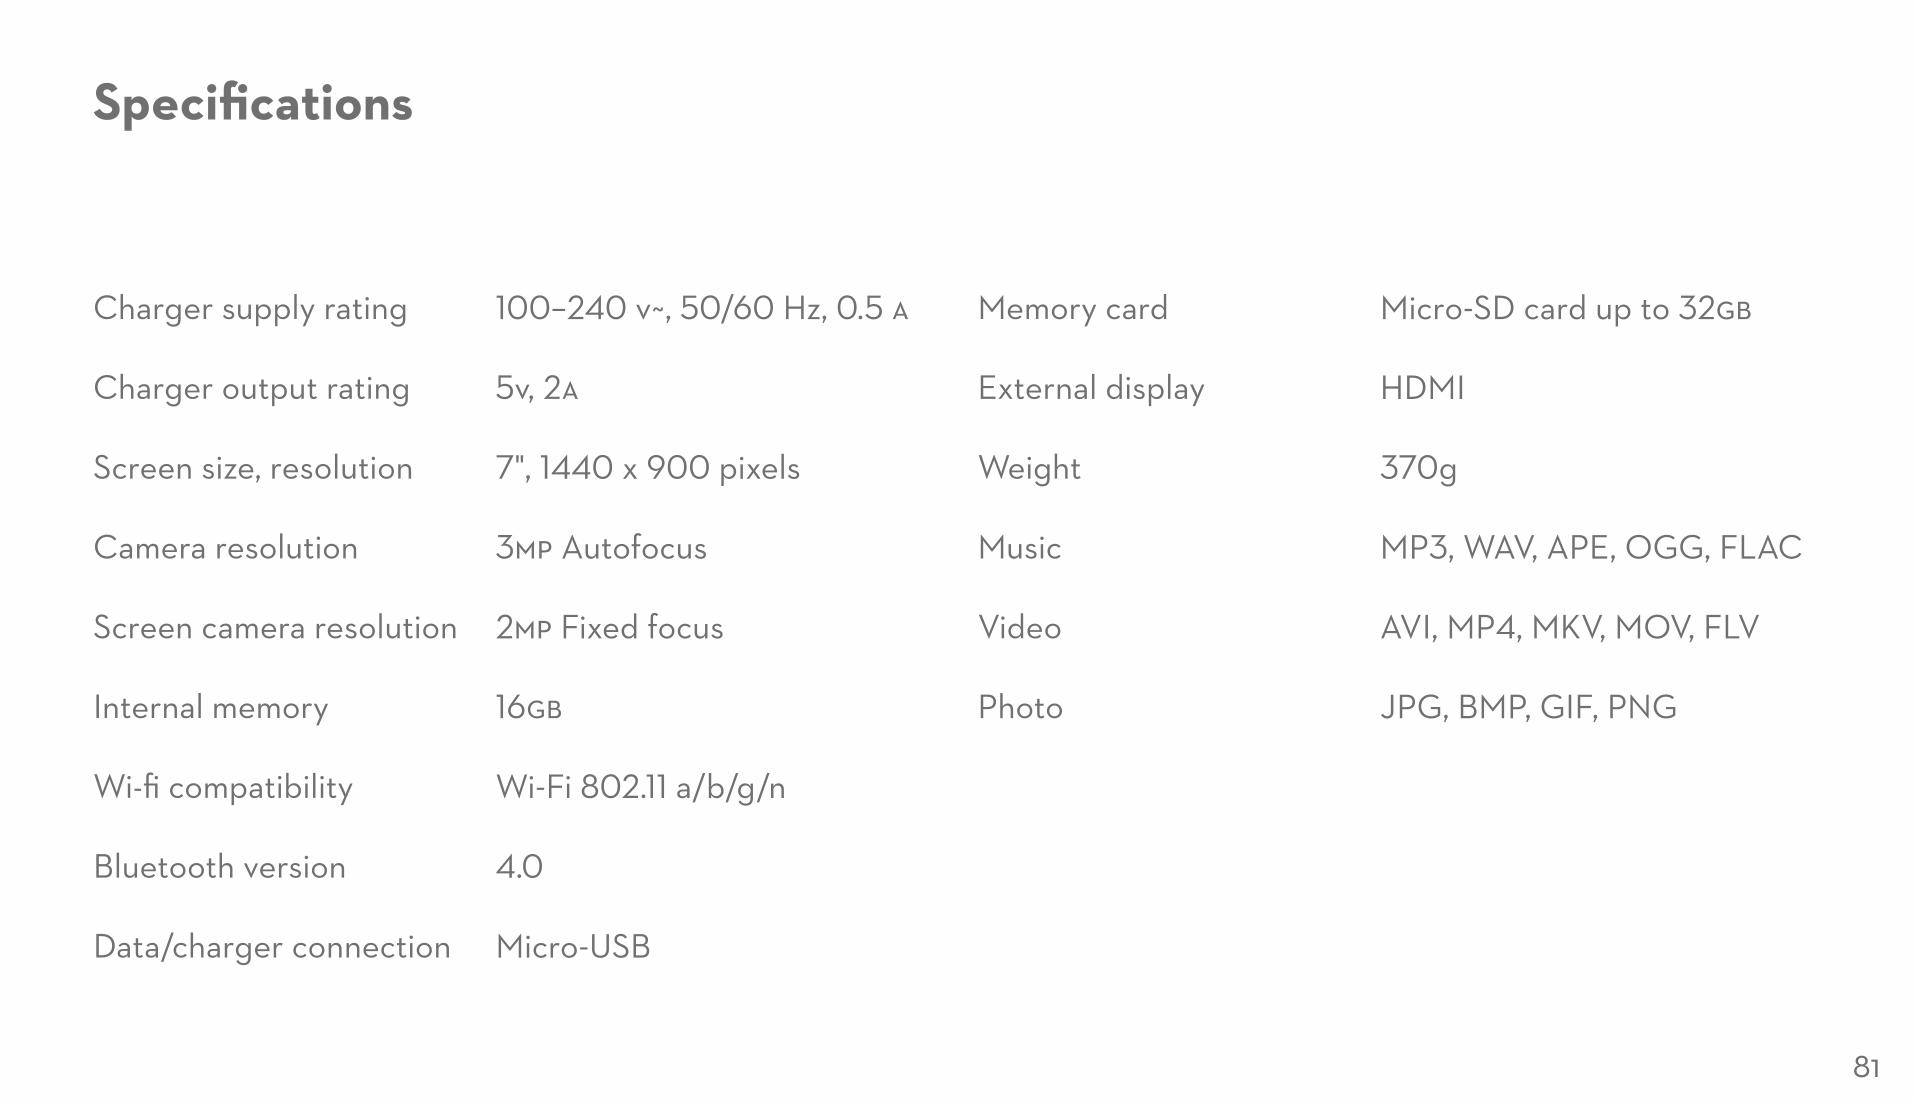
Specifications
Charger supply rating
Charger output rating
Screen size, resolution
Camera resolution
Screen camera resolution
Internal memory
Wi-fi compatibility
Bluetooth version
Data/charger connection
Memory card
External display
Weight
Music
Video
Photo
100–240 v~, 50/60 Hz, 0.5 a
5v, 2a
7", 1440 x 900 pixels
3mp Autofocus
2mp Fixed focus
16gb
Wi-Fi 802.11 a/b/g/n
4.0
Micro-USB
Micro-SD card up to 32gb
HDMI
370g
MP3, WAV, APE, OGG, FLAC
AVI, MP4, MKV, MOV, FLV
JPG, BMP, GIF, PNG
For further reference please visit tesco.com/hudl


![HUDL Judging Paradigms[1]](https://img.pdfslide.us/doc/110x75/577d2fd61a28ab4e1eb2d416/hudl-judging-paradigms1.jpg)