Embed Size (px)
Citation preview
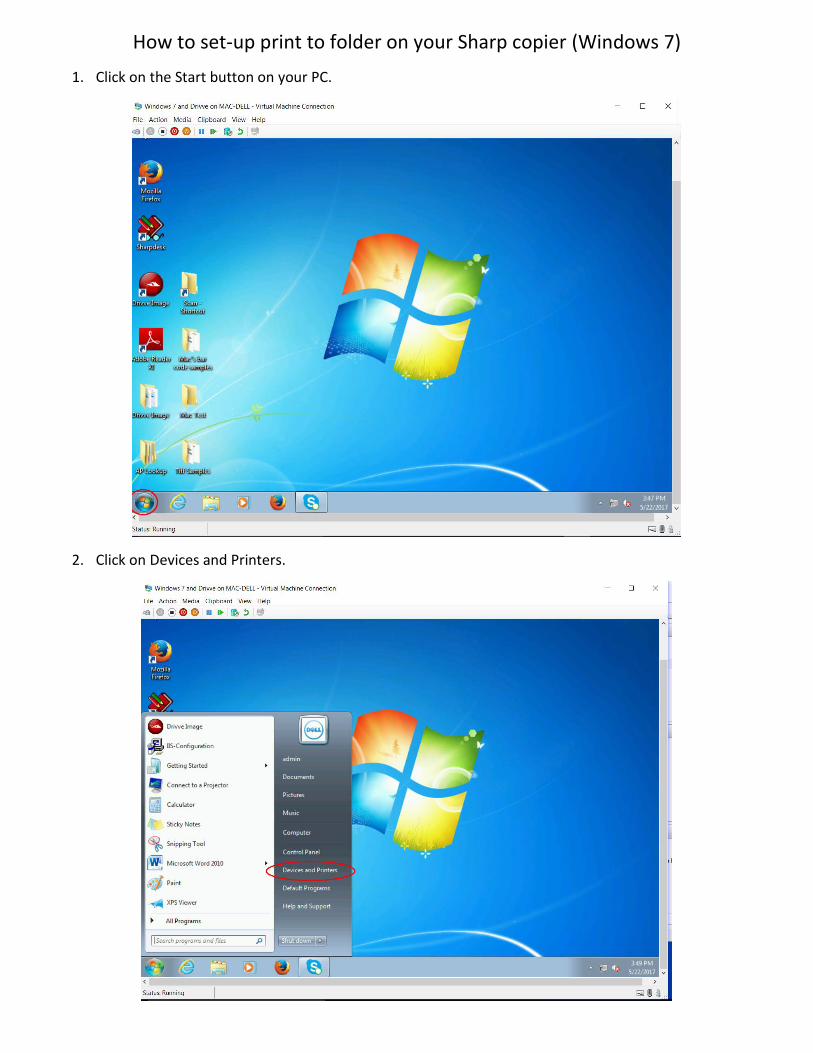
How to set-up print to folder on your Sharp copier (Windows 7)
1. Click on the Start button on your PC.
2. Click on Devices and Printers.
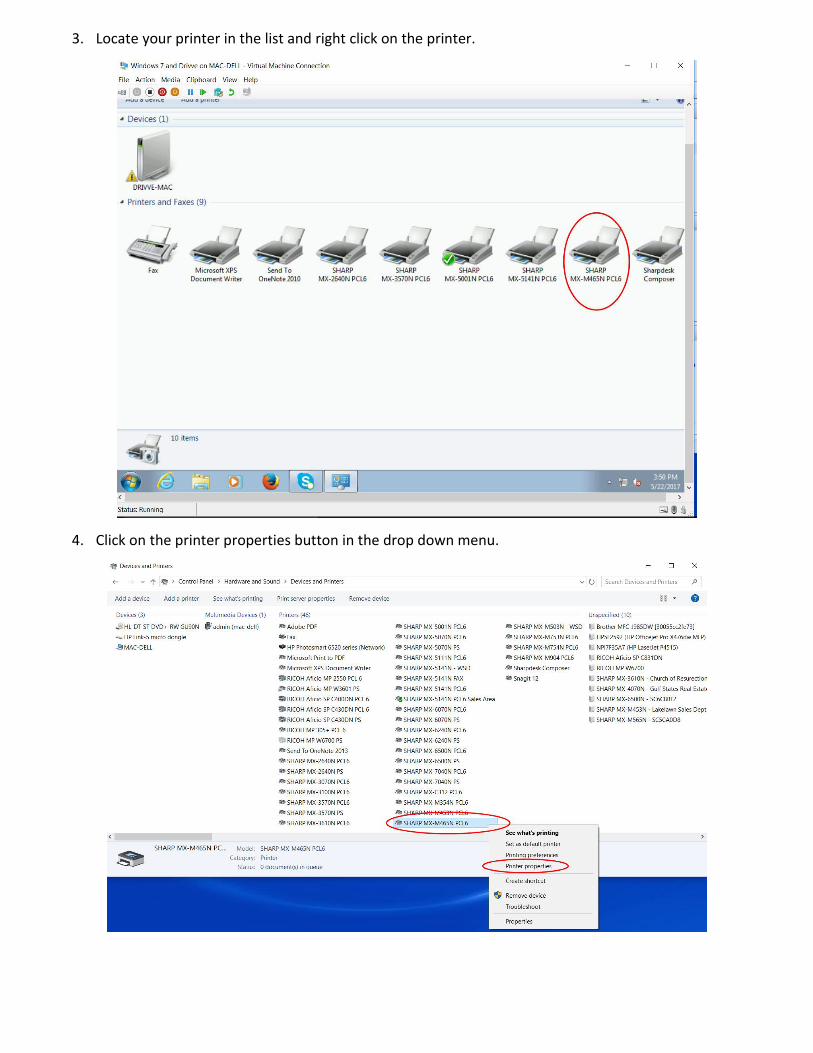
3. Locate your printer in the list and right click on the printer.
4. Click on the printer properties button in the drop down menu.
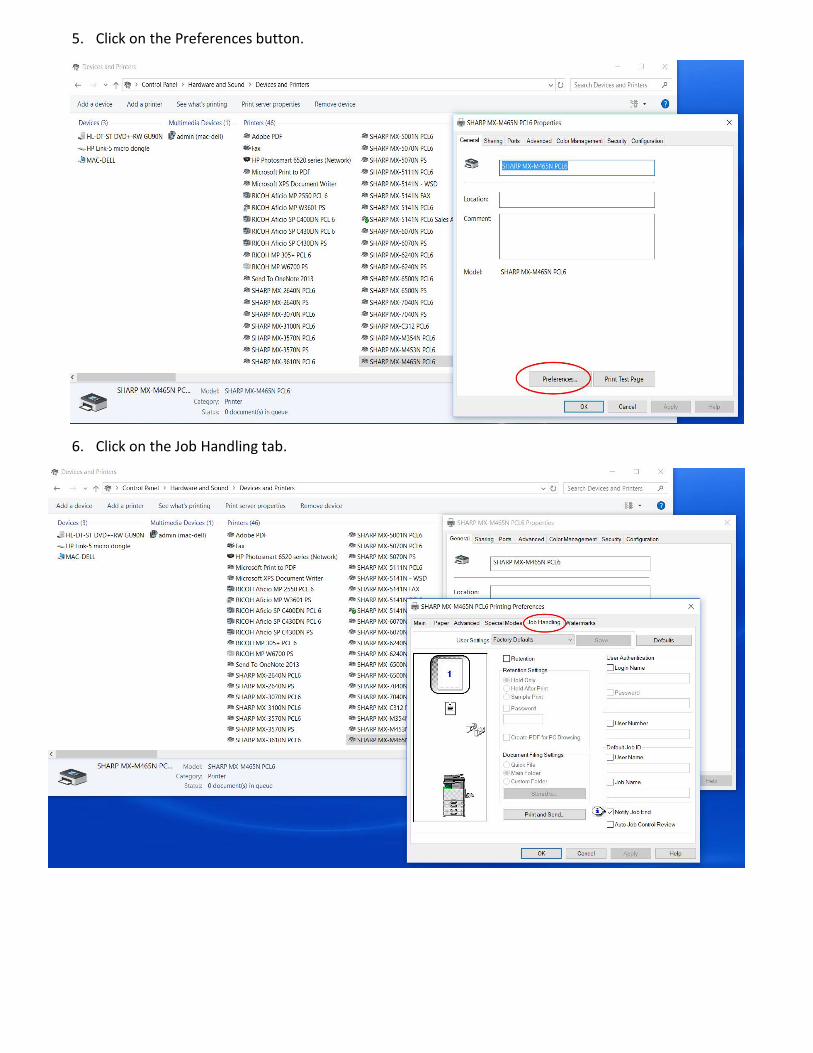
5. Click on the Preferences button.
6. Click on the Job Handling tab.
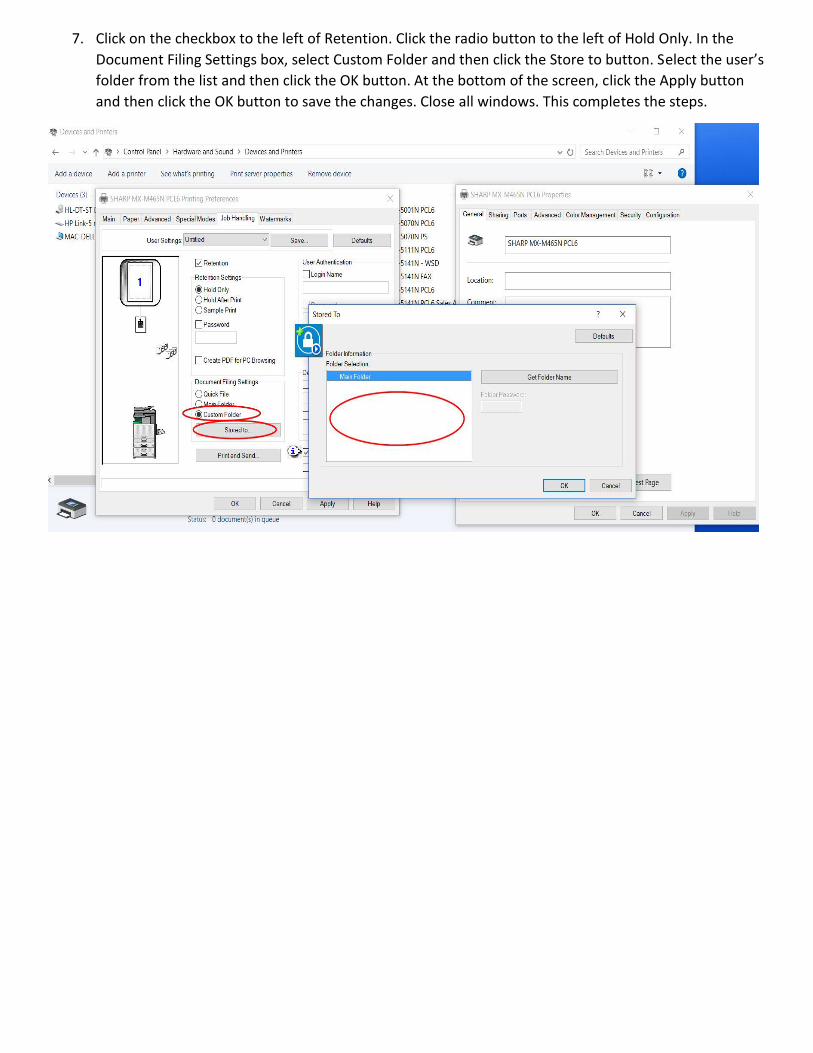
7. Click on the checkbox to the left of Retention. Click the radio button to the left of Hold Only. In the
Document Filing Settings box, select Custom Folder and then click the Store to button. Select the user’s
folder from the list and then click the OK button. At the bottom of the screen, click the Apply button
and then click the OK button to save the changes. Close all windows. This completes the steps.