Embed Size (px)
Citation preview
Sharp Copier/MFP How to print out and clear the copy counts in the
User/Account Control system
This procedure will cover the following models: MX-3070N, MX-3570N, and 4070N Color Copiers.
(***You will use the machine’s webpage to access and print out the copy/print counts for each user/account in your copier/MFP. You will need the IP address/network address of your machine to access the webpage. If
you do not know the IP address of your machine, see the IP Address Handout for instructions***)
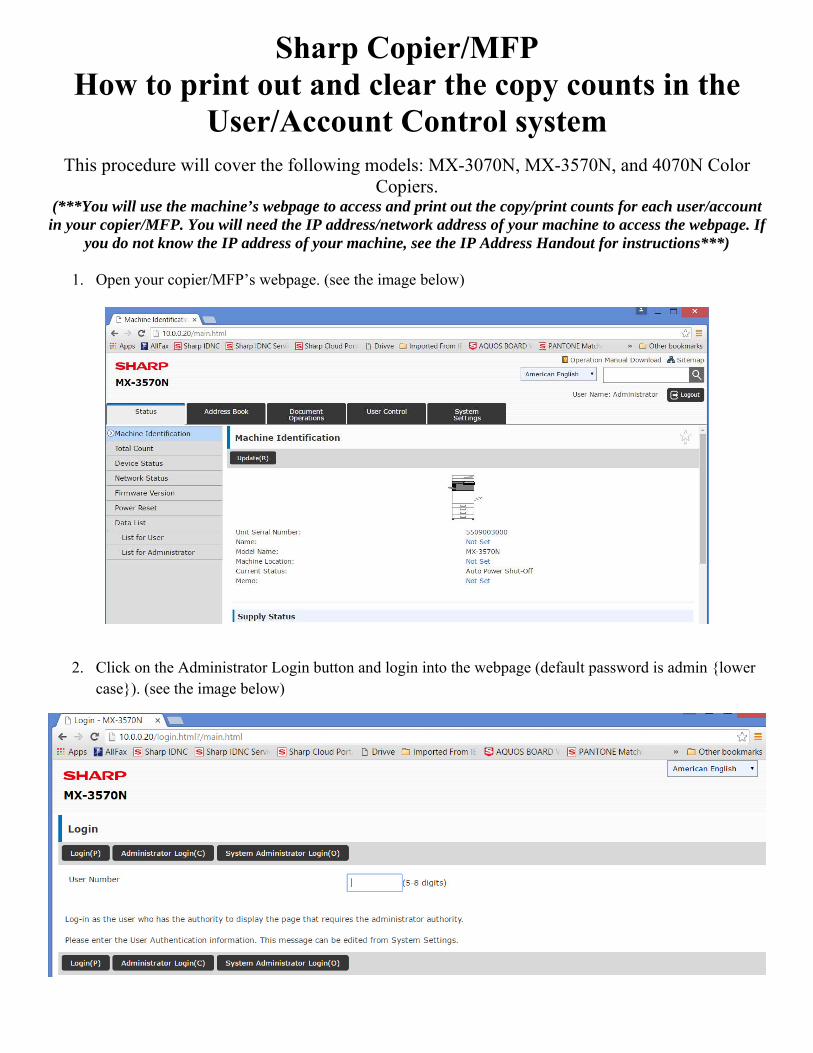
1. Open your copier/MFP’s webpage. (see the image below)
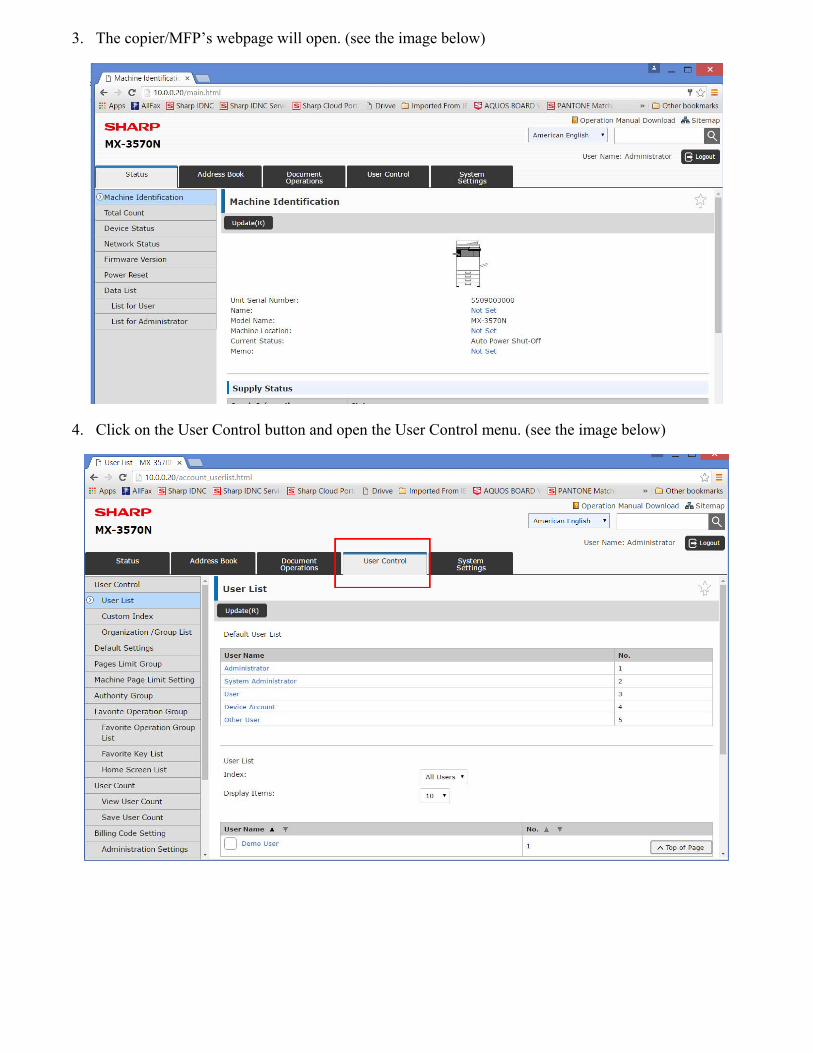
2. Click on the Administrator Login button and login into the webpage (default password is admin {lower case}). (see the image below)
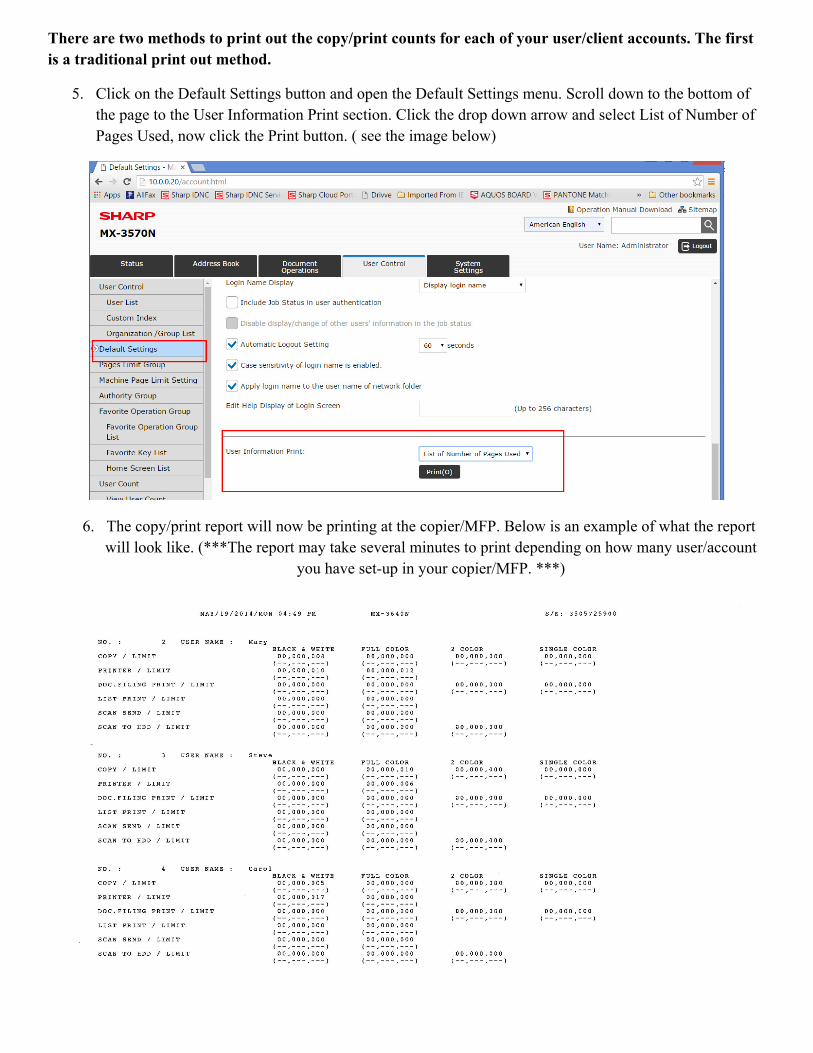
3. The copier/MFP’s webpage will open. (see the image below)
4. Click on the User Control button and open the User Control menu. (see the image below)
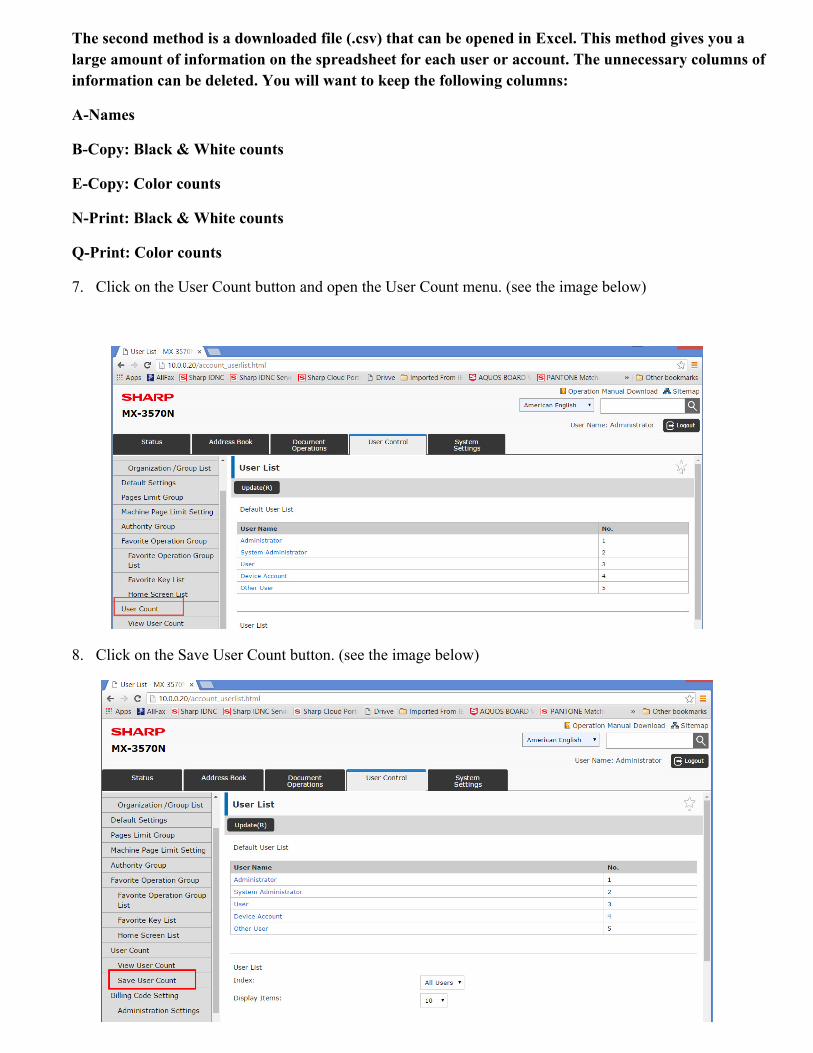
There are two methods to print out the copy/print counts for each of your user/client accounts. The first is a traditional print out method.
5. Click on the Default Settings button and open the Default Settings menu. Scroll down to the bottom of the page to the User Information Print section. Click the drop down arrow and select List of Number of Pages Used, now click the Print button. ( see the image below)
6. The copy/print report will now be printing at the copier/MFP. Below is an example of what the report will look like. (***The report may take several minutes to print depending on how many user/account
you have set-up in your copier/MFP. ***)
The second method is a downloaded file (.csv) that can be opened in Excel. This method gives you a large amount of information on the spreadsheet for each user or account. The unnecessary columns of information can be deleted. You will want to keep the following columns:
A-Names
B-Copy: Black & White counts
E-Copy: Color counts
N-Print: Black & White counts
Q-Print: Color counts
7. Click on the User Count button and open the User Count menu. (see the image below)
8. Click on the Save User Count button. (see the image below)
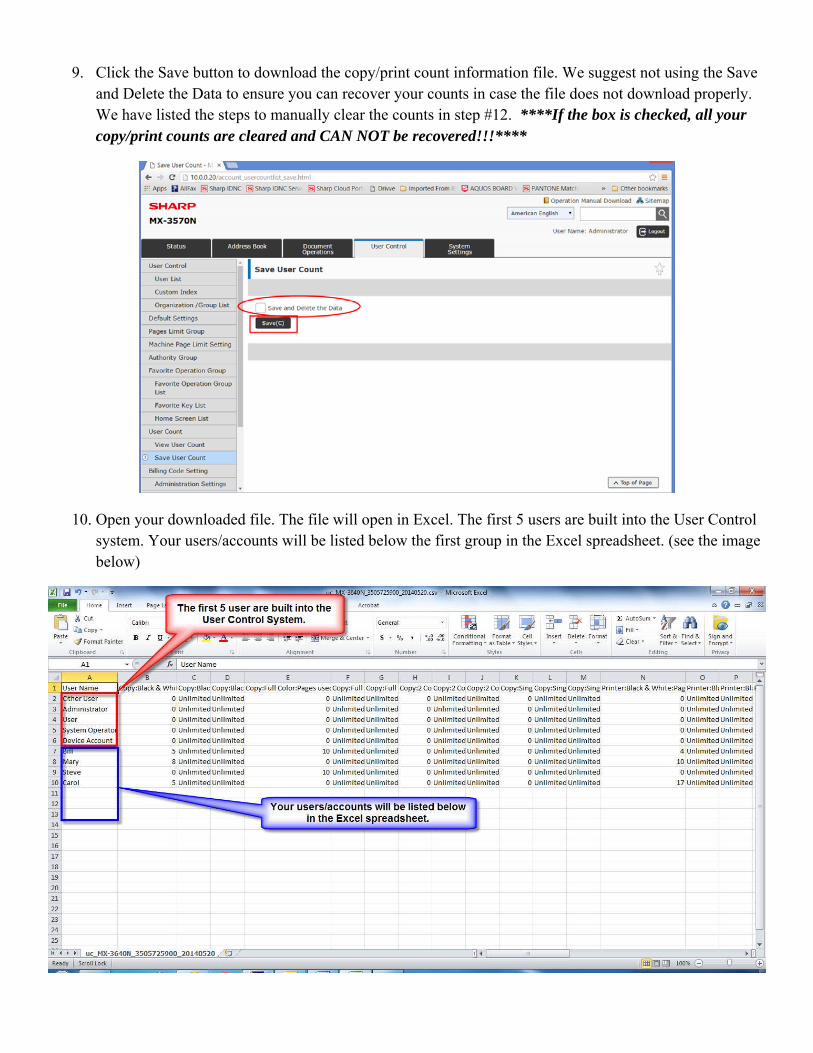
9. Click the Save button to download the copy/print count information file. We suggest not using the Save and Delete the Data to ensure you can recover your counts in case the file does not download properly. We have listed the steps to manually clear the counts in step #12. ****If the box is checked, all your copy/print counts are cleared and CAN NOT be recovered!!!****
10. Open your downloaded file. The file will open in Excel. The first 5 users are built into the User Control system. Your users/accounts will be listed below the first group in the Excel spreadsheet. (see the image below)
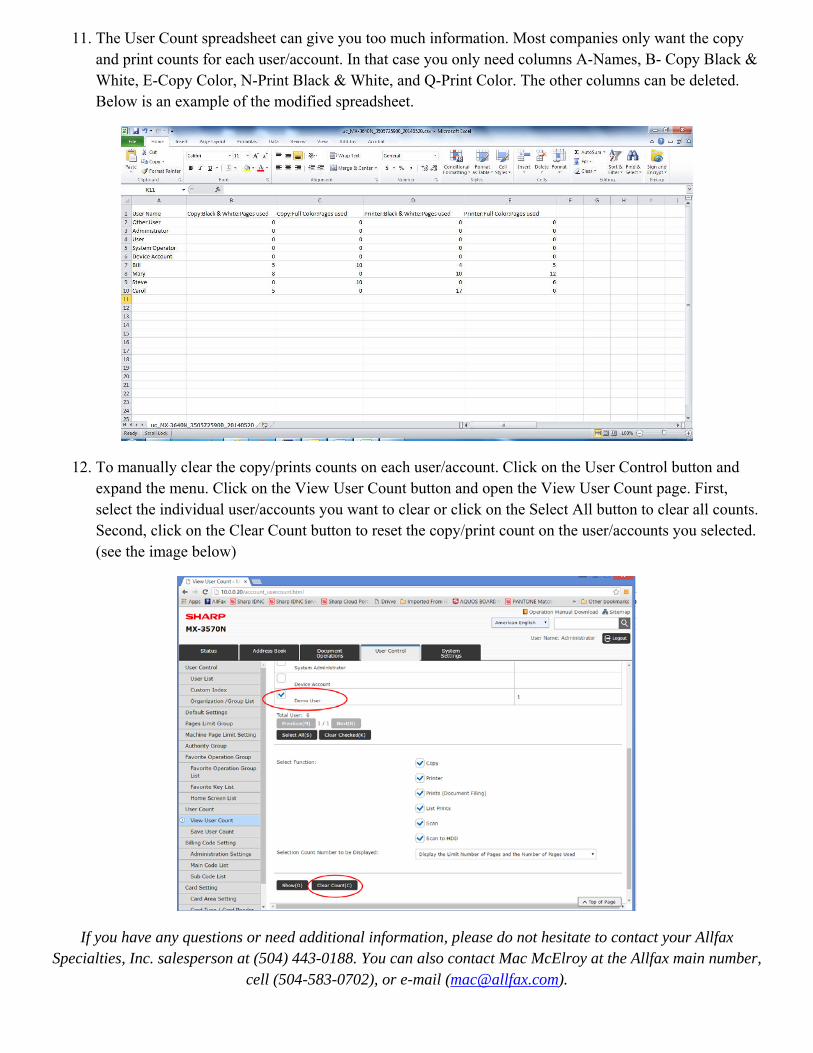
11. The User Count spreadsheet can give you too much information. Most companies only want the copy and print counts for each user/account. In that case you only need columns A-Names, B- Copy Black & White, E-Copy Color, N-Print Black & White, and Q-Print Color. The other columns can be deleted. Below is an example of the modified spreadsheet.
12. To manually clear the copy/prints counts on each user/account. Click on the User Control button and expand the menu. Click on the View User Count button and open the View User Count page. First, select the individual user/accounts you want to clear or click on the Select All button to clear all counts. Second, click on the Clear Count button to reset the copy/print count on the user/accounts you selected. (see the image below)
If you have any questions or need additional information, please do not hesitate to contact your Allfax Specialties, Inc. salesperson at (504) 443-0188. You can also contact Mac McElroy at the Allfax main number,
cell (504-583-0702), or e-mail ([email protected]).