Embed Size (px)
Citation preview
S964
5301 Oceanus Drive Huntington Beach, CA 92649-1030 714.489.2080 FAX 714.230.7070 www.shelleducation.com
Quality Resources for Every Classroom Instant Delivery 24 Hours a Day
Thank you for purchasing the following e-book–another quality product from Shell Education
For more information or to purchase additional books and materials, please visit our website at:
www.shelleducation.com
This e-book is copyrighted. If you accessed this e-book without making payment, you should be aware that neither the author nor the publisher has received any compensation, and you may be in violation of state and federal law.
For further information about our products and services, please e-mail us at: [email protected]
To receive special offers via e-mail, please join our mailing list at:www.shelleducation.com/emailoffers
Author
Christi E. Parker, M.A.Ed.
#9364—30 Graphic Organizers for Writing � ©Shell Educational Publishing
Shell Education5301 Oceanus Drive
Huntington Beach, CA 92649-1030
http://www.shelleducation.com
ISBN-978-1-4258-0389-6
©�006 Shell Education
Reprinted, 2007Made in U.S.A.
EditorGillian Eve Makepeace
Associate EditorHeather Brashear, M.S.
Project ManagerGillian Eve Makepeace
Editorial ConsultantEmily R. Smith, M.A.Ed.
Editor-in-ChiefSharon Coan, M.S.Ed.
Creative DirectorLee Aucoin
Editorial ManagerGisela Lee, M.A.
Production ManagerPeter Pulido
ImagingMisty Shaw
Illustration ManagerTimothy J. Bradley
Cover ArtistLesley Palmer
StandardsCompendium, ©2004 McREL
The classroom teacher may reproduce copies of materials in this book for classroom use only. The reproduction of any part for an entire school or school system is strictly prohibited. No part of this publication may be
transmitted, stored, or recorded in any form without written permission from the publisher.
PublisherCorinne Burton, M.A.Ed
©Shell Educational Publishing 3 #9364—30 Graphic Organizers for Writing
Table of ContentsIntroduction
Graphic Organizers . . . . . . . . . . . . . . . . . . . 4–6
Bloom’s Taxonomy . . . . . . . . . . . . . . . . . . . 7–8
Combining Graphic Organizers and Bloom’s Taxonomy . . . . . . . . . . . . . 8–9
Correlation to Standards . . . . . . . . . . . . . . 9–11
How to Use This Book . . . . . . . . . . . . . . 12–13
Lesson Flow Chart . . . . . . . . . . . . . . . . . . . . 14
Prewriting
A Burst of Ideas Graphic Organizer . . . . . . . . . . . . . . . . 15–18
A Bounty of Businesses Graphic Organizer . . . . . . . . . . . . . . . . 19–22
Shining Stars Graphic Organizer . . . . . . . . . . . . . . . . 23–26
Pondering Points of View Graphic Organizer . . . . . . . . . . . . . . . . 27–30
Building Knowledge Graphic Organizer . . . . . . . . . . . . . . . . 31–34
Surfing for Information Graphic Organizer . . . . . . . . . . . . . . . . 35–38
Drafting
Tuning In Graphic Organizer . . . . . . . . . 39–42
Seeing Clearly Graphic Organizer . . . . . 43–46
Snap, Crackle, Pop Graphic Organizer . . . . . . . . . . . . . . . . 47–50
Ladder of Succession Graphic Organizer . . . . . . . . . . . . . . . . 51–54
To Whom It May Concern Graphic Organizer . . . . . . . . . . . . . . . . 55–58
Outline Creations Graphic Organizer . . . . . . . . . . . . . . . . 59–62
Editing
Capitalization King Graphic Organizer . . . . . . . . . . . . . . . . 63–66
Picking Out Possessives Graphic Organizer . . . . . . . . . . . . . . . . 67–70
Editing (cont.)
Slicing Through Spelling Graphic Organizer . . . . . . . . . . . . . . . . 71–74
Parade of Pronouns Graphic Organizer . . . . . . . . . . . . . . . . 75–78
Pounding Out Prepositions Graphic Organizer . . . . . . . . . . . . . . . . 79–82
In a Nutshell Graphic Organizer . . . . . . . 83–86
Revising
Tying It Together Graphic Organizer . . . . . . . . . . . . . . . . 87–90
Where’s the Beef? Graphic Organizer . . . . . . . . . . . . . . . . 91–94
Me, Myself, and I Graphic Organizer . . . . . . . . . . . . . . . . 95–98
Focusing on Feedback Graphic Organizer . . . . . . . . . . . . . . . 99–102
The Perfect Balance Graphic Organizer . . . . . . . . . . . . . . 103–106
Checkmate Graphic Organizer . . . . . . 107–110
Publishing
Picture This Graphic Organizer . . . . . 111–114
Imaging That Graphic Organizer . . . . 115–118
Right On Time Graphic Organizer . . . 119–122
Check It Over Graphic Organizer . . . . 123–126
Presentation Time Graphic Organizer . . . . . . . . . . . . . . 127–130
In My Defense Graphic Organizer . . . 131–134
Appendix
Works Cited . . . . . . . . . . . . . . . . . . . . . . . . 135
Graphic Organizer Flip Book . . . . . . . 136–144
Graphic Organizer OverheadsThis section contains a copy of each blank graphic organizer. These 30 overhead transparencies are in the same order as the lessons in the book.
#9364—30 Graphic Organizers for Writing 4 ©Shell Educational Publishing
Introduction
Graphic OrganizersWhen working with students, what is the best way to have them classify different kinds of animals? How about getting them to explain the connections between certain characters in a story? How can teachers help students make broad connections between math concepts? Can students ever successfully differentiate between the different instruments in a band?
One way to improve students’ learning and performance across the grade levels, in a wide range of content areas with a diverse population of students, is by using graphic organizers in the classroom. Graphic organizers are visual representations that help gather and sort information. They help students see patterns and relationships between the given information. With only a few words, concepts are clarified, information and ideas are organized, and complex relationships are shown between the elements. Also, as an added bonus, graphic organizers help teachers figure out how students think.
More often than not, these organizers are referred to as maps because they help “map out” ideas in a visual way. In recent years, graphic organizers have taken on various names including semantic maps, webs, concept maps, story maps, and semantic organizers. Some examples of commonly used graphic organizers include spider maps, Venn diagrams, T-charts, and KWL charts. Perhaps the most widely used graphic organizer is the calendar. Calendars are used to sort, sift, record, and share information. In this series, the authors have gone beyond the common organizers seen in the past and have created lessons that use more unique graphic organizers.
How do graphic organizers work? Graphic organizers have a way of connecting several pieces of isolated information. They take new information and file it into an existing framework. Old information is retrieved in the process, and the new information is attached. This is positive news for the classroom teacher who has his or her students using graphic organizers. By using these organizers, the teacher is helping students make connections and assimilate new information into what they already know. In effect, the teacher is providing students with a mental filing cabinet where their knowledge can be easily stored and retrieved.
Understanding how the brain works helps to explain why graphic organizers are valuable tools for learning. Educational brain research says that the brain seeks patterns so that information can be made meaningful. In her book Science Continuum of Concepts for Grades K–6, Karen Olsen (1995) states, “From brain research we have come to understand that the brain is a pattern-seeking device in search of meaning and that learning is the acquisition of mental programs for using what we understand.”
©Shell Educational Publishing � #9364—30 Graphic Organizers for Writing
Introduction (cont.)
Graphic Organizers (cont.)Other researchers believe that graphic organizers are one of the most powerful ways to build semantic memories (Sprenger 1999). Eric Jensen (1998) states that semantic memory is “activated by association, similarities, or contrasts.” Graphic organizers assist students with such necessary connections.
How does the brain do this? The brain stores information in a manner similar to how a graphic organizer shows information. It screens large amounts of information and looks for patterns that are linked together. The brain is able to extract meaning more easily from a visual format like a graphic organizer than from written words on a page. Graphic organizers not only help students manage information but also offer information in a way that students can understand at a glance. When connections are made on paper, the information engages other parts of the brain. When these connections happen, the brain transfers the information from short-term memory to long-term memory.
So what does this mean for classroom teachers? It means that teachers who use graphic organizers help their students manage all the information they are presented with each day. These organizers record important pieces of information that students can connect with previous information and build on for future information.
There is more good news for teachers who are looking to develop their students’ reading skills. Research suggests that graphic organizers improve students’ overall reading abilities. When graphic organizers are used, reading comprehension improves (Brookbank et al. 1999; Sinatra, Stahl-Glemake, and Berg 1984). In fact, the National Reading Panel (2000) included graphic organizers in its list of effective instructional tools to improve reading comprehension.
Researchers also find that students at all levels are mastering key vocabulary skills when graphic organizers are used as teaching aids (Brookbank et al. 1999; Moore and Readence 1984). How does this happen? As previously stated, graphic organizers take new knowledge and integrate it with prior knowledge so that students can make connections and comprehend the material. So, graphic organizers help students focus on vocabulary development rather than other reading skills.
For those teachers who look for ways to improve their students’ writing abilities, graphic organizers do this as well. Studies performed with second and third graders showed that their writing skills improved when graphic organizers were incorporated as part of the writing process (Gallick-Jackson 1997). How do graphic organizers help to improve writing? When students fill out graphic organizers, they learn to summarize information and take notes more efficiently. When used in place of an outlining tool, graphic organizers make students think about how to write the new information in a different way.
#9364—30 Graphic Organizers for Writing 6 ©Shell Educational Publishing
Introduction (cont.)
Graphic Organizers (cont.)The information written on these organizers becomes personal as students write it in their own words. Organizers also provide a unique way for students to take notes during a lecture or while reading a passage. This is a skill that is useful throughout life. When teachers help students see that they only need to write the information they want to remember, students also begin to assess and evaluate what they already know.
Teachers who want to increase their students’ thinking and learning skills should also use graphic organizers. One way to improve students’ critical- and creative-thinking skills is by using graphic organizers while working on classroom projects (Brookbank et al. 1999; DeWispelaere and Kossack 1996). Especially when used with brainstorming, graphic organizers can help students generate creative ideas. Graphic organizers also help students clarify their thinking. Students use organizers to demonstrate their understanding of a topic.
Various types of graphic organizers serve as effective evaluation documents at the end of a unit. Most teachers struggle with getting their students to retain what they have learned. Graphic organizers provide a way for students to discover and retain new information (Bos and Anders 1992; Griffin, Malone, and Kameenui 1995; Ritchie and Volkl 2000).
Graphic organizers also complement many different learning styles. Teachers are faced every day with a diverse population of students who learn in different ways. Many of these students are visual learners. Visual learners remember information better through images like those created through graphic organizers. Students develop the habit of thinking in terms of symbols or key words. Not only are graphic organizers a great tool for visual thinkers, they are a great tool for helping all students become stronger visual thinkers.
Finally, teachers are able to meet the needs of their diverse learners with graphic organizers. Studies indicate that graphic organizers benefit students with learning disabilities (Boyle and Weishaar 1997; Doyle 1999; Gallego, Duran, and Scanlon 1990; Gardill and Jitendra 1999; Griffin, Simmons, and Kameenui 1991; Sinatra, Stahl-Glemake, and Berg 1984). In these studies, learning-disabled students understood content-area material, organized information, and retained and recalled information better when using graphic organizers. As a result, graphic organizers have become a great tool for classroom teachers who need to differentiate the materials.
Overall, researchers and teachers alike have found that the use of graphic organizers is beneficial to student learning. Not only do graphic organizers make learning more interesting and varied, but students’ ability to retain and recall learning is also increased. Teachers will find that when using graphic organizers like the ones in this book, their students are more willing and able to meet their classroom learning standards.
©Shell Educational Publishing � #9364—30 Graphic Organizers for Writing
Introduction (cont.)
Bloom’s TaxonomyIn 1956, educator Benjamin Bloom worked with a group of educational psychologists to classify levels of cognitive thinking. The levels they named are knowledge, comprehension, application, analysis, synthesis, and evaluation. Bloom’s Taxonomy has been used in classrooms over the last 40 years as a hierarchy of questions that progress from easy to more complex. The progression allows teachers to identify the level at which students are thinking. It also provides a framework for introducing a variety of questions and activities to students.
Many teachers see this taxonomy as a ladder. For example, some teachers think they must begin at the bottom with knowledge questions and work their way progressively up to the evaluative questions. But that is not necessary to achieve good questions for students. There are appropriate times for each level of questioning.
The taxonomy is a useful model for categorizing questions and classroom activities. The following paragraphs describe each of the levels of the taxonomy in more detail.
Knowledge—The knowledge cognitive skill requires that students recall or locate information, remember something previously learned, and memorize information. Some specific examples of knowledge in the classroom would include writing the definitions of words or labeling the planets in the solar system.
Comprehension—The comprehension cognitive skill requires that students understand and explain facts, demonstrate basic understanding of concepts and curriculum, translate facts into other words, grasp meanings, interpret information, or explain what happened in their own words (or pictures). Some specific examples of comprehension in the classroom would include describing the reasons clouds rain or summarizing a chapter of a story.
Application—The application cognitive skill requires that students use prior learning to solve a problem or to answer a question, transfer knowledge learned in one situation to another, use different material in new and concrete situations, and apply the lessons of the past to a situation today. A specific example of application would include taking specific data and putting it into a bar graph.
Analysis—The analysis cognitive skill requires that students see in-depth relationships, understand how parts relate to a whole, and break down material into its component parts. Some specific examples of analysis would include comparing and contrasting the current president’s campaign promises to those of President Abraham Lincoln or finding out the ways that a large influx of immigrants might change a community.
#9364—30 Graphic Organizers for Writing � ©Shell Educational Publishing
Introduction (cont.)
Bloom’s Taxonomy (cont.)Synthesis—The synthesis cognitive skill requires that students create new ideas by pulling parts of the information together, reform individual parts to make a new whole, and take a jumble of facts and combine them until they make sense. Some specific examples of synthesis in the classroom include creating a new song about the continents or writing a new ending to a book.
Evaluation—The evaluation cognitive skill requires that students make judgments based on evidence, judge the value of something, support judgments, and examine something and decide whether it measures up to a certain standard. Some specific examples of evaluation in the classroom include justifying the decision made to require homework every night or deciding whether to agree or disagree with the statement “lying is always bad.”
Combining Graphic Organizers and Bloom’s TaxonomyUsing graphic organizers with effective questioning techniques creates an added bonus to any curriculum. This combination takes lessons in the classroom to the next level of excellence. In effect, lessons that combine graphic organizers and Bloom’s Taxonomy create an ideal learning experience for students. The outcome is differentiated material that engages and meets the needs of all students.
Using graphic organizers while getting students to think on different levels creates a more complex and engaging lesson for students. When a teacher needs her students to apply the information they just learned, she can use a graphic organizer that correlates with the application level of Bloom’s Taxonomy. Or, the teacher can touch on multiple levels of the taxonomy. A graphic organizer might require students to fill in a chart to show their knowlege about and comprehension of the material. Then, they have to evaluate what they have written in a sentence or two. Think about the benefits of using graphic organizers to increase vocabulary skills while knowing how to ask different levels of questions to improve thinking skills at the same time. Imagine improving writing with graphic organizers and also getting students to analyze that writing. Students can learn how to take better notes and place them in an organizer that immediately helps them evaluate what they have written.
Critical-thinking skills are a by-product of both graphic organizers and Bloom’s Taxonomy. These two strategies mesh perfectly together and help students to think more effectively. Finally, using both of these strategies meets the needs of diverse students, including those with learning disabilities. All students can find ways to communicate their knowledge at various levels of learning and thinking.
©Shell Educational Publishing 9 #9364—30 Graphic Organizers for Writing
Introduction (cont.)
Combining Graphic Organizers and Bloom’s Taxonomy (cont.)The lessons in this book show how to easily align graphic organizers with Bloom’s Taxonomy. These lessons are organized into five different content areas. For each of these areas, a lesson that correlates with each level of Bloom’s Taxonomy is provided. Each lesson includes general directions, a blank copy of the graphic organizer, an overhead transparency (located in order in the back of the book), and a sample lesson along with a completed sample graphic organizer.
Correlation to StandardsShell Educational Publishing (SEP) is committed to producing educational materials that are research and standards based. In this effort, the company uses the Mid-continent Research for Education and Learning (McREL) Standards Compendium. Each year, McREL analyzes state standards and revises the compendium. By following this procedure, McREL produces a general compilation of national standards. Each lesson in this book is based on a McREL standard. Then, the product is correlated to the academic standards of all 50 states, the District of Columbia, and the Department of Defense Dependent Schools. Correlation reports customized for each state may be printed directly from the SEP website at http://www.seppub.com.
Purpose and Intent of Standards
The No Child Left Behind (NCLB) legislation mandates that all states adopt academic standards that identify the skills students will learn in kindergarten through grade 12. While many states had already adopted academic standards prior to NCLB, the legislation requirements ensure that state standards are detailed and comprehensive.
Standards are designed to focus instruction and guide adoption of curricula. Standards are statements that describe the criteria necessary for students to meet specific academic goals. They define the knowledge, skills, and content students should acquire at each grade level. Standards are also used to develop standardized tests to evaluate students’ academic progress. In many states today, teachers are required to demonstrate how their lessons meet state standards. State standards are used in the planning and development of all SEP products. So, educators can be assured the products meet their academic requirements.
How to Find Standards Correlations
Complete standards correlation reports for each state can be printed from the SEP website. To print a correlation report for this product, visit the website at http://www.seppub.com and follow the on-screen directions. For assistance in printing correlation reports, please contact Customer Service at 1-877-777-3450.

#9364—30 Graphic Organizers for Writing 10 ©Shell Educational Publishing
Introduction (cont.)
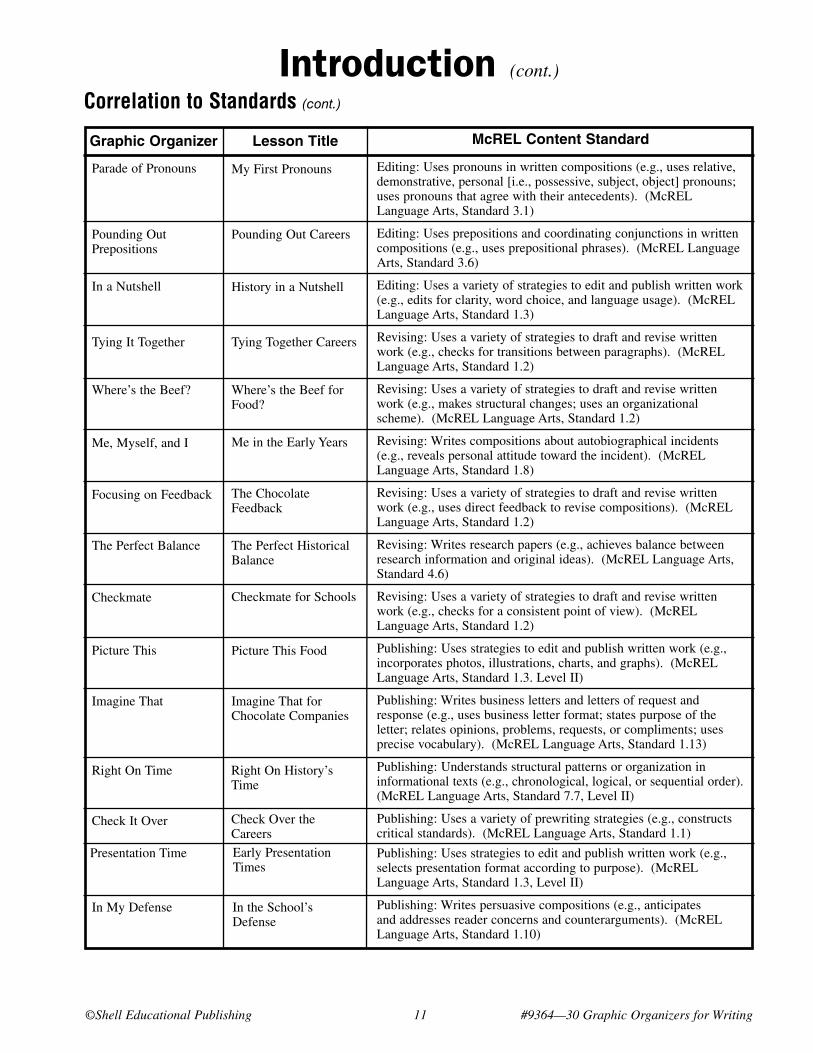
Correlation to Standards (cont.)Unless otherwise noted, the McREL standards listed in this book are taken from the Level III (Grades 5–8) Language Arts standards. The number listed for each standard (e.g., 1.1) refers to the standard number and the benchmark within the standard.
A Burst of Ideas
Pondering Points of View
Ladder of Succession
Capitalization King
Picking Out Possessives
A Burst of Ideas on Food
A Bounty of Businesses A Bounty of Chocolate
Shining Stars The Shining Early Years
Building Knowledge
Surfing for Information
Tuning In
Seeing Clearly
Snap, Crackle, Pop The Snap, Crackle, and Pop of Foods
To Whom It May Concern
Outline Creations School Issues Outlines
To All Chocolate Companies
Seeing Historical Events Clearly
My First Time Tuning In
Surfing for Careers
Building Historical Knowledge
Pondering the School's Point of View
Climbing the Career Ladder
Capitalizing on Chocolate
Picking Out the Food Possessives
Prewriting: Uses a variety of prewriting strategies (e.g., brainstorms). (McREL Language Arts, Standard 1.1)
Prewriting: Uses a variety of prewriting strategies (e.g., brainstorms). (McREL Language Arts, Standard 1.1)
Prewriting: Uses a variety of prewriting strategies (e.g., uses published pieces as writing models). (McREL Language Arts, Standard 1.1)
Prewriting: Writes persuasive compositions (e.g., supports arguments with detailed evidence). (McREL Language Arts, Standard 1.10)
Prewriting: Uses a variety of prewriting strategies (e.g., builds background knowledge). (McREL Language Arts, Standard 1.1)
Prewriting: Uses a variety of prewriting strategies (e.g., constructs critical standards). (McREL Language Arts, Standard 1.1)
Drafting: Writes compositions about autobiographical incidents (e.g., presents details in a logical manner). (McREL Language Arts, Standard 1.8)
Drafting: Uses a variety of strategies to draft and revise written work (e.g., analyzes and clarifies meaning). (McREL Language Arts, Standard 1.2)
Drafting: Uses a variety of strategies to draft and revise written work (e.g., uses sensory words and figurative language). (McREL Language Arts, Standard 1.2)
Drafting: Writes expository compositions (e.g., organizes and presents information in a logical manner). (McREL Language Arts, Standard 1.6)
Drafting: Writes business letters and letters of request and response (e.g., uses business letter format; states purpose of the letter; relates opinions, problems, requests, or compliments). (McREL Language Arts, Standard 1.13)
Drafting: Uses a variety of prewriting strategies (e.g., makes outlines). (McREL Language Arts, Standard 1.1)
Editing: Uses conventions of capitalization in written compositions (e.g., proper nouns [companies, schools, and institutions], brand names of products). (McREL Language Arts, Standard 3.9)
Editing: Uses nouns in written compositions (e.g., forms possessives of nouns). (McREL Language Arts, Standard 3.2)
Editing: Uses conventions of spelling in written compositions (e.g., uses a dictionary and other resources to spell words). (McREL Language Arts, Standard 3.8)
Graphic Organizer Lesson Title McREL Content Standard
Slicing Through School Spellings
Slicing Through Spelling
©Shell Educational Publishing 11 #9364—30 Graphic Organizers for Writing
In the School’s Defense
Editing: Uses pronouns in written compositions (e.g., uses relative, demonstrative, personal [i.e., possessive, subject, object] pronouns; uses pronouns that agree with their antecedents). (McREL Language Arts, Standard 3.1)
Editing: Uses prepositions and coordinating conjunctions in written compositions (e.g., uses prepositional phrases). (McREL Language Arts, Standard 3.6)
Editing: Uses a variety of strategies to edit and publish written work (e.g., edits for clarity, word choice, and language usage). (McREL Language Arts, Standard 1.3)
Revising: Uses a variety of strategies to draft and revise written work (e.g., checks for transitions between paragraphs). (McREL Language Arts, Standard 1.2)
Revising: Uses a variety of strategies to draft and revise written work (e.g., makes structural changes; uses an organizational scheme). (McREL Language Arts, Standard 1.2)
Revising: Writes compositions about autobiographical incidents (e.g., reveals personal attitude toward the incident). (McREL Language Arts, Standard 1.8)
Revising: Uses a variety of strategies to draft and revise written work (e.g., uses direct feedback to revise compositions). (McREL Language Arts, Standard 1.2)
Revising: Writes research papers (e.g., achieves balance between research information and original ideas). (McREL Language Arts, Standard 4.6)
Revising: Uses a variety of strategies to draft and revise written work (e.g., checks for a consistent point of view). (McREL Language Arts, Standard 1.2)
Publishing: Uses strategies to edit and publish written work (e.g., incorporates photos, illustrations, charts, and graphs). (McREL Language Arts, Standard 1.3. Level II)
Publishing: Writes business letters and letters of request and response (e.g., uses business letter format; states purpose of the letter; relates opinions, problems, requests, or compliments; uses precise vocabulary). (McREL Language Arts, Standard 1.13)
Publishing: Understands structural patterns or organization in informational texts (e.g., chronological, logical, or sequential order). (McREL Language Arts, Standard 7.7, Level II)
Publishing: Uses a variety of prewriting strategies (e.g., constructs critical standards). (McREL Language Arts, Standard 1.1)
Publishing: Uses strategies to edit and publish written work (e.g., selects presentation format according to purpose). (McREL Language Arts, Standard 1.3, Level II)
Publishing: Writes persuasive compositions (e.g., anticipates and addresses reader concerns and counterarguments). (McREL Language Arts, Standard 1.10)
In My Defense
Introduction (cont.)
Correlation to Standards (cont.)
Graphic Organizer Lesson Title McREL Content Standard
Parade of Pronouns
Tying It Together
Where’s the Beef?
Me, Myself, and I
Focusing on Feedback
The Perfect Balance
Checkmate
Picture This
Imagine That
Right On Time
Check It Over
My First Pronouns
Pounding Out Prepositions
Pounding Out Careers
Tying Together Careers
Where’s the Beef for Food?
Me in the Early Years
The Chocolate Feedback
The Perfect Historical Balance
Checkmate for Schools
Picture This Food
Imagine That for Chocolate Companies
Right On History’s Time
Check Over the Careers
In a Nutshell History in a Nutshell
Presentation Time Early Presentation Times
#9364—30 Graphic Organizers for Writing 1� ©Shell Educational Publishing
Introduction (cont.)
How to Use This Book
©Shell Educational Publishing 55 #9364—30 Graphic Organizers for Writing
Why Use the Graphic Organizer • Business letters should be professional and well organized. The
To Whom It May Concern graphic organizer allows students to organize their business letters before creating their drafts.
How to Use the Graphic Organizer 1. Have students form groups and create new lists of businesses
that they would like to contact. You may give them ideas of businesses they might choose, such as businesses that could offer information concerning topics being studied in class. Tell students that they are now going to write rough drafts of business letters to these companies.
2. Display the To Whom It May Concern Overhead. Using the overhead, explain the various parts of a business letter, along with the rules for writing a business letter, such as using a colon after the greeting rather than a comma. Then, choose a business as an example. Have the class brainstorm possible greetings, information to include in the body, and possible closings. Write their ideas on the overhead. Then, show students how to transform the information from the graphic organizer into a business letter rough draft. You may wish to explain that the body of the letter should contain the purpose for writing the letter, the students’ requests, and possibly compliments.
3. Distribute the To Whom It May Concern graphic organizer (page 56). Have students complete their own organizers for the companies they have chosen. Have them then transfer the information from their graphic organizers into business letter rough drafts.
4. You may also choose to help the students find the companies’ addresses using the Internet or other resources.
Drafting Lesson
To Whom It May Concern
Graphic Organizer
Skills ConnectionType of Writing—business letter
Drafting—uses the business letter format to state concerns, purposes, and requests
Bloom’s Level—Synthesis (See page 8 for a description.)
Return Address (Your or Your School’s Address):
________________________________________
________________________________________
________________________________________
________________________________________
Date ___________________________________
Recipient’s Name and Business Address
___________________________________________
___________________________________________
___________________________________________
___________________________________________
Possible Salutations or Greetings to Use ______________________________________
__________________________________________________________________________
Body
__________________________________________________________________________
__________________________________________________________________________
__________________________________________________________________________
__________________________________________________________________________
__________________________________________________________________________
__________________________________________________________________________
__________________________________________________________________________
__________________________________________________________________________
Possible Closings ________________________
Signature _______________________________
ELL SupportIf ELL students are struggling with writing their drafts, allow them to tape record the things they would like to say in their drafts for each part of their business letters. Then, allow higher-level students or teachers’ aides to help them transfer their recordings onto paper.
Extension IdeaEncourage students to create clever, yet professional greetings that will get their companies’ attention.
#9364—30 Graphic Organizers for Writing 56 ©Shell Educational Publishing
Drafting Blank Graphic Organizer
Name _______________________________________________
To Whom It May ConcernDirections: Brainstorm possible ideas and information to include in each part of your business letter using the lines below. Then, use the information and format from your graphic organizer to create your business letter rough draft.
Return Address: (Your or Your School’s Address):
________________________________________
________________________________________
________________________________________
________________________________________
Date ___________________________________
Recipient’s Name and Business Address
___________________________________________
___________________________________________
___________________________________________
___________________________________________
Possible Salutations or Greetings to Use ______________________________________
__________________________________________________________________________
Body
__________________________________________________________________________
__________________________________________________________________________
__________________________________________________________________________
__________________________________________________________________________
__________________________________________________________________________
__________________________________________________________________________
__________________________________________________________________________
__________________________________________________________________________
Possible Closings ________________________
Signature _______________________________
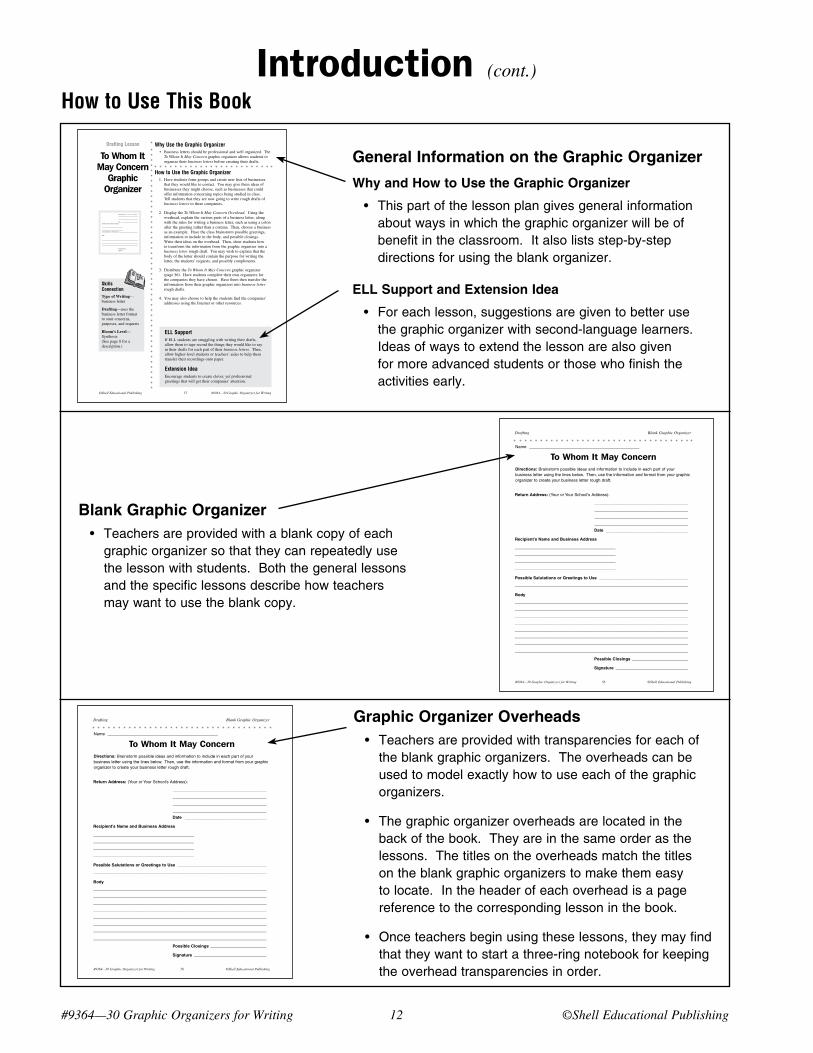
General Information on the Graphic Organizer
Why and How to Use the Graphic Organizer
• Thispartofthelessonplangivesgeneralinformationaboutwaysinwhichthegraphicorganizerwillbeofbenefitintheclassroom.Italsolistsstep-by-stepdirectionsforusingtheblankorganizer.
ELL Support and Extension Idea
• Foreachlesson,suggestionsaregiventobetterusethegraphicorganizerwithsecond-languagelearners.Ideasofwaystoextendthelessonarealsogivenformoreadvancedstudentsorthosewhofinishtheactivitiesearly.
Blank Graphic Organizer • Teachersareprovidedwithablankcopyofeach
graphicorganizersothattheycanrepeatedlyusethelessonwithstudents.Boththegenerallessonsandthespecificlessonsdescribehowteachersmaywanttousetheblankcopy.
Graphic Organizer Overheads • Teachersareprovidedwithtransparenciesforeachof
theblankgraphicorganizers.Theoverheadscanbeusedtomodelexactlyhowtouseeachofthegraphicorganizers.
• Thegraphicorganizeroverheadsarelocatedinthebackofthebook.Theyareinthesameorderasthelessons.Thetitlesontheoverheadsmatchthetitlesontheblankgraphicorganizerstomakethemeasytolocate.Intheheaderofeachoverheadisapagereferencetothecorrespondinglessoninthebook.
• Onceteachersbeginusingtheselessons,theymayfindthattheywanttostartathree-ringnotebookforkeepingtheoverheadtransparenciesinorder.
©Shell Educational Publishing 13 #9364—30 Graphic Organizers for Writing
Introduction (cont.)
How to Use This Book (cont.)
©Shell Educational Publishing 57 #9364—30 Graphic Organizers for Writing
Sample Lesson Drafting
To All Chocolate CompaniesStandard/Objective • Drafting: Writes business letters and letters of request and response (e.g., uses business letter
format; states purpose of the letter; relates opinions, problems, requests, or compliments). (McREL Language Arts, Standard 1.13)
• Students will use their To Whom It May Concern graphic organizers to organize the information they would like to include in their chocolate business letters to chocolate companies. They will then create business letter rough drafts based on the information in their graphic organizers.
The Lesson 1. Tell students that they are now going to write their business letter
rough drafts to the chocolate companies they brainstormed in the prewriting activities. Show students the To Whom It May Concern Overhead. Discuss the various parts of a business letter and rules for writing a business letter using the overhead.
2. Copy the information from the sample graphic organizer (page 58) onto the overhead. Then, go through the example with the students. Ask them for other information or questions that they might include in the body of their letters. Model how to turn the information into a business letter rough draft.
3. Distribute the To Whom It May Concern graphic organizer (page 56) to the students. Have the students complete their graphic organizers for the chocolate companies they have chosen. Then, have them create their own business letter rough drafts using the information in their graphic organizers. After the drafts are completed, collect them so that they can be used in the editing lesson, Capitalization King (pages 63–66).
ELL SupportIf ELL students are struggling with writing their business letter drafts, allow them to tape record the things they would like to say in their drafts for each part of their business letters. Then, allow higher-level students or teachers’ aids to help them transfer their recordings onto paper.
Extension IdeaEncourage students to create clever, yet professional greetings that will get the chocolate companies’ attention.
Connections to Other Lessons• Capitalization King—pages 63–66• Focusing on Feedback—pages 99–102• It’s in the Mail—pages 115–118
Please refer to the following lessons to continue the steps in the process for creating business letters.
Return Address (Your or Your School’s Address):
_____________________________________________
_____________________________________________
_____________________________________________
_____________________________________________
Date _______________________________________
Recipient’s Name and Business Address
________________________________________________
________________________________________________
________________________________________________
________________________________________________
Possible Salutations or Greetings to Use __________________________________________
__________________________________________________________________________________
Body
__________________________________________________________________________________
__________________________________________________________________________________
__________________________________________________________________________________
__________________________________________________________________________________
__________________________________________________________________________________
__________________________________________________________________________________
__________________________________________________________________________________
__________________________________________________________________________________
Possible Closings __________________________
Signature __________________________________
#9364—30 Graphic Organizers for Writing 58 ©Shell Educational Publishing
Drafting Sample Graphic Organizer
Name ______________________________________________________
To Whom It May Concern for Chocolate Companies
Directions: Brainstorm possible ideas and information to include in each part of your business letter using the lines below.
Mrs. Kristin Davidson
North Giggles Middle School
117 North Happy Street
Smiley, Georgia 70259
September 12, 2006
Public Relations Department
The Hershey Company
P.O. Box 810, 100 Crystal A Drive
Hershey, PA 17033
To Whom It May Concern: or Dear Ladies and
Gentlemen: or Dear Chocolate Experts:
I greatly enjoy eating Hershey’s Kisses. They are one of my favorite snacks. In fact, my entire
class is crazy about them.
I am curious about how Hershey’s Kisses are made. I would also like to know how you make
the wrapping for the Hershey’s Kisses, as well as how you decided on the name “Hershey’s Kisses.”
If you have any information on how chocolate is made and, in particular, how Hershey’s Kisses
are made, I would greatly appreciate it. I would also be interested in the history of Hershey’s Kisses
and other Hershey candies. Thank you in advance for any information that you might be able to
send to me and my classmates.
Sincerely or With Many Thanks,
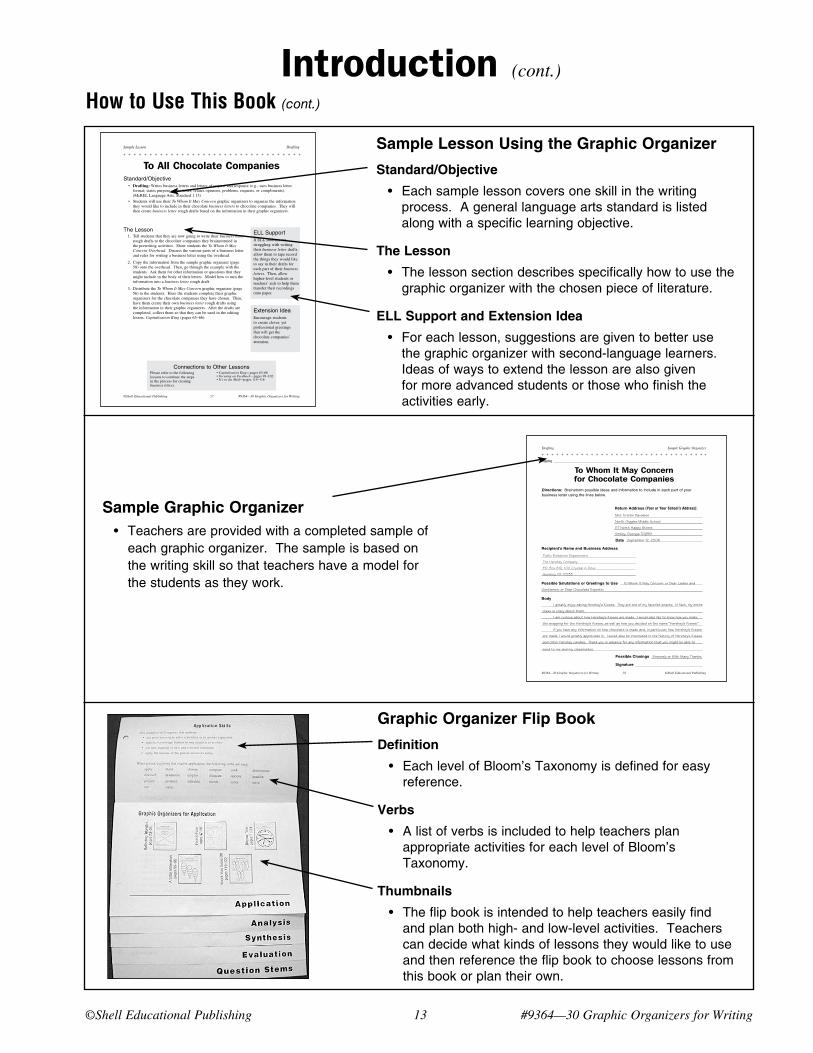
Sample Lesson Using the Graphic Organizer
Standard/Objective
• Eachsamplelessoncoversoneskillinthewritingprocess.Agenerallanguageartsstandardislistedalongwithaspecificlearningobjective.
The Lesson
• Thelessonsectiondescribesspecificallyhowtousethegraphicorganizerwiththechosenpieceofliterature.
ELL Support and Extension Idea
• Foreachlesson,suggestionsaregiventobetterusethegraphicorganizerwithsecond-languagelearners.Ideasofwaystoextendthelessonarealsogivenformoreadvancedstudentsorthosewhofinishtheactivitiesearly.
Sample Graphic Organizer • Teachersareprovidedwithacompletedsampleof
eachgraphicorganizer.Thesampleisbasedonthewritingskillsothatteachershaveamodelforthestudentsastheywork.
Graphic Organizer Flip Book
Definition
• EachlevelofBloom’sTaxonomyisdefinedforeasyreference.
Verbs
• AlistofverbsisincludedtohelpteachersplanappropriateactivitiesforeachlevelofBloom’sTaxonomy.
Thumbnails
• Theflipbookisintendedtohelpteacherseasilyfindandplanbothhigh-andlow-levelactivities.Teacherscandecidewhatkindsoflessonstheywouldliketouseandthenreferencetheflipbooktochooselessonsfromthisbookorplantheirown.
#9364—30 Graphic Organizers for Writing 14 ©Shell Educational Publishing
Introduction (cont.)
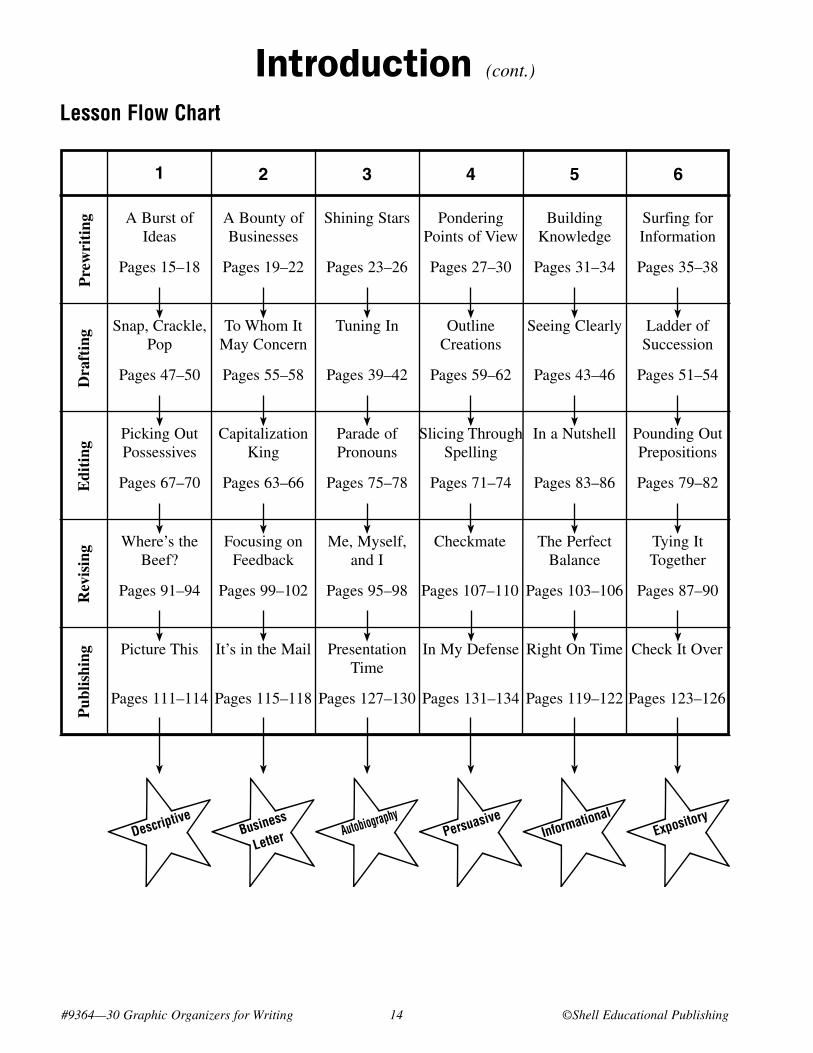
Lesson Flow Chart
1 2 3 4 5 6
A Burst of Ideas
Pages 15–18
Snap, Crackle, Pop
Pages 47–50
Picking Out Possessives
Pages 67–70
Where’s the Beef?
Pages 91–94
Picture This
Pages 111–114
A Bounty of Businesses
Pages 19–22
To Whom It May Concern
Pages 55–58
Capitalization King
Pages 63–66
Focusing on Feedback
Pages 99–102
It’s in the Mail
Pages 115–118
Shining Stars
Pages 23–26
Tuning In
Pages 39–42
Parade of Pronouns
Pages 75–78
Me, Myself, and I
Pages 95–98
Presentation Time
Pages 127–130
Pondering Points of View
Pages 27–30
Outline Creations
Pages 59–62
Slicing Through Spelling
Pages 71–74
Checkmate
Pages 107–110
In My Defense
Pages 131–134
Building Knowledge
Pages 31–34
Seeing Clearly
Pages 43–46
In a Nutshell
Pages 83–86
The Perfect Balance
Pages 103–106
Right On Time
Pages 119–122
Surfing for Information
Pages 35–38
Ladder of Succession
Pages 51–54
Pounding Out Prepositions
Pages 79–82
Tying It Together
Pages 87–90
Check It Over
Pages 123–126
DescriptiveBusiness
Letter AutobiographyPersuasive
InformationalExpository
Pre
wri
ting
Dra
ftin
gE
diti
ngR
evis
ing
Pub
lishi
ng
©Shell Educational Publishing 1� #9364—30 Graphic Organizers for Writing
Why Use the Graphic Organizer • It is important for students to think of several ideas for writing
topics to ensure that they have chosen their best ideas. The A Burst of Ideas graphic organizer allows students to brainstorm ideas for descriptive writing pieces.
How to Use the Graphic Organizer 1. Bring in several objects for students to observe. Some of the
objects might be unknown to them, such as tools used long ago or pieces of artwork. Ask students which of the objects would be best to describe and why. How would they describe the objects?
2. Then, show students the A Burst of Ideas Overhead. Ask them to list other objects that might be fun to describe. Write their ideas on the overhead.
3. Distribute the A Burst of Ideas graphic organizer (page 16). Tell the class that they will be brainstorming other objects that they would like to describe. The objects could be items they see around the room, items they have at home, or some of their favorite things.
4. After they have completed their list of items to describe, ask the students to choose the one item that would be the best to use in a descriptive writing piece. Have them write the item in the center of their graphic organizer.
Prewriting Lesson
A Burst of Ideas Graphic
Organizer
Skills ConnectionType of Writing—descriptive
Prewriting—brainstorming writing ideas
Bloom’s Level—Knowledge (See page 7 for a description.)
#9364—30 Graphic Organizers for Writing 16 ©Shell Educational Publishing
Prewriting Blank Graphic Organizer
Name _______________________________________________
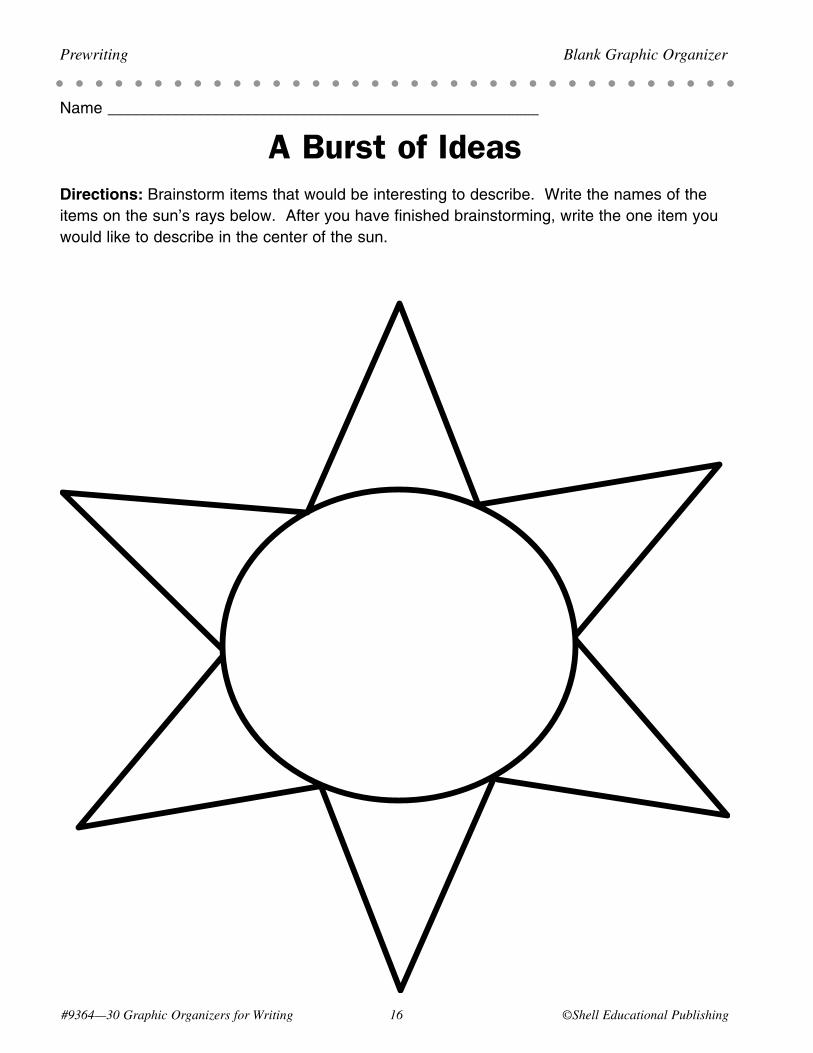
A Burst of IdeasDirections: Brainstorm items that would be interesting to describe. Write the names of the items on the sun’s rays below. After you have finished brainstorming, write in the middle of the sun the one item you would like to describe.
ELL SupportAllow ELL students to glue computer graphics of things they would like to describe on their graphic organizers, rather than requiring them to write out words.
Extension IdeaChallenge students to list items that would be unfamiliar to their classmates. This would allow them to introduce new items to their classmates.
#9364—30 Graphic Organizers for Writing 16 ©Shell Educational Publishing
Prewriting Blank Graphic Organizer
Name ______________________________________________________
A Burst of IdeasDirections: Brainstormitemsthatwouldbeinterestingtodescribe.Writethenamesoftheitemsonthesun’sraysbelow.Afteryouhavefinishedbrainstorming,writetheoneitemyouwouldliketodescribeinthecenterofthesun.
©Shell Educational Publishing 1� #9364—30 Graphic Organizers for Writing
Connections to Other Lessons
Sample Lesson Prewriting
A Burst of Ideas on FoodStandard/Objective • Prewriting: Uses a variety of prewriting strategies (e.g., brainstorms). (McREL Language Arts,
Standard 1.1)
• Students will brainstorm various foods they could describe using their A Burst of Ideas graphic organizers.
The Lesson 1. Project the A Burst of Ideas Overhead so that students can see
it. Then, copy the various foods listed on the sample graphic organizer (page 18) onto the overhead. Ask the students which food names give them vivid pictures in their minds when they hear them. Which foods would be more fun to describe? Which foods would allow for more descriptive words to be used? Have the class vote on the best food to describe. Write that food in the center of the “sun.”
2. Give each student a copy of the A Burst of Ideas graphic organizer (page 16.) Tell them that it is now their turn to brainstorm foods that would be fun to describe. Have them complete their graphic organizers, creating lists of vivid foods.
3. Once students have completed their graphic organizers, ask them to choose the one food on their organizers that they would like to describe in their writing. Have them write that food item in the center of their graphic organizers.
4. Collect their graphic organizers for use later in the Snap, Crackle, Pop drafting lesson (pages 47–50).
ELL SupportAllow ELL students to glue computer graphics of food on their graphic organizers, rather than requiring them to spell all of the various names of the foods they would like to describe.
Extension IdeaChallenge students to list foods that would be unfamiliar to their classmates. This way, they can describe them more vividly in their writing so that their classmates will learn about new foods.
Connections to Other Lessons• Snap, Crackle, Pop—pages 47–50• Picking Out Possessives—pages 67–70• Where’s the Beef?—pages 91–94• Picture This—pages 111–114
Please refer to the following lessons to continue the steps in the process for creating descriptive writing pieces.
#9364—30 Graphic Organizers for Writing 1� ©Shell Educational Publishing
Prewriting Sample Graphic Organizer
Name ______________________________________________________
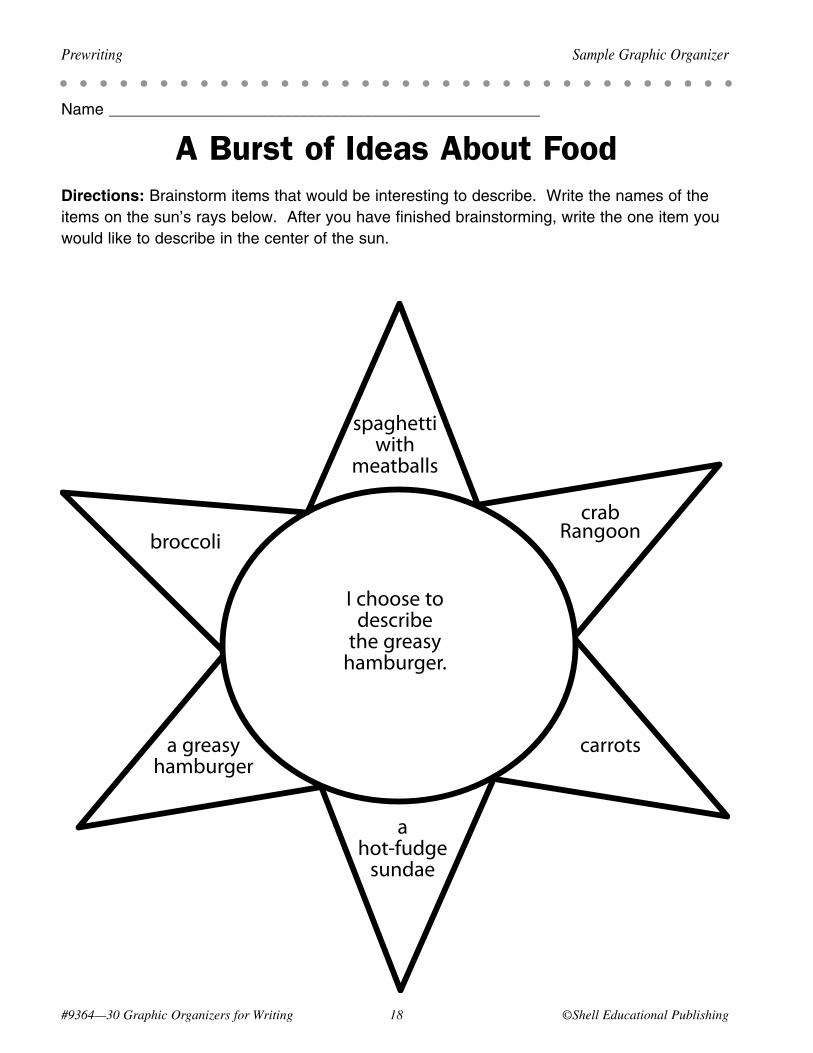
A Burst of Ideas About FoodDirections:Brainstormitemsthatwouldbeinterestingtodescribe.Writethenamesoftheitemsonthesun’sraysbelow.Afteryouhavefinishedbrainstorming,writetheoneitemyouwouldliketodescribeinthecenterofthesun.
broccolicrab
Rangoon
spaghetti with
meatballs
carrotsa greasy hamburger
a hot-fudge
sundae
I choose to describe
the greasy hamburger.
©Shell Educational Publishing 19 #9364—30 Graphic Organizers for Writing
Why Use the Graphic Organizer • The A Bounty of Businesses graphic organizer allows students
to generate lists of various companies that could be written to in order to serve the purpose of the students’ writing.
How to Use the Graphic Organizer 1. Ask students why people write letters to businesses. Write their
responses on the board. Then, tell the students that they will be writing business letters to various businesses in order to gain information about a particular topic. Either give students the topic for which they will be requesting information, or allow them to choose their own topics. The businesses could relate to a thematic unit or topic you are currently studying, or the businesses could be chosen by the student based on their own interests.
2. Display the A Bounty of Businesses Overhead. Use a sample topic to brainstorm a list of businesses that might be able to provide information on that topic. Then, assign students their topics, or allow them to choose their own.
3. Give each student the A Bounty of Businesses graphic organizer (page 20). Tell them that they now need to use their graphic organizers to generate lists of businesses that would be able to provide information concerning their topics.
4. Students may then choose one of the businesses from their graphic organizers to contact when creating their business letters.
Prewriting Lesson
A Bounty of Businesses
Graphic Organizer
Skills ConnectionType of Writing—business letter
Prewriting—creating lists to generate thought
Bloom’s Level—Comprehension (See page 7 for a description.)
ELL SupportAllow ELL students to use the yellow pages of phone books in order to find the names of businesses that would fit into their categories.
Extension IdeaChallenge students to brainstorm lists of businesses that focus on topics they are studying in school.
#9364—30 Graphic Organizers for Writing 20 ©Shell Educational Publishing
Prewriting Blank Graphic Organizer
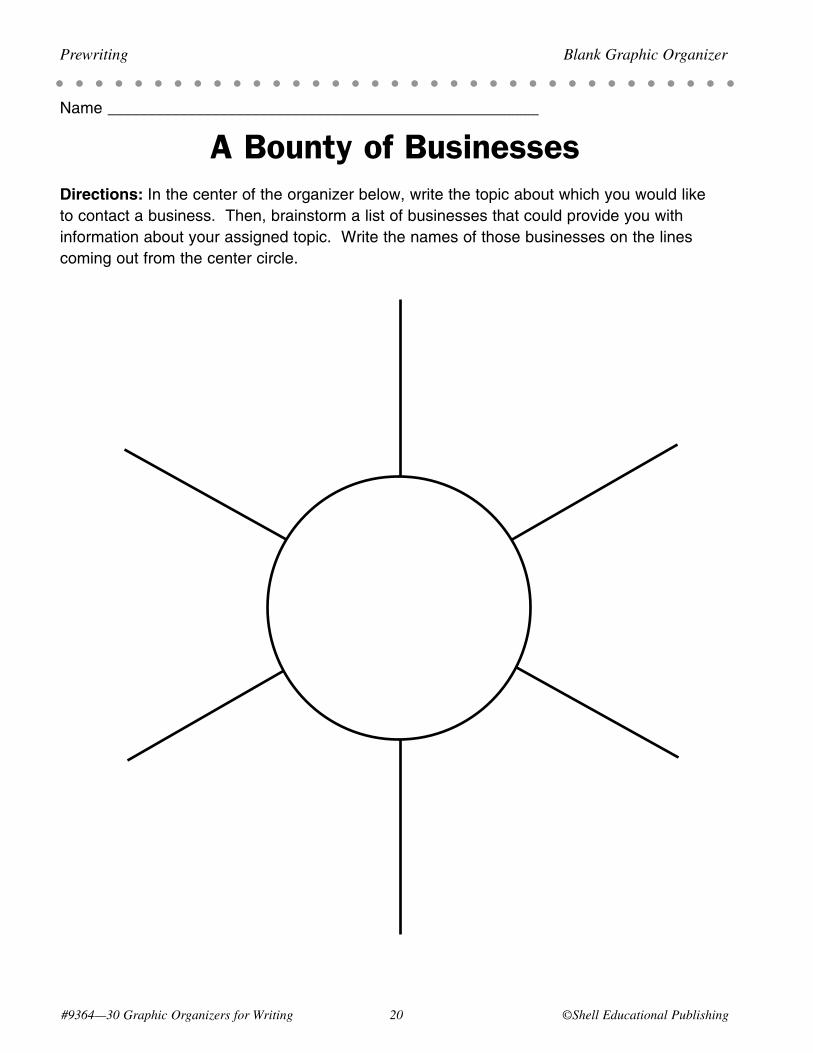
Name ______________________________________________________
A Bounty of BusinessesDirections: In the center of the organizer below, write the topic about which you would like to contact a business. Then, brainstorm a list of businesses that could provide you with information about your assigned topic. Write the names of those businesses on the lines coming out from the center circle.
#9364—30 Graphic Organizers for Writing �0 ©Shell Educational Publishing
Prewriting Blank Graphic Organizer
Name ______________________________________________________
A Bounty of BusinessesDirections: Inthecenteroftheorganizerbelow,writethetopicaboutwhichyouwouldliketocontactabusiness.Then,brainstormalistofbusinessesthatcouldprovideyouwithinformationaboutyourassignedtopic.Writethenamesofthosebusinessesonthelinescomingoutfromthecentercircle.
©Shell Educational Publishing �1 #9364—30 Graphic Organizers for Writing
Sample Lesson Prewriting
A Bounty of ChocolateStandard/Objective • Prewriting: Uses a variety of prewriting strategies (e.g., brainstorms). (McREL Language Arts,
Standard 1.1)
• Students will use their A Bounty of Businesses graphic organizers to generate names of chocolate companies that could provide information concerning chocolate.
The Lesson 1. Give each student a small piece of chocolate. Ask them to
observe their chocolate pieces. How do they think chocolate is made? What ingredients are used to make chocolate? Ask the students how they could find out the answers to these questions.
2. Tell students that one way to get information about a topic is to write letters to businesses that produce or create the topic at hand. Project the A Bounty of Businesses Overhead so that students can see it. As a class, brainstorm one to two businesses that might be able to provide information about chocolate. Then, give each student a copy of the A Bounty of Businesses graphic organizer (page 20). Ask them to list on their own graphic organizers even more chocolate or candy companies that they could write to. You may wish to refer to the sample graphic organizer (page 22) if students are having a difficult time thinking of candy companies.
3. Once students have completed their graphic organizers, allow them to choose one company to write to, asking for information about chocolate. Make sure that the students have not all picked the same companies. Then, collect the students’ graphic organizers for use later in the To Whom It May Concern drafting lesson (pages 55–58).
ELL SupportAllow ELL students to use the yellow pages of phone books in order to find the names of chocolate or candy businesses. They may also use the Internet, if available, to find the names of businesses.
Extension IdeaChallenge students to brainstorm or research lists of candy or chocolate businesses that most people do not know about or are not as familiar with so that even more businesses can be contacted for information.
Connections to Other Lessons• To Whom It May Concern—pages 55–58 • Capitalization King—pages 63–66 • Focusing on Feedback—pages 99–102 • Imagine That—pages 115–118
Please refer to the following lessons to continue the steps in the process for creating business letters.
#9364—30 Graphic Organizers for Writing �� ©Shell Educational Publishing
Prewriting Sample Graphic Organizer
Name ______________________________________________________
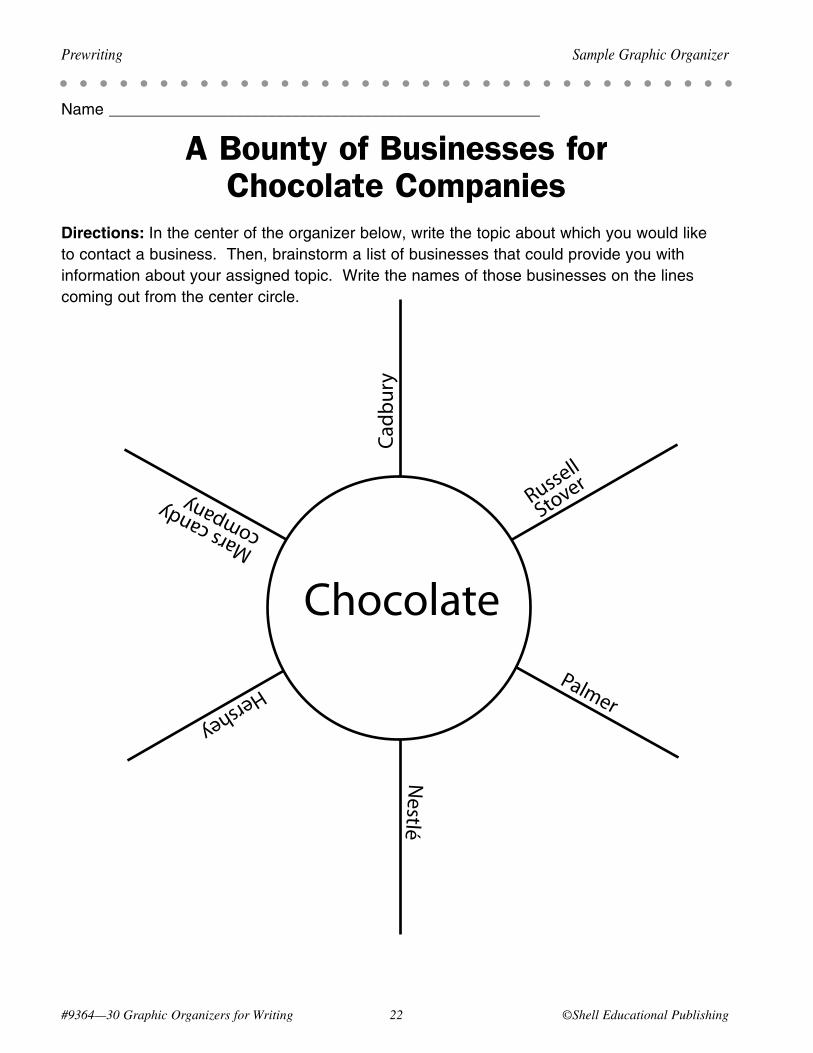
A Bounty of Businesses for Chocolate Companies
Directions: Inthecenteroftheorganizerbelow,writethetopicaboutwhichyouwouldliketocontactabusiness.Then,brainstormalistofbusinessesthatcouldprovideyouwithinformationaboutyourassignedtopic.Writethenamesofthosebusinessesonthelinescomingoutfromthecentercircle.
Russell
Stover
Cadb
ury
Mars candy company
Hershey
Nestlé
Palmer
Chocolate
©Shell Educational Publishing �3 #9364—30 Graphic Organizers for Writing
Why Use the Graphic Organizer • Published works can be used as models to help students discover
what they should include in their own writing. The Shining Stars graphic organizer allows students to list information they would like to include in their own autobiographies after reading published autobiographies.
How to Use the Graphic Organizer 1. Assign students to read age-appropriate autobiographies, or read
a picture book autobiography to the class. Then, ask the class what types of information were given in the autobiography. What did the author tell about himself or herself?
2. Display the Shining Stars Overhead. List some of the types of information that the students found in the autobiographies they read.
3. Place the students into groups of three. Distribute the Shining Stars graphic organizer (page 24). Ask the students to work with their groups, listing items they would like to include in their own autobiographies. Their lists can contain some items found in the published autobiographies as well as their own ideas.
4. Allow the groups to share their ideas with the class. These lists may now be used to create autobiographies.
Prewriting Lesson
Shining Stars Graphic
Organizer
Skills ConnectionType of Writing—autobiographies
Prewriting—using published pieces as writing models
Bloom’s Level—Application (See page 7 for a description.)
#9364—30 Graphic Organizers for Writing 24 ©Shell Educational Publishing
Prewriting Blank Graphic Organizer
Name _______________________________________________
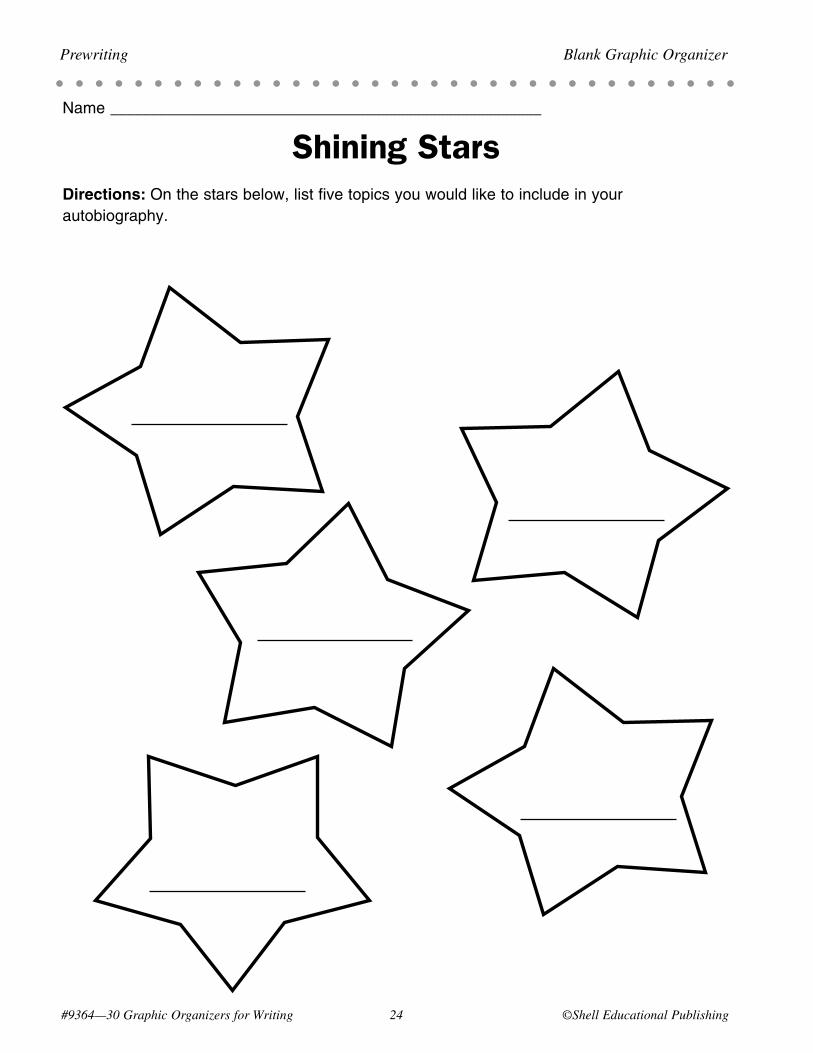
Shining StarsDirections: On the stars below, list five topics you would like to include in an autobiography.
ELL SupportPlace ELL students in groups with higher-level students. The higher-level students can help them as they list their ideas on their graphic organizers.
Extension IdeaChallenge students to read more than one autobiography. This way, they can get even more ideas of what types of items might be included in their own autobiographies.
#9364—30 Graphic Organizers for Writing �4 ©Shell Educational Publishing
Prewriting Blank Graphic Organizer
Name ______________________________________________________
Shining StarsDirections: Onthestarsbelow,listfivetopicsyouwouldliketoincludeinyourautobiography.
©Shell Educational Publishing �� #9364—30 Graphic Organizers for Writing
Sample Lesson Prewriting
The Shining Early Years Standard/Objective • Prewriting: Uses a variety of prewriting strategies (e.g., uses published pieces as writing
models). (McREL Language Arts, Standard 1.1)
• Students will use their Shining Stars graphic organizers to list topics about the early years of their life. These topics will later be used in the students’ own “early years” autobiographies.
The Lesson 1. Read an excerpt from an autobiography that speaks only about
the author’s early years of life. Some possible titles are Flora & Tiger: 19 Very Short Stories from My Life by Eric Carle and My Year by Roald Dahl.
2. Explain to the students that autobiographies do not have to be about a person’s entire life but can also be about a particular time in his/her life. Project the Shining Stars Overhead so that students can see it. Ask them to list the topics that the author in the autobiography you read aloud discussed concerning his/her early years. Write the topics on the overhead. You may also refer to the sample graphic organizer (page 26) for other topics that might be included in an “early years” autobiography.
3. Distribute the Shining Stars graphic organizer (page 24). Ask the students to think of topics they would like to discuss concerning the early years of their own lives. Have them list their thoughts on their graphic organizers. They may choose to include some of the topics listed in class. Collect students’ graphic organizers for use later in the drafting lesson, Tuning In, found on pages 39–42.
ELL SupportPlace ELL students in groups with higher-level students who can help them list their ideas about their early years on their graphic organizers.
Extension IdeaChallenge students to read more than just the autobiography you read to the class concerning an author’s early years. This way, they can get even more ideas of what types of items might be included in their own autobiographies about their early years of life.
Connections to Other Lessons• Tuning In—pages 39–42 • Parade of Pronouns—pages 75–78 • Me, Myself, and I—pages 95–98 • Presentation Time—pages 127–130
Please refer to the following lessons to continue the steps in the process for creating autobiographies.
#9364—30 Graphic Organizers for Writing �6 ©Shell Educational Publishing
Prewriting Sample Graphic Organizer
Name ______________________________________________________
Shining Stars for the Early Years Autobiography
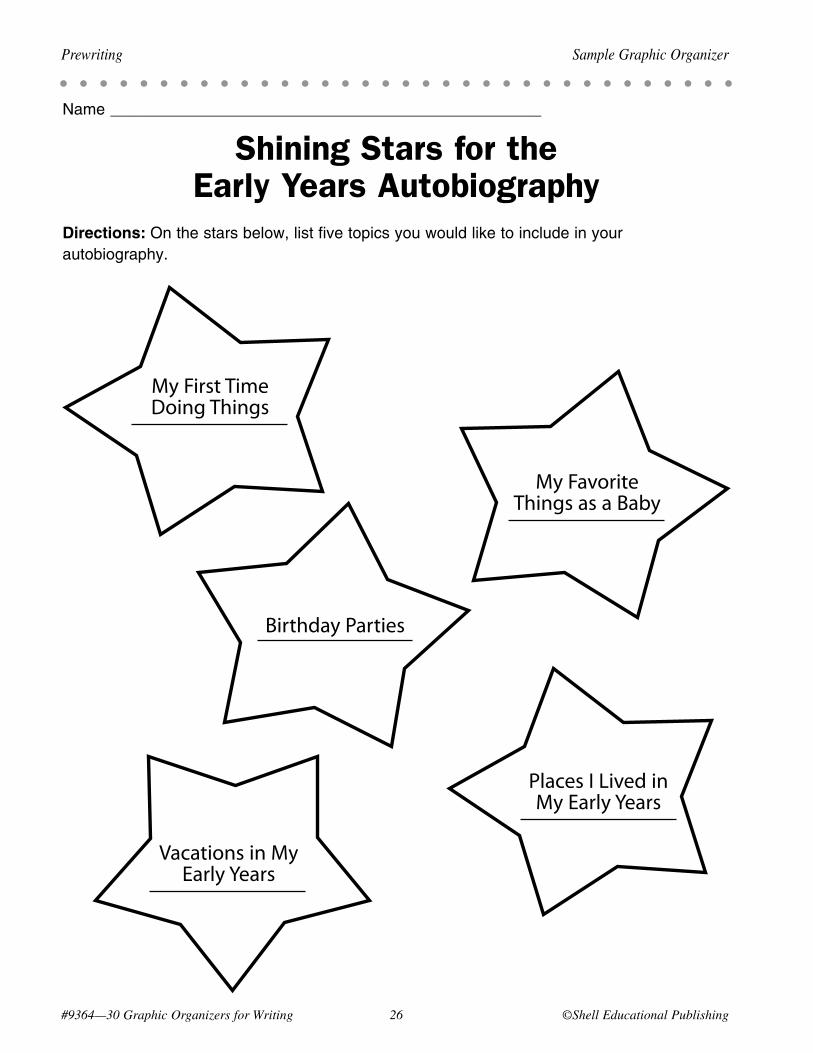
Directions: Onthestarsbelow,listfivetopicsyouwouldliketoincludeinyourautobiography.
My First Time Doing Things
Places I Lived in My Early Years
Vacations in My Early Years
Birthday Parties
My Favorite Things as a Baby
©Shell Educational Publishing �� #9364—30 Graphic Organizers for Writing
Why Use the Graphic Organizer • When writing persuasively, students should identify the pros and
cons of a topic before taking a stance. The Pondering Points of View graphic organizer gives students the opportunity to analyze both sides of a topic before choosing which side they wish to take.
How to Use the Graphic Organizer 1. Read a news article to the class about which various opinions
could be formed. Then, ask the students to state their opinions on the topic. Explain that all topics involve varying points of view.
2. Tell the students that they will be taking a stance on a particular issue or topic. You may choose to allow students to find other popular news stories on which to base their topics, or you may want to place topics in a hat and have the students randomly choose a topic. You may also wish to give students time to research their topics once they have been chosen.
3. After students have decided on topics, distribute the Pondering Points of View graphic organizer (page 28). Explain to the class that all issues have both pros and cons. Before taking a stance, students must analyze their issue and decide which stance to take. Show students how to do this by completing the Pondering Points of View Overhead with the students, using the topic from the news article you brought to class.
4. Then, ask students to consider the varying points of view about their own topics. Have them complete their graphic organizers by listing the pros and cons for each of the points of view. Then, have the students choose which point of view they would like to take. They are now ready to create persuasive writing pieces.
Prewriting Lesson
Pondering Points of
View Graphic Organizer
Skills ConnectionType of Writing— persuasive
Prewriting— analyzing pros and cons
Bloom’s Level—Analysis (See page 7 for a description.)
#9364—30 Graphic Organizers for Writing 28 ©Shell Educational Publishing
Prewriting Blank Graphic Organizer
Name _______________________________________________
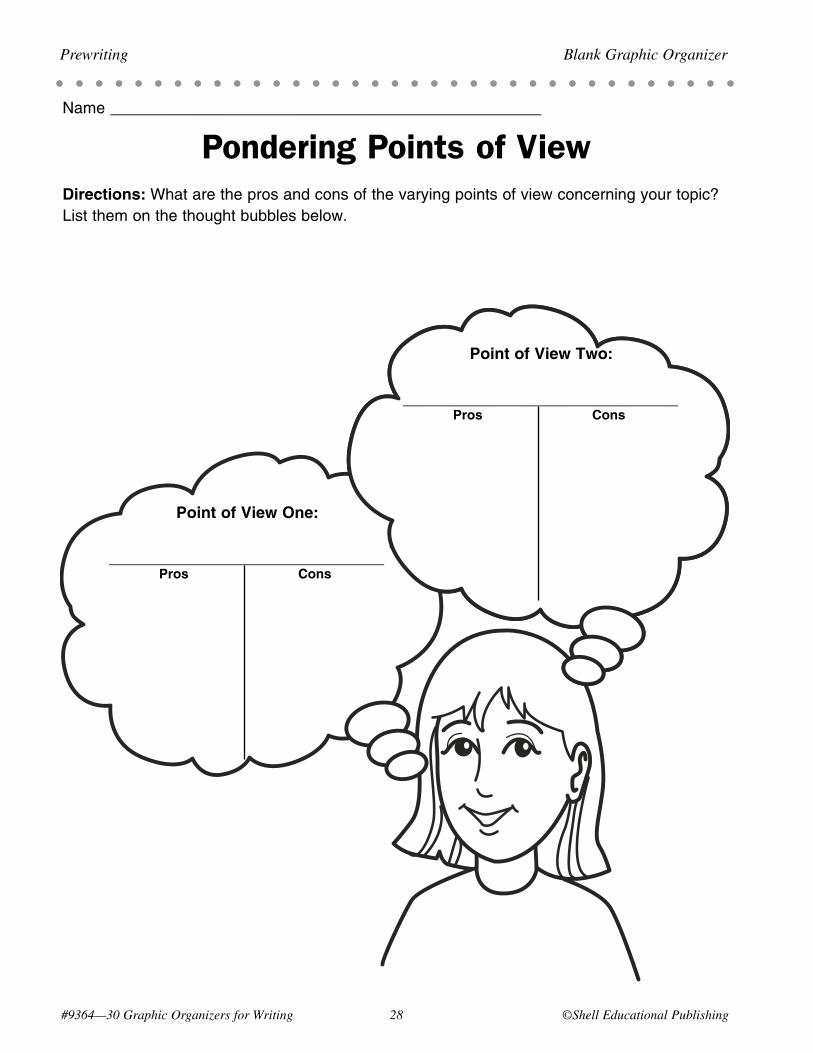
Pondering Points of ViewDirections: What are the pros and cons of the varying points of view concerning your topic? List them on the thought bubbles below.
Point of View One:
_______________________________ Pros Cons
Point of View Two:
_______________________________ Pros Cons
ELL SupportAllow ELL students to work with higher-level students when completing their graphic organizers. This way, they can get help when thinking of pros and cons concerning their topics.
Extension IdeaChallenge students to think of the opposite stance of the one they would normally take concerning their topics. This will challenge them to think “outside the box” and list more ideas for each side of their issues.
#9364—30 Graphic Organizers for Writing �� ©Shell Educational Publishing
Prewriting Blank Graphic Organizer
Name ______________________________________________________
Pondering Points of ViewDirections: Whataretheprosandconsofthevaryingpointsofviewconcerningyourtopic?Listthemonthethoughtbubblesbelow.
Point of View One:
_______________________________ Pros Cons
Point of View Two:
_______________________________ Pros Cons

©Shell Educational Publishing �9 #9364—30 Graphic Organizers for Writing
Sample Lesson Prewriting
Pondering the School’s Point of View
Standard/Objective • Prewriting: Writes persuasive compositions (e.g., supports arguments with detailed evidence).
(McREL Language Arts, Standard 1.10)
• Students will complete their Pondering Points of View graphic organizers in order to analyze the various pros and cons for each of the points of view concerning their school topics.
The Lesson 1. Tell students that you just heard a rumor that soda machines
might be put in every classroom. Ask them if they think this would be a good idea. Why or why not? Allow them to think of both negative and positive consequences of having soda machines in the classroom.
2. Explain that all issues have differing points of view. Tell the students that they will be writing their own persuasive papers about school issues, persuading others to agree with their opinions. Place other school-related issues on small pieces of paper. Have each student randomly choose a piece of paper, which will be his/her persuasive writing topic. Such topics might include chewing gum at school, wearing school uniforms, or homework. You may also brainstorm other possible topics as a class.
3. After students have determined their writing topics, display the Pondering Points of View Overhead. Using the sample graphic organizer (page 30), write the various viewpoints about having soda machines in the classroom. Then, have students list the pros and cons for each point of view. You may refer to the sample for other pros and cons that the students might not have listed.
4. Distribute the Pondering Points of View graphic organizer (page 28). Have students complete their own graphic organizers for the topics they have chosen. Then, collect their organizers for later use in the drafting lesson, Outline Creations (pages 59–62).
ELL SupportAllow ELL students to work with higher-level students when completing their graphic organizers. This way, they can get help when thinking of pros and cons concerning their school topics.
Extension IdeaChallenge students to think of the opposite stance of the one they would normally take concerning their school topics. Have them base their writing on the opposing view, rather than using the view with which they agree.
Connections to Other Lessons• Outline Creations—pages 59–62 • Slicing Through Spelling—pages 71–74 • Checkmate—pages 107–110 • In My Defense—pages 131–134
Please refer to the following lessons to continue the steps in the process for creating persuasive writing pieces.
Point of View One:
_______________________________ Pros Cons
Point of View Two:
_______________________________ Pros Cons
#9364—30 Graphic Organizers for Writing 30 ©Shell Educational Publishing
Prewriting Sample Graphic Organizer
Name ______________________________________________________
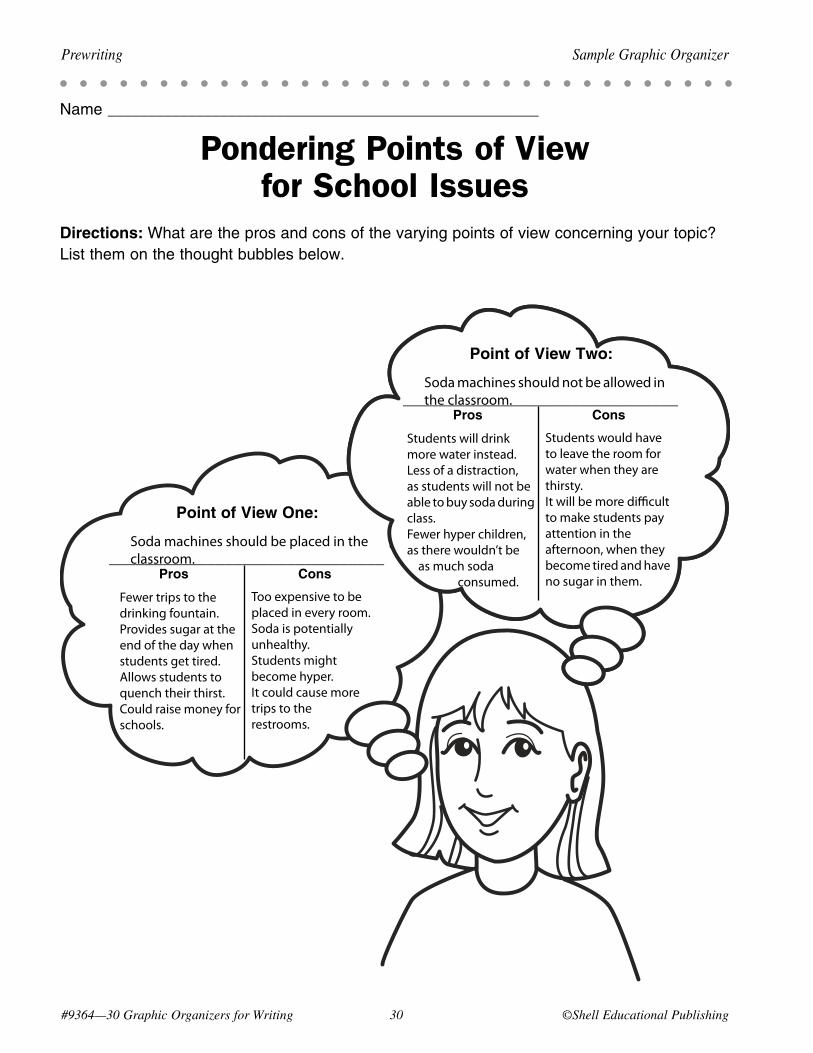
Pondering Points of View for School Issues
Directions: Whataretheprosandconsofthevaryingpointsofviewconcerningyourtopic?Listthemonthethoughtbubblesbelow.
Soda machines should be placed in the classroom.
Fewer trips to the drinking fountain.Provides sugar at the end of the day when students get tired.Allows students to quench their thirst.Could raise money for schools.
Too expensive to be placed in every room.Soda is potentially unhealthy.Students might become hyper.It could cause more trips to the restrooms.
Soda machines should not be allowed in the classroom.
Students will drink more water instead.Less of a distraction, as students will not be able to buy soda during class.Fewer hyper children, as there wouldn’t be as much soda consumed.
Students would have to leave the room for water when they are thirsty.It will be more difficult to make students pay attention in the afternoon, when they become tired and have no sugar in them.
©Shell Educational Publishing 31 #9364—30 Graphic Organizers for Writing
Why Use the Graphic Organizer • The graphic organizer Building Knowledge provides students
with the structure necessary to organize information found in research materials.
How to Use the Graphic Organizer 1. Have each student get out a piece of scrap paper. Ask the
students to list their interests. Then, have the students list some topics they would like to know more about. Have them carefully examine their lists. Tell the class that they will need to choose one idea from their lists to research.
2. Next, distribute the Building Knowledge graphic organizer (page 32). Also display the Building Knowledge Overhead. Choose a topic that would interest students. Then, explain to the class how you could go about researching the topic in order to complete the six areas on the graphic organizer. Write information on the overhead so students can see an example using the topic you chose.
3. After students understand how to research their topics and complete their organizers, allow them the time to do so.
4. Students may now use the information they gathered to write informational writing pieces.
Prewriting Lesson
Building Knowledge
Graphic Organizer
Skills ConnectionType of Writing—informational/research
Prewriting—building background knowledge
Bloom’s Level—Synthesis (See page 8 for a description.)
#9364—30 Graphic Organizers for Writing 32 ©Shell Educational Publishing
Prewriting Blank Graphic Organizer
Name _______________________________________________
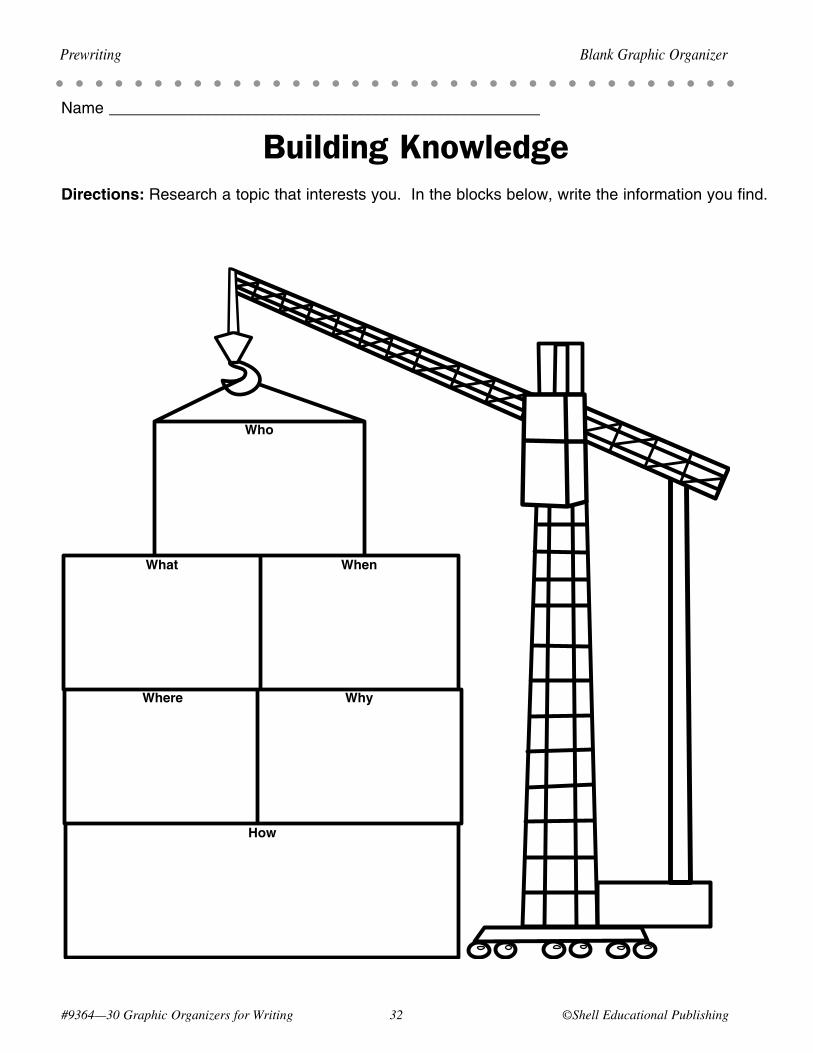
Building KnowledgeDirections: Research a topic that interests you. In the blocks below, write the information you find.
Who
What When
Where Why
How
ELL SupportIt may be helpful to provide ELL students with tape recorders so that they may record their research, rather than asking them to write the information they find.
Extension IdeaChallenge students to use at least four different resources when researching their topics, as students are often tempted to use only one or two resources.
#9364—30 Graphic Organizers for Writing 3� ©Shell Educational Publishing
Prewriting Blank Graphic Organizer
Name ______________________________________________________
Building KnowledgeDirections: Researchatopicthatinterestsyou.Intheblocksbelow,writetheinformationyoufind.
Who
What When
Where Why
How
©Shell Educational Publishing 33 #9364—30 Graphic Organizers for Writing
Sample Lesson Prewriting
Building Historical KnowledgeStandard/Objective • Prewriting: Uses a variety of prewriting strategies (e.g., builds background knowledge).
(McREL Language Arts, Standard 1.1)
• Students will use their Building Knowledge graphic organizers to generalize and rewrite information about historical events from research they have done. They will later use their research as they create informational writing pieces.
The Lesson 1. Have each student choose a historical event that particularly
interests him/her. It may be an event that was studied in class or simply one of interest.
2. Explain to the students that they will research their historical events, finding details about the events. They will then use the information they find to write informational writing pieces, telling others about their historical topics. You may wish to remind students to choose small events, rather than large ones (e.g., choosing a battle in a war, rather than the entire war).
3. Distribute the Building Knowledge graphic organizer (page 32). Then, copy the information from the sample graphic organizer (page 34) onto the Building Knowledge Overhead. Point out to the students the types of information they will need to find concerning their topics. You may also remind them how to rewrite and generalize the information, putting it into their own words.
4. Allow time for students to research their historical topics, completing their graphic organizers as they do their research. Then, collect the students’ graphic organizers for later use as they write their informational drafts in the Seeing Clearly drafting lesson (pages 43–46).
ELL SupportIt may be helpful to provide ELL students with tape recorders so that they may record their research concerning their historical topics, rather than asking them to write the information they find.
Extension IdeaChallenge students to use at least four different resources when researching their historical topics, as students are often tempted to use only one to two resources.
Connections to Other Lessons• Seeing Clearly—pages 43–46 • In a Nutshell—pages 83–86 • The Perfect Balance—pages 103–106 • Right On Time—pages 119–122
Please refer to the following lessons to continue the steps in the process for creating informational writing pieces.
#9364—30 Graphic Organizers for Writing 34 ©Shell Educational Publishing
Prewriting Sample Graphic Organizer
Name ______________________________________________________
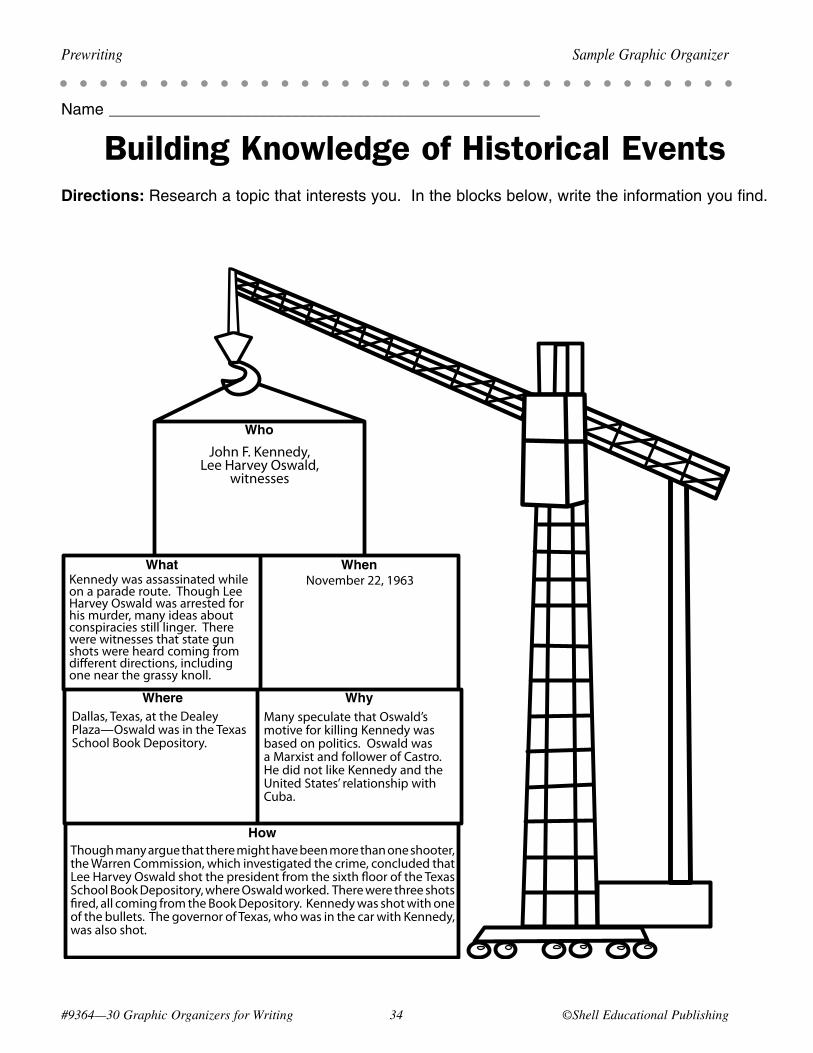
Building Knowledge of Historical EventsDirections: Researchatopicthatinterestsyou.Intheblocksbelow,writetheinformationyoufind.
John F. Kennedy, Lee Harvey Oswald,
witnesses
Kennedy was assassinated while on a parade route. Though Lee Harvey Oswald was arrested for his murder, many ideas about conspiracies still linger. There were witnesses that state gun shots were heard coming from different directions, including one near the grassy knoll.
November 22, 1963
Dallas, Texas, at the Dealey Plaza—Oswald was in the Texas School Book Depository.
Many speculate that Oswald’s motive for killing Kennedy was based on politics. Oswald was a Marxist and follower of Castro. He did not like Kennedy and the United States’ relationship with Cuba.
Though many argue that there might have been more than one shooter, the Warren Commission, which investigated the crime, concluded that Lee Harvey Oswald shot the president from the sixth floor of the Texas School Book Depository, where Oswald worked. There were three shots fired, all coming from the Book Depository. Kennedy was shot with one of the bullets. The governor of Texas, who was in the car with Kennedy, was also shot.
Who
What When
Where Why
How
©Shell Educational Publishing 3� #9364—30 Graphic Organizers for Writing
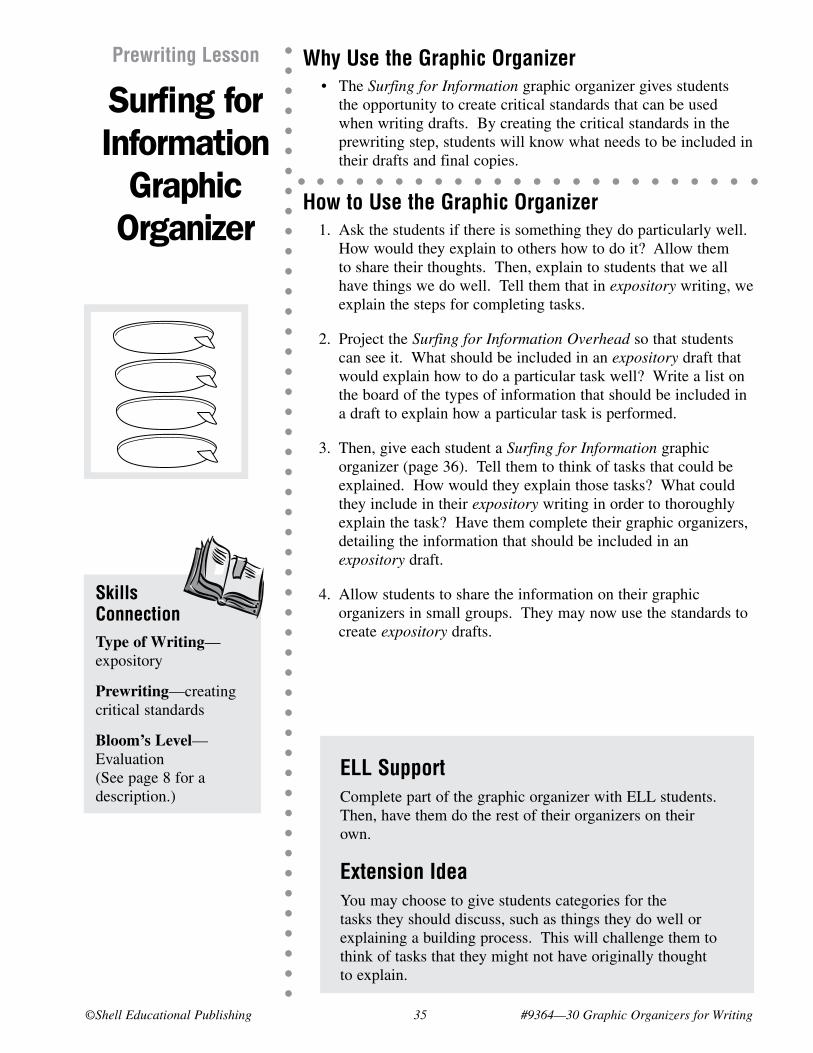
Why Use the Graphic Organizer • The Surfing for Information graphic organizer gives students
the opportunity to create critical standards that can be used when writing drafts. By creating the critical standards in the prewriting step, students will know what needs to be included in their drafts and final copies.
How to Use the Graphic Organizer 1. Ask the students if there is something they do particularly well.
How would they explain to others how to do it? Allow them to share their thoughts. Then, explain to students that we all have things we do well. Tell them that in expository writing, we explain the steps for completing tasks.
2. Project the Surfing for Information Overhead so that students can see it. What should be included in an expository draft that would explain how to do a particular task well? Write a list on the board of the types of information that should be included in a draft to explain how a particular task is performed.
3. Then, give each student a Surfing for Information graphic organizer (page 36). Tell them to think of tasks that could be explained. How would they explain those tasks? What could they include in their expository writing in order to thoroughly explain the task? Have them complete their graphic organizers, detailing the information that should be included in an expository draft.
4. Allow students to share the information on their graphic organizers in small groups. They may now use the standards to create expository drafts.
Prewriting Lesson
Surfing for Information
Graphic Organizer
Skills ConnectionType of Writing—expository
Prewriting—creating critical standards
Bloom’s Level—Evaluation (See page 8 for a description.)
#9364—30 Graphic Organizers for Writing 36 ©Shell Educational Publishing
Prewriting Blank Graphic Organizer
Name _______________________________________________
Surfing for InformationDirections: On the surfboards below, write the pieces of information that should be included in an expository draft.
ELL SupportComplete part of the graphic organizer with ELL students. Then, have them do the rest of their organizers on their own.
Extension IdeaYou may choose to give students categories for the tasks they should discuss, such as things they do well or explaining a building process. This will challenge them to think of tasks that they might not have originally thought to explain.
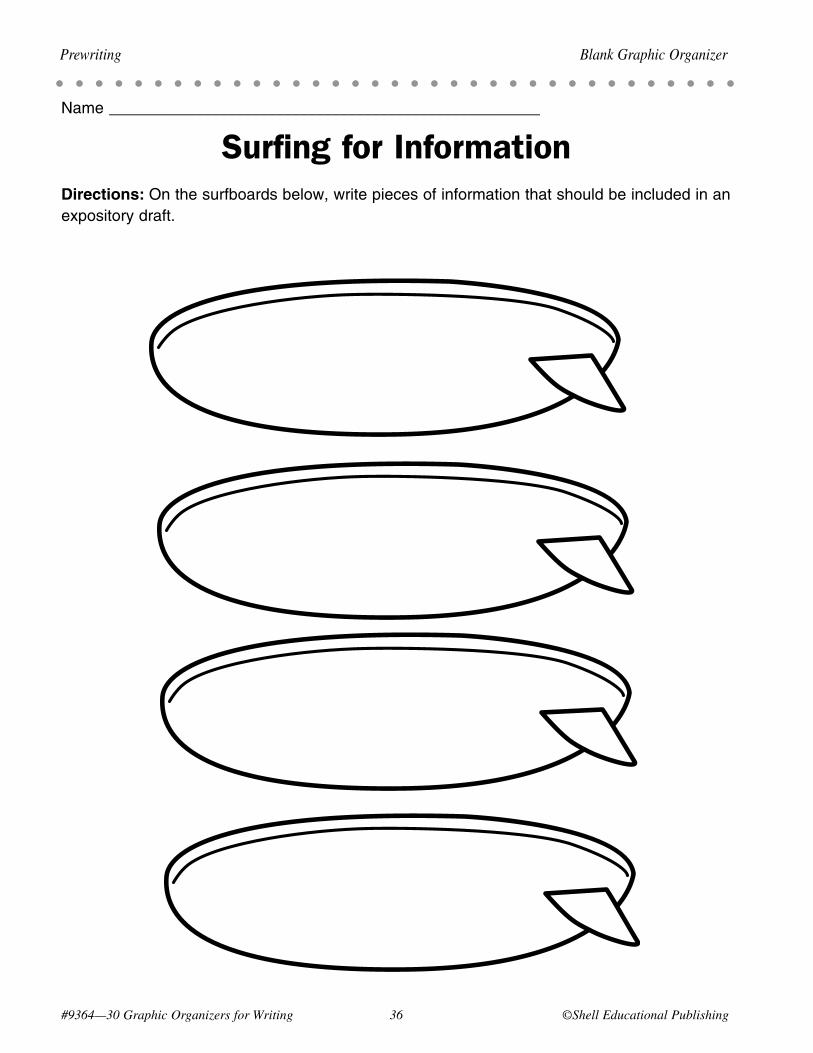
#9364—30 Graphic Organizers for Writing 36 ©Shell Educational Publishing
Prewriting Blank Graphic Organizer
Name ______________________________________________________
Surfing for InformationDirections: Onthesurfboardsbelow,writepiecesofinformationthatshouldbeincludedinanexpositorydraft.
©Shell Educational Publishing 3� #9364—30 Graphic Organizers for Writing
Sample Lesson Prewriting
Surfing for CareersStandard/Objective • Prewriting: Uses a variety of prewriting strategies (e.g., constructs critical standards). (McREL
Language Arts, Standard 1.1)
• Using their Surfing for Information graphic organizers, students will list information that they wish to include in their interviews and in their expository drafts. They will then interview community members on how to perform particular tasks related to their careers.
ELL SupportComplete part of the graphic organizer with ELL students. Then, ask them to think of only one to two standards on their own concerning the careers they have chosen.
Extension IdeaYou may choose to give students career categories for the people they should interview. For example, they might interview people in the cooking profession, people in sports, or types of doctors. This will challenge them to think of people that they might not have originally thought to interview.
Connections to Other Lessons• Ladder of Succession—pages 51–54 • Pounding Out Prepositions—pages 79–82 • Tying It Together—pages 87–90 • Check It Over—pages 123–126
Please refer to the following lessons to continue the steps in the process for creating expository writing pieces.
The Lesson 1. Ask students if they have thought about what careers they would
like to have as adults. What would it take to do that profession? What tasks would have to be performed in that profession? How would those tasks be performed? Explain that every career has tasks that must be completed, and those tasks have steps that must be followed in order for them to be successfully accomplished.
2. Copy the information from the sample graphic organizer (page 38) onto the Surfing for Information Overhead. Then, explain to students that they will be interviewing members of the community to find out how they do their jobs. Students will then write expository drafts, telling about those careers and how they are performed. Show the students the overhead. Explain that you have written a list of standards, or information, which you feel should be included in the expository rough drafts. Ask them if they can think of other things that might need to be included.
3. Distribute the Surfing for Information graphic organizer (page 36). Have students think of people they would like to interview. Have them create standards, or pieces of information, that they would like to include in their drafts about careers. They may use your examples, plus ideas of their own. Give students time to interview people in the fields of their choice, asking how those jobs are performed. Remind them to use their graphic organizers in the interview to make sure they find out all of the necessary information. Collect students’ graphic organizers for later use in the drafting lesson, Ladder of Succession (pages 51–54). Also, keep their standards for use in the publishing lesson.
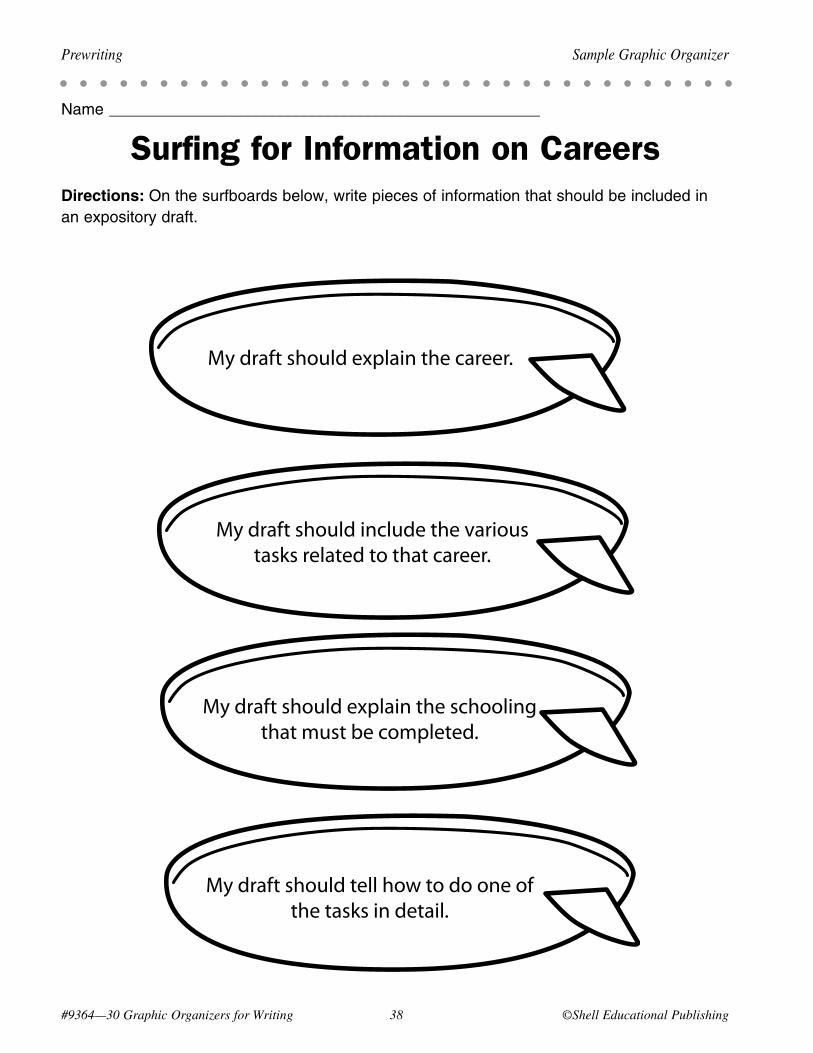
#9364—30 Graphic Organizers for Writing 3� ©Shell Educational Publishing
Prewriting Sample Graphic Organizer
Name ______________________________________________________
Surfing for Information on CareersDirections: Onthesurfboardsbelow,writepiecesofinformationthatshouldbeincludedinanexpositorydraft.
My draft should explain the career.
My draft should include the various tasks related to that career.
My draft should explain the schooling that must be completed.
My draft should tell how to do one of the tasks in detail.
©Shell Educational Publishing 39 #9364—30 Graphic Organizers for Writing
Why Use the Graphic Organizer • Students often have a difficult time staying on topic when
creating original writing. The Tuning In graphic organizer allows students to logically organize events that could be included in autobiographies and then add details for those events so that the details are focused on the intended topics.
How to Use the Graphic Organizer 1. Display the Tuning In Overhead. Ask for a volunteer to name
a topic that could be discussed in an autobiography. Write the topic above the top television. Then, ask the class for possible details that might fall under that topic. Create details, writing them on the screen of the television.
2. Explain to students that they will be creating autobiographies. These autobiographies should have at least three paragraphs. Each television on the overhead represents one paragraph. The topic listed above the television will be made into the topic sentence of the paragraph, and then the details will follow.
3. Distribute the Tuning In graphic organizer (page 40). Have the students list three main topics they would like to discuss in their autobiographies above the televisions. Then, tell them to use those topics to complete the details on their Tuning In graphic organizers, writing those details on the television screens. Once they have done so, they should number the televisions one through three (on the lines provided at the bottom of the televisions) to indicate in which order the paragraphs will appear in their autobiographies.
4. In groups, allow students to share their ideas for topics. It is now time for them to create rough drafts of their autobiographies.
Drafting Lesson
Tuning In Graphic
Organizer
Skills ConnectionType of Writing—autobiographies
Drafting—organizing details; staying on topic
Bloom’s Level—Knowledge (See page 7 for a description.)
Topic _________________________________
Paragraph Number _________
Topic _________________________________
Paragraph Number _________
Topic _________________________________
Paragraph Number _________
#9364—30 Graphic Organizers for Writing 40 ©Shell Educational Publishing
ELL SupportAllow ELL students to work with higher-level students on their graphic organizers. Once their organizers are complete, the ELL students will be more confident to write their rough drafts on their own, using their graphic organizers as guides.
Extension IdeaEncourage students to collect photos or draw pictures that they can use to enhance their autobiographies. Also encourage them to include more than three paragraphs in their autobiographies. Each student may complete another graphic organizer for the other paragraphs.
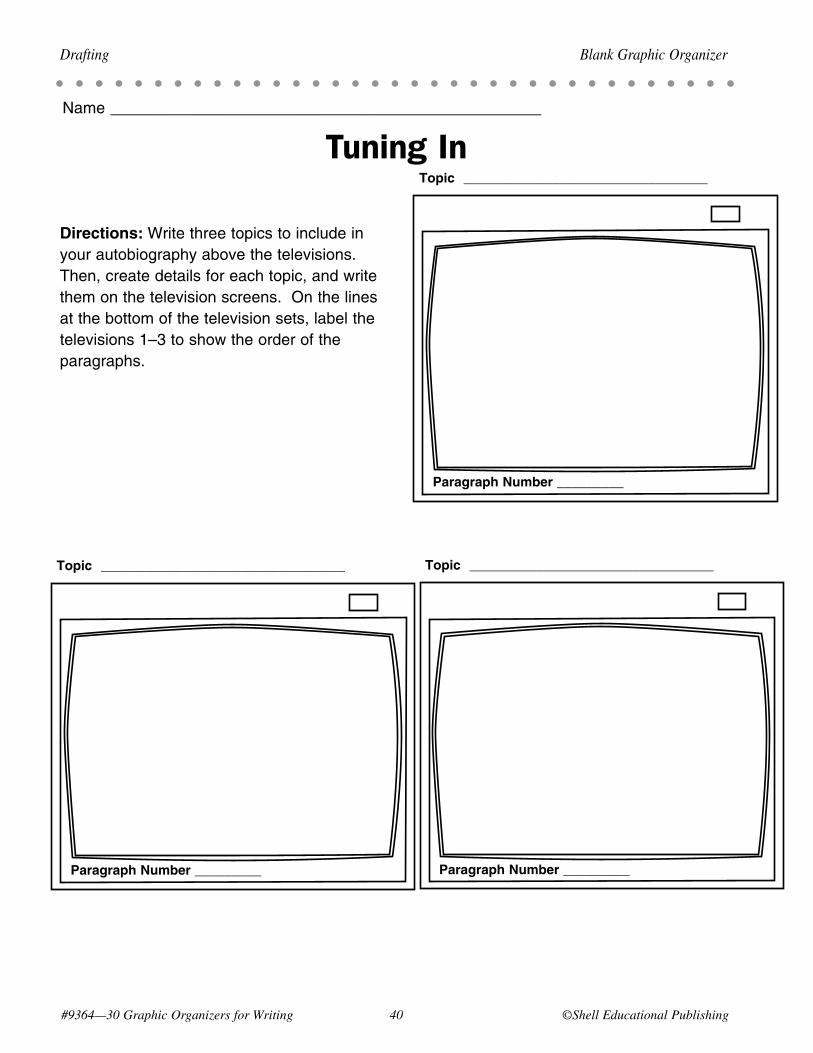
Topic _________________________________
Paragraph Number _________
Topic _________________________________
Paragraph Number _________
Topic _________________________________
Paragraph Number _________
Directions: Writethreetopicstoincludeinyourautobiographyabovethetelevisions.Then,createdetailsforeachtopic,andwritethemonthetelevisionscreens.Onthelinesatthebottomofthetelevisionsets,labelthetelevisions1–3toshowtheorderoftheparagraphs.
#9364—30 Graphic Organizers for Writing 40 ©Shell Educational Publishing
Drafting Blank Graphic Organizer
Name ______________________________________________________
Tuning In
Paragraph Number _________
©Shell Educational Publishing 41 #9364—30 Graphic Organizers for Writing
Sample Lesson Drafting
My First Time Tuning InStandard/Objective • Drafting: Writes compositions about autobiographical incidents (e.g., presents details in a logical
manner). (McREL Language Arts, Standard 1.8)
• Students will use their Tuning In graphic organizers to create details in a logical order for the topics they have chosen to use in the autobiographies about their early years of life.
The Lesson 1. Display the Tuning In Overhead. Write a topic that might be
used in an “early years” autobiography above the top television. You may choose to refer to the sample graphic organizer (page 42) for ideas. Then, ask the students to list some details that might be written under such a topic. Write these details on the screen. Do the same with two other topics. Once details are completed for the three topics, ask the class in which order the paragraphs should be placed in an autobiography. You might suggest that they place the paragraphs in chronological order. Number the televisions one to three (on the lines provided at the bottom of the televisions) to show the order in which they should appear in the draft. Then, model how to turn the topics and details into an autobiography rough draft.
2. Give students their completed Shining Stars prewriting graphic organizers as well as the Tuning In graphic organizers (page 40). Have them use the topics they wrote on their prewriting graphic organizers to create details on their Tuning In graphic organizers. Once they have decided on their three topics and have written details for each, have them then order their paragraphs and begin writing their autobiography drafts.
3. After students have completed their graphic organizers and drafts, collect them so that the drafts can later be used in the Parade of Pronouns editing lesson (pages 75–78).
ELL SupportAllow ELL students to work with higher-level students on their Tuning In graphic organizers. Once their organizers are complete, the ELL students will be more confident to write their “early years” rough drafts on their own, using their graphic organizers as guides.
Extension IdeaEncourage students to begin collecting photos or drawing pictures of themselves in their early years, which they can later use to enhance their autobiographies. Also encourage them to include more than three paragraphs in their autobiographies. Each student may complete another graphic organizer for the other paragraphs.Connections to Other Lessons
• Parade of Pronouns—pages 75–78 • Me, Myself, and I—pages 95–98 • Presentation Time—pages 127–130
Please refer to the following lessons to continue the steps in the process for creating autobiographies.
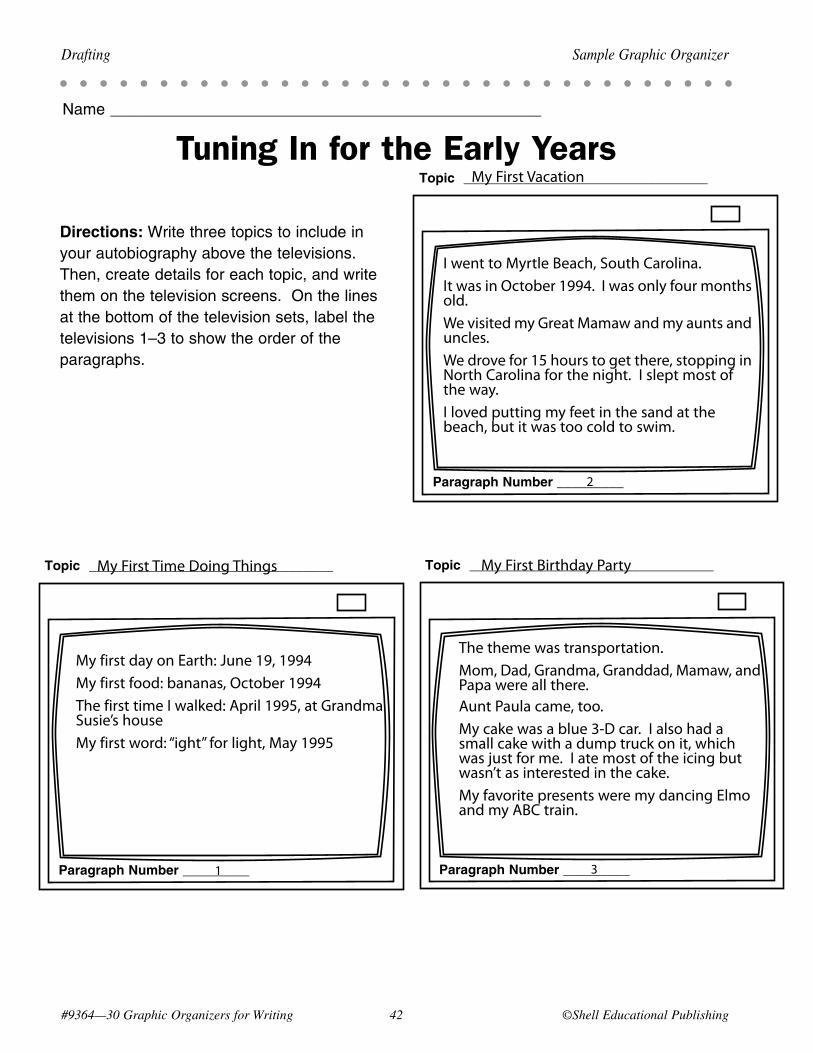
#9364—30 Graphic Organizers for Writing 4� ©Shell Educational Publishing
Drafting Sample Graphic Organizer
Name ______________________________________________________
Tuning In for the Early YearsTopic _________________________________
Paragraph Number _________
Topic _________________________________
Paragraph Number _________
Topic _________________________________
Paragraph Number _________
Directions: Writethreetopicstoincludeinyourautobiographyabovethetelevisions.Then,createdetailsforeachtopic,andwritethemonthetelevisionscreens.Onthelinesatthebottomofthetelevisionsets,labelthetelevisions1–3toshowtheorderoftheparagraphs.
My First Time Doing Things
My first day on Earth: June 19, 1994My first food: bananas, October 1994The first time I walked: April 1995, at Grandma Susie’s houseMy first word: “ight” for light, May 1995
1
2
My First Vacation
I went to Myrtle Beach, South Carolina.It was in October 1994. I was only four months old.We visited my Great Mamaw and my aunts and uncles.We drove for 15 hours to get there, stopping in North Carolina for the night. I slept most of the way.I loved putting my feet in the sand at the beach, but it was too cold to swim.
3
My First Birthday Party
The theme was transportation.Mom, Dad, Grandma, Granddad, Mamaw, and Papa were all there. Aunt Paula came, too.My cake was a blue 3-D car. I also had a small cake with a dump truck on it, which was just for me. I ate most of the icing but wasn’t as interested in the cake.My favorite presents were my dancing Elmo and my ABC train.
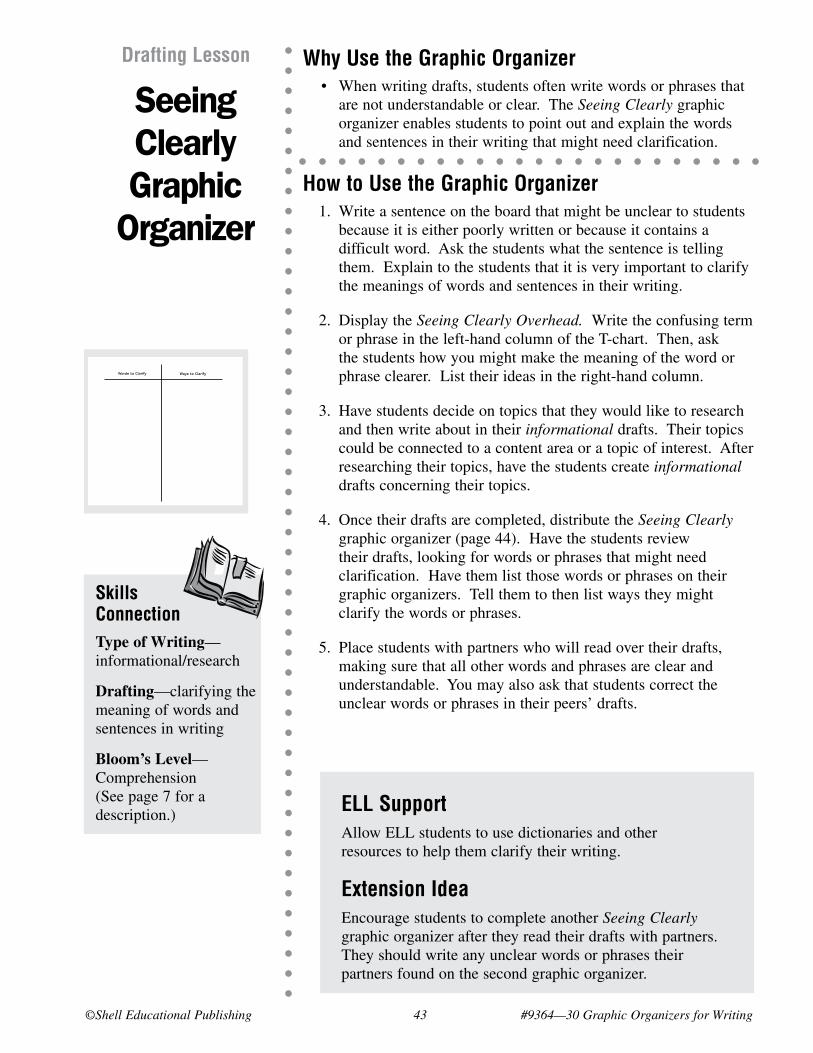
©Shell Educational Publishing 43 #9364—30 Graphic Organizers for Writing
Why Use the Graphic Organizer • When writing drafts, students often write words or phrases that
are not understandable or clear. The Seeing Clearly graphic organizer enables students to point out and explain the words and sentences in their writing that might need clarification.
How to Use the Graphic Organizer 1. Write a sentence on the board that might be unclear to students
because it is either poorly written or because it contains a difficult word. Ask the students what the sentence is telling them. Explain to the students that it is very important to clarify the meanings of words and sentences in their writing.
2. Display the Seeing Clearly Overhead. Write the confusing term or phrase in the left-hand column of the T-chart. Then, ask the students how you might make the meaning of the word or phrase clearer. List their ideas in the right-hand column.
3. Have students decide on topics that they would like to research and then write about in their informational drafts. Their topics could be connected to a content area or a topic of interest. After researching their topics, have the students create informational drafts concerning their topics.
4. Once their drafts are completed, distribute the Seeing Clearly graphic organizer (page 44). Have the students review their drafts, looking for words or phrases that might need clarification. Have them list those words or phrases on their graphic organizers. Tell them to then list ways they might clarify the words or phrases.
5. Place students with partners who will read over their drafts, making sure that all other words and phrases are clear and understandable. You may also ask that students correct the unclear words or phrases in their peers’ drafts.
Drafting Lesson
Seeing Clearly Graphic
Organizer
Skills ConnectionType of Writing—informational/research
Drafting—clarifying the meaning of words and sentences in writing
Bloom’s Level—Comprehension (See page 7 for a description.)
#9364—30 Graphic Organizers for Writing 44 ©Shell Educational Publishing
Drafting Blank Graphic Organizer
Name ______________________________________________________
Seeing ClearlyDirections: Write any words or phrases from your writing that might be unclear in the left-hand column of the T-chart below. Then, list ways to clarify those words or phrases in the the right-hand column.
Words to Clarify Ways to Clarify
ELL SupportAllow ELL students to use dictionaries and other resources to help them clarify their writing.
Extension IdeaEncourage students to complete another Seeing Clearly graphic organizer after they read their drafts with partners. They should write any unclear words or phrases their partners found on the second graphic organizer.
Paragraph Number _________
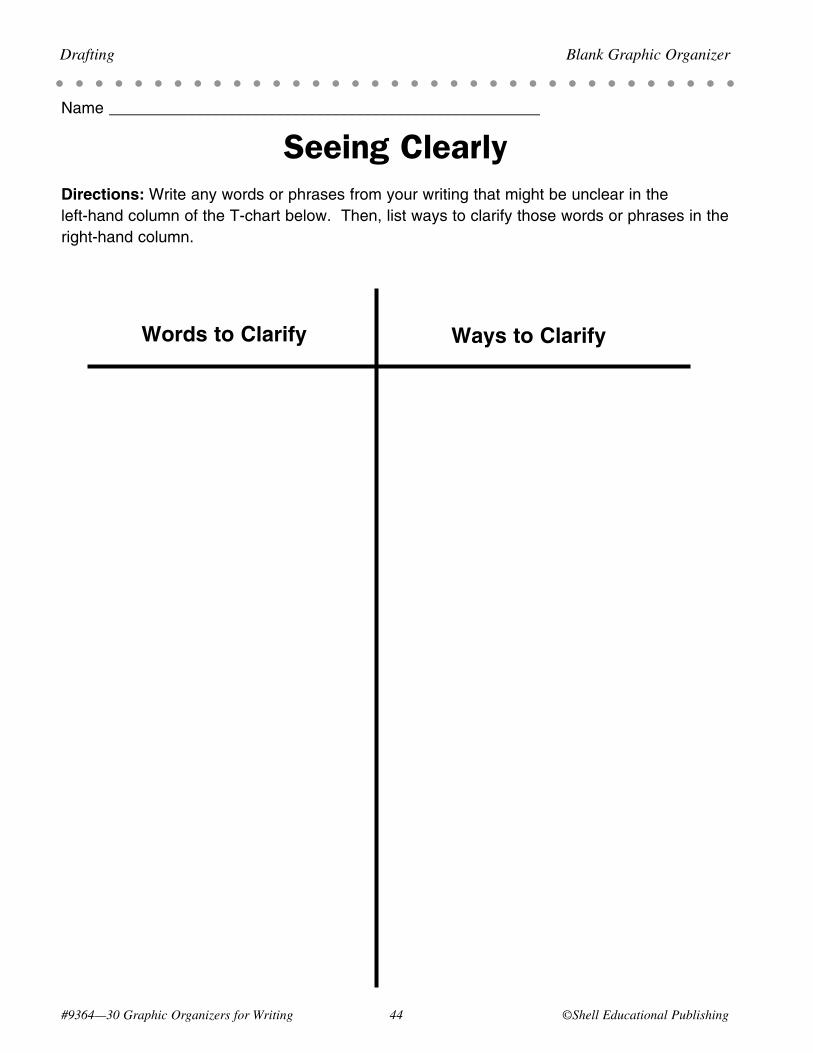
#9364—30 Graphic Organizers for Writing 44 ©Shell Educational Publishing
Drafting Blank Graphic Organizer
Name ______________________________________________________
Seeing ClearlyDirections: Writeanywordsorphrasesfromyourwritingthatmightbeunclearintheleft-handcolumnoftheT-chartbelow.Then,listwaystoclarifythosewordsorphrasesintheright-handcolumn.
Words to Clarify Ways to Clarify
©Shell Educational Publishing 4� #9364—30 Graphic Organizers for Writing
Sample Lesson Drafting
Seeing Historical Events ClearlyStandard/Objective • Drafting: Uses a variety of strategies to draft and revise written work (e.g., analyzes and clarifies
meaning). (McREL Language Arts, Standard 1.2)
• Students will use their Seeing Clearly graphic organizers to list words that might cause confusion in their drafts. They will then list ways to clarify the meanings of those words before writing their informational drafts.
ELL SupportAllow ELL students to use dictionaries and other resources to help them clarify words or phrases in their historical events informational writing.
Extension IdeaEncourage students to complete another Seeing Clearly graphic organizer after they write their historical events informational drafts, again finding any words or phrases that need to be clarified.
Connections to Other Lessons• In a Nutshell—pages 83–86 • The Perfect Balance—pages 103–106 • Right On Time—pages 119–122
Please refer to the following lessons to continue the steps in the process for creating informational/research writing pieces.
The Lesson 1. Copy the information from the sample graphic organizer
(page 46) onto the Seeing Clearly Overhead. Before showing students the overhead, read them the following paragraph: “Kennedy was assassinated while on a parade route. Though Lee Harvey Oswald was arrested for his murder, many ideas about conspiracies still linger. There were witnesses who state that gun shots were heard coming from different directions, including one near the grassy knoll.”
2. Ask students if they knew all the words in the paragraph and their meanings. Which words need clarification? Show students the overhead. Explain that it is important to explain the meaning of difficult words in your writing, especially when informing others about particular topics. Ask students to list ideas other than those written on the overhead that can be used to clarify the meanings of the words. Then, model how to add the ideas to the paragraph so that it has more clarity. You may show students the prewriting sample graphic organizer again to see if there are other words or phrases that also need to be clarified.
3. Distribute the Seeing Clearly graphic organizer (page 44) to students as well as their informational prewriting graphic organizers. Have them search their graphic organizers for words or phrases that need to be clarified and list ways to clarify the words or phrases. Once their organizers are complete, tell students to turn the six areas into informational drafts with six paragraphs. Remind them to clarify the meanings of the words they listed on their Seeing Clearly graphic organizers. Once students have written their drafts, collect the drafts for later use in the In a Nutshell editing lesson (pages 83–86).
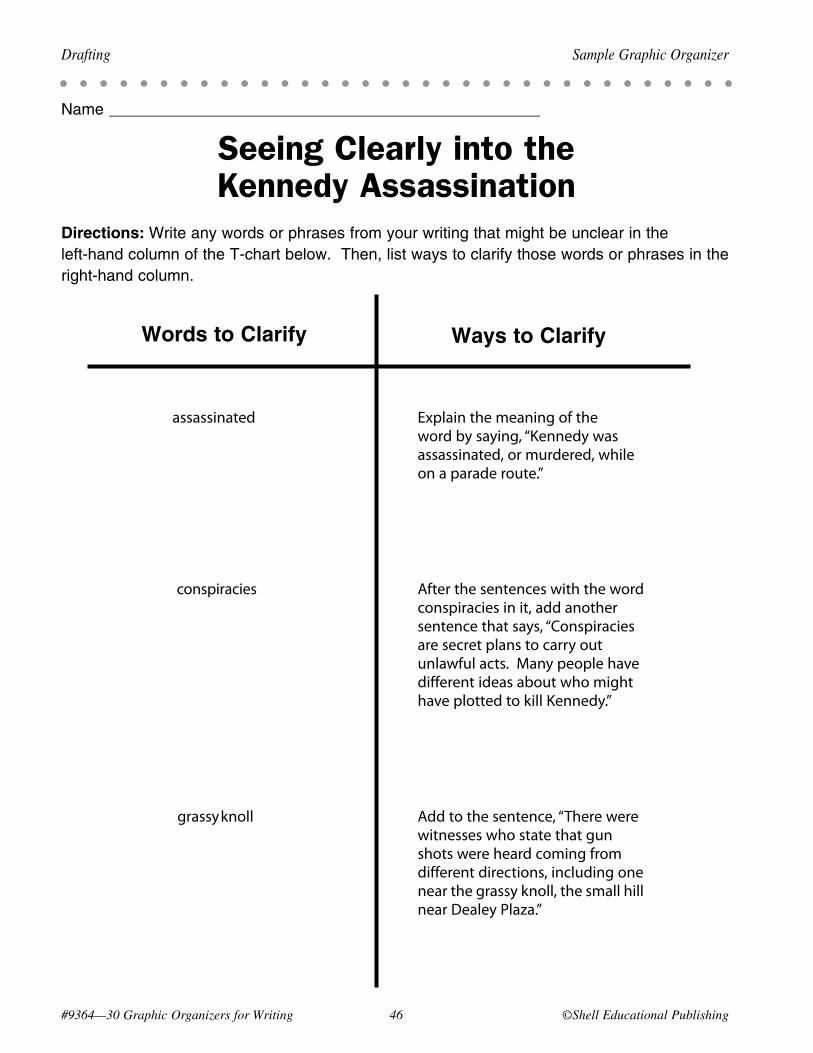
#9364—30 Graphic Organizers for Writing 46 ©Shell Educational Publishing
Drafting Sample Graphic Organizer
Name ______________________________________________________
Seeing Clearly into the Kennedy Assassination
Directions: Writeanywordsorphrasesfromyourwritingthatmightbeunclearintheleft-handcolumnoftheT-chartbelow.Then,listwaystoclarifythosewordsorphrasesintheright-handcolumn.
assassinated Explain the meaning of the word by saying, “Kennedy was assassinated, or murdered, while on a parade route.”
conspiracies After the sentences with the word conspiracies in it, add another sentence that says, “Conspiracies are secret plans to carry out unlawful acts. Many people have different ideas about who might have plotted to kill Kennedy.”
grassy knoll Add to the sentence, “There were witnesses who state that gun shots were heard coming from different directions, including one near the grassy knoll, the small hill near Dealey Plaza.”
Words to Clarify Ways to Clarify
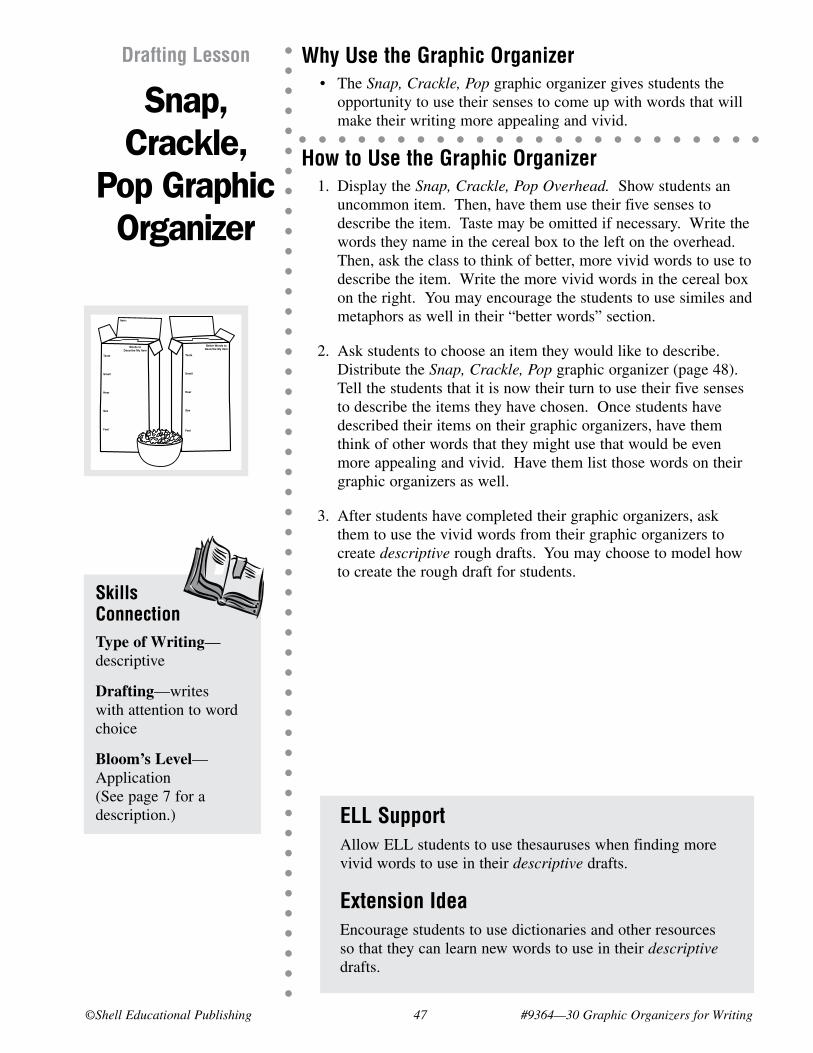
©Shell Educational Publishing 4� #9364—30 Graphic Organizers for Writing
Why Use the Graphic Organizer • The Snap, Crackle, Pop graphic organizer gives students the
opportunity to use their senses to come up with words that will make their writing more appealing and vivid.
How to Use the Graphic Organizer 1. Display the Snap, Crackle, Pop Overhead. Show students an
uncommon item. Then, have them use their five senses to describe the item. Taste may be omitted if necessary. Write the words they name in the cereal box to the left on the overhead. Then, ask the class to think of better, more vivid words to use to describe the item. Write the more vivid words in the cereal box on the right. You may encourage the students to use similes and metaphors as well in their “better words” section.
2. Ask students to choose an item they would like to describe. Distribute the Snap, Crackle, Pop graphic organizer (page 48). Tell the students that it is now their turn to use their five senses to describe the items they have chosen. Once students have described their items on their graphic organizers, have them think of other words that they might use that would be even more appealing and vivid. Have them list those words on their graphic organizers as well.
3. After students have completed their graphic organizers, ask them to use the vivid words from their graphic organizers to create descriptive rough drafts. You may choose to model how to create the rough draft for students.
Drafting Lesson
Snap, Crackle,
Pop Graphic Organizer
Skills ConnectionType of Writing—descriptive
Drafting—writes with attention to word choice
Bloom’s Level—Application (See page 7 for a description.)
#9364—30 Graphic Organizers for Writing 48 ©Shell Educational Publishing
Drafting Blank Graphic Organizer
Name ______________________________________________________
Snap, Crackle, PopDirections: Use your five senses to describe an item you could use in a descriptive rough draft. Write the name of the item on the top flap and the words on the first cereal box. Then, think of other words to use that would be even better and more vivid. Write those words on the second cereal box.
Words to Describe My Item
Taste
Smell
Hear
See
Feel
Better Words to Describe My Item
Taste
Smell
Hear
See
Feel
Item:
ELL SupportAllow ELL students to use thesauruses when finding more vivid words to use in their descriptive drafts.
Extension IdeaEncourage students to use dictionaries and other resources so that they can learn new words to use in their descriptive drafts.
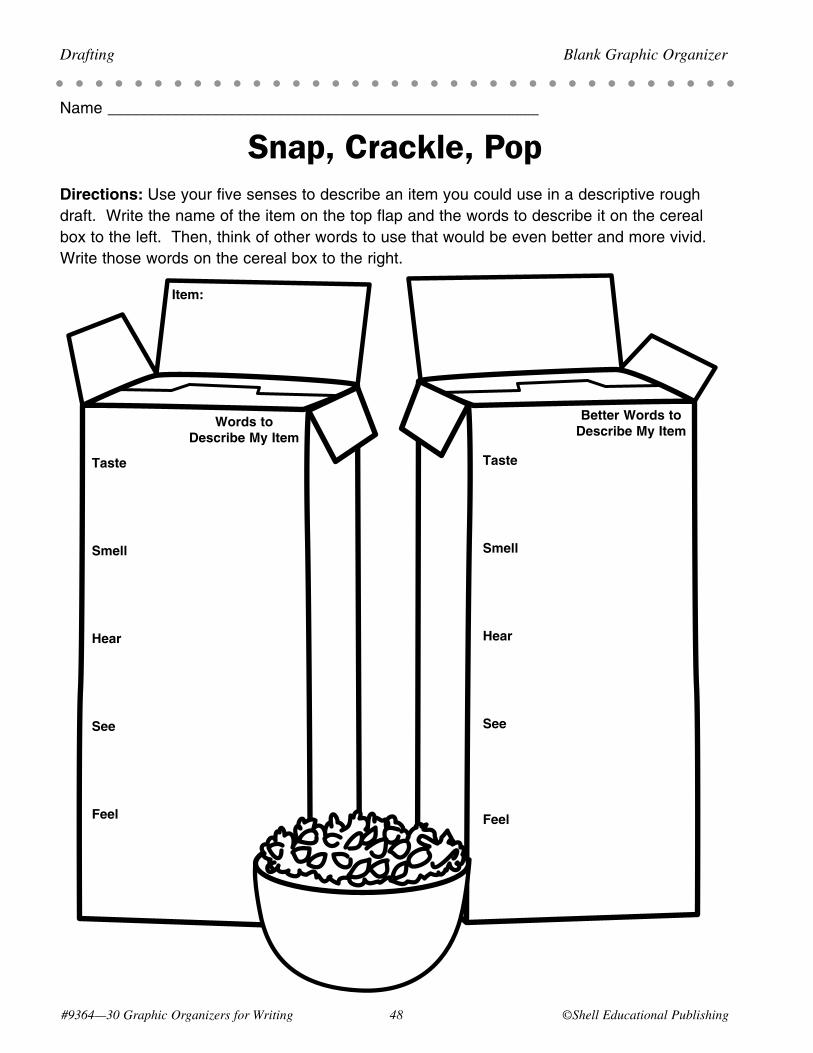
#9364—30 Graphic Organizers for Writing 4� ©Shell Educational Publishing
Drafting Blank Graphic Organizer
Name ______________________________________________________
Snap, Crackle, PopDirections: Useyourfivesensestodescribeanitemyoucoulduseinadescriptiveroughdraft.Writethenameoftheitemonthetopflapandthewordstodescribeitonthecerealboxtotheleft.Then,thinkofotherwordstousethatwouldbeevenbetterandmorevivid.Writethosewordsonthecerealboxtotheright.
Words to Describe My Item
Taste
Smell
Hear
See
Feel
Better Words to Describe My Item
Taste
Smell
Hear
See
Feel
Item:
©Shell Educational Publishing 49 #9364—30 Graphic Organizers for Writing
Sample Lesson Drafting
The Snap, Crackle, and Pop of Foods
Standard/Objective • Drafting: Uses a variety of strategies to draft and revise written work (e.g., uses sensory words
and figurative language). (McREL Language Arts, Standard 1.2)
• Students will describe their food items using their five senses and their Snap, Crackle, Pop graphic organizers. They will then create even more vivid words that they could use to describe their items.
The Lesson 1. Give each student a small powdered doughnut. Ask them to
use their five senses to describe their doughnuts. Then, write the words the students use to describe their doughnuts on the Snap, Crackle, Pop Overhead. Have them then think of even more vivid words that could be used. Write those words on the overhead as well. You may encourage students to use similes and metaphors as well in the “better words” section of the graphic organizer.
2. Then, give students their descriptive prewriting graphic organizers. Also distribute the Snap, Crackle, Pop graphic organizer (page 48). Ask the students to think about the foods they chose to describe from their prewriting graphic organizers. What words would they use to describe their foods? Have them list the words on their graphic organizers. Then, have students think of even better, more vivid words they could use. Have them also list those words on their graphic organizers. You may allow students to refer to the sample graphic organizer (page 50) as an example.
3. Ask students to now use those words to create sentences that will form their descriptive drafts. You may first wish to model how to write descriptive drafts. After the drafts are written, collect them for later use in the editing lesson, Picking Out Possessives (pages 67–70).
ELL SupportAllow ELL students to use thesauruses in order to find even more vivid words to use in their food descriptive drafts.
Extension IdeaEncourage students to use dictionaries and other resources so that they can learn new words to use in their food descriptive drafts.
Connections to Other Lessons• Picking Out Possessives—pages 67–70 • Where’s the Beef?—pages 91–94 • Picture This—pages 111–114
Please refer to the following lessons to continue the steps in the process for creating descriptive writing pieces.
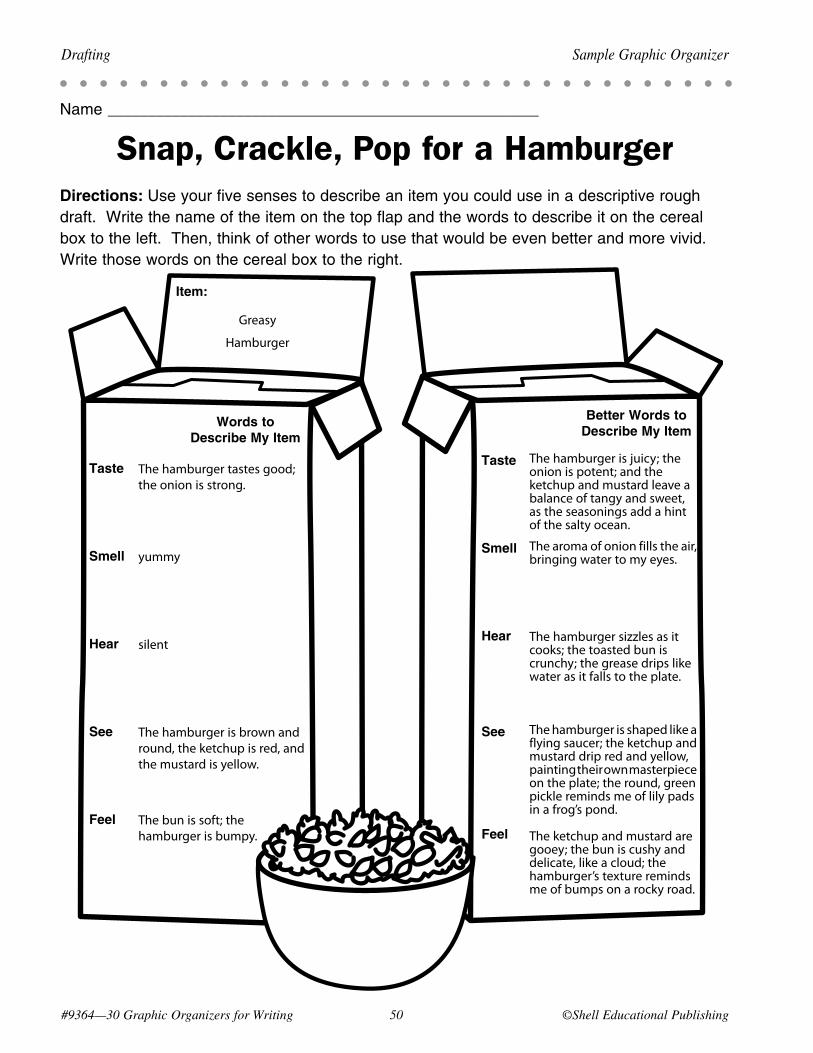
Words to Describe My Item
Taste
Smell
Hear
See
Feel
Better Words to Describe My Item
Taste
Smell
Hear See
Feel
#9364—30 Graphic Organizers for Writing �0 ©Shell Educational Publishing
Drafting Sample Graphic Organizer
Name ______________________________________________________
Snap, Crackle, Pop for a HamburgerDirections: Useyourfivesensestodescribeanitemyoucoulduseinadescriptiveroughdraft.Writethenameoftheitemonthetopflapandthewordstodescribeitonthecerealboxtotheleft.Then,thinkofotherwordstousethatwouldbeevenbetterandmorevivid.Writethosewordsonthecerealboxtotheright.
The hamburger tastes good; the onion is strong.
yummy
silent
The hamburger is brown and round, the ketchup is red, and the mustard is yellow.
The bun is soft; the hamburger is bumpy.
The hamburger is juicy; the onion is potent; and the ketchup and mustard leave a balance of tangy and sweet, as the seasonings add a hint of the salty ocean.
The aroma of onion fills the air, bringing water to my eyes.
The hamburger sizzles as it cooks; the toasted bun is crunchy; the grease drips like water as it falls to the plate. The hamburger is shaped like a flying saucer; the ketchup and mustard drip red and yellow, painting their own masterpiece on the plate; the round, green pickle reminds me of lily pads in a frog’s pond. The ketchup and mustard are gooey; the bun is cushy and delicate, like a cloud; the hamburger’s texture reminds me of bumps on a rocky road.
Item:
Greasy
Hamburger

©Shell Educational Publishing �1 #9364—30 Graphic Organizers for Writing
Why Use the Graphic Organizer • The Ladder of Succession graphic organizer gives students the
opportunity to organize their writing before creating expository drafts, ensuring that they will include introductions and conclusions as well as stay on topic in their writing.
How to Use the Graphic Organizer 1. Read aloud an expository writing piece that explains how to do
something, but change the order so that the writing does not make sense. Ask the class what was wrong with the writing piece. Explain that it is very important for expository writing to go in sequential order, especially when it is meant to inform others of how to do something.
2. Display the Ladder of Succession Overhead. Choose an appropriate expository topic, such as turning on a computer. Write “Introduction” on the first rung of the ladder. Explain what goes into an introduction. Then, have a volunteer explain one step that should be included in the expository writing piece. Have the class tell you where that idea might go in the expository writing. Write it on the appropriate ladder rung. Do this with other steps until they are all logically organized on the overhead. Be sure to write “Conclusion” on the last rung, discussing what belongs in a conclusion. Model for students how to write an expository rough draft in the correct order, using the overhead as a guide. Tell the class that each ladder rung would be a different paragraph in their writing.
3. Give each student a copy of the Ladder of Succession graphic organizer (page 52). Have students think of ideas for expository drafts. Have them then record the steps for completing their chosen tasks on the ladder rungs of their graphic organizers. They should then use their graphic organizers to create expository drafts.
Drafting Lesson
Ladder of Succession
Graphic Organizer
Skills ConnectionType of Writing—expository
Drafting—organizing information
Bloom’s Level—Analysis (See page 7 for a description.)
ELL SupportAllow ELL students to use simple ideas in their paragraphs. Remind them that their sentences do not have to be incredibly detailed.
Extension IdeaAllow students to find graphics or create collages that could go along with their expository writing.
1.
2.
3.
4.
5.
6.
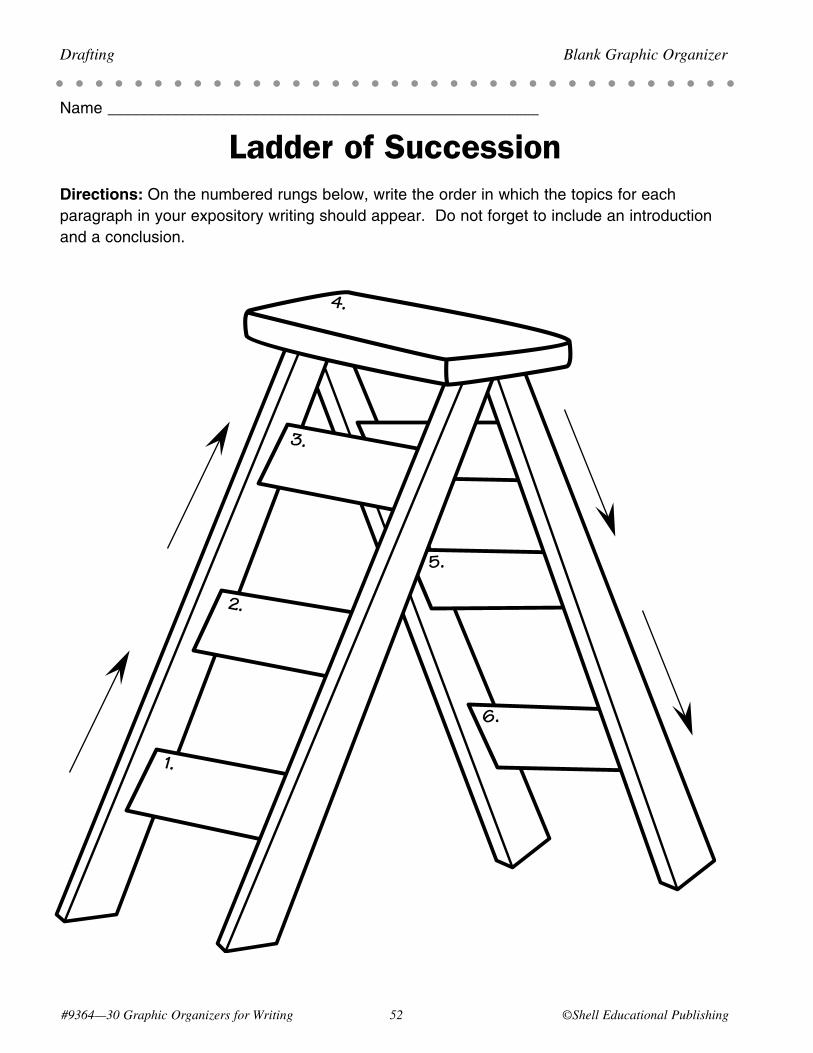
#9364—30 Graphic Organizers for Writing �� ©Shell Educational Publishing
Drafting Blank Graphic Organizer
Name ______________________________________________________
Ladder of SuccessionDirections: Onthenumberedrungsbelow,writetheorderinwhichthetopicsforeachparagraphinyourexpositorywritingshouldappear.Donotforgettoincludeanintroductionandaconclusion.
1.
2.
3.
4.
5.
6.
©Shell Educational Publishing �3 #9364—30 Graphic Organizers for Writing
Sample Lesson Drafting
Climbing the Career LadderStandard/Objective • Drafting: Writes expository compositions (e.g., organizes and presents information in a logical
manner). (McREL Language Arts, Standard 1.6)
• Students will use their Ladder of Succession graphic organizers to organize their career paragraphs in logical order before writing their expository drafts.
The Lesson 1. Copy the information from the sample graphic organizer
(page 54) onto the Ladder of Succession graphic organizer. Then, explain to students that the order in which they place the topics for their career expository writing will help their writing flow and make sense.
2. Show students the overhead. Then, ask them if they feel that the order of the paragraph topics is logical. Is there a different order in which the ideas might be placed? Show them how you will then use the graphic organizer to create a rough draft of the career expository piece, with each rung being a different paragraph with details. Explain that the first and last rungs should be the introduction and conclusion. You may want to give examples of what to include in an introduction and conclusion as well.
3. Distribute the Ladder of Succession graphic organizer (page 52). Also give students their expository prewriting graphic organizers. Tell them to organize the standards they developed in their prewriting graphic organizers into a logical sequence on their Ladder of Succession graphic organizers. Have students then create their career expository drafts, putting the paragraphs in the same order as they are written on their graphic organizers, being sure to include introductions and conclusions. Collect students’ drafts for later use in the editing lesson, Pounding Out Prepositions (pages 79–82).
ELL SupportAllow ELL students to use simple ideas in their career paragraphs. Remind them that their sentences do not have to be incredibly detailed.
Extension IdeaAllow students to find graphics or create collages about their chosen careers. They could work on these pictures throughout the writing process so that they are complete once the writing is “published.”
Connections to Other Lessons• Pounding Out Prepositions—pages 79–82 • Tying It Together—pages 87–90 • Check It Over—pages 123–126
Please refer to the following lessons to continue the steps in the process for creating expository writing pieces.
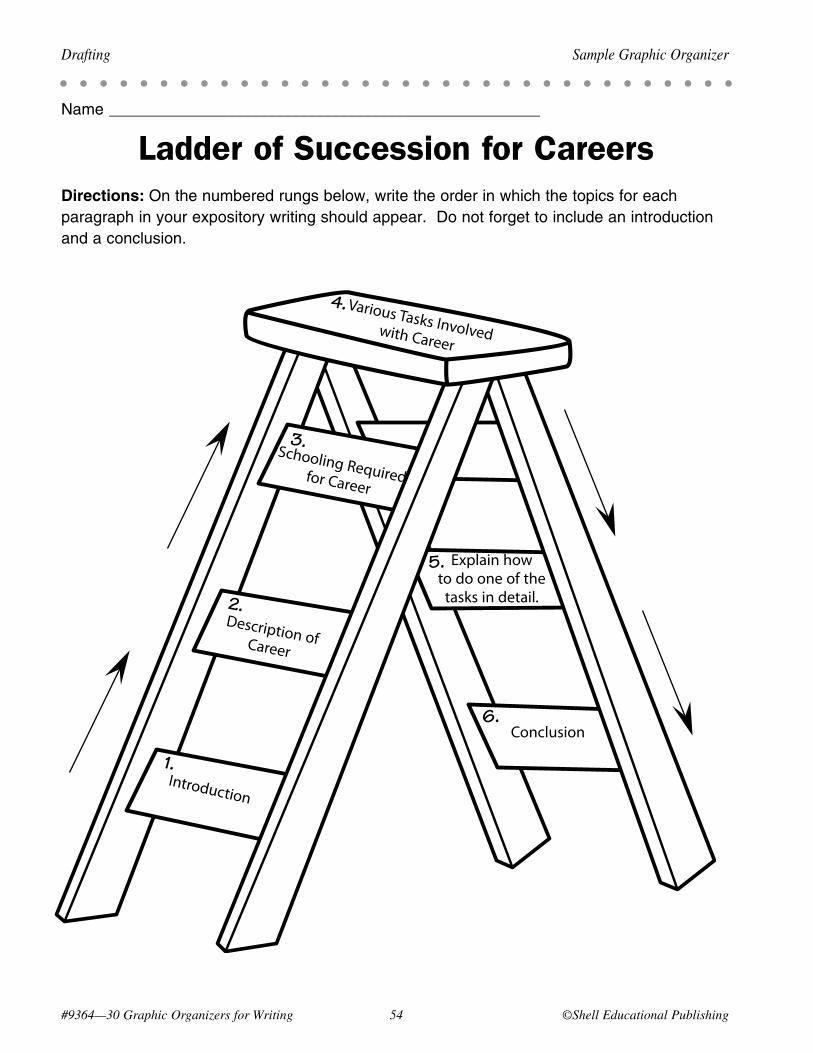
#9364—30 Graphic Organizers for Writing �4 ©Shell Educational Publishing
1.
2.
3.
4.
5.
6.
Drafting Sample Graphic Organizer
Name ______________________________________________________
Ladder of Succession for CareersDirections: Onthenumberedrungsbelow,writetheorderinwhichthetopicsforeachparagraphinyourexpositorywritingshouldappear.Donotforgettoincludeanintroductionandaconclusion.
Introduction
Description of Career
Schooling Required for Career
Various Tasks Involved with Career
Explain how to do one of the
tasks in detail.
Conclusion

©Shell Educational Publishing �� #9364—30 Graphic Organizers for Writing
Why Use the Graphic Organizer • Business letters should be professional and well organized. The
To Whom It May Concern graphic organizer allows students to organize their business letters before creating their drafts.
How to Use the Graphic Organizer 1. Have students form groups and create new lists of businesses
that they would like to contact. You may give them ideas of businesses they might choose, such as businesses that could offer information concerning topics being studied in class. Tell students that they are now going to write rough drafts of business letters to these companies.
2. Display the To Whom It May Concern Overhead. Using the overhead, explain the various parts of a business letter, along with the rules for writing a business letter, such as using a colon after the greeting rather than a comma. Then, choose a business as an example. Have the class brainstorm possible greetings, information to include in the body, and possible closings. Write their ideas on the overhead. Then, show students how to transform the information from the graphic organizer into a business letter rough draft. You may wish to explain that the body of the letter should contain the purpose for writing the letter, the students’ requests, and possibly compliments.
3. Distribute the To Whom It May Concern graphic organizer (page 56). Have students complete their own organizers for the companies they have chosen. Have them then transfer the information from their graphic organizers into business letter rough drafts.
4. You may also choose to help the students find the companies’ addresses using the Internet or other resources.
Drafting Lesson
To Whom It May Concern
Graphic Organizer
Skills ConnectionType of Writing—business letter
Drafting—uses the business letter format to state concerns, purposes, and requests
Bloom’s Level—Synthesis (See page 8 for a description.)
#9364—30 Graphic Organizers for Writing 56 ©Shell Educational Publishing
Drafting Blank Graphic Organizer
Name _______________________________________________
To Whom It May ConcernDirections: Brainstorm possible ideas and information to include in each part of your business letter using the lines below. Then, use the information and format from your graphic organizer to create your business letter rough draft.
Return Address (Your or Your School’s Address):
________________________________________
________________________________________
________________________________________
________________________________________
Date ___________________________________
Recipient’s Name and Business Address
___________________________________________
___________________________________________
___________________________________________
___________________________________________
Possible Salutations or Greetings to Use ______________________________________
__________________________________________________________________________
Body
__________________________________________________________________________
__________________________________________________________________________
__________________________________________________________________________
__________________________________________________________________________
__________________________________________________________________________
__________________________________________________________________________
__________________________________________________________________________
__________________________________________________________________________
Possible Closings ________________________
Signature _______________________________
ELL SupportIf ELL students are struggling with writing their drafts, allow them to tape record the things they would like to say in their drafts for each part of their business letters. Then, allow higher-level students or teachers’ aides to help them transfer their recordings onto paper.
Extension IdeaEncourage students to create clever, yet professional greetings that will get their companies’ attention.
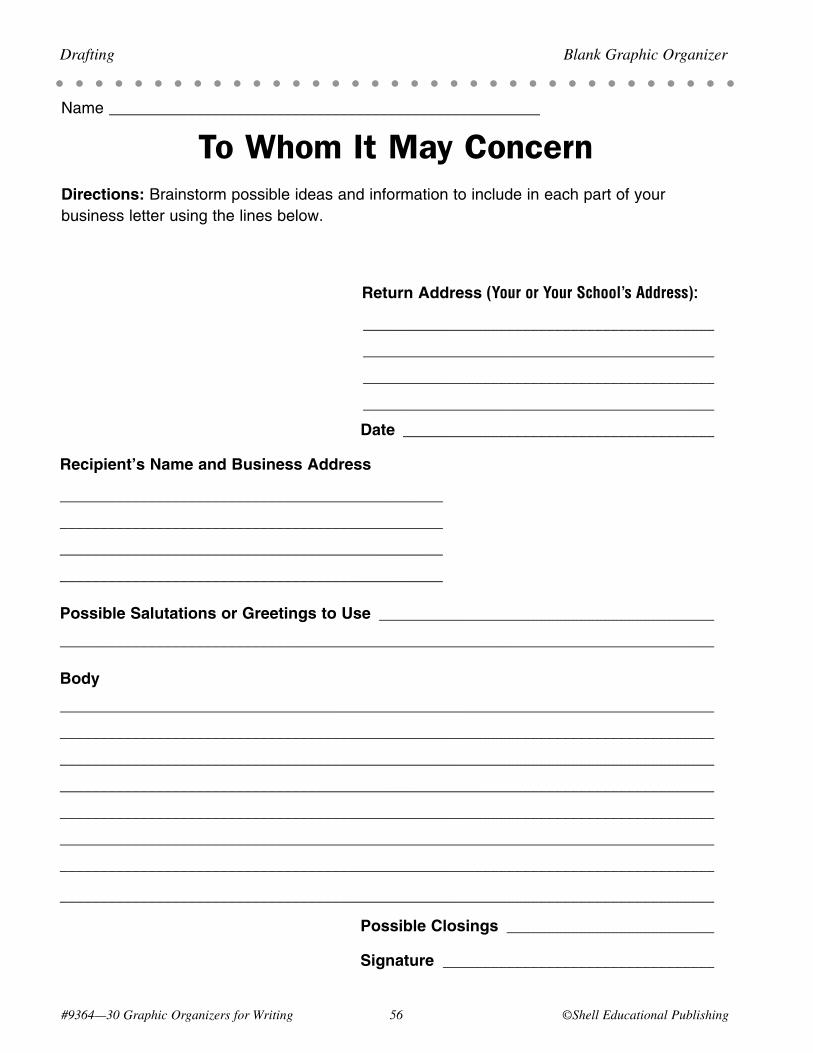
#9364—30 Graphic Organizers for Writing �6 ©Shell Educational Publishing
Drafting Blank Graphic Organizer
Name ______________________________________________________
To Whom It May ConcernDirections:Brainstormpossibleideasandinformationtoincludeineachpartofyourbusinessletterusingthelinesbelow.
Return Address (Your or Your School’s Address):
____________________________________________
____________________________________________
____________________________________________
____________________________________________
Date _______________________________________
Recipient’s Name and Business Address
________________________________________________
________________________________________________
________________________________________________
________________________________________________
Possible Salutations or Greetings to Use __________________________________________
__________________________________________________________________________________
Body
__________________________________________________________________________________
__________________________________________________________________________________
__________________________________________________________________________________
__________________________________________________________________________________
__________________________________________________________________________________
__________________________________________________________________________________
__________________________________________________________________________________
__________________________________________________________________________________
Possible Closings __________________________
Signature __________________________________
©Shell Educational Publishing �� #9364—30 Graphic Organizers for Writing
Sample Lesson Drafting
To All Chocolate CompaniesStandard/Objective • Drafting: Writes business letters and letters of request and response (e.g., uses business letter
format; states purpose of the letter; relates opinions, problems, requests, or compliments). (McREL Language Arts, Standard 1.13)
• Students will use their To Whom It May Concern graphic organizers to organize the information they would like to include in their business letters to chocolate companies. They will then create business letter rough drafts based on the information in their graphic organizers.
The Lesson 1. Distribute students’ business letter prewriting graphic organizers.
Tell students that they are now going to write their business letter rough drafts to the chocolate companies they brainstormed in the prewriting activities. Show students the To Whom It May Concern Overhead. Discuss the various parts of a business letter and rules for writing a business letter using the overhead.
2. Copy the information from the sample graphic organizer (page 58) onto the overhead. Then, go through the example with the students. Ask them for other information or questions that they might include in the body of their letters. Model how to turn the information into a business letter rough draft.
3. Distribute the To Whom It May Concern graphic organizer (page 56) to the students. Have the students complete their graphic organizers for the chocolate companies they have chosen. Then, have them create their own business letter rough drafts using the information in their graphic organizers. After the drafts are completed, collect them so that they can be used in the editing lesson, Capitalization King (pages 63–66).
ELL SupportIf ELL students are struggling with writing their business letter drafts, allow them to tape record the things they would like to say in their drafts for each part of their business letters. Then, allow higher-level students or teachers’ aides to help them transfer their recordings onto paper.
Extension IdeaEncourage students to create clever, yet professional greetings that will get the chocolate companies’ attention.
Connections to Other Lessons• Capitalization King—pages 63–66 • Focusing on Feedback—pages 99–102 • Imagine That—pages 115–118
Please refer to the following lessons to continue the steps in the process for creating business letters.
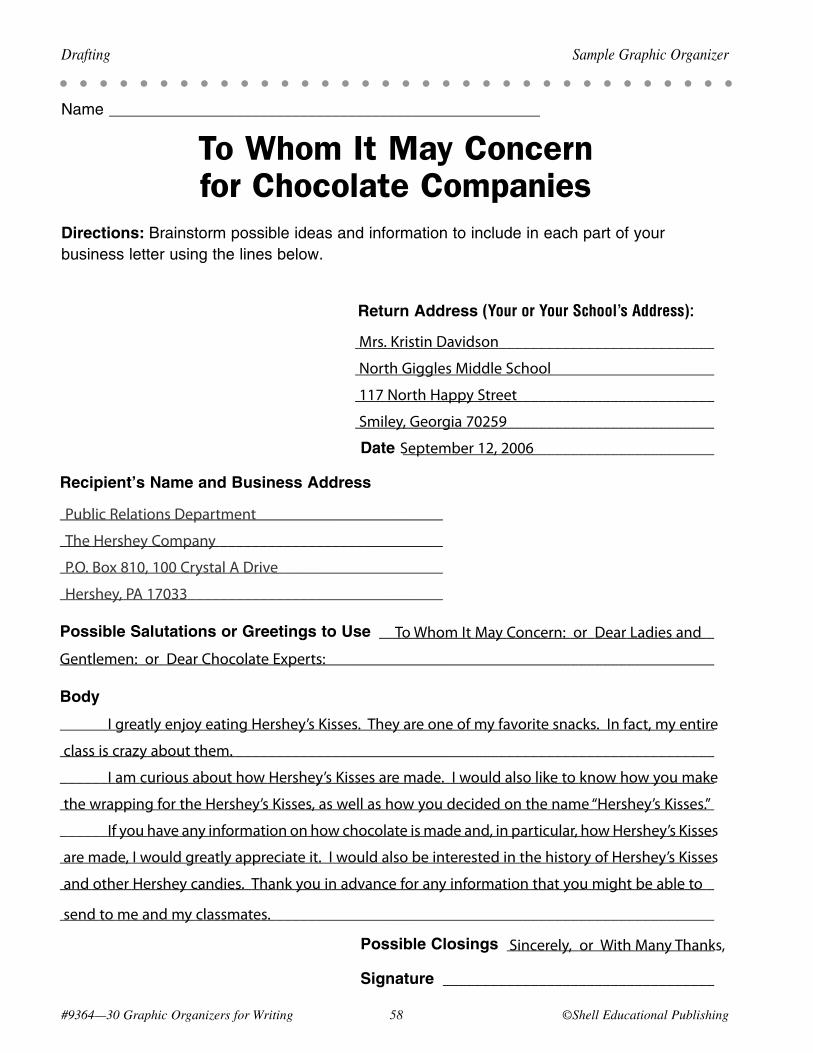
Return Address (Your or Your School’s Address):
_____________________________________________
_____________________________________________
_____________________________________________
_____________________________________________
Date _______________________________________
Recipient’s Name and Business Address
________________________________________________
________________________________________________
________________________________________________
________________________________________________
Possible Salutations or Greetings to Use __________________________________________
__________________________________________________________________________________
Body
__________________________________________________________________________________
__________________________________________________________________________________
__________________________________________________________________________________
__________________________________________________________________________________
__________________________________________________________________________________
__________________________________________________________________________________
__________________________________________________________________________________
__________________________________________________________________________________
Possible Closings __________________________
Signature __________________________________
#9364—30 Graphic Organizers for Writing �� ©Shell Educational Publishing
Drafting Sample Graphic Organizer
Name ______________________________________________________
To Whom It May Concern for Chocolate Companies
Directions: Brainstormpossibleideasandinformationtoincludeineachpartofyourbusinessletterusingthelinesbelow.
Mrs. Kristin Davidson
North Giggles Middle School
117 North Happy Street
Smiley, Georgia 70259
September 12, 2006
Public Relations Department
The Hershey Company
P.O. Box 810, 100 Crystal A Drive
Hershey, PA 17033
To Whom It May Concern: or Dear Ladies and
Gentlemen: or Dear Chocolate Experts:
I greatly enjoy eating Hershey’s Kisses. They are one of my favorite snacks. In fact, my entire
class is crazy about them.
I am curious about how Hershey’s Kisses are made. I would also like to know how you make
the wrapping for the Hershey’s Kisses, as well as how you decided on the name “Hershey’s Kisses.”
If you have any information on how chocolate is made and, in particular, how Hershey’s Kisses
are made, I would greatly appreciate it. I would also be interested in the history of Hershey’s Kisses
and other Hershey candies. Thank you in advance for any information that you might be able to
send to me and my classmates.
Sincerely, or With Many Thanks,
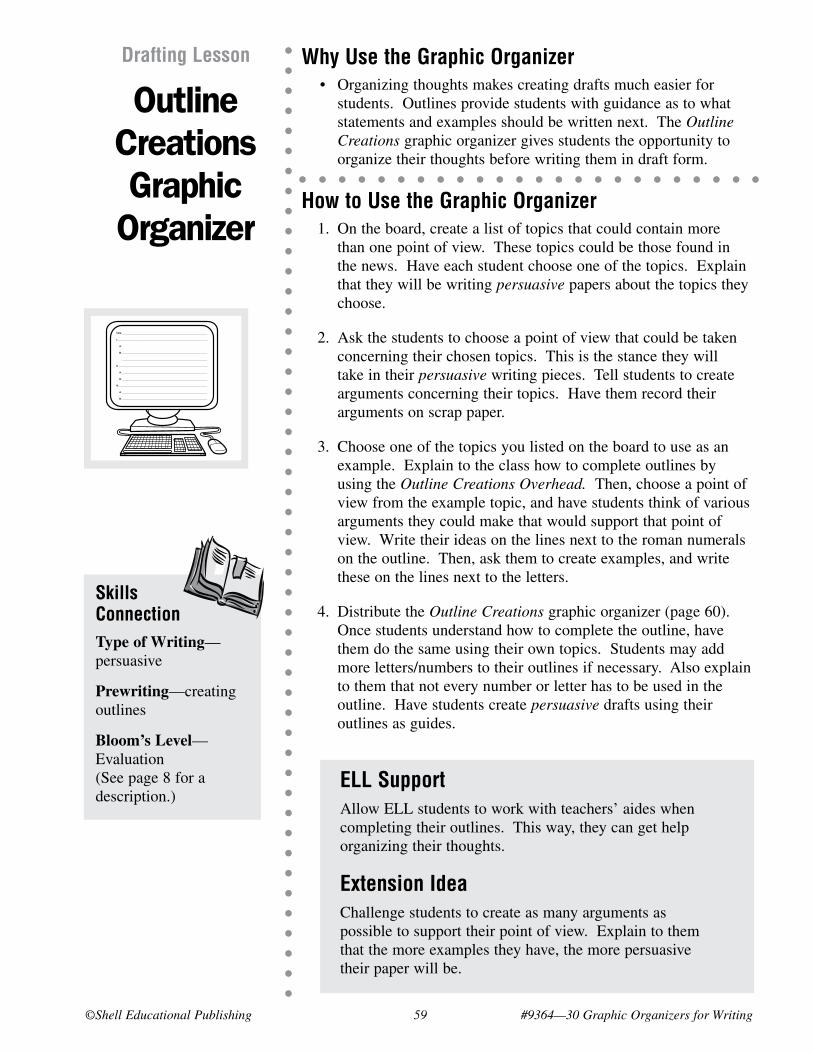
©Shell Educational Publishing �9 #9364—30 Graphic Organizers for Writing
Why Use the Graphic Organizer • Organizing thoughts makes creating drafts much easier for
students. Outlines provide students with guidance as to what statements and examples should be written next. The Outline Creations graphic organizer gives students the opportunity to organize their thoughts before writing them in draft form.
How to Use the Graphic Organizer 1. On the board, create a list of topics that could contain more
than one point of view. These topics could be those found in the news. Have each student choose one of the topics. Explain that they will be writing persuasive papers about the topics they choose.
2. Ask the students to choose a point of view that could be taken concerning their chosen topics. This is the stance they will take in their persuasive writing pieces. Tell students to create arguments concerning their topics. Have them record their arguments on scrap paper.
3. Choose one of the topics you listed on the board to use as an example. Explain to the class how to complete outlines by using the Outline Creations Overhead. Then, choose a point of view from the example topic, and have students think of various arguments they could make that would support that point of view. Write their ideas on the lines next to the roman numerals on the outline. Then, ask them to create examples, and write these on the lines next to the letters.
4. Distribute the Outline Creations graphic organizer (page 60). Once students understand how to complete the outline, have them do the same using their own topics. Students may add more letters/numbers to their outlines if necessary. Also explain to them that not every number or letter has to be used in the outline. Have students create persuasive drafts using their outlines as guides.
Drafting Lesson
Outline Creations Graphic
Organizer
Skills ConnectionType of Writing—persuasive
Prewriting—creating outlines
Bloom’s Level—Evaluation (See page 8 for a description.)
ELL SupportAllow ELL students to work with teachers’ aides when completing their outlines. This way, they can get help organizing their thoughts.
Extension IdeaChallenge students to create as many arguments as possible to support their point of view. Explain to them that the more examples they have, the more persuasive their paper will be.
Title: _________________________________________________________________
I._____________________________________________________________________
A. _________________________________________________________________
B. _________________________________________________________________
_________________________________________________________________
II. ____________________________________________________________________
A. _________________________________________________________________
B. _________________________________________________________________
III. ___________________________________________________________________
A. _________________________________________________________________
B. _________________________________________________________________
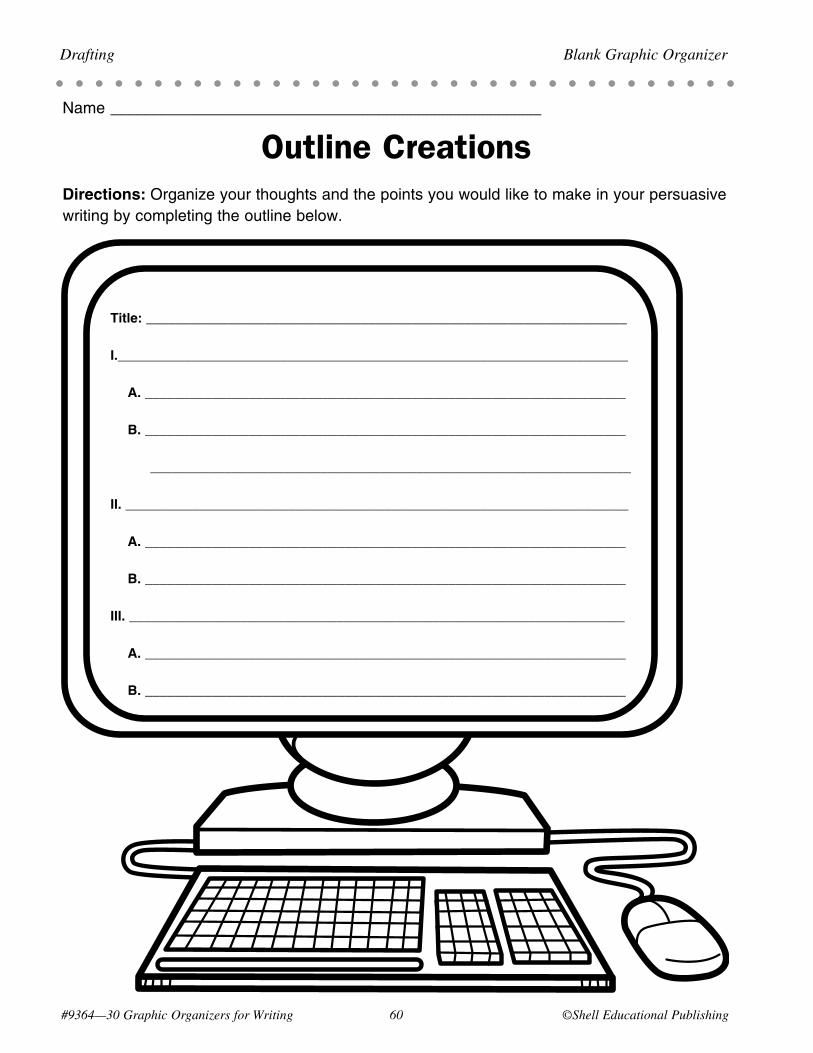
#9364—30 Graphic Organizers for Writing 60 ©Shell Educational Publishing
Drafting Blank Graphic Organizer
Name ______________________________________________________
Outline CreationsDirections: Organizeyourthoughtsandthepointsyouwouldliketomakeinyourpersuasivewritingbycompletingtheoutlinebelow.
Title: _________________________________________________________________
I._____________________________________________________________________
A. _________________________________________________________________
B. _________________________________________________________________
_________________________________________________________________
II. ____________________________________________________________________
A. _________________________________________________________________
B. _________________________________________________________________
III. ___________________________________________________________________
A. _________________________________________________________________
B. _________________________________________________________________

©Shell Educational Publishing 61 #9364—30 Graphic Organizers for Writing
Sample Lesson Drafting
School Issues OutlinesStandard/Objective • Drafting: Uses a variety of prewriting strategies (e.g., makes outlines). (McREL Language Arts,
Standard 1.1)
• Students will complete the outline on their Outline Creations graphic organizers, offering reasons for their point of view, in order to organize their persuasive writing topics concerning school issues.
The Lesson 1. Distribute students’ persuasive prewriting graphic organizers, in
which they considered each point of view for their school-related topics. Then, distribute the Outline Creations graphic organizer (page 60).
2. Write the information from the sample graphic organizer (page 62) onto the Outline Creations Overhead. Show students how to use the information in their prewriting organizers to create outlines, which will help them organize their thoughts as well as prepare them to write their drafts. Once students understand how to complete an outline, allow them to complete their own using their graphic organizers.
3. Tell students to use their outlines on their graphic organizers to help them write their persuasive drafts. Collect their drafts for later use in the editing lesson, Slicing Through Spelling (pages 71–74).
ELL SupportAllow ELL students to work with teachers’ aides when completing their outlines concerning school issues. This way, they can get help organizing their thoughts.
Extension IdeaChallenge students to create even more examples or arguments than those listed on their pros/cons prewriting graphic organizers. Explain to them that the more examples they have concerning their school issues, the more persuasive their papers will be.
Connections to Other Lessons• Slicing Through Spelling—pages 71–74 • Checkmate—pages 107–110 • In My Defense—pages 131–134
Please refer to the following lessons to continue the steps in the process for creating persuasive writing pieces.
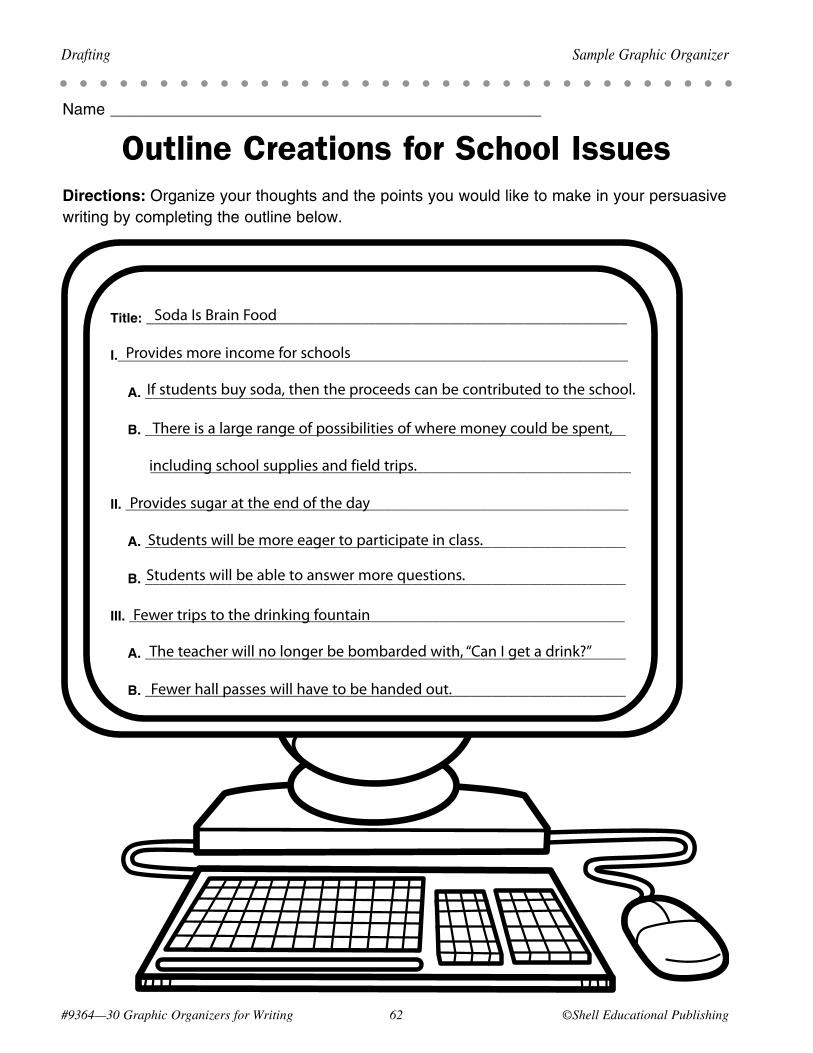
Title: _________________________________________________________________
I._____________________________________________________________________
A. _________________________________________________________________
B. _________________________________________________________________
_________________________________________________________________
II. ____________________________________________________________________
A. _________________________________________________________________
B. _________________________________________________________________
III. ___________________________________________________________________
A. _________________________________________________________________
B. _________________________________________________________________
There is a large range of possibilities of where money could be spent,
including school supplies and field trips.
Provides sugar at the end of the day
#9364—30 Graphic Organizers for Writing 6� ©Shell Educational Publishing
Drafting Sample Graphic Organizer
Name ______________________________________________________
Outline Creations for School IssuesDirections: Organizeyourthoughtsandthepointsyouwouldliketomakeinyourpersuasivewritingbycompletingtheoutlinebelow.
Soda Is Brain Food
Provides more income for schools
If students buy soda, then the proceeds can be contributed to the school.
Students will be more eager to participate in class.
Students will be able to answer more questions.
Fewer trips to the drinking fountain
The teacher will no longer be bombarded with, “Can I get a drink?”
Fewer hall passes will have to be handed out.
©Shell Educational Publishing 63 #9364—30 Graphic Organizers for Writing
Why Use the Graphic Organizer • The Capitalization King graphic organizer allows students to
compare common nouns to proper nouns.
How to Use the Graphic Organizer 1. Display the Capitalization King Overhead. Write five common
items in the top crown. Then, ask the students to list companies or brands that might make those items. Before listing the companies on the overhead, explain to students that companies and brands are proper nouns. You may also wish to explain the difference between a common noun and a proper noun. Explain that proper nouns must be capitalized. Correctly write the companies’ names on the proper noun portion of the overhead.
2. Distribute the Capitalization King graphic organizer (page 64). Have students form small groups. Ask the groups to list items that companies sell or produce. Then, have them write the names of the companies correctly, using proper capitalization, on their graphic organizers.
3. After students have completed their graphic organizers, allow them to share their proper nouns with the rest of the class.
Editing Lesson
Capitalization King Graphic
Organizer
Skills ConnectionType of Writing—business letters
Editing—capitalizing proper nouns
Bloom’s Level—Knowledge (See page 7 for a description.)
#9364—30 Graphic Organizers for Writing 64 ©Shell Educational Publishing
Editing Blank Graphic Organizer
Name _______________________________________________
Capitalization KingDirections: Write five common nouns in the first crown. Then, list brand names or companies that make those common items in the second crown. Be sure to correctly capitalize the proper nouns.
Common Nouns
1.
2.
3.
4.
5.
Proper Nouns
1.
2.
3.
4.
5.
ELL SupportAllow ELL students to find company names or products in catalogs, which they can then use on their graphic organizers.
Extension IdeaChallenge students to list several companies, rather than just one company, that might make the items they mentioned under the “Common Nouns” portion of their graphic organizers. This way, they get more practice writing proper nouns correctly.
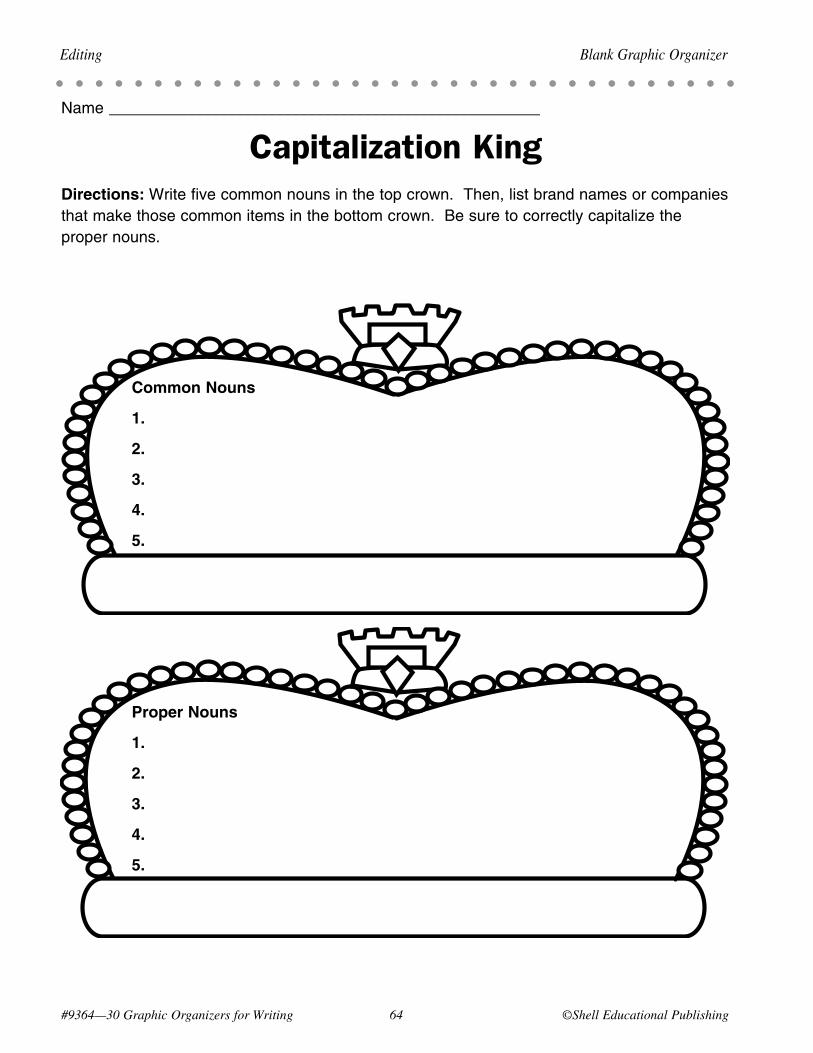
#9364—30 Graphic Organizers for Writing 64 ©Shell Educational Publishing
Editing Blank Graphic Organizer
Name ______________________________________________________
Capitalization KingDirections: Writefivecommonnounsinthetopcrown.Then,listbrandnamesorcompaniesthatmakethosecommonitemsinthebottomcrown.Besuretocorrectlycapitalizethepropernouns.
Common Nouns
1.
2.
3.
4.
5.
Proper Nouns
1.
2.
3.
4.
5.
©Shell Educational Publishing 6� #9364—30 Graphic Organizers for Writing
Sample Lesson Editing
Capitalizing on ChocolateStandard/Objective • Editing: Uses conventions of capitalization in written compositions (e.g., proper nouns
[companies, schools, and institutions], brand names of products). (McREL Language Arts, Standard 3.9)
• Students will use their Capitalization King graphic organizers to practice writing company and brand names correctly. They will then edit their business letters to chocolate companies, checking that the companies’ names and brand names are correctly capitalized.
The Lesson 1. Display the Capitalization King Overhead. Then, write “candy bars”
in the “Common Nouns” crown. Ask students if they can list names of candy bar companies or brands of candy bars. Write these in the bottom crown. Then, ask students what the difference is between the way the common noun candy bars is written and the way the proper nouns are written. Explain to students that company names and brand names are always capitalized, as they are proper nouns.
2. Give each student a copy of the Capitalization King graphic organizer (page 64). Have them work with partners to list other common nouns for types of candy or chocolate. They may refer to the sample graphic organizer (page 66), if necessary. Then, have the students list the name brands or companies for those types of candy, capitalizing them correctly.
3. Once students have completed their graphic organizers, distribute their business letters written to chocolate companies. Have them edit their letters, circling any proper nouns. Then, have them make sure their proper nouns are written correctly. Collect students’ drafts for later use in the revision lesson, Focusing on Feedback (pages 99–102).
ELL SupportAllow ELL students to find company names or products in candy or chocolate catalogs, which can often be requested from the candy companies. Students can then use those company names on their graphic organizers.
Extension IdeaChallenge students to list several candy or chocolate companies, rather than just one company or brand name, for each type of candy they listed. This way, they get more practice writing proper nouns correctly.Connections to Other Lessons
• Focusing on Feedback—pages 99–102 • Imagine That—pages 115–118
Please refer to the following lessons to continue the steps in the process for creating business letters.

Common Nouns
1.
2.
3.
4.
5.
Proper Nouns
1.
2.
3.
4.
5.
#9364—30 Graphic Organizers for Writing 66 ©Shell Educational Publishing
Editing Sample Graphic Organizer
Name ______________________________________________________
Capitalization King for Chocolate Companies
Directions: Writefivecommonnounsinthetopcrown.Then,listbrandnamesorcompaniesthatmakethosecommonitemsinthebottomcrown.Besuretocorrectlycapitalizethepropernouns.
bite-size candies
candy bars
licorice
chocolates
lollipops
M&M’s, Sixlets, Skittles
Clark bar, 3 Musketeers, Hershey’s
Twizzlers, American Licorice Company
Godiva, Russell Stover, Whitman’s
Blow Pops, Dum-Dums
©Shell Educational Publishing 6� #9364—30 Graphic Organizers for Writing
Why Use the Graphic Organizer • The Picking Out Possessives graphic organizer allows students
to practice writing both singular and plural possessive nouns, so that they can be sure to use them correctly in their writing.
How to Use the Graphic Organizer 1. Write several students’ names on the board. Ask those students
to name something they own. Write the items after the students’ names, as well as the apostrophes to make the nouns possessive. Explain to the class that you have written possessive nouns on the board. Possessive nouns show ownership. State the rules for writing possessive nouns.
2. Project the Picking Out Possessives Overhead so that students can see it. Model how to write singular possessive nouns correctly on the petals of the “Singular Possessive Nouns” flower. Then, model how to write plural possessive nouns correctly using the “Plural Possessive Nouns” flower.
3. Give each student a Picking Out Possessives graphic organizer (page 68). Have students write five singular nouns on the lines next to the top flower. Have them make the singular nouns possessive using apostrophes. Then, have students transfer the singular possessive nouns to the flower petals, including items that “belong” to the nouns. Students should follow the same procedure for writing plural possessive nouns on their graphic organizers.
4. Place students in small groups. Allow them to share their graphic organizers with their group members so that they may see more examples of writing possessive nouns correctly.
Editing Lesson
Picking Out Possessives
Graphic Organizer
Skills ConnectionType of Writing—descriptive
Editing—write possessive nouns correctly
Bloom’s Level—Comprehension (See page 7 for a description.)
#9364—30 Graphic Organizers for Writing 68 ©Shell Educational Publishing
Editing Blank Graphic Organizer
Name ______________________________________________________
Picking Out PossessivesDirections: On the lines next to the top flower, write fiver singular nouns. Make the singular nouns possessive using apostrophes. Then, write each singular possessive noun on a petal of the flower, along with an item that might “belong” to the noun. Follow the same steps for plural nouns on the bottom flower.
Singular Possessive
Nouns
Plural Possessive
Nouns
Singular Nouns
____________________
____________________
____________________
____________________
____________________
Plural Nouns
____________________
____________________
____________________
____________________
____________________
ELL SupportYou may wish to give ELL students the singular and plural forms of words to get them started on their graphic organizers. This way, they can focus on the possessive rules without worrying about how to turn nouns into their plural forms.
Extension IdeaAllow students to go on a classroom scavenger hunt, asking their classmates what they own. Have them list those items on their graphic organizers, written correctly in possessive form.
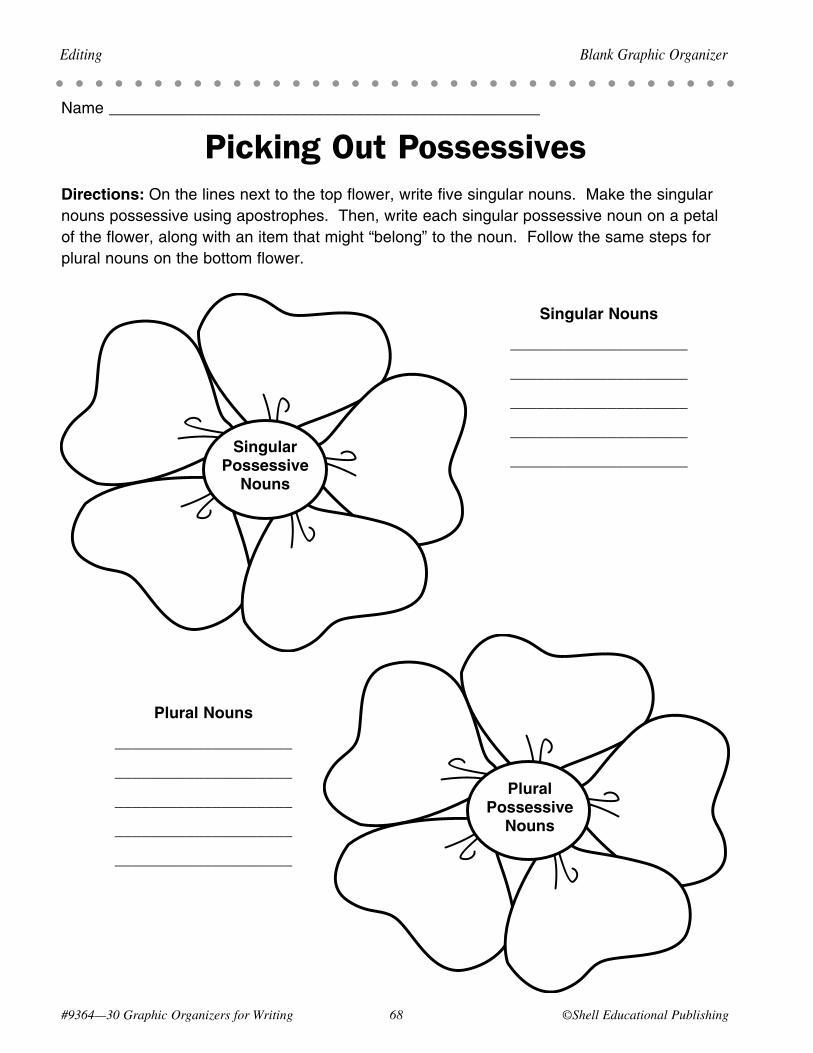
#9364—30 Graphic Organizers for Writing 6� ©Shell Educational Publishing
Editing Blank Graphic Organizer
Name ______________________________________________________
Picking Out PossessivesDirections: Onthelinesnexttothetopflower,writefivesingularnouns.Makethesingularnounspossessiveusingapostrophes.Then,writeeachsingularpossessivenounonapetaloftheflower,alongwithanitemthatmight“belong”tothenoun.Followthesamestepsforpluralnounsonthebottomflower.
Singular Possessive
Nouns
Plural Possessive
Nouns
Singular Nouns
____________________
____________________
____________________
____________________
____________________
Plural Nouns
____________________
____________________
____________________
____________________
____________________
©Shell Educational Publishing 69 #9364—30 Graphic Organizers for Writing
Sample Lesson Editing
Picking Out the Food PossessivesStandard/Objective • Editing: Uses nouns in written compositions (e.g., forms possessives of nouns).
(McREL Language Arts, Standard 3.2)
• Students will learn to write both singular and plural possessive nouns correctly using their Picking Out Possessives graphic organizers. They will then edit their descriptive drafts about food, checking that all possessive nouns were written correctly.
The Lesson 1. Copy the sample graphic organizer (page 70) onto the Picking Out
Possessives Overhead. Explain to students that the foods written in the flower petals all “own” something. And, because they “own” something, they must be written to show that. Give students the rules on how to write both singular and plural possessive nouns, as you point out examples on the overhead.
2. Then, give each student a copy of the Picking Out Possessives graphic organizer (page 68). Have students think of foods they used in their descriptive drafts. Then, have them list five singular foods and five plural foods on the appropriate lines on their graphic organizers. Ask students to turn the foods into possessive nouns, using apostrophes correctly, just as you showed them in the examples. Then, have students transfer the possessive nouns to the petals of the correct flowers, including items each food might “own.”
3. Distribute students’ descriptive drafts about food. Tell them that they now need to edit their drafts, highlighting any possessive nouns they find. They should then make sure the possessive nouns were written correctly in their drafts. If possessive nouns were not used in the students’ descriptive drafts about food, encourage them to add one to two possessive nouns to their drafts while making sure their writing still flows.
ELL SupportYou may wish to give ELL students the singular and plural forms of food words to start them out on their graphic organizers. This way, they can focus on the possessive rules without worrying about how to turn nouns into their plural forms.
Extension IdeaAllow students to go on a classroom scavenger hunt, asking their classmates what foods they like best. Have them list those food items on their graphic organizers, along with what might “belong” to those foods, written correctly in possessive form. An example might be “the spaghetti’s meatball.”
Connections to Other Lessons• Where’s the Beef?—pages 91–94 • Picture This—pages 111–114
Please refer to the following lessons to continue the steps in the process for creating descriptive writing pieces.
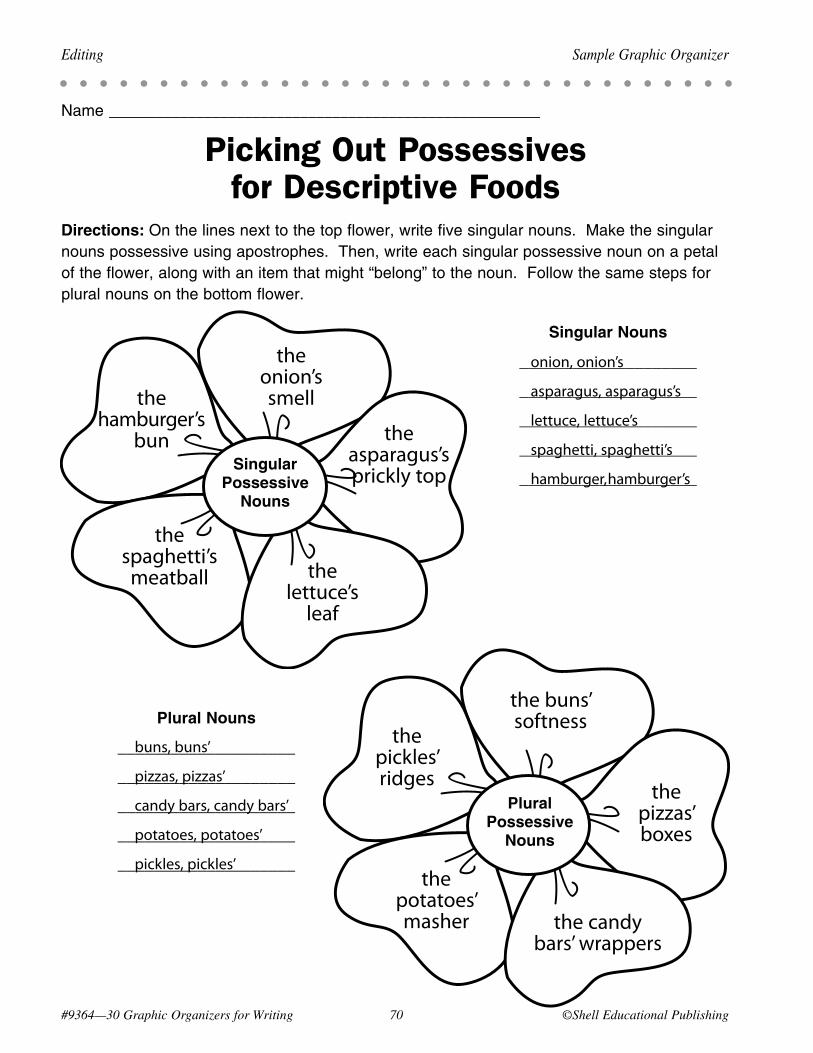
#9364—30 Graphic Organizers for Writing �0 ©Shell Educational Publishing
Editing Sample Graphic Organizer
Name ______________________________________________________
Picking Out Possessives for Descriptive Foods
Directions: Onthelinesnexttothetopflower,writefivesingularnouns.Makethesingularnounspossessiveusingapostrophes.Then,writeeachsingularpossessivenounonapetaloftheflower,alongwithanitemthatmight“belong”tothenoun.Followthesamestepsforpluralnounsonthebottomflower.
Singular Possessive
Nouns
Plural Possessive
Nouns
the hamburger’s
bun
the onion’s smell
the asparagus’s prickly top
the spaghetti’s meatball the
lettuce’s leaf
the buns’ softness
the pickles’ ridges
the potatoes’ masher the candy
bars’ wrappers
the pizzas’ boxes
Singular Nouns
____________________
____________________
____________________
____________________
____________________
Plural Nouns
____________________
____________________
____________________
____________________
____________________
onion, onion’s
asparagus, asparagus’s
lettuce, lettuce’s
spaghetti, spaghetti’s
hamburger, hamburger’s
buns, buns’
pizzas, pizzas’
candy bars, candy bars’
potatoes, potatoes’
pickles, pickles’
©Shell Educational Publishing �1 #9364—30 Graphic Organizers for Writing
Why Use the Graphic Organizer • The Slicing Through Spelling graphic organizer gives students
the opportunity to edit their classmates’ work and find misspelled words, correcting the spellings for their classmates.
How to Use the Graphic Organizer 1. Write two or three sentences on the board, with three to
four spelling errors in them. Then, ask the class to read the sentences and identify the misspelled words. Explain that spelling words correctly in writing is extremely important.
2. Display the Slicing Through Spelling Overhead. Write the misspelled words that the students identified on the crusts of the “pizza slices.” Then, have students use dictionaries to find the correct spellings of the words. Write the correct spellings on the lines of the slices. Tell students that by having the misspelled words written next to the correct spellings, they can see how and why they misspelled the words, so as not to repeat the same mistakes in the future.
3. Place students with partners. Ask the students to give their partners current writing pieces they are developing. Distribute the Slicing Though Spelling graphic organizer (page 72). Have students find and circle any misspelled words they find as they read their partners’ writing. They should then use dictionaries to find the proper spellings. Students should record the misspelled words and their correct spellings on their graphic organizers.
4. Once students have edited their partners’ writing, allow them to have peer discussions, reviewing the misspelled words they
Editing Lesson
Slicing Through Spelling Graphic
Organizer
Skills ConnectionType of Writing—persuasive
Editing—using correct spelling
Bloom’s Level—Application (See page 8 for a description.)
#9364—30 Graphic Organizers for Writing 72 ©Shell Educational Publishing
Editing Blank Graphic Organizer
Name _______________________________________________
Slicing Through SpellingDirections: Write any misspelled words from the draft on the crusts of the pizza slices below. Then, use a dictionary to find the correct spellings of the words, and write them on the main portion of the pizza slices.
ELL SupportRather than having ELL students find the spelling errors, circle the errors for them on their partners’ drafts, but ask them to find the correct spellings using dictionaries.
Extension IdeaAsk students to edit their own writing as well, checking for any misspelled words that their partners might have missed. Also encourage them to use synonyms for some of their misspelled words to make their writing more vivid and lively.
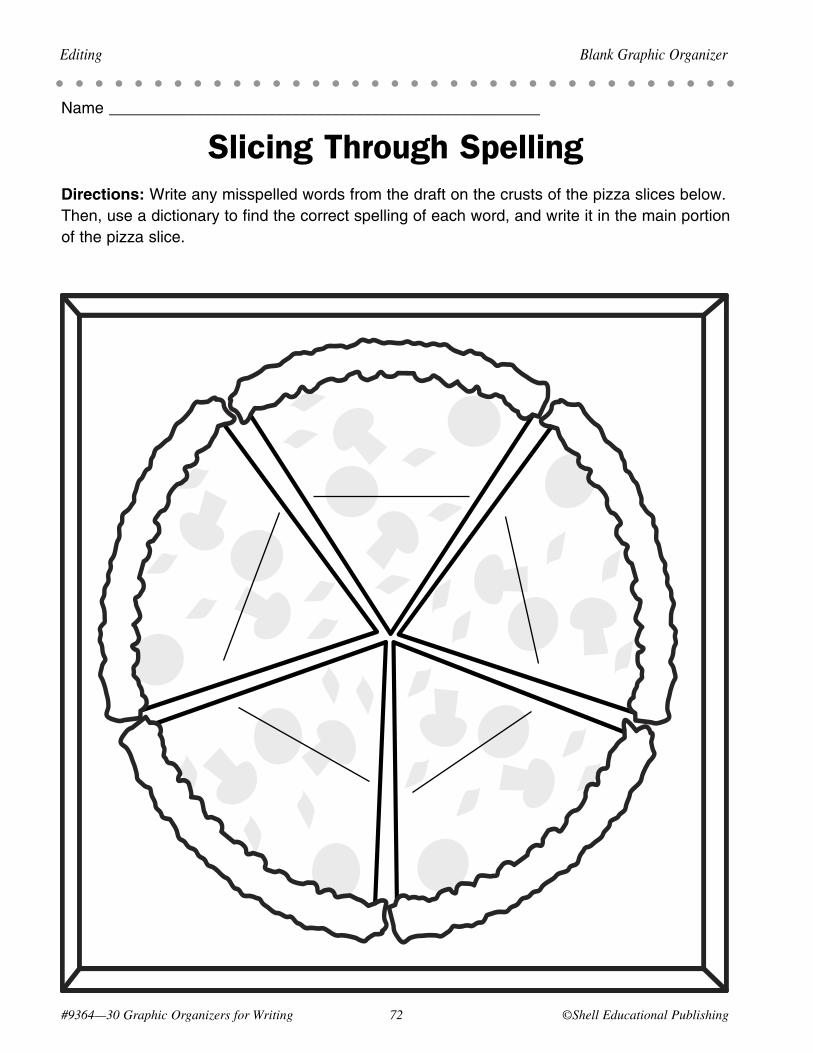
#9364—30 Graphic Organizers for Writing �� ©Shell Educational Publishing
Editing Blank Graphic Organizer
Name ______________________________________________________
Slicing Through SpellingDirections:Writeanymisspelledwordsfromthedraftonthecrustsofthepizzaslicesbelow.Then,useadictionarytofindthecorrectspellingofeachword,andwriteitinthemainportionofthepizzaslice.
©Shell Educational Publishing �3 #9364—30 Graphic Organizers for Writing
Sample Lesson Editing
Slicing Through School SpellingsStandard/Objective • Editing: Uses conventions of spelling in written compositions (e.g., uses a dictionary and other
resources to spell words). (McREL Language Arts, Standard 3.8)
• Students will use their Slicing Through Spelling graphic organizers to find spelling errors in their persuasive writing pieces and then correct them using dictionaries.
ELL SupportRather than having ELL students find their own spelling errors, circle the errors for them on their persuasive drafts about school issues, but ask them to find the correct spellings using dictionaries.
Extension IdeaEncourage students to use synonyms for some of the misspelled words in their persuasive writing to make their writing more vivid and lively.
Connections to Other Lessons• Checkmate—pages 107–110 • In My Defense—pages 131–134
Please refer to the following lessons to continue the steps in the process for creating persuasive writing pieces.
The Lesson 1. Write the following paragraph on the board (with the words
spelled incorrectly): “Having soda mecheens in the classroom will grately help school funds. We can use the money spent on sodas for filed trips and school suplies. The posibiltees are endless!” Then, ask students if the paragraph was easy to read. Why or why not? Did the incorrect spellings affect the persuasiveness of the paragraph? Tell them it is very important to use correct spelling, especially when trying to persuade others.
2. Display the Slicing Through Spelling Overhead. Have students identify misspelled words from the paragraph. Write them on the overhead. Then, ask students to find the correct spellings using dictionaries. Have volunteers read aloud the correct spellings as you write them on the overhead. You may also copy the information from the sample graphic organizer (page 74). Ask the students how seeing the words next to one another might help them in the future.
3. Next, distribute the Slicing Through Spelling graphic organizer (page 72). Also, give students their persuasive rough drafts about school issues. Have students find the spelling errors they made in their persuasive drafts and write them on their graphic organizers. Ask them to then find the correct spellings using dictionaries. They should write the correct spellings on their graphic organizers as well. Once their graphic organizers are completed, students should correct the misspelled words in their drafts. They may also trade papers with partners to double-check for spelling errors that might have gone unnoticed.
4. Collect the students’ persuasive rough drafts so that they can be used in the Checkmate revision lesson (pages 107–110).
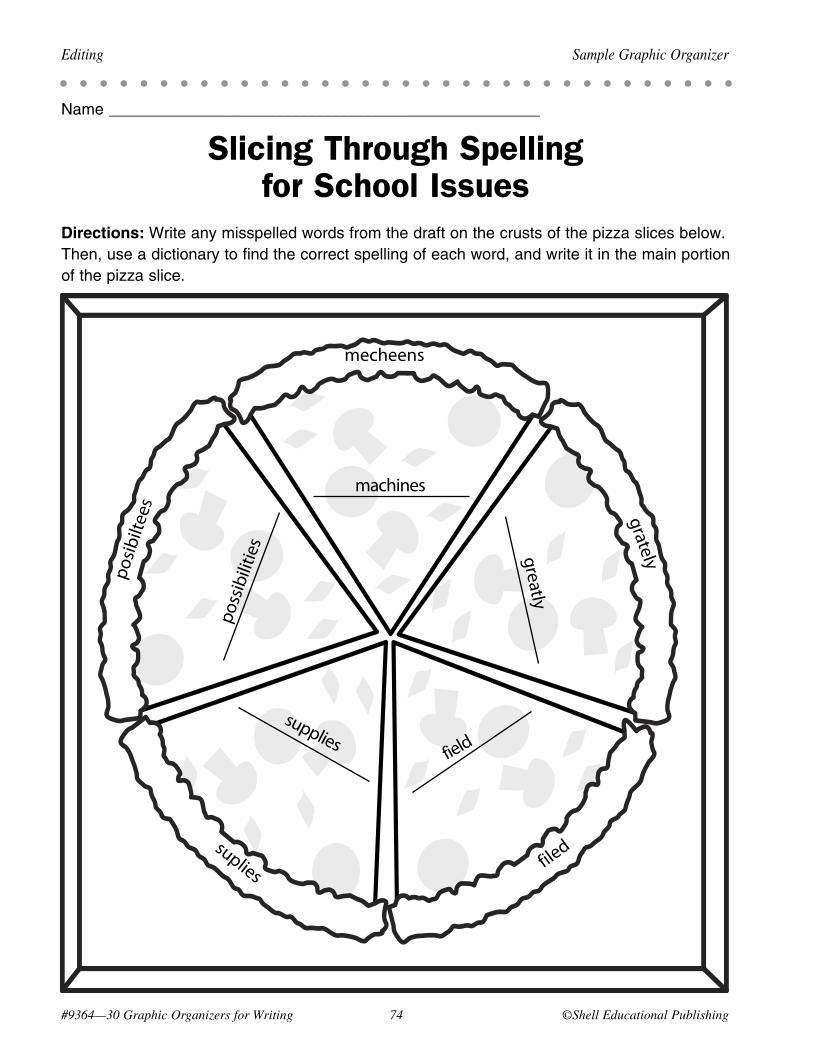
#9364—30 Graphic Organizers for Writing �4 ©Shell Educational Publishing
Editing Sample Graphic Organizer
Name ______________________________________________________
Slicing Through Spelling for School Issues
Directions: Writeanymisspelledwordsfromthedraftonthecrustsofthepizzaslicesbelow.Then,useadictionarytofindthecorrectspellingofeachword,andwriteitinthemainportionofthepizzaslice.
mecheens
grately
filedsuplies
posib
iltee
s
poss
ibili
ties
machines
greatly
fieldsupplies
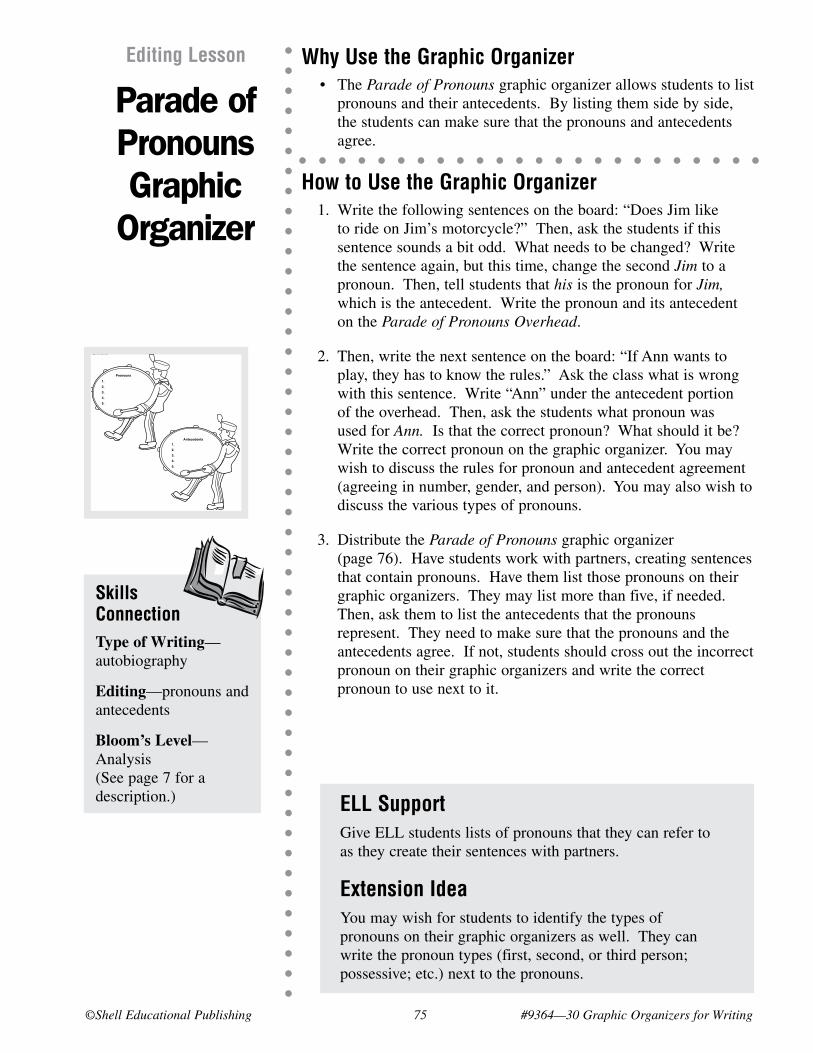
©Shell Educational Publishing �� #9364—30 Graphic Organizers for Writing
Why Use the Graphic Organizer • The Parade of Pronouns graphic organizer allows students to list
pronouns and their antecedents. By listing them side by side, the students can make sure that the pronouns and antecedents agree.
How to Use the Graphic Organizer 1. Write the following sentences on the board: “Does Jim like
to ride on Jim’s motorcycle?” Then, ask the students if this sentence sounds a bit odd. What needs to be changed? Write the sentence again, but this time, change the second Jim to a pronoun. Then, tell students that his is the pronoun for Jim, which is the antecedent. Write the pronoun and its antecedent on the Parade of Pronouns Overhead.
2. Then, write the next sentence on the board: “If Ann wants to play, they has to know the rules.” Ask the class what is wrong with this sentence. Write “Ann” under the antecedent portion of the overhead. Then, ask the students what pronoun was used for Ann. Is that the correct pronoun? What should it be? Write the correct pronoun on the graphic organizer. You may wish to discuss the rules for pronoun and antecedent agreement (agreeing in number, gender, and person). You may also wish to discuss the various types of pronouns.
3. Distribute the Parade of Pronouns graphic organizer (page 76). Have students work with partners, creating sentences that contain pronouns. Have them list those pronouns on their graphic organizers. They may list more than five, if needed.Then, ask them to list the antecedents that the pronouns represent. They need to make sure that the pronouns and the antecedents agree. If not, students should cross out the incorrect pronoun on their graphic organizers and write the correct pronoun to use next to it.
Editing Lesson
Parade of Pronouns Graphic
Organizer
Skills ConnectionType of Writing—autobiography
Editing—pronouns and antecedents
Bloom’s Level—Analysis (See page 7 for a description.)
#9364—30 Graphic Organizers for Writing 76 ©Shell Educational Publishing
Editing Blank Graphic Organizer
Name ______________________________________________________
Parade of PronounsDirections: Write the pronouns from your draft on the top drum. Then, write the antecedents for those pronouns on the bottom drum. Make sure that the antecedents agree with the pronouns.
Pronouns
1.
2.
3.
4.
5.
Antecedents
1.
2.
3.
4.
5.
ELL SupportGive ELL students lists of pronouns that they can refer to as they create their sentences with partners.
Extension IdeaYou may wish for students to identify the types of pronouns on their graphic organizers as well. They can write the pronoun types (first, second, or third person; possessive; etc.) next to the pronouns.
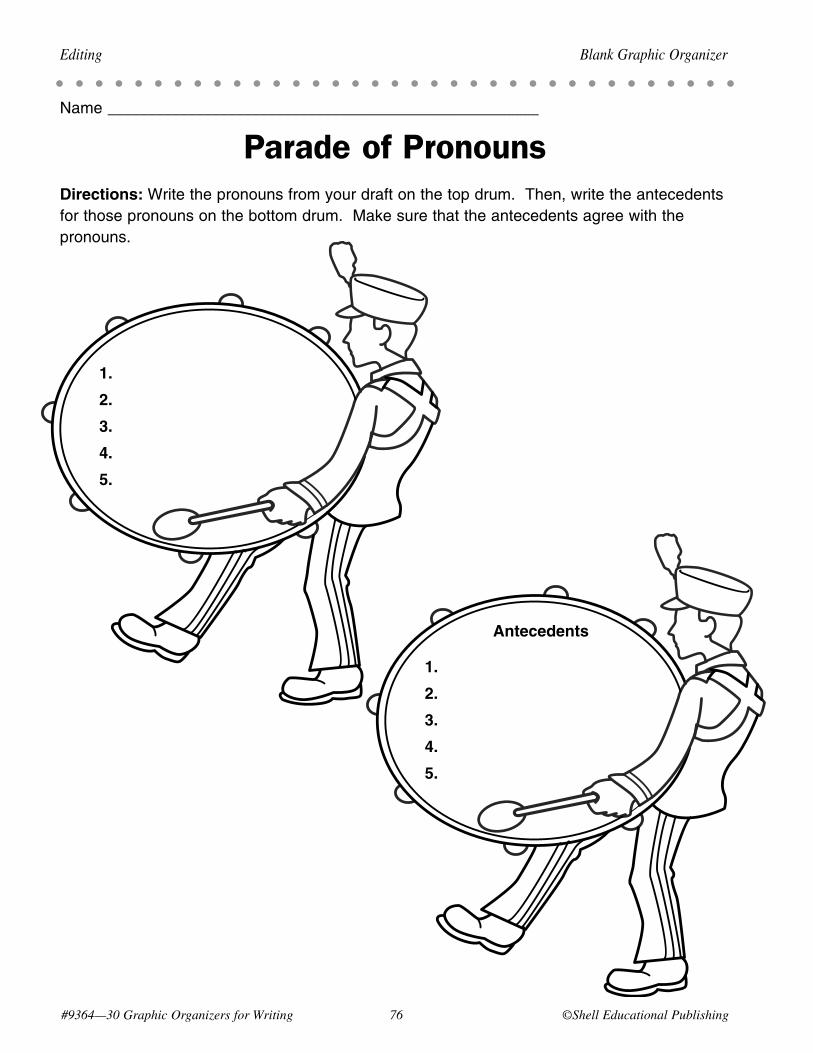
#9364—30 Graphic Organizers for Writing �6 ©Shell Educational Publishing
Editing Blank Graphic Organizer
Name ______________________________________________________
Parade of PronounsDirections: Writethepronounsfromyourdraftonthetopdrum.Then,writetheantecedentsforthosepronounsonthebottomdrum.Makesurethattheantecedentsagreewiththepronouns.
1.
2.
3.
4.
5.
Antecedents
1.
2.
3.
4.
5.
©Shell Educational Publishing �� #9364—30 Graphic Organizers for Writing
Sample Lesson Editing
My First PronounsStandard/Objective • Editing: Uses pronouns in written compositions (e.g., uses relative, demonstrative, personal
[i.e., possessive, subject, object] pronouns; uses pronouns that agree with their antecedents). (McREL Language Arts, Standard 3.1)
• Students will identify the pronouns used in their “early years” autobiographies. Students will then use their Parade of Pronouns graphic organizers to list those pronouns and their antecedents, making sure they agree with one another.
ELL SupportGive ELL students lists of pronouns that they can refer to as they edit their “early years” autobiography drafts.
Extension IdeaYou may want to ask students to identify the types of pronouns they used in their “early years” autobiographies on their graphic organizers as well. They can write the pronoun types (first, second, or third person; possessive; etc.) next to the pronouns.
Connections to Other Lessons• Me, Myself, and I—pages 95–98 • Presentation Time—pages 127–130
Please refer to the following lessons to continue the steps in the process for creating an autobiography.
The Lesson 1. Read the following paragraph from an autobiography to students:
“My name is Emily, and one of my favorite early memories is of her first bike. She was a gift for my fourth birthday. It was red and white, with training wheels. I can remember riding their bike all day.” You may also wish to copy the paragraph onto the board.
2. Ask students to identify the pronouns used in the paragraph. Write them on the Parade of Pronouns Overhead. Tell students that pronouns take the place of nouns, called antecedents. Review the pronouns listed and ask students to list those pronouns’ antecedents. Write them on the overhead. Ask students if the pronouns agree with their antecedents. Change any by crossing out each incorrect pronoun and writing the correct one next to it on the overhead. Also edit the paragraph. Discuss the rules for pronoun and antecedent agreement (number, gender, and person) as well as the types of pronouns.
3. Give each student a copy of the Parade of Pronouns graphic organizer (page 76) and his or her “early years” autobiography draft. Tell students to circle all the pronouns in their autobiographies. Then, ask them to list the pronouns and their antecedents on the graphic organizers. Do the pronouns and antecedents agree? If not, have students correct the pronouns on their graphic organizers and then edit their drafts, changing any agreement errors. Students may refer to the sample graphic organizer (page 78). Remind students not to overuse pronouns. Once the drafts are edited, collect them for later use in the revision lesson, Me, Myself and I, pages 95–98.
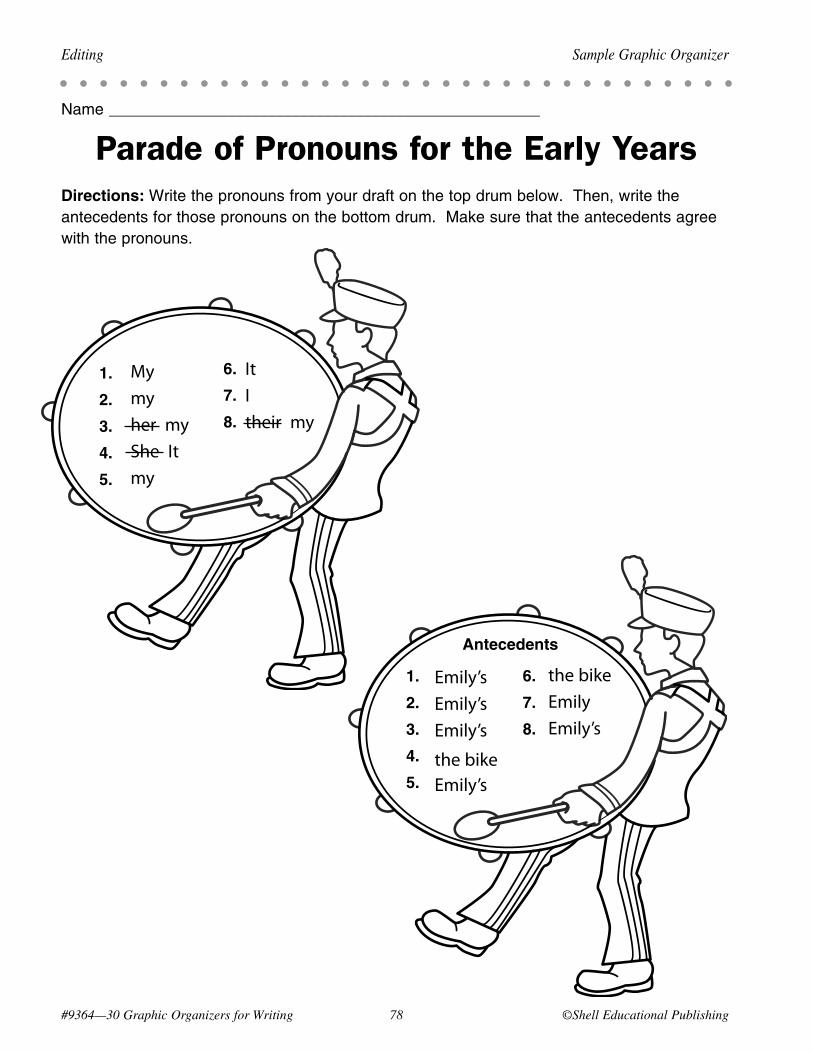
#9364—30 Graphic Organizers for Writing �� ©Shell Educational Publishing
Editing Sample Graphic Organizer
Name ______________________________________________________
Parade of Pronouns for the Early YearsDirections: Writethepronounsfromyourdraftonthetopdrumbelow.Then,writetheantecedentsforthosepronounsonthebottomdrum.Makesurethattheantecedentsagreewiththepronouns.
Mymyher myShe Itmy
Emily’sEmily’sEmily’s
the bikeEmily’s
1.
2.
3.
4.
5.
Antecedents
1.
2.
3.
4.
5.
the bikeEmilyEmily’s
6.
7.
8.
6.
7.
8.
ItItheir my
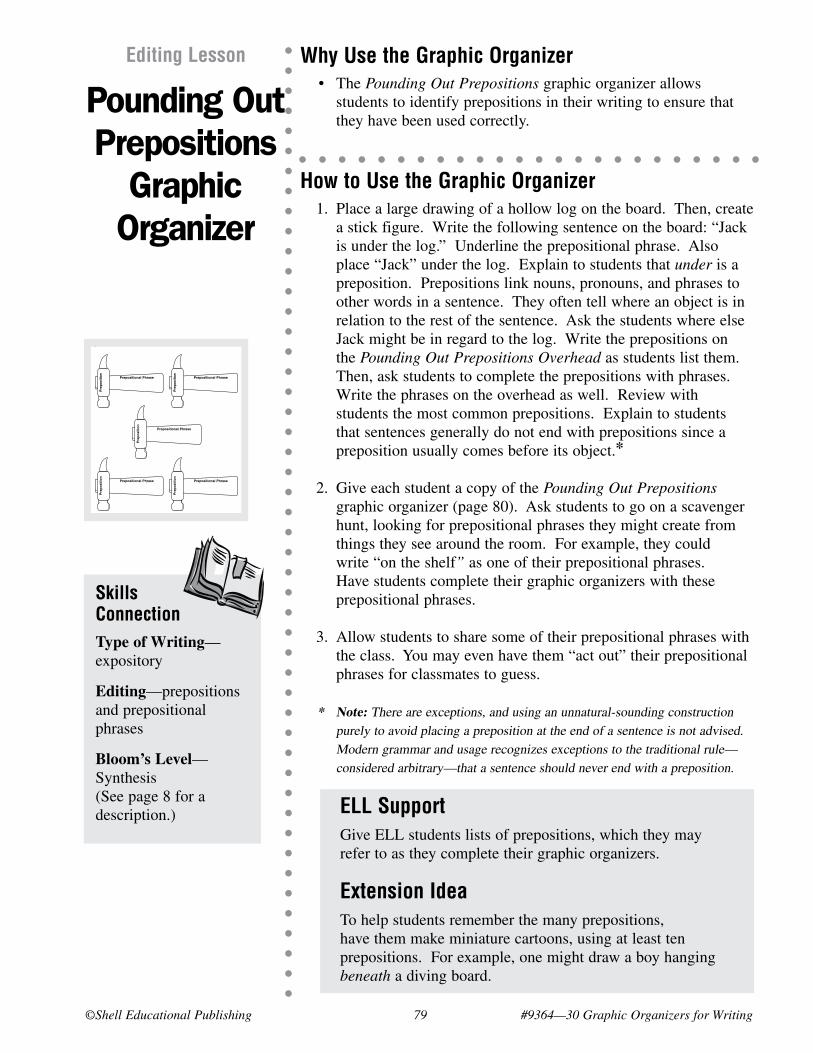
©Shell Educational Publishing �9 #9364—30 Graphic Organizers for Writing
Why Use the Graphic Organizer • The Pounding Out Prepositions graphic organizer allows
students to identify prepositions in their writing to ensure that they have been used correctly.
How to Use the Graphic Organizer 1. Place a large drawing of a hollow log on the board. Then, create
a stick figure. Write the following sentence on the board: “Jack is under the log.” Underline the prepositional phrase. Also place “Jack” under the log. Explain to students that under is a preposition. Prepositions link nouns, pronouns, and phrases to other words in a sentence. They often tell where an object is in relation to the rest of the sentence. Ask the students where else Jack might be in regard to the log. Write the prepositions on the Pounding Out Prepositions Overhead as students list them. Then, ask students to complete the prepositions with phrases. Write the phrases on the overhead as well. Review with students the most common prepositions. Explain to students that sentences generally do not end with prepositions since a preposition usually comes before its object.*
2. Give each student a copy of the Pounding Out Prepositions graphic organizer (page 80). Ask students to go on a scavenger hunt, looking for prepositional phrases they might create from things they see around the room. For example, they could write “on the shelf” as one of their prepositional phrases. Have students complete their graphic organizers with these prepositional phrases.
3. Allow students to share some of their prepositional phrases with the class. You may even have them “act out” their prepositional phrases for classmates to guess.
* Note: There are exceptions, and using an unnatural-sounding construction purely to avoid placing a preposition at the end of a sentence is not advised. Modern grammar and usage recognizes exceptions to the traditional rule—considered arbitrary—that a sentence should never end with a preposition.
Editing Lesson
Pounding Out Prepositions
Graphic Organizer
Skills ConnectionType of Writing—expository
Editing—prepositions and prepositional phrases
Bloom’s Level—Synthesis (See page 8 for a description.)
#9364—30 Graphic Organizers for Writing 80 ©Shell Educational Publishing
Editing Blank Graphic Organizer
Name _______________________________________________
Pounding Out PrepositionsDirections: Write prepositions in the heads of the hammers. Then, write the prepositional phrases on the handles.
Pre
po
siti
on
Prepositional Phrase
Pre
po
siti
on
Prepositional Phrase
Pre
po
siti
on
Prepositional Phrase
Pre
po
siti
on
Prepositional Phrase
Pre
po
siti
on
Prepositional Phrase
ELL SupportGive ELL students lists of prepositions, which they may refer to as they complete their graphic organizers.
Extension IdeaTo help students remember the many prepositions, have them make miniature cartoons, using at least ten prepositions. For example, one might draw a boy hanging beneath a diving board.
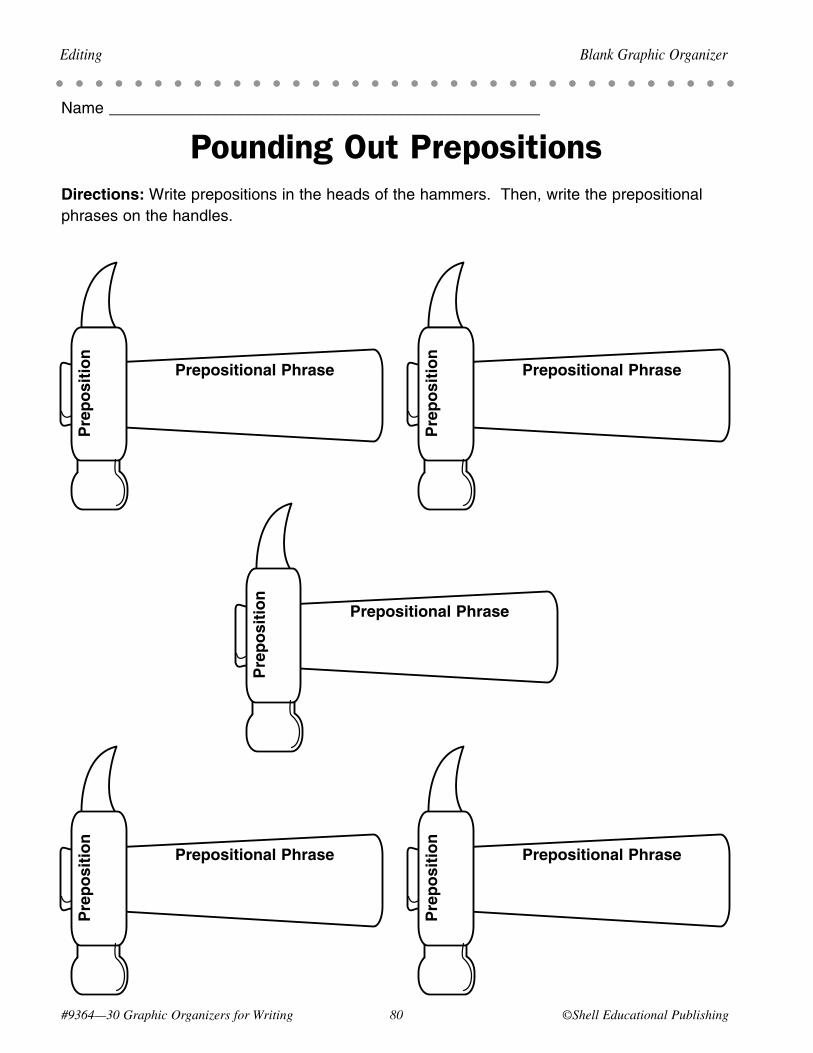
#9364—30 Graphic Organizers for Writing �0 ©Shell Educational Publishing
Editing Blank Graphic Organizer
Name ______________________________________________________
Pounding Out PrepositionsDirections: Writeprepositionsintheheadsofthehammers.Then,writetheprepositionalphrasesonthehandles.
Pre
po
siti
on
Prepositional Phrase
Pre
po
siti
on
Prepositional Phrase
Pre
po
siti
on
Prepositional Phrase
Pre
po
siti
on
Prepositional Phrase
Pre
po
siti
on
Prepositional Phrase
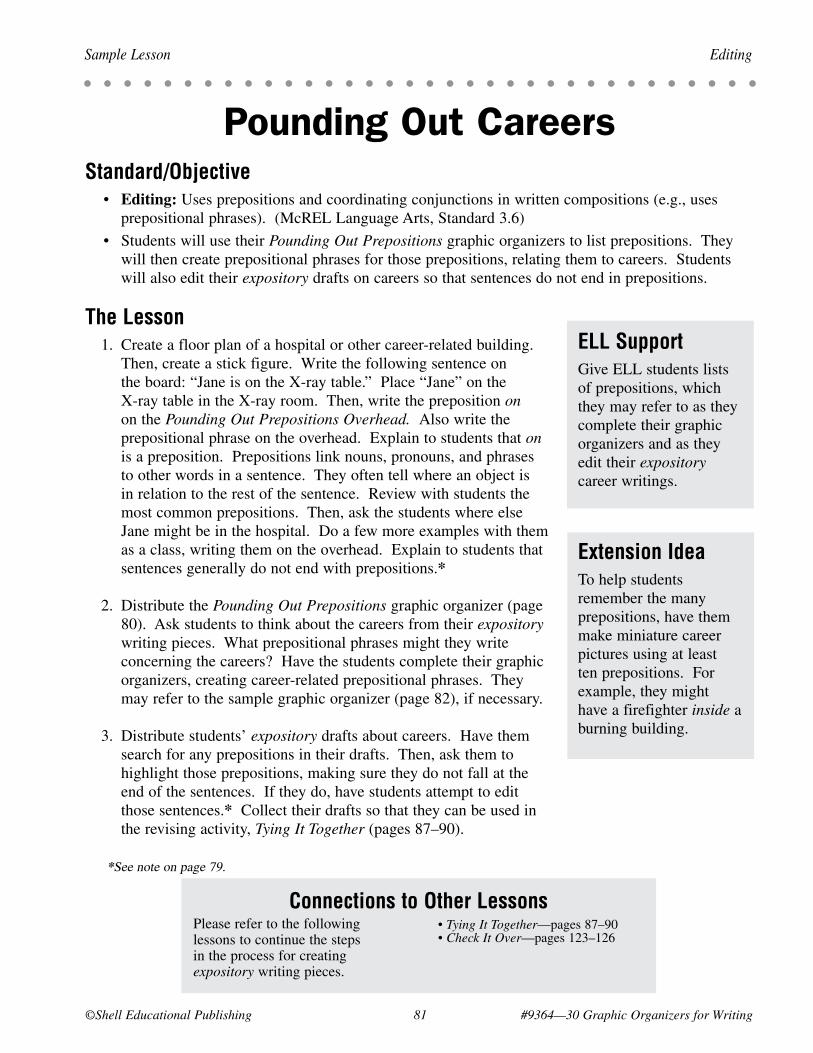
©Shell Educational Publishing �1 #9364—30 Graphic Organizers for Writing
Sample Lesson Editing
Pounding Out CareersStandard/Objective • Editing: Uses prepositions and coordinating conjunctions in written compositions (e.g., uses
prepositional phrases). (McREL Language Arts, Standard 3.6)
• Students will use their Pounding Out Prepositions graphic organizers to list prepositions. They will then create prepositional phrases for those prepositions, relating them to careers. Students will also edit their expository drafts on careers so that sentences do not end in prepositions.
ELL SupportGive ELL students lists of prepositions, which they may refer to as they complete their graphic organizers and as they edit their expository career writings.
Extension IdeaTo help students remember the many prepositions, have them make miniature career pictures using at least ten prepositions. For example, they might have a firefighter inside a burning building.
Connections to Other Lessons
The Lesson 1. Create a floor plan of a hospital or other career-related building.
Then, create a stick figure. Write the following sentence on the board: “Jane is on the X-ray table.” Place “Jane” on the X-ray table in the X-ray room. Then, write the preposition on on the Pounding Out Prepositions Overhead. Also write the prepositional phrase on the overhead. Explain to students that on is a preposition. Prepositions link nouns, pronouns, and phrases to other words in a sentence. They often tell where an object is in relation to the rest of the sentence. Review with students the most common prepositions. Then, ask the students where else Jane might be in the hospital. Do a few more examples with them as a class, writing them on the overhead. Explain to students that sentences generally do not end with prepositions.*
2. Distribute the Pounding Out Prepositions graphic organizer (page 80). Ask students to think about the careers from their expository writing pieces. What prepositional phrases might they write concerning the careers? Have the students complete their graphic organizers, creating career-related prepositional phrases. They may refer to the sample graphic organizer (page 82), if necessary.
3. Distribute students’ expository drafts about careers. Have them search for any prepositions in their drafts. Then, ask them to highlight those prepositions, making sure they do not fall at the end of the sentences. If they do, have students attempt to edit those sentences.* Collect their drafts so that they can be used in the revising activity, Tying It Together (pages 87–90).
*See note on page 79.
• Tying It Together—pages 87–90 • Check It Over—pages 123–126
Please refer to the following lessons to continue the steps in the process for creating expository writing pieces.
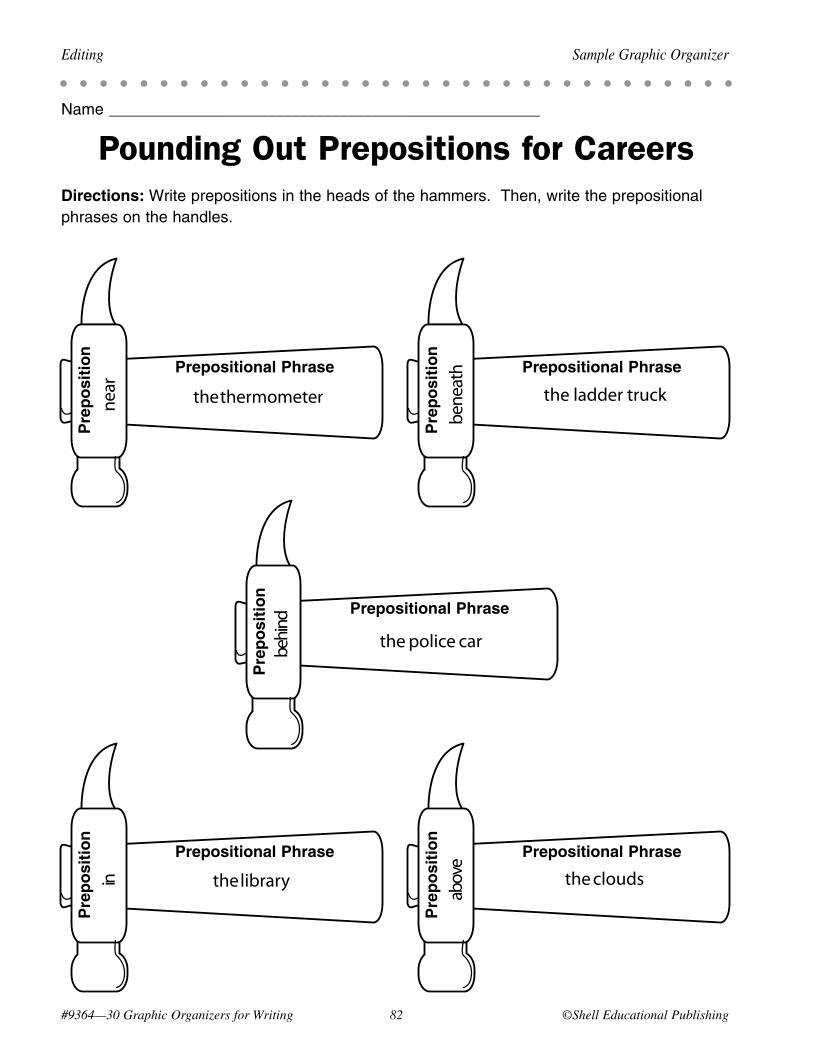
Pre
po
siti
on
Prepositional Phrase
Pre
po
siti
on
Prepositional Phrase
Pre
po
siti
on
Prepositional Phrase
Pre
po
siti
on
Prepositional Phrase
Pre
po
siti
on
Prepositional Phrase
#9364—30 Graphic Organizers for Writing �� ©Shell Educational Publishing
Editing Sample Graphic Organizer
Name ______________________________________________________
Pounding Out Prepositions for CareersDirections: Writeprepositionsintheheadsofthehammers.Then,writetheprepositionalphrasesonthehandles.
near the thermometer
in the library
abov
e
behi
nd
the police car
bene
ath
the ladder truck
the clouds
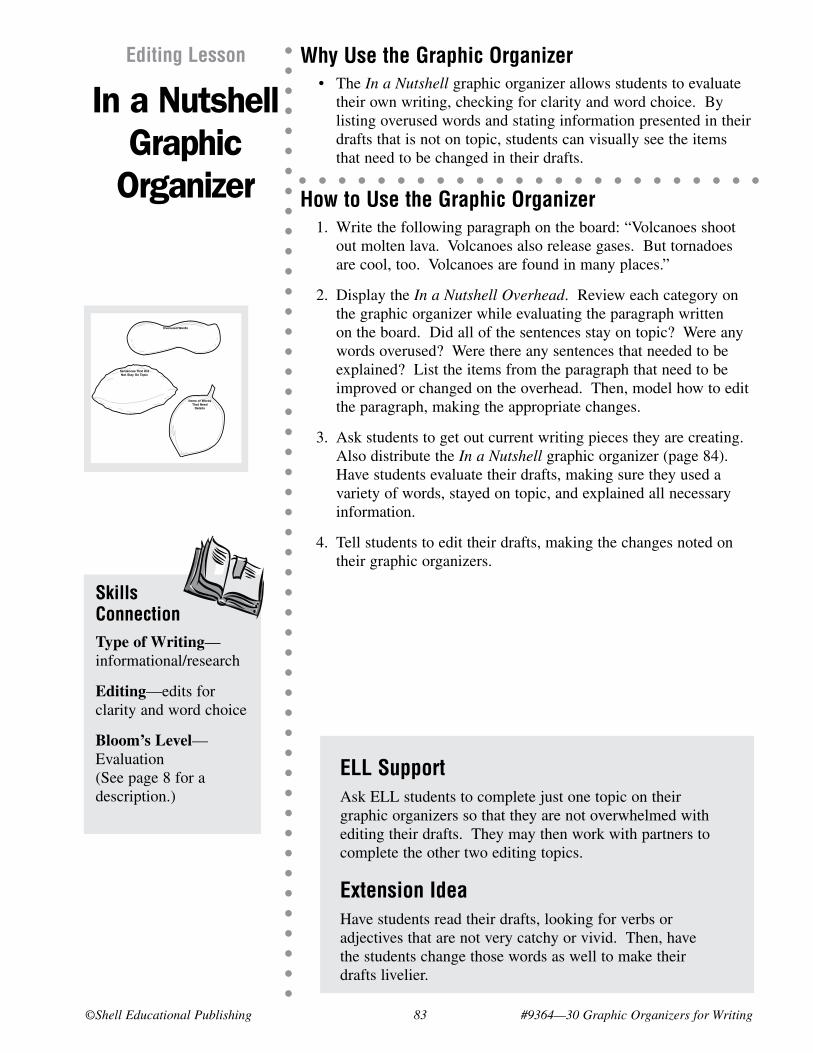
©Shell Educational Publishing �3 #9364—30 Graphic Organizers for Writing
Why Use the Graphic Organizer • The In a Nutshell graphic organizer allows students to evaluate
their own writing, checking for clarity and word choice. By listing overused words and stating information presented in their drafts that is not on topic, students can visually see the items that need to be changed in their drafts.
How to Use the Graphic Organizer 1. Write the following paragraph on the board: “Volcanoes shoot
out molten lava. Volcanoes also release gases. But tornadoes are cool, too. Volcanoes are found in many places.”
2. Display the In a Nutshell Overhead. Review each category on the graphic organizer while evaluating the paragraph written on the board. Did all of the sentences stay on topic? Were any words overused? Were there any sentences that needed to be explained? List the items from the paragraph that need to be improved or changed on the overhead. Then, model how to edit the paragraph, making the appropriate changes.
3. Ask students to get out current writing pieces they are creating. Also distribute the In a Nutshell graphic organizer (page 84). Have students evaluate their drafts, making sure they used a variety of words, stayed on topic, and explained all necessary information.
4. Tell students to edit their drafts, making the changes noted on their graphic organizers.
Editing Lesson
In a Nutshell Graphic
Organizer
Skills ConnectionType of Writing—informational/research
Editing—edits for clarity and word choice
Bloom’s Level—Evaluation (See page 8 for a description.)
#9364—30 Graphic Organizers for Writing 84 ©Shell Educational Publishing
Editing Blank Graphic Organizer
Name _______________________________________________
In a NutshellDirections: Evaluate your draft by completing the items below. Then, edit your draft, making the necessary changes, using your graphic organizer as a guide.
Overused Words
Sentences That DidNot Stay On Topic
Items or Words That Need
Details
ELL SupportAsk ELL students to complete just one topic on their graphic organizers so that they are not overwhelmed with editing their drafts. They may then work with partners to complete the other two editing topics.
Extension IdeaHave students read their drafts, looking for verbs or adjectives that are not very catchy or vivid. Then, have the students change those words as well to make their drafts livelier.
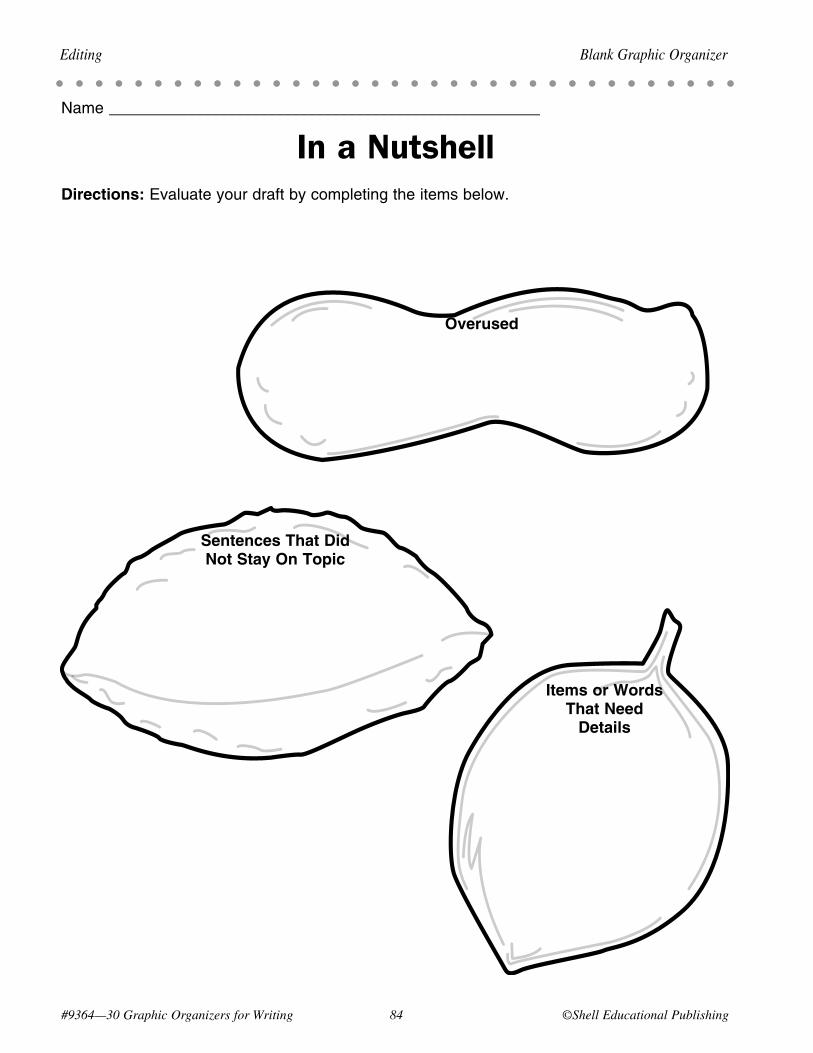
#9364—30 Graphic Organizers for Writing �4 ©Shell Educational Publishing
Editing Blank Graphic Organizer
Name ______________________________________________________
In a NutshellDirections:Evaluateyourdraftbycompletingtheitemsbelow.
Overused
Sentences That Did Not Stay On Topic
Items or Words That Need
Details
©Shell Educational Publishing �� #9364—30 Graphic Organizers for Writing
Sample Lesson Editing
History in a NutshellStandard/Objective • Editing: Uses a variety of strategies to edit and publish written work (e.g., edits for clarity, word
choice, and language usage). (McREL Language Arts, Standard 1.3)
• Students will evaluate their drafts, using their In a Nutshell graphic organizers to make sure all information is clear and that words are not overused. They will then make the changes to their informational drafts on history.
The Lesson 1. Write the following paragraph on the board: “John F. Kennedy was
assassinated. John F. Kennedy was assassinated in Dallas. I have been to Dallas before. He was in a parade. He was shot during the parade. Lee Harvey Oswald was said to be the man who assassinated him.”
2. Place students into small groups. Tell them that the above paragraph needs to be changed so that it is clear and varies in word choice. Display the In a Nutshell Overhead. Review each topic of the overhead. Then, have the small groups change the paragraph to make it more concise and clear, using the overhead as a guide. Have the groups note their changes to the class as you write their changes on the overhead. Ask them if their edited paragraphs sound clearer and have better word choices.
3. Give each student an In a Nutshell graphic organizer (page 84). Also distribute their informational drafts on history. Ask the students to complete their graphic organizers in order to make sure that they have clear, concise information as well as a variety of words used in their informational drafts. They may refer to the sample graphic organizer (page 86), if necessary. Then, ask them to edit their drafts, making the changes noted on their graphic organizers. Once students have completed their rough drafts, collect the drafts so that they can be used in the revision lesson, The Perfect Balance (pages 103–106).
ELL SupportAsk ELL students to complete just one topic on their graphic organizers concerning their informational drafts on history. This way, they are not overwhelmed with editing their drafts. They may then work with partners to complete the other two editing topics.
Extension IdeaHave students read their informational drafts on history, looking for verbs or adjectives that are not very catchy or vivid. Then, have the students change those words as well to make their drafts livelier.Connections to Other Lessons
• The Perfect Balance—pages 103–106 • Right On Time—pages 119–122
Please refer to the following lessons to continue the steps in the process for creating informational writing pieces.
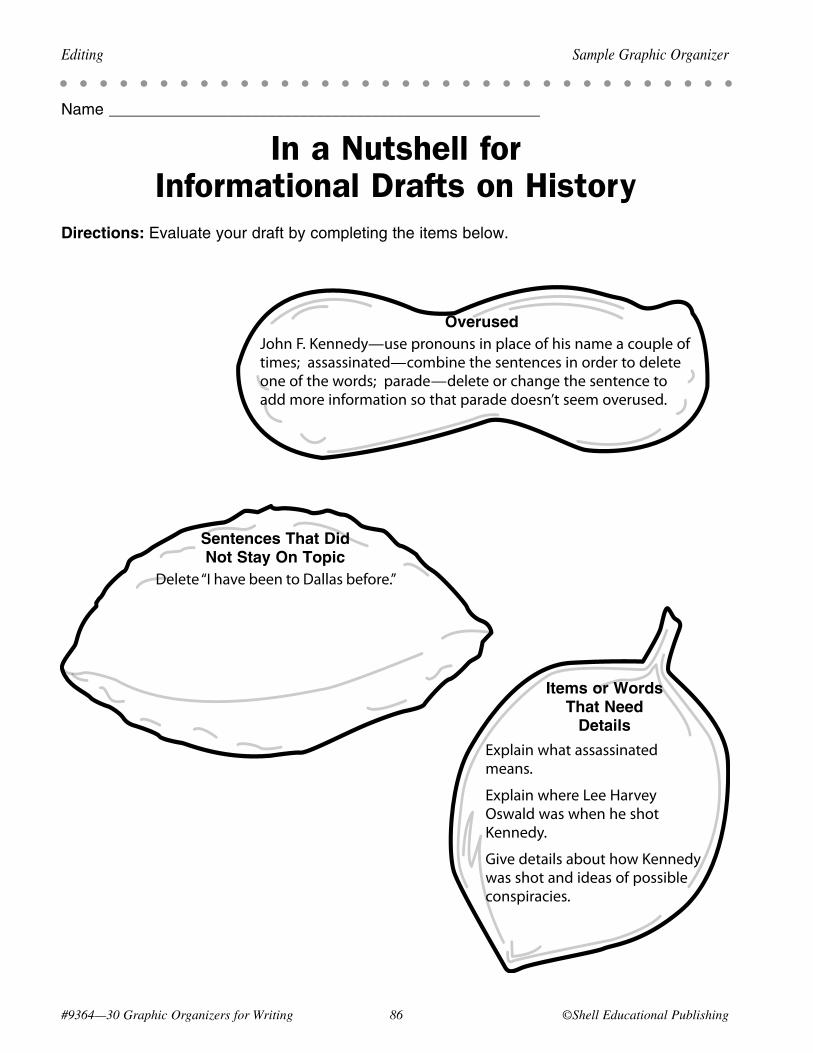
Overused
Sentences That Did Not Stay On Topic
Items or Words That Need
Details
#9364—30 Graphic Organizers for Writing �6 ©Shell Educational Publishing
Editing Sample Graphic Organizer
Name ______________________________________________________
In a Nutshell for Informational Drafts on History
Directions: Evaluateyourdraftbycompletingtheitemsbelow.
John F. Kennedy—use pronouns in place of his name a couple of times; assassinated—combine the sentences in order to delete one of the words; parade—delete or change the sentence to add more information so that parade doesn’t seem overused.
Delete “I have been to Dallas before.”
Explain what assassinated means.
Explain where Lee Harvey Oswald was when he shot Kennedy.
Give details about how Kennedy was shot and ideas of possible conspiracies.
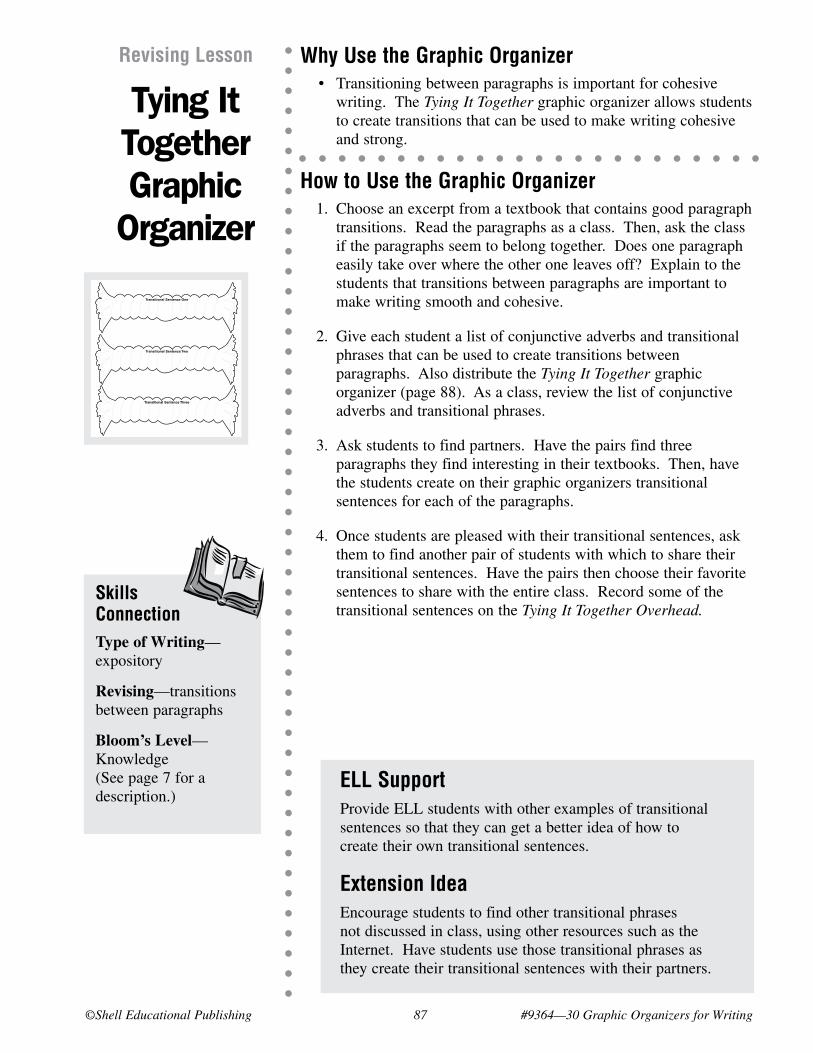
©Shell Educational Publishing �� #9364—30 Graphic Organizers for Writing
Why Use the Graphic Organizer • Transitioning between paragraphs is important for cohesive
writing. The Tying It Together graphic organizer allows students to create transitions that can be used to make writing cohesive and strong.
How to Use the Graphic Organizer 1. Choose an excerpt from a textbook that contains good paragraph
transitions. Read the paragraphs as a class. Then, ask the class if the paragraphs seem to belong together. Does one paragraph easily take over where the other one leaves off? Explain to the students that transitions between paragraphs are important to make writing smooth and cohesive.
2. Give each student a list of conjunctive adverbs and transitional phrases that can be used to create transitions between paragraphs. Also distribute the Tying It Together graphic organizer (page 88). As a class, review the list of conjunctive adverbs and transitional phrases.
3. Ask students to find partners. Have the pairs find three paragraphs they find interesting in their textbooks. Then, have the students create on their graphic organizers transitional sentences for each of the paragraphs.
4. Once students are pleased with their transitional sentences, ask them to find another pair of students with which to share their transitional sentences. Have the pairs then choose their favorite sentences to share with the entire class. Record some of the transitional sentences on the Tying It Together Overhead.
Revising Lesson
Tying It Together Graphic
Organizer
Skills ConnectionType of Writing—expository
Revising—transitions between paragraphs
Bloom’s Level—Knowledge (See page 7 for a description.)
#9364—30 Graphic Organizers for Writing 88 ©Shell Educational Publishing
Revising Blank Graphic Organizer
Name ______________________________________________________
Tying It TogetherDirections: Create transitional sentences on the ropes below that could be used to make a writing piece smooth and coherent.
Transitional Sentence One
Transitional Sentence Two
Transitional Sentence Three
ELL SupportProvide ELL students with other examples of transitional sentences so that they can get a better idea of how to create their own transitional sentences.
Extension IdeaEncourage students to find other transitional phrases not discussed in class, using other resources such as the Internet. Have students use those transitional phrases as they create their transitional sentences with their partners.
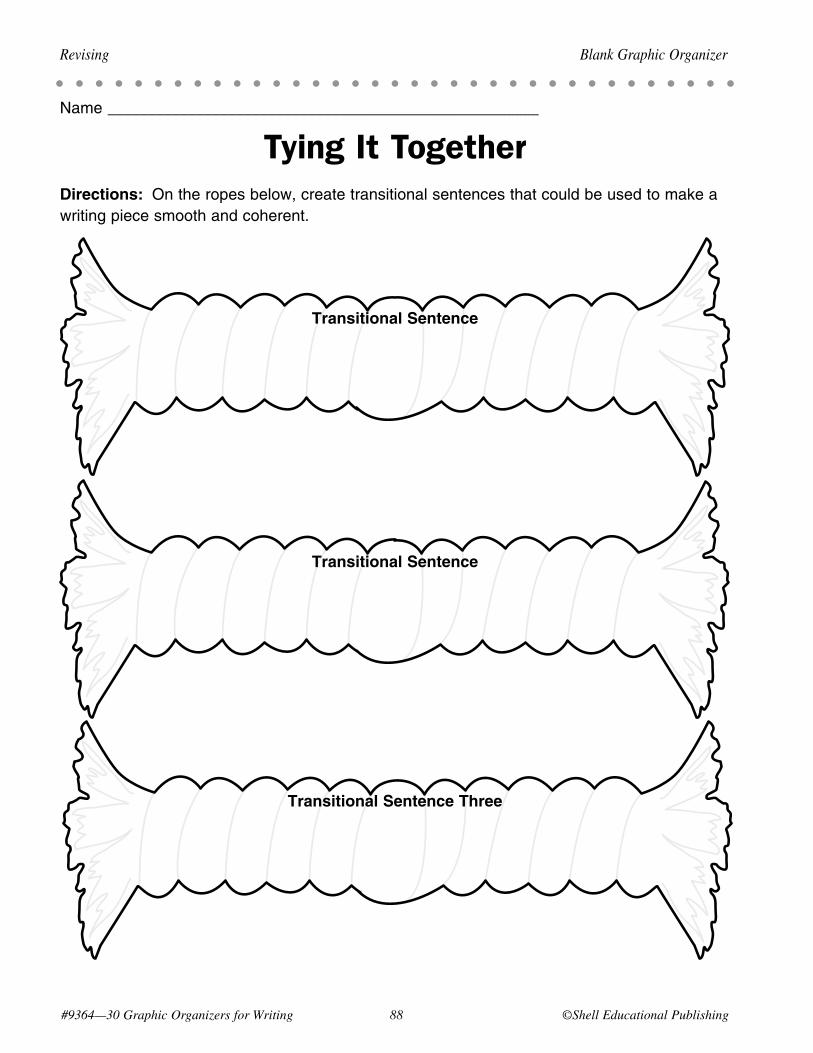
#9364—30 Graphic Organizers for Writing �� ©Shell Educational Publishing
Revising Blank Graphic Organizer
Name ______________________________________________________
Tying It TogetherDirections: Ontheropesbelow,createtransitionalsentencesthatcouldbeusedtomakeawritingpiecesmoothandcoherent.
Transitional Sentence
Transitional Sentence
Transitional Sentence Three
©Shell Educational Publishing �9 #9364—30 Graphic Organizers for Writing
Sample Lesson Revising
Tying Together CareersStandard/Objective • Revising: Uses a variety of strategies to draft and revise written work (e.g., checks for transitions
between paragraphs). (McREL Language Arts, Standard 1.2)
• Students will use their Tying It Together graphic organizers to create transitional sentences that could be used in their career expository drafts. They will then revise their drafts, adding the transitional sentences.
The Lesson 1. Ask a volunteer to read his/her career expository draft to the class. Then,
explain to students that the volunteer’s draft was very good, but there is one thing that all drafts need. In order for writing to appear cohesive, it must have transitions between paragraphs.
2. Give each student a list of conjunctive adverbs and transitional phrases that can be used to help create transitions between paragraphs. Explain the job of the conjunctive adverbs and transitional phrases. Then, display the Tying It Together Overhead. Ask students to think of some good transitional sentences that could be used in the volunteer’s writing. Write their ideas on the overhead. You may also choose to show them the sample graphic organizer (page 90) for other transitional sentence examples.
3. Next, give the students their expository career drafts. Also distribute the Tying It Together graphic organizer (page 88). Ask the class to review the list of conjunctive adverbs and transitional phrases, choosing ones that would work well in their paragraphs. Then, have the students create transitional sentences for each of their paragraphs on their graphic organizers.
4. Once students are pleased with their transitional sentences, ask them to revise their drafts, adding the sentences from their graphic organizers. Collect their drafts for later use in the publishing lesson, Check It Over (pages 123–126).
ELL SupportProvide ELL students with other examples of transitional sentences so that they can get better ideas of how to write their own transitional sentences for their career expository drafts.
Extension IdeaEncourage students to find other transitional phrases not discussed in class by using other resources, such as the Internet. Have them then use those transitional phrases in their career expository drafts.
Connections to Other Lessons• Check It Over—pages 123–126Please refer to the following
lessons for the steps that lead to creating this expository writing piece.
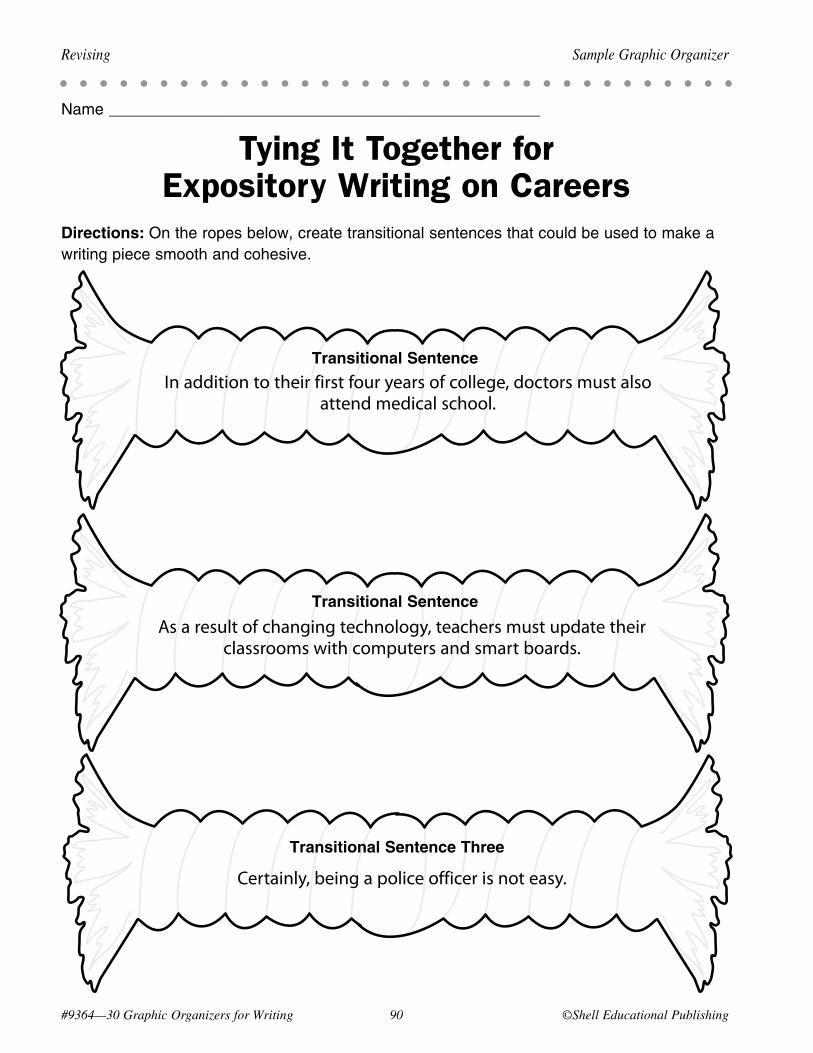
Transitional Sentence
Transitional Sentence
Transitional Sentence Three
#9364—30 Graphic Organizers for Writing 90 ©Shell Educational Publishing
Revising Sample Graphic Organizer
Name ______________________________________________________
Tying It Together for Expository Writing on Careers
Directions: Ontheropesbelow,createtransitionalsentencesthatcouldbeusedtomakeawritingpiecesmoothandcohesive.
In addition to their first four years of college, doctors must also attend medical school.
As a result of changing technology, teachers must update their classrooms with computers and smart boards.
Certainly, being a police officer is not easy.
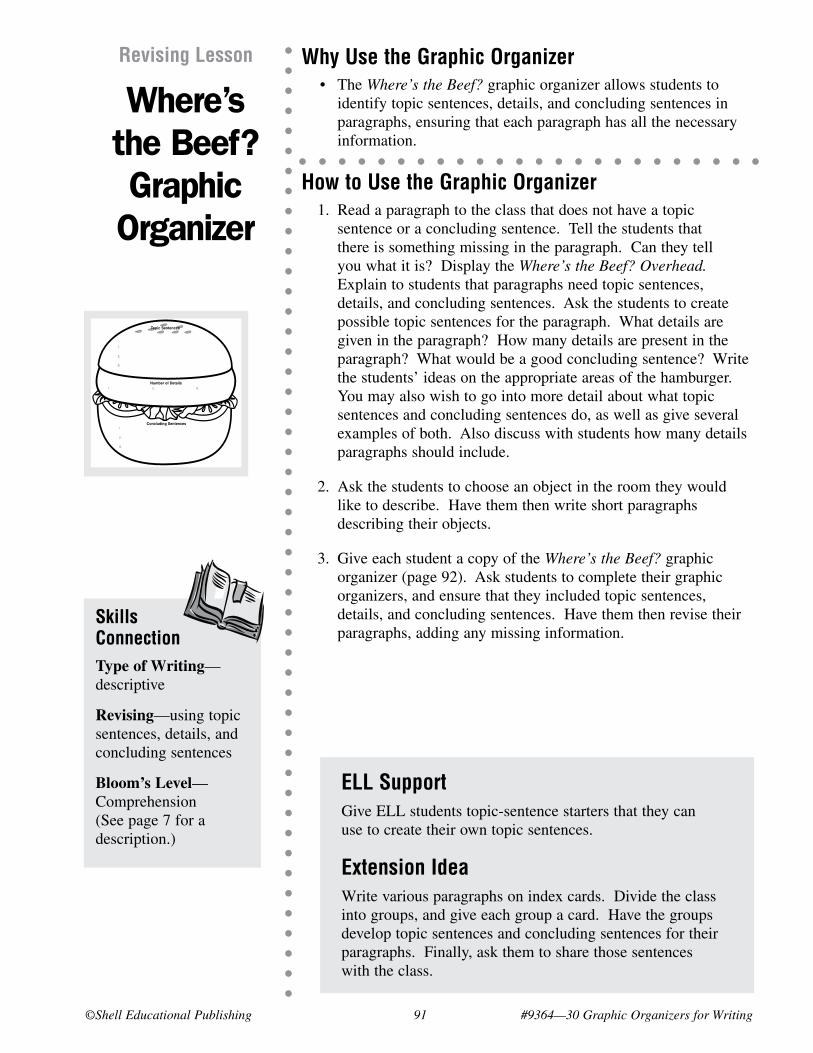
©Shell Educational Publishing 91 #9364—30 Graphic Organizers for Writing
Why Use the Graphic Organizer • The Where’s the Beef? graphic organizer allows students to
identify topic sentences, details, and concluding sentences in paragraphs, ensuring that each paragraph has all the necessary information.
How to Use the Graphic Organizer 1. Read a paragraph to the class that does not have a topic
sentence or a concluding sentence. Tell the students that there is something missing in the paragraph. Can they tell you what it is? Display the Where’s the Beef? Overhead. Explain to students that paragraphs need topic sentences, details, and concluding sentences. Ask the students to create possible topic sentences for the paragraph. What details are given in the paragraph? How many details are present in the paragraph? What would be a good concluding sentence? Write the students’ ideas on the appropriate areas of the hamburger. You may also wish to go into more detail about what topic sentences and concluding sentences do, as well as give several examples of both. Also discuss with students how many details paragraphs should include.
2. Ask the students to choose an object in the room they would like to describe. Have them then write short paragraphs describing their objects.
3. Give each student a copy of the Where’s the Beef? graphic organizer (page 92). Ask students to complete their graphic organizers, and ensure that they included topic sentences, details, and concluding sentences. Have them then revise their paragraphs, adding any missing information.
Revising Lesson
Where’s the Beef? Graphic
Organizer
Skills ConnectionType of Writing—descriptive
Revising—using topic sentences, details, and concluding sentences
Bloom’s Level—Comprehension (See page 7 for a description.)
#9364—30 Graphic Organizers for Writing 92 ©Shell Educational Publishing
Revising Blank Graphic Organizer
Name ______________________________________________________
Where’s the Beef?Directions: Top bun—write the topic sentences you used in each of your paragraphs. Hamburger patty—write how many details were mentioned in each paragraph. Bottom bun -—write your concluding sentences for each paragraph. If you do not have a topic sentence, enough details, or a concluding sentence for one or more of your paragraphs, write the missing information in the appropriate spots below.
Topic Sentences
Number of Details
Concluding Sentences
1.
2.
3.
1.
2.
3.
1. 2. 3.
ELL SupportGive ELL students topic-sentence starters that they can use to create their own topic sentences.
Extension IdeaWrite various paragraphs on index cards. Divide the class into groups, and give each group a card. Have the groups develop topic sentences and concluding sentences for their paragraphs. Finally, ask them to share those sentences with the class.
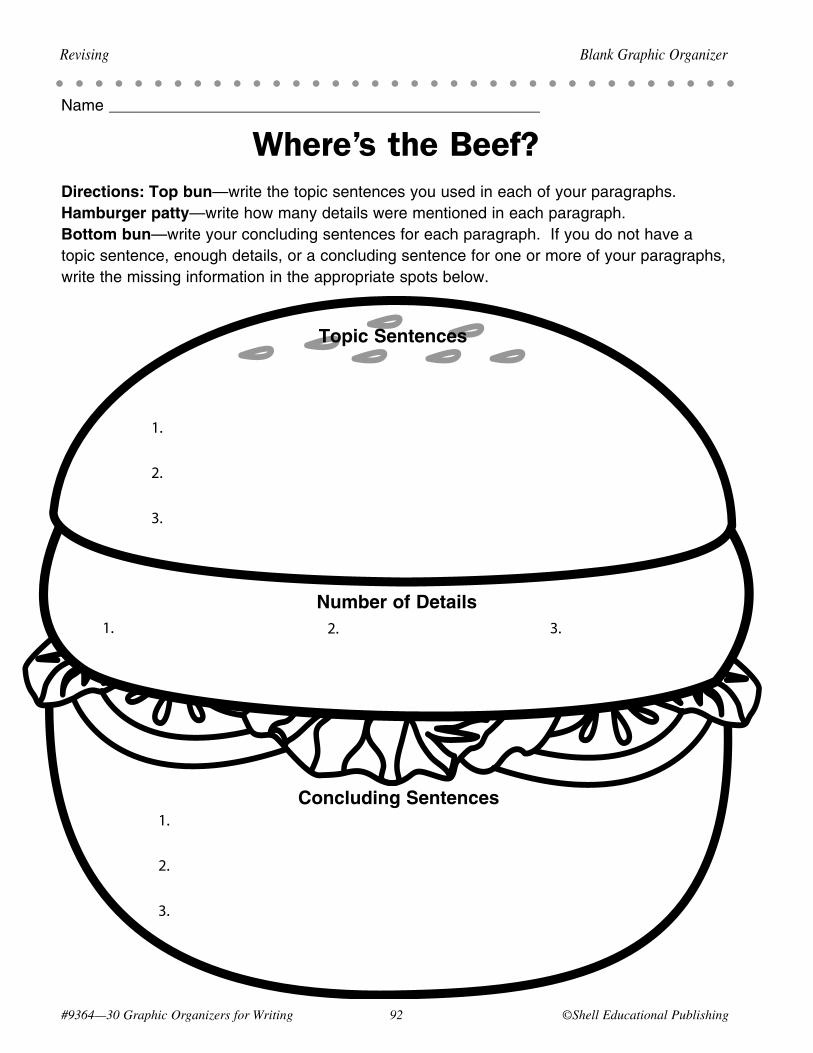
#9364—30 Graphic Organizers for Writing 9� ©Shell Educational Publishing
Revising Blank Graphic Organizer
Name ______________________________________________________
Where’s the Beef?Directions: Top bun—writethetopicsentencesyouusedineachofyourparagraphs.Hamburger patty—writehowmanydetailswerementionedineachparagraph.Bottom bun—writeyourconcludingsentencesforeachparagraph.Ifyoudonothaveatopicsentence,enoughdetails,oraconcludingsentenceforoneormoreofyourparagraphs,writethemissinginformationintheappropriatespotsbelow.
Topic Sentences
Number of Details
Concluding Sentences
1.
2.
3.
1.
2.
3.
1. 2. 3.
©Shell Educational Publishing 93 #9364—30 Graphic Organizers for Writing
Sample Lesson Revising
Where’s the Beef for Food?Standard/Objective • Revising: Uses a variety of strategies to draft and revise written work (e.g., makes structural
changes; uses an organizational scheme). (McREL Language Arts, Standard 1.2)
• Students will list the topic sentences, number of details, and concluding sentences that they used in their descriptive drafts about food. They will then review their graphic organizers to make sure one of the above items was not missing from their descriptive drafts. Students will also revise their drafts, adding any missing topic sentences, details, or concluding sentences.
The Lesson 1. Record the information from the sample graphic organizer (page
94) onto the Where’s the Beef? Overhead. Explain to students that a topic sentence introduces a paragraph to readers. A topic sentence should be catchy and make the reader want to continue. Tell them that the details make the writing vivid and come alive, while the concluding sentence wraps up the details. You may also wish to state how many details should be mentioned in students’ paragraphs. Give more examples of topic sentences, details, and concluding sentences if you feel it is necessary.
2. Tell students they are going to work in groups to revise their descriptive rough drafts. They should take turns reading their rough drafts aloud. Then, as a group, they will identify the topic sentences, the number of details, and the concluding sentences for each of the paragraphs in their drafts. Remind students that they will be responsible for writing the information on their graphic organizers. Students will then review their graphic organizers, making sure that all necessary information has been included in each of their paragraphs. They need to create any missing topic sentences, details, or concluding sentences on their graphic organizers and then revise their drafts, as needed.
3. Distribute students’ descriptive rough drafts about food, as well as the Where’s the Beef graphic organizer (page 92). Tell students to complete their graphic organizers in their groups. When they have completed their graphic organizers, they should revise their drafts. Collect their drafts for later use.
ELL SupportGive ELL students topic-sentence starters that they can fill in to create their own topic sentences. An example of a starter might be, “You haven’t lived until you’ve eaten a delicious ____!”
Extension IdeaIf time permits, write various food paragraphs on index cards. Divide the class into groups, and give each group a card. Have the groups develop topic sentences and concluding sentences for their food-related paragraphs. Finally, ask them to share those sentences with the class.
Connections to Other Lessons• Picture This—pages 111–114Please refer to the following
lessons to continue the steps in the process for creating descriptive writing pieces.
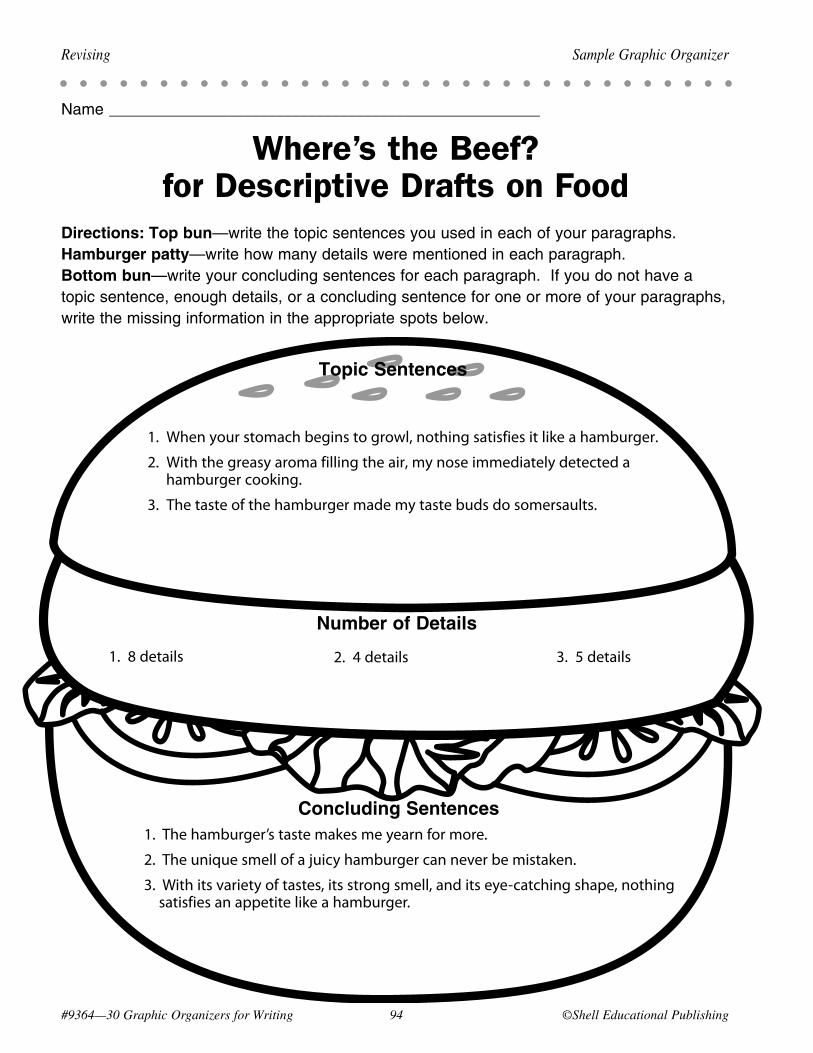
#9364—30 Graphic Organizers for Writing 94 ©Shell Educational Publishing
Topic Sentences
Number of Details
Concluding Sentences
Revising Sample Graphic Organizer
Name ______________________________________________________
Where’s the Beef? for Descriptive Drafts on Food
Directions: Top bun—writethetopicsentencesyouusedineachofyourparagraphs.Hamburger patty—writehowmanydetailswerementionedineachparagraph.Bottom bun—writeyourconcludingsentencesforeachparagraph.Ifyoudonothaveatopicsentence,enoughdetails,oraconcludingsentenceforoneormoreofyourparagraphs,writethemissinginformationintheappropriatespotsbelow.
1. When your stomach begins to growl, nothing satisfies it like a hamburger.
2. With the greasy aroma filling the air, my nose immediately detected a hamburger cooking.
3. The taste of the hamburger made my taste buds do somersaults.
1. The hamburger’s taste makes me yearn for more.
2. The unique smell of a juicy hamburger can never be mistaken.
3. With its variety of tastes, its strong smell, and its eye-catching shape, nothing satisfies an appetite like a hamburger.
1. 8 details 2. 4 details 3. 5 details
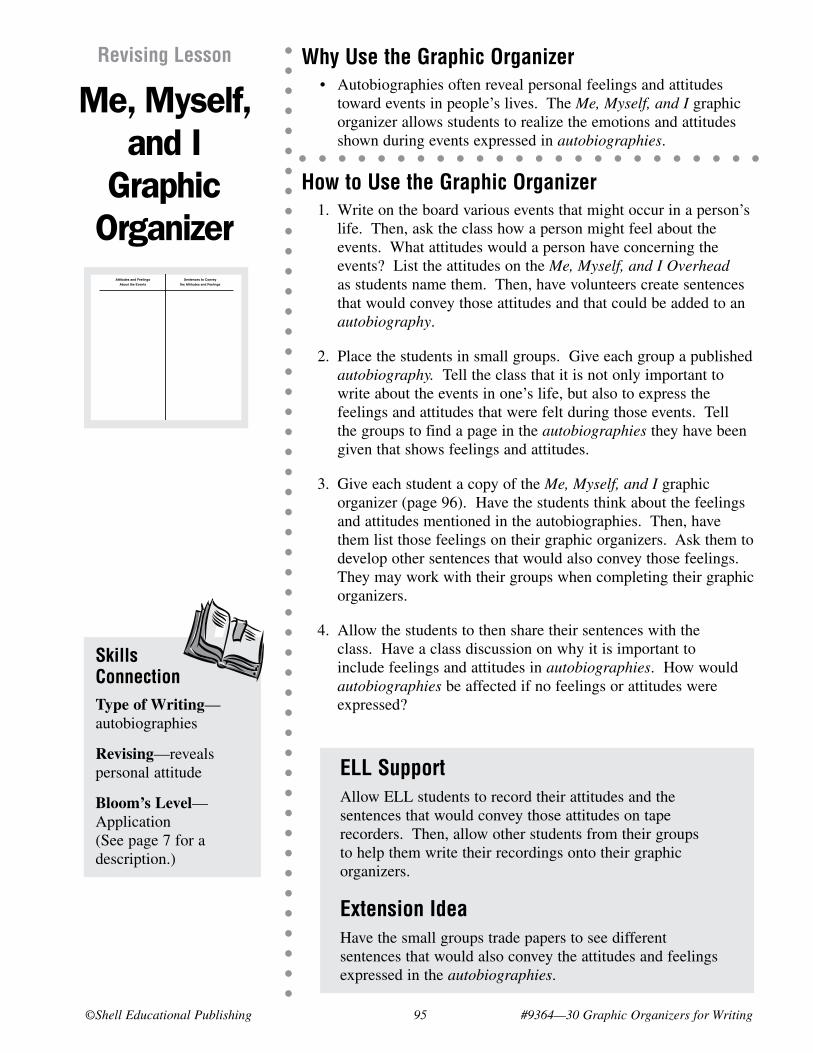
©Shell Educational Publishing 9� #9364—30 Graphic Organizers for Writing
Why Use the Graphic Organizer • Autobiographies often reveal personal feelings and attitudes
toward events in people’s lives. The Me, Myself, and I graphic organizer allows students to realize the emotions and attitudes shown during events expressed in autobiographies.
How to Use the Graphic Organizer 1. Write on the board various events that might occur in a person’s
life. Then, ask the class how a person might feel about the events. What attitudes would a person have concerning the events? List the attitudes on the Me, Myself, and I Overhead as students name them. Then, have volunteers create sentences that would convey those attitudes and that could be added to an autobiography.
2. Place the students in small groups. Give each group a published autobiography. Tell the class that it is not only important to write about the events in one’s life, but also to express the feelings and attitudes that were felt during those events. Tell the groups to find a page in the autobiographies they have been given that shows feelings and attitudes.
3. Give each student a copy of the Me, Myself, and I graphic organizer (page 96). Have the students think about the feelings and attitudes mentioned in the autobiographies. Then, have them list those feelings on their graphic organizers. Ask them to develop other sentences that would also convey those feelings. They may work with their groups when completing their graphic organizers.
4. Allow the students to then share their sentences with the class. Have a class discussion on why it is important to include feelings and attitudes in autobiographies. How would autobiographies be affected if no feelings or attitudes were expressed?
Revising Lesson
Me, Myself, and I
Graphic Organizer
Skills ConnectionType of Writing—autobiographies
Revising—reveals personal attitude
Bloom’s Level—Application (See page 7 for a description.)
#9364—30 Graphic Organizers for Writing 96 ©Shell Educational Publishing
Revising Blank Graphic Organizer
Name ______________________________________________________
Me, Myself, and IDirections: In the left-hand column below, write the attitudes and feelings shown in the autobiography. Then, create sentences that convey those attitudes and feelings and write them in the right-hand column.
Attitudes and Feelings
About the Events
Sentences to Convey
the Attitudes and Feelings
ELL SupportAllow ELL students to record their attitudes and the sentences that would convey those attitudes on tape recorders. Then, allow other students from their groups to help them write their recordings onto their graphic organizers.
Extension IdeaHave the small groups trade papers to see different sentences that would also convey the attitudes and feelings expressed in the autobiographies.
#9364—30 Graphic Organizers for Writing 96 ©Shell Educational Publishing
Revising Blank Graphic Organizer
Name ______________________________________________________
Me, Myself, and IDirections: Intheleft-handcolumnbelow,writetheattitudesandfeelingsshownintheautobiography.Then,createsentencesthatconveythoseattitudesandfeelingsandwritethemintheright-handcolumn.
Attitudes and Feelings
About the Events
Sentences to Convey
the Attitudes and Feelings
©Shell Educational Publishing 9� #9364—30 Graphic Organizers for Writing
Sample Lesson Revising
Me in the Early YearsStandard/Objective • Revising: Writes compositions about autobiographical incidents (e.g., reveals personal attitude
toward the incident). (McREL Language Arts, Standard 1.8)
• Students will use their Me, Myself, and I graphic organizers to list their attitudes and feelings about the events that were recorded in their “early years” autobiographies. They will then create sentences that would convey those feelings, which will be added to their autobiographies.
The Lesson 1. Record the information from the sample graphic organizer
(page 98) onto the Me, Myself, and I Overhead. Explain to students that everyone has feelings and attitudes toward the events in their lives. These attitudes and feelings should be shown in their autobiographies. Point out that several feelings concerning one’s early years have been written on the overhead. Several sentences have also been written to convey those feelings. Tell the students that they will be revising their drafts, making sure that their attitudes and feelings are conveyed. But since they are writing about their early years of life, they might need to ask friends and relatives about how they felt during their special events if they cannot remember.
2. Distribute students’ autobiography rough drafts, as well as copies of the Me, Myself, and I graphic organizer (page 96). Then, ask the class to list the attitudes and feelings they had during the main events of their early years. Have them then create sentences that would convey those feelings. Once students complete their graphic organizers, have them revise their “early years” autobiographies, adding sentences that show their feelings and attitudes.
3. Collect their drafts to be used in the publishing lesson, Presentation Time (pages 127–130).
ELL SupportAllow ELL students to record their attitudes about their “early years” autobiographies, as well as the sentences that would convey them, on tape recorders. Then, allow other students to help them write their recordings onto their graphic organizers.
Extension IdeaHave the students trade papers with neighbors who can also help them think of sentences that would convey their attitudes and feelings concerning their early years of life. You may also need to give the students time to ask their friends and relatives about their feelings and attitudes before revising their drafts.
Connections to Other Lessons• Presentation Time—pages 127–130Please refer to the following
lessons to continue the steps in the process for creating autobiographies.
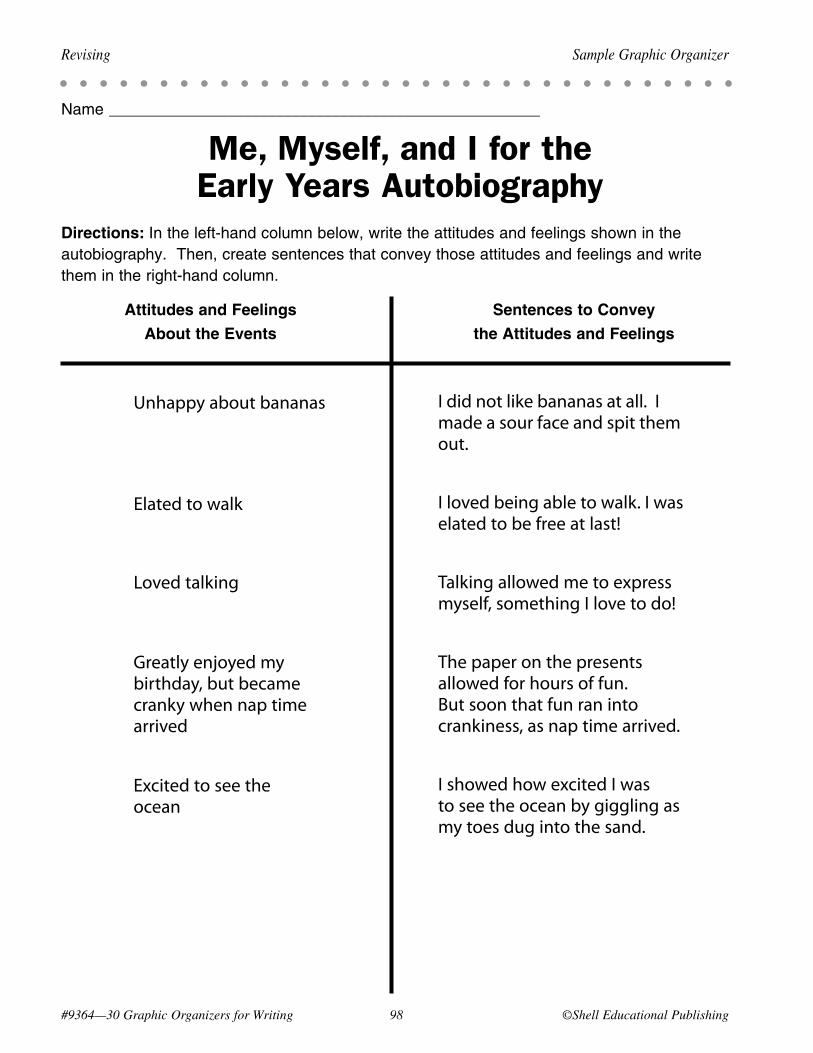
#9364—30 Graphic Organizers for Writing 9� ©Shell Educational Publishing
Revising Sample Graphic Organizer
Name ______________________________________________________
Me, Myself, and I for the Early Years Autobiography
Directions: Intheleft-handcolumnbelow,writetheattitudesandfeelingsshownintheautobiography.Then,createsentencesthatconveythoseattitudesandfeelingsandwritethemintheright-handcolumn.
Unhappy about bananas I did not like bananas at all. I made a sour face and spit them out.
I loved being able to walk. I was elated to be free at last!
Talking allowed me to express myself, something I love to do!
The paper on the presents allowed for hours of fun. But soon that fun ran into crankiness, as nap time arrived.
I showed how excited I was to see the ocean by giggling as my toes dug into the sand.
Attitudes and Feelings
About the Events
Sentences to Convey
the Attitudes and Feelings
Elated to walk
Loved talking
Greatly enjoyed my birthday, but became cranky when nap time arrived
Excited to see the ocean
©Shell Educational Publishing 99 #9364—30 Graphic Organizers for Writing
Why Use the Graphic Organizer • The Focusing on Feedback lesson asks students to analyze their
peers’ writing, offering suggestions in constructive ways.
How to Use the Graphic Organizer 1. Read a piece of writing to the students. It might be one you
have written or one written by a former student.
2. Display the Focusing on Feedback Overhead. Ask students what they liked best about the writing. Write some of their opinions on the overhead. Then, ask them how the writing could be improved. Write their suggestions on the overhead as well. Rewrite the draft on the overhead, adding the suggestions mentioned by the students.
3. Distribute the Focusing on Feedback graphic organizer (page 100). Have each student get out a writing piece he/she has been creating.
4. Have the students read their writing pieces, completing the top two sections on their graphic organizers. Then, assign each student a partner. Tell the students that they are going to work with their partners, reading their drafts and making suggestions on their peers’ graphic organizers, just as they did with the paragraph on the overhead. Remind students not to use harsh words when evaluating their peers’ drafts but to use constructive criticism.
5. Ask students to read their partners’ suggestions and revise their drafts using the suggestions made on their graphic organizers.
Revising Lesson
Focusing on Feedback Graphic
Organizer
Skills ConnectionType of Writing— business letters
Revising—analyzing peers’ drafts
Bloom’s Level— Analysis (See page 7 for a description.)
#9364—30 Graphic Organizers for Writing 100 ©Shell Educational Publishing
Revising Blank Graphic Organizer
Name _______________________________________________
Focusing on FeedbackDirections: Read your draft. Then, write what you liked best about it as well as what you might add or change to make your writing stronger. Then, let a classmate read your draft. Ask him/her to evaluate your draft as well. Finally, revise your draft, adding the suggestions from the graphic organizer.
What I Liked Best
What My Peer Liked Best
What I Would Add or Change to Improve
My Draft
What My Peer Would Add or Change to Improve My Draft
ELL SupportAllow ELL students to work with partners that are higher-level students. Be sure to have the partners read their drafts aloud so that the ELL students do not have to struggle with reading their partners’ drafts.
Extension IdeaIf time permits, allow students to evaluate more classmates’ drafts. This way, students get more input and suggestions that can be used to improve their writing pieces.
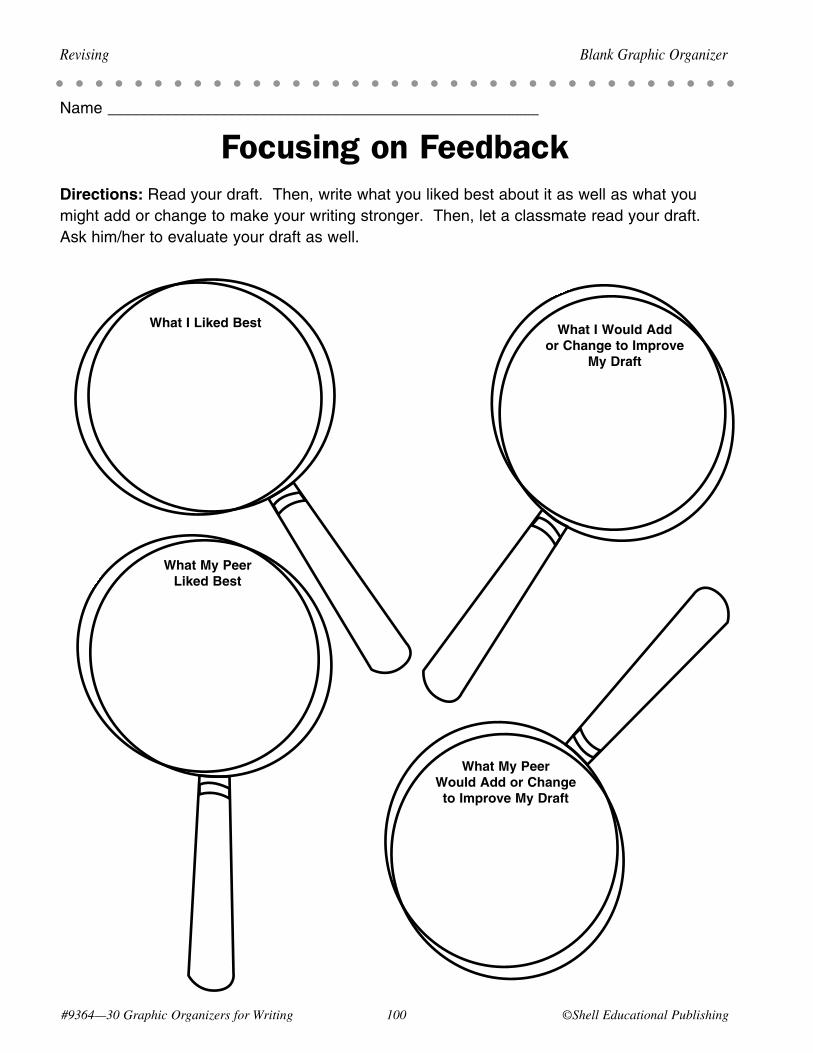
#9364—30 Graphic Organizers for Writing 100 ©Shell Educational Publishing
Revising Blank Graphic Organizer
Name ______________________________________________________
Focusing on FeedbackDirections: Readyourdraft.Then,writewhatyoulikedbestaboutitaswellaswhatyoumightaddorchangetomakeyourwritingstronger.Then,letaclassmatereadyourdraft.Askhim/hertoevaluateyourdraftaswell.
What I Liked Best
What My Peer Liked Best
What I Would Add or Change to Improve
My Draft
What My Peer Would Add or Change to Improve My Draft
©Shell Educational Publishing 101 #9364—30 Graphic Organizers for Writing
Sample Lesson Revising
The Chocolate FeedbackStandard/Objective • Revising: Uses a variety of strategies to draft and revise written work (e.g., uses direct feedback
to revise compositions). (McREL Language Arts, Standard 1.2)
• Students will evaluate both their own and their peers’ business letter drafts to chocolate companies using their Focusing on Feedback graphic organizers.
The Lesson 1. Read the business letter found in the To Whom It May
Concern for Chocolate Companies sample graphic organizer (page 58) aloud to the students.
2. Now, place the Focusing on Feedback for Business Letters sample graphic organizer (page 102) where students can see it. Ask them if they agree with the evaluation of the business letter to a chocolate company written on the sample graphic organizer. What suggestions might they add? What did they like best about the letter?
3. Tell students that they are going to work with partners to evaluate their business letter drafts. Distribute their drafts. Also, give each student a copy of the Focusing on Feedback graphic organizer (page 100). Have each student find a partner, or assign each student a partner. Then, have students read their own drafts first and complete the top two sections on their organizers. Students should have their partners evaluate their drafts as well.
4. Once their graphic organizers are completed, ask students to rewrite their drafts, making the revisions that were suggested on their graphic organizers. Collect their organizers for later use in the publishing lesson, Imagine That (pages 115–118).
ELL SupportAllow ELL students to work with partners who are higher-level students when evaluating their business letter drafts. Be sure to have the partners read their drafts aloud so that the ELL students do not have to struggle with reading their partners’ drafts.
Extension IdeaIf time permits, allow students to evaluate other classmates’ business letter drafts. This way, students get more input and suggestions that they can use to improve their writing.
Connections to Other Lessons• Imagine That—pages 115–118Please refer to the following
lessons to continue the steps in the process for creating business letters.

What I Liked Best
What My Peer Liked Best
What I Would Add or Change to Improve
My Draft
What My Peer Would Add or Change to Improve My Draft
#9364—30 Graphic Organizers for Writing 10� ©Shell Educational Publishing
Revising Sample Graphic Organizer
Name ______________________________________________________
Focusing on Feedback for Business Letters
Directions: Readyourdraft.Then,writewhatyoulikedbestaboutitaswellaswhatyoumightaddorchangetomakeyourwritingstronger.Then,letaclassmatereadyourdraft.Askhim/hertoevaluateyourdraftaswell.
I really like the “Dear Chocolate Experts” greeting–I think it is catchy.
Explain in more detail why I am writing the letter and why I want to know the information I have requested.
I liked how you complimented the company. It lets them know that you are really interested in finding out more information.
Talk about other types of Hershey candy you like and want to know more about. That way, you will get a lot more information.

©Shell Educational Publishing 103 #9364—30 Graphic Organizers for Writing
Why Use the Graphic Organizer • The Perfect Balance graphic organizer allows students to review
the number of facts used in writing pieces, compared to the number of original ideas. Students will then be able to see if the writing pieces were based solely on research gathered, rather than containing a balance between research and original thoughts.
How to Use the Graphic Organizer 1. Show students a portion of the evening news, having them pay
attention to how the broadcaster introduces the news story. Did he/she state only facts, or did he/she have an original idea or opinion to introduce the story? Explain that one’s own thoughts and ideas are often included in informational writing.
2. Display The Perfect Balance Overhead, showing students how to complete the graphic organizer.
3. Place students into small groups. Give each group a newspaper or magazine article that has commentaries included. Distribute The Perfect Balance graphic organizer (page 104). Have students read their groups’ articles and complete their graphic organizers. The groups should determine the number of facts compared to the number of original ideas contained in their articles. Students should then create other original ideas that could be included in their articles and record them on the bottom of their graphic organizers.
4. Have the groups share some of the original ideas they created with the class.
Revising Lesson
The Perfect Balance Graphic
Organizer
Skills ConnectionType of Writing— informational/research
Revising—achieves balance between research and original ideas
Bloom’s Level— Synthesis (See page 8 for a description.)
#9364—30 Graphic Organizers for Writing 104 ©Shell Educational Publishing
Revising Blank Graphic Organizer
Name ______________________________________________________
The Perfect BalanceDirections: Read the informational writing piece. Then, record how many facts and how many original ideas were included in the writing on the balance below. On the lines at the bottom of the page, create other original ideas that could be used in the informational writing.
Number of Facts Number of Original Ideas
Original Ideas to Add to Paper
ELL SupportAllow ELL students to highlight the original ideas and facts in their articles using two different colors. This will help them organize the information before completing their graphic organizers.
Extension IdeaAsk students to find letters in literature books or other reading material. Give students examples of articles that contain too many original ideas or opinions. Then, conduct a class discussion as to why it is important to have the perfect balance between facts and original ideas. How might too many original ideas affect a writing piece?
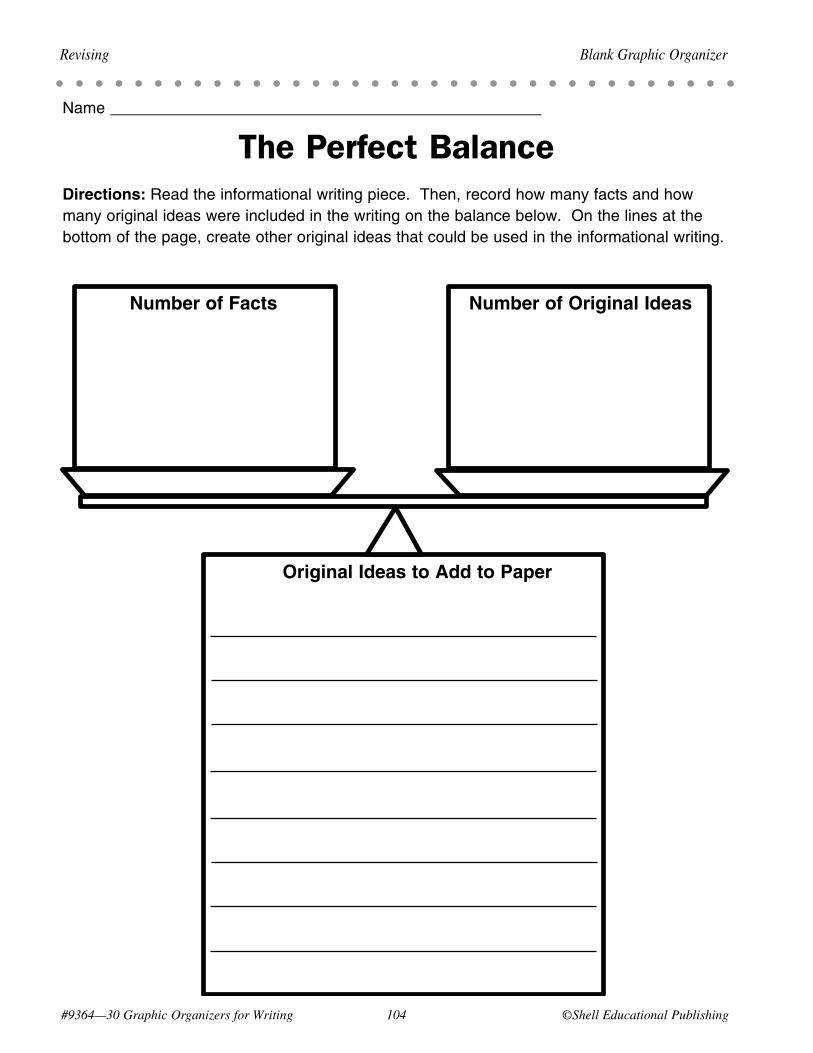
#9364—30 Graphic Organizers for Writing 104 ©Shell Educational Publishing
Revising Blank Graphic Organizer
Name ______________________________________________________
The Perfect BalanceDirections: Readtheinformationalwritingpiece.Then,recordhowmanyfactsandhowmanyoriginalideaswereincludedinthewritingonthebalancebelow.Onthelinesatthebottomofthepage,createotheroriginalideasthatcouldbeusedintheinformationalwriting.
Number of Facts Number of Original Ideas
Original Ideas to Add to Paper
©Shell Educational Publishing 10� #9364—30 Graphic Organizers for Writing
Sample Lesson Revising
The Perfect Historical BalanceStandard/Objective • Revising: Writes research papers (e.g., achieves balance between research information and
original ideas). (McREL Language Arts, Standard 4.6)
• Students will use their The Perfect Balance graphic organizers to compare the number of facts they have in their historical papers to the number of original ideas. They will then create more original ideas to be added to their informational papers.
ELL SupportAllow ELL students to highlight the original ideas and facts in their informational papers using two different colors. This will help them organize the information before completing their graphic organizers as well as guarantee that they have a good balance of facts and opinions.
Extension IdeaIf time permits, give students examples of historical informational papers that contain too many original ideas or opinions. Then, conduct a class discussion as to why it is important to have a good balance between facts and original ideas. How might too many original ideas negatively affect an informational writing piece?
Connections to Other Lessons• Right On Time—pages 119–122Please refer to the following
lessons to continue the steps in the process for creating informational writing pieces.
The Lesson 1. Read the following paragraph to the students: “Many ideas about
conspiracies surround the assassination of John F. Kennedy. Some say that politicians were involved in his assassination. Another conspiracy states that the mob was involved. But, my favorite conspiracy is the shooter behind the grassy knoll. If there was indeed a shooter behind the fence, then many lives would have been completely different. Lee Harvey Oswald was the only one arrested for the murder. And he was later killed himself. But should he have taken all of the blame?”
2. Display The Perfect Balance Overhead. Explain to students that it is important to list facts in their informational writing but that it is also okay to add original thoughts. Ask students how many facts were written in the paragraph above. How many original thoughts? Record the information on the overhead. Ask students what other original ideas might be added. You may refer to the sample graphic organizer (page 106) for examples. Ask students whether the original thoughts enhance the paper. How or why?
3. Give each student a copy of The Perfect Balance graphic organizer (page 104). Distribute their historical informational papers and tell them to read their papers, making sure there is a balance between facts and original thoughts. Have them record the number of each on their graphic organizers. Then, ask them to create original ideas to add to their papers on the bottom of their graphic organizers. Indicate to students that they do not need an exact balance, but that original ideas should be present.
4. Once students have completed their organizers, have them revise their drafts, adding the original thoughts from their graphic organizers. Collect students’ revised drafts for later use in the Right On Time publishing lesson (pages 119–122).
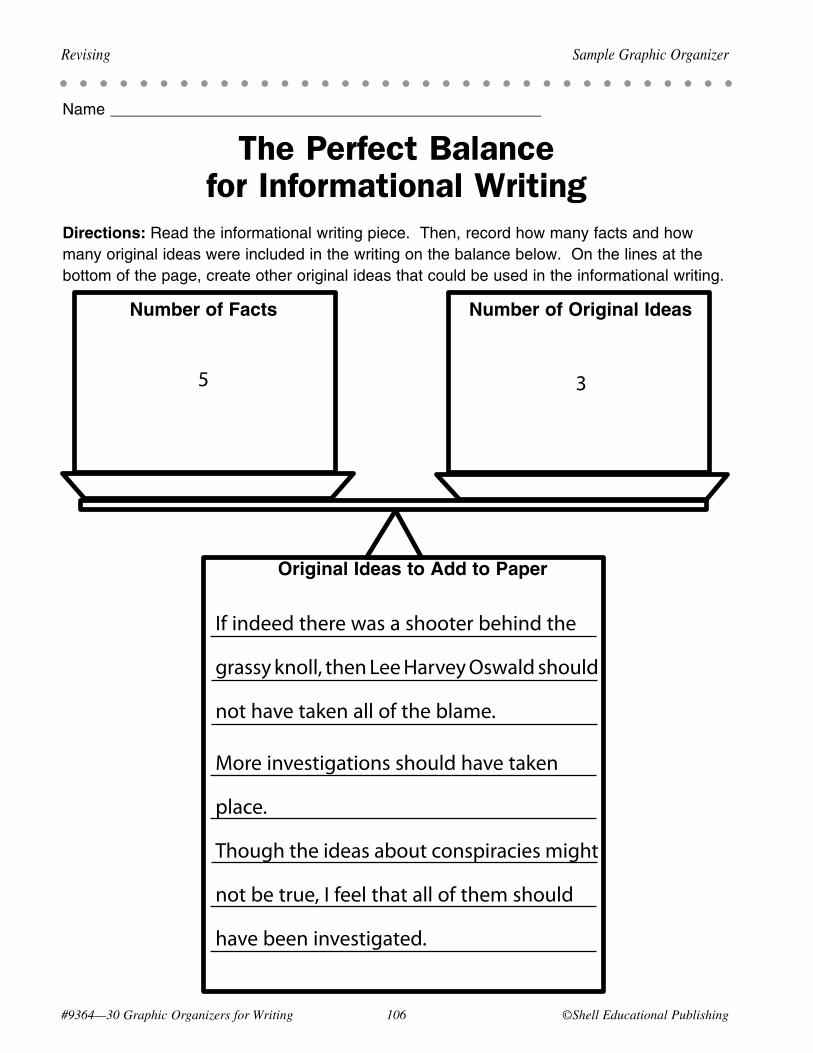
#9364—30 Graphic Organizers for Writing 106 ©Shell Educational Publishing
Revising Sample Graphic Organizer
Name ______________________________________________________
The Perfect Balance for Informational Writing
Directions: Readtheinformationalwritingpiece.Then,recordhowmanyfactsandhowmanyoriginalideaswereincludedinthewritingonthebalancebelow.Onthelinesatthebottomofthepage,createotheroriginalideasthatcouldbeusedintheinformationalwriting.
Number of Facts Number of Original Ideas
Original Ideas to Add to Paper
5 3
If indeed there was a shooter behind the
grassy knoll, then Lee Harvey Oswald should
not have taken all of the blame.
More investigations should have taken
place.
Though the ideas about conspiracies might
not be true, I feel that all of them should
have been investigated.
©Shell Educational Publishing 10� #9364—30 Graphic Organizers for Writing
Why Use the Graphic Organizer • The Checkmate graphic organizer allows students to edit their
peers’ writing, making sure the same point of view is kept throughout. It allows peers to note any questionable arguments, as well as offer advice, so the same point of view is kept.
How to Use the Graphic Organizer 1. Write each of the following sentences on different pieces of
paper, and give them to student volunteers: “Carbohydrates give you energy. Carbohydrates are necessary for proper growth. Sugar, a carbohydrate, rots your teeth. Carbohydrates can be good for you.” Have the volunteers read their pieces of paper. Ask the class if one of the sentences did not belong. Which one? Why? Explain to the class that when persuading an audience about particular topics, they need to keep the same point of view and back it up with evidence to support that point of view.
2. Write various point-of-view sentences on small pieces of paper (e.g.,“Uniforms should be worn in school.”) Have students randomly choose one of the pieces of paper. Then, ask them to write three to five sentences that would support the point of view written on their papers. You may wish to include current topics in the news or at school on the pieces of paper.
3. Display the Checkmate Overhead, and review the directions on the graphic organizer. Explain to students that they will be trading paragraphs with partners. Their partners will read their paragraphs, making sure that all evidence supports their point of view, rather than going against it. They will record any questionable arguments on their graphic organizers. They will also offer advice to their peers for improving their paragraphs.
4. Distribute the Checkmate graphic organizer (page 108). Have students exchange their drafts with classmates. Have the classmates read the drafts, making sure the point of view is consistent. If it is not, have them note necessary changes on their graphic organizers. They may also note arguments that need clarification or offer advice for making the arguments stronger.
5. Have students discuss their evaluations with partners. You may ask students to make any suggested changes to their paragraphs.
Revising Lesson
Checkmate Graphic
Organizer
Skills ConnectionType of Writing— persuasive
Revising—using consistent point of view
Bloom’s Level— Evaluation (See page 8 for a description.)
#9364—30 Graphic Organizers for Writing 108 ©Shell Educational Publishing
Revising Blank Graphic Organizer
Name _______________________________________________
CheckmateDirections: Read your classmate’s draft. Note any arguments that do not support the point of view taken in the draft. Also offer advice for making the arguments stronger.
Paragraph to Revise
Advice and Point-of-View Inconsistencies
ELL SupportAllow ELL students to work with teachers’ aides or parent volunteers when evaluating their peers’ drafts.
Extension IdeaEncourage students to give their classmates other examples to use in their arguments.
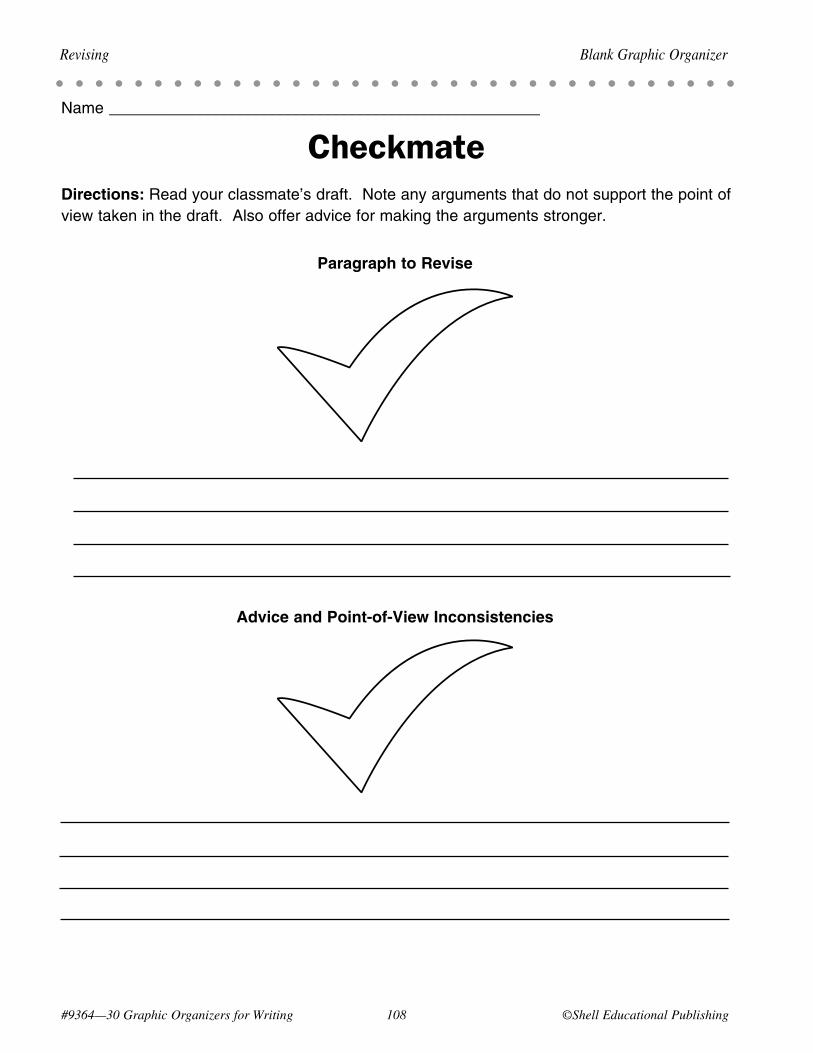
#9364—30 Graphic Organizers for Writing 10� ©Shell Educational Publishing
Revising Blank Graphic Organizer
Name ______________________________________________________
CheckmateDirections: Readyourclassmate’sdraft.Noteanyargumentsthatdonotsupportthepointofviewtakeninthedraft.Alsoofferadviceformakingtheargumentsstronger.
Paragraph to Revise
Advice and Point-of-View Inconsistencies
©Shell Educational Publishing 109 #9364—30 Graphic Organizers for Writing
Sample Lesson Revising
Checkmate for SchoolsStandard/Objective • Revising: Uses a variety of strategies to draft and revise written work (e.g., checks for a
consistent point of view). (McREL Language Arts, Standard 1.2) • Students will edit their classmates’ persuasive drafts on school issues, checking for a consistent
point of view. They will then note any changes that need to be made, as well as any advice, on their Checkmate graphic organizers.
ELL SupportAllow ELL students to work with teachers’ aides or parent volunteers when evaluating their peers’ persuasive drafts.
Extension IdeaEncourage students to give their classmates other examples to use in their school arguments.
Connections to Other Lessons• In My Defense—pages 131–134Please refer to the following
lessons to continue the steps in the process for creating persuasive writing pieces.
The Lesson 1. Ask students if soda machines should be allowed in
classrooms. Then, have one side of the room be “yes” and the other “no.” Have students go to the side of the room that reflects their opinion about the issue. Ask them to defend their thoughts with good, solid arguments. Discuss their thoughts as a class. Explain to the class that their opinions are the points of view they take on issues and that these should be backed up with supporting arguments.
2. Write on the board: “Gum should not be allowed in the classroom. It causes tooth decay. It often distracts others. Gum allows you to exercise your jaws.” Ask the class if the point of view in the paragraph is consistent. Are there sentences that do not support the point of view? What could the author do to be consistent and have a stronger argument? Write their advice on the Checkmate Overhead.
3. Distribute the Checkmate graphic organizer (page 108). Show students the sample graphic organizer (page 110), which has a paragraph to be revised and advice on using a consistent point of view. Tell them they will be reading their peers’ drafts, making sure the arguments are strong and consistent with the intended point of view, as shown in the sample graphic organizer. Distribute the students’ persuasive drafts on school issues. Have them trade papers with peers and read one another’s drafts, offering advice and noting inconsistencies on their graphic organizers. Then, have students revise their persuasive drafts, making the changes their classmates noted.
4. Once students have revised their drafts, collect the drafts for later use in the In My Defense publishing lesson (pages 131–134).
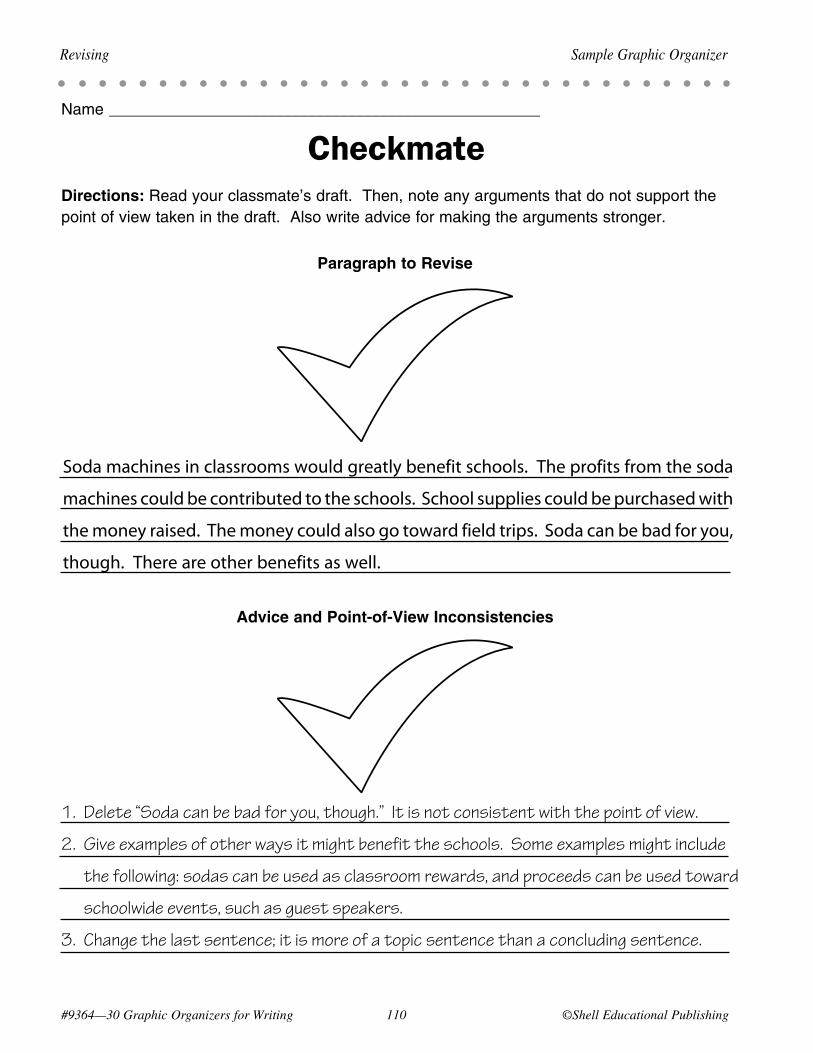
#9364—30 Graphic Organizers for Writing 110 ©Shell Educational Publishing
Revising Sample Graphic Organizer
Name ______________________________________________________
CheckmateDirections: Readyourclassmate’sdraft.Then,noteanyargumentsthatdonotsupportthepointofviewtakeninthedraft.Alsowriteadviceformakingtheargumentsstronger.
Paragraph to Revise
Advice and Point-of-View Inconsistencies
Soda machines in classrooms would greatly benefit schools. The profits from the soda
machines could be contributed to the schools. School supplies could be purchased with
the money raised. The money could also go toward field trips. Soda can be bad for you,
though. There are other benefits as well.
1. Delete “Soda can be bad for you, though.” It is not consistent with the point of view.
2. Give examples of other ways it might benefit the schools. Some examples might include
the following: sodas can be used as classroom rewards, and proceeds can be used toward
schoolwide events, such as guest speakers.
3. Change the last sentence; it is more of a topic sentence than a concluding sentence.
©Shell Educational Publishing 111 #9364—30 Graphic Organizers for Writing
Why Use the Graphic Organizer • Illustrations and photos can greatly enhance writing. The
Picture This graphic organizer allows students to sketch photos or pictures that could be incorporated into writing pieces.
How to Use the Graphic Organizer 1. Read students a descriptive paragraph or a descriptive poem.
Ask the students what visions they got in their minds as the paragraph or poem was read. Display the Picture This Overhead. Allow volunteers to sketch on the overhead some of the pictures they had in their minds. Ask the students how photos or pictures enhance writing. Do they enjoy seeing pictures in their textbooks? Why or why not?
2. Ask each student to find a paragraph from a textbook or a literature book that is currently being read. Distribute the Picture This graphic organizer (page 112). Have the students sketch photos or illustrations on their graphic organizers that would enhance the writing.
3. Place students into small groups. Have them read to their groups the paragraph excerpts they chose from the literature books or textbooks. Then, have them share the pictures they drew to accompany the excerpts.
Publishing Lesson
Picture This Graphic
Organizer
Skills ConnectionType of Writing— descriptive
Publishing— incorporating illustrations or photos into published work
Bloom’s Level— Knowledge (See page 7 for a description.)
#9364—30 Graphic Organizers for Writing 112 ©Shell Educational Publishing
Publishing Blank Graphic Organizer
Name ______________________________________________________
Picture ThisDirections: Sketch pictures below that would enhance a writing piece.
ELL SupportAllow ELL students to find ideas of pictures in magazines or on the Internet that they could sketch on their graphic organizers to enhance the text.
Extension IdeaEncourage students to think of creative ways to incorporate their illustrations. One idea might be to create “stationery” that includes their illustrations. Then, they can write the excerpt from the literature or textbook on the stationery.
#9364—30 Graphic Organizers for Writing 11� ©Shell Educational Publishing
Publishing Blank Graphic Organizer
Name ______________________________________________________
Picture ThisDirections:Sketchpicturesbelowthatwouldenhanceawritingpiece.
©Shell Educational Publishing 113 #9364—30 Graphic Organizers for Writing
Sample Lesson Publishing
Picture This FoodStandard/Objective • Publishing: Uses strategies to edit and publish written work (e.g., incorporates photos,
illustrations, charts, and graphs). (McREL Language Arts, Standard 1.3, Level II)
• Students will create sketches of pictures that could be used with their food descriptive writing on their Picture This graphic organizers. They will then choose one or two illustrations to incorporate into their final copies.
The Lesson 1. Bring in various food containers that include illustrations of the food
on the packaging. Ask the students if the illustrations make them want to buy the products. Why or why not?
2. Display the Picture This Overhead. Then, read the following paragraph to students: “The aroma of onion filled the air, bringing water to my eyes. I then heard sizzling on the grill and grease dripping like water onto a plate. I knew my mother was cooking a juicy hamburger for dinner.” Ask the students what illustrations might go with the paragraph. Allow volunteers to sketch their ideas on the overhead. You may also show them the sample graphic organizer (page 114) for other ideas of illustrations.
3. Distribute the Picture This graphic organizer (page 112). Give students their food descriptive rough drafts. Ask them to use their graphic organizers to sketch illustrations that would go well with their food descriptive drafts. Have them then choose one or two illustrations to incorporate into their drafts.
4. Then, give students blank sheets of paper. Have them create final copies of their drafts, incorporating their illustrations.
ELL SupportAllow ELL students to find ideas of pictures in magazines or on the Internet that they can sketch to go along with their food descriptive drafts.
Extension IdeaEncourage students to think of creative ways to incorporate their illustrations. One idea might be to create food packaging to go with their descriptive drafts. The illustrations would be included on the package labels.
Connections to Other Lessons• A Burst of Ideas—pages 15–18 • Snap, Crackle, Pop—pages 47–50 • Picking Out Possessives—pages 67–70 • Where’s the Beef?—pages 91–94
Please refer to the following lessons for the steps in the process for creating descriptive writing pieces.
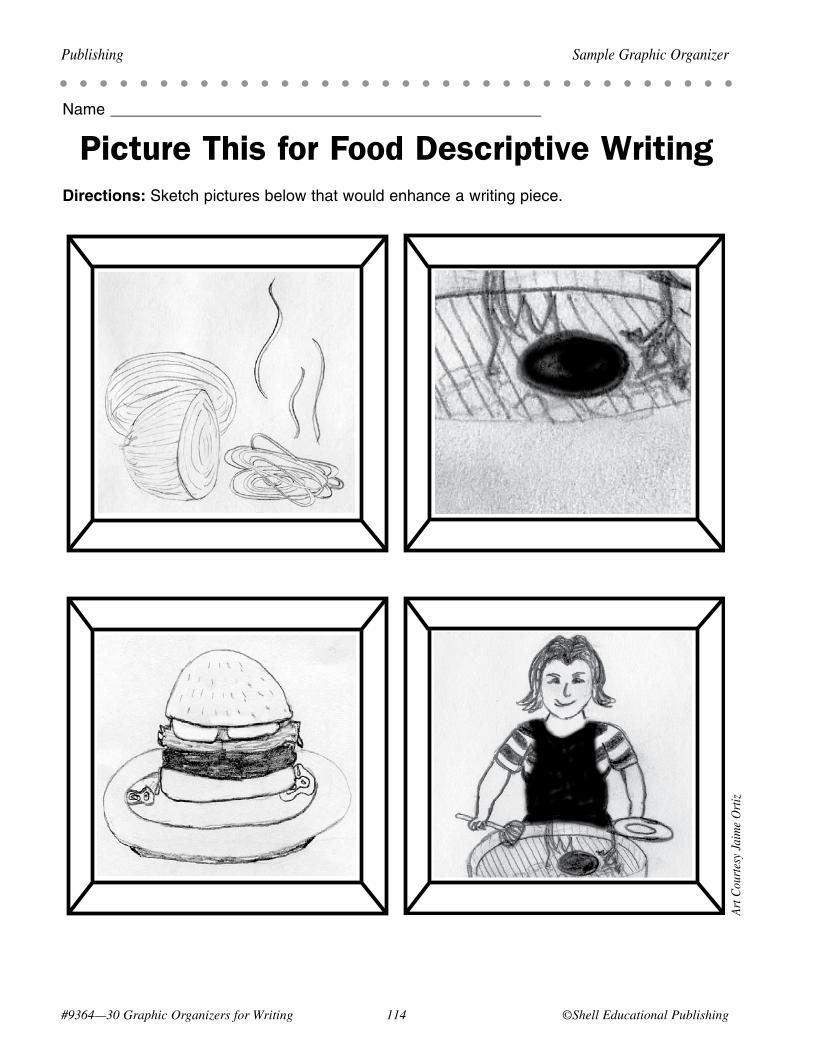
#9364—30 Graphic Organizers for Writing 114 ©Shell Educational Publishing
Publishing Sample Graphic Organizer
Name ______________________________________________________
Picture This for Food Descriptive WritingDirections: Sketchpicturesbelowthatwouldenhanceawritingpiece.
Art C
ourt
esy
Jaim
e O
rtiz
©Shell Educational Publishing 11� #9364—30 Graphic Organizers for Writing
Why Use the Graphic Organizer • The Imagine That graphic organizer allows students to
brainstorm possible responses that companies may give to their classmates’ letters.
How to Use the Graphic Organizer 1. Place students in small groups. Distribute phone books to
the groups. Tell each student to find a local business in the phone book. Ask students to write short business letters to the businesses they choose, asking the businesses any questions they may have about the business or what it produces.
2. Once students have completed their letters, display the Imagine That Overhead. Ask for a volunteer to share his or her business letter with the class. Then, ask the class how the company might respond to the letter. Write types of possible responses on the overhead. Explain to students that even though they will be mailing their letters to the actual businesses, they will be giving each other immediate feedback by participating in a simulation, pretending as if they are the companies that are receiving their letters.
3. Give each student a copy of the Imagine That graphic organizer (page 116). Have them trade their letters with partners. Their partners should then read the letters and pretend as if they are the companies to whom the letters were written. How would they respond to the letters? Have them complete their graphic organizers with ideas for types of responses. Then, ask the students to write mock letters of response to their partners, using the ideas on their graphic organizers. Allow students to share their mock response letters with their partners. Then, mail their real business letters, or ask the students to take them home to mail. You may wish to keep their mock response letters to compare to the real companies’ responses.
Publishing Lesson
Imagine That Graphic
Organizer
Skills ConnectionType of Writing— business letters
Publishing— writing responses to business letters
Bloom’s Level— Comprehension (See page 7 for a description.)
#9364—30 Graphic Organizers for Writing 116 ©Shell Educational Publishing
Publishing Blank Graphic Organizer
Name ______________________________________________________
Imagine ThatDirections: Brainstorm ideas for possible responses to your partner’s letter on the lines provided.
ELL SupportProvide ELL students with examples of possible responses they might be able to use.
Extension IdeaAllow students to search the Internet to research answers to some of the questions in their partners’ letters. This way, they can accurately answer any questions in the letters.
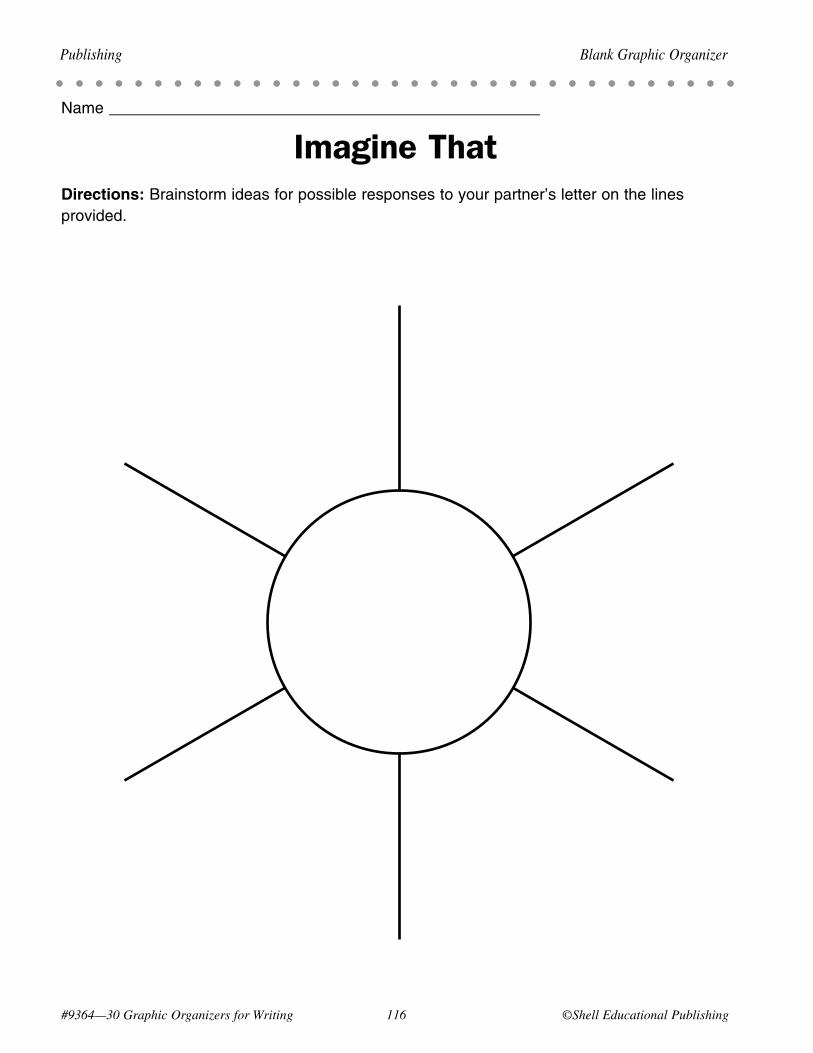
#9364—30 Graphic Organizers for Writing 116 ©Shell Educational Publishing
Publishing Blank Graphic Organizer
Name ______________________________________________________
Imagine ThatDirections:Brainstormideasforpossibleresponsestoyourpartner’sletteronthelinesprovided.
©Shell Educational Publishing 11� #9364—30 Graphic Organizers for Writing
Sample Lesson Publishing
Imagine That for Chocolate Companies
Standard/Objective • Publishing: Writes business letters and letters of request and response (e.g., uses business letter
format; states purpose of the letter; relates opinions, problems, requests, or compliments; uses precise vocabulary). (McREL Language Arts, Standard 1.13)
• Students will create mock response letters, giving responses that companies may give to their partners’ business letters.
ELL SupportGive ELL students examples of possible responses that chocolate companies might use, which they can then transfer onto their own mock response letters.
Extension IdeaAllow students to use the Internet to research answers to some of the chocolate-related questions in their partners’ letters. This way, they can accurately answer any questions in the letters.
Connections to Other Lessons• A Bounty of Businesses—pages 19–22 • To Whom It May Concern—pages 55–58 • Capitalization King—pages 63–66 • Focusing on Feedback—pages 99–102
Please refer to the following lessons for the steps in the process for creating business letters.
The Lesson 1. Give students their business letter drafts to chocolate companies
from the revising lesson. Ask them to create final copies.
2. Once they have finished their letters, display the Imagine That Overhead. Read a business letter to the class. Ask the class how the company might respond to the letter. Write types of possible responses on the overhead. Then, show students the sample graphic organizer (page 118) to give them more examples of types of responses. Explain that even though they will be mailing their letters to the businesses, they will be giving each other immediate feedback by writing mock responses, pretending they are the companies receiving letters.
3. Give each student a copy of the Imagine That graphic organizer (page 116). Have them trade their business letters to chocolate companies with their partners. Their partners should then read the letters and pretend as if they are the companies the letters were written to. How would the companies respond to the letters? Have students complete their graphic organizers with ideas for ways of responding. Then, ask the students to write mock letters of response to their partners, using the ideas on their graphic organizers. Allow students to share the mock response letters with their partners. Then, mail students’ real business letters to chocolate companies, or ask students to take the letters home to mail. You may wish to keep the mock response letters to compare to the real companies’ responses.
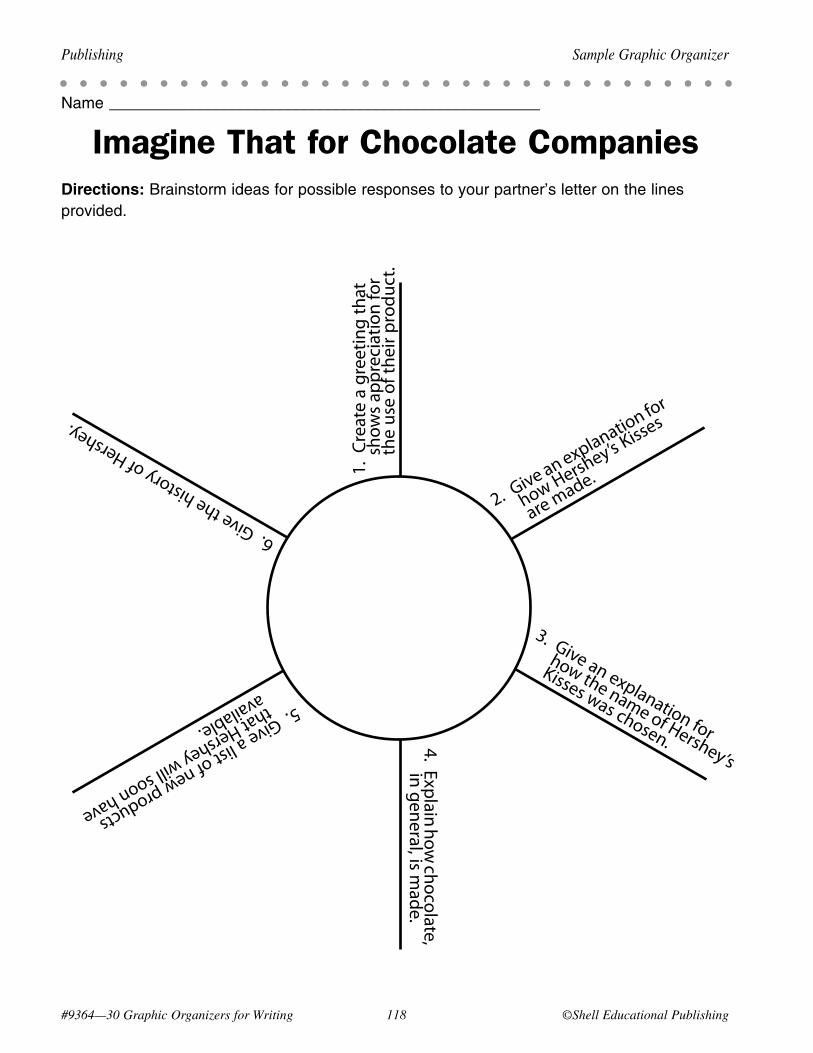
#9364—30 Graphic Organizers for Writing 11� ©Shell Educational Publishing
Publishing Sample Graphic Organizer
Name ______________________________________________________
Imagine That for Chocolate CompaniesDirections:Brainstormideasforpossibleresponsestoyourpartner’sletteronthelinesprovided.
1. C
reat
e a
gree
ting
that
sh
ows
appr
ecia
tion
for
the
use
of th
eir p
rodu
ct.
2. Give an explanation for
how Hershey’s Kisses
are made.
3. Give an explanation for
how the name of Hershey’s
Kisses was chosen.4. Explain how chocolate,
in general, is made.
5. Give a list of new products
that Hershey will soon have
available.
6. Give the history of Hershey.
©Shell Educational Publishing 119 #9364—30 Graphic Organizers for Writing
Why Use the Graphic Organizer • Placing events on time lines in chronological order is an
important skill for students to learn. The graphic organizer Right On Time allows students to create time lines of events.
How to Use the Graphic Organizer 1. Copy the following sentences onto large strips of paper and
cut them out: “A volcano erupts, spilling lava onto the earth. The hot lava cools, turning from a liquid to a solid. Igneous rocks are formed.” Ask three volunteers to come to the front of the room. Have each volunteer randomly choose one of the sentences and read it aloud.
2. Display the Right On Time Overhead. Ask students in what order the three sentences should be written. Create a time line of the events that lead to an igneous rock being formed. Explain to students that all events occur in a particular order, even if dates are not mentioned.
3. Distribute copies of the Right On Time graphic organizer (page 120). Have students find paragraphs or sections in textbooks that include five major events. Ask them to then create drafts of time lines using their graphic organizers, writing the five major events in chronological order.
4. Have the students use large sheets of blank paper to create vivid and appealing time lines, using the information from their graphic organizers. Once their time lines are completed, have students share the five main events with the class or in small groups, referring to their time lines during their presentations.
Publishing Lesson
Right On Time Graphic
Organizer
Skills ConnectionType of Writing— informational/research
Publishing—creates time lines for presentations
Bloom’s Level— Application (See page 7 for a description.)
#9364—30 Graphic Organizers for Writing 120 ©Shell Educational Publishing
Name ______________________________________________________
Right On TimeDirections: Choose five main events that could be included on a time line. Then, write those events in chronological order on the time line below. Create a larger time line, using your graphic organizer as a guide.
Publishing Blank Graphic Organizer
Title_____________
Event One:
Event Two:
Event Three: .
Event Four:
Event Five:
ELL SupportHelp ELL students choose the five major events that would be placed on their time lines. Then, allow them to place those events on their time lines in chronological order.
Extension IdeaEncourage students to add drawings or pictures from magazines to their time lines to make them more visually appealing.
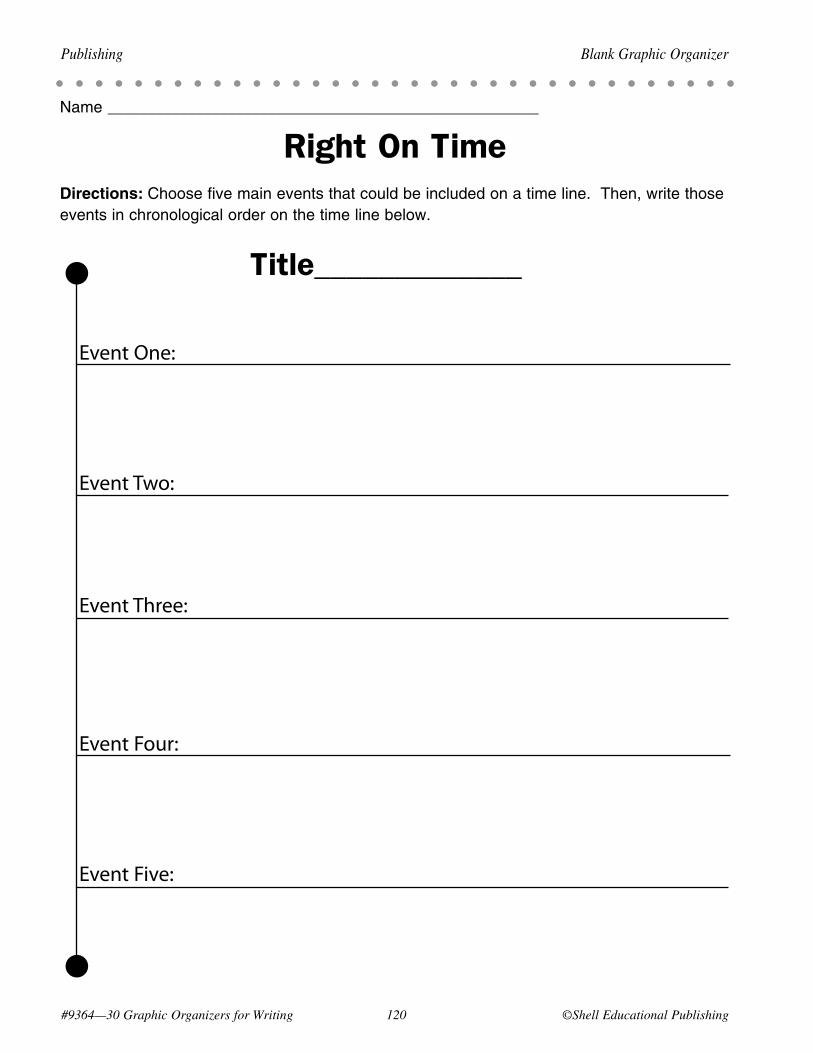
#9364—30 Graphic Organizers for Writing 1�0 ©Shell Educational Publishing
Name ______________________________________________________
Right On TimeDirections: Choosefivemaineventsthatcouldbeincludedonatimeline.Then,writethoseeventsinchronologicalorderonthetimelinebelow.
Publishing Blank Graphic Organizer
Title_____________ Event One:
Event Two:
Event Three:
Event Four:
Event Five:
©Shell Educational Publishing 1�1 #9364—30 Graphic Organizers for Writing
Sample Lesson Publishing
Right On History’s TimeStandard/Objective • Publishing: Understands structural patterns or organization in informational texts (e.g.,
chronological, logical, or sequential order). (McREL Language Arts, Standard 7.7, Level II)
• Students will use their Right On Time graphic organizers to create time lines of the five major events in their historical informational papers. They will then create larger time lines, using their graphic organizers as guides. The students will refer to their time lines during their presentations.
The Lesson 1. Distribute students’ historical informational drafts. Ask them to
create final copies of their informational writing.
2. Write each of the main events from the sample graphic organizer (page 122) onto five different poster boards or large sheets of paper. Have volunteers read them aloud. Then, have the class place the students into chronological order, according to the events on their poster boards.
3. Copy the events onto the Right On Time Overhead. Explain to the students that the time line on the graphic organizer would then be made into a larger time line. The time line would be used as a visual aid when sharing the information from the research paper with the class.
4. Distribute the Right On Time graphic organizer (page 120). Have students choose the five main events from their historical informational papers. Have them write those events in chronological order on their graphic organizers. They should then turn their graphic organizers into visually appealing time lines to use when they present their papers to the class.
5. Have the class present their historical informational papers to the class or to small groups.
ELL SupportHelp ELL students choose the five major historical events that would be placed on their time lines. Then, allow them to place those events on their time lines in chronological order.
Extension IdeaEncourage students to add drawings or pictures from magazines to their historical time lines to make them more visually appealing.
Connections to Other Lessons• Building Knowledge—pages 31–34 • Seeing Clearly—pages 43–46 • In a Nutshell—pages 83–86 • The Perfect Balance—pages 103–106
Please refer to the following lessons for the steps in the process for creating informational writing pieces.
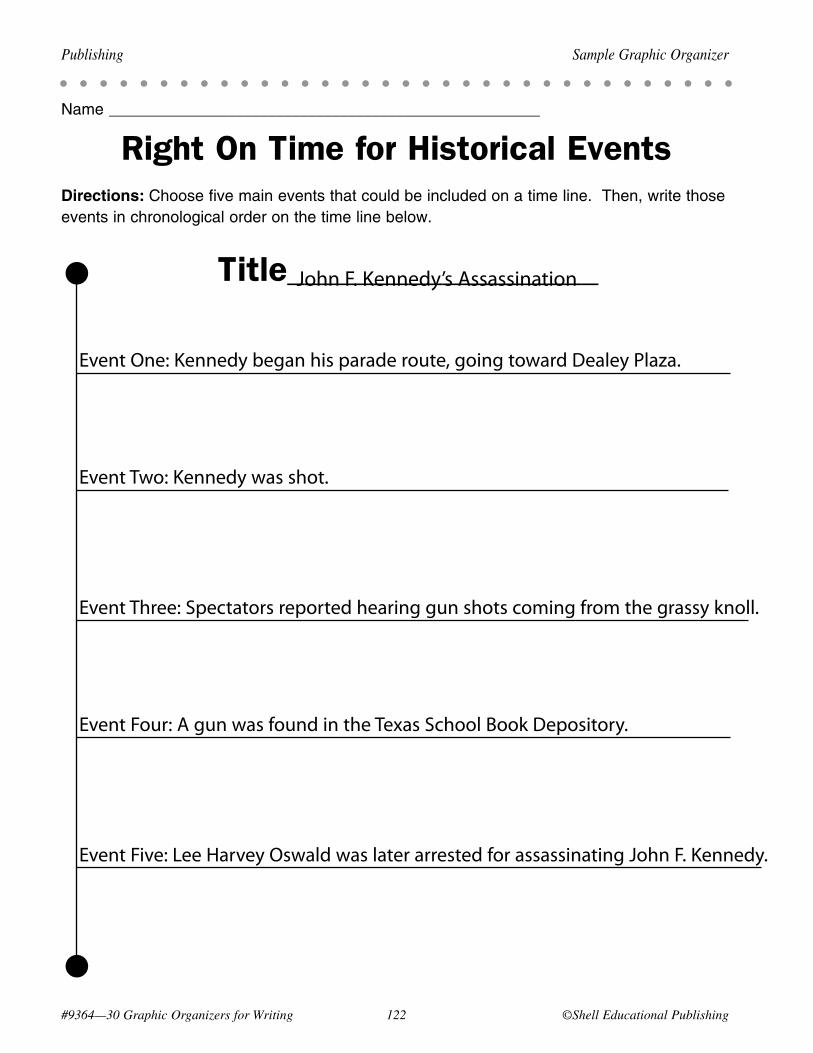
#9364—30 Graphic Organizers for Writing 1�� ©Shell Educational Publishing
Publishing Sample Graphic Organizer
Name ______________________________________________________
Right On Time for Historical Events Directions: Choosefivemaineventsthatcouldbeincludedonatimeline.Then,writethoseeventsinchronologicalorderonthetimelinebelow.
Title__________________John F. Kennedy’s Assassination
Event One: Kennedy began his parade route, going toward Dealey Plaza.
Event Two: Kennedy was shot.
Event Three: Spectators reported hearing gun shots coming from the grassy knoll.
Event Four: A gun was found in the Texas School Book Depository.
Event Five: Lee Harvey Oswald was later arrested for assassinating John F. Kennedy.
©Shell Educational Publishing 1�3 #9364—30 Graphic Organizers for Writing
Why Use the Graphic Organizer • Analyzing and evaluating one’s own writing is an important
step in making a writing piece complete. The Check It Over graphic organizer allows students to analyze their writing using prewritten standards, ensuring that all standards are met.
How to Use the Graphic Organizer 1. As a class, brainstorm a list of standards that should be met
when creating a writing piece. Such standards might include the following: “The writing piece has a purpose. A topic sentence is included.” Write the standards on which the class agrees on the Check It Over Overhead.
2. Read a writing piece to the class. It could be a paragraph you developed or a paragraph belonging to a previous student. Ask the class if the writing piece included all of the standards. Complete the graphic organizer on the overhead accordingly. Ask the students how the writing could be changed to meet the standards. Change the writing with the class if necessary.
3. Distribute the Check It Over graphic organizer (page 124). Have students work in small groups to develop standards that would be appropriate for a type of writing the students are currently working on.
4. Then, have the students read their drafts and complete their graphic organizers. Did they include all of the standards? If any other changes need to be made due to a standard not being met, have the students make those changes on their drafts.
5. You may then ask students to create final copies of their writing pieces.
Publishing Lesson
Check It Over Graphic
Organizer
Skills ConnectionType of Writing— expository
Publishing—analyzing final copies, checking for prewritten standards
Bloom’s Level— Analysis (See page 7 for a description.)
#9364—30 Graphic Organizers for Writing 124 ©Shell Educational Publishing
Publishing Blank Graphic Organizer
Name ______________________________________________________
Check It OverDirections: Write your standards below. Then, read your draft. Check the “Yes” or “No” box for each standard, indicating whether or not it was included in your draft.
1.
2.
3.
4.
5.
Was the standard shown in my writing?Yes No
Standard
ELL SupportAllow ELL students to use highlighters when reading over their drafts. They can highlight where the standards were met on their papers to ensure that each standard was included. Then, they can transfer the information over to their graphic organizers, so as not to be overwhelmed going back and forth from their drafts to their graphic organizers at the same time.
Extension IdeaAllow students to trade papers with peers who can also use the same standards to analyze their classmates’ papers.
Event One: Kennedy began his parade route, going toward Dealey Plaza.
Event Two: Kennedy was shot.
Event Three: Spectators reported hearing gun shots coming from the grassy knoll.
Event Four: A gun was found in the Texas School Book Depository.
Event Five: Lee Harvey Oswald was later arrested for assassinating John F. Kennedy.
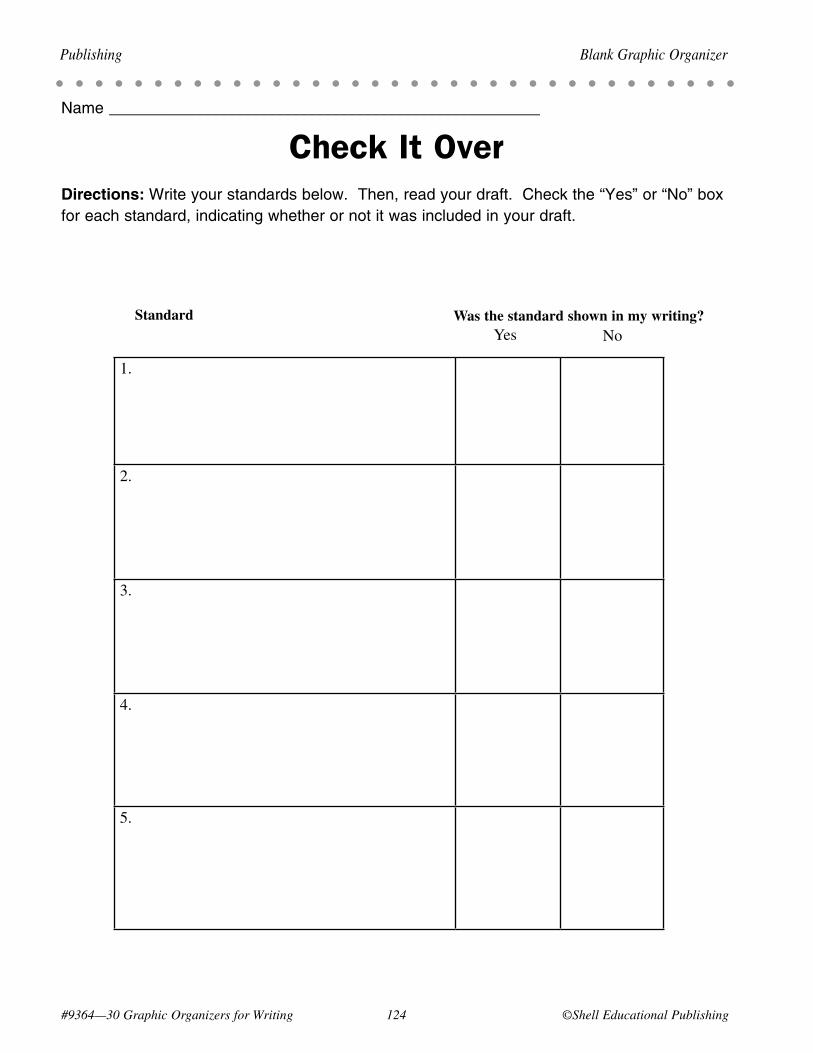
#9364—30 Graphic Organizers for Writing 1�4 ©Shell Educational Publishing
Publishing Blank Graphic Organizer
Name ______________________________________________________
Check It OverDirections: Writeyourstandardsbelow.Then,readyourdraft.Checkthe“Yes”or“No”boxforeachstandard,indicatingwhetherornotitwasincludedinyourdraft.
1.
2.
3.
4.
5.
Was the standard shown in my writing?Yes No
Standard
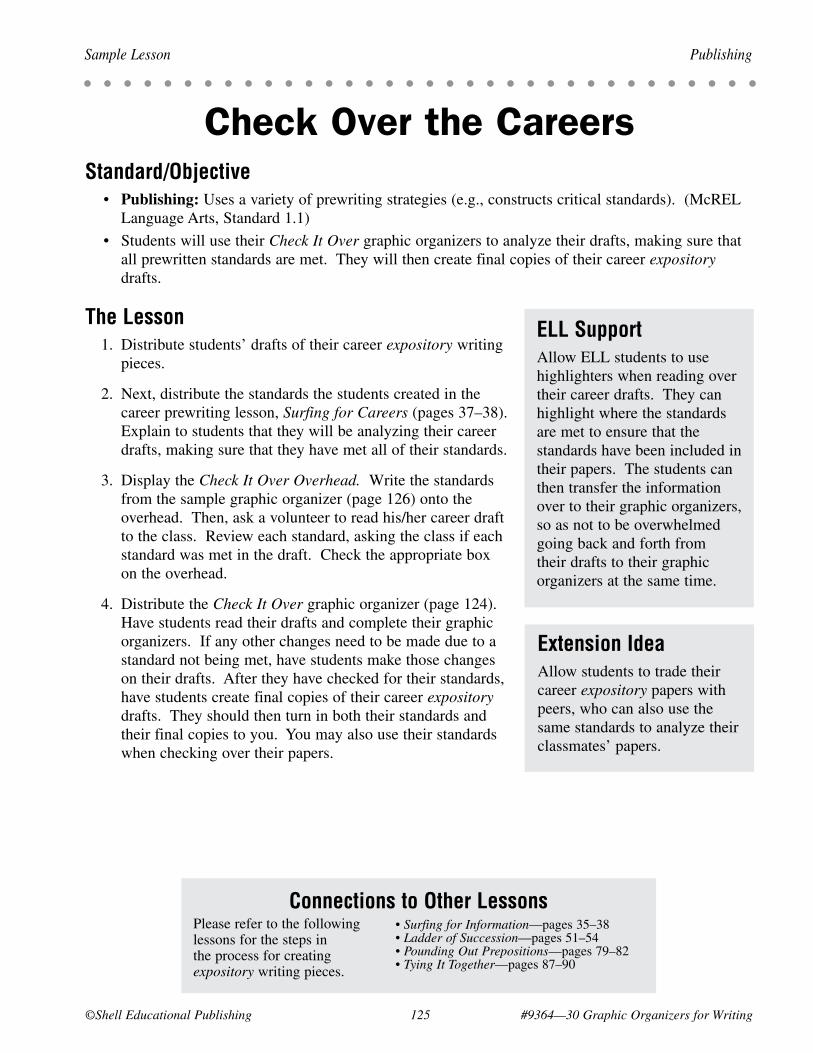
©Shell Educational Publishing 1�� #9364—30 Graphic Organizers for Writing
Sample Lesson Publishing
Check Over the CareersStandard/Objective • Publishing: Uses a variety of prewriting strategies (e.g., constructs critical standards). (McREL
Language Arts, Standard 1.1)
• Students will use their Check It Over graphic organizers to analyze their drafts, making sure that all prewritten standards are met. They will then create final copies of their career expository drafts.
The Lesson 1. Distribute students’ drafts of their career expository writing
pieces.
2. Next, distribute the standards the students created in the career prewriting lesson, Surfing for Careers (pages 37–38). Explain to students that they will be analyzing their career drafts, making sure that they have met all of their standards.
3. Display the Check It Over Overhead. Write the standards from the sample graphic organizer (page 126) onto the overhead. Then, ask a volunteer to read his/her career draft to the class. Review each standard, asking the class if each standard was met in the draft. Check the appropriate box on the overhead.
4. Distribute the Check It Over graphic organizer (page 124). Have students read their drafts and complete their graphic organizers. If any other changes need to be made due to a standard not being met, have students make those changes on their drafts. After they have checked for their standards, have students create final copies of their career expository drafts. They should then turn in both their standards and their final copies to you. You may also use their standards when checking over their papers.
ELL SupportAllow ELL students to use highlighters when reading over their career drafts. They can highlight where the standards are met to ensure that the standards have been included in their papers. The students can then transfer the information over to their graphic organizers, so as not to be overwhelmed going back and forth from their drafts to their graphic organizers at the same time.
Extension IdeaAllow students to trade their career expository papers with peers, who can also use the same standards to analyze their classmates’ papers.
Connections to Other Lessons• Surfing for Information—pages 35–38 • Ladder of Succession—pages 51–54 • Pounding Out Prepositions—pages 79–82 • Tying It Together—pages 87–90
Please refer to the following lessons for the steps in the process for creating expository writing pieces.
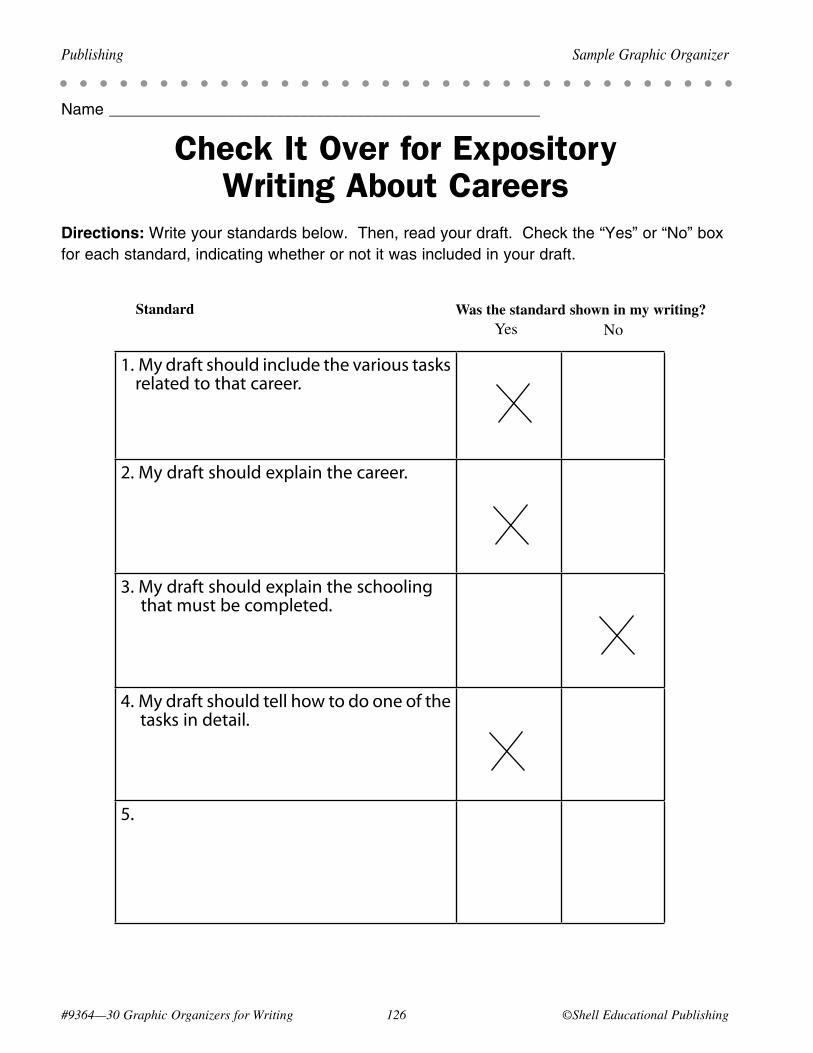
#9364—30 Graphic Organizers for Writing 1�6 ©Shell Educational Publishing
Publishing Sample Graphic Organizer
Name ______________________________________________________
Check It Over for Expository Writing About Careers
Directions: Writeyourstandardsbelow.Then,readyourdraft.Checkthe“Yes”or“No”boxforeachstandard,indicatingwhetherornotitwasincludedinyourdraft.
1. My draft should include the various tasks related to that career.
2. My draft should explain the career.
3. My draft should explain the schooling that must be completed.
4. My draft should tell how to do one of the tasks in detail.
5.
Was the standard shown in my writing?Yes No
Standard
©Shell Educational Publishing 1�� #9364—30 Graphic Organizers for Writing
Why Use the Graphic Organizer • The Presentation Time graphic organizer allows students to
brainstorm creative ideas for presenting their writing to the class.
How to Use the Graphic Organizer 1. Ask each student to choose a writing piece that has been edited
and revised. Have students write final copies of their writing pieces.
2. Display the Presentation Time Overhead. Explain to students that they will be presenting their writing to the class. But instead of just reading their writing to the class, they will be presenting it in fun and creative ways. Write two or three ideas of how the students might present their writing on the overhead.
3. Distribute the Presentation Time graphic organizer (page 128) to the students. Have them work with partners to brainstorm other ideas for presenting their writing. Ask them to choose their favorite ideas from their graphic organizers. Allow them time to prepare their presentations.
4. Have students share their writing presentations with the class.
Publishing Lesson
Presentation Time Graphic
Organizer
Skills ConnectionType of Writing— autobiographies
Publishing—creates presentation format
Bloom’s Level— Synthesis (See page 8 for a description.)
#9364—30 Graphic Organizers for Writing 128 ©Shell Educational Publishing
Publishing Blank Graphic Organizer
Name ______________________________________________________
Presentation TimeDirections: Brainstorm various creative ways that you could present your writing to the class. List your ideas on the clocks below.
ELL SupportGive ELL students video cameras or tape recorders that they could use to prerecord their presentations. This will give them the opportunity to practice their presentations. They may also prefer this method so that they won’t have to read their writing presentations in front of the class.
Extension IdeaAllow students to find presentation ideas on the Internet that might be used for their writing presentations.
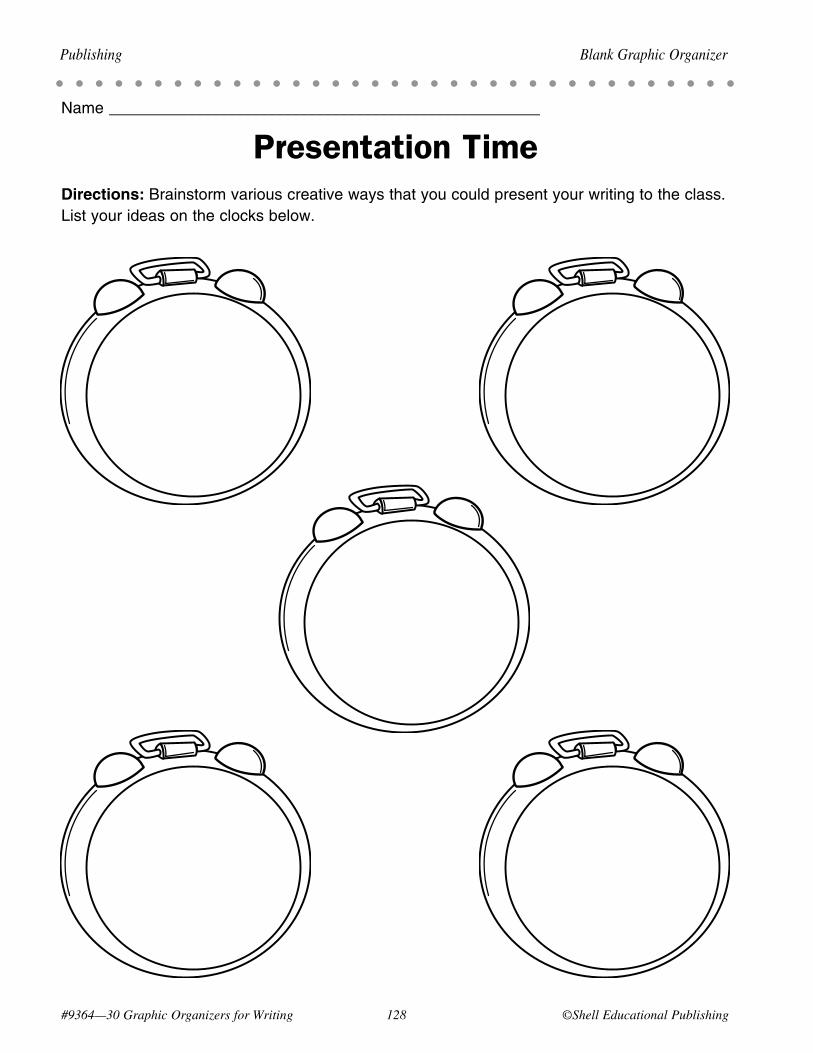
#9364—30 Graphic Organizers for Writing 1�� ©Shell Educational Publishing
Publishing Blank Graphic Organizer
Name ______________________________________________________
Presentation TimeDirections: Brainstormvariouscreativewaysthatyoucouldpresentyourwritingtotheclass.Listyourideasontheclocksbelow.
©Shell Educational Publishing 1�9 #9364—30 Graphic Organizers for Writing
Sample Lesson Publishing
Early Presentation TimesStandard/Objective • Publishing: Uses strategies to edit and publish written work (e.g., selects presentation format
according to purpose). (McREL Language Arts, Standard 1.3, Level II)
• Students will use their Presentation Time graphic organizers to brainstorm creative ideas for presenting their “early years” autobiographies to the class. They will then plan their original presentations.
The Lesson 1. Distribute students’ drafts of their “early years” autobiographies.
Have students write their final copies.
2. Display the Presentation Time Overhead. Explain to students that they will be presenting their “early years” autobiographies to the class. But instead of just reading them to the class, they will be presenting them in fun and creative ways. Write two or three ideas of how the students might present their autobiographies on the overhead. Then, have students think of some other ways that they might present their autobiographies. Write these ideas on the overhead as well. You may refer to the sample graphic organizer (page 130) for other examples.
3. Distribute the Presentation Time graphic organizer (page 128) to the students. Have them work in small groups, brainstorming ideas for their autobiography presentations. But tell them that each person in the group must contribute at least one creative idea. They should record their groups’ ideas onto their own graphic organizers.
4. Have the students then choose their favorite ideas from their graphic organizers. Give them time to prepare their presentations.
5. Have the students share their autobiography presentations with the class.
ELL SupportGive ELL students video cameras or tape recorders that they could use to prerecord their “early years” presentations. This will give them an opportunity to practice their presentations. They may also prefer this method so that they won’t have to read their autobiography presentations in front of the class.
Extension IdeaAllow students to find presentation ideas on the Internet that might be used for their “early years” autobiography presentations.
Connections to Other Lessons• Shining Stars—pages 23–26 • Tuning In—pages 39–42 • Parade of Pronouns—pages 75–78 • Me, Myself, and I—pages 95–98
Please refer to the following lessons for the steps in the process for creating autobiography writing pieces.
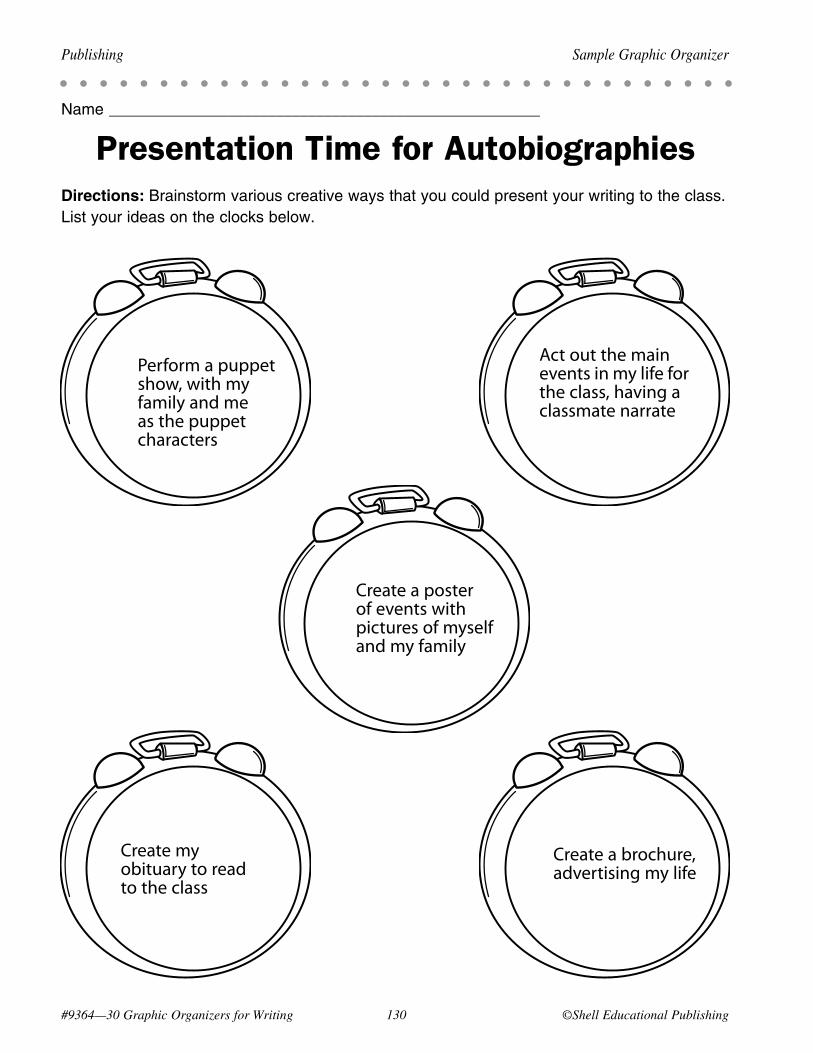
#9364—30 Graphic Organizers for Writing 130 ©Shell Educational Publishing
Publishing Sample Graphic Organizer
Name ______________________________________________________
Presentation Time for AutobiographiesDirections: Brainstormvariouscreativewaysthatyoucouldpresentyourwritingtotheclass.Listyourideasontheclocksbelow.
Perform a puppet show, with my family and me as the puppet characters
Act out the main events in my life for the class, having a classmate narrate
Create a poster of events with pictures of myself and my family
Create my obituary to read to the class
Create a brochure, advertising my life
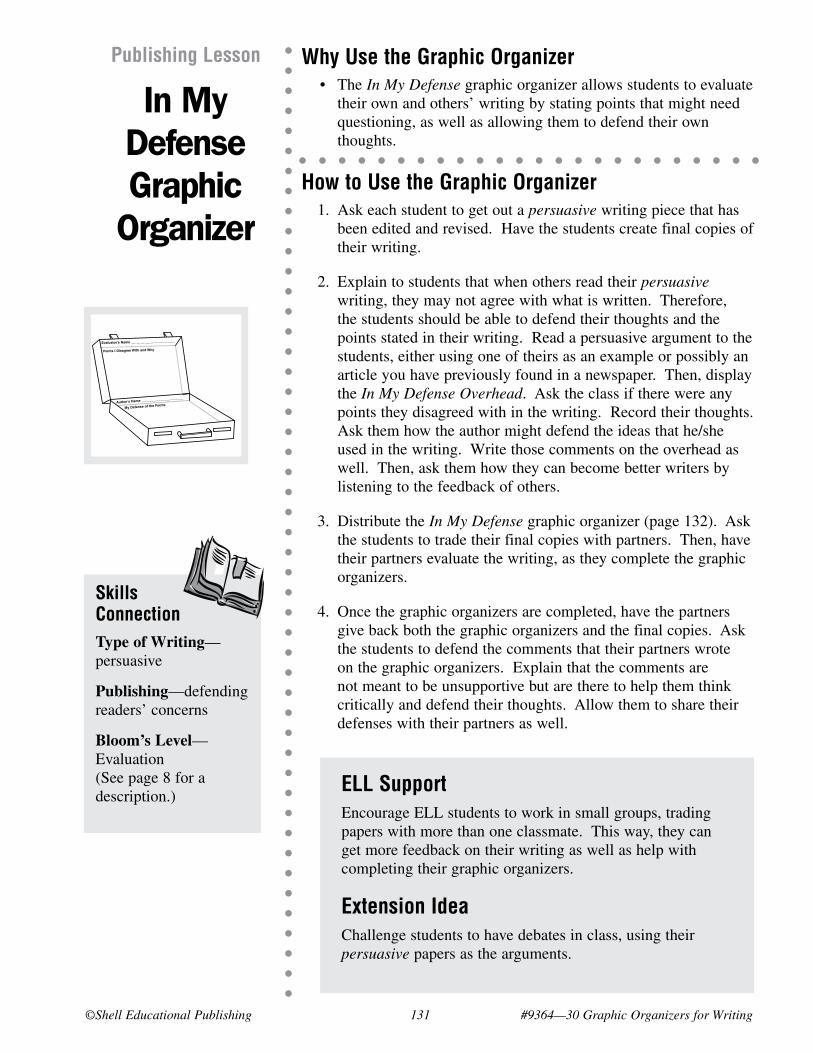
©Shell Educational Publishing 131 #9364—30 Graphic Organizers for Writing
Why Use the Graphic Organizer • The In My Defense graphic organizer allows students to evaluate
their own and others’ writing by stating points that might need questioning, as well as allowing them to defend their own thoughts.
How to Use the Graphic Organizer 1. Ask each student to get out a persuasive writing piece that has
been edited and revised. Have the students create final copies of their writing.
2. Explain to students that when others read their persuasive writing, they may not agree with what is written. Therefore, the students should be able to defend their thoughts and the points stated in their writing. Read a persuasive argument to the students, either using one of theirs as an example or possibly an article you have previously found in a newspaper. Then, display the In My Defense Overhead. Ask the class if there were any points they disagreed with in the writing. Record their thoughts. Ask them how the author might defend the ideas that he/she used in the writing. Write those comments on the overhead as well. Then, ask them how they can become better writers by listening to the feedback of others.
3. Distribute the In My Defense graphic organizer (page 132). Ask the students to trade their final copies with partners. Then, have their partners evaluate the writing, as they complete the graphic organizers.
4. Once the graphic organizers are completed, have the partners give back both the graphic organizers and the final copies. Ask the students to defend the comments that their partners wrote on the graphic organizers. Explain that the comments are not meant to be unsupportive but are there to help them think critically and defend their thoughts. Allow them to share their defenses with their partners as well.
Publishing Lesson
In My Defense Graphic
Organizer
Skills ConnectionType of Writing— persuasive
Publishing—defending readers’ concerns
Bloom’s Level— Evaluation (See page 8 for a description.)
#9364—30 Graphic Organizers for Writing 132 ©Shell Educational Publishing
Publishing Blank Graphic Organizer
Name _______________________________________________
In My DefenseDirections: After reading your classmate’s persuasive writing piece, record any arguments that you disagree with or find confusing. Write an explanation for your comments as well. Then, share your thoughts with your partner. Allow him/her to defend his/her ideas in the space provided.
Points I Disagree With and Why
Evaluator’s Name _______________________
My Defense of the PointsAuthor’s Name ______________________
ELL SupportEncourage ELL students to work in small groups, trading papers with more than one classmate. This way, they can get more feedback on their writing as well as help with completing their graphic organizers.
Extension IdeaChallenge students to have debates in class, using their persuasive papers as the arguments.
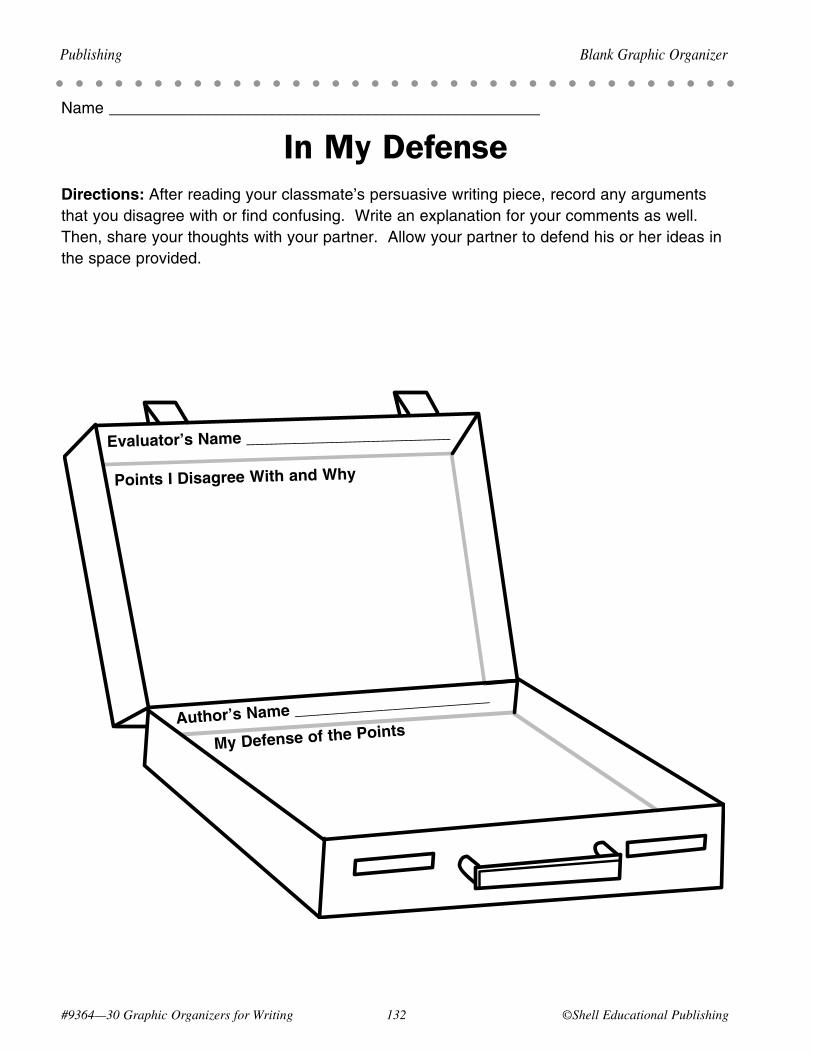
#9364—30 Graphic Organizers for Writing 13� ©Shell Educational Publishing
Publishing Blank Graphic Organizer
Name ______________________________________________________
In My DefenseDirections: Afterreadingyourclassmate’spersuasivewritingpiece,recordanyargumentsthatyoudisagreewithorfindconfusing.Writeanexplanationforyourcommentsaswell.Then,shareyourthoughtswithyourpartner.Allowyourpartnertodefendhisorherideasinthespaceprovided.
Points I Disagree With and Why
Evaluator’s Name _______________________
My Defense of the PointsAuthor’s Name ______________________
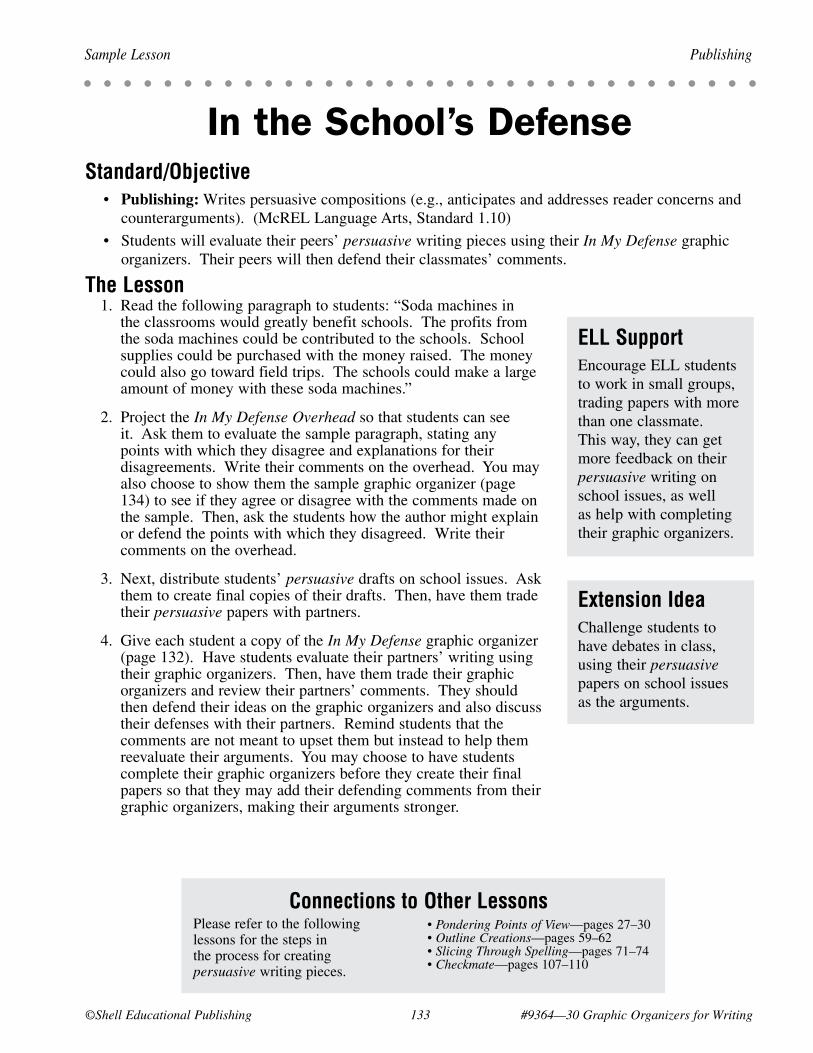
©Shell Educational Publishing 133 #9364—30 Graphic Organizers for Writing
Sample Lesson Publishing
In the School’s DefenseStandard/Objective • Publishing: Writes persuasive compositions (e.g., anticipates and addresses reader concerns and
counterarguments). (McREL Language Arts, Standard 1.10)
• Students will evaluate their peers’ persuasive writing pieces using their In My Defense graphic organizers. Their peers will then defend their classmates’ comments.
The Lesson
ELL SupportEncourage ELL students to work in small groups, trading papers with more than one classmate. This way, they can get more feedback on their persuasive writing on school issues, as well as help with completing their graphic organizers.
Extension IdeaChallenge students to have debates in class, using their persuasive papers on school issues as the arguments.
Connections to Other Lessons• Pondering Points of View—pages 27–30 • Outline Creations—pages 59–62 • Slicing Through Spelling—pages 71–74 • Checkmate—pages 107–110
Please refer to the following lessons for the steps in the process for creating persuasive writing pieces.
1. Read the following paragraph to students: “Soda machines in the classrooms would greatly benefit schools. The profits from the soda machines could be contributed to the schools. School supplies could be purchased with the money raised. The money could also go toward field trips. The schools could make a large amount of money with these soda machines.”
2. Project the In My Defense Overhead so that students can see it. Ask them to evaluate the sample paragraph, stating any points with which they disagree and explanations for their disagreements. Write their comments on the overhead. You may also choose to show them the sample graphic organizer (page 134) to see if they agree or disagree with the comments made on the sample. Then, ask the students how the author might explain or defend the points with which they disagreed. Write their comments on the overhead.
3. Next, distribute students’ persuasive drafts on school issues. Ask them to create final copies of their drafts. Then, have them trade their persuasive papers with partners.
4. Give each student a copy of the In My Defense graphic organizer (page 132). Have students evaluate their partners’ writing using their graphic organizers. Then, have them trade their graphic organizers and review their partners’ comments. They should then defend their ideas on the graphic organizers and also discuss their defenses with their partners. Remind students that the comments are not meant to upset them but instead to help them reevaluate their arguments. You may choose to have students complete their graphic organizers before they create their final papers so that they may add their defending comments from their graphic organizers, making their arguments stronger.
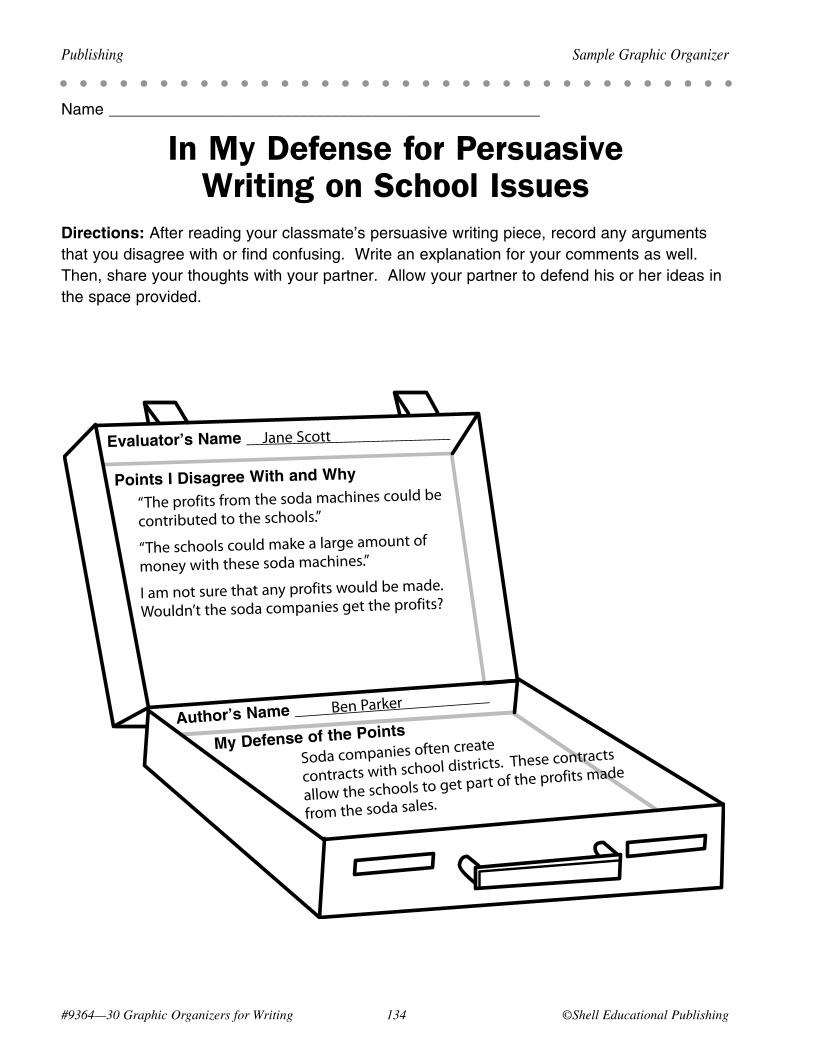
Points I Disagree With and Why
Evaluator’s Name _______________________
My Defense of the PointsAuthor’s Name ______________________
#9364—30 Graphic Organizers for Writing 134 ©Shell Educational Publishing
Publishing Sample Graphic Organizer
Name ______________________________________________________
In My Defense for Persuasive Writing on School Issues
Directions:Afterreadingyourclassmate’spersuasivewritingpiece,recordanyargumentsthatyoudisagreewithorfindconfusing.Writeanexplanationforyourcommentsaswell.Then,shareyourthoughtswithyourpartner.Allowyourpartnertodefendhisorherideasinthespaceprovided.
Jane Scott
“The profits from the soda machines could be
contributed to the schools.”
“The schools could make a large amount of
money with these soda machines.”
I am not sure that any profits would be made.
Wouldn’t the soda companies get the profits?
Soda companies often create
contracts with school districts. These contracts
allow the schools to get part of the profits made
from the soda sales.
Ben Parker
©Shell Educational Publishing 13� #9364—30 Graphic Organizers for Writing
Appendix
Works CitedBos, C. N., and P. L. Anders. 1992. Using interactive teaching and learning strategies to promote text
comprehension and content learning for students with learning disabilities. International Journal of Disability, Development and Education 39:225–238.
Boyle, J. R., and M. Weishaar. 1997. The effects of expert-generated versus student-generated cognitive organizers on the reading comprehension of students with learning disabilities. Learning Disabilities Research & Practice 12:228–235.
Brookbank, D., S. Grover, K. Kullberg, and C. Strawser. 1999. Improving student achievement through organization of student learning. Chicago: Master’s Action Research Project, Saint Xavier University and IRI/Skylight.
DeWispelaere, C., and J. Kossack. 1996. Improving student higher order thinking skills through the use of graphic organizers. Elk Grove Village, IL: Master’s Thesis, Saint Xavier University.
Doyle, C. S. 1999. The use of graphic organizers to improve comprehension of learning disabled students in social studies. Union, NJ: Master of Arts Research Project, Kean University.
Gallego, M. A., G. Z. Duran, and D. J. Scanlon. 1990. Interactive teaching and learning: Facilitating learning disabled students’ progress from novice to expert. In Literacy theory and research: Analyses from multiple paradigms: Thirty-ninth yearbook of the National Reading Conference, J. Zutell and S. McCormick, eds., (pp. 311–319). Chicago: National Reading Conference.
Gallick-Jackson, S. A. 1997. Improving narrative writing skills, composition skills, and related attitudes among second grade students by integrating word processing, graphic organizers, and art into a process approach to writing. Fort Lauderdale, FL: Master of Science Practicum Project, Nova Southeastern University.
Gardill, M. C., and A. K. Jitendra. 1999. Advanced story map instruction: Effects on the reading comprehension of students with learning disabilities. The Journal of Special Education 33:2–17.
Griffin, C., L. Malone, and E. Kameenui. 1995. Effects of graphic organizer instruction on fifth-grade students. Journal of Educational Research 89:98–107.
Griffin, C., D. C. Simmons, and E. J. Kameenui. 1991. Investigating the effectiveness of graphic organizer instruction on the comprehension and recall of science content by students with learning disabilities. Journal of Reading, Writing, and Learning Disabilities International 7:355–376.
Jensen, E. 1998. Teaching with the brain in mind. Alexandria, VA: Association for Supervision and Curriculum Development.
Moore, D., and J. Readence. 1984. A quantitative and qualitative review of graphic organizer research. Journal of Educational Research 78:11–17.
National Reading Panel. 2000. Teaching children to read: An evidence-based assessment of the scientific research literature on reading and its implications for reading instruction. National Institute of Child Health and Human Development. http://www.nichd.nih.gov/publications/nrp/smallbook.htm
Olsen, K. D. 1995. Science continuum of concepts for grades K–6. Covington, WA: Books for Educators. http://www.nichd.nih.gov/publications/nrp/smallbook.htm (accessed April 4, 2005).
Ritchie, D., and C. Volkl. 2000. Effectiveness of two generative learning strategies in the science classroom. School Science and Mathematics 100:83–89.
Sinatra, R. C., J. Stahl-Glemake, and D. N. Berg. 1984. Improving reading comprehension of disabled readers through semantic mapping. Reading Teacher 38:22–29.
Sprenger, M. 1999. Learning and memory: The brain in action. Alexandria, VA: Association for Supervision and Development.
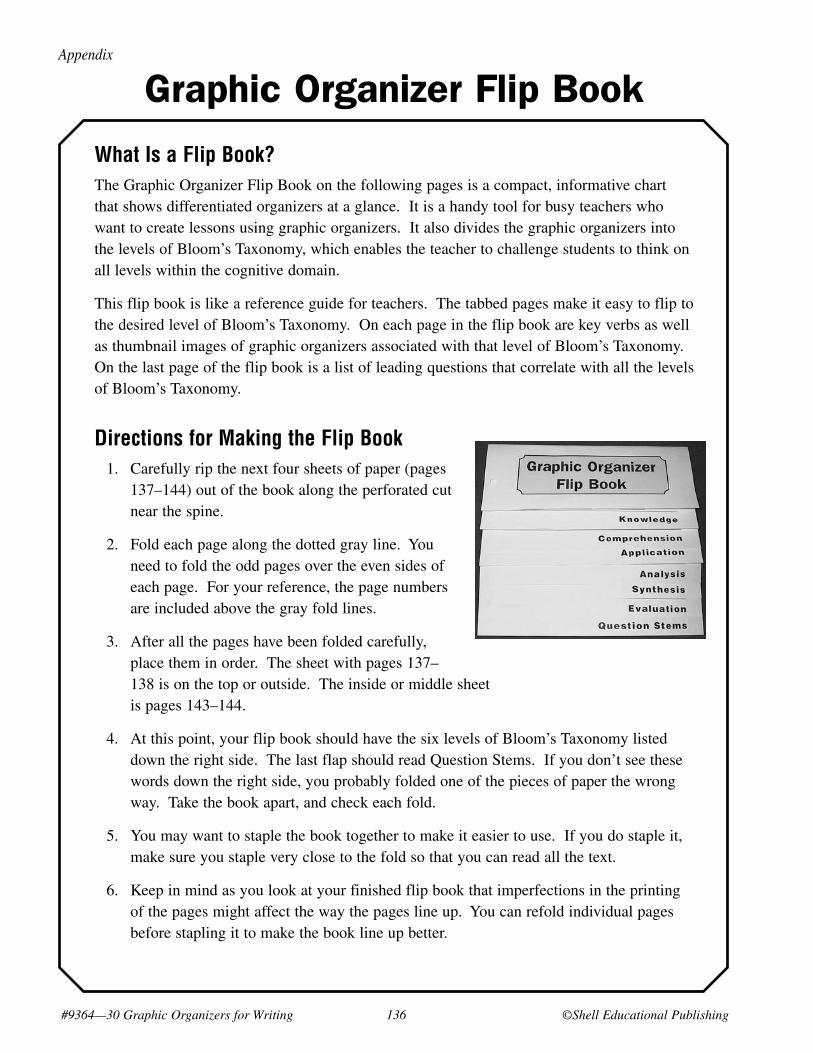
#9364—30 Graphic Organizers for Writing 136 ©Shell Educational Publishing
Appendix
Graphic Organizer Flip Book
What Is a Flip Book?The Graphic Organizer Flip Book on the following pages is a compact, informative chart that shows differentiated organizers at a glance. It is a handy tool for busy teachers who want to create lessons using graphic organizers. It also divides the graphic organizers into the levels of Bloom’s Taxonomy, which enables the teacher to challenge students to think on all levels within the cognitive domain.
This flip book is like a reference guide for teachers. The tabbed pages make it easy to flip to the desired level of Bloom’s Taxonomy. On each page in the flip book are key verbs as well as thumbnail images of graphic organizers associated with that level of Bloom’s Taxonomy. On the last page of the flip book is a list of leading questions that correlate with all the levels of Bloom’s Taxonomy.
Directions for Making the Flip Book 1. Carefully rip the next four sheets of paper (pages
137–144) out of the book along the perforated cut near the spine.
2. Fold each page along the dotted gray line. You need to fold the odd pages over the even sides of each page. For your reference, the page numbers are included above the gray fold lines.
3. After all the pages have been folded carefully, place them in order. The sheet with pages 137–138 is on the top or outside. The inside or middle sheet is pages 143–144.
4. At this point, your flip book should have the six levels of Bloom’s Taxonomy listed down the right side. The last flap should read Question Stems. If you don’t see these words down the right side, you probably folded one of the pieces of paper the wrong way. Take the book apart, and check each fold.
5. You may want to staple the book together to make it easier to use. If you do staple it, make sure you staple very close to the fold so that you can read all the text.
6. Keep in mind as you look at your finished flip book that imperfections in the printing of the pages might affect the way the pages line up. You can refold individual pages before stapling it to make the book line up better.
Graphic Organizer Flip Book
outside fold
page 137

This cognitive skill requires that students do the following:
• Recall or locate information • Remember something previously learned • Memorize information
When asking questions that require knowledge, use the following verbs:
arrange define describe duplicate identify label list
locate match memorize name order recall recite
recognize relate remember repeat reproduce state tell
Question Stems
inside fold
page 138
AnalysisQuestion stems for analysis activities include the following:
• In what ways is ____ related to . . . ? • What was the problem with . . . ?
• How was this similar to . . . ? • How does ____ work?
• What is the theme of . . . ? • What are the parts of . . . ?
• How would you classify . . . ? • Why do you think . . . ?
SynthesisQuestion stems for synthesis activities include the following:
• Can you write a poem/song about . . . ? • Can you invent a way to . . . ?
• What would happen if . . . ? • How would you test . . . ?
• In what ways could you improve . . . ? • What new uses are there for . . . ?
• How many ways can you . . . ? • How would you change . . . ?
EvaluationQuestion stems for evaluation activities include include the following:
• Do you agree or disagree with . . . ? • Why did that person . . . ?
• Judge how well this . . . ? • Can you justify . . . ?
• How effective was . . . ? • In what ways can you support . . . ?
• What would you recommend for . . . ? • Which would you select and why?
Knowledge Skills
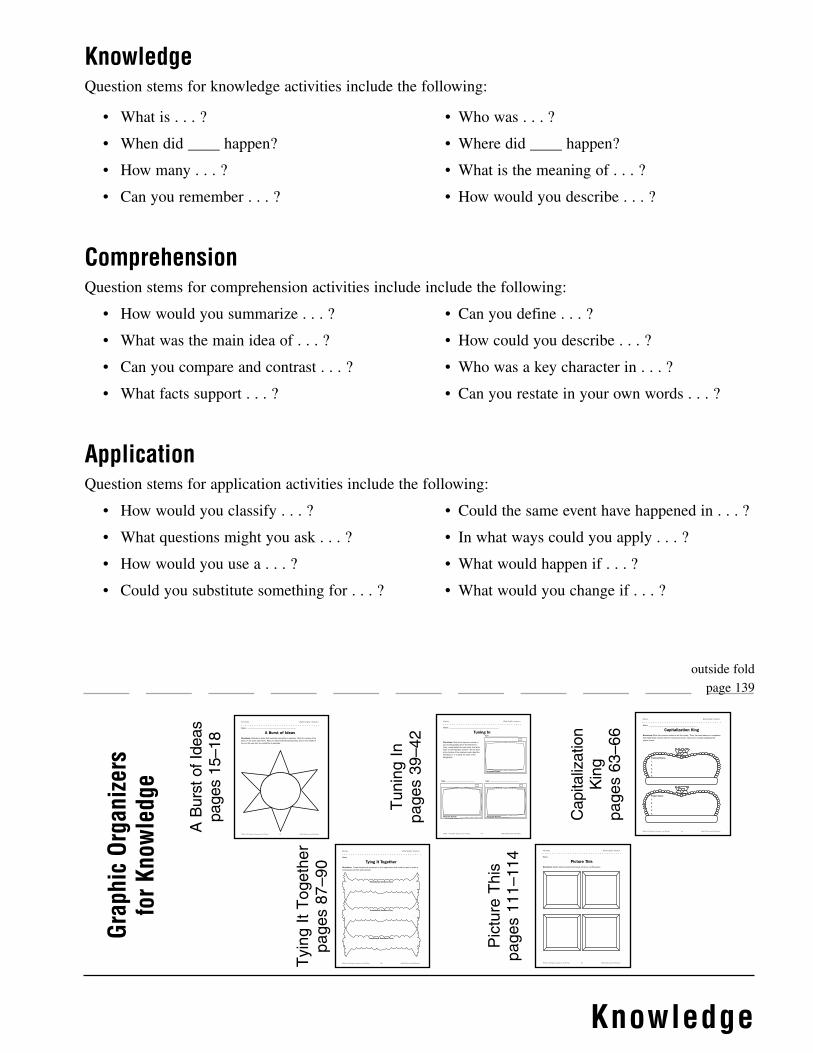
Knowledge
Topic _________________________________
Paragraph Number _________
Topic _________________________________
Paragraph Number _________
Topic _________________________________
Paragraph Number _________
Directions: Write three topics to include in your autobiography above the televisions. Then, create details for each topic, and write them on the television screens. On the lines at the bottom of the television sets, label the televisions 1–3 to show the order of the paragraphs.
#9364—30 Graphic Organizers for Writing 40 ©Shell Educational Publishing
Drafting Blank Graphic Organizer
Name ______________________________________________________
Tuning In
#9364—30 Graphic Organizers for Writing 16 ©Shell Educational Publishing
Prewriting Blank Graphic Organizer
Name _______________________________________________
A Burst of IdeasDirections: Brainstorm items that would be interesting to describe. Write the names of the items on the sun’s rays below. After you have finished brainstorming, write in the middle of the sun the one item you would like to describe.
#9364—30 Graphic Organizers for Writing 64 ©Shell Educational Publishing
Editing Blank Graphic Organizer
Name _______________________________________________
Capitalization KingDirections: Write five common nouns in the first crown. Then, list brand names or companies that make those common items in the second crown. Be sure to correctly capitalize the proper nouns.
Common Nouns
1.
2.
3.
4.
5.
Proper Nouns
1.
2.
3.
4.
5.
#9364—30 Graphic Organizers for Writing 88 ©Shell Educational Publishing
Revising Blank Graphic Organizer
Name ______________________________________________________
Tying It TogetherDirections: Create transitional sentences on the ropes below that could be used to make a writing piece smooth and coherent.
Transitional Sentence One
Transitional Sentence Two
Transitional Sentence Three
#9364—30 Graphic Organizers for Writing 112 ©Shell Educational Publishing
Publishing Blank Graphic Organizer
Name ______________________________________________________
Picture ThisDirections: Sketch pictures below that would enhance a writing piece.
Grap
hic
Orga
nize
rs
for K
now
ledg
e
ABurstofIdeas
pages15–18
TyingItTogether
pages87–9
0
TuningIn
pages39–42
PictureThis
pages111–114
Capitalization
King
pages63–66
outside fold
page 139
KnowledgeQuestion stems for knowledge activities include the following:
• What is . . . ? • Who was . . . ?
• When did ____ happen? • Where did ____ happen?
• How many . . . ? • What is the meaning of . . . ?
• Can you remember . . . ? • How would you describe . . . ?
ComprehensionQuestion stems for comprehension activities include include the following:
• How would you summarize . . . ? • Can you define . . . ?
• What was the main idea of . . . ? • How could you describe . . . ?
• Can you compare and contrast . . . ? • Who was a key character in . . . ?
• What facts support . . . ? • Can you restate in your own words . . . ?
ApplicationQuestion stems for application activities include the following:
• How would you classify . . . ? • Could the same event have happened in . . . ?
• What questions might you ask . . . ? • In what ways could you apply . . . ?
• How would you use a . . . ? • What would happen if . . . ?
• Could you substitute something for . . . ? • What would you change if . . . ?
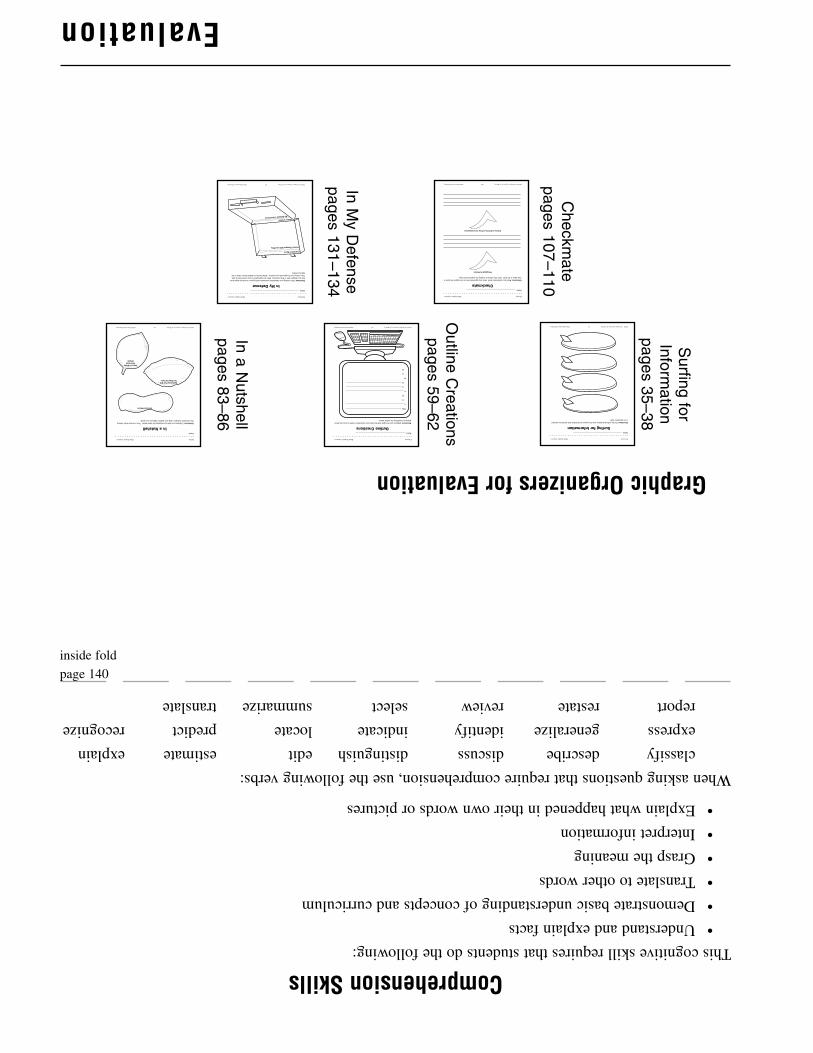
Comprehension SkillsThis cognitive skill requires that students do the following:
• Understand and explain facts
• Demonstrate basic understanding of concepts and curriculum
• Translate to other words
• Grasp the meaning
• Interpret information
• Explain what happened in their own words or pictures
When asking questions that require comprehension, use the following verbs:
classify describe discuss distinguish edit estimate explain
express generalize identify indicate locate predict recognize
report restate review select summarize translate
Evaluation
#9364—30 Graphic Organizers for Writing 60 ©Shell Educational Publishing
Drafting Blank Graphic Organizer
Name ______________________________________________________
Outline CreationsDirections: Organize your thoughts and the points you would like to make in your persuasive writing by completing the outline below.
Title: _________________________________________________________________
I._____________________________________________________________________
A. _________________________________________________________________
B. _________________________________________________________________
II. ____________________________________________________________________
A. _________________________________________________________________
B. _________________________________________________________________
III. ___________________________________________________________________
A. _________________________________________________________________
B. _________________________________________________________________
#9364—30 Graphic Organizers for Writing 36 ©Shell Educational Publishing
Prewriting Blank Graphic Organizer
Name _______________________________________________
Surfing for InformationDirections: On the surfboards below, write the pieces of information that should be included in an expository draft.
#9364—30 Graphic Organizers for Writing 84 ©Shell Educational Publishing
Editing Blank Graphic Organizer
Name _______________________________________________
In a NutshellDirections: Evaluate your draft by completing the items below. Then, edit your draft, making the necessary changes, using your graphic organizer as a guide.
Overused Words
Sentences That DidNot Stay On Topic
Items or Words That Need
Details
#9364—30 Graphic Organizers for Writing 108 ©Shell Educational Publishing
Revising Blank Graphic Organizer
Name _______________________________________________
CheckmateDirections: Read your classmate’s draft. Note any arguments that do not support the point of view taken in the draft. Also offer advice for making the arguments stronger.
Paragraph to Revise
Advice and Point-of-View Inconsistencies
#9364—30 Graphic Organizers for Writing 132 ©Shell Educational Publishing
Publishing Blank Graphic Organizer
Name _______________________________________________
In My DefenseDirections: After reading your classmate’s persuasive writing piece, record any arguments that you disagree with or find confusing. Write an explanation for your comments as well. Then, share your thoughts with your partner. Allow him/her to defend his/her ideas in the space provided.
Points I Disagree With and Why
Evaluator’s Name _______________________
My Defense of the PointsAuthor’s Name ______________________
Graphic Organizers for Evaluation
Surfingfor
Information
pages35–38
Checkm
atepages107–110
OutlineC
reations pages59–62
InMyD
efense pages131–134
InaNutshell
pages83–86
inside fold
page 140
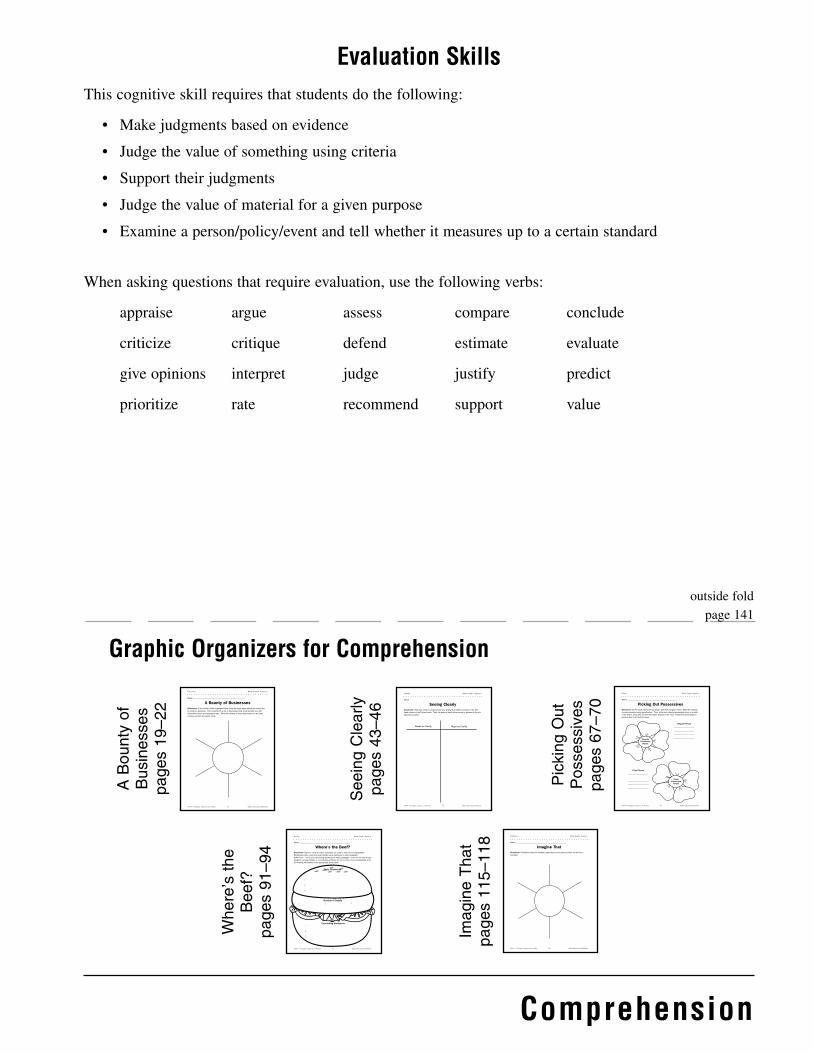
Comprehension
Evaluation SkillsThis cognitive skill requires that students do the following:
• Make judgments based on evidence
• Judge the value of something using criteria
• Support their judgments
• Judge the value of material for a given purpose
• Examine a person/policy/event and tell whether it measures up to a certain standard
When asking questions that require evaluation, use the following verbs:
appraise argue assess compare conclude
criticize critique defend estimate evaluate
give opinions interpret judge justify predict
prioritize rate recommend support value
#9364—30 Graphic Organizers for Writing 44 ©Shell Educational Publishing
Drafting Blank Graphic Organizer
Name ______________________________________________________
Seeing ClearlyDirections: Write any words or phrases from your writing that might be unclear in the left-hand column of the T-chart below. Then, list ways to clarify those words or phrases in the the right-hand column.
Words to Clarify Ways to Clarify
#9364—30 Graphic Organizers for Writing 20 ©Shell Educational Publishing
Prewriting Blank Graphic Organizer
Name ______________________________________________________
A Bounty of BusinessesDirections: In the center of the organizer below, write the topic about which you would like to contact a business. Then, brainstorm a list of businesses that could provide you with information about your assigned topic. Write the names of those businesses on the lines coming out from the center circle.
#9364—30 Graphic Organizers for Writing 68 ©Shell Educational Publishing
Editing Blank Graphic Organizer
Name ______________________________________________________
Picking Out PossessivesDirections: On the lines next to the top flower, write fiver singular nouns. Make the singular nouns possessive using apostrophes. Then, write each singular possessive noun on a petal of the flower, along with an item that might “belong” to the noun. Follow the same steps for plural nouns on the bottom flower.
Singular Possessive
Nouns
Plural Possessive
Nouns
Singular Nouns
____________________
____________________
____________________
____________________
____________________
Plural Nouns
____________________
____________________
____________________
____________________
____________________
#9364—30 Graphic Organizers for Writing 92 ©Shell Educational Publishing
Revising Blank Graphic Organizer
Name ______________________________________________________
Where’s the Beef?Directions: Top bun—write the topic sentences you used in each of your paragraphs. Hamburger patty—write how many details were mentioned in each paragraph. Bottom bun -—write your concluding sentences for each paragraph. If you do not have a topic sentence, enough details, or a concluding sentence for one or more of your paragraphs, write the missing information in the appropriate spots below.
Topic Sentences
Number of Details
Concluding Sentences
1.
2.
3.
1.
2.
3.
1. 2. 3.
#9364—30 Graphic Organizers for Writing 116 ©Shell Educational Publishing
Publishing Blank Graphic Organizer
Name ______________________________________________________
Imagine ThatDirections: Brainstorm ideas for possible responses to your partner’s letter on the lines provided.
Graphic Organizers for Comprehension
ABountyof
Businesses
pages19–22
Where’sthe
Beef?
pages91–94
SeeingClearly
pages43–4
6
ImagineThat
pages115–118
PickingOut
Possessives
pages67–70
outside fold
page 141

Application SkillsThis cognitive skill requires that students do the following:
• Use prior learning to solve a problem or to answer a question
• Transfer knowledge learned in one situation to another
• Use material in new and concrete situations
• Apply the lessons of the past to situations today
When asking questions that require application, use the following verbs:
apply build choose compute cook demonstrate
discover dramatize employ illustrate operate practice
prepare produce schedule sketch solve use
write
Synthesis
Graphic Organizers for Synthesis
#9364—30 Graphic Organizers for Writing 56 ©Shell Educational Publishing
Drafting Blank Graphic Organizer
Name _______________________________________________
To Whom It May ConcernDirections: Brainstorm possible ideas and information to include in each part of your business letter using the lines below. Then, use the information and format from your graphic organizer to create your business letter rough draft.
Return Address (Your or Your School’s Address):
________________________________________
________________________________________
________________________________________
________________________________________
Date ___________________________________
Recipient’s Name and Business Address
___________________________________________
___________________________________________
___________________________________________
___________________________________________
Possible Salutations or Greetings to Use ______________________________________
__________________________________________________________________________
Body
__________________________________________________________________________
__________________________________________________________________________
__________________________________________________________________________
__________________________________________________________________________
__________________________________________________________________________
__________________________________________________________________________
__________________________________________________________________________
__________________________________________________________________________
Possible Closings ________________________
Signature _______________________________
#9364—30 Graphic Organizers for Writing 32 ©Shell Educational Publishing
Prewriting Blank Graphic Organizer
Name _______________________________________________
Building KnowledgeDirections: Research a topic that interests you. In the blocks below, write the information you find.
Who
WhatWhen
WhereWhy
How
#9364—30 Graphic Organizers for Writing 80 ©Shell Educational Publishing
Editing Blank Graphic Organizer
Name _______________________________________________
Pounding Out PrepositionsDirections: Write prepositions in the heads of the hammers. Then, write the prepositional phrases on the handles.
Prep
ositio
n
Prepositional Phrase
Prep
ositio
n
Prepositional Phrase
Prep
ositio
n
Prepositional Phrase
Prep
ositio
n
Prepositional Phrase
Prep
ositio
n
Prepositional Phrase
#9364—30 Graphic Organizers for Writing 104 ©Shell Educational Publishing
Revising Blank Graphic Organizer
Name ______________________________________________________
The Perfect BalanceDirections: Read the informational writing piece. Then, record how many facts and how many original ideas were included in the writing on the balance below. On the lines at the bottom of the page, create other original ideas that could be used in the informational writing.
Number of FactsNumber of Original Ideas
Original Ideas to Add to Paper
#9364—30 Graphic Organizers for Writing 128 ©Shell Educational Publishing
Publishing Blank Graphic Organizer
Name ______________________________________________________
Presentation TimeDirections: Brainstorm various creative ways that you could present your writing to the class. List your ideas on the clocks below.
Building
Know
ledgepages31–34
TheP
erfectBalance
pages103–106
ToW
homItM
ayConcern
pages55–58
PresentationTime
pages127–130
PoundingO
utPrepositions
pages79–82inside fold
page 142
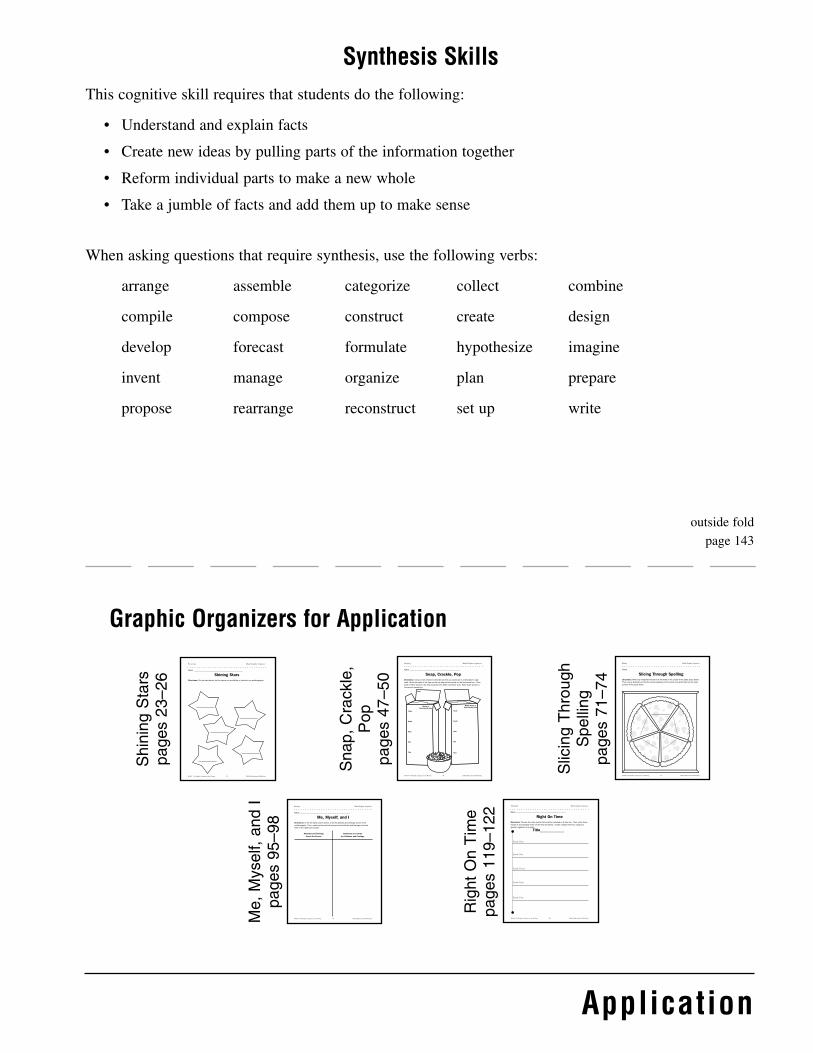
Synthesis SkillsThis cognitive skill requires that students do the following:
• Understand and explain facts
• Create new ideas by pulling parts of the information together
• Reform individual parts to make a new whole
• Take a jumble of facts and add them up to make sense
When asking questions that require synthesis, use the following verbs:
arrange assemble categorize collect combine
compile compose construct create design
develop forecast formulate hypothesize imagine
invent manage organize plan prepare
propose rearrange reconstruct set up write
Application
#9364—30 Graphic Organizers for Writing 48 ©Shell Educational Publishing
Drafting Blank Graphic Organizer
Name ______________________________________________________
Snap, Crackle, PopDirections: Use your five senses to describe an item you could use in a descriptive rough draft. Write the name of the item on the top flap and the words on the first cereal box. Then, think of other words to use that would be even better and more vivid. Write those words on the second cereal box.
Words to Describe My Item
Taste
Smell
Hear
See
Feel
Better Words to Describe My Item
Taste
Smell
Hear
See
Feel
Item:
#9364—30 Graphic Organizers for Writing 24 ©Shell Educational Publishing
Prewriting Blank Graphic Organizer
Name _______________________________________________
Shining StarsDirections: On the stars below, list five topics you would like to include in an autobiography.
#9364—30 Graphic Organizers for Writing 72 ©Shell Educational Publishing
Editing Blank Graphic Organizer
Name _______________________________________________
Slicing Through SpellingDirections: Write any misspelled words from the draft on the crusts of the pizza slices below. Then, use a dictionary to find the correct spellings of the words, and write them on the main portion of the pizza slices.
#9364—30 Graphic Organizers for Writing 96 ©Shell Educational Publishing
Revising Blank Graphic Organizer
Name ______________________________________________________
Me, Myself, and IDirections: In the left-hand column below, write the attitudes and feelings shown in the autobiography. Then, create sentences that convey those attitudes and feelings and write them in the right-hand column.
Attitudes and Feelings
About the Events
Sentences to Convey
the Attitudes and Feelings
#9364—30 Graphic Organizers for Writing 120 ©Shell Educational Publishing
Name ______________________________________________________
Right On TimeDirections: Choose five main events that could be included on a time line. Then, write those events in chronological order on the time line below. Create a larger time line, using your graphic organizer as a guide.
Publishing Blank Graphic Organizer
Title_____________
Event One:
Event Two:
Event Three: .
Event Four:
Event Five:
Graphic Organizers for Application
ShiningStars
pages23
–26
Me,M
yself,andI
pages95–98
Snap,Crackle,
Pop
pages47–50
RightOnTime
page
s119–122
SlicingThrough
Spelling
pages71–74
outside fold
page 143
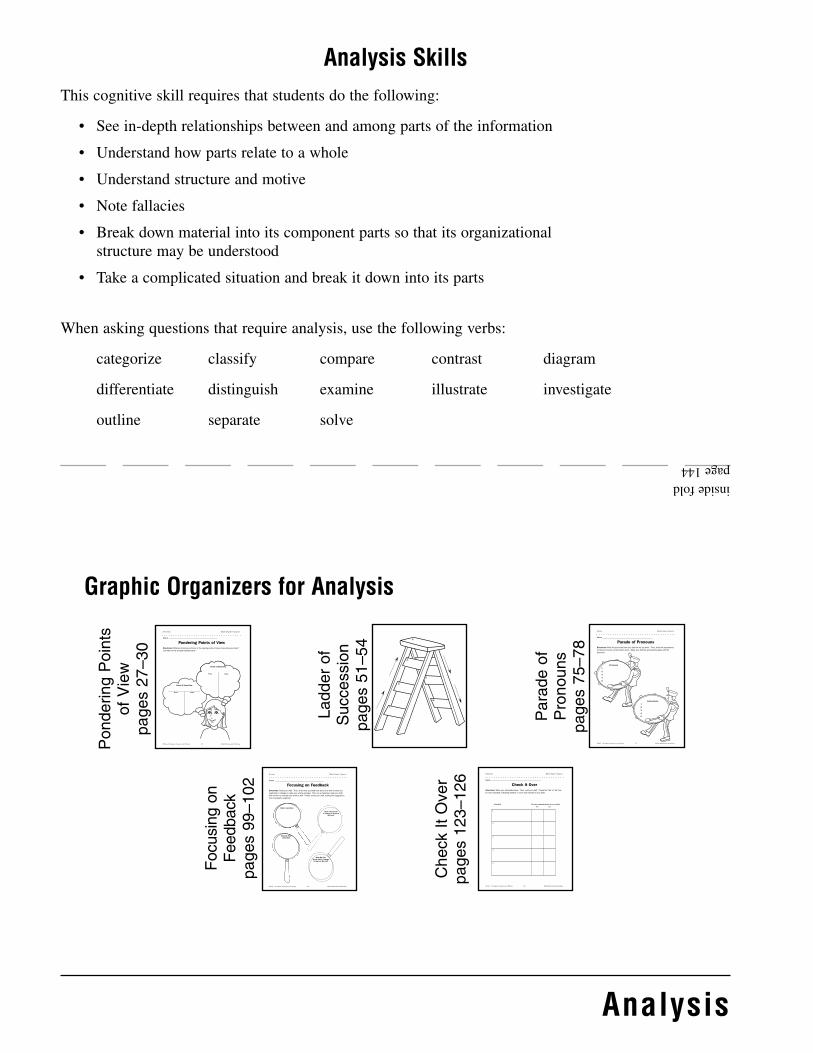
Analysis SkillsThis cognitive skill requires that students do the following:
• See in-depth relationships between and among parts of the information
• Understand how parts relate to a whole
• Understand structure and motive
• Note fallacies
• Break down material into its component parts so that its organizational structure may be understood
• Take a complicated situation and break it down into its parts
When asking questions that require analysis, use the following verbs:
categorize classify compare contrast diagram
differentiate distinguish examine illustrate investigate
outline separate solve
Analysis
1.
2.
3.
4.
5.
6.
#9364—30 Graphic Organizers for Writing 28 ©Shell Educational Publishing
Prewriting Blank Graphic Organizer
Name _______________________________________________
Pondering Points of ViewDirections: What are the pros and cons of the varying points of view concerning your topic? List them on the thought bubbles below.
Point of View One:
_______________________________ Pros Cons
Point of View Two:
_______________________________ Pros Cons
#9364—30 Graphic Organizers for Writing 76 ©Shell Educational Publishing
Editing Blank Graphic Organizer
Name ______________________________________________________
Parade of PronounsDirections: Write the pronouns from your draft on the top drum. Then, write the antecedents for those pronouns on the bottom drum. Make sure that the antecedents agree with the pronouns.
Pronouns
1.
2.
3.
4.
5.
Antecedents
1.
2.
3.
4.
5.
#9364—30 Graphic Organizers for Writing 100 ©Shell Educational Publishing
Revising Blank Graphic Organizer
Name _______________________________________________
Focusing on FeedbackDirections: Read your draft. Then, write what you liked best about it as well as what you might add or change to make your writing stronger. Then, let a classmate read your draft. Ask him/her to evaluate your draft as well. Finally, revise your draft, adding the suggestions from the graphic organizer.
What I Liked Best
What My Peer Liked Best
What I Would Add or Change to Improve
My Draft
What My Peer Would Add or Change to Improve My Draft
#9364—30 Graphic Organizers for Writing 124 ©Shell Educational Publishing
Publishing Blank Graphic Organizer
Name ______________________________________________________
Check It OverDirections: Write your standards below. Then, read your draft. Check the “Yes” or “No” box for each standard, indicating whether or not it was included in your draft.
1.
2.
3.
4.
5.
Was the standard shown in my writing?Yes No
Standard
Graphic Organizers for Analysis
Ponde
ringPoints
ofView
page
s27–30
Focusingon
Feedback
pages99–102
Ladderof
Succession
page
s51–54
CheckItOver
pages123–126
Paradeof
Pronouns
pages75–78
inside fold
page 144