Embed Size (px)
Citation preview
Creating Graphic Organizers in Word 1
Creating Graphic Organizers in Microsoft Word
Description The purpose of this document is to provide an overview of skills covered in Curriculum
Connections with Microsoft Word: Teaching Students to Organize Ideas Effectively. It
may be used as a reference for participants wishing to revisit the activities from training.
Creating and Formatting a Table
Getting started
1. Open Word and create a new blank document.
2. Give the file a name
a. Click the Office button: > Save As > Word Document
b. Select a file location, type a file name, and click Save.
Inserting a table
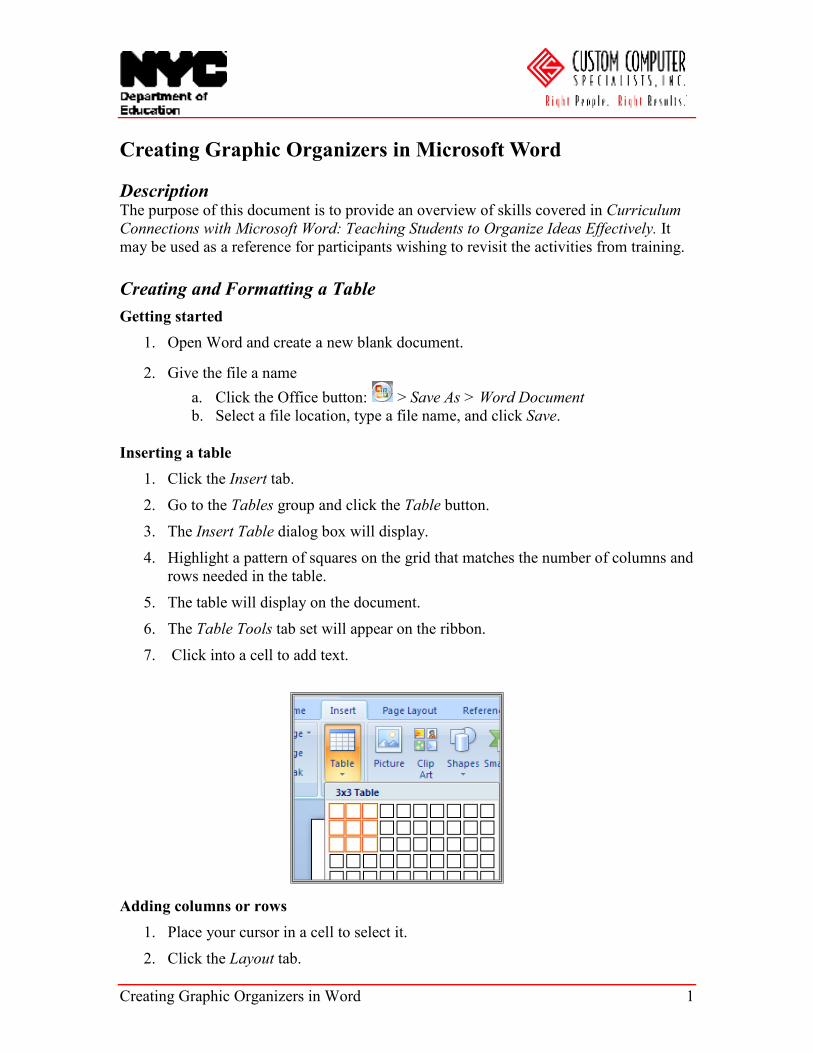
1. Click the Insert tab.
2. Go to the Tables group and click the Table button.
3. The Insert Table dialog box will display.
4. Highlight a pattern of squares on the grid that matches the number of columns and
rows needed in the table.
5. The table will display on the document.
6. The Table Tools tab set will appear on the ribbon.
7. Click into a cell to add text.
Adding columns or rows
1. Place your cursor in a cell to select it.
2. Click the Layout tab.
2 Creating Graphic Organizers in Word
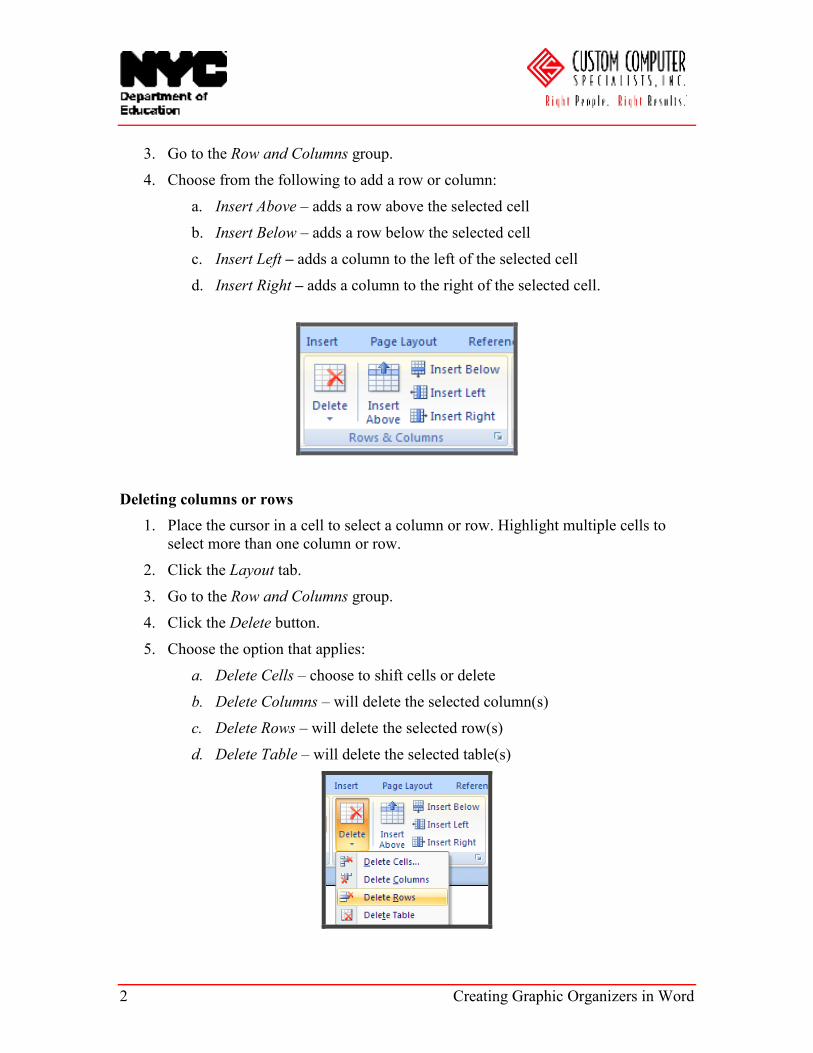
3. Go to the Row and Columns group.
4. Choose from the following to add a row or column:
a. Insert Above – adds a row above the selected cell
b. Insert Below – adds a row below the selected cell
c. Insert Left – adds a column to the left of the selected cell
d. Insert Right – adds a column to the right of the selected cell.
Deleting columns or rows
1. Place the cursor in a cell to select a column or row. Highlight multiple cells to
select more than one column or row.
2. Click the Layout tab.
3. Go to the Row and Columns group.
4. Click the Delete button.
5. Choose the option that applies:
a. Delete Cells – choose to shift cells or delete
b. Delete Columns – will delete the selected column(s)
c. Delete Rows – will delete the selected row(s)
d. Delete Table – will delete the selected table(s)
Creating Graphic Organizers in Word 3
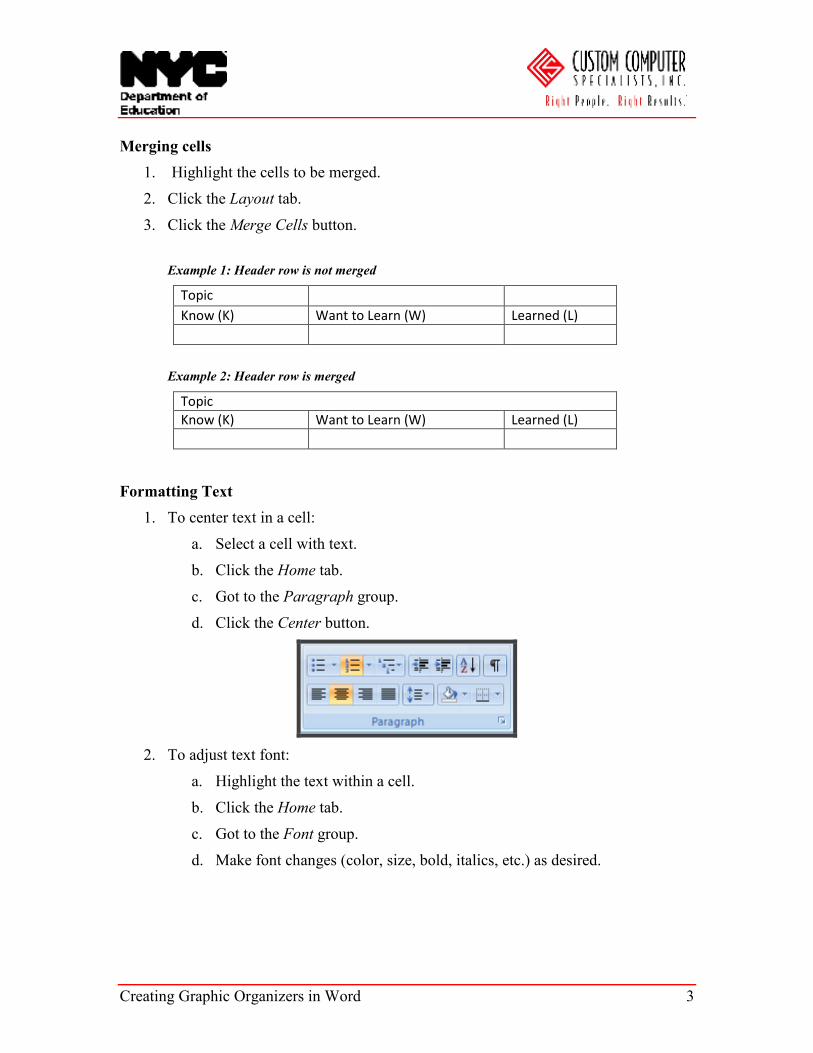
Merging cells
1. Highlight the cells to be merged.
2. Click the Layout tab.
3. Click the Merge Cells button.
Example 1: Header row is not merged
Topic
Know (K) Want to Learn (W) Learned (L)
Example 2: Header row is merged
Topic
Know (K) Want to Learn (W) Learned (L)
Formatting Text
1. To center text in a cell:
a. Select a cell with text.
b. Click the Home tab.
c. Got to the Paragraph group.
d. Click the Center button.
2. To adjust text font:
a. Highlight the text within a cell.
b. Click the Home tab.
c. Got to the Font group.
d. Make font changes (color, size, bold, italics, etc.) as desired.
4 Creating Graphic Organizers in Word
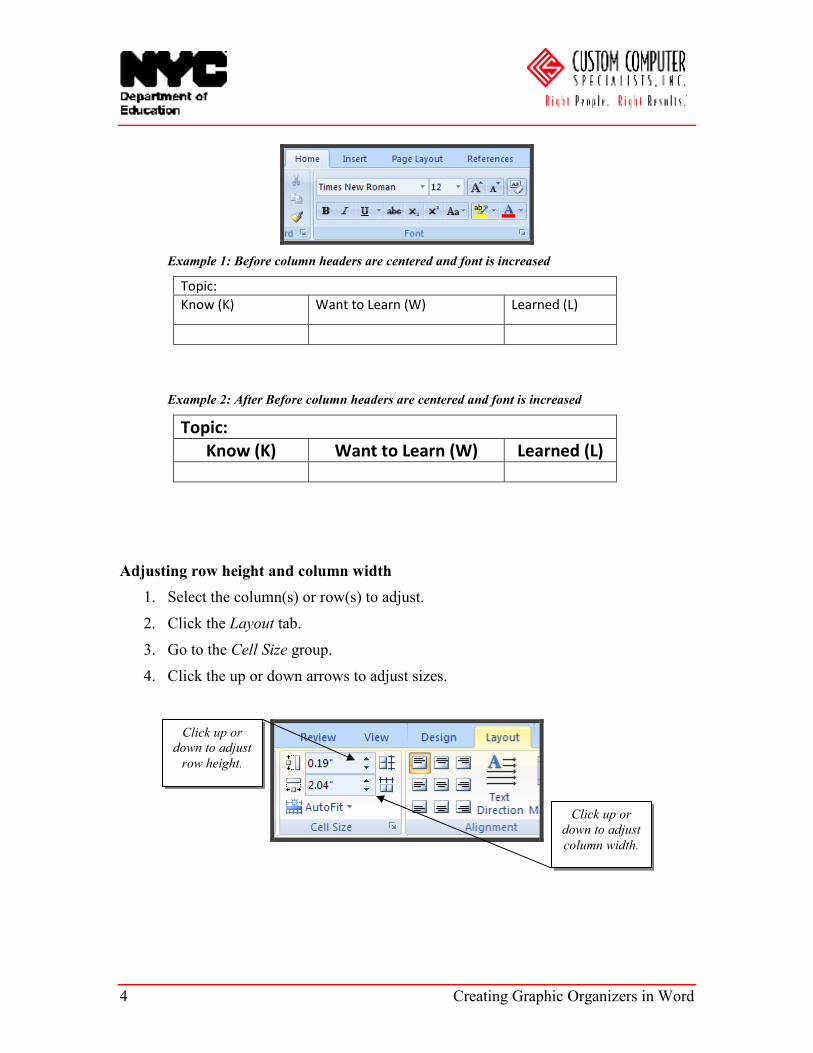
Example 1: Before column headers are centered and font is increased
Topic:
Know (K) Want to Learn (W) Learned (L)
Example 2: After Before column headers are centered and font is increased
Topic:
Know (K) Want to Learn (W) Learned (L)
Adjusting row height and column width
1. Select the column(s) or row(s) to adjust.
2. Click the Layout tab.
3. Go to the Cell Size group.
4. Click the up or down arrows to adjust sizes.
Click up or
down to adjust
column width.
Click up or
down to adjust
row height.
Creating Graphic Organizers in Word 5
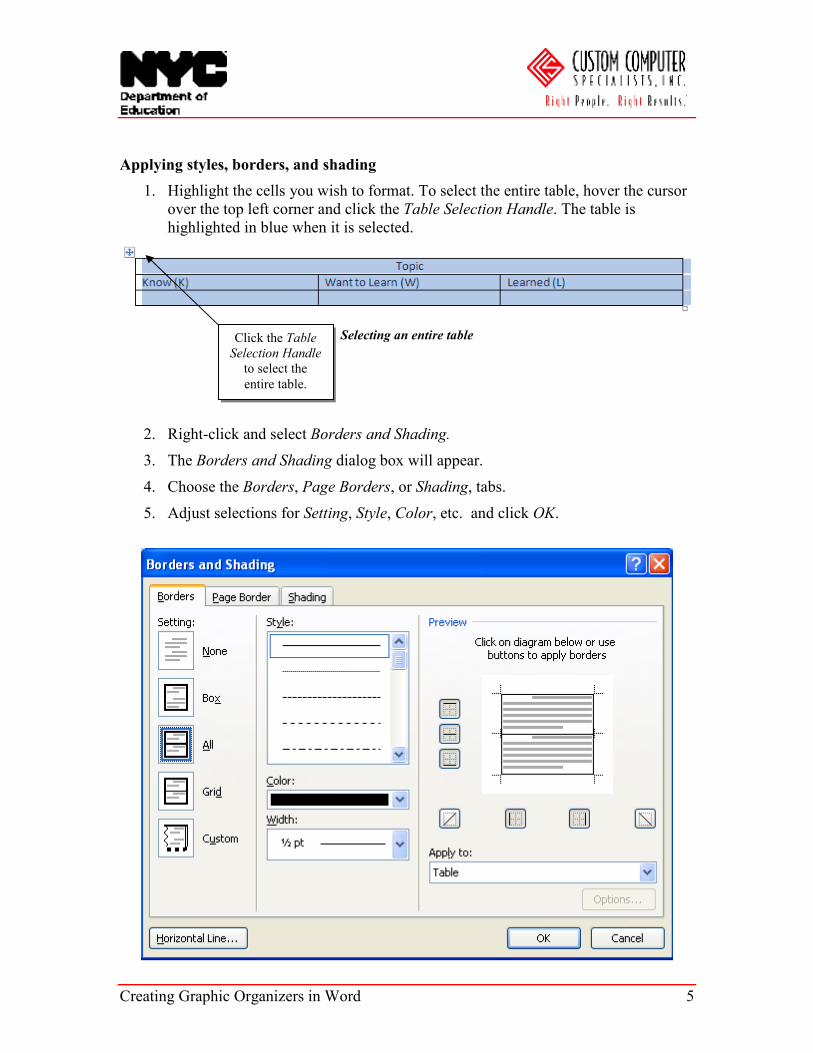
Applying styles, borders, and shading
1. Highlight the cells you wish to format. To select the entire table, hover the cursor
over the top left corner and click the Table Selection Handle. The table is
highlighted in blue when it is selected.
Selecting an entire table
2. Right-click and select Borders and Shading.
3. The Borders and Shading dialog box will appear.
4. Choose the Borders, Page Borders, or Shading, tabs.
5. Adjust selections for Setting, Style, Color, etc. and click OK.
Click the Table
Selection Handle
to select the
entire table.
6 Creating Graphic Organizers in Word
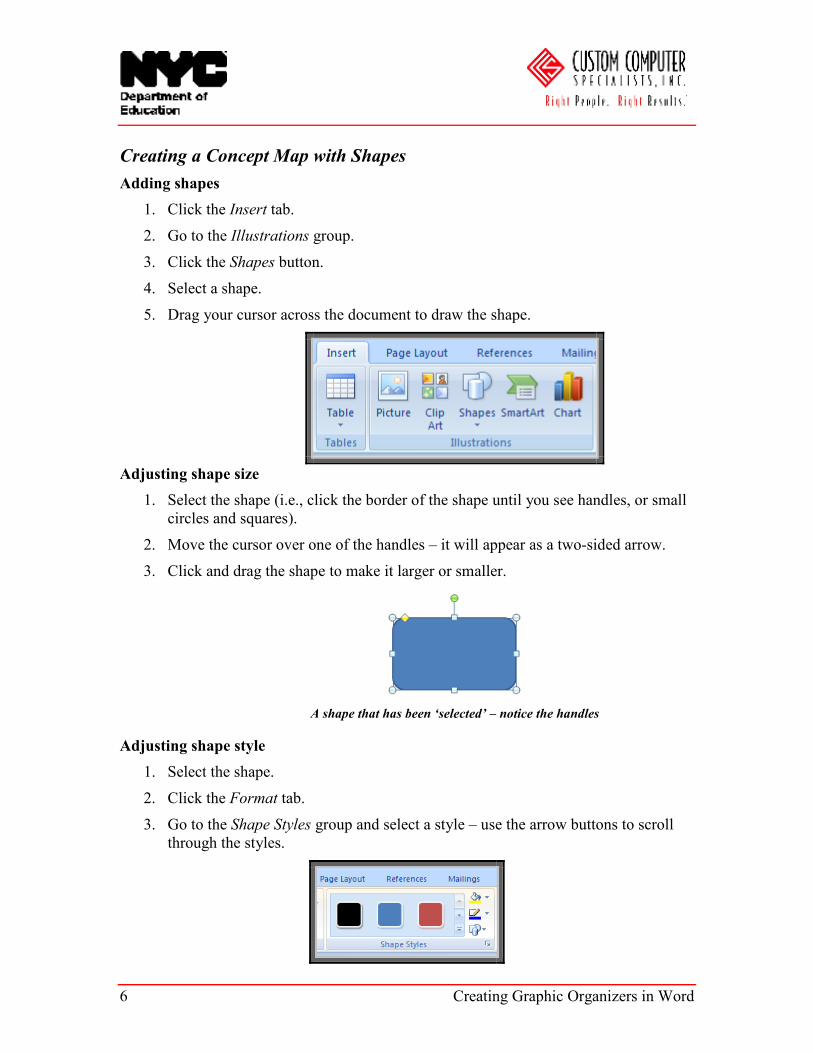
Creating a Concept Map with Shapes
Adding shapes
1. Click the Insert tab.
2. Go to the Illustrations group.
3. Click the Shapes button.
4. Select a shape.
5. Drag your cursor across the document to draw the shape.
Adjusting shape size
1. Select the shape (i.e., click the border of the shape until you see handles, or small
circles and squares).
2. Move the cursor over one of the handles – it will appear as a two-sided arrow.
3. Click and drag the shape to make it larger or smaller.
A shape that has been ‘selected’ – notice the handles
Adjusting shape style
1. Select the shape.
2. Click the Format tab.
3. Go to the Shape Styles group and select a style – use the arrow buttons to scroll
through the styles.
Creating Graphic Organizers in Word 7
Moving a shape
1. Select the shape.
2. The cursor will display as a cross with four arrows.
3. Click and drag the shape to another spot on the slide.
Copying a shape
1. Select the shape.
2. Hit Ctrl and C on the keyboard at the same time.
3. Move the cursor to another spot on the slide.
4. Hit Ctrl and V on the keyboard at the same time.
5. A clone should appear.
6. Move the clone as desired.
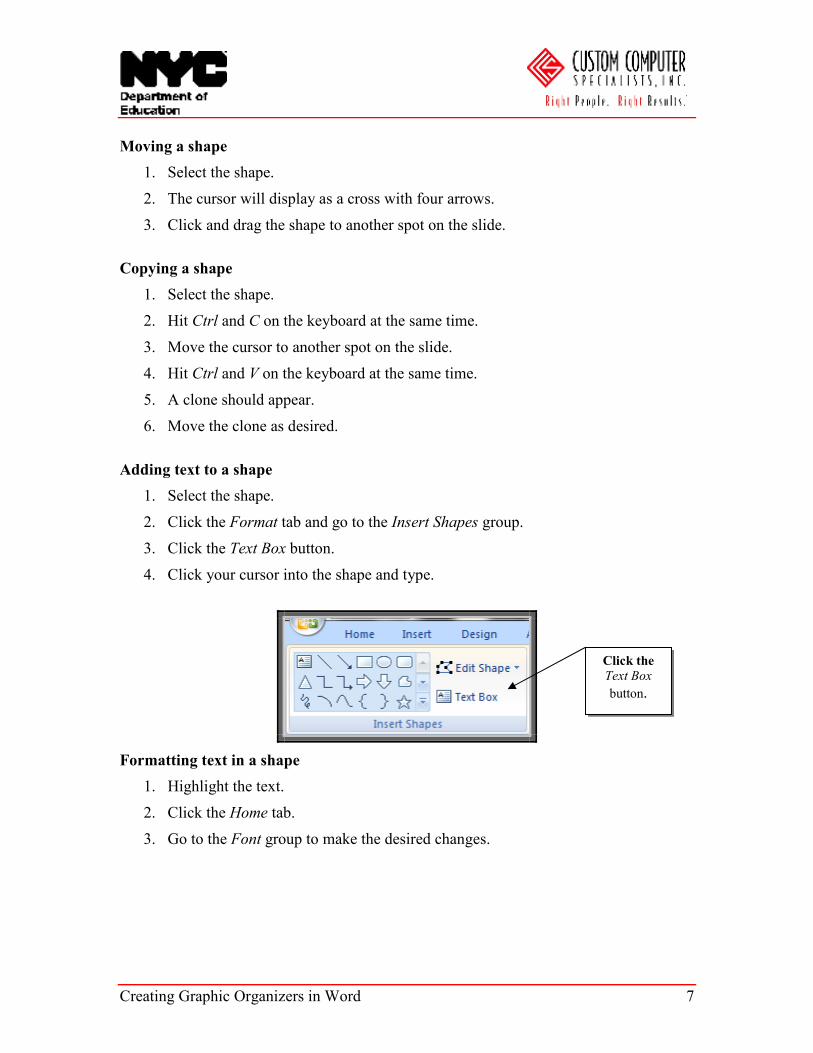
Adding text to a shape
1. Select the shape.
2. Click the Format tab and go to the Insert Shapes group.
3. Click the Text Box button.
4. Click your cursor into the shape and type.
Formatting text in a shape
1. Highlight the text.
2. Click the Home tab.
3. Go to the Font group to make the desired changes.
Click the
Text Box
button.
8 Creating Graphic Organizers in Word
Additional Resources
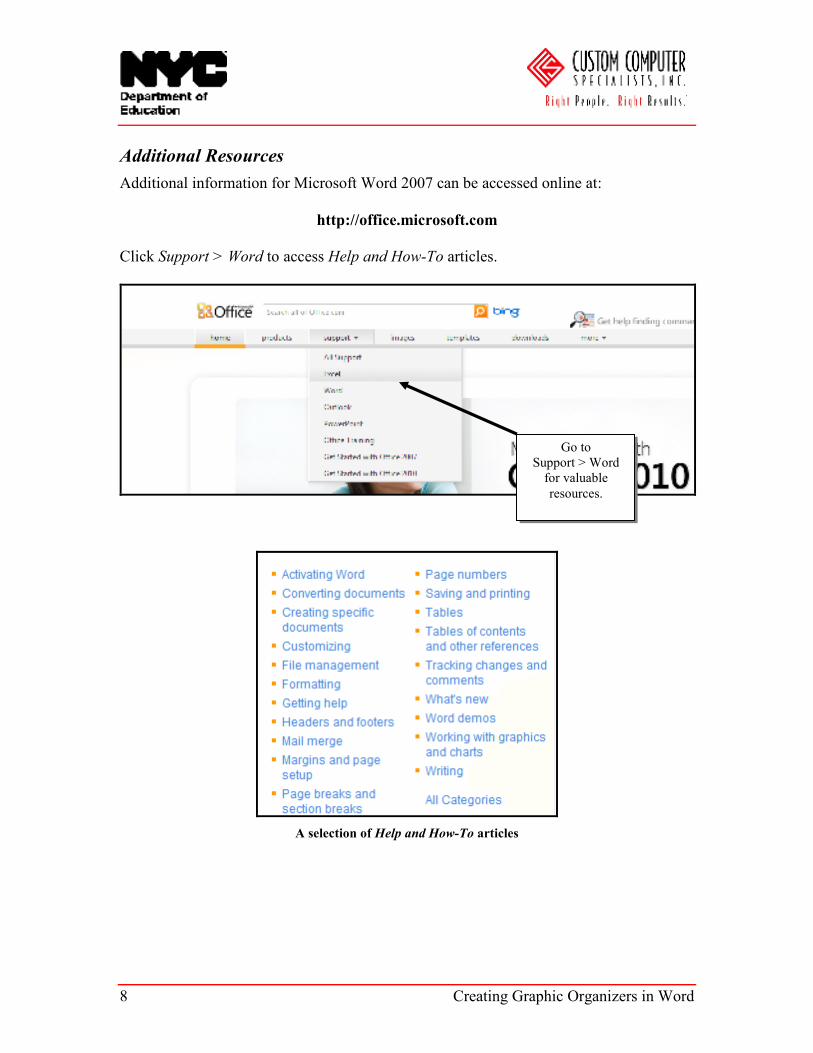
Additional information for Microsoft Word 2007 can be accessed online at:
http://office.microsoft.com
Click Support > Word to access Help and How-To articles.
A selection of Help and How-To articles
Go to
Support > Word
for valuable
resources.