Embed Size (px)
Citation preview

Elastic Load BalancingDeveloper Guide
API Version 2012-06-01
Elastic Load Balancing: Developer GuideCopyright © 2013 Amazon Web Services, Inc. and/or its affiliates. All rights reserved.
The following are trademarks of Amazon Web Services, Inc.: Amazon, Amazon Web Services Design, AWS,Amazon CloudFront, Cloudfront, Amazon DevPay, DynamoDB, ElastiCache, Amazon EC2, Amazon ElasticCompute Cloud, Amazon Glacier, Kindle, Kindle Fire, AWS Marketplace Design, Mechanical Turk, AmazonRedshift, Amazon Route 53, Amazon S3, Amazon VPC. In addition, Amazon.com graphics, logos, pageheaders, button icons, scripts, and service names are trademarks, or trade dress of Amazon in the U.S.and/or other countries. Amazon's trademarks and trade dress may not be used in connection with anyproduct or service that is not Amazon's, in any manner that is likely to cause confusion among customers,or in any manner that disparages or discredits Amazon.
All other trademarks not owned by Amazon are the property of their respective owners, who may or maynot be affiliated with, connected to, or sponsored by Amazon.
Elastic Load Balancing Developer Guide

Elastic Load Balancing Developer Guide ................................................................................................ 1What Is Elastic Load Balancing? ............................................................................................................ 4How Elastic Load Balancing Works ........................................................................................................ 5Concepts ................................................................................................................................................ 5Architectural Overview .......................................................................................................................... 10Integration With AWS Services ............................................................................................................. 12Where Do I Go From Here? .................................................................................................................. 13Get Started with Elastic Load Balancing .............................................................................................. 14Create a Basic Load Balancer in EC2-Classic ..................................................................................... 15Create a Basic Load Balancer in EC2-VPC .......................................................................................... 23Create a Basic Load Balancer in Default VPC ...................................................................................... 34Get Set Up with Elastic Load Balancing Interfaces .............................................................................. 44Installing the Command Line Interface ................................................................................................. 45Use Query Requests to Call Elastic Load Balancing APIs ................................................................... 51
Using the Java SDK to Sign a Query Request ............................................................................ 58Using the SOAP API ............................................................................................................................. 60Using the SDKs ................................................................................................................................... 63Configure Listeners for Your Load Balancer ........................................................................................ 65Elastic Load Balancing Listener Configurations Quick Reference ........................................................ 68Where Do I Go From Here? .................................................................................................................. 69Using Elastic Load Balancing ............................................................................................................... 71Deploy Elastic Load Balancing in Amazon EC2-Classic ....................................................................... 73
Create a Load Balancer with SSL Cipher Settings and Back-End Server Authentication ........... 74Expand a Load Balanced Application to an Additional Availability Zone ..................................... 95Disable an Availability Zone from a Load-Balanced Application ................................................. 98Manage Security Groups in Amazon EC2-Classic .................................................................... 100Use IPv6 with Elastic Load Balancing ....................................................................................... 109
Deploy Elastic Load Balancing in Amazon VPC ................................................................................. 111Create a Basic Internal Load Balancer in Amazon VPC ........................................................... 114Attach Your Load Balancer to a Subnet .................................................................................... 123Detach Your Load Balancer from a Subnet ............................................................................... 125Manage Security Groups in Amazon VPC ................................................................................ 127
Add a Listener to Your Load Balancer ................................................................................................. 129Delete a Listener from Your Load Balancer ........................................................................................ 134De-Register and Register Amazon EC2 Instances ............................................................................. 137Update an SSL Certificate for a Load Balancer .................................................................................. 139Configure Custom Domain Name for Your Load Balancer .................................................................. 144Configure DNS Failover for Your Load Balancer ................................................................................. 150Create Sticky Sessions ....................................................................................................................... 154Monitor Your Load Balancer Using Amazon CloudWatch ................................................................... 160Delete Your Load Balancer ................................................................................................................. 166Control User Access to Your AWS Account ........................................................................................ 169Troubleshoot Elastic Load Balancing .................................................................................................. 172Troubleshooting Elastic Load Balancing: Error Messages .................................................................. 173Troubleshooting Elastic Load Balancing: HTTP Error Codes ............................................................. 174Troubleshooting Elastic Load Balancing: Health Check Configuration ............................................... 175Troubleshooting Elastic Load Balancing: Registering Instances ......................................................... 176Document History ............................................................................................................................... 178Glossary ............................................................................................................................................. 181Index ................................................................................................................................................... 182
API Version 2012-06-013
Elastic Load Balancing Developer Guide

Elastic Load Balancing DeveloperGuide
Welcome to the Elastic Load Balancing Developer Guide. Amazon Web Services (AWS) provides ElasticLoad Balancing to automatically distribute your incoming application traffic across multiple Amazon ElasticCompute Cloud (Amazon EC2) instances. It detects unhealthy instances and reroutes traffic to healthyinstances until the unhealthy instances have been restored. Elastic Load Balancing automatically scalesits request handling capacity in response to incoming traffic.
The Elastic Load Balancing Developer Guide gives you basic information about Elastic Load Balancingso you can make an informed decision about choosing to use it. This guide also helps you decide howto use Elastic Load Balancing in specific user scenarios.You can choose which one is right for you.
Before You BeginRelevant TopicsHow Do I...
Elastic Load Balancing product informationLearn about the business case for ElasticLoad Balancing
What is Elastic Load Balancing? (p. 4)Learn about how Elastic Load Balancingworks and decide whether Elastic LoadBalancing is the right choice for my usecase
Where Do I Start?We recommend that you read What is Elastic load Balancing to get answers to your question on basics.Then, to familiarize yourself with Elastic Load Balancing, you should walk through Get Started with ElasticLoad Balancing. This tutorial will show you how to create a basic load balancer.
If you are a new AWS customer, you are eligible to use the free usage tier for twelve months followingyour AWS sign-up date.The free tier includes 750 hours per month of Amazon EC2 Micro Instance usage,and 750 hours per month of Elastic Load Balancing, plus 15 GB of data processing.
API Version 2012-06-011
Elastic Load Balancing Developer GuideBefore You Begin

Relevant TopicsWhere Do I...
AWS Free Usage TierLearn if I am eligible to use the free usagetier for twelve months following my AWSsign-up date
Get Started With Elastic Load Balancing (p. 14)Learn how to create a basic load balancerand register my Amazon EC2 instanceswith the load balancer
If you've used load balancing in a physical hardware environment, you'll know how to evaluate the behaviorof the load balancer in that context. If you are planning to use load balancing in a cloud environment, youneed to be aware of some of the Elastic Load Balancing features that might affect your load balancingscenario.
Elastic Load Balancing supports the load balancing of applications using HTTP, HTTPS (secure HTTP),TCP, and SSL (secure TCP) listener protocols and allows you to choose the protocols for both the front-end(client to load balancer) and the back-end (load balancer to back-end instance) connections.
Elastic Load Balancing provides several different interfaces you can use to manage your load balancers.You can create, access, and manage your load balancers using the AWS Management Console, thecommand line interface (CLI), or the Query API.You will have to install command line interface and theQuery API before you can use them.
Relevant TopicsWhere Do I ...
Best practices in Evaluating Elastic Load BalancingLearn about the best practices you canuse to evaluate and test Elastic LoadBalancing for your use case
Configure Listeners for Your Load Balancer (p. 65)Learn about the different listenerprotocols supported by Elastic LoadBalancing
Get Set Up with Elastic Load Balancing Interfaces (p. 44)Learn how to install the interfaces neededfor accessing the Elastic Load Balancing
How Do I Use Elastic Load Balancing?Elastic Load Balancing provides several features that help you load balance your applications effectively.You can create and use your load balancer either for Amazon EC2 or within Amazon Virtual Private Cloud(Amazon VPC), depending on where you've launched your EC2 instances.
Relevant TopicsWhere Do I...
Using Elastic Load Balancing (p. 71)Learn more about how to use the variousfeatures supported by Elastic LoadBalancing
Deploy Elastic Load Balancing in AmazonEC2-Classic (p. 73)
Learn more about scenarios specific tomy instances launched in Amazon EC2
Deploy Elastic Load Balancing in Amazon VPC (p. 111)Learn more about scenarios specific tomy instances launched in Amazon VPC
API Version 2012-06-012
Elastic Load Balancing Developer GuideHow Do I Use Elastic Load Balancing?

Relevant TopicsWhere Do I...
Troubleshoot Elastic Load Balancing (p. 172)Learn about potential causes and stepsyou can take to narrow down and resolveissues with Elastic Load Balancing
API Version 2012-06-013
Elastic Load Balancing Developer GuideHow Do I Use Elastic Load Balancing?

What Is Elastic Load Balancing?
Amazon Web Services (AWS) provides Elastic Load Balancing to automatically distribute incoming webtraffic across multiple Amazon Elastic Compute Cloud (Amazon EC2) instances. With Elastic LoadBalancing, you can add and remove EC2 instances as your needs change without disrupting the overallflow of information. If one EC2 instance fails, Elastic Load Balancing automatically reroutes the traffic toremaining running EC2 instances. If the failed EC2 instance is restored, Elastic Load Balancing restoresthe traffic to that instance. Elastic Load Balancing offers clients a single point of contact, and it can alsoserve as the first line of defense against attacks on your network.You can offload the work of encryptionand decryption to the Elastic Load Balancing, so your servers can focus on their main task.
When you use Elastic Load Balancing to manage traffic to your application, you get the following benefits:
• Distribution of requests to Amazon EC2 instances (servers) in multiple Availability Zones in a way thatminimizes the risk of overloading one single instance. And if an entire Availability Zone goes offline,Elastic Load Balancing routes traffic to instances in other Availability Zones.
• Continuous monitoring of the health of Amazon EC2 instances registered with the load balancer sothat requests are sent only to the healthy instances. If an instance becomes unhealthy, Elastic LoadBalancing stops sending traffic to that instance and spreads the load across the remaining healthyinstances.
• Support for end-to-end traffic encryption on those networks that use secure (HTTPS/SSL) connections.
• The ability to take over the encryption and decryption work from the Amazon EC2 instances, andmanage it centrally on the load balancer.
• Support for the sticky session feature, which is the ability to "stick" user sessions to specific AmazonEC2 instances.
• Association of the load balancer with your domain name. Because the load balancer is the only computerthat is exposed to the Internet, you don’t have to create and manage public domain names for theinstances that the load balancer manages.You can point the instance's domain records at the loadbalancer instead and scale as needed (either adding or removing capacity) without having to updatethe records with each scaling activity.
• When used in an Amazon Virtual Private Cloud (Amazon VPC), support for creation and managementof security groups associated with your load balancer to provide additional networking and securityoptions.
• Support for use of both Internet protocol version 4 (IPv4) and Internet protocol version 6 (IPv6).
As with all Amazon Web Services, you pay only for what you use. For Elastic Load Balancing, you payfor each hour or portion of an hour that the service is running, and you pay for each gigabyte of data thatis transferred through your load balancer. For current pricing information for Elastic Load Balancing, goto Elastic Load Balancing Pricing.
API Version 2012-06-014
Elastic Load Balancing Developer Guide

If you are a new AWS customer, you are eligible to use the free usage tier for twelve months followingyour AWS sign-up date.The free tier includes 750 hours per month of Amazon EC2 micro instance usage,and 750 hours per month of Elastic Load Balancing, plus 15 GB of data processing. For information aboutthe free usage tier, go to AWS Free Usage Tier.
How Elastic Load Balancing WorksElastic Load Balancing consists of two components: the load balancers and the controller service. Theload balancers monitor the traffic and handle requests that come in through the Internet. The controllerservice monitors the load balancers, adding and removing capacity as needed and verifying that the loadbalancers are functioning properly.
You have to create your load balancer before you can start using it. Each load balancer you create musthave a unique Domain Name System (DNS) name. For example, if you create a load balancer namedmyLB in the US East (Northern Virginia) Region, your load balancer might have a DNS name such asmyLB-1234567890.us-east-1.elb.amazonaws.com.
You have to register the instances that you want to load balance with the load balancer. Elastic LoadBalancing registers your load balancer with your instances using the IP addresses associated with theinstances. When an instance is stopped and then started, the IP address associated with your instancechanges. This prevents the load balancer from routing traffic to your restarted instance. Elastic LoadBalancing gives you the option to de-register your instance from the load balancer after you have stoppedyour instance, and then register the load balancer with your instance after you restart it.
Your load balancer monitors and routes the incoming traffic to the registered instances.Your load balanceralso monitors the health of the instances and ensures that the traffic goes to healthy instances. Whenthe load balancer detects an unhealthy instance, it stops routing the traffic to that instance and resumesthe routing when the instance has been restored to a healthy state. Elastic Load Balancing performshealth checks on your instances using the configuration you provide, regardless of whether the instanceis in a healthy or unhealthy state.
Amazon Elastic Compute Cloud (Amazon EC2) provides the ability to launch your instances in multipleAvailability Zones.You can configure your load balancer to load balance incoming application trafficacross multiple instances in a single Availability Zone or across multiple instances in several AvailabilityZones in the same region. For example, if you choose to load balance multiple instances across twoAvailability Zones, and all the instances in the first Availability Zone become unhealthy, the load balancerwill route traffic to the healthy instances in the other Availability Zone. When you use multiple AvailabilityZones, it is important to keep approximately the same capacity in each Availability Zone registered withthe load balancer.
Using Auto Scaling with Elastic Load Balancing makes it easy to increase or decrease your back-endcapacity to meet varying traffic levels. For example, you could set a condition declaring that when thenumber of healthy instances behind a load balancer goes down to two, two or more instances are launched.Or, you could set a condition to monitor the latency of the load balancer, and when the latency exceedscertain time period, such as three seconds, capacity is increased.You can also use the AWS ManagementConsole to register or deregister instances used by the load balancer as the capacity requirements ofyour application change over time.
ConceptsTopics
• Load Balancer (p. 6)
• Registering EC2 Instances (p. 6)
• Availability Zones and Regions (p. 7)
API Version 2012-06-015
Elastic Load Balancing Developer GuideHow Elastic Load Balancing Works

• Health Check (p. 7)
• Sticky Sessions (p. 8)
• HTTP Methods (p. 8)
• HTTPS Support (p. 9)
• X-Forwarded-For (p. 9)
• X-Forwarded-Proto Support (p. 10)
This topic introduces you to Elastic Load Balancing basics you need to understand before you createyour load balancer.
Load BalancerA load balancer is the destination to which all requests intended for your load balanced application shouldbe directed. Each load balancer can distribute requests to multiple EC2 instances. A load balancer isrepresented by a DNS name and a set of ports. Load balancers can span multiple Availability Zoneswithin an EC2 Region, but they cannot span multiple regions.
To create or work with a load balancer in a specific region, use the corresponding regional service endpoint.For information about regions and endpoints supported by Elastic Load Balancing, go to Regions andEndpoints.
Elastic Load Balancing automatically generates a DNS name for each load balancer instance you create.Typically, the DNS name includes the name of the AWS region in which the load balancer is created. Forexample, if you create a load balancer named myLB in the US East (Northern Virginia) Region, your loadbalancer might have a DNS name such as myLB-1234567890.us-east-1.elb.amazonaws.com.You just have to paste the DNS name generated by Elastic Load Balancing into the address field of anInternet-connected web browser to connect to your load balancer.
If you'd rather use a user-friendly domain name, such as www.example.com, instead of the load balancerDNS name, you can create a custom domain name and then associate the custom domain name withthe load balancer DNS name. When a request is placed to your load balancer using the custom domainname that you created, it resolves to the load balancer DNS name.
For more information on creating and using a custom domain name for your load balancer, see ConfigureCustom Domain Name for Your Load Balancer (p. 144).
When you create your load balancer, you have to specify the configurations for your load balancer listeners.A listener is a process that listens for connections from incoming requests. It is configured with a protocoland a port number for front-end (load balancer) and back-end (back-end instance) connections. For moreinformation on the ports and protocols supported by Elastic Load Balancing, see Configure Listeners forYour Load Balancer (p. 65).
Registering EC2 InstancesAfter you've created your load balancer, you have to register your EC2 instances with the load balancer.Your EC2 instances can be within a single Availability Zone or span multiple Availability Zones within aregion. Elastic Load Balancing routinely performs health check on all the registered EC2 instances andautomatically distributes all incoming requests to the DNS name of your load balancer across yourregistered, healthy EC2 instances. For more information on the health check of your EC2 instances, seeHealth Check (p. 7).
Elastic Load Balancing registers your load balancer with your EC2 instances using the IP addresses thatare associated with your instances. When an instance is stopped and then restarted, the IP addressassociated with your instance changes.Your load balancer cannot recognize the new IP address, whichprevents it from routing traffic to your instances.You can de-register your Amazon EC2 instances from
API Version 2012-06-016
Elastic Load Balancing Developer GuideLoad Balancer
your load balancer after you stop your instance, and then register the load balancer with your instanceafter you've restarted. For more information on deregistering and registering your EC2 instances, seeDe-Register and Register Amazon EC2 Instances (p. 137).
Availability Zones and RegionsYou can set up your load balancer to load balance incoming requests across EC2 instances in a singleAvailability Zone or multiple Availability Zones within a region.Your load balancer does not distributetraffic across regions.
For critical applications, we recommend that you distribute incoming traffic across multiple AvailabilityZones by registering multiple Availability Zones with your load balancer and registering your EC2 instancesin each registered Availability Zone.
Incoming traffic is load balanced equally across all Availability Zones enabled for your load balancer, soit is important to have approximately equivalent numbers of instances in each zone. For example, if youhave ten instances in Availability Zone us-east-1a and two instances in us-east-1b, the traffic will still beequally distributed between the two Availability Zones. As a result, the two instances in us-east-1b willhave to serve the same amount of traffic as the ten instances in us-east-1a. As a best practice, werecommend you keep an equivalent or nearly equivalent number of instances in each of your AvailabilityZones. So in the example, rather than having ten instances in us-east-1a and two in us-east-1b, youcould distribute your instances so that you have six instances in each Availability Zone.
If your load balancer detects unhealthy or deregistered instances in an enabled Availability Zone, it stopsrouting traffic to those instances. Instead, it spreads the load across the remaining healthy Amazon EC2instances. If all of your instances in a particular Availability Zone are unhealthy or deregistered, but youhave set up and registered instances in multiple Availability Zones, Elastic Load Balancing will route trafficto your registered and healthy instances in those other zones. It will resume load balancing to the originalinstances when they have been restored to a healthy state and are registered with your load balancer.
You can expand the availability of your instances by registering instances in an additional AvailabilityZone and then enabling that Availability Zone for your load balancer. After you've enabled the newAvailability Zone, the load balancer begins to route traffic equally amongst all the enabled AvailabilityZones. For more information on enabling an Availaibility Zone for your load balancer, see Expanding aLoad Balanced Application to an Additional Availability Zone (p. 95).
You can shrink the availability of your instances by first disabling an Availability Zone that was enabledfor your load balancer and then deregistering instances in that Availability Zone. After you've disabledthe Availability Zone, the load balancer will route the traffic to the registered and healthy instances in therest of the enabled Availability Zones. For more information on disabling Availability Zone for your loadbalancer, see Disable an Availability Zone from a Load-Balanced Application (p. 98).
Health CheckElastic Load Balancing routinely checks the health of each registered Amazon EC2 instance based onthe configurations that you specify. If Elastic Load Balancing finds an unhealthy instance, it stops sendingtraffic to the instance and reroutes traffic to healthy instances.
Your load balancer performs health checks on your instances using the protocol, port, URL, timeout, andinterval specified when you configured your load balancer. For example, you can configure a health checkfor your instances as follows - Your load balancer to send request to http://node IP address:80/index.htmevery 5 seconds. Allow 3 seconds for the web server to respond. If the load balancer does not get anyresponse after 2 attempts, take the node out of service. If the load balancer gets 2 successful responses,put the node back in service. Instances that are in service at the time of health check are marked healthyand the instances that are out of service at the time of health check are marked unhealthy.
API Version 2012-06-017
Elastic Load Balancing Developer GuideAvailability Zones and Regions

For information on configuring a health check for the EC2 instances registered with your load balancer,see Configure Health Check for Your Amazon EC2 Instances (p. 17).
Your registered instances can fail the health check for several reasons. The most common reasons forfailing a health check are where EC2 instances close connections to your load balancer or where theresponse from the EC2 instances times out. For information on potential causes and steps you can taketo resolve failed health check issues, see Troubleshooting Elastic Load Balancing: Health CheckConfiguration (p. 175).
Sticky SessionsBy default, a load balancer routes each request independently to the application instance with the smallestload. However, you can use the sticky session feature (also known as session affinity), which enablesthe load balancer to bind a user's session to a specific application instance.This ensures that all requestscoming from the user during the session will be sent to the same application instance.
The key to managing the sticky session is determining how long your load balancer should consistentlyroute the user's request to the same application instance. If your application has its own session cookie,then you can set Elastic Load Balancing to create the session cookie to follow the duration specified bythe application's session cookie. If your application does not have its own session cookie, then you canset Elastic Load Balancing to create a session cookie by specifying your own stickiness duration.Youcan associate stickiness duration for only HTTP/HTTPS load balancer listeners.
• For more information about creating cookies that allow duration-based session stickiness, see EnableDuration-Based Session Stickiness (p. 154).
• For more information about creating cookies that allow application-specific session stickiness, seeEnable Application-Controlled Session Stickiness (p. 157).
An application instance must always receive and send two cookies: A cookie that defines the stickinessduration and a special Elastic Load Balancing cookie named AWSELB, that has the mapping to theapplication instance.
HTTP MethodsThe HTTP method (also called the verb) specifies the action to be performed on the resource receivingan HTTP request.The standard methods for HTTP requests are defined in RFC 2616, Hypertext TransferProtocol-HTTP/1.1. Standard methods include GET, POST, PUT, HEAD, and OPTIONS. Some webapplications require (and sometimes also introduce) new methods that are extensions of HTTP/1.1methods. These HTTP extensions can be non-standard. Some common examples of HTTP extendedmethods include (but are not limited to) PATCH, REPORT, MKCOL, PROPFIND, MOVE, and LOCK.Elastic Load Balancing accepts all standard and non-standard HTTP methods.
When a load balancer receives an HTTP request, it performs checks for malformed requests and for thelength of the method. The total method length in an HTTP request to a load balancer must not exceed127 characters. If the HTTP request passes both the checks, the load balancer sends the request to theback-end EC2 instance. If the method field in the request is malformed, the load balancer responds witha HTTP 400: BAD_REQUEST (p. 173) error message. If the length of the method in the request exceeds127 characters, the load balancer responds with a HTTP 405: METHOD_NOT_ALLOWED (p. 173) errormessage.
The back-end EC2 instance processes a valid request by implementing the method contained in therequest and then sending a response back to the client.Your back-end instance must be configured tohandle both supported and unsupported methods.
API Version 2012-06-018
Elastic Load Balancing Developer GuideSticky Sessions

HTTPS SupportHTTPS Support is a feature that allows you to use the SSL/TLS protocol for encrypted connections (alsoknown as SSL offload). This feature enables traffic encryption between the clients that initiate HTTPSsessions with your load balancer and also for connections between the load balancer and your back-endinstances.
To enable HTTPS support for your load balancer, you'll have to install an SSL server certificate on yourload balancer. The load balancer uses the certificate to terminate and then decrypt requests beforesending them to the back-end instances.
For information on using HTTPS/SSL with your load balancer, see Advantages of Using HTTPS/SSL withElastic Load Balancing (p. 66). For information about creating a load balancer that uses HTTPS, seeCreate a Load Balancer with SSL Cipher Settings and Back-End Server Authentication (p. 74). For moreinformation on creating and uploading SSL certificates, see Creating and Uploading Server Certificatesin the AWS Identity and Access Management documentation.
X-Forwarded-ForThe X-Forwarded-For request header helps you identify the IP address of a client when you useHTTP/HTTPS load balancer. Because load balancers intercept traffic between clients and servers, yourserver access logs contain only the IP address of the load balancer. To see the IP address of the client,use the X-Forwarded-For request header. Elastic Load Balancing stores the IP address of the clientin the X-Forwarded-For request header and passes the header along to your server.
The X-Forwarded-For request header takes the following form:
X-Forwarded-For: clientIPAddress
The following example is an X-Forwarded-For request header for a client with an IP address of203.0.113.7.
X-Forwarded-For: 203.0.113.7
The following example is an X-Forwarded-For request header for a client with an IPv6 address of2001:DB8::21f:5bff:febf:ce22:8a2e.
X-Forwarded-For: 2001:DB8::21f:5bff:febf:ce22:8a2e
If you have back-end application instances in multiple Availability Zones, the X-Forwarded-For requestheader can contain one or more load balancer IP addresses. Because Elastic Load Balancing uses adifferent load balancer for each Availability Zone, a client request can be passed from one load balancerto another before reaching a back-end application instance. For example, if you have back-end instancesin Availability Zones us-east-1a and us-east-1b, a client request might be handled initially by the loadbalancer in us-east-1a. If the instances in us-east-1a are unhealthy, are deregistered, or if sticky sessionsare used and the back-end instance is in us-east-1b, the load balancer in us-east-1a routes the requestto the load balancer in us-east-1b. Each of the load balancer then adds its IP address to theX-Forwarded-For request header.
If more than one load balancer is involved in a client request, the X-Forwarded-For request headertakes the following form:
API Version 2012-06-019
Elastic Load Balancing Developer GuideHTTPS Support

X-Forwarded-For: clientIPAddress, previousLoadBalancerIPAddress-1, previousLoad BalancerIPAddress-2
The following example is an X-Forwarded-For request header that arrived at a back-end applicationinstance in the us-east-1b Availability Zone. The client (203.0.113.7) made a request that arrived firstat a load balancer in us-east-1a (10.12.33.44). Subsequently, the load balancer for us-east-1a routedthe request to the load balancer in us-east-1b (10.73.23.88).
X-Forwarded-For: 203.0.113.7, 10.12.33.44, 10.73.23.88
X-Forwarded-Proto SupportThe X-Forwarded-Proto request header helps you identify the protocol ( HTTP or HTTPS) that a clientused to connect to your server.Your server access logs contain only the protocol used between the serverand the load balancer; they contain no information about the protocol used between the client and theload balancer. To determine the protocol used between the client and the load balancer, use theX-Forwarded-Proto request header. Elastic Load Balancing stores the protocol used between theclient and the load balancer in the X-Forwarded-Proto request header and passes the header alongto your server.
Your application or website can use the protocol stored in the X-Forwarded-Proto request header torender a response that redirects to the appropriate URL.
The X-Forwarded-Proto request header takes the following form:
X-Forwarded-Proto: originatingProtocol
The following example contains an X-Forwarded-Proto request header for a request that originatedfrom the client as an HTTPS request:
X-Forwarded-Proto: HTTPS
Architectural OverviewThe following diagram shows how the various components of the Elastic Load Balancing work together.The remainder of this section provides a step-by-step view of the flow of events that take place when aclient requests a URL served by your applications.
API Version 2012-06-0110
Elastic Load Balancing Developer GuideX-Forwarded-Proto Support

This example assumes that you have created a load balancer, created a custom domain name andassociated your load balancer with the domain name using a CNAME entry in DNS, and have registeredyour instances with it.
1. The client sends a URL request to DNS servers to access your application.The DNS server respondswith a DNS name. For example, myLB-1234567890.us-east-1.elb.amazonaws.com.
2. The client looks for the resolution of the DNS name sent by the DNS server. The DNS entry iscontrolled by Amazon because your application instances are under the amazonaws.com domain.The Amazon DNS servers return one or more IP addresses.
3. The client then opens a connection to the machine at the provided IP address. The instance at thisaddress is the load balancer you created.
4. The load balancer checks the health states of all the registered EC2 application instances within theselected Availability Zones and will begin routing trafic to instances that have met the healthy thresholddefined in the health check configuration.
5. The load balancer routes the client request to the healthy EC2 application instance identified in theprevious step. At this point, the client is communicating with one of your EC2 instances through yourload balancer. The load balancer listeners can be configured to use either HTTP, HTTPS, TCP, orSSL protocols for both front-end connection (client to load balancer) and back-end connection (loadbalancer to back-end instance).
NoteAmazon Route 53 is AWS's highly available and cost-effective DNS service. Using Amazon53's Alias records will provide performance improvements because the clients will need onlyto make a single request to resolve the domain name. Also, queries to Alias records arefree of charge.
Available InterfacesYou can access and work with your load balancer using one of the following interfaces:
• AWS Management Console—A simple web-browser interface that you can use to create and manageyour load balancers without using additional software or tools. On the AWS site, you can open theconsole by clicking Sign in to the AWS Console.
• Command Line Interfaces (CLI)—A Java-based command-line client that wraps the SOAP API.
API Version 2012-06-0111
Elastic Load Balancing Developer GuideAvailable Interfaces

• Programmatic Interface— SDKs provided by AWS, third-party libraries, and Elastic Load BalancingQuery API.
For information on installing and using the command line interfaces, Query APIs, and SDKs provided byAWS, see Get Set Up with Elastic Load Balancing Interfaces (p. 44).
Integration With AWS ServicesElastic Load Balancing integrates with the following AWS services to provide solutions to help your loadbalancer improve availability and scalability of your applications.
SolutionsAmazon Web Services
Runs your back-end application instances.Amazon EC2
Creates capacity groups of instances that can grow or shrink on demand.For more information, see Auto Scaling Developer Guide.
Auto Scaling
Collects the data provided by your load balancer and presents it asreadable, near real-time metrics. These metrics can be used to monitorthe health state of your instances.You can create an AmazonCloudWatch alarm to send notification to an Auto Scaling policy if anindividual metric goes outside of what you consider an acceptable range.For more information on using Amazon CloudWatch with your loadbalancer, see Monitor Your Load Balancer Using AmazonCloudWatch (p. 160). For information on Amazon CloudWatch, seeAmazon CloudWatch Developer Guide.
Amazon CloudWatch
Provides secure and reliable routing to your application instances. Route53 automatically routes queries to the nearest DNS server in a globalnetwork of DNS servers, resulting in low latency.You can use Route 53to translate friendly domain names like www.example.com into IPaddresses like 192.0.2.1. For information on using Amazon Route 53to create a custom domain name for your load balancer, see ConfigureCustom Domain Name for Your Load Balancer (p. 144). For informationon Amazon Route 53, see Amazon Route 53 Developer Guide.
Amazon Route 53
Manages digital server certificates to use with your load balancer.Yourload balancer uses server certificates to terminate and then decryptrequests before sending them to the back-end instances. Use IAM toupload the server certificate to your load balancer. For information oncreating and uploading server certificate, see Creating and UploadingServer Certificates.
Manages users and user permissions in AWS. IAM provides centralcontrol over users and security credentials. Use IAM to create multipleusers who can use AWS products, each with individual securitycredentials, all controlled by a single AWS account. For information onspecifying user permissions for Elastic Load Balancing resources, seeControl User Access to Your AWS Account (p. 169). For information onAWS Identity and Access Management, see Using IAM.
AWS Identity and AccessManagement (IAM)
The following diagram shows how the various services in AWS integrate with Elastic Load Balancing.
API Version 2012-06-0112
Elastic Load Balancing Developer GuideIntegration With AWS Services

Where Do I Go From Here?• You might want to test drive Elastic Load Balancing by creating a basic load balancer and registering
your EC2 instances with the newly created load balancer. Get Started with Elastic Load Balancing (p. 14)provides information on creating a basic load balancer using the AWS Management Console.
• You might want to explore some common user scenarios for Elastic Load Balancing. Before you dothis, you must install the tools and interfaces that you plan to use to access your load balancer. Forinformation on installing the command line interfaces and using the Query API, go to Get Set Up withElastic Load Balancing Interfaces.
• For detailed instructions on using Elastic Load Balancing in Amazon EC2, go to How Do I Use ElasticLoad Balancing in Amazon EC2
• For detailed instructions on using Elastic Load Balancing in Amazon Virtual Private Cloud(VPC), go toHow Do I Use Elastic Load Balancing in Amazon VPC.
API Version 2012-06-0113
Elastic Load Balancing Developer GuideWhere Do I Go From Here?

Get Started with Elastic LoadBalancing
Topics
• Create a Basic Load Balancer in EC2-Classic (p. 15)
• Create a Basic Load Balancer in EC2-VPC (p. 23)
• Create a Basic Load Balancer in Default VPC (p. 34)
After you have read What Is Elastic Load Balancing? (p. 4), and you have decided to load balance yourAmazon Elastic Compute Cloud (Amazon EC2) instances, it's time to get started with basic load balancingtasks.Your first task will be to create a load balancer.
Elastic Load Balancing supports load balancing your Amazon EC2 instances launched within any one ofthe following platforms :
• EC2-Classic — Instances launched in EC2-Classic run in a flat network that you share with othercustomers. We assign each instance with a private IP address from a range of private IP addressesfor the EC2-Classic network.We also assign a public IP address for your instance. For more informationabout Amazon EC2, see What is Amazon EC2? in the Amazon Elastic Compute Cloud User Guide.
• EC2-VPC — Instances launched in EC2-VPC run in an virtual private cloud (VPC) that is logicallyisolated in your AWS account. We assign each instance with a private IP address from the private IPaddress range of your VPC.You have complete control over the VPC assigned to you. For moreinformation about Amazon VPC, see What is Amazon VPC in the Amazon Virtual Private Cloud UserGuide.
If your AWS account comes with a default virtual private cloud (default VPC), your instances arelaunched within the default VPC, by default, unless you specify a subnet from a nondefault VPC. Adefault VPC combines the benefits of the advanced features provided by EC2-VPC with the ease ofuse of EC2-Classic.Your default VPC automatically comes with a default subnet in each AvailabilityZone, an Internet gateway connected to your default VPC, and a default security group associated withyour default VPC, among other default configurations. For more information on default VPCs andsubnets, see Your Default VPC and Subnets.
For information about how you can tell where you have launched your EC2 instances, see SupportedPlatforms in the Amazon Compute Cloud User Guide.
API Version 2012-06-0114
Elastic Load Balancing Developer Guide

If you are creating a load balancer for your EC2 instances in EC2-Classic, see Create a Basic LoadBalancer in EC2-Classic (p. 15).
If you are creating a load balancer for your EC2 instances in VPC, see Create a Basic Load Balancer inEC2-VPC (p. 23).
If you are creating a load balancer for your EC2 instances in default VPC, see Create a Basic LoadBalancer in Default VPC (p. 34).
Create a Basic Load Balancer in EC2-ClassicTopics
• Configure Listeners for Your Load Balancer (p. 16)
• Configure Health Check for Your Amazon EC2 Instances (p. 17)
• Register Amazon EC2 Instances (p. 18)
• Review Settings and Create Your Load Balancer (p. 19)
• Verify the Creation of Your Load Balancer (p. 20)
• Delete Your Load Balancer (p. 22)
This getting started tutorial walks you through the process for creating a basic load balancer for your EC2instances in EC2-Classic platform.
The following step-by-step instructions will help you create a basic load balancer using the AWSManagement Console, a point-and-click web-based interface. Before you get started with the console,be sure you've done the following:
• Sign up for Amazon Web Services (AWS). If you haven't signed up for AWS yet, go tohttp://aws.amazon.com and click the Sign Up Now button.
NoteIf you are a new AWS customer, you are eligible to use the free usage tier for twelve monthsfollowing your AWS sign-up date. The free tier includes 750 hours per month of Amazon EC2Micro Instance usage, and 750 hours per month Elastic Load Balancing plus 15GB of dataprocessing. For more information on what is available on the free tier, go to AWS Free UsageTier.
• Launch Amazon EC2 instances with HTTP access on port 80.You'll be registering these instanceswith your load balancer. For more information about launching Amazon EC2 instances, see Launchingand Using Instances in the Amazon Cloud Compute User Guide.
If you've already launched your EC2 instances, be sure to create your load balancer in the same regionyour EC2 instances are launched in.
The following steps outline how to create a basic load balancer in EC2-Classic.
1. Configure the listeners for your load balancer by specifying the ports and protocols to use for thefront-end connection (client to load balancer) and the back-end connection (load balancer to back-endinstance).
2. Configure a health check for your Amazon EC2 back-end instances.
3. Register your Amazon EC2 instances with the load balancer.
4. Review settings and create your load balancer.
5. Verify that your load balancer is created.
6. [Optional] Delete your load balancer.
API Version 2012-06-0115
Elastic Load Balancing Developer GuideCreate a Basic Load Balancer in EC2-Classic

ImportantThe load balancer you're about to create will be live (and not running in a sandbox). If you arenot signed up for free usage tier, you will incur the standard Elastic Load Balancing usage feesfor the load balancer until you terminate it. The total charges will be minimal (typically less thana dollar), if you complete the Getting Started in one sitting and delete your load balancer whenyou are finished. For more information about Elastic Load Balancing usage rates, go to theElastic Load Balancing product page.
Configure Listeners for Your Load BalancerTo configure listeners for your load balancer
1. Sign in to the AWS Management Console and open the Amazon EC2 console athttps://console.aws.amazon.com/ec2/.
2. Start the Create Load Balancer wizard:
a. On the Amazon EC2 console Getting Started page, in the EC2 Dashboard pane, underNETWORK & SECURITY, click Load Balancers.
b. On the Load Balancers page, click Create Load Balancers.
3. On the DEFINE LOAD BALANCER page, make the following selections:
a. Enter a name for your load balancer (e.g., my-test-loadbalancer).
b. Leave CreateLB inside set to EC2 for this tutorial.
NoteIn this tutorial, you are creating a load balancer for your EC2 instances launched withinAmazon EC2. If you want to create a load balancer for your EC2 instances insideAmazon Virtual Private Cloud (Amazon VPC), see Create a Basic Load Balancer inEC2-VPC (p. 23)
c. Leave Listener Configuration set to the default value for this example.
API Version 2012-06-0116
Elastic Load Balancing Developer GuideConfigure Listeners for Your Load Balancer
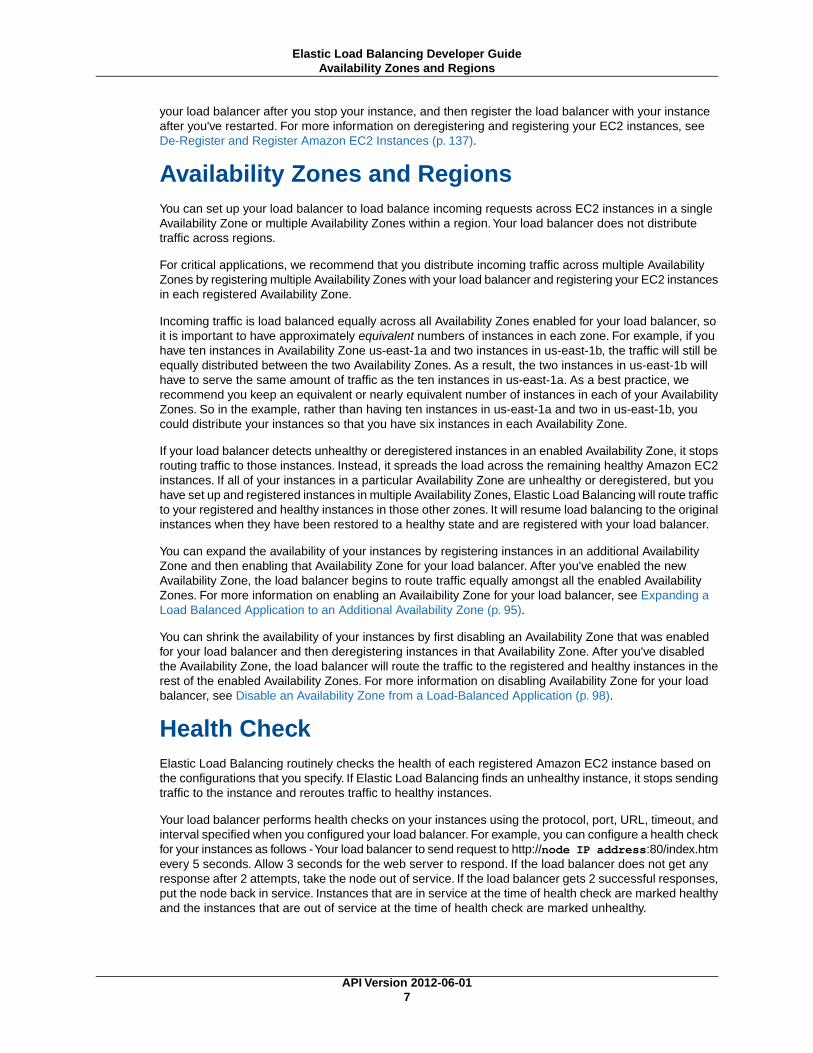
ImportantThe default settings require that your Amazon EC2 HTTP servers are active andaccepting requests on port 80.
4. Click Continue to configure health check for your Amazon EC2 instances.
Configure Health Check for Your Amazon EC2InstancesElastic Load Balancing routinely checks the health of each load-balanced Amazon EC2 instance basedon the configurations that you specify. If Elastic Load Balancing finds an unhealthy instance, it stopssending traffic to the instance and reroutes traffic to healthy instances.
To configure a health check for your Amazon EC2 instances
1. On the CONFIGURE HEALTH CHECK page of the Create a New Load Balancer wizard, set thefollowing configurations:
a. Leave Ping Protocol set to its default value of HTTP.
b. Leave Ping Port set to its default value of 80.
Elastic Load Balancing pings the port you choose (in this example, port 80) to send health checkqueries to your Amazon EC2 instances.
ImportantYour Amazon EC2 instances must accept incoming traffic on the ping port.This exampleassumes that each of your instances has a working HTTP server that accepts incomingtraffic on port 80.
c. In the Ping Path field, replace the default value with a single forward slash ("/").
API Version 2012-06-0117
Elastic Load Balancing Developer GuideConfigure Health Check for Your Amazon EC2 Instances

Elastic Load Balancing sends health check queries to the path you specify in Ping Path. Thisexample uses a single forward slash so that Elastic Load Balancing sends the query to yourHTTP server's default home page, whether that default page is named index.html,default.html, or a different name.
d. Leave the Advanced Options set to their default values.
2. Click Continue to register your Amazon EC2 instances with your load balancer.
Register Amazon EC2 InstancesNow that you've made your configuration choices you're ready to register your EC2 instances using theADD EC2 INSTANCES page of the Create Load Balancer wizard.
API Version 2012-06-0118
Elastic Load Balancing Developer GuideRegister Amazon EC2 Instances

To register your Amazon EC2 instances
1. On the ADD EC2 INSTANCES page, check the boxes in the Select column to add instances to yourload balancer.
2. Click Continue to review your settings and then create your load balancer.
Review Settings and Create Your Load BalancerNow that you've registered your EC2 instances with your load balancer it's time to review the settingsyou have selected.
To review your settings
1. On the REVIEW page of the Create a New Load Balancer wizard, check your settings.You canmake changes by clicking the edit link for each setting.
NoteYou can modify some of the settings even after you've created your load balancer. Forexample, you can modify the port configurations, health check configurations, and add orremove EC2 instances from your load balancer. For more information, see Using ElasticLoad Balancing (p. 71).
API Version 2012-06-0119
Elastic Load Balancing Developer GuideReview Settings and Create Your Load Balancer

2. Click Create to create your load balancer.
Verify the Creation of Your Load BalancerNow that you've created your load balancer, you're ready to verify its settings.
To verify creation of your load balancer
1. After you click Create button in the REVIEW page, a confirmation window opens. Click Close.
2. When the confirmation window closes, the Load Balancers page opens.Your new load balancernow appears in the list.
API Version 2012-06-0120
Elastic Load Balancing Developer GuideVerify the Creation of Your Load Balancer

3. Select the check box next to your load balancer.
The Load Balancer selected pane displays the description of your load balancer. Verify that thedescriptions match your specifications.
If the description in the Status row indicates that some of your instances are not in service, itsprobably because your instances are still in the registration process. For more information, seeTroubleshooting Elastic Load Balancing: Registering Instances (p. 176).
4. You can test your load balancer after you've verified that at least one of your EC2 instances isInService. To test your load balancer, copy the DNS Name value that is listed in the Descriptiontab and paste it into the address field of an Internet-connected web browser. If your load balanceris working, you will see the default page of your HTTP server.
Congratulations! You've successfully created a basic load balancer. The load balancer is live and hasstarted incurring the standard Elastic Load Balancing usage fees.You can either delete the load balancernow and incur minimal hourly (typically less than a dollar) charges, or you can continue using the loadbalancer.
API Version 2012-06-0121
Elastic Load Balancing Developer GuideVerify the Creation of Your Load Balancer

NoteIf you are a new AWS customer and are using the free usage tier, you can continue using theload balancer. Go to AWS Free Usage Tier to check the number of hours available to you.
• For information on deleting your load balancer, see the following section.
• Elastic Load Balancing supports the load balancing of applications using HTTP, HTTPS (Secure HTTP),TCP, and SSL (Secure TCP) listener protocols. For a quick overview of the different configurationsavailable for your load balancer, see Elastic Load Balancing Listener Configurations QuickReference (p. 68).
• For information on some common Elastic Load Balancing user scenarios, and the tasks needed toaccomplish efficient distribution of application loads among your Amazon EC2 instances, see UsingElastic Load Balancing (p. 71).
• For information about Elastic Load Balancing usage rates, go to the Elastic Load Balancing productpage.
Delete Your Load BalancerAs soon as your load balancer becomes available, you’re billed for each hour or partial hour that youkeep the load balancer running. After you've decided that you no longer need the load balancer, you candelete it.
To delete your load balancer
1. On the Amazon EC2 console Getting Started page, in the EC2 Dashboard pane, under NETWORK& SECURITY, click Load Balancers.
2. Select the check box next to the load balancer you want to delete, and then click Delete.
3. In the Delete Load Balancer window, click Yes, Delete.
Elastic Load Balancing deletes the load balancer. As soon as the load balancer is deleted, you stopincurring charges for that load balancer.
NoteEven after you delete a load balancer, the Amazon EC2 instances associated with the loadbalancer continue to run.You will continue to incur charges on the Amazon EC2 instanceswhile they are running. For information on stopping your EC2 instances, go to Stopping andStarting Instances in the Amazon EC2 User Guide. For information on terminating your EC2instances, go to Terminate Your Instance.
API Version 2012-06-0122
Elastic Load Balancing Developer GuideDelete Your Load Balancer

Create a Basic Load Balancer in EC2-VPCTopics
• Configure Listeners for Your Load Balancer (p. 24)
• Configure Health Check for Your Amazon EC2 Instances (p. 25)
• Launch Your Load Balancer Instance in a Subnet (p. 27)
• Assign a Security Group to Your Load Balancer (p. 28)
• Register Your Amazon EC2 Instances (p. 29)
• Review Settings and Create Your Load Balancer (p. 30)
• Verify Creation of Your Load Balancer (p. 31)
• Delete Your Load Balancer (p. 33)
Amazon Web Services (AWS) supports defining a virtual networking environment in a private, isolatedsection of the AWS cloud.Within this virtual private cloud (VPC), you can launch Amazon Elastic ComputeCloud (Amazon EC2) instances that have a private IP address, a public IP address, a public DNS hostname,and a private DNS hostname. These instances can communicate with the Internet through an Internetgateway. An Internet gateway enables your instances to connect to the Internet through the Amazon EC2network edge.You can use a load balancer to monitor and route traffic to your EC2 instances launchedwithin this VPC.
An AWS virtual private cloud (Amazon VPC) can span one or more Availability Zones. Each AvailabilityZone can have multiple subnets. A subnet in Amazon VPC is a subdivision within an Availability Zonedefined by a segment of the IP address range of the VPC. Using subnets you can group your instancesbased on your security and operational needs. A subnet resides entirely within the Availability Zone itwas created in.
When you launch an Amazon EC2 instance within Amazon VPC, you associate it with one or more securitygroups. A security group acts as a firewall that controls the traffic allowed into an instance.
If your AWS account comes with a default VPC, your Amazon EC2 instances will be launched in defaultVPC, by default. To load balance your EC2 instances launched within default VPC, you must create yourload balancer within the default VPC. For more information, see Detecting Your Supported Platforms andWhether You Have a Default VPC. For information on creating a load balancer within a default VPC, seeCreate a Basic Load Balancer in Default VPC (p. 34).
The following step-by-step instructions will help you create a basic load balancer in EC2-VPC using theAWS Management Console, a point-and-click web-based interface. Before you get started with theconsole, be sure you've done the following:
• Sign up for Amazon Web Services (AWS). If you haven't signed up for AWS yet, go tohttp://aws.amazon.com and click the Sign Up Now button.
NoteIf you are a new AWS customer, you are eligible to use the free usage tier for twelve monthsfollowing your AWS sign-up date. The free tier includes 750 hours per month of Amazon EC2Micro Instance usage, and 750 hours per month Elastic Load Balancing plus 15GB of dataprocessing. For more information on what is available on the free tier, go to AWS Free UsageTier.
• To create and use Elastic Load Balancing load balancers within EC2-VPC, you have to first create yourVPC with an Internet gateway, and then launch your EC2 instances within your VPC. For moreinformation, see Get Started with Amazon VPC.
• Make a note of the VPC ID, subnet ID, and the security group associated with the VPC.You will needthem later when you create your load balancer.
API Version 2012-06-0123
Elastic Load Balancing Developer GuideCreate a Basic Load Balancer in EC2-VPC

The following steps outline how to create a basic load balancer in EC2-VPC.
1. Configure the listeners for your load balancer by specifying the ports and protocols to use for thefront-end connection (client to load balancer) and the back-end connection (load balancer to back-endinstance).
2. Configure a health check for your Amazon EC2 back-end instances.
3. Launch your load balancer instance in a subnet.
4. Assign a security group to your load balancer.
5. Register your Amazon EC2 instances with the load balancer.
6. Review settings and create your load balancer.
7. Verify that your load balancer is created.
8. [Optional] Delete your load balancer.
ImportantThe load balancer you're about to create will be live (and not running in a sandbox). If you arenot signed up for the free usage tier, you will incur the standard Elastic Load Balancing usagefees for the load balancer until you terminate it. The total charges will be minimal (typically lessthan a dollar), if you complete the Getting Started in one sitting and delete your load balancerwhen you are finished. For more information about Elastic Load Balancing usage rates, go tothe Elastic Load Balancing product page.
Configure Listeners for Your Load BalancerTo configure listeners for your load balancer
1. Sign in to the AWS Management Console and open the Amazon EC2 console athttps://console.aws.amazon.com/ec2/.
2. Start the Create Load Balancer wizard:
a. On the Amazon EC2 console Getting Started page, in the EC2 Dashboard pane, underNETWORK & SECURITY, click Load Balancers.
API Version 2012-06-0124
Elastic Load Balancing Developer GuideConfigure Listeners for Your Load Balancer

b. Click Create Load Balancer.
3. On the DEFINE LOAD BALANCER page, make the following selections:
a. Enter a name for your load balancer (e.g., my-test-loadbalancer).
b. Click the arrow in the Create LB inside drop-down box and select the VPC ID in which you wantto create your load balancer.
c. Leave the Create an internal load balancer box blank for this tutorial.
NoteIn this tutorial, you are creating an Internet-facing load balancer with a publicly resolvableDNS name that resolves to public IP addresses. If you want to create an internal loadbalancer with a publicly resolvable DNS name that resolves to private IP addresses,see Deploy Elastic Load Balancing in Amazon VPC (p. 111)
d. Leave Listener Configuration set to the default value for this tutorial.
ImportantThe default settings require that your Amazon EC2 HTTP servers are active andaccepting requests on port 80.
4. Click Continue to configure health check for your Amazon EC2 instances.
Configure Health Check for Your Amazon EC2InstancesElastic Load Balancing routinely checks the health of each load-balanced Amazon EC2 instance basedon the configurations that you specify. If Elastic Load Balancing finds an unhealthy instance, it stopssending traffic to the instance and reroutes traffic to healthy instances.
API Version 2012-06-0125
Elastic Load Balancing Developer GuideConfigure Health Check for Your Amazon EC2 Instances

To configure a health check for your Amazon EC2 instances
1. On the CONFIGURE HEALTH CHECK page of the Create a New Load Balancer wizard, set thefollowing configurations:
a. Leave Ping Protocol set to its default value of HTTP.
b. Leave Ping Port set to its default value of 80.
Elastic Load Balancing pings the port you choose (in this example, port 80) to send health checkqueries to your Amazon EC2 instances.
ImportantYour Amazon EC2 instances must accept incoming traffic on the ping port.This exampleassumes that each of your instances has a working HTTP server that accepts incomingtraffic on port 80.
c. In the Ping Path field, replace the default value with a single forward slash ("/").
Elastic Load Balancing sends health check queries to the path you specify in Ping Path. Thisexample uses a single forward slash so that Elastic Load Balancing sends the query to yourHTTP server's default home page, whether that default page is named index.html,default.html, or a different name.
d. Leave the Advanced Options set to their default values.
API Version 2012-06-0126
Elastic Load Balancing Developer GuideConfigure Health Check for Your Amazon EC2 Instances

2. Click Continue to select the subnet in which you want to launch your load balancer instance.
Launch Your Load Balancer Instance in a SubnetIn this step, you select the subnet where you want to launch your load balancer instance.
To select your VPC subnet
1. On the ADD EC2 Instances page, in the Available Subnets table, click the green button to the leftof the subnet into which you want to launch your load balancer instance.
API Version 2012-06-0127
Elastic Load Balancing Developer GuideLaunch Your Load Balancer Instance in a Subnet

Your selected subnets are displayed in the Selected Subnets table.
2. Click Continue to select security groups to assign to your load balancer.
Assign a Security Group to Your Load BalancerTo select security group for your load balancer
1. If you use a pre-existing security group, ensure that it allows ingress to the ports that you configuredthe load balancer to use. If you create a security group in this step, the console will define these portsto be open for you. This tutorial uses the default security group associated with your virtual privatecloud.
API Version 2012-06-0128
Elastic Load Balancing Developer GuideAssign a Security Group to Your Load Balancer

On the ADD EC2 INSTANCES page, select Choose from your existing Security Groups, andthen select the default security group.
2. Click Continue to register EC2 instances with your load balancer.
Register Your Amazon EC2 InstancesNow that you've made your configuration choices you're ready to register your EC2 instances using theADD INSTANCES page of the Create Load Balancer wizard.
To register your EC2 instances launched within VPC with your load balancer
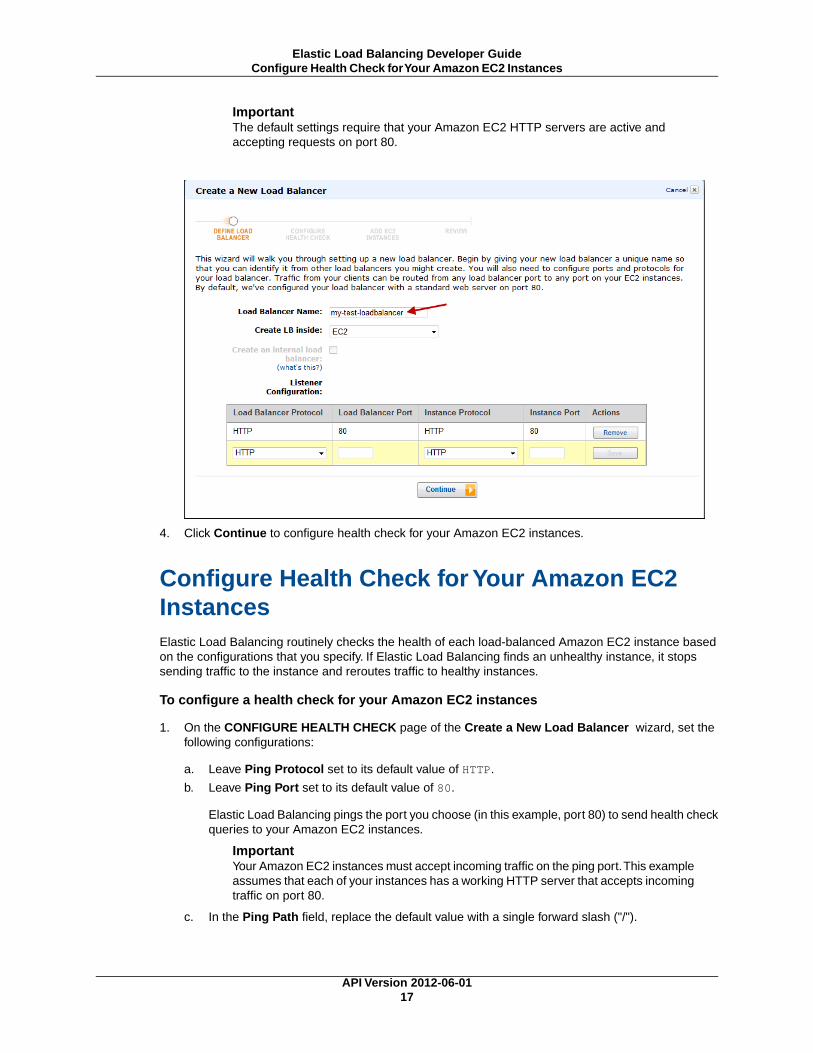
1. On the ADD EC2 INSTANCES page, in the Manually Add Instances to LoadBalancer table, checkthe boxes in the Select column to add instances to your load balancer.
API Version 2012-06-0129
Elastic Load Balancing Developer GuideRegister Your Amazon EC2 Instances
NoteWhen you register a multi-homed instance (an instance that has an elastic network interface(ENI) attached) with your load balancer, the load balancer will route traffic to the primary IPaddress of the instance (eth0). For more information on using ENIs, go to Elastic NetworkInterfaces.
2. Click Continue to review your settings and then create your load balancer.
Review Settings and Create Your Load BalancerNow that you've registered your EC2 instances with your load balancer it's time to to review the settingsyou have selected.
To review your settings
1. On the REVIEW page of the Create a New Load Balancer wizard, check your settings.You canmake changes by clicking the edit link for each setting.
The description in the Scheme row indicates that the load balancer is internet-facing. Thismeans that your load balancer has a publicly resolvable DNS name that resolves to public IPaddresses.
NoteYou can modify some of the settings even after you've created your load balancer. Forexample, you can modify the port configurations, health check configurations, and add orremove EC2 instances from your load balancer. For more information, see Using ElasticLoad Balancing (p. 71).
API Version 2012-06-0130
Elastic Load Balancing Developer GuideReview Settings and Create Your Load Balancer

2. Click Create to create your load balancer.
Verify Creation of Your Load BalancerNow that you've created your load balancer, you're ready to verify its settings.
To verify creation of your load balancer
1. After you click Create button in the REVIEW page, a confirmation window opens. Click Close.
2. When the confirmation window closes, the Load Balancers page opens.Your new load balancernow appears in the list.
Select the check box next to your load balancer.
3. The Load Balancer selected pane displays the description of your load balancer. Verify that thedescriptions match your specifications.
API Version 2012-06-0131
Elastic Load Balancing Developer GuideVerify Creation of Your Load Balancer

If the description in the Status row indicates that some of your instances are not in service, itsprobably because your instances are still in the registration process. For more information, seeTroubleshooting Elastic Load Balancing: Registering Instances (p. 176).
4. You can test your load balancer after you've verified that at least one of your EC2 instances isInService. To test your load balancer, copy the DNS Name value that is listed in the Descriptiontab and paste it into the address field of an Internet-connected web browser. If your load balanceris working, you will see the default page of your HTTP server.
Congratulations! You've successfully created a basic load balancer. The load balancer is live and hasstarted incurring the standard Elastic Load Balancing usage fees.You can either delete the load balancernow and incur minimal hourly (typically less than a dollar) charges, or you can continue using the loadbalancer.
NoteIf you are a new AWS customer and are using the free usage tier, you can continue using theload balancer. Go to AWS Free Usage Tier to check the number of hours available to you.
• For information on deleting your load balancer, see the following section.
• Elastic Load Balancing supports the load balancing of applications using HTTP, HTTPS (Secure HTTP),TCP, and SSL (Secure TCP) listener protocols. For a quick overview of the different configurationsavailable for your load balancer, see Elastic Load Balancing Listener Configurations QuickReference (p. 68).
• For information on some common Elastic Load Balancing user scenarios for Amazon VPC, and thetasks needed to accomplish efficient distribution of application loads among your Amazon EC2 instancesin Amazon VPC, see Deploy Elastic Load Balancing in Amazon VPC (p. 111).
• For information about Elastic Load Balancing usage rates, go to the Elastic Load Balancing productpage.
API Version 2012-06-0132
Elastic Load Balancing Developer GuideVerify Creation of Your Load Balancer

Delete Your Load BalancerAs soon as your load balancer becomes available, you’re billed for each hour or partial hour that youkeep the load balancer running. After you've decided that you no longer need the load balancer, you candelete it.
To delete your load balancer
1. On the Amazon EC2 consoleGetting Started page, in the EC2 Dashboard pane, under NETWORK& SECURITY, click Load Balancers.
2. Select the check box next to the load balancer you want to delete, and then click Delete.
3. In the Delete Load Balancer window, click Yes, Delete.
Elastic Load Balancing deletes the load balancer. As soon as the load balancer is deleted, you stopincurring charges for that load balancer.
NoteEven after you delete a load balancer, the Amazon EC2 instances associated with the loadbalancer continue to run.You will continue to incur charges on the Amazon EC2 instanceswhile they are running. For information on stopping your EC2 instances, go to Stopping andStarting Instances in the Amazon EC2 User Guide. For information on terminating your EC2instances, go to Terminate Your Instance.
API Version 2012-06-0133
Elastic Load Balancing Developer GuideDelete Your Load Balancer

Create a Basic Load Balancer in Default VPCTopics
• Configure Listeners for Your Load Balancer (p. 35)
• Configure Health Check for Your Amazon EC2 Instances (p. 37)
• Assign a Security Group to Your Load Balancer (p. 38)
• Register Your Amazon EC2 Instances (p. 39)
• Review Settings and Create Your Load Balancer (p. 40)
• Verify Creation of Your Load Balancer (p. 41)
• Delete Your Load Balancer (p. 43)
Amazon Web Services (AWS) supports defining a virtual networking environment in a private, isolatedsection of the AWS cloud. Within this virtual private cloud (VPC), you can launch Amazon EC2 instancesthat have a private IP address, a public IP address, a public DNS hostname, and a private DNS hostname.These instances can communicate with the Internet through an Internet gateway. An Internet gatewayenables your instances to connect to the Internet through the Amazon EC2 network edge.You can usea load balancer to monitor and route traffic to your EC2 instances launched within this VPC.
An AWS virtual private cloud (Amazon VPC) spans one or more Availability Zones. Each Availability Zonecan have multiple subnets. A subnet in Amazon VPC is a subdivision within an Availability Zone definedby a segment of the IP address range of the VPC. Using subnets you can group your instances basedon your security and operational needs. A subnet resides entirely within the Availability Zone it was createdin.
When you launch an Amazon EC2 instance within Amazon VPC, you associate it with one or more securitygroups. A security group acts as a firewall that controls the traffic allowed into an instance.
If your AWS account comes with a default VPC, your Amazon EC2 instances are launched within thedefault VPC, by default. For more information, see Detecting Your Supported Platforms and WhetherYou Have a Default VPC.
A default VPC combines the benefits of the advanced networking features provided by Amazon VPCplatform (EC2-VPC) with the ease of use of the Amazon Elastic Compute Cloud platform (EC2-Classic).
Your default VPC automatically comes with a default subnet in each Availability Zone, an Internet gatewayconnected to your default VPC, and a default security group associated with your default VPC, amongother default configurations. For more information on default VPCs and subnets, see Your Default VPCand Subnets.
When you launch your EC2 instances within a default VPC and you don't specify a subnet, they areautomatically launched into a default subnet in your default VPC. By default, we select an AvailabilityZone for you and launch the instance into the corresponding subnet for that Availability Zone. Alternatively,you can select an Availability Zone for your instance by selecting its corresponding default subnet.
To load balance your EC2 instances launched in default VPC, you must create your load balancers withinyour default VPC. When you create a load balancer within default VPC, Elastic Load Balancingautomatically creates a security group by defining the ports specified for the load balancer to be opened.
The following step-by-step instructions will help you create a basic load balancer in default VPC usingthe AWS Management Console, a point-and-click web-based interface. Before you get started with theconsole, be sure you've done the following:
• Sign up for Amazon Web Services (AWS). If you haven't signed up for AWS yet, go tohttp://aws.amazon.com and click the Sign Up Now button.
API Version 2012-06-0134
Elastic Load Balancing Developer GuideCreate a Basic Load Balancer in Default VPC
• Sign in to the AWS Management Console and open the Amazon EC2 console athttps://console.aws.amazon.com/ec2/.
• Confirm that your AWS account supports the default VPC platform. For more information, see DetectingYour Supported Platforms and Whether You Have a Default VPC.
NoteIf you are a new AWS customer, you are eligible to use the free usage tier for twelve monthsfollowing your AWS sign-up date. The free tier includes 750 hours per month of Amazon EC2Micro Instance usage, and 750 hours per month Elastic Load Balancing plus 15GB of dataprocessing. For more information on what is available on the free tier, go to AWS Free UsageTier.
• Launch your Amazon EC2 instances into your default VPC using default subnets and default securitygroup. For more information, see Launching an EC2 Instance into Your Default VPC.
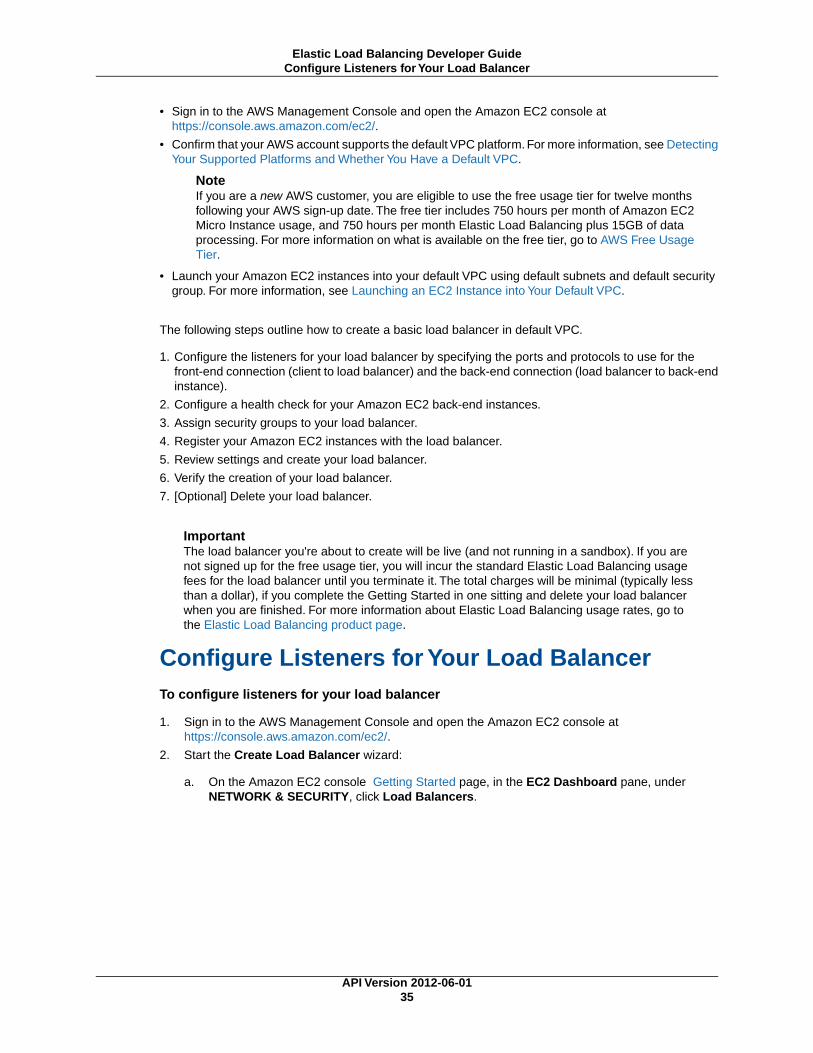
The following steps outline how to create a basic load balancer in default VPC.
1. Configure the listeners for your load balancer by specifying the ports and protocols to use for thefront-end connection (client to load balancer) and the back-end connection (load balancer to back-endinstance).
2. Configure a health check for your Amazon EC2 back-end instances.
3. Assign security groups to your load balancer.
4. Register your Amazon EC2 instances with the load balancer.
5. Review settings and create your load balancer.
6. Verify the creation of your load balancer.
7. [Optional] Delete your load balancer.
ImportantThe load balancer you're about to create will be live (and not running in a sandbox). If you arenot signed up for the free usage tier, you will incur the standard Elastic Load Balancing usagefees for the load balancer until you terminate it. The total charges will be minimal (typically lessthan a dollar), if you complete the Getting Started in one sitting and delete your load balancerwhen you are finished. For more information about Elastic Load Balancing usage rates, go tothe Elastic Load Balancing product page.
Configure Listeners for Your Load BalancerTo configure listeners for your load balancer
1. Sign in to the AWS Management Console and open the Amazon EC2 console athttps://console.aws.amazon.com/ec2/.
2. Start the Create Load Balancer wizard:
a. On the Amazon EC2 console Getting Started page, in the EC2 Dashboard pane, underNETWORK & SECURITY, click Load Balancers.
API Version 2012-06-0135
Elastic Load Balancing Developer GuideConfigure Listeners for Your Load Balancer

b. Click Create Load Balancer.
3. On the DEFINE LOAD BALANCER page, make the following selections:
a. Enter a name for your load balancer (e.g., my-test-loadbalancer).
b. Leave the entry in the Create LB inside: box set to the default VPC for this tutorial.
c. Leave Create an internal load balancer box blank for this tutorial.
NoteIn this tutorial, you are creating an Internet-facing load balancer with a publicly resolvableDNS name that resolves to public IP addresses. If you want to create an internal loadbalancer with a publicly resolvable DNS name that resolves to private IP addresses,see Deploy Elastic Load Balancing in Amazon VPC (p. 111)
d. Leave the Enable advanced VPC configuration: box blank for this tutorial.
NoteAdvanced VPC configuration option allows you to specify your own subnets. Selectthis option if you have created your own subnets and want to use them instead of thedefault subnets.
e. Leave Listener Configuration set to the default value for this tutorial.
ImportantThe default settings require that your Amazon EC2 HTTP servers are active andaccepting requests on port 80.
API Version 2012-06-0136
Elastic Load Balancing Developer GuideConfigure Listeners for Your Load Balancer

4. Click Continue to configure the health check for your instances.
Configure Health Check for Your Amazon EC2InstancesElastic Load Balancing routinely checks the health of each load-balanced Amazon EC2 instance basedon the configurations that you specify. If Elastic Load Balancing finds an unhealthy instance, it stopssending traffic to the instance and reroutes traffic to healthy instances.
To configure a health check for your Amazon EC2 instances
1. On the CONFIGURE HEALTH CHECK page of the Create a New Load Balancer wizard, set thefollowing configurations:
a. Leave Ping Protocol set to its default value of HTTP.
b. Leave Ping Port set to its default value of 80.
Elastic Load Balancing pings the port you choose (in this example, port 80) to send health checkqueries to your Amazon EC2 instances.
ImportantYour Amazon EC2 instances must accept incoming traffic on the ping port.This exampleassumes that each of your instances has a working HTTP server that accepts incomingtraffic on port 80.
c. In the Ping Path field, replace the default value with a single forward slash ("/").
API Version 2012-06-0137
Elastic Load Balancing Developer GuideConfigure Health Check for Your Amazon EC2 Instances

Elastic Load Balancing sends health check queries to the path you specify in Ping Path. Thisexample uses a single forward slash so that Elastic Load Balancing sends the query to yourHTTP server's default home page, whether that default page is named index.html,default.html, or a different name.
d. Leave the Advanced Options set to their default values.
2. Click Continue to select security groups to assign to your load balancer.
Assign a Security Group to Your Load BalancerTo select a security group for your load balancer
1. This tutorial uses the default VPC security group associated with your default VPC.
On the ADD EC2 INSTANCES page, select Choose from your existing Security Groups and thenselect the default security group.
API Version 2012-06-0138
Elastic Load Balancing Developer GuideAssign a Security Group to Your Load Balancer

If you choose a non-default pre-existing security group, ensure that it allows ingress to the ports thatyou configured the load balancer to use. If you create a security group in this step, the console willdefine these ports to be open for you.
2. Click Continue to register your Amazon EC2 instances with your load balancer.
Register Your Amazon EC2 InstancesNow that you've made your configuration choices you're ready to register your EC2 instances with yourload balancer.
To register your EC2 instances launched within VPC with your load balancer
1. On the ADD EC2 Instances page, in the Manually Add Instances to LoadBalancer table, checkthe boxes in the Select column to add instances to your load balancer.
API Version 2012-06-0139
Elastic Load Balancing Developer GuideRegister Your Amazon EC2 Instances

NoteWhen you register a multi-homed instance (an instance that has an elastic network interface(ENI) attached) with your load balancer, the load balancer will route traffic to the primary IPaddress of the instance (eth0). For more information on using ENIs, go to Elastic NetworkInterfaces.
2. Click Continue to review your settings and then create your load balancer.
Review Settings and Create Your Load BalancerNow that you've registered your EC2 instances with your load balancer it's time to review the settingsyou have selected.
To review your settings
1. On the REVIEW page of the Create a New Load Balancer wizard, check your settings.You canmake changes by clicking the edit link for each setting.
The description in the Scheme row indicates that the load balancer is internet-facing. Thismeans that your load balancer has a publicly resolvable DNS name that resolves to public IPaddresses.
The VPC and subnets listed under VPC INFORMATION are the default VPC and default subnetsautomatically created for your AWS account.
NoteYou can modify some of the settings even after you've created your load balancer. Forexample, you can modify the port configurations, health check configurations, and add orremove EC2 instances from your load balancer. For more information, see Deploy ElasticLoad Balancing in Amazon VPC (p. 111).
API Version 2012-06-0140
Elastic Load Balancing Developer GuideReview Settings and Create Your Load Balancer

2. Click Create to create your load balancer.
Verify Creation of Your Load BalancerNow that you've created your load balancer, you're ready to verify its settings.
To verify your load balancer is created
1. After you click Create button in the REVIEW page, a confirmation window opens. Click Close.
2. When the confirmation window closes, the Load Balancers page opens.Your new load balancernow appears in the list.
Select the check box next to your load balancer.
3. The Load Balancer selected pane displays the description of your load balancer. Verify that thedescriptions match your specifications.
API Version 2012-06-0141
Elastic Load Balancing Developer GuideVerify Creation of Your Load Balancer

If the description in the Status row indicates that some of your instances are not in service, itsprobably because your instances are still in the registration process. For more information, seeTroubleshooting Elastic Load Balancing: Registering Instances (p. 176).
4. You can test your load balancer after you've verified that at least one of your EC2 instances isInService. To test your load balancer, copy the DNS Name value that is listed in the Descriptiontab and paste it into the address field of an Internet-connected web browser. If your load balanceris working, you will see the default page of your HTTP server.
Congratulations! You've successfully created a basic load balancer. The load balancer is live and hasstarted incurring the standard Elastic Load Balancing usage fees.You can either delete the load balancernow and incur minimal hourly (typically less than a dollar) charges, or continue using the load balancer.
NoteIf you are a new AWS customer and are using the free usage tier, you can continue using theload balancer. Go to AWS Free Usage Tier to check the number of hours available to you.
• For information on deleting your load balancer, see the following section.
• Elastic Load Balancing supports the load balancing of applications using HTTP, HTTPS (Secure HTTP),TCP, and SSL (Secure TCP) listener protocols. For a quick overview of the different configurationsavailable for your load balancer, see Elastic Load Balancing Listener Configurations QuickReference (p. 68).
• For information on some common Elastic Load Balancing user scenarios, and the tasks needed toaccomplish efficient distribution of application loads among your Amazon EC2 instances in AmazonVPC, see Deploy Elastic Load Balancing in Amazon VPC (p. 111).
API Version 2012-06-0142
Elastic Load Balancing Developer GuideVerify Creation of Your Load Balancer

• For information about Elastic Load Balancing usage rates, go to the Elastic Load Balancing productpage.
Delete Your Load BalancerAs soon as your load balancer becomes available, you’re billed for each hour or partial hour that youkeep the load balancer running. After you've decided that you no longer need the load balancer, you candelete it.
To delete your load balancer
1. On the Amazon EC2 console Getting Started page, in the EC2 Dashboard pane, under NETWORK& SECURITY, click Load Balancers.
2. Select the check box next to the load balancer you want to delete, and then click Delete.
3. In the Delete Load Balancer window, click Yes, Delete.
Elastic Load Balancing deletes the load balancer. As soon as the load balancer is deleted, you stopincurring charges for that load balancer.
NoteEven after you delete a load balancer, the Amazon EC2 instances associated with the loadbalancer continue to run.You will continue to incur charges on the Amazon EC2 instanceswhile they are running. For information on stopping your EC2 instances, go to Stopping andStarting Instances in the Amazon EC2 User Guide. For information on terminating your EC2instances, go to Terminate Your Instance.
API Version 2012-06-0143
Elastic Load Balancing Developer GuideDelete Your Load Balancer
Get Set Up with Elastic LoadBalancing Interfaces
Topics
• Installing the Command Line Interface (p. 45)
• Use Query Requests to Call Elastic Load Balancing APIs (p. 51)
• Using the SOAP API (p. 60)
• Using the SDKs (p. 63)
You can create, access, and manage your load balancers using one of the Amazon Web Services (AWS)Elastic Load Balancing interfaces: the AWS Management Console, the command line interface (CLI), theQuery API, the SOAP API, or the SDK for Elastic Load Balancing.
• AWS Management Console— The AWS Management Console provides a web-based interface formany AWS products.You can use the console to make requests to an API. Before you begin usingthe AWS Management Console, you will need to create an AWS account alias and sign in using thataccount. If you already have an AWS account, you do not need to create a new one.You will use theAmazon EC2 console for Elastic Load Balancing requests. If you haven't signed up for AWS yet,
• Go to http://aws.amazon.com and click the Sign Up Now button.
• Sign in to the AWS Management Console and open the Amazon EC2 console athttps://console.aws.amazon.com/ec2/.
• Command Line Interface— Elastic Load Balancing provides a command line interface (CLI) to accessElastic load Balancing functionality without using the AWS Management Console, the APIs, or theSDKs. The CLI wraps the API actions to provide multi-function commands. The CLI commands arewritten in Java and include shell scripts for both Windows and Linux/Unix/Mac OSX. The shell scriptsare available as a self-contained ZIP file. There is no installation required, simply download and unzipit. For more information on installing and using the Elastic Load Balancing command line interface, seeInstalling the Command Line Interface (p. 45).
• Query API— Elastic Load Balancing provides a Query API you can use to programmatically accessElastic Load Balancing functionality. Query requests are HTTP or HTTPS requests that use the HTTPverbs GET or POST and a Query parameter named Action or Operation. Action is used throughoutthis documentation, although Operation is supported for backward compatibility with other AWS QueryAPIs. For information on using the Query API, see Use Query Requests to Call Elastic Load BalancingAPIs (p. 51).
• SOAP API— You can access the Elastic Load Balancing web service using the SOAP web servicesmessaging protocol. This interface is described by a Web Services Description Language (WSDL)
API Version 2012-06-0144
Elastic Load Balancing Developer Guide

document that defines the operations and security model for the particular service.The WSDL referencesan XML schema document, which strictly defines the data types that might appear in SOAP requestsand responses. For information on using the SOAP API, see Using the SOAP API (p. 60)
• AWS SDKs— AWS SDKs make it easier for developers to build applications that tap into cost-effective,scalable, and reliable AWS infrastructure services. With AWS SDKs, you can get started in minuteswith a single, downloadable package that includes the library, code samples, and referencedocumentation.You can access Elastic Load Balancing programmatically using the SDKs in Java,.NET, PHP, or Ruby. For more information on downloading and using the AWS SDKs, see Using theSDKs (p. 63).
Installing the Command Line InterfaceThis section describes how to set up the Elastic Load Balancing command line tool.
Process for Installing the Command Line Tool
Task 1: Download the Command Line Interface (p. 45)
Task 2: Set the JAVA_HOME Environment Variable (p. 45)
Task 3: Set the AWS_ELB_HOME Environment Variable (p. 47)
Task 4: Set the AWS_CREDENTIAL_FILE Environment Variable (p. 47)
Task 5: Set the Region (p. 48)
NoteAs a convention, command line text is prefixed with a generic PROMPT> command line prompt.The actual command line prompt on your computer is likely to be different. We also use $ toindicate a Linux/UNIX–specific command and C:\> for a Windows–specific command. Althoughwe don't provide explicit instructions, the tool also works on the Mac OS X. (Commands on theMac OS X resemble the Linux and UNIX commands.) The example output resulting from thecommand is shown immediately thereafter without any prefix.
Task 1: Download the Command Line InterfaceThe command line tool is available as a ZIP file on the Elastic Load Balancing Developer Tools website.The tool is written in Java and includes shell scripts for both Windows and Linux/UNIX/Mac OSX. TheZIP file is self-contained; no installation is required.You just download it and unzip it.
Some additional setup is required before you can use the tool. These steps are discussed next.
Task 2: Set the JAVA_HOME Environment VariableThe Elastic Load Balancing command line tool reads an environment variable (JAVA_HOME) on yourcomputer to locate the Java runtime.The command line tool requires Java version 5 or later to run. Eithera JRE or JDK installation is acceptable.
To set the JAVA_HOME Environment Variable
1. If you do not have Java 1.5 or later installed, download and install it now. To view and downloadJREs for a range of platforms, including Linux/UNIX and Windows, go to http://java.oracle.com/.
API Version 2012-06-0145
Elastic Load Balancing Developer GuideInstalling the Command Line Interface

2. Set JAVA_HOME to the full path of the directory that contains a subdirectory named bin that in turncontains the Java executable. For example, if your Java executable is in the /usr/jdk/bin directory,set JAVA_HOME to /usr/jdk. If your Java executable is in C:\jdk\bin, set JAVA_HOME to C:\jdk.
NoteIf you are using Cygwin, you must use Linux/UNIX paths (e.g., /usr/bin instead of C:\usr\bin)for AWS_ELB_HOME and AWS_CREDENTIAL_FILE. However, JAVA_HOME should have aWindows path. Additionally, the value cannot contain any spaces, even if the value is quotedor the spaces are escaped.
The following Linux/UNIX example sets JAVA_HOME for a Java executable in the/usr/local/jre/bin directory.
$ export JAVA_HOME=/usr/local/jre
The following Windows example uses set and setx to set JAVA_HOME for a Java executable in theC:\java\jdk1.6.0_6\bin directory.The set command defines JAVA_HOME for the current sessionand setx makes the change permanent.
C:\> set JAVA_HOME=C:\java\jdk1.6.0_6C:\> setx JAVA_HOME C:\java\jdk1.6.0_6
NoteDon't include the bin directory in JAVA_HOME; that's a common mistake some users make.The command line tool won't work if you do.
3. Add your Java directory to your path before other versions of Java.
On Linux and UNIX, you can update your PATH as follows:
$ export PATH=$JAVA_HOME/bin:$PATH
On Windows the syntax is slightly different:
C:\> set PATH=%JAVA_HOME%\bin;%PATH%C:\> setx PATH %JAVA_HOME%\bin;%PATH%
NoteThe setx command does not use the = sign.
4. On Linux or UNIX, verify your JAVA_HOME setting with the command $JAVA_HOME/bin/java-version.
$ $JAVA_HOME/bin/java -versionjava version "1.5.0_09"Java(TM) 2 Runtime Environment, Standard Edition (build 1.5.0_09-b03)Java HotSpot(TM) Client VM (build 1.5.0_09-b03, mixed mode, sharing)
The syntax is different on Windows, but the output is similar.
C:\> %JAVA_HOME%\bin\java -versionjava version "1.5.0_09"Java(TM) 2 Runtime Environment, Standard Edition (build 1.5.0_09-b03)Java HotSpot(TM) Client VM (build 1.5.0_09-b03, mixed mode, sharing)
API Version 2012-06-0146
Elastic Load Balancing Developer GuideTask 2: Set the JAVA_HOME Environment Variable

Task 3: Set the AWS_ELB_HOME EnvironmentVariableThe command line tool depends on an environment variable (AWS_ELB_HOME) to locate supportinglibraries.You'll need to set this environment variable before you can use the tool.
To set the AWS_ELB_HOME Environment Variable
1. Set AWS_ELB_HOME to the path of the directory into which you unzipped the command line tool. Thisdirectory is named ElasticLoadBalancing-w.x.y.z (w, x, y, and z are version/release numbers)and contains sub-directories named bin and lib.
The following Linux/UNIX example sets AWS_ELB_HOME for a directory namedElasticLoadBalancing-1.0.12.0 in the /usr/local directory.
$ export AWS_ELB_HOME=/usr/local/ElasticLoadBalancing-1.0.12.0
The following Windows example sets AWS_ELB_HOME for a directory namedElasticLoadBalancing-1.0.12.0 in the C:\CLIs directory.
C:\> set AWS_ELB_HOME=C:\CLIs\ElasticLoadBalancing-1.0.12.0C:\> setx AWS_ELB_HOME C:\CLIs\ElasticLoadBalancing-1.0.12.0
2. Add the tool's bin directory to your system PATH. The rest of this guide assumes that you've donethis.
On Linux and UNIX, you can update your PATH as follows:
$ export PATH=$PATH:$AWS_ELB_HOME/bin
On Windows the syntax is slightly different:
C:\> set PATH=%PATH%;%AWS_ELB_HOME%\binC:\> setx PATH %PATH%;%AWS_ELB_HOME%\bin
Task 4: Set the AWS_CREDENTIAL_FILEEnvironment VariableWhen you sign up for an AWS account, we create access credentials for you so that you can make securerequests to AWS.Your access credentials are your AccessKeyId and SecretAccessKey.You mustprovide these credentials to the command line tools so that they know that the commands that you issuecome from your account.
The command line tool reads your credentials from a credential file that you create on your local system.
You can either specify your credentials with the --aws-credential-file parameter every time youissue a command or you can create an environment variable that points to the credential file on your localsystem. If the environment variable is properly configured, you can omit the --aws-credential-fileparameter when you issue a command. The following procedure describes how to create a credentialfile and a corresponding AWS_CREDENTIAL_FILE environment variable.
API Version 2012-06-0147
Elastic Load Balancing Developer GuideTask 3: Set the AWS_ELB_HOME Environment Variable

To create security credentials file on your local system
1. Retrieve an access keyID and its corresponding secret access key
Your account access key ID and its corresponding secret access key were provided when the accountwas created. Although you can retrieve the access key ID from the Security Credentials page, youcannot retrieve the secret access key.You'll need to create new access keys if the secret accesskey was lost or forgotten. For information on retrieving your AWS credentials, see Creating, Modifying,and Viewing User Security Credentials.
2. Write down your secret access key and access key ID, or save them.
3. Add your access key ID and secret access key to the file namedcredential-file-path.template:
a. Open the file credential-file-path.template included in your command line interface(CLI) archive.
b. Copy and paste your access key ID and secret access key into the file.
c. Rename the file and save it to a convenient location on your computer.
d. If you are using Linux, set the file permissions as follows:
$ chmod 600 credential-file-name
4. Set the AWS_CREDENTIAL_FILE environment variable to the fully qualified path of the file you justcreated.
The following Linux/UNIX example sets AWS_CREDENTIAL_FILE for myCredentialFile in the/usr/local directory.
$ export AWS_CREDENTIAL_FILE=/usr/local/myCredentialFile
The following Windows example sets AWS_CREDENTIAL_FILE for myCredentialFile.txt in theC:\aws directory.
C:\> set AWS_CREDENTIAL_FILE=C:\aws\myCredentialFile.txtC:\> setx AWS_CREDENTIAL_FILE C:\aws\myCredentialFile.txt
Task 5: Set the RegionBy default, the Elastic Load Balancing tools use the US East (Northern Virginia) Region(us-east-1)with the elasticloadbalancing.us-east-1.amazonaws.com service endpoint URL. If your instancesare in a different region, you must specify the region where your instances reside. For example, if yourinstances are in EU (Ireland) Region, you must specify the eu-west1 Region by using the --regioneu-west-1 parameter or by setting the AWS_ELB_URL environment variable.
This section describes how to specify a different Region by changing the service endpoint URL.
To specify a different region
1. To view available regions go to Regions and Endpoints in the Amazon Web Services General Reference.
2. If you want to change the service endpoint, set the AWS_ELB_URL environment variable.
• The following Linux/UNIX example sets AWS_ELB_URL to the EU (Ireland) Region.
API Version 2012-06-0148
Elastic Load Balancing Developer GuideTask 5: Set the Region

$ export AWS_ELB_URL=https://elasticloadbalancing.eu-west-1.amazonaws.com
• The following Windows example sets AWS_ELB_URL to the EU (Ireland) Region.
C:\> set AWS_ELB_URL=https://elasticloadbalancing.eu-west-1.amazonaws.com
C:\> setx AWS_ELB_URL https://elasticloadbalancing.eu-west-1.amazonaws.com
Verify if Elastic Load Balancing Command LineInterface(CLI) is InstalledTo verify the installation and configuration of Elastic Load Balancing CLI
1. On your Linux or Windows workstation, open a new command prompt.
2. Type the command elb-cmd.
3. You should see output similar to the following:
Command Name Description
------------ ----------- elb-apply-security-groups-to-lb Apply VPC security groups to Load Balancer.
elb-associate-route53-hosted-zone Associate LoadBalancer DNS... a Route53 resource record.
elb-attach-lb-to-subnets Attach existing LoadBalancer to Subnets in VPC.
elb-configure-healthcheck Configure the parameters f...tered with a LoadBalancer.
elb-create-app-cookie-stickiness-policy Create an application-generated stickiness policy.
elb-create-lb Create a new LoadBalancer.
elb-create-lb-cookie-stickiness-policy Create an LB-generated stickiness policy.
elb-create-lb-listeners Create a new LoadBalancer listener.
elb-create-lb-policy Create a LoadBalancer poli...ed LoadBalancerPolicyType.
elb-delete-lb Deletes an existing LoadBalancer.
elb-delete-lb-listeners Deletes a listener on an existing LoadBalancer.
API Version 2012-06-0149
Elastic Load Balancing Developer GuideVerify if Elastic Load Balancing Command Line
Interface(CLI) is Installed

elb-delete-lb-policy Delete a LoadBalancer policy.
elb-deregister-instances-from-lb Deregisters instances from a Load Balancer.
elb-describe-instance-health Describes the state of instances.
elb-describe-lb-policies Describes the details of LoadBalancer Policies.
elb-describe-lb-policy-types Describes the details of LoadBalancer PolicyTypes.
elb-describe-lbs Describes the state and properties of LoadBalancers.
elb-detach-lb-from-subnets Detach existing LoadBalancer from Subnets in VPC.
elb-disable-zones-for-lb Remove availability zones from an LoadBalancer.
elb-disassociate-route53-hosted-zone Disassociate LoadBalancer ... a Route53 resource record.
elb-enable-zones-for-lb Add availability zones to existing LoadBalancer.
elb-register-instances-with-lb Registers instances to a LoadBalancer.
elb-set-lb-listener-ssl-cert Set the SSL Certificate fo...ecified LoadBalancer port.
elb-set-lb-policies-for-backend-server Set LoadBalancer policies for backend servers.
elb-set-lb-policies-of-listener Set LoadBalancer policies for a port.
version Prints the version of the CLI tool and the API.
For help on a specific command, type '<commandname> --help'
This completes your installation and configuration of the Elastic Load Balancing command line interfacetool.You're ready to start accessing Elastic Load Balancing using the command line interface (CLI). Fordescriptions of all the Elastic Load Balancing commands, see Elastic Load Balancing Quick ReferenceCard.
API Version 2012-06-0150
Elastic Load Balancing Developer GuideVerify if Elastic Load Balancing Command Line
Interface(CLI) is Installed

Use Query Requests to Call Elastic LoadBalancing APIs
Topics
• Process for Signing Query Request Using Signature Verion 2 (p. 52)
• Calculating the AWS Signature Version 2 (p. 54)
• Example Query Request and Response Structures (p. 54)
• Troubleshooting Request Signatures Version 2 (p. 58)
• Using the Java SDK to Sign a Query Request (p. 58)
Query requests are HTTP or HTTPS requests that use the HTTP verb GET or POST and a Queryparameter named Action or Operation that specifies the API you are calling. Action is used throughoutthis documentation, although Operation is also supported for backward compatibility with other AmazonWeb Services (AWS) Query APIs.
Calling the API using a Query request is the most direct way to access the web service, but requires thatyour application handle low-level details such as generating the hash to sign the request, and errorhandling.The benefit of calling the service using a Query request is that you are assured of having accessto the complete functionality of the API.
NoteThe Query interface used by AWS is similar to REST, but does not adhere completely to theREST principles.
Signing Query Requests
Query requests travel over the Internet using either HTTP or HTTPS, and are vulnerable to beingintercepted and altered in transit. To prevent this and ensure that the incoming request is both from avalid AWS account and unaltered, AWS requires all requests to be signed.
To sign a Query request, you calculate a digital signature using a cryptographic hash function over thetext of the request and your AWS secret key. A cryptographic hash is a one-way function that returnsunique results based on the input.
When Elastic Load Balancing receives the request, it re-calculates the signature using the request textand the secret key that matches the AWS access key in the request. If the two signatures match, AutoScaling knows that the query has not been altered and that the request originated from your account.This is one reason why it is important to safeguard your private key. Any malicious user who obtains itwould be able to make AWS calls, and incur charges, on your account.
For additional security, you should transmit your requests using Secure Sockets Layer (SSL) by usingHTTPS. SSL encrypts the transmission, protecting your request or the response from being viewed intransit. For more information about securing your Query requests, see Making Secure Requests to AmazonWeb Services.
The signature format that AWS uses has been refined over time to increase security and ease of use.Elastic Load Balancing supports Signature Version 2 and Signature Version 4. If you are creating newapplications that use Elastic Load Balancing, then we recommend using Signature Version 4 for signingyour query requests.
For information on how to create the signature using Signature Version 4, see Signature Version 4 SigningProcess in the AWS General Reference.
The following sections describe the steps needed to create a query request using Signature Version 2.
API Version 2012-06-0151
Elastic Load Balancing Developer GuideUse Query Requests to Call Elastic Load Balancing APIs

Structure of an Elastic Load Balancing Query Request
Elastic Load Balancing requires that each HTTP or HTTPS query request formatted for Signature Version2 contain the following:
• Endpoint—Also known as the host part of an HTTP request. This is the DNS name of the computerto which you send the Query request. This is different for each AWS Region. For the complete list ofendpoints supported by a web service, see Regions and Endpoints in the Amazon Web ServicesGeneral Reference.The endpoint, elasticloadbalancing.amazonaws.com, shown in the example below, is the defaultendpoint and maps to the Region us-east-1.
• Action—Specifies the action that you want a web service to perform.This value determines the parameters that are used in the request. For descriptions of Elastic LoadBalancing actions and their parameters, see Elastic Load Balancing API Reference.
The action in the example below is DescribeLoadBalancers, which causes a web service to returndetails about one or more load balancers.
• Required and optional parameters—Each action in a web service has a set of required and optionalparameters that define the API call. For a list of parameters that must be included in every a web serviceaction, see Common Parameters. For details about the parameters for a specific action, see the entryfor the specific Actions in the Elastic Load Balancing API Reference.
The following common parameters are required to authenticate a query request:
• AccessKeyId—A value distributed by AWS when you sign up for an AWS Account. For informationon retrieving the AccessId for your AWS account, see Get Your Access Key ID and Secret AccessKey
• Timestamp—This is the time at which you make the request. Including this in the Query requesthelps prevent third parties from intercepting your request and re-submitting to a web service.
• SignatureVersion—The version of the AWS signature protocol you're using. Elastic Load Balancingsupports signature version 2 and signature version 4.
• SignatureMethod—The hash-based protocol you are using to calculate the signature. This can beeither HMAC-SHA1 or HMAC-SHA256 for version 2 AWS signatures.
• Signature—This is a calculated value that ensures the signature is valid and has not been tamperedwith in transit.
Process for Signing Query Request UsingSignature Verion 2Before you can sign the Query request, you must put the request into a completely unambiguous format.This is needed because there are different—and yet correct—ways to format a Query request, but thedifferent variations would result in different HMAC signatures. Putting the request into an unambiguous,canonical, format before signing it ensures that your application and a web service will calculate the samesignature for a given request.
The unambigous string to sign is built up by concatenating the Query request components together asfollows. As an example, let's generate the string to sign for the following call to theDescribeLoadBalancers API.
https://elasticloadbalancing.amazonaws.com?Action=DescribeLoadBalancers&Version=2011-01-01&AWSAccessKeyId=AKIAIOSFODNN7EXAMPLE&SignatureVersion=2
API Version 2012-06-0152
Elastic Load Balancing Developer GuideProcess for Signing Query Request Using Signature
Verion 2

&SignatureMethod=HmacSHA256&Timestamp=2011-10-03T15%3A19%3A30
To create the string to sign (Signature Version 2)
1. Start with the request method (either GET or POST), followed by a newline character. (In the following,for human readability, the newline character is represented as \n.)
GET\n
2. Add the HTTP host header in lowercase, followed by a newline character. The port information isomitted if it is the standard port for the protocol (port 80 for HTTP and port 443 for HTTPS), butincluded if it is a non-standard port.
elasticloadbalancing.amazonaws.com\n
3. Add the URL-encoded version of the absolute path component of the URI (this is everything betweenthe HTTP host header to the question mark character (?) that begins the query string parameters)followed by a newline character. If the absolute path is empty, use a forward slash (/).
/\n
4. Add the query string components (the name-value pairs, not including the initial question mark (?)as UTF-8 characters which are URL encoded per RFC 3986 (hexadecimal characters must beuppercased) and sorted using lexicographic byte ordering. Lexicographic byte ordering is casesensitive.
Separate parameter names from their values with the equal sign character (=) (ASCII character 61),even if the value is empty. Separate pairs of parameter and values with the ampersand character(&) (ASCII code 38).
Some API actions take lists of parameters. These lists are specified using the following notation:param.member.n. Values of n are integers starting from 1. All lists of parameters must follow thisnotation, including lists that contain only one parameter. For example, a query parameter list for loadbalancer names looks like this:
&LoadBalancerNames.member.1=my-test-loadbalancer-1&LoadBalancerNames.member.2=my-test-loadbalancer-2
All reserved characters must be escaped. All unreserved characters must not be escaped. Concatenatethe parameters and their values to make one long string with no spaces between them. Spaces withina parameter value, are allowed, but must be URL encoded as %20. In the concatenated string, periodcharacters (.) are not escaped. RFC 3986 considers the period character an unreserved character,and thus it is not URL encoded.
NoteRFC 3986 does not specify what happens with ASCII control characters, extended UTF-8characters, and other characters reserved by RFC 1738. Since any values may be passedinto a string value, these other characters should be percent encoded as %XY where X andY are uppercase hex characters. Extended UTF-8 characters take the form %XY%ZA...(this handles multi-bytes). The space character should be represented as '%20'. Spacesshould not be encoded as the plus sign (+) as this will cause as error.
API Version 2012-06-0153
Elastic Load Balancing Developer GuideProcess for Signing Query Request Using Signature
Verion 2

The following example shows the query string components of a call to the Elastic Load BalancingAPI DescribeLoadBalancers, processed as described above.
AWSAccessKeyId=AKIAIOSFODNN7EXAMPLE&Action=DescribeLoadBalancers&Signature Method=HmacSHA256&SignatureVersion=2&Timestamp=2011-10-03T15%3A19%3A30&Ver sion=2012-06-01
5. The string to sign for the call to DescribeLoadBalancers takes the following form:
GET\nelasticloadbalancing.amazonaws.com%0A/\nAWSAccessKeyId=AKIAIOSFODNN7EXAMPLE&Action=DescribeLoadBalancers&Signature Method=HmacSHA256&SignatureVersion=2&Timestamp=2011-10-03T15%3A19%3A30&Ver sion=2012-06-01
Calculating the AWS Signature Version 2After you've created the canonical string as described in Process for Signing Query Request UsingSignature Verion 2 (p. 52), you calculate the signature by creating a hash-based message authenticationcode (HMAC) using either the HMAC-SHA1 or HMAC-SHA256 protocols. The HMAC-SHA256 protocolis preferred.
You then add the value returned to the Query request as a signature parameter, as shown below.Youcan then use the signed request in an HTTP or HTTPS call. A web service will then return the results ofthe call formatted as a response.
https://elasticloadbalancing.amazonaws.com?AWSAccessKeyId=AKIAIOSFODNN7EXAMPLE&Ac tion=DescribeLoadBalancers&SignatureMethod=HmacSHA256&SignatureVer sion=2&Timestamp=2011-10-03T15%3A19%3A30&Version=2011-01-01&Signa ture=lptk88A0LEP2KfwM3ima33DUjY0e%2FyfF7YfitJ%2FQw6I%3D
The AWS SDKs offer functions to generate Query request signatures. To see an example using the AWSSDK for Java, go to Using the Java SDK to Sign a Query Request (p. 58).
Example Query Request and Response StructuresExample Query Request Structure
In the Elastic Load Balancing documentation, we leave the example GET requests unencoded to makethem easier to read. To make the GET examples even easier to read, Elastic Load Balancingdocumentation presents them in the following parsed format.
https://elasticloadbalancing.amazonaws.com/?LoadBalancerNames.member.1=my-test-loadbalancer-1&MaxRecords=20&Action=DescribeLoadBalancers&AWSAccessKeyId=AccessKeyID
API Version 2012-06-0154
Elastic Load Balancing Developer GuideCalculating the AWS Signature Version 2

&Timestamp=2012-01-28T21%3A49%3A59.000Z&SignatureVersion=2&SignatureMethod=HmacSHA256&Signature=calculated value
The first line represents the endpoint of the request. This is the resource the request acts on.
After the endpoint is a question mark (?), which separates the endpoint from the parameters. Eachparameter is separated by an ampersand (&).
The Action parameter indicates the action to perform (for a list of the actions, see Elastic Load BalancingAPI Reference). For a list of the other parameters that are common to all Query requests, see CommonParameters in the Elastic Load Balancing API Reference.
In the example Query requests we present in the Elastic Load Balancing documentation, we omit theparameters related to authentication to make it easier to focus on the ones relevant to the particularaction. We replace them with the following literal string to remind you that a real request includes theparameters: &AUTHPARAMS.
The above example without the authentication parameters listed will look similar to the following example:
https://elasticloadbalancing.amazonaws.com/?LoadBalancerNames.member.1=my-test-loadbalancer&LoadBalancerNames.member.2=www-example-com &MaxRecords=20&Action=DescribeLoadBalancers&AUTHPARAMS
Example Query Response Structure
In response to a Query request, the Elastic Load Balancing returns an XML data structure that conformsto an XML schema defined as part of the Elastic Load Balancing WSDL.The structure of an XML responseis specific to the associated request. In general, the response data types are named according to theoperation performed and whether the data type is a container (can have children). Examples of containersinclude <LoadBalancers> (see the example that follows). Member elements are children of containers,and their contents vary according to the container's role.
In every response from AWS, you will see the element ResponseMetadata, which contains a stringelement called RequestId.This is simply a unique identifier that AWS assigns to this request for trackingand troubleshooting purposes.
If the query request is successful, you'll get a response similar to the following example:
<DescribeLoadBalancersResponse xmlns="http://elasticloadbalancing.amazon aws.com/doc/2012-06-01/"> <DescribeLoadBalancersResult> <LoadBalancerDescriptions> <member> <SecurityGroups/> <CreatedTime>2013-01-24T20:51:35.710Z</CreatedTime> <LoadBalancerName>my-test-loadbalancer</LoadBalancerName> <HealthCheck> <Interval>30</Interval> <Target>HTTP:80/</Target> <HealthyThreshold>10</HealthyThreshold> <Timeout>5</Timeout>
API Version 2012-06-0155
Elastic Load Balancing Developer GuideExample Query Request and Response Structures

<UnhealthyThreshold>2</UnhealthyThreshold> </HealthCheck> <ListenerDescriptions> <member> <PolicyNames/> <Listener> <Protocol>HTTP</Protocol> <LoadBalancerPort>80</LoadBalancerPort> <InstanceProtocol>HTTP</InstanceProtocol> <InstancePort>80</InstancePort> </Listener> </member> <member> <PolicyNames> <member>AWSConsole-SSLNegotiationPolicy-my-test-loadbalancer</mem ber> </PolicyNames> <Listener> <Protocol>HTTPS</Protocol> <LoadBalancerPort>443</LoadBalancerPort> <InstanceProtocol>HTTP</InstanceProtocol> <SSLCertificateId>arn:aws:iam::803981987763:server-certific ate/scert</SSLCertificateId> <InstancePort>80</InstancePort> </Listener> </member> </ListenerDescriptions> <Instances> <member> <InstanceId>i-48bb5d38</InstanceId> </member> <member> <InstanceId>i-78bc5a08</InstanceId> </member> <member> <InstanceId>i-98e204e8</InstanceId> </member> <member> <InstanceId>i-ccbb5dbc</InstanceId> </member> </Instances> <Policies> <AppCookieStickinessPolicies/> <OtherPolicies> <member>AWSConsole-SSLNegotiationPolicy-my-test-loadbalancer</member>
</OtherPolicies> <LBCookieStickinessPolicies/> </Policies> <AvailabilityZones> <member>us-east-1e</member> </AvailabilityZones> <CanonicalHostedZoneName>my-test-loadbalancer-1086370712.us-east-1.elb.amazonaws.com</CanonicalHostedZoneName> <CanonicalHostedZoneNameID>Z3DZXE0Q79N41H</CanonicalHostedZoneNameID> <Scheme>internet-facing</Scheme> <SourceSecurityGroup> <OwnerAlias>amazon-elb</OwnerAlias>
API Version 2012-06-0156
Elastic Load Balancing Developer GuideExample Query Request and Response Structures

<GroupName>amazon-elb-sg</GroupName> </SourceSecurityGroup> <DNSName>my-test-loadbalancer-1086370712.us-east-1.elb.amazonaws.com</DNS Name> <BackendServerDescriptions/> <Subnets/> </member> <member> <SecurityGroups/> <CreatedTime>2013-02-08T00:17:08.810Z</CreatedTime> <LoadBalancerName>www-example-com</LoadBalancerName> <HealthCheck> <Interval>30</Interval> <Target>HTTP:80/index.html</Target> <HealthyThreshold>10</HealthyThreshold> <Timeout>5</Timeout> <UnhealthyThreshold>2</UnhealthyThreshold> </HealthCheck> <ListenerDescriptions> <member> <PolicyNames/> <Listener> <Protocol>HTTP</Protocol> <LoadBalancerPort>80</LoadBalancerPort> <InstanceProtocol>HTTP</InstanceProtocol> <InstancePort>80</InstancePort> </Listener> </member> </ListenerDescriptions> <Instances/> <Policies> <AppCookieStickinessPolicies/> <OtherPolicies/> <LBCookieStickinessPolicies/> </Policies> <AvailabilityZones> <member>us-east-1a</member> </AvailabilityZones> <CanonicalHostedZoneName>www-example-com-512613397.us-east-1.elb.amazonaws.com</CanonicalHostedZoneName> <CanonicalHostedZoneNameID>Z3DZXE0Q79N41H</CanonicalHostedZoneNameID> <Scheme>internet-facing</Scheme> <SourceSecurityGroup> <OwnerAlias>amazon-elb</OwnerAlias> <GroupName>amazon-elb-sg</GroupName> </SourceSecurityGroup> <DNSName>www-example-com-512613397.us-east-1.elb.amazonaws.com</DNSName>
<BackendServerDescriptions/> <Subnets/> </member> </LoadBalancerDescriptions> </DescribeLoadBalancersResult> <ResponseMetadata> <RequestId>6fbe234c-80f9-11e2-a17f-9148EXAMPLE</RequestId> </ResponseMetadata></DescribeLoadBalancersResponse>
API Version 2012-06-0157
Elastic Load Balancing Developer GuideExample Query Request and Response Structures

Troubleshooting Request Signatures Version 2This section describes some error codes you might see when you are initially developing code to generatethe signature to sign Query requests.
SignatureDoesNotMatch Signing Error in a web serviceThe following error response is returned when a web service attempts to validate the request signatureby recalculating the signature value and generates a value that does not match the signature you appendedto the request.This can occur because the request was altered between the time you sent it and the timeit reached a web service endpoint (this is the case the signature is designed to detect) or because thesignature was calculated improperly. A common cause of the error message below is not properly creatingthe string to sign, such as forgetting to URL encode characters such as the colon (:) and the forward slash(/) in Amazon S3 bucket names.
<ErrorResponse xmlns="http://elasticmapreduce.amazonaws.com/doc/2009-03-31"> <Error> <Type>Sender</Type> <Code>SignatureDoesNotMatch</Code> <Message>The request signature we calculated does not match the signature you provided. Check your AWS Secret Access Key and signing method. Consult the service documentation for details.</Message> </Error> <RequestId>7589637b-e4b0-11e0-95d9-639f87241c66</RequestId></ErrorResponse>
IncompleteSignature Signing Error in a web serviceThe following error indicates that signature is missing information or has been improperly formed.
<ErrorResponse xmlns="http://elasticmapreduce.amazonaws.com/doc/2009-03-31"> <Error> <Type>Sender</Type> <Code>IncompleteSignature</Code> <Message>Request must contain a signature that conforms to AWS standards</Mes sage> </Error> <RequestId>7146d0dd-e48e-11e0-a276-bd10ea0cbb74</RequestId></ErrorResponse>
Using the Java SDK to Sign a Query RequestThe following example uses the amazon.webservices.common package of the AWS SDK for Java togenerate an AWS Signature Version 2 Query request signature.To do so, it creates an RFC 2104-compliantHMAC signature. For more information about HMAC, go to HMAC: Keyed-Hashing for MessageAuthentication.
API Version 2012-06-0158
Elastic Load Balancing Developer GuideTroubleshooting Request Signatures Version 2

NoteJava is used in this case as a sample implementation.You can use the programming languageof your choice to implement the HMAC algorithm to sign Query requests.
import java.security.SignatureException;import javax.crypto.Mac;import javax.crypto.spec.SecretKeySpec;import com.amazonaws.util.*;
/*** This class defines common routines for generating* authentication signatures for AWS Platform requests.*/public class Signature { private static final String HMAC_SHA256_ALGORITHM = "HmacSHA256";
/** * Computes RFC 2104-compliant HMAC signature. * * @param data * The signed data. * @param key * The signing key. * @return * The Base64-encoded RFC 2104-compliant HMAC signature. * @throws * java.security.SignatureException when signature generation fails */ public static String calculateRFC2104HMAC(String data, String key) throws java.security.SignatureException { String result; try {
// Get an hmac_sha256 key from the raw key bytes. SecretKeySpec signingKey = new SecretKeySpec(key.getBytes("UTF8"), HMAC_SHA256_ALGORITHM);
// Get an hmac_sha256 Mac instance and initialize with the signing key. Mac mac = Mac.getInstance(HMAC_SHA256_ALGORITHM); mac.init(signingKey);
// Compute the hmac on input data bytes. byte[] rawHmac = mac.doFinal(data.getBytes("UTF8"));
// Base64-encode the hmac by using the utiliy in the SDK result = BinaryUtils.toBase64(rawHmac);
} catch (Exception e) { throw new SignatureException("Failed to generate HMAC : " + e.get Message()); } return result; }}
API Version 2012-06-0159
Elastic Load Balancing Developer GuideUsing the Java SDK to Sign a Query Request

Using the SOAP APITopics
• Endpoints (p. 60)
• WSDL and Schema Definitions (p. 60)
• Programming Language Support (p. 60)
• Request Authentication (p. 61)
• The Response Structure (p. 62)
• Web Services References (p. 63)
EndpointsFor information about this product's regions and endpoints, go to Regions and Endpoints in the AmazonWeb Services General Reference.
WSDL and Schema DefinitionsYou can access the Elastic Load Balancing web service using the SOAP web services messaging protocol.This interface is described by a Web Services Description Language (WSDL) document, which definesthe operations and security model for the particular service. The WSDL references an XML Schemadocument, which strictly defines the data types that might appear in SOAP requests and responses. Formore information on WSDL and SOAP, see Web Services References (p. 63).
NoteElastic Load Balancing supports SOAP only through HTTPS.
All schemas have a version number. The version number appears in the URL of a schema file and in aschema's target namespace.This makes upgrading easy by differentiating requests based on the versionnumber.
Programming Language SupportBecause the SOAP requests and responses in Elastic Load Balancing follow current standards, nearlyany programming language can be used.
NoteAWS provides libraries, sample code, tutorials, and other resources for software developers whoprefer to build applications using language-specific APIs instead of Elastic Load Balancing's .These libraries provide basic functions (not included in Elastic Load Balancing's ), such as requestauthentication, request retries, and error handling so you can get started more easily. Librariesand resources are available for the following languages:
• Java
• PHP
• Python
• Ruby
• Windows and .NET
For libraries and sample code in all languages, go to Sample Code & Libraries.
API Version 2012-06-0160
Elastic Load Balancing Developer GuideUsing the SOAP API

Request AuthenticationElastic Load Balancing complies with the current WS-Security standard, which requires you to hash andsign SOAP requests for integrity and non-repudiation. WS-Security defines profiles which are used toimplement various levels of security. Secure SOAP messages use the BinarySecurityToken profile,consisting of an X.509 certificate with an RSA public key.
The following is the content of an insecure RunInstances operation (using EC2 as an example):
<Runinstances xmlns="http://ec2.amazonaws.com/doc/2009-05-05"> <instancesSet> <item> <imageId>ami-60a54009</imageId> <minCount>1</minCount> <maxCount>3</maxCount> </item> </instancesSet> <groupSet/></RunInstances>
To secure the request, we add the BinarySecurityToken element.
The secure version of the request begins with the following:
<SOAP-ENV:Envelope xmlns:SOAP-ENV="http://schemas.xmlsoap.org/soap/envelope/">
<SOAP-ENV:Header> <wsse:Security xmlns:wsse="http://docs.oasis-open.org/wss/2004/01/oasis-200401-wss-wssecurity-secext-1.0.xsd"> <wsse:BinarySecurityToken xmlns:wsu="http://docs.oasis-open.org/wss/2004/01/oasis-200401-wss-wsse curity-utility-1.0.xsd" EncodingType="http://docs.oasis-open.org/wss/2004/01/oasis-200401-wss-soap-message-security-1.0#Base64Binary" ValueType="http://docs.oasis-open.org/wss/2004/01/oasis-200401-wss-X.509-token-profile-1.0#X.509v3" wsu:Id="CertId-1064304">....many, many lines of base64 encoded X.509 certificate...</wsse:BinarySecurityToken> <ds:Signature xmlns:ds="http://www.w3.org/2000/09/xmldsig#"> <ds:SignedInfo> <ds:CanonicalizationMethod Algorithm="http://www.w3.org/2001/10/xml-exc-c14n#"></ds:CanonicalizationMethod> <ds:SignatureMethod Algorithm="http://www.w3.org/2000/09/xmldsig#rsa-sha1"></ds:SignatureMethod> <ds:Reference URI="#id-17984263"> <ds:Transforms> <ds:Transform Algorithm="http://www.w3.org/2001/10/xml-exc-c14n#"></ds:Transform> </ds:Transforms> <ds:DigestMethod Algorithm="http://www.w3.org/2000/09/xmld sig#sha1"></ds:DigestMethod> <ds:DigestValue>0pjZ1+TvgPf6uG7o+Yp3l2YdGZ4=</ds:DigestValue> </ds:Reference> <ds:Reference URI="#id-15778003"> <ds:Transforms>
API Version 2012-06-0161
Elastic Load Balancing Developer GuideRequest Authentication

<ds:Transform Algorithm="http://www.w3.org/2001/10/xml-exc-c14n#"></ds:Transform> </ds:Transforms> <ds:DigestMethod Algorithm="http://www.w3.org/2000/09/xmld sig#sha1"></ds:DigestMethod> <ds:DigestValue>HhRbxBBmc2OO348f8nLNZyo4AOM=</ds:DigestValue> </ds:Reference> </ds:SignedInfo> <ds:SignatureValue>bmVx24Qom4kd9QQtclxWIlgLk4QsQBPaKESi79x479xgbO9PEStXMi HZuBAi9luuKdNTcfQ8UE/d jjHKZKEQRCOlLVy0Dn5ZL1RlMHsv+OzJzzvIJFTq3LQKNrzJzsNe</ds:SignatureValue>
<ds:KeyInfo Id="KeyId-17007273"> <wsse:SecurityTokenReference xmlns:wsu="http://docs.oasis-open.org/wss/2004/01/oasis-200401-wss-wssecurity-utility-1.0.xsd" wsu:Id="STRId-22438818"> <wsse:Reference URI="#CertId-1064304" ValueType="http://docs.oasis-open.org/wss/2004/01/oasis-200401-wss-X.509-token-profile-1.0#X.509v3"> </wsse:Reference> </wsse:SecurityTokenReference> </ds:KeyInfo> </ds:Signature> <wsu:Timestamp xmlns:wsu="http://docs.oasis-open.org/wss/2004/01/oasis-200401-wss-wssecurity-utility-1.0.xsd" wsu:Id="id-17984263"> <wsu:Created>2006-06-09T10:57:35Z</wsu:Created> <wsu:Expires>2006-06-09T11:02:35Z</wsu:Expires> </wsu:Timestamp> </wsse:Security> </SOAP-ENV:Header>
If you are matching this against requests generated by Elastic Load Balancing supplied libraries, or thoseof another vendor, the following are the most important elements.
Elements
• BinarySecurityToken—Contains the X.509 certificate in base64 encoded PEM format
• Signature—Contains an XML digital signature created using the canonicalization, signature algorithm,and digest method
• Timestamp—Requests to Elastic Load Balancing are valid within 5 minutes of this value to help preventreplay attacks
The Response StructureIn response to a request, the Elastic Load Balancing service returns an XML data structure that conformsto an XML schema defined as part of the Elastic Load Balancing WSDL.The structure of a XML responseis specific to the associated request.
The following is an example response (using EC2 as an example):
<RuninstancesResponse xmlns="http://ec2.amazonaws.com/doc/2009-05-05"> <reservationId>r-47a5402e</reservationId> <ownerId>UYY3TLBUXIEON5NQVUUX6OMPWBZIQNFM</ownerId>
API Version 2012-06-0162
Elastic Load Balancing Developer GuideThe Response Structure

<groupSet> <item> <groupId>default</groupId> </item> </groupSet> <instancesSet> <item> <InstanceId>i-2ba64342</InstanceId> <imageId>ami-60a54009</imageId> <InstanceState> <code>0</code> <name>pending</name> </InstanceState> <DNSName></DNSName> </item> <item> <InstanceId>i-2bc64242</InstanceId> <imageId>ami-60a54009</imageId> <InstanceState> <code>0</code> <name>pending</name> </InstanceState> <DNSName>ec2-67-202-51-176.compute-1.&api-domain;</DNSName> </item> <item> <InstanceId>i-2be64332</InstanceId> <imageId>ami-60a54009</imageId> <InstanceState> <code>0</code> <name>pending</name> </InstanceState> <DNSName>ec2-67-202-51-122.compute-1.&api-domain;</DNSName> <keyName>example-key-name</keyName> <instanceType>m1.small</instanceType> <launchTime>2007-08-07T11:54:42.000Z</launchTime> </item> </instancesSet></RunInstancesResponse>
Web Services ReferencesFor more information about using web services, go to any of the following resources:
• Web Service Description Language (WSDL)
• WS-Security BinarySecurityToken Profile
Using the SDKsThe following table lists the available SDKs and third-party libraries you can use to access Elastic LoadBalancing programmatically.
API Version 2012-06-0163
Elastic Load Balancing Developer GuideWeb Services References

DescriptionType of Access
AWS provides the following SDKs:
• AWS SDK for Java Documentation
• AWS SDK for .NET Documentation
• AWS SDK for PHP Documentation
• AWS SDK for Ruby Documentation
AWS SDKs
Developers in the AWS developer community also provide their own libraries,which you can find at the following AWS developer centers:
• AWS Java Developer Center
• AWS PHP Developer Center
• AWS Python Developer Center
• AWS Ruby Developer Center
• AWS Windows and .NET Developer Center
Third-Party Libraries
API Version 2012-06-0164
Elastic Load Balancing Developer GuideUsing the SDKs

Configure Listeners for Your LoadBalancer
A typical web application communication goes through layers of hardware and software. Each layerprovides a specific communication function. The control over the communication function is passed fromone layer to the next, in sequence. The Open System Interconnection (OSI) defines a model frameworkfor implementing a standard format for communication, called a protocol, in these layers. For detailedinformation about the layers of the OSI model, go to http://en.wikipedia.org/wiki/OSI_model.
When you use Elastic Load Balancing, you need to have a basic understanding of two layers: layer 4 andlayer 7. Layer 4 is the transport layer that describes the Transmission Control Protocol (TCP) connectionbetween the client and your back-end instance, through the load balancer. Layer 4 is the lowest level thatis configurable for your load balancer. Layer 7 is the application layer that describes the use of HypertextTransfer Protocol (HTTP) and HTTPS (secure HTTP) connections from clients to the load balancer andfrom the load balancer to your back-end instance.
Elastic Load Balancing supports the load balancing of applications using HTTP, HTTPS , TCP, and SecureSockets Layer (SSL) protocols.You can specify the protocols for the front-end connections (client to loadbalancer) and the back-end connections (load balancer to back-end instance) independently. If you chooseHTTPS/SSL protocols for your front-end connection, the back-end connection to the instance can eitherbe in plain text or HTTPS/SSL. If you choose HTTP for your front-end connection, the back-end connectionto the instance can be HTTP or HTTPS.
The acceptable ports for both HTTPS/SSL and HTTP/TCP connections are 25, 80, 443, and 1024-65535.
Before you start using Elastic Load Balancing, you'll have to configure the listeners for your load balancer.Listener is a process that listens for client connection requests. It is configured with a protocol and a portnumber for front-end (Load Balancer) and back-end (Back-end instance) connections.
By default, your load balancer is set to use the HTTP protocol with port 80 for the front-end connectionand the back-end connection.The default settings can be changed using the AWS Management Console,the Query API, the command line interface (CLI), or the SDKs.
API Version 2012-06-0165
Elastic Load Balancing Developer Guide

Using TCP/SSL (Layer 4) with Elastic LoadBalancing
When you use TCP for both front-end and back-end connections, your load balancer will forward therequest to the back-end instances without modification to the headers. Because load balancers intercepttraffic between clients and servers, your server access logs contain only the IP address of the loadbalancer.
If you use SSL (secure TCP) for your front-end connection, you will have to install an SSL server certificateon your load balancer. The load balancer uses the certificate to first terminate and then decrypt therequests before sending the requests to the back-end instances. With this configuration, you can alsochoose to configure ciphers for SSL negotiation between your client and the load balancer.
This configuration will not insert cookies for session stickiness or the X-Forwarded-* headers.
Using HTTP/HTTPS (Layer 7) with Elastic LoadBalancing
When you use HTTP (layer 7) for both front-end and back-end connections, your load balancer parsesthe headers in the request and terminates the connection before re-sending the request to the registeredinstance(s). This is the default configuration provided by Elastic Load Balancing.
If you use HTTPS (secure HTTP) for your front-end listener, you must install an SSL server certificate onyour load balancer. The load balancer uses the certificate to terminate and then decrypt requests beforesending them to the back-end instances. Additionally, when you use HTTPS, the load balancer insertsor updates the X-Forwarded-* headers and can insert or update cookies for sticky sessions. For moreinformation on X-Forwarded-* headers, see X-Forwarded-For (p. 9). With this configuration, you canalso choose to configure ciphers for SSL negotiation between your client and the load balancer.
Not all HTTP extensions are supported in the load balancer. In some cases you will need to use a TCPlistener if the load balancer is not able to terminate the request due to unexpected methods, responsecodes, or other non-standard HTTP 1.0/1.1 implementations.
Advantages of Using HTTPS/SSL with ElasticLoad Balancing
Elastic Load Balancing provides SSL support for connections between clients and the load balancer andalso for connections between the load balancer and your back-end application instances. Support for anend-to-end HTTPS/SSL connection enables traffic encryption on those network segments that initiateHTTPS/SSL connections.
There are several advantages to using HTTPS/SSL connections with your load balancer:
• The SSL server certificate used to terminate client connections can be managed centrally on the loadbalancer, rather than on every individual application instance.
• The work of encrypting and decrypting SSL traffic is moved from the application instance to the loadbalancer.
• The load balancer can ensure session affinity or "sticky sessions" by terminating the incoming HTTPSrequest and then re-encrypting the content to send to the back-end application instance.
API Version 2012-06-0166
Elastic Load Balancing Developer GuideUsing TCP/SSL (Layer 4) with Elastic Load Balancing

• All of the features available for HTTP can be used with HTTPS connections.
Using HTTPS/SSL protocols for both front-end and back-end connections ensures end-to-end trafficencryption. If you are using SSL and do not want Elastic Load Balancing to terminate, you can use a TCPlistener and install certificates on all the back-end instances handling requests.
To enable HTTPS support, use AWS Identity and Access Management (IAM) to upload your SSL certificateand key. After you upload your certificate, specify its Amazon Resource Name (ARN) when you createa new load balancer or update an existing load balancer. For more information see Creating a HTTPS/SSLLoad Balancer (p. 74).
To update an existing SSL certificate, use IAM to upload your new SSL certificate. After you upload thenew certficate, update your load balancer with the new certificate. For more information, see How toUpdate an SSL Certificate for a Load Balancer (p. 139).
Using SSL Cipher Settings with Elastic LoadBalancing
If you choose HTTPS/SSL for your front-end connection, you can either use the pre-defined SSL cipherset or use a cipher set of your choice to enable or disable the ciphers based on your specific requirements.
The Secure Sockets Layer (SSL) protocol uses a combination of protocols and algorithms to protect yourinformation over the internet. A SSL cipher is an encryption algorithm that uses encryption keys to createa ciphered (coded) message. There are multiple forms of SSL cipher algorithms available.
Elastic Load Balancing configures your load balancer with a pre-defined cipher set that is used for SSLnegotiation when a connection is established between a client and your load balancer. The pre-definedcipher set provides compatibility with a broad range of clients and uses high strength cryptographicalgorithms. However, in some use cases there might be a requirement for all data on the network to beencrypted and for allowing only specific ciphers. Some use cases might require specific protocols (suchas PCI, SOX, etc.) from clients to ensure that standards are met. In such cases, Elastic Load Balancingprovides options for you to select different configurations for SSL protocols and ciphers.You can chooseto enable or disable the ciphers depending on your specific requirements. Depending on the number ofnodes, your ciphers and protocols should take less than 30 seconds to take effect.
For information on how to configure the cipher settings, see Creating a HTTPS/SSL Load Balancer (p. 74).
Using Back-End Server Authentication withElastic Load Balancing
If you choose to use an HTTPS/SSL connection for your back end, you can enable authentication onyour back-end instance. This authentication can be used to ensure that back-end instances accept onlyencrypted communication and to ensure that the back-end instance has the correct certificates.
For a quick reference to the listener configurations supported by Elastic Load Balancing, see Elastic LoadBalancing Listener Configurations Quick Reference (p. 68).
API Version 2012-06-0167
Elastic Load Balancing Developer GuideUsing SSL Cipher Settings with Elastic Load Balancing
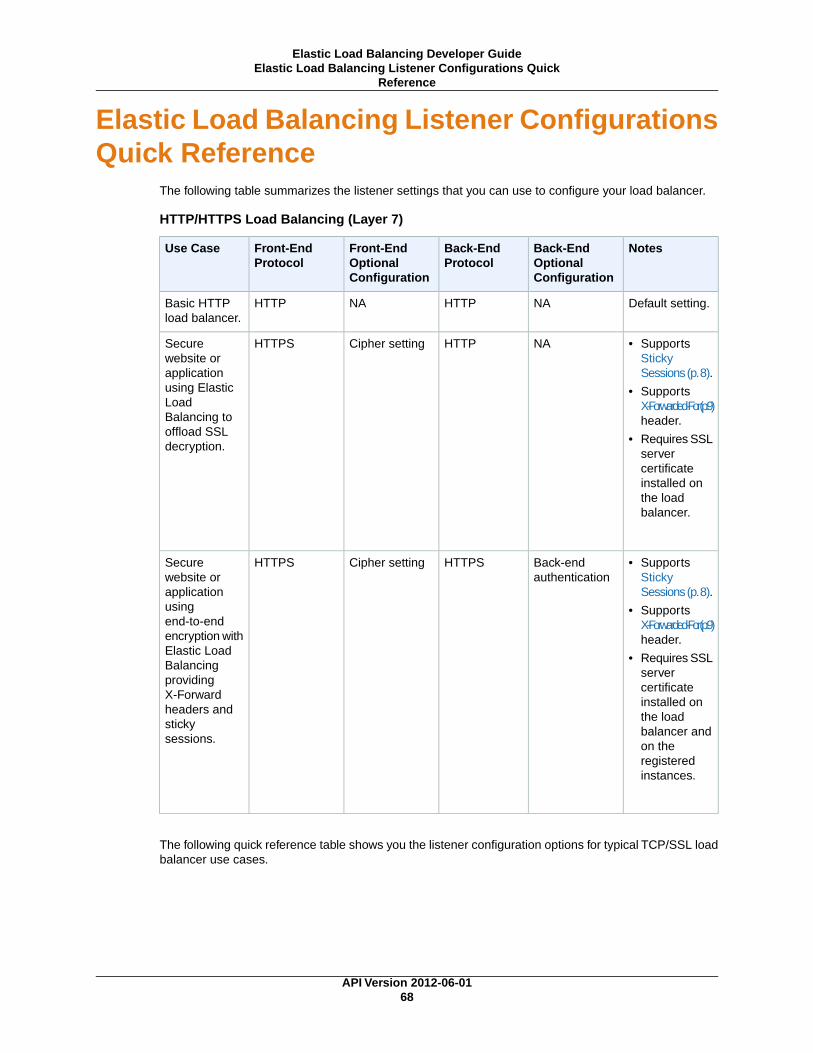
Elastic Load Balancing Listener ConfigurationsQuick Reference
The following table summarizes the listener settings that you can use to configure your load balancer.
HTTP/HTTPS Load Balancing (Layer 7)
NotesBack-EndOptionalConfiguration
Back-EndProtocol
Front-EndOptionalConfiguration
Front-EndProtocol
Use Case
Default setting.NAHTTPNAHTTPBasic HTTPload balancer.
• SupportsStickySessions (p.8).
• SupportsX-Forwarded-For (p.9)header.
• Requires SSLservercertificateinstalled onthe loadbalancer.
NAHTTPCipher settingHTTPSSecurewebsite orapplicationusing ElasticLoadBalancing tooffload SSLdecryption.
• SupportsStickySessions (p.8).
• SupportsX-Forwarded-For (p.9)header.
• Requires SSLservercertificateinstalled onthe loadbalancer andon theregisteredinstances.
Back-endauthentication
HTTPSCipher settingHTTPSSecurewebsite orapplicationusingend-to-endencryption withElastic LoadBalancingprovidingX-Forwardheaders andstickysessions.
The following quick reference table shows you the listener configuration options for typical TCP/SSL loadbalancer use cases.
API Version 2012-06-0168
Elastic Load Balancing Developer GuideElastic Load Balancing Listener Configurations Quick
Reference

TCP/SSL Load Balancing (Layer 4)
NotesBack-EndOptionalConfiguration
Back-EndProtocol
Front-EndOptionalConfiguration
Front-EndProtocol
Use Case
• Basic TCPloadbalancing.
NATCPNATCPBasic TCPload balancer.
• Requires SSLservercertificateinstalled onthe loadbalancer.
NATCPCipher settingSSLSecurewebsite orapplicationusing ElasticLoadBalancing tooffload SSLdecryption.
• Requires SSLservercertificateinstalled onthe loadbalancer andon theregisteredinstances.
Back-endauthentication
SSLCipher settingSSLSecurewebsite orapplicationusingend-to-endencryption withElastic LoadBalancing.
Where Do I Go From Here?For configuring listeners:
• To learn how to set up a basic HTTP/TCP load balancer using the AWS Management Console, seeGet Started with Elastic Load Balancing (p. 14).
• For information on how to set up an HTTPS/SSL load balancer with cipher settings and back-endauthentication, see Create a Load Balancer with SSL Cipher Settings and Back-End ServerAuthentication (p. 74).
• For information on how to set up a basic HTTP/TCP load balancer within Amazon VPC, see DeployElastic Load Balancing in Amazon VPC (p. 111).
• For information on adding a listener to an existing load balancer, see Adding a Listener to your LoadBalancer (p. 129).
• For information on deleting a listener from an existing load balancer, see Delete a Listener from YourLoad Balancer (p. 134).
For performing Elastic Load Balancing tasks:
• If you haven't already, install the tools you plan to use for performing Elastic Load Balancing tasks. Forinformation on installing the command line interface or the Query API, see Get Set Up with Elastic LoadBalancing Interfaces (p. 44).
API Version 2012-06-0169
Elastic Load Balancing Developer GuideWhere Do I Go From Here?

• For information on using the various features supported by Elastic Load Balancing, see Using ElasticLoad Balancing (p. 71).
• For detailed descriptions of the Elastic Load Balancing API operations, see the Elastic Load BalancingAPI Reference.
• For detailed descriptions of the Elastic Load Balancing commands, see the Elastic Load BalancingQuick Reference Card.
API Version 2012-06-0170
Elastic Load Balancing Developer GuideWhere Do I Go From Here?

Using Elastic Load Balancing
Elastic Load Balancing makes it easy for you to distribute application load to your Amazon EC2 instances.Load balancing increases the availability and scalability of your applications.This section discusses somecommon Elastic Load Balancing user scenarios, and it walks you through the various tasks needed toaccomplish efficient distribution of application loads among your Amazon EC2 instances.
Before you explore the Elastic Load Balancing scenarios, be sure that you have done the following tasks:
• Determined the region in which your EC2 instances will run.
The examples in this guide assume that your EC2 instances are in the US East (Northern Virginia)Region (us-east-1. If your instances are in Europe, you can specify the EU (Ireland) Region by usingthe --region eu-west-1 parameter from the command line interface or by setting the AWS_ELB_URLenvironment variable.
For more information on using the region parameter with your Elastic Load Balancing commands, goto the Elastic Load Balancing Quick Reference Card. For information on setting your environmentvariable, see Installing the Command Line Interface (p. 45). For information about this product's Regionsand endpoints, go to Regions and Endpoints in the Amazon Web Services General Reference.
• Decided on the listener configurations for your load balancer. For a quick overview of the differentconfigurations available for your load balancer, see Elastic Load Balancing Listener ConfigurationsQuick Reference (p. 68).
• Decided whether you want to load balance your instances launched in Amazon Elastic Compute Cloud(Amazon EC2) or the instances launched within Amazon Virtual Private Cloud (Amazon VPC).
Amazon EC2 provides features such as security groups that can be used for creating and managing theload balancers within Amazon EC2. For information about the using features specific to instances launchedwithin Amazon EC2, see Deploy Elastic Load Balancing in Amazon EC2-Classic (p. 73).
Amazon VPC lets you define a virtual networking environment in a private, isolated section of the AmazonWeb Services (AWS) cloud and launch EC2 instances in that environment. Elastic Load Balancing onAmazon VPC works in a similar manner to the way it works in Amazon EC2, and it supports the sameset of features.There are however some differences in the procedures for associating your load balancerwith the instances. For information on creating and managing load balancers within Amazon VPC, seeDeploy Elastic Load Balancing in Amazon VPC (p. 111).
Elastic Load Balancing associates your load balancer with your EC2 instances using IP addresses.Whenan instance is stopped and then restarted, the IP addresses associated with your instance change. Insuch cases, we recommend that you de-register your Amazon EC2 instance from your load balancerafter you stop your instance, and then register the load balancer with your instance after you've restarted.
API Version 2012-06-0171
Elastic Load Balancing Developer Guide

For detailed instructions on de-registering and registering instances, see De-Register and Register AmazonEC2 Instances (p. 137).
Elastic Load Balancing supports the load balancing of applications using HTTP, HTTPS (Secure HTTP),TCP, and SSL (Secure TCP) listener protocols.You can specify the protocols for the front-end connections(client to load balancer) and the back-end connections (load balancer to back-end instance) independently.You choose configurations for the front-end and the back-end connections when you create your loadbalancer.You can also later add listener to your existing load balancer, or delete a listener from yourexisting load balancer.
• For information on creating a basic load balancer with HTTP/TCP listener, see Get Started With ElasticLoad Balancing (p. 14).
• For information on creating HTTPS/SSL load balancer, see Creating a HTTPS/SSL LoadBalancer (p. 74).
• For information on adding listener to your existing load balancer, see Adding a Listener to your LoadBalancer (p. 129).
• For information on deleting a Listener from your load balancer, see Delete a Listener from Your LoadBalancer (p. 134).
If you are using HTTPS/SSL protocol for your listeners, you might have an SSL server certificate installedon your load balancer.You will have to update this certificate periodically. For information on updatingyour existing SSL certificate, see Update an SSL Certificate for a Load Balancer (p. 139).
Each Elastic Load Balancing instance that you create has a unique Domain Name System (DNS) name.If you'd prefer to have a custom domain name instead of the load balancer DNS name, you can useAmazon Route 53 to create a custom domain name and associate it with your load balancer DNS name.For more information, see Configure Custom Domain Name for Your Load Balancer (p. 144).
The load balancer uses a special load-balancer-generated cookie to track the application instance foreach request. After the application instance is tracked, the cookie is inserted in the response for bindingsubsequent requests from the same user to that application instance. Elastic Load Balancing allows youto configure policies to establish the duration of validity of these cookies. For more information aboutconfiguring policies for load-balancer-generated cookies, see Enable Duration-Based SessionStickiness (p. 154).
The load balancer uses a special cookie to associate the session with the original server that handledthe request, but follows the lifetime of the application-generated cookie corresponding to the cookie namespecified in the policy configuration. Elastic Load Balancing allows you to configure policies forapplication-generated cookies if the application cookie is explicitly removed or expires. For more informationabout configuring policies for application-generated cookies, see Enable Application-Controlled SessionStickiness (p. 157).
Elastic Load Balancing provides data about your load balancers and your back-end application instancesto Amazon CloudWatch. Amazon CloudWatch collects the data and presents it as readable, near real-timemetrics. For more information on viewing and interpreting your load balancer metrics, see Monitor YourLoad Balancer Using Amazon CloudWatch (p. 160).
For information on deleting an existing load balancer, see Delete Your Load Balancer (p. 166).
API Version 2012-06-0172
Elastic Load Balancing Developer Guide

Deploy Elastic Load Balancing in AmazonEC2-Classic
Topics
• Create a Load Balancer with SSL Cipher Settings and Back-End Server Authentication (p. 74)
• Expand a Load Balanced Application to an Additional Availability Zone (p. 95)
• Disable an Availability Zone from a Load-Balanced Application (p. 98)
• Manage Security Groups in Amazon EC2-Classic (p. 100)
• Use IPv6 with Elastic Load Balancing (p. 109)
Amazon Web Services (AWS) lets you launch your instances in either Amazon EC2 or Amazon VirtualPrivate Cloud (Amazon VPC). If you've launched your instances in Amazon EC2, you will have to createa load balancer in Amazon EC2. If you've launched your instances with Amazon VPC, you will have tocreate your load balancer within the VPC. Elastic Load Balancing on Amazon VPC works mostly in asimilar manner as in Amazon EC2 and supports the same set of features. There is however a significantdifference between the procedures involved in launching a load balancer and the way security groupsfunction on Amazon VPC and Amazon EC2.
This section walks you through the process of creating, accessing, and managing your load balancers inAmazon EC2. For information on creating, accessing, and managing your load balancers in AmazonVPC, see Deploy Elastic Load Balancing in Amazon VPC (p. 111).
Elastic Load Balancing provides Secure Sockets Layer (SSL) support for connections between clientson the front-end and the load balancer and also for connections between the load balancer and yourback-end application instances. If you choose HTTPS/SSL for your front-end connection, you can eitheruse the pre-defined cipher set or use a cipher set of your choice to enable or disable the ciphers basedon your specific requirements. If you choose to use an HTTPS/SSL connection for your back end, youcan enable authentication on your back-end instance. For more information on configuring your loadbalancer to use cipher settings and for enabling authentication on your back-end instance, see ConfigureListeners for Your Load Balancer (p. 65). And for detailed instructions on creating a load balancer inAmazon EC2 with pre-defined cipher settings and enabling the back-end authentication, see Create aLoad Balancer with SSL Cipher Settings and Back-End Server Authentication (p. 74).
As the traffic to your instances increases, you might consider expanding your EC2 instances to run in anadditional Availability Zone. For detailed instructions on expanding to additional Availability Zones, seeExpand a Load Balanced Application to an Additional Availability Zone (p. 95).
When the trafic to your instances decreases, you might consider scaling down the availability of yourinstances by disabling some Availibility Zones. For detailed instructions on disabling your AvailabilityZones, see Disable an Availability Zone from a Load-Balanced Application (p. 98).
Elastic Load Balancing provides a special Amazon EC2 source security group that you can use to ensurethat a back-end Amazon EC2 instance receives traffic only from Elastic Load Balancing. For informationon locking the incoming traffic between your load balancer and your back-end instances , see ManageSecurity Groups in Amazon EC2-Classic (p. 100).
After you create your load balancer, Elastic Load Balancing returns a public DNS name that combinesyour load balancer's name and region. This base public DNS name returns only IPv4 records.
Elastic Load Balancing supports both Internet Protocol version 6 (IPv6) and Internet Protocol version 4(IPv4). IPv6 support is currently not available in all regions. For current IPv6 support, go to Elastic LoadBalancing.
Clients can connect to your load balancer using either IPv4 or IPv6 (in regions where it is available).However, communication between the load balancer and its back-end instances uses only IPv4.You
API Version 2012-06-0173
Elastic Load Balancing Developer GuideDeploy Elastic Load Balancing in Amazon EC2-Classic

might want to use the dualstack-prefixed DNS name to enable IPv6 support for communications betweenclient and the load balancers so that clients are able to access the load balancer using either IPv4 or IPv6as their individual connectivity needs dictate. For more information on enabling IPv6 support, see UseIPv6 with Elastic Load Balancing (p. 109).
NoteIPv6 support is not currently available for load balancers in Amazon VPC.
Create a Load Balancer with SSL Cipher Settingsand Back-End Server AuthenticationTopics
• Using AWS Management Console (p. 75)
• Using Query API (p. 83)
• Using the Command Line Interface (p. 89)
This example walks you through the process of creating your own load balancer with custom settings.The following task list describes the process of creating a load balancer.
Before you get started, be sure you've met the following preconditions:
• Sign up for Amazon Web Services (AWS). If you haven't signed up for AWS yet, go tohttp://aws.amazon.com and click the Sign Up Now button.
• Sign in to the AWS Management Console and open the Amazon EC2 console athttps://console.aws.amazon.com/ec2/.Alternatively, you can create a load balancer using the command line interface or the Query API. Installthe tools you'll need to perform Elastic Load Balancing tasks. For information on installing the commandline interfaces and the Query API, see Get Set Up with Elastic Load Balancing Interfaces (p. 44).
• For this example, we use Availability Zone us-east-1a. In Availability Zone us-east-1a, launch theinstances you intend to register with your load balancer. For more information about launching AmazonEC2 instances, see Launching and Using Instances.
• Elastic Load Balancer maintains a 60-second timeout setting for idle connections to back-end applicationservers. Update these settings on your back-end server to a timeout of at least 60 seconds for thecommunication to work properly.
• The instances to be registered with your load balancer must respond to the target of the health checkwith an HTTP status code 200.
• To enable HTTPS support for your listeners, you must create and then install an SSL server certificateon your load balancer. The load balancer uses the certificate to terminate and then decrypt requestsbefore sending them to the back-end instances. Elastic Load Balancing uses AWS Identity and AccessManagement (IAM) to upload your certificate to your load balancer. For information on how to createan SSL certificate, go to Creating and Uploading Server Certificates in Using IAM.
All your SSL server certificates are managed by IAM. By default, IAM allows 10 SSL server certificatesper AWS account. If you try to upload a new server certificate after reaching this limit, you'll get anerror.You can request for more certificates using this form - IAM Limit Increase Contact Us Form.
Tasks for Creating a Load Balancer with SSL Cipher Settings and Back-end ServerAuthentication
Configure the listeners for your load balancer by specifying the ports and protocols to use forfront-end connection (client to load balancer) and back-end connection (load balancer to back-endinstance).
1
API Version 2012-06-0174
Elastic Load Balancing Developer GuideCreate a Load Balancer with SSL Cipher Settings and
Back-End Server Authentication

Configure SSL ciphers for SSL negotiation when a connection is established between the clientand your load balancer.
2
[Optional] Enable the back-end server authentication.3
Configure an application health check for your back-end instances.4
Add Amazon EC2 instances to your load balancer.5
Launch your load balancer.6
The following sections include instructions for creating a load balancer using the AWS ManagementConsole, command line interface, or the Query API.
Using AWS Management ConsoleTopics
• Configuring Listeners (p. 75)
• Configure SSL Ciphers (p. 78)
• Configure Back-end Server Authentication (p. 79)
• Configure Health Check Settings (p. 80)
• Add Amazon EC2 Instances (p. 81)
Configuring Listeners
Configure the listeners for your load balancer by specifying the ports and protocols to use for front-endconnection (client to load balancer) and back-end connection (load balancer to back-end instance). Thefirst listener accepts HTTP requests on port 80 and sends the request to the back-end application instanceson port 80 using HTTP. The second listener accepts HTTPS requests on port 443 and sends the requestto back-end application instances using HTTPS on port 443.
To configure listeners for your load balancer
1. Start the Create Load Balancer wizard:
a. On the Amazon EC2 Getting Started page, in the EC2 Dashboard pane, under NETWORK &SECURITY, click Load Balancers.
API Version 2012-06-0175
Elastic Load Balancing Developer GuideCreate a Load Balancer with SSL Cipher Settings and
Back-End Server Authentication

b. On the Load Balancers page, click Create Load Balancer.
2. On the DEFINE LOAD BALANCER page, enter a name for your load balancer (e.g., MyLoadBalancer).
3. Leave the Listener Configuration set to the default value for the first listener.
4. Select HTTPS (Secure HTTP) from the drop-down box in the Load Balancer Protocol box. Thispopulates the Load Balancer Port box. Select HTTPS (Secure HTTP) from the drop-down box inthe Instance Protocol box, then enter port number 443 for the instance port in the Instance Portbox.
API Version 2012-06-0176
Elastic Load Balancing Developer GuideCreate a Load Balancer with SSL Cipher Settings and
Back-End Server Authentication

5. Click Save, then click Continue to upload your SSL certificate.
NoteIf you do not have an SSL certificate, create an SSL certificate and upload the certificateusing AWS Identity and Access Management (IAM). For instructions on creating anduploading the SSL certificate, go to Creating and Uploading Server Certificates in the UsingIAM.
6. Select Choose from your existing SSL Certificates to use the previously uploaded SSL certificateand select the certificate from the drop-down box.
7. Or, select Upload a new SSL Certificate if you have a signed SSL certificate and want to uploadit.
Before you upload, check if your certificate meets the following criteria:
• Certificates must follow the X.509 PEM format.
• The current date must be between the certificate’s start and end date.
• Public and private certificate files must contain only a single certificate.
• The private key must match the public key that is in the digital server certificate.
• The private key must be an RSA private key in PEM format, where the PEM header is BEGIN RSAPRIVATE KEY and the footer is END RSA PRIVATE KEY.
• The private key cannot be encrypted with a password.
• A certificate chain starts with the immediate signing certificate and is then followed by anyintermediaries in order. Intermediaries that are not involved in the trust path must not be included.The trusted root certificate can be optionally included as the last certificate.
If your certificate does not meet the criteria listed in step 7, you might get an error when you uploadit. Create a new SSL certificate and upload the certificate using IAM. For instructions on creating anduploading the SSL certificate, go to Creating and Uploading Server Certificates in Using IAM.
API Version 2012-06-0177
Elastic Load Balancing Developer GuideCreate a Load Balancer with SSL Cipher Settings and
Back-End Server Authentication

If your certificate meets the criteria, step through the following instructions to continue uploading yourSSL certificate.
a. Enter the name of the certificate to upload.
b. Copy and paste the contents of the private key file (PEM-encoded) in the Private Key box.
c. Copy and paste the contents of the public key certificate file (PEM-encoded) in the Public KeyCertificate box.
d. [Optional] Copy and paste the contents of the public key certificate chain file (PEM-encoded) inthe Certificate Chain box.
8. Click Continue to configure SSL ciphers for the HTTPS/SSL listeners.
Configure SSL Ciphers
Next the wizard takes you through the steps for configuring SSL ciphers for your HTTPS/SSL listeners.The Elastic Load Balancing service provides you with sample cipher policies:ELBSample-ELBDefaultCipherPolicy and ELBSample-OpenSSLDefaultCipherPolicy.You can selectone of the sample policies or customize your own ciphers.
To customize the SSL ciphers,
1. Select Custom on the DEFINE LOAD BALANCER page, then select the protocol version and theciphers from the list box.
NoteYou must enable at least one protocol version and one cipher for SSL negotiation to takeplace.
API Version 2012-06-0178
Elastic Load Balancing Developer GuideCreate a Load Balancer with SSL Cipher Settings and
Back-End Server Authentication

2. Click Continue to configure back-end server authentication.
Configure Back-end Server Authentication
Next the wizard gives you an option to enable authentication for your back-end server if you have selectedHTTPS/SSL protocol between your load balancer and the back-end instance. Select Proceed withoutbackend authentication if you do not want to enable authentication for your back-end server.
To configure back-end server authentication
1. Select Enable backend authentication.
a. Enter the name of the public key certificate in the Certificate Name box, and then copy andpaste the contents of the certificate (PEM-encoded) in the Certificate body box.
b. Click Add another Backend Certificate to add multiple certificates.
API Version 2012-06-0179
Elastic Load Balancing Developer GuideCreate a Load Balancer with SSL Cipher Settings and
Back-End Server Authentication

2. Click Continue to configure health check for your back-end server.
Configure Health Check Settings
Next the wizard takes you through the steps for configuring a health check for your back-end instances.
To configure the health check
1. Configure the health check settings that your application requires.
API Version 2012-06-0180
Elastic Load Balancing Developer GuideCreate a Load Balancer with SSL Cipher Settings and
Back-End Server Authentication

2. Click Continue to add your Amazon EC2 instances.
Add Amazon EC2 Instances
Next the wizard takes through the steps for adding Amazon EC2 instances to your load balancer.
To add Amazon EC2 instances
1. Check the boxes in the Select column to add instances to your load balancer.
API Version 2012-06-0181
Elastic Load Balancing Developer GuideCreate a Load Balancer with SSL Cipher Settings and
Back-End Server Authentication

2. Click Continue to review your configuration. On the REVIEW page, click Create to create your loadbalancer.
3. After you click Create button in the REVIEW page, a confirmation window opens. Click Close.
4. When the confirmation window closes, the Load Balancers page opens.Your new load balancernow appears in the list.
5. Select the check box next to your load balancer.
The bottom pane displays the description of your load balancer. Verify that the descriptions matchyour specifications.
API Version 2012-06-0182
Elastic Load Balancing Developer GuideCreate a Load Balancer with SSL Cipher Settings and
Back-End Server Authentication

If the description in the Status row indicates that some of your instances are not in service, it'sprobably because your instances are still registering. For more information, see TroubleshootingElastic Load Balancing: Registering Instances (p. 176).
6. You can test your load balancer after you've verified that at least one of your EC2 instances isInService. To test your load balancer, copy the DNS Name value that is listed in the Descriptiontab and paste it into the address field of an Internet-connected web browser. If your load balanceris working, you will see the default page of your HTTP server.
ImportantElastic Load Balancing associates your load balancer with your EC2 instance using the IPaddresses. When the instance is stopped and then restarted, the IP addresses associated withyour instance change.Your load balancer cannot recognize the new IP addresses, which preventsit from routing traffic to your instance. We recommend that you de-register your Amazon EC2instance from your load balancer after you stop your instance, and then register the load balancerwith your instance after you've restarted. For procedures associated with de-registering and thenregistering your instances with your load balancer, see De-Register and Register Amazon EC2Instances (p. 137).
Using Query APITopics
• Configure Listeners (p. 84)
• Configure SSL Ciphers (p. 85)
• Configure Back-End Server Authentication (p. 86)
• Configure Health Check Settings (p. 88)
API Version 2012-06-0183
Elastic Load Balancing Developer GuideCreate a Load Balancer with SSL Cipher Settings and
Back-End Server Authentication

• Add Amazon EC2 Instances (p. 88)
• Check the state of your newly registered Amazon EC2 Instances (p. 89)
Configure Listeners
In this example, you configure the listeners for your load balancer by specifying the ports and protocolsto use for front-end connection (client to load balancer) and back-end connection (load balancer toback-end instance). The first listener accepts HTTP requests on port 80 and sends the request to theback-end application instances on port 80 using HTTP. The second listener accepts HTTPS requests onport 443 and sends the request to back-end application instances using HTTPS on port 443.You alsoneed to specify the Availability Zone that you want to enable for your load balancer.
For detailed descriptions of the Elastic Load Balancing API actions, see Elastic Load Balancing APIReference.
To configure listeners for your load balancer
1. Create and upload your certificate
To enable HTTPS support for your listeners, you must install an SSL server certificate on your loadbalancer.The load balancer uses the certificate to terminate and then decrypt requests before sendingthem to the back-end instances. Elastic Load Balancing uses AWS Identity and Access Managementto upload your certificate to your load balancer.
To create an SSL certificate and upload the certificate using AWS Identity and Access Management(IAM), go to Creating and Uploading Server Certificates in Using IAM.
If you have an SSL certificate and have uploaded it using IAM, go to step 2.
If you have an SSL certificate and want to upload it using IAM, step through the following instructions:
a. Check if your certificate meets the following criteria:
• Certificates must follow the X.509 PEM format.
• The current date must be between the certificate’s start and end date.
• Public and private certificate files must contain only a single certificate.
• The private key must match the public key that is in the digital server certificate.
• The private key must be an RSA private key in PEM format, where the PEM header is BEGINRSA PRIVATE KEY and the footer is END RSA PRIVATE KEY.
• The private key cannot be encrypted with a password.
• A certificate chain starts with the immediate signing certificate and is then followed by anyintermediaries in order. Intermediaries that are not involved in the trust path must not beincluded. The trusted root certificate can be optionally included as the last certificate.
If your SSL certificate does not meet the criteria listed in this step, you might get an error whenyou upload it. Create a new SSL certificate and upload the certificate using AWS Identity andAccess Management (IAM). For instructions on creating and uploading the SSL certificate, goto Creating and Uploading Server Certificates in the Using IAM.
If your certificate meets the criteria, step through the following instructions to continue uploadingyour certificate.
b. Call the AWS Identity and Access Management UploadServerCertificate action with the followingparameters:
• ServerCertificateName = testCert
API Version 2012-06-0184
Elastic Load Balancing Developer GuideCreate a Load Balancer with SSL Cipher Settings and
Back-End Server Authentication

• CertificateBody = <encoded certificate body>
• PrivateKey = <encoded private key>
• [Optional] CertificateChain = <concatenation of the encoded public keycertificates>
• [Optional] Path = /
NoteIf it is not included, the path defaults to /. For more information about paths, go toIdentifiers for IAM Entities in Using IAM.
c. The response includes the Amazon Resource Name (ARN) of the server certificate. Copy theAmazon Resource Name (ARN) of the certificate for the next step.
2. Call CreateLoadBalancer with the following parameters:
• AvailabilityZones = us-east-1a
• Listener
• Protocol = HTTP
• InstanceProtocol = HTTP
• InstancePort = 80
• LoadBalancerPort = 80
• Listener
• Protocol = HTTPS
• InstanceProtocol = HTTPS
• InstancePort = 443
• LoadBalancerPort = 443
• SSLCertificateID =arn:aws:iam::55555555555:server-certificate/production/myCert
• LoadBalancerName = MyLoadBalancer
The operation returns the DNS name of your load balancer. Copy the DNS name in a safe place.You'll be using the DNS name to connect to the load balancer later in the procedure.You can alsolater map any other domain name (such as www.example.com) to your load balancer’s DNS nameusing CNAME or some other technique.
Configure SSL Ciphers
In this example, you create an SSL cipher policy to configure SSL ciphers for SSL negotiation when aconnection is established between the client and your load balancer. The Elastic Load Balancing servicedefines a policy called SSLNegotiationPolicyType.You create your own SSL cipher policyMySSLNegotiationPolicy of the type SSLNegotiationPolicyType. After creating the SSL cipherpolicy, you enable the cipher settings by associating MySSLNegotiationPolicy with a listener.
To configure SSL ciphers
1. List all the policies associated with your load balancer by calling DescribeLoadBalancerPolicieswith the following parameter:
• LoadBalancerName = MyLoadBalancer
API Version 2012-06-0185
Elastic Load Balancing Developer GuideCreate a Load Balancer with SSL Cipher Settings and
Back-End Server Authentication
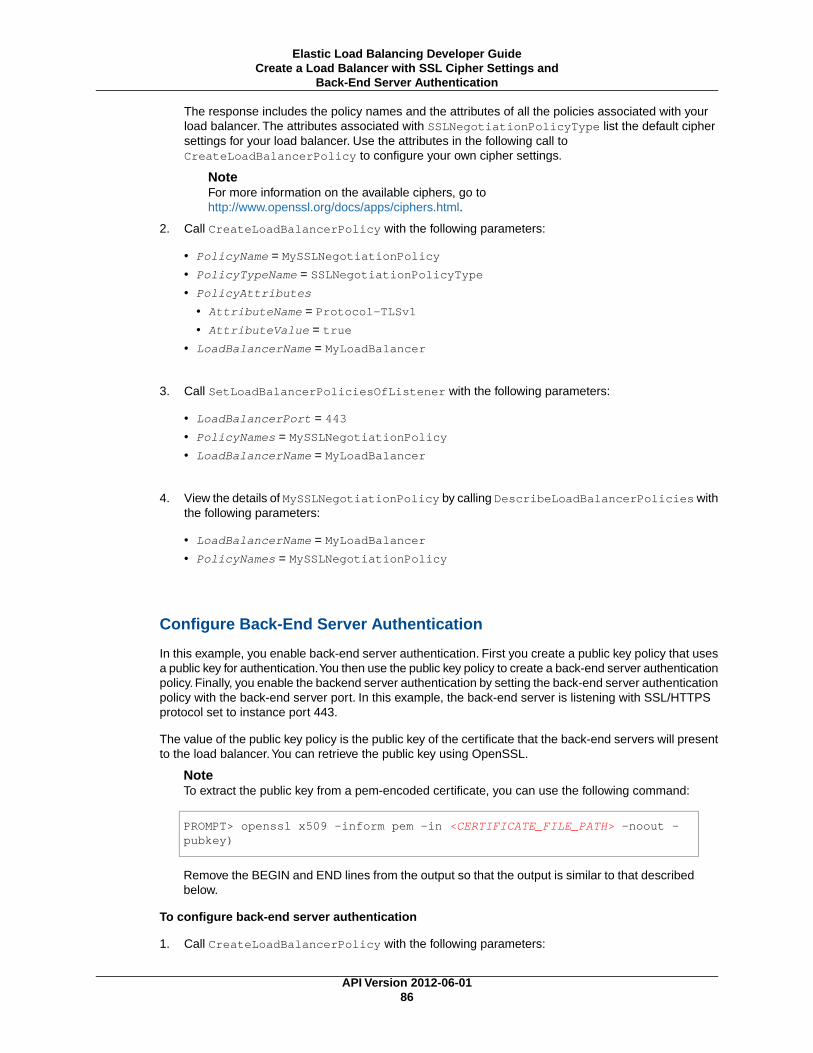
The response includes the policy names and the attributes of all the policies associated with yourload balancer. The attributes associated with SSLNegotiationPolicyType list the default ciphersettings for your load balancer. Use the attributes in the following call toCreateLoadBalancerPolicy to configure your own cipher settings.
NoteFor more information on the available ciphers, go tohttp://www.openssl.org/docs/apps/ciphers.html.
2. Call CreateLoadBalancerPolicy with the following parameters:
• PolicyName = MySSLNegotiationPolicy
• PolicyTypeName = SSLNegotiationPolicyType
• PolicyAttributes
• AttributeName = Protocol-TLSv1
• AttributeValue = true
• LoadBalancerName = MyLoadBalancer
3. Call SetLoadBalancerPoliciesOfListener with the following parameters:
• LoadBalancerPort = 443
• PolicyNames = MySSLNegotiationPolicy
• LoadBalancerName = MyLoadBalancer
4. View the details of MySSLNegotiationPolicy by calling DescribeLoadBalancerPolicies withthe following parameters:
• LoadBalancerName = MyLoadBalancer
• PolicyNames = MySSLNegotiationPolicy
Configure Back-End Server Authentication
In this example, you enable back-end server authentication. First you create a public key policy that usesa public key for authentication.You then use the public key policy to create a back-end server authenticationpolicy. Finally, you enable the backend server authentication by setting the back-end server authenticationpolicy with the back-end server port. In this example, the back-end server is listening with SSL/HTTPSprotocol set to instance port 443.
The value of the public key policy is the public key of the certificate that the back-end servers will presentto the load balancer.You can retrieve the public key using OpenSSL.
NoteTo extract the public key from a pem-encoded certificate, you can use the following command:
PROMPT> openssl x509 -inform pem -in <CERTIFICATE_FILE_PATH> -noout -pubkey)
Remove the BEGIN and END lines from the output so that the output is similar to that describedbelow.
To configure back-end server authentication
1. Call CreateLoadBalancerPolicy with the following parameters:
API Version 2012-06-0186
Elastic Load Balancing Developer GuideCreate a Load Balancer with SSL Cipher Settings and
Back-End Server Authentication

• PolicyName = MyPublicKeyPolicy
• PolicyTypeName = PublicKeyPolicyType
• PolicyAttributes
• AttributeName = PublicKey
• AttributeValue =
MIICiTCCAfICCQD6m7oRw0uXOjANBgkqhkiG9w0BAQUFADCBiDELMAkGA1UEBhMCVVMxCzAJBgNVBAgTAldBMRAwDgYDVQQHEwdTZWF0dGxlMQ8wDQYDVQQKEwZBbWF6b24xFDASBgNVBAsTC0lBTSBDb25zb2xlMRIwEAYDVQQDEwlUZXN0Q2lsYWMxHzAdBgkqhkiG9w0BCQEWEG5vb25lQGFtYXpvbi5jb20wHhcNMTEwNDI1MjA0NTIxWhcNMTIwNDI0MjA0NTIxWjCBiDELMAkGA1UEBhMCVVMxCzAJBgNVBAgTAldBMRAwDgYDVQQHEwdTZWF0dGxlMQ8wDQYDVQQKEwZBbWF6b24xFDASBgNVBAsTC0lBTSBDb25zb2xlMRIwEAYDVQQDEwlUZXN0Q2lsYWMxHzAdBgkqhkiG9w0BCQEWEG5vb25lQGFtYXpvbi5jb20wgZ8wDQYJKoZIhvcNAQEBBQADgY0AMIGJAoGBAMaK0dn+a4GmWIWJ21uUSfwfEvySWtC2XADZ4nB+BLYgVIk60CpiwsZ3G93vUEIO3IyNoH/f0wYK8m9TrDHudUZg3qX4waLG5M43q7Wgc/MbQITxOUSQv7c7ugFFDzQGBzZswY6786m86gpEIbb3OhjZnzcvQAaRHhdlQWIMm2nrAgMBAAEwDQYJKoZIhvcNAQEFBQADgYEAtCu4nUhVVxYUntneD9+h8Mg9q6q+auNKyExzyLwaxlAoo7TJHidbtS4J5iNmZgXL0FkbFFBjvSfpJIlJ00zbhNYS5f6GuoEDmFJl0ZxBHjJnyp378OD8uTs7fLvjx79LjSTbNYiytVbZPQUQ5Yaxu2jXnimvw3rrszlaEXAMPLE=
• LoadBalancerName = MyLoadBalancer
2. Call CreateLoadBalancerPolicy with the following parameters:
• PolicyName = MyBackendServerAuthenticationPolicy
• PolicyTypeName = BackendServerAuthenticationPolicyType
• PolicyAttributes
• AttributeName = PublicKeyPolicyName
• AttributeValue = MyPublicKeyPolicy
• LoadBalancerName = MyLoadBalancer
3. Call SetLoadBalancerPoliciesForBackendServer with the following parameters:
• LoadBalancerName = MyLoadBalancer
• InstancePort = 443
• PolicyNames = MyBackendServerAuthenticationPolicy
4. To list all the policies associated with your load balancer,
call DescribeLoadBalancerPolicies with the following parameters:
• LoadBalancerName = MyLoadBalancer
5. To view the details of MyBackendServerAuthenticationPolicy,
call DescribeLoadBalancerPolicies with the following parameters:
• LoadBalancerName = MyLoadBalancer
• PolicyNames = MyBackendServerAuthenticationPolicy
API Version 2012-06-0187
Elastic Load Balancing Developer GuideCreate a Load Balancer with SSL Cipher Settings and
Back-End Server Authentication

Configure Health Check Settings
In this example, you configure the health check settings for your back-end servers.
To configure health check settings
• Call ConfigureHealthCheck with the following parameters:
• LoadBalancerName = MyLoadBalancer
• Target = http:80/ping
NoteMake sure your instances respond to a ping on port 80 with an HTTP 200 status code.
• Interval = 30
• Timeout = 3
• HealthyThreshold = 2
• UnhealthyThreshold = 2
Add Amazon EC2 Instances
In this example, you register your newly created load balancer with your Amazon EC2 instances.
ImportantYou should only register instances that are in the Pending or Running state and are not in aVirtual Private Cloud (VPC). If you are using Elastic Load Balancing in a VPC, see Deploy ElasticLoad Balancing in Amazon VPC (p. 111)
To add Amazon EC2 instances
• Call RegisterInstancesWithLoadBalancer with the following parameters:
• LoadBalancerName = MyLoadBalancer
• Instances = [ i-4f8cf126, i-0bb7ca62 ]
NoteTo allow communication between Elastic Load Balancing and your back-end instances,create a security group ingress rule that applies to all of your back-end instances. Thesecurity group rule can either allow ingress traffic from all IP addresses (the 0.0.0.0/0 CIDRrange) or allow ingress traffic only from Elastic Load Balancing.To ensure that your back-endEC2 instances can receive traffic only from Elastic Load Balancing, enable network ingressfor the Elastic Load Balancing security group on all of your back-end EC2 instances. Formore information, see Manage Security Groups in Amazon EC2 (p. 100).
ImportantElastic Load Balancing registers your load balancer with the instance using the IP addresses.When the instance is stopped and then restarted, the IP addresses associated with your instancechange.Your load balancer cannot recognize the new IP address, which prevents it from routingtraffic to your instance. We recommend that you de-register your Amazon EC2 instances fromyour load balancer after you stop your instance, and then register the new instance ID with theload balancer after you restart your instance. For procedures associated with de-registering andthen registering your instances with load balancer, see De-Register and Register Amazon EC2Instances (p. 137).
API Version 2012-06-0188
Elastic Load Balancing Developer GuideCreate a Load Balancer with SSL Cipher Settings and
Back-End Server Authentication
Check the state of your newly registered Amazon EC2 Instances
In this example, you check the state of your newly registered Amazon EC2 instances.Your load balanceris usable as soon as any one of your registered EC2 instance is in InService state.
To check the state of your newly registered Amazon EC2 instances
1. Call DescribeInstanceHealth with the following parameters:
• LoadBalancerName = MyLoadBalancer
• Instances.member.N = [i-4f8cf126 ,i-0bb7ca62]
2. If the State field of some or all of your instances displays OutOfService, it's probably because yourinstances are still registering. For more information, see Troubleshooting Elastic Load Balancing:Registering Instances (p. 176).
3. You can test your load balancer after you have verified that at least one of your EC2 instances isInService. To test your load balancer, copy the DNS Name of your load balancer that you receivedafter you completed the Configure Listeners (p. 84) task, and paste it into the address field of anInternet-connected web browser. If your load balancer is working, you will see the default page ofyour HTTP server.
Using the Command Line InterfaceTopics
• Configure Listeners (p. 89)
• Configure SSL Ciphers (p. 91)
• Configure Back-end Server Authentication (p. 92)
• Configure Health Check Settings (p. 94)
• Add Amazon EC2 Instances (p. 94)
• Check the state of your newly registered Amazon EC2 Instances (p. 95)
Configure Listeners
In this example, you configure the listeners for your load balancer by specifying the ports and protocolsto use for front-end connection (client to load balancer) and back-end connection (load balancer toback-end instance). The first listener accepts HTTP requests on port 80 and sends the request to theback-end application instances on port 80 using HTTP. The second listener accepts HTTPS requests onport 443 and sends the request to back-end application instances using HTTPS on port 443.You alsoneed to specify the Availability Zone that you want to enable for your load balancer.
For descriptions of all the Elastic Load Balancing commands, see Elastic Load Balancing Quick ReferenceCard.
To configure listeners for your load balancer
1. Create and upload your certificate
To enable HTTPS support for your listeners, you must install an SSL server certificate on your loadbalancer.The load balancer uses the certificate to terminate and then decrypt requests before sendingthem to the back-end instances. Elastic Load Balancing uses AWS Identity and Access Management(IAM) to upload your certificate to your load balancer.
To create an SSL certificate and upload the certificate using IAM, go to Creating and UploadingServer Certificates in the Using IAM.
API Version 2012-06-0189
Elastic Load Balancing Developer GuideCreate a Load Balancer with SSL Cipher Settings and
Back-End Server Authentication

If you already have an SSL certificate and have uploaded it using IAM, go to step 2.
If you already have an SSL certificate and want to upload it using IAM, step through the followinginstructions.
a. Check if your signed certificate meets the following criteria:
• Certificates must follow the X.509 PEM format.
• The current date must be between the certificate’s start and end date.
• Public and private certificate files must contain only a single certificate.
• The private key must match the public key that is in the digital server certificate.
• The private key must be an RSA private key in PEM format, where the PEM header is BEGINRSA PRIVATE KEY and the footer is END RSA PRIVATE KEY.
• The private key cannot be encrypted with a password.
• A certificate chain starts with the immediate signing certificate and is then followed by anyintermediaries in order. Intermediaries that are not involved in the trust path must not beincluded. The trusted root certificate can be optionally included as the last certificate.
If your certificate does not meet the criteria listed in this step, you might get an error when youupload it. Create a new SSL certificate and upload the certificate using AWS Identity and AccessManagement (IAM). For instructions on creating and uploading the SSL certificate, go to Creatingand Uploading Server Certificates in the Using IAM.
If your certificate meets the criteria, step through the following instructions to continue uploadingyour certificate.
b. Use the IAM command iam-servercertupload in verbose mode, as in the following example,to upload your SSL certificate to the AWS IAM service.
NoteYou have to download and install the AWS Identity and Access Management commandline interface (IAM CLI) to use this command. For more information about installing theIAM CLI, go to Getting the Command Line Tools in the AWS Identity and AccessManagement CLI Reference.
PROMPT> iam-servercertupload -b <encoded certificate body> -k <encoded private key> -s myCert [-c <concatenation of the encoded public key certificates>] -v
The response includes the server certificate Amazon Resource Name (ARN) and GUID.
arn:aws:iam::55555555555:server-certificate/production/myCertASCACexampleKEZUQ4K
2. The first line is the ARN and the second line is the GUID. Copy the ARN of the certificate for the nextstep.
3. Enter the command elb-create-lb, as in the following example.
PROMPT> elb-create-lb MyLoadBalancer --headers --listener "lb-port=80,in stance-port=80,protocol=http,instance-protocol=http" --listener "lb-port=443,instance-port=443,protocol=https,instance-pro tocol=https, cert-id=arn:aws:iam::55555555555:server-certificate/produc tion/myCert" --availability-zones us-east-1a
API Version 2012-06-0190
Elastic Load Balancing Developer GuideCreate a Load Balancer with SSL Cipher Settings and
Back-End Server Authentication

Elastic Load Balancing returns the DNS name of your load balancer.
DNS-NAME DNS-NAME DNS-NAME MyLoadBalancer-2111276808.us-east-1a.elb.amazonaws.com
4. Copy the DNS name in a safe place.You'll be using the DNS name to connect to the load balancerlater in the procedure.You can also later map any other domain name (such as www.example.com)to your load balancer’s DNS name using CNAME or some other technique.
Configure SSL Ciphers
Your Elastic Load Balancer is first created with a default set of SSL ciphers and protocols.You can createoverrides to this default by specifying your own cipher policy.
In this example, you create an SSL cipher policy to configure SSL ciphers for SSL negotiation when aconnection is established between the client and your load balancer. The Elastic Load Balancing servicedefines a policy called SSLNegotiationPolicyType.You create your own SSL cipher policyMySSLNegotiationPolicy of the type SSLNegotiationPolicyType. After creating the SSL cipherpolicy, you enable the cipher settings by associating MySSLNegotiationPolicy with a listener.
To configure SSL ciphers
1. Enter the command elb-describe-lb-policies, as in the following example, to list all the policiesassociated with MyLoadBalancer.
PROMPT>elb-describe-lb-policies MyLoadBalancer --headers
Elastic Load Balancing returns the following:
POLICY NAME TYPE_NAMEPOLICY MyAppStickinessPolicy AppCookieStickinessPolicyTypePOLICY MyLBStickinessPolicy LBCookieStickinessPolicyTypePOLICY MySSLNegotiationPolicy SSLNegotiationPolicyType
The response includes the policy names of all the policies associated with your load balancer. Wewill be using SSLNegotiationPolicyType to create a new policy by changing the pre-definedcipher settings. For more information on all the available ciphers, go tohttp://www.openssl.org/docs/apps/ciphers.html.
2. Enter the command elb-describe-lb-policy-types, as in the following example to retrieve alist of available ciphers and policies associated with SSLNegotiationPolicyType.
PROMPT>elb-describe-lb-policy-types SSLNegotiationPolicyType --show-long
We will be changing the cipher settings and the protocols associated withSSLNegotiationPolicyType to create MySSLNegotiationPolicy.
3. Enter the command elb-create-lb-policy, as in the following example, to create a new policyfor your load balancer that accepts TLSv1 protocol, does not accept SSLv2 protocol, and acceptsthe cipher DHE-RSA-AES256-SHA. Protocol SSLv3 is still enabled, because that is part of the defaultpolicy.
API Version 2012-06-0191
Elastic Load Balancing Developer GuideCreate a Load Balancer with SSL Cipher Settings and
Back-End Server Authentication

PROMPT>elb-create-lb-policy MyLoadBalancer --policy-name MySSLNegotiation Policy --policy-type SSLNegotiationPolicyType --attribute "name=Protocol-TLSv1,value=true" --attribute "name=Protocol-SSLv2,value=false --attribute "name=DHE-RSA-AES256-SHA,value=true"
4. Enter the command elb-set-lb-policies-of-listener, as in the following example, to enablethe cipher settings by setting the MySSLNegotiationPolicy with a listener.
PROMPT>elb-set-lb-policies-of-listener MyLoadBalancer --lb-port 443 --policy-name MySSLNegotiationPolicy
5. Enter the command elb-describe-lb-policies, as in the following example, to view details ofMySSLNegotiationPolicy.
PROMPT>elb-describe-lb-policies MyLoadBalancer --policy-names MySSLNegoti ationPolicy
Following is the partial listing of the example response:
POLICY,NAME,TYPE_NAME,POLICY_ATTRIBUTE_DESCRIPTIONSPOLICY,MySSLNegotiationPolicy,SSLNegotiationPolicyType,"{name=Protocol-SSLv2,value=true},{name=EDH-DSS-DES-CBC3-SHA,value=false},{name=DHE-RSA-CAMELLIA128-SHA,value=false},{name=DES-CBC-MD5,value=false},{name=KRB5-RC4-SHA,value=false},{name=ADH-CAMELLIA128-SHA,value=false},{name=EXP-KRB5-RC4-MD5,value=false}
Configure Back-end Server Authentication
In this example, you enable the back-end server authentication by creating a public key policy that usesa public key for authentication.You then use the public key policy to create a back-end server authenticationpolicy. Finally, you enable the back-end server authentication by setting the back-end server authenticationpolicy with the back-end server port. In this example, the back-end server is listening with SSL/HTTPSprotocol set to instance port 443.
The value of the public key policy is the public key of the certificate that the back-end servers will presentto the load balancer.You can retrieve the public key using OpenSSL.
To configure back-end server authentication
1. Enter the command openssl x509 to retrieve the public key.
openssl x509 -in PublicKey -pubkey -noout
2. Enter the command elb-create-lb-policy, as in the following example, to create a public keypolicy.
PROMPT>elb-create-lb-policy MyLoadBalancer --policy-name MyPublicKeyPolicy --policy-type PublicKeyPolicyType --attribute "name=PublicKey,value=
API Version 2012-06-0192
Elastic Load Balancing Developer GuideCreate a Load Balancer with SSL Cipher Settings and
Back-End Server Authentication

MIICiTCCAfICCQD6m7oRw0uXOjANBgkqhkiG9w0BAQUFADCBiDELMAkGA1UEBhMCVVMxCzAJBgNVBAgTAldBMRAwDgYDVQQHEwdTZWF0dGxlMQ8wDQYDVQQKEwZBbWF6b24xFDASBgNVBAsTC0lBTSBDb25zb2xlMRIwEAYDVQQDEwlUZXN0Q2lsYWMxHzAdBgkqhkiG9w0BCQEWEG5vb25lQGFtYXpvbi5jb20wHhcNMTEwNDI1MjA0NTIxWhcNMTIwNDI0MjA0NTIxWjCBiDELMAkGA1UEBhMCVVMxCzAJBgNVBAgTAldBMRAwDgYDVQQHEwdTZWF0dGxlMQ8wDQYDVQQKEwZBbWF6b24xFDASBgNVBAsTC0lBTSBDb25zb2xlMRIwEAYDVQQDEwlUZXN0Q2lsYWMxHzAdBgkqhkiG9w0BCQEWEG5vb25lQGFtYXpvbi5jb20wgZ8wDQYJKoZIhvcNAQEBBQADgY0AMIGJAoGBAMaK0dn+a4GmWIWJ21uUSfwfEvySWtC2XADZ4nB+BLYgVIk60CpiwsZ3G93vUEIO3IyNoH/f0wYK8m9TrDHudUZg3qX4waLG5M43q7Wgc/MbQITxOUSQv7c7ugFFDzQGBzZswY6786m86gpEIbb3OhjZnzcvQAaRHhdlQWIMm2nrAgMBAAEwDQYJKoZIhvcNAQEFBQADgYEAtCu4nUhVVxYUntneD9+h8Mg9q6q+auNKyExzyLwaxlAoo7TJHidbtS4J5iNmZgXL0FkbFFBjvSfpJIlJ00zbhNYS5f6GuoEDmFJl0ZxBHjJnyp378OD8uTs7fLvjx79LjSTbNYiytVbZPQUQ5Yaxu2jXnimvw3rrszlaEXAMPLE=
"
NoteTo specify a public key value for the attribute argument, remove the first and last linesof the public key (the line containing "-----BEGIN PUBLIC KEY-----" and the linecontaining "-----END PUBLIC KEY-----"). The CLI does not accept white spacecharacters inside the value for the attribute argument.
3. Enter the command elb-create-lb-policy, as in the following example, to create a back-endserver authentication policy by referring to MyPublicKeyPolicy.You can refer to multiple publickey policies. When multiple public key policies are used, the load balancer will try all the keys oneby one for authentication. If one of the public keys matches the server certificate, authenticationpasses.
PROMPT>elb-create-lb-policy MyLoadBalancer --policy-name MyBackendServerAu thenticationPolicy --policy-type BackendServerAuthenticationPolicyType --attribute "name=PublicKeyPolicyName,value=MyPublicKeyPolicy"
4. Enter the command elb-set-lb-policies-for-backend, as in the following example, to setMyBackendServerAuthenticationPolicy to the back-end server port.
PROMPT>elb-set-lb-policies-for-backend-server MyLoadBalancer --instance-port 443 --policy-names MyBackendAuthenticationPolicy
5. Enter the command elb-describe-lb-policies, as in the following example, to list all the policiescreated for MyLoadBalancer.
PROMPT>elb-describe-lb-policies MyLoadBalancer
6. Enter the command elb-describe-lb-policies, as in the following example, to view details ofMyBackendServerAuthenticationPolicy.
PROMPT>elb-describe-lb-policies MyLoadBalancer --policy-names MyBackend ServerAuthenticationPolicy
API Version 2012-06-0193
Elastic Load Balancing Developer GuideCreate a Load Balancer with SSL Cipher Settings and
Back-End Server Authentication

Configure Health Check Settings
In this example, you configure the health check settings for your back-end servers.
• To configure health check settings for your back-end server
Enter the command elb-configure-healthcheck as in the following example.
PROMPT> elb-configure-healthcheck MyLoadBalancer --headers --target "HT TP:80/ping" --interval 30 --timeout 3 --unhealthy-threshold 2 --healthy-threshold 2
Elastic Load Balancing returns the following:
HEALTH-CHECK TARGET INTERVAL TIMEOUT HEALTHY-THRESHOLD UNHEALTHY-THRESHOLDHEALTH-CHECK HTTP:80/ping 30 3 2 2
Add Amazon EC2 Instances
In this example, you register your newly created load balancer with your Amazon EC2 instances.
ImportantYou should only register instances that are in the Pending or Running state and are not in aVirtual Private Cloud (VPC). If you are using Elastic Load Balancing in a VPC, see Deploy ElasticLoad Balancing in Amazon VPC (p. 111).
• To add Amazon EC2 instances
Use the elb-register-instances-with-lb command as in the following example.
PROMPT> elb-register-instances-with-lb MyLoadBalancer --headers --instances i-4f8cf126,i-0bb7ca62
Elastic Load Balancing returns the following:
INSTANCE INSTANCE-IDINSTANCE i-4f8cf126INSTANCE i-0bb7ca62
ImportantElastic Load Balancing registers your load balancer with the instance using the IP addresses.When the instance is stopped and then restarted, the IP addresses associated with your instancechanges.Your load balancer cannot recognize the new IP address, which prevents it from routingtraffic to your instances. We recommend you de-register your Amazon EC2 instances from yourload balancer after you stop your instance, and then register the new instance ID with the loadbalancer after you restart your instance. For procedures associated with de-registering and thenregistering your instances with load balancer, see De-Register and Register Amazon EC2Instances (p. 137).
API Version 2012-06-0194
Elastic Load Balancing Developer GuideCreate a Load Balancer with SSL Cipher Settings and
Back-End Server Authentication

Check the state of your newly registered Amazon EC2 Instances
In this example, you check the state of your newly registered Amazon EC2 instances.Your load balanceris usable as soon as any one of your registered EC2 instance is in InService state.
1. To check the state of your newly registered Amazon EC2 instances
Use the elb-describe-instance-health command as in the following example.
PROMPT> elb-describe-instance-health MyLoadBalancer --headers --instances i-4f8cf126,i-0bb7ca62
Elastic Load Balancing returns the following:
INSTANCE_ID INSTANCE_ID STATE DESCRIPTION REASON-CODEINSTANCE_ID i-4f8cf126 OutOfService Instance has failed at least the UnhealthyThreshold number of health checks consecutively. InstanceINSTANCE_ID i-0bb7ca62 InService N/A N/A
2. If the State field of some or all of your instances display OutOfService, it's probably because yourinstances are still registering. For more information, see Troubleshooting Elastic Load Balancing:Registering Instances (p. 176).
3. You can test your load balancer after you have verified that at least one of your EC2 instances isInService. To test your load balancer, copy the DNS Name of your load balancer that you got afteryou completed the Configure Listeners (p. 89) task, and paste it into the address field of anInternet-connected web browser. If your load balancer is working, you will see the default page ofyour HTTP server.
Expand a Load Balanced Application to anAdditional Availability ZoneIn this example, you expand your EC2 application to run in an additional Availability Zone (us-east-1b).To do so, you first register the instances in the Availability Zone us-east-1b with the load balancer.Youwait for the instances to show up in the OutOfService state for the load balancer. Finally you enableAvailability Zone us-east-1b for your load balancer.
NoteIt is important to register instances in the new Availability Zone with your load balancer beforeadding the Availability Zone. When you call EnableAvailabilityZonesForLoadBalancer,the load balancer begins to route traffic equally amongst all the enabled Availability Zones.
Preconditions:
• You have set up an HTTP load balancer in Availability Zone us-east-1a as in Creating a HTTPS/SSLLoad Balancer (p. 74).
• In Availability Zone us-east-1b, you have launched the instances you intend to register with your loadbalancer.
Using Query APITo expand a load balanced application to an additional Availability Zone
API Version 2012-06-0195
Elastic Load Balancing Developer GuideExpand a Load Balanced Application to an Additional
Availability Zone

1. Call RegisterInstancesFromLoadBalancer with the following parameters:
• LoadBalancerName = MyLoadBalancer
• Instances = [i-3a8cf324, i-2603ca33]
2. Call DescribeInstanceHealth with the following parameters.
• LoadBalancerName = MyLoadBalancer
• Instances = i-3a8cf324, i-2603ca33
3. When the instances from the previous step are in the OutOfService state, you can proceed to thenext step. Call EnableAvailabilityZonesForLoadBalancer.
• LoadBalancerName = MyLoadBalancer
• Availability Zones = us-east-1b
The operation returns the updated list of Availability Zones enabled for your load balancer.
Using the Command Line InterfaceTo expand a load balanced application to an additional Availability Zone
1. Use the elb-register-instances-with-lb command as in the following example.
PROMPT> elb-register-instances-with-lb MyLoadBalancer --headers --instances i-3a8cf324, i-2603ca33
Elastic Load Balancing returns the following:
INSTANCE INSTANCE-IDINSTANCE i-3a8cf324INSTANCE i-2603ca33INSTANCE i-4f8cf126INSTANCE i-0bb7ca62
2. Use the elb-describe-instance-health command as in the following example.
PROMPT> elb-describe-instance-health MyLoadBalancer --headers --instances i-3a8cf324,i-2603ca33
Elastic Load Balancing returns the following:
INSTANCE INSTANCE-ID STATEINSTANCE i-3a8cf324 OutOfServiceINSTANCE i-2603ca33 OutOfService
3. Use the elb-enable-zones-for-lb command as in the following example.
API Version 2012-06-0196
Elastic Load Balancing Developer GuideExpand a Load Balanced Application to an Additional
Availability Zone

PROMPT>elb-enable-zones-for-lb MyLoadBalancer --headers --availability-zones us-east-1b
Elastic Load Balancing returns the following:
AVAILABILITY_ZONES AVAILABILITY-ZONESAVAILABILITY_ZONES us-east-1a, us-east-1b
API Version 2012-06-0197
Elastic Load Balancing Developer GuideExpand a Load Balanced Application to an Additional
Availability Zone

Disable an Availability Zone from a Load-BalancedApplicationIn this example, you disable the Availability Zone us-east-1a for your EC2 application.
This scenario assumes that you have an HTTP load balancer enabled in Availability Zones us-east-1aand us-east-1b.
You disable the Availability Zone for the load balancer first, then give the instances time to go into theOutOfService state before deregistering them from your load balancer.
NoteYour load balancer always distributes traffic to all the enabled Availability Zones. If there are nohealthy instances in an enabled Availability Zone, the request will be forwarded to healthyinstances in another enabled Availability Zone. If you do not plan to have instances in a zone,you must disable it by calling the DisableAvailabilityZonesForLoadBalancer action onthat Availability Zone.
Using Query APITo disable an availability zone from a Load Balanced Application
1. Call DisableAvailabilityZonesForLoadBalancer with the following parameters:
• LoadBalancerName = MyLoadBalancer
• Availability Zones = us-east-1a
The operation returns the updated list of Availability Zones enabled for your load balancer.
2. Call DescribeInstanceHealth with the following parameters.You have to wait until all of theinstances in the disabled Availability Zones are in the OutOfService state.
• LoadBalancerName = MyLoadBalancer
• Instances = i-4f8cf126, i-0bb7ca62
3. Call DeregisterInstances with the following parameters:
• LoadBalancerName = MyLoadBalancer
• Instances = i-4f8cf126, i-0bb7ca62
Using the Command Line InterfaceTo disable an availability zone from a Load Balanced Application
1. Use the elb-disable-zones-for-lb command as in the following example.
PROMPT> elb-disable-zones-for-lb MyLoadBalancer --headers --availability-zones us-east-1a
Elastic Load Balancing returns the following:
API Version 2012-06-0198
Elastic Load Balancing Developer GuideDisable an Availability Zone from a Load-Balanced
Application
AVAILABILITY_ZONES AVAILABILITY-ZONESAVAILABILITY_ZONES us-east-1b
2. Use the elb-describe-instance-health command as in the following example.
PROMPT> elb-describe-instance-health MyLoadBalancer --headers --instances i-4f8cf126,i-0bb7ca62
Elastic Load Balancing returns the following:
INSTANCE INSTANCE-ID STATEINSTANCE i-4f8cf126 OutOfServiceINSTANCE i-0bb7ca62 OutOfService
3. Use the elb-deregister-instances-from-lb command as in the following example.
PROMPT> elb-deregister-instances-from-lb MyLoadBalancer --headers --in stances i-4f8cf126,i-0bb7ca62
Elastic Load Balancing returns the following:
INSTANCE INSTANCE-IDINSTANCE i-3a8cf324INSTANCE i-2603ca33
API Version 2012-06-0199
Elastic Load Balancing Developer GuideDisable an Availability Zone from a Load-Balanced
Application

Manage Security Groups in Amazon EC2-ClassicA security group acts as a firewall that controls the traffic allowed into a group of instances. When youlaunch an Amazon EC2 instance, you can assign it to one or more security groups. For each seucuritygroup, you can add rules that govern the allowed inbound traffic to instances in the group. All other inboundtraffic is discarded.You can modify rules for a security group at any time. The new rules are automaticallyenforced for all existing and future instances in the group. For information on Amazon EC2 security groups,go to Using Security Groups.
Elastic Load Balancing provides a special Amazon EC2 source security group that you can use to ensurethat a back-end Amazon EC2 instance receives traffic only from Elastic Load Balancing. This featureinvolves two security groups—the source security group and a security group that defines the ingressrules for your back-end instance. To lock down traffic between your load balancer and your back-endinstances, add or modify a rule to your back-end security group that limits ingress traffic so that it cancome only from the Amazon EC2 source security group provided by the Elastic load Balancing.
Locking down traffic between Elastic Load Balancing andback-end Amazon EC2 instanceTopics
• Using the AWS Management Console (p. 101)
• Using the command line interface (CLI) (p. 102)
• Using the Query API (p. 104)
In this section, we will walk you through the process for locking down the traffic between your load balancerand your back-end Amazon EC2 instances.
Before you continue, be sure you’ve read Security Group Concepts section in the Amazon EC2 UserGuide.
The following table outlines the steps for locking down the traffic between your load balancer and theback-end instances.This will be followed by instructions for locking down traffic between your load balancerand your back-end instances using the AWS Management Console, the command line interface (CLI),or the Query API.
If you are planning on using the command line interface (CLI), be sure that you've installed the AmazonEC2 command line interface tool. For information on downloading and installing the tool, go to SettingUp the Amazon EC2 Command Line Tools section in the Amazon EC2 User Guide.
Steps for locking down the traffic between your load balancer and your back-end instance
Get the name of the source security group provided by Elastic Load Balancing for your load balancer.1
Add a new rule in the security group associated with your Amazon EC2 back-end instances to allowinbound traffic from your load balancer.
2
Verify that the new rule has been added.3
[optional] Remove the rules in your back-end instance's security group that are less restrictive.4
API Version 2012-06-01100
Elastic Load Balancing Developer GuideManage Security Groups in Amazon EC2-Classic

Using the AWS Management Console
1. To get the name of the source security group provided by Elastic Load Balancing for yourload balancer,
a. On the Amazon EC2 Getting Started page, in the EC2 Dashboard pane, under NETWORK &SECURITY, click Load Balancers.
b. On the Load Balancers page, select your load balancer.
c. The bottom pane displays the details of your load balancer.
d. Click the Security tab.
e. Copy the name displayed in the Source Security Group row. This is the source security groupprovided by Elastic Load Balancing for your load balancer.
2. To add a rule in the security group of your Amazon EC2 back-end instances to allow incomingtraffic from the Elastic Load Balancing source security group,
a. On the Load Balancers page, click Instances in the Navigation pane.
b. On the My Instances page, select an instance registered with your load balancer.
c. The bottom pane displays details of your instance. Make sure that the Description tab is selected.
d. Make a note of the name of the security group displayed in the Security Groups: field. This isthe security group associated with your back-end instance.
e. Click Security Groups in the Navigation pane.
f. On the Security Groups page, select the security group associated with your back-end instance.
g. The bottom pane displays details of the security group.
h. Click the Inbound tab. The right pane of the Inbound tab displays the rules that belong to thesecurity group.
i. In the Port range: field, specify the port or port range for accessing your Amazon EC2 instances.
j. In the Source: field, type the source security group name of your load balancer. This should bethe same name you used in step 1. In our example it’s amazon-elb/amazon-elb-sg.
k. Click Add Rule and then click Apply Rule Changes.
3. The right-side pane of the Inbound tab displays the new rule. Verify that the new rule is added tothe security group of your back-end instance.
API Version 2012-06-01101
Elastic Load Balancing Developer GuideManage Security Groups in Amazon EC2-Classic

4. [optional] If your security group has rules that are less restrictive than the rule you added in step 2,remove the less restrictive rule by clicking Delete in the row that has the less restrictive rule.
NoteIf you want to connect directly to your back-end instances, do not delete inbound rules thatallow you to do so. For example, you might have rules that allow inbound traffic on ports 22(SSH) and 3389 (RDP).
Using the command line interface (CLI)
1. To get the name of the source security group provided by Elastic Load Balancing for yourload balancer,Enter the elb-describe-lbs command.You must include the --show-long parameter to displaythe source security group name. For information on using additional parameters with this command,go to Elastic Load Balancing Quick Reference Card.
The following example returns a description of the MyLoadBalancer load balancer.
elb-describe-lbs MyLoadBalancer --show-long --headers
The following is an example response.
LOAD_BALANCER,NAME,DNS_NAME,CANONICAL_HOSTED_ZONE_NAME,CANONICAL_HOS TED_ZONE_NAME_ID,HEALTH_CHECK,AVAILABILITY_ZONES,SUBNETS,VPC_ID,INSTANCE_ID,LISTENER_DESCRIP TIONS,BACKEND_SERVER_DESCRIPTIONS,OTHER_POLICIES,SOURCE_SECURITY_GROUP,SECUR ITY_GROUPS,CREATED_TIME,SCHEMELOAD_BALANCER,MyLoadBalancer,MyLoadBalancer-91948427.us-east-1.elb.amazon aws.com,MyLoadBalancer-91948427.us-east-1.elb.amazonaws.com,Z3DZXE0Q79N41H,"{inter val=6,target=HTTP:80/,timeout=5,healthy-threshold=2,unhealthy-threshold=2}",us-east-1e,(nil),(nil),"i-f5ab7988, i-fbab7986","{protocol=HTTP,lb-port=80,instance-protocol=HTTP,instance-port=80,policies=},{protocol=HTTPS,lb-port=443,instance-protocol=HTTP,instance-port=80,cert-id=arn:aws:iam::803981987763:server-certific ate/sc
API Version 2012-06-01102
Elastic Load Balancing Developer GuideManage Security Groups in Amazon EC2-Classic
ert,policies=AWSConsole-SSLNegotiationPolicy-MyLoadBalancer}",(nil),AWSCon sole-SSLNegotiationPolicy-MyLoadBalancer,"{owner-alias=example-elb,group-name=ex ample-elb-sg}",(nil),2012-09-28T17:57:27.580Z,internet-facing
The response element includes a source security group data structure composed of an owner-aliasand group-name.This is the source security group associated with your load balancer. Make a noteof the owner-alias and group-name.You’ll use it in the next step.
2. To add a rule in the security group of your Amazon EC2 back-end instances to allow incomingtraffic from the Elastic Load Balancing source security group,
You will be using the Amazon EC2 CLI commands for this step.
a. [optional] If you do not know the name of the security group of your back-end instances, enterthe ec2-describe-group command as in the following example.
ec2-describe-group --headers
The response element includes the details of all the security groups in your account. Make anote of the security group name associated with the back-end instance that you want to modify.
b. Enter the ec2-authorize command to add a rule to the security group associated with yourback-end instance.
In the following example, ec2-authorize limits incoming traffic for all back-end instances thatbelong to a security group named MyTestSecurityGroup.
ec2-authorize MyTestSecurityGroup -u amazon-elb -o amazon-elb-sg
For specifying additional parameters for ports and protocols, go to ec2-authorize in the AmazonEC2 CLI Reference.
3. To verify that the security group associated with your back-end instance has the new rulethat allows incoming traffic from the Elastic Load Balancing source security group,
Enter ec2-describe-group command as in the following example:
ec2-describe-group MyTestSecurityGroup --headers
The following is the example response that lists the newly added rule:
GROUP Id Owner Name DescriptionGROUP sg-9cd8a3f4 000011112222 MyTestSecurityGroup This is an ex ample PERMISSION 000011112222 MyTestSecurityGroup ALLOWS tcp 0 0FROM USER amazon-elb NAME amazon-elb-sg ID sg-843f59ed in gressPERMISSION 000011112222 MyTestSecurityGroup ALLOWS tcp 3389 3389FROM USER amazon-elb NAME amazon-elb-sg ID sg-843f59ed in gressPERMISSION 000011112222 MyTestSecurityGroup ALLOWS tcp 22
API Version 2012-06-01103
Elastic Load Balancing Developer GuideManage Security Groups in Amazon EC2-Classic

22FROM CIDR 0.0.0.0/0 ingressPERMISSION 000011112222 MyTestSecurityGroup ALLOWS tcp 80 80FROM CIDR 0.0.0.0/0 ingress
4. [optional] If your security group has rules that are less restrictive than the rule you added in theprevious step, use the ec2-revoke command to remove the less restrictive rules. For example, anexisting rule might allow ingress traffic from the CIDR range 0.0.0.0/0 (all IPv4 addresses).
The following example uses ec2-revoke to remove a rule that allows HTTP traffic from all IPv4addresses from a security group named MyTestSecurityGroup.
ec2-revoke MyTestSecurityGroup -p 80 -s 0.0.0.0/0
NoteIf you want to connect directly to your back-end instances, do not revoke ingress rules thatallow you to do so. For example, you might have rules that allow ingress traffic on ports 22(SSH) and 3389 (RDP).
Using the Query API
1. To get the name of the source security group provided by Elastic Load Balancing for yourload balancer,
a. Call the DescribeLoadBalancers action with the following parameter:
• LoadBalanacerNames = MyLoadBalancer
The response should include the details of your load balancer. The information you get shouldbe similar to the following example:
<DescribeLoadBalancersResponse xmlns="http://elasticloadbalancing.amazon aws.com/doc/2012-06-01/"> <DescribeLoadBalancersResult> <LoadBalancerDescriptions> <member> <SecurityGroups/> <LoadBalancerName>MyLoadBalancer</LoadBalancerName> <CreatedTime>2012-09-28T17:57:27.580Z</CreatedTime> <HealthCheck> <Interval>6</Interval> <Target>HTTP:80/</Target> <HealthyThreshold>2</HealthyThreshold> <Timeout>5</Timeout> <UnhealthyThreshold>2</UnhealthyThreshold> </HealthCheck> <ListenerDescriptions> <member> <PolicyNames/> <Listener> <Protocol>HTTP</Protocol> <LoadBalancerPort>80</LoadBalancerPort> <InstanceProtocol>HTTP</InstanceProtocol>
API Version 2012-06-01104
Elastic Load Balancing Developer GuideManage Security Groups in Amazon EC2-Classic
<InstancePort>80</InstancePort> </Listener> </member> <member> <PolicyNames> <member>AWSConsole-SSLNegotiationPolicy-MyLoadBalancer</mem ber> </PolicyNames> <Listener> <Protocol>HTTPS</Protocol> <LoadBalancerPort>443</LoadBalancerPort> <InstanceProtocol>HTTP</InstanceProtocol> <SSLCertificateId>arn:aws:iam::000011112222:server-certi ficate/scert</SSLCertificateId> <InstancePort>80</InstancePort> </Listener> </member> </ListenerDescriptions> <Instances> <member> <InstanceId>i-f5ab7988</InstanceId> </member> <member> <InstanceId>i-fbab7986</InstanceId> </member> </Instances> <Policies> <AppCookieStickinessPolicies/> <OtherPolicies> <member>AWSConsole-SSLNegotiationPolicy-MyLoadBalancer</mem ber> </OtherPolicies> <LBCookieStickinessPolicies/> </Policies> <AvailabilityZones> <member>us-east-1e</member> </AvailabilityZones> <CanonicalHostedZoneName>MyLoadBalancer-91948427.us-east-1.elb.amazonaws.com</CanonicalHostedZoneName> <CanonicalHostedZoneNameID>Z3DZXE0Q79N41H</CanonicalHostedZone NameID> <Scheme>internet-facing</Scheme> <SourceSecurityGroup> <OwnerAlias>amazon-elb</OwnerAlias> <GroupName>amazon-elb-sg</GroupName> </SourceSecurityGroup> <DNSName>MyLoadBalancer-91948427.us-east-1.elb.amazonaws.com</DNS Name> <BackendServerDescriptions/> <Subnets/> </member> </LoadBalancerDescriptions> </DescribeLoadBalancersResult> <ResponseMetadata> <RequestId>0d7f1256-0b10-11e2-b66c-d3e9bEXAMPLE</RequestId> </ResponseMetadata>
API Version 2012-06-01105
Elastic Load Balancing Developer GuideManage Security Groups in Amazon EC2-Classic

</DescribeLoadBalancersResponse>
b. The response element includes a SourceSecurityGroup data structure composed of anOwnerAlias and GroupName. This is the security group provided by Elastic Load Balancingfor your load balancer. Make a note of the details in the SourceSecurityGroup data structure.You’ll use it in the next step.
2. To add a rule in the security group of your Amazon EC2 back-end instances to allow incomingtraffic from the Elastic Load Balancing source security group,
a. [optional] If you do not know the name of the security group of your back-end instances, call theDescribeSecurityGroup action to find out the name of the security group associated withyour back-end instance.
The response includes the details of all the security groups in your account. Make a note of thesecurity group name associated with the back-end instance that you want to modify.
b. Call the AuthorizeSecurityGroupIngress action with the following parameters :
• GroupName = MyTestSecurityGroup
• IpPermissions.1.Groups.1.UserId = amazon-elb
• IpPermissions.1.Groups.1.GroupName = amazon-elb-sg
For information on specifying additional parameters for the ports and protocols, go toAuthorizeSecurityGroupIngress in the Amazon EC2 API Reference.
3. Verify that the security group associated with your back-end instance has the new rule that allowsincoming traffic from the Elastic Load Balancing source security group.
Call DescribeSecurityGroups with the following parameters:
• GroupName = MyTestSecurityGroup
The response should include the details of the security group including the newly added rule. Theinformation you get should be similar to the following example:
<DescribeSecurityGroupsResponse xmlns="http://ec2.amazonaws.com/doc/2012-03-01/"> <requestId>a8a2955f-61db-4e5e-b138-e2be7EXAMPLE</requestId> <securityGroupInfo> <item> <ownerId>000011112222</ownerId> <groupId>sg-9cd8a3f4</groupId> <groupName>MyTestSecurityGroup </groupName> <groupDescription>This is an example </groupDescription> <ipPermissions> <item> <ipProtocol>tcp</ipProtocol> <fromPort>0</fromPort> <toPort>0</toPort> <groups> <item> <userId>amazon-elb</userId>
API Version 2012-06-01106
Elastic Load Balancing Developer GuideManage Security Groups in Amazon EC2-Classic

<groupId>sg-843f59ed</groupId> <groupName>amazon-elb-sg</groupName> </item> </groups> <ipRanges/> </item> <item> <ipProtocol>tcp</ipProtocol> <fromPort>3389</fromPort> <toPort>3389</toPort> <groups> <item> <userId>amazon-elb</userId> <groupId>sg-843f59ed</groupId> <groupName>amazon-elb-sg</groupName> </item> </groups> <ipRanges/> </item> <item> <ipProtocol>tcp</ipProtocol> <fromPort>22</fromPort> <toPort>22</toPort> <groups/> <ipRanges> <item> <cidrIp>0.0.0.0/0</cidrIp> </item> </ipRanges> </item> <item> <ipProtocol>tcp</ipProtocol> <fromPort>80</fromPort> <toPort>80</toPort> <groups/> <ipRanges> <item> <cidrIp>0.0.0.0/0</cidrIp> </item> </ipRanges> </item> </securityGroupInfo> </DescribeSecurityGroupsResponse>
4. [optional] If your security group has rules that are less restrictive than the rule you added in theprevious step, use the RevokeSecurityGroupIngress action to remove the less restrictive rules.For example, an existing rule might allow ingress traffic from the CIDR range 0.0.0.0/0 (all IPv4addresses).
The following example calls the RevokeSecurityGroupIngress action with the following parametersto remove a rule that allows HTTP traffic from all IPv4 addresses from a security group namedMyTestSecurityGroup.
• GroupName = MyTestSecurityGroup
• IpPermissions.1.FromPort = 80
• IpPermissions.1.IpRanges.1.CidrIp = 0.0.0.0/0
API Version 2012-06-01107
Elastic Load Balancing Developer GuideManage Security Groups in Amazon EC2-Classic

NoteIf you want to connect directly to your back-end instances, do not revoke ingress rules thatallow you to do so. For example, you might have rules that allow ingress traffic on ports 22(SSH) and 3389 (RDP).
API Version 2012-06-01108
Elastic Load Balancing Developer GuideManage Security Groups in Amazon EC2-Classic
Use IPv6 with Elastic Load BalancingElastic Load Balancing supports both Internet Protocol version 6 (IPv6) and Internet Protocol version 4(IPv4). Clients can connect to your load balancer using either IPv4 or IPv6. Communication between theload balancer and its back-end instances uses only IPv4 (regardless of how the client communicates withyour load balancer). This means that your back-end Amazon EC2 instances do not need native IPv6support.
Elastic Load Balancing provides a public DNS name that combines your load balancer's name and Region.For example, a load balancer named myLB in the US-East Region might be represented by the DNSname myLB-1234567890.us-east-1.elb.amazonaws.com. This base public DNS name returns only IPv4records.
In addition to the base public DNS name, Elastic Load Balancing provides two additional public DNSnames. The first combines the string ipv6 with the name of your load balancer and Region. This mightlook like ipv6.myLB-1234567890.us-east-1.elb.amazonaws.com. The ipv6-prefixed DNS name returnsonly IPv6 records. The second public DNS name combines the string dualstack with the name of yourload balancer and Region.This might look like dualstack.myLB-1234567890.us-east-1.elb.amazonaws.com.The dualstack-prefixed DNS name returns both IPv4 and IPv6 records.
Most customers will want to use the dualstack-prefixed DNS name to enable IPv6 support for their loadbalancers. Because the dualstack-prefixed DNS name returns both IPv6 and IPv4 records, clients areable to access the load balancer using either IPv4 or IPv6 as their individual connectivity needs dictate.The ipv6-prefixed DNS name returns only IPv6 addresses, which means that clients with only IPv4connectivity will not be able to reach the load balancer if they use the ipv6-prefixed DNS name.
Elastic Load Balancing supports X-Forwarded-For request headers for clients that connect using eitherIPv4 or IPv6. If a client connects using IPv6, Elastic Load Balancing inserts the IPv6 address of the clientinto the request header. For more information on X-Forwarded-For support, see Terminology and KeyConcepts (p. 5).
Elastic Load Balancing allows you to map DNS names to your load balancer with IPv6 in much the sameway as you map DNS names with IPv4. If you use a CNAME record to map your DNS name to your loadbalancer, you can continue to use that method. If you use an Amazon Route 53 hosted zone, you canuse the same Elastic Load Balancing command to create a resource record for both IPv4 and IPv6.
NoteIPv6 support is currently not available in all regions. For current IPv6 support, go to Elastic LoadBalancing.
IPv6 and CNAME records for Elastic Load BalancingIf you use a CNAME record to map a DNS name such as www.example.com to your load balancer, youcan use any of the three public DNS names as the alias in a CNAME record. For example, the followingCNAME record maps www.example.com to a load balancer's IPv4 address.
www.example.com CNAME myLB-1234567890.us-east-1.elb.amazonaws.com
The following example maps www.example.com to a load balancer's IPv6 address.
www.example.com CNAME ipv6.myLB-1234567890.us-east-1.elb.amazonaws.com
To handle a mixture of IPv4 and IPv6 address resolution, use the dualstack prefix in your CNAME record.
www.example.com CNAME dualstack.myLB-1234567890.us-east-1.elb.amazonaws.com
API Version 2012-06-01109
Elastic Load Balancing Developer GuideUse IPv6 with Elastic Load Balancing

IPv6 and Hosted Zones for Elastic Load BalancingIf you use an Amazon Route 53 hosted zone to map a domain name or zone apex to your load balancer,you can use the elb-associate-route53-hosted-zone command to create resource records thatwork with IPv4, IPv6, or both.
To create an IPv4 resource record, specify the value A for the --rr-type parameter.You can also omitthis parameter because its default value is A.
elb-associate-route53-hosted-zone myLB --rr-name example.com --rr-type A --hosted-zone-id Z123456789 --weight 100
To create an IPv6 resource record, specify the value AAAA for the --rr-type parameter.
elb-associate-route53-hosted-zone myLB --rr-name example.com --rr-type AAAA --hosted-zone-id Z123456789 --weight 100
To create the equivalent of a dualstack resource record, create a resource record that specifies the valueA for the --rr-type parameter and another resource record that specifies the value AAAA.
elb-associate-route53-hosted-zone myLB --rr-name example.com --rr-type A --hosted-zone-id Z123456789 --weight 100elb-associate-route53-hosted-zone myLB --rr-name example.com --rr-type AAAA --hosted-zone-id Z123456789 --weight 100
For more information about using Amazon Route 53 with Elastic Load Balancing, see Option 2: Createan Amazon Route 53 Hosted Zone (p. 146).
API Version 2012-06-01110
Elastic Load Balancing Developer GuideUse IPv6 with Elastic Load Balancing

Deploy Elastic Load Balancing in Amazon VPCTopics
• Default VPC (p. 112)
• Internet-facing and Internal Load Balancers (p. 113)
• Create Amazon VPC for Elastic Load Balancing (p. 114)
• Create a Basic Internal Load Balancer in Amazon VPC (p. 114)
• Attach Your Load Balancer to a Subnet (p. 123)
• Detach Your Load Balancer from a Subnet (p. 125)
• Manage Security Groups in Amazon VPC (p. 127)
Amazon Virtual Private Cloud ( Amazon VPC) lets you define a virtual networking environment in a private,isolated section of the Amazon Web Services (AWS) cloud.
Within this virtual private cloud, you can launch Amazon EC2 instances that have private (RFC 1918) IPaddresses in the classless inter-domain routing (CIDR) range of your choice (for example, 10.0.0.0/16).You can use a load balancer to monitor and route traffic to your EC2 instances launched within a VPC.
You can create a VPC that spans multiple Availability Zones then add one or more subnets in eachAvailability Zone. A subnet in Amazon VPC is a subdivision within an Availability Zone defined by asegment of the IP address range of the VPC. Using subnets you can group your instances based on yoursecurity and operational needs. A subnet resides entirely within the Availability Zone it was created in.
To enable communication between the Internet and the instances in your subnets, you must create andattach an Internet gateway (IGW) to your VPC. An IGW connects the instances within your subnets tothe Internet. The subnets that interact directly with the Internet must contain public instances (instanceswith public IP addresses).
For more information on Amazon VPC, see What is Amazon VPC in the Amazon Virtual Private CloudUser Guide. For information on Amazon VPC subnets, see Your VPC and Subnets.
To load balance your EC2 instances in a VPC, when you register load balancers in multiple AvailabilityZones, specify one subnet in each Availability Zone to which you want to attach the load balancer. Becausea subnet is created for an Availability Zone, specifying the subnet ensures that the load balancer isconfigured to listen to requests in the corresponding Availability Zone.
When you attach your load balancer to a subnet, this defines the subnet that traffic must enter to forwardthe request to registered instances. The registered instances do not need to be in the same subnet thatyou attach to the load balancer. To ensure that your load balancer can scale properly, specify that theCIDR block of the subnet to which you attach the load balancer has at least a /27 bitmask (e.g., 10.0.0.0/27).You should also have at least 20 free IP addresses in the subnet where you attach the load balancer.
Elastic Load Balancing on Amazon VPC works essentially the same way as it does on Amazon EC2 andsupports the same set of features.There is, however, a significant difference between the way the securitygroups function on Amazon VPC and Amazon EC2. In Amazon EC2, Elastic Load Balancing provides aspecial Amazon EC2 source security group that you can use to ensure that a back-end Amazon EC2instance receives traffic only from Elastic Load Balancing.You cannot modify the source security group.Within Amazon VPC, you have control over the security groups assigned to your load balancer. Havingcontrol over your load balancer's security groups allows you to choose the ports and protocols to accept.For example, in Amazon VPC you can open Internet Control Message Protocol (ICMP) connections forthe load balancer to respond to ping requests. (However, ping requests will not be forwarded to anyregistered instances.)
NoteIPv6 support is not currently available for load balancers in Amazon VPC.Dedicated tenancy VPCs are not currently supported by Elastic Load Balancing.
API Version 2012-06-01111
Elastic Load Balancing Developer GuideDeploy Elastic Load Balancing in Amazon VPC

Default VPCIf your AWS account comes with a default virtual private cloud (default VPC), your instances are launchedwithin the default VPC, by default, unless you specify a subnet from a nondefault VPC. For moreinformation, see Detecting Your Supported Platforms and Whether You Have a Default VPC.
A default VPC combines the benefits of the advanced networking features provided by Amazon VPCplatform (EC2-VPC) with the ease of use of the Amazon Elastic Compute Cloud platform (EC2-Classic).
Your default VPC automatically comes with a default subnet in each Availability Zone, an Internet Gatewayconnected to your default VPC, and a default security group associated with your default VPC, amongother default configurations. For more information on default VPC and Subnets, see Your Default VPCand Subnets.
When you launch your EC2 instances within default VPC without specifying a subnet, it is automaticallylaunched into a default subnet in your default VPC. By default, we select an Availability Zone for you andlaunch the instance into the corresponding subnet for that Availability Zone. Alternatively, you can selectthe Availability Zone for your instance by selecting its corresponding default subnet.
To load balance your EC2 instances launched in default VPC, you have to create your load balancerswithin your default VPC. When you create a load balancer within default VPC, Elastic Load Balancingautomatically creates a security group by defining the ports specified for the load balancer to be opened.
If you are using the AWS Management Console to create your load balancer with default VPC, you canchoose the default VPC security group associated with your default VPC, choose any other pre-existingsecurity group associated with your AWS account, or modify the existing security group to create a newone. If you choose a non-default pre-existing security group, ensure that it allows ingress to the ports thatyou configured the load balancer to use. If you choose to create a security group, the console will definethese ports to be open for you.
The security group you create using the AWS Management Console is associated with your load balancer.You cannot delete the security group as long as it is associated with a load balancer.
If you are using the Elastic Load Balancing command line interface (CLI) or the Query API to create yourload balancer within your default VPC, a default security group; default_elb_special number will becreated for 0.0.0.0/0 with the ports specified for the load balancer. Currently, Elastic Load Balancing doesnot support the option to choose a security group to associate with your load balancer when you useeither the CLI or the Query API.
A security group created for your load balancer within default VPC using either the CLI or the Query APIis associated with your AWS account. Only one security group will be created per AWS account.Subsequent calls to create new load balancers will re-use the same security group. If you add listenersto an existing load balancer, you will need to review the security groups that are applied to the loadbalancer; otherwise, traffic may not reach the load balancer. If you create a load balancer that uses thisdefault security group and the new load balancer has a different listener configuration, you will need toreview and update the security groups that are applied to the load balancer.
If you are using the CLI to create a load balancer for your EC2 instances in default VPC, you can see thesecurity group associated with your load balancer by using the -show-long option withelb-describe-lbs command.The load balancer security group is listed as SOURCE_SECURITY_GROUPin the CLI output and the query response.This security group can be used to limit ingress to your instancefrom only the selected security group.
Whether you are using the console, CLI, or the Query API, if you update the listeners of your load balancerwithin default VPC, the security groups associated with the load balancer will not change. If you deleteyour load balancer, the security group will not be deleted automatically.
For information on creating a basic load balancer for your EC2 instances within default VPC, see Createa Basic Load Balancer in Default VPC (p. 34).
API Version 2012-06-01112
Elastic Load Balancing Developer GuideDefault VPC

Internet-facing and Internal Load BalancersYou can make your load balancer internal (private) or Internet-facing (public) when creating it within aVPC. When you make your load balancer internal, a DNS name will be created, and it will contain theprivate IP address of the load balancer. Internal load balancer is not exposed to the internet. When youmake your load balancer Internet-facing, a DNS name will be created with the public IP address. TheDNS records are publicly resolvable in both cases.
By combining both internal and internet-facing load balancers, you can balance requests between multipletiers of your application. For example, let us say you have web servers at your front-end that takes requestsfrom the internet and passes it on to your back-end application instances.You can create an internal loadbalancer in your VPC and then place your back-end application instances behind the internal load balancer.You can create an internet-facing load balancer with the DNS name and public IP address and place itin front of your web server.Your web server will take requests coming from the internet-facing loadbalancer and will make requests to the internal load balancer, using private IP addresses that are resolvedfrom the internal load balancer’s DNS name.The internal load balancer will route requests to the back-endapplication instances, which are also using private IP addresses and only accept requests from the internalload balancer. With this multi-tier architecture, all your infrastructure can use private IP addresses andsecurity groups so that the only part of your architecture that has public IP address is the internet-facingload balancer.
For a load balancer to be Internet-facing, the load balancer must reside in a public subnet (with public IPaddresses). The application instances behind the load balancer do not need to be in the public subnets.
The following diagram shows Elastic Load Balancing within Amazon VPC combining both Internet-facingand internal load balancers.
API Version 2012-06-01113
Elastic Load Balancing Developer GuideInternet-facing and Internal Load Balancers
Create Amazon VPC for Elastic Load BalancingTo create and use Elastic Load Balancing load balancers within Amazon VPC, you have to first configureyour VPC environment. This section provides you with steps you can use to configure your VPC. If youare using default VPC, your VPC environment is automatically configured for you.You can skip this step.
• Create your Amazon VPC with an Internet gateway and create subnets in each Availability Zone inwhich you want to load balance your instances. For information on creating an Amazon VPC andsubnets, see Get Started with Amazon VPC.
• If you are creating an Internet-facing load balancer, be sure to create a VPC with public subnet.YourInternet-facing load balancer must be in a public subnet to establish connections with the Internet.
• Launch the Amazon EC2 instances that you want to register with your load balancer in your AmazonVPC. For more information about launching Amazon EC2 instances within Amazon VPC, see Launchan Instance.
• The examples in this guide assume that your Amazon VPCs are in the US East (Northern Virginia)Region.You can set up your VPCs in other AWS regions. For example, if you want to launch yourinstances in a VPC in a region in Europe, you can specify the EU (Ireland) Region by using the--region eu-west-1 parameter from the command line interface or by setting the AWS_ELB_URLenvironment variable.
For more information on using the region parameter with your Elastic Load Balancing commands, goto the Elastic Load Balancing Quick Reference Card. For information on setting your environmentvariable, see Installing the Command Line Interface (p. 45). For information about this product's regionsand endpoints, go to Regions and Endpoints in the Amazon Web Services General Reference.
You've now completed creating your VPC environment for your load balancers. Next, click any one ofthe following sections to create and manage your load balancer within your Amazon VPC.
• Create a Basic Load Balancer in EC2-VPC (p. 23)
• Create a Basic Load Balancer in Default VPC (p. 34)
• Create a Basic Internal Load Balancer in Amazon VPC (p. 114)
• Attach Your Load Balancer to a Subnet (p. 123)
• Detach Your Load Balancer from a Subnet (p. 125)
• Manage Security Groups in Amazon VPC (p. 127)
Create a Basic Internal Load Balancer in AmazonVPCTopics
• Using the AWS Management Console (p. 115)
• Using the Query API (p. 120)
• Using the Command Line Interface (p. 121)
This topic uses an example to walk you through the process for creating a basic internal load balancerwithin your VPC and registering your EC2 instances with the newly created internal load balancer. Thisexample uses default configurations for security group, listener protocols and ports, and for the healthcheck. If you want to create an internet-facing load balancer, see Create a Basic Load Balancer inEC2-VPC (p. 23).
API Version 2012-06-01114
Elastic Load Balancing Developer GuideCreate Amazon VPC for Elastic Load Balancing
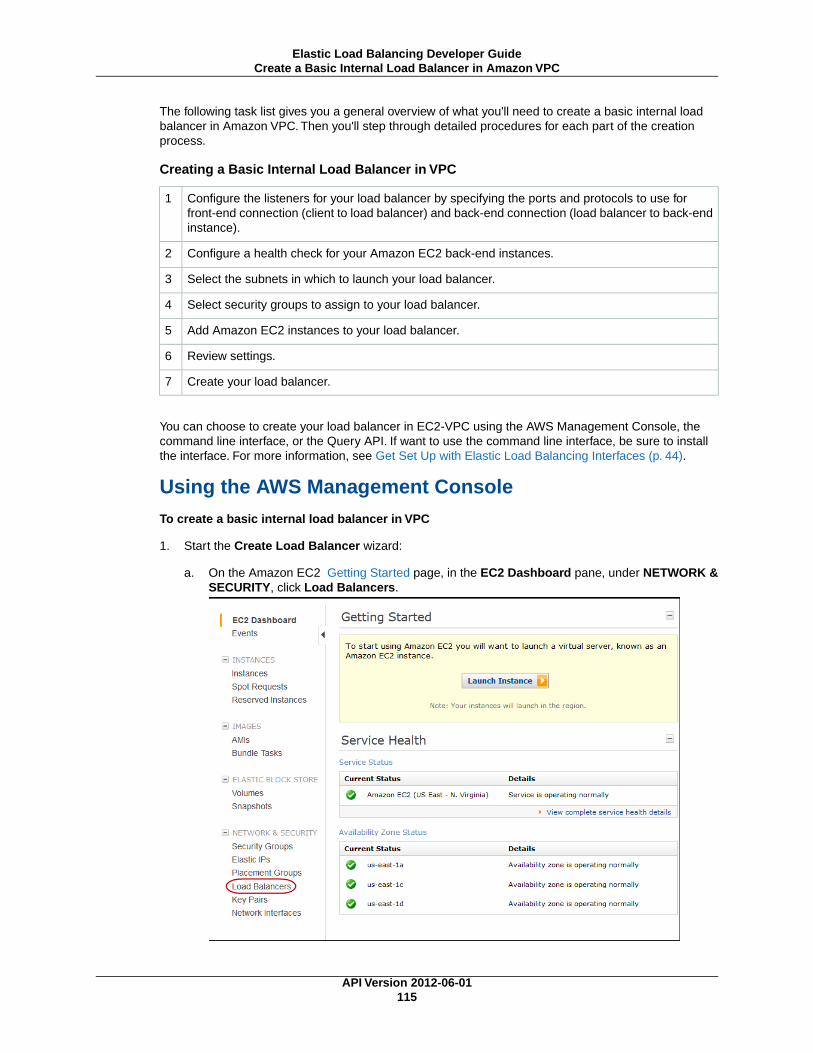
The following task list gives you a general overview of what you'll need to create a basic internal loadbalancer in Amazon VPC. Then you'll step through detailed procedures for each part of the creationprocess.
Creating a Basic Internal Load Balancer in VPC
Configure the listeners for your load balancer by specifying the ports and protocols to use forfront-end connection (client to load balancer) and back-end connection (load balancer to back-endinstance).
1
Configure a health check for your Amazon EC2 back-end instances.2
Select the subnets in which to launch your load balancer.3
Select security groups to assign to your load balancer.4
Add Amazon EC2 instances to your load balancer.5
Review settings.6
Create your load balancer.7
You can choose to create your load balancer in EC2-VPC using the AWS Management Console, thecommand line interface, or the Query API. If want to use the command line interface, be sure to installthe interface. For more information, see Get Set Up with Elastic Load Balancing Interfaces (p. 44).
Using the AWS Management ConsoleTo create a basic internal load balancer in VPC
1. Start the Create Load Balancer wizard:
a. On the Amazon EC2 Getting Started page, in the EC2 Dashboard pane, under NETWORK &SECURITY, click Load Balancers.
API Version 2012-06-01115
Elastic Load Balancing Developer GuideCreate a Basic Internal Load Balancer in Amazon VPC

b. On the Load Balancers page, click Create Load Balancer.
2. On the DEFINE LOAD BALANCER page, enter a name for your Amazon VPC load balancer (e.g.,MyVPCLoadBalancer).
3. Click the arrow in the Create LB inside box and select the Amazon VPC in which you want to createyour load balancer.
4. By default, Elastic Load Balancing creates an Internet-facing load balancer with a publicly resolvableDNS name that resolves to public IP addresses. In this example, you'll create an internal load balancerwith a publicly resolvable DNS name that resolves to private IP addresses.
Click Create an internal load balancer box.
NoteDo not select Create an internal load balancer if you want the DNS name of your loadbalancer to resolve to public IP addresses.
5. Leave the Listener Configuration set to the default value.
6. Click Continue to configure the health check for your instances.
7. Configure the health check settings that your application requires.
API Version 2012-06-01116
Elastic Load Balancing Developer GuideCreate a Basic Internal Load Balancer in Amazon VPC

8. Click Continue to select the subnet in which you want to launch your load balancer instance.
9. In the Available Subnets table, click the green button at the left to select the subnet in which youwant to have your load balanced instances.
API Version 2012-06-01117
Elastic Load Balancing Developer GuideCreate a Basic Internal Load Balancer in Amazon VPC

Your selected subnets are displayed in the Selected Subnets table.
10. Click Continue to select security groups to assign to your load balancer.
11. If you use a pre-existing security group, ensure that it allows ingress to the ports that you configuredthe load balancer to use. If you create a security group in this step, the console will define these portsto be open for you. This example uses the default security group associated with your virtual privatecloud.
Select Choose one or more of your existing Security Groups and then select the default securitygroup.
12. Click Continue to add running EC2 instances to your load balancer.
13. In the Manually Add Instances to LoadBalancer table, check the boxes in the Select column toadd instances to your load balancer.
API Version 2012-06-01118
Elastic Load Balancing Developer GuideCreate a Basic Internal Load Balancer in Amazon VPC

NoteWhen you register a multi-homed instance (an instance that has an elastic network interface(ENI) attached) with your load balancer, the load balancer will route traffic to the primary IPaddress of the instance (eth0). For more information on using ENIs, go to Elastic NetworkInterfaces.
14. Click Continue to review your configuration. On the REVIEW page, click Create to create your loadbalancer.
15. A confirmation window opens. Click Close.
16. When the confirmation window closes, the Load Balancers page opens.Your new load balancernow appears in the list. Select the check box next to your load balancer.
17. A set of tabs opens with details about your new load balancer. Check the description in the row titledScheme. It shows that your newly created load balancer is internal.
API Version 2012-06-01119
Elastic Load Balancing Developer GuideCreate a Basic Internal Load Balancer in Amazon VPC

Using the Query APIBy default, Elastic Load Balancing creates an Internet-facing load balancer with a publicly resolvableDNS name that resolves to public IP addresses.You can choose to create an internal load balancer witha DNS name that resolves to private IP addresses.
This example walks you through the process for creating a basic HTTP internal load balancer on AmazonVPC and registers Amazon EC2 instances with the newly created VPC load balancer.This example usesa default security group.
To create a basic internal load balancer in EC2-VPC
1. Call CreateLoadBalancer using the following parameters:
• Subnets = subnet-450f512c
• [Optional] Use this parameter to create an internal load balancer.You need not specify thisparameter if you're creating an Internet-facing load balancer.
Scheme = internal
• Listener
• Protocol = HTTP
• InstanceProtocol = HTTP
• InstancePort = 80
• LoadBalancerPort = 80
• LoadBalancerName = MyVPCLoadBalancer
• SecurityGroups = sg-b9ffedd5
2. The operation returns the DNS name of your load balancer.You can then map any other domainname (such as www.example.com) to your load balancer’s DNS name using CNAME or some othertechnique.
To register your Amazon EC2 instances with your VPC load balancer
You should only register instances that are in the Pending or Running state and are in an Amazon VirtualPrivate Cloud (VPC).
• Call RegisterInstancesWithLoadBalancer with the following parameters:
• LoadBalancerName = MyVPCLoadBalancer
• Instances = [ i-4f8cf126, i-0bb7ca62 ]
NoteWhen you register a multi-homed instance (an instance that has an elastic network interface(ENI) attached) with your load balancer, the load balancer will route traffic to the primary IPaddress of the instance (eth0). For more information on using ENIs, go to Elastic NetworkInterfaces.
To verify that an internal load balancer was created
1. Call DescribeLoadBalancers with the following parameter:
• LoadBalancerName = MyVPCLoadBalancer
API Version 2012-06-01120
Elastic Load Balancing Developer GuideCreate a Basic Internal Load Balancer in Amazon VPC

2. The operation returns the description of your load balancer. The description in the Scheme fieldindicates that your newly created load balancer is internal.
For detailed descriptions of the Elastic Load Balancing API actions, see Elastic Load Balancing APIReference.
Using the Command Line InterfaceBy default, Elastic Load Balancing creates an Internet-facing load balancer with a publicly resolvableDNS name that resolves to public IP addresses.You can choose to create an internal load balancer witha DNS name that resolves to private IP addresses.
This example walks you through the process for creating a basic HTTP internal load balancer on AmazonVPC and registers Amazon EC2 instances with the newly created VPC load balancer.This example usesa default security group that is open to the Internet on port 80.
To create a basic internal load balancer in EC2-VPC
1. Enter the command elb-create-lb as in the following example.
PROMPT> elb-create-lb MyVPCLoadBalancer --subnets subnet-4e05f721 --scheme internal --security-groups sg-b9ffedd5 --listener "lb-port=80,instance-port=80,protocol=http,instance-protocol=http"
NoteUse --scheme option to create an internal load balancer.You need not specify this optionif you're creating an Internet-facing (public) load balancer.
2. Elastic Load Balancing returns the following:
DNS-NAME DNS-NAME DNS-NAME internal-MyVPCLoadBalancer-2111276808.us-east-1a.elb.amazonaws.com
To register your Amazon EC2 instances with your VPC load balancer
You should only register instances that are in the Pending or Running state and are in an Amazon VPC.
1. Use the elb-register-instances-with-lb command as in the following example.
PROMPT> elb-register-instances-with-lb MyVPCLoadBalancer --instances i-4f8cf126,i-0bb7ca62
2. Elastic Load Balancing returns the following:
INSTANCE INSTANCE-IDINSTANCE i-4f8cf126INSTANCE i-0bb7ca62
NoteWhen you register a multi-homed instance (an instance that has an elastic network interface(ENI) attached) with your load balancer, the load balancer will route traffic to the primary IP
API Version 2012-06-01121
Elastic Load Balancing Developer GuideCreate a Basic Internal Load Balancer in Amazon VPC

address of the instance (eth0). For more information on using ENIs, go to Elastic NetworkInterfaces.
To verify that an internal load balancer was created
1. Use the elb-describe-lbs command as in the following example.
PROMPT> elb-describe-lbs MyVPCLoadBalancer
2. Elastic Load Balancing returns the following:
LOAD_BALANCER MyVPCLoadBalancer internal-MyVPCLoadBalancer-2111276808.us-east-1a.elb.amazonaws.com2012-06-04T02:33:20 450Z internal
For detailed descriptions of the Elastic Load Balancing commands, see the Elastic Load Balancing QuickReference Card.
API Version 2012-06-01122
Elastic Load Balancing Developer GuideCreate a Basic Internal Load Balancer in Amazon VPC

Attach Your Load Balancer to a SubnetTopics
• Using AWS Management Console (p. 123)
• Using the Query API (p. 123)
• Using the Command Line Interface (p. 124)
This example walks you through the process of attaching a subnet to an existing load balancer usingeither the AWS Management Console, the Query API, or the command line interface (CLI).
Before you get started, be sure you've created your Amazon VPC with an Internet gateway and createdsubnets in each Availability Zone in which you want to load balance your instances. For information oncreating an Amazon VPC and subnets for Elastic Load Balancing, see Deploy Elastic Load Balancing inAmazon VPC (p. 111).
Using AWS Management ConsoleTo attach your load balancer to a subnet
1. Open the Amazon EC2 console at https://console.aws.amazon.com/ec2/.
2. On the Amazon EC2 Getting Started page, in the EC2 Dashboard pane, under NETWORK &SECURITY, click Load Balancers.
3. On the Load Balancers page, select the load balancer that you created for your Amazon VPC.
4. The bottom pane displays the details of your load balancer.
5. Click the Instances tab.
6. In the Availability Zones table, click the green plus sign to attach a subnet.
7. The Add and Remove Subnets page is displayed.
8. In the Available Subnets table, click the plus sign in the green circle to select the subnet.You can select only one subnet per Availability Zone.
9. The selected subnet is displayed in the Selected Subnets table.
10. Click Save to attach the subnet to your load balancer.
Using the Query APITo attach your load balancer to a subnet
1. Call AttachLoadBalancerToSubnets with the following parameters:
API Version 2012-06-01123
Elastic Load Balancing Developer GuideAttach Your Load Balancer to a Subnet

• Subnets = subnet-4e05f721
• LoadBalancerName = MyVPCLoadBalancer
2. The operation returns the subnet ID of the attached subnet.
For detailed descriptions of the Elastic Load Balancing API actions, see the Elastic Load Balancing APIReference.
Using the Command Line InterfaceTo attach your load balancer to a subnet
1. Enter the command elb-attach-lb-to-subnets as in the following example.
PROMPT> elb-attach-lb-to-subnets MyVPCLoadBalancer --subnets subnet-450f512c
2. The operation returns the subnet ID of the attached subnet.
For detailed descriptions of the Elastic Load Balancing commands, see Elastic Load Balancing QuickReference Card.
API Version 2012-06-01124
Elastic Load Balancing Developer GuideAttach Your Load Balancer to a Subnet
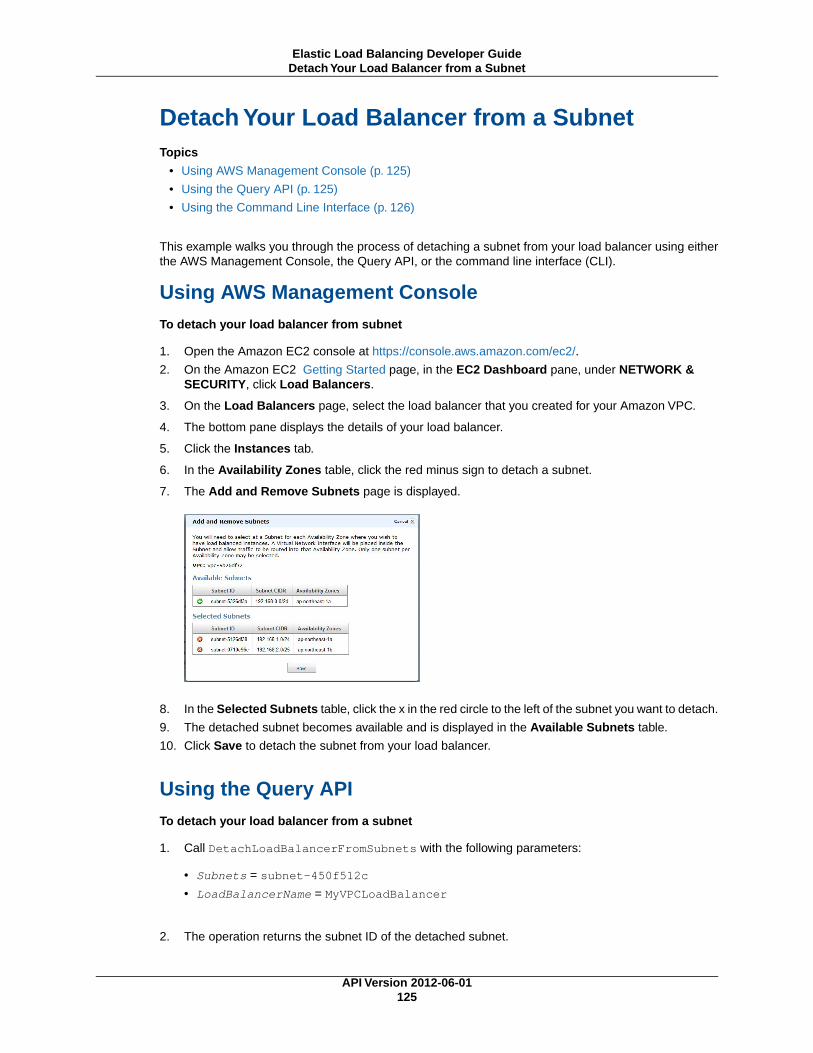
Detach Your Load Balancer from a SubnetTopics
• Using AWS Management Console (p. 125)
• Using the Query API (p. 125)
• Using the Command Line Interface (p. 126)
This example walks you through the process of detaching a subnet from your load balancer using eitherthe AWS Management Console, the Query API, or the command line interface (CLI).
Using AWS Management ConsoleTo detach your load balancer from subnet
1. Open the Amazon EC2 console at https://console.aws.amazon.com/ec2/.
2. On the Amazon EC2 Getting Started page, in the EC2 Dashboard pane, under NETWORK &SECURITY, click Load Balancers.
3. On the Load Balancers page, select the load balancer that you created for your Amazon VPC.
4. The bottom pane displays the details of your load balancer.
5. Click the Instances tab.
6. In the Availability Zones table, click the red minus sign to detach a subnet.
7. The Add and Remove Subnets page is displayed.
8. In the Selected Subnets table, click the x in the red circle to the left of the subnet you want to detach.
9. The detached subnet becomes available and is displayed in the Available Subnets table.
10. Click Save to detach the subnet from your load balancer.
Using the Query APITo detach your load balancer from a subnet
1. Call DetachLoadBalancerFromSubnets with the following parameters:
• Subnets = subnet-450f512c
• LoadBalancerName = MyVPCLoadBalancer
2. The operation returns the subnet ID of the detached subnet.
API Version 2012-06-01125
Elastic Load Balancing Developer GuideDetach Your Load Balancer from a Subnet

For detailed descriptions of the Elastic Load Balancing API actions, see the Elastic Load Balancing APIReference.
Using the Command Line InterfaceTo detach your load balancer from a subnet
1. Enter the command elb-detach-lb-from-subnets as in the following example.
PROMPT> elb-detach-lb-from-subnets MyVPCLoadBalancer --subnets subnet-450f5127
2. The operation returns the subnet ID of the detached subnet.
For detailed descriptions of the Elastic Load Balancing commands, see the Elastic Load Balancing QuickReference Card.
API Version 2012-06-01126
Elastic Load Balancing Developer GuideDetach Your Load Balancer from a Subnet

Manage Security Groups in Amazon VPCTopics
• Using the AWS Management Console (p. 127)
• Using the Query API (p. 128)
• Using the Command Line Interface (p. 128)
A security group acts as a virtual firewall that controls the traffic allowed into an instance. When youlaunch an instance in an Amazon Virtual Private Cloud, you can assign the instance to up to five VPCsecurity groups. The groups act at the instance level, not the subnet level. Therefore, each instance in asubnet in your Amazon VPC could belong to a different set of security groups. If you don't specify aparticular security group at launch time, the instance automatically belongs to the VPC's default securitygroup.
For each security group you create, you add rules that control the inbound traffic to instances, and aseparate set of rules that control the outbound traffic. The security groups you've created for AmazonEC2 (i.e., EC2 security groups) are not available to use in your VPC.You must create a separate set ofsecurity groups to use in your Amazon VPC (i.e., VPC security groups). The rules you create for a VPCsecurity group can't reference a EC2 security group in your account, and vice versa. Also, VPC securitygroups have additional capabilities not available to EC2 security groups.
For information on Amazon VPC security groups, go to Security Groups for Your VPC.
This section walks you through the process to update or reset the VPC security group assigned to yourexisting load balancer in Amazon VPC.You can use the AWS Management Console, the Query API orthe command line interface (CLI) to update or reset the VPC security group.
Using the AWS Management ConsoleTo update a security group assigned to your load balancer
1. In the AWS Management Console, click the Amazon EC2 tab.
2. On the Amazon EC2 Getting Started page, in the EC2 Dashboard pane, under NETWORK &SECURITY, click Load Balancers.
3. On the Load Balancers page, select the load balancer that you created for your VPC.
4. The bottom pane displays the details of your load balancer.
5. Click the Security tab.
6. In the Security Groups pane, select the security group.
7. A list of assigned security groups for your load balancer is displayed below the Security Groupspane.
API Version 2012-06-01127
Elastic Load Balancing Developer GuideManage Security Groups in Amazon VPC

Using the Query APITo assign a security group to an existing load balancer
1. Call ApplySecurityGroupsToLoadBalancer with the following parameters:
• SecurityGroups = sg-53fae93f
• LoadBalancerName = MyVPCLoadBalancer
2. The operation returns the security group ID of the assigned security group.
For detailed descriptions of the Elastic Load Balancing API actions, see Elastic Load Balancing APIReference.
Using the Command Line InterfaceTo assign a security group to your existing load balancer in Amazon VPC
Enter the command elb-apply-security-groups-to-lb as in the following example.
PROMPT>elb-apply-security-groups-to-lb MyVPCLoadBalancer --groups sg-53fae93f
The operation returns the security group ID of the assigned security group.
For detailed descriptions of the Elastic Load Balancing commands, see the Elastic Load Balancing QuickReference Card.
API Version 2012-06-01128
Elastic Load Balancing Developer GuideManage Security Groups in Amazon VPC

Add a Listener to Your Load BalancerTopics
• Using the AWS Management Console (p. 129)
• Using the Command Line Interface (p. 132)
• Using the Query API (p. 133)
Elastic Load Balancing supports the load balancing of applications using HTTP, HTTPS (Secure HTTP),TCP, and SSL (Secure TCP) protocols.You can specify the protocols for the front-end connections (clientto load balancer) and the back-end connections (load balancer to back-end instance) independently.Youchoose configurations for the front-end and the back-end connections when you create your load balancer.By default, your load balancer is set to use HTTP for both the connections. The Elastic Load BalancingListener Configurations Quick Reference (p. 68) table provides information on different configurations,along with the use case best suited for that configuration.
This section describes how to add a new listener on your existing load balancer. Before you get started,be sure you've done the following:
• Created a load balancer with Elastic Load Balancing. For information on how to set up an HTTPS/SSLload balancer with the AWS Management Console, command line interfaces (CLI), or Query API, seeCreate a Load Balancer with SSL Cipher Settings and Back-End Server Authentication (p. 74). Tolearn how to set up a HTTP/TCP load balancer with the AWS Management Console, go to the GetStarted with Elastic Load Balancing (p. 14).
• Installed the Elastic Load Balancing tools that you plan to use to perform load balancing tasks.Youcan add or delete listeners on your existing load balancer using the AWS Management Console,command line interface (CLI), or the Query API. For information on installing the CLI or the Query API,see Get Set Up with Elastic Load Balancing Interfaces (p. 44).
• For detailed descriptions of the Elastic Load Balancing Query API actions, see Elastic Load BalancingAPI Reference.
• For detailed descriptions of the Elastic Load Balancing commands, see the Elastic Load BalancingQuick Reference Card.
The following sections include instructions for adding a listener to your existing load balancer using theAWS Management Console, command line interface (CLI), or the Query API. In this example, you configurea new listener for your existing load balancer MyLoadBalancer that accepts HTTPS requests on port443 for the front-end connection and HTTP requests on port 80 for the back-end connection.
Using the AWS Management ConsoleTo add a new listener to your load balancer
1. Sign in to the AWS Management Console and open the Amazon EC2 console athttps://console.aws.amazon.com/ec2/.
2. On the Amazon EC2 Getting Started page, in the EC2 Dashboard pane, under NETWORK &SECURITY, click Load Balancers.
3. On the Load Balancers page, select your load balancer.
4. The bottom pane displays the details of your load balancer.
5. Click the Listeners tab.
6. In the Listeners table Load Balancer Protocol column, select HTTPS (Secure HTTP) from thedrop-down box.This populates the box in the Load Balancer Port column. In the Instance Protocolcolumn, select HTTP from the drop-down box, then enter port number 80 for the instance port in theInstance Port box.
API Version 2012-06-01129
Elastic Load Balancing Developer GuideAdd a Listener to Your Load Balancer

7. The Elastic Load Balancing service provides you with sample cipher policies,ELBSample-ELBDefaultCipherPolicy and ELBSample-OpenSSLDefaultCipherPolicy.You canselect one of the sample policies or customize your own ciphers. A default policy will be used if noneis specified.
a. To specify a cipher policy, select Change in the Cipher box.
b. On the Configure Cipher page, select one of the sample policies provided.
c. Or, select Custom to customize your own ciphers, then select the protocol version and theciphers from the list box.
NoteYou must enable at least one protocol version and one cipher for SSL negotiation totake place.
d. Click Save.
API Version 2012-06-01130
Elastic Load Balancing Developer GuideUsing the AWS Management Console

8. Click Select in the SSL Certificate box to specify an SSL certificate to install on your load balancer.
NoteTo enable HTTPS support for your listeners, you must install an SSL server certificate onyour load balancer. The load balancer uses the certificate to terminate and then decryptrequests before sending them to the back-end instances. Elastic Load Balancing uses AWSIdentity and Access Management (IAM) to upload your certificate to your load balancer. Ifyou do not have an SSL certificate, go to Creating and Uploading Server Certificates inUsing AWS Identity and Access Management for instructions on creating and uploadingSSL certificates.
9. In the Configure SSL Certificate page, select Choose from your existing SSL Certificates touse the previously uploaded SSL certificate and select the certificate from the drop-down box.
10. Alternatively, select Upload a new SSL Certificate if you have an SSL certificate and want to uploadusing AWS Identity and Access Management.
Check if your certificate meets the following criteria:
• Certificates must follow the X.509 PEM format.
• The current date must be between the certificate’s start and end date.
• Public and private certificate files must contain only a single certificate.
• The private key must match the public key that is in the digital server certificate.
• The private key must be an RSA private key in PEM format, where the PEM header is BEGIN RSAPRIVATE KEY and the footer is END RSA PRIVATE KEY.
• The private key cannot be encrypted with a password.
• A certificate chain starts with the immediate signing certificate and is then followed by anyintermediaries in order. Intermediaries that are not involved in the trust path must not be included.The trusted root certificate can be optionally included as the last certificate.
If your certificate does not meet the criteria, you might get an error when you upload it. Create a newSSL certificate and upload the certificate using AWS Identity and Access Management (IAM). Forinstructions on creating and uploading the SSL certificate, go to Creating and Uploading ServerCertificates in Using AWS Identity and Access Management.
If your certificate meets the criteria, step through the following instructions to continue uploading yourSSL certificate.
a. Enter the name of the certificate to upload.
b. Copy and paste the contents of the private key file (PEM-encoded) in the Private Key box.
c. Copy and paste the contents of the public key certificate file (PEM-encoded) in the Public KeyCertificate box.
d. [Optional] Copy and paste the contents of the public key certificate chain file (PEM-encoded) inthe Certificate Chain box.
NoteThe certificate chain must be ordered such that the root certificate is the last certificatein the chain. If you use a certificate chain in a different order, you will receive an error.
e. Click Save.
API Version 2012-06-01131
Elastic Load Balancing Developer GuideUsing the AWS Management Console

11. Click Save in the Actions box.
Using the Command Line InterfaceTo enable HTTPS support for your listeners, you must install an SSL server certificate on your loadbalancer. The load balancer uses the certificate to terminate and then decrypt requests before sendingthem to the back-end instances. Elastic Load Balancing uses AWS Identity and Access Management(IAM) to upload your certificate to your load balancer. If you do not have an SSL certificate, go to Creatingand Uploading Server Certificates in Using AWS Identity and Access Management for instructions oncreating and uploading SSL certificates.
To add a new listener to your load balancer
1. Get the Amazon Resource Name (ARN) of your SSL certificate.
2. Enter the command elb-create-lb-listeners as in the following example.
PROMPT> elb-create-lb-listeners MyLoadBalancer --listener "protocol=HTTPS,lb-port=443,instance-port=80,instance-protocol=HTTP, cert-id=arn:aws:iam::55555555555:server-certificate/production/myCert"
3. Enter the command elb-describe-lbs as in the following example to view the updated details ofyour load balancer MyLoadBalancer.
PROMPT> elb-describe-lbs MyLoadBalancer
The operation returns a list of updated configurations of your load balancer.
API Version 2012-06-01132
Elastic Load Balancing Developer GuideUsing the Command Line Interface

Using the Query APITo enable HTTPS support for your listeners, you must install an SSL server certificate on your loadbalancer. The load balancer uses the certificate to terminate and then decrypt requests before sendingthem to the back-end instances. Elastic Load Balancing uses AWS Identity and Access Management(IAM) to upload your certificate to your load balancer. If you do not have an SSL certificate, go to Creatingand Uploading Server Certificates in Using AWS Identity and Access Management for instructions oncreating and uploading SSL certificates.
To add a new listener to your load balancer
1. Get the Amazon Resource Name (ARN) of your SSL certificate.
2. Call CreateLoadBalancerListeners with the following parameters:
• Listener
• Protocol = HTTPS
• InstanceProtocol = HTTP
• InstancePort = 80
• LoadBalancerPort = 443
• SSLCertificateID =arn:aws:iam::55555555555:server-certificate/production/myCert
• LoadBalancerName = MyLoadBalancer
3. Call DescribeLoadBalancers as in the following example to view the updated configurationinformation of your load balancer.
• LoadBalancerName = MyLoadBalancer
The operation returns a list of updated configurations of your load balancer.
For detailed descriptions of this Elastic Load Balancing API action, see CreateLoadBalancerListenersin the Elastic Load Balancing API Reference.
API Version 2012-06-01133
Elastic Load Balancing Developer GuideUsing the Query API
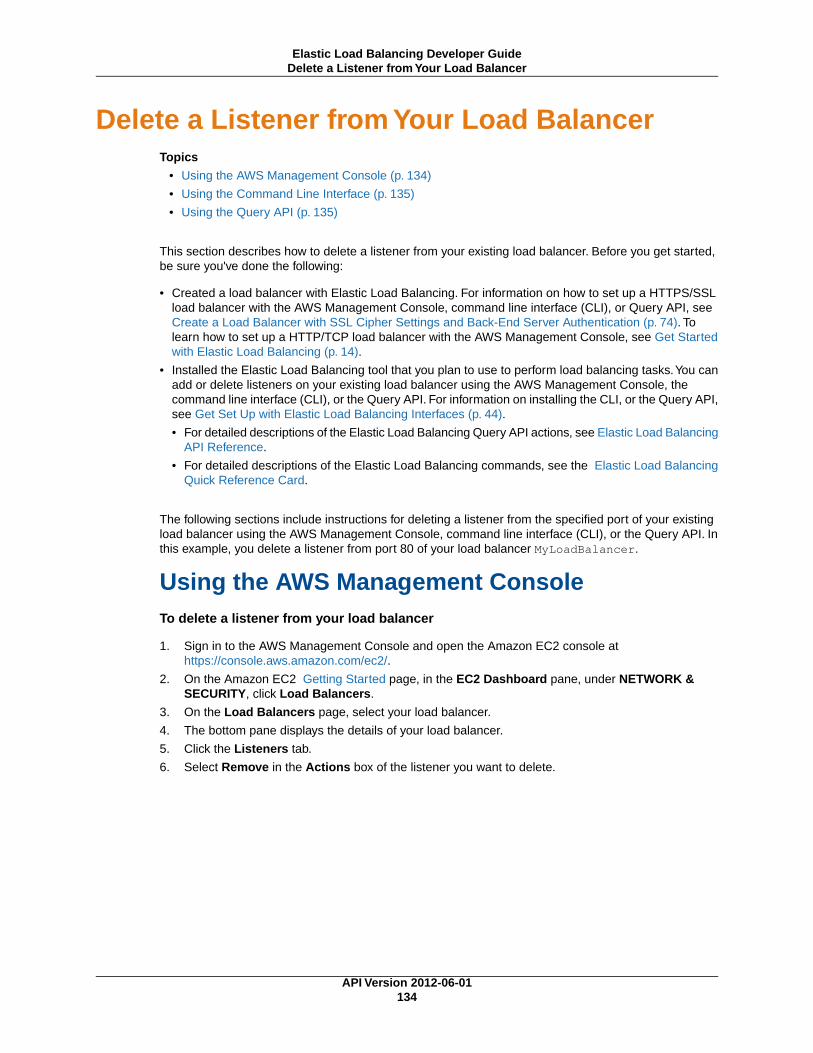
Delete a Listener from Your Load BalancerTopics
• Using the AWS Management Console (p. 134)
• Using the Command Line Interface (p. 135)
• Using the Query API (p. 135)
This section describes how to delete a listener from your existing load balancer. Before you get started,be sure you've done the following:
• Created a load balancer with Elastic Load Balancing. For information on how to set up a HTTPS/SSLload balancer with the AWS Management Console, command line interface (CLI), or Query API, seeCreate a Load Balancer with SSL Cipher Settings and Back-End Server Authentication (p. 74). Tolearn how to set up a HTTP/TCP load balancer with the AWS Management Console, see Get Startedwith Elastic Load Balancing (p. 14).
• Installed the Elastic Load Balancing tool that you plan to use to perform load balancing tasks.You canadd or delete listeners on your existing load balancer using the AWS Management Console, thecommand line interface (CLI), or the Query API. For information on installing the CLI, or the Query API,see Get Set Up with Elastic Load Balancing Interfaces (p. 44).
• For detailed descriptions of the Elastic Load Balancing Query API actions, see Elastic Load BalancingAPI Reference.
• For detailed descriptions of the Elastic Load Balancing commands, see the Elastic Load BalancingQuick Reference Card.
The following sections include instructions for deleting a listener from the specified port of your existingload balancer using the AWS Management Console, command line interface (CLI), or the Query API. Inthis example, you delete a listener from port 80 of your load balancer MyLoadBalancer.
Using the AWS Management ConsoleTo delete a listener from your load balancer
1. Sign in to the AWS Management Console and open the Amazon EC2 console athttps://console.aws.amazon.com/ec2/.
2. On the Amazon EC2 Getting Started page, in the EC2 Dashboard pane, under NETWORK &SECURITY, click Load Balancers.
3. On the Load Balancers page, select your load balancer.
4. The bottom pane displays the details of your load balancer.
5. Click the Listeners tab.
6. Select Remove in the Actions box of the listener you want to delete.
API Version 2012-06-01134
Elastic Load Balancing Developer GuideDelete a Listener from Your Load Balancer

Using the Command Line InterfaceTo delete a listener from your load balancer
1. Enter the command elb-delete-lb-listeners as in the following example.
PROMPT> elb-delete-lb-listeners MyLoadBalancer lb-ports 80
2. Enter the command elb-describe-lbs as in the following example to view the updated details ofyour load balancer MyLoadBalancer.
PROMPT> elb-describe-lbs MyLoadBalancer
The operation returns a list of updated configurations of your load balancer.
Using the Query APITo delete a listener from your load balancer
Call DeleteLoadBalancerListeners with the following parameters:
• LoadBalancerPorts = 80
• LoadBalancerName = MyLoadBalancer
Call DescribeLoadBalancers as in the following example to view the updated configuration informationof your load balancer.
• LoadBalancerName = MyLoadBalancer
The operation returns a list of updated configurations of your load balancer.
API Version 2012-06-01135
Elastic Load Balancing Developer GuideUsing the Command Line Interface

For detailed descriptions of this Elastic Load Balancing API action, see the DeleteLoadBalancerListenersin the Elastic Load Balancing API Reference.
API Version 2012-06-01136
Elastic Load Balancing Developer GuideUsing the Query API
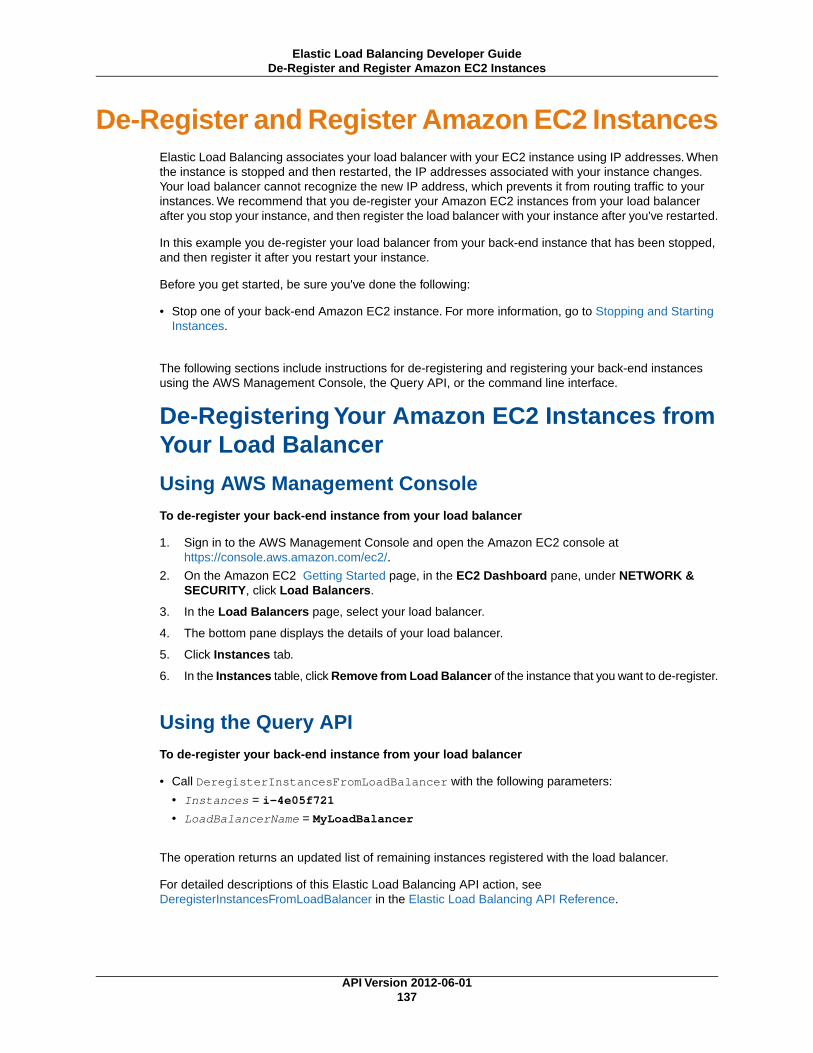
De-Register and Register Amazon EC2 InstancesElastic Load Balancing associates your load balancer with your EC2 instance using IP addresses. Whenthe instance is stopped and then restarted, the IP addresses associated with your instance changes.Your load balancer cannot recognize the new IP address, which prevents it from routing traffic to yourinstances. We recommend that you de-register your Amazon EC2 instances from your load balancerafter you stop your instance, and then register the load balancer with your instance after you've restarted.
In this example you de-register your load balancer from your back-end instance that has been stopped,and then register it after you restart your instance.
Before you get started, be sure you've done the following:
• Stop one of your back-end Amazon EC2 instance. For more information, go to Stopping and StartingInstances.
The following sections include instructions for de-registering and registering your back-end instancesusing the AWS Management Console, the Query API, or the command line interface.
De-Registering Your Amazon EC2 Instances fromYour Load Balancer
Using AWS Management ConsoleTo de-register your back-end instance from your load balancer
1. Sign in to the AWS Management Console and open the Amazon EC2 console athttps://console.aws.amazon.com/ec2/.
2. On the Amazon EC2 Getting Started page, in the EC2 Dashboard pane, under NETWORK &SECURITY, click Load Balancers.
3. In the Load Balancers page, select your load balancer.
4. The bottom pane displays the details of your load balancer.
5. Click Instances tab.
6. In the Instances table, click Remove from Load Balancer of the instance that you want to de-register.
Using the Query APITo de-register your back-end instance from your load balancer
• Call DeregisterInstancesFromLoadBalancer with the following parameters:
• Instances = i-4e05f721
• LoadBalancerName = MyLoadBalancer
The operation returns an updated list of remaining instances registered with the load balancer.
For detailed descriptions of this Elastic Load Balancing API action, seeDeregisterInstancesFromLoadBalancer in the Elastic Load Balancing API Reference.
API Version 2012-06-01137
Elastic Load Balancing Developer GuideDe-Register and Register Amazon EC2 Instances

Using the Command Line InterfaceTo de-register your back-end instance from your load balancer
• Enter the command elb-deregister-instances-from-lb as in the following example.
PROMPT> elb-deregister-instances-from-lb MyLoadBalancer --instances i-4e05f721
The operation returns an updated list of remaining instances registered with the load balancer.
For detailed descriptions of the Elastic Load Balancing commands, see the Elastic Load Balancing QuickReference Card.
Registering Your Amazon EC2 Instances with YourLoad BalancerIf you haven't done so yet, you should now restart the instance that you stopped in the previous step.
Using AWS Management ConsoleTo register your back-end instance with your load balancer
1. Sign in to the AWS Management Console and open the Amazon EC2 console athttps://console.aws.amazon.com/ec2/.
2. On the Amazon EC2 Getting Started page, in the EC2 Dashboard pane, under NETWORK &SECURITY, click Load Balancers.
3. In the Load Balancers page, select your load balancer.
4. The bottom pane displays the details of your load balancer.
5. Click Instances tab.
6. In the Instances table, click the green plus sign at the right to add instances to your load balancer.
7. In the Manually Add Instances to LoadBalancer table, check the boxes in the Select column toadd instances to your load balancer.
8. Click Save to register your instances.
Using the Query APITo register your back-end instance with your load balancer
Call RegisterInstancesWithLoadBalancer with the following parameters:
• Instances = i-802ffe77b
• LoadBalancerName = MyLoadBalancer
The operation returns an updated list of instances registered with the load balancer.
For detailed descriptions of this Elastic Load Balancing API action, see RegisterInstancesWithLoadBalancerin the Elastic Load Balancing API Reference.
API Version 2012-06-01138
Elastic Load Balancing Developer GuideRegistering Your Amazon EC2 Instances with Your Load
Balancer

Using the Command Line InterfaceTo register your back-end instance from your load balancer
Enter the command elb-register-instances-with-lb as in the following example.
PROMPT> elb-register-instances-with-lb MyLoadBalancer --instances i-802ffe77b
The operation returns an updated list of instances registered with the load balancer.
For detailed descriptions of the Elastic Load Balancing commands, see the Elastic Load Balancing QuickReference Card.
Update an SSL Certificate for a Load BalancerIf you are using HTTPS/SSL protocol for your listeners, you might have an SSL server certificate installedon your load balancer. The SSL certificate has to be updated periodically. This section describes how toupdate an SSL certificate for your HTTPS/SSL load balancer. Before you get started, be sure you'vedone the following:
• Created a HTTPS/SSL load balancer with Elastic Load Balancing. For information on how to set up anHTTPS/SSL load balancer with the AWS Management Console, the command line interfaces (CLI), orthe Query API, see Create a Load Balancer with SSL Cipher Settings and Back-End ServerAuthentication (p. 74).
• Created a new SSL server certificate to replace the expired server certificate and have uploaded itusing the AWS Identity and Access Management (IAM). For information on how to create and uploada SSL certificate, go to Creating and Uploading Server Certificates in Using IAM.
All your SSL server certificates are managed by AWS Identity and Access management (IAM). Bydefault, IAM allows 10 server certificates per AWS account. If you try to upload a new server certificateafter reaching this limit, you'll get an error.You can request for more certificates using this form - IAMLimit Increase Contact Us Form.
• Installed the Elastic Load Balancing tools that you plan to use to perform load balancing tasks.Youcan update your SSL certificate installed on your HTTPS/SSL load balancer using the AWS ManagementConsole, command line interface (CLI), or the Query API. For information on installing the CLI, or theQuery API, see Get Set Up with Elastic Load Balancing Interfaces (p. 44).
• If you plan to use the command line interface (CLI), you'll also have to install the AWS Identity andAccess Management command line tools. For more information, go to Get the Tools in the IAM GettingStarted Guide.
• For detailed descriptions of the Elastic Load Balancing Query API actions, see Elastic Load BalancingAPI Reference.
• For detailed descriptions of the Elastic Load Balancing commands, see the Elastic Load BalancingQuick Reference Card.
• For information on using AWS Identity and Access Management APIs and command line interfaces,go to Using IAM.
The following sections include instructions for updating an SSL certificate using the AWS ManagementConsole, the command line interface (CLI), or the Query API.
API Version 2012-06-01139
Elastic Load Balancing Developer GuideUpdate an SSL Certificate for a Load Balancer

Using the AWS Management ConsoleTo update an SSL certificate for an HTTPS load balancer
1. Sign in to the AWS Management Console and open the Amazon EC2 console athttps://console.aws.amazon.com/ec2/.
2. On the Amazon EC2 Getting Started page, in the EC2 Dashboard pane, under NETWORK &SECURITY, click Load Balancers.
3. On the Load Balancers page, select your load balancer.
4. The bottom pane displays the details of your load balancer.
5. Click the Listeners tab.
6. Click Change in the SSL Certificate column of the certificate you want to update.
7. On the Configure SSL Certificate page, select Choose from your existing SSL Certificates touse previously uploaded SSL certificate and select the certificate from the drop-down box.
8. Or, select Upload a new SSL Certificate if you have a SSL certificate and want to uploaded it.
Before you upload, ensure that your certificate meets the following citeria:
• Certificates must follow the X.509 PEM format.
• The current date must be between the certificate’s start and end date.
• Public and private certificate files must contain only a single certificate.
• The private key must match the public key that is in the digital server certificate.
• The private key must be an RSA private key in PEM format, where the PEM header is BEGIN RSAPRIVATE KEY and the footer is END RSA PRIVATE KEY.
• The private key cannot be encrypted with a password.
• A certificate chain starts with the immediate signing certificate and is then followed by anyintermediaries in order. Intermediaries that are not involved in the trust path must not be included.The trusted root certificate can be optionally included as the last certificate.
If your certificate does not meet the criteria listed in this step, you might get an error when you uploadit. Create a new SSL certificate and upload the certificate using AWS Identity and Access Management(IAM). For instructions on creating and uploading the SSL certificate, go to Creating and UploadingServer Certificates in Using AWS Identity and Access Management.
Step through the following instructions to continue uploading your SSL certificate.
a. Enter the name of the certificate to upload.
b. Copy and paste the contents of the private key file (PEM-encoded) in the Private Key box.
c. Copy and paste the contents of the public key certificate file (PEM-encoded) in the Public KeyCertificate box.
d. [Optional] Copy and paste the contents of the public key certificate chain file (PEM-encoded) inthe Certificate Chain box.
NoteThe certificate chain must be ordered such that the root certificate is the last certificatein the chain. If you use a certificate chain in a different order, you will receive an error.
API Version 2012-06-01140
Elastic Load Balancing Developer GuideUsing the AWS Management Console

9. Click Save.
Using the Query APITo update an SSL certificate for an HTTPS load balancer
1. If you have a SSL certificate and have uploaded it using the AWS Identity and Access Management(IAM), get the Amazon Resource Name (ARN) of your certificate and go to step 3.
2. If you have a SSL certificate and want to upload it, step through the following instructions:
a. Check if your certificate meets the following criteria:
• Certificates must follow the X.509 PEM format.
• The current date must be between the certificate’s start and end date.
• Public and private certificate files must contain only a single certificate.
• The private key must match the public key that is in the digital server certificate.
• The private key must be an RSA private key in PEM format, where the PEM header is BEGINRSA PRIVATE KEY and the footer is END RSA PRIVATE KEY.
• The private key cannot be encrypted with a password.
• A certificate chain starts with the immediate signing certificate and is then followed by anyintermediaries in order. Intermediaries that are not involved in the trust path must not beincluded. The trusted root certificate can be optionally included as the last certificate.
If your certificate does not meet the criteria, you might get an error when you upload it. Createa new SSL certificate and upload the certificate using AWS Identity and Access Management(IAM). For instructions on creating and uploading the SSL certificate, go to Creating and UploadingServer Certificates in the Using AWS Identity and Access Management.
If your certificate meets the criteria, step through the following instructions to continue uploadingyour SSL certificate.
API Version 2012-06-01141
Elastic Load Balancing Developer GuideUsing the Query API

b. Call the AWS Identity and Access Management UploadServerCertificate API with the followingparameters:
• ServerCertificateName = newCert
ImportantYou cannot use the name of the expired certificate.You must use a new name forthe ServerCertificateName parameter.
• CertificateBody = <encoded certificate body>
• PrivateKey = <encoded private key>
• CertificateChain = <concatenation of the encoded public key certificates>
NoteCertificateChain is optional. If you are using CertificateChain, then youmust order the certificates such that the root certificate is the last certificate in thechain. If you use a certificate chain in a different order, you will receive an error.
• Path = /
NotePath is optional. If it is not included, the path defaults to /. For more informationabout paths, go to Identifiers for IAM Entities in Using IAM.
The response includes an Amazon Resource Name (ARN) for your new certificate. Use thisnew ARN for the SSLCertificateId parameter in the next step.
3. Call SetLoadBalancerListenerSSLCertificate to replace the expired certificate with the new one.
• LoadBalancerName = test-lb
• LoadBalancerPort = 443
• SSLCertificateId = arn:aws:iam::322191361670:server-certificate/newCert
Using the Command Line InterfaceTo update an SSL certificate for an HTTPS load balancer
1. If you have a SSL certificate and have uploaded it using the AWS Identity and Access Management(IAM), get the Amazon Resource Name (ARN) of your certificate and go to step 3.
2. If you have a SSL certificate and want to upload it using AWS Identity and Access management(IAM), step through the following instructions:
a. Check if your certificate meets the following criteria:
• Certificates must follow the X.509 PEM format.
• The current date must be between the certificate’s start and end date.
• Public and private certificate files must contain only a single certificate.
• The private key must match the public key that is in the digital server certificate.
• The private key must be an RSA private key in PEM format, where the PEM header is BEGINRSA PRIVATE KEY and the footer is END RSA PRIVATE KEY.
• The private key cannot be encrypted with a password.
API Version 2012-06-01142
Elastic Load Balancing Developer GuideUsing the Command Line Interface
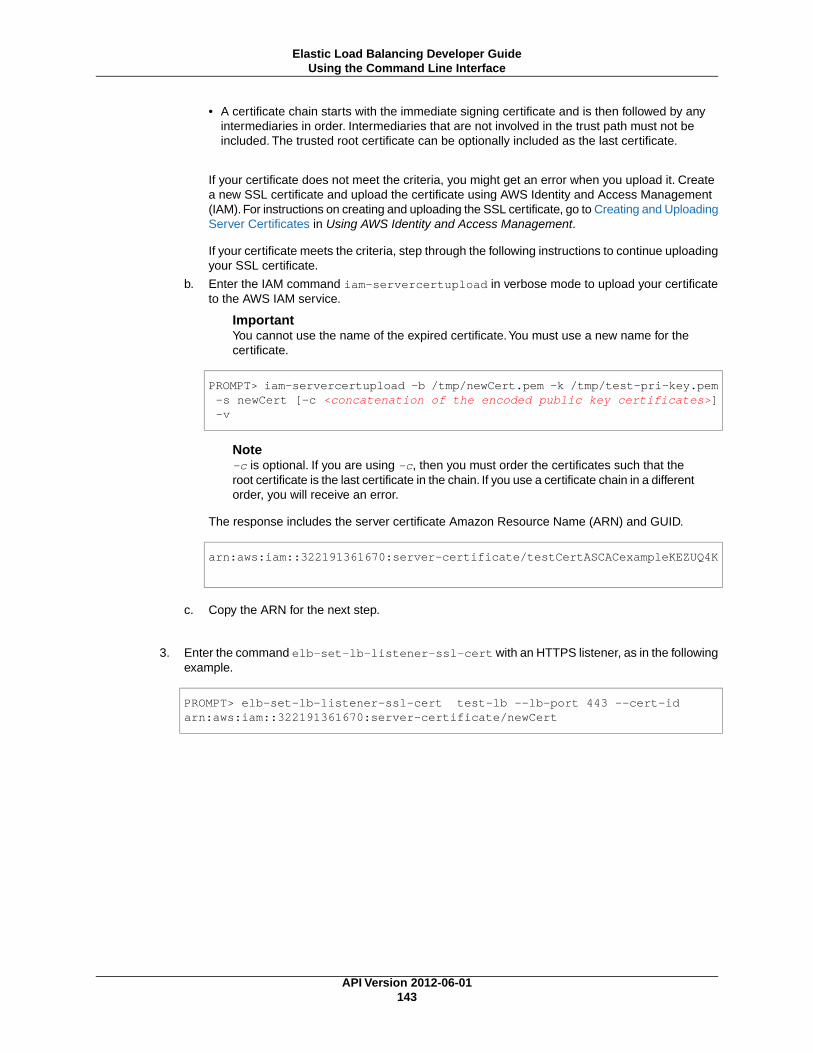
• A certificate chain starts with the immediate signing certificate and is then followed by anyintermediaries in order. Intermediaries that are not involved in the trust path must not beincluded. The trusted root certificate can be optionally included as the last certificate.
If your certificate does not meet the criteria, you might get an error when you upload it. Createa new SSL certificate and upload the certificate using AWS Identity and Access Management(IAM). For instructions on creating and uploading the SSL certificate, go to Creating and UploadingServer Certificates in Using AWS Identity and Access Management.
If your certificate meets the criteria, step through the following instructions to continue uploadingyour SSL certificate.
b. Enter the IAM command iam-servercertupload in verbose mode to upload your certificateto the AWS IAM service.
ImportantYou cannot use the name of the expired certificate.You must use a new name for thecertificate.
PROMPT> iam-servercertupload -b /tmp/newCert.pem -k /tmp/test-pri-key.pem -s newCert [-c <concatenation of the encoded public key certificates>] -v
Note-c is optional. If you are using -c, then you must order the certificates such that theroot certificate is the last certificate in the chain. If you use a certificate chain in a differentorder, you will receive an error.
The response includes the server certificate Amazon Resource Name (ARN) and GUID.
arn:aws:iam::322191361670:server-certificate/testCertASCACexampleKEZUQ4K
c. Copy the ARN for the next step.
3. Enter the command elb-set-lb-listener-ssl-cert with an HTTPS listener, as in the followingexample.
PROMPT> elb-set-lb-listener-ssl-cert test-lb --lb-port 443 --cert-id arn:aws:iam::322191361670:server-certificate/newCert
API Version 2012-06-01143
Elastic Load Balancing Developer GuideUsing the Command Line Interface

Configure Custom Domain Name for Your LoadBalancer
Topics
• Associating Your Custom Domain Name with Your Load Balancer Name (p. 144)
• Disassociating Your Custom Domain Name From Your Load Balancer Name (p. 148)
Each Elastic Load Balancing load balancer that you create has an automatically created Domain NameSystem (DNS) name. Typically, the DNS name includes the name of the AWS region in which the loadbalancer is created. For example, if you create a load balancer named myLB in the US-East Region, yourload balancer might have a DNS name such as myLB-1234567890.us-east-1.elb.amazonaws.com.Youjust have to paste the DNS name generated by Elastic Load Balancing into the address field of anInternet-connected web browser to connect to your load balancer.
If you'd rather use a user-friendly domain name, such as www.example.com, instead of the load balancerDNS name, you can create a custom domain name and then associate the custom domain name withthe load balancer DNS name. When a request is placed to your load balancer using the custom domainname that you created, it resolves to the load balancer DNS name.
To use a custom domain name for your load balancer instance, you’ll have to first register your domainname with a DNS service provider.
When you register a domain name, you reserve not only the domain name itself, but also an entire setof subdomain names. For example, if you register example.com as your custom domain name, you cancreate subdomain names such as foo.bar.example.com, foo.myLB.example.com, and so on. This set ofa domain and its subdomain names is called a zone. A domain name that you reserve, such asexample.com, is called the zone apex because it sits at the top of the zone's hierarchy.
Associating Your Custom Domain Name with YourLoad Balancer NameAfter you register your custom domain name, you have two ways to associate your custom domain namewith the load balancer DNS name.
Option 1: Create a canonical name (CNAME) record for your zone with your existing domain nameprovider. A CNAME record specifies that a domain name is an alias of another CNAME domain name.For example, the following CNAME record associates an alias, www.foo.example.com, with a canonicalname, the DNS name of an Elastic Load Balancing instance.
www.foo.example.com CNAME myLB-1234567890.us-east-1.elb.amazonaws.com
For more information on CNAME records, go to the Wikipedia articlehttp://en.wikipedia.org/wiki/CNAME_record.
The creation of CNAME records is a simple process. Many domain name registrars provide self-servicetools that you can use to create the CNAME record yourself. However, you can't use a CNAME recordto associate your zone apex with your Elastic Load Balancing instance. DNS rules prohibit the creationof a CNAME record at the zone apex (e.g., example.com). For example, if you own the example.comdomain name, you can use a CNAME record for the foo.example.com subdomain name, but not for theexample.com zone apex.
You can use the next option if you want to associate a zone apex with your load balancer DNS name.
API Version 2012-06-01144
Elastic Load Balancing Developer GuideConfigure Custom Domain Name for Your Load Balancer

Option 2: Create a domain using Amazon Route 53 as the DNS service. Amazon Route 53 storesinformation about your domain in a hosted zone. A hosted zone is an Amazon Route 53 concept that issimilar to a zone file on a DNS name server. Like a zone file, a hosted zone contains information aboutyour domain name, including the subdomain names within the domain and mappings between namesand IP addresses. For more information about Amazon Route 53, go to What is Route 53 and How Doesit Work?
Use this option to associate a zone apex with your load balancer DNS name.You’ll use Amazon Route53 to create a hosted zone for your domain (for example, example.com), and then create alias resourcerecord sets. An alias resource record set contains a pointer to a resource record set that contains yourDNS resource records. For example, an alias resource record set for your domain, example.com, canpoint to the DNS name of your Elastic Load Balancing load balancer instancemyLB-1234567890.us-east-1.elb.amazonaws.com. After you create a hosted zone, you can also createalias resource record sets to associate subdomain names with your Elastic Load Balancing instance.
DNS Failover:When you use Route 53 to create and associate a custom domain name with your loadbalancer you have an option to enable DNS failover for your load balancer. If DNS failover is enabled,Route 53 responds to the queries to your alias record set, example.com based on the health checks ofthe associated primary and secondary load balancer instances.
If you plan to enable DNS failover for your load balancers, see Configure DNS Failover for Your LoadBalancer (p. 150).
This section describes how to associate your Elastic Load Balancing instance with a custom domainname using Option 1 or Option 2.
PrerequisiteBefore you start associating a load balancer DNS name with a custom domain name, you first need tocreate a load balancer. For information on creating a basic load balancer, see Get Started with ElasticLoad Balancing (p. 14) For information on creating a load balancer with custom settings, see Create aLoad Balancer with SSL Cipher Settings and Back-End Server Authentication (p. 74).
NoteThe time-to-live (TTL) for an Elastic Load Balancing DNS entry is set to 60 seconds.This settingensures that IP addresses can be re-mapped quickly to respond to events that cause ElasticLoad Balancing to scale up or down.
Option 1: Create a CNAME Record for your subdomain andload balancer1. Register your custom domain name with your DNS provider. For a list of registrar websites you can
use to register your domain name, go to ICANN. Wait for your registrar to notify you that your domainname is successfully registered.
2. Create a subdomain name to associate with your load balancer DNS name. For example, if yourcustom domain name is example.com, you can create a subdomain name such asfoo.mylb.example.com.
3. Retrieve the public DNS name of your load balancer.You can use AWS Management Console, theElastic Load Balancing Query API, or the Elastic Load Balancing command line interface (CLI) toretrieve your load balancer DNS name.
To use the AWS Management Console to retrieve the public DNS name of your load balancer
a. Sign in to the AWS Management Console and open the Amazon EC2 console athttps://console.aws.amazon.com/ec2/.
b. On the Amazon EC2 Getting Started page, in the EC2 Dashboard pane, under NETWORK &SECURITY, click Load Balancers.
API Version 2012-06-01145
Elastic Load Balancing Developer GuideAssociating Your Custom Domain Name with Your Load
Balancer Name
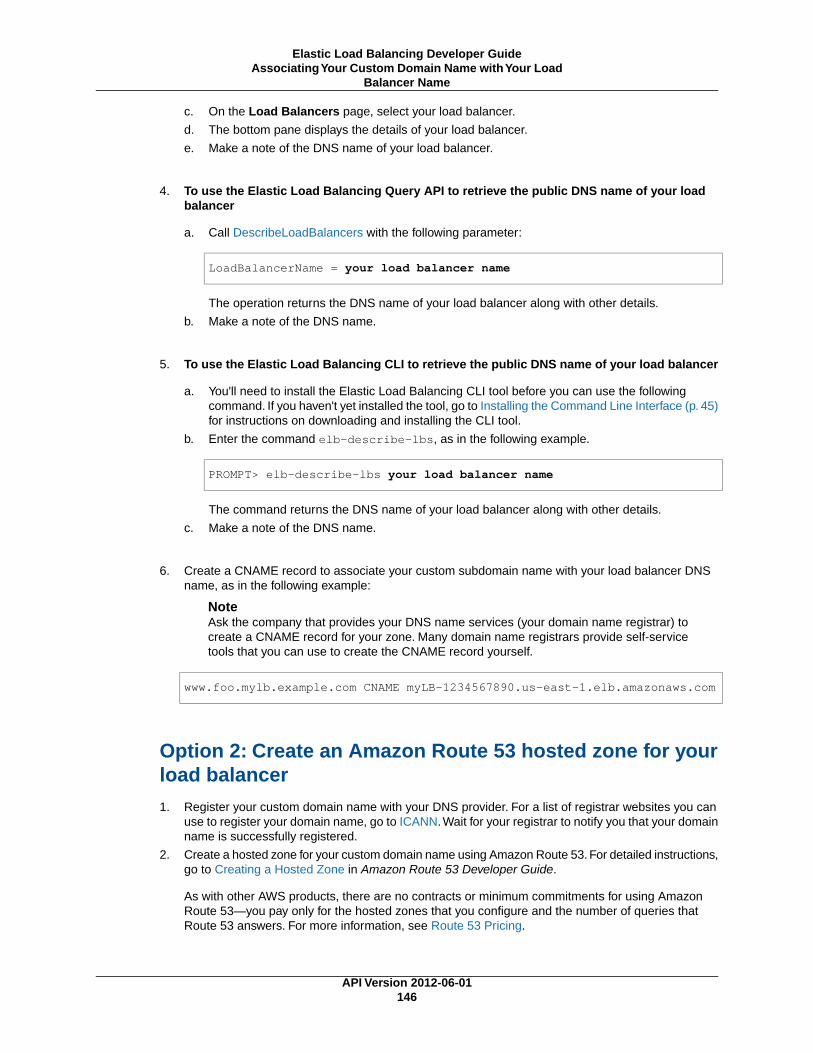
c. On the Load Balancers page, select your load balancer.
d. The bottom pane displays the details of your load balancer.
e. Make a note of the DNS name of your load balancer.
4. To use the Elastic Load Balancing Query API to retrieve the public DNS name of your loadbalancer
a. Call DescribeLoadBalancers with the following parameter:
LoadBalancerName = your load balancer name
The operation returns the DNS name of your load balancer along with other details.
b. Make a note of the DNS name.
5. To use the Elastic Load Balancing CLI to retrieve the public DNS name of your load balancer
a. You'll need to install the Elastic Load Balancing CLI tool before you can use the followingcommand. If you haven't yet installed the tool, go to Installing the Command Line Interface (p. 45)for instructions on downloading and installing the CLI tool.
b. Enter the command elb-describe-lbs, as in the following example.
PROMPT> elb-describe-lbs your load balancer name
The command returns the DNS name of your load balancer along with other details.
c. Make a note of the DNS name.
6. Create a CNAME record to associate your custom subdomain name with your load balancer DNSname, as in the following example:
NoteAsk the company that provides your DNS name services (your domain name registrar) tocreate a CNAME record for your zone. Many domain name registrars provide self-servicetools that you can use to create the CNAME record yourself.
www.foo.mylb.example.com CNAME myLB-1234567890.us-east-1.elb.amazonaws.com
Option 2: Create an Amazon Route 53 hosted zone for yourload balancer1. Register your custom domain name with your DNS provider. For a list of registrar websites you can
use to register your domain name, go to ICANN. Wait for your registrar to notify you that your domainname is successfully registered.
2. Create a hosted zone for your custom domain name using Amazon Route 53. For detailed instructions,go to Creating a Hosted Zone in Amazon Route 53 Developer Guide.
As with other AWS products, there are no contracts or minimum commitments for using AmazonRoute 53—you pay only for the hosted zones that you configure and the number of queries thatRoute 53 answers. For more information, see Route 53 Pricing.
API Version 2012-06-01146
Elastic Load Balancing Developer GuideAssociating Your Custom Domain Name with Your Load
Balancer Name

3. For each hosted zone you create, Route 53 automatically creates four name server (NS) records.These four name servers are called the delegation set. Before the Domain Name System will startto route queries for your domain to Route 53 name servers, you must update your registrar's or yourDNS service's name server records, to point to the Route 53 name servers.
Follow the instructions in Getting the Name Servers for a Hosted Zone to get the four name serversassigned to your hosted zone.
Follow the instructions in Name Server (NS) Records to update your registrar's or your DNS service'sname server records, to point to the Route 53 assigned name servers.
4. Create an alias resource record set you will use to associate your zone apex with your Elastic LoadBalancing instance DNS name. If you want to enable DNS failover for your load balancers, see CreateAlias Resource Records Sets and Enable DNS Failover (p. 151).
To create the alias resource record set you can use the Amazon Route 53 console, Amazon Route53 API, or the Elastic Load Balancing command line interface (CLI).
NoteUse either the Route 53 console or the Route 53 API if you want to enable DNS failover foryour load balancer. Elastic Load Balancing CLI does not support DNS failover options atthis time.
To use Amazon Route 53 console or Amazon Route 53 Query API
For detailed instructions on using the Amazon Route 53 console or the Amazon Route 53 Query APIto create an alias resource record set, go to Creating Alias Resource Record Sets in the AmazonRoute 53 Developer Guide.
To use the Elastic Load Balancing command line interface
a. Before you get started, be sure you’ve installed the Elastic Load Balancing CLI tools. For moreinformation, see Installing the Command Line Interface (p. 45) for instructions on downloadingand installing the CLI tools. For detailed descriptions of the Elastic Load Balancing commands,see the Elastic Load Balancing Quick Reference Card.
b. Enter the elb-associate-route53-hosted-zone command, as in the following example,to associate a zone apex with an Elastic Load Balancing instance.
This command creates an association between your zone apex and your Elastic Load Balancinginstance by adding an alias resource record set to your hosted zone. The following examplecreates an association between example.com and a load balancer named myLoadBalancer.
elb-associate-route53-hosted-zone myLoadBalancer --rr-name example.com --hosted-zone-id Z123456789 --weight 100
For the hosted-zone-id parameter, use the hosted zone ID of your custom domain namerather than the Elastic Load Balancing hosted zone ID. For instructions on getting the hostedzone ID of your custom domain name, go to Listing the Hosted Zones for an AWS Account.
For more information about the weight parameter, go to Setting Up Weighted Resource RecordSets in the Amazon Route 53 API Reference Guide.
NoteYou might have to wait several minutes for your changes to propagate to all AmazonRoute 53 DNS servers. For information on how to check the status of your change, goto Checking the Status of Your Change in the Amazon Route 53 Developer Guide.
c. You can also use elb-associate-route53-hosted-zone to create aliases for subdomainsthat are part of your hosted zone. The following example associates the subdomainfoo.bar.example.com your Amazon Route 53 hosted zone with ID number Z123456789.
API Version 2012-06-01147
Elastic Load Balancing Developer GuideAssociating Your Custom Domain Name with Your Load
Balancer Name

elb-associate-route53-hosted-zone myLoadBalancer --rr-name foo.bar.ex ample.com --hosted-zone-id Z123456789 --weight 100
NoteThe elb-associate-route53-hosted-zone command works only with AWS secretkey authentication. Unlike other Elastic Load Balancing CLI commands, this ElasticLoad Balancing command does not work with X.509 certificate and RSA private keycredentials.
Disassociating Your Custom Domain Name FromYour Load Balancer NameYou can disassociate your custom domain name from a load balancer instance by first deleting theresource record sets in your hosted zone and then deleting the hosted zone.
1. Delete the alias resource record sets in your Amazon Route 53 hosted zone
You can use Amazon Route 53 console, Amazon Route 53 API, or the Elastic Load Balancingcommand line interface (CLI) to delete alias resource record sets in your hosted zone.
Using the Amazon Route 53 Console
• For information on using Amazon Route 53 console, go to Creating, Changing, and DeletingResource Record Sets in the Amazon Route 53 Developer Guide.
Using the Amazon Route 53 Query API
• For information on using Amazon Route 53 Query API, scroll down to the Creating, Changing,and Deleting Resource Record Sets Using the Route 53 API section in the Creating, Changing,and Deleting Resource Record Sets topic in the Amazon Route 53 Developer Guide.
Using the Elastic Load Balancing command line interface
• Enter the elb-disassociate-route53-hosted-zone command.
This command removes the association between your zone apex or subdomain and your ElasticLoad Balancing instance by deleting an alias resource record set from your hosted zone. Thefollowing example removes an association between example.com and a load balancer namedmyLB. The hosted-zone-id parameter is your custom hosted zone ID.
elb-disassociate-route53-hosted-zone myLB --rr-name example.com --hosted-zone-id Z123456789 --weight 100
NoteThe weight parameter value must match the value you used to create the resource recordset specified in the rr-name parameter. If you don't remember the original weight value,use the Amazon Route 53 ListResourceRecordSets action to retrieve the value. Formore information, go to ListResourceRecordSets in the Amazon Route 53 API Reference
API Version 2012-06-01148
Elastic Load Balancing Developer GuideDisassociating Your Custom Domain Name From Your
Load Balancer Name

Guide. For more information about the weight parameter, go to Setting Up WeightedResource Record Sets in the Amazon Route 53 API Reference Guide.
NoteThe elb-disassociate-route53-hosted-zone command works only with AWS secretkey authentication. Unlike other Elastic Load Balancing CLI commands, this new ElasticLoad Balancing command does not work with X.509 certificate and RSA private keycredentials.
2. Delete the hosted zone associated with your load balancer DNS name
You can use the Amazon Route 53 console or the Amazon Route 53 Query API to delete the hostedzone associated with your load balancer DNS name. For more information, go to Deleting a HostedZone in the Amazon Route 53 Developer Guide.
API Version 2012-06-01149
Elastic Load Balancing Developer GuideDisassociating Your Custom Domain Name From Your
Load Balancer Name

Configure DNS Failover for Your Load BalancerYou can provide high availability and redundancy for your applications running behind Elastic LoadBalancing by enabling Amazon Route 53 Domain Name System (DNS) failover for your load balancers.Amazon Route 53 is a DNS service that provides reliable routing to your infrastructure.When DNS failoveris enabled, Route 53 uses a health-checking feature to determine the availability of the applicationsrunning behind the load balancers. If there are no healthy EC2 instances registered with the load balanceror if the load balancer itself is unhealthy, Route 53 will route traffic away from the unhealthy load balancer,and to the other available healthy load balancers.
For information on Amazon Route 53, see What is Route 53 and How Does it Work?.
We will use an example to illustrate how Route 53 DNS failover works with your load balancers. Supposeyou have a web application for www.example.com, and you want to have redundant applications runningbehind two load balancers residing in two different regions, US East and US West.You want the trafficfor www.example.com to be primarily routed to the load balancer in US East, and use the load balancerin US West as a backup during failures. In this example, if you use Route 53 DNS failover, you can specifyhow you want the DNS service to route queries to your domain name, www.example.com. When youenable DNS failover, you must specify your primary and your secondary (backup) load balancers. Enablingthe failover routing mechanism tells Route 53 to direct traffic to a primary load balancer, if available, orotherwise reroute the traffic to a secondary load balancer.
To configure DNS failover, you will need to associate your domain name, www.example.com, with yourload balancers. Each load balancer has an automatically generated DNS name, such asmyLB-1234567890.us-east-1.elb.amazonaws.com. Using Route 53, you will create records for yourdomain name, www.example.com, pointing to the load balancer DNS name,myLB-1234567890.us-east-1.elb.amazonaws.com.
In this section we walk you through the process of enabling Amazon Route 53 DNS failover for your loadbalancers running in two different regions.
PrerequisitesBefore you can enable DNS failover for your load balancers, you first need to create your load balancers.Be sure to create a primary and a secondary load balancer, preferably in two separate regions. Forinformation on creating a basic load balancer, see Get Started with Elastic Load Balancing (p. 14).
If you do not already have a custom domain name, register your domain name with your DNS provider.For a list of registrar websites you can use to register your domain name, go to ICANN.org. Wait for yourregistrar to notify you that your domain name is successfully registered.
Use the Console to Configure DNS Failover forYour Load BalancersThe following steps outline how to configure DNS failover for your load balancers using the Route 53console.
1. Create a hosted zone for your custom domain name.
2. Update the DNS Name Server Records to Point to Route 53 Name Servers.
3. Create alias record sets for your primary and secondary load balancers.
API Version 2012-06-01150
Elastic Load Balancing Developer GuideConfigure DNS Failover for Your Load Balancer

Create an Amazon Route 53 Hosted Zone for Your CustomDomain NameThe hosted zone contains information about your domain name, including the subdomain names andmappings.
Follow the instructions in Creating a Hosted Zone in the Amazon Route 53 Developer Guide to create ahosted zone for your custom domain name name, www.example.com.
As with other AWS products, there are no contracts or minimum commitments for using Amazon Route53—you pay only for the hosted zones that you configure and the number of queries that Route 53answers. For more information, see Route 53 Pricing.
Update the DNS Name Server Records to Point to Route 53Name ServersFor each hosted zone you create, Route 53 automatically creates four name server (NS) records. Beforethe DNS will start to route queries for your domain to Route 53 name servers, you must update yourregistrar's or your DNS service's name server records, to point to the Route 53 name servers.
1. Follow the instructions in Getting the Name Servers for a Hosted Zone to get the name serversassigned to your hosted zone.
2. Follow the instructions in Name Server (NS) Records to update your registrar's or your DNS service'sname server records to point to the Route 53 assigned name servers.
Create Alias Resource Records Sets and Enable DNS FailoverAfter you have created a hosted zone for your domain, you need to create primary and secondary aliasresource record sets to tell the DNS how you want traffic to be routed for your domain.
1. Open the Amazon Route 53 console at https://console.aws.amazon.com/route53/.
2. Click the row of your hosted zone, and click Go to Record Sets.
3. Click Create Record Set.
4. In the Name box, type the domain name for this record set, or use the default value.
5. In the Type box, select A - Ipv4 address.
6. For Alias, click Yes
API Version 2012-06-01151
Elastic Load Balancing Developer GuideUse the Console to Configure DNS Failover for Your
Load Balancers

7. Click the Alias Target field, and choose your primary load balancer from the list.
8. The value of Alias Hosted Zone ID appears automatically based on the value that you selected orentered for Alias Target.
9. In the Routing Policy: drop-down box, select Failover.
10. For Failover Record Type:, select Primary.
11. For Set ID: enter an ID for the record set or use the default value.
12. For Evaluate Target Health, select Yes.
13. For Associate with Health Check, select No.
14. Click Create Record Set.
API Version 2012-06-01152
Elastic Load Balancing Developer GuideUse the Console to Configure DNS Failover for Your
Load Balancers

15. Follow the same steps to create another alias record set for your secondary load balancer, with thefollowing exceptions:
• In the Alias Target field, choose your secondary load balancer from the list.
• For Failover Record Type:, select Secondary.
• For Evaluate Target Health, select Yes if you want Route 53 to evaluate the health of the secondaryload balancer. If the secondary load balancer is unhealthy, Route 53 will route back to the primaryload balancer. If Evaluate Target Health is set to No, Route 53 will assume that the secondaryload balancer is healthy and route traffic to the secondary load balancer whenever the primaryload balancer is unhealthy.
For information on how to set up advanced DNS failover configurations, see Managing Resource Availabilitywith Route 53 DNS Failover in the Amazon Route 53 Developer Guide.
API Version 2012-06-01153
Elastic Load Balancing Developer GuideUse the Console to Configure DNS Failover for Your
Load Balancers

Create Sticky SessionsTopics
• Enable Duration-Based Session Stickiness (p. 154)
• Enable Application-Controlled Session Stickiness (p. 157)
By default, a load balancer routes each request independently to the application instance with the smallestload. However, you can use the sticky session feature (also known as session affinity) which enables theload balancer to bind a user's session to a specific application instance. This ensures that all requestscoming from the user during the session will be sent to the same application instance.
The key to managing the sticky session is determining how long should your load balancer consistentlyroute the user's request to the same application instance. If your application has its own session cookie,then you can set Elastic Load Balancing to create the session cookie to follow the duration specified bythe application's session cookie. If your application does not have its own session cookie, then you canset Elastic Load Balancing to create a session cookie by specifying your own stickiness duration.You canassociate stickiness duration for only HTTP/HTTPS load balancer listeners.
Enable Duration-Based Session StickinessThe load balancer uses a special load-balancer-generated cookie to track the application instance foreach request. When the load balancer receives a request, it first checks to see if this cookie is presentin the request. If so, the request is sent to the application instance specified in the cookie. If there is nocookie, the load balancer chooses an application instance based on the existing load balancing algorithm.A cookie is inserted into the response for binding subsequent requests from the same user to thatapplication instance. The cookie is automatically updated with each request. The policy configurationdefines a cookie expiry, which establishes the duration of validity for each cookie.
In this example, you create a stickiness policy and then use it to enable sticky sessions for a load balancerthat has load balancer-generated HTTP cookies. Before you get started, be sure you've done the following:
• Created a load balancer with Elastic Load Balancing. For information on how to set up a HTTPS/SSLload balancer with the AWS Management Console, command line interface (CLI), or Query API, seeCreate a Load Balancer with SSL Cipher Settings and Back-End Server Authentication (p. 74). Tolearn how to set up a HTTP load balancer with the AWS Management Console, see Get Started withElastic Load Balancing (p. 14).
• Installed the Elastic Load Balancing tool that you plan to use to perform load balancing tasks.You cancreate a stickiness policy using the AWS Management Console, the command line interface (CLI), orthe Query API. For information on installing the CLI or the Query API, see Get Set Up with Elastic LoadBalancing Interfaces (p. 44).
• For detailed descriptions of the Elastic Load Balancing commands, see the Elastic Load BalancingQuick Reference Card.
• For detailed descriptions of the policy configuration Query API for load-balancer-generated HTTPcookies, go to CreateLBCookieStickinessPolicy in the Elastic Load Balancing API Reference.
Using the AWS Management Console
To enable duration-based sticky sessions for a load balancer
1. Sign in to the AWS Management Console and open the Amazon EC2 console athttps://console.aws.amazon.com/ec2/.
2. On the Amazon EC2 Getting Started page, in the EC2 Dashboard pane, under NETWORK &SECURITY, click Load Balancers.
API Version 2012-06-01154
Elastic Load Balancing Developer GuideCreate Sticky Sessions

3. On the Load Balancers page, select your load balancer.
4. The bottom pane displays the details of your load balancer.
5. Click (edit) in the Port Configuration: row.
6. On the Edit Stickiness for name of your load balancer, port number of your loadbalancer page, click Enable Load Balancer Generated Cookie Stickiness.
7. In the Expiration Period box, enter the cookie expiration period. This example creates a cookiestickiness policy with a cookie expiration period of 60 seconds.
8. Click Save.
9. The Port Configurationrow in the Description pane shows the newly created cookie stickinesspolicy.
API Version 2012-06-01155
Elastic Load Balancing Developer GuideEnable Duration-Based Session Stickiness

Using the Query APITo enable duration-based sticky sessions for a load balancer
1. Call CreateLBCookieStickinessPolicy with the following parameters to create aload-balancer-generated cookie stickiness policy with a cookie expiration period of 60 seconds.
• LoadBalancerName = MyLoadBalancer
• PolicyName = MyLoadBalancerPolicy
• CookieExpirationPeriod = 60
2. Call SetLoadBalancingPoliciesOfListener with the following parameters to enable sessionstickiness for a load balancer using the MyLoadBalancer policy.
• LoadBalancerName = MyLoadBalancer
• LoadBalancerPort = 80
• PolicyNames = MyLoadBalancerPolicy
Using the Command Line InterfaceTo enable duration-based sticky sessions for a load balancer
1. Use the elb-create-lb-cookie-stickiness-policy command to create aload-balancer-generated cookie stickiness policy with a cookie expiration period of 60 seconds.
PROMPT>elb-create-lb-cookie-stickiness-policy example-lb --policy-name My LoadBalancerPolicy --expiration-period 60
Elastic Load Balancing returns the following:
OK-Creating LB Stickiness Policy
2. Use the elb-set-lb-policies-of-listener command to enable session stickiness for a loadbalancer using the MyLoadBalancerPolicy.
PROMPT>elb-set-lb-policies-of-listener example-lb --lb-port 80 --policy-names MyLoadBalancerPolicy
Elastic Load Balancing returns the following:
OK-Setting Policies
API Version 2012-06-01156
Elastic Load Balancing Developer GuideEnable Duration-Based Session Stickiness

Enable Application-Controlled Session StickinessThe load balancer uses a special cookie to associate the session with the original server that handledthe request, but follows the lifetime of the application-generated cookie corresponding to the cookie namespecified in the policy configuration.The load balancer only inserts a new stickiness cookie if the applicationresponse includes a new application cookie. The load balancer stickiness cookie does not update witheach request. If the application cookie is explicitly removed or expires, the session stops being stickyuntil a new application cookie is issued.
If an application server fails or is removed, the load balancer will try to route the sticky session to anotherhealthy application server.The load balancer will try to stick to new healthy application server and continuerouting to currently stick application server even after the failed application server comes back. However,it is up to the new application server on how it'll respond to a request which it has not seen previously.
In this example, you configure a load balancer for session stickiness when the life of the session followsthat of an application-generated cookie. Before you get started, be sure you've done the following:
• Created a load balancer with Elastic Load Balancing. For information on how to set up a HTTPS/SSLload balancer with the AWS Management Console, command line interface (CLI), or Query API, seeCreate a Load Balancer with SSL Cipher Settings and Back-End Server Authentication (p. 74). Tolearn how to set up a HTTP load balancer with the AWS Management Console, see Get Started withElastic Load Balancing (p. 14).
• Installed the Elastic Load Balancing tool that you plan to use to perform load balancing tasks.You cancreate a session stickiness policy using the AWS Management Console, the command line interface(CLI) or the Query API. For information on installing the CLI or the Query API, see Get Set Up withElastic Load Balancing Interfaces (p. 44).
• For detailed descriptions of the Elastic Load Balancing commands, see the Elastic Load BalancingQuick Reference Card.
• For detailed descriptions of the policy configuration Query API for application-generated HTTPcookies, go to CreateAppCookieStickinessPolicy in the Elastic Load Balancing API Reference
Using the AWS Management Console
To Enable Application-Controlled Session Stickiness
1. Sign in to the AWS Management Console and open the Amazon EC2 console athttps://console.aws.amazon.com/ec2/.
2. On the Amazon EC2 Getting Started page, in the EC2 Dashboard pane, under NETWORK &SECURITY, click Load Balancers.
3. On the Load Balancers page, select your load balancer.
4. The bottom pane displays the details of your load balancer.
5. Click (edit) in the Port Configuration: row.
API Version 2012-06-01157
Elastic Load Balancing Developer GuideEnable Application-Controlled Session Stickiness

6. On the Edit Stickiness for name of your load balancer, port number of your loadbalancer page, click Enable Application Generated Cookie Stickiness.
7. In the Cookie Name box, enter the the name for your cookie, for example my-cookie.
8. Click Save.
9. The Port Configurationrow in the Description pane shows the newly created cookie stickinesspolicy.
Using the Query APITo Enable Application-Controlled Session Stickiness
1. Call CreateAppCookieStickinessPolicy with the following parameters to create anapplication-generated cookie stickiness policy.
• LoadBalancerName = my-load-balancer
API Version 2012-06-01158
Elastic Load Balancing Developer GuideEnable Application-Controlled Session Stickiness

• PolicyName = my-app-cookie-lb-policy
• CookieName = my-cookie
2. Call SetLoadBalancingPoliciesOfListener with the following parameters to enable sessionstickiness for a load balancer using the my-load-balancer policy.
• LoadBalancerName = my-load-balancer
• LoadBalancerPort = 80
• PolicyNames = my-app-cookie-lb-policy
Using the Command Line InterfaceTo Enable Application-Controlled Session Stickiness
1. Use the elb-create-app-cookie-stickiness-policy command to create a loadapplication-generated cookie stickiness policy .
PROMPT>elb-create-app-cookie-stickiness-policy my-load-balancer -p my-app-cookie-lb-policy -c my-cookie
Elastic Load Balancing returns the following:
OK-Creating App Stickiness Policy
2. Use the elb-set-lb-policies-of-listener command to enable session stickiness for a loadbalancer using the my-load-balancer policy.
PROMPT>elb-set-lb-policies-of-listener example-lb --lb-port 80 --policy-names my-app-cookie-lb-policy
Elastic Load Balancing returns the following:
OK-Setting Policies
API Version 2012-06-01159
Elastic Load Balancing Developer GuideEnable Application-Controlled Session Stickiness

Monitor Your Load Balancer Using AmazonCloudWatch
Topics
• Available Metrics (p. 160)
• View Metrics (p. 163)
• Create Alarms (p. 164)
Elastic Load Balancing provides data to Amazon CloudWatch about your load balancers and your back-endapplication instances. The Amazon CloudWatch service collects the data and presents it as readable,near real-time metrics. This metric variable is represented by Amazon CloudWatch as a time-ordered setof data points. Each data point has an associated time stamp and (optionally) a unit of measurement.You can request one or more data points or request an aggregated set of data points called a statisticsset. For example, you might monitor the number of unhealthy instances behind your load balancer in anAvailability Zone over a specified time period.
One reason for monitoring metrics in Amazon CloudWatch is to verify that your system is behaving asyou expect. If an individual metric goes outside what you consider an acceptable range, you will probablywant to be notified. To receive such notification, you can create an alarm in Amazon CloudWatch. ACloudWatch alarm watches over a specified metric and initiates an action if the metric goes outside ofthe specified range. An action can be a notification sent to you.
This section defines the metrics that Elastic Load Balancing sends to Amazon CloudWatch. It also explainshow to view the metrics, and how you can set alarms when a metric meets a condition that you specify.
For information about Amazon CloudWatch, go to Introduction to Amazon CloudWatch.
Available MetricsElastic Load Balancing sends metrics and dimensions for all load balancers to Amazon CloudWatch. Bydefault, Amazon CloudWatch uses these metrics to provide detailed monitoring of the load balancers.You do not need to specifically enable detailed monitoring.
NoteElastic Load Balancing only emits Amazon CloudWatch metrics when requests are flowingthrough the load balancer. If there are no requests or data for a given metric, the metric will notbe reported to CloudWatch.If there are requests flowing through the load balancer, Elastic Load Balancing will measure andsend metrics for that load balancer in 60-second intervals.
Elastic Load Balancing MetricsThe following Elastic Load Balancing metrics are available from Amazon CloudWatch.
The HTTP response code metrics reflect the count of Elastic Load Balancing response codes that aresent to clients within a given time period. If no response codes in the category 2XX-5XX range are sentto clients within the given time period, values for these metrics will not be recorded in CloudWatch.
API Version 2012-06-01160
Elastic Load Balancing Developer GuideMonitor Your Load Balancer Using Amazon CloudWatch

DescriptionMetric
Time elapsed after the request leaves the load balancer until it receives thecorresponding response.
Units: Seconds
Valid Statistics: Minimum, Maximum, Average, and Count
Latency
The number of requests handled by the load balancer.
Units: Count
Valid Statistics: Sum
RequestCount
The number of healthy Amazon EC2 instances registered with the loadbalancer in a specified Availability Zone. Hosts that have not failed morehealth checks than the value of the unhealthy threshold are consideredhealthy. When evaluating this metric, the dimensions must be provided forLoadBalancerName and AvailabilityZone. The metric represents thecount of healthy instances in the specified Availability Zone. Instances maybecome unhealthy due to connectivity issues, health checks returning non-200responses (in the case of HTTP or HTTPS health checks), or timeouts whenperforming the health check. To get the total count of all healthy hosts, thismetric must be retrieved for each registered Availability Zone and then all themetrics need to be added together.
Units: Count
Valid Statistics: Minimum, Maximum, and Average
HealthyHostCount
The number of unhealthy Amazon EC2 instances registered with the loadbalancer in a specified Availability Zone. Hosts that have failed more healthchecks than the value of the unhealthy threshold are considered unhealthy.When evaluating this metric, the dimensions must be provided forLoadBalancerName and AvailabilityZone. The metric represents thecount of unhealthy instances in the specified Availability Zone. Instances maybecome unhealthy due to connectivity issues, health checks returning non-200responses (in the case of HTTP or HTTPS health checks), or timeouts whenperforming the health check.To get the total count of all unhealthy hosts, thismetric must be retrieved for each registered Availability Zone and then all themetrics need to be added together.
Units: Count
Valid Statistics: Minimum, Maximum, and Average
UnHealthyHostCount
Count of HTTP response codes generated by Elastic Load Balancing thatare in the 4xx (client error) series.
Units: Count
Valid Statistics: Sum
HTTPCode_ELB_4XX
API Version 2012-06-01161
Elastic Load Balancing Developer GuideAvailable Metrics

DescriptionMetric
Count of HTTP response codes generated by Elastic Load Balancing thatare in the 5xx (server error) series. Elastic Load Balancing may generate 5xxerrors if no back-end instances are registered, no healthy back-end instances,or the request rate exceeds Elastic Load Balancing's current availablecapacity. This response count does not include any responses that weregenerated by back-end instances.
Units: Count
Valid Statistics: Sum
HTTPCode_ELB_5XX
Count of HTTP response codes generated by back-end instances that are inthe 2xx (success) series.
Units: Count
Valid Statistics: Sum
HTTPCode_Backend_2XX
Count of HTTP response codes generated by back-end instances that are inthe 3xx (user action required) series.
Units: Count
Valid Statistics: Sum
HTTPCode_Backend_3XX
Count of HTTP response codes generated by back-end instances that are inthe 4xx (client error) series. This response count does not include anyresponses that were generated by Elastic Load Balancing.
Units: Count
Valid Statistics: Sum
HTTPCode_Backend_4XX
Count of HTTP response codes generated by back-end instances that are inthe 5xx (server error) series. This response count does not include anyresponses that were generated by Elastic Load Balancing.
Units: Count
Valid Statistics: Sum
HTTPCode_Backend_5XX
Dimensions for Elastic Load Balancing MetricsTo refine the metrics returned by a query, you can use the dimensions for Elastic Load Balancing thatare listed in the table in this section. For example, with the HealthyHostCount metric, you can use thedimensions LoadBalancerName and AvailabilityZone to get the average number of healthy instancesbehind the specified load balancer within the specified Availability Zone for a given period of time.Alternatively, it may be useful to track the minimum number of healthy hosts or the maximum number ofunhealthy hosts to better understand how the health and the count of backend instances change overtime.
Elastic Load Balancing data can be aggregated along any of the following dimensions shown in thefollowing table.
API Version 2012-06-01162
Elastic Load Balancing Developer GuideAvailable Metrics

DescriptionDimension
Limits the metric data to Amazon EC2 instances that are connected to thespecified load balancer.
LoadBalancerName
Limits the metric data to load balancers in the specified Availability Zone.AvailabilityZone
View MetricsYou can view the CloudWatch metrics for your Elastic Load Balancing load balancers directly in the EC2console’s Load Balancer page. The load balancer metrics are displayed as monitoring graphs. Thefollowing metrics are available in the EC2 console:
• Average Latency
• Sum Requests
• Sum ELB HTTP 4XXs
• Sum ELB HTTP 5XXs
• Sum HTTP 2XXs
• Sum HTTP 4XXs
• Sum HTTP 5XXs
To view the metrics from your load balancer
1. Sign in to the AWS Management Console and open the Amazon EC2 console athttps://console.aws.amazon.com/ec2/.
2. On the Amazon EC2 console Getting Started page, in the EC2 Dashboard pane, under NETWORK& SECURITY, click Load Balancers.
3. On the Load Balancers page, select the check box next to your load balancer.
The bottom pane displays the details of your load balancer.
4. Click the Monitoring tab.
The bottom pane displays the graphs of metrics sent by Elastic Load Balancing for the selected loadbalancer.
5. If you want to filter the results by time, select the time range in the Time Range drop-down box.
API Version 2012-06-01163
Elastic Load Balancing Developer GuideView Metrics

6. Click on an individual graph to get a larger view of the individual metric.
The my-test-loadbalancer load balancer used in this example is inactive and is used for displaypurposes only. The monitoring graphs will show data points if the load balancer is active and receivingrequests.
You can also view metrics for your load balancer using the Amazon CloudWatch console, command lineinterface (CLI), or the Query API. For information on using the CloudWatch console to view metrics, seeViewing Your AWS Metrics with Amazon CloudWatch. To view metrics using the command line interface,use the mon-list-metrics command. To view metrics using the Query API, use the ListMetrics action.
Create AlarmsAn alarm watches a single metric over a time period you specify. Depending on the value of the metricrelative to a threshold that you define, the alarm can send one or more notifications to an Amazon SimpleNotification Service (Amazon SNS) topic. Amazon SNS is a web service that enables applications, endusers, and devices to instantly send and receive notifications. For more information, see Get Started withAmazon SNS.
An alarm will send notifications to Amazon SNS when the specified metric reaches the defined range andremains in that range for a specified period of time. An alarm has three possible states:
API Version 2012-06-01164
Elastic Load Balancing Developer GuideCreate Alarms

• OK—This is the state the alarm is in when the value of the metric remains within the range you’vespecified.
• ALARM—This is the state the alarm goes to when the value of the metric goes out of the range you’vespecified and remains outside of the range for a specified time duration.
• INSUFFICIENT_DATA—When the alarm is in this state, it either means that the metric is not yetavailable or not enough data is available for the metric to determine the alarm state.
Whenever the state of an alarm changes, Amazon CloudWatch uses Amazon SNS to send a notificationto the email addresses that you specify.
You can create alarms for your load balancer using either the Elastic Load Balancing wizard in the EC2console or the Amazon CloudWatch console. This section walks you through the steps for creating analarm using the Elastic Load Balancing wizard. For information on creating a load balancer alarm usingthe Amazon CloudWatch console, see Send Email Based on Load Balancer Alarm.
To create an alarm for your load balancer
1. Sign in to the AWS Management Console and open the Amazon EC2 console athttps://console.aws.amazon.com/ec2/.
2. On the Amazon EC2 console Getting Started page, in the EC2 Dashboard pane, under NETWORK& SECURITY, click Load Balancers.
3. On the Load Balancers page, select the check box next to the load balancer for which you want tocreate an alarm.
The bottom pane displays the details of your load balancer.
4. On the Monitoring tab in the bottom pane, click Create Alarm.
5. In the Create Alarm dialog box, set the criteria for your alarm. In this example, we’ll set an alarm ifthe load balancer's latency is above 120 seconds for 1 consecutive period of 5 minutes.
6. The check box next to Send a notification to is selected by default.
If you've already created a SNS topic and want to use it, select your topic from the drop-down box.Skip the next step.
If you do not have a SNS topic, click create topic.
7. In the With these recipients box, enter the email addresses of the recipients you want to notify.Youcan enter up to 10 email addresses, each separated by a comma.
NoteIf your email recepients have not yet been subscribed to the SNS topic, each email recipientwill receive an email from Amazon SNS with a link to confirm their subscription to the SNStopic. If they do not confirm subscription, they will not receive future email Alarm notifications.
8. Configure the threshold for your alarm.
a. In the Whenever boxes, select Average and Latency.
b. In the Is boxes, define the threshold for the alarm by selecting > and entering 120.
c. In the For at least boxes, enter 1 and then select 5 minutes, or you can define your ownevaluation period.
NoteA shorter period creates a more sensitive alarm. A longer period can mitigate briefspikes in a metric.
d. In Name this alarm, a name is automatically generated for you. Click Edit if you want to changethe name.
ImportantYou cannot modify the name after you create the alarm.
API Version 2012-06-01165
Elastic Load Balancing Developer GuideCreate Alarms

9. Click Create Alarm.
10. Click Close.
After you create the alarm, you can use the Monitoring tab to view a summary of alarms that have beenset for that load balancer. From there, you can also edit the alarm.
Delete Your Load BalancerIn this example, you stop using Elastic Load Balancing on a currently load balanced EC2 fleet.You deletethe load balancer, which automatically deregisters the associated instances from the load balancer. Assoon as the load balancer is deleted, you stop incurring charges for that load balancer.
NoteEven after you delete the load balancer and the associated EC2 instances are deregistered, theEC2 instances continue to run.You will continue to incur charges on the Amazon EC2 instanceswhile they are running. For information on stopping your EC2 instances, go to Stopping andStarting Instances in the Amazon EC2 User Guide. For information on terminating your EC2instances, go to Terminate Your Instance.
The following sections include instructions for deleting your load balancer using the AWS ManagementConsole, the Query API, or the command line interface (CLI). If you plan on using either the Query APIor the CLI, be sure that you've installed the tools. For information on installing the CLI or the Query API,see Get Set Up with Elastic Load Balancing Interfaces (p. 44).
API Version 2012-06-01166
Elastic Load Balancing Developer GuideDelete Your Load Balancer

Using the AWS Management ConsoleTo delete your load balancer
1. On the Amazon EC2 Getting Started page, in the EC2 Dashboard pane, under NETWORK &SECURITY, click Load Balancers.
2. On the Load Balancers page, select the check box next to the load balancer you want to delete,and then click Delete.
3. In the Delete Load Balancer windows, click Yes, Delete.
Using the Query APITo delete a load balancer
• Call DeleteLoadBalancer with LoadBalancerName = my-test-loadbalancer.
The operation returns an empty response.
Using the Command Line InterfaceTo delete a load balancer
• Use the elb-delete-lb command as in the following example.
PROMPT> elb-delete-lb my-test-loadbalancer
Elastic Load Balancing returns the following:
Warning: Deleting a LoadBalancer can lead to service disruption to any cus tomers connected to the load balancer. Are you sure you want to delete this load balancer? [Ny]
API Version 2012-06-01167
Elastic Load Balancing Developer GuideUsing the AWS Management Console

Enter Y to delete the LoadBalancer
Elastic Load Balancing returns the following:
OK-Deleting LoadBalancer
API Version 2012-06-01168
Elastic Load Balancing Developer GuideUsing the Command Line Interface

Control User Access to Your AWSAccount
Topics
• No Elastic Load Balancing ARNs (p. 169)
• Elastic Load Balancing Actions (p. 170)
• Elastic Load Balancing Keys (p. 170)
• Example Policies for Elastic Load Balancing (p. 170)
Elastic Load Balancing does not offer its own resource-based permissions system. However, the serviceintegrates with AWS Identity and Access Management (AWS IAM) so that you can specify which ElasticLoad Balancing actions a user in your AWS Account can perform with Elastic Load Balancing resources.
Permissions are granted for resources in general.You can't specify a particular Elastic Load Balancingresource in the policy (e.g., a specific load balancer). For example, you could create a policy that givesthe Managers group permission to use only DescribeLoadBalancers. They could then use thoseactions with any load balancers that belong to your AWS Account.
ImportantUsing Elastic Load Balancing with IAM doesn't change how you use Elastic Load Balancing.There are no changes to Elastic Load Balancing actions, and no new Elastic Load Balancingactions related to users and access control.
For examples of policies that cover Elastic Load Balancing actions and resources, see Example Policiesfor Elastic Load Balancing (p. 170).
No Elastic Load Balancing ARNsAn Amazon Resource Name (ARN) is a unique identifier that some AWS products use to identify resources.For example, you can use an ARN to identify a specific Amazon Simple Queue Service queue or AmazonSimpleDB domain. Elastic Load Balancing has no ARNs for you to use because you can't specify aparticular Elastic Load Balancing resource in an IAM policy. When writing a policy to control access toElastic Load Balancing actions, you use "*" as the resource. For more information about ARNs, go toARNs in the Using IAM.
API Version 2012-06-01169
Elastic Load Balancing Developer GuideNo Elastic Load Balancing ARNs

Elastic Load Balancing ActionsIn an IAM policy, you can specify any and all actions that Elastic Load Balancing offers. The action namemust be prefixed with the lowercase string elasticloadbalancing:. For example:elasticloadbalancing:ConfigureHealthCheck, elasticloadbalancing:* (for all Elastic LoadBalancing Balancing actions). For a list of the actions, go to Actions in the Elastic Load Balancing APIReference.
Elastic Load Balancing KeysElastic Load Balancing implements the following policy keys, but no others. For more information aboutpolicy keys, go to Condition in the Using IAM.
AWS-Wide Policy Keys
• aws:CurrentTime—To check for date/time conditions.
• aws:EpochTime—To check for date/time conditions using a date in epoch or UNIX time.
• aws:principaltype—To check the type of principal (user, account, federated user, etc.) for the currentrequest.
• aws:SecureTransport—To check whether the request was sent using SSL. For services that useonly SSL, such as Amazon RDS and Amazon Route 53, the aws:SecureTransport key has nomeaning.
• aws:SourceArn—To check the source of the request, using the Amazon Resource Name (ARN) ofthe source. (This value is available for only some services. For more information, see Amazon ResourceName (ARN) under "Element Descriptions" in the Amazon Simple Queue Service Developer Guide.)
• aws:SourceIp—To check the IP address of the requester. Note that if you use aws:SourceIp, andthe request comes from an Amazon EC2 instance, the public IP address of the instance is evaluated.
• aws:UserAgent—To check the client application that made the request.
• aws:userid—To check the user ID of the requester.
• aws:username—To check the user name of the requester, if available.
NoteKey names are case sensitive.
Example Policies for Elastic Load BalancingThis section shows several simple policies for controlling User access to Elastic Load Balancing.
NoteIn the future, Elastic Load Balancing might add new actions that should logically be included inone of the following policies, based on the policy’s stated goals.
API Version 2012-06-01170
Elastic Load Balancing Developer GuideElastic Load Balancing Actions

Example 1: Allow a group to create and delete load balancers
In this example, we create a policy that gives access to CreateLoadBalancer andDeleteLoadBalancerThe resource is stated as "*", because you can't specify a particular Elastic LoadBalancing resource in an AWS IAM policy.
{ "Statement":[{ "Effect":"Allow", "Action":["elasticloadbalancing:CreateLoadBalancer", "elasticloadbalancing:DeleteLoadBalancer"], "Resource":"*" } ]}
Example 2: Allow system administrators to configure load balancers
In this example, we create a group for system administrators, and assign a policy that gives access tothe relevant actions.
{ "Statement":[{ "Effect":"Allow", "Action":["elasticloadbalancing:DescribeLoadBalancers", "elasticloadbalancing:ConfigureHealthCheck", "elasticloadbalancing:RegisterInstancesWithLoadBalancer", "elasticloadbalancing:DeregisterInstancesFromLoadBalancer", "elasticloadbalancing:DescribeInstanceHealth", "elasticloadbalancing:EnableAvailabilityZonesForLoadBalancer",
"elasticloadbalancing:DisableAvailabilityZonesForLoadBalancer",
"elasticloadbalancing:CreateAppCookieStickinessPolicy", "elasticloadbalancing:CreateLBCookieStickinessPolicy", "elasticloadbalancing:SetLoadBalancerPoliciesOfListener"], "Resource":"*" } ]}
API Version 2012-06-01171
Elastic Load Balancing Developer GuideExample Policies for Elastic Load Balancing

Troubleshoot Elastic LoadBalancing
The following tables list the troubleshooting resources that you'll find useful as you work with Elastic LoadBalancing.
Troubleshooting Elastic Load Balancing: Error Messages
ResourceTopic
What HTTP error codes can my load balancer return? (p. ?)HTTP error codes
HTTP 400: BAD_REQUEST (p. 173)HTTP 400
HTTP 405: METHOD_NOT_ALLOWED (p. 173)HTTP 405
HTTP 408: Request Timeout (p. 173)HTTP 408
HTTP 502: Bad Gateway (p. 174)HTTP 502
HTTP 503: Service Unavailable (p. 174)HTTP 503
Identifying the source of HTTP errors (p. 175)HTTP response codes
Troubleshooting Elastic Load Balancing: Health Check
ResourceTopic
Troubleshooting Elastic Load Balancing: Health Check Configuration (p. 175)Registered instancesfailing health check
Health check URL and frequency different from configuration in API andconsole (p. 176)
Health check URL doesnot match theconfiguration
Instances treated as unhealthy when sending a 302 redirect response (p. 176)Unhealthy instancesending 302 responsecode to load balancer
API Version 2012-06-01172
Elastic Load Balancing Developer Guide

Troubleshooting Elastic Load Balancing : Registering Instances
ResourceTopic
Taking too long to register back-end instances. (p. 176)Delay in making aregistered instanceavailable for service
Unable to register instance launched from a paid AMI. (p. 177)Unable to register aninstance launched froma paid AMI
OutofService: A Transient Error Occurred (p. 173)Registered instance isout of service
Troubleshooting Elastic Load Balancing: ErrorMessages
This section provides information about the error messages returned by your load balancer, potentialcauses, and steps you can take to narrow down and resolve the issue.
CertificateNotFound: undefinedCause: There is a delay in propogating the certificate to all the regions when it is created using the AWSManagement Console. When the delay occurs, the error message is shown in the last step of the CreateLoad Balancer process.
Solution: Wait approximately 15 minutes and then try again. If the problem persists, contact the AWSSupport Center.
OutofService: A Transient Error OccurredCause: This error message usually indicates some sort of internal problem within the Elastic LoadBalancing service or the underlying network which is quite transient in nature. This temporary issue mayalso occur when Elastic Load Balancing queries the health of the load balancer and its associated back-endinstances.
Solution: Retry the API call. If the problem persists, contact the AWS Support Center.
HTTP 400: BAD_REQUESTDescription: Indicates that the client sent a bad request.
Cause: The client sent a malformed request that does not meet HTTP specifications.
Solution: Inspect the request headers being sent to the back-end EC2 instance for the malformed request.
HTTP 405: METHOD_NOT_ALLOWEDDescription: Indicates that the method length is not valid.
Cause: The length of the method in the request header exceeds 127 characters.
Solution: Check the length of the method.
HTTP 408: Request TimeoutDescription: Indicates that the client cancelled the request or failed to send a full request.
Cause: A network interruption or a bad request construction, such as partially formed headers; specifiedcontent size doesn’t match the actual content size transmitted; and so on.
API Version 2012-06-01173
Elastic Load Balancing Developer GuideTroubleshooting Elastic Load Balancing: Error Messages

Solution: Inspect the code that is making the request and try sending it directly to your registered instances(or a development / test environment) where you have more control over inspecting the actual request.
HTTP 502: Bad GatewayDescription: Indicates that the load balancer was unable to parse the response sent from a registeredinstance.
Cause: Malformed response from the instance or potentially an issue with the load balancer.
Solution:Verify that the response being sent from the instance conforms to HTTP specifications. Contactthe AWS Support Center for further assistance.
HTTP 503: Service UnavailableDescription: Indicates that either the load balancer or the registered instances are causing error. Theerror can be caused by either one of more of the following:
• Cause 1: Insufficient capacity in the load balancer to handle the request.
Solution: This should be a transient issue and should not last more than a few minutes. If it persists,contact the AWS Support Center for further assistance.
• Cause 2: Registered instances closing the connection to Elastic Load Balancing.
Solution: Set idle connection timeouts to more than 60 seconds on your registered instances.
• Cause 3: No registered instances.
Solution: Register at least one instance in every Availability Zone that your load balancer is configuredto respond in. Verify this by looking at the HealthyHostCount metrics in CloudWatch.
• Cause 4: No healthy instances.
Solution: Ensure that you have healthy instances in every Availability Zone that your load balancer isconfigured to respond in. Verify this by looking at the HealthyHostCount in CloudWatch.
• Cause 5: Connection to the client is closed
Solution: If your instances are in a Auto Scaling group, ensure that the desired capacity, if set, is equalto the number of Availability Zones in your Auto Scaling group. Or, reduce the number of Availabilityzones in your Auto Scaling group to match the minumum number of instances specified. By doing so,you make sure that none of your Availability zones is empty.
If your instances are not part of an Auto Scaling group, your client must have closed the connection.
Troubleshooting Elastic Load Balancing: HTTPError Codes
This section provides information about the HTTP error codes returned by your load balancer, potentialcauses, and steps you can take to narrow down and resolve the issue.
What HTTP error codes can my load balancerreturn?Your load balancer will return 400, 405, 408, 502 and 503 error responses in addition to any error responsesreturned by the registered instances.
API Version 2012-06-01174
Elastic Load Balancing Developer GuideHTTP 502: Bad Gateway
Identifying the source of HTTP errorsYour load balancer emits metrics to Amazon CloudWatch for the HTTP response codes sent to clients,identifying the source of the errors as either the load balancer or the back-end instances. For informationon using Amazon CloudWatch and defination of the available metrics, see Monitor Your Load BalancerUsing Amazon CloudWatch (p. 160). The following metrics are available:
• Response code: HTTPCode_ELB_4XX
Cause: Indicates a malformed or a cancelled request from the client.
Solution:See HTTP 400: BAD_REQUEST (p. 173).
Solution:See HTTP 405: METHOD_NOT_ALLOWED (p. 173).
Solution: See HTTP 408: Request Timeout (p. 173).
• Response code: HTTPCode_ELB_5XX
Cause: Either the load balancer or the registered instance is causing the error or the load balancer isunable to parse the response.
Solution: See HTTP 502: Bad Gateway (p. 174).
Solution: See HTTP 503: Service Unavailable (p. 174).
• Response code: HTTPCode_Backend_2XX
Cause: Indicates a normal, successful response from the registered instance(s).
Solution: None
• Response code: HTTPCode_Backend_3XX
Cause: Indicates some type of redirect response sent from the registered instance(s).
Solution:View the access or error logs on your instance(s) to determine the cause.
• Response code: HTTPCode_Backend_4XX
Cause: Indicates some type of client error response sent from the registered instance(s).
Solution: View the access or error logs on your instance(s) to determine the cause.
• Response code: HTTPCode_Backend_5XX
Cause: Indicates some type of server error response sent from the registered instance(s).
Solution: View the access or error logs on your instance(s) to determine the cause.
Troubleshooting Elastic Load Balancing: HealthCheck Configuration
Your load balancer performs health checks on your instances using the protocol, URL, timeout, andinterval specified when you configured your load balancer. However, there are several reasons yourhealth check can fail from the load balancer perspective.This section provides information about potentialcauses and steps you can take to narrow down and resolve the failed health check issues.
Registered instances failing load balancer healthcheckYour registered instances can fail the health check performed by your load balancer for one or more ofthe following reasons:
• Problem: Instance(s) closing the connection to the load balancer.
API Version 2012-06-01175
Elastic Load Balancing Developer GuideIdentifying the source of HTTP errors

Cause: Elastic Load Balancing terminates a connection if it is idle for more than 60 seconds. The idleconnection is established when there is no read or write event taking place on both the sides of theload balancer (client to load balancer and load balancer to the back-end instance).
Solution: Set the idle timeout to at least 60 seconds on your registered instances.
• Problem: Responses timing out.
Cause: When the load balancer performs a health check, the instance may be under significant loadand may take longer than your configured timeout interval to respond.
Solution: Try adjusting the timeout on your health check settings.
• Problem: Failing public key authentication.
Cause: If you are using an HTTPS or SSL load balancer with back-end authentication enabled, thepublic key authentication will fail if the public key on the certificate does not match the public keyconfigured on the load balancer.
Solution: Check if your SSL certificate needs to be updated. If your SSL certificate is current, tryre-installing the certificate on your load balancer.
Health check URL and frequency different fromconfiguration in API and consoleProblem: The health check URL displayed on the console and the API does not match the URL in healthcheck configuration.
Cause: In addition to the health check you configure for your load balancer, a second health check isperformed by the service to protect against potential side-effects caused by instances being terminatedwithout being deregistered. To perform this check, the load balancer opens a TCP connection on thesame port that the health check is configured to use, and then closes the connection after the healthcheck is completed.
Solution: This extra health check does not affect the performance of your application because it is notsending any data to your back-end instances.You cannot disable or turn off this health check.
Instances treated as unhealthy when sending a302 redirect responseProblem: The load balancer treats a redirect response (302) as a failed health check.
Cause: For an HTTP(S) health check, any response other than a 200 response will be treated as a failedhealth check.Your load balancer does not follow redirect requests in order to determine if a 200 responsewill eventually be returned.
Solution: See the preceding section Troubleshooting Elastic Load Balancing: Health CheckConfiguration (p. 175) to troubleshoot the failed health check.
Troubleshooting Elastic Load Balancing:Registering Instances
When you register an instance with your load balancer, there are a number of steps that are taken beforethe load balancer will begin sending requests to your instance. This section provides information aboutpotential causes and steps you can take to narrow down and resolve the issues your load balancer mightencounter when registering your back-end instances.
Taking too long to register back-end instances.Problem: Registering instances taking longer than expected to be In Service.
API Version 2012-06-01176
Elastic Load Balancing Developer GuideHealth check URL and frequency different from
configuration in API and console

Cause:Your back-end instances might be failing health check. After the initial instance registration stepsare completed (it can take up to approximately 30 seconds), the back-end instances go through the healthchecks.Your load balancer will not treat your back-end instances as In Service until it has successfullymet the healthy threshold defined in your health check configuration.
Solution:Try the steps recommended in the preceding section Registered instances failing load balancerhealth check (p. 175).
Unable to register instance launched from a paidAMI.Some older paid AMIs cannot be registered with your load balancer due to special pricing on the bandwidththat would be inaccurately billed if the AMI were used with a load balancer that has its own bandwidthpricing.
API Version 2012-06-01177
Elastic Load Balancing Developer GuideUnable to register instance launched from a paid AMI.

Document History
The following table describes the important changes to the Elastic Load Balancing Developer Guide.
• API version: 2012-06-01
• Latest documentation update: June 3, 2013
Release DateDescriptionChange
3 June 2013Added information about configuring Route 53 DNSfailover for load balancers. For more information, seeConfigure DNS Failover for Your LoadBalancer (p. 150).
Support for DNSFailover
20 May 2013Added information about the HTTP methods supportedby Elastic Load Balancing. For more information, seeHTTP Methods (p. 8).
HTTP Methods
28 March 2013Added information about viewing Amazon CloudWatchmetrics and creating alarms for a specified loadbalancer using the Monitoring tab in the console. Formore information, see Monitor Your Load BalancerUsing Amazon CloudWatch (p. 160).
Console supportfor viewingAmazonCloudWatchmetrics and forcreating alarms
11 March 2013Added information about default VPC and loadbalancing Amazon EC2 instances launched within thedefault VPC. For information on default VPC, seeDefault VPC (p. 112). For information on creating aload balancer within a default VPC, see Create a BasicLoad Balancer in Default VPC (p. 34).
Load Balancing inDefault VPC
API Version 2012-06-01178
Elastic Load Balancing Developer Guide

Release DateDescriptionChange
10 June 2012With this release, a load balancer in Amazon VirtualPrivate Cloud (Amazon VPC) can be made eitherinternal or Internet-facing. An internal load balancerhas a publicly resolvable DNS name that resolves toprivate IP addresses. An Internet-facing load balancerhas a publicly resolvable DNS name that resolves topublic IP addresses. For more information, see Createa Basic Internal Load Balancer in AmazonVPC (p. 114).
Internal LoadBalancing inAmazon VPC
18 May 2012Added information about console support for managinglisteners, certificates, and cipher settings for existingload balancers. For information on managing listenersand cipher settings, see Add a Listener to Your LoadBalancer (p. 129) and Delete a Listener from Your LoadBalancer (p. 134). For information on managingcertificates, see Update an SSL Certificate for a LoadBalancer (p. 139).
New features
3 April 2012Folded the previously separate Elastic Load BalancingGetting Started Guide into this guide. For moreinformation, see Get Started with Elastic LoadBalancing (p. 14).
Moved GettingStarted information
3 April 2012Added a section on choosing the listenerconfigurations for your load balancer that work bestfor your use case. For more information, see ConfigureListeners for Your Load Balancer (p. 65).
New listenerconfigurationcontent
3 April 2012Added a section on troubleshooting Elastic LoadBalancing that provides information on issues youmight encounter when using Elastic Load Balancing,discuss the causes, and the steps you can take toresolve the issue. For more information, seeTroubleshooting ELB (p. 172).
Newtroubleshootingcontent
3 April 2012Added documentation for adding a listener to yourload balancer and for deleting a listener from your loadbalancer using the Query API or the command linetool. For more information, see Add a Listener to YourLoad Balancer (p. 129) and Delete a Listener from YourLoad Balancer (p. 134).
New content onadding anddeleting listeners
21 November 2011Updated the API version to 2011-11-15 and addeddocumentation for using Elastic Load Balancing onAmazon VPC. For more information, see DeployElastic Load Balancing in Amazon VPC (p. 111).
New features
21 November 2011Added new content for de-registering Amazon EC2instances from your load balancer. For moreinformation see, De-Register and Register AmazonEC2 Instances (p. 137).
New content
21 November 2011Changed the title of Using Elastic Load Balancing toAccessing Elastic Load Balancing. Changed the titleof User Scenarios to How Do I Use Elastic LoadBalancing in Amazon EC2.
Restructuredcontent
API Version 2012-06-01179
Elastic Load Balancing Developer Guide

Release DateDescriptionChange
17 October 2011Added documentation for monitoring the load balancerusing Amazon CloudWatch. For more information seeMonitor Your Load Balancer Using AmazonCloudWatch (p. 160).
New content
17 October 2011Moved Using Domain Names With Elastic LoadBalancing and Using Ipv6 with Elastic Load Balancingtopics from Using Elastic Load Balancing section andplaced it under User Scenarios section.
Restructuredcontent
30 August 2011Updated the API version to 2011-08-15 and addeddocumentation for the new configurable SSL ciphers,back-end SSL, and back-end server authenticationfeatures. For more information, see Creating aHTTPS/SSL Load Balancer (p. 74).
New features
30 August 2011Consolidated the instructions for setting up a loadbalancer with HTTP support and with HTTPS supportinto Create a Load Balancer with SSL Cipher Settingsand Back-End Server Authentication section.
Restructuredcontent
04 August 2011Added instructions for installing the Elastic LoadBalancing command line tool For more information,see Installing the Command Line Interface (p. 45).
New content
24 May 2011Updated the API version to 2011-04-05 and addeddocumentation for the new zone apex domain namesfeature. For more information, see Configure CustomDomain Names for Your Load Balancer (p. 144).
New feature
24 May 2011Added documentation for the new Elastic LoadBalancing security group for back-end applicationinstance lock-down. For more information, see ManageSecurity Groups in Amazon EC2 (p. 100).
New feature
24 May 2011Added documentation for the new Internet Protocolversion 6 (IPv6) feature. For more information, seeUse IPv6 with Elastic Load Balancing (p. 109).
New feature
24 May 2011Added information about controlling user access toyour AWS account with AWS Identity and AccessManagement. For more information, see ControllingUser Access to Your AWS Account (p. 169).
Added content
API Version 2012-06-01180
Elastic Load Balancing Developer Guide

Glossary
Access Key ID An alphanumeric token that uniquely identifies a request sender. This ID isassociated with your Secret Access Key.
Amazon Machine Image An Amazon Machine Image (AMI) is an encrypted machine image stored inAmazon Simple Storage Service (Amazon S3). It contains all the informationnecessary to boot instances of your software.
Amazon Resource Name (ARN) A standardized way to refer to an AWS resource. For example:arn:aws:iam::123456789012:user/division_abc/subdivision_xyz/Bob.For more information about ARNs, see Using Identifiers in the AWS Identity andAccess Management User Guide .
Availability Zone Amazon EC2 locations are composed of Regions and Availability Zones.Availability Zones are distinct locations that are engineered to be insulated fromfailures in other Availability Zones and provide inexpensive, low latency networkconnectivity to other Availability Zones in the same Region.
certificate A credential that some AWS products use for authentication of AWS Accountsand Users. Also known as an X.509 certificate. The certificate is paired with aprivate key, and it has an AWS-assigned certificate ID associated with it.
key A credential that identifies an AWS Account or User to AWS (see Secret AccessKey).
Region Amazon EC2 locations are composed of Regions and Availability Zones. Regionsare geographically dispersed and will be in separate geographic areas or countries.Regions consist of one or more Availability Zones.
Secret Access Key A key assigned to you by Amazon Web Services (AWS) when you sign up for anAWS account. Used for request authentication.
unbounded Term used in Web Service Definition Language (WSDL), e.g.maxOccurs="unbounded", meaning that the number of potential occurrences isnot limited by a set number. Very often used when defining a data type that is alist of other types, such as an unbounded list of integers (element members) oran unbounded list of other complex types that are element/members of the listbeing defined.
API Version 2012-06-01181
Elastic Load Balancing Developer Guide

IndexAAccess Key ID, 181Amazon Machine Image (AMI), 181API
SOAP, 60User Scenarios, 71, 74, 95, 98, 129, 134, 137, 139, 154,154, 157, 160, 166User Scenarios ELB in VPC, 111
Architectural OverviewElastic Load Balancing, 10
ARNsfor Elastic Load Balancing, 169
authenticationSOAP, 61
Availability Zone, 181AvailabilityZones, 7
CCNAME record, 145
Ddefault VPC
User Scenarios ELB in Default VPC, 34Dimensions
dimensions available for Elastic Load Balancing groupmetrics, 162
domain name, 144
EElastic Load Balancing, 169
Amazon CloudWatch metrics available, 160ELB Healthcheck, 7
GGettingStarted
Elastic Load Balancing, 14
HHTTPS Support, 9
Kkey terms
AvailabilityZone, 7EC2Instances, 6Health Check, 7HTTPS Support, 9load balancer, 6Sticky Sessions, 8
LListener Configurations
Elastic Load Balancing, 65Load Balancer, 6
MMetrics
available metrics, 160
Ppolicies
examples, 170programming language support, 60
QQuery, 52
RRegion, EC2 Region, 181Regions, 48RegisteringInstances, 6response structure, 62response structure, SOAP, 62
SSecret Access Key, 181SOAP
API, 60authentication, 61response structure, 62, 62WSDL, 60
StickySessions, 8
TTroubleshoot
ElasticLoadBalancing, 172Troubleshooting
ELB, 172
Uunbounded, 181User Scenarios
Add Listeners, 129API, 71, 111default VPC, 34Delete Listeners, 134How to Create a Load Balancer, 74How to de-register instances from the Load Balancer,137How to Delete A Load Balancer, 166How to Disable an Availability Zone from aLoad-Balanced Application, 98How to Enable Application-Controlled SessionStickiness, 157
API Version 2012-06-01182
Elastic Load Balancing Developer Guide

How to Enable Duration-Based Session Stickiness,154How to Expand Load Balanced Application to anAdditional Availability Zone, 95How to Update an SSL Certificate for a Load Balancer,139Monitoring Your Load Balancer, 160Sticky Sessions, 154
Wweb services references, 63WSDL, 60
Zzone apex, 144
API Version 2012-06-01183
Elastic Load Balancing Developer Guide