Embed Size (px)
Citation preview

ED 264 059
AUTHORTITLE
INSTITUTION
SPONS AGENCYPUB DATECONTRACTNOTEAVAILABLE FROM
PUB TYPE
EDRS PRICEDESCRIPTORS
DOCUMENT RESUME
RC 015 536
Payne, Milton R.Using the Outdoors to Teach Science: A Resource Guidefor Elementary and Middle School Teachers.ERIC Clearinghouse on Rural Education and SmallSchools, Las Cruces, N. Mex.National Inst. of Education (ED), Washington, DC.85NIE-400-83-002354p.; For related document, see RC 015 540.ERIC/CRESS, Department 12, Box 3AP, New Mexico StateUniversity, Las Cruces, NM 88003 ($5.50).Guides - Classroom Use - Guides (For Teachers) (052)-- Information Analyses - ERIC Information AnalysisProducts (071)
MF01/PC03 Plus Postage.Concept Teaching; *Curriculum Enrichment; ElementaryEducation; *Elementary School Science; *ExperientialLearning; Fundamental Concepts; Lesson Plans;*Outdoor Activities; *Outdoor Education; *ScienceActivities; Scientific Attitudes; ScientificConcepts
ABSTRACTThe first in a series of booklets on using outdoor
education methodologies to enhance the academic curriculum, thisguide is written to help teachers of grades K-8 develop activities toenrich science instruction. The introductory sections define outdooreducation and provide a rationale for outdoor science teachingstressing the opportunities it provides for creativity, inquiry, andproblem solving. The bulk of the guide consists of detailed plans foroutdoor sites. Each activity is adaptable for use in several gradesand follows a basic lesson plan format stating purpose, concepts,objectives for learners, materials, and procedures. The first set ofthree activities illustrates ways to introduce students to the schoolgrounds as an outdoor laboratory. Topics are soil, leaves, andlitter. The remaining six activities cover concepts of observation,classification, logical thinking and inference, interdependence, andcommunity. Activity titles include: "Observing: The Basic; ofScience," "A School Yard Alphabet Hike," "The Mystery Sack,""Similarities and Differences," "The Web of Life," and "The 113 UnitHomestead." An appendix lists 17 organizations providing informationabout outdoor education. (JHZ)
***********************************************************************
Reproductions supplied by EDRS are the best that can be madefrom the original document.
*********************k*************************************************

US. DEPARTMENT OF EDUCATIONNATIONAL INSTITUTE OF EDUCATION
EDUCATIONAL RESOURCES INFORMATIONCENTER (ERIC!
N/Tho document has been reproduced asreceived from the person or organizationoriginating itMinor changes have been made to Improve
reproduction quality
Points of view or opinions stated in this docu
merit do not necessarily represent official ME
position of policy2

-1/
Using the Outdoors to Teach Science:
A Resource Guide for Elementary and Middle School Teachers
by
Milton R. PayneProfessor, Science and Outdoor Education
School of EducationStephen F. Austin State University
Nacogdoches, Texas
1985
Educational Resources Information Center (ERIC)Clearinghouse on Rural Education and Small Schools (CRESS)
New Mexico State UniversityLas Cruces, New Mexico 88003-0042
3

The NationalInstitute ofEducationU.S. Department of
EducationWashington D.C. 2020$
This publication was prepared with funding fromthe National Institute of Education, U.S.Department of Education under contract no.NIE 400-83-0023. The opinions expressed in thisreport do not necessarily reflect the positions orpolicies of NIE or the Department of Education.
Cover design by Debbie Guerrero.

Table of Contents
Preface iv
Note to Teachers
Introduction 1
The What, Why, and Where of Outdoor Teaching 2
Outdoor Science Teaching--A Key to the Developmentof Creativity, Inquiry, and Problem Solving 5
Outdoor Science Activities for School Groundsand Other Easy-Access Outdoor Sites 6
I. Mini-Excursions 111. Soil 122. Leaves 133. Litter 14
II. Observing: The Basis of Science 16
III. A School Yard Alphabet Hike 20A School Yard Alphabet Hike Task Sheet 24
IV. The Mystery Sack 27
V. Similarities and Differences 30
VI. The Web of Life 39
VII. The 113 Unit Homestead 43
Appendix: Sources of Outdoor Education Information 47
About the Author 49
5 iii

Preface
This publication initiates an ERIC/CRESS series onutilizing outdoor education methodologies to enhance theacademic curriculum. The series is written for teachers inelementary and middle schools and for personnel at outdooreducation centers. This booklet will help classroomteachers develop activities that will make the teaching ofscience an enjoyable and educationally rewarding experience.
Recent events have highlighted the need to intensify andpromote science education in American schools. Since use ofoutdoor methodologies provides opportunities for students to
see science in action, these kinds of activities areparticulary appropriate as an introduction to the laboratorysciences available in later school years. These learningexperiences provide the sound base for study recommended bythe National Commission on Excellence in Education for thosecrucial first eight years of study.
Dr. Milton Payne brings to this work 20 years ofexperience in the areas of science education, outdooreducation, middle school teaching, and individualizedinstruction. He currently teaches several courses inoutdoor education using a multidisciplinary approach and hasconducted workshops and seminars in more than 30 schooldistricts including Houston, Fort Worth, Texarkana, andTyler. Dr. Payne was also one of the Founders of the Texas
Outdoor Education Association.
Elaine Roanhorse BenallyMonitor for Outdoor Education
ERIC Clearinghouse onRural Education andSmall Schools
iv 6

Note to Teachers
I hope that the activities presented in this guide willhelp you add a new dimension to your instruction. Theactivities I have included are those that will help yourecognize the number of different science concepts that canbe taught more effectively (and as such, will be moreinteresting to students), in an outdoor environment. Nowit's your turn. Look through your textbook, curriculumguides, and other sources. You will find many good scienceactivities. Try your hand at developing outdoor lessonplans for some of these activities. Once you get started, Ithink you will find the task very interesting. I alsobelieve that once you start using and developing outdoorscience activities, you will find the excitement of thechildren you teach reward enough for the efforts you haveextended. Good luck and happy outdoor teaching!
Milton Payne
7

Introduction
The purpose of this booklet is to help the classroom teacher
develop activities which will make the teaching of science an enjoyable
and educationally rewarding experience. Many teachers feel
unprepared to teach science for a variety of reasons. Scme feel they do
not know enough science to be comfortable with the subject. Other
teachers think they do not have enough laboratory equipment. Still
others may have concluded that they do not possess the skills necessary
to develop an "activity-centered" science curriculum. If you include
yourself in any of these categories, or if you are interested in some
new ideas and activities to enrich a science program you have already
developed, then read on . . . this booklet vies written just for you.
8

The What, and mere of Outdoor Teaching
It is important that teachers have an educationally sound reason,
purpose, or rationale for what they do. As teachers, we have to make
choices which will determine the effectiveness of our instruction. Why
do we sometimes choose a film to present a subject rather than have
students read home book? Why, when teaching science, do we choose a
teacher demonstration rather than an experiment conducted by our
students? Since we constantly make such curriculum decisions, they must
be based on our best judgment. We should, therefore, be able to explain
the reasons for our educational decisions to students, parents, the
principal, and other interested persons.
If we plan to take our students outside (which is what this booklet
is all about), then we must be able to justify such action: we need a
purpose for going outside with our class. But before we can develop a
rationale for outdoor teaching, we must first get clearly in mind what
is meant by "outdoor education" or "outdoor teaching." When we research
this subject by reading professional journals and talking with teachers
from schools that have "outdoor education" programs or subjects, it
becomes clear that this term has many meanings.
We need some kind of "handle" for the term, or we cannot easily
talk about it. And, practically speaking, it will be difficult to
convince our principal that we are providing our students with the most
effective learning experiences possible unless we ,an clearly
communicate what it is that we are doing.
I propose the following definition for "outdoor education":
Outdoor education is a teaching method or strategychosen by a teacher as the most effective means ofinsuring a student's mastery of selected objectives
2

of the curriculum. It involves students in out-of-classroom activities which are direct and relevantand which are difficult or impossible to providewithin the classroom.
It now becomes easy to discuss outdoor education. It is a method of
instruction. A teacher uses reading groups, learning centers, and
classroom bulletin boards because these are effective instructional
methods. Outdoor education is one of the many teaching methods
available to teachers.
The next point to understand is that a particular method or
strategy will not be equally effective for all objectives of the
curriculum. It is also true that certain methods of instruction are
more effective than others with certain groups of students. Different
objectives and different children call for varying instructional
approaches. For many objectives of the science curriculum, for much
content found in life, earth, and physical science, and for many
children, out-of-classroom environments, resources, and activities
provide the most effective means of instruction.
Let's examine two examples. The first grade teacher who interrupts
the reading period to let her students go out on the school grounds
during the first snowfall of the year is wise enough to take advantage
of "the teachable moment"--that golden opportunity that is here for a
moment and then possibly lost forever. She provides her children with
small pieces of black felt or construction paper and magnifying lenses
so that they can catch snowflakes and closely examine their unique
designs. This is a great teacher! By making such a choice, she matches
an instructional objective (having to do with snowflakes) with an
appropriate method of instruction. It would be impossible to provide
such an experience inside the classroom.
Let's think about another situation with which, I dare say, each of
us is familiar. I doubt that any person gets through 12 years of school
without being taught "about" the different types of clouds at least six
3
.10

different times. In the first grade, the teacher shows the children
pictures of clouds. In the third grade, the teacher shows pictures with
the names of the clouds printed in big block letters under them. In the
fourth grade, the teacher shows the children pictures, rolls down a
chart at the front of the room, and lets the students read about clouds
in their textbooks. By junior high school, teachers still do all of
these things but add a filmstrip about clouds. Finally, in high school,
each student writes a term paper using no less than five references,
including the Encyclopedia Britannica; then, at the end of the unit, a
45-minute film, complete with sound and color, is shown.
Ask 10 adults to name the three basic cloud types, and it's not
likely you'll find 4 of them who can correctly name all 3--and besides,
who's interested in clouds anyway! In 12 years of school, not one
teacher took the students outside the classroom to look at and study the
clouds in the sky. This example, and so many similar situations, helps
us appreciate the truth found in the classic Chinese proverb:
I hear and I forgetI see and I rememberI do and I understand.
The out-of-doors is a great place for children and youth to do science!
11

Outdoor Science TeachingA Key to the Development
of Creativity, Inquiry, and Problem Solving
Science is the greatest subject in the school curriculum to teach.
Why? Because it is lots of fun to teach and because, of all subjects,
it has the best chance of developing children's creativity and thinking
skills. A biased statement? Yes, it is. But I would like to think
that there is a great deal of truth to it.
Kids love science. Young kids especially love it; they like to
bring things to school. They are full to the brim with questions about
their environment and everything in it. They are curious, Inquisitive,
seeking, and searching--until, for many, too much school takes these
traits away from them.
We don't want to do that. Educators must encourage--not
discourageoriginal thought, creativity, and inquiry into the unknown
and unanswered. Schools, of all places, must be places where thinking
and problem solving are nurtured as the priceless skills they are.
Science has the power, in the hands of a creative teacher, to accomplish
all these things. It can do so inside the classroom, but in many cases
it works even better outside the classroom.
12

Outdoor Science Activities for School Grounds
and Other Easy-Access Outdoor Sites
There are two areas, or components, of science as a discipline or
subject--content and process. Content has to do with the information of
science--the facts, concepts, and theories. Process has to do with the
methods of science--the particular means of inquiry used in seeking
answers to questions and solutions to problems.
Science in school, at all levels, is too often taught as an
accumulation of factual information. Scientific information is an
important part of science, but by itself it soon dulls the mind and
curiosity and becomes boring to students and teachers alike.
It has been said that blood is the life of the flesh. In science
teaching and learning, process is the life of the knowledge and
information of the subject. Process is what makes science fun to teach.
Process makes science the most interesting subject in the school
curriculum. Process is the "finding out": it's the questions, the
investigations, and the experiments. It's the "life' of the subject.
But, as with the body, you must have flesh and blood to have life. Thus
to have a well-balanced science curriculum, we need both science
information and the methods of science. Scientists use particular
processes or skills to investigate, to discover. Children also can use
these skills for the same purposes--and in so doing, they can accumulate
knowledge of scientific information and develop their own processes of
rational thought.
A great place to accumulate scientific information and develop
rational thinking processes isz.-you guessed it--outside the classroom!
I hope the following ideas and activities will begin for sou a nc' and
exciting excursion into a new world of teaching. It is the real world,
not a world of chalkboard and textbook, but the world just outside your
classroom door.
6
13

These activities won't cost your school any money. You won't need
any fancy equipment. And, if you will start correctly, you will finally
get to teach in a situation where there are no discipline problems--
well, at least not many.
How do you get started with outdoor teaching? The answer is--you
get started very slowly. No matter where you teach or what grade or
subject you teach, you will have confusion and discipline problems with
outdoor teaching unless you religiously do two things: start slowly and
plan well.
Why will you have discipline problems? Because kids are used to
going outside for what reason? You're right--to play. That's where
they go at recess. The playground is outside. You go to school
inside; you play outside.
So what do we have working for us? The first thing is that we must
recognize the positive psychology of "going outside." Kids love it!
Let's use this for our benefit. We can put this attitude to use in our
efforts to improve the educational opportunities of the children we
teach.
When you have collected or developed some great outdoor science
activities, when you're excited and enthusiastic and can hardly wait to
get your kids outside for their first science activity . . . wait.
Don't go yet. Those 25 or 30 kids of yours can drain all of your new-
found excitement and enthusiasm and trample underfoot your "great
activity" as they stampede toward the swings and gym sets. Start
slowly!
When you have your outdoor science activity prepared and ready,
then it's time to start preparing your students. Explain to them that,
in a few days, you are going to do some science activities outside on
the school grounds. Name some specific location. Explain in detail
7
14

what you are going to do. Discuss with the class the behavior you
expect of the group while outside. Do this several times.
Your first activity should be short, very short--no more than 5
minutes. You have been studying rocks, so you take the children to a
specific location on the school grounds. Each child picks up a rock and
places it in a sack: then you herd them back into the classroom where
each child gets to describe his rock.
Keep your first activities short. Each child should understand
exactly what he is to do. Introduce the objective of the outdoor
activity indoors, do the activity, return to your room, and complete the
activity indoors.
You will modify this procedure according to the age and behavior
characteristics of your students. However, if you will begin slowly and
use simple and very specific tasks for your first few excursions outside
the classroom, then you will experience few, if any, problems when you
involve your class in longer, more extensive outdoor activities.
The following activities have been chosen as ones which can most
easily get you started as a successful "outdoor teacher." These are
given to get you started. Your best activities are the ones you will
develop yourself. It is easy to develop outdoor science activities.
Examine your science curriculum guide or your textbook and ask yourself,
Can this activity--this objective--be taught more effectively indoors
or outside?" With a little practice, you will soon be saying "outside"
for much of your science curriculum. You will then be developing your
own outdoor activities and modifying indoor activities so that they
become more effective when performed in the outdoor environment.
The outdoor science activities which follow are not designated by
grade level. You will find activities which, with only slight
modift^ation, can be used successfully in multiple grades. The
activities are written using a basic lesson plan format. Although
8 15

objectives and concepts are stated, most of the activities may be
revised or their emphases changed to suit individual teacher needs and
goals.
Each lesson contains comments to help identify problems to watch
for as the lesson is being taught. Also included, when appropriate, are
suggestions about planning the lesson and following up in the classroom
as well as specific content information.
The first set of activities is called mini-excursions. Their
purpose is to illustrate ideas which can be used to initiate students
into the outdoor laboratory--the school grounds. They establish
behavior guidelines and help the children begin the transition from
viewing the school grounds as only a "playground" to understanding that
it is also a place where they are going to learn lots of neat things
about science. Depending upon the nature of the class, it may be
necessary to develop additional mini-excursions before children are
engaged in longer, more involved activities. Remember, these first
outdoor experiences will set thb stage. Success and good behavior with
these activities will help insure success with your future activities.
Plan well and be as organized as possible.
Topics for other mini-excursions include plants, insects, clouds,
weather, textures, shapes, colors, rocks, ants, and many other subjects
in the fields of life and earth science.
One note of caution: since you will be taking children outside, it
is wise to consider potential areas of danger. If there is an area of
the school grounds (or neighborhood park, or other area selected for
outdoor learning) which contains potential hazards, you may need to
establish an "off limits" area. It is also a good idea to teach a unit
on "outdoor safety" before taking classes outside and to have a first
aid kit handy in case of ant stings or skinned knees. School grounds,
parks, and other such outdoor areas are generally quite safe. However,
16

accidents can happen anywhere. Prepare yourself and your children for
such eventualities.
10
17

I. MINI-EXCURSIONS
A. Purpose:
The purpose of these activities is to introduce students to
the use of the outdoors as a resource for learning.
B. Concept:
The outdoors provides many resources useful in developing an
understanding of science and in acquiring certain basic skills.
C. Objectives:
After completing the following activities, the students will:
1. Appropriately manage their behavior to the extent thatthey can be responsible learners in an out-of-classroomenvironment.
2. Describe general rules of behavior appropriate for out-of-classroom learning experiences.
3. Demonstrate a positive attitude toward outdoor learningexperiences.
4. Develop the knowledge and skill associated with theparticular activity.
D. Materials:
Materials are listed separately for each excursion.
E. Activities and Procedures (details are on the following pages):
Mini-Excursion 1: Soil
Mini-Excursion 2: Leaves
Mini-Excursion 3: Litter
11
18

Mini-Excursion 1: Soil
12
Time:
Outside--5 minutes.
Materials:
1. Magnifying lenses.
2. Sheets of newspaper.
3. Several small garden spades (kitchen spoons will do).
4. One small container for each student.
Objectives:
The student will:
1. Discover the nature and properties of soil.
2. Develop skill in the use of hand magnifiers.
3. .Use the senses to collect data.
Procedure:
Introduce the subject of soil in the classroom. What is soil?
Is it the same as "dirt"? Why is soil important? How do we use
soil? Discuss the correct use of the magnifying lenses.
For this introductory activity, take your students to apredetermined area of the school grounds. Have each child collect
a sample of soil. Return to the classroom. Students can pour
their soil samples on a sheet of newspaper. They should examine
the soil using appropriate senses to discover texture, color,
smell, etc. They should use magnifying lenses to discover elements
of the soil not readily observable with the unaided eye. Discuss
the various discoveries the children have made. Return the soil to
the area from which it was removed.
19

Mini-Excursion 2: Leaves
Time:
Outside--5-10 minutes.
Materials:
1. Sacks for collecting leaves.
2. Butcher paper.
Objectives:
The student will:
1. Use comparators: length, area, shape, height, size,texture, and color.
2. Observe similarities and differences.
3. Group leaves by comparing similarities anddifferences.
Procedure:
You may wish to use this activity as an introduction to the
process of classifying. In the classroom, discuss how objects have
properties in common. For example, how are a tree and a rosebush
(or other plants of your choice) alike? How are they different? In
what ways are our shoes alike/different? Discuss properties and
characteristics of objects--color, size, use, shape, etc.
Take the class to an area of the school grounds where there
are leaves on the ground. Discourage removing leaves from living
trees or shrubs. Have each student collect several leaves that he
especially likes. Return to the classroom. Group the children in
teams of two or three. The students should identify how the leaves
are alike and how they are different. Students may group leaves
into sets determined by the properties they have identified. You
may want the children to make a simple classification key on a
large piece of butcher paper. Children can then share the ways
they grouped the leaves. They might see if different leaves from
other groups would fit the grouping they have developed.
13
20

Mini-Excursion 3: Litter
14
Time:
Outside -- 5-10 minutes.
Materials:
1. Paper sacks.
2. Butcher paper or poster board.
3. Felt-tip pens.
Objectives:
The student will:
1. Communicate data in an appropriate form.
2. Identify different kinds of litter.
3. Discuss problems which are caused by litter.
4. Develop solutions for problems caused by litter.
Procedure:
Litter exists all around us. It is evident on any school
ground. Discuss the types of litter which are likely to be found
on the school grounds. Ask the students how their lives may be
affected by litter.
Give each student a paper sack. Walk arcund the school
grounds. Each student is to collect different kinds of litter.
Return to the room. Group the children in teams of four. Provide
each group with a sheet of butcher paper or poster board. Have
students discuss the different types of litter that they have
collected. Litter groups might include such things as paper,
metal, plastic, cloth, wood, etc. Older students might include
groups such as biodegradable and nonbiodegradable. Once students
have developed groups for the litter they have collected, have each
team combine each team member's litter collection. They can then
count the items collected within each of their groupings. Instruct
the class in communicating the data they have organized. One good
21
way is through the use of a graph. A bar graph would be
appropriate for this kind of data. Teams can then develop graphs
on butcher paper or poster board. You might want to make a graph
on the chalkboard which would be a composite of the data from each
team.
Discuss such issues as types of litter found most often/least
often and the effects of litter. This provides an opportunity to
introduce the concept that litter is a form of pollution. Have the
students suggest ways to reduce the amount and effects of litter on
the school grounds as well as in other areas such as parks, cities,
and homes.
Note: The previous three activities illustrate the types of
introductory activities you should use with your students. You may need
to develop several more short "excursions" before beginning the more
involved activities which follow.
15
22

II. OBSERVING: THE BASIS OF SCIENCE
A. Purpose:
This activity is designed to help children become aware of
the fact that few of us are careful observers and that the skill of
careful and accurate observation is the basis of scientific problem
solving.
B. Concepts:
1. The skill of observation is necessary in scientificinvestigation.
2. Few c,:lople observe as well as they should.
3. The skill of observation can be improved.
C. Objectives:
After completing the following activities, the student will:
1. Demonstrate an improved awareness of the importance ofaccurate observation.
2. Explain several reasons why most individuals fail toobserve objects and events as carefully as they should.
D. Materials:
Two large paper bags.
E. Activities and Procedure:
Begin this activity with a general discussion of problem
solving, scientific method, t:.t: skills of a scientist, or something
similar. Ask the children what they think it takes to be a good
scientist. List on the chalkboard the ideas that the students
identify as answers to this question.
16
After this discussion, explain to the students that you are
going outside to do an activity. Before you leave the room, review
the guidelines for behavior.
23

Select an outdoor area where the students will be able to find
a small rock without too much trouble. They will need the rock for
the second part of the activity.
Explain to the students that they are to choose a partner.
This is best done in teams of two; however, a team of three
students is acceptable in the event of an uneven number. Explain
that they are to either stand or sit, as they wish, and talk to one
another for a few minutes about a subject you have selected.
Choose any subject you think will appeal to them. What they did
over the weekend, their favorite singer, hobbies--something that
will make conversation easy. Explain that they will be signaled
when you want them to stop the conversation.
Allow whatever time you think is appropriate. Then stop the
children and get their attention. Ask them to turn around with
their backs to their partners. Explain that they should not, at
this point in the activity; look at their partners. Ask if
everyone understands.
After asking the children to listen carefully, explain that
you are going to give directions for the next part of the activity.
One student in each team is to start this part of the activity
by asking his partner questions about himself. Questions should
relate to observations the partner could easily have made during
the discussion such as: "What color are my eyes?" "Am I wearing
glasses?" "What color is my shirt?" "Am I wearing a belt?"
Suggest a few questions; then let the students make up others
of their own. Partners should take turns asking a series of
questions about each other. Depending upon the age of your
students, this activity will last 5-15 minutes. You will be able
to judge when you should conclude this part. Circulate among the
students. Participate as you see opportunity. Have the students
conclude their questions. Ask them to arrange themselves in a
17
24

18
semicircle :acing you. Help them develop this habit when it is
time for you to discuss something with them. The semicircle is the
best arrangement for outdoor discussions as it allows you to see
each child and allows them to get as close to you as possible.
Your voice does not carry as well in the outdoors as it does in the
classroom. Take care that the students are in a position so that
they can hear and see.
Ask the children to explain what they learned from the
activity. They will be very aware of the fact that they were
unable to answer many seemingly obvious questions about their
partners. Allow them time to discuss some specific examples. Ask
them how this activity is related to the classroom discussion about
the importance of accurate observation and the characteristics of
scientists. Guide them toward the conclusion that each of us can
improve our skills of observation. Explain that observing means
more than just using our eyes. Ask the children what other ways we
collect information. Discuss each of the other senses briefly.
Tell the students that you want them tc look around for a few
minutes, in an area you point out, and find a "special" rock. They
are not to find just any rock, but rather one that has some special
appeal. Each student should collect one rock, no one else should
see the rock, and it must be small enough to fit easily in the
hand.
Allow about 5 minutes for this ta.A. You must set a time
limit or some children will explore for the rest of the day!
Arrange the children in a close circle. You stand in the center.
Remind the children that they,are not to allow anyone to see their
rocks. Ask them to hold the rocks in their hands and hold their
hands behind their backs.
25
I

Select several children and ask each to describe his or her
rock. See how many use senses other than sight; however, don't
comment about this at this time.
The next step in this activity is a surprise to the students.
You want them fo mix the rocks so that they will be holding another
person's rock. There are a variety of ways to do this. One way is
to have the children pass the rocks behind their backs from hand to
hand. Another means is to have half of the grow place their rocks
in a paper bag. The other gall places their rocks in a second bag.
Then each child, without looking, picks a rock from the bag which
does not contain his own. At no time should they see any of the
rocks. You will have to remind them of this.
Return to the circle. Select a child to describe the rock he
now holds. This will challenge the child to use descriptive
observations using only the sense of touch. Encourage the students
to be as specific as possible and to use texture words, shape
words, comparisons to some standard or arbitrary unit of weight,
etc. Do this with several children.
An added dimension to this activity is to have one child
describe the rock being held and allow other children to ask
questions about the characteristics of the rock. The objective is
for students to find their rock through description and through
their own "data-gathering" questions.
While this is an excellent activity to help children use and
develop skills in acquiring data through the senses, it also helps
develop a variety of language skills.
2619

III. A SCHOOL YARD ALPHABET HIKE
A. Purpose:
This activity should follow instruction in using the senses as
tools of observation. It provides practice in the use of all the
senses to gather data. It helps the student develop an
understanding of the many dimensions of the outdoor environment.
The activity reinforces the fact that we are highly "selective" in
what we perceive around us. As e walk across a school ground, we
don't "see" very much of what is around us.
B. Concepts:
1. lie are surrounded by an environment rich in a variety ofElements.
2. The senses are the tools through which we informourselves about our surroundings.
3. Classification keys are used to indicate similarities anddifferences in objects.
C. Objectives:
After completing the following activities, the student will:
1. Identify and name properties of objects or events usingeach of the five senses.
2. Name properties of objet -3 which could be used to
classify the objects.
3. Construct a one-stage classification scheme.
D. Materials:
1. School yard hike task sheet with the alphabet on it in
list form (sample on p. 25).
2. Paper bag for each pair of students.
3. Butcher paper.
4. Pencil for pair of students.
20
27

E. Activities and Procedure:
Explain to the students that they are to work in pairs for
this activity and that each pair should work independently. Their
task is to see if they can fill in each letter of the alphabet with
an observation from a short hike around the school grounds. They
should use each of the senses. Caution them about the sense of
taste. Use it only when it is obviously safe to do so.
Before the students begin the hike, give them several examples
of the types of observations they may list. If they find an ant,
they list it under "A" and code it with "Si" for "sight." If they
hear a bird sing, then they may list it under 9," and code it with
"H" for "hearing." If they find a rock, pick it up, and feel its
texture, then they may wish to list it as an "R" for "rough feeling
rock," coded with a "T" for utouchP A following section provides
more detail.
Tell the students to collect some of the most interesting
objects observed on the hike. You should establish some guidelines
for what they should and should not collect. You may encourage
children to return certain objects to the school grounds. Either
lead the students on the hike, or take them to a pre-selected
location and explain that they are to explore a given area, then
reassemble with you in about 15 minutes.
After the students have completed the school grounds hike,
you can complete the activity outside or return to the classroom.
Discuss the observations they have made in both general and
specific terms. Ask students to describe some of the observations
from their list. Ask whether they were able to use all of the
senses, which sense was used most, and what were some "sound"
observations and "smell" observations. Ask what they found for
some of the letters. Discuss how much there is to observe on the
school grounds. Ask how the hike might have been different in a
city park, near a stream, and in other such areas. Explain that we
21
22
become more aware of the details of our environment if we practice
the use of our senses.
Students can now be asked to think about ways to roup or
classify the observations they have made. Explain that
classification is looking for similarities and differences. Ask the
children to tell ways some of their observations are alike and ways
they are different. Examples might include: some are alike
because they were observed using the same sense; some are man-made,
others occur naturally; some are brightly colored, others dull;
some are litter, others non-litter; some are made of metal, others
of wood. Continue this discussion until the children realize how
many different ways there are to group different objects.
Tell students that they will now use the objects they have
collected to make a simple one-stage classification key. A one-
stage classification is based upon the presence of one property in
a set of objects. For example, if the children collect several
different leaves, there will exist a variety of similarities and
differences within the set of leaves. A one-stage classification
is based upon the similarities found among a certain number of
leaves and the absence of this characteristic among the remaining
leaves in the set. Illustrations of one-stage classifications of
the leaves follow:
29

Set of Leaves
I
Leaves with Leaves without,serrated edges serrated edges
4'
Green leaves
-- or --
Set of Leaves
30
4,
Leaves whichare not green
23
f
,
. 41
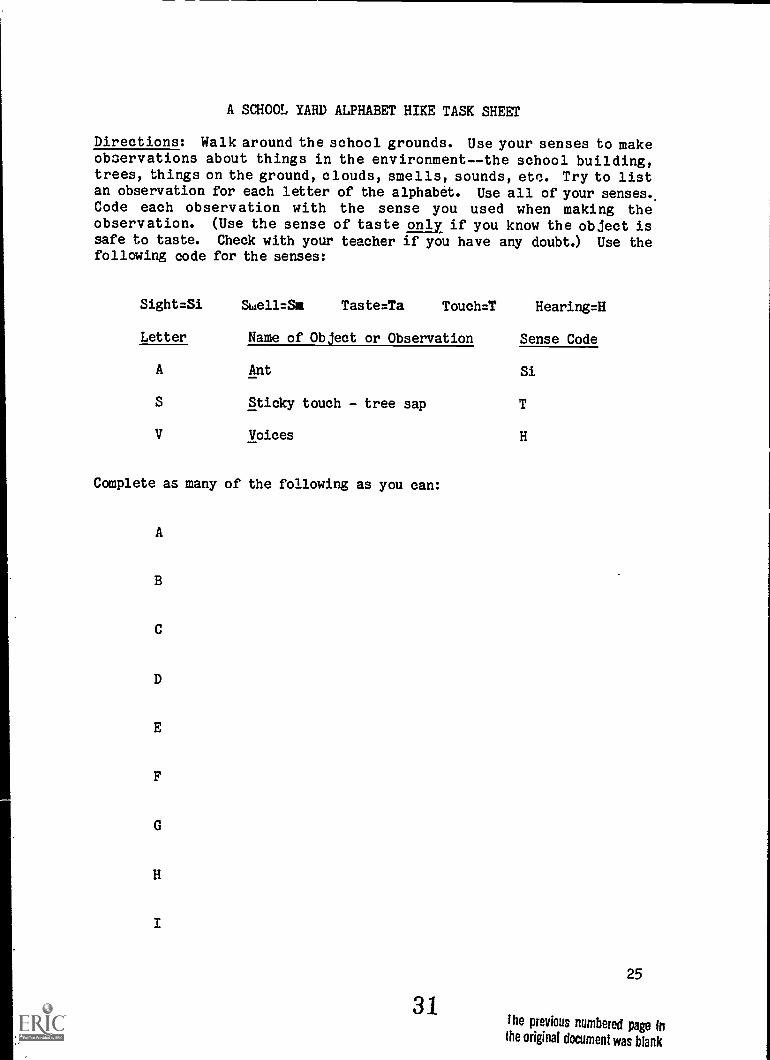
A SCHOOL YARD ALPHABET HIKE TASK SHEEP
Directions: Walk around the school grounds. Use your senses to makeobservations about things in the environment--the school building,trees, things on the ground, clouds, smells, sounds, eta. Try to listan observation for each letter of the alphabet. Use all of your senses.,Code each observation with the sense you used when making theobservation. (Use the sense of taste only if you know the object issafe to taste. Check with your teacher if you have any doubt.) Use thefollowing code for the senses:
Sight=Si Swell=Sm Tasteera Touchrl Hearing=H
Letter Name of Object or Observation Sense Code
A Ant Si
S Sticky touch - tree sap T
V Voices H
Complete as many of the following as you can:
A
B
C
D
E
F
G
H
I
31
25
the previous numbered page Inthe original document was blank

26
1"
32

IV. THE MYSTERY SACK
A. Purpose:
One of the most important skills of problem solving and
logical thought is inferring. False conclusions are usually the
result of incorrect inferences. There is a close relationship
between observing and inferring. Inferences are based upon
observations. They are also influenced heavily by past
experiences. For example, if it is a cloudy day and you hear a
loud noise, you are likely to infer that the noise is thunder. The
inference is based upon an observation--the cloudy sky. It is also
based upon past experience--you recall thunder you have heard in
the past and associate it with rain and a cloudy sky. However, in
this case, let's assume that you did not see the jet plane which,
in fact, broke the sound barrier and caused the noise. Your
observation was a cloudy sky which you saw and a loud noise which
you heard. Along with past experience, you put these together and
made a logical but incorrect inference.
One of the most important goals of science teaching is to help
the child develop an understanding of the relationship which exists
among observing, past experience, and inferring.
B. Concepts:
1. Logical thinking is closely associated with the skills ofobserving and inferring.
2. Past experience is often misleading and can tend tocause us to ignore observations.
C. Objectives:
After completing the following activities, the student will:
1. Name properties of an object using senses other thansight.
2. Distinguish among observations, past experience, andinferences.
3. Construct inferences from a set of observations.
27
33

D. Materials:
1. Small paper bags (one per stment plus five additionalbags).
2. Paper and pencil for each student.
E. Activities and Procedure:
This lesson begins with a teacher-directed activity to be
conducted indoors or out, as you choose. Prepare five small paper
bags (approximately 10 inches deep and 4 inches wide) by placing
one unusual object in each bag. Select such objects as a clothes
pin, a water faucet knob, an unusually shaped bone, or a fresh, raw
okra pod. Try to find an object for each bag which, in the absence
of a sight observation, would be somewhat difficult to identify
accurately by name.
28
Divide the class in five groups. Before giving a sack to each
-oup, explain that the sack is to be passed around the group.
Encourage each student to use all senses except sight when the bag
is passed to him or her. (The teacher should use judgment in
allowing the use of the sense of taste.) Using the other senses,
the students will derive some description of the object.
Explain that after all members of the group have had an
opportunity to examine the object in the sack, each will state one
observation. Rotate from person to person within the group until
all observations have been stated.
You will need to emphasize that the students should not try to
name the object. Also remind them that they should state only one
observation at a time; then it is the next person's turn to name an
observation. Observations would include such things as textures,
weight, odor (if any), size, shape, sound (when rattled or
thuinned), etc.
34

After all observations have been stated, each student in the
group is to write the name of the object and share it with the
others. When stating what they think the object is, students
should explain--based on observations--why they think the object is
what they have named.
Upon completion of this part of the activity, you may ask each
group to share its findings with the other groups in a class
discussion.
If you do not already have your class outside, then take them
there now. Give each student a small paper bag. Explain that each
person is to search the school grounds for a "mystery" object to be
placed in the sack. (Possibly, depending upon circumstances, you
may wish to state some guidelines for what should not be placed in
the sack as a "mystery object "!) When each student has a mystery
object, have the students get in the groups previously organized.
Conduct the activity as you did before but have students use their
own "mystery sacks."
After the students have completed the activity, explain that
an inference is a conclusion or an explanation in which
observations and past experiences are the basis of what is
concluded. Ask the children to suggest what leads to our being
able to make logical and accurate inferences.
Two things determine the accuracy of inferences: (1) the
extent and quality of our past experience as it relates to the
particular object or situation involved and (2) the extent to which
we gather a variety of observations using as many senses as
possible.
29
35

V. SIMILARITIES AND DIFFERENCES
Note: This activity will extend for several class periods. Divide it
according to your time. It should be used at upper-elementary or
middle-school levels.
A. Purpose:
People must often deal with similarities and differences
in the objects, events, and situations they encounter. In order to
be able to deal effectively with objects, events, etc., scientists
bring order to these through the use of classification schemes.
30
All of us use classification schemes in one way or another.
Automobiles are classified according to their similarities: those
that run on diesel, those that are compact, or those that have
eight cylinders. We also identify differences such as color, vinyl
roof or not, four-wheel or two-wheel drive, and so forth.
A classification system is used in grocery stores with like
items placed in the same area. Scientists classify chemical
elements, insects, rocks, minerals, fish, and hundreds of other
such categories.
Most students will sooner or later use a classification key.
This activity will help them understand not only how to use a
classification system, but how to make one. It will also help
children understand that methods of non-verbal communication (a
classification key, for example) are used in many circumstances.
They will also learn that clear, concise, unambiguous communication
is necessary if others are expected to understand the intent of our
message.
36

B. Concepts:
1. Classification systems are used to help order andorganize information.
2. Scientists use classification keys to identify objects orevents.
C. Objectives:
After completing the following activities, individual students
will:
1. Construct a multi-stage classification of a set ofobjects collected from an outdoor environment.
2. Use a classification key they have developed to classifya set of objects not used in the development of theirkeys.
3. Describe the properties of an object in such a way thatit can be easily identified by another person.
D. Materials:
1. Paper bags.
2. Butcher paper.
3. Pencils.
E. Activities and Procedure:
This activity is a companion activity to "A School Yard
Alphabet Hike." It extends the concept of classification. If it
has been some time since students completed the Alphabet Hike, it
would be a good idea to review them on how they had constructed the
one-stage classification of leaves.
Take the students to a pre-selected area of the school
grounds. Choose an area of diversity if possible--some trees,
grass, rocks, etc. If you have an "asphalt" school ground, there
will still be plenty of "objects" for this activity. You can even
have the students use playground equipment for their classification
key.
31
37

Sit in the chosen area and ask the students to describe the
types of objects in the area. Discuss similarities and differences
of the objects named.
Explain that most things are not neatly categorized in the
environment; that is, they are not grouped in sets, they are mixed
up with one another. We don't find all of the insects in one
corner of the school grounds, all the twigs neatly arranged in a
stack under a tree, or different types of soils here and there.
Explain that scientists make classification systems to help order
and explain the relationships in the physical world.
If you have a classification key, you might share it at this
time. Most bookstores carry keys for a variety of things--
classifications of birds, minerals, fish, plants, and such.
Tell the Children that they are going to develop a key.
Explain that the key they develop is to be a key that not only they
can use, but that anyone else in the class can also use.
Group the class in teams, three children per team if possible.
Explain that they are going to explore the school grounds looking
for ideas for a classification system. They can decide to make a
key for a specific object such as "rocks," or they may choose a
general category such as "man-made things" or "living things."
Once they have decided on their "object" or "category" for
classification, they should return to you for approval. About the
only thing that should note approved would be things that might
be difficult or impossible to work with--for example, clouds.
Give each group a sack. If their object is collectable, ask
them to select eight different samples of the objects. If it is
not possible to find eight, six will do.
If their objects for classification are not collectable--
3 8
11
playground equipment, trees, buildings, etc.--then they should make
32

drawings, write short descriptions, or even place markers upon the
items chosen to represent their collection of objects. Remind the
students that once they have developed their key, other students
are going to try to use it. The original eight objects must be
either collected or identified in some way so as to be accessible
to others.
Once you have explained what each team is to do and have
reassembled the children, explain the task in the following way,
demonstrating the steps, one at a time, using a chart you have made
on a large poster board or sheet of butcher paper:
1. Ask the students to take a sheet of butcher paper about
3 feet in length.
2. At the top center of the sheet, draw a circle about 4
inches in diameter.
3. Give a name to their collection ("junk," "outdoor stuff,"
"rocks "), and write this name in the circle.
4. From the circle, draw two "legs." Draw them about 4
inches long. One should be drawn from about the "five
o'clock" position and the other from "seven o'clock."
Draw a circle like the first one at the end of each line.
5. Choose a property which is true of one-half of the group
(four of the objects since they have collected eight).
Possibilities include approximate size or weight (sense
of touch), color (sight), special odor (smell), etc.
6. In the circle on the left, write the property chosen to
divide the groups in half. Blue, rough texture, man-
made, etc. Designate the circle on the right as "non" or
"not" the property. The two groups are now "mutually
exclusive." That is, an object from our original
33
39

34
collection of eight cannot be placed in both groups. An
object is "included" in one group because it has a
particular property; objects not having this property are
"excluded" from the group. The children would have a
classification key which looks like this (Figure 1):
A. Name Chosen ForGroup Of ObjectsCollected (e.g.,"School Ground
41) tbObjects")
B. Property For AboutHalf The Group(e.g., "Blue")
Figure 1
C. "Not Property"(e.g., "Not Blue")
7. The next step in the system is to subdivide groups B and
C as was done with the original group A. Divide the
objects included in group B by choosing a property that
is true of about half the group. Draw two "legs" from
circle B just as was done with circle A. Do the same
with the objects included in group C. The key now looks
like this (Figure 2):
40

(D)
Figure 2
8. A final subdivision is needed to conclude the key. Since
each team started with eight objects in the set, the
goal is to get each object "keyed" or classified
according to its unique prci.erties. Because there were
no duplications of objects in the original set, there
will be eight final categories in the key--eight circles
at the bottom of the chart.
To finish the key, follow the same steps used in the
previous divisions of objects: Divide each group (D, E,
F, G) in half using a property characteristic for half
the group and a "non" or "not" statement for the other
half. This results in the eight objects "keyed out" at
the bottom of the chart--H through 0.
41
35

36
Figure 3 is an example of a completed classification key
if the original eight objects were (1) a bottle cap,
(2) a leaf, (3) a rock, (4) a cigarette butt, (5) a gum
wrapper, (6) a blade of grass, (o) a yellow pencil, and
(8) a dead insect.
Note: Students will not label their keys with the letters A - 0
nor will they include numbers identifying the objects. This has
been done to help you "read" the key in the absence of real
objects.
There are many other groupings we could have used with these
original eight objects. Also, it is not always easy or possible to
divide each group exactly in half. Try to find a property which
divides a group in half; if this appears impossible, then group
them as you see fit.
When a team completes the key, they should signal you that
they are ready for the next step. When two teams are completed,
they should trade the objects and the key for the objects. They
should then determine if the other team's key "wcirlo." They should
use the original eight objects and "key" each object. If they have
trouble, they should point out the place of difficulty to the team
which developed the key.
You may want each team to let you check their key before they
begin the last part of this activity. Use your judgment--if it
appears that the students have done a thorough job of checking one
another, then it's not likely you need to re-check.
Each team should now explore the school grounds and
locate other objects which fit the original designation for their
classification system. If a team has developed a key for rocks,
then the team should locate a "new" rock, one not in the original
set used in developing the key, and use their key to classify the
42

(H)
Vs
(I) (J) (K)
Figure 3
(L) (M) (N) (0)
44

38
new rock. They will want to continue this activity for some time.
Allow them enough time to classify a dozen or so new objects.
As a follow-up to this activity, the students can give an
arbitrary name to each of the final "circles" in their key. Thus,
when a new rock is keyed, it now has a new name-- a "Bloomper" or a
"Shmurf."
Some students may want to extend this activity by designing
their own key using other objects. This makes an excellent
independent project. For example, if a student collects 20
different insects, he can, with patience, good observation
technique, and time, develop his awn insect key. The key, properly
constructed, following the steps of this activity, will be
functional with any other insect collected.
45

VI. THE WEB OF LIFE
A. Purpose:
This activity helps children understand one of the basic
concepts of science--interdependence. There are some excellent
discussions to be found in many books about food webs, food chains,
and other examples of interdependence. However, there are few
concrete activities available to help students become directly
involved in learning about the relationships which exist among the
elements of our environment.
B. Concepts:
1. There exists an interdependence of organisms and otherelements within the environment.
2. Like all other organisms, man is dependent upon theenvironment and its various interrelationships.
C. Objectives:
1. Explain how organisms in the environment areinterrelated.
2. Describe a food web.
3. Infer what will happen if elements in a food web areeliminated.
4. Describe a simple food chain.
D. Materials:
1. Several skeins of yarn.
2. Scissors.
3. Small strips of paper with names of parts of theenvironment written on them.
4. Paper bag.
5. Five large tags with attached 18-inch lengths of string.
39
46
E. Activities and Procedure:
Introduce the term "environment." Ask the children what the
word means. Discuss the "environment" of the classroom. Ask the
children to identify items in the classroom which are necessary for
conducting normal classroom activities. List the items on the
board--teacher, students, desks, paper, pencil, and such things
should be written. Ask the students if they can think of ways the
items on the board are related to each other. An answer might be
that the scissors are related to paper, students to chalk, etc. Go
to the board and ask them to watch what you are about to do. When
you have their attention, erase the word "pencil." Ask the
students to explain how removal of pencil from the classroom
environment would affect the activities of the classroom. Develop
the idea of interdependence--the pencil is not an isolated element
in the classroom. It is an essential element tied to many
functions and many other parts of the classroom.
40
Take the class to an open area of the school grounds and ask
them to name components of the school ground environment which they
can see. Select five students and ask them to line up and face the
group. Hang a labeled tag around each student's neck.
A 5" x 7" card with a string loop makes a good tag; it should
have already been labeled with one of the following: soil, plant,
insect, bird, and fox. Do not place the tags in a pre-selected
order. From left to right, you might place the cards randomly:
(1) insect, (2) fox, (3) soil, (4) plant, (5) bird. Ask the
students if the parts of the environment represented by the five
cards are related in any way. Encourage expression of many ideas.
Ask the children to think of a logical way you could arrange the
five students so that a relationship could easily be seen. Ask
them to explain why they suggest their particular arrangement.
47

Usually the children suggest (1) soil, (2) plant, (3) insect,
(4) bird, (5) fox. Explain that this is an example of a food
chain. Have the children identify elements of other food chains
which can be seen on the school grounds.
You will need to have cut out a small slip of paper for each
child in class beforehand. On each slip, write the name of some
element in the environment. Place the slips in a large paper bag.
What you include will depend upon what you wish to teach and the
age of your children. You may wish to begin with half the class
and have the others watch. Or you may conduct the activity with
two or three groups simultaneously.
Explain that each child is to reach into the sack and pick out
one slip of paper. He should read the slip which identifies what
he now represents--bird, seed, flower, cloud, tree, twig, rock,
dog, pond, fish--just as the first five students represented
environmental objects.
Select one student at random and place him a short distance
from the group. Give him the end of a length of yarn. Ask the
student to call out his name--"fish" for example. Anyone else from
the remainder of the group may call out "May I" meaning "May I join
the fish because I am related." He must then justify why he thinks
he is related. For example, the "pond" says "May I," gives the
reason, and then joins the "fish." If you have a "raccoon," he may
also say "May I," give his reason (he eats fish), and join the
fish. Accept any logical reasons.
Have students stand about 6 feet apart as they join the
"environment." Connect the yarn from student to student depending
on how they are related. Select a student who has joined the
"environment" and ask if anyone is related to him. Continue the
activity in this manner until all students are in the"environment." As students join the group, you will need to
48

42
continue to link them with yarn. Soon you will have a "web" of
yarn.
Explain to the children that they have created a "food web."
Ask them to explain the difference between a food chain and a food
web. Develop the idea that a food web, or web of life, shows the
complexity of relationships existing among organisms and that, in
one way or another, each organism affects every other organism.
What happens to one organism may ultimately affect all other parts
of the web.
As the final part of this activity, explain that you are going
to cut the yarn between two parts of the food web. The two
affected components of the web are to drop the yarn that they hold
and fall to their knees. As soon as these two components of the
web are "eliminated," anyone holding a string connecting themselves
to the eliminated parts must then drop the yarn which they are
holding and drop to their knees. Like dominoes in a row, each will
quickly be eliminated.
Explain that the same thing can happen in the natural
environment, but that it may take years to observe. Ask the
students if they can think of illustrations of animals which have
been eliminated--become extinct--or may be in danger of becoming
so.
Discuss man's role in the environment. Ask the children what
would have happened to man if he had been part of the web. Develop
the idea that it is up to man to protect the environment and to
conserve the resources of planet earth.
49

VII. The 113 Unit Homestead
A. Purpose:
This is a fantasy activity in which the children discover the
meaning in and importance of a community. A community is a group
of elements--plants, animals, soil, streams, etc.--which are
present in a particular area. Together they are responsible for
the characteristics of the area and what it can and cannot do.
B. Concepts:
1. There is a relationship between an organism and itsenvironment.
2. Even in a small area, there will be a great variation oforganisms and other elements of the environment.
3. Man is part of a community.
4. Man is both affected by and has an effect upon a community.
C. Objectives:
1. Describe a community as a group of plants, animals, and othercomponents of a given environment which have an effect uponeach other.
2. Explain how man can influence the environment and change thenature of a community.
3. Identify the number and kind of plants, animals, and othercomponents of a small study plot.
D. Materials:
1. A 12-inch paper plate for each group of three students.
2. Magnifying lenses, if available.
3. Paper and pencils for recording observations.
4. Spoon or small spade for digging.
5. Small bag, box, or cup for collecting.
6. Popsicle or craft sticks.
7. String or yarn.
43
50

E. Activities and Procedure:
Tell the children that the class has just landed upon a
distant planet. The planet _s an atmosphere similar to that of
earth. The proportions of the planet are quite different, however,
from those on earth. The magnitude of everything on plant " Hugeo"
is such that everything appears to be hundreds of times larger than
what we are used to on earth. Thus, we are the size of ants in
comparison to the plants and animals of "Hugeo."
As the "pioneers" of the planet, we will have the right to
settle a large area of the planet. To settle the planet, we are
grouped in families of three or four.
Our task is to locate our claim and do a survey of what is
contained in the area given to us. We are to describe the type of
soil present as well as the composition of the soil, rocks, plant,
and animal life. Is the area desert -like, or is it covered with
trees? In our report we should also describe the probable needs we
will have before we can inhabit our 113-unit tract of land. How
will we need to modify the area in order that it can more easily
support us?
Tell the students that they are about to leave the spaceship
(classroom) and go out onto the surface of "Hugeo" (the school
grounds). In a "family" of three, they are to identify their 113 -
unit homestead by tossing a paper plate through the air. Wherever
it falls, the area underneath the plate is their new "home."
Outline the edge of the plate with 10 popsicle or craft sticks.
This is "fence.," Use string or yarn for wire if you wish to
complete the "fence."
Each family needs a recorder to make notes. First the felily
describes the general nature of the homestead using the magnifying
lenses. Is it barren, rocky, full of trees, diversified, or on a
slope?
51

The family should then collect some of the soil and examine it
carefully. They should describe the soil: Does it appear to be
fertile? Is it sandy? Closely packed? Rocky? They should dig
down into the soil several inches. Does the soil change? How?
What kind of plants and animals are present? Look closely. Do
they appear dangerous? Are they possible food sources? Describe
them. How many different kinds are on that particular homestead?
What other things are found on the land? What will the family
need to do to make the land fit to live on? Will it farm the land
or raise cattle? Wherf, will the cabin be located? Why was this
location chosen?
Once students have completed "exploring" and recording data,
each "family" should now show the other "families" their homestead.
The recorder for each group should explain all findings and tell
what they hope to do with the land. You should encourage comments,
questions, and ideas from the class as they move from homestead to
homestead.
Discuss the variety of life found in each area. What was
found in the soil? Were there both plant and animal life on each
plot? Were the plans to modify the plots feasible? Would man have
a negative effect on the environment of each area? A positive
effect? What could we do to preserve the planet "Hugeo" in as
natural a state as possible and yet make it habitable for man?
Finally, ask the students why the activity is called the "113 -
Unit Homestead"? (Hint: consider the paper plate and use wr24
15
52

Appendix
Sources of Outdoor Education Information
American Association for theAdvancement of Science
1515 Massachusetts Ave., NWWashington, DC 20005
American Camping AssociationBradford Woods5000 State Road, 67 NorthMartinsville, IN 46151-7902
American Forestry Association1319 Eighteenth St., NWWashington, DC 20036
Association of InterpretiveNaturalists
2240 W. Buno RoadMilford, MI 48042
Bureau of Outdoor RecreationDepartment of InteriorEighteenth and C St., NWWashington, DC 20240
Council on Outdoor Education1900 Association DriveReston, VA 22091
ERIC/CRESS (covers outdooreducation for ERIC)
New Mexico State UniversityBox 3APLas Cruces, NM 88003-0042
ERIC/SMEAC InformatAonReference Center
College of EducationThe Ohio State University1200 Chambers RoadColumbus, OH 43212
National Audubon Society1130 Fifth AvenueNew York, NY 11028
National Parks andConservation Association
1701 Eighteenth St., NWWashington, DC 20009
National Science TeachersAssociation
1742 Connecticut Ave., NWWashington, DC 20009
National Wildlife Federation1412 Sixteenth St., NWWashington, DC 22201
Outdoor Biology InstructionalStrategies
Lawrence Hall of ScienceUniversity of CaliforniaBerkeley, CA 93305
Safari Club InternationalConservation Fund
5151 E. Broadway, Suite 1680Tucson, AZ 85711
Soil Conservation ServiceU.S. Department of AgricultureWashington, DC 20250
Superintendent of DocumentsU.S. Government Printing
OfficeWashington, DC 20402
Van Matre, S. Acclimatizing. Martinsville, IN: American CampingAssociation, 1974.
47
53

About the Author
Milton Payne is a professor of science and outdoor
education at Stephen F. Austin State University, in
Nacogdoches, Texas. Dr. Payne taught science in the
Waco and Austin Public Schools. He attended Texas A & M
and North c.7exas State University and received his EdD
degree from North Texas State in 1967.
Dr. Payne's primary interests since joining the
faculty at Stephen F. Austin in 1967 have been in the
areas of science education, outdoor education, middle-
school teaching, and individualized instruction. He has
conducted workshops and seminars in more than 30 school
districts including Houston, Fort Worth, Texarkana, and
Tyler.
He has presented papers before the Texas Academy of
Science, the Texas Middle School Association, the Texas
Outdoor Education Association, and other professional
organizations. He was among the founders of the Texas
Outdoor Education Association. Articles he has written
about science and outdoor teaching have appeared in
several regional and national publications.
49
54