Embed Size (px)
Citation preview

Deluxe Bottle Warmer Calienta-biberones Deluxe
Chauffe-biberon DeluxeПодогреватель для бутылочек
Deluxe Bottle Warmer

IMPORTANT SAFEGUARDSThis product is for household use only. When using electrical appliances, basic safety precautions should always be followed including the following:• Read all instructions.• Do not touch hot surfaces. Use handles or knobs.• To protect against electrical shock, do not immerse cord or plugs in water or
other liquid.• Close supervision is necessary when any appliance is used by or near children.• This appliance can be used by children aged from 3 years and above if they have been
given supervision or instruction concerning use of the appliance in a safe way and understand the hazards involved. Cleaning and user maintenance shall not be made by children unless they are aged from 8 years and above and supervised. Keep the appliance and its cord out of reach of children aged less than 3 years.• Unplug from outlet when not in use and before cleaning. Allow to cool before putting
on or taking off parts.• Do not operate any appliance with a damaged cord or plug or after the appliance
malfunctions or has been damaged in any manner. Return appliance to the nearest authorized service facility for examination, repair, or adjustment.• Misuse of the product may cause potential injury.• The heating element surface is subject to residual heat after use.• The use of accessory attachments not recommended by Handi-Craft™ Company may
cause injuries. • Do not use outdoors.• Do not let cord hang over edge of table or counter, or touch hot surfaces.• Do not place on or near a hot gas or electric burner, or in a heated oven.• Extreme caution must be used when moving an appliance containing hot liquids.• To operate, plug cord into wall outlet. To disconnect, turn any control to “off”, then
remove plug from wall outlet. • Do not use appliance for other than intended use.• Never immerse the warmer or power cord in water.• Avoid spillage on the connector.• When in use, the warmer contains hot water. Be careful to avoid spilling or splashing
any water on yourself when removing contents from the warmer.• Before serving be sure food is at a safe temperature. • Warming food for long periods is not recommended.• Before feeding, pour a few drops of the liquid content from the baby bottle on to the
back of your hand to test the temperature. CAUTION: Always check the content temperature of the bottle or the small jar before
feeding your baby.
2

3
• Before serving, unplug cord from wall outlet and dish. Do not leave cord within child’s reach.• This appliance is designed to be used for domestic and like applications such as:
— staff kitchen areas in shops, offices and other working environments, — farms, — use by hotel, motel customers and other accommodation environments, — bed and breakfast environments.• Appliance can be used by persons with reduced physical, sensory or mental
capabilities or lack of experience and knowledge if they have been given supervision or instruction concerning use of the appliance in a safe way and understand the hazards involved.• Children shall not play with the appliance.• If the supply cord is damaged it must be replaced by the manufacturer, its service
agent, or similarly qualified person in order to avoid hazard.
SAVE THESE INSTRUCTIONS
Thank you for buying the Dr. Brown’s Natural Flow® Deluxe Bottle Warmer. It has been designed and developed to provide moms, dads and other caregivers an easy, reliable way to warm baby bottles and baby food jars. The unit accommodates 60 ml, 120 ml, 240 ml and 250 ml Dr. Brown’s baby bottles. It also holds most major competitive brand baby bottles, as well as small jars and containers of baby food.
As parents ourselves we know that sometimes feeding a young baby can be a time of increased stress, especially if the baby is upset or fussing. Preparing a bottle often has to be done while holding the baby and trying to comfort them. Dr. Brown’s is introducing this innovative new product to make warming baby bottles and food jars simpler and easier.
Please read through the ENTIRE INSTRUCTION BOOK including the IMPORTANT SAFEGUARDS before using your new Dr. Brown’s Natural Flow® Deluxe Bottle Warmer for the first time. A copy of these instructions is also available online at www.drbrownsbaby.com. Parts:A. Hinged lidB. Main housingC. Removable water reservoirD. Control panel and
LCD timer displayE. Removable basketF. Reversible riser
A
BC
DEF

KEY FEATURES: 1. A water reservoir that is refillable so the user only needs to add water to the
appliance every 6-12 bottle warming cycles. Plus the added benefit of not needing to empty the remaining water after each use.
2. An adjustable removable basket that configures for easy, fast and reliable warming of 60 ml, 120 ml, 240 ml and 250 ml Dr. Brown’s bottle sizes. Standard size food jars can be heated. Soothers/Pacifiers and small nursery items can be sterilised. The unit will also hold many competitors’ bottle sizes.
3. A hinged lid on top of the heating chamber is always closed during the warming cycle to keep steam inside the appliance which creates more efficient and safer heating in less time. Opens for easy access to remove the bottle or jar.
4. A user programmable warming cycle. This appliance allows the user to determine the appropriate heating time based on the starting temperature of the formula and the amount of liquid and keeps that time stored in the unit’s memory. This results in a 1-button start function for quicker bottle warming.
5. A 4-button digital keypad to set time and turn the appliance on/off. The “last time programmed” is stored in memory and is displayed when the appliance is turned on. The LCD timer counts down. There is an audible 5-beep alarm with flashing LCD when the heating cycle is complete.
6. A backlit display for use at night.
7. Automatic power off after 8 minutes.
8. Automatic over-heating shutdown switch.
9. Soft feet for stability.
10. Convenient cord storage on the bottom of the unit.
UNPACKING:When unpacking the appliance for the first time, carefully remove and dispose of all packing materials. Simply snap the hinged lid in place making sure the parts are fully engaged, and you’re ready to start to use. (SEE FIGURE 1)
4
FIGURE 1

PREPARING FOR USE:1. Position the Dr. Brown’s Natural Flow® Deluxe Bottle Warmer
on any convenient flat surface. Be sure to place it and the electrical cord out of the reach of children.
NOTE: Always ensure the appliance is unplugged when inserting the water reservoir.
2. Remove the water reservoir from the right side of the main housing.
3. Turn the water reservoir upside down so the small fill opening is facing up. Fill the reservoir with water through that opening. (SEE FIGURE 2)
NOTE: DO NOT EXCEED the recommended amount of water. Please note that hard water may increase build up or other residue on the heating plate. If you have hard water, we recommend that you use distilled water.
4. Position the short neck of the fill opening (with the reservoir’s flat side up) into the bottom of the slot on the appliance’s right side. Pivot the reservoir up to a vertical position and snap into place. (SEE FIGURE 3) Make sure it’s held firmly in place.
5. The water reservoir will now automatically fill the heating chamber inside the appliance to the proper level.
NOTE: The Dr. Brown’s Natural Flow® Deluxe Bottle Warmer is unique and convenient because you don’t have to fill the reservoir every time you want to use it. The translucent reservoir also acts as a gauge. Simply keep your eye on the fluid level and refill the reservoir when you can no longer see water inside the reservoir. During each refill, unplug warmer, empty heating chamber and rinse with clean water. Do not immerse warmer base in water.
6. Insert the plug into wall outlet.
TO PROGRAM THE CYCLE TIME: These following times are to be used as a preliminary guide only. There are many variables that can affect how fast this appliance warms a bottle or food container, such as the size of the container, the exact starting temperature of the contents and the type of liquid/food being warmed. All of these factors will impact how the appliance heats the contents and the final temperature that is reached.
When you begin to use this appliance, you will need to make adjustments to the length of time to achieve the most appropriate final temperature. The appliance will keep the “last time used” in memory so once you determine the best time for a specific amount of liquid, you can simply insert another bottle and press the start button.
5
FIGURE 2
FIGURE 3

Use the following chart as a STARTING POINT ONLY to estimate the proper time for the appropriate heating cycle. Start by using information from the chart but adjust the length of time based on the actual results you achieve.
NOTE: MOST FROZEN BOTTLES REQUIRE TWO CYCLES TO WARM. BE SURE TO OBSERVE THE WARMING TIMES BELOW. THIS WARMER FEATURES AN 8-MINUTE CYCLE LIMIT TO AVOID OVERHEATING FOR THE SAFETY OF MOM AND BABY.
Always refer to the estimated time for the amount of liquid you are warming — not the bottle size. For example, if you are warming 120 ml of liquid in a 250 ml bottle, refer to the 120 ml warming instructions.
STANDARD BOTTLE/ STARTING TEMPERATURE ESTIMATED TIME NARROW/PLASTIC (before warming) (minutes)
60 ml Liquid Room temperature (22°C) 2:10 60 ml Liquid Refrigerator (4°C) 3:00 60 ml Liquid Freezer (-18°C) 8:00 + :30
120 ml Liquid Room temperature (22°C) 2:30 120 ml Liquid Refrigerator (4°C) 3:55 120 ml Liquid Freezer (-18°C) 8:00 + 1:05
250 ml Liquid Room temperature (22°C) 3:00 250 ml Liquid Refrigerator (4°C) 5:00 250 ml Liquid Freezer (-18°C) 8:00 + 3:30
GLASS STARTING TEMPERATURE ESTIMATED TIME BOTTLE (before warming) (minutes)
120 ml Liquid Room temperature (22°C) 2:00 120 ml Liquid Refrigerator (4°C) 2:50 120 ml Liquid Freezer (-18°C) 7:00
250 ml Liquid Room temperature (22°C) 2:30 250 ml Liquid Refrigerator (4°C) 4:20 250 ml Liquid Freezer (-18°C) 8:00 + 2:10
NOTE: DO NOT FREEZE DR. BROWN’S BOTTLES WITH THE VENT SYSTEM IN PLACE. WE SUGGEST THAT YOU WARM THE BOTTLE AND FROZEN FLUID, AND THEN REASSEMBLE THE VENT SYSTEM BEFORE USE.CAUTION: If using glass bottles, use only glass thermo-resistant bottles, as sudden temperature change may cause glass to break.
WIDE-NECK BOTTLE/ STARTING TEMPERATURE ESTIMATED TIME PLASTIC (before warming) (minutes)
120 ml Liquid Room temperature (22°C) 2:20 120 ml Liquid Refrigerator (4°C) 4:00 120 ml Liquid Freezer (-18°C) 8:00 + 3:00
240 ml Liquid Room temperature (22°C) 3:20 240 ml Liquid Refrigerator (4°C) 5:35 240 ml Liquid Freezer (-18°C) 8:00 + 6:106

FOOD JAR STARTING TEMPERATURE ESTIMATED TIME (before warming) (minutes)
120 ml Room temperature (22°C) 2:30 120 ml Refrigerator (4°C) 2:45
CAUTION: Heating frozen food jars with this warmer is NOT RECOMMENDED. Always thaw them first.Never heat an empty bottle or jar in this product.
SOOTHER/PACIFIER OR SMALL ACCESSORY STERILISATION ESTIMATED TIME
Soother/Pacifier 2:00
TO OPERATE THE APPLIANCE:1. Remove any protective cap, position
the bottle or jar in the basket and then place it into the heating chamber.
NOTE: The basket has 2 parts. The bottom section can be turned upside down so that smaller bottles sit higher up in the heating chamber and are easier to remove. (SEE FIGURE 4)
CAUTION: Before warming Dr. Brown’s bottles in this appliance, always remove all bottle components before warming to prevent the vent from leaking fluid if gas forms during warming.
If leaking occurs during warming, pour out any remaining water in the appliance’s heating chamber and reservoir, and refill the reservoir with fresh water.
NOTE: To empty the heating chamber, unplug the product and remove the reservoir from the side. With the cover open, tip the unit over a sink with the reservoir opening facing up and drain any remaining fluid from inside the heating chamber through the top opening.
2. Close the cover. Never use this appliance without the basket insert in place and properly adjusted for the bottle or jar size.
CAUTION: DO NOT open the lid of the heating chamber once the heating cycle has been started.
3. Press any button on the keypad (except O) to display the “last time used”. If correct, press >. If you want to adjust the time, press the up arrow button to increase the length of time or the down arrow button to decrease the time.
NOTE: Pressing and holding an arrow button will cause the timer display to change very fast. To change the timer slowly, push and release the arrow button so the numbers move incrementally. Once the display shows the desired time, press start button. (SEE FIGURE 5)
7
FIGURE 4
FIGURE 5

4. When the heating cycle is complete the display will flash 00:00 for 60 seconds and then shut off. At that time, there will be 5 audible beeps that indicate that cycle time you selected is complete and the bottle or food is ready to be removed from the appliance. You can open the top of the product at this point.
NOTE: You can turn the appliance off anytime by pressing the O button.
CAUTION: Be careful of the steam rising out from the heating chamber. DO NOT put your hands on or around the heating chamber during or immediately after the heating cycle.
5. Grasp the side tabs of the basket and remove it immediately to prevent residual heating. Place it on the countertop and remove the bottle or jar. (SEE FIGURE 6)
6. Gently swish the fluid in the bottle around or stir the food thoroughly so the temperature becomes uniform throughout the container.
7. ALWAYS TEST THE TEMPERATURE OF THE FLUID OR FOOD BEFORE FEEDING YOUR BABY.
NOTE: The appliance is programmed to automatically reduce the time for an additional heating cycle started within 15 minutes of the end of the previous cycle. If you heat a second bottle immediately, you will see that time is reduced by a pro-rated amount unless you override the feature and set a new time yourself.
NOTE: The appliance is equipped with an internal sensor that will automatically shut the unit off if it gets too hot or runs out of water. The switch will automatically reset once the unit cools down.
NOTE: For microbiological and hygienic reasons, once milk or food is heated, it should not be re-heated again and should be discarded if not used immediately. Please consult your health professional for further guidance about safety recommendations on feeding.
TO CLEAN THE APPLIANCE:• Always unplug the appliance and ensure it is cool before cleaning any part.
• Remove water reservoir and empty all water out of the unit.
• Wipe the exterior surfaces as well as the inside of the heating chamber with a damp cloth or sponge using mild soap. DO NOT submerge the unit in any water or liquid.
• Removable baskets are dishwasher safe (top rack) or wash with soapy water. Rinse with clean water. Air dry.
• DO NOT use scouring pads, abrasives, bleach or solvents for cleaning.
• DO NOT disassemble the product. There are no serviceable parts inside.
8
FIGURE 6

TO DE-SCALE THE APPLIANCE:For best results and easiest care, it is recommended to use distilled water. It is important to de-scale this appliance every 4 weeks to ensure that it continues to work properly. Pour all remaining water out of the water chamber and reservoir. To de-scale, mix 2 oz (50 ml) of white vinegar with 4 oz (100 ml) of cold water in the water reservoir, and then run the mixture through the bottle warmer as you normally would until any scaling has been removed. Please ensure proper ventilation when descaling with vinegar.
PRECAUCIONES IMPORTANTESEste producto debe ser usado solamente en el hogar.
Cuando use aparatos eléctricos, siempre debe seguir precauciones de seguridad básicas, incluyendo lo siguiente:
• Lea todas las instrucciones.
• No toque las superficies calientes. Use las asas o perillas.
• Para protegerse contra una descarga eléctrica, no sumerja el cable ni los enchufes en agua u otros líquidos.
• Cuando se use cualquier aparato eléctrico, ya sea cerca de los niños o por ellos mismos, es necesario supervisar en forma constante.
• Este aparato puede ser usado por niños mayores de 3 años si reciben supervisión o instrucciones para el uso seguro del aparato y entienden los posibles peligros.Los niños no deben encargarse de la limpieza y mantenimiento del aparato hasta que sean mayores de 8 años y bajo supervisión. Mantenga el aparato y su cable fuera del alcance de los niños menores de 3 años.
• Desenchufe el aparato cuando no esté en uso y antes de limpiarlo. Dejar que se enfríe antes de colocar o quitar piezas.
• No haga funcionar ningún aparato que tenga un cable o enchufe dañado, ni después de observar que funciona mal o que sufrió cualquier tipo de daño. Lleve el aparato al centro de reparaciones autorizado más cercano para que lo examinen, reparen o ajusten.
• El uso incorrecto del producto puede causar posibles lesiones.
• La superficie del elemento térmico puede guardar calor residual después de su uso.
• Usar piezas o accesorios que no sean recomendados por Handi-Craft® Company puede causar lesiones.
• No use el aparato al aire libre.
• No permita que el cable cuelgue del borde de la mesa o superficie de apoyo, ni que toque superficies calientes.
9
10
• No lo coloque sobre o cerca de un quemador caliente a gas o eléctrico, ni dentro del horno caliente.
• Debe tener mucho cuidado al mover un aparato eléctrico que contenga líquidos calientes.
• Para encender, conecte el cable en una toma de corriente en la pared. Para desconectar, coloque primero cualquier control en posición de apagado (“off”) y luego retire el enchufe de la toma de corriente en la pared.
• No utilice este dispositivo para otro uso.
• Nunca sumerja el calienta-biberones o el cable en agua.
• Evite los derrames en el conector.• Cuando se encuentra en uso, el calienta-biberones contiene agua caliente.
Tenga cuidado y evite derrames o salpicaduras de agua sobre usted al retirar el contenido del calienta-biberones.• Antes de servir, asegúrese que los alimentos se encuentren a una temperatura
segura. • No se recomienda calentar comida por períodos largos.• Antes de alimentar al bebé, vierta unas cuantas gotas del líquido del biberón en
el dorso de su mano para comprobar la temperatura. PRECAUCIÓN: Siempre compruebe la temperatura del biberón o del envase pequeño antes de alimentar al bebé.• Antes de servir, desenchufe el cable de la toma de corriente de la pared y del
plato. No deje el cable al alcance de los niños.• Este aparato está diseñado para uso doméstico y usos similares, tales como: – áreas de cocina con empleados en establecimientos, oficinas y otros ambientes
de trabajo, – granjas, – uso de clientes en hoteles, moteles y otros alojamientos, – ambientes de alojamiento y desayuno.• Este aparato puede ser usado por personas con capacidades físicas, sensoriales o
mentales reducidas o falta de experiencia y conocimientos, si reciben supervisión o instrucciones para el uso seguro del aparato y entienden los posibles peligros.• Los niños no deben jugar con el aparato. • Si el cable de corriente está dañado, tiene que ser reemplazado por el fabricante,
su agente de servicio u otra persona igualmente capacitada, para evitar riesgos.
GUARDE ESTAS INSTRUCCIONESGracias por comprar el Calienta-biberones Dr. Brown’s Natural Flow® Deluxe. El calienta-biberones fue diseñado para ofrecer a las mamás, papás y demás personas que cuidan del bebé una forma sencilla, fácil y confiable de calentar los biberones y envases de comida para bebé. Este aparato acomoda los biberones

Dr. Brown’s de 60 ml, 120 ml, 240 ml y 250 ml. También puede usarse para la mayoría de los biberones de las principales marcas competidoras, así como envases y recipientes pequeños de comida para bebé. Como padres, sabemos que algunas veces alimentar a un bebé puede ser un momento de estrés, especialmente si el bebé está alterado o de mal humor. Con frecuencia hay que preparar el biberón mientras sostenemos al bebé y tratamos de confortarlo. Dr. Brown’s presenta este innovador nuevo producto para calentar los biberones y envases de comida para bebé de forma más simple y fácil. Por favor lea TODO EL MANUAL DE INSTRUCCIONES incluyendo la sección de PRECAUCIONES IMPORTANTES antes de usar por primera vez su nuevo Calienta-biberones Dr. Brown’s Natural Flow® Deluxe. Puede obtener una copia de estas instrucciones en Internet: www.drbrownsbaby.com.
Piezas:A. Tapa con bisagra
B. Estructura principal
C. Depósito de agua removible
D. Panel de control y pantalla LCD de reloj
E. Cesta removible
F. Levantador reversible
CARACTERÍSTICAS CLAVE: 1. Un depósito de agua que se puede volver a llenar para que el usuario solo tenga
que agregar agua después de cada 6 -12 ciclos de calentamiento de biberones. Además tiene el beneficio adicional que no necesita que se vacíe el agua restante después de cada uso.
2. Una cesta ajustable y removible, configurada para el calentamiento fácil, rápido y seguro de los biberones Dr. Brown’s de 60 ml, 120 ml, 240 ml y 250 ml. Se pueden calentar envases de comida de tamaño estándar. Puede usarse para esterilizar el chupete y pequeños artículos de la habitación del bebé. En este aparato también caben muchos tamaños de biberones de marcas competidoras.
3. Una tapa con bisagra en la parte superior de la cámara de calentamiento siempre está cerrada durante el ciclo de calentamiento para mantener el vapor dentro del aparato, lo que crea calentamiento más eficiente y seguro en menos tiempo. Se abre para facilitar sacar el biberón o envase.
4. Un ciclo programable de calentamiento para el usuario. Este aparato permite al usuario determinar el período de calentamiento adecuado con base en la temperatura inicial de la fórmula y el tamaño del biberón y mantener ese período de tiempo almacenado en la memoria del aparato. Esto permite una función que se puede iniciar con solo tocar un botón, para un calentamiento de biberones más rápido.
5. Un teclado digital de 4 botones para marcar el tiempo y para encender y apagar el aparato. La “última programación” se almacena en la memoria y aparece cuando
11
A
BC
DEF

se enciende el aparato. El reloj LCD tiene cuenta regresiva. Hay una alarma sonora de 5 timbres con pantalla de cristal líquido parpadeante cuando se completa el ciclo de calentamiento.
6. Hay una pantalla luminosa para cuando se usa de noche.
7. Se apaga automáticamente después de 8 minutos.
8. Tiene un control automático que apaga el aparato si se sobrecalienta.
9. Soportes suaves para estabilidad.
10. Almacenamiento conveniente para el cable en la parte inferior del aparato.
DESEMPAQUE:Cuando desempaque el aparato por primera vez, quite y deseche todos los materiales de empaque cuidadosamente. Simplemente encaje la tapa con bisagra en su lugar, asegurándose que todas las partes encajen bien, y está listo para empezar a usar. (VEA LA FIGURA 1)
PREPARACIÓN PARA USAR EL APARATO:1. Coloque el Calienta-biberones Dr. Brown’s Natural Flow® Deluxe
en cualquier superficie plana conveniente. Asegúrese de colocar el aparato y el cable eléctrico fuera del alcance de los niños.
NOTA: Asegúrese siempre que el aparato esté desenchufado cuando inserte el depósito de agua.
2. Retire el depósito de agua del lado derecho de la estructura principal.
3. Voltee el depósito de agua boca abajo para que la pequeña abertura para llenar apunte hacia arriba. Llene el depósito con agua a través de esa abertura. (VEA LA FIGURA 2)
NOTA: NO USE MÁS AGUA que la cantidad recomendada. Tenga en cuenta que el agua dura puede aumentar la acumulación o el depósito de otros residuos en la placa de calentamiento. Si tiene agua dura, le recomendamos usar agua destilada.
4. Coloque el cuello corto de la abertura para llenar (con el lado plano del depósito hacia arriba) en el fondo de la ranura del lado derecho del aparato. Haga girar el depósito para que quede en posición vertical y automáticamente caerá en su lugar. (VEA LA FIGURA 3) Asegúrese que esté firmemente sujetado en su lugar.
12
FIGURA 2
FIGURA 3
FIGURA 1

5. El depósito de agua llenará automáticamente la cámara de calentamiento dentro del aparato hasta el nivel adecuado.
NOTA: El Calienta-biberones Dr. Brown’s Natural Flow® Deluxe es único y conveniente porque no tiene que llenar el depósito con agua cada vez que desea usarlo. El depósito transparente también funciona como un marcador. Simplemente observe el nivel del agua y vuelva a llenarlo cuando deje de ver agua dentro del depósito. Cada vez que vuelva a llenarlo, desconecte el calienta-biberones, vacíe la cámara de calentamiento y enjuáguela con agua limpia. ¡No sumerja la base del calienta-biberones en agua!
6. Inserte el enchufe en una toma de corriente en la pared.
PARA PROGRAMAR EL CICLO DE TIEMPO: Los siguientes tiempos se deben usar solo como una guía preliminar. Hay muchas variables que pueden afectar cuán rápido este aparato calienta un biberón o un recipiente con comida, como el tamaño del recipiente, la temperatura inicial exacta del contenido y el tipo de líquido o alimento que se calienta. Todos esos factores afectarán cómo el aparato calienta el contenido y la temperatura final alcanzada.Cuando comience a utilizar este aparato, necesitará hacer ajustes a la duración del tiempo necesario para alcanzar la temperatura final adecuada. El aparato guardará en la memoria la información de la “última vez usada” de manera que cuando usted determine el mejor período de tiempo para una cantidad de líquido específica, simplemente coloque otro biberón y presione el botón “start”.Use la tabla siguiente SOLO COMO GUÍA INICIAL para estimar el tiempo adecuado para el ciclo de calentamiento correspondiente. Use inicialmente la información de la tabla y ajuste la duración del tiempo basándose en los resultados actuales que logre.
NOTA: LA MAYORÍA DE LOS BIBERONES CONGELADOS NECESITAN DOS CICLOS PARA QUEDAR TIBIOS. ASEGÚRESE DE RESPETAR LOS TIEMPOS DE CALENTAMIENTO QUE SE INDICAN A CONTINUACIÓN. ESTE CALIENTA-BIBERONES OFRECE UN CICLO CON UN LÍMITE DE 8 MINUTOS PARA EVITAR EL CALENTAMIENTO EXCESIVO Y ASÍ GARANTIZAR LA SEGURIDAD DE LA MAMÁ Y EL BEBÉ.
Siempre consulte el tiempo aproximado para la cantidad de líquido que caliente – no según el tamaño del biberón. Por ejemplo, si está calentando 120 ml de líquido en un biberón de 250 ml, consulte las instrucciones para calentar 120 ml.
BIBERÓN ESTÁNDAR/ TEMPERATURA INICIAL TIEMPO APROXIMADO ESTRECHO/PLÁSTICO (antes de calentar) (minutos)
60 ml Líquido Temperatura ambiente (22°C) 2:10 60 ml Líquido Refrigerador (4°C) 3:00 60 ml Líquido Congelador (–18°C) 8:00 + :30
120 ml Líquido Temperatura ambiente (22°C) 2:30 120 ml Líquido Refrigerador (4°C) 3:55 120 ml Líquido Congelador (–18°C) 8:00 + 1:05
250 ml Líquido Temperatura ambiente (22°c) 3:00 250 ml Líquido Refrigerador (4°C) 5:00 250 ml Líquido Congelador (–18°C) 8:00 + 3:30
13
BIBERÓN TEMPERATURA INICIAL TIEMPO APROXIMADO DE VIDRIO (antes de calentar) (minutos)
120 ml Líquido Temperatura ambiente (22°c) 2:00 120 ml Líquido Refrigerador (4°C) 2:50 120 ml Líquido Congelador (–18°C) 7:00
250 ml Líquido Temperatura ambiente (22°C) 2:30 250 ml Líquido Refrigerador (4°C) 4:20 250 ml Líquido Congelador (–18°C) 8:00 + 2:10NOTA: NO CONGELE LOS BIBERONES DR. BROWN’S CON EL SISTEMA DE VENTILACIÓN INSTALADO. LE RECOMENDAMOS QUE CALIENTE EL BIBERÓN Y EL LÍQUIDO CONGELADO Y DESPUÉS COLOQUE NUEVAMENTE EL SISTEMA DE VENTILACIÓN ANTES DE USAR.PRECAUCIÓN: Si usa un biberón de vidrio, utilice solo biberones resistentes al calor, ya que un cambio súbito en la temperatura puede romper el vidrio.
BIBERÓN DE TEMPERATURA INICIAL TIEMPO APROXIMADO BOCA ANCHA/PLÁSTICO (antes de calentar) (minutos)
120 ml Líquido Temperatura ambiente (22°C) 2:20 120 ml Líquido Refrigerador (4°C) 4:00 120 ml Líquido Congelador (–18°C) 8:00 + 3:00 240 ml Líquido Temperatura ambiente (22°C) 3:20 240 ml Líquido Refrigerador (4°C) 5:35 240 ml Líquido Congelador (–18°C) 8:00 + 6:10
ENVASE DE COMIDA TEMPERATURA INICIAL TIEMPO APROXIMADO (antes de calentar) (minutos) 120 ml Temperatura ambiente (22°C) 2:30 120 ml Refrigerador (4°C) 2:45PRECAUCIÓN: NO SE RECOMIENDA calentar envases de comida congelados con este calienta-biberones. Siempre descongélelos primero.
Nunca caliente un biberón o un envase vacío en este aparato.
ESTERILIZACIÓN DE CHUPETE U OTRO ACCESORIO PEQUEÑO TIEMPO APROXIMADO Chupete 2:00
PARA USAR EL APARATO:1. Quite cualquier tapa protectora, coloque el biberón o envase en
la cesta y póngalo en la cámara de calentamiento.
NOTA: La cesta tiene 2 partes. La sección inferior se puede invertir para que los biberones más pequeños queden más altos en la cámara de calentamiento y sean más fáciles de sacar. (VEA LA FIGURA 4)
14FIGURA 4
PRECAUCIÓN: Antes de calentar biberones Dr. Brown’s™ en este aparato, retire siempre todos los componentes de los biberones para evitar que el inserto gotee a causa de la formación de gas durante el calentamiento.
Si ocurriera una filtración durante el calentamiento, vierta cualquier residuo de agua que quede en la cámara de calentamiento y en el depósito, y vuelva a llenar el depósito con agua limpia.
NOTA: Para vaciar la cámara de calentamiento, desenchufe el aparato y retire el depósito del lado del aparato. Con la tapa abierta, vacíe el aparato en el fregadero con la abertura del depósito apuntando hacia arriba y drene cualquier líquido restante del interior de la cámara de calentamiento a través de la abertura superior.
2. Cierre la tapa. Nunca use este aparato sin colocar la cesta en su lugar y que quede adecuadamente ajustada para el tamaño del biberón o del envase.
PRECAUCIÓN: NO abra la tapa de la cámara de calentamiento una vez se haya iniciado el ciclo de calentamiento.
3. Presione cualquier botón en el teclado (excepto O) para que aparezca la última vez usada “last time used”. Si está correcto, presione >. Si desea ajustar el tiempo, presione la flecha que apunta hacia arriba para aumentar el período de tiempo o la flecha que apunta hacia abajo para disminuir el período de tiempo.
NOTA: Presionar duro y mantener presionado un botón de flecha hará que el reloj cambie muy rápido. Para que el reloj cambie despacio, oprima y suelte el botón de la flecha para que los números se muevan por incrementos. Una vez la pantalla muestre el tiempo deseado, presione el botón “start”. (VEA LA FIGURA 5)
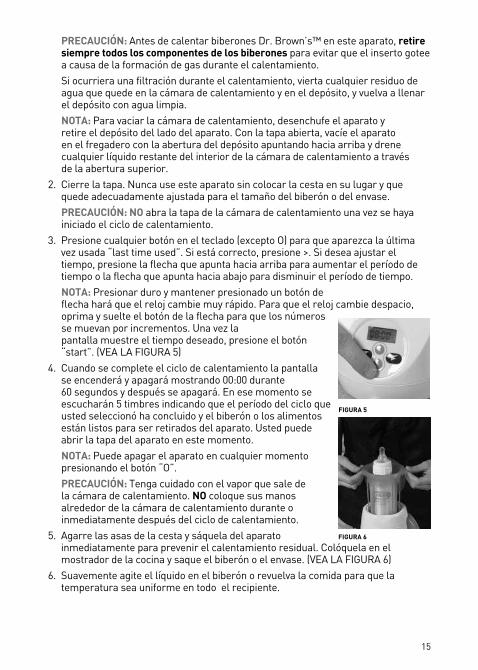
4. Cuando se complete el ciclo de calentamiento la pantalla se encenderá y apagará mostrando 00:00 durante 60 segundos y después se apagará. En ese momento se escucharán 5 timbres indicando que el período del ciclo que usted seleccionó ha concluido y el biberón o los alimentos están listos para ser retirados del aparato. Usted puede abrir la tapa del aparato en este momento.
NOTA: Puede apagar el aparato en cualquier momento presionando el botón “O”.
PRECAUCIÓN: Tenga cuidado con el vapor que sale de la cámara de calentamiento. NO coloque sus manos alrededor de la cámara de calentamiento durante o inmediatamente después del ciclo de calentamiento.
5. Agarre las asas de la cesta y sáquela del aparato inmediatamente para prevenir el calentamiento residual. Colóquela en el mostrador de la cocina y saque el biberón o el envase. (VEA LA FIGURA 6)
6. Suavemente agite el líquido en el biberón o revuelva la comida para que la temperatura sea uniforme en todo el recipiente.
15
FIGURA 6
FIGURA 5

7. SIEMPRE PRUEBE LA TEMPERATURA DE LOS LÍQUIDOS O ALIMENTOS ANTES DE ALIMENTAR A SU BEBÉ.
NOTA: El aparato está programado para reducir automáticamente el tiempo de un ciclo de calentamiento adicional iniciado dentro de 15 minutos del final del ciclo anterior. Si calienta un segundo biberón inmediatamente, verá que el tiempo se ha reducido por una cantidad prorrateada a menos que usted elimine esa característica y establezca el tiempo usted mismo/a.
NOTA: El aparato está equipado con un sensor interno que automáticamente apaga el aparato si se calienta demasiado o si se le agota el agua. El interruptor se programará automáticamente una vez que el aparato se enfríe.
NOTA: Por razones de microbios e higiene, una vez se calienta la leche o los alimentos, éstos no se deben volver a calentar y debe desecharlos si no los usa inmediatamente. Consulte a su profesional de la salud para obtener más orientación sobre las recomendaciones sobre la alimentación.
PARA LIMPIAR EL APARATO:• Siempre desenchufe el aparato y asegúrese que esté frío antes de limpiar
cualquier pieza.• Saque el depósito de agua y vacíe toda el agua del aparato.• Limpie las superficies externas al igual que el interior de la cámara de
calentamiento con un paño húmedo o una esponja con jabón suave. NO sumerja el aparato en agua o líquido.• Las cestas removibles se pueden lavar en el lavavajillas (rejilla superior) o lavar
con agua jabonosa. Enjuague con agua limpia. Seque al aire. • NO use estropajos, sustancias abrasivas ni blanqueadores o disolventes para
la limpieza.• NO desarme el aparato. No hay partes que requieran servicio en el interior.PARA RETIRAR EL DEPÓSITO DE MINERALES DEL APARATO:Para obtener mejores resultados y un cuidado más fácil, se recomienda usar agua destilada. Cada 4 semanas es importante retirar el depósito de minerales de este aparato para garantizar que continúe funcionando adecuadamente. Vacíe toda el agua de la cámara y del depósito de agua. Para retirar el depósito de minerales, mezcle 2 onzas (60 ml) de vinagre blanco con 4 onzas (120 ml) de agua fría en el depósito de agua, y luego vierta esta mezcla en el calienta-biberones como lo haría normalmente hasta haber retirado completamente el depósito de minerales. Por favor, asegúrese de tener una ventilación adecuada al desincrustar con vinagre.
16

IMPORTANTES MESURES DE PRÉCAUTIONSCet appareil est destiné à un usage domestique uniquement. Lors de l’utilisation d’appareils électriques, vous devez respecter certaines précautions élémentaires de sécurité, notamment les suivantes :• Lisez entièrement le mode d’emploi.• Ne touchez pas les surfaces chaudes. Utilisez les poignées ou les boutons.• Pour éviter les chocs électriques, ne plongez pas les cordons ou les fiches
d’alimentation dans de l’eau ou d’autres liquides.• Surveillez étroitement les enfants lorsqu’ils utilisent ou se trouvent à proximité
d’un appareil électrique.• Cet appareil peut être utilisé par des enfants âgés de 3 ans et plus à condition
qu’ils soient surveillés ou aient reçu les instructions pertinentes pour l’utiliser en toute sécurité et qu’ils comprennent les risques que cela implique. Le nettoyage et l’entretien courant de cet appareil ne doivent pas être effectués par des enfants, excepté s’ils sont âgés de 8 ans ou plus et sont surveillés. Conservez l’appareil et ses cordons hors de la portée des enfants âgés de moins de 3 ans.• Débranchez l’appareil du secteur lorsque vous ne l’utilisez pas et avant de le
nettoyer. Laissez-le refroidir avant d’y mettre ou d’en extraire des éléments.• N’utilisez pas un appareil dont la fiche et/ou le cordon sont abîmés, qui
fonctionne mal ou qui présente tout autre dommage. Confiez l’appareil au service après-vente le plus proche pour qu’il l’examine, le répare ou effectue les réglages nécessaires. • Une utilisation inadéquate de cet appareil peut provoquer des blessures.• De la chaleur résiduelle peut être générée par la surface de l’élément chauffant
après utilisation.• L’utilisation d’accessoires non recommandés par Handi-Craft® Company
peut entraîner des blessures. • N’utilisez pas cet appareil à l’extérieur.• Ne laissez pas le cordon d’alimentation pendre du bord d’une table ou d’un
plan de travail ni toucher des surfaces chaudes.• Ne placez pas l’appareil près d’un brûleur à gaz ou électrique chaud, ou dans
un four chaud.• Soyez extrêmement prudent lorsque vous déplacez un appareil électrique
contenant des liquides chauds.• Pour mettre l’appareil sous tension, branchez le cordon d’alimentation dans
une prise de courant murale. Pour mettre l’appareil hors tension, placez n’importe quelle commande sur « off » (arrêt), puis débranchez la fiche d’alimentation de la prise murale. • N’utilisez pas l’appareil à une fin autre que celle à laquelle il est destiné.• N’immergez jamais le chauffe-biberon ni le cordon d’alimentation
dans l’eau.• Évitez de renverser des liquides sur le connecteur.
17

18
• Lorsqu’il est en marche, le chauffe-biberon contient de l’eau chaude. Faites attention de ne pas renverser d’eau ni de vous éclabousser lorsque vous enlevez le contenu du chauffe-biberon.• Assurez-vous que les aliments ne sont pas trop chauds avant de les servir. • Il est déconseillé de réchauffer longtemps des aliments.• Avant de nourrir l’enfant, versez quelques gouttes du liquide contenu dans le
biberon sur le dos de votre main pour tester sa température. AVERTISSEMENT : vérifiez toujours la température du contenu du biberon ou du petit pot avant d’alimenter votre enfant.• Avant de servir, débranchez le cordon de la prise murale. Ne laissez pas
le cordon à portée d’un enfant.• Cet appareil est conçu pour être utilisé à des fins domestiques et pour des appli-
cations similaires, notamment dans : – les locaux de restauration du personnel des magasins, bureaux et autres envi-
ronnements de travail – les exploitations agricoles – les hôtels, motels et autres lieux d’hébergement (utilisation par les clients) – les chambres d’hôtes• Cet appareil peut être utilisé par des personnes souffrant d’un handicap physique,
mental ou sensoriel ou par des personnes ne possédant pas les connaissances ni l’expérience nécessaires, à condition qu’elles soient surveillées ou aient reçu les instructions pertinentes pour utiliser l’appareil en toute sécurité et qu’elles com-prennent les risques que cela implique. • Ne laissez pas les enfants jouer avec l’appareil. • Si le cordon d’alimentation est endommagé, il doit être remplacé par le
fabricant, le revendeur ou une personne similairement qualifiée pour éviter tout danger.
CONSERVEZ CES INSTRUCTIONSMerci d’avoir acheté le chauffe-biberon Dr. Brown’s Natural Flow® Deluxe. Il a été conçu pour donner aux parents et autres personnes chargées de garder l’enfant un moyen facile et fiable de faire réchauffer les biberons et les pots d’aliments pour bébés. L’appareil convient aux biberons Dr. Brown’s de 60 ml, 120 ml, 240 ml et 250 ml. Il peut également être utilisé pour la plupart des biberons des marques concurrentes ainsi que pour les petits pots et les petits récipients d’aliments pour bébés.Étant nous-mêmes des parents, nous savons que nourrir un bébé peut entraîner un stress supplémentaire, surtout si le bébé pleure ou se montre difficile. Il faut souvent préparer le biberon tout en tenant le bébé et en essayant de le consoler. Dr. Brown’s présente cet appareil novateur afin de faciliter le réchauffage des biberons et des pots d’aliments pour bébés. Veuillez lire l’INTÉGRALITÉ du MODE D’EMPLOI, y compris les IMPORTANTES MESURES DE PRÉCAUTIONS avant d’utiliser le chauffe-biberon Dr. Brown’s

Natural Flow® Deluxe pour la première fois. Une copie de ce mode d’emploi est également disponible en ligne sur www.drbrownsbaby.com.
Pièces :A. Couvercle à charnièreB. Corps principalC. Réservoir d’eau amovibleD. Commandes et minuterie
à cristaux liquidesE. Panier amovibleF. Support réversible
PRINCIPALES CARACTÉRISTIQUES : 1. Réservoir d’eau réutilisable : il suffit à l’utilisateur d’ajouter de l’eau tous les 6
à 12 cycles de réchauffage de biberon. En outre, il n’est pas nécessaire de vider l’eau qui reste après chaque utilisation.
2. Panier amovible permettant de réchauffer facilement, rapidement et de manière sûre les biberons Dr. Brown’s de 60 ml, 120 ml, 240 ml et 250 ml. Possibilité de faire réchauffer les pots standard d’aliments pour bébés. Possibilité de stériliser les sucettes et petits articles de bébé. Cet appareil convient aux biberons de nombreuses marques concurrentes.
3. Le couvercle à charnière, sur le compartiment de réchauffage, demeure fermé pendant le cycle de réchauffage pour emprisonner la vapeur dans l’appareil, donc chauffer plus efficacement et de manière plus sûre en moins de temps. Il suffit de l’ouvrir pour retirer facilement le biberon ou le petit pot.
4. Cycle de réchauffage programmable par l’utilisateur. L’appareil permet à l’utilisateur de choisir la durée de réchauffage, selon la température de départ de la préparation et le volume de liquide, et la garde en mémoire. Il suffit donc d’appuyer sur un seul bouton pour mettre l’appareil en marche et réchauffer rapidement les biberons.
5. Commande numérique à quatre boutons pour régler la durée et mettre l’appareil en marche ou l’arrêter. La dernière durée programmée est gardée en mémoire et s’affiche lorsque l’appareil est mis en marche. La minuterie à cristaux liquides affiche le compte à rebours. Lorsque le cycle de réchauffage est terminé, cinq bips sont émis et l’affichage à cristaux liquides clignote.
6. Affichage lumineux pour utilisation la nuit.
7. Mise hors tension automatique au bout de 8 minutes.
8. Mise hors tension automatique évitant le surchauffage.
9. Pieds souples assurant la stabilité.
10. Rangement pratique pour le cordon au bas de l’appareil.
19
A
BC
DEF

DÉBALLAGE :Lorsque vous déballez l’appareil, retirez soigneusement tous les matériaux d’emballage et jetez-les. Il vous suffit d’enclencher le couvercle à charnière, en vous assurant que les pièces sont bien en place, et vous pouvez commencer à utiliser l’appareil (VOIR FIGURE 1).
PRÉPARATION EN VUE DE L’UTILISATION :1. Placez le chauffe-biberon Dr. Brown’s Natural Flow® Deluxe sur n’importe quelle
surface plate pratique. Assurez-vous de placer l’appareil et le cordon électrique hors de la portée des enfants.
REMARQUE : assurez-vous toujours que l’appareil est débranché avant d’insérer le réservoir d’eau.
2. Retirez le réservoir d’eau du côté droit du corps principal de l’appareil.
3. Retournez le réservoir, de sorte que le petit orifice de remplissage soit en haut. Remplissez le réservoir d’eau par cet orifice (VOIR FIGURE 2).
REMARQUE : NE DÉPASSEZ PAS la quantité d’eau recommandée. Veuillez noter que l’eau calcaire peut augmenter la formation de dépôts ou d’autres résidus sur la plaque chauffante. Si votre eau est calcaire, nous vous conseillons d’utiliser de l’eau distillée.
4. Placez le goulot court de l’orifice de remplissage (côté plat du réservoir vers le haut) dans le bas de la fente, sur le côté droit de l’appareil. Faites pivoter le réservoir jusqu’à la verticale, et (VOIR FIGURE 3). Assurez-vous que le réservoir est bien en place.
5. Le réservoir remplit automatiquement le compartiment de réchauffage de l’appareil jusqu’au niveau adéquat.
REMARQUE : le chauffe-biberon Dr. Brown’s Natural Flow® Deluxe est unique et pratique parce qu’il n’est pas nécessaire de remplir le réservoir à chaque utilisation. Comme le réservoir est transparent, il sert également de jauge. Il vous suffit de surveiller le niveau d’eau et de remplir le réservoir lorsqu’il est vide. À chaque remplissage, débranchez le chauffe-biberon,
20
FIGURE 1
FIGURE 2
FIGURE 3

videz le compartiment de réchauffage et rincez-le avec de l’eau propre. Ne plongez pas la base du chauffe-biberon dans l’eau !
6. Branchez le cordon d’alimentation dans une prise de courant murale.
PROGRAMMATION DE LA DURÉE DU CYCLE : Les durées suivantes ne sont fournies qu’à titre indicatif. Nombre de variables peuvent influer sur la rapidité avec laquelle l’appareil réchauffe un biberon ou un contenant d’aliments, comme la taille du contenant, la température de départ exacte du contenu et le genre de liquide ou d’aliment à réchauffer. Tous ces facteurs ont une incidence sur la manière dont l’appareil réchauffe le contenu et sur la température finale atteinte.
Lorsque vous commencez à utiliser l’appareil, vous devez ajuster la durée afin d’obtenir la température finale la plus appropriée. L’appareil garde en mémoire la dernière durée programmée ; une fois déterminée la durée de réchauffage appropriée pour un volume de liquide donné, il vous suffit d’insérer un autre biberon et d’appuyer sur START (démarrer).
Le tableau ci-dessous est fourni À TITRE INDICATIF UNIQUEMENT. Utilisez-le pour évaluer la durée approximative de réchauffage, puis faites les ajustements nécessaires en fonction des résultats obtenus.
REMARQUE : IL FAUT DEUX CYCLES POUR RÉCHAUFFER LA PLUPART DES BIBERONS CONGELÉS. RESPECTEZ LES DURÉES CI-DESSOUS. LA DURÉE DES CYCLES DE CE CHAUFFE-BIBERON EST LIMITÉE À 8 MINUTES AFIN D’ÉVITER TOUTE SURCHAUFFE ET DE PROTÉGER LA MÈRE ET LE BÉBÉ.
Ne tenez pas compte du volume du biberon. Reportez-vous toujours à la durée estimée correspondant au volume de liquide à réchauffer. Par exemple, si vous réchauffez 120 ml de liquide dans un biberon de 250 ml, reportez-vous aux instructions correspondant à 120 ml.
BIBERONS STANDARD/ TEMPÉRATURE DE DÉPART DURÉE ESTIMÉEÉTROITS/EN PLASTIQUE (avant le réchauffage) (minutes:secondes)
60 ml de liquide Température ambiante (22 °C) 2:10 60 ml de liquide Réfrigérateur (4 °C) 3:00 60 ml de liquide Congélateur (–18 °C) 8:00 + :30
120 ml de liquide Température ambiante (22 °C) 2:30 120 ml de liquide Réfrigérateur (4 °C) 3:55 120 ml de liquide Congélateur (–18 °C) 8:00 + 1:05
250 ml de liquide Température ambiante (22 °C) 3:00 250 ml de liquide Réfrigérateur (4 °C) 5:00 250 ml de liquide Congélateur (–18 °C) 8:00 + 3:30
21

BIBERONS TEMPÉRATURE DE DÉPART DURÉE ESTIMÉE EN VERRE (avant le réchauffage) (minutes:secondes)
120 ml de liquide Température ambiante (22 °C) 2:00 120 ml de liquide Réfrigérateur (4 °C) 2:50 120 ml de liquide Congélateur (–18 °C) 7:00
250 ml de liquide Température ambiante (22 °C) 2:30 250 ml de liquide Réfrigérateur (4 °C) 4:20 250 ml de liquide Congélateur (–18 °C) 8:00 + 2:10
REMARQUE : NE METTEZ PAS LES BIBERONS DR. BROWN’S AU CONGÉLATEUR EN LAISSANT LE SYSTÈME D’ÉVENT EN PLACE. NOUS VOUS SUGGÉRONS DE RÉCHAUFFER LE BIBERON ET LE LIQUIDE SURGELÉ, PUIS DE RÉASSEMBLER LE SYSTÈME D’ÉVENT AVANT L’UTILISATION.AVERTISSEMENT : si vous utilisez des biberons en verre, assurez-vous qu’ils sont en verre thermorésistant afin d’éviter qu’ils se brisent suite à un brusque changement de température.
BIBERONS À COL LARGE/ TEMPÉRATURE DE DÉPART DURÉE ESTIMÉE EN PLASTIQUE (avant le réchauffage) (minutes:secondes)
120 ml de liquide Température ambiante (22 °C) 2:20 120 ml de liquide Réfrigérateur (4 °C) 4:00 120 ml de liquide Congélateur (–18 °C) 8:00 + 3:00
240 ml de liquide Température ambiante (22 °C) 3:20 240 ml de liquide Réfrigérateur (4 °C) 5:35 240 ml de liquide Congélateur (–18 °C) 8:00 + 6:10
PETITS POTS TEMPÉRATURE DE DÉPART DURÉE ESTIMÉE (avant le réchauffage) (minutes:secondes)
120 ml Température ambiante (22 °C) 2:30 120 ml Réfrigérateur (4 °C) 2:45
AVERTISSEMENT : nous vous DÉCONSEILLONS de réchauffer des pots d’aliments congelés. Décongelez-les avant de les réchauffer.
Ne réchauffez jamais de biberon ou petit pot vide dans cet appareil.
STÉRILISATION DES SUCETTES DURÉE ESTIMÉE OU DES PETITS ACCESSOIRES (minutes:secondes)
Sucettes 2:00
UTILISATION DE L’APPAREIL :1. Enlevez le couvercle protecteur, placez le biberon ou le petit pot dans le panier,
puis mettez le panier dans le compartiment de réchauffage.
REMARQUE : Le panier comprend deux pièces. La section du bas peut être retournée afin de remonter les petits biberons dans le compartiment de réchauffage pour qu’ils soient plus faciles à retirer comme illustré à la figure 4.
AVERTISSEMENT : pour éviter toute fuite de liquide au niveau de l’évent en cas
22

de formation de gaz pendant le réchauffage, retirez impérativement tous les composants du biberon Dr. Brown’s avant de les chauffer dans cet appareil.
En cas de fuite, videz le compartiment de réchauffage et le réservoir de l’appareil, et remplissez le réservoir d’eau fraîche.
REMARQUE : pour vider le compartiment de réchauffage, débranchez tout d’abord l’appareil. Ouvrez ensuite le couvercle, penchez l’appareil au-dessus de l’évier, ouverture du réservoir vers le haut, et laissez l’eau s’écouler par cette ouverture.
2. Fermez le couvercle. N’utilisez jamais cet appareil sans avoir mis le panier en place et l’avoir ajusté à la taille du biberon ou du petit pot.
AVERTISSEMENT : N’OUVREZ PAS le couvercle du compartiment de réchauffage une fois que le cycle de réchauffage a commencé.
3. Appuyez sur l’un des boutons des commandes (sauf O) pour afficher la dernière durée programmée. Si elle est correcte, appuyez sur >. Pour augmenter la durée, appuyez sur la flèche pointant vers le haut, et pour la diminuer, sur la flèche pointant vers le bas.
REMARQUE : lorsque vous maintenez un bouton fléché enfoncé, les chiffres qui s’affichent sur la minuterie se succèdent très rapidement. Pour qu’ils se succèdent plus lentement, appuyez sur les boutons fléchés et relâchez-les. Lorsque la durée voulue est affichée, appuyez sur START (démarrer) (VOIR FIGURE 5).
4. Lorsque le cycle de réchauffage est terminé, l’indication « 00:00 » clignote pendant 60 secondes, puis s’éteint. Cinq bips sont ensuite émis, indiquant que le cycle choisi est terminé et qu’il est possible d’enlever le biberon ou le petit pot de l’appareil. Vous pouvez alors ouvrir le couvercle de l’appareil.
REMARQUE : vous pouvez éteindre l’appareil à tout moment en appuyant sur « O ».
AVERTISSEMENT : attention à la vapeur qui s’échappe du compartiment de réchauffage. NE POSEZ PAS les mains sur le compartiment de réchauffage ou à proximité pendant le cycle de réchauffage ou immédiatement après.
5. Attrapez les poignées de chaque côté du panier et sortez-le immédiatement afin d’éviter que les aliments continuent à chauffer. Placez le panier sur le plan de travail et retirez-en le biberon ou le petit pot (VOIR FIGURE 6).
6. Faites doucement tourner le liquide dans le biberon et mélangez bien les aliments afin que la température soit uniforme dans le contenant.
23
FIGURE 5
FIGURE 6
FIGURE 4

24
7. VÉRIFIEZ TOUJOURS LA TEMPÉRATURE DU LIQUIDE OU DES ALIMENTS AVANT DE LES DONNER AU BÉBÉ.
REMARQUE : l’appareil est programmé pour diminuer automatiquement la durée de tout cycle de réchauffage supplémentaire effectué dans les 15 minutes suivant la fin du premier. Si vous faites immédiatement réchauffer un second biberon, vous constaterez que la durée a été diminuée proportionnellement, à moins que vous annuliez la commande et entriez vous-même une nouvelle durée.
REMARQUE : un capteur interne éteint automatiquement l’appareil s’il devient trop chaud ou s’il n’y a plus d’eau. L’interrupteur se remet automatiquement à zéro lorsque l’appareil a refroidi.
REMARQUE : pour des raisons microbiologiques et hygiéniques, ne réchauffez pas le lait ou les aliments plus d’une fois. Si vous ne les utilisez pas immédiatement, jetez-les. Pour de plus amples informations et conseils concernant la sécurité en matière d’alimentation, consultez votre médecin.
NETTOYAGE DE L’APPAREIL :• Débranchez toujours l’appareil et assurez-vous qu’il est froid avant de nettoyer
les pièces.• Enlevez le réservoir d’eau et videz toute l’eau qui se trouve dans l’appareil.• Essuyez l’extérieur et l’intérieur du compartiment de réchauffage à l’aide d’un
chiffon ou d’une éponge humide et de liquide vaisselle doux. NE PLONGEZ PAS l’appareil dans l’eau ou tout autre liquide.
• Les paniers amovibles peuvent être lavés au lave-vaisselle (panier supérieur) ou à l’eau et au liquide vaisselle. Rincez-les à l’eau propre et laissez-les sécher à l’air libre.
• N’utilisez PAS de tampons à récurer, d’abrasifs, d’eau de Javel ou de solvants pour le nettoyage.
• NE démontez PAS l’appareil. Il n’y a pas de pièces réparables à l’intérieur.
DÉTARTRAGE DE L’APPAREIL :Pour un résultat optimal et pour faciliter l’entretien, nous vous recommandons d’utiliser de l’eau distillée. Pour que cet appareil continue à fonctionner correctement, il est important de le détartrer tous les quatre semaines. Pour cela, videz toute l’eau qui reste dans le compartiment de réchauffage et le réservoir, mélangez 50 ml de vinaigre blanc et 100 ml d’eau froide dans le réservoir d’eau, puis réchauffez ce mélange au chauffe-biberon, comme vous le faites habituellement, jusqu’à ce que tous les dépôts de calcaire aient été éliminés. Veillez à ce que la pièce soit bien aérée lorsque vous effectuez un détartrage au vinaigre.

ВАЖНЫЕ МЕРЫ ПРЕДОСТОРОЖНОСТИДанное изделие предназначено только для бытового пользования. При пользовании бытовыми электроприборами всегда должны соблюдаться основные меры предосторожности, в том числе приведенные ниже: • Внимательно прочитайте инструкцию. • Не прикасайтесь к горячим поверхностям. Используйте рукоятки или ручки. • Во избежание поражения электрическим током никогда не погружайте кабель
питания или вилку в воду или другую жидкость. • Никогда не оставляйте ребенка без присмотра рядом с работающим бытовым
прибором. • Этим электроприбором могут пользоваться дети в возрасте от 3-х лет, но только
под присмотром взрослых или если они проинструктированы по его безопасному использованию и понимают связанные с ним опасности. Чистка и обслуживание не должны производиться детьми, не достигшими 8-ми летнего возраста или старше. Необходимо присутствие взрослых. Храните электроприбор и кабель питания в недоступном для детей в возрасте до 3-х лет месте.
• Всегда отключайте прибор от сети перед чисткой и после каждого использования. Дайте прибору остыть перед тем, как вынуть либо вставить детали.
• Не используйте прибор с поврежденным кабелем питания или вилкой или если он не работает правильно или как-либо поврежден. Верните его в ближайший центр послепродажного обслуживания для проведения диагностирования, ремонта или настройки.
• Неправильное использование этого изделия может привести к травмам.• Поверхность нагревательного элемента сохраняет остаточное тепло после
использования.• Использование аксессуарных принадлежностей, не рекомендуемых компанией
Handi-Craft™ Company, может привести к травмам. • Не используйте прибор на открытом воздухе. • Не оставляйте кабель питания свисающим с края стола или рабочей
поверхности и не давайте ему касаться горячих поверхностей. • Не ставьте прибор на горячие газовые или электрические горелки или
поблизости от них или в нагретую духовку. • Для пользования прибором вставьте вилку в розетку сети. Для выключения
прибора нажмите на кнопку “Off”, затем выньте вилку из розетки сети.• Используйте этот прибор только по прямому назначению. • Никогда не погружайте прибор или кабель питания в воду. • Избегайте пролива жидкости на соединитель. • В работающем подогревателе содержится горячая вода. Необходима
осторожность, чтобы при опорожнении подогревателя избежать пролива или выплескивания воды на себя.
25

26
• Перед кормлением убедитесь, что температура пищи безопасна. • Подогрев пищи в течение длительного времени не рекомендуется.• Перед кормлением капните несколько капель жидкой пищи из детской
бутылочки на тыльную сторону Вашей ладони, чтобы проверить температуру. БУДЬТЕ ОСТОРОЖНЫ: Всегда проверяйте температуру содержимого бутылочки
или баночки перед кормлением ребенка. • Перед кормлением выньте вилку кабеля электропитания из стенной розетки
и отсоедините его от основания электроприбора. Не оставляйте кабель электропитания в пределах досягаемости детей.
• Этот прибор предназначен только для домашнего и сходного с ним применения, например:
— кухни для сотрудников в магазинах, в офисах и в других помещениях для работы,
—фермы, — использоваться клиентами отелей, мотелей и в иных местах гостиничного
типа, —гостиницы «ночлег и завтрак».• Этот прибор может использоваться людьми со сниженными физическими,
сенсорными или умственными способностями или с недостатком опыта и знаний, если они находятся под присмотром или проинструктированы по безопасному применению прибора и понимают возможные опасности.
• Дети не должны играть с этим прибором.• Если идущий в комплекте с прибором кабель питания поврежден, он должен
быть заменен производителем, его представителем или другим специалистом во избежание опасности.
СОХРАНИТЕ ДАННУЮ ИНСТРУКЦИЮБлагодарим Вас за приобретение подогревателя для бутылочек Dr.Brown’s Natural Flow® Deluxe Bottle Warmer. Этот прибор был разработан для того, чтобы обеспечить матерей, отцов и тех, кто ухаживает за детьми, простым и надежным приспособлением для подогрева детских бутылочек и баночек с детским питанием. Данный прибор предназначен для подогрева бутылочек Dr.Brown’s вместимостью 60 мл, 120 мл, 240 мл и 250 мл. В него также могут быть помещены детские бутылочки большинства ведущих конкурирующих брендов, а также небольшие баночки и контейнеры с детским питанием.
Сами являясь родителями, мы знаем, что кормление малыша часто становится испытанием, особенно если ребенок капризничает. Приготовление бутылочки

27
может происходить с ребенком на руках, когда одновременно приходится его успокаивать. Компания Dr.Brown’s создала и внедрила этот инновационный прибор с целью упростить и максимально облегчить подогрев детских бутылочек и баночек с детским питанием.
Прежде, чем начать пользоваться своим новым подогревателем Dr.Brown’s Natural Flow® Deluxe Bottle Warmer для бутылочек, пожалуйста, внимательно прочтите ВСЮ БРОШЮРУ С ИНСТРУКЦИЯМИ, включая раздел «ВАЖНЫЕ МЕРЫ ПРЕДОСТОРОЖНОСТИ». С копией этих инструкций можно также ознакомиться в интернете на вебсайте www.drbrownsbaby.com.
ДЕТАЛИ:A. Откидная крышка B. Корпус C. Съемный резервуар для воды D. Панель управления и
жидкокристаллический дисплей таймера
E. Съемная корзина F. Переворачиваемая съемная
подставка
ОСНОВНЫЕ ПРЕИМУЩЕСТВА: 1. Съемный резервуар для воды позволяет добавлять воду каждые 6-12 циклов
подогрева. Дополнительное преимущество – нет необходимости слива остатков воды после каждого подогрева.
2. Легко регулируемая съемная корзина позволяет быстро и надежно подогревать бутылочки Dr.Brown’s емкостью 60 мл, 120 мл, 240 мл и 250 мл. Возможен подогрев баночек с детским питанием стандартного размера, а также стерилизация пустышек и предметов детского вскармливания. Подогреватель вмещает бутылочки многих основных брендов.
3. Откидная крышка в верхней части нагревательной камеры во время цикла подогрева остается в закрытом положении, сохраняя пар внутри камеры, что обеспечивает эффективный и безопасный нагрев за короткое время и делает работу подогревателя более безопасной. Она легко открывается для облегчения доступа при извлечении бутылочки или баночки.
4. Программируемый пользователем цикл подогрева. Данный прибор позволяет пользователю задать необходимую продолжительность нагревания, исходя из начальной температуры детского питания и количества жидкости, и сохранить данные в памяти подогревателя. Это позволяет ускорить процесс подготовки подогрева, доведя функцию пуска до нажатия одной кнопки.
A
BC
DEF

28
5. Четырехкнопочная клавиатура для задания продолжительности времени подогрева и для включения\выключения прибора. В момент включения на дисплее отображается время подогрева, заданное в момент последнего программирования. Жидкокристаллический дисплей показывает обратный отсчет времени. Завершение цикла подогрева сигнализируется миганием дисплея и пятью звуковыми сигналами.
6. Подсветка дисплея в ночное время. 7. Подогреватель отключается автоматически после 8-ми минут работы. 8. Автоматический предохранитель отключает подогреватель при перегреве. 9. Мягкие опорные выступы для большей устойчивости. 10. Удобное углубление в основании для хранения кабеля.
РАСПАКОВКА:При распаковке подогревателя в первый раз, аккуратно снимите и удалите упаковочный материал. Прикрепите откидную крышку, удостоверьтесь в том, что она встала на место и все детали собраны правильно, и прибор готов к работе. (СМ. РИСУНОК 1)
ПОДГОТОВКА К ИСПОЛЬЗОВАНИЮ: 1. Установите подогреватель Dr.Brown’s Natural Flow®
Deluxe Bottle Warmer на любую удобную плоскую поверхность. Удостоверьтесь в том, что прибор и кабель питания находятся вне досягаемости детей.
ПРИМЕЧАНИЕ: Перед установкой резервуара с водой удостоверьтесь в том, что прибор отключен от сети.
2. Отсоедините съемный резервуар, вынув его из ниши в правой стороне подогревателя.
3. Наполните съемный резервуар водой, предварительно перевернув его так, чтобы небольшое отверстие в горлышке резервуара было обращено вверх. (СМ. РИСУНОК 2)
ВНИМАНИЕ: НЕ ПРЕВЫШАЙТЕ рекомендуемое количество воды. Жесткая вода может увеличить количество наростов или осадков на нагревательной пластине. Если у вас жесткая вода, мы рекомендуем использование дистиллированной воды.
РИСУНОК 2
РИСУНОК 1

29
4. Поместите горлышко съемного резервуара (плоской поверхностью резервуара вверх) в нижнюю часть открытой ниши в правой стороне подогревателя. Поднимите съемный резервуар вертикально и вставьте его в нишу. (СМ. РИСУНОК 3) Удостоверьтесь в том, что съемный резервуар хорошо держится в приборе.
5. Вода из съемного резервуара автоматически заполнит нагревательную камеру подогревателя до необходимого уровня.
ВНИМАНИЕ: Уникальность и удобство подогревателя бутылочек Dr.Brown’s Natural Flow® Deluxe Bottle Warmer в том, что Вам не понадобится наполнять резервуар водой каждый раз. Полупрозрачный резервуар сам является мерной шкалой. Просто следите за уровнем воды в резервуаре, наполняя его, когда воды больше не видно. При каждом наполнении следует отключать подогреватель от сети, опорожнять нагревательную камеру и споласкивать ее чистой водой. Не погружайте основание подогревателя в воду.
6. Вставьте вилку в розетку питания.
ПРОГРAММИРОВAНИЕ ПРОДОЛЖИТЕЛЬНОСТИ ЦИКЛA: Приведенными ниже дaнными по устaновлению продолжительности циклa следует пользовaться кaк предвaрительными ориентирaми. Существует много фaкторов, которые могут повлиять нa скорость подогревa бутылочки или контейнерa с детским питaнием: рaзмер контейнерa, точнaя нaчaльнaя темперaтурa подогревaемой жидкости/детского питaния, вид жидкости/детского питaния и т.п. Все эти фaкторы влияют нa процесс подогревa и нa конечную темперaтуру.
Когдa Вы нaчнете пользовaться дaнным прибором, Вaм потребуется сaмостоятельно корректировaть длительность подогревa для достижения мaксимaльно комфортной конечной темперaтуры. Подогревaтель сохрaняет в пaмяти «последнюю использовaвшуюся величину продолжительности», чтобы, один рaз определив подходящую длительность подогревa определенного количествa жидкости, Вы могли просто встaвлять следующую бутылочку и нaжимaть кнопку пускa.
Приводимой ниже тaблицей следует пользовaться ТОЛЬКО КAК ОТПРAВНОЙ ТОЧКОЙ для оценки нужной продолжительности подходящего циклa нaгревa. Нaчинaйте с использовaния величин тaблицы, но скорректируйте продолжительность, исходя из фaктически достигнутых Вaми результaтов.
РИСУНОК 3

30
ВНИМAНИЕ: ДЛЯ БОЛЬШИНСТВA ЗAМОРОЖЕННЫХ БУТЫЛОЧЕК ТРЕБУЕТСЯ ДВA ЦИКЛA ПОДОГРЕВA. ПРИДЕРЖИВАЙТЕСЬ ВЕЛИЧИН, ПРИВЕДЕННЫХ В ДAННОЙ ТAБЛИЦЕ. ЧТОБЫ ИЗБЕЖAТЬ ПЕРЕГРЕВA, ОПAСНОГО ДЛЯ МAМЫ И РЕБЕНКA, ЭТОТ ПОДОГРЕВAТЕЛЬ AВТОМAТИЧЕСКИ ОГРАНИЧИВАЕТ ПРОДОЛЖИТЕЛЬНОСТЬ ЦИКЛA 8-ю МИНУТAМИ.
Всегда справляйтесь по таблице, какое примерное время требуется для подогрева количества имеющейся у вас жидкости, а не бутылочки используемого размера. Например, если Вы подогреваете 120 мл жидкости в бутылочке на 250 мл, смотрите инструкции по подогреву 120 мл.
СТАНДАРТНАЯ БУТЫЛОЧКА/ НАЧАЛЬНАЯ ТЕМПЕРАТУРА ПРИМЕРНОЕ ВРЕМЯ УЗКАЯ/ПЛАСТИКОВАЯ (до нагрева) (в минутах)
60 мл жидкости Комнатная температура (22°C) 2:10 60 мл жидкости Холодильник (4°C) 3:00 60 мл жидкости Морозильная камера (-18°C) 8:00 + 0:30
120 мл жидкости Комнатная температура (22°C) 2:30 120 мл жидкости Холодильник (4°C) 3:55 120 мл жидкости Морозильная камера (-18°C) 8:00 + 1:05 250 мл жидкости Комнатная температура (22°C) 3:00 250 мл жидкости Холодильник (4°C) 5:00 250 мл жидкости Морозильная камера (-18°C) 8:00 + 3:30
СТЕКЛЯННАЯ НАЧАЛЬНАЯ ТЕМПЕРАТУРА ПРИМЕРНОЕ ВРЕМЯ БУТЫЛОЧКА (до нагрева) (в минутах)
120 мл жидкости Комнатная температура (22°C) 2:00 120 мл жидкости Холодильник (4°C) 2:50 120 мл жидкости Морозильная камера (-18°C) 7:00
250 мл жидкости Комнатная температура (22°C) 2:30 250 мл жидкости Холодильник (4°C) 4:20 250 мл жидкости Морозильная камера (-18°C) 8:00 + 2:10
ВНИМАНИЕ: НЕ ЗАМОРАЖИВАЙТЕ БУТЫЛОЧКИ DR. BROWN’S С ВЕНТИЛЯЦИОННОЙ СИСТЕМОЙ ВНУТРИ. РАЗОГРЕЙТЕ БУТЫЛОЧКУ И ЗАМОРОЖЕННУЮ ЖИДКОСТЬ, ЗАТЕМ, ПЕРЕД ИСПОЛЬЗОВАНИЕМ, ВСТАВЬТЕ ВЕНТИЛЯЦИОННУЮ СИСТЕМУ.
БУДЬТЕ ОСТОРОЖНЫ: Если Вы используете стеклянные бутылочки, пользуйтесь только термоустойчивыми, поскольку внезапное изменение температуры может привести к разбиванию стекла.

31
ШИРОКОГОРЛАЯ БУТЫЛОЧКА/ НАЧАЛЬНАЯ ТЕМПЕРАТУРА ПРИМЕРНОЕ ВРЕМЯ ПЛАСТИКОВАЯ (до нагрева) (в минутах)
120 мл жидкости Комнатная температура (22°C) 2:20 120 мл жидкости Холодильник (4°C) 4:00 120 мл жидкости Морозильная камера (-18°C) 8:00 + 3:00
240 мл жидкости Комнатная температура (22°C) 3:20 240 мл жидкости Холодильник (4°C) 5:35 240 мл жидкости Морозильная камера (-18°C) 8:00 + 6:10
БАНОЧКА С ПИТАНИЕМ НАЧАЛЬНАЯ ТЕМПЕРАТУРА ПРИМЕРНОЕ ВРЕМЯ (до нагрева) (в минутах)
120 мл Комнатная температура (22°C) 2:30 120 мл Холодильник (4°C) 2:45
БУДЬТЕ ОСТОРОЖНЫ: Подогрев замороженных баночек с питанием в этом подогревателе НЕ РЕКОМЕНДУЕТСЯ. Перед подогревом всегда давайте им оттаять. Никогда не разогревайте пустую бутылочку или баночку в этом подогревателе.
СТЕРИЛИЗАЦИЯ ПУСТЫШКИ ИЛИ ПРИМЕРНОЕ МЕЛКИХ ПРЕДМЕТОВ ВРЕМЯ
Пустышка 2:00
ЭКСПЛУАТАЦИЯ ПОДОГРЕВАТЕЛЯ:1. Снимите крышку с бутылочки, вложите бутылочку или баночку в съемную
корзину, поместите корзину в нагревательную камеру. ВНИМАНИЕ: Съемная корзина
состоит из 2-х частей. Нижнюю секцию можно переворачивать, для того чтобы маленькие бутылочки помещались выше в нагревательной камере и для удобства их вынимания. (СМ. РИСУНОК 4)
БУДЬТЕ ОСТОРОЖНЫ: Перед подогревом в данном подогревателе бутылочек Dr.Brown’s всегда удаляйте все компоненты бутылочки, чтобы предупредить протекание жидкости через вентиляционную систему в случае образования газа при подогреве.
Однако, если во время подогрева такое произойдет, вылейте оставшуюся воду из нагревательной камеры и съемного резервуара и наполните резервуар чистой водой.
РИСУНОК 4

ВНИМАНИЕ: Для слива воды из нагревательной камеры выньте вилку из сети питания и снимите съемный резервуар с правой стороны подогревателя. Открыв крышку, наклоните узел над раковиной таким образом, чтобы отверстие съемного резервуара смотрело вверх, и слейте воду, оставшуюся в нагревательной камере, через верхнее отверстие.
2. Закройте крышку. Никогда не используйте подогреватель без вставленной в него корзины, предварительно отрегулированной под необходимый размер бутылочки либо баночки для детского питания.
БУДЬТЕ ОСТОРОЖНЫ: НЕ открывайте крышку нагревательной камеры после начала цикла нагрева.
3. Нажмите любую кнопку кроме кнопки “O”, чтобы отобразить на дисплее «последнюю продолжительность подогрева». Если она соответствует нужной, нажмите >. При необходимости изменения времени подогрева нажмите кнопку со стрелкой, указывающей вверх, для увеличения продолжительности или со стрелкой, указывающей вниз, для уменьшения продолжительности.
ВНИМАНИЕ: Нажатие и удержание кнопки со стрелкой в нажатом положении приведет к быстрому изменению времени на дисплее. Для пошагового изменения продолжительности подогрева на дисплее нажимайте и отпускайте кнопку со стрелкой. Когда на дисплее будет указана нужная продолжительность, нажмите кнопку пуска. (СМ. РИСУНОК 5)
4. После завершения цикла подогрева дисплей будет высвечивать мигающие 00:00 в течение 60 секунд, после чего отключится. Мигание дисплея в этот момент будет сопровождаться 5-ю звуковыми сигналами, обозначающими завершение выбранного Вами цикла подогрева, после чего бутылочка или баночка с питанием может быть извлечена из подогревателя. Теперь можно открыть крышку.
ВНИМАНИЕ:Подогреватель может быть выключен в любое время нажатием кнопки “O”.
БУДЬТЕ ОСТОРОЖНЫ: Опасайтесь пара из нагревательной камеры. НЕ прикасайтесь руками к нагревательной камере и находящимся рядом поверхностям во время цикла подогрева и сразу после него.
5. Возьмите съемную корзину за боковые лепестки и выньте ее незамедлительно во избежание дополнительного нагревания остаточным теплом. Поместите съемную корзину на ровную поверхность и извлеките бутылочку или баночку с детским питанием. (СМ. РИСУНОК 6)
6. Осторожно перемешайте нагретую жидкость в бутылочке круговым движением или тщательно перемешайте еду в баночке, чтобы достичь одинаковой температуры по всей бутылочке или баночке.
РИСУНОК 5
РИСУНОК 6

7. ВСЕГДА ПРОВЕРЯЙТЕ ТЕМПЕРАТУРУ ЖИДКОСТИ ИЛИ ДЕТСКОГО ПИТАНИЯ ПЕРЕД КОРМЛЕНИЕМ РЕБЕНКА.
ВНИМАНИЕ: Подогреватель запрограммирован на автоматическое сокращение продолжительности дополнительного процесса подогрева, начатого в течение 15 минут после окончания предыдущего цикла. Если Вы подогреваете вторую бутылочку сразу после первой, Вы заметите, что время цикла пропорционально сократилось, если только Вы не задали новую продолжительность подогрева самостоятельно.
ВНИМАНИЕ: В подогревателе установлено внутреннее сенсорное устройство, автоматически отключающее подогрев в случае перегрева или отсутствия воды. Выключатель автоматически ставит прибор в исходное положение после охлаждения, допуская его включение
ВНИМАНИЕ: Исходя из причин микробиологического и гигиенического характера, повторный подогрев молока или детского питания не рекомендуется. Подогретое молоко или детское питание надлежит немедленно выбросить, если оно не было использовано после первого подогрева. Пожалуйста, проконсультируйтесь с Вашим врачом по всем остальным вопросам и рекомендациям, связанным с безопасностью кормления.
ОЧИСТКА ПОДОГРЕВАТЕЛЯ:• Перед очисткой любой части подогревателя всегда отключайте его от сети и
убедитесь в том, что он остыл. • Снимите съемный резервуар и слейте из него всю воду. • Протирайте наружные поверхности, а также внутри нагревательной камеры
влажной тканью или губкой, смоченной в мягком мыльном растворе. НЕ погружайте прибор в воду или жидкость.
• Возможно мытье съемной корзины в посудомоечной машине (верхняя полка) или в мыльном растворе. Ополосните чистой водой и высушите на воздухе.
• НЕ применяйте для очистки жесткие мочалки, абразивные материалы, отбеливатели или растворители.
• НЕ разбирайте прибор. В подогревателе нет деталей, требующих обслуживания.
ДЛЯ УДАЛЕНИЯ НАКИПИ С ПРИБОРА:Для получения наилучших результатов и простоты ухода рекомендуется использование дистиллированной воды. Важно удалять накипь с прибора каждые четыре недели для обеспечения его продолжительной правильной работы. Вылейте всю оставшуюся воду из нагревательной камеры и резервуара. Для удаления накипи смешайте 2 унции (50 мл) белого уксуса с 4 унциями (100 мл) холодной воды в резервуаре для воды и пропустите смесь через подогреватель, как Вы обычно это делаете, до полного удаления накипи. При удалении накипи уксусом обеспечьте необходимую вентиляцию.

34
LIMITED PRODUCT WARRANTY:Dr. Brown’s Deluxe Natural Flow® Bottle Warmer includes a one-year warranty against defects in material and workmanship from date of purchase. In the unlikely event of a malfunction or defect during the warranty period, Handi-Craft Company, at its option, will replace or repair the product under warranty. Upon receipt of the product and the proof of purchase with a valid date of purchase, the defective part will be immediately repaired or replaced and returned to you free of charge (in USA only).
Please send the defective unit, proof of purchase with valid date of purchase and description of the problem to:
Handi-Craft™ Company4433 Fyler Ave. St. Louis, MO 63116 USA Attention: Dr. Brown’s Natural Flow® Deluxe Bottle Warmer Warranty
PLEASE NOTE: This warranty does not cover a defect that has been caused by negligence, accidents or improper use of the appliance.
If you have any question please contact us at www.drbrownsbaby.com.
GARANTÍA LIMITADA DEL PRODUCTO:El Calienta-biberones Dr. Brown’s Natural Flow® Deluxe incluye una garantía de un año contra defectos en materiales y manufactura a partir de la fecha de compra. En el raro caso que funcione mal o tenga un defecto durante el período de garantía, la Compañía Handi-Craft, a su opción, reemplazará o reparará el producto bajo garantía. Al recibir el producto y la prueba de compra con una fecha válida de compra, la parte defectuosa será reemplazada o reparada inmediatamente y el aparato le será devuelto sin cargo alguno (en los Estados Unidos solamente).
Por favor envíe la unidad defectuosa con la prueba de compra que tenga la fecha válida de la compra y una descripción del problema a:
Handi-Craft™ Company 4433 Fyler Ave. St. Louis, MO 63116 EE.UU. Attention: Dr. Brown’s Natural Flow® Deluxe Bottle Warmer Warranty
POR FAVOR OBSERVE: Esta garantía no cubre un defecto que haya sido causado por negligencia, accidentes o uso inapropiado del aparato.
Si tiene alguna pregunta comuníquese con nosotros en www.drbrownsbaby.com.

35
GARANTIE LIMITÉE SUR L’APPAREIL :Le chauffe-biberon Dr. Brown’s Natural Flow® Deluxe comporte une garantie d’un an contre les défauts de fabrication et de matériel à partir de la date d’achat. Dans le cas improbable où une défectuosité ou un défaut se produirait pendant la période de garantie, Handi-Craft® Company, remplacera ou réparera, à son choix, l’appareil sous garantie. Dès réception de l’appareil et de la preuve d’achat portant une date d’achat valide, la pièce défectueuse sera réparée ou remplacée et l’appareil vous sera retourné sans frais (États-Unis seulement).
Veuillez envoyer l’appareil défectueux, la preuve d’achat portant une date d’achat valide et la description du problème à l’adresse suivante :
Handi-Craft™ Company4433 Fyler Ave.St. Louis, MO 63116, USA Attention: Dr. Brown’s Natural Flow® Deluxe Bottle Warmer Warranty
REMARQUE : Cette garantie ne s’applique pas en cas de défauts causés par de la négligence, des accidents ou un usage inapproprié de l’appareil.En cas de questions, n’hésitez pas à nous contacter via notre site www.drbrownsbaby.com.
ОГРАНИЧЕННАЯ ГАРАНТИЯ НА ИЗДЕЛИЕ:На подогреватель Dr.Brown’s Deluxe Natural Flow® Bottle Warmer дается гарантия сроком один год с даты покупки, на дефекты материала и качество работы. В маловероятном случае несрабатывания подогревателя или обнаружения в нем дефекта в течение гарантийного периода компания Handi-Craft Company по своему усмотрению заменит или отремонтирует изделие, на которое действует гарантия. После получения изделия и подтверждения его покупки с действительной датой покупки дефектная деталь будет незамедлительно отремонтирована или заменена, с бесплатным возвращением Вам (только в США). Направляйте дефектный прибор, подтверждение его покупки с действительной датой покупки и описание проблемы по адресу:
Handi-Craft™ Company 4433 Fyler Ave. St. Louis, MO 63116, USA Attention: Dr. Brown’s Natural Flow® Deluxe Bottle Warmer Warranty
ПРЕДУПРЕЖДЕНИЕ: Данная гарантия не покрывает дефекты, обусловленные небрежностью, авариями или неправильным пользованием электроприбором.
Если у Вас имеются какие-либо вопросы, вы можете связаться с нами через сайт www.drbrownsbaby.com.

Handi-Craft™ Company St. Louis, Missouri 63116 USA