Embed Size (px)
DESCRIPTION
Creating Constructions. Unit 7. Word Splash. Construction. Can you build it?. Short Video. What is a. construction?. Constructions. Construction – creating shapes using a straight edge and a compass Straight edge – clear, plastic tool similar to a ruler - PowerPoint PPT Presentation
Citation preview

Creating Constructions
Unit 7

Word Splash

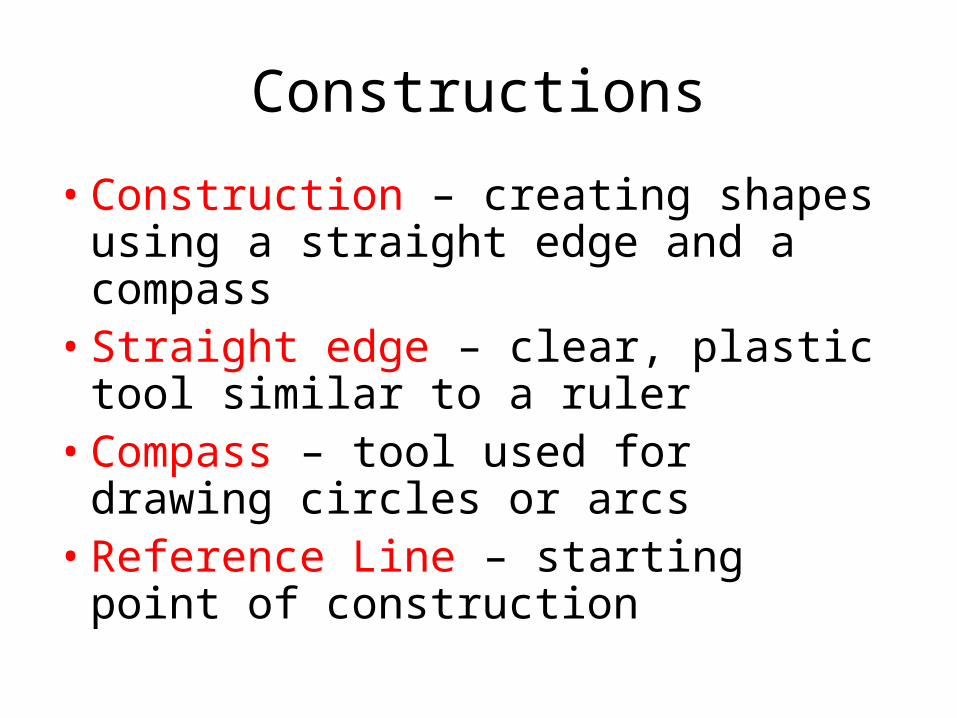
Constructions
• Construction – creating shapes using a straight edge and a compass
• Straight edge – clear, plastic tool similar to a ruler
• Compass – tool used for drawing circles or arcs
• Reference Line – starting point of construction
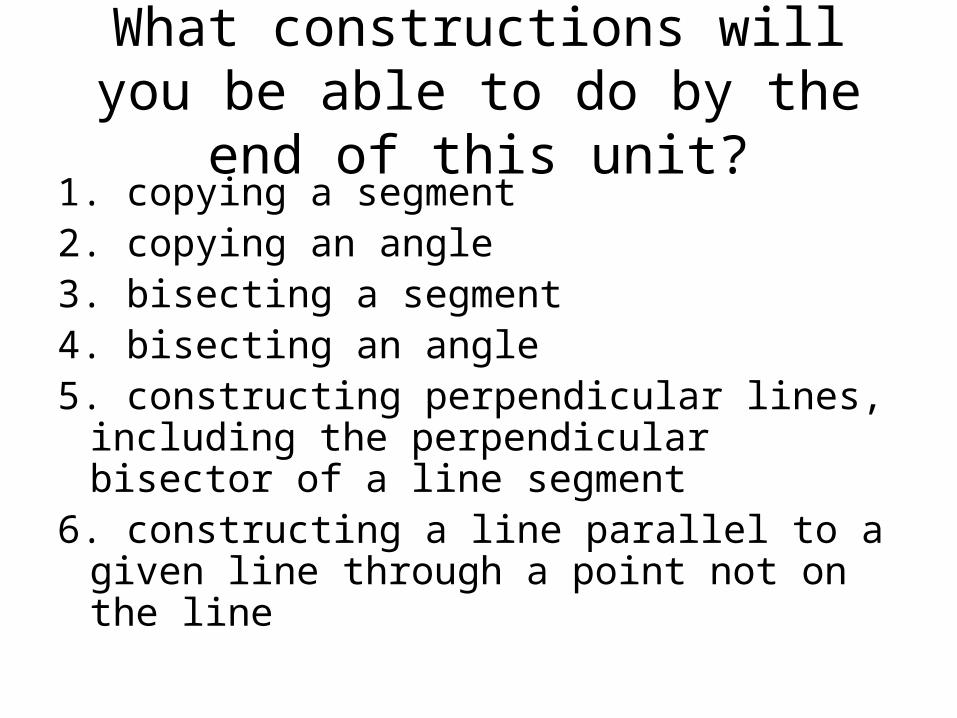
What constructions will you be able to do by the end of this unit?
1. copying a segment 2. copying an angle 3. bisecting a segment 4. bisecting an angle 5. constructing perpendicular lines, including
the perpendicular bisector of a line segment
6. constructing a line parallel to a given line through a point not on the line
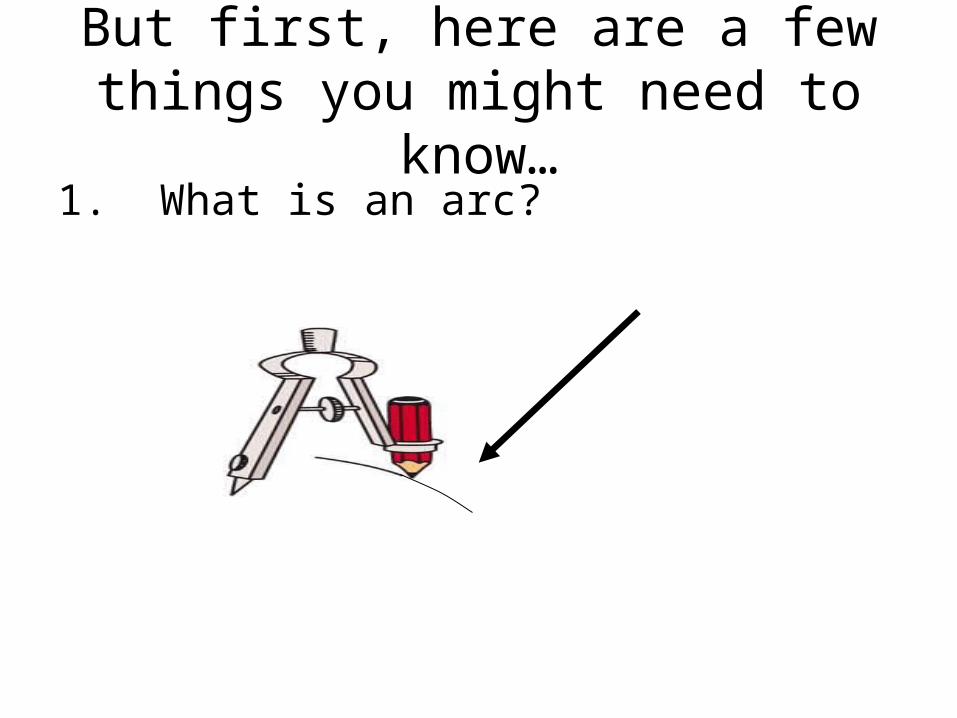
But first, here are a few things you might need to know…
1. What is an arc?

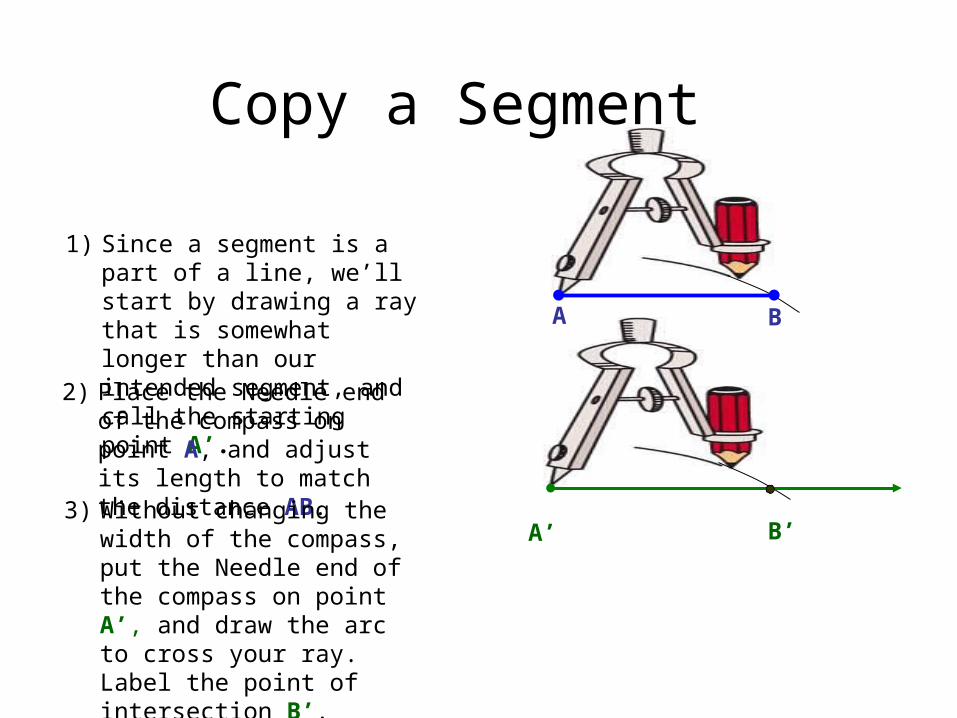
Copy a Segment
A B
1) Since a segment is a part of a line, we’ll start by drawing a ray that is somewhat longer than our intended segment, and call the starting point A’.
A’
2) Place the Needle end of the compass on point A, and adjust its length to match the distance AB.
3) Without changing the width of the compass, put the Needle end of the compass on point A’, and draw the arc to cross your ray. Label the point of intersection B’. You’ve just copied AB to A’B’
B’


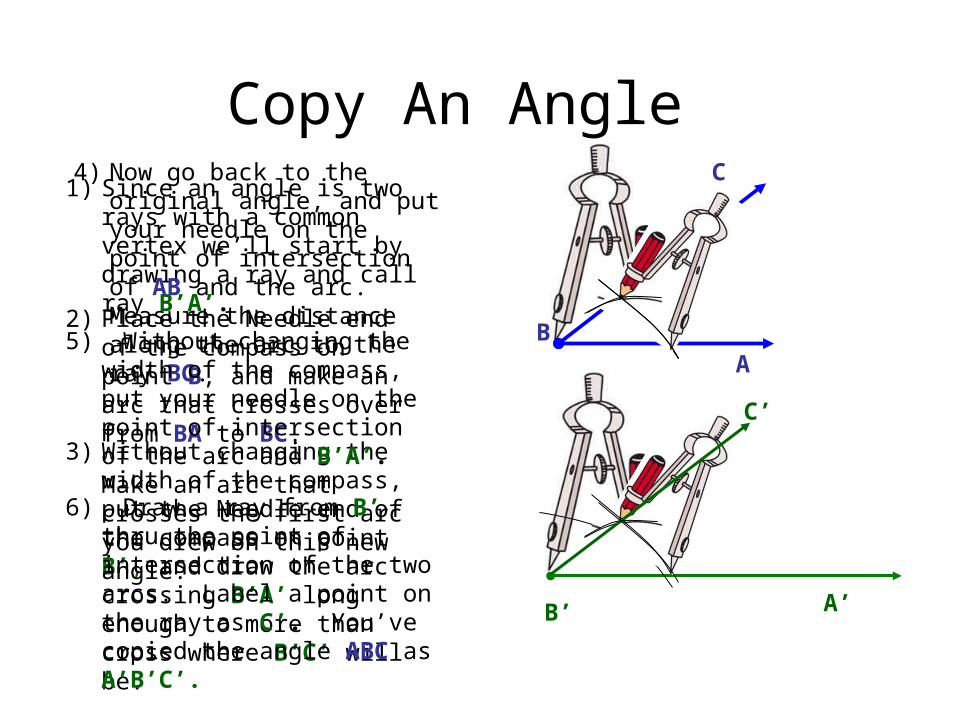
Copy An Angle
AB
1) Since an angle is two rays with a common vertex we’ll start by drawing a ray and call ray B’A’.
A’
2) Place the Needle end of the compass on point B, and make an arc that crosses over from BA to BC.
3) Without changing the width of the compass, put the Needle end of the compass on point B’, and draw the arc crossing B’A’ long enough to more than cross where B’C’ will be.
B’
C4) Now go back to the original angle, and put your needle on the point of intersection of AB and the arc. Measure the distance along the arc to the ray BC.
5) Without changing the width of the compass, put your needle on the point of intersection of the arc and B’A’. Make an arc that crosses the first arc you drew on this new angle.
6) Draw a ray from B’ thru the point of intersection of the two arcs. Label a point on the ray as C’. You’ve copied the angle ABC as A’B’C’.
C’


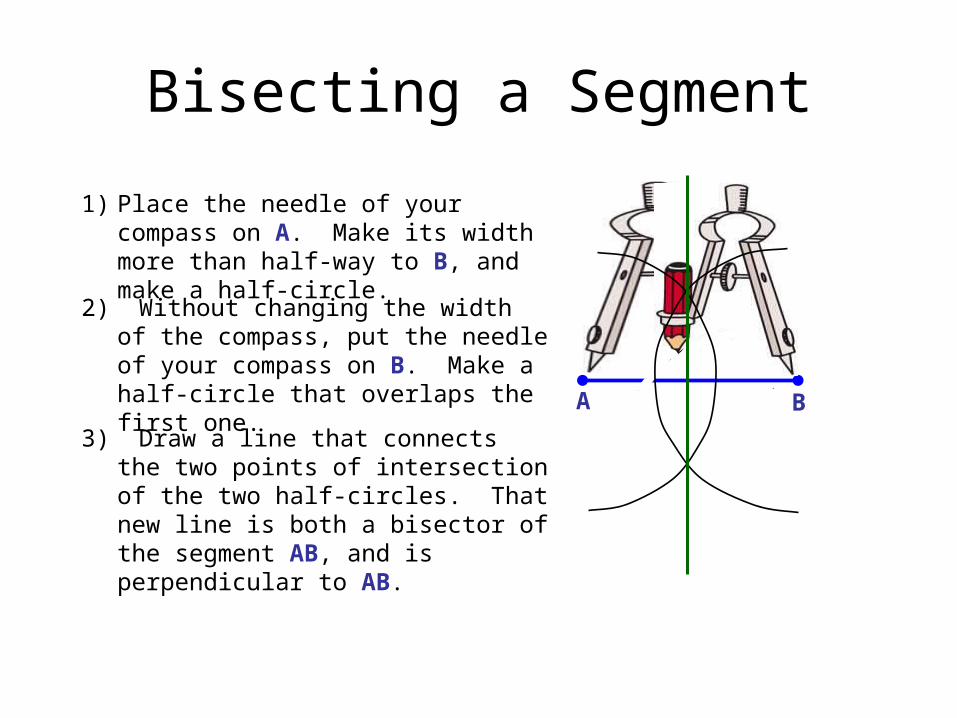
Bisecting a Segment
A B
1) Place the needle of your compass on A. Make its width more than half-way to B, and make a half-circle.
2) Without changing the width of the compass, put the needle of your compass on B. Make a half-circle that overlaps the first one.
3) Draw a line that connects the two points of intersection of the two half-circles. That new line is both a bisector of the segment AB, and is perpendicular to AB.

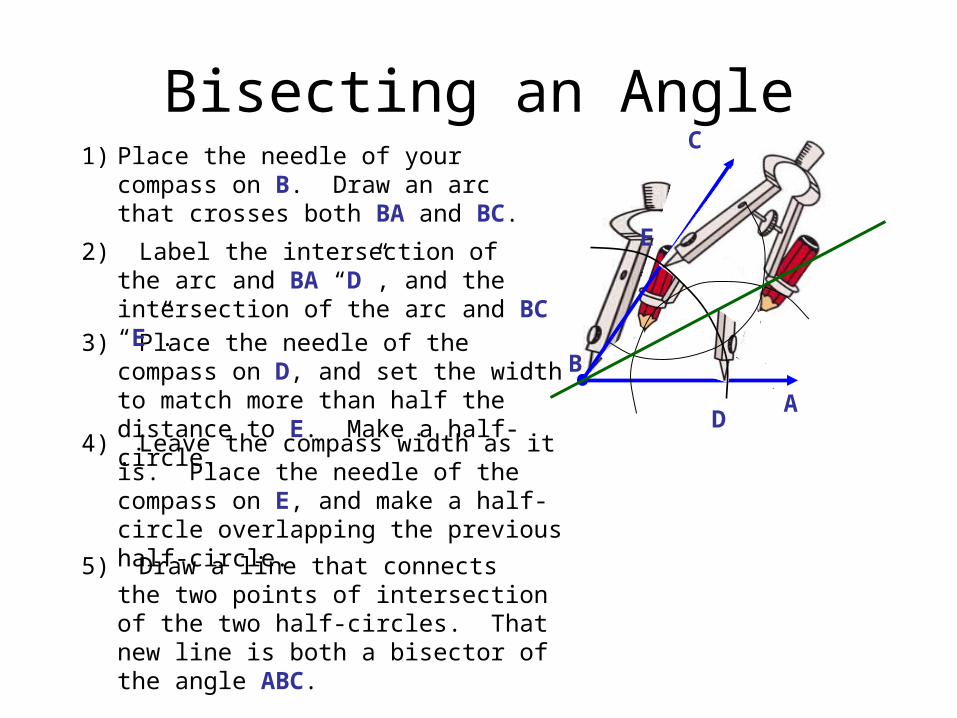
Bisecting an Angle
A
B
1) Place the needle of your compass on B. Draw an arc that crosses both BA and BC.
3) Place the needle of the compass on D, and set the width to match more than half the distance to E. Make a half-circle.
5) Draw a line that connects the two points of intersection of the two half-circles. That new line is both a bisector of the angle ABC.
C
D
E2) Label the intersection of the arc and BA
“D”, and the intersection of the arc and BC “E”.
4) Leave the compass width as it is. Place the needle of the compass on E, and make a half-circle overlapping the previous half-circle.

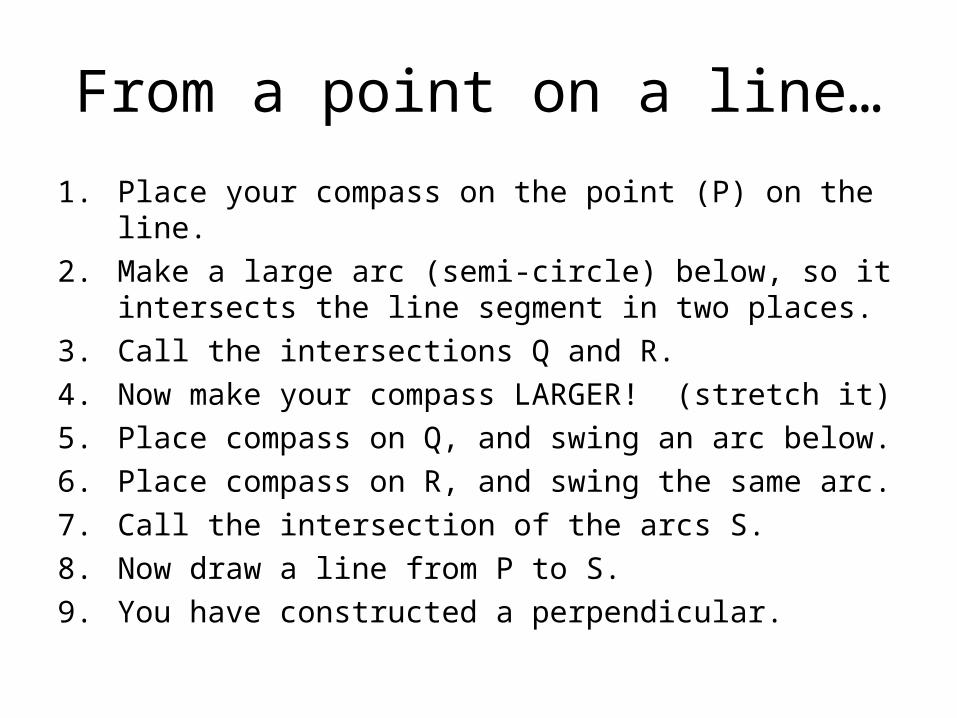
From a point on a line…
1. Place your compass on the point (P) on the line.
2. Make a large arc (semi-circle) below, so it intersects the line segment in two places.
3. Call the intersections Q and R.
4. Now make your compass LARGER! (stretch it)
5. Place compass on Q, and swing an arc below.
6. Place compass on R, and swing the same arc.
7. Call the intersection of the arcs S.
8. Now draw a line from P to S.
9. You have constructed a perpendicular.


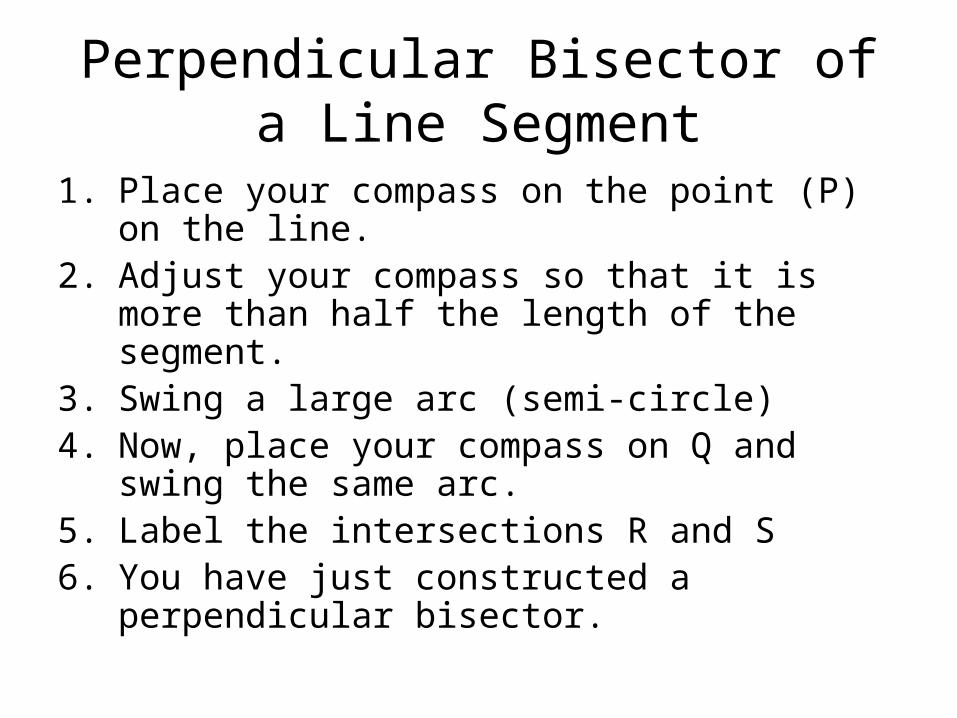
Perpendicular Bisector of a Line Segment
1. Place your compass on the point (P) on the line.
2. Adjust your compass so that it is more than half the length of the segment.
3. Swing a large arc (semi-circle)4. Now, place your compass on Q and swing the
same arc. 5. Label the intersections R and S6. You have just constructed a perpendicular
bisector.


Parallel Line Through a Point No on the Given Line
1. Draw a transversal through point P and call the intersection Q.
P
Q
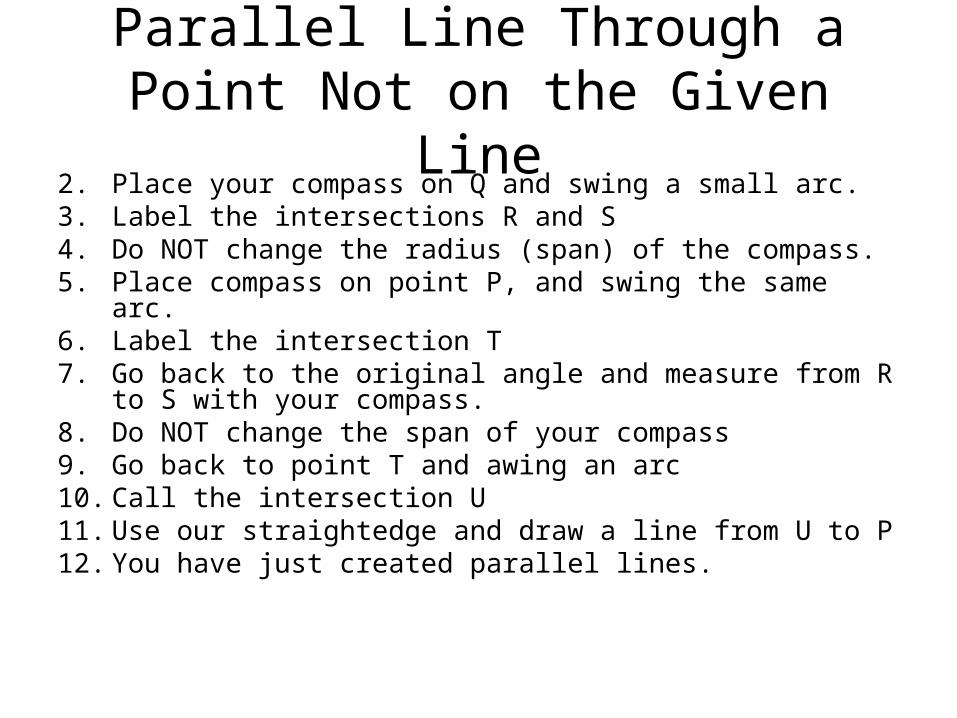
Parallel Line Through a Point Not on the Given Line
2. Place your compass on Q and swing a small arc.3. Label the intersections R and S4. Do NOT change the radius (span) of the compass. 5. Place compass on point P, and swing the same arc.6. Label the intersection T7. Go back to the original angle and measure from R to S
with your compass.8. Do NOT change the span of your compass9. Go back to point T and awing an arc10. Call the intersection U11. Use our straightedge and draw a line from U to P12. You have just created parallel lines.