Embed Size (px)
Citation preview
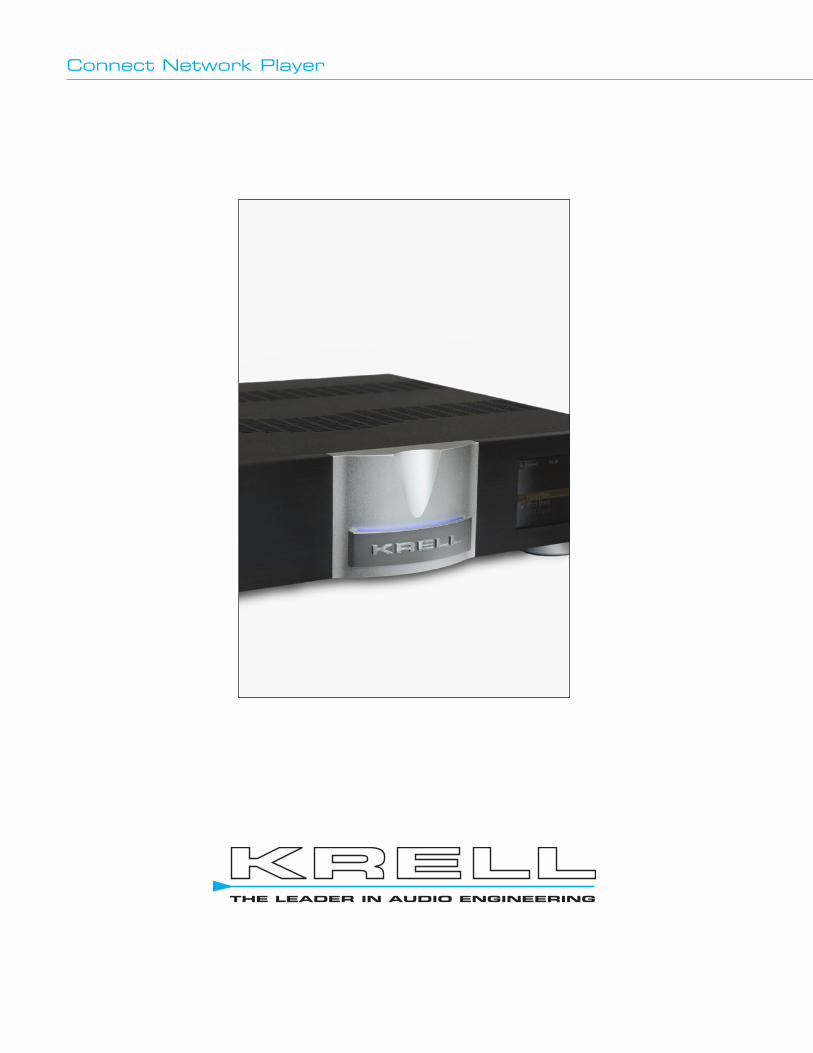
Connect Network Player
2
Connect Network Player
© 2013 by Krell Industries LLC. All rights reserved.
THERE ARE NO USER-SERVICEABLE PARTS INSIDE ANY KRELL PRODUCT.
Please contact your authorized dealer, distributor, or Krell if you have any questions not addressed in this reference manual.
WARNING: Do not place the component where it could be exposed to dirt or excessive moisture.
The ventilation grids on the top and bottom of the Connect Network Player must be unobstructed at all times. Do not place flammable material on top of or beneath the component.
When making connections to this or any other component, make sure all components are off. Turn off all system power before connecting the Connect Network Player to any other component. Make sure all cable terminations are of the highest quality, free from frayed ends, short circuits or cold solder joints.
CONTACT INFORMATION: Krell Industries, LLC
45 Connair Road
Orange, CT 06477-3650 USA
TEL 203-799-9954
FAX 203-891-2028
E-MAIL [email protected]
WEBSITE http://www.krellonline.com
Krell® is a registered trademark of Krell Industries LLC., and is restricted for use by Krell Industries LLC., its subsidiaries, and authorized agents. All other trademarks and tradenames are registered to their respective companies.Manufactored under licence from Dolby Laboratories. Dolby Pro Logic and the double-D symbol are trademarks of Dolby Laboratories.
3Connect Network Player
Table of Contents
Getting Started (4)
Front Panel and Remote Diagram (5)
Back Panel Diagram (6)
Connecting the Connect to your System (7)
Initial Setup (8)
Connect Set-up (10)
Warranty (14)
Service (15)
Specifications (16)
4Connect Network Player
Getting Started
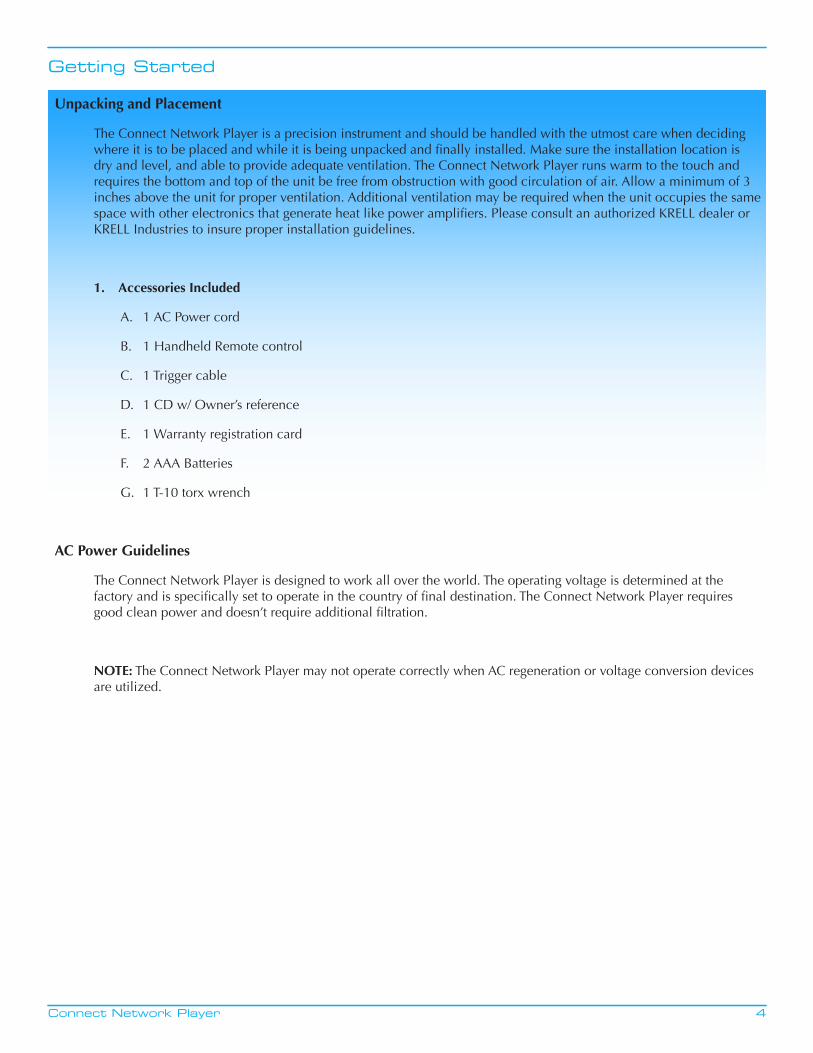
Unpacking and Placement
The Connect Network Player is a precision instrument and should be handled with the utmost care when deciding where it is to be placed and while it is being unpacked and finally installed. Make sure the installation location is dry and level, and able to provide adequate ventilation. The Connect Network Player runs warm to the touch and requires the bottom and top of the unit be free from obstruction with good circulation of air. Allow a minimum of 3 inches above the unit for proper ventilation. Additional ventilation may be required when the unit occupies the same space with other electronics that generate heat like power amplifiers. Please consult an authorized KRELL dealer or KRELL Industries to insure proper installation guidelines.
1. Accessories Included
A. 1 AC Power cord
B. 1 Handheld Remote control
C. 1 Trigger cable
D. 1 CD w/ Owner’s reference
E. 1 Warranty registration card
F. 2 AAA Batteries
G. 1 T-10 torx wrench
AC Power Guidelines
The Connect Network Player is designed to work all over the world. The operating voltage is determined at the factory and is specifically set to operate in the country of final destination. The Connect Network Player requires good clean power and doesn’t require additional filtration.
NOTE: The Connect Network Player may not operate correctly when AC regeneration or voltage conversion devices are utilized.
5Connect Network Player
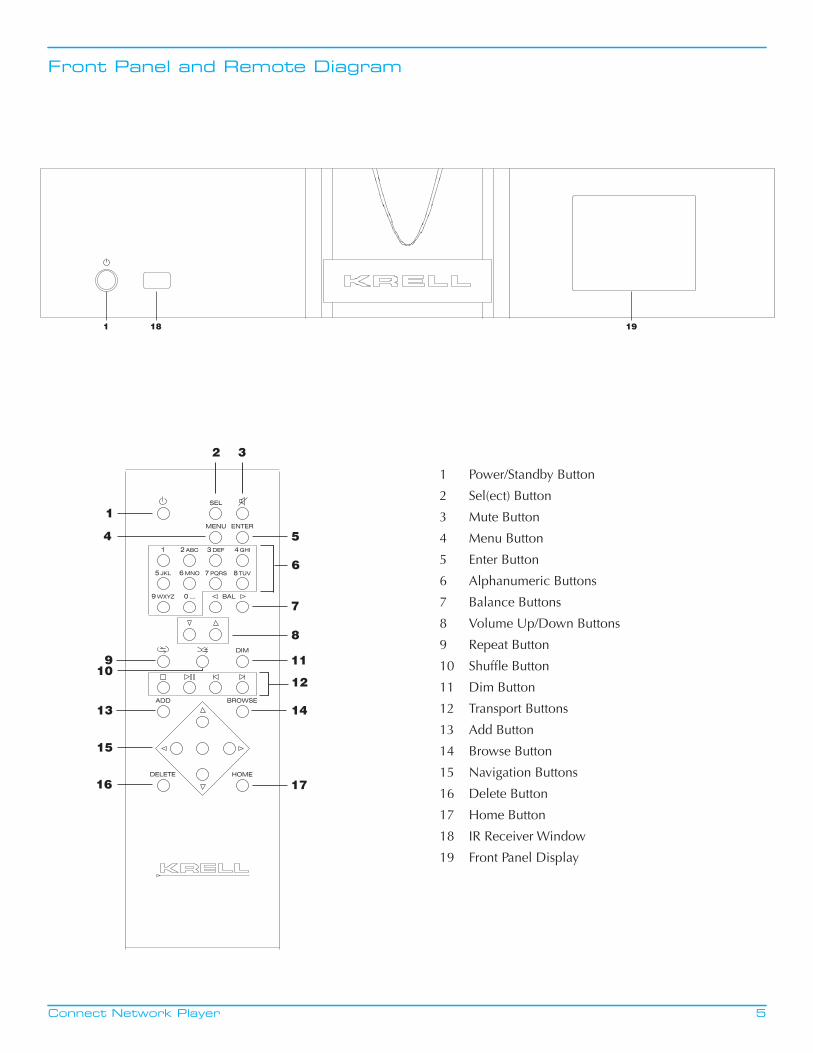
Front Panel and Remote Diagram
1 18 19
1
5
910
13
16
12
6
7
2
15
4
3
8
11
14
17
1 Power/Standby Button
2 Sel(ect) Button
3 Mute Button
4 Menu Button
5 Enter Button
6 Alphanumeric Buttons
7 Balance Buttons
8 Volume Up/Down Buttons
9 Repeat Button
10 Shuffle Button
11 Dim Button
12 Transport Buttons
13 Add Button
14 Browse Button
15 Navigation Buttons
16 Delete Button
17 Home Button
18 IR Receiver Window
19 Front Panel Display
6Connect Network Player
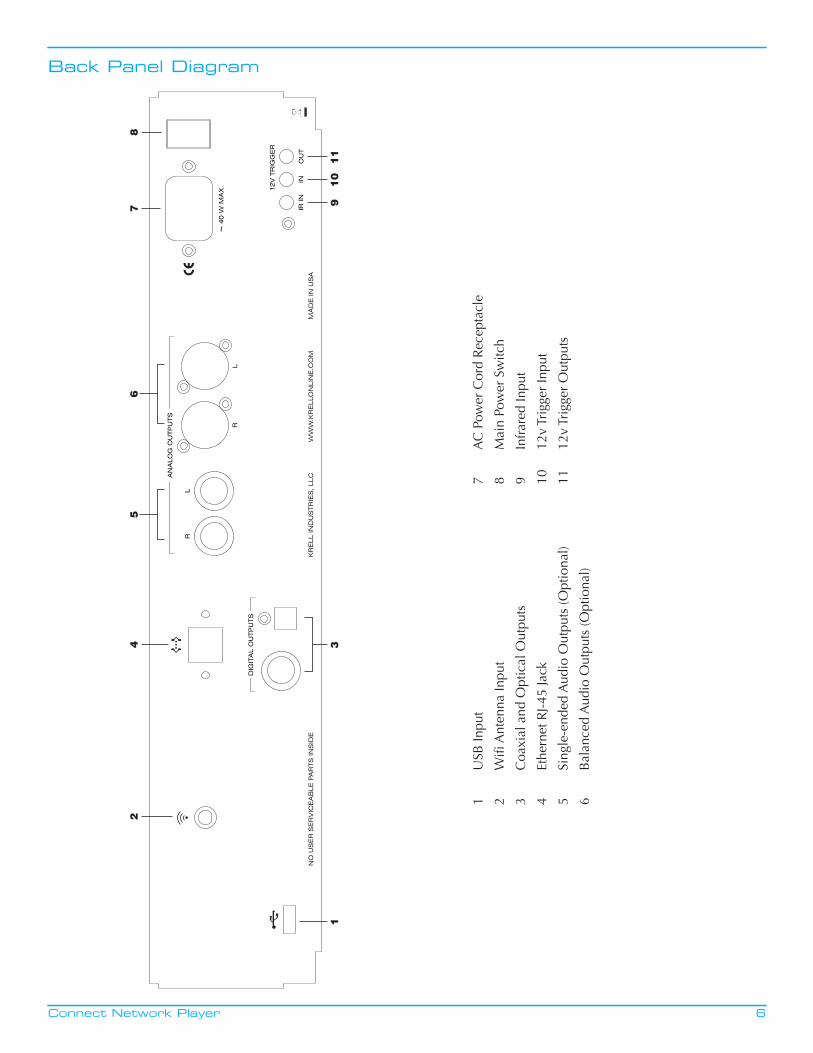
Back Panel Diagram
11
03
91
1
52
47
86
1 U
SB In
put
2 W
ifi A
nten
na In
put
3 C
oaxi
al a
nd O
ptic
al O
utpu
ts
4 Et
hern
et R
J-45
Jack
5 Si
ngle
-end
ed A
udio
Out
puts
(Opt
iona
l)
6 B
alan
ced
Aud
io O
utpu
ts (O
ptio
nal)
7 A
C P
ower
Cor
d R
ecep
tacl
e
8 M
ain
Pow
er S
witc
h
9 In
frar
ed In
put
10
12v
Trig
ger
Inpu
t
11
12v
Trig
ger
Out
puts
Connect Network Player
Connecting the Connect to Your System
7
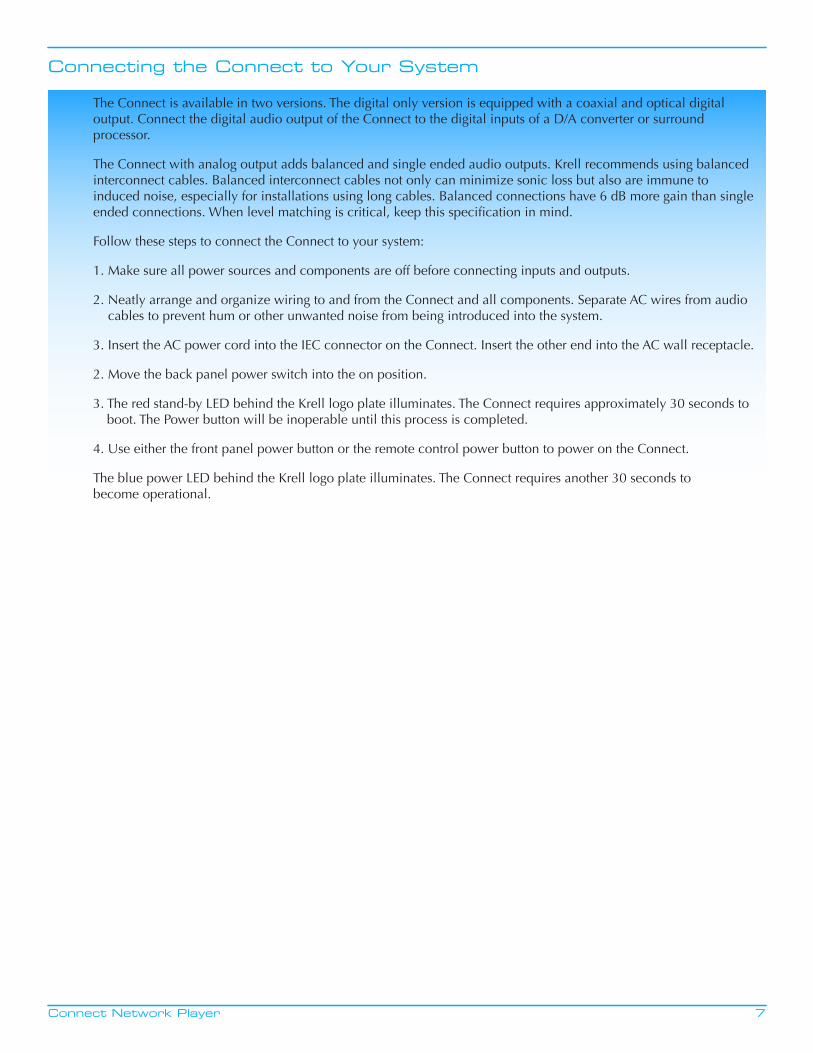
The Connect is available in two versions. The digital only version is equipped with a coaxial and optical digital output. Connect the digital audio output of the Connect to the digital inputs of a D/A converter or surround processor.
The Connect with analog output adds balanced and single ended audio outputs. Krell recommends using balanced interconnect cables. Balanced interconnect cables not only can minimize sonic loss but also are immune to induced noise, especially for installations using long cables. Balanced connections have 6 dB more gain than single ended connections. When level matching is critical, keep this specification in mind.
Follow these steps to connect the Connect to your system:
1. Make sure all power sources and components are off before connecting inputs and outputs.
2. Neatly arrange and organize wiring to and from the Connect and all components. Separate AC wires from audio cables to prevent hum or other unwanted noise from being introduced into the system.
3. Insert the AC power cord into the IEC connector on the Connect. Insert the other end into the AC wall receptacle.
2. Move the back panel power switch into the on position.
3. The red stand-by LED behind the Krell logo plate illuminates. The Connect requires approximately 30 seconds to boot. The Power button will be inoperable until this process is completed.
4. Use either the front panel power button or the remote control power button to power on the Connect.
The blue power LED behind the Krell logo plate illuminates. The Connect requires another 30 seconds to become operational.
8Connect Network Player
Initial Setup
With the Krell Connect, music tracks from a home network can be streamed and played back through a stereo or home theater system. The music is stored on a server and must be on the same network as the Connect. A normal PC can act as a server but more commonly a NAS (Network Attached Storage) works as an interface between one or more large hard disks and the network. A program integrated on the NAS works as a server and makes music files available to the network. Twonky Media is a widely used and recommended music server program for this purpose. The Connect can stream music files from servers that use the DLNA/UPnP standard. Consult the NAS owner’s manual for help on installing music server programs on a NAS.
Remote and Front Panel Legend
Remote Control
1. Power
Toggles the Connect between standby and full operation
2. Sel(ect) Button
Changes inputs on a Krell preamplifier
3. Mute Button
First press of the Mute button mutes the audio output on a Krell preamplifier. Second button press restores output.
4. Menu Button
Press the Menu button to enter the menu button on a Krell preamplifier.
5. Enter Button
The Enter button is for use with a Krell preamplifier and duplicates the functionality of the Enter button on a Krell preamplifier remote control.
6. Alphanumeric Buttons
Use the Alphanumeric buttons for searching items within music collections, Internet radio stations and to enter values during setup.
7. Balance Buttons.
Adjusts balance on a Krell preamplifier.
8. Volume Up/Down Buttons
Adjusts volume up and down on a Krell preamplifier
1 Power/Standby Button
2 Sel(ect) Button
3 Mute Button
4 Menu Button
5 Enter Button
6 Alphanumeric Buttons
7 Balance Buttons
8 Volume Up/Down Buttons
9 Repeat Button
10 Shuffle Button
11 Dim Button
12 Transport Buttons
13 Add Button
14 Browse Button
15 Navigation Buttons
16 Delete Button
17 Home Button
18 IR Receiver Window
19 Front Panel Display
9Connect Network Player
Initial Setup Continued
9. Repeat button
First button press repeats the title that is currently playing. The second button press will repeat the entire playback list that is currently active. If an album is playing, then the Connect will repeat the entire album.
10. Shuffle Button
Press the Shuffle button and the Connect will play the currently active music list in a random order. If an album is currently playing, the Connect will play all album tracks in a random order. If all titles is playing, the Connect will play all tracks on the current music server in random order.
11. Dim Button
First button press dims the front panel display 50%. Second button press dims the front panel display completely. Third button press restores display to full illumination.
12. Transport Buttons
Stop - stops playback. The menu displayed prior to playback will reappear.
Play/Pause - First button press begins playback of currently selected item. Second button press pauses currently selected item. Third button press resumes playback.
Track back/forward - With playback from music servers or USB, button press either plays the previous track or next track. With Internet radio, button press moves to the previous or next station.
13. Add Button
Adds the current song title or Internet radio station to the Favorites list. The Favorites list is available on the main menu.
14. Browse Button
Toggles between the play view and the previous menu when a selection is playing.
15. Navigation Buttons
Use the Navigation buttons to move within the setup menu. Use the Up and Down buttons to scroll through items in menus. Press the Enter or the Right button to confirm selections. In a music track menu or Internet radio station list, the Enter and Right buttons will start playback.
Press the Left button to return to the previous menu.
16. Delete Button
Deletes the current song title or Internet radio station from the Favorites list.
17. Home Button
Press the Home button to display the main menu on the front panel.
18. IR Receiver Window
19. Front Panel Display
10Connect Network Player
Connect Setup
Wired Network Configuration
Use an Ethernet cable (RJ 45 connector) to connect the Connect to the network’s router.
Press Menu and navigate to Settings > Network > Network Setup sub menu. Select Wired and press the Enter button to confirm.
Select Automatic (DHCP) now and press the Enter button to confirm.
Select Proxy Off and press the Enter button to confirm.
The Connect will display the question Apply Settings? Press the Enter button to confirm. The Connect will now be ready to work with virtually all home networks and will find all available music servers.
If different settings are necessary for a specific network, such as a proxy server or a fixed IP address, please consult a network installation specialist for advice.
Wireless Network Configuration
Please make sure the included WLAN antenna is attached to the back of the Connect.
Press Menu and navigate to Settings > Network > Network Setup sub menu. Select Wireless and press the Enter button to confirm.
If the Connect was previously set for wired operation, the Connect will reset to ready itself for wireless setup.
Select Scan and press the Enter button. The Connect will search for locally available wireless networks.
After the search is complete, the Connect will display available networks. Select the correct network and press the Enter button to confirm selection.
The next step is to enter the wireless encryption key. Enter characters by pressing the Up or Down button keys repeatedly until the desired character is shown in the lowest line. Alternatively, use the alphanumeric keys. All letters are printed on the remote control above the numeric keys. Similar to a mobile phone, press the particular key until the desired character is displayed. Lower case characters will be displayed first and then the respective numeral and finally the upper case characters. Example: The sequence for the 5 button is j, k, l, 5, J, K, L. The sequence will continue to cycle through this sequence will additional button presses.
Special characters are available using the 1 and 0 button
To enter the next character, wait one second for the cursor to move to the right automatically, or press the Right button. Press the Track Back button twice to delete a wrong character. Once complete, press the Play button to confirm the wireless key. If the wireless key is correct, connection to the wireless network will be established. If the wireless key is incorrect, Connection Failed, will be displayed.
With an established connection the Network menu comes up in the display. Information from the router is available in the Network Info sub menu. This information is only required for help in resolving network related issues.
Network Info
Friendly Name is the name that the Connect identifies itself as in the home network.
SSID is the name of the wireless router. This is not displayed when the Connect is used in a wired network.
DHCP is a function by which a network router or server assigns IP addresses to other network devices automatically.
The IP Address is the identification address the Connect was assigned by the router.
The MAC Address is unique ID for each network device in the world and identifies the Connect.
Default UPnP Server
This setting allows a preferred media server to be the default playback server. If a default UPnP Server is preselected, the Connect will use this server when Media Server is selected form the main menu. If no selection is made in the Default UPnP Server menu, the desired server in the Media Server menu must be selected first.
Friendly Name
Friendly Name is the name that the Connect identifies itself as in the home network. The default name is Connect but this may be changed. Navigate to Edit and use the same procedure used to enter the wireless key information to edit the name. It is helpful when multiple Connect units are installed in the same system to enter unique names for each one. Select Reset to Default to return to the factory default name, Connect.
Other Settings
Time
Time Zone
Sets the location of the Connect.
Daylight Saving
Set on or off.
Show Clock
Displays the current time and date.
User Interface
Themes
There are four different themes for the Connect front panel display.
Display Timeout
The Connect front panel display can be set to turn off at a preset time. The display illuminates again when any button is pressed on the remote control. The function of the button will not be executed in this case. A second button push is required to execute the command.
Connect Setup Continued
11Connect Network Player

Connect Setup Continued
12Connect Network Player
Playing Music from a Media Server
On the main menu, navigate to Media Server press the Enter button. If a default music server has not been selected, all available music servers in the network will be displayed. Select the desired server and press the Enter button to confirm.
Navigate to Music and press the Enter button to confirm.
The music tracks on the selected server are sorted by several criteria for easier search including Album, Artist, Song, etc.
Navigate to the desired criteria and press the Enter button to view the content within the selected choice.
Playlists contain the playlists generated on the computer and saved on the server.
Alphanumeric Search
The Connect allows for an alphanumeric search within menu items on music servers including albums, titles, or artists. Only the items of the menu that is currently displayed can be found. Items within submenus cannot be searched. To search for a certain title, navigate to the menu option, All Tracks, in the Music menu on your media server. Enter the song title using the alphanumeric buttons on the remote control. You can do that in exactly the same way as is describe on pages 9 and 10 for the WLAN encryption key.
Playing Music from USB Flash Drive
To play music from a USB flash drive, connect it to the USB connector on the back of the Connect. On the main menu, navigate to USB Input and press the Enter button to confirm. The menu operation is similar, including the search function, to playing music from a media server. The main difference between playback from media servers and USB flash drives is that the Connect only shows the folder structure as displayed on a standard computer. Additionally, it doesn’t display the title names extracted from tag information, but only the normal computer file names. This limits the sort order to alphabetical only and will reorganize the tracks of an album from the original order.
Playing Internet Radio Stations
Many radio stations all over the world transmit their programs on the internet. The Connect enables internet radio listening without a PC.
Press the Home button to enter the main menu and navigate to the Internet radio option. Internet radio search options include Local Stations, Recently Played, Search Stations, Location, Genre, Search Podcasts, Podcasts by Location, Podcasts by Genre, New Stations, Most Popular Stations, Get Access code, and Reset Favorites.
Local Stations
Lists stations within the area normally covered by over the air broadcasts.
Recently Played
Lists the previously accessed stations.
Search Stations
Enter the name of the desired station with the alphanumeric keys on the remote control. Use the same method of entering alphanumeric characters as in entering wireless key information.
Location
Lists stations in various parts of the world.

Connect Setup Continued
13Connect Network Player
Genre
Lists stations broadcasting a specific type of content.
New Stations
Lists stations that have recently begun broadcasting
Most Popular Stations
Lists the most popular radio stations from around the world
A podcast is a radio program that is not broadcast live but is recorded and can be retrieved via the internet. Similar to radio stations, the Connect provides Search Podcasts, Podcast by Location and Podcast by Genre search options.
For added convenience, the Connect can utilize the functionality of the vTuner internet service. This service is free of charge for all owners of the Connect and provides a number of criteria for search, sorting, and adding stations to the favorites list.
To use the vTuner website, retrieve the access code listed in the Internet Radio sub menu. Visit the vTuner internet site, http://streamunlimited.vtuner.com. Follow the instructions on the website for registering the Connect and using the vTuner functionality.
Reset Favorites
Use this option to delete any radio stations added to a favorites list
Software Update
The operating software in the Connect can be updated via the internet. Navigate to Software Update in the Settings sub menu in the main menu. Press the Enter button to confirm. The Connect will now contact the Krell server and determine if there is an updated version of the operating software. If the Connect finds a new version, it will install the software immediately.
14Connect Network Player
Warranty
This Krell product has a limited warranty of five years for parts and labor on circuitry from date of purchase or six years from date of original shipment from the Krell factory. Should this product fail to perform at any time during the warranty, Krell will repair it at no cost to the owner, except as set forth in this warranty.
The warranty does not apply to damage caused by acts of God or nature.
The warranty on this page shall be in lieu of any other warranty, expressed or implied, including, but not limited to, any implied warranty of merchantability or fitness for a particular purpose. There are no warranties which exceed beyond those described in thisdocument. If this product does not perform as warranted herein, the owner’s sole remedy shall be repair. In no event will Krell be liable for incidental or consequential damages arising from purchase, use, or inability to use this product, even if Krell has been advised of the possibility of such damages.
Proof of purchase in the form of a bill of sale or receipted invoice substantiating that the unit is within the warranty period must be presented to obtain warranty service. The warranty begins on the date of retail purchase, as noted on the bill of sale or receipted invoice from an authorized Krell dealer or distributor.
The warranty for Krell products is valid only in the country to which they were originally shipped, through the authorized Krell distributor for that country, and at the factory. There may be restrictions on or changes to Krell’s warranty because of regulations within aspecific country. Please check with your distributor for a complete understanding of the warranty in your country.
If a unit is serviced by a distributor who did not import the unit, there may be a charge for service, even if the product is within the warranty period.
Freight to the factory is your responsibility. Return freight within the United States (U.S.A.) is included in the warranty. If you have purchased your Krell product outside the U.S.A. and wish to have it serviced at the factory, all freight and associated charges to the factory are your responsibility.
Krell will pay return freight to the U.S.A.-based freight forwarder of your choice. Freight and other charges to ship the unit from the freight forwarder to you are also your responsibility.
Krell is not responsible for any damage incurred in transit. Krell will file claims for damages as necessary for units damaged in transit to the factory. You are responsible for filing claims for shipping damages during the return shipment.
Krell does not supply replacement parts and/or products to the owner of the unit. Replacement parts and/or products will be furnished only to the distributor performing service on this unit on an exchange basis only; any parts and/or products returned to Krellfor exchange become the property of Krell.
No expressed or implied warranty is made for any Krell product damaged by accident, abuse, misuse, natural or personal disaster, or unauthorized modification.
Any unauthorized voltage conversion, disassembly, component replacement, perforation of chassis, updates, or modifica-tions performed to the unit will void the warranty.
The operating voltage of this unit is determined by the factory and can only be changed by an authorized Krell distributor or at the factory. The voltage for this product in the U.S.A. cannot be changed until six months from the original purchase date.
In the event that Krell receives a product for warranty service that has been modified in any way without Krell authorization, all warranties on that product will be void. The product will be returned to original factory layout specifications at the owner’s expense before it is repaired. All repairs required after the product has been returned to original factory specificationswill be charged to the customer, at current parts and labor rates.
All operational features, functions, and specifications and policies are subject to change

15Connect Network Player
Service
Return Authorization Procedure
If you believe there is a problem with your component, please contact your dealer, distributor, or the Krell factory to discuss the problem before you return the component for repair. To expedite service, you may wish to complete and e-mail the Service Request Form in the Service section of our website at: www.krellonline.com
To return a product to Krell, please follow this procedure so that we may serve you better:
1. Obtain a Return Authorization Number (R/A number) and shipping address from the Krell Service Department.
2. Insure and accept all liability for loss or damage to the product during shipment to the Krell factory and ensure all freight (shipping) charges are prepaid.
3. The product may also be hand delivered if arrangements with the Service Department have been made in advance. Proof of purchase will be required for warranty validation at the time of hand delivery.
NOTE: Use the original packaging to ensure the safe transit of the product to the factory, dealer, or distributor. Krell may, at its discretion, return a product in new packaging and bill the owner for such packaging if the product received by Krell was boxed in nonstandard packaging or if the original packaging was so damaged that it was unusable. If Krell determines that new packaging is required, the owner will be notified before the product is returned.
To purchase additional packaging, please contact your authorized Krell dealer, distributor, or the Krell Service Department for assistance.
To Contact the Krell Service Department:
Telephone 203-799-9954 Monday-Friday, 9:00 am to 5:00 pm EST
Fax 203-799-9796
E-Mail [email protected]
World Wide Web http://www.krellonline.com
16Connect Network Player
Specifications
SIGNAL-TO-NOISE RATIO “A” Weighted 96 dB
TOTAL HARMONIC DISTORTION (THD) Unweighted 20 Hz-20 kHz, 0.002%
OUTPUTS ANALOG AUDIO(Optional)
(2) Balanced via XLR Connectors R, L
(2) Single-ended via RCA Connectors R, L
DIGITAL AUDIO (1) EIAJ optical via TosLink connector
(1) Coaxial via RCA connector
CONTROL/UPDATE (1) IR Receiver for Remote Control
(1) RC-6 via 1/8” stereo “trs” Receptacle
(1) Ethernet via RJ-45 Connector
(1) 12vdc Remote Trigger Input via 1/8” Mono Receptacle
(1) 12vdc Remote Trigger Output via 1/8” Mono Receptacle
RC-5 pin out Tip = RC-5 data, Ring = +5 V, Sleeve = GND
XLR Pin Out Pin 1 (ground) Pin 2 (non-inverting “Hot”) Pin 3 (Inverting)
Maximum Output Balanced 4 Vrms
Single Ended 2 Vrms
Audio Output Impedance Balanced 100 Ω
Single Ended 100 Ω
Power Consumption Stand-by 3w
Operation 32w
DIMENSIONS Inches (L) 16.83 x (W) 17.06 x (H) 3.47
Centimeters (L) 42.76 x (W) 43.33 x (H) 88.1
WEIGHT 18lbs Unit only8.16kg Unit only
24lbs Shipping Weight10.89kg Shipping weight
All operational features, functions and specifications are subject to change without notification.


![Krell evolution505 HFC 0107 - Absolute Sounds evolution505 HFC... · Krell Evolution 505 CD/SACD player [Review] "Highlights include a fully machined case with no sharp edges, first](https://img.pdfslide.us/doc/110x75/5b77aba17f8b9a515a8d8a0d/krell-evolution505-hfc-0107-absolute-evolution505-hfc-krell-evolution-505.jpg)