Embed Size (px)
Citation preview
Please contact the Help desk at ext. 4400 to have any questions regarding the iOS provisioning process directed appropriately.
UConn Health IT DEPARTMENT
BYOD – Provisioning an iOS Device
A Provisioning Guide for Employee-owned iPhones and iPads
facilitated using the UConn Health BYOD portal and MobileIron
Version 4.0 w/ Mobile Application Management
Note the following before continuing: There is an excellent BYOD resource available for UConn Health users on line here:
https://health.uconn.edu/information-technology/technical-support/faqs/bring-your-own-device-byod/
You MUST complete the following items prior to continuing:
o Know your network sign on credentials:These are the credentials that you use when signing into your desktop computer.
o Have or Obtain an Apple Store ID:Please refer to Obtaining an Apple Store ID Tutorial, which is available here: http://health.uconn.edu/products_services/telecomm_voice_services/BYOD-Apple-ID-Tutorial.pdf
o Remove any manually configured UConn Health Exchange Accounts from your iOS device:Please refer to How to remove your Outlook account from your iOS Device, which is available here:https://health.uconn.edu/information-technology/
o If you have registered in the past, open a browser on your computer and type BYOD.uchc.edu/manage to take you to your portal page where you will remove
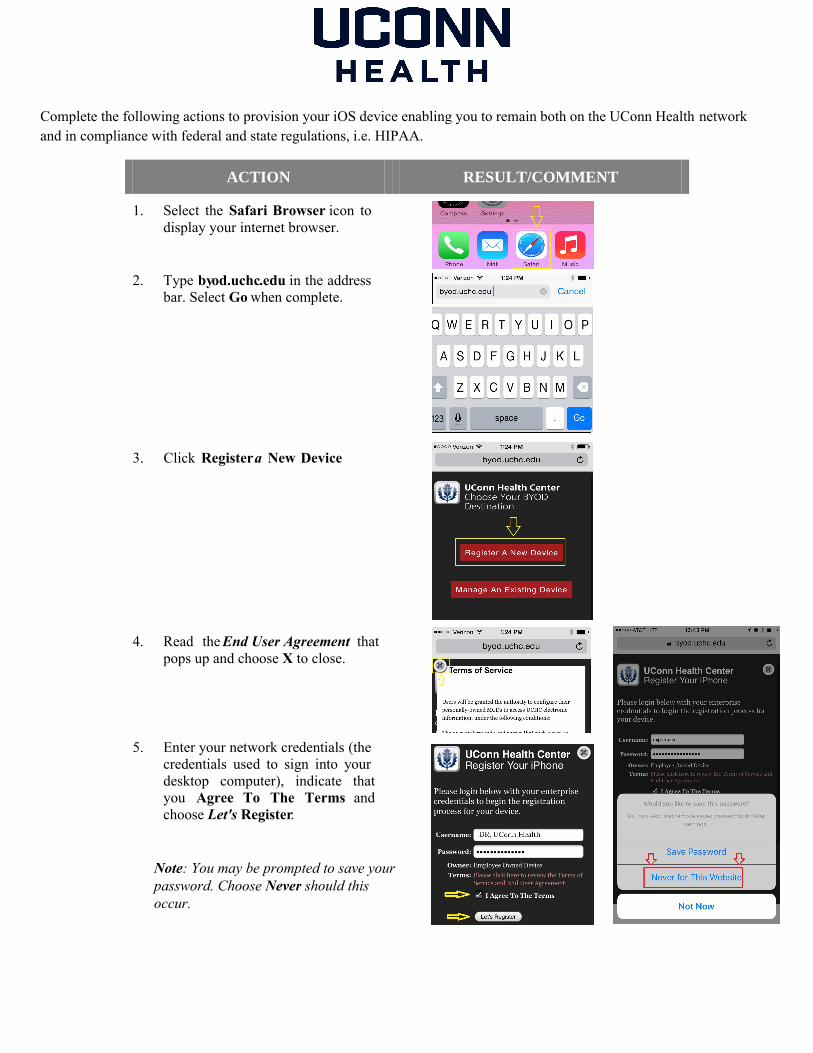
Complete the following actions to provision your iOS device enabling you to remain both on the UConn Health networkand in compliance with federal and state regulations, i.e. HIPAA.
ACTION RESULT/COMMENT
1. Select the Safari Browser icon todisplay your internet browser.
2. Type byod.uchc.edu in the addressbar. Select Go when complete.
3. Click Register a New Device
4. Read the End User Agreement thatpops up and choose X to close.
5. Enter your network credentials (thecredentials used to sign into yourdesktop computer), indicate thatyou Agree To The Terms andchoose Let's Register.
Note: You may be prompted to save yourpassword. Choose Never should this occur.
ACTION RESULT/COMMENT
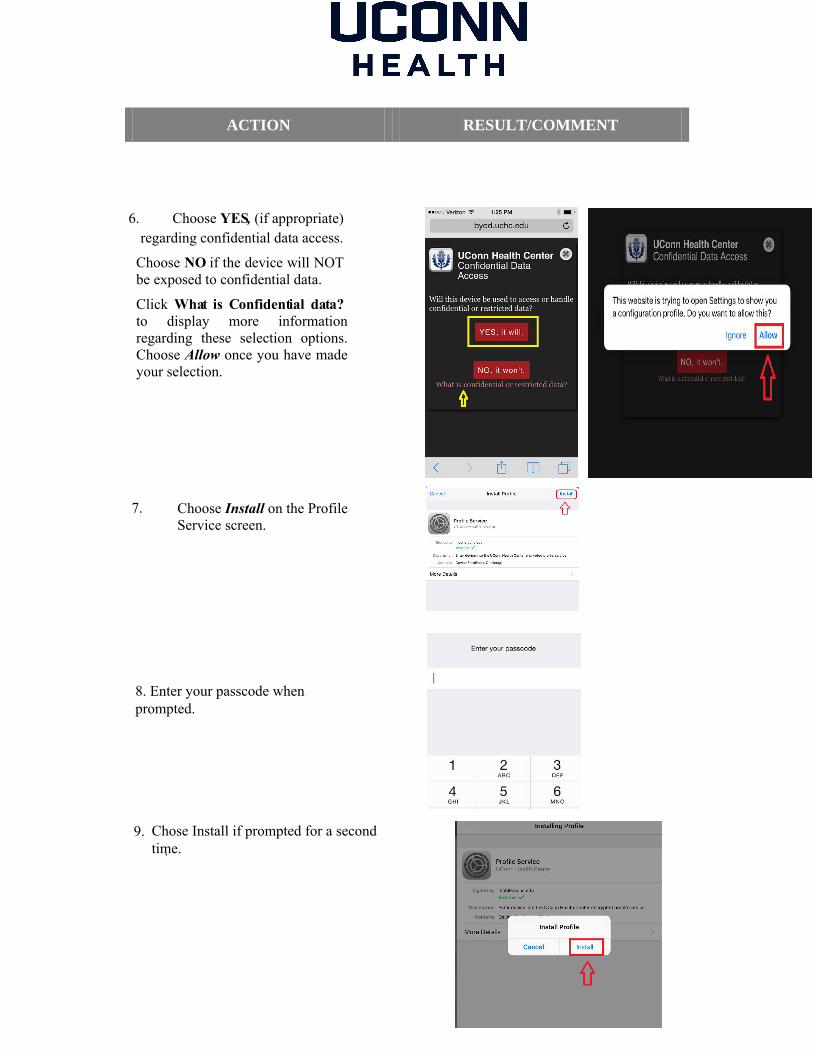
6. Choose YES, (if appropriate)regarding confidential data access.
Choose NO if the device will NOTbe exposed to confidential data.
Click What is Confidential data?to display more informationregarding these selection options.Choose Allow once you have madeyour selection.
7. Choose Install on the ProfileService screen.
9. .
Chose Install if prompted for a second time.
8. Enter your passcode when prompted.
ACTION RESULT/COMMENT
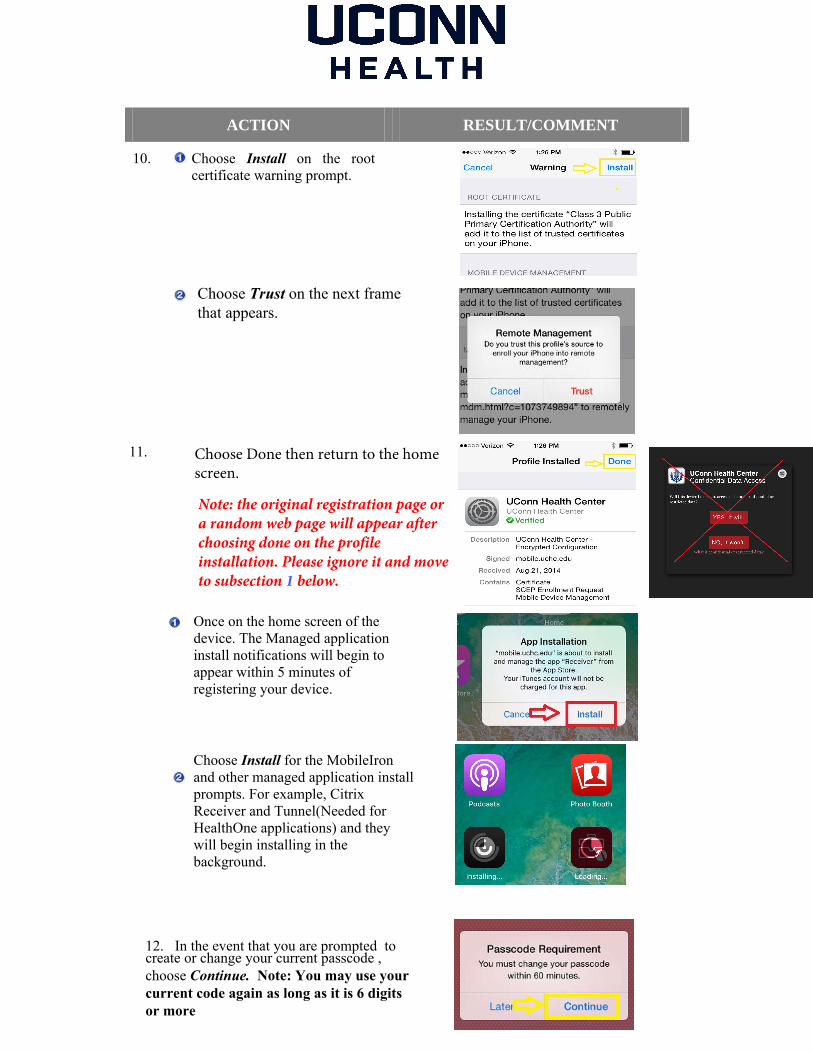
10. Choose Install on the rootcertificate warning prompt.
11.
Once on the home screen of the device. The Managed application install notifications will begin to appear within 5 minutes of registering your device.
Choose Install for the MobileIron and other managed application install prompts. For example, Citrix Receiver and Tunnel(Needed for HealthOne applications) and they will begin installing in the background.
Choose Trust on the next frame that appears.
Choose Done then return to the home screen.
12. In the event that you are prompted tocreate or change your current passcode ,choose Continue. Note: You may use yourcurrent code again as long as it is 6 digitsor more
Note: the original registration page or a random web page will appear after choosing done on the profile installation. Please ignore it and move to subsection 1 below.
RESULT/COMMENT
14.
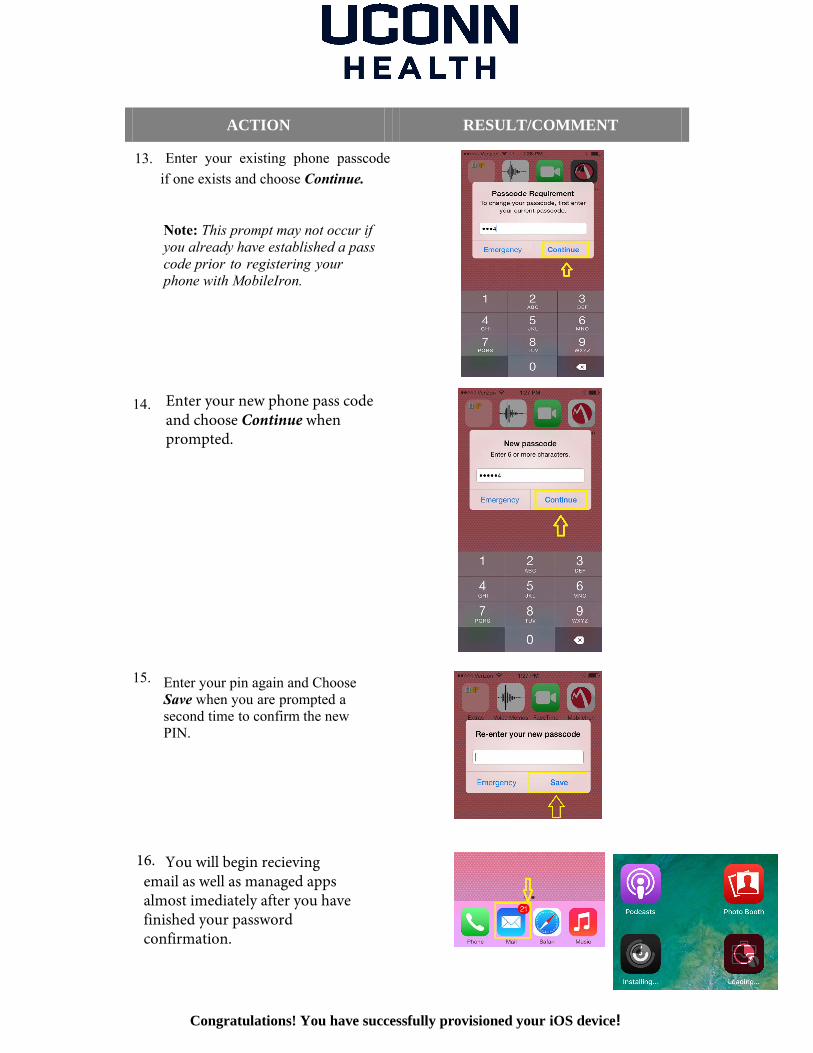
15. Enter your pin again and ChooseSave when you are prompted asecond time to confirm the newPIN.
Congratulations! You have successfully provisioned your iOS device!
ACTION
13. Enter your existing phone passcodeif one exists and choose Continue.
Note: This prompt may not occur if you already have established a pass code prior to registering your phone with MobileIron.
Enter your new phone pass code and choose Continue when prompted.
16. You will begin recievingemail as well as managed appsalmost imediately after you havefinished your passwordconfirmation.
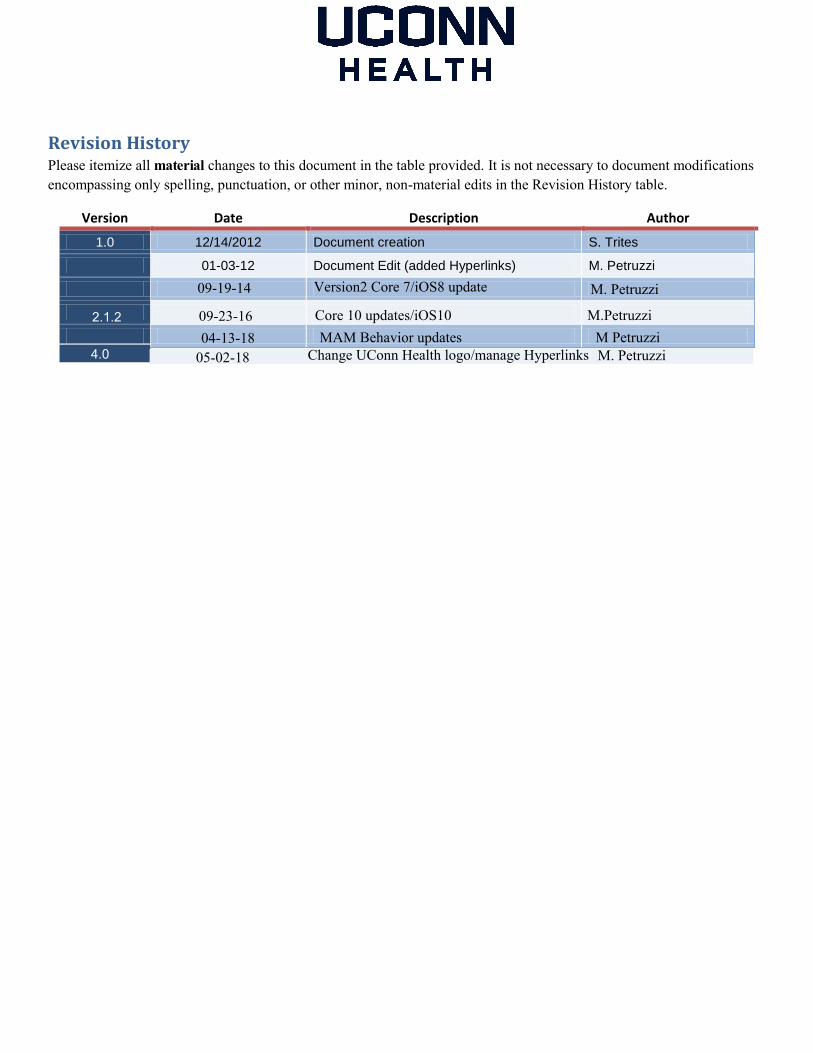
Revision History Please itemize all material changes to this document in the table provided. It is not necessary to document modifications encompassing only spelling, punctuation, or other minor, non-material edits in the Revision History table.
Version Date Description Author
1.0 12/14/2012 Document creation S. Trites
01-03-12 Document Edit (added Hyperlinks) M. Petruzzi
09-19-14 Version2 Core 7/iOS8 update M. Petruzzi
2.1.2 09-23-16 Core 10 updates/iOS10 M.Petruzzi04-13-18 MAM Behavior updates M Petruzzi
05-02-18 Change UConn Health logo/manage Hyperlinks M. Petruzzi4.0


![How disable iTunes automatic backups for any iOS … disable iTunes automatic backups for any iOS device [ iPod, iPad, iPhone ] When you sync any iOS device [ iPad, iPod, iPhone ]](https://img.pdfslide.us/doc/110x75/5adb41e17f8b9ae1768e43a5/how-disable-itunes-automatic-backups-for-any-ios-disable-itunes-automatic-backups.jpg)