Embed Size (px)
Citation preview

Skin tutorial by Ritesh Kawadkar Page 1
How to create theme for WMP10+
by Ritesh Kawadkar

Skin tutorial by Ritesh Kawadkar Page 2
Before actually starting working on my tutorial please read the following theory carefully, you can also leave that and can start directly working but it is recommended that you first read it, it will give you a general overview and will really help you a lot.
How to create skin for Window Media Player
What a skin is? When art work (pictures), some scripts, text files and media are combined together to give Window Media Player a new look and feel, this is what I called a skin. Skin defines the basic functionality of Media Player i.e. where to place buttons, how it should perform, how it should look etc. In this tutorial I will tell you how to create a skin. Windows Media Player already have a lot of skins, but creating your own skin is something different. Creating a skin is really something different you don’t need to be a good programmer nor it needs a good work at computer graphics i.e. art work. If you have ever worked on paint or Photoshop than that is enough. If you have ever worked on HTML or some scripting language than it is well and good otherwise it is not required at all.
Source code What makes creating a skin easy is the source code which you can see of any skin mind it you can see the art work, script file of any skin. Basically skin file are loaded by default in C:\Program Files\Windows Media Player\Skins folder. These skin files are in the compressed in a package having the extension wmz. So to decompress the file and view the contents rename the .WMZ file to .ZIP and use an unzipping utility such as WinZIP or WinRAR to extract the containing files.

Skin tutorial by Ritesh Kawadkar Page 3
Skin Files As said above skin is a group of files and all files has its own function. There are mainly 3 types of file they are- File type Description Skin Definition File This is a text file and has a .wms file name
extension. This is the main file which contains
the position of components, and how other art
file and scripts are to be used. Art Files It contains the graphic part of your skin i.e.
how your skin would look. These include
BMP, GIF, JPEG, and PNG files. JScript Files This is a text file and has a .js file name
extension. It contains the
information/command of event which has to be
take place.
Skin Definition File: Skin definition files contain the basic instructions for what
the skin does and where other files used by the skin can be found. There can only
be one skin definition file for a skin, and it has a .wms file name extension.
The instructions in the skin definition file are written in eXtensible Markup
Language (XML), which is similar to HTML. If you have used HTML to create
Web pages, you will find that XML looks familiar.

Skin tutorial by Ritesh Kawadkar Page 4
Creating skin
First we would start from the basic art work since it is the main part of our skin; it
is the element that would decide how our skin would look like. Actually this is the
only part that your users can see.
Creating necessary art work
In this tutorial I am creating a NOKIA N96 model as my primary image. The
reason I choose it is that firstly, it looks good, secondly it has all the necessary
features like play/pause buttons that I would need. The actual image of NOKIA
N96 mobile is shown below
You can choose any art work that you like or you can simply create.

Skin tutorial by Ritesh Kawadkar Page 5
Art file has 3 main images
Primary Images
This is what your users will see when they install your skin. I have
Mapping Images
One of the most powerful features of Windows Media Player skins is that you can
use image mapping to trigger events for your skin. Different controls need different
kinds of image maps. For example, if you color part of an image map a specific red
value, and the user clicks on the corresponding area of your primary image, a
button will fire an event. Color is used to define which events are triggered by
clicking in a particular area of the skin.
Alternate Images
You can also set up alternate images to display when a user does something. For
example, you can create an alternate image of a button that will be displayed only
when the mouse hovers over the button.
And that’s all you need to know, for any further reading go to Microsoft site and search MSDN
library for more.
Now we would start creating our first skin.
NOTE: save all your files in one folder
Skin tutorial by Ritesh Kawadkar Page 6
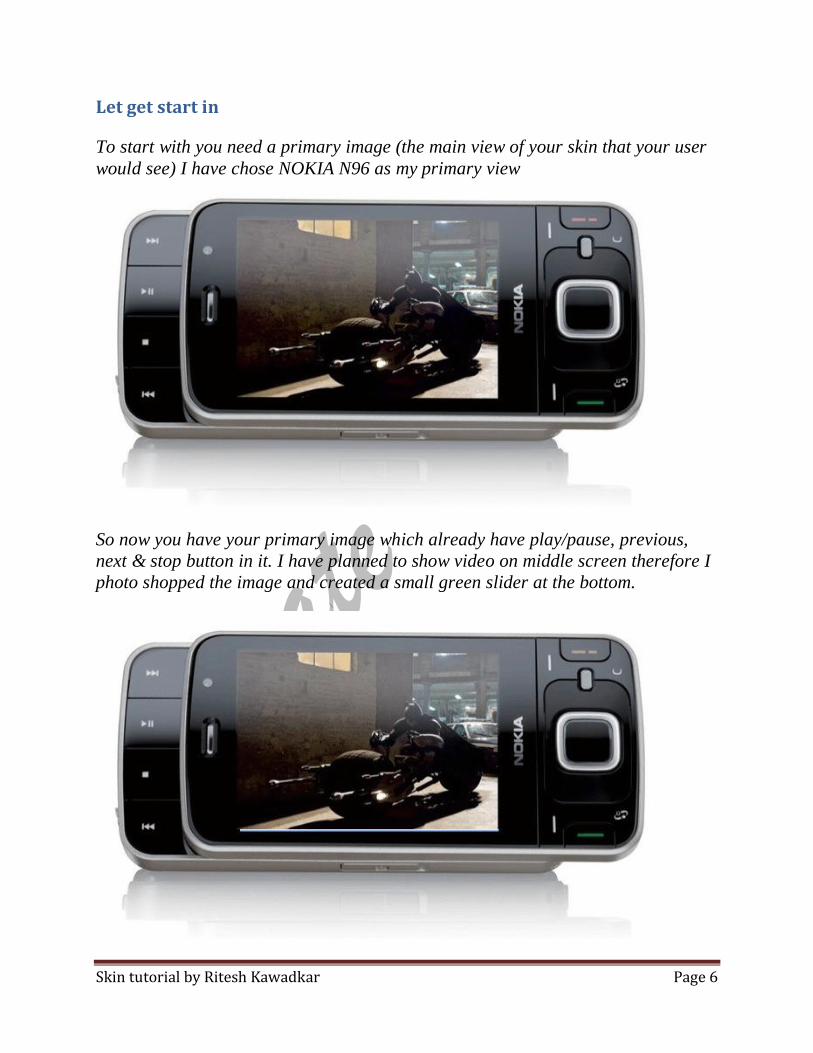
Let get start in
To start with you need a primary image (the main view of your skin that your user
would see) I have chose NOKIA N96 as my primary view
So now you have your primary image which already have play/pause, previous,
next & stop button in it. I have planned to show video on middle screen therefore I
photo shopped the image and created a small green slider at the bottom.

Skin tutorial by Ritesh Kawadkar Page 7
Now our primary art work is completed. So we can start with the skin definition
file. To create your skin definition file open Notepad and type
The THEME element is the root element for your skin. If you have ever used
HTML than it is also as simple as it is.
Every THEME has at least one view element. It governs the particular image you see on the screen. You can have more than one view for showing playlist, visualization etc. Now I would let you explain the following attributes of VIEW element.
Attributes Description
id Every element in skin file has its unique identity which helps in identifying them.
width and height Gives skin a particular width and height. My primary image fits best in 690*410.
resizable
Set this attribute to true or false according to your need
titlebar In this case I don’t want title bar because it distract the look
scriptFile Write the name of the script file.
backgroundColor If you want any background color you can write the name of the color or type none to make the skin transparent where nothing is specified
minWidth & minHeight
Restricts minimum width and height
<THEME>
...
</THEME>

Skin tutorial by Ritesh Kawadkar Page 8
So now the code would look like below
<THEME>
<VIEW
id="mview"
left="0" top="0" width="690" height="410"
resizable="false"
minWidth="600" minHeight="267"
titlebar="false"
title="Batman Begins"
backgroundColor="none">
…
</VIEW>
...
</THEME>

Skin tutorial by Ritesh Kawadkar Page 9
Now we would add our primary image to the skin by using a subview element
<THEME>
<VIEW>
<SUBVIEW>
backgroundImage="main_bg.png" >
…
...
</VIEW>
…
</THEME>
Now if we would write the whole code

Skin tutorial by Ritesh Kawadkar Page 10
</VIEW> </THEME> And save the file as batman.wms and then execute it our skin would look like this
But I don’t want that white color around our image so I opened Photoshop and colored that white portion with #FF00FF so that I can clip that white portion easily. After coloring my image look like below

Skin tutorial by Ritesh Kawadkar Page 11
As you can see it has a uniform color throughout and therefore it is easy to clip that portion out, to do that I have to just write added a one line code in subview element and i.e.
clippingColor ="#FF00FF" this line will clip of the colored portion, now the code is

Skin tutorial by Ritesh Kawadkar Page 12
Now if we would execute the above line of code we would get our skin like below
Now half of our task is completed we have a good looking skin. Now we have to add functionality in it. Have you ever used window media player, what happens when you place your mouse over play button or any other button? Yes, the button glows if you have not experienced that, than no problem take your mouse over start button and look the start button will glow out. In my skin I too want to create that thing so I started with play/pause, forward, next and stop button which are there in my primary image’s left portion.

Skin tutorial by Ritesh Kawadkar Page 13
To do that open primary image in Adobe Photoshop and cut the play/pause, forward, next and stop buttons from it using rectangle, polygon or any other tool. Or you can use any other imaging software that you like. I have cut down the above button using rectangle & polygon tool
Stop forward stop play/pause previous Now we have to color the white portion of these buttons to any color you can choose I have used orange.
Pause forward stop play previous So when you will place your mouse over them they will turn orange in color. Now again we need a mapping image for all these buttons so just again open these image in Photoshop and color them.
Play/pause forward stop previous Now the coding part for them, so that when we place our mouse over these images it glow. I am telling you coding for stop button coding for other button is also similar.

Skin tutorial by Ritesh Kawadkar Page 14
Attributes Description
image
It is the actual stop image
hoverImage It is the image which you want to see when you place
your mouse above the stop button
mappingImage They are used for specific controls to specify which regions (i.e. the total area covered by image here it is 100*66 in pixels) will respond to mouse clicks and to determine which controls receive which events.
mappingColor It is the color of the mapping image #9999FF
onClick The event which should takes place when we click on button
upToolTip You can write the tool tip here it means when you hover your mouse on stop button it will show what it will do.
Note: In the above case when the mouse come in area of mapping image it will turn into hand shape and when we click on the button it stops our song. So mapping image defines the area where mouse turns into hand

Skin tutorial by Ritesh Kawadkar Page 15
Below are the codes for different buttons
Full Screen Bid=max
Minimize Bid=minimize
Close Bid=close
Repeat Bid=repeat
Open website Bid=launch Mute On/Off
Bid=mute
View Playlist Bid= playlst

Skin tutorial by Ritesh Kawadkar Page 16

Skin tutorial by Ritesh Kawadkar Page 17

Skin tutorial by Ritesh Kawadkar Page 18

Skin tutorial by Ritesh Kawadkar Page 19

Skin tutorial by Ritesh Kawadkar Page 20
Now we have written the code for all of our button but in this mobile we don’t have any volume button, at first I thought of creating a volume slider but then I stick with buttons to let the integrity of a mobile as it is. So I have used the right middle portion for the volume, the upper and lower button will act as volume buttons and the middle portion will show the volume

Skin tutorial by Ritesh Kawadkar Page 21
To do that I can cut the portion of that image, then created a hover image for them
And the code for two buttons and the text that shows volume is
Raise volume Bid=up
Lower volume Bid=down
Skin tutorial by Ritesh Kawadkar Page 22
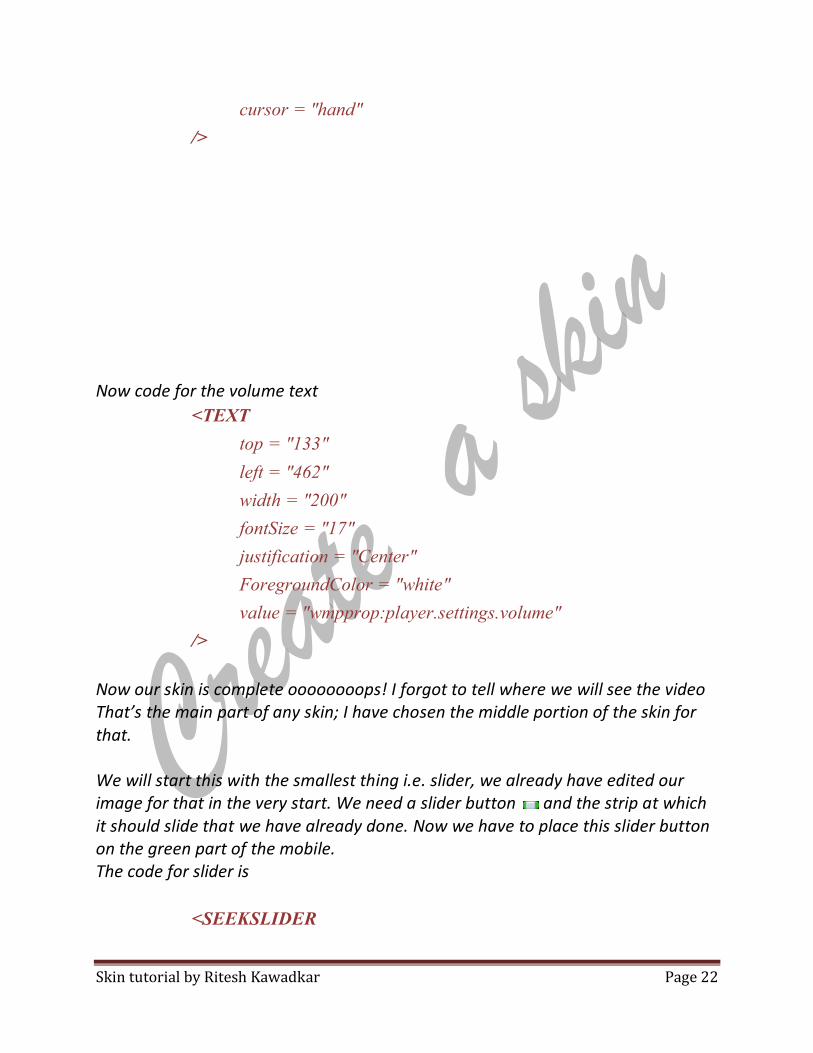
Now code for the volume text
Now our skin is complete oooooooops! I forgot to tell where we will see the video That’s the main part of any skin; I have chosen the middle portion of the skin for that. We will start this with the smallest thing i.e. slider, we already have edited our image for that in the very start. We need a slider button and the strip at which it should slide that we have already done. Now we have to place this slider button on the green part of the mobile. The code for slider is

Skin tutorial by Ritesh Kawadkar Page 23
Now our slider is also ready now we should work on video To add the video at the middle of the mobile here is the code
Now our video is also complete but what about audio, yes, your audio is also completed, you can also play your audio and your slider will also respond to it. But to give a good skin you must inherit some audio properties in it too. I.e. you can provide the basic information of your file and the time left etc.

Skin tutorial by Ritesh Kawadkar Page 24
For displaying time
For displaying file name

Skin tutorial by Ritesh Kawadkar Page 25
But we have left one more thing that is the playlist section, first I thought of creating a playlist in another view but then I found that I can utilize me mobile also for that.
The coding for this is

Skin tutorial by Ritesh Kawadkar Page 26
Now the complete code
™

Skin tutorial by Ritesh Kawadkar Page 27

Skin tutorial by Ritesh Kawadkar Page 28

Skin tutorial by Ritesh Kawadkar Page 29

Skin tutorial by Ritesh Kawadkar Page 30

Skin tutorial by Ritesh Kawadkar Page 31

Skin tutorial by Ritesh Kawadkar Page 32

Skin tutorial by Ritesh Kawadkar Page 33

Skin tutorial by Ritesh Kawadkar Page 34

Skin tutorial by Ritesh Kawadkar Page 35
So here your skin definition file ends now you have to create java script file for the events to take place We have only used one javascropt function in the abive wriiten code that is for increasing and decreasing volume save this code as batman.js

Skin tutorial by Ritesh Kawadkar Page 36
When all your files are ready compress all the file to a zip file then open command prompt and rename the zip file to batman.wmz and this is your skin package file which you can distribute. I have enclosed all the artwork, script file and skin definition file in the batman source folder. Creating a skin is a tough task but if you want any reference at any where you can ask me but a better option is decompress different wmz files and view their actual coding. If you found any problem or confusion then ask me I am available at [email protected] or visit my blog and leave a reply there at www.riteshhowto.wordpress.com.