Embed Size (px)
Citation preview
8/4/2019 Box - Recipe Box
http://slidepdf.com/reader/full/box-recipe-box 1/3
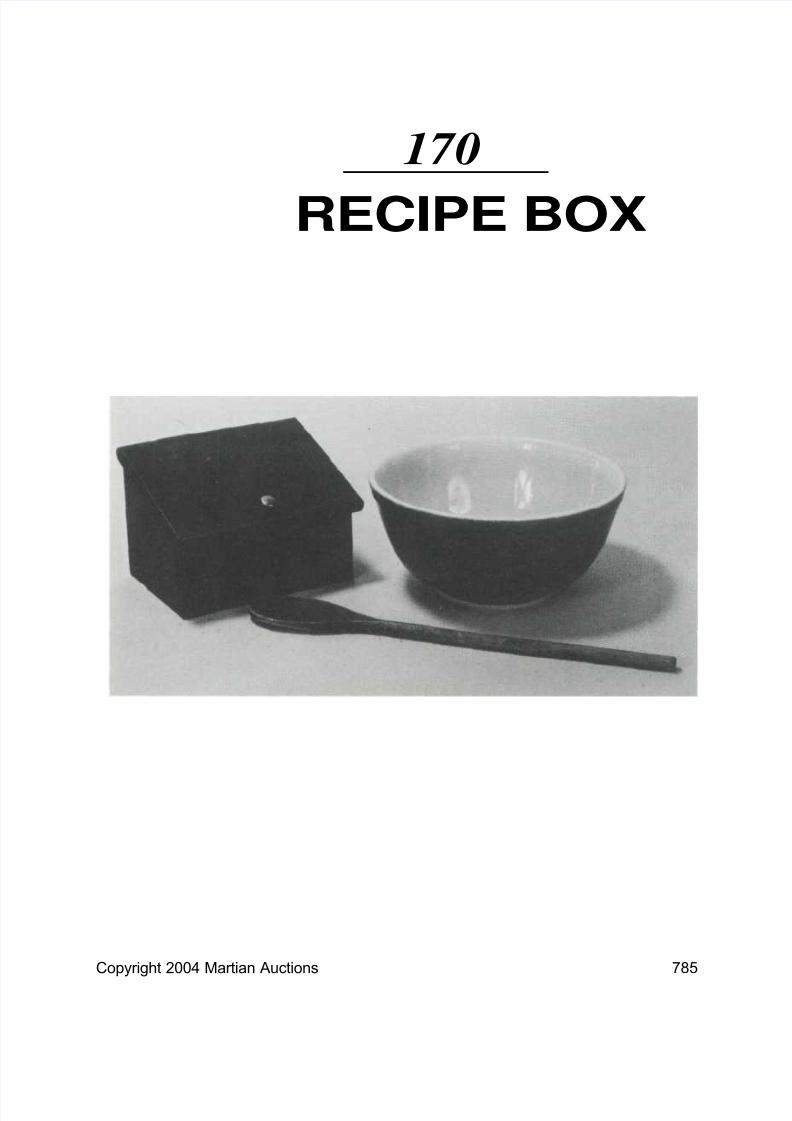
170
RECIPE BOX
Copyright 2004 Martian Auctions 785
8/4/2019 Box - Recipe Box
http://slidepdf.com/reader/full/box-recipe-box 2/3
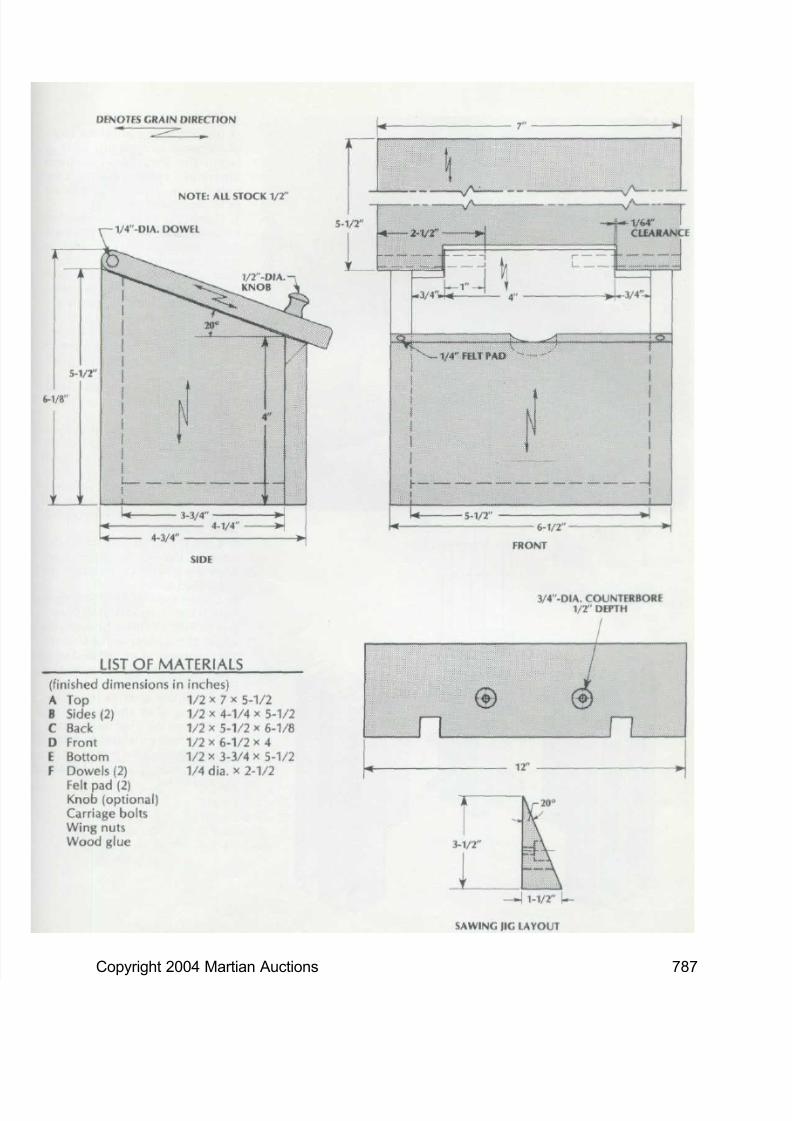
This recipe box can hold morethan recipe cards—buttons, ad-dress cards, candy, crayons, almostany little thing around the housecan find a home in it.1. If you are unable to purchasethe 1/2" stock needed for the reci-pe box, custom plane the neces-sary amount of 3/4" stock or resaw
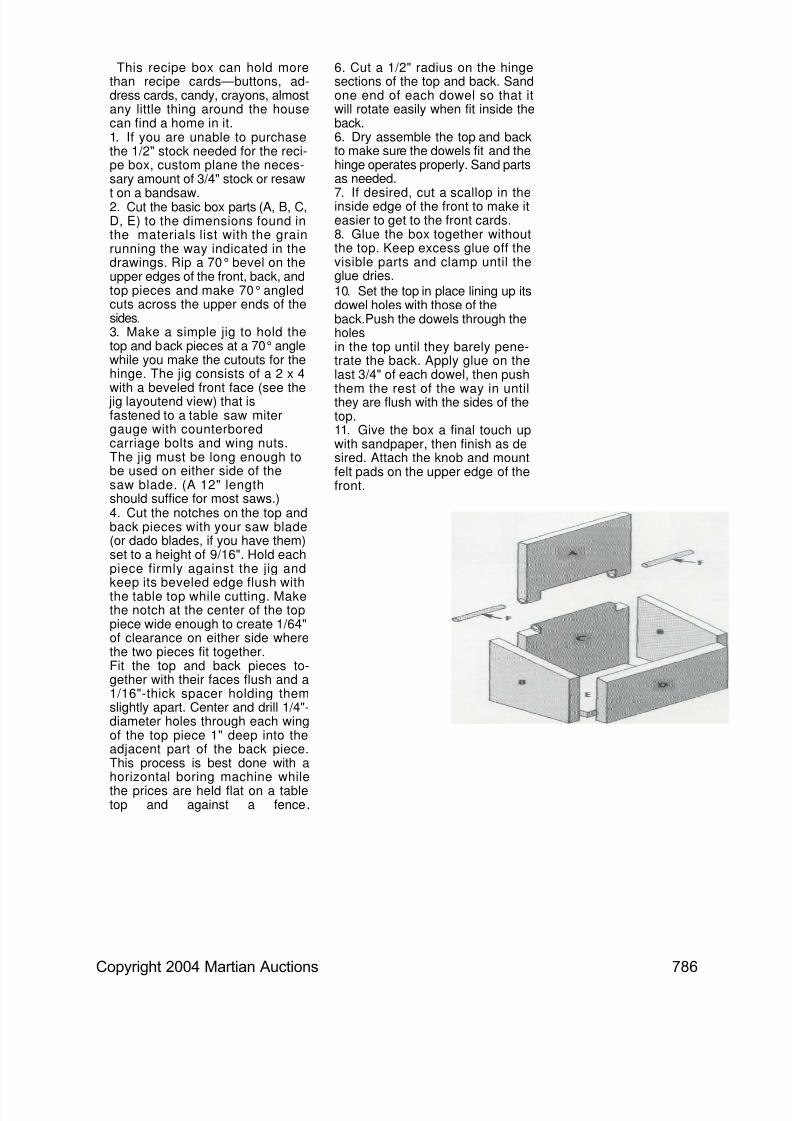
t on a bandsaw.2. Cut the basic box parts (A, B, C,D, E) to the dimensions found inthe materials list with the grainrunning the way indicated in thedrawings. Rip a 70° bevel on theupper edges of the front, back, andtop pieces and make 70° angledcuts across the upper ends of thesides.3. Make a simple jig to hold thetop and back pieces at a 70° anglewhile you make the cutouts for thehinge. The jig consists of a 2 x 4
with a beveled front face (see the jig layoutend view) that isfastened to a table saw mitergauge with counterboredcarriage bolts and wing nuts.The jig must be long enough tobe used on either side of thesaw blade. (A 12" lengthshould suffice for most saws.)4. Cut the notches on the top andback pieces with your saw blade(or dado blades, if you have them)set to a height of 9/16". Hold eachpiece firmly against the jig and
keep its beveled edge flush withthe table top while cutting. Makethe notch at the center of the toppiece wide enough to create 1/64"of clearance on either side wherethe two pieces fit together.Fit the top and back pieces to-gether with their faces flush and a1/16"-thick spacer holding themslightly apart. Center and drill 1/4"-diameter holes through each wingof the top piece 1" deep into theadjacent part of the back piece.This process is best done with ahorizontal boring machine whilethe prices are held flat on a tabletop and against a fence.
6. Cut a 1/2" radius on the hingesections of the top and back. Sandone end of each dowel so that itwill rotate easily when fit inside theback.6. Dry assemble the top and backto make sure the dowels fit and thehinge operates properly. Sand partsas needed.
7. If desired, cut a scallop in theinside edge of the front to make iteasier to get to the front cards.8. Glue the box together withoutthe top. Keep excess glue off thevisible parts and clamp until theglue dries.10. Set the top in place lining up itsdowel holes with those of theback.Push the dowels through theholesin the top until they barely pene-trate the back. Apply glue on thelast 3/4" of each dowel, then push
them the rest of the way in untilthey are flush with the sides of thetop.11. Give the box a final touch upwith sandpaper, then finish as desired. Attach the knob and mountfelt pads on the upper edge of thefront.
Copyright 2004 Martian Auctions 786
8/4/2019 Box - Recipe Box
http://slidepdf.com/reader/full/box-recipe-box 3/3
Copyright 2004 Martian Auctions 787