Embed Size (px)
Citation preview
1
AUDIO MASTERING: AN INVESTIGATION AND ANALYSIS OF CONTEMPORARY TECHNIQUES
BY
KARL N. FLECK B.A. HOPE COLLEGE (2013)
SUBMITTED IN PARTIAL FULFILLMENT OF THE REQUIREMENTS FOR THE DEGREE OF MASTER OF MUSIC
DEPARTMENT OF SOUND RECORDING TECHNOLOGY UNIVERSITY OF MASSACHUSETTS LOWELL
Signature of Author: Date: Signature of Thesis Supervisor: Name Typed:
2
Abstract
Mastering is an aspect of music production that is encompassed by air of mystery.
There is very little specific information written about mastering and it is
oftentimes overlooked in common collegiate Audio Engineering curricula. The
purpose of this study is to investigate audio mastering and examine its finer
details. In this study a single song was recorded; mixed by four different mixing
engineers; and finally collected, analyzed, and mastered. Furthermore, interviews
were conducted with five prominent mastering engineers regarding the many
specific facets of mastering. These interviews were then transcribed and analyzed
for common trends and practices. The goal is to illuminate various techniques for
mastering while utilizing these examples in the context of a case study.
Throughout this study, several themes emerged including the need for accurate
monitoring, specified equipment, experience, and a touch of luck. The
information gathered in this study will benefit those interested in understanding
mastering. This could range from students wishing to pursue a career in
mastering, to artists looking to comprehend how the mastering process affects
their work.
3
Acknowledgements
I would like to offer my most sincere thanks and gratitude to Alan
Williams and the rest of the members of Birdsong at Morning, Darleen Wilson
and Greg Porter. Your cooperation, musical wisdom, and guidance has truly been
treasured.
I would also wish to thank my advisor Alex Case for his support, direction, and
the 3:01 meetings that we have had to brainstorm every aspect of this project.
To the crew at M-Works: Jonathan Wyner, Alex Psaroudakis, and Nick Dragoni:
the time spent with you all has been one of my most valued educational
experiences. Your open communication about mastering has profoundly shaped
my thoughts and practices of this art form. It has been through my time with you
that I have learned to be truthfully critical in all aspects of mastering.
In a similar fashion, my deepest thanks goes out to the mastering engineers that
participated in the interviews, Jay Frigoletto, Matt Azevedo, Adam Ayan, Paul
Angelli, and Jonathan Wyner. Open and honest communication about mastering
is difficult to come by and I genuinely appreciate every thought and concept that
you all have discussed in our interviews.

4
This project would be nothing without the participation of my trusted mix
engineers, Alan Williams, Nick Dragoni, Brandon Vaccaro, and Bradford
Swanson. Thank you for the time, consideration, and creativity that you have
invested in my project.
Lastly, to my wife Hannah, thank you for your support, editing skills, and
willingness to listen to all of this mastering ‘nonsense’ that I constantly talk about.
5
Table of Contents
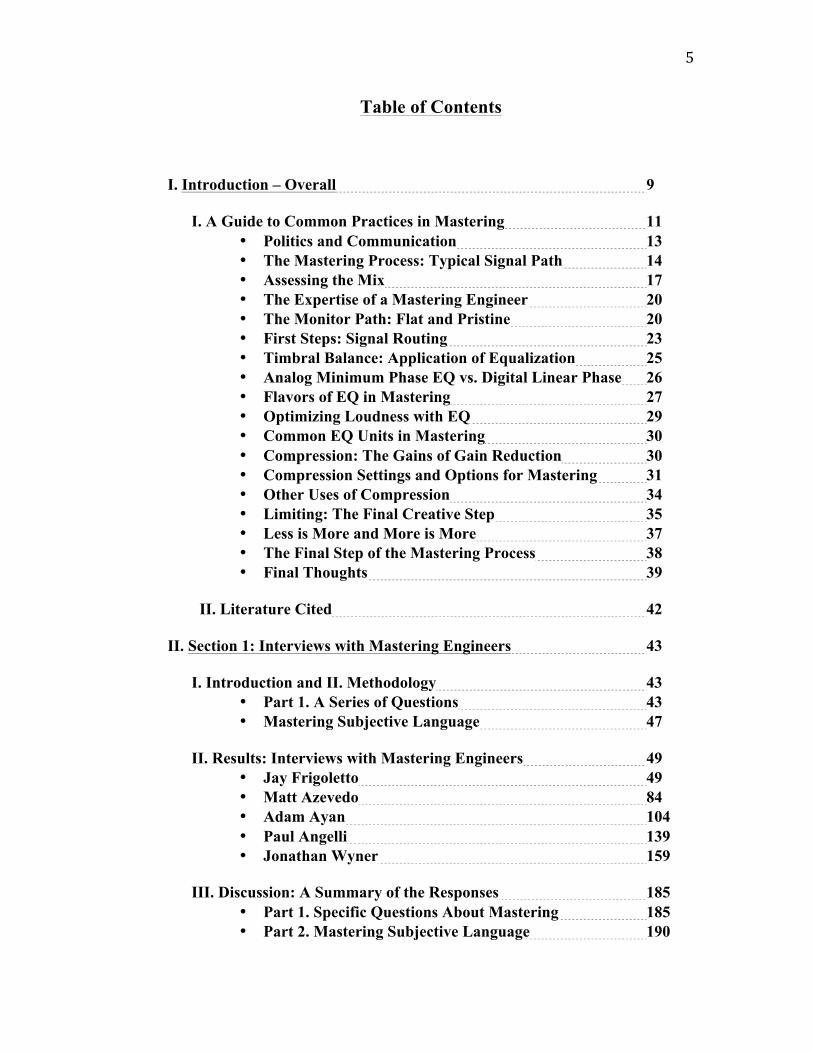
I. Introduction – Overall 9 I. A Guide to Common Practices in Mastering 11
• Politics and Communication 13 • The Mastering Process: Typical Signal Path 14 • Assessing the Mix 17 • The Expertise of a Mastering Engineer 20 • The Monitor Path: Flat and Pristine 20 • First Steps: Signal Routing 23 • Timbral Balance: Application of Equalization 25 • Analog Minimum Phase EQ vs. Digital Linear Phase 26 • Flavors of EQ in Mastering 27 • Optimizing Loudness with EQ 29 • Common EQ Units in Mastering 30 • Compression: The Gains of Gain Reduction 30 • Compression Settings and Options for Mastering 31 • Other Uses of Compression 34 • Limiting: The Final Creative Step 35 • Less is More and More is More 37 • The Final Step of the Mastering Process 38 • Final Thoughts 39
II. Literature Cited 42 II. Section 1: Interviews with Mastering Engineers 43 I. Introduction and II. Methodology 43
• Part 1. A Series of Questions 43 • Mastering Subjective Language 47
II. Results: Interviews with Mastering Engineers 49
• Jay Frigoletto 49 • Matt Azevedo 84 • Adam Ayan 104 • Paul Angelli 139 • Jonathan Wyner 159
III. Discussion: A Summary of the Responses 185
• Part 1. Specific Questions About Mastering 185 • Part 2. Mastering Subjective Language 190
6
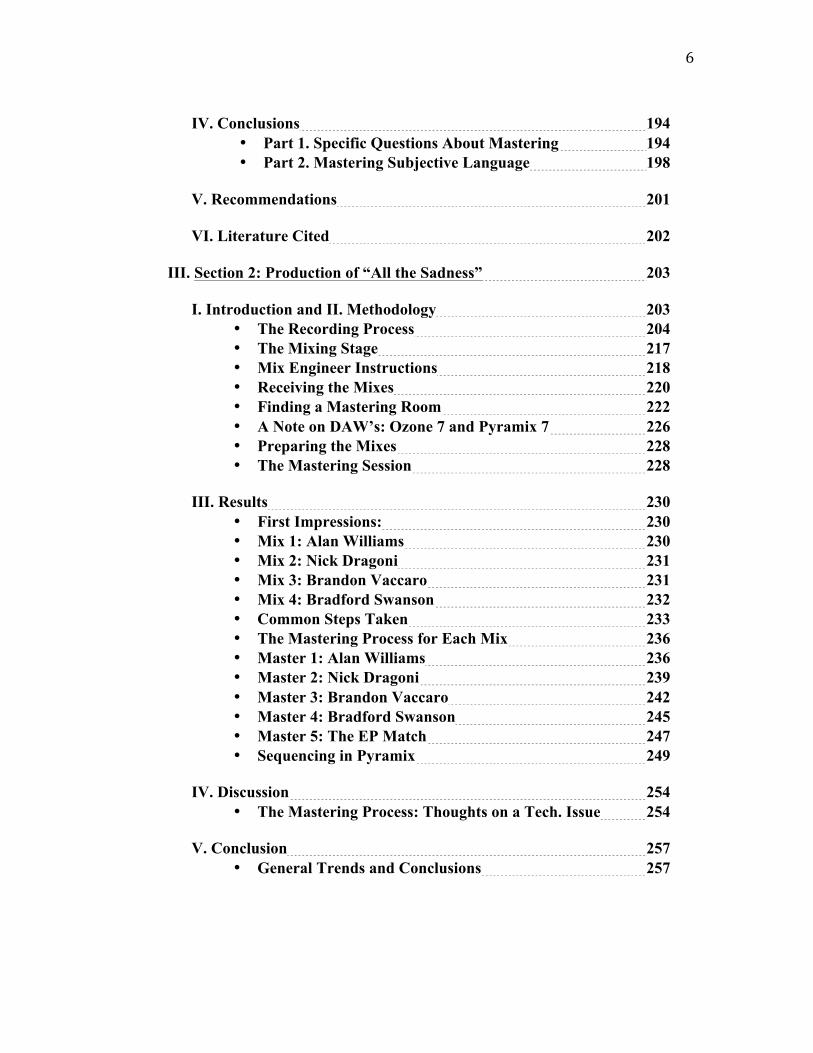
IV. Conclusions 194
• Part 1. Specific Questions About Mastering 194 • Part 2. Mastering Subjective Language 198
V. Recommendations 201 VI. Literature Cited 202
III. Section 2: Production of “All the Sadness” 203
I. Introduction and II. Methodology 203 • The Recording Process 204 • The Mixing Stage 217 • Mix Engineer Instructions 218 • Receiving the Mixes 220 • Finding a Mastering Room 222 • A Note on DAW’s: Ozone 7 and Pyramix 7 226 • Preparing the Mixes 228 • The Mastering Session 228
III. Results 230
• First Impressions: 230 • Mix 1: Alan Williams 230 • Mix 2: Nick Dragoni 231 • Mix 3: Brandon Vaccaro 231 • Mix 4: Bradford Swanson 232 • Common Steps Taken 233 • The Mastering Process for Each Mix 236 • Master 1: Alan Williams 236 • Master 2: Nick Dragoni 239 • Master 3: Brandon Vaccaro 242 • Master 4: Bradford Swanson 245 • Master 5: The EP Match 247 • Sequencing in Pyramix 249
IV. Discussion 254
• The Mastering Process: Thoughts on a Tech. Issue 254
V. Conclusion 257 • General Trends and Conclusions 257

7
VI. Recommendations 259 VII. Literature Cited 261
IV. Conclusion – Overall 262 V. Appendix 265 VI. Biographical Sketch 266
8
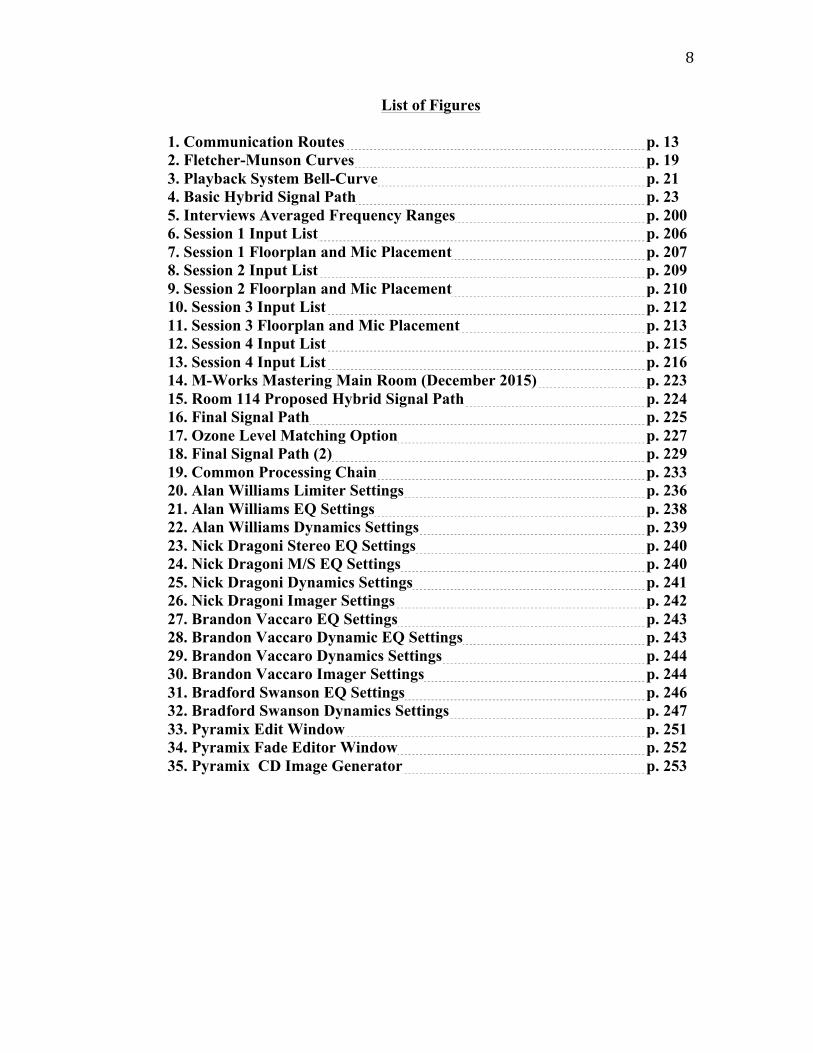
List of Figures
1. Communication Routes p. 13 2. Fletcher-Munson Curves p. 19 3. Playback System Bell-Curve p. 21 4. Basic Hybrid Signal Path p. 23 5. Interviews Averaged Frequency Ranges p. 200 6. Session 1 Input List p. 206 7. Session 1 Floorplan and Mic Placement p. 207 8. Session 2 Input List p. 209 9. Session 2 Floorplan and Mic Placement p. 210 10. Session 3 Input List p. 212 11. Session 3 Floorplan and Mic Placement p. 213 12. Session 4 Input List p. 215 13. Session 4 Input List p. 216 14. M-Works Mastering Main Room (December 2015) p. 223 15. Room 114 Proposed Hybrid Signal Path p. 224 16. Final Signal Path p. 225 17. Ozone Level Matching Option p. 227 18. Final Signal Path (2) p. 229 19. Common Processing Chain p. 233 20. Alan Williams Limiter Settings p. 236 21. Alan Williams EQ Settings p. 238 22. Alan Williams Dynamics Settings p. 239 23. Nick Dragoni Stereo EQ Settings p. 240 24. Nick Dragoni M/S EQ Settings p. 240 25. Nick Dragoni Dynamics Settings p. 241 26. Nick Dragoni Imager Settings p. 242 27. Brandon Vaccaro EQ Settings p. 243 28. Brandon Vaccaro Dynamic EQ Settings p. 243 29. Brandon Vaccaro Dynamics Settings p. 244 30. Brandon Vaccaro Imager Settings p. 244 31. Bradford Swanson EQ Settings p. 246 32. Bradford Swanson Dynamics Settings p. 247 33. Pyramix Edit Window p. 251 34. Pyramix Fade Editor Window p. 252 35. Pyramix CD Image Generator p. 253
9
I. Introduction- Overall
Mastering is the least understood step in the production of professional
commercial audio. This final step in the professional recording process is highly
specified, competitive, and thus notoriously secretive. In the current state of the
music industry with increasing numbers of home studios, professional audio
mastering has become a topic of significance. This is due to the fact of the
increasing numbers of artists who want their productions to be mastered, but often
cannot afford to send their project to high-end mastering studios. This creates a
demand for low-cost mastering that has the potential to be detrimental to the
quality of music production, leading to the employment of inexperienced and ill-
equipped mastering engineers. In order to combat the general lack of
comprehension of mastering, information on its finer processes and details must
be shared; artists, audio professionals, and the general public must be informed in
order to make the best decisions for musical production and the audio industry.
Currently, there are several resources that contain information about audio
mastering. There are some informal articles and videos that can be found online,
such as those by Mike Collins and Johnathan Wyner, and there are a few
textbooks published about mastering. Two of the most authoritative textbooks are
Mastering Audio: the Art and the Science by Bob Katz (2007) and Audio
Mastering: Essential Practices by Jonathan Wyner (2013). These books provide
an introduction to mastering and are vital resources for learning about the
10
common elements of mastering including effects processing, file formats, and
general mastering aesthetics.
These two textbooks are tremendous resources for attaining an
introduction to the concepts of the mastering process. Furthermore, Wyner’s book
features two “case studies” where he walks the reader through the mastering of
two sample recordings. This takes the concepts presented in the book and makes
them practical, providing the reader with the implementation of specific examples
of the mastering process. Even though Wyner includes these “case study”
examples in his book, the details and processes of other techniques could be
explained further. Because mastering is a diverse discipline and the process is
specific to the genre of music, it is not enough to talk about mastering in general
terms. Additionally, it is much more meaningful to discuss mastering when the
concepts are put into context. Despite these great resources, there is still a lack of
variety and depth of mastering literature and resources.
This study further investigates the details of mastering, providing
examples for a specific discussion about the mastering process. It provides
information relevant to audio engineers, producers, and artists who might not
fully understand all that mastering entails. This study is separated into two
sections. The first is section is comprised of a series of interviews conducted with
veteran mastering engineers. This section allows mastering engineers to talk about
their craft, oftentimes citing specific examples relating to their past projects and
experiences. The goal of these interviews is to provide relevant and valuable
insight into the current state of mastering.
11
The second section of this study focuses on the recording of one song;
four different mixes by four different mix engineers; and the mastering of those
four mixes. This section offers insight into the entire audio production chain and
focuses on the final mastering of the four mixes of a single song. Furthermore,
one of the mixes was a part of an EP match exercise which is another aspect of
mastering that requires a differing approach than mastering for a “single.”
This study combining these two sections provides relevant information
about many aspects of audio mastering. It examines the responses in the
interviews of mastering engineers and analyzes the mastering process in the
context of four different mixes of the same song. The purpose of this study is to
investigate examples that provide a context for specific discussions about
contemporary mastering techniques. The following section, “A Guide to Common
Practices in Mastering,” lays the groundwork for this studies’ investigation of the
audio mastering process.
A Guide to Common Practices in Mastering
To reiterate, mastering is the most misunderstood step in the recording
process. There exist rumors of mythical audio alchemy and Wizard-of-Oz-style
“man behind the curtain” trickery. This lack of understanding may be true for
some audio professionals, but even more so, it is especially true for audio
engineering students who are primarily taught about the recording and mixing
processes.

12
So then, what actually happens during the mastering process? What are
some of the mastering methods used to alter a piece of audio? The following is a
guidebook that elucidates some of the common practices of mastering,
specifically in manipulating a two-track, stereo piece of music. Included in this
guide are tips, techniques, and tools used to transform raw mixes into polished
masters.
Politics and Communication
Before diving into the technical and artistic sides of audio mastering, there
must first be a discussion on the politics of dealing with clients. Mastering does
not exist without clients—period. Therefore, one of the most crucial aspects of
mastering is keeping the client happy; always remember: “the client is king.”
Though it may seem like common sense for some, this is not an easy concept to
accept for others. However, once the “client is king” mentality is adopted, both
the client and mastering engineer will be pleased throughout the entire mastering
process.
Therefore it is crucial to not allow ego to get in the way of the client’s
desires. This is not to say one cannot offer expert, educated opinions. Instead, try
to educate the client about the situation as politely and respectfully as possible. In
the end, if it comes down to a matter of artistic taste, trust the client. However, if
it is a matter of technical limitations or misunderstandings, try to inform the
client.
13
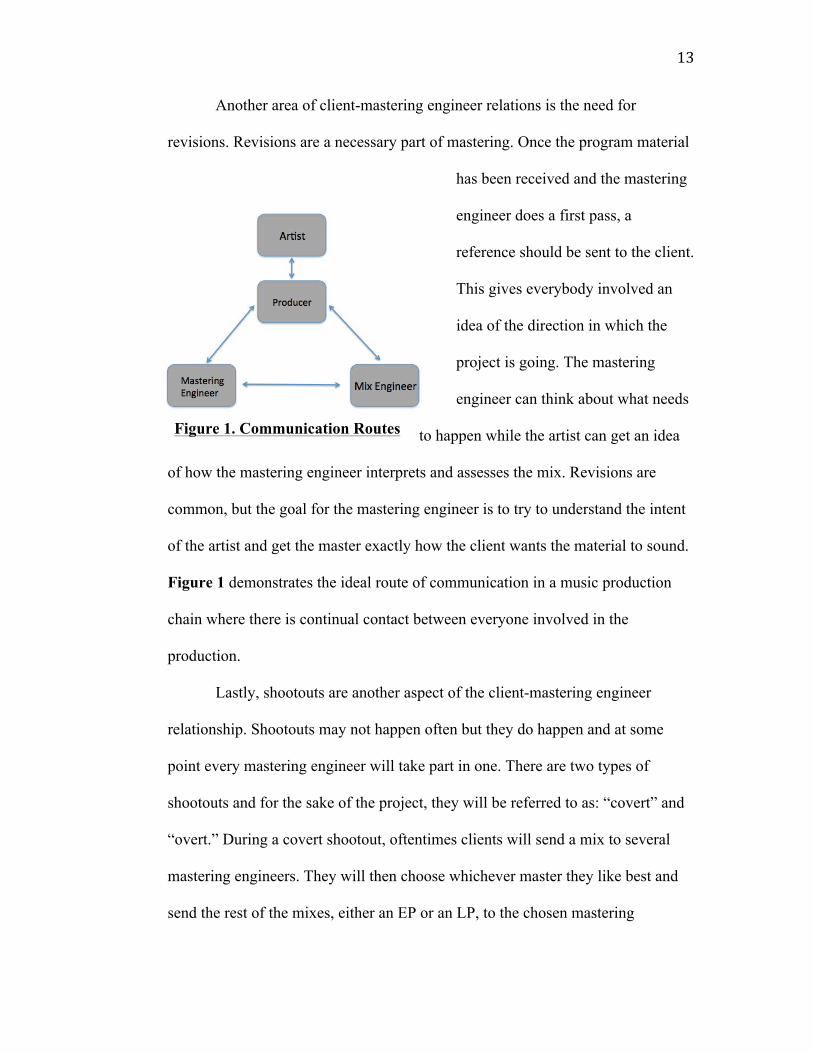
Another area of client-mastering engineer relations is the need for
revisions. Revisions are a necessary part of mastering. Once the program material
has been received and the mastering
engineer does a first pass, a
reference should be sent to the client.
This gives everybody involved an
idea of the direction in which the
project is going. The mastering
engineer can think about what needs
to happen while the artist can get an idea
of how the mastering engineer interprets and assesses the mix. Revisions are
common, but the goal for the mastering engineer is to try to understand the intent
of the artist and get the master exactly how the client wants the material to sound.
Figure 1 demonstrates the ideal route of communication in a music production
chain where there is continual contact between everyone involved in the
production.
Lastly, shootouts are another aspect of the client-mastering engineer
relationship. Shootouts may not happen often but they do happen and at some
point every mastering engineer will take part in one. There are two types of
shootouts and for the sake of the project, they will be referred to as: “covert” and
“overt.” During a covert shootout, oftentimes clients will send a mix to several
mastering engineers. They will then choose whichever master they like best and
send the rest of the mixes, either an EP or an LP, to the chosen mastering
Figure 1. Communication Routes
14
engineer. This process can be underhanded when the artist chooses not to mention
that the mix is a part of a shootout. In this case it is only after the matter that the
mastering engineers realize they were part of a mastering shootout.
While these “secret shootouts” do occur, sometimes shootouts will be
known to all of the parties involved. An overt shootout is a great opportunity to
try and prove one’s skills and to compete for the project. This competition-style
shootout can be beneficial for mastering engineers who are just starting out. For
example, say a mid-level artist is sending a mix to mastering engineers A, B, and
C. Let us say that Engineer A is at a prime studio in New York City, Engineer B
is at a similar space in Los Angeles, and Engineer C is a relatively unknown
wildcard in Boston. It can be assumed that Engineer C is going to give the mix an
extraordinary amount of thought and work. This is not to say that the other
engineers will not put much effort into their work, but this gives Engineer C the
opportunity to compare his work and abilities to that of more established
mastering engineers. No matter the outcome, this type of shootout is a great
learning experience for everybody involved.
The Mastering Process: Typical Signal Path
It is important to remember that mastering is a personal ordeal for the
mastering engineer. He or she typically spends years, if not decades, honing their
craft and dialing in exactly what workflow works best. Some people prefer to
work entirely in the digital domain, others prefer analog, and most mastering
15
engineers utilize both analog and digital processors in the signal path. This is
called a hybrid signal path when both analog and digital components are used.
Keeping in mind that every mastering engineer has his or her own
workflow preference, the following is an outline of a typical hybrid signal path.
Again, this is the most common process in mastering today, especially for non-
classical applications. This outline highlights the process of working with a client
who has delivered the mixes as digital audio files.
The mastering process begins when the client sends the files to the
mastering engineer. This can be done via any kind of digital transfer medium: a
flash drive or more typically, a file uploaded to web-based cloud storage like
Dropbox, Google Drive, or WeTransfer. Oftentimes larger mastering facilities
will have their own secure servers to which the client can upload files.
Once the files have been received, the mastering engineer will import the
file into his or her choice of Digital Audio Workstations (DAW). There are a
myriad of DAWs that can facilitate mastering, but the two that are most common
among professional mastering engineers are Magix’s Sequoia and Merging
Technologies’ Pyramix. Both of these DAWs are known for the ease of operation
in terms of workflow and editing capabilities. For example, the fade editing on
these programs are intuitive and flexible to the point where one can create any
desired fade effect. What separates a mastering DAW from any other is its ability
to author disc information. This includes metadata entry, track spacing, and the
creation of DDP (Disc Description Protocol) files.
16
When a mastering engineer receives a mix from a client, they look for the
following four things:
• Lossless Format Typically this would be either .aiff or .wav files.
• Correct Sample Rate and Bit Depth The rule of thumb here is that the mix
engineer should not do any sample rate or bit depth conversion at all. It is best
when the mix is sent to the mastering engineer in the same format it was mixed in.
For example, if the song was mixed with a sample rate of 96kHz, it should be
exported and sent to mastering at 96kHz. It is also crucial to have the file with a
bit depth of 24 bits. This allows for optimal resolution in processing, especially in
the digital domain. Additionally, this allows the mastering engineer to do the final
conversion for CD quality, Red Book standard, 44.1kHz 16 bit files. The
mastering engineer will be able to utilize the best sample rate conversion and
dithering for this process. Lastly, beware of ultra-high sample rates and bit depths
like 192kHz 32-floating point because some plug-ins cannot operate at that high
resolution. Sample rates and bit depths of 96kHz 24-bit are perfectly adequate for
non-classical applications.
• No Fades Sometimes the mixing engineer will want to add the fades before
mastering. This can cause some problems with the level of the signal while
processing. Without the fade, mastering can be completed without any drops in
level before it hits the processing chain. The mastering engineer will add the fades
to the file after the file has gone through the signal processing.
• No Limiting Another temptation of the mix engineer is to put a limiter on the
output of the mix in order to keep the peaks of the mix from clipping.

17
Alternatively, the mixing engineer could lower the level of the entire mix so that
the peaks do not go above 0dB FS (Full Scale). It is preferred to have files that
have peaks of around -3dB FS, but it is acceptable to have mixes that reach, but
do not exceed, 0dB FS. A mix of -3dB FS will allow the devices in the mastering
chain a fair amount of headroom so that there is no distortion or clipping at the
input stage of the devices or plug-ins.
Lastly, it is important to distinguish the difference between mix bus
compression and limiting the mix. It is perfectly acceptable to receive and work
with a mix that has appropriate mix bus compression. The mix engineer may
decide to use type of compression as an artistic decision by to “glue” the mix
together.
Assessing the Mix
Once the mix has been received and meets the above criteria, the
mastering engineer will import the file into the DAW. He or she will then observe
the mix, listening for anything needing to be altered, and will look for any
abnormalities in the file itself, making sure that the file is ready to be mastered.
This is an important step in the process when first impressions are made.
The mastering engineer will get a sense for the direction and goals the
client is striving to achieve. The engineer should then ask the following questions:
What genre is the material? What kind of processing is needed? How will the
processing affect the mix? What kind of processing is appropriate for this style of
18
music? These are important questions because a seasoned mastering engineer will
know exactly what kind of processing is best for each style of music. For
example, he or she will probably not apply a lot of compression or distortion to a
classical or jazz piece. However, they will probably add a fair amount of
compression and distortion to a rock or pop mix. This assessment can be difficult
at first, but experience will expedite the situation once the mastering engineer is
familiar with his or her room, monitors, and gear.
Another helpful tool in assessing a mix is having reference material. This
usually consists of previously released commercial material that is of a similar
genre. If the client sends a mix of hip-hop music, the mastering engineer should
have a collection of hip-hop recordings that he or she is familiar with. The
mastering engineer would know every characteristic of the references and would
then compare the mix to the reference. When comparing, the mastering engineer
may ask himself: What is the timbral spectrum of the mix compared to the
reference? What is the level of the reference and can the mix attain a similar
loudness? It is most helpful when a client recommends a reference recording.
That way the mastering engineer will know the exact direction the client is
moving toward and then no assumptions need to be made.
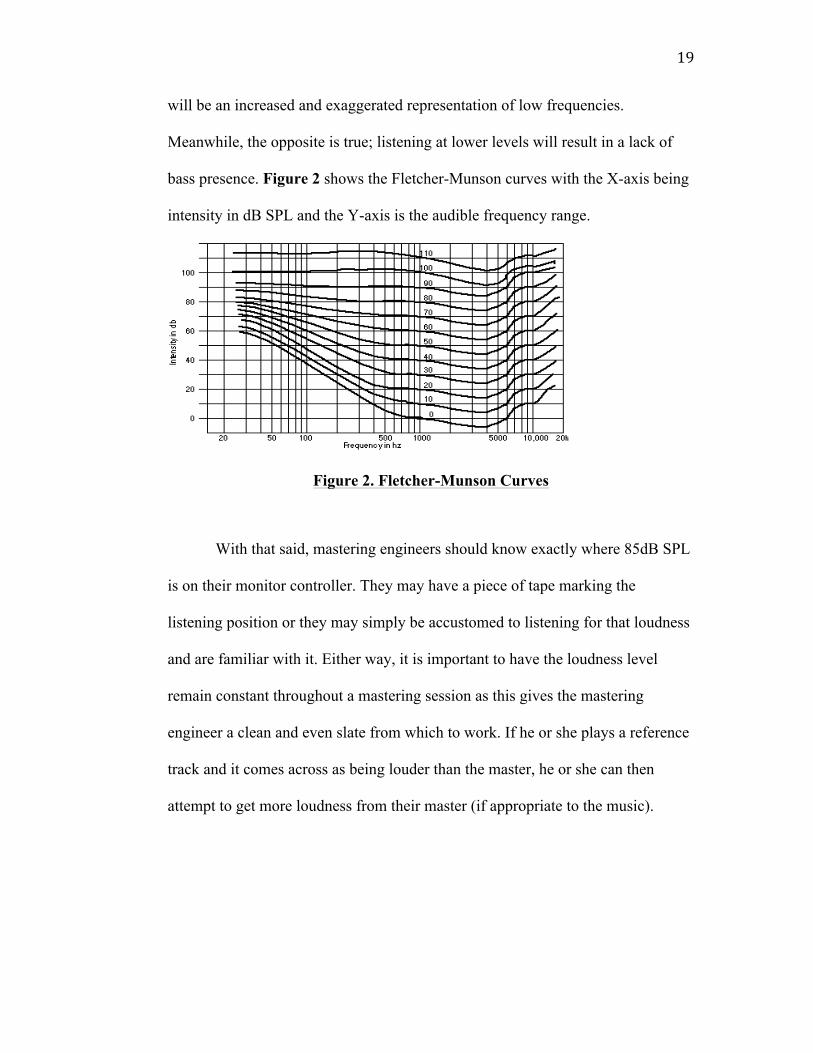
The loudness level at which a mastering engineer listens to the music is
critical. We know via the Fletcher-Munson Equal Loudness Curves that human
hearing is best perceptive across the frequency spectrum at around 85dB SPL
(Sound Pressure Level). Much farther above or below 85dB SPL will skew how
the music is perceived. For example, if one listens louder than 85dB SPL there
19
will be an increased and exaggerated representation of low frequencies.
Meanwhile, the opposite is true; listening at lower levels will result in a lack of
bass presence. Figure 2 shows the Fletcher-Munson curves with the X-axis being
intensity in dB SPL and the Y-axis is the audible frequency range.
Figure 2. Fletcher-Munson Curves
With that said, mastering engineers should know exactly where 85dB SPL
is on their monitor controller. They may have a piece of tape marking the
listening position or they may simply be accustomed to listening for that loudness
and are familiar with it. Either way, it is important to have the loudness level
remain constant throughout a mastering session as this gives the mastering
engineer a clean and even slate from which to work. If he or she plays a reference
track and it comes across as being louder than the master, he or she can then
attempt to get more loudness from their master (if appropriate to the music).
20
The Expertise of a Mastering Engineer
Before diving into the finer aspects of mastering, it is important to state
that the most important elements in mastering are the engineer’s critical listening
skills and musical intuition. This takes time to develop and is what separates
decent mastering engineers from great mastering engineers. For example, a
mastering engineer needs to be able to tell the difference between compression
ratios of 1:1.5 and 1:2; between an EQ cut of 0.3dB and 0.4dB; or the difference
between Redco or Siltech cables. These seem like small differences, but they are
decisions that are made on a daily basis and can have a tremendous impact on the
material.
Monitor Path: Flat and Pristine
A discussion on mix assessment cannot be made without emphasizing the
importance of a pristine monitor path and listening environment. A mastering
studio must absolutely be designed to be as neutral as possible, incorporating a
Zen-like harmony of acoustical design, treatment, and frequency response of the
monitors. This neutrality of frequency response is essential in order for everything
to be heard evenly. It is not uncommon for a mastering engineer to make a
decision to one-half of a dB in both frequency and dynamic domains. This slight
alteration may be subtle, but can have a dramatic effect to the material as a whole.
21
These moves can only truly be understood when the monitor path is neutral and
accurate enough that a change of a half-dB can be heard. Thus, again, the slightest
move can lead to a dramatic outcome to the material and will influence how the
music translates and is perceived on various listening systems.
There are some whose school of thought is that mastering should be done
with a monitoring system similar to what the audience is using. That way, the
mastering engineer can make the music sound as good as possible on an average
playback system. After all, most people will be listening on laptop speakers and
inexpensive ear-buds. This at first sounds like a good idea, but it only works if
everybody is listening on that same exact playback system: the master will not
translate across other kinds of playback systems.
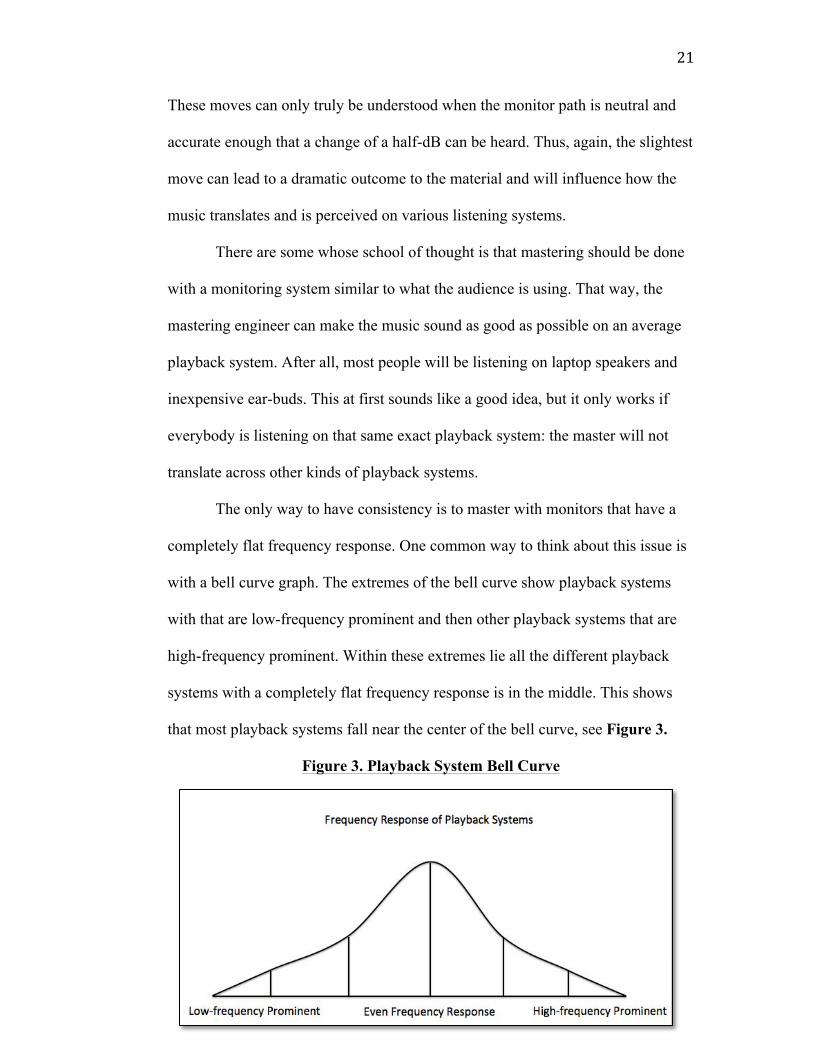
The only way to have consistency is to master with monitors that have a
completely flat frequency response. One common way to think about this issue is
with a bell curve graph. The extremes of the bell curve show playback systems
with that are low-frequency prominent and then other playback systems that are
high-frequency prominent. Within these extremes lie all the different playback
systems with a completely flat frequency response is in the middle. This shows
that most playback systems fall near the center of the bell curve, see Figure 3.
Figure 3. Playback System Bell Curve
22
There are many elements that factor into the equation of listening room
neutrality and these elements are not to be overlooked. As a result you will find
that a majority of the budget for equipping a mastering studio is spent on room
design, speakers, amps, and cables etc. Mastering-grade speakers, amps, and
cables especially are most often found among the “audiophile” market and not
necessarily the typical pro-audio market. For example, renowned mastering
engineer, Bob Ludwig, at Gateway Mastering, worked with loudspeaker
manufacturers, EgglestonWorks to create a custom speaker, The Ivy.
EgglestonWorks’ client base includes both mastering engineers and people
investing in high-end listening environments like home theaters.
23
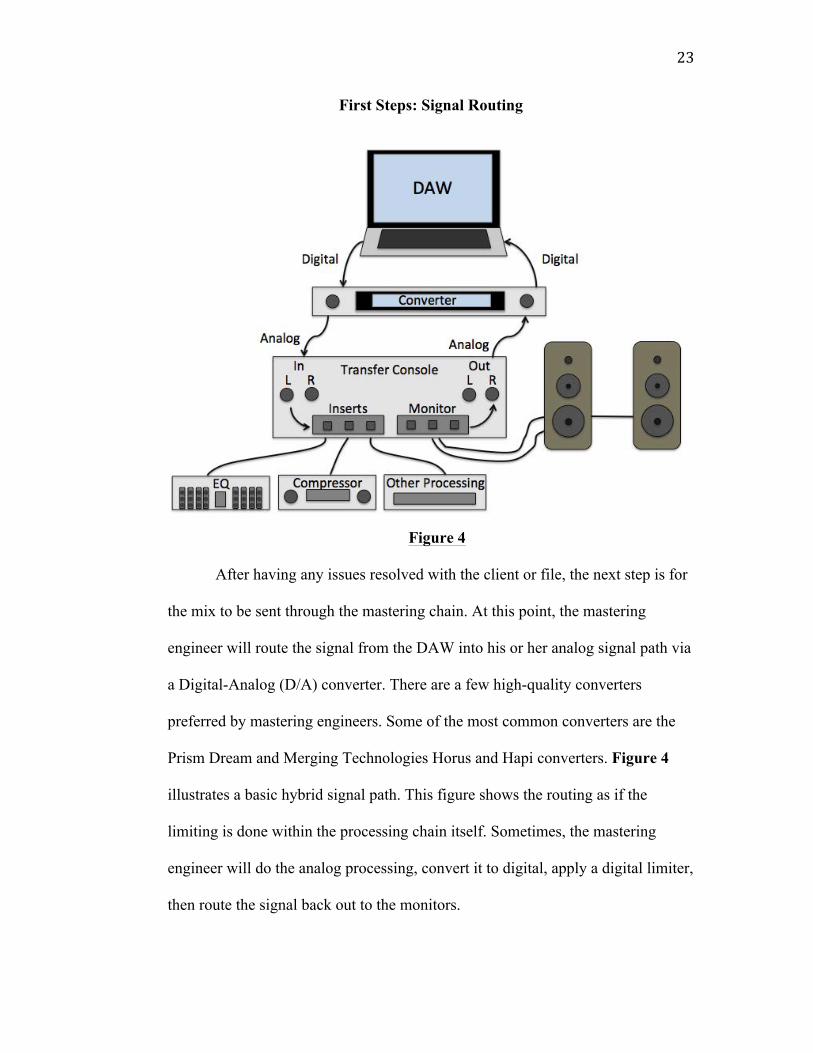
First Steps: Signal Routing
After having any issues resolved with the client or file, the next step is for
the mix to be sent through the mastering chain. At this point, the mastering
engineer will route the signal from the DAW into his or her analog signal path via
a Digital-Analog (D/A) converter. There are a few high-quality converters
preferred by mastering engineers. Some of the most common converters are the
Prism Dream and Merging Technologies Horus and Hapi converters. Figure 4
illustrates a basic hybrid signal path. This figure shows the routing as if the
limiting is done within the processing chain itself. Sometimes, the mastering
engineer will do the analog processing, convert it to digital, apply a digital limiter,
then route the signal back out to the monitors.
Figure 4

24
Once the signal has been converted from digital to analog, it will be routed
to a mastering console, also known as a transfer console. These consoles consist
of several elements. They typically include several insert sends and returns
through which one can insert various pieces of analog gear: EQ’s and
compressors. The insert sends and returns eliminate the need of a patch bay,
which otherwise would introduce unnecessary connectors and cable length.
The transfer console also includes several mastering-specific elements.
First, transfer consoles often have an insert to a parallel circuit. This is commonly
used for parallel effects such as parallel compression where the mastering
engineer wants to mix the signal of the affected parallel processing into the
unaffected signal. The transfer console would also have a level control on the
parallel circuit so that the mastering engineer can dial in the exact amount of the
parallel effect.
Second, another mastering-specific element to a mastering console is an
M/S (mid-side) insert. This allows the mastering engineer to use a stereo device
not in its usual stereo left and right, but in mid and side (sum and difference). M/S
can be used for both timbral and dynamic applications. For example, M/S
processing can be used if a vocal is in the center of the stereo image and is
abundantly dynamic to the point where it sticks out too much at points relative to
the rest of the arrangement. The instruments in the sides, left and right, are
adequately controlled dynamically so the mastering engineer can insert a
compressor in M/S and be able to compress just the center of the stereo image
where the problematic vocal resides. Once the compressor is dialed in, the vocal
25
in the center of the stereo image will be compressed to match the rest of the
arrangement without affecting their dynamics. Similar timbral issues can be
solved using an EQ in M/S. This can be a powerful tool, but just like anything
else in mastering, the effect is best used cautiously because M/S can potentially
cause time-domain phase anomalies and unnaturally distort the stereo image.
The last stage of a transfer console is a final output gain stage. At this
point, the mastering engineer can control the amount of signal that leaves the
console making it appropriate for whatever medium the signal will be captured. In
this case, the output of the console will feed the input of an analog-to-digital
(A/D) converter. The gain stage is there so that the signal is at a suitable level to
the converter. It is desirable to have a healthy amount of signal going to the A/D,
but it is also important not to clip the input of the A/D, unless that is an effect the
mastering engineer is attempting to achieve. Some common transfer consoles
include the Dangerous Master and Liason, and the Maselec MTC-1X.
Timbral Balance: Application of Equalization
At this point in the signal chain, it is important for the mastering engineer
to react to the artistic elements of what he or she hears. In rare events, the mix
could be so pristine that there is not anything for the mastering engineer to do. In
this situation, there are no timbral issues and the dynamic aspect of the mix is
perfect. The only thing left to do is raise the mix to an appropriate level and
prepare it for export.
26
Unfortunately, this is not always the case and more likely there is yet work
to be done. Generally the first place the mastering engineer will start is with an
EQ where he or she would attempt to resolve any timbral issues before the
dynamics are addressed. The tonal results of dynamics processing can be affected
afterward if need be. With most mixes, there are often many small timbral issues,
or unnatural frequency resonances. Sometimes the mastering engineer will do
small EQ adjustments in the digital domain before the signal is sent to the analog
chain. He or she may use a precise digital EQ to target any specific problematic
frequencies, whereas larger, more general frequency domain issues can be easily
resolved with analog EQ. The scale of EQ moves in mastering is in the half-dB
range and is thus much more precise than the mixing stage.
Analog Minimum-Phase EQ vs. Digital Linear Phase EQ
It is important for the mastering engineer to realize that any adjustment in
EQ has consequences in the time domain of the affected frequency range. This
time domain alteration is referred to as ringing, smearing, and phase-shifting. In
the analog domain, the phase-shift that occurs is referred to as “minimum phase.”
This is a complicated concept, but it essentially means that the ringing caused by
the EQ happens after the transient event of the affected frequency range.
Conversely, digital “linear-phase” EQ processes the ringing differently. Because
computers have the ability to buffer and automatically delay signal processing,
this can allow the computer to realign the ringing so that it is centered on the
27
transient event of the affected frequency. In other words, it takes the ringing that
would typically happen after the event and moves it equally both before and after
the event.
One of the main differences between minimum-phase and linear-phase EQ
is that the linear-phase EQ can potentially “blur” the transient by putting some of
the ringing at the front of the transient. The minimum-phase EQ retains the
fidelity of the transient and the ringing is oftentimes at a low enough level that the
remaining signal will mask the ringing. After some time, the mastering engineer
will understand which style of EQ works best in each specific situation (Wyner,
2013).
Flavors of EQ in Mastering
In mastering, as well as mixing, there are many types of EQ. There are
bandpass, shelving, bell, proportional Q, and Baxandall filters, to name a few.
Each of these styles of EQ is used in mastering in various ways. Typically the
bandpass, shelving, and Baxandall filters are used on the extremes of the
frequency ranges. They can be used to control and tame any anomalies in low and
high frequencies. One specific use of a highpass filter is in dance, electronic, or
hip-hop music, sometimes the mastering engineer will cut out some of the
extreme low frequencies. This allows the impact of the kick drum and bass sounds
to be present without letting the extreme low frequencies muddle the upper
harmonic transient. With this technique, it is important to not cut the fundamental
28
frequency. The aim is to cut just below the fundamental and allow the “punch” of
the transient to come through.
Another situation in which an analog EQ would be used is if the mix (for
example the vocal) has an abundance of frequencies in the 600Hz range. This
frequency area can be described as being “boxy” or “muffled.” The mastering
engineer would then reach for the EQ, search for the most prominent frequency
and then with a bell curve, reduce the level of that frequency. The amount of
reduction and width of the Q-value are also elements in play and it is up to the
discretion of the mastering engineer to adjust those parameters.
Once the problematic frequency range has been reduced, the mastering
engineer will then assess the mix for any further problematic frequencies. Another
typical mastering EQ technique is when the mastering engineer is much more
likely to use reductive rather than additive EQ. If well trained, he or she would
know that a reduction of problematic frequencies is more efficient than raising
other frequencies to match the problematic frequency.
With any artistic decision in mastering, there is a balancing act of
compromises. With EQ, the balancing act exists in the question, how much is too
much? For example, where is the line between “bright” and “harsh”? Both refer to
high-mid and high frequencies, but “bright” generally offers a more pleasurable
listening experience than “harsh.” So, what is the correct amount of EQ? This is
where the mastering engineer’s experience and intuition comes into play. He or
she could also use their reference recordings in the situation. Furthermore, the
mastering engineer can trust their room, speakers, and ears to give a reliable
29
representation of the frequency content of the mix. This combination of
techniques and experience will lead to making the correct decision about the
amount of EQ. Additionally, it is important to understand the context and become
familiar with the genre and the geographic region of where the mix originated;
different musical cultures have various expectations on the timbral relationships
of the finished master.
Optimizing Loudness with EQ
The topic of perceived loudness is commonly discussed and debated
amongst mastering engineers. There are certain EQ techniques which mastering
engineers use to optimize loudness. This again brings up our old friend Fletcher
and Munson and the Equal Loudness Curves. Remember, the graph plots the
threshold of hearing in the frequency and amplitude domains. The graph also
shows that humans are most sensitive to frequencies around 3-4kHz and less
sensitive at the extremes of the audible frequency spectrum. A clever mastering
engineer can use this psychoacoustic phenomenon to optimize the perceived
loudness of a master by highlighting the frequencies where human hearing is most
sensitive. This can be done by both cutting out some extreme high and low
frequencies and also boosting high-mid frequencies. This technique can be helpful
especially when a there is a mix with a lack of high-mid presence. It is also
critical to not push this technique too far as it can easily create an unbalanced and
“harsh” sound. If this technique is used poorly, the master may sound acceptable
30
for a few seconds of listening, but after a while it will start to become a fatiguing
and unpleasant listening experience. For a visualization of this, please refer back
to Figure 2.
Common EQ Units in Mastering
In mastering there are several analog EQ units that are commonly used.
This includes the Dangerous Music Bax EQ, Manley Massive Passive (Mastering
Version), and the famed, George Massenburg designed, Sontec MES-432C. These
EQ’s are known for their quality of sound, ease of use, and precision. They all
feature stepped gain and bandwidth controls for ease and accuracy of recall. They
also feature boosts and cuts by half-dB increments allowing for ultimate precision
in any timbral adjustment.
Compression: The Gains of Gain Reduction
There is a variety of makes and models of compressors on the market
today. Some are vintage or vintage-inspired, and others feature new, state-of-the-
art technology. Some are used for mixing and some for mastering. So then, what
are mastering engineers looking for in a compressor? The one with the most
knobs! Seriously, it is the truth. Mastering engineers need compressors with
which they can manipulate every parameter with exacting detail and precision.
Features of mastering-grade compressors include low ratio settings, sidechain EQ,
31
various rectifier circuits or transformer options, link and unlink switches, and
precise attack and release times. Additionally, compression is often used in
parallel applications.
Compression Settings and Options for Mastering
The following section is a brief explanation of the aforementioned
parameters manipulated by mastering engineers while using compression.
• Ratio Settings Mastering engineers use a compressor on the entire mix and the
slightest amount of compression can have dramatic results. Because of this,
mastering compressors are equipped with relatively low ratio settings. Common
mixing compressors, like a UREI 1176, will have ratio settings of 4:1, 8:1, 12:1,
and 20:1. In comparison, mastering compressors, like the Dangerous Music
Compressor, features ratio settings of 1:1, 1.4:1, 1.7:1, 2:1, 3:1 and also some
higher ratios. The Dangerous Compressor is a great example of a mastering
compressor because of the range of ratio options. It has many low ratio options
and a few higher ratio settings continuing up to 4:1, 6:1 and 20:1.
• Sidechain EQ This is an extremely powerful option in the realm of mastering.
Some units have EQ filters built into the detector circuits of the compressor
known as sidechain EQ. One example of where sidechain EQ would be very
useful is in a rock mix that has too much high-frequency “snap” relative to the
lower-frequency fundamental of a snare drum. The mastering engineer could use
32
a traditional EQ to target and reduce the high frequencies or they could use the
sidechain of the compressor to introduce some additive EQ to the target
frequency range. This boosted signal of the target frequency range would then
allow the detection circuit of the compressor to react more dramatically to that
frequency range. In other words, the sidechain EQ allows the problematic
frequencies to be raised and thus be detected and reduced more intensely.
More commonly, the sidechain EQ is used to reduce the pumping artifacts
of compression. An example of this would be in a hip-hop mix that has a lot of
low-frequency content in the sustained bass and kick drum sounds. The sidechain
EQ can be used to implement a highpass filter to the mix to allow the sustained
low-frequency information to pass through the compressor unaffected. This way
the compressor will not react to the kick and bass, which otherwise would have
caused unwanted pumping of the low frequencies because of ill-timed attack and
release.
• Options in Circuitry Compressors such as the SPL Iron and Shadow Hills
Mastering Compressor have many different options in the electrical components
of the circuitry. The SPL Iron is a tube-based compressor that features six
different rectifier circuits, each offering a different timbral character. The Shadow
Hills compressor features three different output transformers: iron, nickel, and
steel, which also offer an array of sonic palates.
• Linked and Unlinked The link feature on compressors like the API 2500 allows
the compressor to be used in a few different ways. With the left and right channels
completely linked, each channel will react identically no matter the difference of
33
level between the sides. The unlinked option will allow the two channels of the
compressor to react independently to each other. This can be used in two
situations. The first by unlinking the compressor on a typical left and right stereo
track. This can add to the perceived separation of the stereo imaging. Therefore it
is important to always listen to the stability of the imaging while unlinking the
compressor. For example, if the vocal is in the phantom center of the stereo
image, the vocal is equally in both the left and right channels. If there is a high-
amplitude event in either the left or right channel and it gets compressed, the
stability of the vocal image will be compromised. In other words, the vocal will
move according to the amount of left and right amplitude variation.
The other main use of an unlinked compressor is when the mastering
engineer uses the compressor in M/S where one channel is comprised of the mid
and the other is comprised of the side. In the example mentioned previously, a
loud snare drum in a rock mix, most of the time the snare drum is panned to the
center of the stereo image so the mastering engineer can use an unlinked
compressor in M/S and compress the mids differently than the sides.
• Attack and Release Times In general, mastering engineers utilize slow attack
and fast release times. The reason for this is that the goal in compression for
mastering is to not affect a single peak or fast transient, but rather ebb and flow
with the musical phrases. The slow attack times allow the transients to go through
the compressor unaffected and the fast release times allow the compressor to get
out of the way quickly. This aim is to have an appropriate amount of compression
without having any obvious artifacts like pumping.
34
Other Uses of Compression
Multiband Compression: Mastering engineer and author, Jonathan Wyner,
introduces multiband compression in his book Audio Mastering: Essential
Practices. Wyner discusses this processing technique and how it utilizes
compression within a specified frequency range. Like most processing tools in
mastering, multiband compression can be dangerous if used heavy-handedly. The
most dangerous pitfall with multiband compression is the fact that there are
crossover filters built into the boundaries of the specified frequency range. This,
similar to EQ’s, will cause phase shifting.
However, multiband compression does have its merits; allowing the
mastering engineer to tailor each compression parameter to each frequency range.
This can be useful because the low frequencies may require different compression
processing than high frequencies (Wyner 73).
Parallel Compression: According to mastering engineer, Bob Katz, “[Parallel
compression] is probably the single more potent technique to add loudness and
power to a master” (Katz 213). Parallel compression is dynamics processing that
occurs separate to the main signal. In other words, the two tracks of a stereo
signal are routed to the transfer console, split into the primary signal, and then
further into a parallel signal. The parallel signal is then processed separately and
later mixed back together with the primary signal.
35
One of the main advantages of parallel compression is the addition of
perceived loudness. In audio, loudness is measured in Root Mean Square (RMS),
which is a number generated from the average amplitude of the waveform. This is
the best way to calculate the overall loudness of program material. The RMS level
is read similarly to peak level, in dB FS. For example, an EDM (Electronic Dance
Music) track would typically have RMS levels of -4 or -5dB FS, which is
extremely loud. On the other end of the spectrum, jazz or classical might have
RMS levels around -20dB FS.
Parallel compression can add perceived loudness to a master by raising the
RMS level. Typically, parallel compression more aggressive than overall
compression. The attack is faster, the threshold lower, and the ratio higher. The
aim is to reduce the peak level and concentrate more energy into a condensed
amplitude range. This way, the parallel level control can be used to add the
concentrated signal back with the unaffected signal, raising the overall peak
value. This allows the transients of the unaffected signal to remain true, but raises
the average amplitude level of the waveform.
Limiting: The Final Creative Step
Once the program material has been processed and appropriate EQ and
compression have been applied (or not), the signal is then routed through an
output gain stage of the transfer console where the level can be adjusted as it goes
to the analog-to-digital (A/D) converter. The level should be hot enough to make
36
full use of the bit-depth for the best resolution. At the same time, the level should
also not be too hot or else it could distort at the conversion stage. Too much
clipping from the converter can be problematic, yet sometimes mastering
engineers intentionally clip the converter to create distortion adding a controlled
amount “edge” to the master. However, this should only be attempted with only
the highest quality converters.
Once the signal has been converted and bounced into the DAW, the final
stage of processing is applied. Sometimes mastering engineers use this stage to do
some final EQ adjustments. However, this is primarily when the final limiting
occurs. At this point, the mastering engineer will apply a digital “brick-wall”
limiter to the processing chain. The brick-wall limiter is a compressor that has an
ultra-fast attack time and an ultra-high threshold. Basically, it stops the signal
from extending beyond the threshold, hence its name brick-wall. For this
application, analog limiters are not used because they are not fast enough to deal
with the demands of modern mastering. Only digital technology has the ability to
do the necessary limiting in a relatively transparent way.
Next, the mastering engineer can then set the threshold of the limiter to
where he or she likes. Again, this threshold is where the limiter stops the signal
from going any further in amplitude. The makeup gain is commonly correlated to
the limiter threshold. For example, if the mastering engineer sets the threshold to -
4dB FS and there are no other parameters involved, the limiter will automatically
apply a makeup gain of 4dB.
37
The mastering engineer will also set the final output level. This output
level is generally set to -.3dB FS in order to leave ample headroom for inter-
sample peaks and allow for the best lossy-format encoding.
Less is More and More is More: A Note on Processing
In mastering the adage, “less is more” is certainly true in terms of the
amount of processing. EQ and compression moves are made at scales of tenths of
a dB, whereas processing in mixing requires much larger increments. However,
another note on processing is that each piece of gear features its own sonic
character. For example, the Dangerous Compressor sounds different than an API
2500. Due to this fact, mastering engineers will stack various pieces of gear so
that not one sonic signature will become too apparent. Continuing the example,
perhaps a mastering engineer wants to apply 4dB of gain reduction through the
use of an analog compressor. He or she could implement all 4dB of gain reduction
on the Dangerous Compressor, but the outcome might have a bit too much of the
Dangerous’ artifacts or character. Instead, he or she can apply 2dB of reduction
on the Dangerous and the other 2dB on the API. This minimizes the amount of
artifacts of any one piece of gear. This is why less is more and more is more. The
mastering engineer can use more pieces of gear, but have them do less work;
having two-times the processing doing half of the work. This is true for most
aspects of mastering, from EQ, compression, and limiting. As mastering engineer,
38
Jay Frigoletto, worded it during the interview portion of this project, “this is a
way to ‘spread out the pain.’”
The Final Step of the Mastering Process: QC, PQ, and DDP, etc.
Once all of the artistic alterations have been completed, including fades
and spacing of the material, the last steps in the mastering process involve quality
control (QC), metadata (track names, PQ, and IRSC/UPC codes), and the creation
of the final DDP file (Disc Description Protocol). There are several elements to
the quality control stage of mastering. In large mastering studios, there will be
dedicated employees, assistants or production engineers, who are in charge of the
quality control. They will listen through all the mastered material, listening for
any abnormalities like clicks, dropouts, and anything else that may be
unacceptable. The quality controller is last person to listen to the masters before it
is sent to out for distribution or to web-based services like Spotify and iTunes.
This person will also enter all the metadata, which would include entering
CD text for album, artist and track names. The assistant will also enter IRSC
codes. IRSC stands for International Recording Standard Code and is data that is
used to identify the owners of the material. An individual code is assigned to each
specific track so that it can be identified by radio play, downloads, and streaming.
When all the metadata has been entered, the final step for preparing a
master for CD duplication is the creation of the DDP file. The DDP (Disc
Description Protocol) is a digital file that contains information about every aspect

39
of the master including timing, metadata, and the audio files. Creating a DDP
gives the mastering engineer total control over every aspect of the album while
not subjecting it to the discrimination of the CD duplicators.
So what is the standard format for the creation of CD’s? Redbook is a set
of guidelines created by Sony and Philips in 1980 in order to standardize the
creation of CD’s. The following are some of the standards, as outlined in Wyner’s
previously mentioned book, Audio Mastering: Essential Practices:
1. There is at least one start track and one end track marker.
2. Tracks must be longer than four seconds.
3. The entire disc can’t be any longer than 74 minutes (650 MB of data).
4. The maximum number of tracks and index points is 99.
5. The contents of the disc are written as a singe volume (without partitions).
Final Thoughts
The following is a summary on some of the common aesthetics of
mastering. These include words of advice for people who are interested in
becoming competent mastering engineers.
• Do no Harm Legendary mastering engineer, Bob Ludwig, explains the “first rule
of mastering” found in Phil Ramone’s book, Making Records: The Scenes Behind
the Music (2007):
The first rule of mastering is, ‘Do no harm,’ explains Ludwig of Gateway Mastering. The secret to being a good mastering engineer is being able to listen to
40
a mix, imagine how it could sound, and then push the right buttons to achieve the sound you have in your head. For most of the recordings I work on, great mix engineers and producers have spent lots of time trying to get it right in the first place, and I have to honor what they send me.
• Vocal is King It can be tempting to pay attention to and highlight an instrumental
element of a mix like a “punchy” snare drum. This can be dangerous because it
could mask the vocal. As a general rule of thumb, always make sure that the vocal
is clear and comprehensible.
• Balancing Act of Dynamics One of the most discussed topics in mastering is
“The Loudness Wars.” This is a phenomenon based on the presumption that
louder is better. This is a misguided idea because louder is almost always worse.
The louder the master, the less dynamic range there is and the music becomes a
homogenous glob of loud noises. It does not lead to a pleasurable listening
experience. However, most artists want their music to be of a comparable
loudness to what has been previously released. With this in mind, there is an art to
making loud masters that seem to have a good amount of dynamic range. This can
lead to an investigation into perceived loudness within the frequency domain. It
can also lead to investigation of advanced compression techniques, such as
parallel compression.
• Ditch the Ego It is safe to assume that people find the most success in
collaborative work when all the people involved are even-tempered,
communicative, and professional. Yes, some artists can be fooled into working

41
with hotshot engineers who are difficult to work with and have an ego bigger than
the galaxy. However, this is not sustainable. The best mastering engineers are
those who have the ability lay aside their ego in order to efficiently get the work
done.
42
Literature Cited Katz, Bob. Mastering Audio: The Art and the Science. 2nd ed. Burlington: Focal, 2007. Print. Ramone, Phil, and Charles L. Granata. Making Records: The Scenes Behind the Music. New York: Hyperion, 2007. Print. Wyner, Jonathan. Audio Mastering: Essential Practices. 1st ed. Boston: Berklee, 2013. Print.
43
Section 1: Interviews with Mastering Engineers
Introduction and Methodology
Upon investigation into the topic of mastering, it became apparent that
there was very little relevant and specific information about the mastering
process. Prominent mastering engineers like, Bob Katz and Jonathan Wyner, have
written several books. These books offer great overviews of mastering techniques,
but generally lack specific details regarding the implementation of those
techniques. The goal of this series of interviews is to go in depth into the finer
aspects of mastering, to look for common trends, link these trends together to
make better sense of mastering, and distinguish what is common practice in this
mysterious niche.
The first section of the interview contains seven questions pertaining to
various facets of mastering. The second section speaks to the usage of subjective
musical language in mastering and how the mastering engineer often acts as a
translator from the subjective musical language to a technical application. The
following are the seven questions that were asked during the first part of the
interview:
44
1. Could you tell me a bit about how you first got involved in mastering? Did
you get into audio first as a musician or were you more interested in the
technical side of audio? Did you go to school for audio? Did you intern or
have an apprenticeship?
This question asks about the origin of the mastering engineer’s career. It
allows them to speak about their hobbies, passions, musical and technical
experiences, and education. The goal is to learn from other’s examples and find
how people interested in mastering can successfully navigate their way into a
position as a mastering engineer.
2. As your career advanced, how did your philosophy on mastering evolve?
Is there anything you know now that you wish you knew when you first
started?
The second question attempts to bring out any pitfalls a young mastering
engineer might experience and learn how to avoid them. It also tries to shed light
onto the mastering engineer’s career as they discuss any periods of time when
they were mistaken and unhappy with the results they were getting. Simply put,
this question is about learning from other’s mistakes.
45
3. Are there any projects that stick out to you as having a particularly
challenging aspect or technical difficulty that you had to overcome? What
was the nature of the challenge and how did you react to it?
This next question deals with the technical intricacies of mastering. It
pertains to some common mistakes found in the mixes they receive and some of
the ways they fixed the mistakes. The intent of this question is to try to find
concrete, relevant information about some of the common practices in mastering.
4. With the understanding that every mastering project is different and that
each piece of gear has its own unique character, how often do you find
yourself working in the analog domain? Or do you prefer digital? What are
some of the pros and cons that you’ve found with each format? Do you use a
hybrid system? If so, do you do your digital processing before or after the
D/A?
This question essentially asks if the mastering engineer prefers to use
analog, digital, or both (hybrid). This is a hot topic in mastering because there are
very strong arguments for the usage (or not) of the different styles of processing.
Both analog and digital processes have their advantages and disadvantages and
this question provides the mastering engineers the opportunity to share their
thoughts on this subject.
46
5. How much communication is there usually between you and the artist or
producer? Do you master the record as a whole and send it to them for
revisions or do you send them a few tracks for review? What is your policy
for revisions? Shootouts?
With this question, communication was put under the magnifying glass.
The aim was to understand how the client – mastering engineer relationship
typically unfolded. This question asked about the methods of file transfers,
shootouts, revisions, references, and other such routes of communication and how
were are handled.
6. There are a lot of DAWs designed for mastering like Sequoia, Wavelab,
and Pyramix (to name a few). Which DAW do you prefer and why? Is it an
issue of workflow or does one program actually sound “better” than the
other (i.e. does one handle fades better? does one have better dithering,
sample rate conversion, etc.?)
This was another question pertaining to personal preference and matters of
workflow. It brought forward a discussion of mastering-specific DAWs (Digital
Audio Workstation) that were uncommon to a student, tracking engineer,
producer, or mixing engineer. This was because DAWs for mastering were highly
detailed in aspects that were not so critical in a tracking or mixing situation such
47
as object editing, fade editing, entering metadata, and creating a final DDP file
(Disc Description Protocol).
7. Do you have any advice for somebody who wants to start a career in
mastering?
The final question attempts to illuminate the current state of the mastering
industry and how somebody could successfully navigate a career in such a small,
specified, and competitive industry.
Mastering Subjective Language
The second section of the interview deals with the subjective, non-
absolute language used in mastering. There are many subjective terms that are
commonly used in the music industry, especially when communicating with
clients. When these words are used it is generally assumed that the audience
knows what he or she means. However, these terms do not deal in absolutes, but
rather provide an idea or guideline for musical interpretation. This can be viewed
similarly to the usage of formal musical language, with words such as piano,
forte, or crescendo. The goal of the second part of the interview is to find out how
the definitions of these subjective terms translate from person to person and to see
if there are commonalities between each person’s definitions.
48
It is also important to mention that the mastering engineer serves as a
translator, or in continuing the musical example, a conductor, between the
subjective language and the technical. For example, if a client requests more
“snap” from the snare drum, the mastering engineer must be able to listen to the
material and assess what “snap” really is. It could be a matter of frequency
content (timbral detail) or dynamic responsiveness, perhaps a combination of the
two. This second part of the interview asks the mastering engineers to define the
commonly used terms: punch, warm, harsh, clear, and groove. It also asks the
mastering engineers to define the boundaries of the frequency ranges: lows, low-
mids, mids, high-mids, and highs.
49
Results: Interviews in Chronological Order
* N.B. These interviews have been transcribed verbatim.
I. Jay Frigoletto
Jay Frigoletto is a mastering engineer currently working at Mastersuite Studio in
Brookline, NH. He is a graduate of Berklee College of Music in Boston, MA and
has been operating as a mastering engineer consistently since 1992. His credits
include Alice in Chains, Black Eyed Peas, and Arrested Development, to name a
few.
This interview was conducted over two conversations. The first was held
on November 6th, 2015 at Chrysanthi’s Restaurant in Brookline, NH and the
second was a conversation held via Skype on Friday, December 4th, 2015.
K: Could you tell me a bit about how you first got involved in mastering? Did
you get into audio first as a musician or were you more interested in the
technical side of audio? Did you go to school for audio? Did you intern or
have an apprenticeship?
J: I was into music from a very very early age. My dad was a Dixieland drummer
back in the day. But also played a little piano, played a little guitar. So there was
music in the house. He would have us as kids sit at the piano bench. He’d teach us
the little tiny things and he’d play the left hand. So, definitely, I was into music
50
very early on and just showed an aptitude for it. Came home from kindergarten
and there was a piano in the back of the class and while we waited for the bus the
Nun would go back there an play something and I thought, “Oh, I’ve got one of
those piano things.” My mother tells this story and I kind of went in and played
Three Blind Mice. She came in and went, “Hey who taught you that song?” and I
went like, “Why would anybody need to teach you?” She went, “You know that’s
not that way for everybody, right?” And I went, “No, can’t you just do it?” So she
was like, OK get this kid some lessons.
In addition to that I was always in to technical stuff. I love music,
creativity; love drawing, things like that. But I was also into technical and
engineering and I used to like be really into architecture as a young person and do
like house plans and had architecture tools and read. I was a junior high kid and I
was doing like architectural planning. And I’m like, OK this is getting interesting
here. And I used to play with electronics and stuff. You know, I saw what kind of
signals you could send over the phone, what you couldn’t and then figured out
mayne it was too high of bandwidth and thought, Oh I can hook it up to the radio
and I can make my own “on hold” music – alligator clips, undo the phone and
hook it onto the leads. And you know, like batteries and LED’s; I’d go to
Radioshack and be like, I’m gonna buy a bunch of stuff and wire up your room
and make Halloween costumes with like lights.
So I was always into this technical and the creative and the music for sure.
So in high school I was like, OK, so what am I going to do with that? I like both
of these things. I sent letters to, being a keyboard player I was into synthesizers
51
and whatnot. So I sent letters to Korg, Roland, and Yamaha. I said, hey, I’m into
this technical stuff. I’m trying to figure out how to put these things together,
thinking of people who are there. I thought, maybe designing musical instruments
and such. And so to their credit all three of them wrote back, sent me nice letters
saying, Oh people here kinda did this, they have this background. But I decided,
you know what, I don’t know, that’s cool, but I that’s a little to far removed from
the creative side. I want to make music with these things. That’s when I started
the recording thing and you know, got into a band. I did some recording and I
said, Ok this is it. This is definitely what I need to do. So I decided I liked that and
you know, went to Berklee and did the piano major thing. And then decided, Ok
what part of audio do I want to get into? And at the time, I got out of high school
in ’87, took a year off and just gigged. I got accepted to Berklee and gigged for a
year.
So um, I sorta started researching, again being creative and really tweaky-
technical, mastering is that little more technically oriented than the mix or
recording thing. You know, the attention to detail and some of the tools that are a
little bit more esoteric than what would be in the regular studio. That really
appealed to me. And nobody knew about it. You know, ’92 is when I got out of
Berklee and that was really like the Wizard of Oz behind the curtain. Mastering
was like, there weren’t a bunch of articles about it. We’re like, what’s that thing?
Even the artists we like, I don’t know, I finished my record and now it has to go to
that guy that has like those bat ears that hears all those sorts of crazy things and it
comes back sounding better. You don’t know what happens. And artists used to
52
tell me that. And it’s sorta still like that way. There’s some misinformation out
there, oh just make it loud and bright. But at least people know it’s something. It’s
more of a known quantity now.
But that really appealed to me. The tweaky details and you know. And you
almost feel like you’re in a little club. It’s some small illusive group of people that
are like, hey we know a couple of things that the other guys don’t know. It’s like,
a-ha, you don’t know how to do this, but we do. You know, you start doing weird
things like mid-side processing. People look at you and go, oh my god, you can
do that in mastering? And I’m like, yeah totally.
So after Berklee I had decided you know, mastering is what I wanted to
do. And of course, they didn’t offer any mastering ideas – courses like that at the
time. But I knew that was what I wanted to do. So right out of Berklee I went and
got an internship at a mastering studio. And from there, ended up moving to
Atlanta. I was offered a job in ‘post’ as a staff engineer. You know wow, I’ll take
that. I did that for a year but at the same time, I was looking around that scene and
there was really no mastering happening down there. So I sorta slowly stared
buying equipment and finally just took out an SBA loan. Just went, you know,
and went in with the big business plan and went crazy, applied to the bank and got
this loan. And so was able to open up a mastering studio. So, that was the way,
musician – you know, music and audio school, interned at mastering, staff
engineer at the post thing, opened my own place. That was that route.
K: Where did you intern?
53
J: With Jonathan Wyner actually: M-Works. Yeah when he first left, he was
working with Toby Mountain at Digital Recording. He had just left and he wasn’t
at his big place now but he was in the same building. But he had a room, like
downstairs. I had actually worked with him with the band I was in. We had
worked at a place called Eastern Sound and Video in Methuen, which is not there
anymore. And he had been like part-time engineer there. We liked him so much
we were like, hey come with us. So we did some stuff at Bluejay, some mixes –
we had him come. And he said, I do this other thing, mastering with Toby
Mountain. And the second time we worked with him at Bluejay, he said, I’m
opening my own room. And I was just finishing at Berklee at the time and I’m
like, Ok that’s actually, funny you should say, this is what I’m interested in doing,
I want to come check it out. So I spent nine – ten months there, you know, did the
internship for school and stayed on afterward. I’d go in once or twice a week, you
know, help, assist, watch, whatever. And just was like, yes, this is definitely cool.
This is what I want to do. I also learned at the time, he had been working a bit
with the No-Noise, doing some of the restoration work, which again, was like
cooler. You know, even more esoteric and technical and I’m like I need to do that.
So, learned a bit about that, which really served me well because when I went to
Atlanta that was one of the things I ended up doing with my loan is bought No-
Noise, which at the time was horribly expensive and nobody had the real high-end
cleaning tools, was probably close to a $20,000 addition to their $15,000 system.
So I ended up spending 35-grand on, you know, with a CD recorder, which was
54
like, holy shit you can burn CD’s? They were like, oh my god you have this No-
Noise package and like, you have that Sonic System thing. You know, at the time
it was this weird thing to have that. Like, no one had that. It was like huge money
I spent – crazy, crazy big. But as a young guy, you know, I was like, Ok, I want to
do this. I want to set myself apart and show people I’m serious and have
something that other people don’t have. And if I don’t get enough mastering
work, I can get a gig doing this clean-up work that’s in town. And like the big
places, like the really big places like Crawford didn’t have those tools. They were
like, you do that? They started referring all that stuff to me. It was a really smart
idea to be like, Ok I’m going to bite the bullet and it’s scary to take that big loan
out, but I need to set myself apart. I need to give myself something unique that
doesn’t exist here. And that’s the way I can get some more clients and that’s the
way I can make a name for myself, and it totally worked.
K: So you think that’s still a smart thing to do now-a-days to invest in something
that will set you apart?
J: Yes! Because everybody has a little thing in their bedroom that they can do…
Like it’s a problem. You don’t want to invest so much that you’re gonna be like,
Ok I need 40 grand a month, you know, just to pay. Because you’re gonna have
this horrible rate pressure coming up from the bottom. But one way to keep your
rates at a certain level is to have something other people don’t have – something
unique where you go, I know this, but look, this is obviously different. Everyone
55
has Protools. You can’t be like, I have Protools. People don’t understand that, you
have the big HD rig and he has the little thing on his laptop. He’s like, it doesn’t
matter, Protools is Protools and might not understand that.
But yeah, if you can figure out, OK what’s a niche that isn’t being served
right now. You know, what’s and area that isn’t happening but there’s a demand
for it. And, can I set myself up in that niche thing that’s gonna set myself apart.
Now, I’m gonna be the guy, Oh he’s the guy who does that thing. At the time
when surround was happening, that was an idea. I got into surround, and of course
there’s not as much surround happening these days but in concert video, we do a
lot in surround. So that’s another one of those things where those things came out
that people didn’t know about. And I’m this technical brain that’ll soak that stuff
up like a sponge. Ok so I said I’ll do that. The 5.1 stuff, I got into that right away.
Plus I had post experience anyway, mastering in post, so I understood that. So I
think that, find something that’s going to set you apart, you know. And don’t be
afraid to invest a little bit. If you come out of the box just as one of everybody
with nothing really special about you, you’re going to be fighting that noisefloor
to get above it. Where as, if you sorta make that investment, and again, not
anything ridiculous, but just enough to get above that level a little bit, then they’ll
go, Oh he’s a professional guy with real stuff. You know what I mean? And then
you get that first impression as, Oh yeah, he’s actually on this level. You know,
the pyramid – he’s that step up; the smaller echelon of professional guys, not just
the noisefloor.
56
K: As your career advanced, how did your philosophy on mastering evolve?
Is there anything you know now that you wish you knew when you first
started?
J: It certainly evolved as I learned things but I had a pretty good feeling for what I
wanted to do from the beginning and what I thought really made sense and was
lucky enough to have guessed right. So obviously started out in the Boston area
they headed down to Atlanta for about 6 years then sorta started feeling the glass
ceiling there, like Ok you can only go so far in Atlanta. And I originally thought
I’d come back to New York but New York was a pain in the butt: too expensive
to live. I ended up calling Sterling which was where my favorite guys were. I like
the guys who aren’t just super loud and bright. I like the guys who are into that
sort of, you know, Ok, you know how to make it loud but it sort of cleaner than
the other guys and I’m not willing to go to that last step where it’s all fuzzy. Greg
Calbi was one of those guys in New York at Sterling whose work I really liked
and who had a little bit more of that feel for being picky about that last little 2%
of quality, you know, we’re gonna go for it. And so I ended up getting through to
him and talking to him and he’s like, well you know we’re moving to our new big
space in Chelsea and we’re like, you know, we aren’t looking for anybody now.
We’re about to move so we aren’t going to do anything. But he said, you know
what, a client, good friend of mine, Roy Secala, who’s the guy who did, who used
to own Record Plant and did like, John Lennon’s Imagine and all that stuff. He
just moved out to LA and was at this other studio and they’re looking to improve
57
that studio and add things. They might want to add mastering, why don’t you call
him? So I called up Roy and he’s like, yep that would be cool. Why don’t you
come? And of course, I had all my gear. I had a fully functioning mastering. And
they had, it was a place out there called Studio 56 and they had a back room that
was like empty and they were like, what can we do in this room to make it do
something, like well… So I was like, I can come fully formed. I can come with a
truck and you’ve got that room. I will set my gear up and we’ll do something. So
that’s how I ended up sorta in LA.
Now as far as what had sorta changed in my idea. I sorta found out the
loud thing was something you definitely have to deal with. So I had to start
learning about, Ok how do I make it loud without just doing that thing. You know
at the time Waves had just come out with the L1 which just sounded terrible! I
mean, crunchy, fuzzy… but Oh, but it’s loud! That whole like, in the first five
seconds you go, yay it’s loud. And then ten seconds later you’re like, Oh. One of
the things I say is that in the first five seconds louder and brighter will always
catch your attention. Just psycho-acoustically that’s the way it works. It’s sorta an
anthropological thing that as a caveman when the tiger comes and is about to eat
you, and it goes “roar” you’re going to be drawn to that and go, Holy moly. You
know what I mean? So it’s like really good at preserving life of a caveman, not as
helpful when you’re trying to make music because if you make these snap
judgments, you’re gonna go oh course you’re gonna think the louder, brighter
version is better. And then you’re not going to know why, you know, back in the
day I used to listen to this record over-and-over-and-over and now you’re like half
58
way through the song you just want to turn it off. It doesn’t mean I don’t listen to
that record anymore. And a lot of people don’t think about it and understand, but
that’s part of what’s going on. Though, Ok, that whole how do I make it loud
without falling into that trap, and still having it sound good and sorta maintaining
that. But again, with the mastering engineer, and even the engineers that I liked. I
mean, George Massenburg was like, holy moly, every freaking record that
Massenburg touched sounds so good! That’s that sort of three dimensional,
realistic, amazing, detail. I need to go after that. So it wasn’t so much that I
changed, it’s more that I learned more about how to get that thing that I already
wanted to do from the beginning. And that still is kinda, you know to a certain
extent what I’m known for. Some guys are so like, No I won’t make it loud, I
won’t do anything, I don’t care what the client wants, this is my… I’m like, no
you have to do what the client wants. You have to do what the client wants a
certain amount but you know, you have to also educate them and convince them
through the force of argument that you know, you have the better idea. And if
they don’t agree, they don’t agree. You have to make it sound the way they want
to. But you have to at least try to give them the information and if they go, Ok
now I understand, that makes total sense, I’m glad you told me about that, lets not
go quite that loud, lets not quite use so much clipping. So, I’m sorta a blend of
that, I’m like Ok so I’m gonna make it this commercial thing that you want. I’m
not gonna go, don’t worry I won’t let you fall off the edge before that, you know,
you’re gonna have buyer’s remorse in the morning. And you know, I will get your
record to be very very nearly as loud as the other one, but sounding a whole
59
bunch better at the same time. So that’s kinda a bit of what my reputation is and I
get calls for that. I’m the guy who’s not gonna destroy this or sometimes you get
the call and they’re like I just went to this other mastering engineer and he just did
his usual crunchy, loud, fuzzy thing that hurts my ears, can you fix it? So it’s
good. And I like that position. I’m not in the position where it’s like, oh he’s the
esoteric guy who only does jazz and classical who’s not willing to throw down
and make some rock-and-roll. It’s kinda like, well how do we get a guy that will
make rock-and-roll that’s not going to be tweaky-weird like the classical guy but
is gonna care more than the big-ol metal just-make-it-fuzzy guy. And there aren’t
enough of those guys. And I’m like, I’m that guy!
K: I think it’s so important to be diverse, especially in mastering. Maybe as the
client base shrinks and, I don’t know what they’re doing now-a-days, but being
able to treat each genre of music with respect and being able to know what each
genre requires.
J: Yeah exactly. And understanding. There are mastering engineers that might
specialize to a certain extent and might do a little more of this than the other
thing. Every mastering engineer does a little of everything. You know, mix
engineers can be like the rock guy or the hip-hop guy. If you’re in mastering
you’re going to do a little bit of everything. At some point you’re gonna get a jazz
gig, at some point you’re gonna get a classical gig. I mean, I do.
60
K: Are there any projects that stick out to you as having a particularly
challenging aspect or technical difficulty that you had to overcome? What
was the nature of the challenge and how did you react to it?
J: There’s not one that sticks out but there are definitely things and problems that
happen. I mean, heck, 5.1 was a thing for sure where that was a whole big
learning curve where we applied that to music and not film, where do I you know,
in dynamics processing, how do I pair this? Do I pair each channel individually,
do I pair all six, do I pair, five but not the subwoofer, do I pair the left-right pair,
the back pair, and like the center-subwoofer, or you know, how do you do that?
How do you afford all of that sound. You know, if you like the Manley Vari-Mu
sound I’m not gonna buy two more of those. I’m not that rich, you know? What
do you do? And then just the whole sample-rate converter stuff. Like, Ok well
what was it shot at, do they want a CD of it as well, or is it going to be video, so
it’s 48k. So it’s a much more complex job. And you know, sync’ing to the video. I
worked in post so that stuff was great for me. It made more sense to me.
But as far as other stuff, there’s not one job that was like, oh wow this is
crazy, how am I gonna fix this. There’s problems that come in all the time that are
unique and other problems that you hear all the time. Like stuff comes in from
project studios now and the low end is a mess. They were in a bad little room with
tiny speakers so you have to deal with that. Some mixes come in where the guys
limit the hell out of it. It’s already distorted; it’s louder as a mix than I think the
master should be. You know, how do you deal with that? That’s a problem. And
61
because I’m into the tweaky-esoteric stuff I got into the multiband stuff before
anybody else. Not that I use it a lot, but you know, some people are like, you pull
a multiband on everything. I’m like, oh my god no you don’t. You pull up a
multiband if there’s a problem. When it’s screwed-up is when I’ll pull up a
multiband. And they’re like use all five bands. I’m like, heck no! You’re putting a
bunch of crossovers in the path. You know, you don’t put anything in the path
that you don’t need. Everything you do has a downside. And if you don’t need it,
why pay that price for no gain? Now if it’s like, EQ, now there’s a problem, if
what you gain is so much more than what you lose. If with all that stuff there’s
gonna be a little noise, there’s gonna be a little phase shift, there might be a tiny
bit more distortion, but it sounded like hell and it sounds great now. You’ve
definitely gained more. But just to throw extra stuff in the path that isn’t really
doing anything for you… And multiband’s like that. And very often I’m trying to
do everything with two bands, maybe a third band. The amound of times that I’ve
used all five bands of multiband? Like, it’s been a long time, certainly more than
a year. Maybe more than two years since I’ve had all five bands active on a
multiband compressor. Anyways, so a lot of those things I got into sooner than a
lot of the other guys. And when they were like, freaky tools. There weren’t
multiband compression plug-ins. I had to get the crazy TCM-5000 with the MD-2,
their mastering package for that, which was like one of the first real mastering-
specific pieces of like software editions for this hardware unit you could get
anywhere. And that had multiband in it. And at the time that was awesome
because there were certain things that I could do, like the hi-hat was crazy, you’d
62
take that mid-band and just… and some people were like, why don’t you just use
a de-esser? Well what that is is just like the sidechain high-frequency thing hits it,
it compresses mono-band, the whole thing. Whereas the multiband actually only
compresses that area. So that was a great tool. And like the mid-side. Now
everybody thinks, fun, lets make it wide and stereo and you lose your imaging and
it gets all phasey. You should only use this when you need it. Say you’ve got
something where the vocal is like, really dull. And you’ve got guitars that are
super high and piercing. What are you supposed to do? If you add high-end to the
vocal, it’s gonna destroy the guitar. If you tame down the guitars, it’s gonna make
a dull vocal even worse. Well if you’re talking about a rock thing and the guitars
are panned wide and the vocals are in the center… mid-side. I can add brightness
to the center and take some of that high-mid pierce down on the sides. And so
that’s a real challenge when you have two things that the fix for one is the break
for the other. And now if the guitar and vocal are both dead-center, now you’re
screwed. But if you’ve got that panning thing happening and they’re in different
places, now you’ve got a fix for that. Now people will start going, oh my god how
did you do that? So those are some of the challenges that sorta can come in. So
it’s not like, Ok here’s one thing and this is what I did. But rather these are some
of the challenges that you can run into and here are some of the fixes.
K: With the understanding that every mastering project is different and that
each piece of gear has its own unique character, how often do you find
yourself working in the analog domain? Or do you prefer digital? What are
63
some of the pros and cons that you’ve found with each format? Do you use a
hybrid system? If so, do you do your digital processing before or after the
D/A?
J: Absolutely hybrid. Digital and analog both do certain things really well and
both things do certain things not so well, and can be appropriate for certain
sounds and not for others. I love a hybrid approach. My typical path is an analog
EQ and an analog compressor, followed by a digital EQ and digital limiting.
K: So, you do digital after the analog?
J: Usually there’s certain times where you want to affect a chain before it hits the
compressor or something like that. I’ll do a little bit of digital you know on the
file itself, you know on the source material before it hits the analog chain. But
more often, I’m doing digital after the analog. And one of the reasons for that also
is that if something comes in at 44.1 or at 48, I’m gonna go through the chain and
capture at a higher sample rate and I’d capture at 88.2. And that gives me so
much. Now the digital processing, and one of the problems with digital is the
aliasing and this and that happen when you hit that brickwall filter. So now I can
go back EQ, and do that limiting with a higher bandwidth, and of course spreads
the junk out. And then I go through a very simple synchronous sample rate
converter, a Lavry, which is why I do 88.2. It’s not like you can’t do a 96k to 44.1
but that’s better at software process offline. I also have a Weiss and iZotope
64
resamplers that will do when I do it that way. But in the chain, I like to do real
time synchronous, so you do the 88.2. And it’s the very simplest way to do it. So
you move all that, it spreads out all junk, especially when you’re limiting and that
fuzz happens, it gets spread out. And then you go through that same sample rate
converter, which is filtered when you get back down to your desired sample rate
that actually contends to remove some junk that was up at… Bottom line is it’s
cleaner if you do your limiting and that really high frequency EQ boost… if you
do that at higher sample rates... It has nothing to do with, Oh it’s greater
resolution, that’s bullshit. We can talk about the myths of how digital audio
works, but in processing that higher bandwidth actually helps and you’re gonna
be able to do your processing cleaner. I’m gonna be able to get a little more level
with a little bit little less of the fuzz if I do it at that higher sample rate.
So absolutely, the hybrid way is the way to go. I mean, digital
compressors don’t really have any mojo; they don’t sound good. The digital EQ’s
sound good. So I very seldom do any sort of digital compression. But digital
limiting, on the other hand – there’s no way that an analog limiter can react that
fast and have the recovery time and all that stuff. Digital limiting is just better. So
they both do things… I want both advantages.
K: Ok, so picking and choosing which device works best?
J: Totally.
65
K: How much communication is there usually between you and the artist or
producer? Do you master the record as a whole and send it to them for
revisions or do you send them a few tracks for review? What is your policy
for revisions? Shootouts?
J: Revisions? If they’re small, and they’re not on every song, and you haven’t
gone through a million of em, yeah you do them. If they say, oh now that I hear
how it sounds after mastering and they wish they’d mixed it a little differently,
then they send a new mix? That’s not covered because they’re sending me a new
mix, that’s a new thing, right? That’s starting from scratch and that’s not anything
that… it wasn’t like, the normal course of my work to try to understand what the
client wants and get them there. That’s now, here’s something new. And if they’re
just super tweaky people that just want to try eighteen different things, you just let
them know, look there’s a limit to this. So basically if it’s within reason, or it’s
and error that I made, or it’s just something that, Ok we’re still working on getting
to where you want to be. We’ll always do, even if they’re not in attendance, we’ll
do a couple of songs, they’re download and listen, and comment. I sorta do that
where they say, Ok now we can go that direction. Now we have to apply that to
the rest of them, and not have to worry so much about revisions. That kind of
revision, not a problem. But you know, within reason.
K: So is that usually how you work? You do a few songs, send it to them for them
to approve, and then you do the rest of the songs?
66
J: If it’s in attendance, then it’s a real time process. But if they’re not in
attendance, I try to, if we have the time, to send them a couple things before I
finish the whole record.
And communication’s important. I need to know what they’re interested
in. So you need to know what they’re expectations are. What are the records you
like, what are the sounds? Sometimes they’ll just sorta tell me and I’ll listen to it,
I’m familiar. Oftentimes they’ll send along a reference track and that’ll give me
an idea. One thing you definitely want to know is sometimes the mix engineer
will do, here is the mixes, and here is the car-test where we’ll do a little bit of
limiting so you can kinda tell a bit more what it’s like. You want to know what
those car-test mixes sound like because sometimes they are ridiculously loud,
crazy, or who knows? You want to know what client expectations are, what
they’ve heard. Like I did this acoustic thing and the guy’s like, I dunno it’s kinda
weird. The master you gave me is quieter than the original and there’s not as
much bass. And I’m like, I added bass and I made it about 6dB louder, what are
you talking about? And I found out, Oh it’s an acoustic guitar and voice. And I’m
like, yeah I didn’t think it needed to be as loud as a heavy-metal record, why
would I do that? But now that I found out, Oh ok. Then of course, there’s demo-it
is where they like the rough mix or they like the demo better. Well there’s also
this fake mixing engineer mastering. You go, Oh I got used to it being really loud
and bassy. But I’m like, acoustic guitar doesn’t have like, you know 80Hz does
not like move air. It’s like having a subwoofer on a guitar and a voice. You know,
67
so you wanted some more of that because he got used to it. So that was a problem
I wish they had let me know ahead of time. Save yourself effort and know what
they’re thinking, know what they’ve heard, you know? But at the end of the day,
my picture isn’t on the front of the record, it’s theirs. I will try to save them from
themselves if they make a mistake, be a safetynet. But in the end, they’re like, this
is how I like it to be. And, great, I gave you the information and they said, those
two things I agree with you one, this one, I still like it the other way. I don’t
mind. Sure. As long as you’ve made a rational decision now, it’s when you’re
like, no it has to be this way because I think it’s supposed to be. I’m like, well
wait a minute, let me give you the information. They’re like, Oh I didn’t realize
that if you made it really loud the snare drum’s going to get quieter and the vocal
will distort. I’m like, Well yeah that’s how it works. Oh no, I want that to happen.
And you know what? I know how to make a record loud. And you know
what, I can probably make it loud, cleaner than the other guy. Even though I’ll
still have some fuzz happen, and the snare drum starting to smear a little, for the
same level as the next guy, my snare isn’t gonna smear as much and fuzz isn’t
going to be as bad.
There are ways. Like I said, clipping, you think is evil, and it is but when
you’re going for really loud records and you don’t want the snare drum to
disappear, there’s a certain amount of clipping that I will use in certain places in
conjunction with other stuff that helps you get that little bit more. There’s some of
that evil you’re not supposed to do that if you use a little bit in the right way and
kinda sweep it under the rug it helps you. But you don’t want to do that as a
68
matter of course, you only do it on those records where they go, Ok I heard what
you’re saying but I still want it to be ridiculously loud.
K: And so is that what people do when you clip the converters?
J: Yeah, clipping converters is one of the things, but there’s other places. Like in
the TC, you have softclip which you can use a little bit of, but not… you don’t
want to hit it all the time.
There are also certain spots in digital. Back in the day, people used to like
the Sonic bus, this is one of the mastering engineer secrets, is where you’d pull
the output bus down by like a few 10ths both for inter-sample peak reasons but
also, back in the day, if there were any digital overs, the plant would reject the
master. So you would prevent your overs so you would use your channel fader
and go just into clipping and clip digitally. One of the things about digital clipping
is, in some ways it’s worse, but in some ways it’s better. Again, it reacts so
quickly, the minute it goes over, the digital just takes it down. So it gets into and
out of that quicker than analog can, which in certain cases can be better. But in
other cases, OK, well it fuzzes up too.
So there’s advantages and disadvantages but using a tiny bit of that digital
clip can sometimes be a better thing. But then the analog clip, there’s a certain
amount of, it’s almost like dynamics processing, there’s a little compression that
happens at well. If you’ve got really great gear with a really ample power supply
that’s not gonna sag, the distortion products you get from analog clipping is
69
different from what you get from the digital and can be a bit more musical and a
little less harsh and it’ll be a little warmer. And there’s other elements about how
that analog clipping works that also can be a little better.
But yeah, A/D converters. When people start clipping cheap or even
medium grade converters, oh my god, no. That sounds really bad. It’s just awful.
But if you’re dealing with, like a $9,000.00 Lavry, yeah that analog stage is like,
amazing. You can slip the daylights out of, well you know what I mean. You can
clip that and it will still sound pretty good. But when people hear that he clips his
A/D converter, I’m clipping a $9,000.00 converter. Don’t clip your M-Box. And
don’t only clip and don’t clip a ridiculous amount.
One of the tricks to getting level is to get a little bit in a lot of places.
Some guy’s like, Oh great, I’ll turn it up ‘til it’s loud enough and clip the A/D
converter and you’ll get that horrible fuzzy crap. So typically if you need
something that’s like really loud, an itty bit of clip on the A/D converter, maybe a
tiny bit of clip in a digital stage. I’ll sometimes let my Weiss EQ sometimes just
clip every once-in-a-while. Maybe a little actual compression gives you a little bit.
And then sometimes two different limiters. Say you’ve got a Sony Oxford and
then for me, the TC has an AMD-4. It’s expensive but it’s really good! But that
limiter has a certain sound and the artifacts kinda go a certain way, whereas an
Oxford also is a pretty good thing. I don’t like it as much as the TC, but it’s a
good one. But it has its problems is a little different area. So I have the analog
clip, the digital clip, the compression, and two different limiters, everything doing
just a little bit. And each one of those has artifacts are in a kind of different place.
70
So instead of bunching up all one thing and making it obvious, you’ve like, spread
out the evil. You’ve got a little bit in a lot of different places. And that’s the trick
to lots of level clean. That’s how to do it. Don’t let any one set of artifacts get too
objectionable. Spread out the pain.
K: There are a lot of DAW’s designed for mastering like Sequoia, Wavelab,
and Pyramix (to name a few). Which DAW do you prefer and why? Is it an
issue of workflow or does one program actually sound “better” than the
other (i.e. does one handle fades better? does one have better dithering,
sample rate conversion, etc.?)
J: Back in the day Sonic was like the clear choice, it was the only choice. It
sounded better, the fade editor was there, the waveform generation, I mean,
everything about it was just head and shoulders above anything out there. Slowly
but surely everybody, well, not everybody else, began catching up. And then there
was a time that Sonic sort of orphaned their workstation and they started getting
into DVD and they tried to do other stuff. And that’s when the audio department
finally sort of bought out the rights to the workstation and they just became Sonic
Studio instead of Sonic Solutions. When Sonic Solutions was the company, Sonic
Studio was the product. And then the audio department broke off and became
Sonic Studio the company, which Soundblade was the product. So and that’s what
I’m still using because I’ve still been using it from the beginning, like since it was
pretty darn new. When did I start using it? I think Sonic Solutions was like started
71
in 1989, it was the people from Lucasfilm, that had done the, what was called
Droidworks and they were building workstations of both video and audio before
workstations were even thought of and basically that little section of Lucasfilm is
what became Sonic Solutions and they came out with the No Noise stuff, the
audio clean up stuff. It’s like their first thing. And you would send it to them, they
didn’t have a workstation yet and then they made that available and then they
made a workstation. So, early ‘90’s that became available, you know, finally
selling that. Late ‘80’s they started doing that. Probably early ‘90’s, like ’91 or
something they came out with that. By 1992 I was using the damn thing. I’ve
been using that forever. And back then it absolutely sounded better. There’s no
question about it. There’s so many other things. You know, when other DAWs
were 16bit, this was full 24, they understood, a guy named Andy Moore is sorta
the original guy who put all this stuff together and he really understands digital
audio. So everything was properly done, everything was properly coded. You
know, it was dithering when it was supposed to. It wasn’t truncating stuff or
messing stuff up. So that was back then. Now a days, yeah Sequoia, caught up
when Sonic Solutions kinda got into the DVD and orphaned the workstation there
and everyone kinda got pissed off and needed something. Sequoia more or less
said, lets take Samplitude and copy Sonic’s waveform generation and copy their
fade editor and copy how they put in all the marks and PQ codes in. Ok, so I
would probably, if I were not using Sonic, although geez, I’m a Mac guy. I don’t
really like PC so that’s why Sonic’s my favorite out of all of them. Pyramix is
good, there’s nothing wrong with that, it’s a really popular one. That one you can

72
do, some of the classical guys use that as well in addition to that. And of course,
SADiE, was probably the second one. That was the first company that really sort
of gave Sonic a run for their money. I mean, they were competitive. I don’t think
they quite matched it but at least they were kind of in the ballpark, they were a
good high-end, mastering-centric thing. So those are the big ones. And then, you
know there’s like Wavelab and it’s Ok. Kind of the next level down. The top level
stuff is Sonic, Sequoia, Pyramix, and SADiE. But yeah, Sonic, I use just because
I’ve been used to it and I still it does some things a little bit better in the mastering
world than other stuff. Now, if you’re using a lot of plug-ins, it’s still not that
stable with plug-ins and that’s what everyone complains about. They say, oh
yeah, it’s buggy bla bla bla. Yeah, when you use plug-ins, it can do some funky
weird things. In a higher-end mastering house when you’re using pretty much
outboard all the time. You know, I barely use plug-ins inside Sonic and when I
do, it’s one little plug-in. It’s like oh, I have this and this and only song number
four you do this thing to it after it’s in the workstation. It can handle that without
crashing. So that’s the thing. People have sort of complained, and it’s improved,
but it’s a small group of guys. It’s not like, hey they have a huge budget, but I
mean they’re a small group of people that said they don’t want to let Sonic die,
it’s such a great product. But it’s hard for them to compete with people with
resources and huge teams of programmers. If you’re not using plug-ins, I think
it’s still the one to beat. If you’re on PC, I’d say get Sequoia. Other than that, if
you’re mixing a lot of tracks of classical music then, sure, get Pyramix. There’s
nothing wrong with that. But I didn’t like that as much. Definitely Sonic and
73
Sequoia are the two that I like. But again, Sonic if you’re not using lots of lots of
plug-ins.
K: Well, it’s nice if you’re used to Apple.
J: Like I said, if you don’t use a lot of those plug-ins, and I mean, honestly, it
keeps getting a little more stable, a little more stable, it keeps getting better, not
worse. And they’re doing not quite the object oriented stuff that like Sequoia’s
doing but it’s not bad. They’re doing it so that you can drag a plug-in onto just
that song. You’ve got all those little things where drag it and you can slide how
long you want it to last. So I mean, it’s not bad. It also depends on what plug-in
you’re using. They don’t have all the resources, they’re not gonna test two
hundred plug-ins to make sure that they’re gonna work well. You know, get a
plug-in that you know works well with it and use outboard. Just get gear. I think
of the people who go, oh the plug-in’s not perfect, how am I gonna master? How
else are you going to master?
K: The last question may be a little selfish but do you have any advice for
somebody who wants to start a career in mastering?
J: I mean, a lot of it is the same old stuff that, I don’t know, I say the same old
stuff a million times and sometimes people say, no I haven’t heard that. So I
mean, lets start in general, the 30,000 foot view, audio in general. There aren’t a
74
lot of jobs out there that are like, here’s the 9:00 to 5:00 job with the benefits and
here’s the ladder that you climb and work you way up… There’s not a lot of that
going on. Even when you get a job at that place, you need to be an entrepreneur,
you need to go out there and sort of shake the tree and get your own clients, or the
ones that come in, make them love you. To be able to sort of create your own job
if you can’t get one, even if you’re working for someone, within that, you want to
become the guy everybody wants to go to. That’s how to work your way up in
that company and then be able to sort of go out on your own afterward if you
want to or start a partnership with someone. Or if you stay at that company but
now you’ve gone out and you’re bringing in clients and you’re bringing in work
and you’re the one that they’re saying, hey this guy here, he’s the go-getter, he’s
going to benefit our business. I mean, that’s really, like anything you don’t go in
going, Hi I want a job from you, how can you benefit me? You need to go in and
be like, how can I benefit you? You know, that’s the trick. There’s plenty of
people showing up with their hand out but when you show up with something in
your hand, they go, this is different. You bring things to the table? Ok, great. And
sometimes, people who are really good hustlers end up doing better than people
who are really good technically. A really good hustler who is good enough often
can go a lot further than the super talented guy who’s sort of the social misfit. So
that’s that part. The entrepreneurial thing, definitely figure out how to benefit
others, make them like, you gotta have this guy around. Yeah networking and
social skills, the ability to sort of fit in to any situation. That’s one of the things
that some of my interns have said, which is interesting because I hadn’t really
75
thought of it in that way until several of them in a row told me. They said as much
as we learned about technical stuff, one of the biggest things we’ve learned from
you is about dealing with people. They would see a lot of client interactions. And
it’s just that anyone who comes in, you know, making them comfortable, making
sure that whatever their vibe is, and you know, the heavy-metal guys come in and
you don’t want to be wearing an oxford and acting like a nun. Whereas the
Christian clients come in, you don’t want to be sitting there, you know, smoking a
bong and drinking Jack Daniels out of the bottle! This is not something you do on
a session. It’s about what make the client comfortable. You always want to be
professional and business-like to a certain degree but there’s certain people that
want to joke around, there’s certain people who want to be a little bit more loose.
There’s other people who are like, you’re the mad scientist, I want you to act that
way. So you have to be able to key into, and it’s not like you have to change who
you are. No, no, no, there’s parts of our personality that you know, I’ve got in me
the rocker, the nerd, the scholar, whatever. I’ve got all these pieces and it’s more
like which one of these am I gonna let out more today and which ones am I gonna
subdue. So fitting into people. Making them comfortable, making them think it’s
their idea so to speak. You know what I mean? Always making them feel
empowered but that the same time, you’re kind of steering the ship.
So, the other part of making it in this business is just, it’s a war of attrition.
You know, last man standing. There’s gonna be a hundred people who go, I
wanna do this. Then fifty of them right off the bat are like, oh forget it. This takes
work. I didn’t know about that. Now the other half that are left, some of them are

76
gonna be like, oh I really want to do this but I have this full-time job and I have a
wife and a kid already. Wow, to break into the business when you already have all
of those responsibilities, wow, that’s tough. It takes a couple of years when you
just eat, sleep, drink this stuff. If you want to make it, don’t be like, Oh I’ll do it
on my off hours. You don’t have any off hours. If you need to go into that
situation, take a year and work and save up money at home so that you have a
nest-egg there, then go spend a couple of years wherever you’re gonna go and not
have to worry about the, oh well I have to have a job. Things are gonna come up
last minute and they’re gonna be like, hey can you come over and do this thing?
Yes! Sure, I can. You know, you just did a session for eight hours and they’re
like, hey, there’s a thing going on at night, can you come over and do that? Might
as well! And trust me, once you’re in your 40’s with a wife and kid, you’re not
gonna get it anyway. So that’s the thing, be around all the time. Work with
people, hang out for every possible session, be at the studio always. Do what ever
that takes. Then the people who didn’t save up the money or who didn’t spend the
time or after a year or a year and a half start to go, oh this sucks. I’m not getting
paid. No, give yourself at least two years to be used and abused. It’s really that
simple. And over that two years, the people are gonna widdle down to like, ten if
you’re lucky. Maybe not even that many. And you want to be one of those ten
guys because now you’ve got a shot. Now people know you, you’ve done some
stuff. You were there when whoever didn’t show up and they were like, hey he’s
gonna be three hours late, can you record these vocals?
77
Within the mastering context, hey, you’re sitting here and observing and
they’re like, oh you know what, our production guy’s not here. Wouldn’t it be
nice if we had production engineers? But the big guys like Sterling still have
production engineers where all of a sudden, they’re gonna be like, hey I EQ’d all
of this stuff, alright can you edit and do the PQ and do the delivery on the
Beyoncé record? And all of a sudden, you’ve done a couple of those and then it’s
like, oh hey, at night, whatever engineer you’re attached to, when they go home at
night and that studio is open, they’re gonna go, hey, if you want to go out, shake
the tree, and bring your own clients in, you can work that room for half-price.
And in a big room like that, half-price is still expensive for your clients, but your
clients are gonna be like, I can get mastering done at Sterling and for half-price.
The facility wants to do that because they want you to build a clientele and if it
really works out well, then bam, we’ll give you the night time hours for real in the
room. We’ll start feeding you work. It’s in their interest to have that career. That’s
sort of the, there it is. I mean it’s pretty straight-forward. It’s not rocket science.
There’s a little luck and ok, maybe some rocket science. Go meet bands! Go to
clubs, do that. And some of your friends that you’re going to school with, some of
them are gonna be making records as musicians, some are gonna be making
records as engineers and, of course, some are gonna be flipping burgers. You can
probably tell the talented guys who are probably gonna do something. Keep in
touch with those guys.
And the other thing is to really hone your craft. Work on everything, work
on different styles. Once you get it done, listen to it one every system under the
78
earth, you know what I mean? It’s about learning what translates and what
doesn’t. Keep notes, absolutely take recall notes of your settings. There will be
changes that the clients will order but once that’s like two years from now, you’ll
go, I wish I had done that better. Bot I’ve learned a lot since then about what I do
and I can go back and just for practice, just look at what you did and what you’d
do differently now. Why did I boost 600hz? Everything sounds so boxy and
awful.
Part 2. Mastering Subjective Language
Punch: Punchy stuff to me is usually midbass stuff. I want it to hit you in the
chest. If you want punchy kick drum, you’re not boosting the super bassy 60hz
stuff, you’re boosting 90, 100, 110, maybe up to 140. Even on a snare drum, a
punchy snare drum could be up to 200, it’s a woody thing. But once you go over
200, it’s not punch anymore.
Warm: Warmth; that can come from frequency ranges or distortion products. If
you’re talking frequency ranges, that’s what happens sort of above the punch.
Sometimes it’s 250, it could be as high as 800 but typically, it’s gonna be 300 or
400. That’s kind of the warm area where you want warmth and body in the
guitars. The guitar tracks sometimes are these weird scoopy things where it’s all
boomy and all bright and you’re like, where’s the 400 man? It’s like so important.
There’s so much to the warmth and body in an electric guitar in that range. You
79
know, the other things that people talk about processes being warm is it’s really
tubey, it’s really a distortion product. I can’t say it’s more second or third order
harmonic distortion, you know, because the distortion also gives presence
depending on how much of it and what it is. You can get warmth or presence, of
course presence is higher up. Well, what about tubes? Well, you know, what
about transformers? Transformers are hipper than tubes. You know, for like cool
warm bizarre distortion products, things like that, and it gives you a little bit of
compression in a weird way. You know, it slows down those transients a touch.
There are people who listen to the old Neumann tube mics and then they’re like,
oh the new Neumann reissues just aren’t as good because they have tubes but no
transformers. You know, why does a Neve module sound so warm and wonderful
and great? Transformers! Why do I love a high-watt guitar amp? Transformers are
a really really cool sound.
Clear: Clarity! I mean that can mean so many things. I mean, if you want clarity,
so many things go into that. In a mix, you have stuff panned properly, have
everything have its own frequency range. Sometimes having a full range or
frequencies is not the right thing to do. The big heavy ridiculous guitar thing, a lot
of times you take out a lot of that bottom and then it’s with the bass.
The musical arrangement absolutely contributes to clarity. And when the
bass and the guitar play together, it sounds like this big huge heavy thick guitar
sound where if you listen to the guitar sound, you go, actually that’s not nearly as
heavy as I thought. But in context with everything else, it’s amazing. So clarity a
80
lot of times has to do with that where you have this mix where you feel like it’s
well represented from the lowest lows to the highest highs but that doesn’t mean
every situation has the lowest lows to the highest highs. So even and balanced EQ
over the whole spectrum, each instrument playing its part, everything in its own
space. Even the pan position is hugely important. A lot of times, if you pan
something out a little bit wider, you don’t have to touch it. You’re like, oh, that
works!
So from a frequency standpoint, what’s gonna give you clarity? It’s not so
much what you’re adding, it’s what you’re taking away if there’s too much of it.
If you’ve got too much of the sort of warmth, boxiness, or if anywhere from 200
to 800 (800 might be a little high on that). But if you’ve got too much of that
thing that muddies it up or boxes it up, or something that puts a blanket over it,
it’s that. You can’t have too much of that.
Harsh: Harsh; anything that if you turn it up, it’s gonna make your ears go
“eeek”. And again, typically it’s around 2.5k. That’s the one that people sort of
think of first. Yeah, that one but 4k can be piercingly awful. That’s one of those
spots that if you look at Fletcher-Munsen where you’re gonna be really sensitive.
And that’s also the spot that if you look at audiologist data who look at where you
loose hearing, you loose the extreme top, that’s just natural with age. But a lot of
trauma-induced loss happens around 4k. And certainly 1k is plenty painful so you
can have harsh anywhere from 1 to 4 and probably a little to either side of that,
maybe.
81
Groove: Mmhmm, groove, my favorite stuff. Here’s one thing that people don’t
realize is that you can actually improve the groove in mastering. People are just
like, what are you kidding? They’d be like, it wasn’t grooving when we sent it but
it’s grooving when we got it back. How on earth did you do that, it’s just
mastering. And there are a couple ways. Of course, one of the obvious ways to do
it is to feature the things that contribute to the groove. Whether it’s the kick drum
was muddy or not being heard, or was it this cool hi-hat part that wasn’t there or
was it this tambourine or shaker thing that’s doing 16ths or was it a guitar riff?
Bring out those elements. What are those elements that contribute to this groove
and go in and find those and sort of enhance those and sort of highlight those.
The second way you can highlight the groove in mastering is with the
compressor. One of the big tricks to buss compression, separate to how I want to
control the transients and dynamic range, is to get those attack and release times,
and you’re still typically going with slower attacks and faster releases, things like
that. But even within those parameters, of somewhat slower here, somewhat faster
here, you want to get them to bounce with the music. If you can use the
compressor to kind of bounce with the music, you can actually create this little
hip-hop, create that little bounce and have the music groove with the action of the
compressor. And that’s a cool trick; it’s a tough one to master (no pun intended).
And it doesn’t work all the time, you can’t use it for everything but every once in
a while, you can go out and it’s like, yeah it’s bouncing this cool way.
82
K: Is that something you can do with parallel compression, or is it just straight
buss compression?
J: To a certain extent you can do it with parallel compression but of course, at
that point it’s bouncing more from the bottom. So instead of just the bottom
bouncing, you want the whole thing to bounce. But to a certain extent, yeah, you
can do a little bit of that with parallel especially if you’re in the situation where
you’re like, I can’t put any more compression on this or it’s gonna sound like hell.
I’m gonna bounce it with parallel. But it’s easier to do it not in parallel if there’s
not a lot of compression on it already.
Frequency Ranges:
Lows: Lows are everything under 100 and probably everything under 75. I
absolutely add midbass into that. It’s really an important region. There are times
where like, bass guitar is doing this ridiculous awful stuff where it’s just taking
over, making everything muddy and there’s other times when somebody would be
like, I want that. Bring back that punch, I want to feel that kick drum, I want to
feel that low end and you keep cutting 40 or 50 and it’s horrible. And I’m like add
a little 100, 110 to it. That’s really midbass. Again, it’s useful for me to have
those two things separate because they function differently. And think about it
too, remember those frequency numbers, as you go up, from 20 to 80, you have
two octaves, that’s a lot of area. And then from like, 300 to 400, that’s not even
83
half an octave. People are like, bass is 20 to 160 and I’m like that’s so many
octaves. Keep it 20 to 80 then have 80 to 160 be your midbass.
Low Mids: It’s almost hard, I think of that lower-midrange, and this is probably
the way, you know, one of the teachers I had at Berklee kind of thought of lower-
midrange as being a more limited thing. A lot of people are like, oh no, the lower
midrange is everything from 100 to 1k. I’m like, by the time I get to 900, I just
think that’s midrange. I don’t think that’s lower, you’re in the mids! It’s the
“mud” into the “box”. It’s muddies and boxies, that’s lower midrange.
Mids: So once you get to 800, that’s midrange. 600? Ok, I’ll buy that as lower
midrange, that’s still a nasty nasaly-boxy thing. But, I dunno, after that, you’re
just in the midrange. Maybe even 500. Traditionally, I thought of 250 to 500,
that’s the lower midrange octave. And then 500 to 2k, 2.5k, is like the regular
midrange and then like, 3, 4, 5, 6k, that’s upper mid.
High-Mids/Highs: 6 is really starting to be the lower part of treble, you know
what I mean? That’s kind of trebley, but that could go either way. It depends what
it’s attached to. It’s either the top of the upper midrange or the bottom of the
treble. I tend to think of 6k as still part of the midrange. You’re still getting
presence, and like some snare snap or whatever. 8k, you’re definitely into treble at
that point. 7.5, you’re definitely into treble. 7, yeah, I’m gonna say your high end
comes at 7. I’m gonna keep 6’s in the upper midrange. And if you’re thinking of
84
the treble, you can think of octaves, 8k to 16k, yeah that’s treble. Above 16k, you
can sort of thing of as the air kind of treble. But think of that, when you’re
thinking of frequency ranges like that, think of some octaves. Midrange is the
biggest one, that’s where we’re most sensitive. It covers a lot of ground. But it’s
the middle, think of the biggest part of the bell curve.
II. Matt Azevedo
Matt Azevedo is a graduate of the Sound Recording Technology program at the
University of Massachusetts Lowell. Since his graduation, Matt has spent ten
years as a mastering engineer at M-Works mastering in Cambridge, MA. Matt
then decided to pursue other interests and has since been working as an acoustical
consultant and designer. His multifaceted skill set includes electrician,
acoustician, musician, and audio engineer.
This interview was also conducted over two sessions. The first was at the
Sweet Touch Café in Cambridge, MA on Wednesday November 18th, 2015. The
second was a response to the questions via email.
K: Could you tell me a bit about how you first got involved in mastering? Did
you get into audio first as a musician or were you more interested in the
technical side of audio? Did you go to school for audio? Did you intern or
have an apprenticeship?
85
M: I was at UML, and fellow UML alum Mark Donahue. I like Mark Donahue.
Anyway, he came and did some stuff with us. It was pretty cool.
So I was a senior John Shirley’s first year here. And there was this “intro
to DAW’s” class. Back then we were spending most of our time on 2-inch. So this
class looked at Protools and Sonic Solutions. And part of the reason Shirley got
hired was because all the little old dudes were there at the time and none of them
really knew this DAW stuff. And Shirley’s big claim to fame was that he was a
hot-shit Protools guy. And the other DAW, the Avid one… ya know, it was weird.
It was Protools-y enough for him to be OK with it. And then we got to Sonic. And
I had paid a lot of attention when Mark came and demo’ed Sonic and I thought it
was the coolest thing. And I’d gone in and like spend some time with Sonic.
Sonic does not work like Protools at all. It’s a whole different logic to how it
works and Shirley just did not know how to use it at that point. So that class
ended up being, he’d be like, Ok so what you want to do is… and I’d say, Oh you
click on this thing. Like, Oh it’s this menu. And by the end of the class, I was
sitting in front of the class teaching everyone how to use Sonic Solutions. And I
still love that platform. The current version sucks in terrible ways. It breaks my
heart because I want to love it. Kinda like if your husband becomes an alcoholic.
Like you remember the good times but he’s a violent drunk now and it’s just
really hard to keep the family together. Soundblade, the new version, is a violent
drunk. But back in 1998, me and Sonic Solutions 5.4 were BFF’s.
So I love that kind of editing. I was super super technically minded. I was
really into the guts of how stuff worked. And towards the end of my tenure, I tried
86
to find a job, tried to find an internship and bounced around a few things. Nothing
really panned out and Dr. Moylan called me and said, Matthew, have you found
an internship yet? I was like, well, yeah, I’m working on it. I got a few leads
hopefully it’ll work out. And the manager at M-Works at the time was a woman
named Gene Savedi who’s awesome. But they needed an intern and she called her
alma mater and said, hey we need an intern and Dr. Moylan said, I think this will
be a great place for you. I’m putting this fax that I got up on the internship board
in one week. What you do in the next week is your business. So I ended up at M-
Works. So I had an interview and bullshitted at the right level so I ended up with
an internship. And I made a point of hanging out late after sessions and futzin’
around with files on the drive and tried to figure out how stuff worked…
Smuggled a couple… I had a friend who had recordings from a blues show from
WJUL back when it was not UML. We did a little comp CD of live performances.
He just gave me the stuff and I stayed out late one night. And I was doing a ton of
editing and QC work. And initially there was a band called Dialectric and they
wanted their record mastered and didn’t have a lot of money. So one of them was
roommates with my very dear friend Andy. Andy said, Oh my friend Matt is
interning at a mastering studio maybe he could do it for cheap. So the first album
I ended up doing was the Dialectric CD. And I said to Jonathan, hey I have some
friends who want to work on a record, what should I charge and what would I
get? So we worked out a deal. So before I was on the payroll there I was already
bringing in… I was already a profit source. I was already an income stream,
which I don’t think a lot of interns try to get themselves into that position. They
87
just kind of hang out and wait for something to happen. So I made a point of
going out and finding… My wife’s a hairstylist. To become a hairstylist, you have
to be willing to go out and assault people on the street. Like, she would run
Craigslist ads and she would just get people and do haircuts. So I was kinda doing
the same thing. I was active in the music scene and I was talking to every band I
knew. I was like, oh it’s like the nicest studio in town and I can totally master
your record. And I screwed up a little bit but not so bad that anybody got angry.
Not so bad that anybody noticed, but in my heart, I knew. So when my internship
was up, I had become a profit source for the studio. And that was just when they
were breaking ground on the current facility. We used to be in the basement. So
we were going from a one studio, one, literally, edit-closet facility with two staff
engineers and an intern and a manager to the current space with three rooms. So
now we’re gonna have all this space and we need to be able to operate all these
spaces at once; they needed a third guy. I ended up doing a lot of work, like I
wired the network. Every Ethernet wire in that place, I terminated. I shouted at the
electrician a couple of times, which is kind of a weird thing to be doing, but I did.
It’s all about being scary in the right way. So it was Colin Decker working in the
back room, Jonathan in the big room, and I was in the little room doing edits and
QC’s. I would come in at like 2:00 and run Jonathan’s masters, which is a much
bigger pain-in-the-ass those days because he wouldn’t print any EQ. He would
save everything as presets on the desk. So I’d have a move list and the disc would
burn in real time. So it would be edited in Sonic, and it’d be running a loop in real
time through the desk then back in to the CD burner. So I had a move sheet. The
88
song would fade out and I’d be like, “whoop” and I’d change all the settings on
everything in real the two-second gap between the songs. And if you screwed up
on the last track, you started over. I’m kinda glad that’s not actually a practical
way to make records anymore. Because in the olden days, like there was no DAW
so you had to splice everything together on a reel and you’d play the reel through
the desk and you’d have to do all the moves in real time between the tape deck
and the lathe. And that style of working persisted longer than it should have. And
really, the real way to do it was to have two of everything. You’d have two
Sontecs, two compressors, and you’d have two limiters. And your Neve transfer
console, there was a button for path A or path B. Put the first song on path A and
the second on path B and you’d just push the button. And you’d set up track three
on path A then track 4 on path B. We didn’t have the switcher. It sucked. You
want to learn humility, blow a master in front of the client 3 or 4 times. Boy that
sucked, but I did that.
After Jonathan’s sessions, I would have clients at night. So I’d come in at
2:00, do Jonathan’s stuff. His clients would be out at 5:30 and mine would come
in at 6:00 and I’d work until the album was finished. And then after a couple of
years, Colin got sick of being broke, and ended up going to grad school. And last
time I checked, he was Vice President of online video for Yahoo, making
profoundly more money than anyone I know in audio. So, you know, grad
school… Master for ten years then go to grad school.
So I took over Colin’s room when he left. So then it was me and Jonathan
from 2002 to 2010. At some point, Jonathan looked at how much work we were
89
doing and did finances and decided to rent out my room to a sub-tenant. So I was
doing editing, post production, QC’ing, whatever in the back room. And then
Jonathan and I would share the big room. And that’s how we did things up until
2010 when we were really hurting after the 2008 crash. So there was a real perfect
storm of… when I started, if you wanted to burn CD masters, you needed a
$20,000 Sonic Solutions computer rig and a $5,000 CD burner. So no one was
just gonna buy that. For a long time, consumer CD burners could not write the full
set of PQ data. So you could not burn a replication master on a consumer CD
burner. So it was by the mid-2000’s when you could buy a non-scuzzy CD burner
that could burn a valid master. And then it wasn’t too long after that, you could
get a piece of software that would at least let you open up a list of files and gather
them and put in PQ data. So by 2010, everybody was hurt and all the mix studios
that used to feed me work had become by enemies because they were all saying,
You can go to M-Works and they’d charge you $1,000 or for $200, I got the
brand new Waves L2 plug-in and we can put your mixes through that and make
em loud and I’ll burn you a CD. That’ll save you 800 bucks. So work got tight.
What it basically came down to was I went from doing 200-plus albums a year in
2006 to 150/120 a year in 2010. And Jonathan had really moved off and began
doing more work at Berklee. His wife at the time was a touring concert harpist.
They shot a PBS special and whenever she was touring, she would have him on
her contract as her manager. So he was on the road a lot with her. So he wasn’t
doing much. When we were both cranking, we were doing like 250 albums a year.
We were doing an album a day, 5 days a week, all year and not taking vacations.
90
And that was the glory days of 2006. So things got really bad and I evaluated my
options and thought what could I do that wouldn’t jettison 12 years of audio
expertise? So I was hanging out with my friend Andy and we were thinking, Oh
what am I gonna do? Andy said, well there’s a guy who plays cello in my band
and he’s an acoustical consultant and he does all this sound stuff. I bet you could
get into that; you’re smart, you like sound. So I met up with him and talked about
acoustical consulting and he said, Yeah you’d probably be pretty good at this but
you’re gonna have a hard time without any credentials.
So right in 2008 when things started getting bad, I started formulating
escape plans and they were all technically oriented. But I still master a few
albums a month. I still do some tracking. But, you know, I buy name brand juice
now. So that’s how I got into it, and that’s how I got out of it.
K: As your career advanced, how did your philosophy on mastering evolve?
Is there anything you know now that you wish you knew when you first
started?
M: When I first started out, the logic, like if you’re working on something and it’s
not working is to throw on another piece of gear. It’s like, oh this isn’t really
working, I’ll put on a second EQ or I put on another compressor. I was doing
more stuff and the worst sounding records I’ve done in my career were within two
weeks of getting a new piece of gear in the studio. Because there’d be a new thing
91
and I was really excited about whatever the good-sounding thing it did was and
the excitement was masking all the not good-sounding things it has done. There’d
be some new toy and I’d overuse it for a week and a half and I’d realize, Nah this
just sounds like crap, what am I doing? So there’s a bunch of like, new toy
showed up and new toy enthusiasm resulted in less than my best work. At this
point I don’t do anything. People get concerned. They ask me what I did on the
track and I tell them. They say, that’s all you did? When I’m working in the big
room at M-Works, 95% of the tracks I work on are the Sontec, the Requisite, and
whatever limiter I’m into that year in the box. That’s it. If you’re using more than
four bands of EQ, you’re probably doing the wrong things. If you can see the
needles moving on the compressor, you’re right on the edge of doing too much. If
you can tell the limiter’s in, you’re probably doing too much. Even when I’m
working in the box, there’s the EQ I like. Bi-quad filters are bi-quad filters.
There’s the compressor plug-in that adds a nice distortion, and there’s a
compressor plug-in that doesn’t have a nice distortion. I will sometimes use one
of those two and the same limiter I would use at M-Works, which for a long time
was the Xenon limiter, the PSP one. I think since Ozone 6, the Ozone is my
favorite. 5 wasn’t quite there, but 6 and 7, it’s really good. So every track I do is
the same. Now, that’s if the mix is right; that’s mastering. Mastering, I’m doing
two or three bands of EQ, and a bit of compression. The reason I use the Requisite
on every track at M-Works is because it’s got big fat transformers, legitly run on
proper 300 volt rail tubes. And there’s this little bit of euphonic saturation that
you get just running through it. And I put things through it because I like a little
92
bit of euphonic saturation. That feedback control on the newest version, you can
even intensify that. I’m pretty much using it for color and I set the threshold
usually with the filter turned way up so it’s not reacting to bass stuff at all, and the
threshold so that if you kinda look at it, you can kinda tell that the needles are
alive. And it’s just enough to lop off the really peaky-peaks so you save yourself,
so your digital limiter’s working a little less hard.
Now, there’s also fixing mixes. If I’m fixing mixes, the gloves come off.
There are times I’m fixing mixes and I’m doing Mid-Side, multiband, parallel
compression, or other bizarre terrible things that I’d rather not talk about. But
when something’s broken, you just do whatever you can to fix it. And I’ve had
some really broken projects come in.
I think the first assumption should be, somebody approved these mixes.
Probably many people have approved these mixes before they move to mastering.
If the mix engineer liked em, and the producer liked em, and the artist liked em,
then if you give them back something that doesn’t sound like their mixes, you’re
disrespecting the fact that all these people said that they like this. So starting from
there, sometimes I don’t do anything. Some people talk about mastering as
framing a picture. I think even that is too dramatic. I have a friend who owns a
gallery and I’ve watched her set up shows. And there’s a real beautiful art at what
height to hang a piece of art and how directly to light the piece of art. I think
that’s really what good mastering is. Someone has handed you a painting and you
are displaying it. You’re saying, Ok there’s a strong compositional line so I want
that to be at eye-level. And it’s got this kind of color so I want like a more
93
yellowish incandescent light or like a more blue full bandwidth light and I want it
to be this bright so the colors pop. It’s still the same piece, like the piece has not
been changed at all. You haven’t turned it sideways and you haven’t gone in with
a paintbrush and say, Oh this guy needs a mustache. You’re just presenting it for
the viewer to experience it. I think good mastering is deciding how high to hang it
on the wall and how to light it. Everything else is restoration. I have clients that
say, I did this in our bedroom and it was really frustrating. We didn’t get the
sounds we wanted. And it’s like, cool, we will change it. But the first question I
ask in every session is, how do you feel about the mixes? And the answer’s
usually like, yeah we’re excited about them. Cool, we will maintain your sound.
We will give you back your mixes but better.
One group I worked with, a singer-songwriter group came in and I started
listening. Everything was fine until the chorus when the kick drum came in, it was
like a techno track. They were on the couch, just slackjawed. I was like, is this
how you wanted it? Turns out they mixed it on mid-sized midfield monitors with,
like and 8-inch driver. They just couldn’t reproduce the fundamental so what they
were hearing was the first harmonic. So there was a lot of cutting in the bass on
this record.
K: So I guess that can segue into the next question. Are there any projects
that stick out to you as having a particularly challenging aspect or technical
difficulty that you had to overcome? What was the nature of the challenge
and how did you react to it?
94
M: Most mixes just sucked, you know? Bad mixes by inexperienced engineers…
I think the more interesting things were, one I thought was really cool fix was an
album for my friend, Mike Bulluck, who’s a wonderful experimental, traditionally
trained upright bass player, who does really wonderful fascinating sound art
experimental stuff. And he had gotten, you know, a label was going to put out his
record on the vinyl LP. And he had made all his recordings, you know, heavily
processed field recordings, heavily processed instrumental things and there was
no center to the bass. Like, the information from the left and right were totally
uncorrelated and if you hit mono, the bottom will disappear. Due to the physics on
an LP, mono information is cut laterally and stereo information is cut vertically.
Basically, the cutter head is an M/S matrix. So a mono album is just left/right and
the way they made mono and stereo compatible, so you could play a stereo record
with a mono needle, the left/right is still a mono signal and the up/down is the
stereo information. You take the one magnet that reads the vertical and one that
reads the horizontal and you do vertical plus horizontal is your left channel and
horizontal minus vertical is your right channel. You know, just straight up M/S
matrix. Which means that if you have too loud particularly low-frequency
information on your record, the vertical travel of the cutter head gets so big that it
either lifts out of the record, the groove disappears, or it punches down through
the bottom of the record. But if you have too much stereo information below, say,
200hz you get a record that is physically unplayable.
95
So Mike had this really cool stuff that sounded great on headphones and
was physically impossible to cut to a record. And the normal thing you do when
there’s too much, when the bass gets too wide for a record cut is to high-pass the
side channels. Just put a high-pass filter at 200-ish Hz and you get rid of that out-
of-phase bass information. Even for a lot of mixes where you listen and you’re
like, man that kick drum is muddy… there’s just no focus at all in the bass. If you
kill the low frequency in the side channel and have a clean mono bass, it does a
lot to clean up the low end in general (that’s a freebie). But on Mike’s record, if
you did that, because all the bass was in the side channel, it just, all the bass went
away. So what I ended up doing was stacking, high-passing, I think it was the
right channel… one of the channels, I cut the bass out… a steep high-pass filter, a
third-order high pass filter at like 80hz. And then I took the Ozone multiband
stereo width control, cut it down to just two bands, put the crossover on that to
where I put my high-pass filter and when you go into the preferences you can
change the shape of the filter. So I matched that crossover filter with the crossover
of the high-pass filter I used, put it at the same frequency, and then mono-ed the
low end. So I basically took all the right channel bass away and then panned the
left-channel bass to center and then added 3dB of gain to make up for the loss and
it sounded perfect. And like it didn’t even sound that different. On speakers it
sounded better because listening to out-of-phase information in the air is kinda
weird. So it made it just sound better in general and it made it physically cutable.
One of the things I like about that particular story is it really ties into the original
purpose of mastering, which was to get things ready for pressing. And because I
96
understood the physical limitations of the release media, I could identify what was
a catastrophic problem before it went to press. And it was great. The album came
put and everyone likes it.
K: Ok, next question. Do you prefer analog, digital, or do you run a hybrid
system?
M: I like tools of both flavors. I have a broad preference for hardware because I
can focus on what I’m listening to and turn a knob with hardware. Where with
software, I’m really forced to look at a screen while I’m working and I find that
critical listening works better when you minimize the visual stimulation you’re
getting. So I like to have pretty minimal metering in the room. Like, just kinda
something that gives an idea of where the levels are at. I like mechanical VU
meters for that reason because there’s kind of, you know, they don’t tell you
enough to distract you. Like, yeah you know, it’s kinda bouncing around that
looks pretty good. So that said, you know how I mentioned that all bi-quad filters
sound the same. But they sound really clean. You can very carefully define the
phase-response, the frequency-response, you get a ton of control. Really, when
you deal with any kind of a DSP process that you’re handing to a user, the
question isn’t what can you do, it’s what controls do you actually want to expose
to the user?
So digital’s great because especially if you get nerdy enough to get into
like programming language like Max or MatLab or something, you can do pretty
97
much anything you want. Something like iZotope RX is totally impossible
because you’re using FFT algorithms that require time to be able to go backward
and forward. So you just can’t do that kind of stuff in the analog domain. On the
other hand… You know Jeremy Houle? Once upon a time he was at an AES thing
and he bumped into Mr. Rupert Neve. And he kinda fanboyed out a bit. He was
like, Oh Mr. Neve I loved your stuff. So tell me, what’s the secret to Neve’s
sound? And Mr. Neve intoned, “Distortion”. And that’s really it. You know like,
the magical wonderful thing the Requisite (L2M MKIII compressor) does is a
non-linear, non-constant level and frequency-dependent distortion. Big
transformers are completely linear except for just a little bit they’re not. Tube
triodes operated in the linear, middle part of their, you know biased clean at
reasonable levels are super linear. But as the peaks just get the tiniest bit out of
the linear range, at the very tippy-tops of the wave, there’s just this little bit of
extra stuff. If you ever get into DSP there’s a thing in the world that is called the
LTI system. A linear time invariant system. It means that there is a direct
relationship between the input and the output and the relationship is always the
same. So if you had an amplifier that’s set up for 6dB of gain, and it’s flat from
DC to way higher than we care about. That’s a linear time invariant system; you
put in a signal and it comes out 6dB hotter until the input signal hits the power rail
of the amplifier and then it can’t give you 6dB of gain so you get 5dB of gain and
a flat-topped wave that gives you all this distortion. So now, linear just screwed
the pooch and those distortion characteristics are going to be dependent on the
slew rate and the temperature and all kinds of other fiddley non-changing-over-
98
time aspects of the amplifier. Anything that is linear and time-invariant, you can
do in DSP- easy. Rooms, like acoustic systems are, unless you’re getting to levels
over 170dB where air clips, and you’d be dead so it doesn’t matter, but unless
you’re modeling bomb blasts, sound in a room is a linear time invariant system.
So you can do all kinds of great things with acoustical modeling. You can
parameterize the room and you can do math and see how the room behaves. Or
you can go out with test equipment and play test signals and see how it behaves.
Assuming you make adjustments for humidity and temperature you can come
back a year later and get the same result.
There are lots of distortions that are musically useful. Like, what comes
off a violin string is a near-perfect sawtooth wave. But what comes off the body
of the violin is totally not a sawtooth wave. So there’s this distortion happening
from the input signal of the strings to the output acoustic signal of the body that’s
profoundly not linear, and it’s nice. You know, turning up a guitar amp a little too
loud sounds nice. The magic of most distortion is its harmonic. So you get
distortion at overtones of the input signal and increased harmonic complexity is
often a nice thing. So I think analog gear, I mean there’s digital models of
saturation and they’re OK. It’s a thing, whatever. I find digital warmth, which in
this case is really just distortion. But digital pleasant distortion processes tend to
go from too little to be worth it to too much to be worth it in a very small range.
Like, the exciter thing in Ozone by the time that slider’s on like, 2 out of 10, it’s
too much and 1 doesn’t really do anything. So you’ve got this teeny little range of
well, 1.1 – 1.3… and that’s it. That’s the only usable range on the thing. And it’s
99
not dynamic. So the way tubes and transformers react to the signal, you know it’s
heavily influenced by the recent signal that has gone through it. You know, like if
you hit a piece of tube gear really hard with a big transient you suck enough
current out of the filter cap that it doesn’t have enough to properly run the circuit
afterwards, you get this kind of sag in the response after a big hit. I wouldn’t do
that as a mastering thing but I do it with guitars all the time.
So I think there’s this nice free stuff, there’s this enjoyable distortion that
you get out of analog gear that’s still not well emulated. And like I can sit in the
studio at M-Works and operate the Sontec without looking at it at all. There’s a
lot of years of muscle memory. I know where all the knobs are and there’s this
great tactile clicky feedback when you move them. So I can just sit there with my
eyes closed and EQ a record. And I do! I kinda of just sit there and just stare off
into the distance and the knobs are different sizes so you can tell what you’re
doing and I’ll just EQ a track. And on the Requisite, I can just take that thing and
having that tactile feedback that the control is doing without having to look at the
control, I find super valuable in assuring I’m doing my best listening. And I just
love not having visual feedback on things. Because everyone’s done the thing
where you sit there for 5 minutes dialing in a piece of gear and then you realize
it’s on bypass. The amount that confirmation bias skews our hearing is hilarious.
And if you’ve got a picture sitting in front of you and you think I’m doing this
thing, it’s really easy to believe that picture. So I like hardware for tactile reasons,
for practical reasons. There’s a lot of things that I do digitally that I would never
want to do otherwise. Brickwall limiting for instance, being able to do look-ahead
100
limiting, I mean you can’t do that analog. So I can’t think of a time I do serious
CD-type limiting with an analog limiter, it’s just stupid. But there’s a lot of times
when there’s pretty distortion I want. I want my EQ changes to not just emphasize
that frequency, I want it to create a ripple of the harmonics of that frequency. And
digital doesn’t do that well.
So my perfect mastering, I’m actually building a mastering studio right
now because I just bought a house. But I’m building a Sontec clone, and I’m
proably just suck it up and buy a Requisite. I’d like to go and build the all-tube,
you know, James Baxandall Baxandall schematic from the ‘30’s. Build a Bax EQ
with maybe a sweepable mid in there too. Like the high and low control of a Bax
and maybe the mid of a Pultec. I want to stick that in a box. And it’s going to be
all tubes and transformers because I want to open up the top end and distort it at
the same time. And I’ve got a potentially brilliant alternate way of handling
compression that I’ll probably initially develop as a plug-in and then potentially
do it as a hardware version. But that’s it. That’s all the hardware I want for my
studio. Really, 95% of what I do is the Sontec and the Requisite. If I have just
those two and a bunch of plug-ins for the weird stuff, that’s all I need. I could buy
more crap but I’m not interested. I want a good EQ and a compressor that does
what my brain thinks it should do, which is hard to come by. That’s all I need.
And that’s it.
101
K: How much communication is there usually between you and the artist or
producer? Do you master the record as a whole and send it to them for
revisions or do you send them a few tracks for review? What is your policy
for revisions? Shootouts?
M: Usually a lot, especially in the situation of an attended session. I prefer
attended sessions so that there can be a running dialogue throughout the process.
If it is an unattended session, usually I will master the entire album and post it for
comments and feedback. My official policy on revisions is "revisions within
reason are included in the base price". 19/20 times that covers everything, but you
need to leave yourself an "out" for that 1/20 client who just can't call it quits. I
generally don't like doing shootouts unless it is for a large body of work. For one
album, I usually say "Look, pay me for mastering a single, and if you love it we
can do the rest and if you don't, well, you have that master to do whatever you
want with."
K: There are a lot of DAW’s designed for mastering like Sequoia, Wavelab,
and Pyramix (to name a few). Which DAW do you prefer and why? Is it an
issue of workflow or does one program actually sound “better” than the
other (i.e. does one handle fades better? does one have better dithering,
sample rate conversion, etc.?)

102
M: Pyramix and Sequoia are the best things going right now, but both are
Windows only. soundBlade and Pyramix are tied for best editing, but sB is a
buggy mess in every other way. Sequoia has the cleanest interface and best plugin
handling. Wavelab is quite solid, especially given its reasonable price. It is the
best option if you want to work in MacOS.
For dither, I use flat TPDF 99% of the time, and nobody does that wrong. SRC I
do in iZotope RX. The fade editors in soundBlade and Pyramix are a class apart
from all the others.
K: Do you have any advice for somebody who wants to start a career in
mastering?
M: Aside from don't? It is a niche industry, and it is getting to be a harder and
harder service to do exclusively and make a living. If you decide you have to do
it, ideally find a gig as an assistant with an established engineer and learn and
watch for a while before really worrying about doing any mastering. If you can't
find that gig, or you don't want to wait, start small. Do cheap work and screw it up
and it was cheap so what did they expect. Get a real monitoring set up ASAP,
then some basic outboard gear. As you and your studio develop, charge what
you're worth. If you get lucky and don't overshoot the prices your market can
handle, you too can barely get by doing something awesome for a living.
103
Part 2: Mastering Subjective Language
Punch: Pft. Who knows? I think of it as clear, defined transients.
Warm: Appropriate balance between low mids and upper mids/highs, favoring
the low mids.
Clear: Appropriate balance between low mids and upper mids/highs, favoring the
upper mids/highs. Ideally a perfect balance is both "warm" and "clear."
Harsh: Excessive upper mids / highs, particularly in the sibilant region.
Groove: What a funk band does.
Frequency Ranges:
Low: 0 to 80 Hz. Low-mid: 80 to 320. Mid: 320 to 1240. High-mid: 1240 to
4880. Highs: 4880 + (basically, two octaves each).
104
III. Adam Ayan
Adam Ayan is a graduate of the Sound Recording Technology program at the
University of Massachusetts Lowell. Upon matriculation, he interned at M-Works
Mastering in Cambridge, MA. He then moved to Gateway Mastering in Portland,
ME where he worked for a few years as a Production Engineer and Assistant to
famed mastering engineer, and owner of Gateway Mastering, Bob Ludwig. Since
then, Adam was promoted to mastering engineer and developed a highly
successful career in his own right, amassing multiple Grammy awards and
nominations. A select few of his clients include Rascal Flatts, Carrie Underwood,
and Lana Del Rey. This interview was conducted via Skype conversation on
Wednesday, November 25th, 2015.
K: Could you tell me a bit about how you first got involved in mastering? Did
you get into audio first as a musician or were you more interested in the
technical side of audio? Did you go to school for audio? Did you intern or
have an apprenticeship?
A: I’d really like to go way back and started out as a fan of music. As a kid I just
loved music. I grew up, of course, in the MTV era with the good days of MTV.
So MTV and FM radio were like the two places I heard music the most. But as a
younger person, I was just really really into music. By my early teenage years, I
started playing bass guitar. I like to think of it as I went from being a fan to being
a musician and then when I was finishing up high school I knew I wanted to go to
105
school for music, and I was gonna go to school for just music performance. But
one of the bands I was in at the time, I played mostly rock music and in rock
bands as a teenager. One of the bands I was in had made a recording at a
commercial studio and I think, looking over your questions about the technical
side of things, I really didn’t at that time know very much at all about the
technical side of what we do. I just knew I loved music and I loved playing music,
I was a musician. And when I was at the studio, I remember the time going by
really fast, really enjoying the process, it was a completely new process to me.
And all those positive things about that experience… so when it came time to
look for where am I going to go to school, what am I going to go to school for… I
knew I wanted to go to school for music performance but I thought, of course my
parents were like, you should go to business school. And I thought, what if I go to
school for music performance and recording? There’s this other thing, you know,
that will broaden my horizons in terms of what I could do after school and what I
could do professionally. And of course, I pretty quickly found the program at
Umass and actually I applied for early acceptance in the fall because I knew at
that point I wanted to go there so it was the one school I applied to, I got accepted
and I didn’t have to do any other applications or essays or anything else. So that
was sorta how it started for me but once you get into, what, I guess it’s second
semester of sophomore year, you get into your first recording classes. Once that
happened, my entire perspective on what I wanted to do changed. At that point I
realized I wanted to become a professional musician anymore, I wanted to
become an audio engineer. And all that technical stuff that I didn’t really know or
106
understand before, I wouldn’t consider myself a technical kind of person, I just
realized that I had an aptitude for it. But of course, all the way through that, and to
present day, I feel as though… the technology is interesting, I love technology, of
course, but it definitely takes a back seat to music for me. And, you know, that’s
why we’re all into it. Most of us are into it for the music side of it. I definitely
think that there are people in our industry that really are into the technology side
of it. And that is maybe more than the musicality side of things. For the music
guy, the technology is a means to an end and what’s important is making great
music and great recordings. That’s kinda my perspective. And like I said, I take a
little bit for granted that I have the aptitude for the technology side of it and I
know that stuff really well and can move forward with learning new things easily.
It comes very easily to me, the technology side of it, but that’s not what gets me
going every day. So that’s pretty much it, in a nutshell of how I started out.
K: As your career advanced, how did your philosophy on mastering evolve?
Is there anything you know now that you wish you knew when you first
started?
A: I think the one thing that I can point out to you that has evolved a little bit over
the years, and that I feel like I learned fairly early on, but from project to project,
you have a different mindset on is that if you look at what mastering is all about,
for lack of a better way to say it, we take recorded music and we make it sound
better. We make it sound as great as we possibly can. And that can mean a lot of
107
different things and it’s a little different for each person. But, starting out I felt as
though, you know, I’d be given a mix and of course, in theory, I feel like this all
the way through today, that the mix has been approved by the client. Somebody
liked what they did. There’s always something that maybe needs to be fixed, and
that’s the thing. But we’re starting at a point where the client really likes the mix,
the mix engineers are happy with it, the producer’s happy with it, the artist is
happy with it. My job is to make it sound better. And starting out, I guess maybe I
didn’t take as many liberties as I did within a few years of really feeling
comfortable as a mastering engineer and as I would today in terms of, always
respecting the mix. And I’m in this great place where I get a lot of really great
mixes so it’s usually like, why do I make this mix sound better? I’m not going to
turn it into something that it shouldn’t be or isn’t, right?
The one thing that I feel has evolved is, has kind of ebbed and flowed, for
me depending on each individual project and the kind of things I get is, I learned
fairly early on is to not to be afraid to go for it. You know, if in my mind, I’m
like, Ok, well this is the mix that’s been approved; everybody loves it and my job
is to make it better, if I think I’m making it better, with instead of, you know,
going this far with it and going that far with it, I learned fairly quickly to not to be
afraid to go that far with it and see how the client reacts. And if it needs changing,
we change it, you know like that. So that is something that I think evolved with
me and continues to evolve because I think it’s different with every project and I
think you have to know the client you’re dealing with as well as you possibly can
to know whether or not if that’s acceptable to them. You know, today, I might
108
work on a project for one client, they want me to go super far with it and for
another client, they want me just to make what they gave me better and not take
serious liberties with it. So I think that’s one thing that is forever evolving and,
again, is different on a project-by-project basis. And early on, I probably would
have leaned more on the side of not taking super liberties with whatever I was
doing… make it sound better, of course, and improve it as much as I can, but after
I gained some confidence, I was like, I’m just gonna go for it, you know? And I
think what’s evolved is I realized you can’t go for it with everything, not every
client wants that mentality, so it changes on a project-by-project basis.
K: And you can get a sense of what the artist is looking for?
A: Yeah, absolutely. You know, I have some record producers who I’ve worked
with for over a decade and I know what they like and I know some of the liberties
I might take if it wasn’t their production, it would be the wrong thing to do. So I
show some restraint in those situations. And others I know they want me to take
every liberty, you know, go as far as I want with it, and I do that. And what’s
interesting is the flipside is when some clients will be like, Oh I wish you would
have taken that a little further, just do whatever you want with it. And in some
instances, the flipside instances, I’d be like, well, but you gave me a great mix.
You gave me something that is awesome, the artist loves it, I don’t need to go that
far. Like, you’re imagining I could go further but as an experienced mastering
109
engineer, I’m gonna say, no I don’t need to go any further with that because this is
where it lives best.
K: Do you think it takes a few years to realize when to stop? Like, having the
experience to know how much is enough?
A: Yeah, I think so because, I mean, I hate to say this but I feel like I learned it
pretty early on but I think that when you’re first starting out you kind of want to
try everything. And sometimes it’s like you can throw the whole kitchen sink on
every project and you start to realize that you find with your ears and your
experience that not everything needs that. So I think there was a process for me
learning that but maybe the reason I knew that so early on was, having been Bob’s
assistant, his mentor. And I’ll take that one step further, when I was assisting him,
when I got to a point when I was assisting him when I knew exactly how he
would master something, I felt like I just had a really good bead on how he would
do something. And to that point, he would come in the morning after I set up and
EQ’d a couple of tracks and most days he’d come in and be like, That’s exactly
what I wanted. The learning how far to go or not to go happened before that I
think. You know, as his assistant. But at some point I felt that I got to this point
where, there were a couple of years, of course, where I was mastering my own
records and developing my own clientele but I was still assisting him. I was both
of those things. I was still developing clientele and I wasn’t mastering my own
projects every day and the days when I wasn’t, I was assisting him. Or on some
110
days, doing a little bit of both. And I got to a point, and all because of that
assistantship experience and his mentorship, where I would be like, Ok I’m
assisting Bob on one of his projects and I’m gonna do it this way because I know
that’s what he would want. I’m doing my own projects now and I’m gonna do
them this way because I know that’s what I want. There are slight differences.
K: So you’re developing your own style.
A: Yeah, exactly. If anything, and I guess my own style, and I’ve had clients say
this in different ways to me, but I feel like my style is similar to what Bob does
but it’s maybe a little more aggressive, so it’s maybe a little more… pushing it a
little more and going beyond the boundary Bob might have on something… if
there are any differences between the two of us. And I learned where those
boundaries were being his assistant. And I learned, I wouldn’t cross that boundary
on his project because I would respect that’s what he would want. He would come
in and want me to dial it back or change it if I’d done that. But on my own
project, I could cross that boundary line. I knew where my boundary was.
K: Are there any projects that stick out to you as having a particularly
challenging aspect or technical difficulty that you had to overcome? What
was the nature of the challenge and how did you react to it?
111
A: Sure, I gave a little thought to this just before we hopped on Skype and there
were two that I could think of that were pretty close to each other, and also I think
they dovetail well into what I think the next question is. And one of them was
this, and I might have played this. You were up here, right? And I played this. It’s
the Rock and Roll Hall of Fame concert and the other one was this Joe Satriani
DVD. So both of those came within a year of each other and what was
particularly difficult about both of those projects is they are very large in scope
and there was a lot of work that had to be done. So in other words, the Rock Hall
of Fame thing was about five and a half hours of music to be mastered in stereo
and also mastered in 5.1. Yeah, right! And to further complicate that, it was a
bunch of different artists. So there was this thing where when they did those
shows, several artists got a set. Like, here was your forty-five minute set, or
whatever it was. And it was like, Ok, U2 has a set and they’d bring up all these
other performers. Springsteen has a set and he’d bring out these performers,
Stevie Wonder has a set and he’d bring out these performers. So, not only was it
five and a half hours long, but it was really varied musically. And then to add to
that, when it was mixed, a vast majority that was mixed by the same two mixers,
but some of the bands brought their own mixers in. So not it’s like, it’s all these
other artist plus it’s four or five mixers, something like that… and in stereo and
5.1. So how do you get through all of that work efficiently and get the result
creatively that you want best? The Satriani thing was similar, yet different in the
sense that it was shorter, it was one artist, one mixer, but it was stereo, 5.1, and
7.1. So there were three different mixes to master. So in the case of both of these
112
projects, It was like, Ok I have to do all of this, and I’m gonna get through all this
work, it’s gonna be complex, it’s gonna be complicated, and it’s gonna take a
long time. How do I do this most efficiently? And jumping from, say, stereo to
surround sound, how do I make the leap from stereo to surround in the most
efficient way as well? And what I decided to try was, I’m gonna get myself a little
outside my comfort zone, and my comfort zone at the time was to use a lot of
analog. I’m gonna get myself a little outside my comfort zone. I’m gonna do this
all digital and I’m gonna try to do as much of it in the box as I possibly can. And,
of course, I’ve done a lot of projects like these and a lot of them I’ve done all
digital but in this case, I was really trying to keep it all in the box, really try to be
able to automate as many things as I could, really try to be able to copy-paste
automation with the stereo to the 5.1 or at least efficiently get from, you know,
stereo automation to the 5.1 automation and do all these things that would make
the process as quickly as possible, yet still yield the best results as possible. So I
went into it with that mindset knowing that if this isn’t going to work out for me
creatively, I’ll just pull the plug and go back to my comfort zone. But in both
cases, this is where I started to discover that I didn’t need to stay in the analog
domain, or go into the analog domain with every project and yield the results I
wanted. So even in the box, I tried some new plug-ins that I hadn’t used very
often that I thought would be helpful in this process. So adding these things into
the signal path is always a scary thing, especially in mastering. But I just went for
it and started to realize, wow, this stuff in the box has come so far now for
mastering that I’m not missing my analog, and didn’t miss my analog in those two
113
projects at all. And since I’ve already got myself out of my comfort zone with
those projects, I continued to refine my process. Like, do I want to go analog for
most, and do I want to do that signal path for most of my projects or do I go
digital? And I feel like those projects were sorta like the beginning of me starting
to stay all digital and finding tools that worked for me completely in the box that
were surpassing what I was doing with the hybrid signal path.
K: Ok, that can lead us into the next question. You obviously use a lot of
digital. In a lot of the conversations I have with people, especially at M-
Works, is that they can’t do what they do without the analog gear. Do you
think that’s just habit or superstition?
A: I mean it could be a number of things. I’m sure certainly that it’s not just the
guys at M-Works that feel that way. I would have felt that way five years ago. I
would’ve sworn up and down that my analog was doing better than the digital
signal path and that the hybrid was the way to go. But I think it’s habit, and I
think in mastering, I mentioned that when you add anything or change anything in
your signal path, it’s not a light thing to do. You do it and you’re really careful
and you’re really cautious. Every mastering engineer knows their signal path well
and may have elements of their signal path that change depending on the projects,
but the idea is that you know your signal path all the way around really well. So
you start changing it up, it can be daunting and you want to feel really
comfortable with that. But I’ve come to this place now that, and with those two
114
projects as examples of a starting point in trying to do everything digital, where I
started to realize that I really do think that digital is better all around and I’m not
finding that there are analog tools that are making me want to go back to analog.
And in doing this, a number of times I’ve started off with my analog signal path,
and said, well, I’m gonna do my normal thing, maybe I’ll try the digital thing.
And I started to realize that when I compare apples to apples, I was becoming less
and less happy with the results I was getting through my analog signal path. And
I’m not sure if I can put my finger on why. I mean phase-shift is always an issue
when you use analog. If we had this conversation 5 or 6 years ago, and I would
have said to you analog always sounded better to me, or a hybrid always sounded
better, some engineers would say, Oh but you need to do a D/A and an A/D
conversion and you’re doing all these extra conversions, technically that’s not a
good thing. My answer to that would always be yeah, but I have the best
converters that you can find. And I always find the sonic benefit of using my
analog signal path far outweighed any issues of conversion and I still believe
that’s true. But, lately, when I’ve been trying to go analog, I feel like I’m hearing
something that’s not jiving for me and staying all digital is feeling better to me in
a lot of ways. My other theory, we may have talked about this when we talked at
Parsons’, but my other theory on that is that a vast majority of what’s happening
before me now, you know, five or ten years ago, when folks were mainly doing
things in the box, their tools weren’t providing those colors, not necessarily the
sound of just analog, but colors and vibe that you couldn’t get out of digital at the
time. And I feel as though there are some many really good colored plug-ins now
115
that are inducing, whether it is harmonic distortion or other things that we’ve
always lost, things that have always worked well for music in the analog domain.
I feel like those tools exist now in the digital domain where they really didn’t
before.
K: So emulations – UAD plug-ins? Stuff like that?
A: Yeah, whether it’s UAD plug-ins, emulations of analog devices, or even just
other cool new digital devices that sound better than they did ten years ago.
Which I think is getting that color that we missed, not being in the analog domain
before, those things are now getting colors for us at an earlier part of the process.
And I never went out to analog just for the sake of analog. But, the things that I
would get out of my analog signal path, I feel like I’m just not getting. And
maybe now I am hearing the phase-shift better than I would have before because
I’m not getting, the phase-shift was far outweighed by the sonic benefits of the
analog path in the past that makes it not the case anymore. That’s my theory at
least. And really, again, like ninety-nine out of one hundred times now, I’m doing
all digital. I’m happier with the results.
And it really truly is not an ease of recall thing for me. Recall in the
analog domain for me isn’t that hard either. But the sonics are really what’s
driving that for me. It’s like, sonically staying in the digital domain is working
better for me. And maybe not for everybody, but for me I feel like it’s superior.
116
K: Ok, that’s reassuring. It’s like now I don’t have to go out and buy thousands of
dollars worth of gear.
A: Right, like if I had to outfit this room today, you know, I sit in front of tens-of-
thousands of dollars of both analog hardware, digital outboard hardware… You
know, it’s great I still have them if I feel like it will be useful, I will certainly use
them. But if I had to outfit the room again today, it would be a fair amount of
plug-ins and I wouldn’t need all those hardware devices. It would be a lot less
expensive.
K: Right, and still have your pristine monitor path.
A: Exactly, that’s the most important thing. Like you had mentioned, if anything
came to my mind in this interview, that’s one of the things that I come back to, is
your monitor path and listening environment. You know, occasionally I get asked,
Hey, I’m mastering at home or I’m mixing at home, and I want to spend some
money on plug-ins and tools, what should I get? And I’ll always say, well what
are you using for monitors? And why don’t you focus on your monitor path first
because that by far is gonna make such bigger difference in experience in your
ability to do your work well than any one plug-in or any other device will. So
monitor path is super important. And again, yeah, if I had to outfit this room
again, that’s where most of the money would be is the monitor path.
117
K: How much communication is there usually between you and the artist or
producer? Do you master the record as a whole and send it to them for
revisions or do you send them a few tracks for review? What is your policy
for revisions? Shootouts?
A: So every project is definitely different. If I were to say… the vast majority of
the people that I talk to or email back and forth with… most of the time, the
majority of them would be a record producer or a mix engineer. In fact, I would
also say that those are the two people in the process that most often would be
requesting me to master their record or whoever you’re gonna master with.
They’re usually the folks who chose who the mastering engineer is gonna be. So
those are the folks I talk to the most. I certainly talk to some artists, and indie all
the way to superstar, it’s usually a matter of how hands-on the artist is in this part
of the process. In most cases, I would say most artists rely on their record
producer to interface with me, and then, of course, they end up listening and the
artist is a part of the approval process as well. But most days I come in, I get
mixes, I do my job, I may get some notes from the artist, the producer, or the mix
engineer. I do my thing and send it back to them at the end of the day. They
spend, hopefully some time in a good environment listening, and then maybe
come back with some revisions. Come back and say, hey it’s all approved or they
come back and say we need some adjustments. If they want me to make some
adjustments, or now that they’ve heard it mastered, they want to make some mix
tweaks, that sort of thing. And there’s a back-and-forth until it’s approved. So, the
118
communication can vary from project to project, what almost never varies is the
fact that what I do will go out to a number of people for the process of listening
and for approval and that almost always includes the artist, the record producer,
and the mix engineer, and may include some other folks as well. So I’m not
working in a vacuum. And I was actually just saying this to Gale yesterday and
since you’re at M-Works, I’d be interested to know if this is still how things go
there. But, the way that we work here is we do our thing, we give our clients
references, whether they’re here, they leave with a CD or if they’re in London or
Nashville, whatever, we’ll send them an upload, which is the most, how we do
most of it. There’s still an approval process and there’s never a, “we master the
record today, we cut vinyl masters, it’s done” kind of thing. And I remember
when I was at M-Works it was very different, it was almost every session then
was attended. This is in ’97 and ’98. So every session I was involved with at M-
Works was attended by a client, mostly because they were regional and they
would usually leave with a reference and a vinyl master. And we’ve never
operated that way, we’ve operated very differently. And in fact, sometimes the
reason Gale and I had this conversation yesterday was that I worked with a client
yesterday that was here, and I think their expectation was that when they left was
that they were getting the final master. And not to think that they necessarily
needed it yesterday, but when I asked them at the end of the day, what they
wanted to leave with for their reference, they started talking final masters. And I
said, oh no no no. I mean, what you’re getting today is a reference that you should
listen to, make sure you love, and then you should let us know and we’ll make
119
final masters. That’s sorta the next step in the process. And so at any rate, are they
still doing it like that at M-Works? Where it’s like end of the day, final mastering
and it’s done?
K: You know, I honestly don’t know. I’ve only seen one client come in and
actually do an attended session.
A: I’m sure things have changed. I mean, I was there eighteen years ago.
K: Yeah, and I think there is a pretty hefty revision process. Alex (Psaradukais)
does a lot of stuff like Dropbox uploads for the single and he’ll get approval to do
the rest of the record.
A: Sure, so I was just curious. But in terms of your original question, that is
usually how it works is we’ll send a reference off to whoever’s involved in the
approval process, which again, always includes the producer, and the artist, and
usually the mix engineer. And then they’ll get… somebody in that camp will get
back to us with revisions, if there are revisions, or an approval if there is an
approval. Most projects, there is a little bit of a back-and-forth. You know, there
might be a, Hey we love the EQ but we want to change the sequence or we want
to send you a new mix. Or there may be a, We love it overall but we want to make
some overall EQ changes. There’s usually a back-and-forth until the point at
which they approve it. And then we can start getting in to making final masters.
120
K: OK cool, moving on. So I know you guys are working on Pyramix
whereas a lot of people use Sequoia or other DAW’s. Why did you choose the
DAW that you did? Did you A/B different ones? Was it a matter of
workflow, stuff like that? Could you talk a bit about that?
A: Yeah for sure, absolutely. We definitely did that. At the time that we moved to
the Pyramix, our entire world had changed around that time. So take one step
back in this, which I think is a valuable part of this conversation. We worked on
Sonic Solutions for a long time. And, of course, most mastering houses did up
until the early 2000’s, almost everybody was on Sonic Solutions. It was the best
sounding DAW and at a time where there were some really bad sounding DAW’s
for whatever reason under the hood, things didn’t sound good. Sonic always
sounded great. Sonic’s editing model and workflow was really tailored to
mastering. But what Sonic couldn’t do by the late ‘90’s was it couldn’t do hi-res
audio, or it didn’t do it well. And it didn’t do multi-channel audio very well. And
it certainly did not to at all do Direct Stream Digital, or DSD. And we were doing
all those things. So it was almost like, within a course of a year, we went from
everybody knowing Sonic Solutions to, at least me, being Bob’s assistant at the
time, knowing about four or five different workstations. Protools was just starting
to come on for us and we were getting most of our digital mixes as .wav files or
as Protools files, which at the time might have been Sound Designer 2 files or
.aiff files. We were doing multi-channel into SADiE because we found that it was

121
the best for us at hi-res and multi-channel. We had Sonic’s new workstation,
Sonic HD, which really was just crap. It was meant to do hi-res for us and it
didn’t really work. It was really a nightmare. We had Sonoma, which was Sony’s
proprietary DAW for DSD. And we had one or two others that we used a little bit
and we realized pretty quickly that this really sucked going from one workstation
to another depending on the project. If we were doing DSD, I’d have to sit down
at Sonoma, which was a really bad editing model. And I’d remember all my
quick-keys for Sonoma, I’d remember all my tricks for getting past its bad editing
model, and I’d go over to Sonic and have to reconform my thinking to that. And
then I’d go over to SADiE… So at any rate, when we came upon Pyramix, we
were looking for an application that did it all. At the time it was either going to be
Pyramix, SADiE, or Sonic HD. And Sonic HD pretty quickly was out of the mix
because it just didn’t function very well. It’s hardware didn’t interface with its
software. It was really clumsy. We just decided to ditch it. So it came down to
Pyramix and SADiE, which SADiE was their latest and greatest at the time would
do DSD as well as hi-res PCM. And they both sounded really good. They were
both superior to other workstations sonically and they both had tools for DSD,
which at the time we thought it was going to be a bigger deal for us than it turned
out to be. Pyramix had better tools for DSD. And Pyramix also, so sonically there
were those reasons. It sounded great. It sounded as good as SADiE, if not slightly
better and it sounded better in the DSD domain, at least in terms of processing in
the DSD domain and using actual tools like equalizers and limiters. So it had that
up on SADiE and everything else. And workflow-wise, it allowed us to continue
122
the way we worked in Sonic Solutions. So the one complaint I hear from Pyramix
users, especially relitavely new Pyramix users, is that when they sit down at
Pyramix and they’re like, how the hell do I use this thing? It’s so complicated,
there are so many ways to do things, how do I do this? And what I tell them is that
you gotta narrow your field of vision in Pyramix to something that works for you.
And knowing that about Pyramix before we got onto it, we realized very quickly
that we could take that Sonic editing model that we all knew so well and we could
port it over to Pyramix. In other words, we could put our Sonic hat on and, how
would I do all these things in Sonic? We could make Pyramix quick keys, lets
make Pyramix templates that look like Sonic Solutions. So source and destination,
one, two, three, and four point editing and similar quick-keys. Because we knew
all these other workstations, we also said, well you know there’s this quick key
here, this function in Protools that we really like. This quick key or function in
Sonoma that we really like. Can we emulate that on Pyramix? And in a lot of
instances, we could. So it was both about sonics and about workflow. And
Pyramix felt superior to us in both of those ways. And then the workflow side,
Pyramix just does things… I shouldn’t speak about Sequoia or other workstations
because I haven’t had any experience with them. But in terms of everything else
I’ve ever experienced, nothing else would conform to our workflow like Pyramix
would, or did. And lastly, in terms of workflow, being PC based, it allowed us to
network in a way that you just can’t do on the Apple side of things, which is huge
for us. I mean, you’ve seen our place. We have two mastering rooms, we have
edit rooms, and everything is networked together. Yeah, so I can be mastering a

123
record today and one of our production engineers can pull up my record from last
week that’s now approved, has now gone through that process that we spoke
about a few minutes ago, and they can start making masters. I don’t have to stop
what I’m doing to do final masters. I can continue on mastering a new project. So
all of those things were big for us, and you know, that was a nutshell or a
longwinded way of telling you why we chose Pyramix over everything else.
K: Do you find that you’re still getting many DSD projects? They just come
along now-and-then?
A: Now and then is probably the best way to say it. They’re few and far between.
It seems like every couple of years, I feel like over the past few years there have
been a bit of a push for DSD again. And I think what’s probably driving that is a
lot of people, certainly on the coast at least, have enough internet bandwidth that
if they want to buy hi-res audio, they could buy and download DSD audio. I think
the major record labels view hi-res audio as a means of moving forward in terms
of, I don’t know if I necessarily agree with it, but as a business model… they
probably love the fact that they can sell a DSD file for about three times as much
as they can sell iTunes files. You know, because there’s an audience for them.
There are people who’ll buy them because they’re DSD files. And that’s not to
say DSD doesn’t sound superior, it certainly does. But I think that’s what’s
driving it now. With that said, they’re still few and far between. This past year,
I’ve done a handful of them and they’ve all been live Bruce Springsteen records.
124
So for the past year, and hopefully moving forward, Springsteen’s camp has been
going back to his archives in terms of recorded concerts and either working from
analog, in terms of the early ones, working from two-track analog, or remixing…
most of them are actually re-mixed and they’re being mixed to DSD and then I
am mastering them DSD. And then they’re either for sale at livespringsteen.net or
nugs.net, which is a company that does a lot of live music for a lot of artists.
They’re being sold as DSD files or hi-res PCM files, audio CD’s and the whole
gambit. That’s where most of my DSD work has been. There really hasn’t been a
lot of it.
K: Do you find that it sounds better than a 192-24 bit file? How is it different?
A: It has been a while since I’ve done a comparison. But we had done those
comparisons ad nauseam like ten or fifteen years ago and it sounded slightly
better in different environments. It sounded slightly closer, if you actually took,
say, an analog tape, and you digitize it 192-24 and you digitize it DSD, you know,
essentially from the same exact signal path, you know a “Y” to go each direction.
And in an apples-to-apples comparison, the DSD always sounded a little closer to
the analog, so slightly better. I would counter this, though, with the notion that in
the DSD world, the tools are extremely limited. It’s almost like that discussion we
had about analog and doing analog conversion, D/A – A/D conversions, at some
point now, we always found that whatever ding you might get when doing
multiple conversions, was far outweighed by the overall sonic benefit of using the
125
analog signal path. Analogous to that, I sorta feel as though DSD versus PCM,
even say, 96-24 PCM, the amount of “better” the DSD sounds, it was usually far
outweighed by the fact that there are so many more tools in the PCM world than
the DSD world. Once you commit to DSD, at least, beyond just committing
yourself to using it just as a recording format, that’s where it thrives. But if you
commit to it beyond that, as an overall production format, immediately your
hands are tied by the tools that are available and that means there are very few
tools in the DSD world. That’s why DSD never took off. At least from a
production standpoint is that the tools didn’t really exist early on. Here we are
fifteen years or so later from where we first started doing DSD and they haven’t
improved very much at all. In the PCM world, there is just a plethora of really
amazing sounding tools to use. So that’s what made DSD a hard sell all these
years.
K: Ok, I guess the last question is a bit selfish. Do you have any advice or
words of wisdom for somebody who wants to start a career in mastering?
A: I think the best advice I could give you is to try to find a good mentor. I think
that in 1997 or ’98, for me was a little easier than now it is for somebody in 2015,
but it still exists, there are still opportunities out there. And I think that that is
really important because, you know, to get back to one of your first questions
about the things that have evolved or changed in terms of my process and what I
learned early on in terms of how far to go with something or whether I’ve gone
126
far enough, I learned a lot of those things by being an assistant, my being Bob’s
assistant. I learned those things a lot faster that I ever would have learned them if
I just decided, I’m going to be a mastering engineer, I’m gonna buy some plug-ins
and a couple of the workstations and start offering that service to clients and sorta
learning on my own. There’s a huge benefit to having a mentor. There’s also a
huge benefit to being around your peers. And we’re a smaller, in terms of
mastering engineers, it’s just Bob and I, and we have other engineers here. But we
all learn something from each other, especially Bob and I learn things from each
other every day, like oh hey, I tried this new plug-in, you should try it out. Or hey,
I tried this new plug-in, you should watch out for this or that that’s not super
obvious. You know, I think that even kind of before my time in some ways when
there were larger recording and mastering facilities, you could learn from a
number of mentors and you could learn a lot from your peers. So, those would be
my biggest two pieces of advice. Find a good mentor, and really spend a lot of
time with your peers and try to learn a lot that way because I think that in 2015,
for several years now, folks are more apt to be in their own little bubble, like you
miss… there’s a lot of experience and a lot of things you miss out from sorta
knowledge sharing, and even just, off the cuff, decisions, whether or not it’s
creatively or technically that you get from those interactions.
K: Yeah, because I’ve thought about that. Especially as a mastering engineer, you
are able to just sit in your cave by yourself and do mastering and not have the
interactions with other people. That’s one reason why I like UMass Lowell so
127
much is, you know, with our friends, we’re in the studio every week, talking
about audio… Yeah, it’s just a good community to like, bounce ideas off of each
other and to learn from each other.
A: Yeah, and I think that that’s invaluable. I think that if you can continue that
community in the professional world and in your professional life, you’ll gain an
awful lot from that. I think that stuff is super important. Those are some of the
things that, unfortunately, the way the record business is now, it changed a little
bit and it’s harder to find those situations, but they exist. I mean that’s why I got
to things like Parsons’ and AES and do those things because we are on a bit of an
island up here in Portland. Bob and I have each other, I certainly have some
friends that are in the business that are around here that do really great work and
I’ll get beers with and chat with but, you know, we’re not like in New York City
where I can just be in one facility and walk down the street and visit friends, that
sort of thing. So, I think there’s a lot of value to that. And you weren’t able to
make it to the educational summit at the end of Parsons’, but I think the very first
point that came up, or the very first question that Paul Leerman posed to the panel
is, I’ll paraphrase, but it’s something to the affect of, should we be teaching
professional audio, especially in 2015 with limited job opportunities, especially in
music production. And through the conversation that came out of that question,
one experience I remember having at UMass Lowell that always stuck with me
was… Well let me tell you the experience and I’ll tell you what I mean, but did
128
you guys have to take a class called Recording Industry, well were you undergrad
at UMass?
K: No, I wasn’t.
A: No, that’s right, you went somewhere else. But, as an undergrad, there’s a
class called Recording Industry when I was there. I think it was junior year and it
was basically like a means of explaining all these areas and options for your
professional livelihood when you finish up at UMass Lowell. Like, don’t just
think about being a record producer, or whatever you’re thinking, you should
know that all these other things exist, which is a really powerful thing. But I
remember in the first class, first day, first class, the guy that was teaching it,
Marty Pulland I think was his name, one of the first things he said, basically was
like shitting on the record business! Saying, how many of you guys want to own
studios when you graduate? Only at this point two or three people raised their
hand. He was like, you’re not going to own a studio, you’re not going to open a
recording studio, right? But out of that conversation, one thing that came up was
that he said, if you think you’re gonna be Prince’s engineer at Paisley Park, that’s
probably not gonna happen. And I remember sitting there being like, uh, that was
at the top of my list of places to work. That was before I knew about mastering,
before I knew that’s what I wanted to do. I was like, I love Prince. He has this
studio called Paisley Park, I wanna go be his engineer. But what I got out of it
was, you know, I said that and another gentleman that was on the panel said, well,
129
my friend I went to Berklee with ended up being an engineer at Paisley Park.
Anyway, my whole point of this story and the reason why I’m bringing it up to
you now is that Marty Pulland would have also said, you’re not going to become a
mastering engineer at Gateway Mastering Studios and have a room build for you
at Gateway Mastering Studios. If I had heard that then, maybe I wouldn’t have
come down this road. I think that he would have said the same kind of thing about
that. And my whole point is, find a good mentor, get out there and do it, and
especially when you first get out of school, it’s like, go for what you want to go
for. Even though it’s infinitely more difficult as it ever has been, but the
opportunities exist and if you’re the right person to do it, with the right mindset
and the right work ethic, you’ll find an opportunity similar to the one that I have.
Very few people do find them but they still do have them. Don’t shy away from
trying because you won’t ever know if you don’t try. You know, your career is
probably gonna zigzag a bit and maybe not be as linear as mine has been because
I think that is kinda unique. But just go out and do it and don’t let the Marty
Pullands of the world tell you that you can’t. He was like, don’t expect to be an
engineer at Paisley Park. Ok, I crossed that off my list.
K: Yeah, when I first started at UML, I was like, OK these guys send people to
Avatar, all these big studios in New York. I was like, I wanna do that. But then I
heard the reality of the situation and I was like, Ok so maybe not. That’s not for
me.
130
A: Right, well, the thing I love about the UMass Lowell program, a number of
things I love about that program is that they arm their students with all the stuff
that they need to be good as professionals, but they also arm them with reality.
And I also don’t think that they really completely discourage students by any
means from doing what they want to do even if it’s going to be a difficult path. I
think that they encourage them to do those things and they also arm them with the
reality. You know, this isn’t a glamorous business. I mean to that point, I was at
the Latin Grammys last week. I won album of the year, but I felt a little slighted
by the recording academy because they didn’t give me really good seats and I felt
like they don’t always take great care of their nominees, aside from maybe the
artists themselves. But that’s the way this business is. The Grammys are
glamorous and winning one is certainly glamorous, but it’s not the glamor that
most people might think it is. And I feel like at UMass Lowell, they do a really
good job of keeping you grounded in a positive way, giving you the reality of
what our industry is in a positive way while opening up all these other frames of
reference of other things you could be doing in this industry that might be just as
interesting to you as being a record producer or being a mastering engineer, or
whatever. I’m definitely one who’s like, go for your dream, go do it and try to
make it happen when you first get out of school and it’s a good time of your life
to do that. And it may very well happen. And if you don’t try, it’s certainly not
gonna happen.
131
K: Ok, I have a sorta unrelated question. But it kinda came up when you were
talking about how you and Bob share ideas and stuff. But I’ve always been
wondering, if I may ask, I know there’s inevitable hearing loss that happens, is
there anything that you guys do to protect your ears? Like do you take a break
after an hour just to rest your ears? Is there anything you can do to prolong the
inevitable as much as possible?
A: Yeah, no, I think protecting your ears is the number one thing you have to do.
And for both Bob and I, I mean neither one of us go to a lot of shows. And part of
it is we’re super busy. And I can speak for myself in the sense that I have a super
busy studio and I have a young family so going out isn’t something I do a lot
anyways. But when I do it’s always with earplugs. It just doesn’t exist going to a
rock show and any show for that matter, without earplugs. At the Latin Grammys
I had my earplugs. On the plane, earplugs are something that I had with me.
Earplugs are something that I carry around with me and I use them very very
often. And I’m walking down the street with my dog or if I’m out running, I live
in the city, if a fire engine comes by, I’m not too proud to do this (plugs his ears
with his fingers) as it’s going by. So it’s really protecting your ears in all instances
that I think is the most important thing that will help stave that off. And then in
the studio, for me, I mean I listen 85, sometimes 90dB SPL while EQ’ing. I do
take brakes. They’re not regimented, like on the hour, but you know, if I start like
I need to walk away for a few minutes, go get a glass of water, get a cup of coffee,
stop and do an email, that sort of thing, those breaks I think are really important
132
for my ear and for my mental fatigue. I find that, maybe because I don’t listen
super duper loud, but I find that mental fatigue sets in much faster than ear
fatigue. In fact, ear fatigue is almost not a thing for me. I don’t listen super loud
for long periods of time and I do take those breaks. I’m also fortunate enough to
be listening in a really well balanced environment. So it’s not like eighty-five to
ninety where like, two to five kHz is just tearing my head off the whole time, or
something. I listen on a very well balanced and very neutral playback and
monitoring situation, so that helps. I think everything that you possibly could
think of doing to protect your ears, in the studio, meaning don’t listen very loud,
take those breaks. And everything you can do to protect them outside of the
studio, meaning wearing earplugs in any loud situation, you’ve gotta do and that’s
the way to do it. Interestingly enough, you were at the Platinum Mastering panel,
right? At AES? That question came up, and I was the first one to say anything and
I was like, well that’s a loaded question. And Tom Coyne’s response was I don’t
want to know. He’s like, I don’t want to know. I feel good, I feel like my ears are
fine, and as long as my clients continue to love everything that I do and keep
coming back, and the people who are working with me feel like I’m in a good
place. And I mentioned that to Jonathan Wyner, you know, a mutual friend of
ours, and he actually takes the opposite tact, which I thought was interesting. He
annually goes to get his hearing checked so that he feels like he can at least have a
baseline as to where his hearing is. I sorta lean more on the Tom Coyne side of
things, maybe not as brashly, but I do everything I can do to protect my ears. I
don’t get my hearing checked often. I can’t remember the last time I did. Maybe

133
as I get older I might start falling more… if you think of those as two extremes,
Tom’s take on it and Jonathan’s take on it, maybe as I get older, maybe I’ll start
leaning more toward Jonathan’s take on it. But it is a really important
consideration, to make sure that you protect your ears everywhere that you go.
K: Yeah it’s funny, my wife always makes fun of me. Even when I’m just
walking to campus, I have my earplugs in because, yeah, loud trucks go by and
it’s just annoying.
A: Annoying too, and I think just as a person in general, being a human being in
general, society’s pretty loud in general and it can be annoying. And I really do
think it grates on your whole body and mind in some ways. So I applaud you for
doing that. You never know, you live in Lowell and a fire engine comes by that’s
super super loud and you happen to be really close to it, it could hurt your ears
and I think it’s wise to do that. Even at movie theaters, pretty much anywhere I
know it might be loud, my earplugs are with me. It really makes a difference.
K: I know, we were watching the new Mad Max when it came out and the whole
time I was like, ah!
A: I know, any, like action, shoot-em-up movie. I went to see The Dark Knight
Rises when it came out a few years ago at our quasi-IMAX here in Maine and I
had my earplugs in and I was like, it’s just unbelievable how loud these situations
134
are. I mean, we’ll go to shows and it’s almost criminal just how loud shows are. I
mean, the Grammys, it was super loud in there. It’s like you are putting on a show
for, in that case, the entire Latin music industry, but a lot of people like myself in
a lot of genres of music, or the regular Grammys for that matter where the entire
U.S. record business is there and you’re making them all deaf… It’s not cool!
K: I know, it would be a terrible tragedy if everybody goes deaf.
A: Right! It’d be good for you guys getting out of school (laughs).
K: Yeah! But we do need their expertise and experience too because we’re a
bunch of dumb kids.
A: Right, well I don’t think that’s the case. You’re probably a lot smarter than
you give yourself credit for. Also, and with the ears things. I think that in general
most people have better ears than they would give themselves credit for. And then
somebody like yourself who is exposed to so much critical listening, whether it be
academically or what you do on your own out of interest and knowing that this is
your profession, you probably have better ears than you think. But yes, having a
mentor to help you with the experience and their even more refined ears is really
important as well.
135
Part 2: Mastering Subjective Language
Punch: Punch to me is good low-end response, though good and tight low end
response, a good glue between the kick drum and the bass guitar in the world of
pop and rock. And also to me is the main driver of the rhythm section of any
recording. That’s how I would define punch.
Warm: Warm I think is similar, yet different than punch. It’s about the low end.
It’s still about… I was gonna say, It’s about warmth. No, it’s still about the low
end. It’s still about the bass guitar and the kick drum in most pop and rock music,
but I also feel as though it’s not about the tightness or that glue as much between
the kick drum and the bass guitar or the low end in general. To me, if you talk
about the difference between warm and punch, warm is a little more open, a little
more subdued, and less tight, less glued. And also, unlike punch, to me, warmth
not only is about the low-end response, but is also about a duller top end. I don’t
think you have warmth and you have brightness in quite the same way. You
would never say something that’s warm is bright. Not only is it a focus on the low
end, and again, one that’s not tight or as glued as punch is, but it also is taking
away from the top-end in some way.
Clear: Ah, clear. I don’t usually use the word clear a lot, but I use clarity quite a
bit. It’s usually about detail, and often it’s about detail in terms of individual
instruments. If I’m describing a recording that sounds clear to me in some way,
136
maybe that means I can pick out individual instruments in their own clarity.
Frequency-wise, it usually means upper midrange to overall top air. Things that
open up clarity and open up upper harmonics on an individual instrument.
Harsh: Harsh to me usually means upper midrange, too bright, unmusical, and a
listening experience that is not pleasant at all. And the kind of thing where that
part of our hearing range, that 2-4k range is sorta being overwhelmed with that
kind of frequency response. And it also means lack of low-end warmth.
Groove: Groove is similar to punch for me. And maybe groove is somewhere
between punch and warmth. And again, a focus on the low-end, a focus on the
lower part of the kick and the bass guitar. Maybe it’s more glued and tight than
warmth is, but not quite as much as punch.
Frequency Ranges:
Lows: Low to me is all the way up to 80Hz, maybe 100 at the high end of it.
Low-mids: Whereas low mids, I would say 100 to about 500Hz. And, of course,
there are a lot of ways to differentiate between those two things but, in terms of
just overall perception, I really like low but often don’t like low-mid. I can
tolerate accentuated low a little bit but I cannot tolerate too much low-mid.
Perceptually, low-mid to me means cloudy. It also can mean sort of a fundamental
137
of a bass guitar, depending on where the instrument is being played, but often as
you get further away from low and further into low-mid, I get cloudy, that’s how I
would describe it.
Mids: I would call mid like 500 to 1,500 or 1,600Hz.
High-mids: Whereas high-mid I would call say, 1,500 and maybe on the higher
side, 2k, upward to 6 to 8k. High-mid to me is a double-edged sword. It’s very
important in terms of transient response on most instruments. It can be important
in the clarity, the clear range. You know, if you don’t have enough crack on the
snare drum, because you don’t have enough high-mid, then there’s a problem. It’s
a double-edged sword to me in that you can very quickly get into the harsh zone
that we talked about a minute ago with the high-mids. It’s really important that
they’re well represented and that transient response is good, but you can very
quickly get into a danger zone. And I think our ears get tricked by that danger
zone sometimes. Maybe it’s because of the sensitivity of our ears or maybe it’s
because that transient response that lives in there is so important to music, that
sometimes we can cross the line in terms of OK high-mids into bad high-mids
pretty easily and we can fool ourselves into thinking that the bad high-mids are
OK. And then that cold light of day, listen the next day can be like, Oh now we’ve
got into harsh.
138
Highs: So highs for me mean 8k and up. I can find a lot of pleasing things
perceptually in the highs. It’s usually to me about upper harmonics. Again, you
can, maybe not quite as bad as you can in the upper mid range, but you can go too
far easily and still be pleased by it and trick yourself a little bit pretty easily. And
for the entire overall spectrum, like, if I think about a part of the spectrum that
makes me the happiest, it’s usually the low. Yeah, and I guess that’s why I’m a
bass player.
K: Yeah, and I totally agree with you about the low-mids, like, 200-300Hz. I
usually refer to it as being muddy.
A: Yeah, and that stuff is usually, I’ve found over the years, having done mix
evaluations for people, and working with a lot of really really good engineers too,
that that range is the range that is most commonly problematic for recording and
mix engineers. Maybe for mastering engineers as well in lesser environments than
my own, but that is the most problematic range because I think it’s a difficult
range number one, and I think, in terms of monitor path, it can be the range that
lies to you the most. I feel that that range is the hardest to get just right in a room.
And for most recording and mix engineers, it’s the range that they struggle with
the most. And they might not hear that they have too much of that range in their
mix until it gets to me or until they bring it into another environment that’s not
lying to them about that range. So they end up with muddier mixes because of
139
that. Until they learn that about their space, and or fix that problem, which is a
hard problem to fix I think.
IV: Paul Angelli is a graduate of the Sound Recording Technology program at the
University of Massachusetts Lowell. After leaving UMass Lowell, Paul lived in
New York City for many years working in the indie-rock scene as a producer,
manager, and audio engineer. He eventually found his way to the famous
mastering house, Sterling Sound and worked there for nearly a decade. Paul
maintained his own client base of predominantly indie-rock artists and also was
the main assistant to Ted Jensen. Paul has since left Sterling Sound, currently
works for Bose, and has returned to UMass Lowell to pursue a masters’ degree in
Sound Recording Technology. This interview was conducted via phone
conversation on Saturday December 5th, 2015.
K: Could you tell me a bit about how you first got involved in mastering? Did
you get into audio first as a musician or were you more interested in the
technical side of audio? Did you go to school for audio? Did you intern or
have an apprenticeship?
P: You know, I stopped working in mastering in 2006. So I’ll fill ya in on my
story. I started working as a mastering engineer probably in about 1993. I was at
Sterling Sound for years – for eight years I guess. One of the reasons they were

140
interested in hiring me is I had been working in the indie rock community for
years as a producer, engineer, live mixer. I was known as a bit of a computer
geek, you know? I was the audio engineer that was the “geek” at any studio that I
worked at. Which basically meant that I’m no super genius at computers but I
knew more about computers than just to push the buttons on the applications. You
know what I’m saying? So when they brought me in, they were interested in
getting someone out of the New York indie community because up until that time,
this is the old music business now. Like, I’m pre-dating the ‘90’s like when they
wouldn’t even take a client in to do a mastering session unless you had a P.O.
from a major label. By the early ‘90’s, you know, IRS records, FFT, the indie
rock thing, for you, this day of the web and Sound Cloud and all this stuff, which
is great. It’s hard to understand really what it was like when the major labels had
total hegemony over how music got distributed. Indie rock was really indie rock.
They really comped it on radio stations at colleges. But that was even a very
different thing. You know, you would subscribe to fanzines that you would get in
the mail, stuff with your favorite bands. You know, really word of mouth. It’s
crazy, right? You learned about stuff at the local CD store. It was probably CD’s
and all that. There was vinyl but this in not the old-old time
K: So we’re into the CD age now?
P: Yes, firmly into the CD age. So I’m just tellin’ ya, when I came into Sterling,
now they wanted someone who was an indie guy and I think a lot of the bigger
141
facilities, the way to get your foot in the door was, you know, great you have your
client base, you start building it, and you’ll also do production work. Which
meant, you know, editing, QC, compiling, master generation. That kind of stuff.
Because then, the tools back then, Sonic Solutions was the only tool back then,
which got eaten by Roxio. So everything had to be done in real time. So one of
two workflows would occur. So I was Ted Jensen’s guy for like three years and I
maintained my own indie rock client base. So Ted, on his records, would start
EQ’ing and then once he had, if he needed editing or anything during the day.
Depending on the record, the budget, the timeline… Sometimes the client would
kind of walk between his studio and my studio where Ted would EQ pieces and
then edit with me. Sometimes my involvement would just be at 4:00 Ted would
come in and say the record’s ready, you know, make the masters, do the QC. We
were sometimes mastering actual PM CD’s to the CD format, but back then, the
big robust format for replication was ¾-inch video deck with the Sony 1630
processor on the front-end to get the digital audio off of it. Just to paint the picture
to you, there were still lathes in every room, but there were only two people
actively cutting vinyl at that time. One of them was, of course, probably the most
legendary vinyl cutter in the history of music, George Marino, who I was lucky
enough to be there when we did the entire Hendrix catalog to CD and to vinyl.
You know, the Zeppelin stuff. Actually Zeppelin, predated my time there. I did
the Cat Stevens catalog with Ted… Anyway, just to fill you in. The other guy
cutting vinyl was Tom Coyne, who was unquestionably the top R+B and Hip-Hop
and pop music guy. So I was lucky enough to sit at the knees of three of these
142
guys for years. It was a really cool experience. Each and every one of them,
particularly George Marino, he has unfortunately passed away a few years ago.
But, that man was an angel on this earth. You could never meet a lower-key
person. To know that everyone from Metallica… you know what I mean, to Yoko
Ono would absolutely not do a record with anyone other than him. You just sit in
that room thinking this guy’s amazing. So anyway, just to give you a little,
because this is going to frame a lot of my answers here. So, you know Adam
(Ayan) and I can connect you with Ue Nastasi down at Sterling as well.
K: Yeah, that’d be great!
P: Yeah, really great engineer. Really more into the, you know it’d be good
probably. He’s really more into the metal scene… to give you up-to-date stuff.
You know, the technology changes so much faster than it used to. So, alright,
that’s sorta how I got involved. Yeah bla bla bla… (reading from the
questionnaire) audio as a musician or are you more interested in the technical?
Yeah, I did both of them. From the minute I was a kid, I was really really into it.
So yeah, you know, I went to the UMass program. I’m like graduate number ten. I
came in either the first or second year when you could actually enroll as a
freshman in the program. Like a guy like Bill Carman… Bill was an E.E. major
and then Moylan started the program and Bill was able to migrate over half way.
Just to give you a little background.
143
K: As your career advanced, how did your philosophy on mastering evolve?
Is there anything you know now that you wish you knew when you first
started?
P: You know, that… how has it evolved? That’s a good question. This one I’ll
answer from something I actually learned from Ted that I think is actually one of
his key strengths that I saw. So, Ted, what I learned from him, that was definitely
an evolution for me was, listening to the raw tracks when you hear them and
understanding whether your approach is to do absolutely as little as possible or
whether it needs major surgery or somewhere in between. And bringing that open
mind to the table with every project. And, of course, then (this is where I’ll sound
like Alex Case), having done your homework and having the skillset to take any
one of those approaches. I’ve never seen anyone like Ted just be able to listen to a
sampling of the tracks at the start of the day and just know the way to go. Does
that make sense?
K: So it comes with experience…
P: Yeah it comes with experience and then part of it, for me, is talking to your
client or the artist and understand… and you know, this is gonna sound weird, not
necessarily listening to what they tell you, but what they’re really saying. I had
artist who, they were working in their studios or whatever, they were listening to
144
their record the whole time but they were hearing it kinda in their head. And you
know, they would come in and be like, yeah man these tracks… and I’m just
throwing out an iconic record, but they’d be like, yeah it sounds like Houses of
the Holy. And then they’d hear it on another system in a neutral environment for
the first time in your mastering room, they would be like, huh. That doesn’t sound
like what it sounded like. You know what I mean? It wasn’t just that it was
different speakers, but that now they were putting on different ears. Does that
make sense? So a lot of times, talking to people to really understand what they
were thinking about the sound of their own music and what they meant by words,
which your second page is kind of funny about that. So it was that kind of client
thing is the other part that evolved and I think it does for everyone. Like so when
a client would say, Can you give it more air, and then turning and saying, Can you
describe what you mean by air? Inevitably it would be like, what they really
meant was, could you get more out of the reverb tail on the hi-hat during the
breakdown. You know what I mean? It was like, hey we’re not really talking
about air, could you give me more high-end? Well what do you mean by high-
end? Well I mean shimmer on the guitar. Ok, that’s not necessarily high-end.
Great, we’ll bring that character of the guitar out, no problem. So the other big
thing was really learning to… the language that I needed to really understand
really what my clients were saying, what they were hearing, and what they were
after.
K: Yeah, so that’s what the second page of the interview is about.
145
P: Yeah, so that answer was basically, that was my second page answer for ya.
You know what I mean? I think it’s great that you are after it. You know, funny
enough, when I was in the grad program, in some of my classes with Alex, we
had very deep discussions particularly about the term, punch, and what it meant to
a snare drum and a kick drum in particular. But my big take away from that is you
already get what the challenge is. What really matters is, with every artist you
work with, what do they mean by these words? So you’re…
K: You really have to be the interpreter.
P: You’re already ten years ahead ahead of where I was at your age, lets put it
that way (laughs). So you know what I mean? So it’s good. Alright, (reading from
the questionnaire) are there any projects that stick out to you as having a
particularly challenging aspect or technical difficulty that I had to overcome?
You know, nothing really sticks out now, but again, it’s about communication. I
had these rock clients I did a lot of records for. Really really good, like downtown
indie rockers at the time. And in the late ‘90’s after everything had moved to
digital, they decided to make a record on analog. This is another communication
story. So they came in, actually, who’s the artist? Anyway, it’ll come to me. I
think it might have been Patty Larkin, was a big woman rock artist at the time.
Ok, so, anyway, she came in and we were working on the tracks all day and she
was like, yeah Paul, we recorded to 24-track analog, it’s awesome… bla bla bla.
146
And we got it and it was good, but it had analog hiss, which people had kinda
forgotten. And we mastered the whole thing. It had an appropriate amount of
analog noise. It was very well recorded. So we got it all together, they did a great
job. It was a really great record. For me, it was a straight-forward day. I
assembled the whole record, edited it, had all the PQ points in and we were going
to take the master and the producer, I remember this guy’s name, Freddy Catz,
and he said, alright, fantastic Paul. So when do you remove the hiss? And of
course, we had Cedar, which I think now is still a software package, I think
they’re still around. They were ahead of the curb with noise-removal at the time.
Now iZotope is clearly the winner now. And fortunately for me, I worked with
them enough that I looked at Freddy and I said, you know, this thing sounds great
Freddy. You remove the hiss when you record it. And he looked at me and he was
like, right it’s an analog process. Ok, good answer, thank you. And you know,
with clients that I didn’t know, that could’ve become a two-hour you’ve gotta be
kidding me lets go get the Cedar hardware archival tape-hiss reduction and see if
we can make it work. So, just to me, it’s funny that technology is the technology.
It’s all about, especially in mastering, it’s all about communication. You’re the
midwife. They’ve been working on their baby and you’re the one who’s gonna
birth it for them. It’s another story where, really, ultimately where like matching
the communication style and getting that message across to the client. Trust me,
I’ve said the wrong things plenty of times as well. Fortunately on that day, it was
a client I knew well and I knew he would understand. And the other big one,
which I still think is a challenge for people is learning about digital distortion, like
147
the really subtle things about digital distortion. When you’re working to get the
last tenth of a dB out of the program material. The tools now are way way more
advanced. In the early years I did it, we had all the good look-ahead program
limiters, that kind of thing that are standard now. But the first four or five years of
mastering for CD there was none of that. And man, did you really have to learn
how to get it a tenth of a dB over, then bring it back. The concept of figuring it
out what we’re absolutely gonna be the loudest passages of the entire record, and
making that to the tenth of a dB as loud as you could and then letting the rest of
the dynamic range of the record fall where it should around that. So that was the
other challenge. And as I said, I still think it’s a challenge now, the guy, the
engineer behind Meridian Audio in the UK. What was his name, Bob? Anyway,
he’s the guy who invented Meridian Lossless Tracking, which is now Dolby’s
lossless… Dolby then licensed it. It was the DVD audio format… Bob Stewart.
He has written… you may want to look him up. In my research in audio, I was
like obsessed with this guy, I think he’s great. He’s really pushing the envelope of
what do we need in digital to really capture audio, manipulate it, and then play it
back as humans can actually hear it. He’s a big proponent of, you don’t need too
much but you need enough. The last time I checked in, and every couple of years,
he does a survey of digital audio strategies for human perception paper for AES
and the one five or six years ago was awesome. He was like, really what we need
is 52k 20bit: here’s the reason why. And he’s not saying that should be the
format, but he’s always trying to hone in. He’s like, 192, 24bit: overkill for a
delivery format for the following reasons, appropriate for an archival format, you
148
know. So you may want to look up some of these Bob Stewart papers because he
has some super fascinating, really great stuff about digital distortion, particularly
with respect to bit depth. And if you look on Meridian Audio’s site, some of the
papers he has just published there so you don’t even have to go like, through the
AES. It’s really amazing. He shows how manipulation of digital audio at various
bit depths really induces even how the processing induces distortion if you don’t
dither it correctly and really understand your chain. So I think that’s a really
important thing that honestly I saw a big separation between the understanding
and the way we treated that at Sterling and how this kind of next, how some of the
mastering facilities that I dealt with here in Boston when I came back didn’t have
a (subtle) in engineering. Now places like Sound Mirror: world class. I mean there
are people who are doing it right. I’m talking more about people who are doing
the five hundred dollar a day home mastering, which I personally think the
technology is there to do. And it’s a great way to go and I think that’s where you
see a really wide discrepancy between people who totally get it and people who
totally do not get it, alright? So that’s the other big thing. Ok next question… bla
bla bla.
K: Yeah, it’s basically digital, analog, or both.
P: Yeah yeah, and I’d be curious what Adam has to say. These days, he’d
probably pick, you know, the tools in the digital domain probably exist where you
could do most of your stuff in it. Although, you know, I can say the analog stuff
149
I’ve had in my room at Sterling, you know, it was ridiculous because I had like,
original parametric EQ’s handwired by George Massenburg.
K: The Sontecs?
P: What’s that? Yeah, you know, I had the original Sontecs and the big old
Focusrite, I think it’s the 200 series, that they don’t make anymore. So even then
though, it was totally hybrid. And in a sense that, so the mastering, the format was
people who had money when I was mastering, at least the first couple years, still
mixed to half-inch because it was better. Your only mix formats were, you know,
DAT tapes and all that. You know, no one wanted to go to 16bit as a delivery
format if they could avoid it, right? Then 24bit proprietary came in in the mid
‘90’s. Tascam came out with a DAT machine, Alesis made actually and amazing
24bit hard-disc/disc format. And I gotta say, even the DAC’s in this Alesis were
mindblowing for the money. They just sounded great. Anyway, so my sources
came kinda half-and-half. But at that point it was a hybrid deal because I had such
good stuff. So, whether the source was analog or digital, I brought it in digital…
let me think. I did the analog manipulation part of the chain first, then converted it
back from the analog domain to 24bit, did my digital processing… At that time,
you know, it’s kinda standard issue with, what was then to bring it into Sonic. My
thing was to bring it in four or five dB softer than I needed it, still at 24bit. Then
have a loop back with, you know, there was no mastering-level digital EQ at the
time in software, absolutely not. Zsys did do that great. Daniel Weiss, I had a
150
couple of really high end digital EQ’s that I then had in a loopback situation in
Sonic. So I would keep that handy for the finishing-touch part like, once I’d get
the record, it would be close, and once I would lay in the sequence, I would be
like, eh track five to match will take a half a dB at 6.3k. So I would keep that in
and then I would, once I had the whole record where I’d wanted it, then I knew,
back to the earlier comment, then I would know where the loudest passage is
gonna be. Then I could globally get the gain up to where I wanted it by whatever
method was appropriate for their audio and for the tools that I had at my disposal,
and then I would do my pass. So it was a hybrid system kind of in that way.
The next bullet point, “how much communication”? Back when sessions were
attended, 99.5% of my sessions were attended. Because there was no digital. It
wasn’t like, hey I’m putting the files on your FTP. Also, again, due to my
relationship with the indie rock community, it was really… I’m not going to say it
was a family affair but these were my people, you know? Part of why they wanted
to work with me was because they wanted to spend the day at Sterling Sound to
be quite honest, you know what I mean? So they were there, that was that. They
would take a reference, back then it had to be a disc. So few people could even
afford… back then, Protools was way more expensive than analog, think about
that. So then they would go back and they would hit you with their notes and you
would determine was it adjusting the gain of a couple of tracks, was it a global,
hey the whole record needs 2/10ths more around 8k. You know what I mean? Was
there some global thing that they wanted? So it could be anything from there’s
151
one track that sticks out gain-wise or EQ-wise or, hey, the whole record, yeah it’s
good but I’d love just a little more of, you know, the bottom two octaves. Alright?
So DAW’s you know, you talked, this I would take from other people, but I can
tell ya. So, you know, again, I used Sonic just because that was the thing.
Basically Sonic’s fade editing no one has ever come up with a better way to do it.
Sequoia’s editing, their fade editing is basically how Sonic worked. So, people
that I’ve talked to, if they have access, they still seem to prefer Sequoia’s editing,
but really all the heavy hitters ultimately go to Pyramix. I’ll tell you though at
Sterling, they all use Nuendo for processing and then they dump it into Pyramix
to do little stuff and then actually make disc masters. When they’re going to
iTunes delivery, that kind of stuff, I don’t know if they even bother with Pyramix
anymore. I don’t know, what did Adam have to say about that? I’m curious.
K: Adam, they used Sonic Solutions for a long time at Gateway kind of fell out.
So they ended up using Pyramix because they could adapt it to like Sonic
Solutions did in terms of workflow, hot-key shortcuts, all the fade editing. That
sort of stuff.
P: Yeah, that’s right. Definitely for final editing and master generation, Pyramix
is the closest, there’s no doubt about it. The other thing is, most places that I
know, Gateway and Sterling, they just made their own quick-key template and
dumped it into Pyramix so it would just behave like Sonic and they didn’t have to
152
re-learn all the quick-keys to be able to move fast. So I mean it just sounds like a
dumb workflow thing, unless you work on an App all day, then you know, that’s
worth the time and investment. I gotta say that the iZotope tools have brought a
whole new dimension, particularly for the non-heavy hitter studios. Even, I know
one of the engineers at Sterling, I don’t think even considered it. I mentioned it to
them about a year ago and actually, Ue Nastasi, I talked to him a few months later
and he was like, holy crap, I checked that thing out. You can make a record with
that. So even guys like that are shocked to see what Izotope has been able to bring
to the table with modern processing power and computers, you know what I
mean? So that’s it, that’s kinda what I have to offer you. I hope that’s enough but
not too much.
K: You may be looking at an old version of the questions, but I have one last
question. Do you have any advice for somebody who wants to start a career in
mastering?
P: You know, this is where I don’t know the business well enough right now. Of
course, my advice would be to try to get in the door in some capacity at one of the
major places that are left. For the same reason that I still think it’s worth it for
people who want to make records to do what they can to try to get in the door at
one of the few remaining big studios. And a lot of it is just, in the beginning, put
yourself in a situation where you’re gonna be talking about techniques,
technology, and communication with the artists all the time with people who are
153
doing it every day. You know, then you can take that and start your own place and
I think these days with technology and digital delivery, what’s changed is a
person could, with minimal investment, you know, but I mean minimal
investment... build a room in a house or in a space and really run a one or two
person show. The trick is finding a dedicated client base. I think that can be done,
but I think coming into it after some time, maybe a year, two years, five years, of
being somewhere that you can just soak in it with other people, I think that’s just
really important because you could just learn so much more so much quicker. You
know what I mean?
K: Yeah, that’s how I feel about my time at UMass Lowell. We have a great
community here where we can bounce ideas off each other and help on each
other’s sessions. Yeah, and I’m also doing an internship at M-Works so…
P: So J-W (Jonathan Wyner), I heard M-Works is closing or something?
K: Oh, that’s kind of a taboo subject right now.
P: Ok, so anyway I was the chief engineer at a boutique multimedia mastering
place when I moved back to Massachusetts called DVD Lab. We shared space
with J-W and then ultimately the front space in 232 was a brick wall and we were
in there for years. Anyway, Matt Azevedo is one of my closest friends on this
planet. So did Matt teach the Advanced Acoustics class for you guys?
154
K: That wasn’t offered.
P: Oh, I feel so bad for you!
K: Yeah, I know. But I was talking with Pat Drumm and he was telling me about
it.
P: Yeah, it was funny for me because Matt and I worked together for years and
then he was my teacher. I’m, you know, much older than he is. But getting to be a
student of Matt Azevedo’s for me was a highlight of my audio life. So, no one has
more respect for… you know, anyway, I’m in the Matt Azevedo fan club so I’ll
shut up. Yeah so that’s interesting, I don’t know if it’s news there, but I also know
J-W really well. I did a couple records a month for five or six years in Jonathan’s
room. But just to tell you how this works, when I did my records, I would come in
and run my own meters, I would re-wire the way the gear was set up, just like
Matt would. You know, everybody has their own style. So his room is
phenomenal, I mean it’s a great place. My clients were really really happy with
anything I ever did for them in that room. Alright, so there’s more gossip, more
depth to the gossip than what I heard. Ok, I should probably just call Jonathan.
K: I asked him about it and he said, I’ll let you know more when I know more.
You know, the intern is low man on the totem pole.
155
P: We all did our time man. So, you know, in the multi-track world, I quite
honestly answered the phone and cleaned toilets for the first six months for
minimum wage so I know exactly what you’re talking about.
K: Well you’re lucky you got minimum wage.
P: I was lucky at the time. Yeah it was good when the big rooms in New York
were booming and it was right at the start of both when as colleges, at that point it
was only UMass Lowell and the University of Miami, but the big studios were
beginning to get that having kids who actually went through a program and came
in armed with a little bit of knowledge of how microphones and consoles and
signal flow worked, was a big deal. It definitely gave us at that time the edge of
getting into the big rooms in New York. The thing is, in Yew York City at the
time, they were starved for good second engineers because, this is gonna sound
kinda funny but you know, no surprise, a lot of guys who wanted to do it thought
the gig meant sitting around smoking pot and playing guitar, which… it was
exactly the opposite of that. It was, you know, don’t do drugs, be really into
audio, and live here eighty five hours a week, and survive on the free fruit left by
clients. That’s what me and my friends did for the first five years we worked in
New York City.
156
K: Yeah, I did an internship for this place called Brooklyn Recording and it was
very similar. Like, I would eat the leftovers from the sessions and that was my
dinner for most of the time.
P: Yeah, most of my closest friends at the time founded Studio G. I actually did
the wiring, the design, and the install of the original Studio G. Yeah, Tony
Mamoni and I were on tour together for years. I lived about three blocks from
there in Williamsburg for billion years. Yeah, Ok, Karl, this was good. Don’t
hesitate to get in touch with me. Unless you have more OK. Ok, well thanks Karl,
it’s good to meet you.
K: Yeah good to meet you too! Thanks Paul, I really appreciate it.
P: Yeah, it’s my pleasure. I hope I didn’t talk too much. I’m famous for the
sidebar, so…
K: No, no, I’m happy to get all your thoughts.
P: Yeah, absolutely, have a great weekend!
* Paul promised to write out his thoughts and comments about the
subjective language used in mastering. The following is a response recived via
email on Saturday, March 25, 2016.
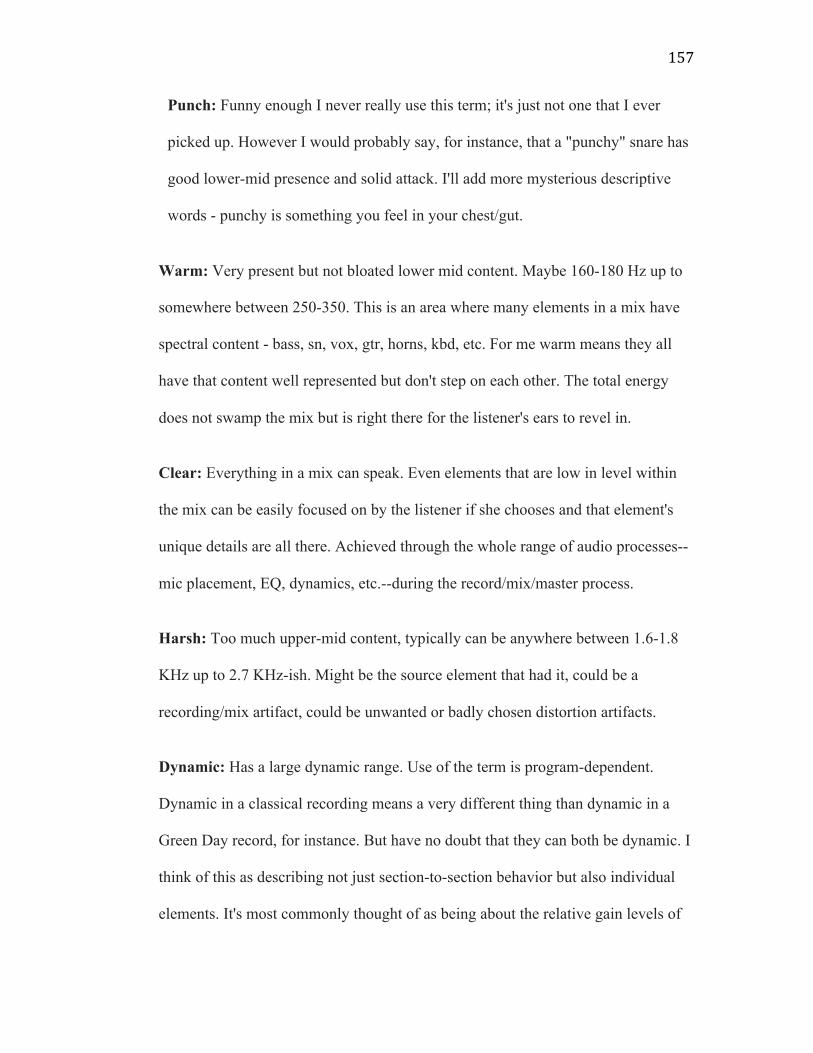
157
Punch: Funny enough I never really use this term; it's just not one that I ever
picked up. However I would probably say, for instance, that a "punchy" snare has
good lower-mid presence and solid attack. I'll add more mysterious descriptive
words - punchy is something you feel in your chest/gut.
Warm: Very present but not bloated lower mid content. Maybe 160-180 Hz up to
somewhere between 250-350. This is an area where many elements in a mix have
spectral content - bass, sn, vox, gtr, horns, kbd, etc. For me warm means they all
have that content well represented but don't step on each other. The total energy
does not swamp the mix but is right there for the listener's ears to revel in.
Clear: Everything in a mix can speak. Even elements that are low in level within
the mix can be easily focused on by the listener if she chooses and that element's
unique details are all there. Achieved through the whole range of audio processes--
mic placement, EQ, dynamics, etc.--during the record/mix/master process.
Harsh: Too much upper-mid content, typically can be anywhere between 1.6-1.8
KHz up to 2.7 KHz-ish. Might be the source element that had it, could be a
recording/mix artifact, could be unwanted or badly chosen distortion artifacts.
Dynamic: Has a large dynamic range. Use of the term is program-dependent.
Dynamic in a classical recording means a very different thing than dynamic in a
Green Day record, for instance. But have no doubt that they can both be dynamic. I
think of this as describing not just section-to-section behavior but also individual
elements. It's most commonly thought of as being about the relative gain levels of
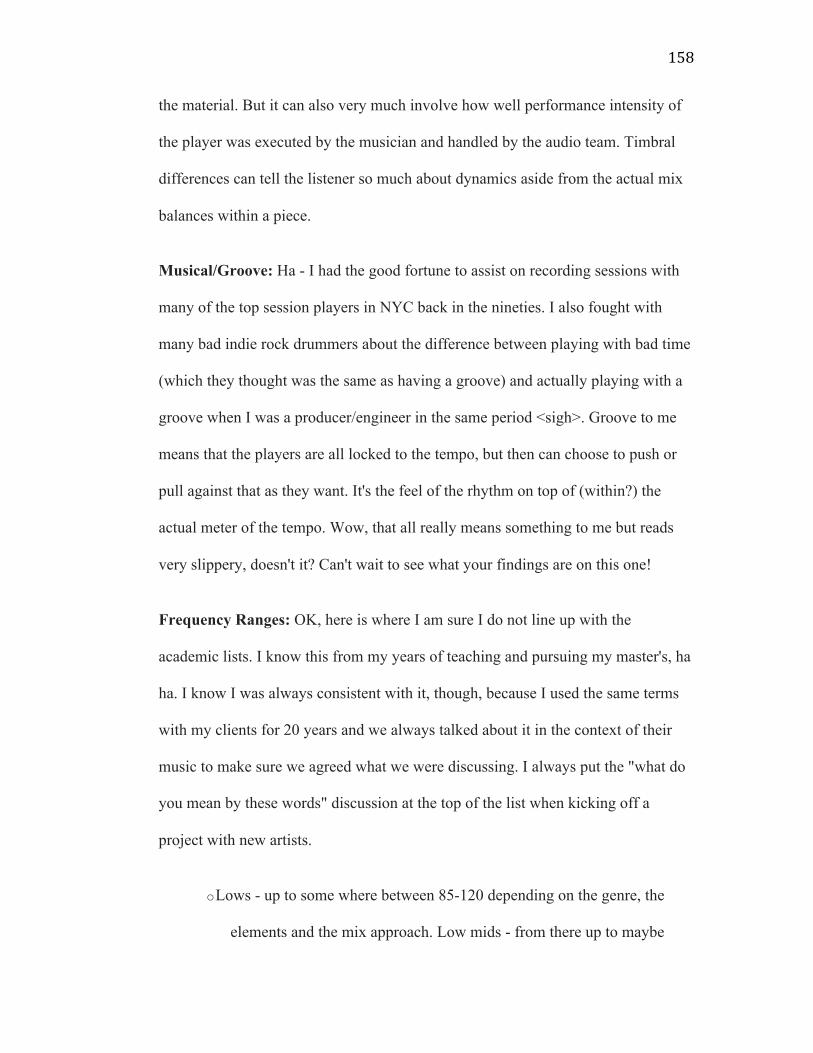
158
the material. But it can also very much involve how well performance intensity of
the player was executed by the musician and handled by the audio team. Timbral
differences can tell the listener so much about dynamics aside from the actual mix
balances within a piece.
Musical/Groove: Ha - I had the good fortune to assist on recording sessions with
many of the top session players in NYC back in the nineties. I also fought with
many bad indie rock drummers about the difference between playing with bad time
(which they thought was the same as having a groove) and actually playing with a
groove when I was a producer/engineer in the same period <sigh>. Groove to me
means that the players are all locked to the tempo, but then can choose to push or
pull against that as they want. It's the feel of the rhythm on top of (within?) the
actual meter of the tempo. Wow, that all really means something to me but reads
very slippery, doesn't it? Can't wait to see what your findings are on this one!
Frequency Ranges: OK, here is where I am sure I do not line up with the
academic lists. I know this from my years of teaching and pursuing my master's, ha
ha. I know I was always consistent with it, though, because I used the same terms
with my clients for 20 years and we always talked about it in the context of their
music to make sure we agreed what we were discussing. I always put the "what do
you mean by these words" discussion at the top of the list when kicking off a
project with new artists.
o Lows - up to some where between 85-120 depending on the genre, the
elements and the mix approach. Low mids - from there up to maybe
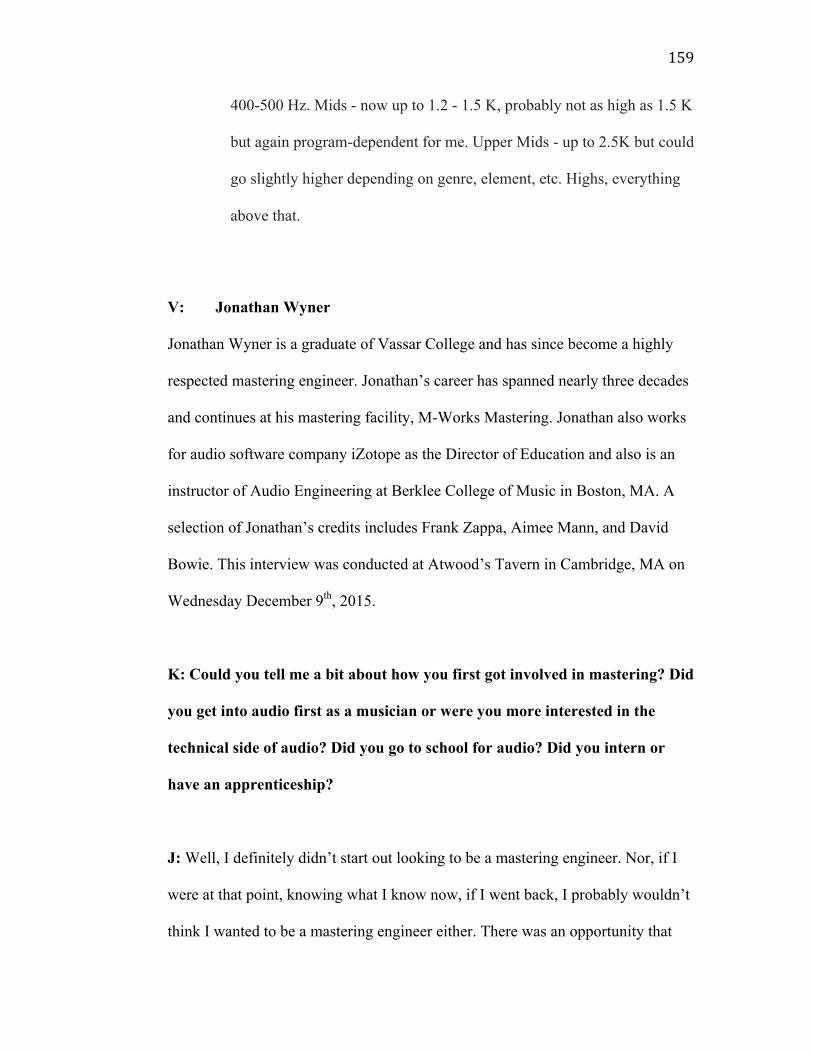
159
400-500 Hz. Mids - now up to 1.2 - 1.5 K, probably not as high as 1.5 K
but again program-dependent for me. Upper Mids - up to 2.5K but could
go slightly higher depending on genre, element, etc. Highs, everything
above that.
V: Jonathan Wyner
Jonathan Wyner is a graduate of Vassar College and has since become a highly
respected mastering engineer. Jonathan’s career has spanned nearly three decades
and continues at his mastering facility, M-Works Mastering. Jonathan also works
for audio software company iZotope as the Director of Education and also is an
instructor of Audio Engineering at Berklee College of Music in Boston, MA. A
selection of Jonathan’s credits includes Frank Zappa, Aimee Mann, and David
Bowie. This interview was conducted at Atwood’s Tavern in Cambridge, MA on
Wednesday December 9th, 2015.
K: Could you tell me a bit about how you first got involved in mastering? Did
you get into audio first as a musician or were you more interested in the
technical side of audio? Did you go to school for audio? Did you intern or
have an apprenticeship?
J: Well, I definitely didn’t start out looking to be a mastering engineer. Nor, if I
were at that point, knowing what I know now, if I went back, I probably wouldn’t
think I wanted to be a mastering engineer either. There was an opportunity that
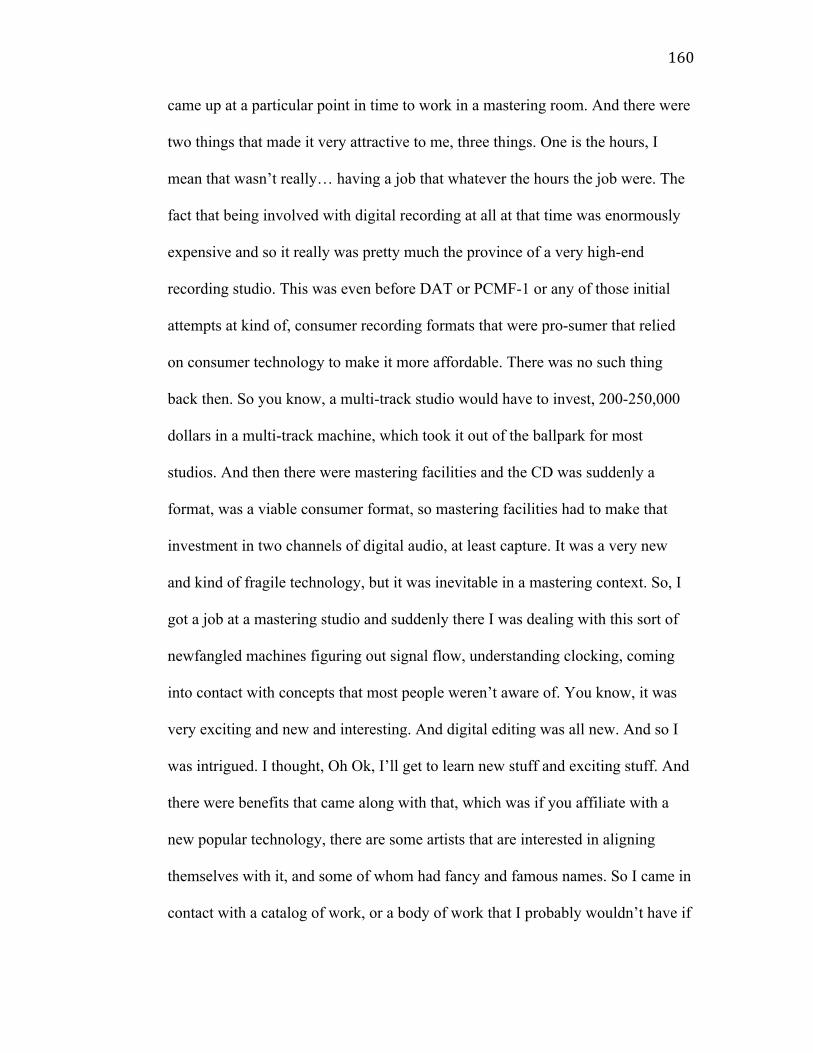
160
came up at a particular point in time to work in a mastering room. And there were
two things that made it very attractive to me, three things. One is the hours, I
mean that wasn’t really… having a job that whatever the hours the job were. The
fact that being involved with digital recording at all at that time was enormously
expensive and so it really was pretty much the province of a very high-end
recording studio. This was even before DAT or PCMF-1 or any of those initial
attempts at kind of, consumer recording formats that were pro-sumer that relied
on consumer technology to make it more affordable. There was no such thing
back then. So you know, a multi-track studio would have to invest, 200-250,000
dollars in a multi-track machine, which took it out of the ballpark for most
studios. And then there were mastering facilities and the CD was suddenly a
format, was a viable consumer format, so mastering facilities had to make that
investment in two channels of digital audio, at least capture. It was a very new
and kind of fragile technology, but it was inevitable in a mastering context. So, I
got a job at a mastering studio and suddenly there I was dealing with this sort of
newfangled machines figuring out signal flow, understanding clocking, coming
into contact with concepts that most people weren’t aware of. You know, it was
very exciting and new and interesting. And digital editing was all new. And so I
was intrigued. I thought, Oh Ok, I’ll get to learn new stuff and exciting stuff. And
there were benefits that came along with that, which was if you affiliate with a
new popular technology, there are some artists that are interested in aligning
themselves with it, and some of whom had fancy and famous names. So I came in
contact with a catalog of work, or a body of work that I probably wouldn’t have if
161
I was just doing a multi-track analog studio. The other thing that was
advantageous that working at a mastering studio was at that time it was not trivial
to release a CD. And so it was much cheaper to make vinyl. And so anything that
I was mastering that was going to be released had to be release-quality in a sense
that the artist had to be able to justify the investment that they were making. So
the end result was the quality of the products I was working on went from doing a
bunch of producing and recording and mixing on my own, and interspersed with
the occasional high-quality project was something that was, you know, there was
a lot of stuff that was not that good. At the mastering studio, the quality just
suddenly went to like release-quality. Everything was better. It was much more
satisfying artistically to come in contact with better records all the time. So,
anyway, that’s sort of what happened at the point of entry for me. And, you know,
the seduction was the name of the artists I got to work with.
K: That was the Bowie catalog you did?
J: Bowie, Zappa, Paul McCartney’s brother, Russ and Roland Kirk, you know,
every genre… Ringo Starr, and Nirvana. Sub Pop records was an early client and
they would just send me boxes of records to look at and it was kind of awesome.
So that definitely kept me in the game. It was great ear training to have to listen to
records that I was working for a guy called Toby Mountain, at the time. I’d listen
to the records he was doing over and over, and listening to my own work over and
over. I learned an immense amount in a very short period of time, I think. I mean,
162
it still took me a couple of years before I was ready to master my first record, and
it took me another, honestly, it probably took me another ten to fifteen before I
felt confident in what I was doing as a mastering engineer. I mean, I mastered
hundreds or thousands of during that period but, in terms of feeling the facility
and ease with the craft, it took me a very long time. And I don’t know if that’s
true of everyone. I don’t know how many mastering engineers would admit to it
taking them that long. I remember the first session I did and I sat down in front of
the console. I’d seen it done, I’ve heard it done, I’ve mixed records, whatever. I
finally had my first attended session and I sat down in front of the console and I
was totally panicked. Like, oh my god, what do I do? I knew how everything
worked, but attaching the act of changing something to result and the impotence, I
was really at sea for a while. And it went well enough. That client ended up doing
five or six records with me over the next twenty years so I didn’t end up screwing
it up too bad but, it was kind of terrifying. You know, it was weird. I think
anybody who remembers what the first mix was, or whatever, even though you
understand the tools, the first attempt to do something, until you’ve integrated the
act of observation and listening and assessment and sort of have that internal
benchmark of what you hear and what you want to hear and how to get there,
there’s a lot of confusion and bewilderment. And that doesn’t ever completely go
away. But at least those periods last a much shorter time when you have
experience.
163
K: One thing I’ve come to realize with anything like this is that it’s sort of like
learning a new language. For me, for example, Alex (Psaradukais) is letting me sit
in on sessions and Nick is really helpful with showing me how the signal is
routed, but until you actually immerse yourself in doing it…
J: It’s context and what I call integration. It just takes time. I mean, it’s that five
thousand hours or ten thousand… how many years?
K: Ok, and did you grow up in a musical family? Is that how you got into the
position of being hired at a mastering studio? You said you did mixing and
producing before?
J: So yes, my grandfather’s a composer, or was, and a conductor. My father was a
pianist. My uncle was a prize-winning composer and pianist and yeah, I was
completely surrounded… I mean, I probably spoke music better than I did English
when I was three. And I grew up around Mozart and Bach and Yiddish art songs
and Stravinsky, Michael Jackson and Jimi Hendrix and Sly Stone and this sort of
incredible stew of genres. And actually that among other things is one of the
things that I think set me up to be a mastering engineer. Because I see music as
the language and the style is like an overlay. And so I was prepared for that for
being able to understand how to connect style to intent or whatever. So I played
music when I was a youngster. When I got into college, I went to Vassar. I ended
up in a liberal arts program. I don’t know all the reasons why I didn’t go to a
164
conservatory, but I didn’t. Probably because I was smarter than that. But liberal
arts schools tend to be much stronger at fine arts than performing arts. Art history
as opposed to painting. I meant there wasn’t really a strong… there were just a
few of us who were interested in performance and because there were so few of
us, we had free reign of the school. And I had already, going into college, been
interested in music and technology and pulling apart guitar amplifiers, mistreating
instruments… And so I was immediately attracted to the radio station, became the
program director. My campus job was recording all the faculty and student
recitals. I had no idea which direction to point the microphone in, but I figured it
out after a while. I knew how to thread the tape machine. They had an electronic
music studio for composition that had an Electrocomp modular synth and a
keyboarding synth and two 4-track machines. And I sort of put together this little
production chain where I’d record stuff in the recital hall, mistreat it, and play it
over the air. And I was in bliss but at that time there was no such thing as
electronic production or music production as a discipline. You know, I was just
kind of making it up. And I didn’t realize until a few years after graduating that it
was a thing you could do. And once I did, I started investigating it, went to a
program in Ohio called the Recording Workshop.
K: Where in Ohio?
J: Chillicothe.
165
K: Ok, cool, I’m from Sandusky, up on Lake Erie.
J: Ok, yeah, I spent six weeks there (at the Recording Workshop), got totally
turned on, they couldn’t tear me away, and they offered me a job to stay and
teach. And that’s where I cut my teeth on understanding concepts, practices, did
lots of sessions, produced my first album for a label out there. It was an eight-
track half-inch recording for a band called, The Royal Crescent Mob and it came
out on Celluloid Records and it was very charming. Not a great sounding record,
but there are a couple of tracks on that record that are actually pretty awesome. I
remember sending it out to mastering, and it came back and I was very
disappointed because it didn’t improve anything and I was surprised. The record
just sounded just like my mixes! Ok, anyway, I worked for about four years
professionally as a recording engineer and producer before I was offered the
mastering job and that experience was invaluable in fostering my understanding
about, and also my experience as a live performer. Understanding what went into
the thing that I’m in charge with doing something about.
K: That’s funny; I did a very similar thing in my undergrad. I recorded all the
recitals and concerts and was in charge of making CD’s and archives. Ok,
anyway, the next question deals a bit with the technical aspect of mastering. Are
there any projects that stick out to you as having a particularly challenging
aspect or technical difficulty that you had to overcome? What was the nature
of the challenge and how did you react to it?
166
J: Well… where do I start? The two that immediately come to mind, I worked on
a record by Amy Mann called I’m With Stupid. I think it may have had eleven or
twelve tracks on the record, eight of them were mixed by Jack Puig and produced
by Jon Brion. To this day I think, by the way, that record is a study in guitar
distortion, it’s amazing. Anyway, he mixed the record in a studio where he had
never mixed before and for whatever reason, he wasn’t really referencing outside
of the studio and he had set up the control room with all of his favorite outboard
gear right behind him. And it was a considerable amount of outboard gear and so
there was an edifice of outboard gear behind him on the producer’s desk of his
favorite compressors and EQ’s, which served really well as an early-reflections
generator. And so the mixes had a real lack of presence. They were really kind of
murky. I got a call from Aimee and her manager, Michael Housman, and she said
I need your help. She said, I don’t care how much time it takes. So I spent three
days investigating how to reverse engineer this early-reflection generator and
pretty successfully rescued the record. The stakes were really high. She was doing
really well in her career, one song had already been a hit on the record. So that’s
one that sorta sticks out to me. Another is the mastering of Madame Butterfly that
was recorded by the BBC in 1912. It was recorded via gramophone and the way
that they would record it was the transcription platters would only hold seven
minutes of audio and they had two of them. Singers in the room, they would start
one and about ninety seconds before the one stopped, they would start the other.
And the frequency response across the platter changed dramatically. You would
167
loose a lot of low-frequency information as you got closer to the center and they
were read from the outside in. They wanted me to stitch it together, do a lot of
noise removal, which in and of itself was challenging because we didn’t have the
electronic transfers, an acoustic transfer, which meant that all the transients were
rounded off and it was harder to do noise reduction.
K: So were you working from the originals?
J: They had done a capture. They lived in the national archive in New
Zealand and they sent me DAT, no, I can’t remember what the format was. It
might have been DAT. And so I had to put it together so it sounded like a
continuous performance, which meant doing a lot of clever processing in
increments as you went across so you wouldn’t detect a change in tone during the
seven minutes, or five and a half minutes or whatever it was that you were
listening to. Then on the transition of one to the beginning of another, that had to
be seamless. That was enormously time-consuming.
K: So what kind of stuff did you have to do? I don’t know if there was
automation at the time.
J: Not good automation. This was 1989 or ’90. So, a lot of real-time gradual
changes and a lot of clever editing using these luxurious hundred-millisecond
buffers that we had, which was pretty much all we had. I mean, we couldn’t do
168
long crossfades. So, it was a lot of slight-of-hand with crossfading, and sometimes
manual, sort of, crossmixing between synced sources and then editing the
transitions.
K: Yeah, it sounds tough.
J: It was painful. It was tedious. You know, it was a challenge. It had its
advantages. You know, back then, you got paid for every moment. And this was a
project of historic importance and the client was willing to make the investment.
Noise reduction was a time consuming and expensive undertaking.
K: Was that the Sonic Solutions No Noise system?
J: Yup. So I don’t even remember what the invoice was, but they were willing to
pay it. And they were willing to keep asking me for more, even beyond the point
where I was interested. That’s what it was like. I was like, lets stop now and they
said, No no lets do more! Anyway, so those are two… The Russ and Roland Kirk
compilation that I had to do was an interesting challenge because it was basically
a re-issue of three recordings. One of which had been done on digital quarter-inch
reel-to-reel. And there was an analog quarter-inch master and a vinyl that had was
the only existing copy. They had lost all the other masters. And I had to take all
three and master then onto a single compilation and that was another interesting
challenge. I dunno, I could probably come up with a million others.
169
K: I’m curious, what was your solution to the early-reflection issue with the
Aimee Mann stuff?
J: Well, it all came in on half-inch tape. I played around with the alignment on
my Studer and also discovered that there was something about the sound of my
Neve 2254 compressors without compressing, just the audio path. It really
complimented what I was starting with. So that was the foundation of my
solution. I kinda tried running the audio through everything I had. Using signal
path changes for the color is something that mastering engineers do routinely,
rather than relying on EQ or compression. It’s about choosing the right path.
Sometimes that has as much as, if not more to do with the result of the sound than
what you do with the gear. So in this case, that was absolutely true. I didn’t turn
on the compression on the 2254. It’s too slow and the noisefloor is right on the
edge of being acceptable. For that record it was OK.
K: Ok, so next thing I wanted to touch on is the topic of analog and digital. I
know you use both and I’m wondering if you could talk about the pros and cons
of using a hybrid system rather than just working in the box.
J: Well, forget about in the box for a minute. I think there are really three
variables here. One is hardwarde vs. software, another is analog signal path vs.
digital. And back in the day when you did anything analog, it required an extra
170
A/D and D/A conversion and it’s not until fairly recently that the penalty for
doing that is acceptable. In most cases, I wouldn’t take an orchestral recording
and take it out into the analog domain unless I really wanted to fix something. So
DSP-based processing has this obvious advantage of avoiding this conversion
step. Hardware has the obvious advantage that you can reach out and touch a
knob and turn away from a screen. Visual acuity, in my mind, doesn’t play a large
role in our aural perception. It can influence it for better or worse, but I would
much rather… If I’m thinking about what I’m hearing I want to focus on what I’m
hearing, not what I’m seeing. So the reason for my investment in hardware is
partly because of that. And also, video displays are famous polluters of stereo
field. The advantage of analog over digital? Until recently, digital EQ has gotten
pretty good and we’ve gotten better and better at modeling harmonic distortion
and the vagaries, time domain distortions of analog typologies and so on. I’ve
been willing to accept digital EQ as a substitute or whatever for some number of
years. Compression’s a different story. There’s such a complex interaction
between the output of the device and the side-chain. And my subjective
impression is that most DSP-based compressors did not do a very good job
dealing with that complexity. So most digital compressors felt to me as if they
caused the sound to get small. It would be bandwidth-limited, the image would
shrink. I’ve also been given to understand that most digital compressors, either in
the box or out, to date have been feed-forward and not really feedback. And a
feedback compressor has a different kind of smoothing effect on the overall level
because of the feedback loop. I think we’re starting to turn the corner there but I’ll
171
still investigate hardware compression. There have been some instances where
I’ve done everything in the box lately. You know, and there are obvious
advantages to that: recall, economy, etc. The early-reflection generators that
hardware make, you know, they’re not so cool. So if you can get all of the gear
out of the room, you know, in somebody’s world, the perfect mixing and
mastering or anything studio is a room where you just have one knob and a pair of
speakers and some 3-D glasses. So hardware gets in the way of that.
K: So is that a new product in development at iZotope? The 3-D glasses?
J: No, I wish it was. The other good thing about hardware is that if you invest
wisely, it holds its value. Buy a compressor for $3,000.00 and you can at least sell
it for $2,000.00. In some cases, you can sell it for $8,000.00. Plug-ins, you know,
one of the biggest problems our world faces is, with certain kinds of things, given
with the absence of scarcity, where a world where it’s easy to copy and duplicate
something, then how do we assess its value? You know, people used to go to the
record store and try to buy the new Talking Heads record, maybe it was sold out.
You can’t sell out of a record now. It’s always available on the Internet. If your
server goes down, people go on to the next artist.
K: Ok, cool. The next question is how much communication is there usually
between you and the artist or producer in a typical mastering project?
172
J: As much as possible. And I mean, obviously, the possible is an important
variable. That doesn’t really say anything but it’s my way of saying that there
needs to be some communication especially before and during the session. And
without that, it’s almost certain that you end up with a less-than satisfactory result
and with it, you can surmount almost any obstacle because if you align your
expectations and you’re all working toward the same goal, with the same sort of
filter, or some way of determining success. So, it’s really important. While I have
to trouble and no problem offering my assessment… Any mastering engineer that
thinks they know better than the artist, at the end of the day is doing the artist and
themselves a disservice. Not to say that artists don’t make mistakes, they do. But
If you come into a project with that approach, you’re setting yourself up for a
difficult situation, probably for an unhappy artist.
K: Right, they’re the ones in charge, they’re the ones paying the bills.
J: Well, they may have ideas that are different and who’s to say whose are right?
I mean, there are people who will send records from around the world and just
say, please master my record. And do we do it, sure. Is it my favorite way of
doing things or is it the thing that’s going to lead to the most satisfying result?
K: Yeah, one of the things I was talking with Alex about was that he was working
on a record with Greg (Calbi) and it was from Japan. He was saying it was like,
super harsh. The high frequencies were really grating and Alex said that Greg
173
said, yep, that’s how the people in Japan like it. They want it super harsh and
aggressive. I would do something to make it less harsh but they want it that way
so it’s super important to know your client and their expectations. I also wonder
how other cultures prefer their music to sound.
Ok, next question. There are a lot of DAW’s designed for mastering
like Sequoia, Wavelab, and Pyramix. You obviously use Sequoia.
J: At home I sometimes still use soundBlade because I don’t have a PC.
K: So my question would be why Sequoia?
J: Familiarity, ergonomics, the feature set is complete enough to do most of the
stuff that I need to do. It has superior editing… those are the primary reasons.
And there are certain things Soundblade does that are better than almost every
other program. Maybe with the exception of SADiE. I think Pyramix is kinda
configurable, kinda the same way. There are certain things you can’t do. And their
crossfades and their fade shapes and the playback engine are just kind of
awesome. So yeah, I guess those are the reasons.
K: Did you test out several different DAWs before you decided on Sequoia?
J: Until recently, there were not so many DAWs that would directly output
DDP’s, or that would allow you to do four-point editing. In the case of Sequoia,
174
when I first started using it, there were occasions where I would output surround
test discs for clients and you can do it directly from the DAW. The real win with
that DAW is that when we started using plug-ins, having the ability to put plug-
ins on clips and crossfades between plug-in states, is just like a total win. You no
longer have to automate anything. It’s a time-saver and a right-brain saver. I’m
intrigued by Studio 1. It seems like an interesting production tool that has some
decent mastering features.
K: I’m not familiar with Studio 1.
J: It’s the Presonus DAW. There are many more mastering DAW’s. Some of
which implemented pretty good feature sets except it couldn’t address external
hardware. I guess I’m not willing to invest in a totally closed system. So that’s
why I gravitated to those. And once you buy into something and you start to
generate a body of work and archives in that platform, you’re married to it. And
as long as the manufacturers don’t do anything totally stupid, which Sonic
Solutions did, but you’re gonna stick to it. It’s kinda like marriage. You don’t get
divorced unless somebody does something really stupid.
K: Yeah, I’m still running Protools 9. I have an old computer and haven’t
updated. I’m sticking with it.
J: You’ll change. At some point you will.
175
K: Yeah, at some point but it works just fine for me now.
J: Yeah but if you’re doing a lot of MIDI, it’s not 64-bit and you’ll run out of
virtual instruments. You know, you can only address four gigs of RAM. Even if
you have thirty two, you can only address four.
K: But I’m not doing much on my own rig anymore. I’m mostly using school’s
computers and it’s working just fine. Ok, cool. My next question is do you have
any advice for somebody who wants to start a career in mastering?
J: Well, if you’re hell-bent into getting into mastering, then I would suggest you
do one of two things. Get a real assistant position at a real facility, working for
somebody who has a name, and spend at least a couple of years hanging out and
learning and absorbing what you can. Or the other is spend a stupid amount of
money equipping a room that satisfies the minimum requirements and get really
really good at social media and executing a business plan and networking and
have some kind of buffer for a few years between yourself and the bill collector
and give it a go. If you wanted to pursue it as a specialty, a singular discipline, I
don’t think you can mess around with doing a lot of things at once. You have to
completely steep yourself in whatever that specialty is. I’m not sure I’d advise it,
but I think that that is true. I think that if you’re going to incorporate it into a
collection of services you’re looking to do, you don’t necessarily be that good at
176
it. You know, you can mix projects and offer to compile them for artists. You
don’t usually have to rise to the same level. You know, then it’s sort of like, the
mix engineers who say to me, I would’ve loved to have sent you the record but
my client insisted and they pulled out $250.00 and said, master this now, and so I
did. So they got what they got and I got $250.00 and off we go. There are
certainly those shortcuts. There’s a real big question in my mind whether
anybody, the way things look right now, can make a long-term career as a
mastering engineer in the way that we used to think about somebody being a
mastering engineer. You know, you can apply some polish and you can output
files and do all of that but, you know, there aren’t enough record labels, there
aren’t enough repeat clients that can really support working at a really high level.
I mean I could go on but I guess those would be my pieces of advice. Yeah, so
being detail oriented, being very humble, and I don’t mean humble in the
Christian sense. I mean humble in the same way that, you know, interns will
succeed if they don’t offer opinions if they’re not asked for. That’s doubly
important in the context of mastering. If you walk into a room with Bob Ludwig
or Greg Calbi or anybody and start telling them about how you once mastered a
record like they did, sorry you’re done.
K: Yeah, I mean that’s just rude.
J: It’s not rude, it exhibits a lack of understanding and also a closed mind. Just
being in the room, just checking out what’s going on, listening, seeing if you

177
notice tendencies and patterns and habits. And then when the invitation comes to
ask questions, ask questions. But to offer assessment or opinions is, in that
situation where you’re learning, you’re acquiring context and knowledge, I think
it just gets in the way for everybody. I just see that, people make that mistake over
and over again where they’ll go in and sort of want to seem like they know what’s
going on and be everybody’s best friend.
K: They probably want to sound like they know what they’re talking about.
J: Yeah, it’s not born of ill will, they just want to seem like they’re part of the
club but they want to sort of play that game. But really, that ultimately doesn’t
contribute to anything, to the relationship or to the learning.
Mastering Subjective Language
Punch:
J: Well I think what they mean is reducing the peak-to-average ratio to the point
where you get enough thrust from the transients speaking more in the midrange
and less in the top end.
Warm: Yeah, it depends on what instrument they play.
178
K: Lets say it’s a pop or rock record.
J: Who’s asking for it?
K: The producer.
J: Well, then forget it. Usually they mean not too much top end, probably not too
much deep bass, I don’t know. Really, from a bass player, they’re usually talking
about early harmonics, vocalists they’re usually talking about not too much
midrange. Some people may think it means depth of field, maintaining ambience
or emphasizing ambiance. But I think that it doesn’t have any, there’s no intrinsic
singular meaning to the word, except to say an emphasis on the low-midrange and
less on the high end and less on the presence. But that’s, you know, just hard to
distill a single meaning.
Clear:
J: Clear means where you have, you don’t have collisions.
K: Collisions in terms of…
J: Yes. In terms of arrangement, in terms of energy buildup in the spectrum. You
know, it says everything about proportion, and a lack of masking. That’s probably
the closest I can get.
179
Harsh:
J: The opposite! No, harsh is too much emphasis on either odd order or higher
harmonics and a lack of support in the fundamentals. But again, when some
people say thin, some people mean harsh. And, you know, maybe there are some
alt-punk records that want to be harsh. You brought up the Japanese artists, so
yeah, is harsh good or bad? I don’t know. Well, we say it and we think it’s
undesirable. That’s really culturally chauvinistic.
Groove:
J: Oh yeah. Groove is where you get enough of the 2 and the 4 and not just the 1
and the 3.
K: Yeah, I’m having trouble understanding that one myself.
J: Well, it’s the thing that the stylus sits in when you plan an LP. You know,
groovy, the expression came from when they were cutting live to vinyl. If the got
a good take, they would say, well, it’s groovy, it’s all in the grooves.
K: Oh, cool, I didn’t know that.
Frequency Ranges: Lows, Low Mids, Mids, High Mids, Highs.
180
J: Again, it depends who I’m talking to. If I’m left to my own devices I think, you
know, low end is 100hz and down. Low mid is 180 to 350, maybe 400. Midrange
is 500 to 1.8k, maybe 2k. High-mid: 2k up to about 3.8. Upper mid, that sort of
presence where you get up into the high end where there’s a sort of strata in the
high end. One is like 4 to 6k, another is 6 to 9k, and then you have a little overlap,
8 to 10k and then up into air.
K: Are there certain characteristics that you would attribute to each frequency
range?
J: I don’t think a frequency has a characteristic, I think it’s the relationship and
proportion of frequencies and one band to the other depending on the particular
instrument. Where proportionality and character comes into play. And I almost
have this religious superstitious belief that there is something, such a thing as as
the proper proportion and when something feels like it’s in the proper proportion,
there’s an ease to the experience of listening to it that just kind of happens and
until that happens, I feel uneasy. So sometimes I feel that what we do is audio-
chiropractic, it’s kind of an alignment of the frequencies, which is one of the
reasons why I think that time domain is as interesting and important to consider in
what we do as any kind of frequency adjustment. So I think whether we’re talking
about groove, or psychoacoustic impression of the results of our signal processing
chain, changes in timing relationships defines a lot of what we hear and why we
like what we like.
181
Discussion: A Summary of the Responses
Part 1: Specific Questions about Mastering
Question 1: Background and Finding a Career in Mastering
Jay: Jay was interested in music and electronics as a child. He went to Berklee
College of Music for piano performance, but was also interested in the technical
side of music recording. He then interned with Jonathan Wyner at M-Works
Mastering. After the internship, Jay moved to Atlanta, GA and worked at a post-
production facility where he began to build his own mastering studio, investing in
Sonic Solution’s unique and, at the time, rather exclusive No-Noise System. After
a few years in Atlanta, Jay moved his mastering business to Los Angeles, CA and
later relocated to his current facility in Brookline, NH.
Matt: Matt graduated from the University of Massachusetts Lowell and during
his time there he honed his skills in the use of DAWs and other pertinent audio
disciplines. He then interned at M-Works Mastering where he did editing, PQ,
QC, and eventually became a full-time mastering engineer. He then described the
state of mastering during the early and mid-2000’s. He also talked about how and
why he left mastering to pursue acoustical consulting.
182
Adam: Adam grew up playing electric bass and is also a graduate of UMass
Lowell’s SRT program and interned at M-Works. He was at M-Works for a time
and then moved to Gateway Mastering in Portland, ME. He soon found himself
assisting famed mastering engineer, Bob Ludwig and eventually was promoted to
full-time mastering engineer.
Paul: Paul is one of the first graduates of the SRT program at UMass Lowell. He
established himself as a prominent figure in New York City’s budding indie-rock
scene in the early 1990’s. After working at recording studios for a time, he began
working at Sterling Sound and had his own client-base among the indie rockers as
a mastering engineer. He also was the lead assistant to Ted Jensen. He currently
works at Bose Corporation.
Jonathan: Jonathan grew up in a musical family and his interest in music
recording and technology was spurred when he attended Vassar College and
began recording the concerts and recitals there. He then traveled to Chillicothe,
OH and attended the Recording Workshop where he was quickly hired on as an
instructor. Jonathan was then offered a job at a mastering studio called,
Northeastern Digital, where he was one of the first mastering engineers to
embrace digital technology. It was because of this that he was able to work with
high-profile artists. Jonathan eventually founded his own mastering studio, M-
Works Mastering, where he continues to work today.
183
Question 2: Evolution of Mastering
Jay: Jay had a good sense of what he wanted to do in mastering, probably from a
musical upbringing and critical listening experience. He mentioned that it’s also
important to be diverse, being able to master any genre.
Matt: At first it was easy for him to put more gear in the signal path if there was a
lot wrong with it. He then realized that the saying, “less is more” applies to
mastering. Now he uses three pieces of gear for 95% of his work: the Sontec EQ,
Requisite compressor, and a digital limiter.
Adam: Adam pointed out that each mix the mastering engineer receives has been
approved by the client, most likely the artist, producer, and mix engineer. His job
is to take that mix and make it sound “better,” if he can without destroying the
integrity of the mix. He then goes on to say that when he first started, he didn’t
take as many liberties in the mastering process as he does now. He says, “Don’t
be afraid to go for it.”
Paul: Something Paul learned from Ted Jensen, was to be able to listen to the raw
mix and then know what exactly what needed to be done in the mastering process.
184
Question 3: Technical Challenges
Jay: Jay discussed dealing with 5.1 surround sound and how to process each
channel. Also, low-frequency problems that come in mixes from small studios. He
also discussed the problems with multiband compression.
Matt: Matt discussed one project with an avant-garde musician who wanted to
cut his record to vinyl. The problem was that the recording had a lot of stereo bass
information and it was impossible to cut to vinyl without complication. Matt
described what he did to fix the problem, which was to highpass one of the stereo
channels and then use a frequency-specific stereo control plug-in to move the bass
frequencies of the other channel to the center. One tip Matt includes is if there’s a
generally “muddy” low end in a mix, put a highpass filter on the side channel
using an M/S control.
Adam: There were two very large DVD projects, a Joe Satriani project and a
video for the Rock and Roll Hall of Fame. Both were many hours in length and
diverse in scope. These projects forced him to find the most efficient and effective
means to master the music. He discovered the effectiveness of current digital
technology via plug-ins. This allowed him to efficiently change settings and
automation to best fit the diverse musical material.
185
Paul: The biggest challenge he mentioned was about communication with the
artist.
Jonathan: There were two projects that were challenging. The first was an Aimee
Mann record called, I’m With Stupid. The mixing engineer worked with a
reflective surface behind him so there were strange effects in the mixes because of
the early reflections. The second was the compilation and mastering of a 1912
BBC recording of Madame Butterfly, which was recorded via gramophone.
Question 4: Analog, Digital, or Hybrid?
Jay: “Absolutely hybrid.” Jay typically uses analog EQ and compression and then
digital EQ and limiting. Sometimes he EQ’s the file before going to analog if
there are timbral problems with the material. Jay also provided the tip, to avoid
too much of a strange artifact of a piece of gear or plug-in, use a few different
pieces of gear or plug-ins to do the same amount of work. “Spread out the pain.”
Matt: Hybrid: “I like tools of both flavors.” He prefers using knobs and other
manual controls to master because it allows him to look away from a computer
screen and focus more on the music. He also discussed the benefits of the effects
of distortion through incorporating tubes. It can add a pleasing character to the
music.
186
Adam: Almost always uses digital and he discovered its effectiveness while
working on those two large concert videos. He “became less and less happy with
the results [he] was getting from [his] analog signal path.” He also pointed out
that there is inherent phase-shift while using analog gear and also that plug-in
developers are becoming better at modeling the distortion characteristics of
analog gear.
Paul: He used a hybrid system, primarily using a Sontec EQ, Focusrite 200 series,
and Sonic Solutions.
Jonathan: Jonathan uses a hybrid signal chain. Recently digital EQ has gotten
much better than it has been in the recent past. However, he feels that digital
compressors haven’t matched analog yet. He also stresses the importance of a
high-quality converter.
Question 5: Communication
Jay: Sometimes there are revisions and if they’re small, he will do them with no
charge. However, it is best to be straightforward with the client and let them know
that they can’t have too many revisions just for the sake of revisions. Also,
sometimes he will send the client a reference master to see if they like the
direction in which he’s going.
187
Matt: “Usually a lot.” He usually masters the record and then does revisions. His
revision policy is “revisions within reason.” He also said that he does not like
doing shootouts.
Adam: It’s different from project to project and he mostly communicates with the
producer or mix engineer. He also usually provides the clients with a reference
master.
Paul: 99.5% of his sessions at Sterling were attended by the clients so the
communication was immediate.
Jonathan: “As much as possible.” He also says to make sure that everybody’s
expectations are in alignment.
Question 6: Choice of DAWs
Jay: Gives a brief history of mastering-specific workstations like Sonic Solutions.
Jay’s personal preference is soundBlade because it is a derivative of Sonic
Solutions and it is also Mac compatible. He also mentions that Sequoia, Pyramix,
and SADiE are the other top DAWs for mastering.
Matt: Pyramix and Sequoia are the best DAWs for mastering, but both are only
Windows.
188
Adam: He discusses some of the history and development of mastering-specific
DAWs, which evolved from the use of Sonic Solutions to the use of many other
DAWs, each of which was good at one aspect of mastering and not necessarily
anything else. They eventually settled with Pyramix because they were able to
model a lot of the same editing techniques and hot-keys as Sonic Solutions.
Pyramix is also able to do all the necessary mastering-related tasks such as hi-res
audio, DSD, surround, and outputting final masters.
Paul: While at Sterling, he used Sonic Solutions, but now he says that the guys at
Sterling use Nuendo for effects processing and Sequoia for the creation of the
final master.
Jonathan: M-Works is set up to use Sequoia because of “familiarity, ergonomics,
the feature set is complete enough to do most of the stuff that [he] need[s] to do. It
has superior editing…” He also uses soundBlade at home sometimes because it
works on Mac.
189
Question 7: Advice for Young Mastering Engineers
Jay: Become the guy everybody wants to work with. You can do this by working
hard, staying late, and being attentive. Also, try to be an asset to the company by
providing your own clients, another source of income for them.
Matt: The best way is to find an assistant job with an established mastering
engineer. Other than that, start small and work your way up. The most important
element in mastering is the monitor path.
Adam: “I think the best advice I could give you is to try to find a good mentor.”
Also he says to be prepared for whatever opportunities come your way. He also
points out the importance of being in a community where audio and mastering is
discussed on a daily basis.
Paul: Try to get your foot in the door at an established mastering studio and be in
a situation where mastering and audio are discussed daily.
Jonathan: There are two ways to get into mastering. The first is to get an
assistant job at an established mastering studio and gain experience and contacts.
The second is to set up your own studio and become adept at social media and
self-promotion.
190
Part 2: Mastering Subjective Language
Punch:
Jay: Midbass frequencies between 90hz and 140Hz.
Matt: “Clear and well defined transients.”
Adam: Good and tight low end response, specifically with the kick drum and bass
guitar in a pop or rock situation.
Jonathan: “Well I think what they mean is reducing the peak-to-average ratio to
the point where you get enough thrust from the transients speaking more in the
midrange and less in the top end.”
Warm:
Jay: Could be frequency ranges or a product of distortion. Usually exists around
400Hz.
Matt: “Appropriate balance between low-mids and upper mids/highs, favoring
the low mids.”
Adam: Similar to punch in that there is good low-end response and relationship
between the kick drum and bass. But the instruments might not be as “glued”
191
together. Warm also means that there is not much brightness in the recording.
You cannot have a warm and bright recording.
Jonathan: In a pop or rock setting: “Usually they mean not too much top end,
probably not too much deep bass.”
Clear:
Jay: There are a lot of elements to clarity a few being, panning (making the best
use of the sound stage), musical arrangement, and even and balanced frequency
response throughout the entire spectrum.
Matt: “Appropriate balance between low-mids and upper mids/highs, favoring
the upper mids/highs. Ideally a perfect balance is both "warm" and "clear".”
Adam: Deals with the detail among individual instruments in terms of frequency.
Recordings with clarity have a good amount of upper harmonic presence, upper
midrange to “air.”
Jonathan: A lack of collisions in terms of musical arrangement, spectrum,
masking, and proportion.

192
Harsh:
Jay: Usually around 2.5kHz, but anything in the sensitive spots of the Fletcher-
Munsen curves.
Matt: “Excessive upper-mids / highs, particularly in the sibilant region.”
Adam: “Harsh usually means upper midrange, too bright, unmusical, and a
listening experience that is not pleasant at all.” This involves especially the 2-
4kHz range and a lack of lows and low-mids.
Jonathan: “Harsh is too much emphasis on either odd order or higher harmonics
and a lack of support in the fundamentals.”
Groove:
Jay: Creating groove in mastering through the use of compression to create a bit
of ebb and flow in the dynamics.
Matt: “What a funk band does.”
Adam: Similar to warmth and punch in that they are about the low-end response
and “glue” between the kick and bass. “Maybe it’s more glued and tight than
warmth is, but not quite as much as punch.”
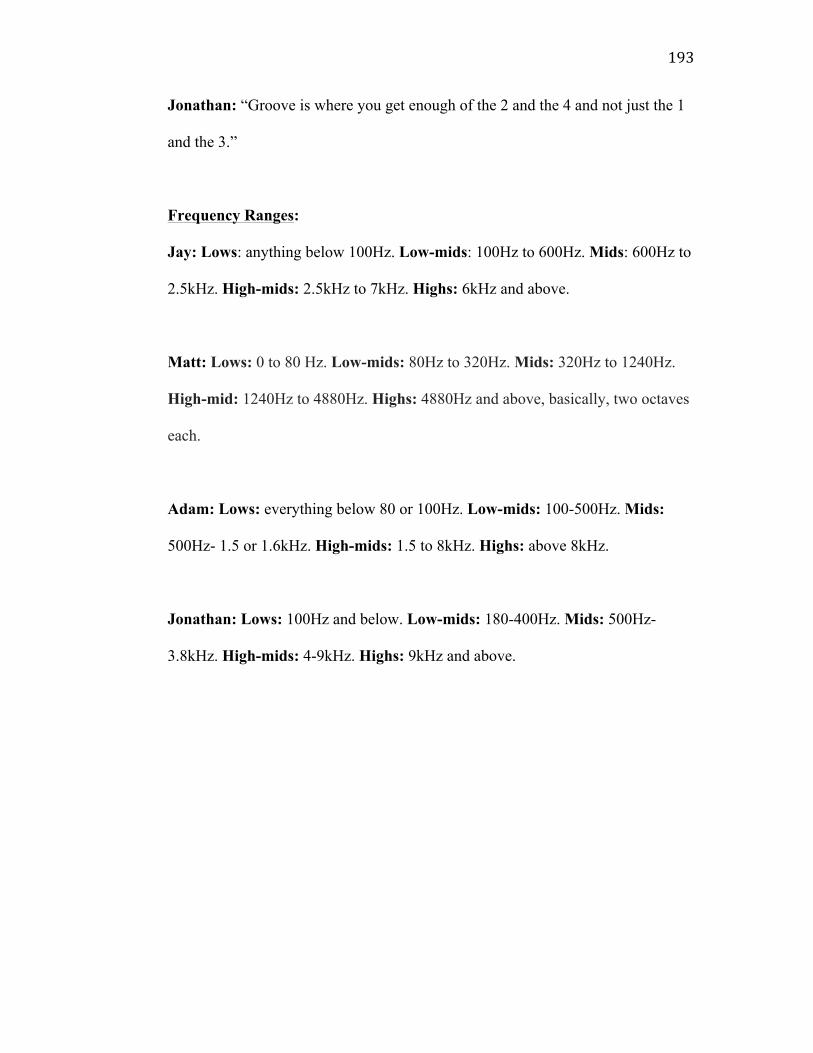
193
Jonathan: “Groove is where you get enough of the 2 and the 4 and not just the 1
and the 3.”
Frequency Ranges:
Jay: Lows: anything below 100Hz. Low-mids: 100Hz to 600Hz. Mids: 600Hz to
2.5kHz. High-mids: 2.5kHz to 7kHz. Highs: 6kHz and above.
Matt: Lows: 0 to 80 Hz. Low-mids: 80Hz to 320Hz. Mids: 320Hz to 1240Hz.
High-mid: 1240Hz to 4880Hz. Highs: 4880Hz and above, basically, two octaves
each.
Adam: Lows: everything below 80 or 100Hz. Low-mids: 100-500Hz. Mids:
500Hz- 1.5 or 1.6kHz. High-mids: 1.5 to 8kHz. Highs: above 8kHz.
Jonathan: Lows: 100Hz and below. Low-mids: 180-400Hz. Mids: 500Hz-
3.8kHz. High-mids: 4-9kHz. Highs: 9kHz and above.

194
Conclusions
These interviews are excellent insights into the world of mastering. Each
mastering engineer offered a diverse array of responses by providing real-world
insight and intelligent responses to the questions. From these responses, we are
able to pick out some trends that emerge as common practices in mastering.
However, it is essential to note that there are pros and cons for every response and
it is equally important to remember that whichever method the mastering engineer
prefers, there is always a reason behind their choice.
Part 1: Specific Questions About Mastering
Question 1: Background and Finding a Career in Mastering
Several interesting trends emerge from the responses of the mastering
engineers to this question. The first is that they all went to school for audio in
some regard. Everybody except Jonathan Wyner and Jay Frigoletto went to school
for specifically audio, and even more specifically, to UMass Lowell’s Sound
Recording Technology program, though this is a matter of coincidence due to
regional proximity.
It is also noteworthy that all of the mastering engineers began their careers
either interning or working at a mastering studio. This coincides with the final
195
question because most of the engineers said that the best way to start a career in
mastering is by trying to work at an established mastering studio.
One last thing to mention is the importance of being an asset to the studio
where one is working. It is great to be an assistant, but it is better to be an
assistant and bring in your own clients that can be another income source for the
studio.
Question 2: Evolution of Mastering
This question offered a diverse array of responses. Some of which were
bits of practical wisdom like being able to listen and assess a mix for the things
the mastering engineer needs to do. Other responses discussed musical
background and knowing how much was enough in terms of processing, offering
the idiom, “less is more.”
Question 3: Technical Challenges
Question 3 also offered a variety of responses from the mastering
engineers. These challenges ranged from processing historical and primitive
recordings; the challenges of cutting vinyl; communication with the artist; and the
intricacies of mastering 5.1 surround sound. Perhaps this range of responses is
because the mastering engineer must be prepared to encounter any challenge. It is
also crucial for the mastering engineer to have all the tools necessary for fixing
196
problems. These tools can include common devices like EQ and compression, but
might need more specific and detailed tools like, noise reduction, automation, and
tape machines, to name a few.
Question 4: Analog, Digital, or Hybrid?
When it comes to signal path, there was a very clear preference of a hybrid
system for mastering. One of the engineers, Adam Ayan, mostly preferred a
digital signal path and none of the engineers said that they use an entirely analog
signal path. Though one can imagine that an entirely analog signal path could
happen from time to time under the right circumstances.
The engineers who preferred the hybrid signal path said that they could
pick and choose of the best equipment of each flavor (digital or analog). One
thing they stressed was the purity of the signal path, especially quality of the
Digital/Analog and Analog/Digital conversion. Their reason was that if they go
out to an analog signal path, they want the conversion to be the best, most precise
conversion in order to maintain the integrity of the signal.
197
Question 5: Communication
It was apparent that there is a correlation between the amount of
communication and the satisfaction of the client; the more communication, the
better the result, the happier the client. This would include finding out how the
client feels about the mixes. Should the mastering engineer do a lot to change the
mixes or are they generally happy with the mixes? Are there any reference
recordings that the client suggests so that the engineer can try to match the
references in terms of loudness and overall timbre and vibe?
Sometimes the mastering engineer will master a few songs and send it to
the client for their impressions. Once the client approves the mastering, the
engineer will create a final master, which will be checked for flaws like
inappropriate distortion and then sent out for distribution.
Question 6: Choice of DAWs
Within the world of Digital Audio Workstations for mastering, there
seems to be a common preference for Sequoia and Pyramix. These are the two
most widely accepted DAWs for mastering. Though if there is a mastering
engineer that prefers to use Apple equipment, soundBlade is the most preferred
for that operating system.
The mastering engineers also discuss the use of Sonic Solutions as the first
operational digital system for mastering. Unfortunately it died out after the
198
company decided to change its focus from mastering to the creation of DVDs.
This provided a chance for other companies to make DAWs for mastering and
this is when Sequoia and Pyramix emerged as the best mastering DAWs
available.
Question 7: Advice for Young Mastering Engineers
The most common advice given by the engineers is to find an assistant
position at an established mastering studio and also try to get into a
mentor/apprentice relationship. We see this especially in the career path of Adam
Ayan, who assisted Bob Ludwig for years and later became a full-fledged
mastering engineer.
Some other advice offered by the mastering engineers was to be a reliable
person. This best achieved by staying late, offering assistance whenever needed,
and being generally knowledgeable and helpful. Becoming a successful mastering
engineer requires a combination of preparedness and luck: being ready for any
opportunity that arises.
Part 2: Mastering Subjective Language
Punch: Most of the mastering engineers stated that punch is about the transient
response of low and low-mid frequencies, generally referring to the kick drum
and bass guitar in a pop or rock setting.
199
Warm: The general response to warmth is similar to punch in that it is referring
to the frequency response of low-mids. This is often in conjunction with a lack of
high frequencies.
Clear: This refers to a combination of a few elements in the mix: evenness of
frequency response across the spectrum; thoughtful execution of the musical
arrangement; the clever use of panning within the mix; and an appropriate amount
of upper harmonic presence in the “air” region of the high frequencies.
Harsh: Harsh involves an abundance of upper-mid frequencies, which includes
the 2-4kHz region where the ear is most sensitive. This also means that there is a
lack of low-frequency fundamentals supporting the upper harmonics.
Groove: This term offers the most varied response because it is quite abstract in
the scope of terms used by musicians. It is generally accepted that groove is about
the cyclic dynamic response of a song found mostly in the drums and bass guitar,
the rhythm section of a band.
Frequency Ranges: Some of the mastering engineers offered responses of octave
ranges. This is important to remember while assessing spectral characteristics in
order to fairly account for the frequency ranges. The responses to frequency
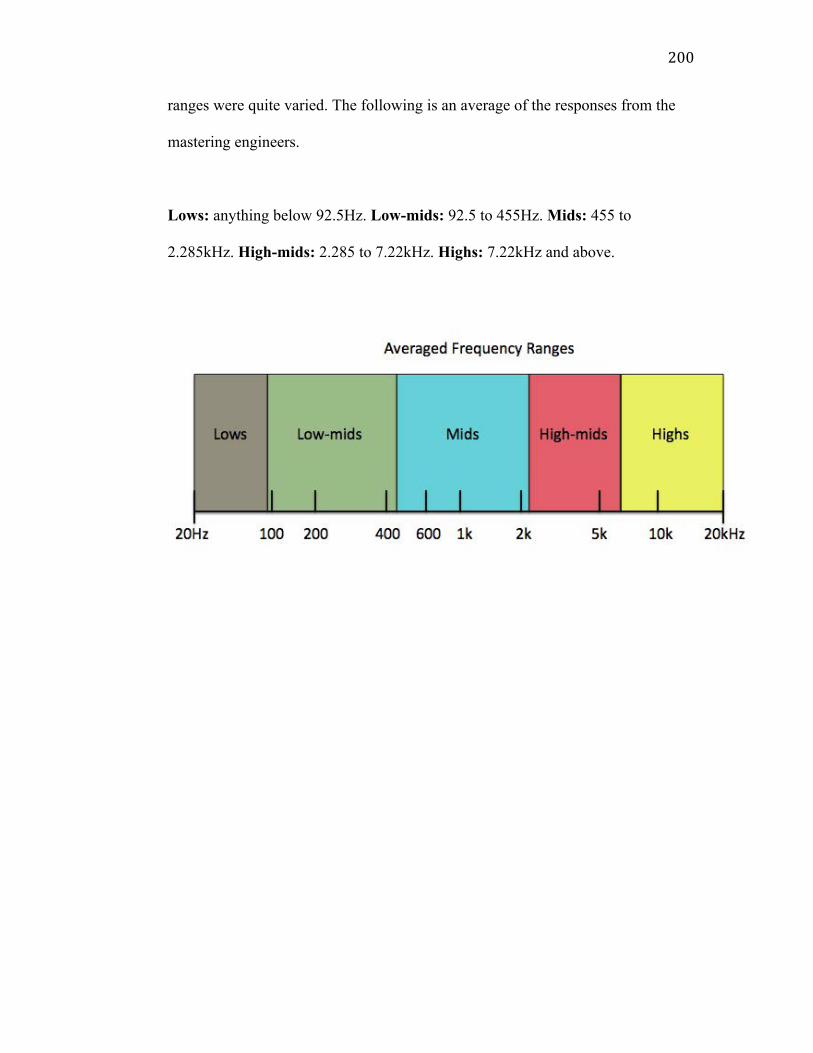
200
ranges were quite varied. The following is an average of the responses from the
mastering engineers.
Lows: anything below 92.5Hz. Low-mids: 92.5 to 455Hz. Mids: 455 to
2.285kHz. High-mids: 2.285 to 7.22kHz. Highs: 7.22kHz and above.
201
Recommendations
This section of the project examined several aspects of mastering. The
interviews provided invaluable insight into contemporary mastering techniques
from people who have established themselves as authorities in mastering. The
following is a discussion of some areas of further potential study.
• Sample Size: The mastering engineers that were interviewed in this
section were all located within the greater Boston area. More specifically,
the majority of the interviewees had a connection to UMass Lowell’s
Sound Recording Technology program. This study would benefit from a
larger sample size in order to confirm the common trends in mastering.
• More Questions: The questions asked were designed to be rather general
and to allow the mastering engineer to go into any specifics if they
desired. Some additional, specific, questions could have been asked
regarding the details of mastering. For example, it would have been
interesting to get their thoughts about mastering for surround sound.
202
LiteratureCited
Angelli, Paul. “Interview with Paul Angelli.” Telephone interview. 5 Dec. 2015. Ayan, Adam. “Interview with Adam Ayan.” Skype interview. 25 Nov. 2015. Azevedo, Matthew. “Interview with Matthew Azevedo.” Personal interview. 18 Nov. 2015 Frigoletto, Jay. “Interview with Jay Frigoletto.” Personal interview. 6 Nov. 2015 and 4 Dec. 2015. Frigoletto, Jay. “Mastersuite Mastering Studio.” Matersuite Mastering Studio. Mastersuite, n.d. Web. 26 Jan. 2016. Wyner, Jonathan. “Interview with Jonathan Wyner.” Personal interview. 9 Dec. 2015.
203
SECTION 2: PRODUCTION OF “ALL THE SADNESS”
I. Introduction and II. Methodology
This second portion of the thesis focuses on the recording, mixing, and
mastering of the song, “All the Sadness”, by Alan Williams’ group, Birdsong at
morning. The elements of this section are twofold: the mastering of four different
mixes of “All the Sadness” and an EP match exercise involving this song and two
previously recorded Birdsong at Morning songs. In this part of the study, “All the
Sadness” was recorded, and sent to four different mixing engineers, Alan
Williams, Nick Dragoni, Brandon Vaccaro, and Bradford Swanson. The four
mixes were then mastered as if they were each a “single”: one song that stnds
alone as a complete musical work.
The second part of this study was an EP match exercise. In this section,
“All the Sadness” was incorporated with two other Birdsong at Morning songs:
“Murderous Friend” and “Down in the Hole.” These two additional songs were a
part of Birdsong at Morning’s 2015 release, A Slight Departure, which was mixed
by Alan Williams and Mastered by Adam Ayan. This exercise attempted to match
the overall aesthetic of “All the Sadness” with that of “Murderous Friend” and
“Down in the Hole” in order to create a cohesive short, three song EP.
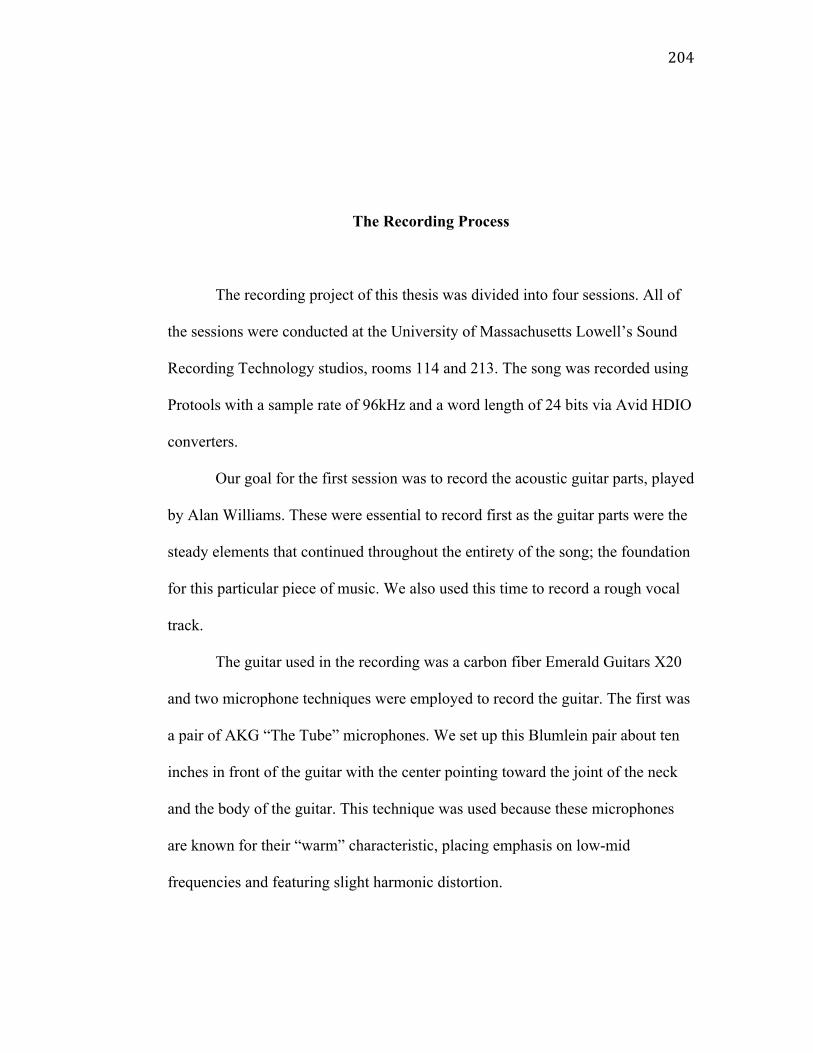
204
The Recording Process
The recording project of this thesis was divided into four sessions. All of
the sessions were conducted at the University of Massachusetts Lowell’s Sound
Recording Technology studios, rooms 114 and 213. The song was recorded using
Protools with a sample rate of 96kHz and a word length of 24 bits via Avid HDIO
converters.
Our goal for the first session was to record the acoustic guitar parts, played
by Alan Williams. These were essential to record first as the guitar parts were the
steady elements that continued throughout the entirety of the song; the foundation
for this particular piece of music. We also used this time to record a rough vocal
track.
The guitar used in the recording was a carbon fiber Emerald Guitars X20
and two microphone techniques were employed to record the guitar. The first was
a pair of AKG “The Tube” microphones. We set up this Blumlein pair about ten
inches in front of the guitar with the center pointing toward the joint of the neck
and the body of the guitar. This technique was used because these microphones
are known for their “warm” characteristic, placing emphasis on low-mid
frequencies and featuring slight harmonic distortion.
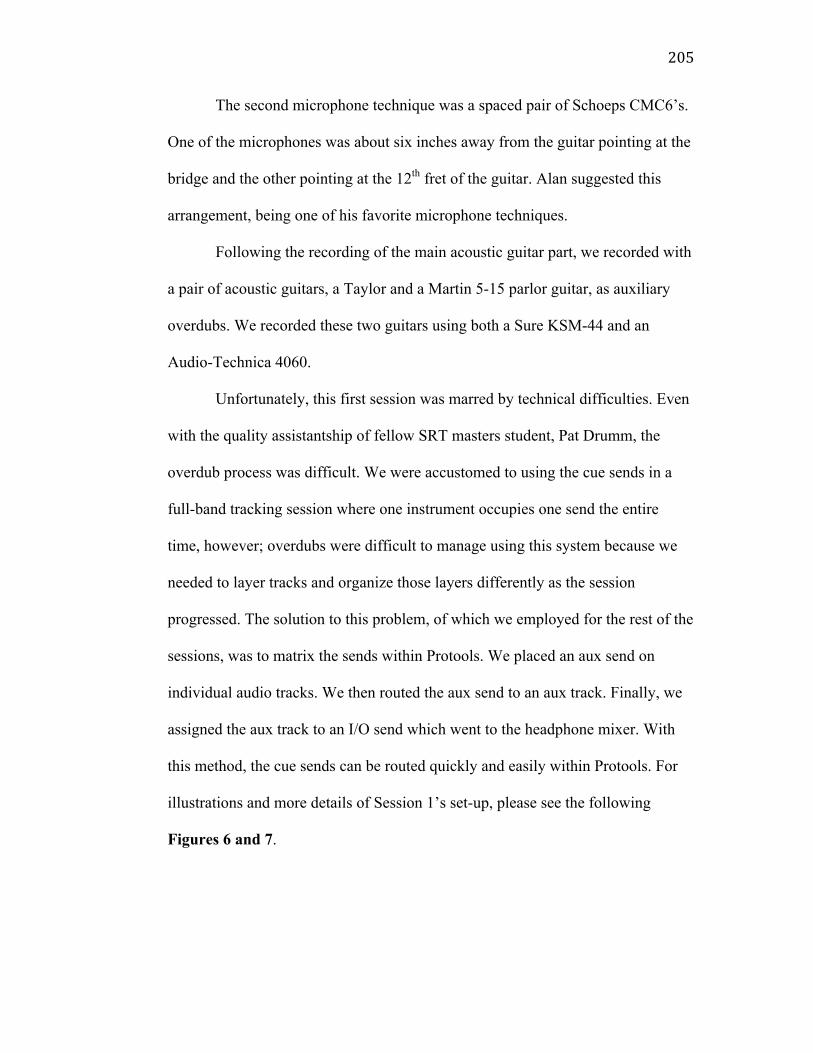
205
The second microphone technique was a spaced pair of Schoeps CMC6’s.
One of the microphones was about six inches away from the guitar pointing at the
bridge and the other pointing at the 12th fret of the guitar. Alan suggested this
arrangement, being one of his favorite microphone techniques.
Following the recording of the main acoustic guitar part, we recorded with
a pair of acoustic guitars, a Taylor and a Martin 5-15 parlor guitar, as auxiliary
overdubs. We recorded these two guitars using both a Sure KSM-44 and an
Audio-Technica 4060.
Unfortunately, this first session was marred by technical difficulties. Even
with the quality assistantship of fellow SRT masters student, Pat Drumm, the
overdub process was difficult. We were accustomed to using the cue sends in a
full-band tracking session where one instrument occupies one send the entire
time, however; overdubs were difficult to manage using this system because we
needed to layer tracks and organize those layers differently as the session
progressed. The solution to this problem, of which we employed for the rest of the
sessions, was to matrix the sends within Protools. We placed an aux send on
individual audio tracks. We then routed the aux send to an aux track. Finally, we
assigned the aux track to an I/O send which went to the headphone mixer. With
this method, the cue sends can be routed quickly and easily within Protools. For
illustrations and more details of Session 1’s set-up, please see the following
Figures 6 and 7.

206
Figure 6. Session 1 Input List
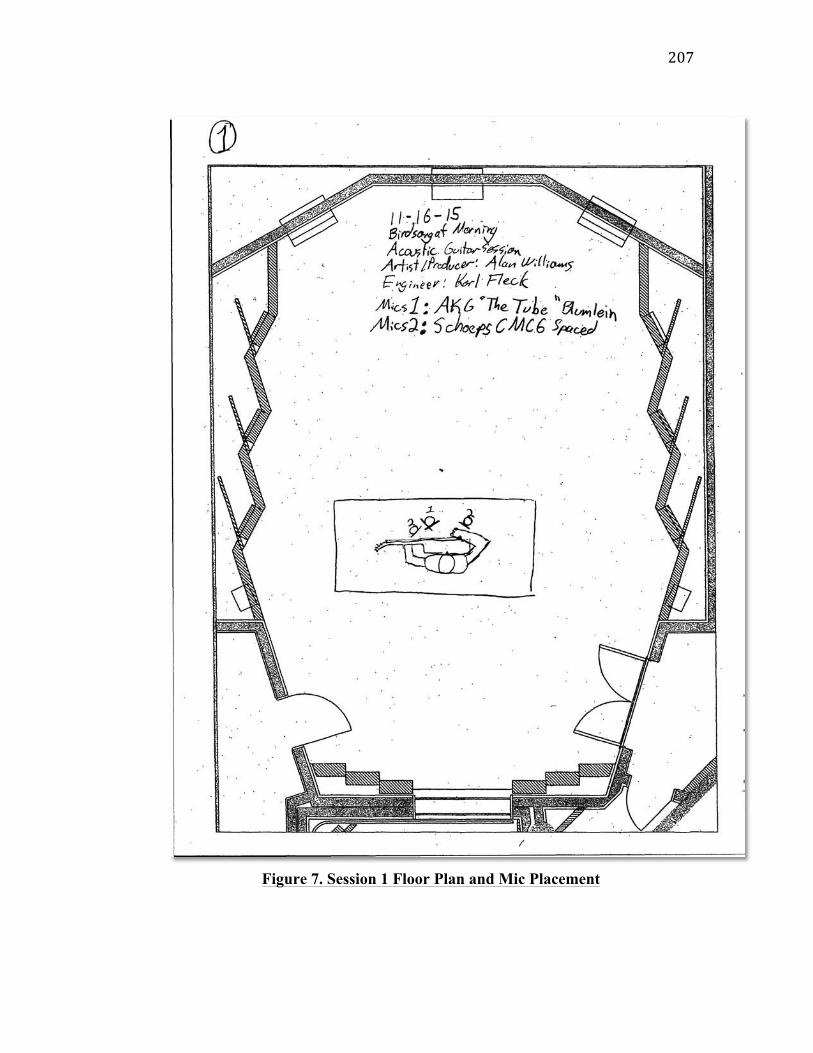
207
Figure 7. Session 1 Floor Plan and Mic Placement
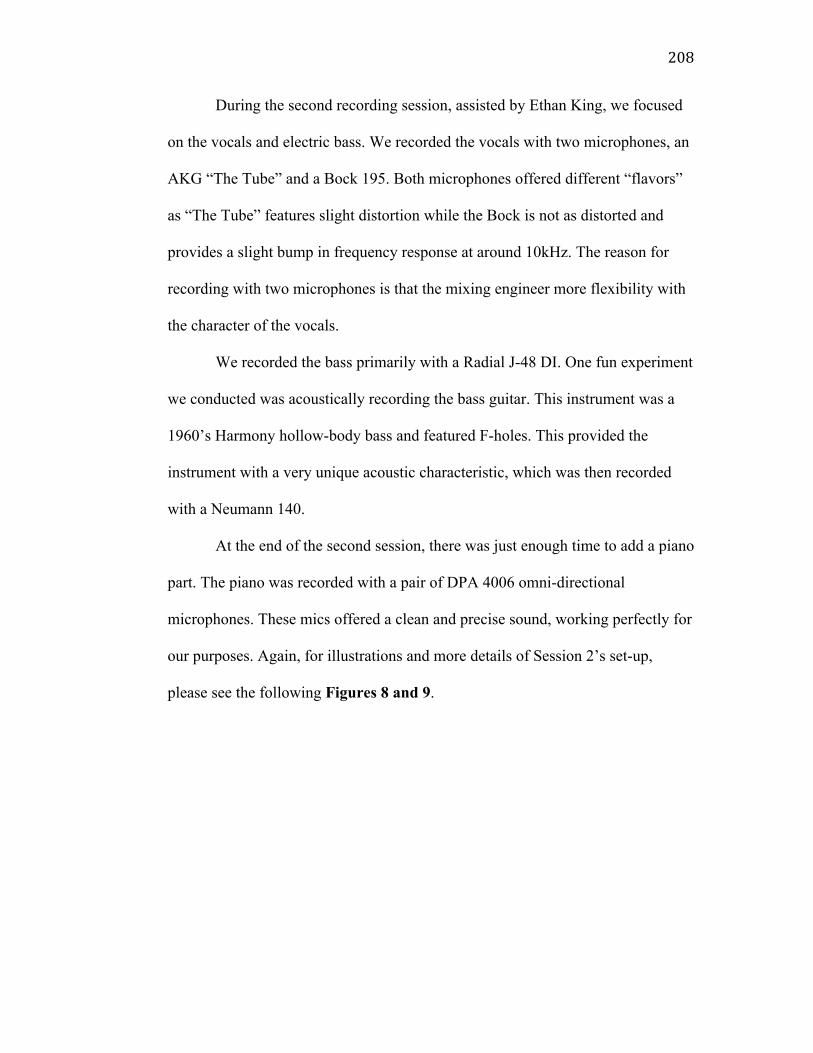
208
During the second recording session, assisted by Ethan King, we focused
on the vocals and electric bass. We recorded the vocals with two microphones, an
AKG “The Tube” and a Bock 195. Both microphones offered different “flavors”
as “The Tube” features slight distortion while the Bock is not as distorted and
provides a slight bump in frequency response at around 10kHz. The reason for
recording with two microphones is that the mixing engineer more flexibility with
the character of the vocals.
We recorded the bass primarily with a Radial J-48 DI. One fun experiment
we conducted was acoustically recording the bass guitar. This instrument was a
1960’s Harmony hollow-body bass and featured F-holes. This provided the
instrument with a very unique acoustic characteristic, which was then recorded
with a Neumann 140.
At the end of the second session, there was just enough time to add a piano
part. The piano was recorded with a pair of DPA 4006 omni-directional
microphones. These mics offered a clean and precise sound, working perfectly for
our purposes. Again, for illustrations and more details of Session 2’s set-up,
please see the following Figures 8 and 9.

209
Figure 8. Session 2 Input List
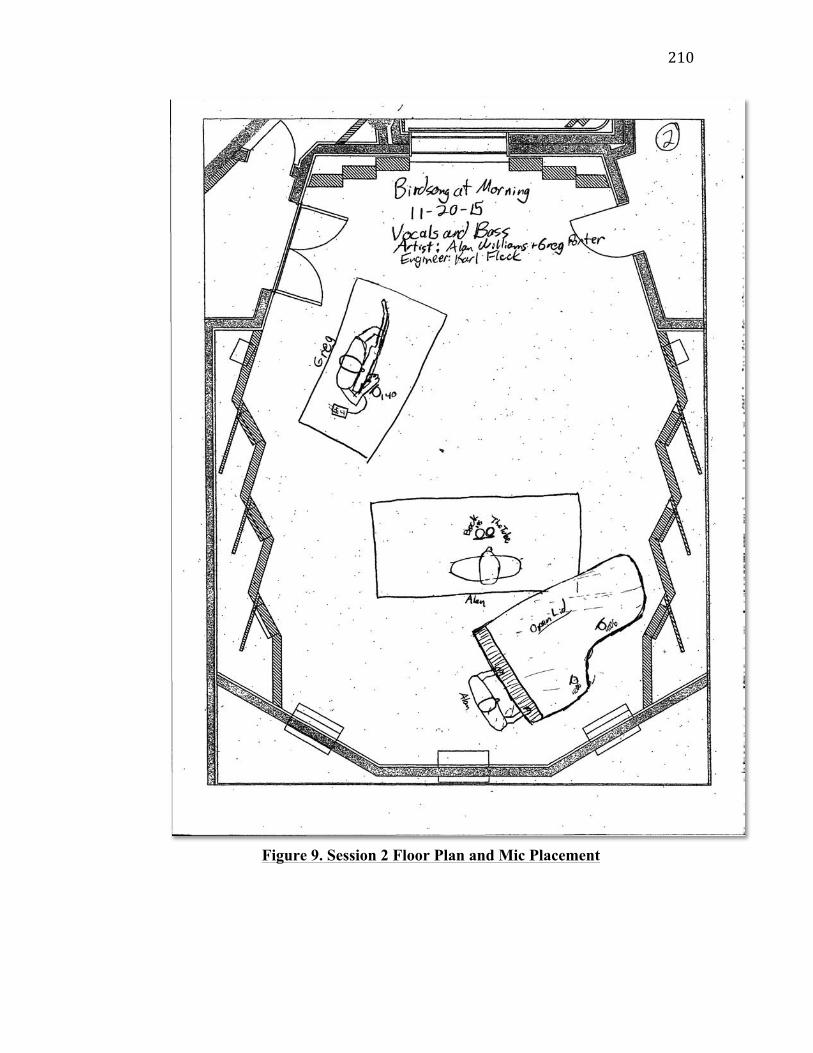
210
Figure 9. Session 2 Floor Plan and Mic Placement
211
The third session was dedicated to recording the strings. Alan wrote a
string arrangement and hired his favorite string quartet for the recording. Alan has
recorded strings many times for his previous albums and has created a method to
simulate a full orchestra sound while only recording a quartet. Firstly, his method
includes using three stereo pairs of microphones and also uses spot mic’s on each
instrument. The three stereo pairs are: XY, ORTF, and a Decca Tree. The spot
mic’s used were Neumann 140’s on Violin 1 and 2, and AKG “The Tube” mic’s
on the Cello and Viola.
212
The second aspect to Alan’s string recording method is a layering multiple
takes. The main layer consists of three comped and edited takes of the entire
quartet, using all stereo pairs and spot mic’s. On top of that, there is a take of just
the first Violin part and another take of just the second Violin part. We recorded
these two takes using only the stereo pairs. This combination and layering of
tracks simulates the sound of a full orchestra. See Figures 10 and 11 for Session
3’s input list and illustrations of the mic placement and floor plan.
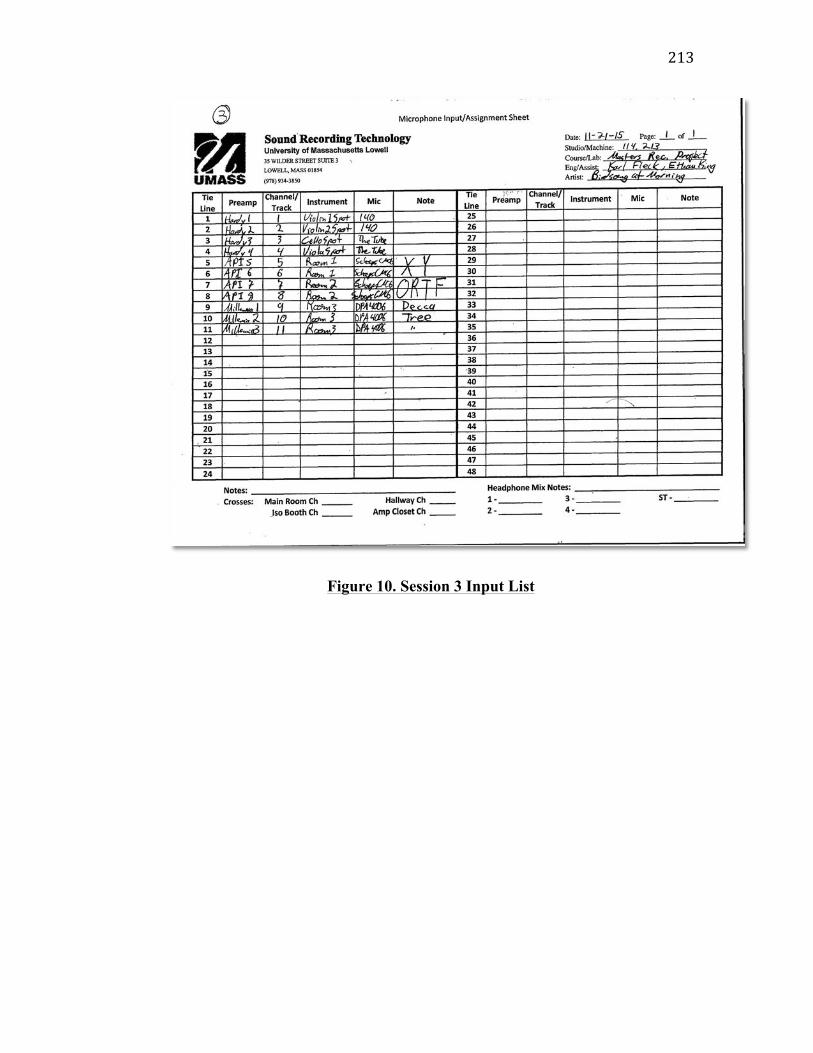
213
Figure 10. Session 3 Input List
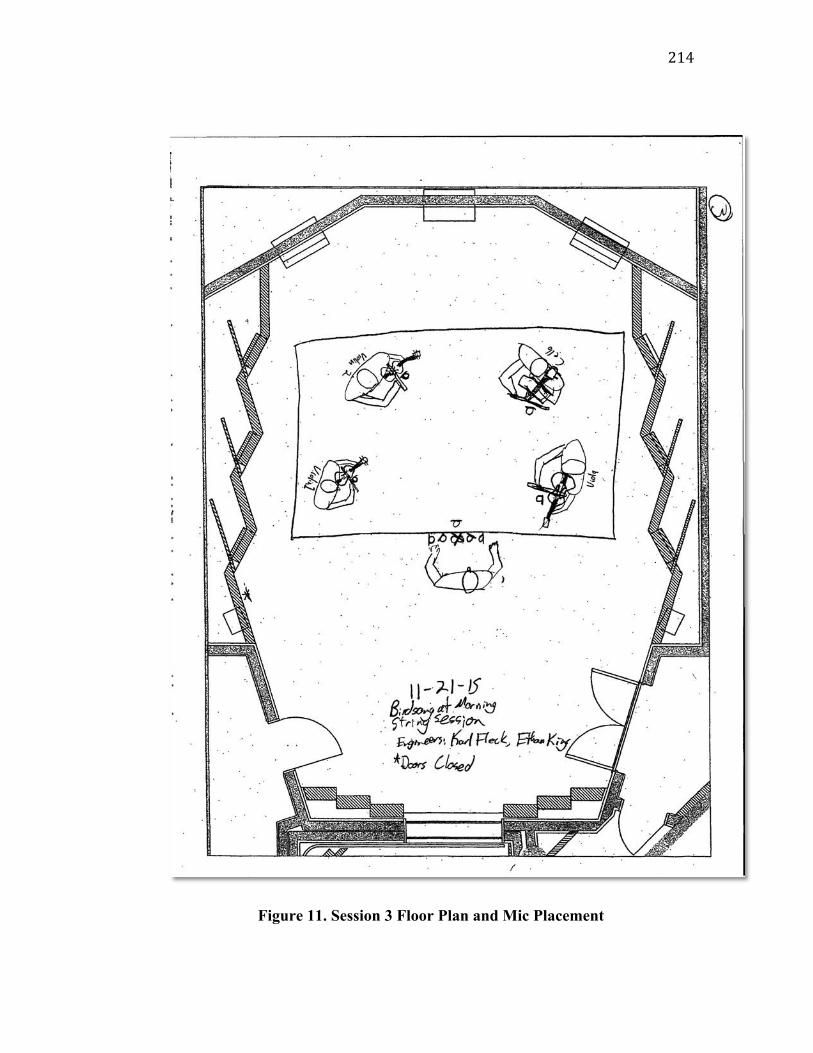
214
Figure 11. Session 3 Floor Plan and Mic Placement
215
The fourth and final session was for recording the electric guitar. Band
member, Darleen Wilson played a Fender Strat style guitar with single-coil
pickups. She played through a modern solid-state Fender Princeton amplifier. We
recorded the guitar using a Radial J-48 DI (direct input); a Sure SM-57; and a
Sure KSM-44. We placed both microphones about four inches from the speaker
and the KSM-44 was placed on the center of the speaker cone while the SM-57
was placed about an inch off center.
There was an issue of noise coming through the amp and several steps
were taken to reduce that problem. First, we lifted the ground on the DI and then
we had Darleen physically move into the hallway to give the amp space. In the
end, the solution we found to be most helpful was when Darleen turned the face
of the guitar away from the amp. For one reason or another, there was feedback
between the guitar and the amp. This could be because of the single-coil pickups,
which are notoriously noisy. See Figures 12 and 13 for Session 4’s input list and
illustrations of the mic placement and floor plan.

216
Figure 12. Session 4 Input List
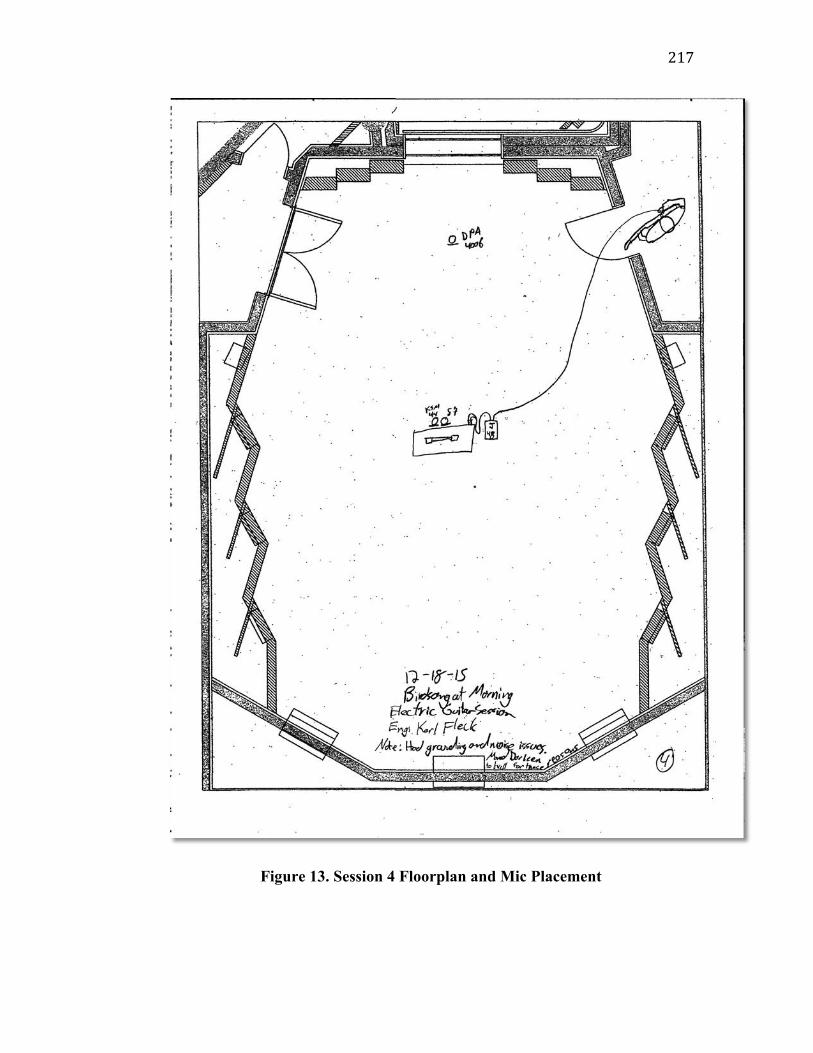
217
Figure 13. Session 4 Floorplan and Mic Placement
218
The Mixing Stage
Once the recording was completed, I edited and prepped the Protools
session for the four mixers. This involved choosing the best takes of each take for
each instrument and putting in all the appropriate fades on the audio clips. This
process also involved using Melodyne to tune the vocal tracks.
All of the mix engineers involved in this project used Protools for all of
their processing, except for Alan Williams. Because of this, a separate bounce
was made of each track starting all from the same point. I put these files into a
folder from which Alan could simply import all the files and they would all be
lined up and start from the same point. An issue arose with the rendering of one of
the acoustic guitar tracks; it appeared to have been rendered with a separate, low-
level, guitar track. Due to the timeline of this project, Brandon Vaccaro solved the
problem by re-rendering the file and double-checking its integrity.
After editing the session and finalizing all the components, I sent the
following the instructional details to the mix engineers, Nick Dragoni, Bradford
Swanson, Brandon Vaccaro, and Alan Williams. The following was sent to each
of the mix engineers as an outline of the instructions and expectations:
219
Mix Engineer Instructions
The time has come to hand the session off to you trusted mix engineers.
Before I get into the instructions, allow me to provide a little background into my
goal for this exercise. As you know, I have been working with the band Birdsong
at Morning, and over the past few weeks, we recorded one song. The focus of my
project is mastering so I’m now handing the recording off to you four mixers.
Once I get the mixes back, I will master them and analyze their similarities and
differences. I will also discuss the various aspects of each mix with regard to the
mastering process.
Here are your instructions:
1: Get a copy of the session from 213.
The session is located on the Media 0 drive is in the folder called “Karl
Fleck_Thesis Project Files”. Inside that folder there is another folder with the
Protools session. There is also a folder of files for Alan, who can simply import
them all into Nuendo. All the files start from the same point so it should be pretty
straightforward.
Also, for those working from the Protools session, the session as it is now
is about 40 gigs. I tried deleting the unused playlists and files but it’s still a large
session. If you can find a way to trim it down a bit, please feel free to do so. I
didn’t dig into it too much because I’m paranoid about losing something
220
important. All this to say, if you’re taking the session with you, make sure you
have a large enough hard-drive.
2: Mix away!
You are free to mix the session any way you please. If you want to mix
completely in the box, feel free to do so; if you want to bounce it to tape and mix
completely analog, be my guest. This mixing exercise is supposed to simulate
real-world situations where the mastering engineer has little to no control over the
mixing process.
As far as editing goes, all the tracks are as they ought to be. You should be
able to open the session and mix. However, if there is something obviously wrong
(i.e. missing fade) that I missed, please feel free to edit as much as you feel
comfortable. But all the tracks present are of the correct take, etc.
3: Documentation
For the sake of the formal project, I would like full documentation of your
mixes. This includes all effects and settings used. Also, please include the pan and
fader information. If you’re working in the box, screenshots of settings etc. will
suffice. If analog, please fill out recall sheets.
4: Delivery
The timeline of the project is such that you should have your mix and
documentation completed and ready for delivery by Tuesday, February 2nd. If you
221
have it completed sooner, that’d be great. This delivery date gives you all of
winter break plus a few weeks to refine your mix. I will have a computer and a
flash drive and we can meet and I will get your mix and documentation.
The session is 24-bit 96k so I would like to see your final mix as a 24-bit
96k .wav file. It can be either interleaved of multiple mono. Please refrain adding
any large fade-in or outs to your mix. If you would like a fade, please let me
know, and I will do it in mastering.
I would like to offer my sincere gratitude and thanks to all of you for
partaking in this exercise. I can’t communicate how much it means to me that you
are taking time to work on a mix. I asked you all to do a mix because of your
reputation as authorities in audio and I am honored to have you all involved in the
project.
Receiving the Mixes
Alan Williams’s mix was the first that I received. Alan worked entirely in
Nuendo and did a few alterations to the arrangement of the song. I did not have a
problem with this as first because, after all, it was his song and he was the
producer. Second, it made sense musically.
Upon further review of the mix, I realized that there was already some
limiting on the mix so I asked Alan for a revision. I asked him to reduce the level
of the mix and also remove the limiter on his mix. Alan used the limiter to catch
just the loudest peaks of his mix, but I asked for the revision because, ideally, the
mastering engineer should be the one to use the limiter. After Alan made the
revision, the mix was the ideal level and file type and was ready for mastering.
222
The next mix that was received was Nick Dragoni’s. Nick came to UMass
Lowell’s room 213 and mixed on the API Vision console. His mix was
immediately acceptable for mastering; the mix was at an appropriate level, with
peaks landing at least -3dBFS and at the original sample rate and bit depth.
The following mix that I received was from Brandon Vaccaro. His mix
was the most complicated and detailed of all the mixes. There are multiple
changes in the entire mix throughout the song. He even took the liberty to add
some parts to the song. Vaccaro re-amped the electric guitar parts and also added
several percussion tracks. This addition of additional instruments was not part of
the original song, but with mastering, you never know what the nature of the
mixes you receive will be. Therefore, I decided to keep the mix the way Vaccaro
submitted it.
SRT alumnus, Bradford Swanson, was the final mix engineer. With the
time restraint and the commitment needed, it was a bit difficult trying to nail
down a fourth mix engineer. First, I asked Alex Case, but quickly realized that he
had many other obligations and responsibilities. Second, I asked Bill Carman, the
SRT studio manager. But like Case, he was unsure of being able to complete the
mix on time. Bill advised that a search for another mix engineer should ensue.
This is when I decided to contact Bradford Swanson. My fellow SRT graduate
students highly recommended Swanson as a mixer. Fortunately, he was able to
complete a mix within the timeframe and sent in his mix the night before the
scheduled mastering session.
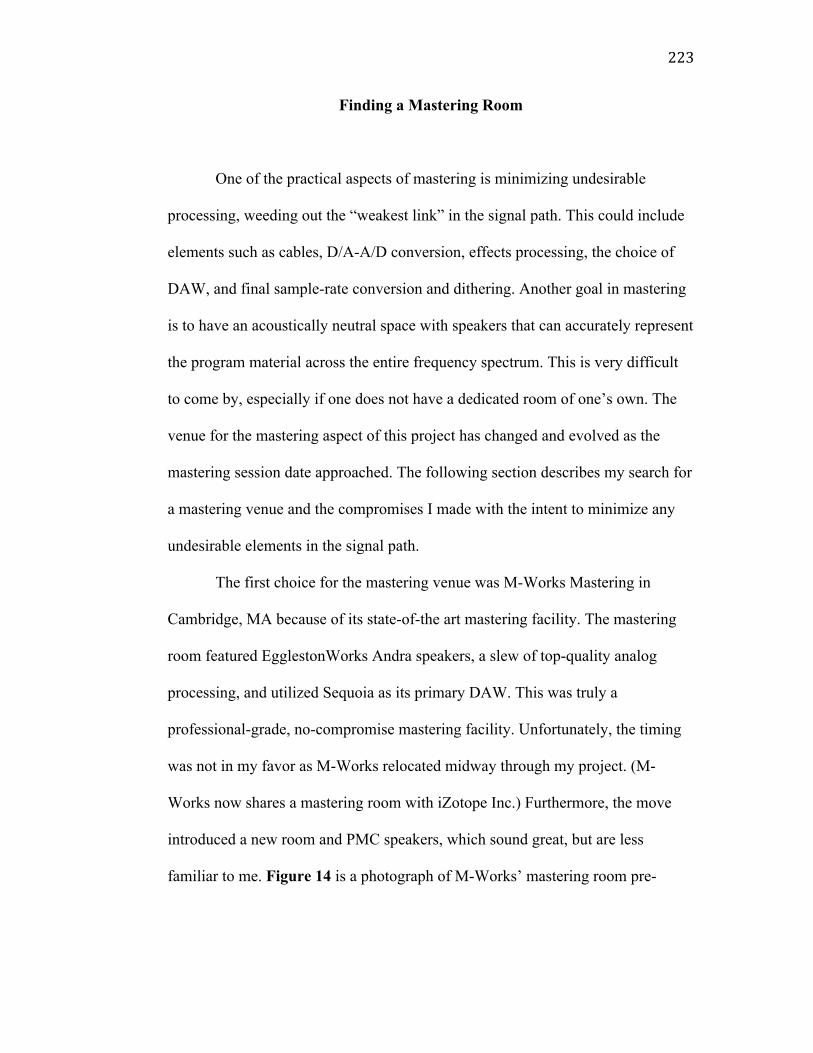
223
Finding a Mastering Room
One of the practical aspects of mastering is minimizing undesirable
processing, weeding out the “weakest link” in the signal path. This could include
elements such as cables, D/A-A/D conversion, effects processing, the choice of
DAW, and final sample-rate conversion and dithering. Another goal in mastering
is to have an acoustically neutral space with speakers that can accurately represent
the program material across the entire frequency spectrum. This is very difficult
to come by, especially if one does not have a dedicated room of one’s own. The
venue for the mastering aspect of this project has changed and evolved as the
mastering session date approached. The following section describes my search for
a mastering venue and the compromises I made with the intent to minimize any
undesirable elements in the signal path.
The first choice for the mastering venue was M-Works Mastering in
Cambridge, MA because of its state-of-the art mastering facility. The mastering
room featured EgglestonWorks Andra speakers, a slew of top-quality analog
processing, and utilized Sequoia as its primary DAW. This was truly a
professional-grade, no-compromise mastering facility. Unfortunately, the timing
was not in my favor as M-Works relocated midway through my project. (M-
Works now shares a mastering room with iZotope Inc.) Furthermore, the move
introduced a new room and PMC speakers, which sound great, but are less
familiar to me. Figure 14 is a photograph of M-Works’ mastering room pre-
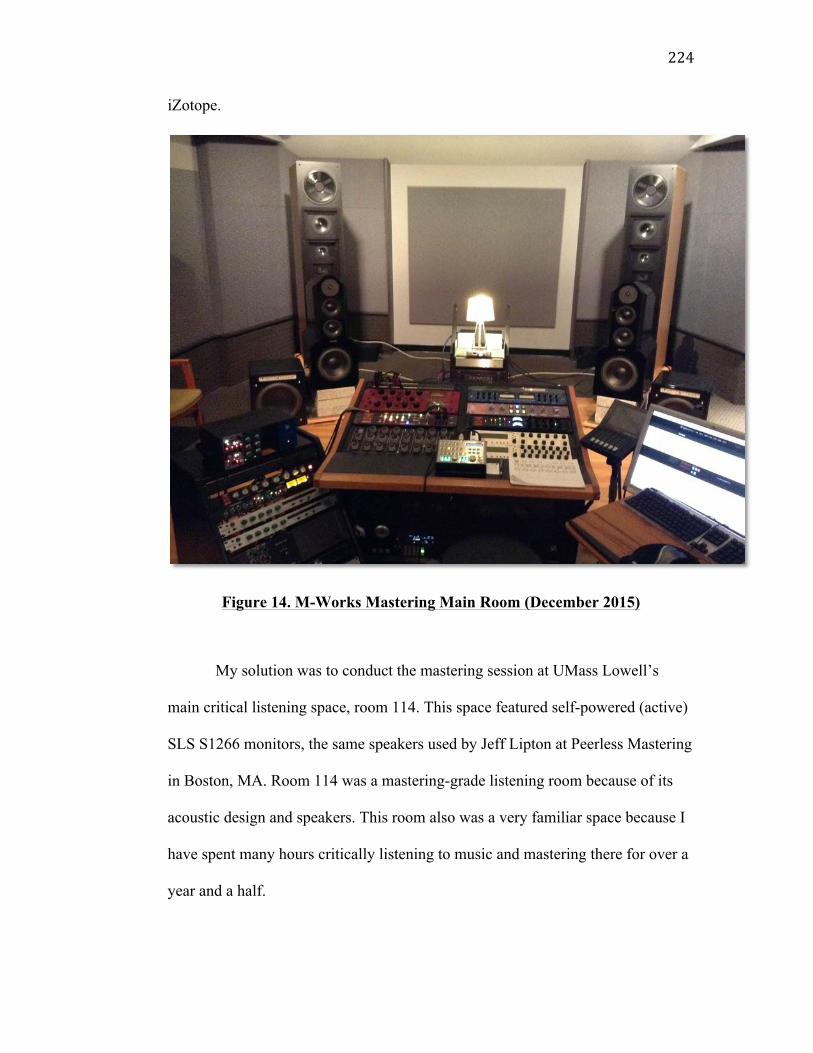
224
iZotope.
Figure 14. M-Works Mastering Main Room (December 2015)
My solution was to conduct the mastering session at UMass Lowell’s
main critical listening space, room 114. This space featured self-powered (active)
SLS S1266 monitors, the same speakers used by Jeff Lipton at Peerless Mastering
in Boston, MA. Room 114 was a mastering-grade listening room because of its
acoustic design and speakers. This room also was a very familiar space because I
have spent many hours critically listening to music and mastering there for over a
year and a half.
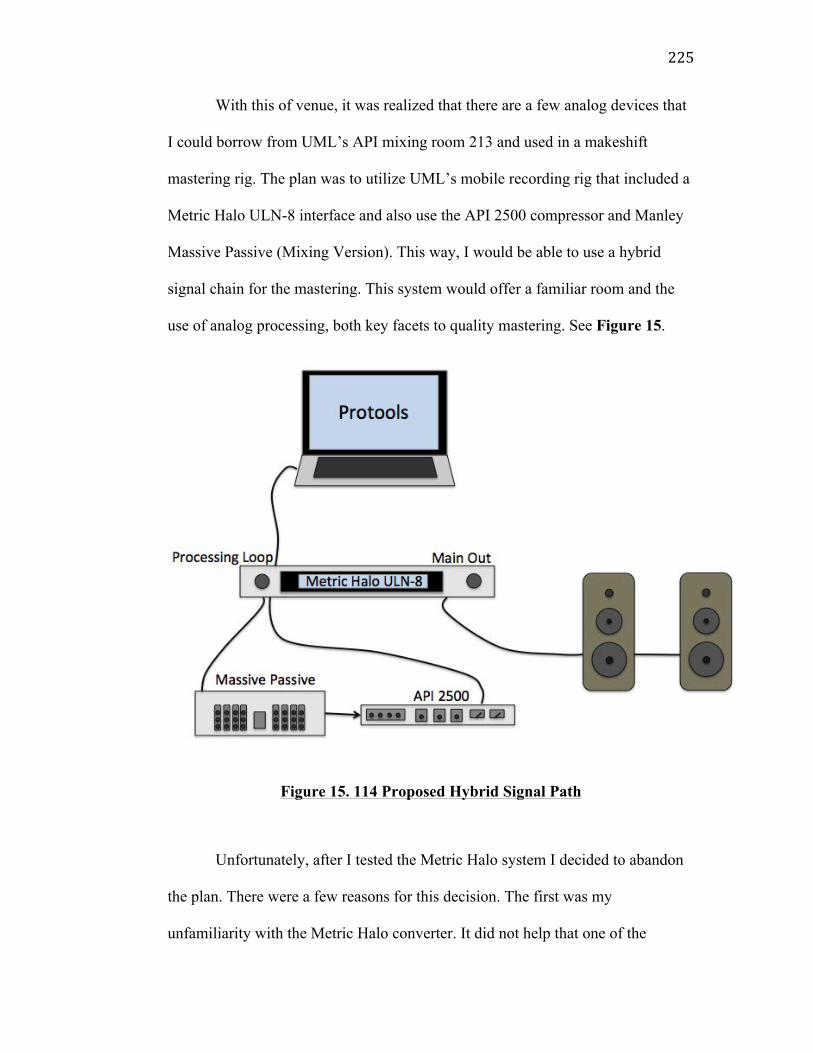
225
With this of venue, it was realized that there are a few analog devices that
I could borrow from UML’s API mixing room 213 and used in a makeshift
mastering rig. The plan was to utilize UML’s mobile recording rig that included a
Metric Halo ULN-8 interface and also use the API 2500 compressor and Manley
Massive Passive (Mixing Version). This way, I would be able to use a hybrid
signal chain for the mastering. This system would offer a familiar room and the
use of analog processing, both key facets to quality mastering. See Figure 15.
Figure 15. 114 Proposed Hybrid Signal Path
Unfortunately, after I tested the Metric Halo system I decided to abandon
the plan. There were a few reasons for this decision. The first was my
unfamiliarity with the Metric Halo converter. It did not help that one of the
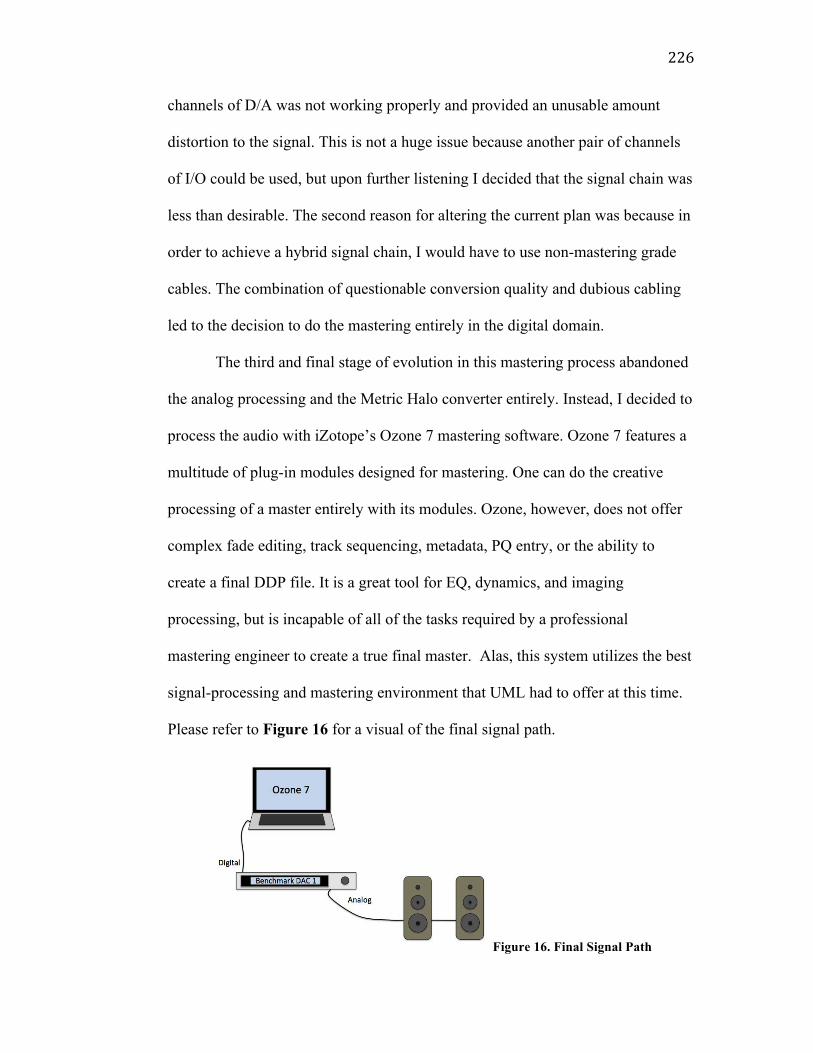
226
channels of D/A was not working properly and provided an unusable amount
distortion to the signal. This is not a huge issue because another pair of channels
of I/O could be used, but upon further listening I decided that the signal chain was
less than desirable. The second reason for altering the current plan was because in
order to achieve a hybrid signal chain, I would have to use non-mastering grade
cables. The combination of questionable conversion quality and dubious cabling
led to the decision to do the mastering entirely in the digital domain.
The third and final stage of evolution in this mastering process abandoned
the analog processing and the Metric Halo converter entirely. Instead, I decided to
process the audio with iZotope’s Ozone 7 mastering software. Ozone 7 features a
multitude of plug-in modules designed for mastering. One can do the creative
processing of a master entirely with its modules. Ozone, however, does not offer
complex fade editing, track sequencing, metadata, PQ entry, or the ability to
create a final DDP file. It is a great tool for EQ, dynamics, and imaging
processing, but is incapable of all of the tasks required by a professional
mastering engineer to create a true final master. Alas, this system utilizes the best
signal-processing and mastering environment that UML had to offer at this time.
Please refer to Figure 16 for a visual of the final signal path.
Figure 16. Final Signal Path
227
A Note on DAW’s: Ozone 7 and Pyramix 7
After much careful thought and deliberation, I decided to master entirely
within the stand-alone application of iZotope’s Ozone 7. This offered a complete
array of plug-ins and modules designed specifically for mastering. The modules
themselves sounded great and were very powerful. Although iZotope produces
professional-grade audio technology, their products are easily approachable for
the “pro-sumer” market. This market includes people who love music, recording,
mixing, and mastering, but do not necessarily have much technical or professional
experience.
While working with Ozone 7, I found that the modules were not very
specific in how they functioned. For example, their limiter module, the
maximizer, had four different limiter options. They were different algorithms for
their IRC (Intelligent Release Control) limiters. The question then arose, which
one does what? Is there one IRC that sounds better for a certain style of music?
To further complicate the matter, some of the IRC’s had different selections
within the individual algorithm like, “smooth” or “crisp”. To make an automotive
analogy, Ozone 7 can be thought of as a high-end sports car with an automatic
transmission. When I used it for this project, it was flexible, agile, and extremely
powerful but it was never very clear how the results occurred. In the end, as
always with mastering, it was best to trust my ears. I found it helpful to listen to
the different settings and see which ones sounded best for each particular
application.
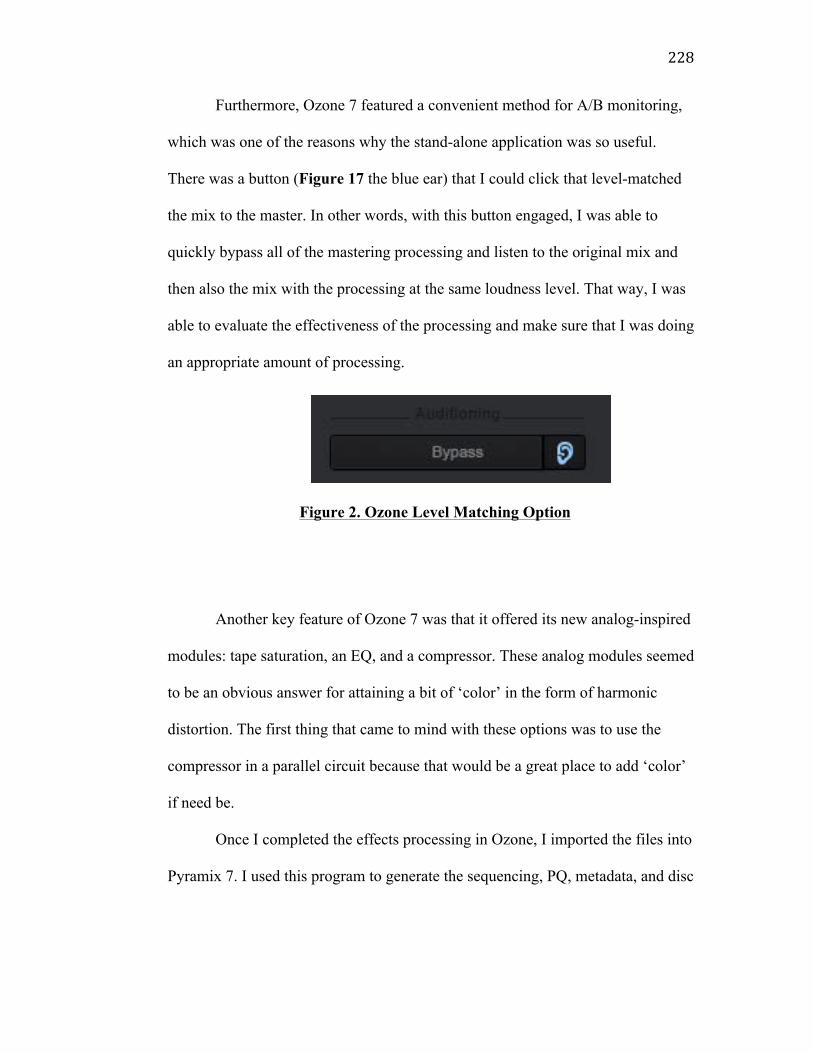
228
Furthermore, Ozone 7 featured a convenient method for A/B monitoring,
which was one of the reasons why the stand-alone application was so useful.
There was a button (Figure 17 the blue ear) that I could click that level-matched
the mix to the master. In other words, with this button engaged, I was able to
quickly bypass all of the mastering processing and listen to the original mix and
then also the mix with the processing at the same loudness level. That way, I was
able to evaluate the effectiveness of the processing and make sure that I was doing
an appropriate amount of processing.
Another key feature of Ozone 7 was that it offered its new analog-inspired
modules: tape saturation, an EQ, and a compressor. These analog modules seemed
to be an obvious answer for attaining a bit of ‘color’ in the form of harmonic
distortion. The first thing that came to mind with these options was to use the
compressor in a parallel circuit because that would be a great place to add ‘color’
if need be.
Once I completed the effects processing in Ozone, I imported the files into
Pyramix 7. I used this program to generate the sequencing, PQ, metadata, and disc
Figure 2. Ozone Level Matching Option
229
image. This was the last step in creating the final master and the only creative
aspect to this process was when I applied fades and spaced the songs.
Preparing the Mixes
All of the mixes that were received were at 96kHz 24-bit except for one,
Brandon Vaccaro’s, which was changed from the original 24-bit to 32-bit
somewhere within the mixing stage. I converted the mix back to 24-bit using
iZotope’s RX software. This is not generally desirable because any conversion or
processing provides an opportunity for degradation of the original file. However,
with proper dithering, a 32-bit file can be truncated to a 24-bit file without much
of a problem. Furthermore, iZotope RX is well known for being one of the best
programs for sample rate and bit depth conversion.
The Mastering Session
I conducted the mastering for this recording project at UMass Lowell’s
Sound Recording Technology Room 114 on Friday, March 18th. The physical
signal path of this set-up was relatively minimal. The mixes were processed
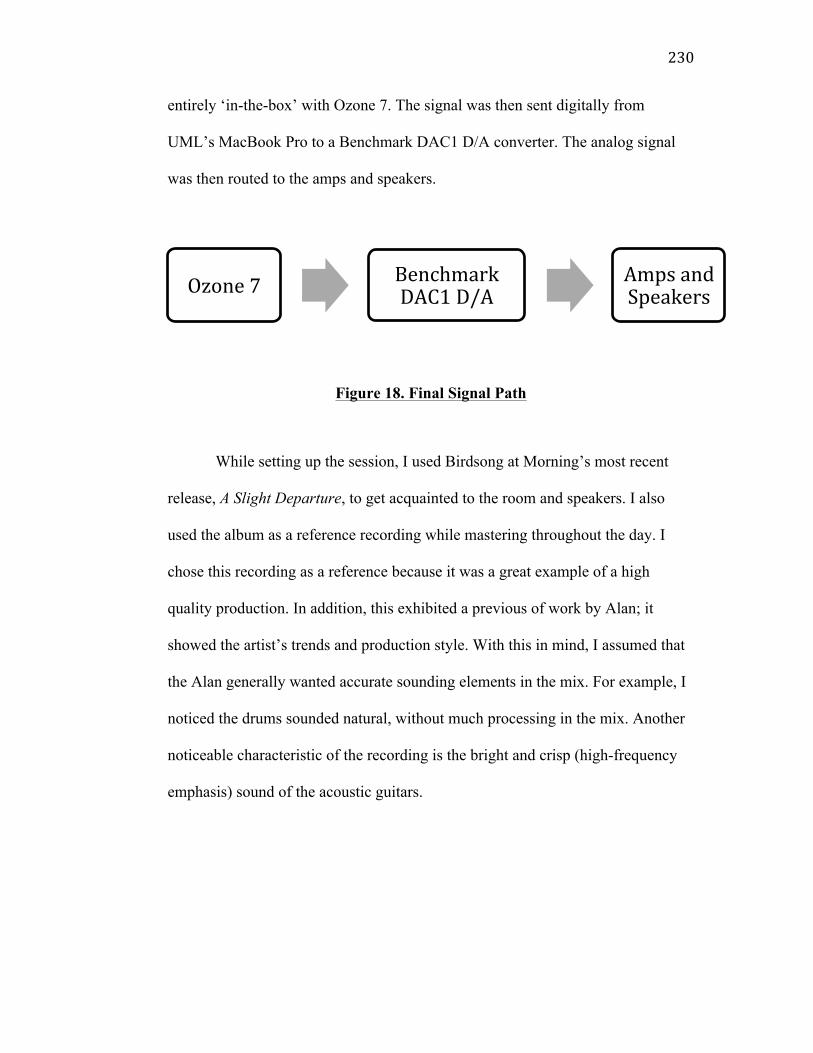
230
entirely ‘in-the-box’ with Ozone 7. The signal was then sent digitally from
UML’s MacBook Pro to a Benchmark DAC1 D/A converter. The analog signal
was then routed to the amps and speakers.
Figure 18. Final Signal Path
While setting up the session, I used Birdsong at Morning’s most recent
release, A Slight Departure, to get acquainted to the room and speakers. I also
used the album as a reference recording while mastering throughout the day. I
chose this recording as a reference because it was a great example of a high
quality production. In addition, this exhibited a previous of work by Alan; it
showed the artist’s trends and production style. With this in mind, I assumed that
the Alan generally wanted accurate sounding elements in the mix. For example, I
noticed the drums sounded natural, without much processing in the mix. Another
noticeable characteristic of the recording is the bright and crisp (high-frequency
emphasis) sound of the acoustic guitars.
Ozone7 BenchmarkDAC1D/A
AmpsandSpeakers
231
III. Results
First Impressions
The mastering process should be a fluid interaction between one’s first
impressions and the implementation of any processing effect. Within the first few
listens of the mix, the mastering engineer will have an idea of the intent of the
artist and what processing needs to happen in order to best highlight it. The
mastering engineer will also listen for any problematic aspects of the mix.
Generally the most obvious issues in a mix are in the frequency domain.
The song, “All the Sadness,” was pensive and moody, perfect for a more
‘vibey’ and ‘warm’ character in the mix. I found that this character was common
throughout all the mixes. The mix engineers successfully worked not for a
“perfect” sounding mix, but rather incorporated some “vibe” into the mix. During
the mastering, I made all the decisions around this “vibey” atmosphere. The
following is a description of the first impressions of each mix.
Mix 1: Alan Williams
Alan William’s mix had a peak value of 0.0dBFS so I lowered the gain at
the input stage of Ozone by 3dB. Once that simple step was completed, I still
noticed too many low and low-mid frequencies in the vocal and acoustic guitars.
232
This was caused by proximity-effect in the recording stage. The acoustic guitars
also seemed to lack some high-frequency “sparkle.” Lastly, the bass guitar was
getting a little masked and cluttered by the obtrusive amount of low-midrange.
Overall, the mix was very nice and these first impressions were simply problems
found in mastering. In other words, this mix was ready for mastering since there
were no large issues that needed further revision in the mix.
Mix 2: Nick Dragoni
The next mix, by Nick Dragoni, had three issues that I observed within
the first few listens. Like Alan’s mix, there was still some low-mid proximity
effect left in the mix. Secondly, the string section seemed to have an abundance of
mid-range frequencies around 550Hz. Finally, the overall sound stage was
relatively narrow and was especially apparent in the strings.
Mix 3: Brandon Vaccaro
Brandon was very thorough in his mixing and freely took many artistic
liberties. Brandon’s mix stood out because the other mixes remained relatively
neutral, presenting the music as clearly as possible, without any distractions.
Brandon especially paid attention to the lyrics and interpreted the song through
his mixing decisions. One example of this was at the end of the song, the final line
was, “I just can’t say I’m sorry anymore”. Brandon then used a delay to ironically
233
repeat the phrase, “I’m sorry.” This is just one example of his creative mixing
decisions.
Brandon also sent two versions of his mix. One was bounced ‘in-the-box’
and the other was bounced to tape and then back into the DAW. Upon review of
the two mixes, I decided that the tape version had a slight but pleasant amount of
tape-based artifacts. This added nicely to the overall gritty character of the song.
Aside from the interesting, the other thing I noticed was that the peak
value of the mix was -7dBFS so 4dB of gain was added at the input of Ozone.
While assessing the timbre of the vocal, I noticed there was little low-mid and
mid frequencies and also an emphasis on the high frequencies. Another issue was
that the vocal seemed a little low in level relative to the rest of the mix. Lastly, I
thought the stereo width could be increased to better use the extremes of the
sound stage to its fullest potential.
Mix 4: Bradford Swanson
Bradford Swason’s mix was possibly the most ‘vibey’ of the bunch. There
was a general emphasis on the low and low-mid frequencies. I did not think of
this as a problem, but rather an artistic decision, which worked very well for this
particular song. Another compelling aspect to Brad’s mix was his use of space
and reverb on the strings. He was able to achieve a uniquely pleasurable sense of
distance and large-room decay on the strings. Lastly, Brad also sent a few
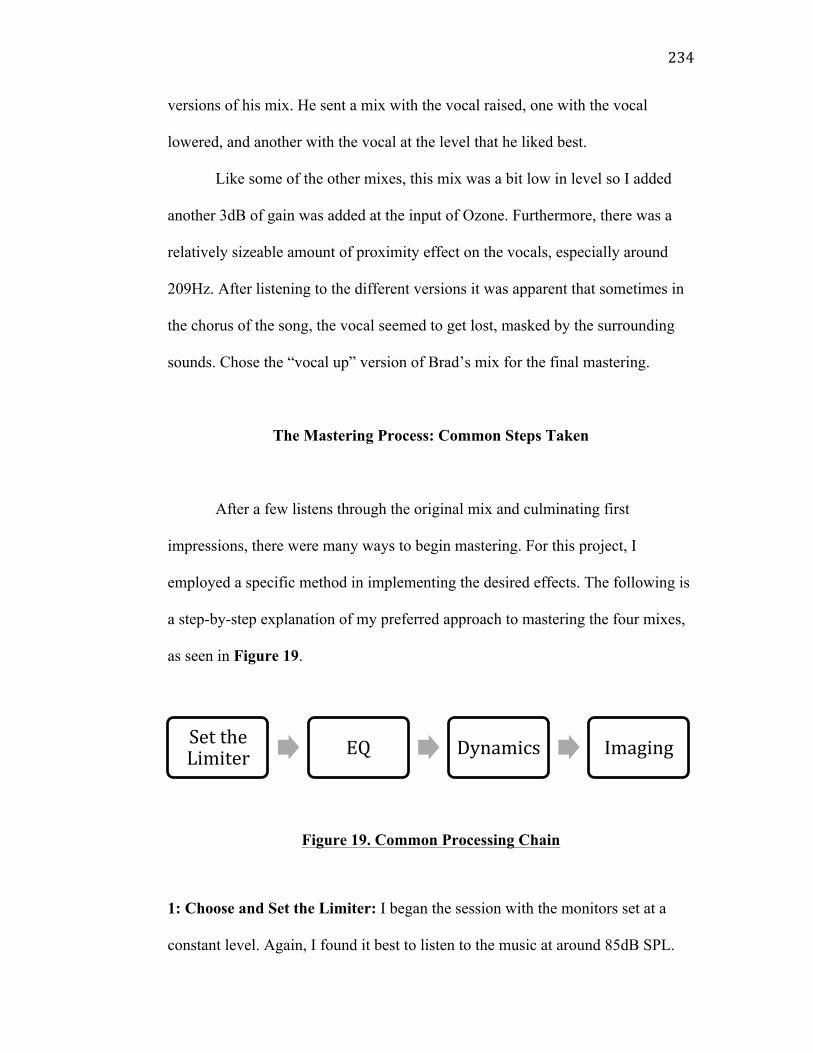
234
versions of his mix. He sent a mix with the vocal raised, one with the vocal
lowered, and another with the vocal at the level that he liked best.
Like some of the other mixes, this mix was a bit low in level so I added
another 3dB of gain was added at the input of Ozone. Furthermore, there was a
relatively sizeable amount of proximity effect on the vocals, especially around
209Hz. After listening to the different versions it was apparent that sometimes in
the chorus of the song, the vocal seemed to get lost, masked by the surrounding
sounds. Chose the “vocal up” version of Brad’s mix for the final mastering.
The Mastering Process: Common Steps Taken
After a few listens through the original mix and culminating first
impressions, there were many ways to begin mastering. For this project, I
employed a specific method in implementing the desired effects. The following is
a step-by-step explanation of my preferred approach to mastering the four mixes,
as seen in Figure 19.
Figure 19. Common Processing Chain
1: Choose and Set the Limiter: I began the session with the monitors set at a
constant level. Again, I found it best to listen to the music at around 85dB SPL.
SettheLimiter EQ Dynamics Imaging
235
With that in mind, the mastering began with an assessment of the various brick-
wall limiters within Ozone 7. The intent with choosing and setting the limiter first
was that the effects processing could be accomplished while listening to the
effects of the limiter. For example, how did the limiter sound and how did it react
to any dynamics processing? How did it react to any EQ adjustments? Those were
important questions to ask because the processing will be done in conjunction
with the sound of the final limiter.
2. Apply Appropriate EQ: As mentioned previously, problematic frequencies
were possibly the easiest issues to spot. In the case of this song, there may be too
much low-mid in the vocal because of proximity effect during the recording
process. The best time to tame any problems is during mastering with the addition
of EQ. Generally a mastering engineer will do reductive EQ more frequently than
additive EQ. The idea behind that was to reduce the abundant frequency and get it
to match evenly with the rest of the frequencies. However, sometimes there could
be a moment when additive EQ is necessary for example, if an acoustic guitar
could use more “brightness” in the high frequencies.
3. Dynamics: The next step in the process was to add any necessary compression.
For this project, the compression ratios were low and the thresholds were high.
The aim was to delicately compress any loud sections so that they could be
brought up in level on a global scale at the final limiter stage. The compression
236
was light and the effect was very subtle, which was the intent with the
compression.
In general, this particular song did not require much compression because
the level remained relatively consistent throughout its duration. It also did not
need much compression because the final master did not need to be overly loud.
Again, sometimes the idea behind compression in mastering is to reduce the
extreme peak levels so that the overall level of the song can be raised. This did
not need to happen with this song. The aim for this project was to preserve any
natural transients and overall musical ebb and flow.
4. Imaging: Once the frequency and dynamics processing occurred, there may be
an issue with the sound stage, in particular, the stereo width. Ozone features many
ways to manipulate the stereo width with their “Imager” module. This particular
module can increase or decrease the width of a selected frequency range. I found
this tool especially helpful for this project because some of the mixes did not
utilize the stereo width to its fullest potential.
The Imager module in Ozone is very powerful and it was important to not
get carried away with the settings because it could potentially cause more harm
than good. For example, spreading out the stereo width could leave holes in the
perceived imaging. The center would remain but the left and right could be
pushed so far than there is a gap in the imaging between the center and the
extreme left and right.
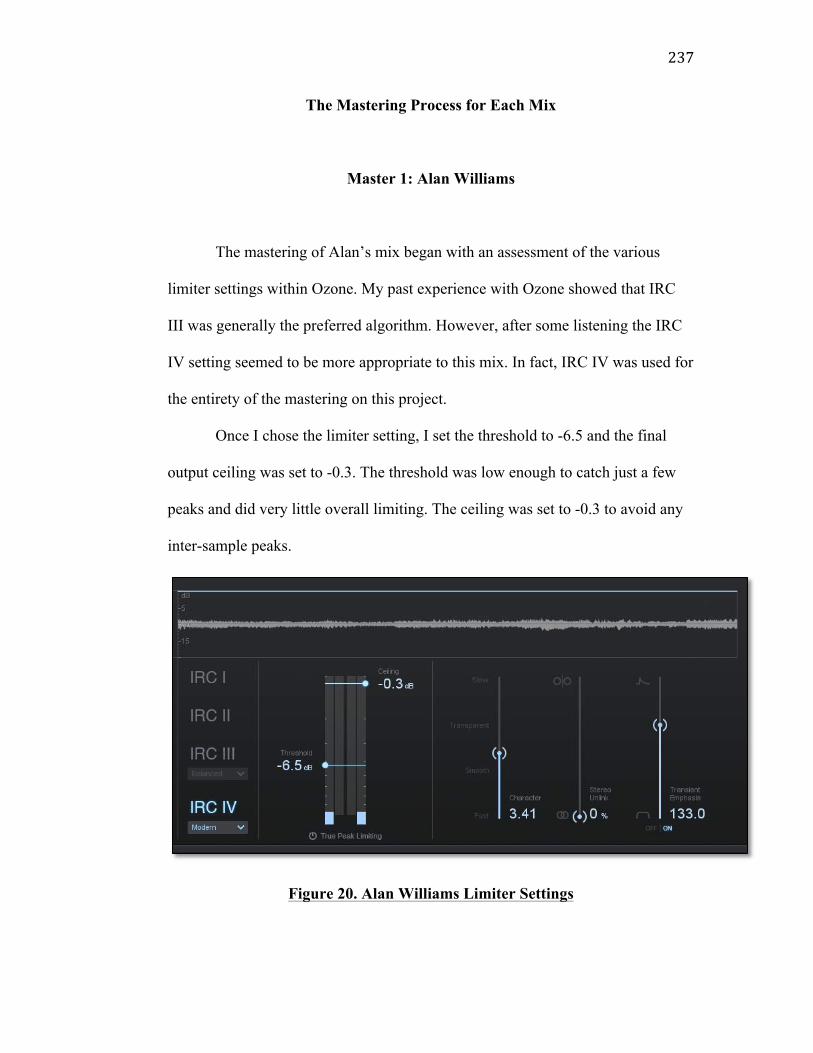
237
The Mastering Process for Each Mix
Master 1: Alan Williams
The mastering of Alan’s mix began with an assessment of the various
limiter settings within Ozone. My past experience with Ozone showed that IRC
III was generally the preferred algorithm. However, after some listening the IRC
IV setting seemed to be more appropriate to this mix. In fact, IRC IV was used for
the entirety of the mastering on this project.
Once I chose the limiter setting, I set the threshold to -6.5 and the final
output ceiling was set to -0.3. The threshold was low enough to catch just a few
peaks and did very little overall limiting. The ceiling was set to -0.3 to avoid any
inter-sample peaks.
Figure 20. Alan Williams Limiter Settings
238
The first issue that I noticed in the frequency domain was the abundance
of low-mid frequencies due to proximity effect. After searching for the
problematic frequencies, I made a reduction at 183Hz. That was the main
frequency-based issue caused by proximity effect.
Upon further listening, I discovered several more problematic frequencies
in the lows (89Hz), mids (613Hz and 1.7kHz), and highs (4.5kHz). All of these
frequencies required a reduction around 1.5dB except for the high frequency,
which only needed a reduction of 0.5dB. Furthermore, I decided that the acoustic
guitars could benefit from some additional high frequencies so I employed a
Baxandall shelf to boost 8.3kHz and above by a small but noticeable, 0.3dB. I
added some additional EQ was added to the mastering chain so that the
problematic frequencies would be tamed even further. This also included the use
of the Dynamic EQ, which was essentially a multiband compressor with the
character of an EQ. This means that the compression can be added to a specific
frequency and that the character of the threshold has a ‘Q’ control. Figure 21
shows a display of the EQ used where the Y-axis shows the amount of addition or
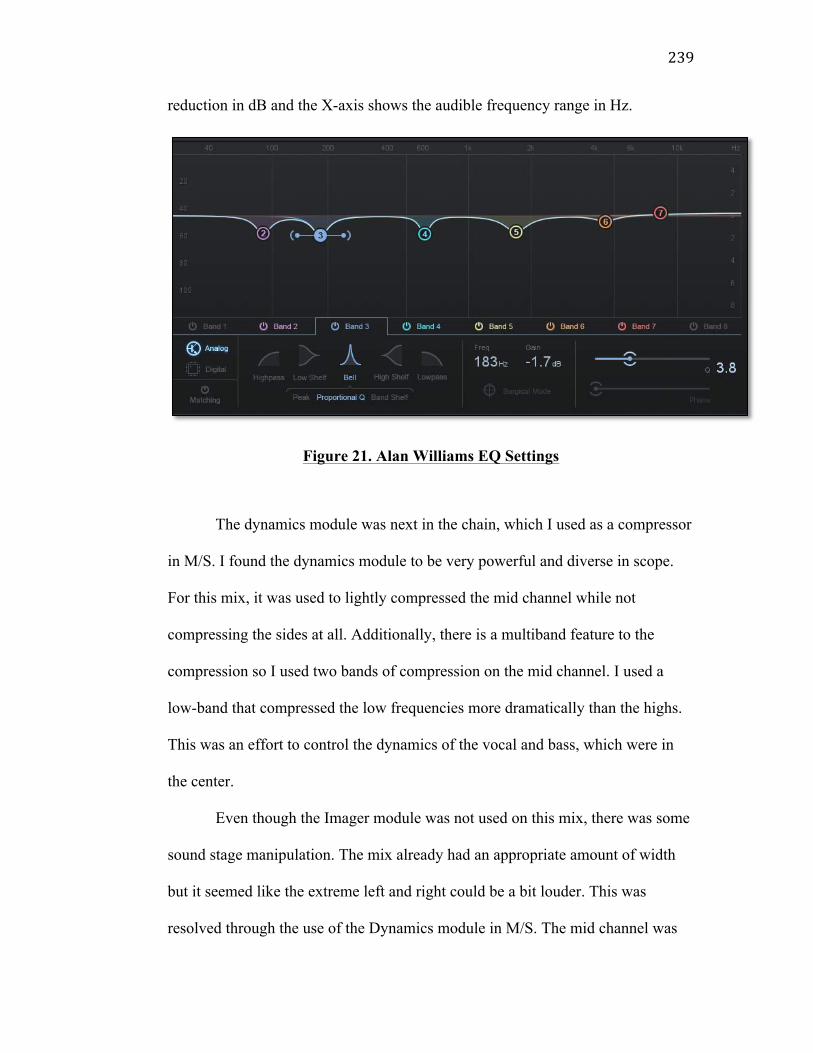
239
reduction in dB and the X-axis shows the audible frequency range in Hz.
Figure 21. Alan Williams EQ Settings
The dynamics module was next in the chain, which I used as a compressor
in M/S. I found the dynamics module to be very powerful and diverse in scope.
For this mix, it was used to lightly compressed the mid channel while not
compressing the sides at all. Additionally, there is a multiband feature to the
compression so I used two bands of compression on the mid channel. I used a
low-band that compressed the low frequencies more dramatically than the highs.
This was an effort to control the dynamics of the vocal and bass, which were in
the center.
Even though the Imager module was not used on this mix, there was some
sound stage manipulation. The mix already had an appropriate amount of width
but it seemed like the extreme left and right could be a bit louder. This was
resolved through the use of the Dynamics module in M/S. The mid channel was
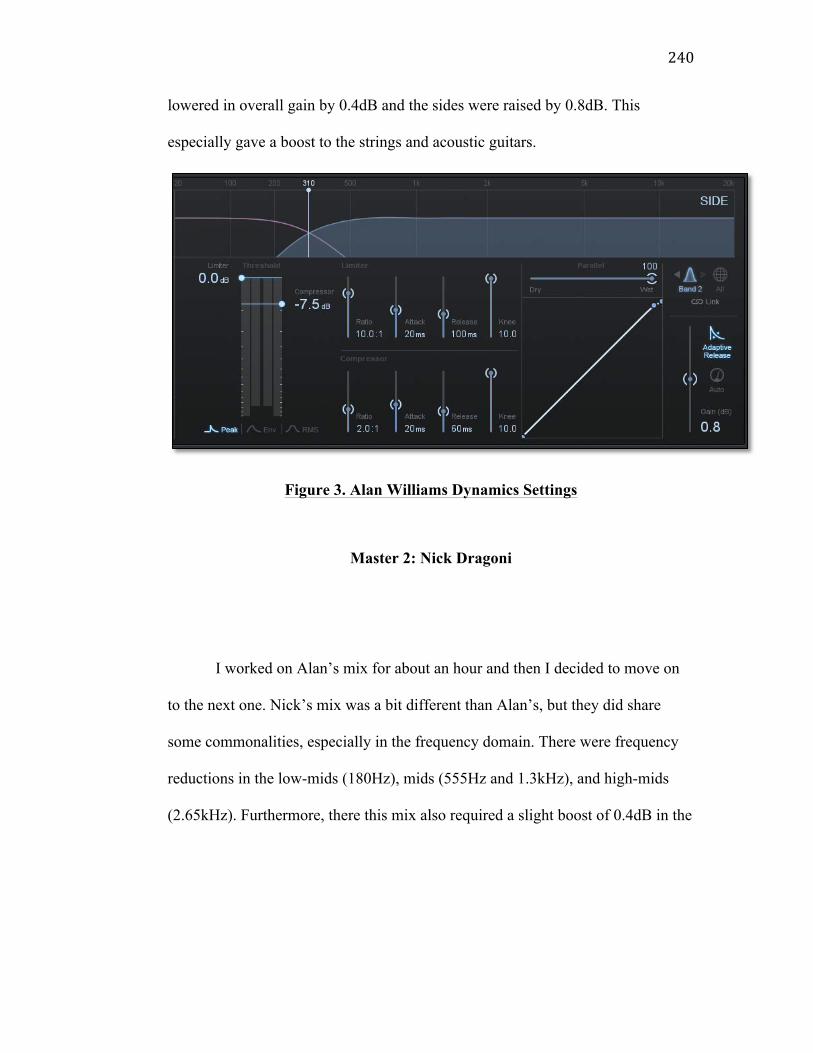
240
lowered in overall gain by 0.4dB and the sides were raised by 0.8dB. This
especially gave a boost to the strings and acoustic guitars.
Figure 3. Alan Williams Dynamics Settings
Master 2: Nick Dragoni
I worked on Alan’s mix for about an hour and then I decided to move on
to the next one. Nick’s mix was a bit different than Alan’s, but they did share
some commonalities, especially in the frequency domain. There were frequency
reductions in the low-mids (180Hz), mids (555Hz and 1.3kHz), and high-mids
(2.65kHz). Furthermore, there this mix also required a slight boost of 0.4dB in the

241
high frequencies with a Baxandall shelf at 6.4kHz.
Figure 23. Nick Dragoni Stereo EQ Settings
After this global EQ adjustment, there still seemed to be an abundance of
low-mids in the side channels, specifically in the acoustic guitars, electric guitar,
and strings. I used another EQ module in M/S to reduce this low-mid build-up in
the sides. This reduction was centered at 199Hz and was reduced by 2.5dB.
Figure 24. Nick Dragoni M/S EQ Settings
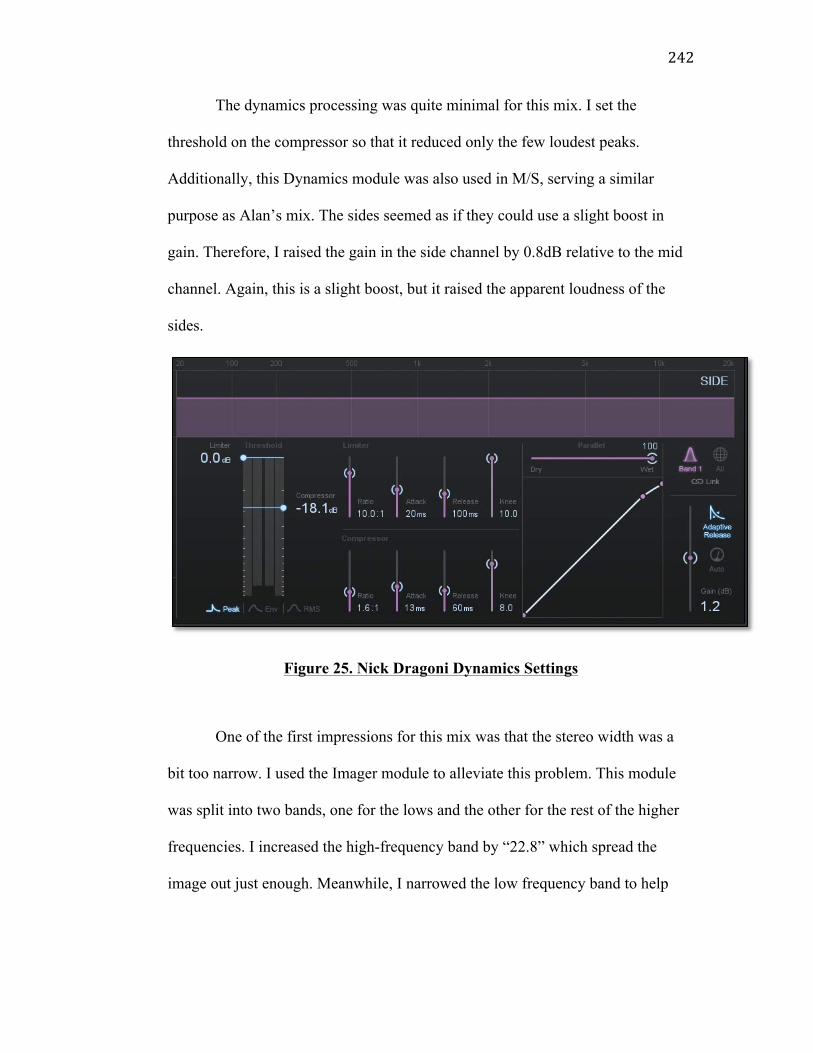
242
The dynamics processing was quite minimal for this mix. I set the
threshold on the compressor so that it reduced only the few loudest peaks.
Additionally, this Dynamics module was also used in M/S, serving a similar
purpose as Alan’s mix. The sides seemed as if they could use a slight boost in
gain. Therefore, I raised the gain in the side channel by 0.8dB relative to the mid
channel. Again, this is a slight boost, but it raised the apparent loudness of the
sides.
Figure 25. Nick Dragoni Dynamics Settings
One of the first impressions for this mix was that the stereo width was a
bit too narrow. I used the Imager module to alleviate this problem. This module
was split into two bands, one for the lows and the other for the rest of the higher
frequencies. I increased the high-frequency band by “22.8” which spread the
image out just enough. Meanwhile, I narrowed the low frequency band to help
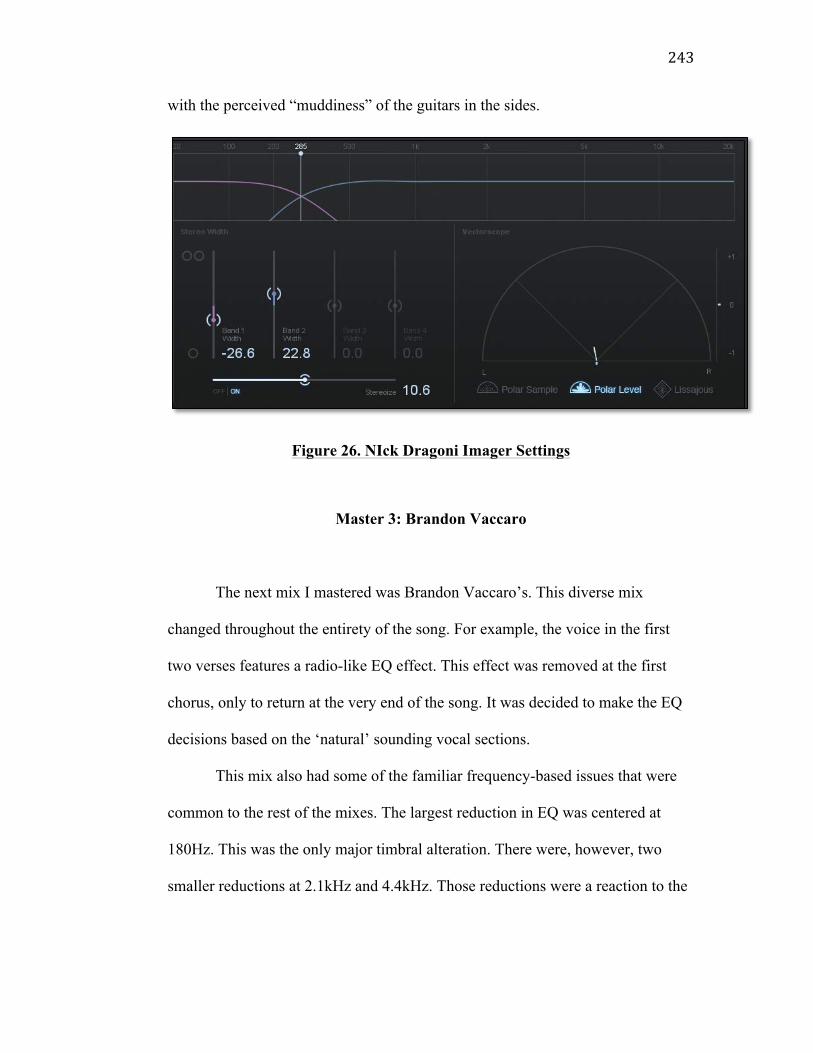
243
with the perceived “muddiness” of the guitars in the sides.
Figure 26. NIck Dragoni Imager Settings
Master 3: Brandon Vaccaro
The next mix I mastered was Brandon Vaccaro’s. This diverse mix
changed throughout the entirety of the song. For example, the voice in the first
two verses features a radio-like EQ effect. This effect was removed at the first
chorus, only to return at the very end of the song. It was decided to make the EQ
decisions based on the ‘natural’ sounding vocal sections.
This mix also had some of the familiar frequency-based issues that were
common to the rest of the mixes. The largest reduction in EQ was centered at
180Hz. This was the only major timbral alteration. There were, however, two
smaller reductions at 2.1kHz and 4.4kHz. Those reductions were a reaction to the
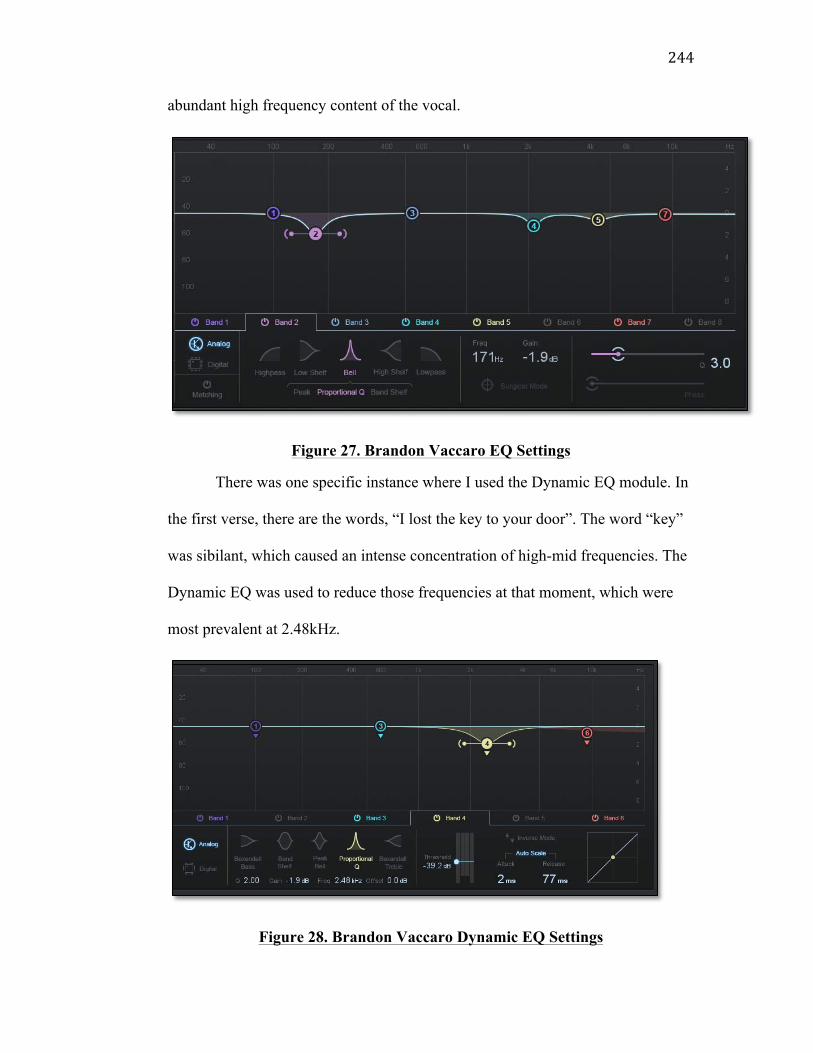
244
abundant high frequency content of the vocal.
Figure 27. Brandon Vaccaro EQ Settings
There was one specific instance where I used the Dynamic EQ module. In
the first verse, there are the words, “I lost the key to your door”. The word “key”
was sibilant, which caused an intense concentration of high-mid frequencies. The
Dynamic EQ was used to reduce those frequencies at that moment, which were
most prevalent at 2.48kHz.
Figure 28. Brandon Vaccaro Dynamic EQ Settings
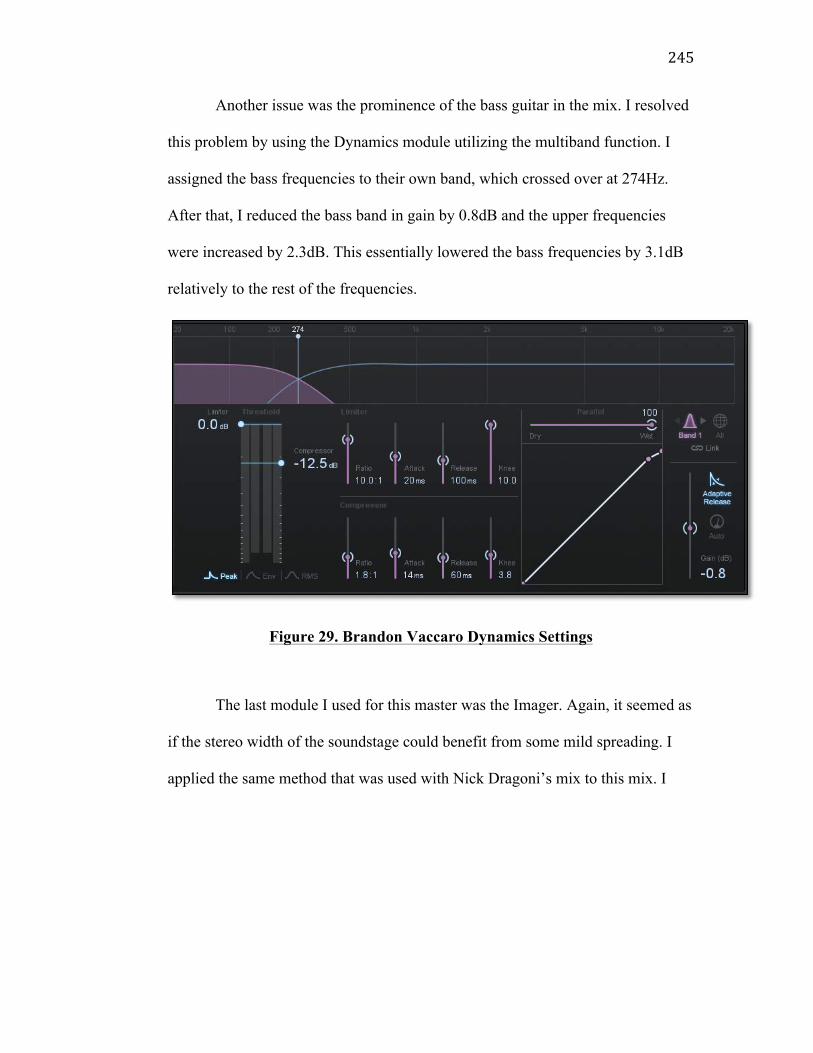
245
Another issue was the prominence of the bass guitar in the mix. I resolved
this problem by using the Dynamics module utilizing the multiband function. I
assigned the bass frequencies to their own band, which crossed over at 274Hz.
After that, I reduced the bass band in gain by 0.8dB and the upper frequencies
were increased by 2.3dB. This essentially lowered the bass frequencies by 3.1dB
relatively to the rest of the frequencies.
Figure 29. Brandon Vaccaro Dynamics Settings
The last module I used for this master was the Imager. Again, it seemed as
if the stereo width of the soundstage could benefit from some mild spreading. I
applied the same method that was used with Nick Dragoni’s mix to this mix. I
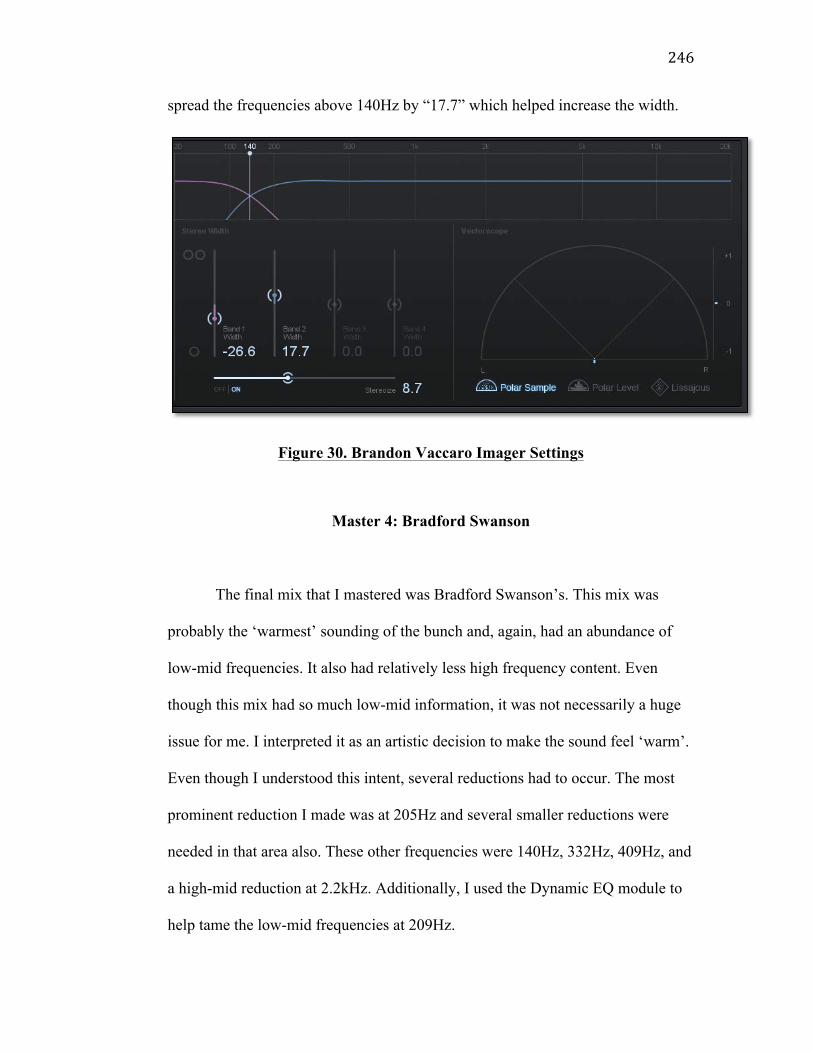
246
spread the frequencies above 140Hz by “17.7” which helped increase the width.
Figure 30. Brandon Vaccaro Imager Settings
Master 4: Bradford Swanson
The final mix that I mastered was Bradford Swanson’s. This mix was
probably the ‘warmest’ sounding of the bunch and, again, had an abundance of
low-mid frequencies. It also had relatively less high frequency content. Even
though this mix had so much low-mid information, it was not necessarily a huge
issue for me. I interpreted it as an artistic decision to make the sound feel ‘warm’.
Even though I understood this intent, several reductions had to occur. The most
prominent reduction I made was at 205Hz and several smaller reductions were
needed in that area also. These other frequencies were 140Hz, 332Hz, 409Hz, and
a high-mid reduction at 2.2kHz. Additionally, I used the Dynamic EQ module to
help tame the low-mid frequencies at 209Hz.
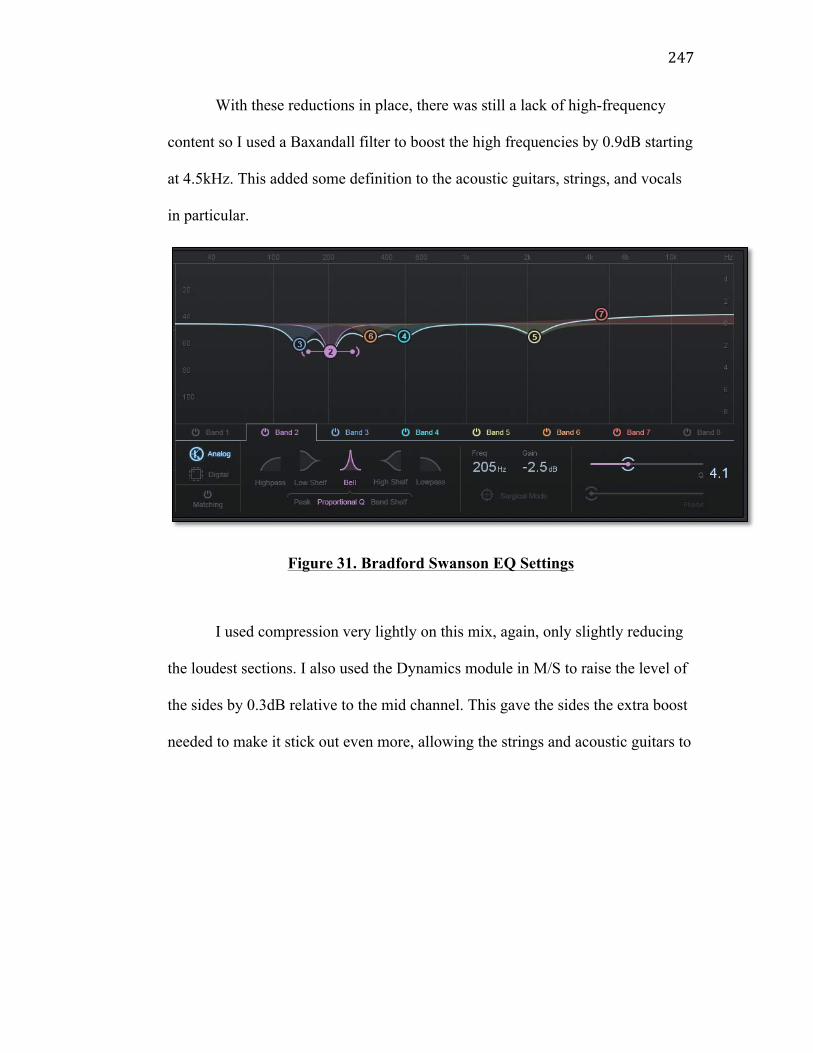
247
With these reductions in place, there was still a lack of high-frequency
content so I used a Baxandall filter to boost the high frequencies by 0.9dB starting
at 4.5kHz. This added some definition to the acoustic guitars, strings, and vocals
in particular.
Figure 31. Bradford Swanson EQ Settings
I used compression very lightly on this mix, again, only slightly reducing
the loudest sections. I also used the Dynamics module in M/S to raise the level of
the sides by 0.3dB relative to the mid channel. This gave the sides the extra boost
needed to make it stick out even more, allowing the strings and acoustic guitars to
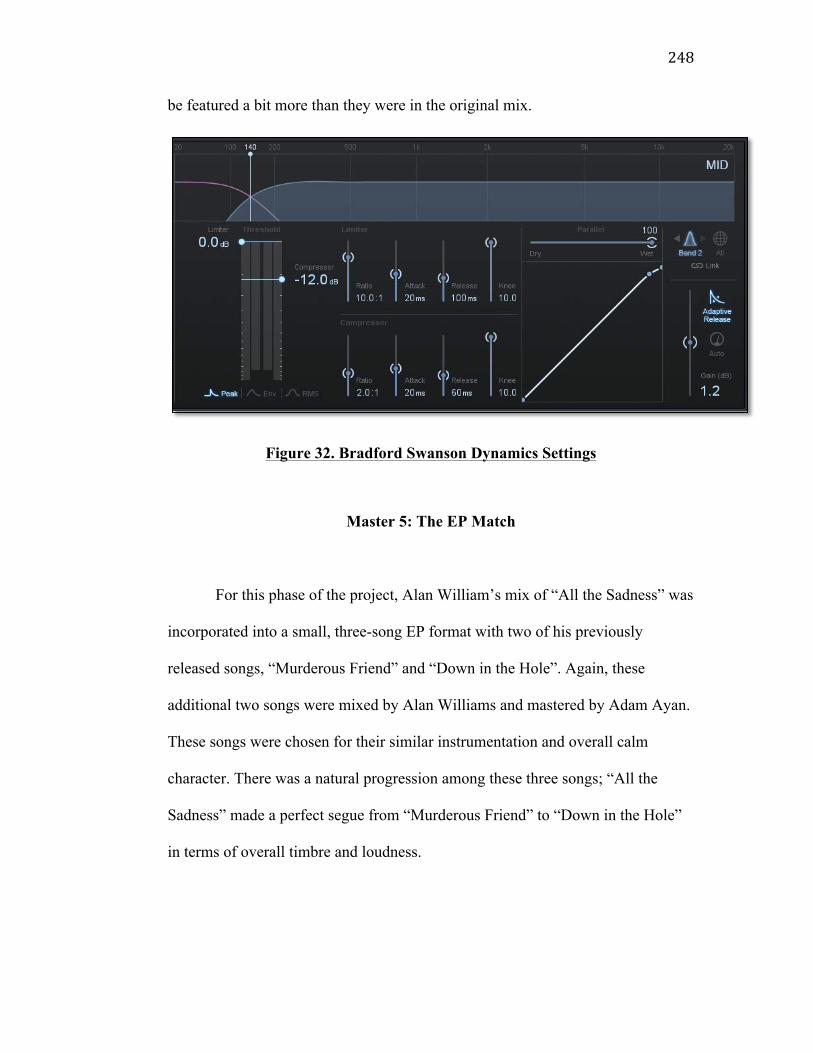
248
be featured a bit more than they were in the original mix.
Figure 32. Bradford Swanson Dynamics Settings
Master 5: The EP Match
For this phase of the project, Alan William’s mix of “All the Sadness” was
incorporated into a small, three-song EP format with two of his previously
released songs, “Murderous Friend” and “Down in the Hole”. Again, these
additional two songs were mixed by Alan Williams and mastered by Adam Ayan.
These songs were chosen for their similar instrumentation and overall calm
character. There was a natural progression among these three songs; “All the
Sadness” made a perfect segue from “Murderous Friend” to “Down in the Hole”
in terms of overall timbre and loudness.

249
When mastering for a single, there are no restrictions on the amount of
processing used by the mastering engineer. He or she has one goal in mind: make
the song sound as good as possible.
Mastering for a single gives the mastering engineer the freedom to
enhance the song to its utmost potential, whereas mastering songs as a part of
larger works is more restrictive. More often a song exists within a larger group of
songs, either in a small group of songs called an EP (Extended Play) or a larger
full-length album, called an LP (Long Play).
In this situation, it is important that the mastering engineer keeps the entire
scope of the project in mind while mastering each individual song. He or she will
notice common aesthetic trends throughout the work and should react to its
problems within the larger context. There may be some alterations that he or she
might want to do when mastering a song, but cannot because the change would
make that specific song stand out, distracting the listener from the atmosphere of
the record as a whole. In other words, when it comes to an EP or LP, keeping the
integrity of the whole work can restrict the mastering engineer.
One of the goals for this exercise was to match “All the Sadness” with the
other songs, for example, in terms of frequency content and overall character.
One of the main challenging elements of this exercise was getting the vocal of
“All the Sadness” to match the other songs. The processing of the mix for the EP
match exercise was continued from the previous mastering of Alan’s mix. With
the “single” version of the master, there were a few things that needed to happen
to get the song to fit with the others.
250
To get the vocal to match, some further EQ’ing was necessary. The timbre
of the vocal of “All the Sadness” was a bit brighter than the other two songs. To
get it to match with the other two songs, I made a reduction of 0.5dB with a
Baxandall shelf at 5.9kHz, which dimmed the overall brightness to the desired
level.
Furthermore, the “single” master of “All the Sadness” featured a touch
more low and low-mid frequencies than the other two songs. Adam’s masters of
the two other songs were clear and focused in the lows. In order to get “All the
Sadness” to match with his masters, I made a further reduction in the low-mids
around 180Hz. That EQ move helped somewhat but what was most noticeable
was the buildup of low-mids because of proximity effect. In order to alleviate this
problem, the Dynamic EQ was used to reduce those frequencies. The use of the
Dynamic EQ reduced the low-mid buildup enough to get it to match with the
other two songs.
In the end, the three songs naturally worked together well as an EP. Even
though the recording process was different for “All the Sadness”, the same person
mixed all of these songs, which was the most profound element in common and
successfully matched the aesthetic of the three songs.
Sequencing in Pyramix
After the songs were matched in terms of creative aspects, I imported
them into Pyramix 7 and sequenced. This involved many steps in the creation of a
251
final disc image. The first step I took was to put the songs in order. After some
thought, the EP seemed to flow well with the order: “Murderous Friend”, “All the
Sadness”, and then “Down in the Hole”. This order had a natural progression and
crescendo from “Murderous Friend” to “Down in the Hole” in terms of timbral
character, instrumentation, and loudness.
The timbral character in “Murderous Friend” was dark and brooding; there
was not much apparent high-frequency sparkle in the vocal or guitars. “All the
Sadness” expanded the high-frequency content a little bit, while “Down in the
Hole” features a pleasant amount of high-frequency content.
There was also an increase of instrumentation as the EP progressed.
“Murderous Friend” was relatively sparse. It included mainly vocals, acoustic
guitar, strings, bass, and electric guitar. “All the Sadness” was similarly sparse but
also included background vocals and piano. This was a small addition but it added
to the growth of the EP. Furthermore, the musical arrangement of “All the
Sadness” was a bit more complex than “Murderous Friend”, featuring a well-
arranged solo string section. This lead to the next song, “Down in the Hole”
which featured a much more complicated arrangement. The most prominent
difference was the addition of drums.
The overall loudness of the songs also increased as the EP progressed. The
RMS level of “Murderous Friend” was -14.7dB RMS, “All the Sadness” was
-13.2dB RMS, and “Down in the Hole” measured -12.6dB RMS. I wanted there
to be an overarching crescendo that lasts throughout the entire EP.
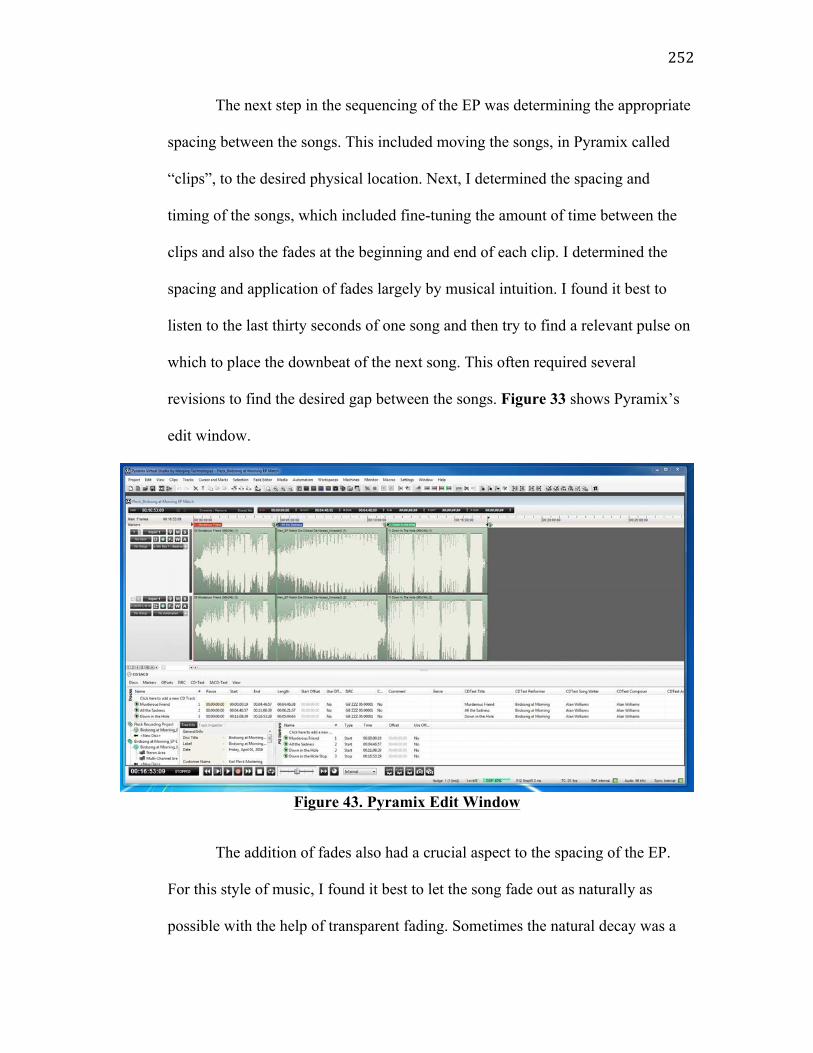
252
The next step in the sequencing of the EP was determining the appropriate
spacing between the songs. This included moving the songs, in Pyramix called
“clips”, to the desired physical location. Next, I determined the spacing and
timing of the songs, which included fine-tuning the amount of time between the
clips and also the fades at the beginning and end of each clip. I determined the
spacing and application of fades largely by musical intuition. I found it best to
listen to the last thirty seconds of one song and then try to find a relevant pulse on
which to place the downbeat of the next song. This often required several
revisions to find the desired gap between the songs. Figure 33 shows Pyramix’s
edit window.
Figure 43. Pyramix Edit Window
The addition of fades also had a crucial aspect to the spacing of the EP.
For this style of music, I found it best to let the song fade out as naturally as
possible with the help of transparent fading. Sometimes the natural decay was a

253
bit too prolonged and the addition of a fade would assist the decay and allow the
song to end at the desired, musically relevant time. Pyramix’s fade editor allowed
for the creation of specific, natural-sounding fades. Figure 34 shows Pyramix’s
fade editor window.
Figure 34. Pyramix Fade Editor
Once the three songs were adequately spaced and fades were added, the
next step was to create the PQ points. Essentially, these points told the program
where the song began and ended. These were stop and start points applied just
before the song started and right after the song faded out.
Once I completed these steps, the metadata was entered. This included the
text information such as the disc title, date, track title, composer, et cetera. This
information is necessary for the duplication company who would use these files to
create the physical CD copies.
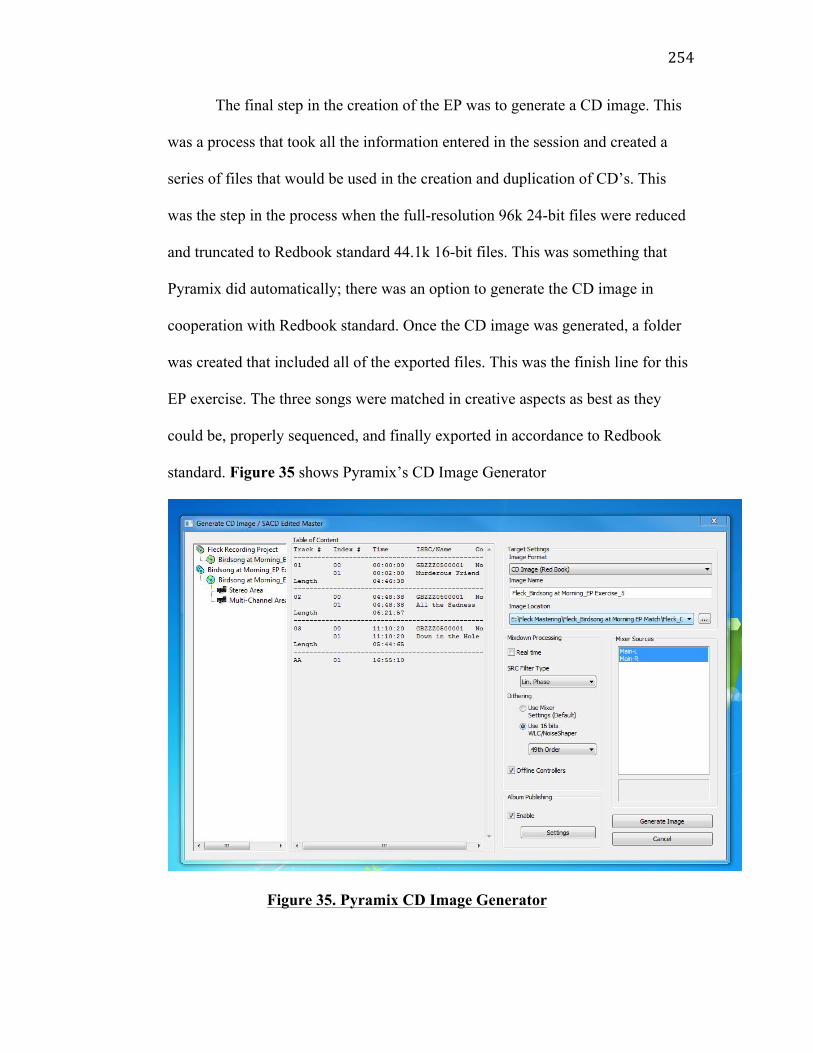
254
The final step in the creation of the EP was to generate a CD image. This
was a process that took all the information entered in the session and created a
series of files that would be used in the creation and duplication of CD’s. This
was the step in the process when the full-resolution 96k 24-bit files were reduced
and truncated to Redbook standard 44.1k 16-bit files. This was something that
Pyramix did automatically; there was an option to generate the CD image in
cooperation with Redbook standard. Once the CD image was generated, a folder
was created that included all of the exported files. This was the finish line for this
EP exercise. The three songs were matched in creative aspects as best as they
could be, properly sequenced, and finally exported in accordance to Redbook
standard. Figure 35 shows Pyramix’s CD Image Generator
Figure 35. Pyramix CD Image Generator
255
IV. Discussion
The Mastering Process: Thoughts on a Technical Issue
From this experience, I learned that there were many common challenges
inherent in each mix. These were either an issue innate to the recording, an issue
of the mixer’s monitoring situation, or a combination of the two. After these
mixes were mastered in Room 114, they were additionally reviewed in UML’s
Rooms 205 and 223, which featured Event Audio and Genelec speakers,
respectively. These rooms have always been thought to be rather “bright”,
emphasizing high frequencies and lacking appropriate low frequencies. With this
in mind, the masters seemed a bit too bright. This brightness furthermore
accentuated the amount of noise that was in the masters. This noise was probably
caused by the AKG “The Tube” microphones and generated an abundance of
high-frequency hiss, which extended well beyond 20kHz. While comparing the
master of “All the Sadness” with the other two songs, the high frequency hiss was
unacceptable needed to be removed in order to get it to match with “Murderous
Friend” and “Down in the Hole”.
The hiss was in all of the mixes, except for Brad’s. In order to combat the
hiss, the three problematic original mixes were imported into iZotope RX and de-
noised. Thankfully, I was able to extract a clean noise-profile to eliminate a large
amount of the hiss. With that said, this tool was used lightly, aiming not to get rid
256
of all the hiss because it was also an artistic element and adds character to the
overall impact of the song.
Why then was the hiss never so apparent before? After all, each mixing
engineer listened to the song many times over. Again, the hiss was always
acknowledged but never considered a hindrance until it was reviewed on bright
speakers. Perhaps the mix engineers also were not monitoring with bright
speakers and allowed the hiss to remain.
After I completed the de-noising procedure, I then processed the mixes in
Ozone with the same settings as before, just without the noise. Listening on the
bright speakers was an unnerving experience because it begged the question,
which speakers were most accurate? Where was home base? After much
deliberation, I decided that the original mastering done in room 114 would be
home base, so the original mastering effect settings were not altered to sound
better on the bright speakers. In the end, this was a great example for the necessity
of two things: 1. extremely accurate speakers and 2. a lot of time listening to those
speakers.
After resolving this technical issue, I then resumed my attention to
analyzing the slight differences between the four mixes. Under the microscope of
a critical ear, the mixes were all incredibly diverse: the strings featured various
reverbs, the voice had different timbres, the acoustic guitar was more or less
features, etc. I observed each detail and variation and my mastering decisions
reflected those differences. I should note that these decisions were made to

257
increments of a tenth of a decibel, demonstrating the nitty-gritty nature of
mastering.
258
V. Conclusion
General Trends and Conclusions
On a broader scale, I found three common trends that emerged while
mastering each of the mixes. These trends were the abundance of low-mid
frequencies; the narrowness of the soundstage; and the correlated relationship
between the mix and the master.
I attributed the low-mid build up to proximity effect stemming from the
close-microphone technique used to record the vocals and acoustic guitars. While
recording, there was a decision to close mic these sources, making the
compromise between the mutually inclusive timbral detail and proximity effect.
While mastering, I found it difficult to react to the low-mid abundance because of
the question, how much was too much? It was difficult to determine the line
between an artistic amount of low-mids and problematic, unintentional amount of
low-mids. In the end, I left healthy amounts of low-mids in the masters because it
added to the artistic timbral character of the song and gave it a “warm” feeling. I
made this decision based on experience and musical sense.
The next trend that emerged while mastering the mixes was the apparent
narrowness of the sound stage. Over the course of the mastering session, I
increased the soundstage for two reasons. The first reason was to utilize the stereo
width to its fullest potential. This widening of the image worked well for “All the
259
Sadness” because the arrangement was dense enough to handle the spacing. In
other words, there was enough information in the side channels that holes did not
appear in the soundstage between the middle and the extreme sides.
The second reason for the increase in the soundstage width was to give the
musical arrangement an appropriate amount of space. This gave each instrument
enough room in the soundstage to be properly highlighted without being overly
masked. This was especially helpful because there were a lot of instruments that
had frequencies specifically in the low-mid frequency range.
So then, why were all the mixes lacking in the width of the sound stage?
This could be attributed to the mixer’s monitoring situation but more likely it
could simply have been overlooked. The widening of the stereo image was
relatively slight and a move appropriate to mastering. Again, it was a creative step
that was lead by experience and musical intuition.
The final trend that emerged was that the mix and the master were
intimately related. My philosophy for mastering during this project was to
enhance each individual mix in accordance with the intent of the artist and mix
engineer. The philosophy was not to turn the mix into something completely
different, implying that, as the mastering engineer, I should not deviate drastically
from the mix. After all, the mix engineers had already approved the mixes before
they were sent to mastering. If there were any technical issues with the recording,
they should have been fixed in the editing or mixing stage.
260
VI. Recommendations
As mentioned before, audio mastering is a diverse field; there are different
genres of mastering, just as there are genres of music. This project’s one example
of mastering “All the Sadness” is just one genre of music and requiring relatively
simple mastering techniques. Some recommendations for further study are as
follows:
• Style Variations: Different styles of music require different styles of
mastering. There are some things a mastering engineer would do to a
metal or EDM record that he or she would not do to a classical or jazz
record. For each genre of music, there are certain guidelines for the
mastering of each genre and this topic could easily be explored further.
• M/S, side-chain, and parallel techniques: Standard application of EQ
and compression are relatively common practices for mastering engineers
but the use of M/S, side-chain, and parallel techniques are areas where
further exploration can occur. For example, what would happen if the
typical roles are reversed and compression is used in M/S and EQ is used
in parallel? Can these tools be used in a meaningful way?
• Getting out of the box: Because of technical restrictions, the mastering
for this project exists entirely in the digital domain. This was convenient
because it makes for simple recall and graphical displays of settings, etc.
Furthermore, many mastering engineers prefer a completely digital signal
261
path. Nevertheless, the majority of mastering engineers utilize a hybrid,
analog and digital signal path. For a study in contemporary mastering
techniques, a hybrid signal chain should have been used because it is the
most common processing path. However, there are constant improvements
in digital technology both in creating new, groundbreaking technologies
(ex. iZotope’s IRC limiters), and in emulating classic analog equipment
(ex. Universal Audio plug-ins). Perhaps purely digital processing will be
the widely accepted in the future.
• Exploring the possibilities of surround: This study focused on two-track
stereo mastering. This is by far the most common style of mastering, but
there are many projects mixed in surround. A further investigation into
surround sound mastering techniques would a valuable, especially for film
and video game applications.
262
VII. Literature Cited
Case, Alexander U. Mix Smart: Pro Audio Tips for Your Multitrack Mix. 1st ed. Waltham: Focal, 2011. Print. Collins, Mike. “Compact Disc Formats Explained.” Compact Disc Formats Explained. Sound on Sound, 01 Jan. 1998. Web. 10 Mar. 2016. Fletcher Munson. Digital image. Fletcher Munson @ Vettaville.nl. N.p., 2008. Web. 06 Apr. 2016. Katz, Bob. Mastering Audio: The Art and the Science. 2nd ed. Burlington: Focal, 2007. Print. Ramone, Phil, and Charles L. Granata. Making Records: The Scenes Behind the Music. New York: Hyperion, 2007. Print. Williams, Alan. A Slight Departure. Birdsong at Morning. Alan Williams, 2015. CD. Wyner, Jonathan. Audio Mastering: Essential Practices. 1st ed. Boston: Berklee, 2013. Print. Wyner, Jonathan, ed. Mastering with Ozone. 2nd ed. Cambridge: iZotope, 2015. Educational Guides. 2015. Web. 17 Mar. 2016
263
Overall Conclusion
The mastering process is a constantly evolving system. There will always
new clients with new projects, providing the mastering engineer with new
challenges on a daily basis. Furthermore, mastering is a balancing act between
musicianship, technical know-how, interpersonal skills, and an undying quest for
perfection. The mastering engineer must be fluent in all of these skills in order to
be successful in this competitive industry. My desire for this thesis is to provide
insight into the world of mastering and present concrete ways of understanding
and defining the mastering process through the culmination of the interviews,
mastering project, and guidebook.
The Guide to Common Practices in Mastering provides the reader with a
brief introduction to some of the technical aspects of mastering. This introduction
offers the foundation for technical exploration in the mastering chain. It provides
information about the common hybrid signal path and allows the reader to
contemplate further signal-processing possibilities.
The Interview section offers some personal insights into the practicality of
becoming and working as a mastering engineer. The results are wonderful assets
for gaining a basic understanding of what mastering engineers do. This is
important knowledge especially for a client or fellow audio engineer, but once
these basic processes are understood, the mastering engineer will have his or her
personal preference as to how they like to work. As the interviews prove, there
truly is no right answer to any specific detail in mastering – instead the more
264
experience in the field, the more the mastering engineer finds the workflow that is
best for them and their specific client-base.
Furthermore, from the interviews we learn how mastering consists of
utilizing several general elements including DAW’s, EQ’s, compressors, and
limiters. These are some of the tools that every mastering engineer needs in order
to do their job. The difference between mastering engineers exists in which DAW,
EQ, compressor, and limiter they use and the combination in which they
implement each piece of gear. Furthermore, the more important difference
between mastering engineers is in their personal taste, musical intuition,
background, and how they use the gear they have.
From the mastering project of this study, I learned that discernment is
probably one of the most valuable qualities in a mastering engineer. The
mastering of “All the Sadness” is proof that the mastering engineer must be able
to discern which tools he or she should use in order to best serve the provided
material. In regards to this project, the master did not require any complicated
signal processing like parallel or multi-band compression. Though those processes
can be suitable for other styles of music, I decided they were not appropriate to
the style of “All the Sadness”.
In summation, experience and consistency are the mastering engineer’s
best friends. The mastering engineer can only make truly informed decisions after
he or she knows the room, speakers, converters, cables, EQ’s, compressors,
limiters, and any other signal processor. This is the reason mastering engineers
customize their room exactly to their preference and then change it as little as
265
possible. This experience along with a consistent room is a mastering engineer’s
“home base.” Additionally, the best way the mastering engineer creates that
perfect place is by listening consistently to reference recordings and mastering in
the room on a daily basis.
Because the mastering engineer is the last person involved in the
production of musical material, he or she must rely on that experience and
discernment to make definitive decisions to best prestnt the music. The mastering
engineer can be thought of as a literary editor. The written work is not original to
the editor, but he or she will read and comprehend the material in order to quickly
make decisions and make necessary alterations. The changes will allow the
writing to be clear, concise, and ready for publication - creating a new and
exciting experience for the reader.
One final note, what matters above all is that the mastering engineer
produces the work exactly how the client envisioned. This was the philosophy
behind the mastering of “All the Sadness.” The mastering was meant to enhance
the mix within the context of the intent of the artist and mixing engineer. The
mastering did not change the song beyond recognition, but instead attempted to
carry the mix along the same aesthetic projection, thus allowing the mix to realize
its fullest artistic potential.
In conclusion, the world of mastering may seem mysterious due to its
personal and subjective nature. Nonetheless, for anyone going into a career in the
music industry, whether as an artist, technician, producer, or engineer, it is

266
important to attempt to understand all of the stages of musical production
especially the final step of mastering.
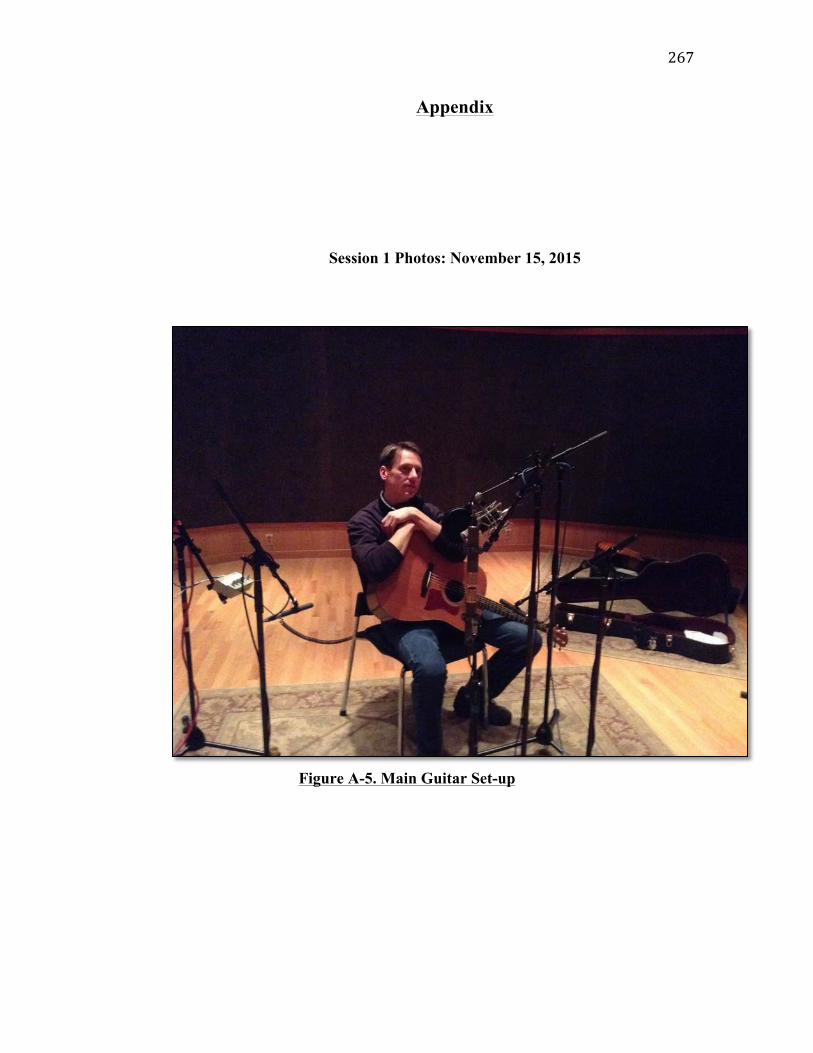
267
Appendix
Session 1 Photos: November 15, 2015
Figure A-5. Main Guitar Set-up
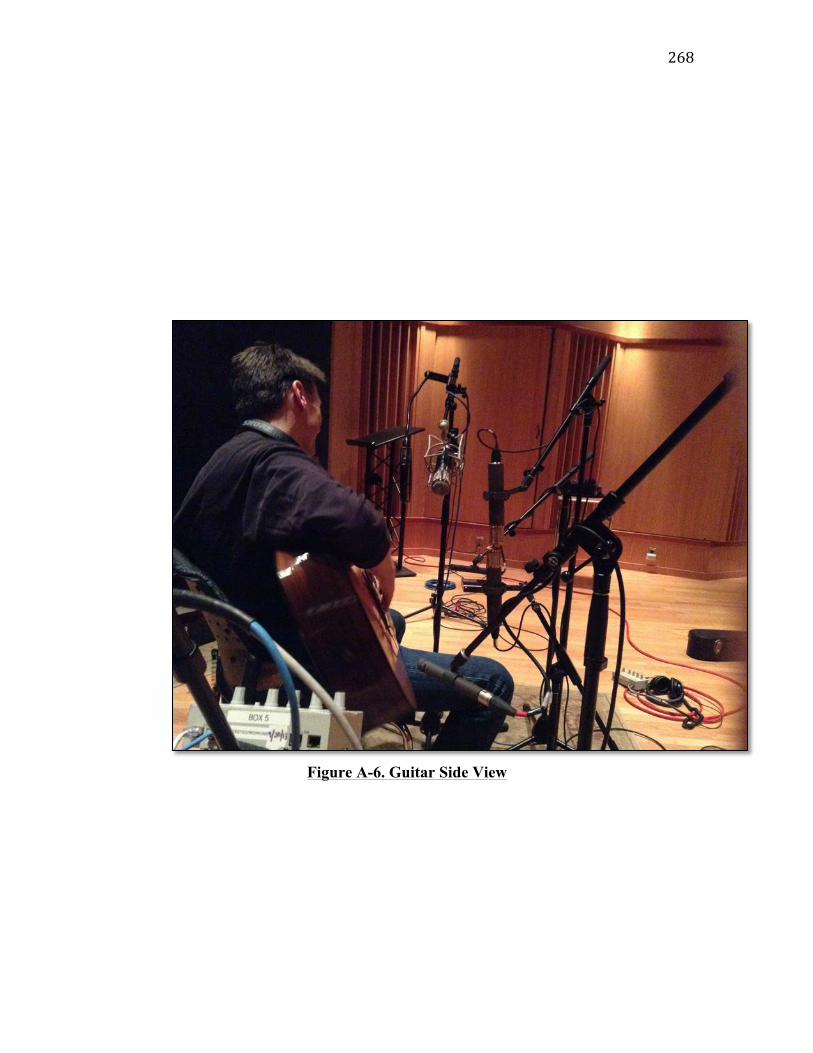
268
Figure A-6. Guitar Side View
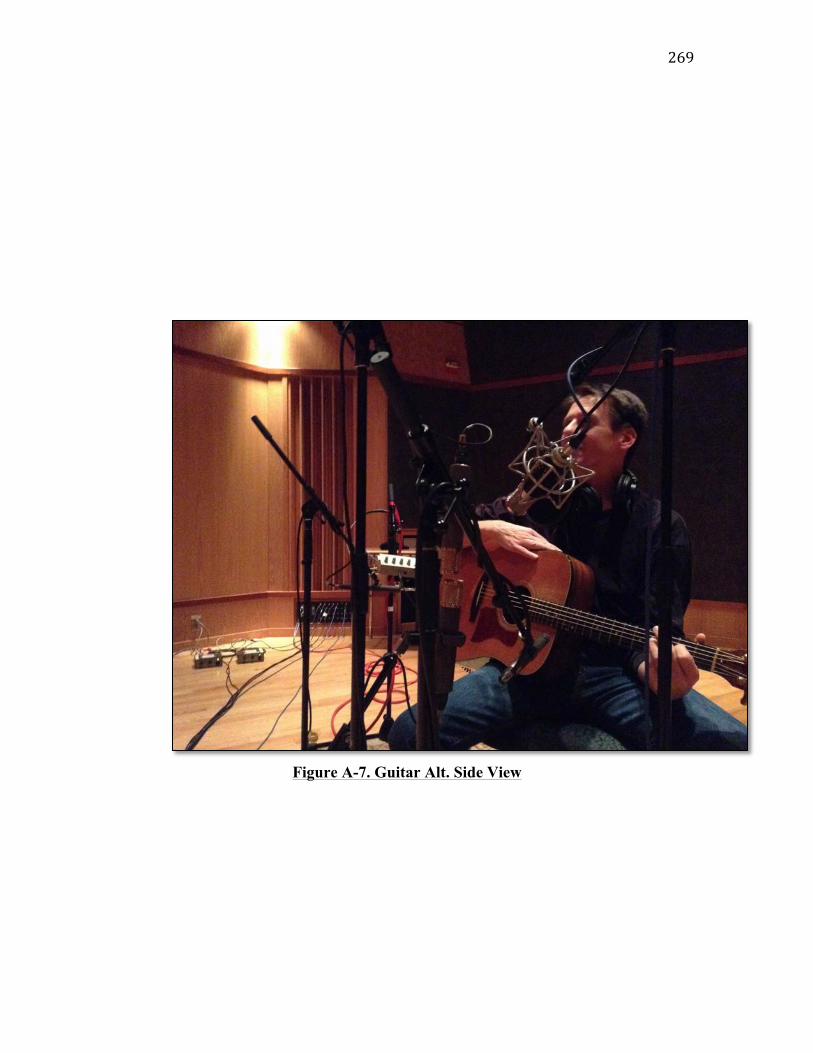
269
Figure A-7. Guitar Alt. Side View
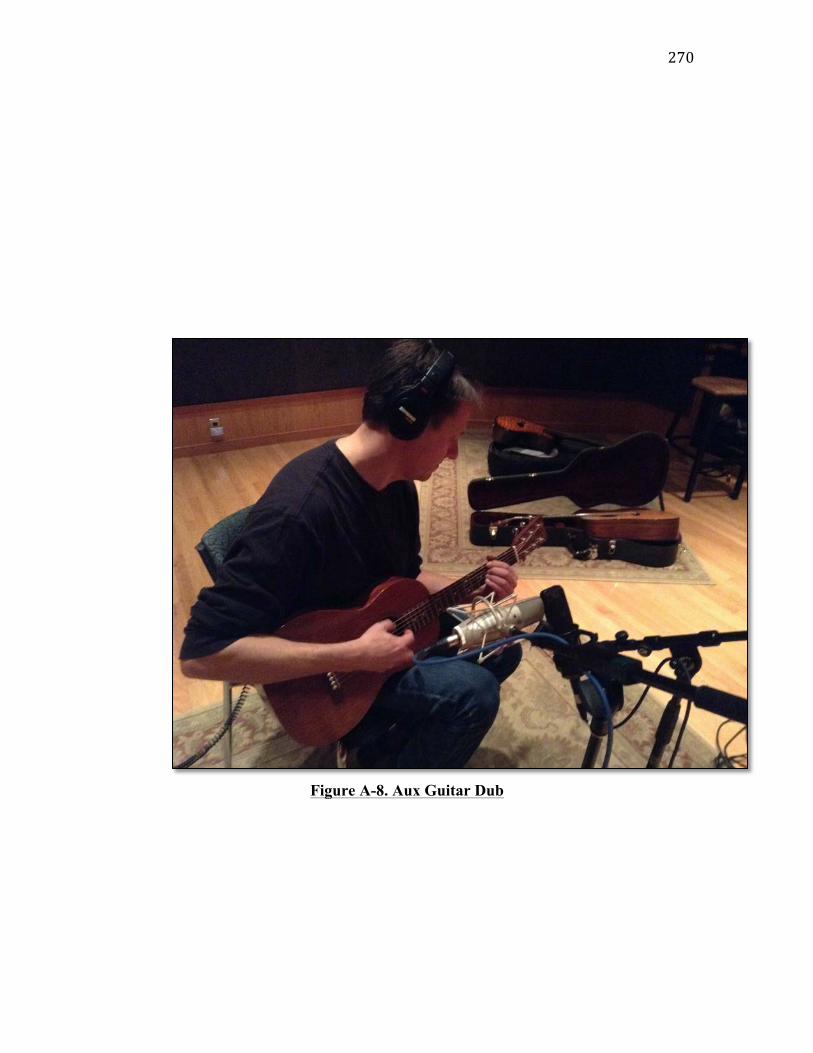
270
Figure A-8. Aux Guitar Dub
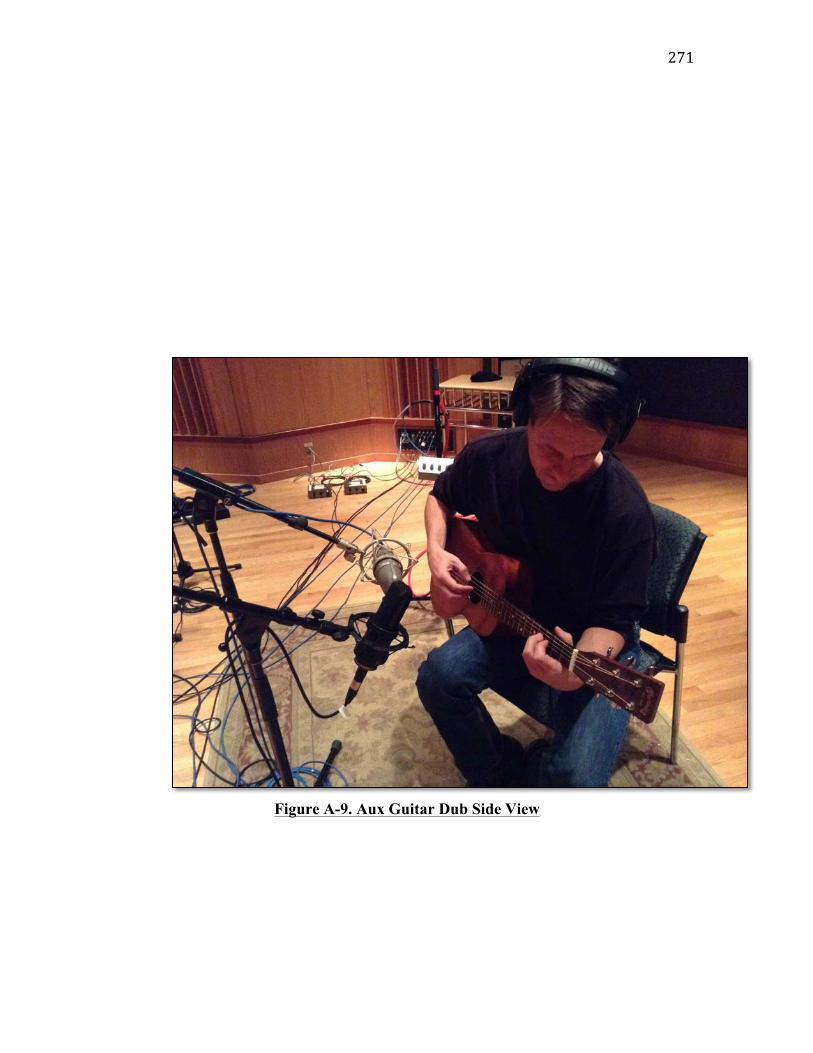
271
Figure A-9. Aux Guitar Dub Side View

272
Figure A-10. API Vision Console and Protools Session
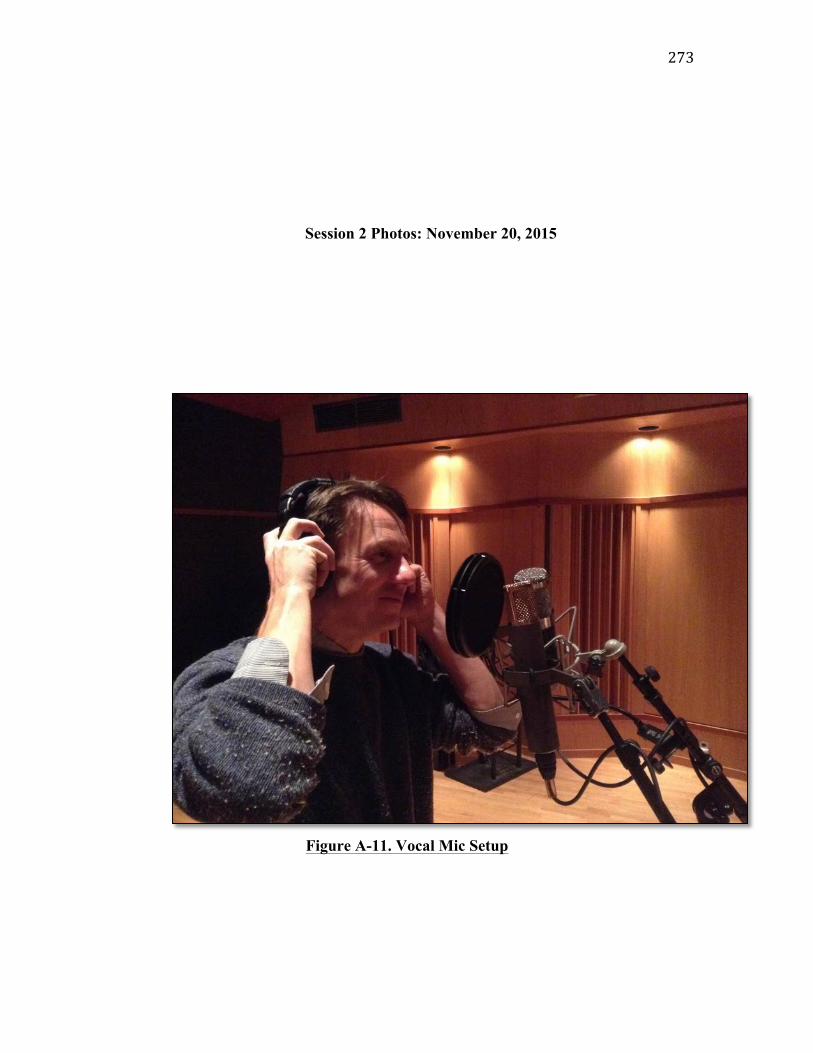
273
Session 2 Photos: November 20, 2015
Figure A-11. Vocal Mic Setup
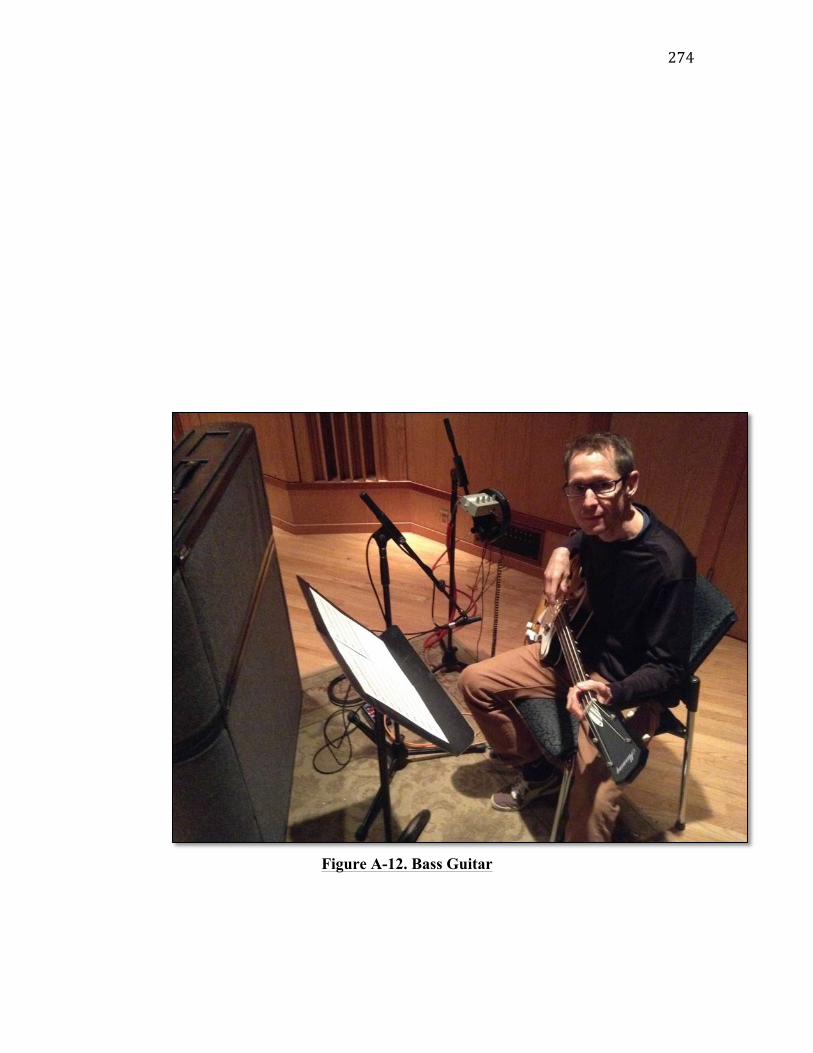
274
Figure A-12. Bass Guitar
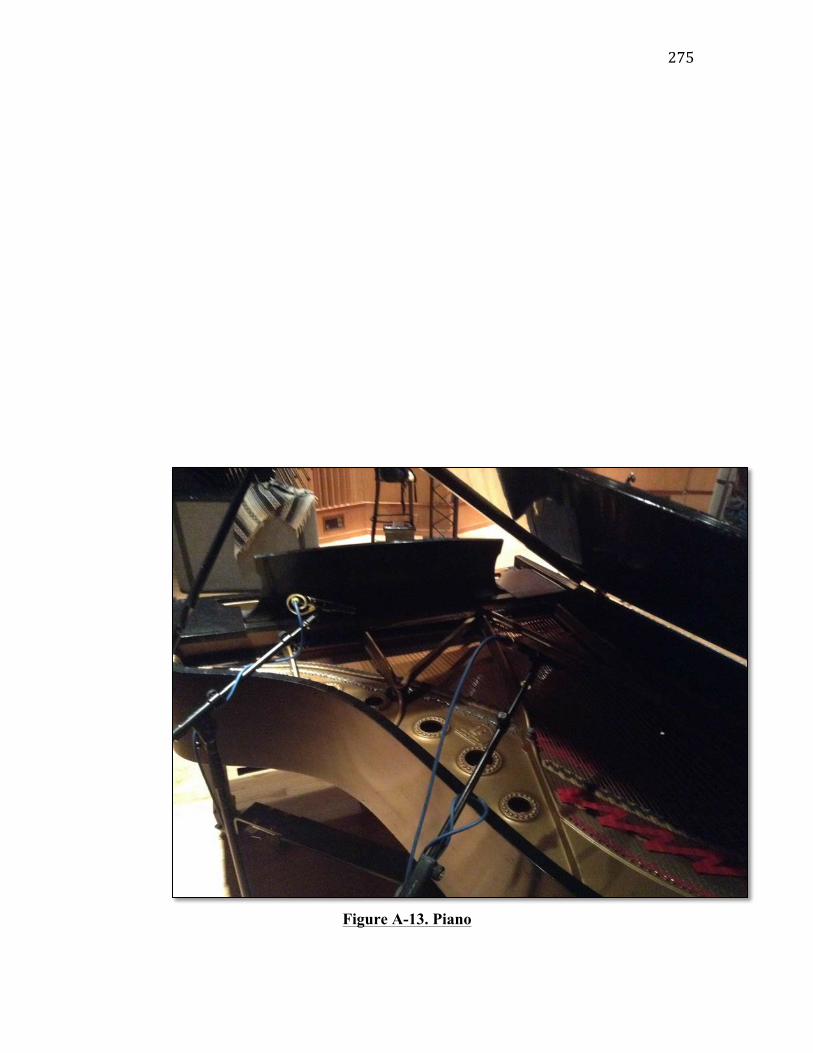
275
Figure A-13. Piano
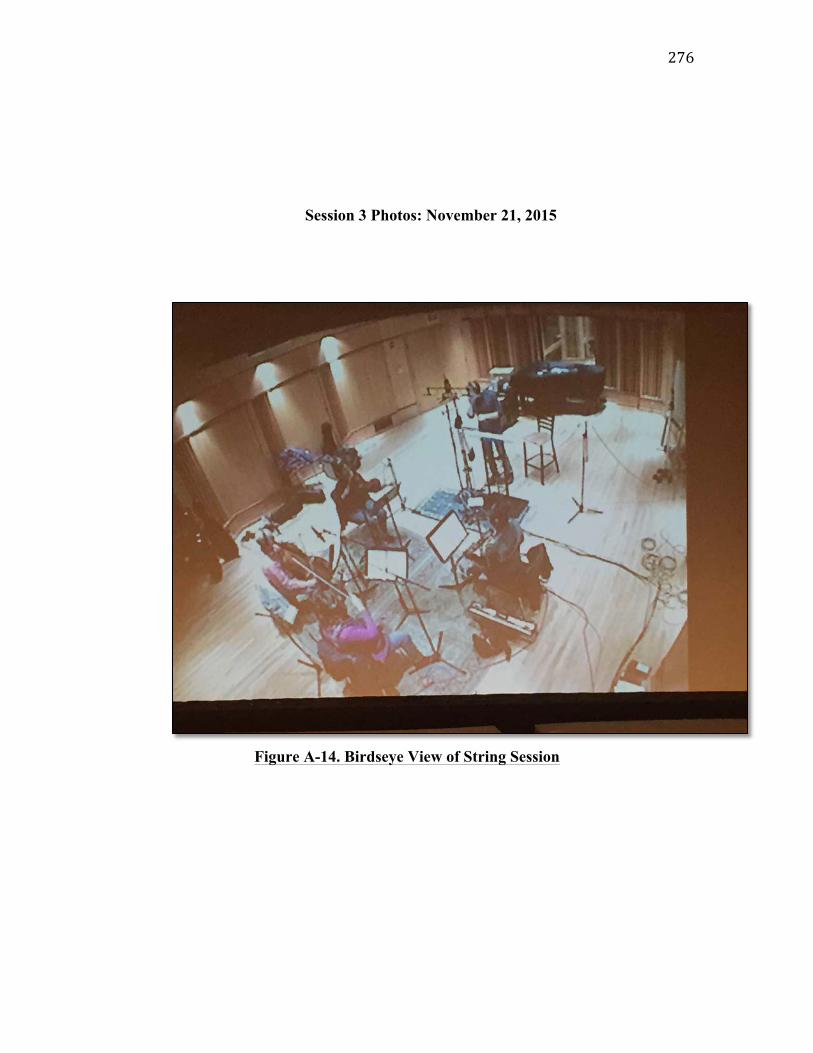
276
Session 3 Photos: November 21, 2015
Figure A-14. Birdseye View of String Session
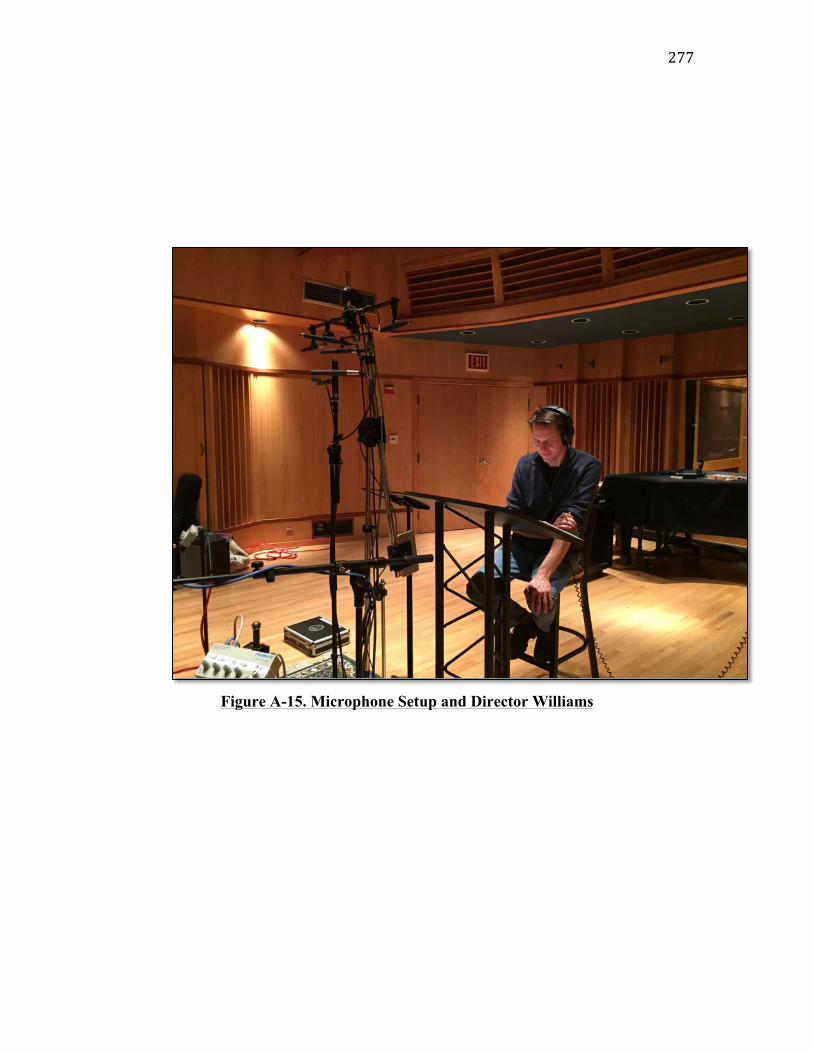
277
Figure A-15. Microphone Setup and Director Williams
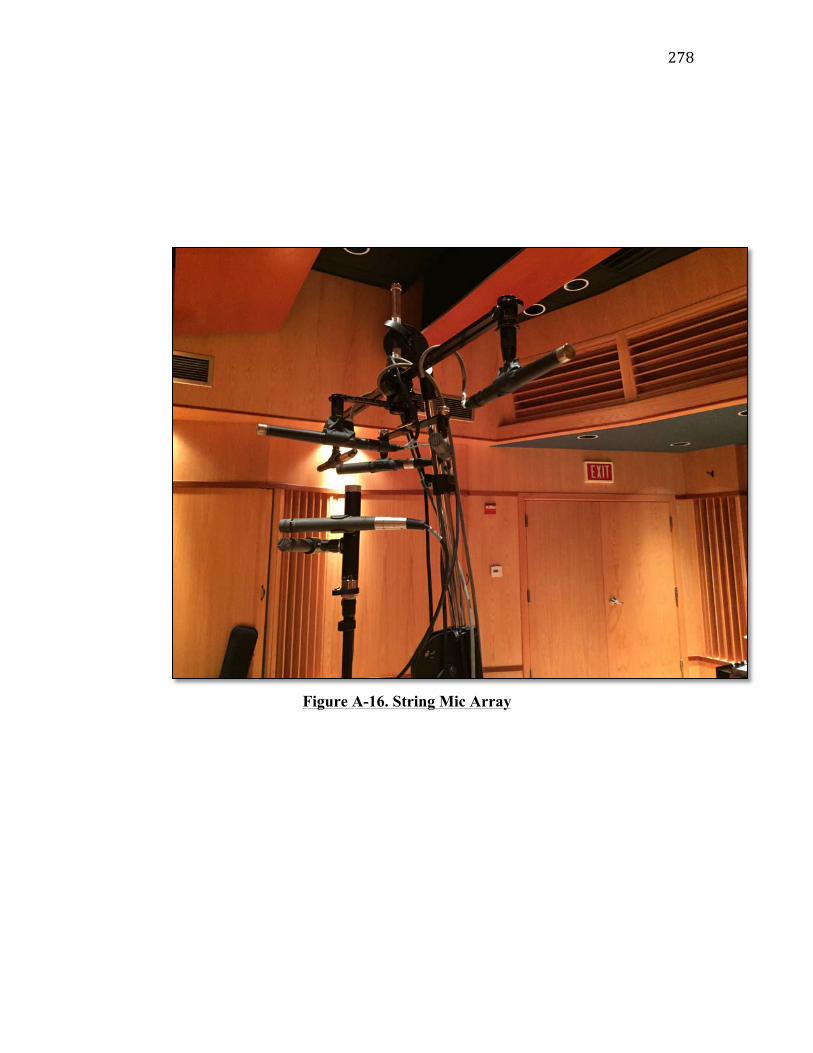
278
Figure A-16. String Mic Array
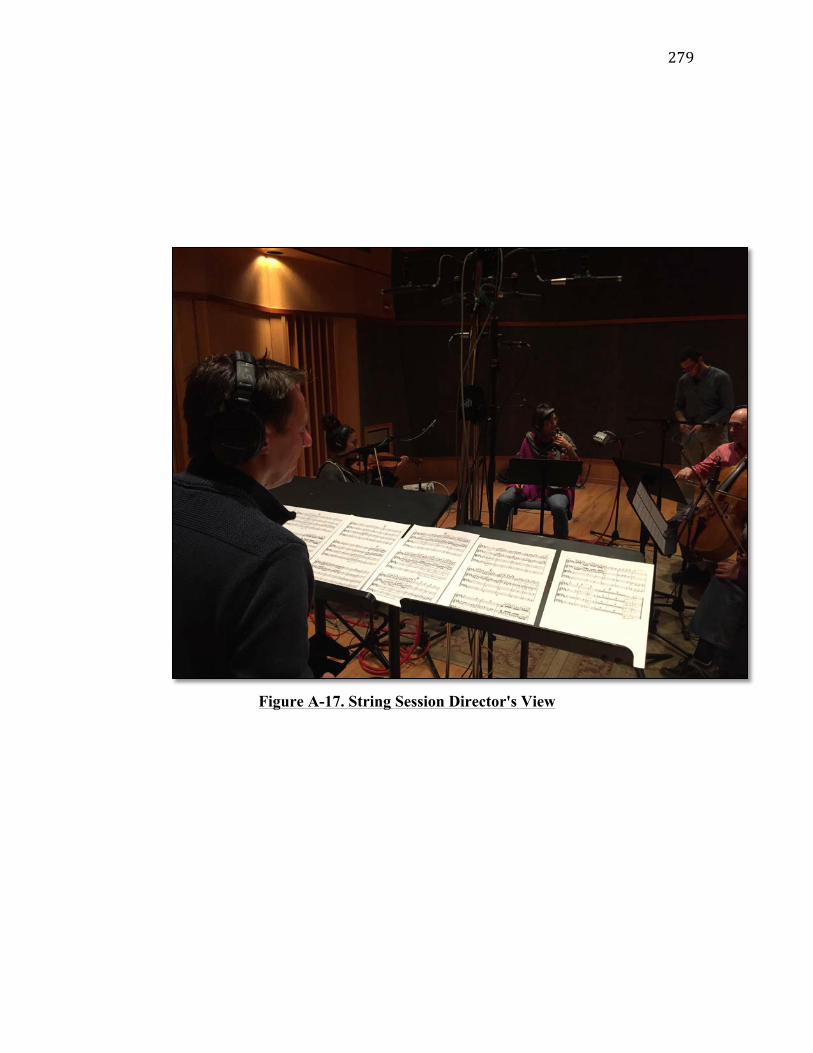
279
Figure A-17. String Session Director's View
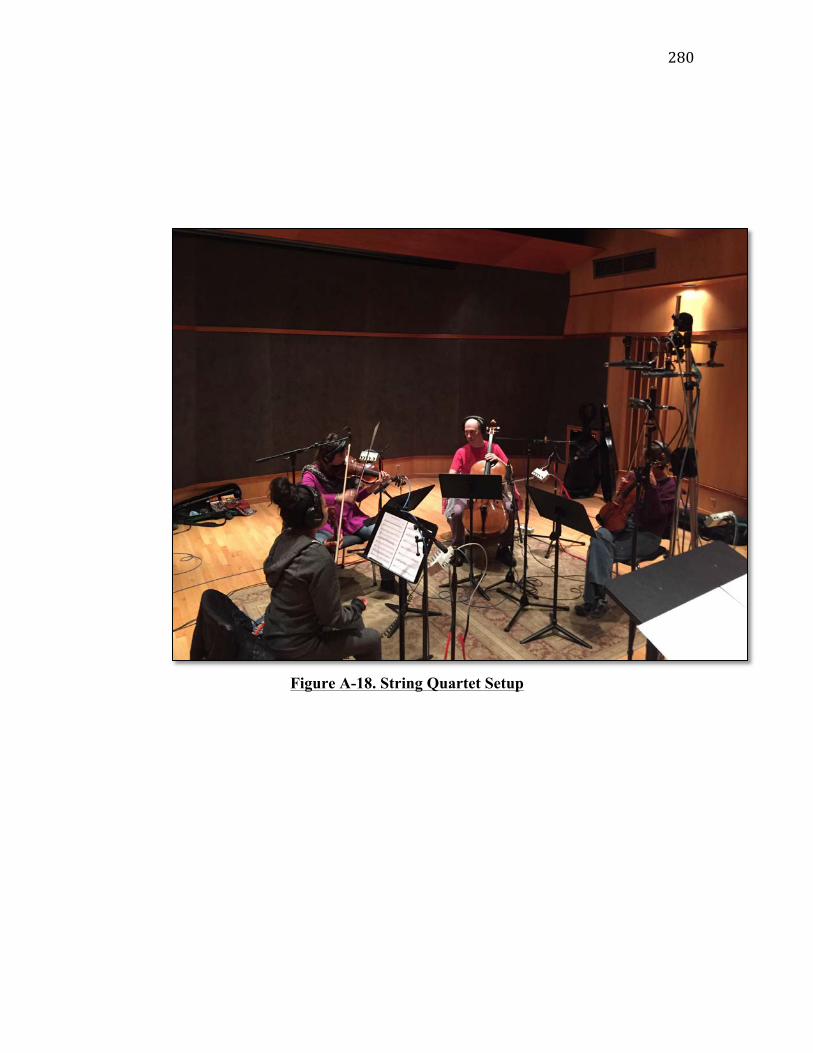
280
Figure A-18. String Quartet Setup
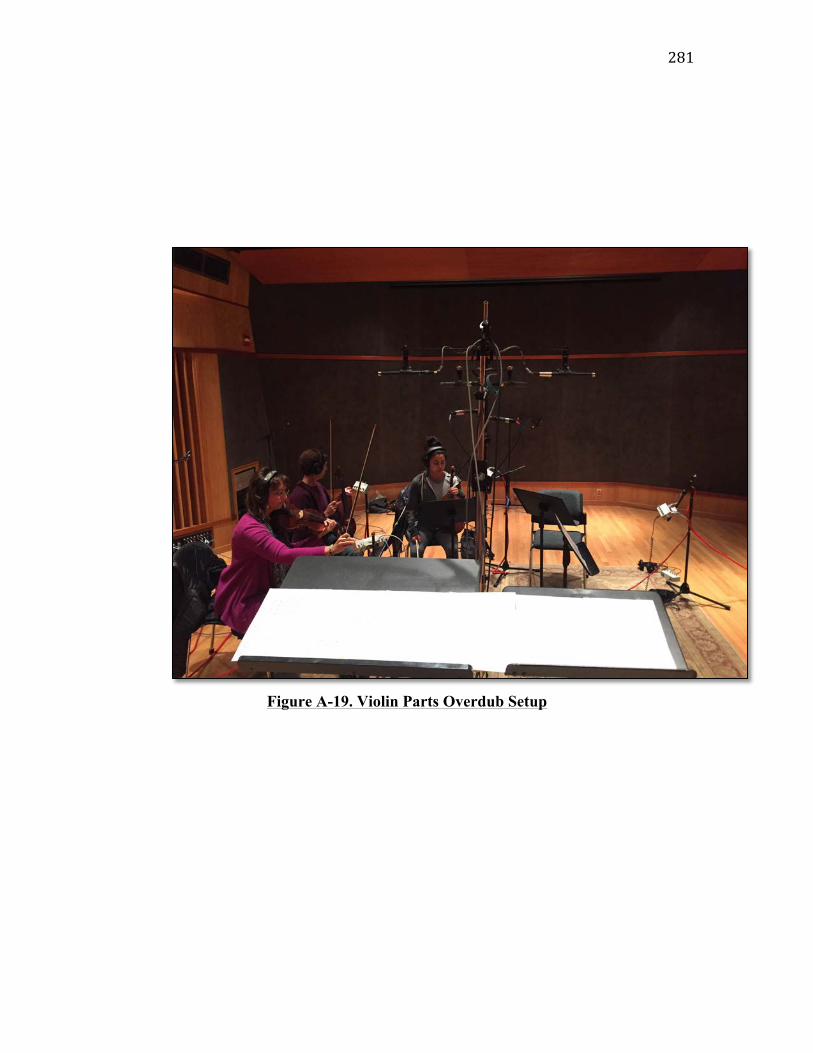
281
Figure A-19. Violin Parts Overdub Setup
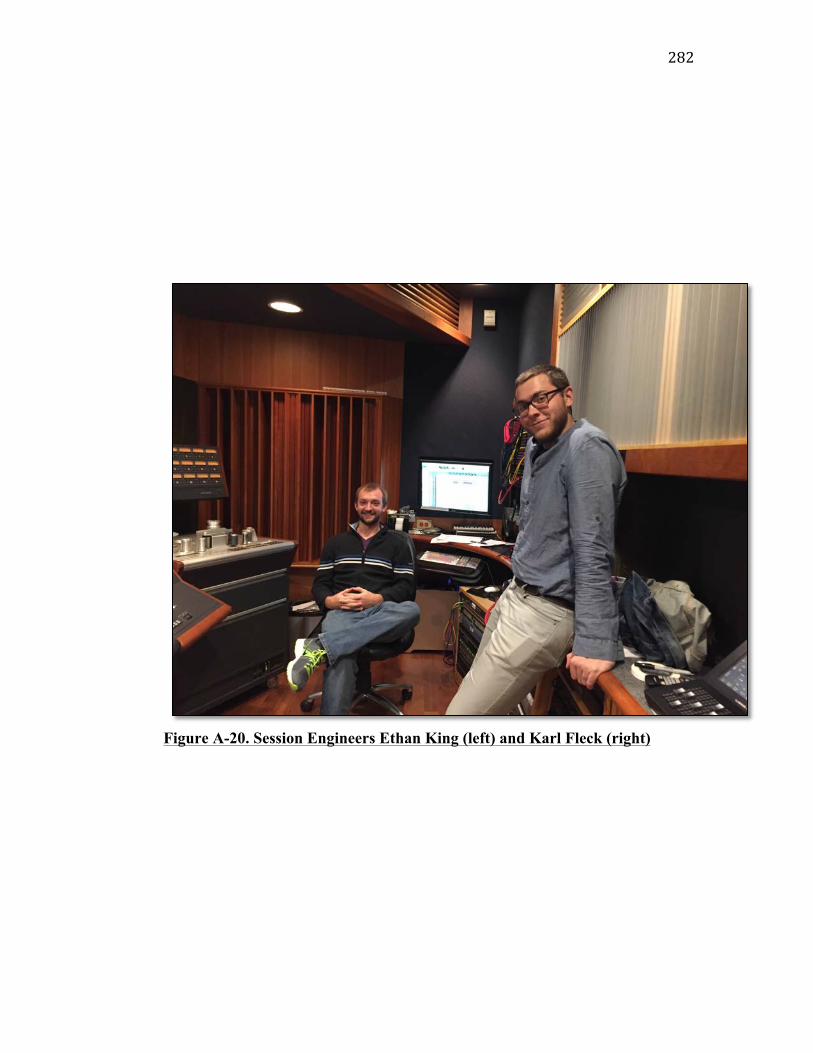
282
Figure A-20. Session Engineers Ethan King (left) and Karl Fleck (right)
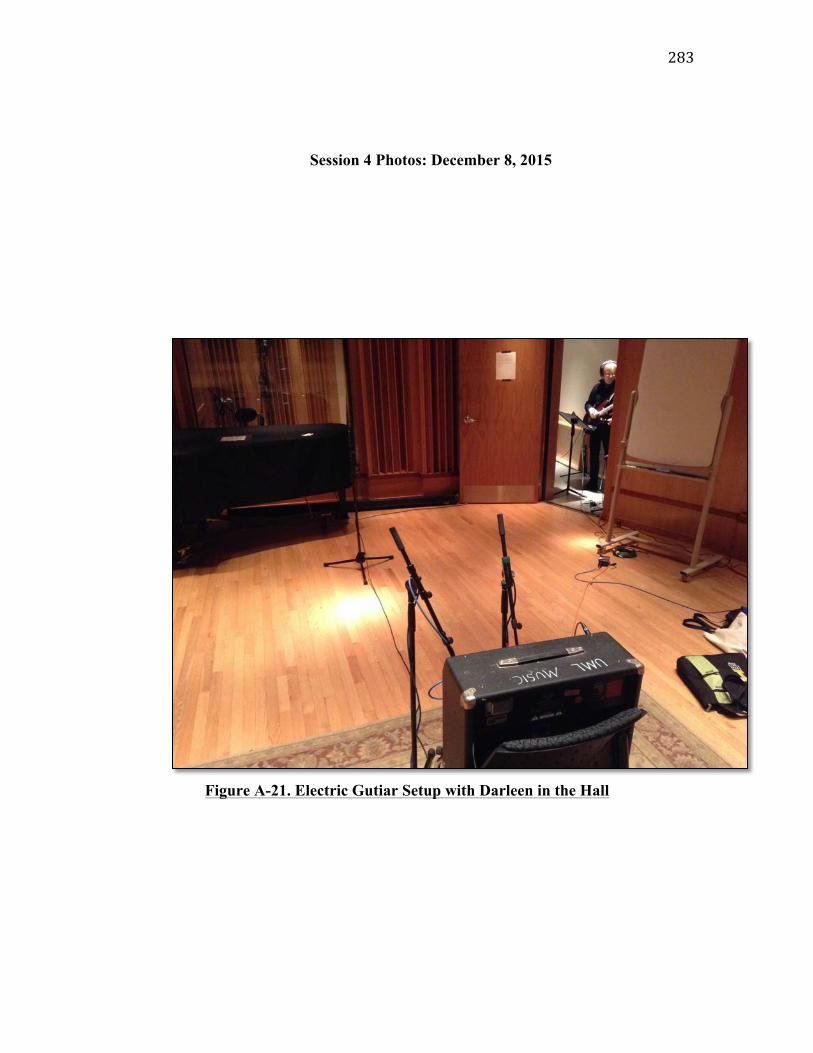
283
Session 4 Photos: December 8, 2015
Figure A-21. Electric Gutiar Setup with Darleen in the Hall
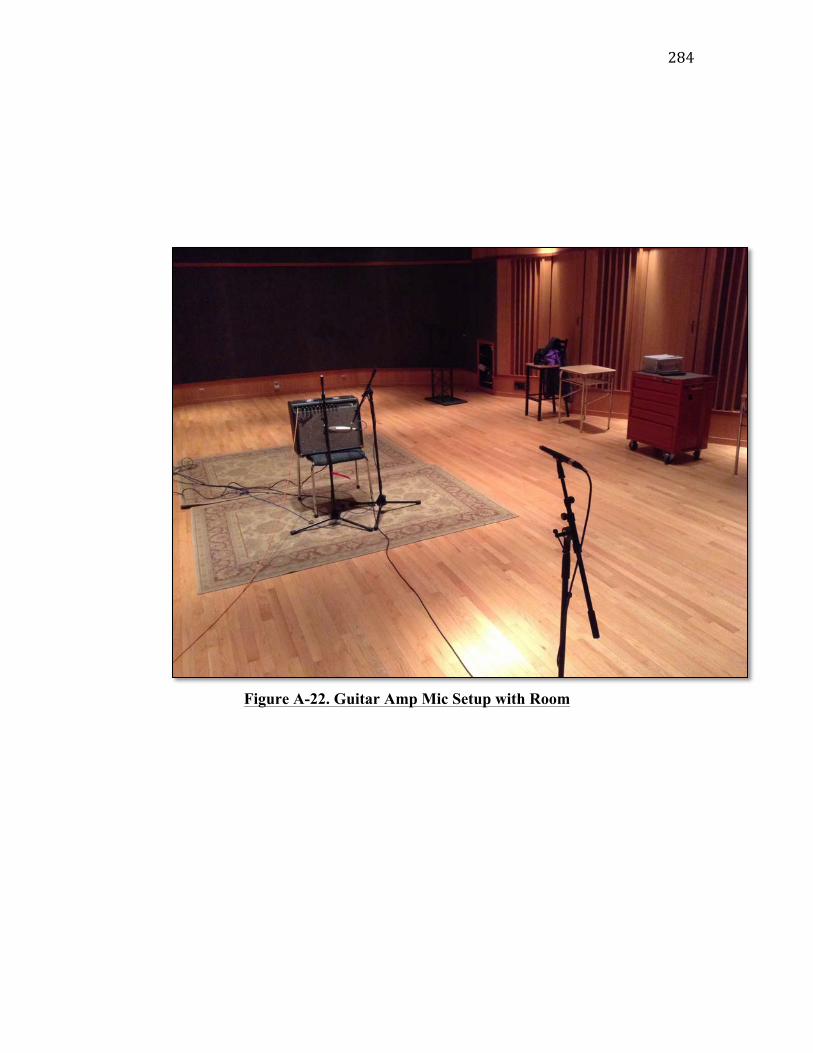
284
Figure A-22. Guitar Amp Mic Setup with Room
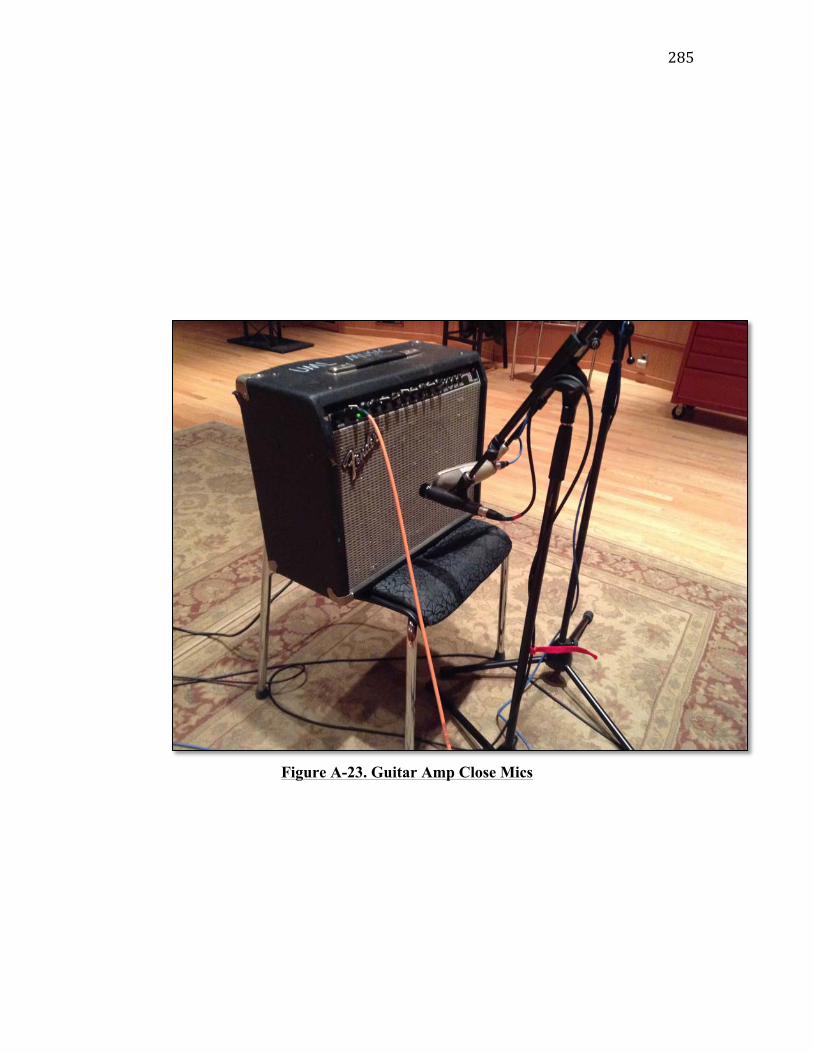
285
Figure A-23. Guitar Amp Close Mics
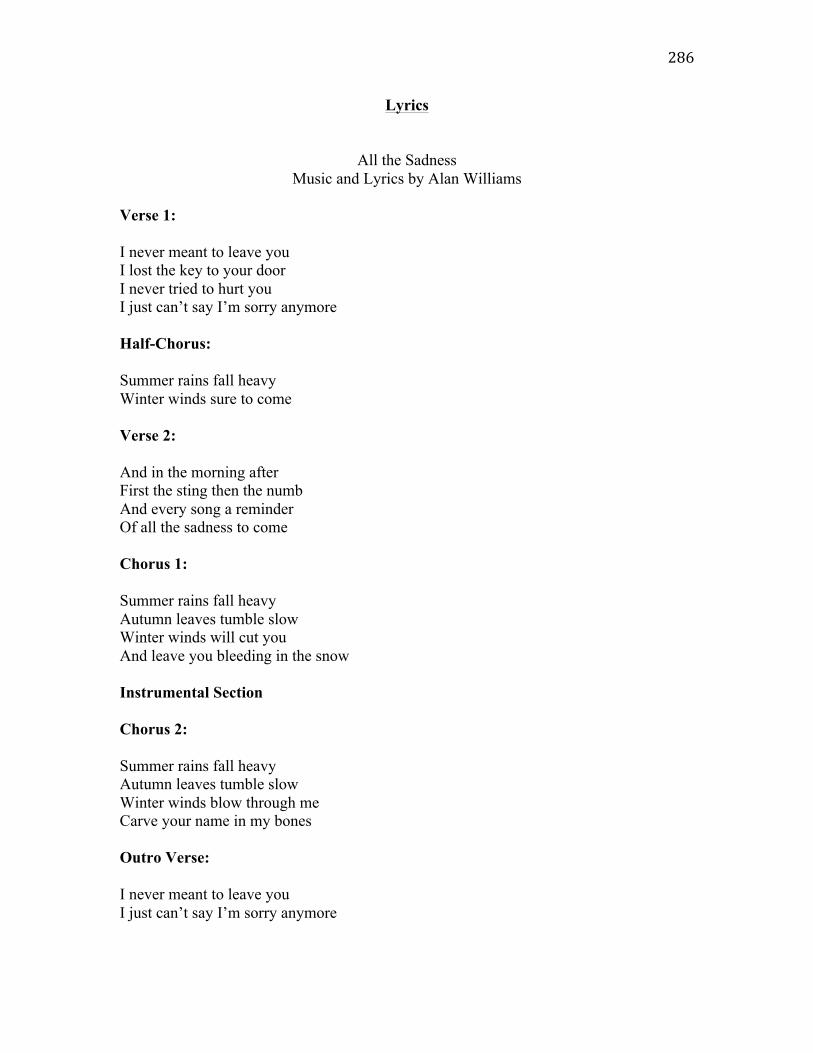
286
Lyrics
All the Sadness Music and Lyrics by Alan Williams
Verse 1: I never meant to leave you I lost the key to your door I never tried to hurt you I just can’t say I’m sorry anymore Half-Chorus: Summer rains fall heavy Winter winds sure to come Verse 2: And in the morning after First the sting then the numb And every song a reminder Of all the sadness to come Chorus 1: Summer rains fall heavy Autumn leaves tumble slow Winter winds will cut you And leave you bleeding in the snow Instrumental Section Chorus 2: Summer rains fall heavy Autumn leaves tumble slow Winter winds blow through me Carve your name in my bones Outro Verse: I never meant to leave you I just can’t say I’m sorry anymore
287
Biographical Sketch
Karl Fleck graduated from Hope College in 2013 with Bachelor of Arts degree in
Recording Arts. Post matriculation, Karl worked as a recordist and archivist at Hope
College. He also operated as a freelance audio engineer in west Michigan. Alongside
audio engineering, Karl is an avid musician primarily enjoying the mandolin.