Embed Size (px)
Citation preview
2
About this pack
Background This activity pack includes science investigations you can do to familiarise yourself
with chemistry. These activities are an ideal way for schools, science clubs and even
families to take part in chemistry hands-on activities and have fun. For this project,
we have asked the experts from the Royal Society of Chemistry (RSC) to help us
choose the best activities from our packs.
Royal Society of Chemistry The RSC is delighted to be partnering with the British Science
Association (BSA) for British Science Week (BSW). The RSC
and the BSA together have over three hundred years of
experience promoting the wonders of science, and the RSC
has supported teachers and students with resources and
publications for half a century. This pack features a dozen of
the best practical activities to spark an interest in chemistry in students of any age,
and should be suitable for use by specialist and non-specialist teachers, alike.
Summary Bakelite plastic / silly putty ………………………………………………………….. Page 4
Burp in a pot (Alka Seltzer rockets) ……………………………………………….. Page 5
Crazy cubes …………………………………..………………………………………. Page 5
Splitting sweets …………………………………..………………………………….... Page 8
Make a rainbow fish …………………………………………………………………. Page 9
Colourful combustion …………………………………………………….…………. Page 10
Honeycomb toffee…………………………………………………………………… Page 11
Dressing the salad ……………………………………………………………………. Page 12
Money laundering ……………………………………………………………………. Page 12
It's slime time! ……………………………………………………….………………… Page 13
Bubble tennis ………………………………………………….……………………… Page 13
Ready, Bread-y, Go! ………………………………………………………………… Page 14
Science safety Some of these activities involve using objects that could potentially be dangerous.
Please read each activity carefully, and take appropriate measures to ensure the
safety and enjoyment of all participants.
Educational links Each of the activities in this pack are included elsewhere in the BSW series. You will
find further educational links in the specific pack the activity is extracted from – see
the top of the activity title.
For more information on projects, resources and events, go to
www.britishscienceweek.org.
3
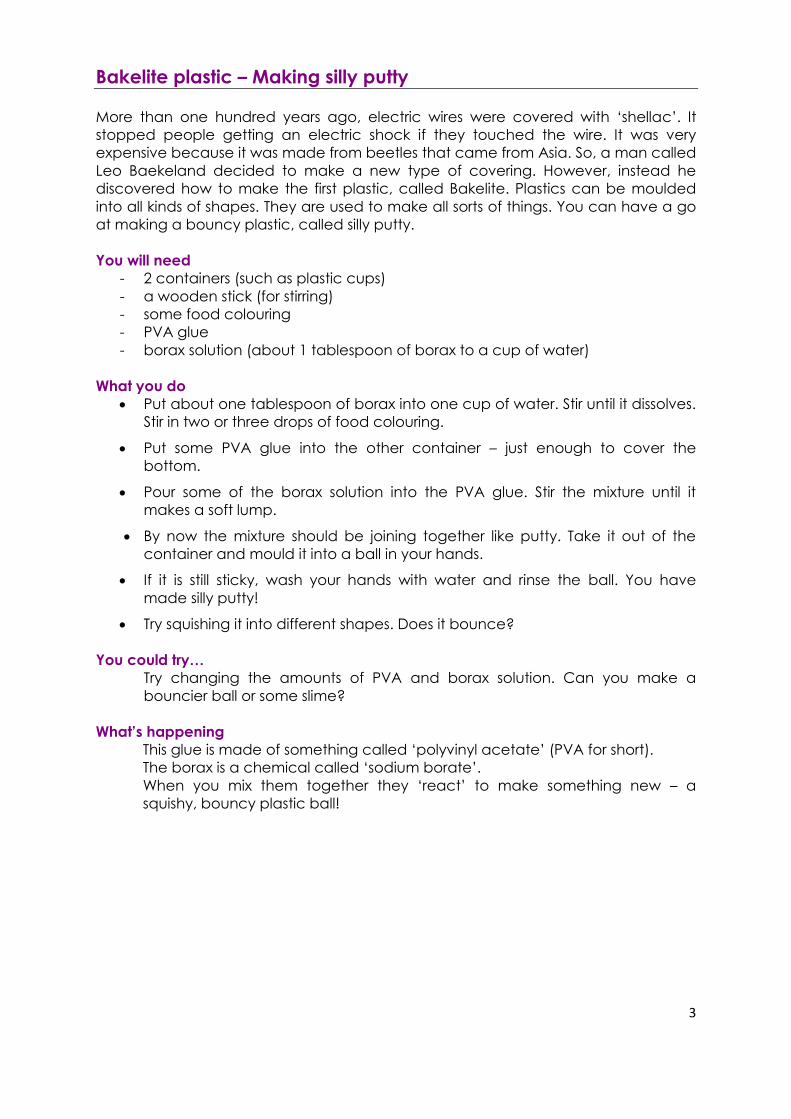
Bakelite plastic – Making silly putty
More than one hundred years ago, electric wires were covered with „shellac‟. It
stopped people getting an electric shock if they touched the wire. It was very
expensive because it was made from beetles that came from Asia. So, a man called
Leo Baekeland decided to make a new type of covering. However, instead he
discovered how to make the first plastic, called Bakelite. Plastics can be moulded
into all kinds of shapes. They are used to make all sorts of things. You can have a go
at making a bouncy plastic, called silly putty.
You will need
- 2 containers (such as plastic cups)
- a wooden stick (for stirring)
- some food colouring
- PVA glue
- borax solution (about 1 tablespoon of borax to a cup of water)
What you do
Put about one tablespoon of borax into one cup of water. Stir until it dissolves.
Stir in two or three drops of food colouring.
Put some PVA glue into the other container – just enough to cover the
bottom.
Pour some of the borax solution into the PVA glue. Stir the mixture until it
makes a soft lump.
By now the mixture should be joining together like putty. Take it out of the
container and mould it into a ball in your hands.
If it is still sticky, wash your hands with water and rinse the ball. You have
made silly putty!
Try squishing it into different shapes. Does it bounce?
You could try…
Try changing the amounts of PVA and borax solution. Can you make a
bouncier ball or some slime?
What’s happening
This glue is made of something called „polyvinyl acetate‟ (PVA for short).
The borax is a chemical called „sodium borate‟.
When you mix them together they „react‟ to make something new – a
squishy, bouncy plastic ball!
4
Burp in a pot Ask people why they think Alka-Seltzer needs to be dissolved in water before taking.
You will need
- 35mm film canister
- alka-Seltzer
- water
What you do
Place a tablet in some water and watch it fizz. Suggest that if you were to eat
the tablet without water it would create all that fizz inside your stomach. How
could you expel this buildup of gas? In a giant burp?
Using the film canister as a substitute stomach, fill it about a third full of water.
Place a quarter of an Alka-Seltzer tablet in the canister and quickly fit the lid.
Place on a level surface and stand back.
The lid will be fired off.
What’s happening
When an Alka-Seltzer tablet is placed in water, the CO2 is produced as a result
of a chemical reaction. In the canister the gas builds up so much pressure the
lid is forcibly launched.
Burps, on the other hand, are usually caused by excess air that has been
swallowed.
Useful notes
Always take care when dealing with projectiles and use appropriate eye
protection.
Crazy cubes
The first thing you could investigate on your
science mission is how water changes. You know it
can change from ice, to water, to steam and back
again. Scientists call this a physical change.
If water couldn‟t change there would never be
any clouds, it would never rain or snow, there
would be no rivers and there would be no ice at
the north and South Pole – and that‟s just some
examples!
You have been given six ice cubes by your teacher
to investigate what makes water change. But
something is strange about these ice cubes. One is black, one white, one red, one
blue, one green and one yellow. Your teacher says that when these ice cubes melt,
some melt slower than others. Your teacher says they are crazy ice cubes and you
should investigate!
5
You will need
- coloured food dyes: yellow, green, blue, red
- milk
- Coca Cola® (or use all food dyes together to make black)
- white paper or card to place ice cubes on
- timer
What you do
Can you test these crazy coloured ice cubes? Can you time how long each is taking
to melt?
Here are some ideas to get you started:
- How will you test how long it is taking for these ice cubes to melt?
- What materials do you need?
- When and how and what will you measure to test these ice cubes?
- How will you make sure your tests are fair?
Now you can start investigating your ice cubes. Get your materials ready and
compare how quickly they melt.
What else might slow or speed up the time it takes for an ice cube to melt?
Clue: what does the council put on the roads when it‟s cold and about to
snow?
Talk about
When an ice cube gets warm what happens?
Do you know what a solid, a liquid and a gas are?
What might be making these coloured ice cubes melt strangely? (Clue: Do
you get warmer on a hot sunny day in black clothes or white ones?)
After the experiment what did you find? Which ice cube melted the fastest?
Which the slowest? Can you explain why?
Crazy cubes: Organiser’s notes
What do I do?
1. Read the „Mission‟ sheet to familiarise yourself with the activity.
2. Check the resources list and make sure you make time to prepare the ice
cubes. See background for information.
3. Make sure the children understand their science mission – to investigate
change.
4. Give the children time to think about water and how it changes state.
Encourage them to think about how temperature makes it change. If water
didn‟t change what might our planet be like?
5. Give them the equipment needed to time how quickly their coloured ice
cubes are melting. Make sure they put the ice cubes somewhere so that
each cube gets the same about of light/heat from the sun/lamp.

6
6. Get the children to predict/guess which ice cubes they think will melt the
slowest/fastest.
7. Encourage them to discuss why different coloured ice cubes would melt
slower/faster. Talk about how colours absorb light.
8. To make the white ice cube add milk to the water. For the black one mix up
all the other colour food dyes, (it won't be quite black but it will be close) or
use Coca Cola.
9. You can make the children prepare the ice cubes the day before if you wish.
10. You can also put normal ice cubes on coloured card rather than using
coloured food dye to colour the ice cubes themselves.
Background
This experiment demonstrates that different colours absorb light/heat
differently. Don‟t you get hotter on a sunny day in black clothes? This is
because the colour black absorbs more light making the clothes get warmer.
Black is the most efficient „solar heat collector‟. The white ice cube will melt
the slowest since it reflects most of the light. The other colours absorb all the
light except for the one they reflect. This is the colour they appear to us.
If sunlight passes through a prism, a band of colours like a rainbow are
produced. This was discovered by Isaac Newton. The band of colours is
called the colour spectrum.
In terms of physics, light is a type of electromagnetic wave. The distance from
trough to trough (or from peak to peak) of these waves is called the
wavelength. The colours we perceive differ depending on the wavelength of
the light we are seeing.
The reason human beings can see the colour spectrum is that certain specific
wavelengths of light stimulate the retinas of our eyes, causing us to perceive
colours. We perceive the light with the longest wavelengths as red and that
with the shortest wavelengths as violet. The range of wavelengths the human
eye is capable of perceiving is referred to as "visible light".
For older children
You could look further into the properties of light. How does our brain let us
see light? It recognizes different wavelengths of light and then perceives this
as colour.
Can the children draw accurate scaled-up diagrams of what each colour
looks like in terms of the shape of its wave? Or alternatively can they match
the wavelength with the correct colour?
For example red would be a wave with a wavelength of 780 nm and violet
would be a wave with a wavelength of 380 nm. Your brain can tell these
apart easily – but can the children?

7
Splitting sweets
You will need
- washable felt tip pens or coloured sweets e.g. Smarties® or M&M®‟s
- water
- 1 circular piece of blotting paper or a coffee filter
- 1 plastic pot e.g. a yoghurt pot
What you do
Put a small amount of water in the bottom of
your plastic container.
Cut two slits into the side of your blotting paper
so that there is a strip of paper which can hang
into the pot of water whilst the rest of the paper
rests on top of the pot (see diagram).
On top of the blotting paper, either draw a
large coloured spot or place one of your
sweets.
Leave this for approximately 5 to 10 mins. Black
and brown felt-tipped pens and Smarties®
produce the widest range of colours.

8
What’s happening
Washable pens and sweets are used in this experiment as their pigments are
water soluble. Although some inks often only appear to be made up of one
colour, they are usually composed of a number of different pigments. As the
water moves up and outwards onto the circle of paper, the different
pigments are carried through the paper at varying speeds. Pigments which
are more soluble in water move through the filter paper at a faster rate and
will travel further from the centre than those which are less soluble; this should
cause a series of concentric, differently coloured circles to form on the paper.
Make a rainbow fish
You will need
- coffee filter paper
- red cabbage
- water
- lemon juice or vinegar
- bicarbonate of soda
- paintbrush
- wiggly or paper eyes
- silver foil
What you do
Prepare some red cabbage water by breaking up the cabbage leaves into
small pieces.
Pour hot water over the cabbage and leave for half an hour or until the water
turns dark purple.
Once cool, remove all the chunks of cabbage, soak the filter papers in the
cabbage water and leave to dry.
Next, flatten out coffee filter on a plate and cut out a fish shape from it.
Dip the paintbrush in lemon juice or vinegar and paint onto the fish. See the
colour change?
Make up some bicarbonate of soda solution by putting a couple of
teaspoons of powder into a little water and mixing it up. Dip in the paintbrush
and paint the fish. See the colour change again?
Once the fish is dry, glue on some small strips and triangles of silver foil, glue
on a wiggly eye and draw on a mouth and you have your rainbow fish!
What’s happening
These colour changes are all due to acid-base chemistry. The cabbage water is
purple initially. When you add an alkali, such as bicarbonate of soda, it will
turn blue. Adding an acid such as vinegar will turn it red.
Red cabbage contains the pigment anthocyanin and the structure of the
molecules of anthocyanin changes depending on whether it is in an acid or an
alkali solution. This change in structure means that the pigment can actually
change colour from bright red in acid to deep blue in alkali.
9
Red cabbage water is a good simple indicator and can be used to tell you
whether something is acidic or alkali but it cannot tell you how acidic or how
alkali. For that you need a more sensitive indicator such as universal indicator or
methyl orange indicator.
Colourful combustion
You will need
- test tubes
- test tube racks
- Bunsen burners
- bench mats
- distilled water
- wire loops (preferably made from platinum or nickel-chromium)
- 5M hydrochloric acid in labelled test tubes
In tubes labelled with the name of the metal, approx. 0.5M solutions of:
- barium chloride
- calcium chloride
- copper (II) sulphate
- lead (II) nitrate
- potassium nitrate
- sodium chloride
Plus four test tubes as unknowns, filled with four of the six solutions above, labelled
from 1 to 4.
Safety
Always use good safety techniques. Make sure you are wearing safety goggles, a
chemical apron and are supervised by a chemistry teacher.
What you do
First test that your wire loop is clean by putting it into the Bunsen burner flame.
If the flame changes colour then place the loop into the hydrochloric acid
solution, rinse it with the distilled water and try again. If there is a burst of
colour, then it is not sufficiently clean. If there is no change in the colour, then
the loop is ready to use. If you have more than one loop, use a separate one
for each test.
Dip the loop into one of the known solutions and place it into the blue part of
the Bunsen burner flame. Make a note of solution and the colour of the
flame.
Clean the wire loop and keep testing each of the known solutions until you
know the colour of each one.
Solution Barium Calcium Copper Lead Potassium Sodium
Colour
Next test the four unknown solutions and make a note of their flame colours.
Can you work out what metals the solutions contain?
10
In this experiment, you should find the following metals produce the following
colours:
Solution Barium Calcium Copper Lead Potassium Sodium
Colour Light
green
Brick red Blue/green Blue/white Lilac Bright
orange
What’s happening
When a solution is heated up it gives off a characteristic colour that can be used
to identify the metal within it. For example, sodium will give off a bright orange
light which is often seen in sodium street lights or fireworks.
Electrons in the metal ions in the solution absorb the heat of the Bunsen burner
and move to a higher energy level, i.e. become “excited”. When these electrons
fall back down to their original energy level, or “ground state”, the energy is
released in the form of light. Different metal ions have different separations
between their excited and ground states and therefore absorb and release
different amounts of energy. These different energies correspond to different
wavelengths of light. This therefore means that when different types of metal are
heated up they create different coloured flames.
Honeycomb toffee
You will need
- 4 desert spoons granulated sugar
- 2 desert spoons syrup
- 1/4 teaspoon bicarbonate of soda
- saucepan
What you do
Measure the sugar and syrup into a pan and stir over a medium heat. What
happens to the sugar?
When the sugar has completely dissolved, bring the mixture to the boil and let
it bubble until the mixture turns dark brown. Why has the colour changed?
Add ¼ teaspoon of bicarbonate of soda. What happens to the mixture?
Allow to froth while stirring out any lumps.
Pour onto a baking tray and allow to cool. What happens to the mixture as it
cools down?
Challenges
What other sweets could you make by altering the properties of sugar?
11
Dressing the salad
You will need
- 4 containers with lids (e.g. jam jars)
- olive oil
- vinegar
- pepper
- stopwatch/timer.
What you do
Half-fill one container with olive oil and another with vinegar. Record what
they look like.
Pour 2 tablespoons of oil and 2 tablespoons of vinegar into each of the third
and fourth containers.
Shake one of these for 5 seconds and the other for 60 seconds. Record what
happens to the liquids. How long does it takes for each one to separate?
Add pepper to one of these containers. Shake both containers for 30
seconds. How long do they take to separate now? Why do you think the 2
mixtures behave differently?
Challenges
- How can you alter the proportions of the ingredients to make a delicious but
more stable salad dressing?
- Can you find 3 everyday examples of emulsions?
Money laundering
You will need
- dull or dirty copper coins
- white vinegar
- 1 teaspoon salt
- glass bowl
- paper towels.
What you do
Pour the vinegar into the bowl. Add the salt and stir until it dissolves. Drop the
pennies into the bowl. What happens?
Rinse the pennies well under running water. Place them on a paper towel to
dry. How have the pennies changed?
Challenges
- What happens if you don‟t rinse the pennies?
- What happens if you use different types of coins?
12
It’s slime time!
Liquid or solid? This is one confused mixture!
You will need
- cornflour
- water
- food colouring (optional)
What you do
Put 2 cups of cornflour in a bowl, add 2 teaspoons of food colouring (this is
optional) and 1 cup of water.
Mix it all up with your hands until all the powder is wet and then continue
adding a few drops of water at a time, until you have a thick, smooth mixture.
Now play with it, hit it, squeeze it, push it slowly and smack it hard! Do you
notice anything strange about this material?
Bubble tennis
You will need
- bubble mixture and large bowl as above
- 2 coat hangers
- tube from a ballpoint pen (without the ink cartridge)
What you do
Shape the coat hangers until they are in the shape of a circle (~12cm
diameter) with a handle.
Dip each hanger in the soap solution and pull them out so that a film of soap
fills up the whole circle. These are your bubble racquets.
Hold the pen tube by one end and dip the other into the solution for a few
seconds.
Pull the tube out and blow into the other end, forming a soap bubble. This is
your tennis ball.
Now you can practice your serve. This may take a little practice and works
better if you are able to add glycerine to the bubble mixture. Make sure your
actions are gentle or the bubble and racquet will burst!
13
Ready, Bread-y, Go!
Why are some types of bread flat and firm and others light and spongy? What
makes bread rise? Get stuck in and investigate what it takes to make the perfect
loaf of bread.
You will need
- plastic cups/glasses
- access to water
- dried yeast, sugar, flour (plain flour or strong bread flour – not self-raising)
- teaspoon (to measure and stir)
- timer
What you do
Collect together the basic bread ingredients of yeast, sugar and flour
together with some half-filled cups of warm water.
Which of the basic ingredients do you think is most important to put the „rise‟
into bread? How could you test this? What do you think you will see?
Label your cups carefully. Watch closely for 30 minutes and note at intervals
what is happening in each of the cups.
Compare your bread with other groups. Did all the bread „rise‟ at the same
rate?
Create a winners‟ podium of the „perfect‟ bread.
Talk about
How many different kinds of bread are there?
Do you know what bread is made from and how it is made?
Which ingredient makes bread rise?
Some extra things that you can do
If you change the temperature of the water does it work better if the water is
hotter? Or colder?
Is there anything else you could change?
Look up some different bread recipes. What else is sometimes added in
addition to the basic ingredients? What effect do you think the extra
ingredients have?
Try making some bread with an adult at home.
Ready, Bread-y, Go: Organiser’s notes
What do I do?
1. Read the children‟s card to familiarise yourself with the activity.
2. Check the resources.

14
3. Set the scene by discussing breads and bread-making with the children.
4. Give the children time to discuss with a buddy their ideas on what makes
bread rise.
5. Gather everyone‟s ideas and discuss how you are going to test these and
how you will record the results.
6. Now let the children try out their ideas and see what happens.
7. When they have finished, talk about what they found. The children can have
a display of their „perfect‟ bread.
8. There are extra challenges on the children‟s card. These can be used if there
is any spare time or if the children want to try out more ideas at home.
Background
Yeast is the ingredient commonly used to make bread rise. It is a single-celled
fungus, usually bought in supermarkets in a dried form. Dried yeast remains
dormant until brought into contact with warm water.
Yeast feeds on sugar to release carbon dioxide gas (which makes the bread
rise) and alcohol (which evaporates in baking).
Flour is a starch and starch contains glucose, a form of sugar.
To access the sugar in flour, the yeast has first to attack the starch with
enzymes. Fermentation occurs with just yeast and flour (no sugar) but it can
be very slow.
Yeast grows best at a temperature of between 27 and 32°C. At temperatures
lower than 10°C yeast is inactive, above 54°C yeast dies.
Things to look out for
Use small quantities of the ingredients. One way to start might be:
Cup 1 1 tsp flour + 1 tsp sugar (no yeast)
Cup 2 Half a teaspoon of yeast (only yeast)
Cup 3 Half a teaspoon of yeast + 1 tsp sugar
Cup 4 Half a teaspoon of yeast + 1 tsp flour
Cup 5 Half a teaspoon of yeast + 1 tsp flour + 1 tsp sugar
Any cup containing yeast and sugar should start producing bubbles
within 5–10 minutes.
Water used should be warm but not hot.
Mix ingredients well.
Too much sugar will slow the production of carbon dioxide or even stop
activity completely – children might like to investigate what „too much‟ is!
Safety
Danger of scalding from water which is too hot.