Embed Size (px)
Citation preview
Seats and Restraint Systems ........................... 1-1Front Seats ............................................... 1-2Rear Seats ............................................... 1-9Safety Belts ............................................. 1-10Child Restraints ....................................... 1-28Air Bag Systems ...................................... 1-46Restraint System Check ............................ 1-55
Features and Controls ..................................... 2-1Keys ........................................................ 2-2Doors and Locks ....................................... 2-7Windows ................................................. 2-13Theft-Deterrent Systems ............................ 2-15Starting and Operating Your Vehicle ........... 2-18Mirrors .................................................... 2-31Storage Areas ......................................... 2-33Sunroof .................................................. 2-35
Instrument Panel ............................................. 3-1Instrument Panel Overview .......................... 3-4Climate Controls ...................................... 3-18Warning Lights, Gages, and Indicators ........ 3-30Secondary Information Center (SIC) ............ 3-46Audio System(s) ....................................... 3-48
Driving Your Vehicle ....................................... 4-1Your Driving, the Road, and Your Vehicle ........ 4-2Towing ................................................... 4-29
Service and Appearance Care .......................... 5-1Service ..................................................... 5-3Fuel ......................................................... 5-5Checking Things Under the Hood ............... 5-10Headlamp Aiming ..................................... 5-40Bulb Replacement .................................... 5-41Windshield Wiper Blade Replacement ......... 5-47Tires ...................................................... 5-48Appearance Care ..................................... 5-68Vehicle Identification ................................. 5-77Electrical System ...................................... 5-78Capacities and Specifications ..................... 5-85
Maintenance Schedule ..................................... 6-1Maintenance Schedule ................................ 6-2
Customer Assistance and Information .............. 7-1Customer Assistance and Information ........... 7-2Reporting Safety Defects ........................... 7-11
Index ................................................................ 1
2004 Chevrolet Epica Owner Manual M
GENERAL MOTORS, GM, the GM Emblem,CHEVROLET, and the CHEVROLET Emblem areregistered trademarks of General Motors Corporation.The name EPICA is a trademark of General MotorsCorporation.
This manual includes the latest information at the timeit was printed. We reserve the right to make changes afterthat time without further notice. For vehicles first sold inCanada, substitute the name “General Motors of CanadaLimited” for Chevrolet Motor Division whenever it appearsin this manual.
Please keep this manual in your vehicle, so it will bethere if you ever need it when you’re on the road.If you sell the vehicle, please leave this manual in itso the new owner can use it.
Part No. 04EPICA A First Edition ©Copyright General Motors Corporation 10/01/03All Rights Reserved
Canadian OwnersYou can obtain a French language copy of this manualfrom your dealer or from:
Helm, IncorporatedP.O. Box 07130Detroit, MI 48207
How to Use This ManualMany people read their owner’s manual from beginningto end when they first receive their new vehicle. If you dothis, it will help you learn about the features and controlsfor your vehicle. In this manual, you will find that picturesand words work together to explain things.
IndexA good place to look for what you need is the Index inback of the manual. It is an alphabetical list of what is inthe manual, and the page number where you will find it.
ii
Safety Warnings and SymbolsYou will find a number of safety cautions in this book. Weuse a box and the word CAUTION to tell you about thingsthat could hurt you if you were to ignore the warning.
{CAUTION:
These mean there is something that could hurtyou or other people.
In the caution area, we tell you what the hazard is.Then we tell you what to do to help avoid or reduce thehazard. Please read these cautions. If you don’t, youor others could be hurt.
You will also find acircle with a slashthrough it in this book.This safety symbol means“Don’t,” “Don’t do this”or “Don’t let this happen.”
iii
Vehicle Damage WarningsAlso, in this book you will find these notices:
Notice: These mean there is something that coulddamage your vehicle.
A notice will tell you about something that can damageyour vehicle. Many times, this damage would not becovered by your warranty, and it could be costly.But the notice will tell you what to do to help avoidthe damage.
When you read other manuals, you might see CAUTIONand NOTICE warnings in different colors or in differentwords.
You’ll also see warning labels on your vehicle.They use the same words, CAUTION or NOTICE.
Vehicle SymbolsYour vehicle has components and labels that usesymbols instead of text. Symbols, used on your vehicle,are shown along with the text describing the operationor information relating to a specific component, control,message, gage or indicator.
If you need help figuring out a specific name of acomponent, gage or indicator, reference the followingtopics:
• Seats and Restraint Systems in Section 1
• Features and Controls in Section 2
• Instrument Panel Overview in Section 3
• Climate Controls in Section 3
• Warning Lights, Gages and Indicators in Section 3
• Audio System(s) in Section 3
• Engine Compartment Overview in Section 5
iv
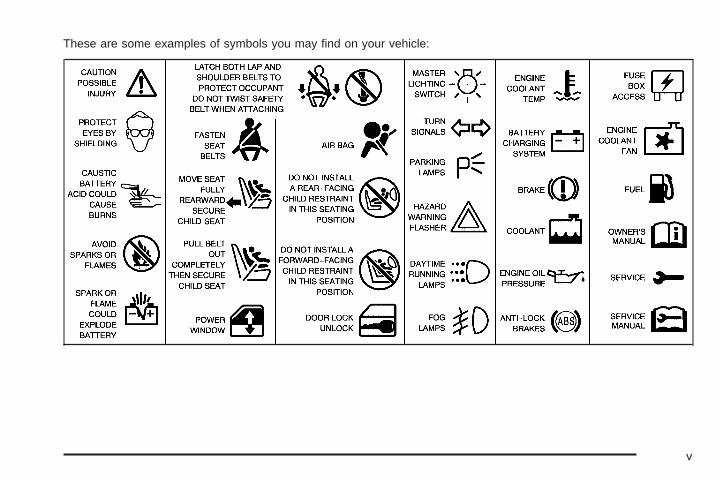
These are some examples of symbols you may find on your vehicle:
v

✍ NOTES
vi
Front Seats ......................................................1-2Manual Seats ................................................1-2Driver Seat Height Adjuster ..............................1-3Power Seat ...................................................1-3Manual Lumbar ..............................................1-5Heated Seats .................................................1-5Reclining Seatbacks ........................................1-6Head Restraints .............................................1-8
Rear Seats .......................................................1-9Rear Seat Operation .......................................1-9
Safety Belts ...................................................1-10Safety Belts: They Are for Everyone ................1-10Questions and Answers About Safety Belts ......1-15How to Wear Safety Belts Properly .................1-16Driver Position ..............................................1-16Safety Belt Use During Pregnancy ..................1-23Right Front Passenger Position .......................1-24Rear Seat Passengers ..................................1-24Safety Belt Pretensioners ...............................1-27
Child Restraints .............................................1-28Older Children ..............................................1-28Infants and Young Children ............................1-30Child Restraint Systems .................................1-34Where to Put the Restraint .............................1-37
Top Strap ....................................................1-37Top Strap Anchor Location .............................1-39Lower Anchorages and Top Tethers for
Children (LATCH System) ...........................1-40Securing a Child Restraint Designed for
the LATCH System ....................................1-43Securing a Child Restraint in a
Rear Outside Seat Position .........................1-43Securing a Child Restraint in a
Center Rear Seat Position ..........................1-46Securing a Child Restraint in the
Right Front Seat Position ............................1-46Air Bag Systems ............................................1-46
Where Are the Air Bags? ...............................1-49When Should an Air Bag Inflate? ....................1-51What Makes an Air Bag Inflate? .....................1-52How Does an Air Bag Restrain? .....................1-52What Will You See After an Air Bag
Inflates? ...................................................1-53Servicing Your Air Bag-Equipped Vehicle .........1-54
Restraint System Check ..................................1-55Checking Your Restraint Systems ...................1-55Replacing Restraint System Parts
After a Crash ............................................1-55
Section 1 Seats and Restraint Systems
1-1
Front Seats
Manual Seats
{CAUTION:
You can lose control of the vehicle if you try toadjust a manual driver’s seat while the vehicleis moving. The sudden movement could startleand confuse you, or make you push a pedalwhen you don’t want to. Adjust the driver’sseat only when the vehicle is not moving.
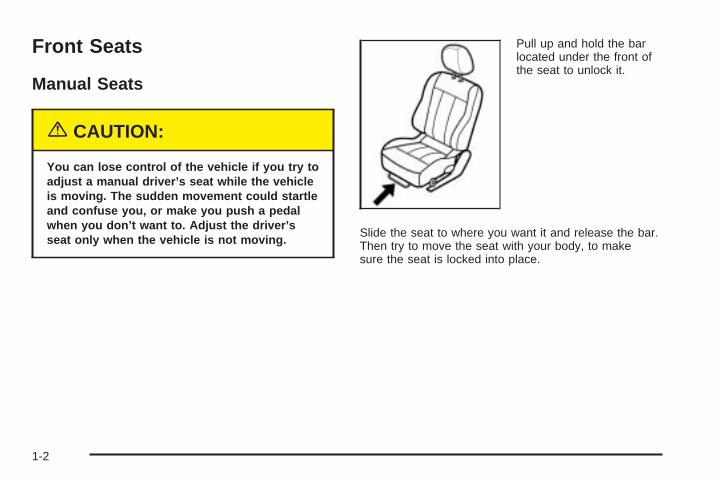
Pull up and hold the barlocated under the front ofthe seat to unlock it.
Slide the seat to where you want it and release the bar.Then try to move the seat with your body, to makesure the seat is locked into place.
1-2
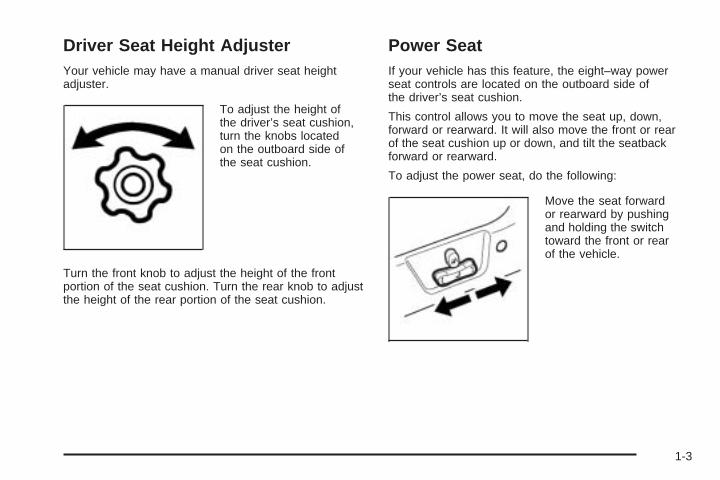
Driver Seat Height AdjusterYour vehicle may have a manual driver seat heightadjuster.
To adjust the height ofthe driver’s seat cushion,turn the knobs locatedon the outboard side ofthe seat cushion.
Turn the front knob to adjust the height of the frontportion of the seat cushion. Turn the rear knob to adjustthe height of the rear portion of the seat cushion.
Power SeatIf your vehicle has this feature, the eight–way powerseat controls are located on the outboard side ofthe driver’s seat cushion.
This control allows you to move the seat up, down,forward or rearward. It will also move the front or rearof the seat cushion up or down, and tilt the seatbackforward or rearward.
To adjust the power seat, do the following:
Move the seat forwardor rearward by pushingand holding the switchtoward the front or rearof the vehicle.
1-3
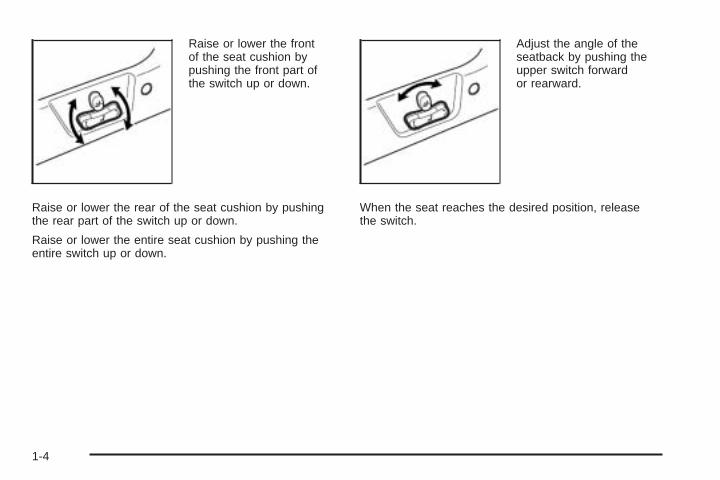
Raise or lower the frontof the seat cushion bypushing the front part ofthe switch up or down.
Raise or lower the rear of the seat cushion by pushingthe rear part of the switch up or down.
Raise or lower the entire seat cushion by pushing theentire switch up or down.
Adjust the angle of theseatback by pushing theupper switch forwardor rearward.
When the seat reaches the desired position, releasethe switch.
1-4
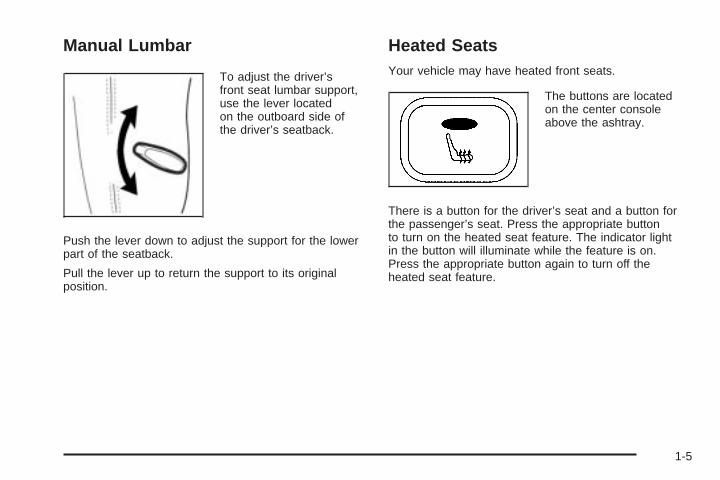
Manual Lumbar
To adjust the driver’sfront seat lumbar support,use the lever locatedon the outboard side ofthe driver’s seatback.
Push the lever down to adjust the support for the lowerpart of the seatback.
Pull the lever up to return the support to its originalposition.
Heated SeatsYour vehicle may have heated front seats.
The buttons are locatedon the center consoleabove the ashtray.
There is a button for the driver’s seat and a button forthe passenger’s seat. Press the appropriate buttonto turn on the heated seat feature. The indicator lightin the button will illuminate while the feature is on.Press the appropriate button again to turn off theheated seat feature.
1-5
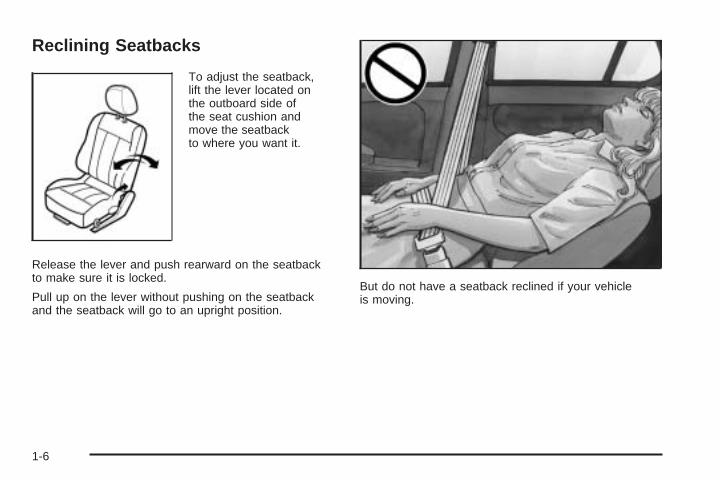
Reclining Seatbacks
To adjust the seatback,lift the lever located onthe outboard side ofthe seat cushion andmove the seatbackto where you want it.
Release the lever and push rearward on the seatbackto make sure it is locked.
Pull up on the lever without pushing on the seatbackand the seatback will go to an upright position.
But do not have a seatback reclined if your vehicleis moving.
1-6
{CAUTION:
Sitting in a reclined position when your vehicleis in motion can be dangerous. Even if youbuckle up, your safety belts can’t do their jobwhen you’re reclined like this.
The shoulder belt can’t do its job because itwon’t be against your body. Instead, it will bein front of you. In a crash you could go into it,receiving neck or other injuries.
The lap belt can’t do its job either. In a crashthe belt could go up over your abdomen.The belt forces would be there, not at yourpelvic bones. This could cause serious internalinjuries.
CAUTION: (Continued)
CAUTION: (Continued)
For proper protection when the vehicle is inmotion, have the seatback upright. Then sitwell back in the seat and wear your safetybelt properly.
1-7
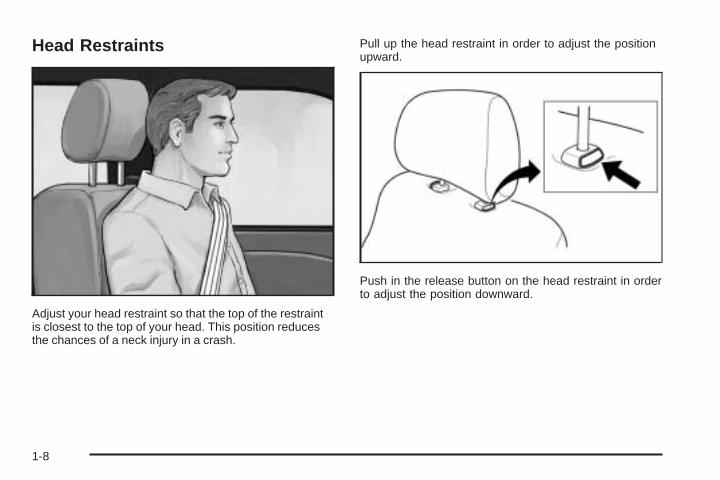
Head Restraints
Adjust your head restraint so that the top of the restraintis closest to the top of your head. This position reducesthe chances of a neck injury in a crash.
Pull up the head restraint in order to adjust the positionupward.
Push in the release button on the head restraint in orderto adjust the position downward.
1-8
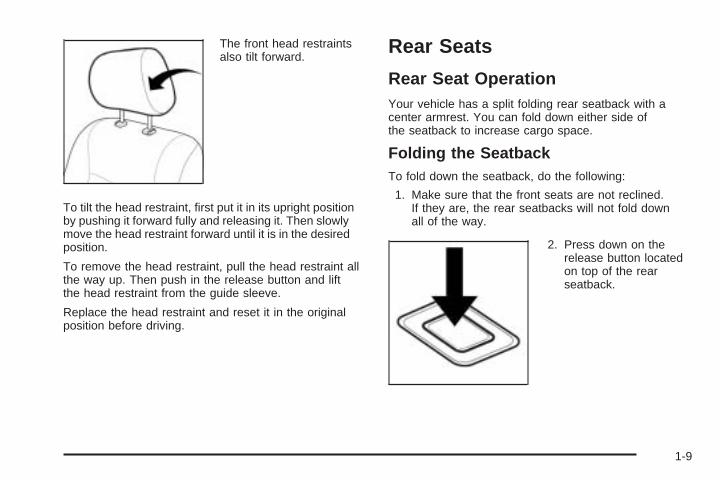
The front head restraintsalso tilt forward.
To tilt the head restraint, first put it in its upright positionby pushing it forward fully and releasing it. Then slowlymove the head restraint forward until it is in the desiredposition.
To remove the head restraint, pull the head restraint allthe way up. Then push in the release button and liftthe head restraint from the guide sleeve.
Replace the head restraint and reset it in the originalposition before driving.
Rear Seats
Rear Seat OperationYour vehicle has a split folding rear seatback with acenter armrest. You can fold down either side ofthe seatback to increase cargo space.
Folding the SeatbackTo fold down the seatback, do the following:
1. Make sure that the front seats are not reclined.If they are, the rear seatbacks will not fold downall of the way.
2. Press down on therelease button locatedon top of the rearseatback.
1-9
3. Fold the rear seatback forward and down.
{CAUTION:
If the seatback isn’t locked, it could moveforward in a sudden stop or crash. That couldcause injury to the person sitting there. Alwayspress rearward on the seatback to be sure it islocked.
{CAUTION:
A safety belt that is improperly routed, notproperly attached, or twisted won’t provide theprotection needed in a crash. The personwearing the belt could be seriously injured.After raising the rear seatback, always checkto be sure that the safety belts are properlyrouted and attached, and are not twisted.
To return the seatback to the upright position, do thefollowing:
1. Lift up the seatback and push it to its originalposition. Ensure that the safety belts are not twistedor caught under the seat cushion.
2. Push down firmly on the top of the seatback until itlatches securely in the fully upright position.
Safety Belts
Safety Belts: They Are for EveryoneThis part of the manual tells you how to use safetybelts properly. It also tells you some things you shouldnot do with safety belts.
{CAUTION:
Don’t let anyone ride where he or she can’twear a safety belt properly. If you are in acrash and you’re not wearing a safety belt,your injuries can be much worse. You can hitthings inside the vehicle or be ejected from it.
CAUTION: (Continued)
1-10
CAUTION: (Continued)
You can be seriously injured or killed. In thesame crash, you might not be, if you arebuckled up. Always fasten your safety belt,and check that your passengers’ belts arefastened properly too.
{CAUTION:
It is extremely dangerous to ride in a cargoarea, inside or outside of a vehicle. In acollision, people riding in these areas are morelikely to be seriously injured or killed. Do notallow people to ride in any area of your vehiclethat is not equipped with seats and safetybelts. Be sure everyone in your vehicle is in aseat and using a safety belt properly.
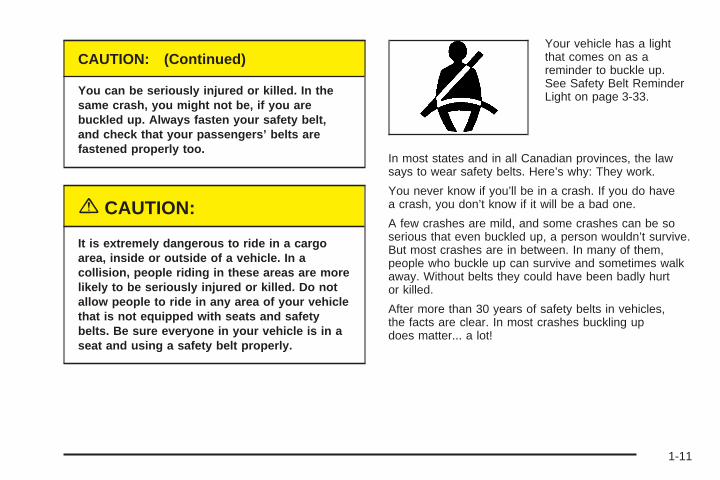
Your vehicle has a lightthat comes on as areminder to buckle up.See Safety Belt ReminderLight on page 3-33.
In most states and in all Canadian provinces, the lawsays to wear safety belts. Here’s why: They work.
You never know if you’ll be in a crash. If you do havea crash, you don’t know if it will be a bad one.
A few crashes are mild, and some crashes can be soserious that even buckled up, a person wouldn’t survive.But most crashes are in between. In many of them,people who buckle up can survive and sometimes walkaway. Without belts they could have been badly hurtor killed.
After more than 30 years of safety belts in vehicles,the facts are clear. In most crashes buckling updoes matter... a lot!
1-11
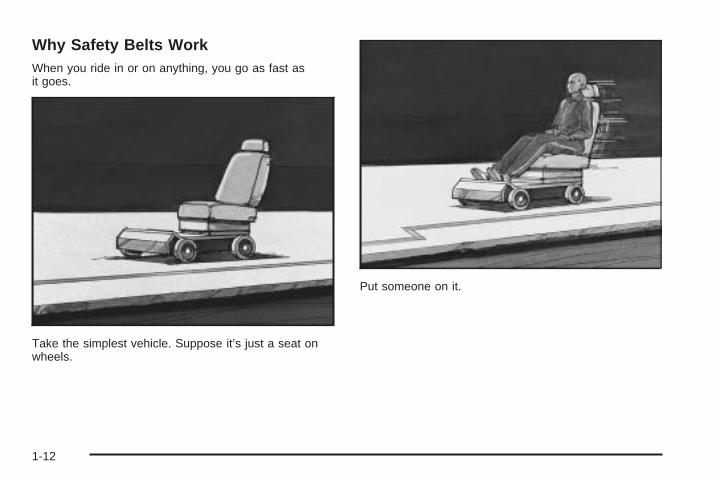
Why Safety Belts WorkWhen you ride in or on anything, you go as fast asit goes.
Take the simplest vehicle. Suppose it’s just a seat onwheels.
Put someone on it.
1-12
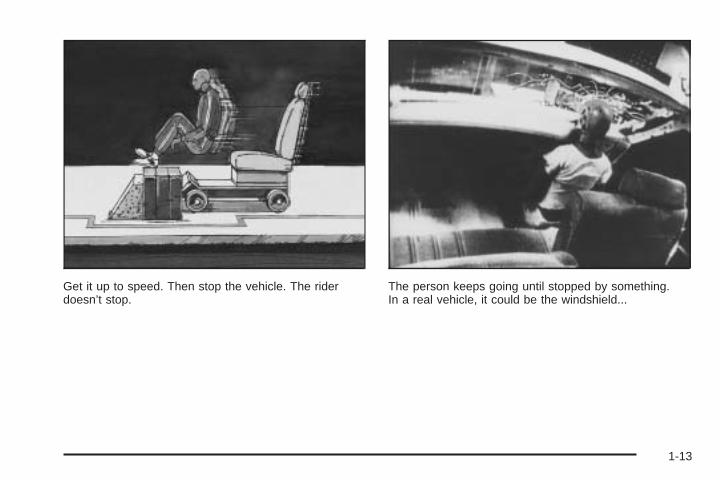
Get it up to speed. Then stop the vehicle. The riderdoesn’t stop.
The person keeps going until stopped by something.In a real vehicle, it could be the windshield...
1-13

or the instrument panel... or the safety belts!
With safety belts, you slow down as the vehicle does.You get more time to stop. You stop over more distance,and your strongest bones take the forces. That’s whysafety belts make such good sense.
1-14
Questions and Answers AboutSafety Belts
Q: Won’t I be trapped in the vehicle after anaccident if I’m wearing a safety belt?
A: You could be – whether you’re wearing a safetybelt or not. But you can unbuckle a safety belt,even if you’re upside down. And your chanceof being conscious during and after an accident, soyou can unbuckle and get out, is much greaterif you are belted.
Q: If my vehicle has air bags, why should I haveto wear safety belts?
A: Air bags are in many vehicles today and will be inmost of them in the future. But they are supplementalsystems only; so they work with safety belts – notinstead of them. Every air bag system ever offeredfor sale has required the use of safety belts. Even ifyou’re in a vehicle that has air bags, you still have tobuckle up to get the most protection. That’s true notonly in frontal collisions, but especially in side andother collisions.
Q: If I’m a good driver, and I never drive far fromhome, why should I wear safety belts?
A: You may be an excellent driver, but if you’re inan accident – even one that isn’t your fault – youand your passengers can be hurt. Being a gooddriver doesn’t protect you from things beyond yourcontrol, such as bad drivers.
Most accidents occur within 25 miles (40 km)of home. And the greatest number of seriousinjuries and deaths occur at speeds of less than40 mph (65 km/h).
Safety belts are for everyone.
1-15
How to Wear Safety Belts ProperlyThis part is only for people of adult size.
Be aware that there are special things to know aboutsafety belts and children. And there are differentrules for smaller children and babies. If a child will beriding in your vehicle, see Older Children on page 1-28or Infants and Young Children on page 1-30. Followthose rules for everyone’s protection.
First, you’ll want to know which restraint systems yourvehicle has.
We’ll start with the driver position.
Driver PositionThis part describes the driver’s restraint system.
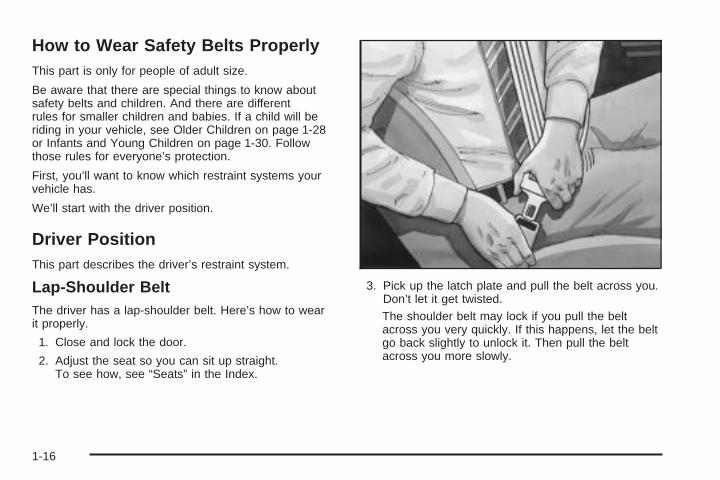
Lap-Shoulder BeltThe driver has a lap-shoulder belt. Here’s how to wearit properly.
1. Close and lock the door.
2. Adjust the seat so you can sit up straight.To see how, see “Seats” in the Index.
3. Pick up the latch plate and pull the belt across you.Don’t let it get twisted.The shoulder belt may lock if you pull the beltacross you very quickly. If this happens, let the beltgo back slightly to unlock it. Then pull the beltacross you more slowly.
1-16
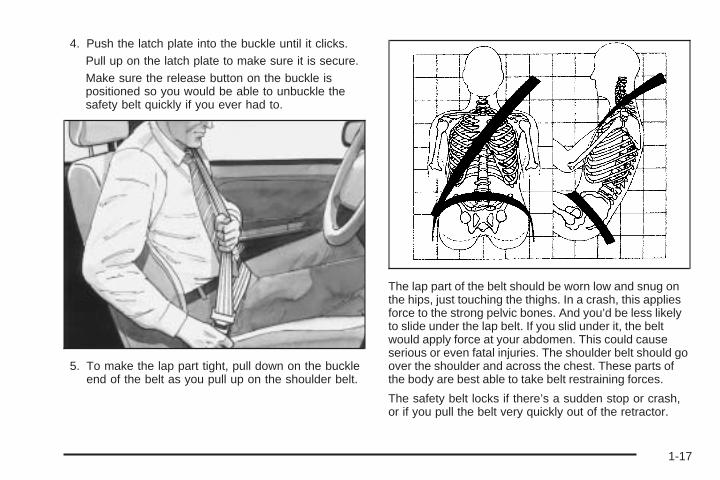
4. Push the latch plate into the buckle until it clicks.Pull up on the latch plate to make sure it is secure.Make sure the release button on the buckle ispositioned so you would be able to unbuckle thesafety belt quickly if you ever had to.
5. To make the lap part tight, pull down on the buckleend of the belt as you pull up on the shoulder belt.
The lap part of the belt should be worn low and snug onthe hips, just touching the thighs. In a crash, this appliesforce to the strong pelvic bones. And you’d be less likelyto slide under the lap belt. If you slid under it, the beltwould apply force at your abdomen. This could causeserious or even fatal injuries. The shoulder belt should goover the shoulder and across the chest. These parts ofthe body are best able to take belt restraining forces.
The safety belt locks if there’s a sudden stop or crash,or if you pull the belt very quickly out of the retractor.
1-17
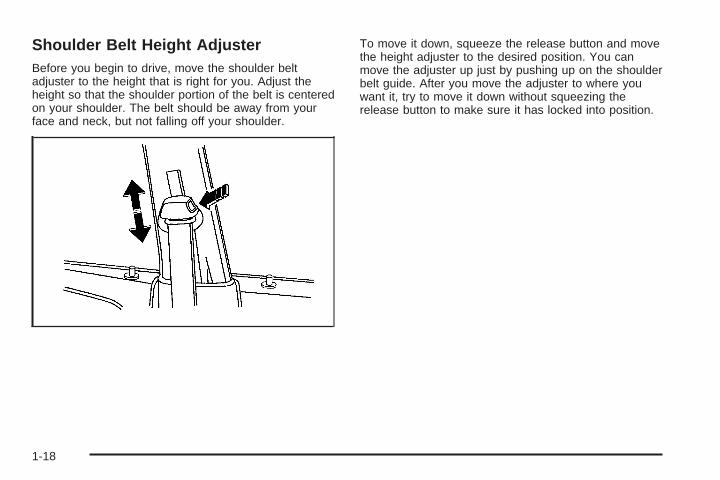
Shoulder Belt Height AdjusterBefore you begin to drive, move the shoulder beltadjuster to the height that is right for you. Adjust theheight so that the shoulder portion of the belt is centeredon your shoulder. The belt should be away from yourface and neck, but not falling off your shoulder.
To move it down, squeeze the release button and movethe height adjuster to the desired position. You canmove the adjuster up just by pushing up on the shoulderbelt guide. After you move the adjuster to where youwant it, try to move it down without squeezing therelease button to make sure it has locked into position.
1-18
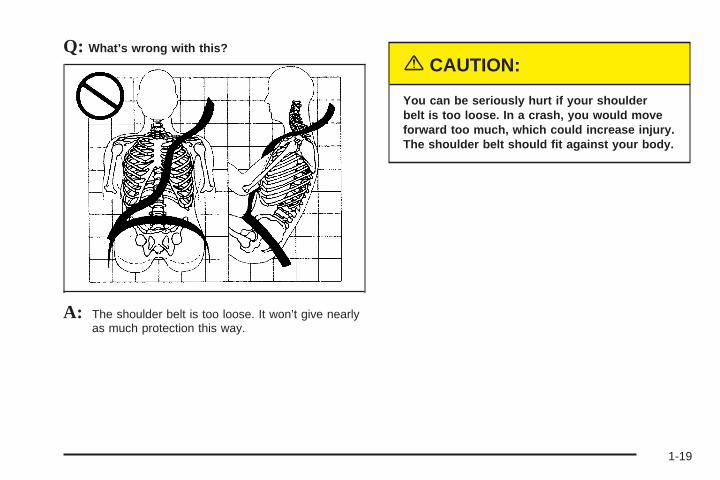
Q: What’s wrong with this?
A: The shoulder belt is too loose. It won’t give nearlyas much protection this way.
{CAUTION:
You can be seriously hurt if your shoulderbelt is too loose. In a crash, you would moveforward too much, which could increase injury.The shoulder belt should fit against your body.
1-19
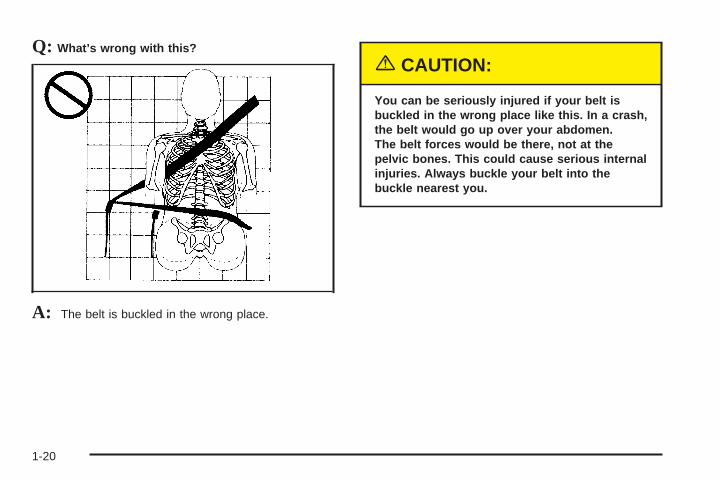
Q: What’s wrong with this?
A: The belt is buckled in the wrong place.
{CAUTION:
You can be seriously injured if your belt isbuckled in the wrong place like this. In a crash,the belt would go up over your abdomen.The belt forces would be there, not at thepelvic bones. This could cause serious internalinjuries. Always buckle your belt into thebuckle nearest you.
1-20
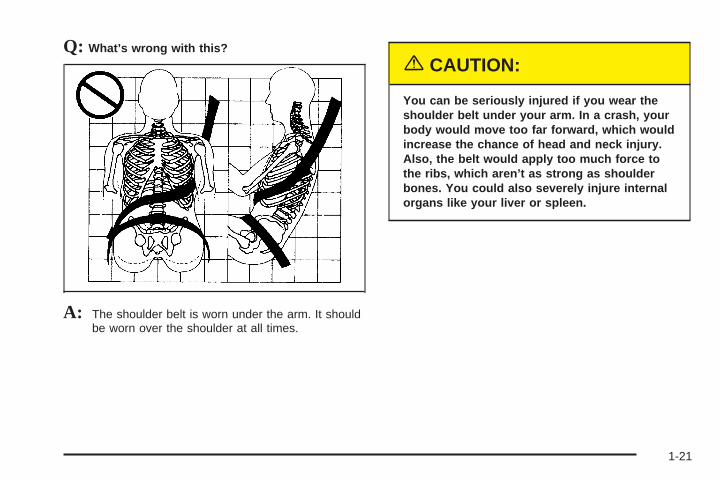
Q: What’s wrong with this?
A: The shoulder belt is worn under the arm. It shouldbe worn over the shoulder at all times.
{CAUTION:
You can be seriously injured if you wear theshoulder belt under your arm. In a crash, yourbody would move too far forward, which wouldincrease the chance of head and neck injury.Also, the belt would apply too much force tothe ribs, which aren’t as strong as shoulderbones. You could also severely injure internalorgans like your liver or spleen.
1-21
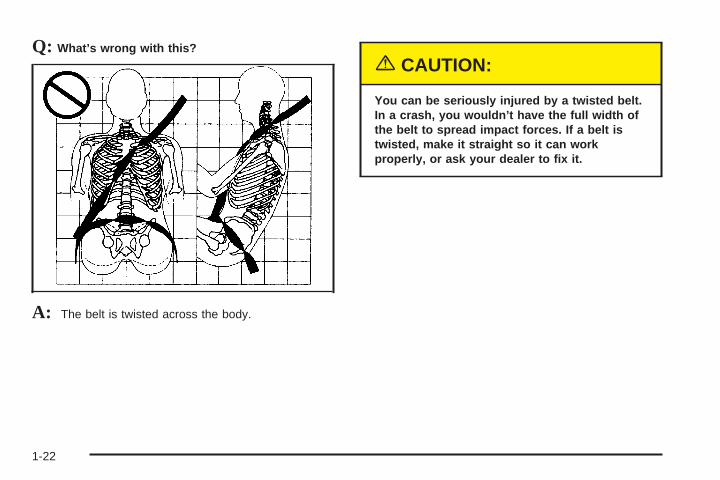
Q: What’s wrong with this?
A: The belt is twisted across the body.
{CAUTION:
You can be seriously injured by a twisted belt.In a crash, you wouldn’t have the full width ofthe belt to spread impact forces. If a belt istwisted, make it straight so it can workproperly, or ask your dealer to fix it.
1-22

To unlatch the belt, just push the button on the buckle.The belt should go back out of the way.
Before you close the door, be sure the belt is out ofthe way. If you slam the door on it, you can damageboth the belt and your vehicle.
Safety Belt Use During PregnancySafety belts work for everyone, including pregnantwomen. Like all occupants, they are more likely to beseriously injured if they don’t wear safety belts.
A pregnant woman should wear a lap-shoulder belt,and the lap portion should be worn as low as possible,below the rounding, throughout the pregnancy.
1-23
The best way to protect the fetus is to protect themother. When a safety belt is worn properly, it’s morelikely that the fetus won’t be hurt in a crash. Forpregnant women, as for anyone, the key to makingsafety belts effective is wearing them properly.
Right Front Passenger PositionTo learn how to wear the right front passenger’s safetybelt properly, see Driver Position on page 1-16.
The right front passenger’s safety belt works the sameway as the driver’s safety belt – except for one thing.If you ever pull the shoulder portion of the belt out all theway, you will engage the child restraint locking feature.If this happens, just let the belt go back all the wayand start again.
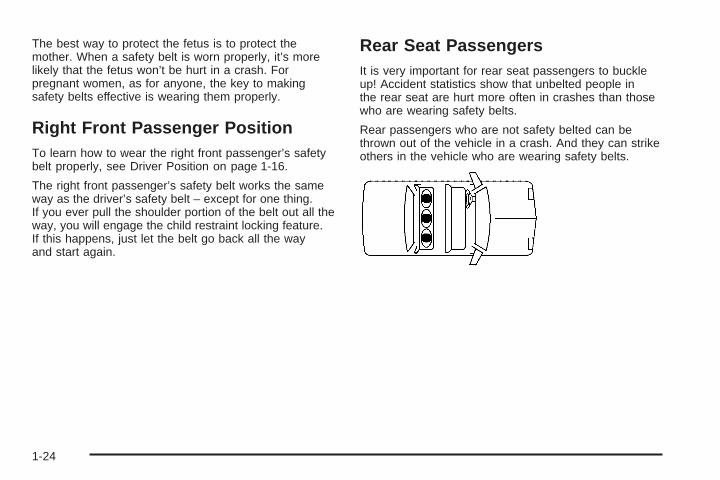
Rear Seat PassengersIt is very important for rear seat passengers to buckleup! Accident statistics show that unbelted people inthe rear seat are hurt more often in crashes than thosewho are wearing safety belts.
Rear passengers who are not safety belted can bethrown out of the vehicle in a crash. And they can strikeothers in the vehicle who are wearing safety belts.
1-24
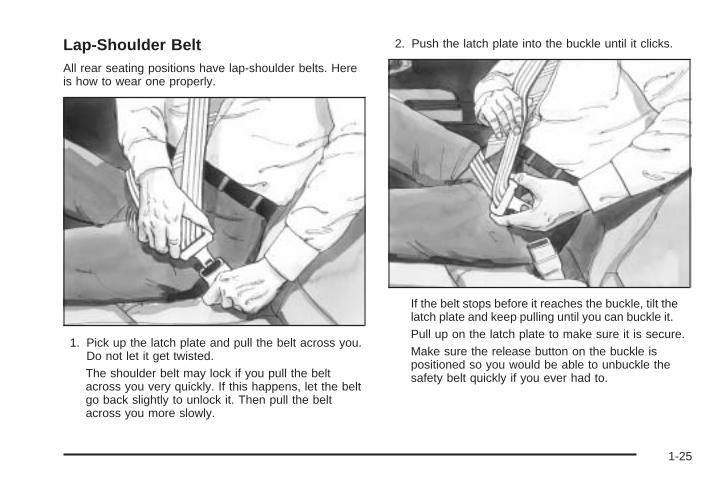
Lap-Shoulder BeltAll rear seating positions have lap-shoulder belts. Hereis how to wear one properly.
1. Pick up the latch plate and pull the belt across you.Do not let it get twisted.The shoulder belt may lock if you pull the beltacross you very quickly. If this happens, let the beltgo back slightly to unlock it. Then pull the beltacross you more slowly.
2. Push the latch plate into the buckle until it clicks.
If the belt stops before it reaches the buckle, tilt thelatch plate and keep pulling until you can buckle it.Pull up on the latch plate to make sure it is secure.Make sure the release button on the buckle ispositioned so you would be able to unbuckle thesafety belt quickly if you ever had to.
1-25
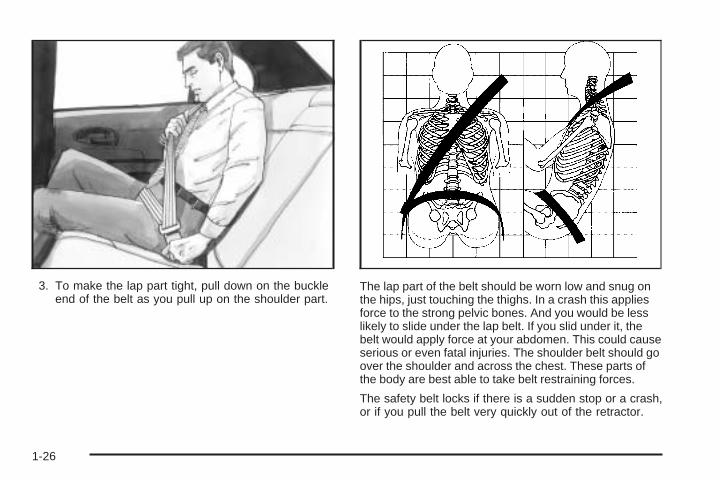
3. To make the lap part tight, pull down on the buckleend of the belt as you pull up on the shoulder part.
The lap part of the belt should be worn low and snug onthe hips, just touching the thighs. In a crash this appliesforce to the strong pelvic bones. And you would be lesslikely to slide under the lap belt. If you slid under it, thebelt would apply force at your abdomen. This could causeserious or even fatal injuries. The shoulder belt should goover the shoulder and across the chest. These parts ofthe body are best able to take belt restraining forces.
The safety belt locks if there is a sudden stop or a crash,or if you pull the belt very quickly out of the retractor.
1-26
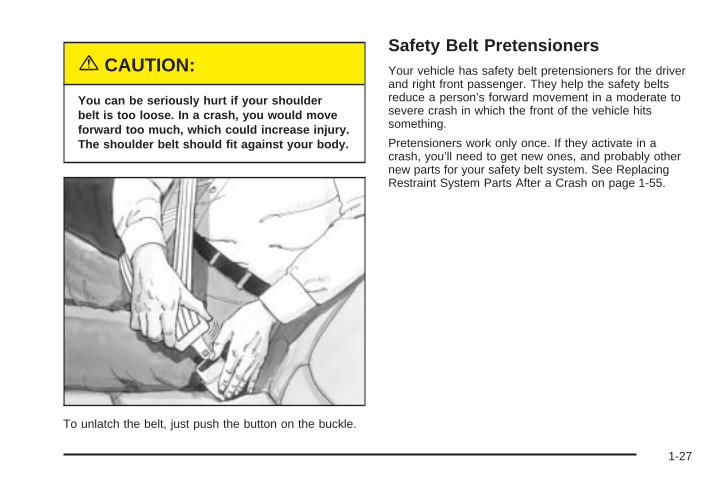
{CAUTION:
You can be seriously hurt if your shoulderbelt is too loose. In a crash, you would moveforward too much, which could increase injury.The shoulder belt should fit against your body.
To unlatch the belt, just push the button on the buckle.
Safety Belt PretensionersYour vehicle has safety belt pretensioners for the driverand right front passenger. They help the safety beltsreduce a person’s forward movement in a moderate tosevere crash in which the front of the vehicle hitssomething.
Pretensioners work only once. If they activate in acrash, you’ll need to get new ones, and probably othernew parts for your safety belt system. See ReplacingRestraint System Parts After a Crash on page 1-55.
1-27
Child Restraints
Older Children
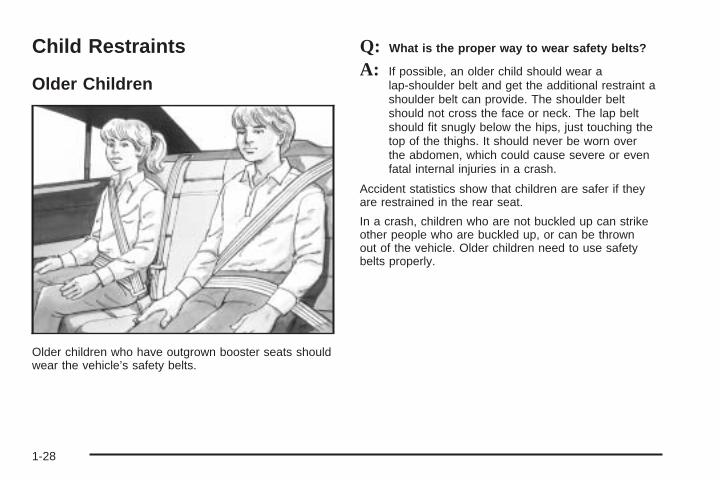
Older children who have outgrown booster seats shouldwear the vehicle’s safety belts.
Q: What is the proper way to wear safety belts?
A: If possible, an older child should wear alap-shoulder belt and get the additional restraint ashoulder belt can provide. The shoulder beltshould not cross the face or neck. The lap beltshould fit snugly below the hips, just touching thetop of the thighs. It should never be worn overthe abdomen, which could cause severe or evenfatal internal injuries in a crash.
Accident statistics show that children are safer if theyare restrained in the rear seat.
In a crash, children who are not buckled up can strikeother people who are buckled up, or can be thrownout of the vehicle. Older children need to use safetybelts properly.
1-28

{CAUTION:
Never do this.
Here two children are wearing the same belt.The belt can’t properly spread the impactforces. In a crash, the two children can becrushed together and seriously injured. A beltmust be used by only one person at a time.
Q: What if a child is wearing a lap-shoulder belt,but the child is so small that the shoulder beltis very close to the child’s face or neck?
A: If the child is sitting in a seat next to a window,move the child toward the center of the vehicle.If the child is sitting in the center rear seatpassenger position, move the child toward thesafety belt buckle. In either case, be sure that theshoulder belt still is on the child’s shoulder, sothat in a crash the child’s upper body would havethe restraint that belts provide.
1-29

{CAUTION:
Never do this.
Here a child is sitting in a seat that has alap-shoulder belt, but the shoulder part isbehind the child. If the child wears the belt inthis way, in a crash the child might slide underthe belt. The belt’s force would then be appliedright on the child’s abdomen. That could causeserious or fatal injuries.
Wherever the child sits, the lap portion of the beltshould be worn low and snug on the hips, just touchingthe child’s thighs. This applies belt force to the child’spelvic bones in a crash.
Infants and Young ChildrenEveryone in a vehicle needs protection! This includesinfants and all other children. Neither the distancetraveled nor the age and size of the traveler changesthe need, for everyone, to use safety restraints. In fact,the law in every state in the United States and inevery Canadian province says children up to some agemust be restrained while in a vehicle.
1-30
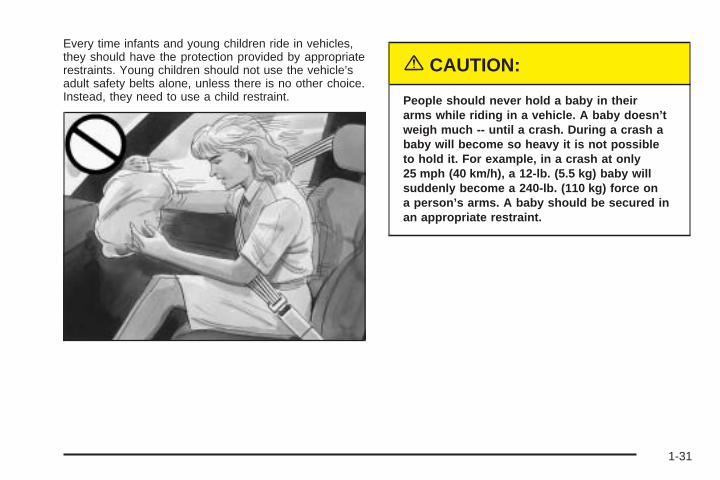
Every time infants and young children ride in vehicles,they should have the protection provided by appropriaterestraints. Young children should not use the vehicle’sadult safety belts alone, unless there is no other choice.Instead, they need to use a child restraint.
{CAUTION:
People should never hold a baby in theirarms while riding in a vehicle. A baby doesn’tweigh much -- until a crash. During a crash ababy will become so heavy it is not possibleto hold it. For example, in a crash at only25 mph (40 km/h), a 12-lb. (5.5 kg) baby willsuddenly become a 240-lb. (110 kg) force ona person’s arms. A baby should be secured inan appropriate restraint.
1-31

{CAUTION:
Children who are up against, or very close to,any air bag when it inflates can be seriouslyinjured or killed. Air bags plus lap-shoulderbelts offer outstanding protection for adultsand older children, but not for young childrenand infants. Neither the vehicle’s safety beltsystem nor its air bag system is designed forthem. Young children and infants need theprotection that a child restraint system canprovide.
Q: What are the different types of add-on childrestraints?
A: Add-on child restraints, which are purchased bythe vehicle’s owner, are available in four basictypes. Selection of a particular restraint should takeinto consideration not only the child’s weight,height and age but also whether or not the restraintwill be compatible with the motor vehicle inwhich it will be used.
1-32
For most basic types of child restraints, there aremany different models available. When purchasinga child restraint, be sure it is designed to beused in a motor vehicle. If it is, the restraint willhave a label saying that it meets federal motorvehicle safety standards.
The restraint manufacturer’s instructions that comewith the restraint, state the weight and heightlimitations for a particular child restraint. In addition,there are many kinds of restraints available forchildren with special needs.
{CAUTION:
Newborn infants need complete support,including support for the head and neck. This isnecessary because a newborn infant’s neck isweak and its head weighs so much comparedwith the rest of its body. In a crash, an infant ina rear-facing seat settles into the restraint, sothe crash forces can be distributed across thestrongest part of an infant’s body, the back andshoulders. Infants always should be secured inappropriate infant restraints.
{CAUTION:
The body structure of a young child is quiteunlike that of an adult or older child, for whomthe safety belts are designed. A young child’ship bones are still so small that the vehicle’sregular safety belt may not remain low on thehip bones, as it should. Instead, it may settleup around the child’s abdomen. In a crash,the belt would apply force on a body areathat’s unprotected by any bony structure.This alone could cause serious or fatalinjuries. Young children always should besecured in appropriate child restraints.
1-33
Child Restraint Systems
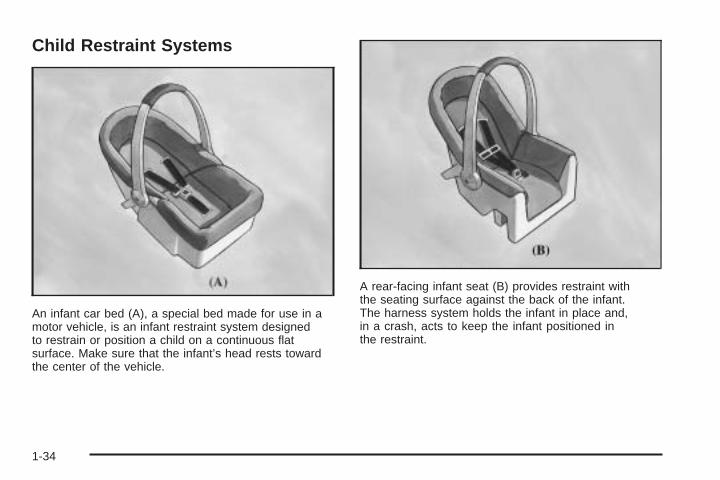
An infant car bed (A), a special bed made for use in amotor vehicle, is an infant restraint system designedto restrain or position a child on a continuous flatsurface. Make sure that the infant’s head rests towardthe center of the vehicle.
A rear-facing infant seat (B) provides restraint withthe seating surface against the back of the infant.The harness system holds the infant in place and,in a crash, acts to keep the infant positioned inthe restraint.
1-34
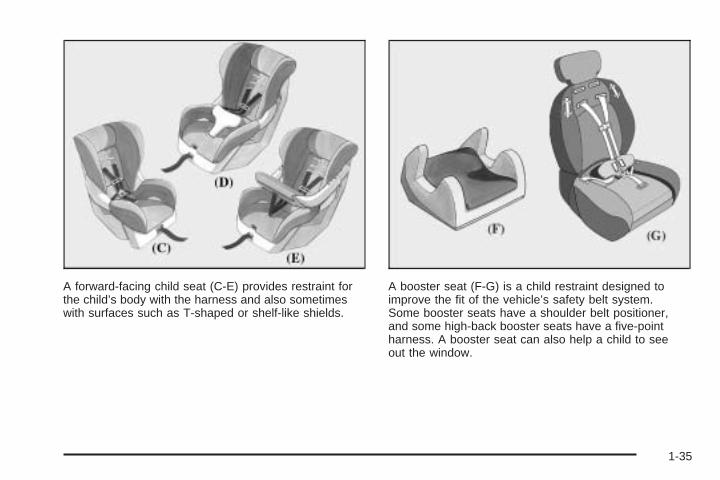
A forward-facing child seat (C-E) provides restraint forthe child’s body with the harness and also sometimeswith surfaces such as T-shaped or shelf-like shields.
A booster seat (F-G) is a child restraint designed toimprove the fit of the vehicle’s safety belt system.Some booster seats have a shoulder belt positioner,and some high-back booster seats have a five-pointharness. A booster seat can also help a child to seeout the window.
1-35
Q: How do child restraints work?
A: A child restraint system is any device designed foruse in a motor vehicle to restrain, seat, or positionchildren. A built-in child restraint system is apermanent part of the motor vehicle. An add-onchild restraint system is a portable one, whichis purchased by the vehicle’s owner.
For many years, add-on child restraints haveused the adult belt system in the vehicle. To helpreduce the chance of injury, the child also has tobe secured within the restraint. The vehicle’sbelt system secures the add-on child restraint inthe vehicle, and the add-on child restraint’s harnesssystem holds the child in place within the restraint.
One system, the three-point harness, has straps thatcome down over each of the infant’s shoulders andbuckle together at the crotch. The five-point harnesssystem has two shoulder straps, two hip straps anda crotch strap. A shield may take the place of hipstraps. A T-shaped shield has shoulder straps thatare attached to a flat pad which rests low against thechild’s body. A shelf- or armrest-type shield hasstraps that are attached to a wide, shelf-like shieldthat swings up or to the side.
When choosing a child restraint, be sure the childrestraint is designed to be used in a vehicle. If it is,it will have a label saying that it meets federal motorvehicle safety standards.
Then follow the instructions for the restraint. You mayfind these instructions on the restraint itself or in abooklet, or both. These restraints use the belt systemor the LATCH system in your vehicle, but the child alsohas to be secured within the restraint to help reducethe chance of personal injury. When securing an add-onchild restraint, refer to the instructions that come withthe restraint which may be on the restraint itself or in abooklet, or both, and to this manual. The child restraintinstructions are important, so if they are not available,obtain a replacement copy from the manufacturer.
1-36
Where to Put the RestraintAccident statistics show that children are safer if theyare restrained in the rear rather than the front seat.In addition, the only seats in the vehicle that are designedto accommodate a child restraint are the rear outboardseating positions. Do not install a child restraint in thefront passenger’s seat and/or the rear center seatingposition. The child restraint will not fit properly.
Wherever you install it, be sure to secure the childrestraint properly.
Keep in mind that an unsecured child restraint canmove around in a collision or sudden stop and injurepeople in the vehicle. Be sure to properly secureany child restraint in your vehicle — even when nochild is in it.
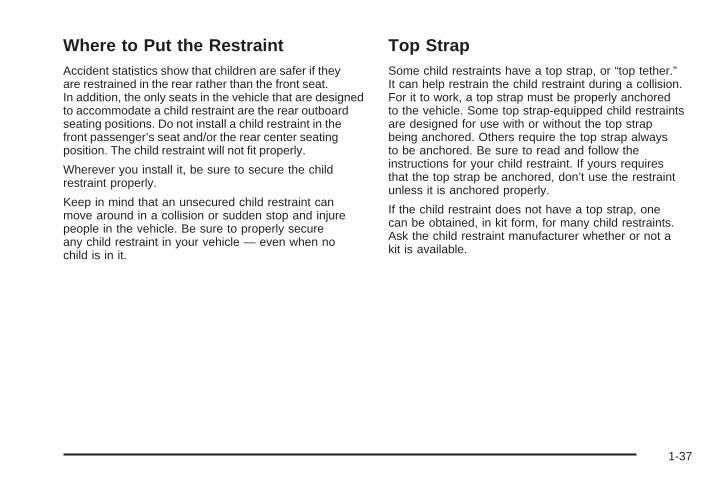
Top StrapSome child restraints have a top strap, or “top tether.”It can help restrain the child restraint during a collision.For it to work, a top strap must be properly anchoredto the vehicle. Some top strap-equipped child restraintsare designed for use with or without the top strapbeing anchored. Others require the top strap alwaysto be anchored. Be sure to read and follow theinstructions for your child restraint. If yours requiresthat the top strap be anchored, don’t use the restraintunless it is anchored properly.
If the child restraint does not have a top strap, onecan be obtained, in kit form, for many child restraints.Ask the child restraint manufacturer whether or not akit is available.
1-37
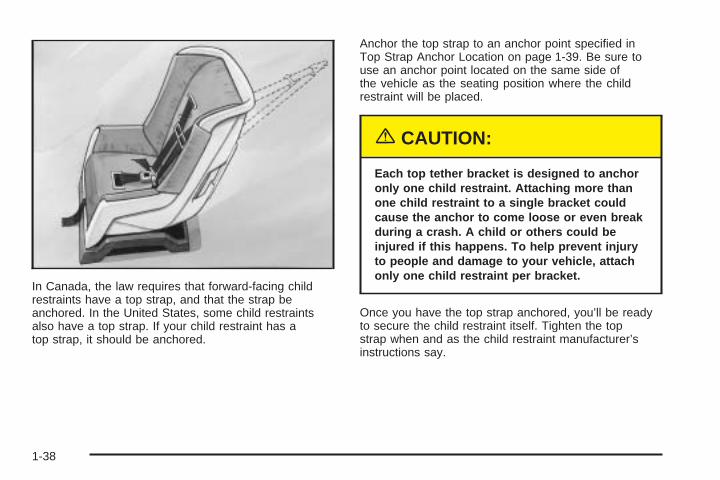
In Canada, the law requires that forward-facing childrestraints have a top strap, and that the strap beanchored. In the United States, some child restraintsalso have a top strap. If your child restraint has atop strap, it should be anchored.
Anchor the top strap to an anchor point specified inTop Strap Anchor Location on page 1-39. Be sure touse an anchor point located on the same side ofthe vehicle as the seating position where the childrestraint will be placed.
{CAUTION:
Each top tether bracket is designed to anchoronly one child restraint. Attaching more thanone child restraint to a single bracket couldcause the anchor to come loose or even breakduring a crash. A child or others could beinjured if this happens. To help prevent injuryto people and damage to your vehicle, attachonly one child restraint per bracket.
Once you have the top strap anchored, you’ll be readyto secure the child restraint itself. Tighten the topstrap when and as the child restraint manufacturer’sinstructions say.
1-38
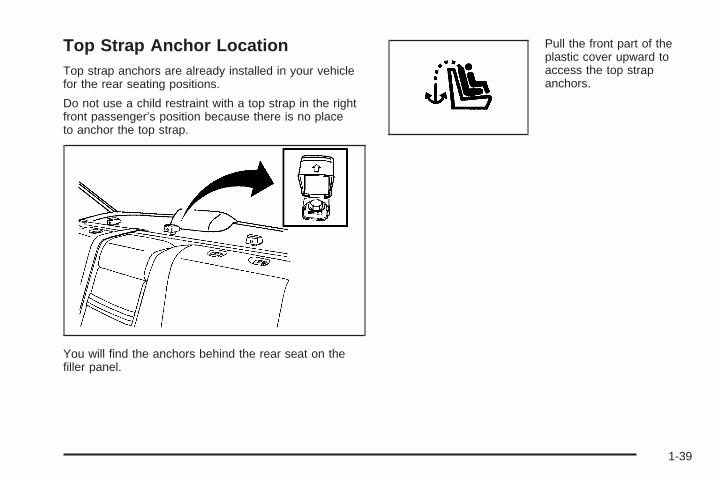
Top Strap Anchor LocationTop strap anchors are already installed in your vehiclefor the rear seating positions.
Do not use a child restraint with a top strap in the rightfront passenger’s position because there is no placeto anchor the top strap.
You will find the anchors behind the rear seat on thefiller panel.
Pull the front part of theplastic cover upward toaccess the top strapanchors.
1-39
Lower Anchorages and Top Tethersfor Children (LATCH System)
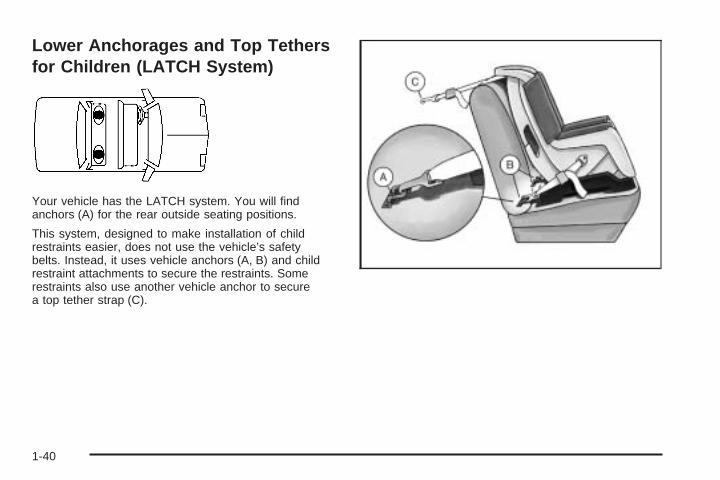
Your vehicle has the LATCH system. You will findanchors (A) for the rear outside seating positions.
This system, designed to make installation of childrestraints easier, does not use the vehicle’s safetybelts. Instead, it uses vehicle anchors (A, B) and childrestraint attachments to secure the restraints. Somerestraints also use another vehicle anchor to securea top tether strap (C).
1-40
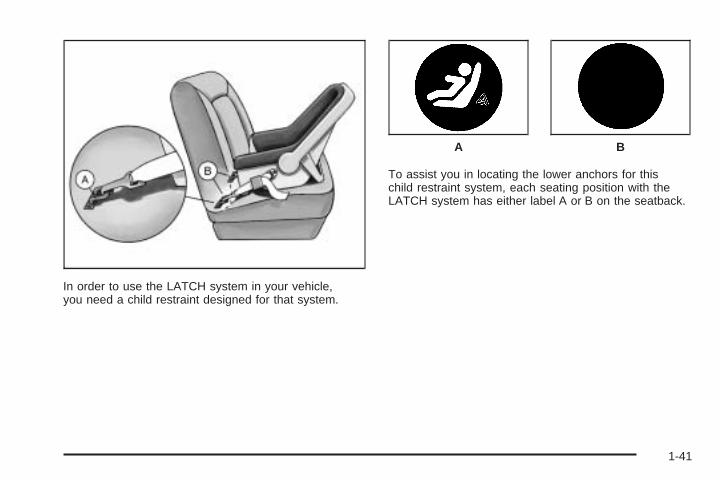
In order to use the LATCH system in your vehicle,you need a child restraint designed for that system.
To assist you in locating the lower anchors for thischild restraint system, each seating position with theLATCH system has either label A or B on the seatback.
A B
1-41
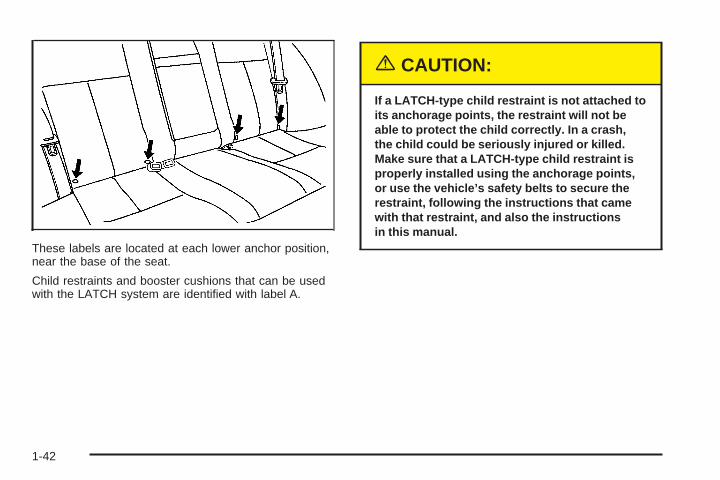
These labels are located at each lower anchor position,near the base of the seat.
Child restraints and booster cushions that can be usedwith the LATCH system are identified with label A.
{CAUTION:
If a LATCH-type child restraint is not attached toits anchorage points, the restraint will not beable to protect the child correctly. In a crash,the child could be seriously injured or killed.Make sure that a LATCH-type child restraint isproperly installed using the anchorage points,or use the vehicle’s safety belts to secure therestraint, following the instructions that camewith that restraint, and also the instructionsin this manual.
1-42
Securing a Child Restraint Designedfor the LATCH System
1. Find the LATCH anchorages for the seatingposition you want to use, where the bottom of theseatback meets the back of the seat cushion.See Lower Anchorages and Top Tethers forChildren (LATCH System) on page 1-40.
2. Put the child restraint on the seat.
3. Attach and tighten the LATCH attachments onthe child restraint to the LATCH anchorages inthe vehicle. The child restraint instructions willshow you how.
4. If the child restraint is forward-facing, attach andtighten the top tether to the top tether anchorage.The child restraint instructions will show youhow. Also see Top Strap on page 1-37.
5. Push and pull the child restraint in differentdirections to be sure it is secure.
To remove the child restraint, simply unhook thetop tether from the top tether anchorage and thendisconnect the LATCH attachments from the LATCHanchorages.
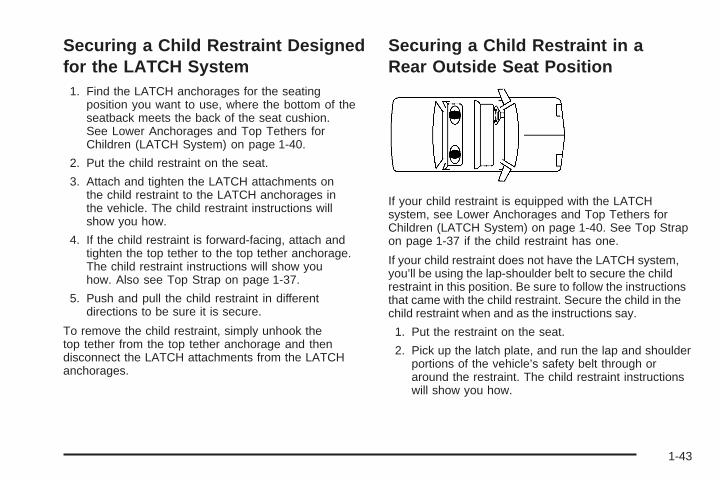
Securing a Child Restraint in aRear Outside Seat Position
If your child restraint is equipped with the LATCHsystem, see Lower Anchorages and Top Tethers forChildren (LATCH System) on page 1-40. See Top Strapon page 1-37 if the child restraint has one.
If your child restraint does not have the LATCH system,you’ll be using the lap-shoulder belt to secure the childrestraint in this position. Be sure to follow the instructionsthat came with the child restraint. Secure the child in thechild restraint when and as the instructions say.
1. Put the restraint on the seat.
2. Pick up the latch plate, and run the lap and shoulderportions of the vehicle’s safety belt through oraround the restraint. The child restraint instructionswill show you how.
1-43
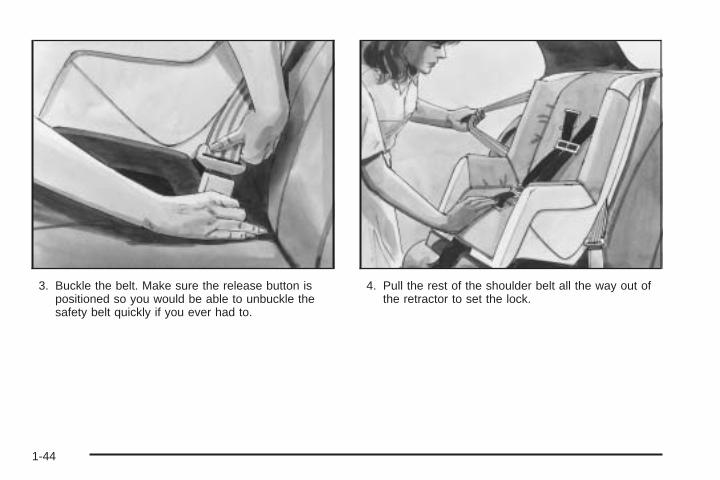
3. Buckle the belt. Make sure the release button ispositioned so you would be able to unbuckle thesafety belt quickly if you ever had to.
4. Pull the rest of the shoulder belt all the way out ofthe retractor to set the lock.
1-44
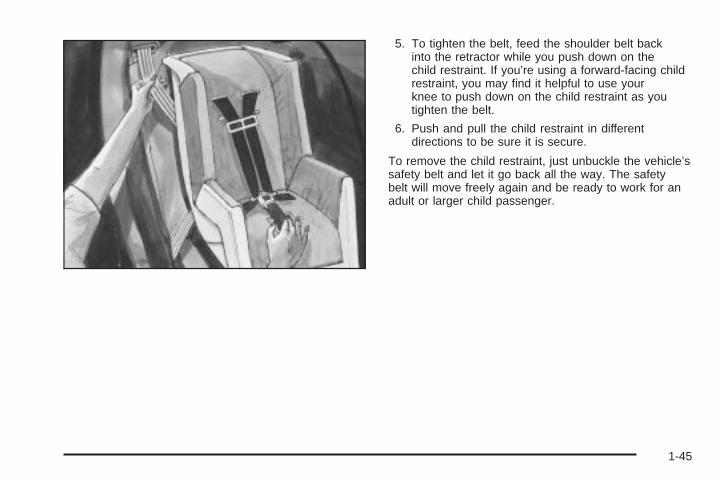
5. To tighten the belt, feed the shoulder belt backinto the retractor while you push down on thechild restraint. If you’re using a forward-facing childrestraint, you may find it helpful to use yourknee to push down on the child restraint as youtighten the belt.
6. Push and pull the child restraint in differentdirections to be sure it is secure.
To remove the child restraint, just unbuckle the vehicle’ssafety belt and let it go back all the way. The safetybelt will move freely again and be ready to work for anadult or larger child passenger.
1-45
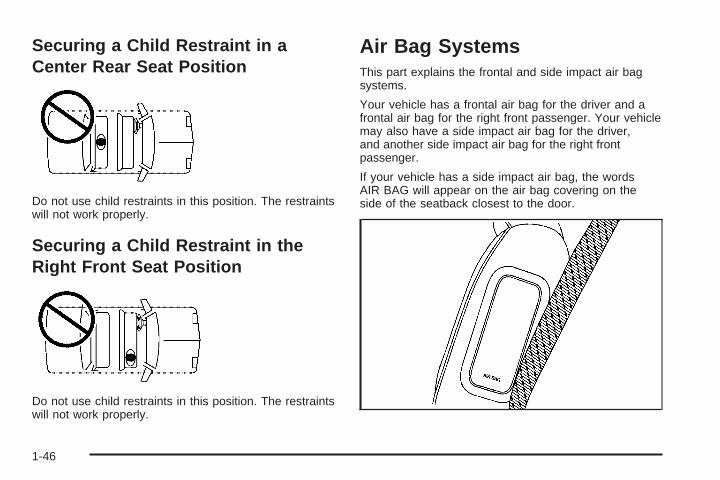
Securing a Child Restraint in aCenter Rear Seat Position
Do not use child restraints in this position. The restraintswill not work properly.
Securing a Child Restraint in theRight Front Seat Position
Do not use child restraints in this position. The restraintswill not work properly.
Air Bag SystemsThis part explains the frontal and side impact air bagsystems.
Your vehicle has a frontal air bag for the driver and afrontal air bag for the right front passenger. Your vehiclemay also have a side impact air bag for the driver,and another side impact air bag for the right frontpassenger.
If your vehicle has a side impact air bag, the wordsAIR BAG will appear on the air bag covering on theside of the seatback closest to the door.
1-46
Frontal air bags are designed to help reduce the riskof injury from the force of an inflating frontal air bag.But these air bags must inflate very quickly to do theirjob and comply with federal regulations.
Here are the most important things to know about theair bag systems:
{CAUTION:
You can be severely injured or killed in a crashif you are not wearing your safety belt – even ifyou have air bags. Wearing your safety beltduring a crash helps reduce your chance ofhitting things inside the vehicle or being ejectedfrom it. Air bags are designed to work withsafety belts but do not replace them.
Frontal air bags for the driver and right frontpassenger are designed to deploy only inmoderate to severe frontal and near frontalcrashes. They are not designed to inflate in
CAUTION: (Continued)
CAUTION: (Continued)
rollover, rear or low-speed frontal crashes, or inmany side crashes. And, for some unrestrainedoccupants, frontal air bags may provide lessprotection in frontal crashes than more forcefulair bags have provided in the past.
A side impact air bag is designed to inflate onlyin moderate to severe crashes where somethinghits the side of your vehicle. It is not designedto inflate in frontal, in rollover or in rear crashes.
Everyone in your vehicle should wear a safetybelt properly – whether or not there is an air bagfor that person.
1-47

{CAUTION:
Both frontal and side impact air bags inflatewith great force, faster than the blink of aneye. If you’re too close to an inflating air bag,as you would be if you were leaning forward,it could seriously injure you. Safety beltshelp keep you in position for air bag inflationbefore and during a crash. Always wearyour safety belt, even with frontal air bags.The driver should sit as far back as possiblewhile still maintaining control of the vehicle.Front occupants should not lean on or sleepagainst the door.
{CAUTION:
Anyone who is up against, or very close to, anyair bag when it inflates can be seriously injuredor killed. Air bags plus lap-shoulder belts offer
CAUTION: (Continued)
CAUTION: (Continued)
the best protection for adults, but not for youngchildren and infants. Neither the vehicle’s safetybelt system nor its air bag system is designedfor them. Young children and infants need theprotection that a child restraint system canprovide. Always secure children properly inyour vehicle. To read how, see the part of thismanual called “Older Children” or “Infants andYoung Children.”
There is an air bagreadiness light on theinstrument panel, whichshows AIR BAG.
The system checks the air bag electrical system formalfunctions. The light tells you if there is an electricalproblem. See Air Bag Readiness Light on page 3-33.
1-48
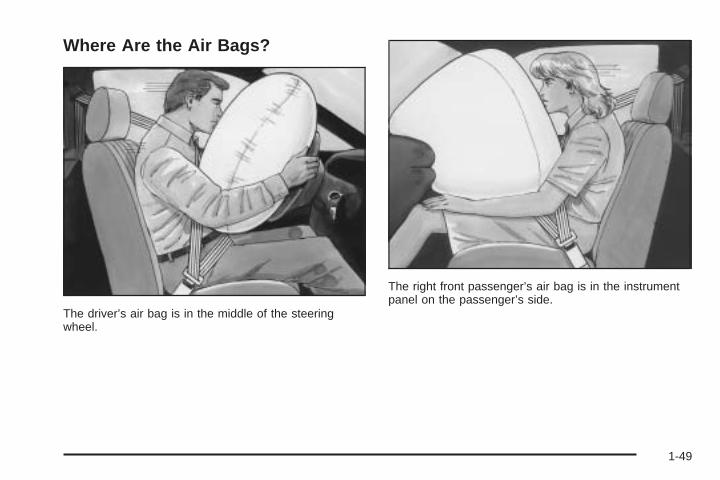
Where Are the Air Bags?
The driver’s air bag is in the middle of the steeringwheel.
The right front passenger’s air bag is in the instrumentpanel on the passenger’s side.
1-49
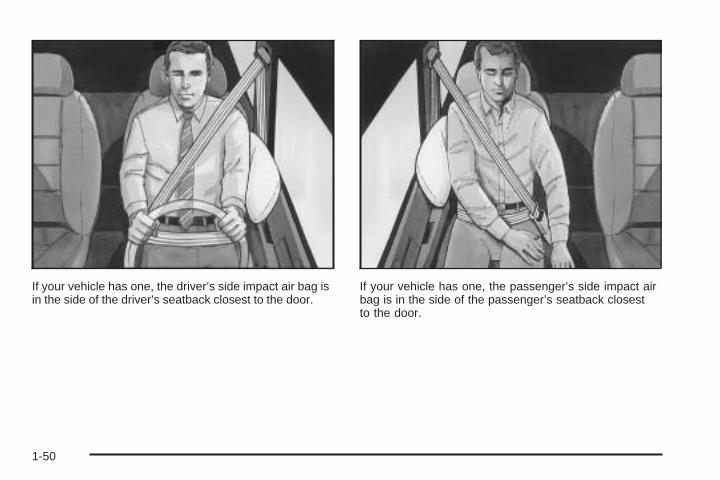
If your vehicle has one, the driver’s side impact air bag isin the side of the driver’s seatback closest to the door.
If your vehicle has one, the passenger’s side impact airbag is in the side of the passenger’s seatback closestto the door.
1-50
{CAUTION:
If something is between an occupant and anair bag, the bag might not inflate properly or itmight force the object into that person causingsevere injury or even death. The path of aninflating air bag must be kept clear. Don’t putanything between an occupant and an air bag,and don’t attach or put anything on thesteering wheel hub or on or near any other airbag covering. Don’t let seat covers block theinflation path of a side impact air bag.
When Should an Air Bag Inflate?The driver’s and right front passenger’s frontal air bagsare designed to inflate in moderate to severe frontalor near-frontal crashes. But they are designed to inflateonly if the impact speed is above the system’sdesigned “threshold level.”
If the front of your vehicle goes straight into a wall thatdoesn’t move or deform, the threshold level is about9 to 14 mph (14.5 to 23 km/h). The threshold level canvary, however, with specific vehicle design, so thatit can be somewhat above or below this range.
If your vehicle strikes something that will move ordeform, such as a parked car, the threshold level will behigher. The driver’s and right front passenger’s frontalair bags are not designed to inflate in rollovers, rearimpacts, or in many side impacts because inflationwould not help the occupant.
Your vehicle may or may not have a side impact airbag. See “Air Bag Systems” in the Index. A driver’s sideimpact air bag is designed to inflate in moderate tosevere side crashes involving the driver’s door. A sideimpact air bag will inflate if the crash severity isabove the system’s designed “threshold level.” Thethreshold level can vary with specific vehicle design.A driver’s side impact air bag is not designed to inflatein frontal or near-frontal impacts, rollovers or rearimpacts, because inflation would not help the occupant.
1-51
In any particular crash, no one can say whether an airbag should have inflated simply because of the damageto a vehicle or because of what the repair costs were.For frontal air bags, inflation is determined by the angleof the impact and how quickly the vehicle slows downin frontal and near-frontal impacts. For side impactair bags, inflation is determined by the locationand severity of the impact.
What Makes an Air Bag Inflate?In an impact of sufficient severity, the air bag sensingsystem detects that the vehicle is in a crash. For bothfrontal and side impact air bags, the sensing systemtriggers a release of gas from the inflator, which inflatesthe air bag. The inflator, the air bag and related hardwareare all part of the air bag modules. Frontal air bagmodules are located inside the steering wheel andinstrument panel. For vehicles with side impact air bags,the air bag modules are located in the seatback closest tothe driver’s and/or right front passenger’s door.
How Does an Air Bag Restrain?In moderate to severe frontal or near frontal collisions,even belted occupants can contact the steering wheel orthe instrument panel. In moderate to severe sidecollisions, even belted occupants can contact the insideof the vehicle. The air bag supplements the protectionprovided by safety belts. Air bags distribute the force ofthe impact more evenly over the occupant’s upper body,stopping the occupant more gradually. But the frontal airbags would not help you in many types of collisions,including rollovers, rear impacts, and many side impacts,primarily because an occupant’s motion is not toward theair bag. Side impact air bags would not help you in manytypes of collisions, including frontal or near frontalcollisions, rollovers, and rear impacts, primarily becausean occupant’s motion is not toward those air bags. Airbags should never be regarded as anything more than asupplement to safety belts, and then only in moderate tosevere frontal or near-frontal collisions for the driver’s andright front passenger’s frontal air bags, and only inmoderate to severe side collisions for vehicles with adriver’s and right front passenger’s side impact air bag.
1-52
What Will You See After an Air BagInflates?After the air bag inflates, it quickly deflates, so quicklythat some people may not even realize the air baginflated. Some components of the air bag module – thesteering wheel hub for the driver’s air bag, the instrumentpanel for the right front passenger’s bag, the side of theseatback closest to the door for the driver’s side impactair bag – will be hot for a short time. The parts of the bagthat come into contact with you may be warm, but not toohot to touch. There will be some smoke and dust comingfrom the vents in the deflated air bags. Air bag inflationdoes not prevent the driver from seeing or being able tosteer the vehicle, nor does it stop people from leavingthe vehicle.
{CAUTION:
When an air bag inflates, there is dust in theair. This dust could cause breathing problemsfor people with a history of asthma or otherbreathing trouble. To avoid this, everyone inthe vehicle should get out as soon as it is
CAUTION: (Continued)
CAUTION: (Continued)
safe to do so. If you have breathing problemsbut can’t get out of the vehicle after an airbag inflates, then get fresh air by opening awindow or a door. If you experience breathingproblems following an air bag deployment,you should seek medical attention.
In many crashes severe enough to inflate an air bag,windshields are broken by vehicle deformation. Additionalwindshield breakage may also occur from the right frontpassenger air bag.
• Air bags are designed to inflate only once. After anair bag inflates, you will need some new parts foryour air bag system. If you do not get them, the airbag system will not be there to help protect you inanother crash. A new system will include air bagmodules and possibly other parts. The servicemanual for your vehicle covers the need to replaceother parts.
1-53
• Your vehicle is equipped with a crash sensingand diagnostic module, which records informationabout the frontal air bag system. The modulerecords information about the readiness of thesystem, when the system commands air baginflation and driver’s safety belt usage at deployment.The module also records speed, engine rpm,brake and throttle data.
• Let only qualified technicians work on your air bagsystems. Improper service can mean that an air bagsystem will not work properly. See your dealer forservice.
Notice: If you damage the covering for the driver’sor the right front passenger’s air bag, or an airbag covering on a seatback, the bag may not workproperly. You may have to replace the air bagmodule in the steering wheel, both the air bagmodule and the instrument panel for the right frontpassenger’s air bag, or the air bag module andseatback for a side impact air bag. Do not openor break the air bag coverings.
Servicing Your Air Bag-EquippedVehicleAir bags affect how your vehicle should be serviced.There are parts of the air bag systems in several placesaround your vehicle. Your dealer and the service manualhave information about servicing your vehicle and the airbag systems. To purchase a service manual, see ServicePublications Ordering Information on page 7-12.
{CAUTION:
For up to 10 seconds after the ignition key isturned off and the battery is disconnected,an air bag can still inflate during improperservice. You can be injured if you are closeto an air bag when it inflates. Avoid yellowconnectors. They are probably part of the airbag system. Be sure to follow proper serviceprocedures, and make sure the personperforming work for you is qualified to do so.
The air bag systems do not need regular maintenance.
1-54

Restraint System Check
Checking Your Restraint SystemsNow and then, make sure the safety belt reminder lightand all your belts, buckles, latch plates, retractorsand anchorages are working properly. Look for any otherloose or damaged safety belt system parts. If you seeanything that might keep a safety belt system from doingits job, have it repaired.
Torn or frayed safety belts may not protect you in acrash. They can rip apart under impact forces. If a beltis torn or frayed, get a new one right away.
Also look for any opened or broken air bag covers, andhave them repaired or replaced. (The air bag systemdoes not need regular maintenance.)
Replacing Restraint System PartsAfter a Crash
{CAUTION:
A crash can damage the restraint systemsin your vehicle. A damaged restraint systemmay not properly protect the person using it,resulting in serious injury or even death ina crash. To help make sure your restraintsystems are working properly after a crash,have them inspected and any necessaryreplacements made as soon as possible.
If you have had a crash, do you need new belts orLATCH system parts?
After a very minor collision, nothing may be necessary.But if the belts were stretched, as they would be if wornduring a more severe crash, then you need new parts.
If the LATCH system was being used during a moresevere crash, you may need new LATCH system parts.
1-55
If belts are cut or damaged, replace them. Collisiondamage also may mean you will need to have LATCHsystem, safety belt or seat parts repaired or replaced.New parts and repairs may be necessary even if the beltor LATCH system wasn’t being used at the time ofthe collision.
If the frontal air bags inflate, you will also need toreplace the driver’s and right front passenger’s safetybelt pretentioners and safety belt. Be sure to doso. Then the new pretensioner and safety belt will bethere to help protect you in a collision.
After a crash you may need to replace the driver andright front passenger’s safety belt retractor assemblies,even if the frontal air bags have not deployed. Thedriver and right front passenger’s safety belt retractorassemblies contain the safety belt pretensioners.
Have your safety belt pretensioners checked if yourvehicle has been in a collision, or if your air bagreadiness light stays on after you start your vehicle orwhile you are driving. See Air Bag Readiness Lighton page 3-33.
If your vehicle is equipped with side air bags, the frontseat assembly must be replaced after the side airbag has been deployed.
If an air bag inflates, you will need to replace air bagsystem parts. See the part on the air bag system earlierin this section.
1-56
Keys ...............................................................2-2Remote Keyless Entry System .........................2-4Remote Keyless Entry System Operation ...........2-5
Doors and Locks .............................................2-7Door Locks ....................................................2-7Central Door Unlocking System ........................2-8Power Door Locks ..........................................2-9Door Ajar Reminder ........................................2-9Rear Door Security Locks ..............................2-10Lockout Protection ........................................2-10Leaving Your Vehicle ....................................2-11Trunk ..........................................................2-11
Windows ........................................................2-13Power Windows ............................................2-14Sun Visors ...................................................2-14
Theft-Deterrent Systems ..................................2-15Theft-Deterrent System ..................................2-15Immobilizer ..................................................2-17Immobilizer Operation ....................................2-17
Starting and Operating Your Vehicle ................2-18New Vehicle Break-In ....................................2-18Ignition Positions ..........................................2-19Starting Your Engine .....................................2-20
Engine Coolant Heater ..................................2-21Automatic Transaxle Operation .......................2-22Parking Brake ..............................................2-26Shifting Into Park (P) .....................................2-27Shifting Out of Park (P) .................................2-28Parking Over Things That Burn .......................2-29Engine Exhaust ............................................2-29Running Your Engine While
You Are Parked ........................................2-30Mirrors ...........................................................2-31
Manual Rearview Mirror .................................2-31Automatic Dimming Rearview Mirror ................2-31Outside Power Mirrors ...................................2-32Outside Convex Mirror ...................................2-33Outside Heated Mirrors ..................................2-33
Storage Areas ................................................2-33Glove Box ...................................................2-33Cupholder(s) ................................................2-33Coinholder(s) ................................................2-33Sunglasses Storage Compartment ...................2-34Center Console Storage Area .........................2-34Rear Seat Armrest ........................................2-34
Sunroof .........................................................2-35
Section 2 Features and Controls
2-1
Keys
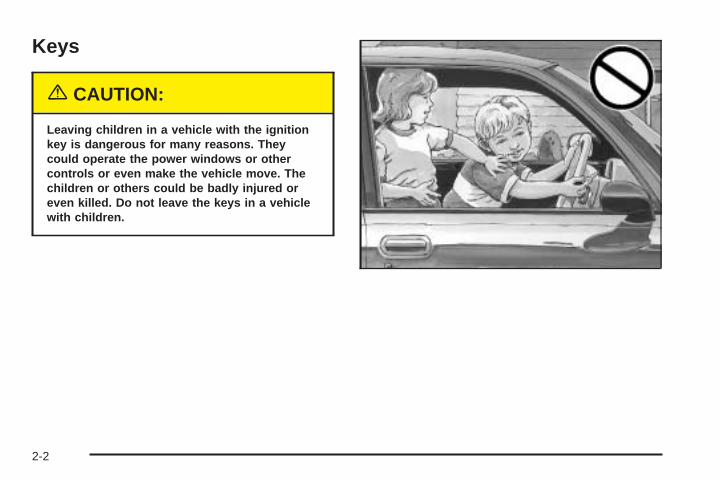
{CAUTION:
Leaving children in a vehicle with the ignitionkey is dangerous for many reasons. Theycould operate the power windows or othercontrols or even make the vehicle move. Thechildren or others could be badly injured oreven killed. Do not leave the keys in a vehiclewith children.
2-2
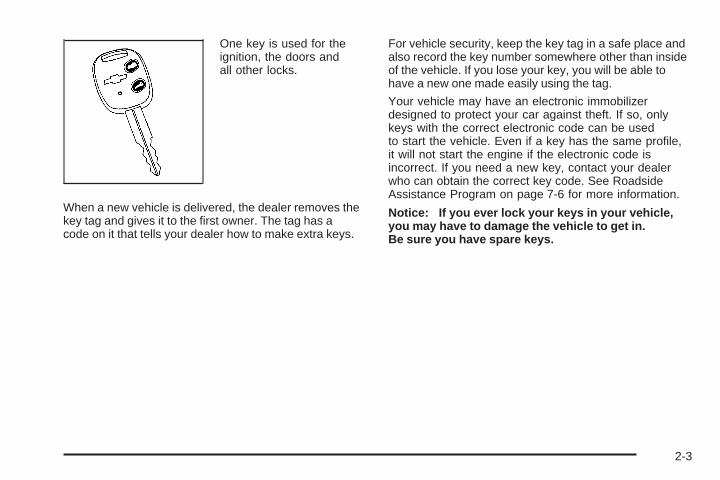
One key is used for theignition, the doors andall other locks.
When a new vehicle is delivered, the dealer removes thekey tag and gives it to the first owner. The tag has acode on it that tells your dealer how to make extra keys.
For vehicle security, keep the key tag in a safe place andalso record the key number somewhere other than insideof the vehicle. If you lose your key, you will be able tohave a new one made easily using the tag.
Your vehicle may have an electronic immobilizerdesigned to protect your car against theft. If so, onlykeys with the correct electronic code can be usedto start the vehicle. Even if a key has the same profile,it will not start the engine if the electronic code isincorrect. If you need a new key, contact your dealerwho can obtain the correct key code. See RoadsideAssistance Program on page 7-6 for more information.
Notice: If you ever lock your keys in your vehicle,you may have to damage the vehicle to get in.Be sure you have spare keys.
2-3
Remote Keyless Entry SystemIf equipped, the keyless entry system operates on aradio frequency subject to Federal CommunicationsCommission (FCC) Rules and with Industry Canada.
This device complies with Part 15 of the FCC Rules.Operation is subject to the following two conditions:
1. This device may not cause interference, and
2. This device must accept any interference received,including interference that may cause undesiredoperation of the device.
This device complies with RSS-210 of Industry Canada.Operation is subject to the following two conditions:
1. This device may not cause interference, and
2. This device must accept any interference received,including interference that may cause undesiredoperation of the device.
Changes or modifications to this system by other thanan authorized service facility could void authorization touse this equipment.
At times you may notice a decrease in range. This isnormal for any remote keyless entry system. If thetransmitter does not work or if you have to stand closerto your vehicle for the transmitter to work, try this:
• Check the distance. You may be too far from yourvehicle. You may need to stand closer duringrainy or snowy weather.
• Check the location. Other vehicles or objects maybe blocking the signal. Take a few steps to theleft or right, hold the transmitter higher, andtry again.
• Check to determine if battery replacement isnecessary. See “Battery Replacement” underRemote Keyless Entry System Operation onpage 2-5.
• If you are still having trouble, see your dealer ora qualified technician for service.
2-4
Remote Keyless Entry SystemOperation
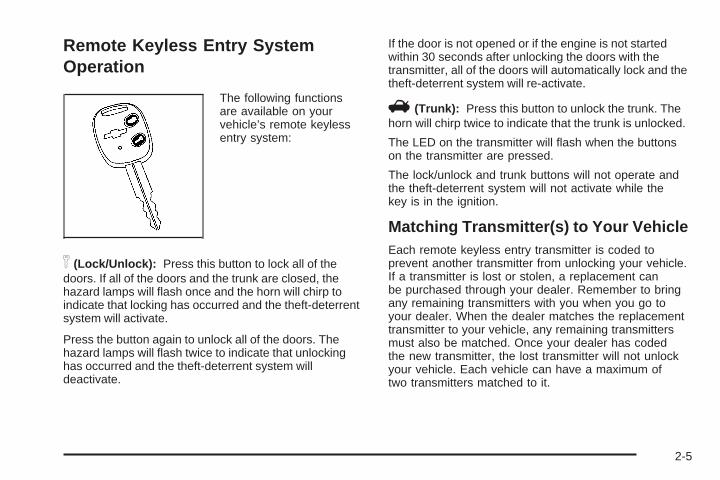
The following functionsare available on yourvehicle’s remote keylessentry system:
n (Lock/Unlock): Press this button to lock all of thedoors. If all of the doors and the trunk are closed, thehazard lamps will flash once and the horn will chirp toindicate that locking has occurred and the theft-deterrentsystem will activate.
Press the button again to unlock all of the doors. Thehazard lamps will flash twice to indicate that unlockinghas occurred and the theft-deterrent system willdeactivate.
If the door is not opened or if the engine is not startedwithin 30 seconds after unlocking the doors with thetransmitter, all of the doors will automatically lock and thetheft-deterrent system will re-activate.
V(Trunk): Press this button to unlock the trunk. Thehorn will chirp twice to indicate that the trunk is unlocked.
The LED on the transmitter will flash when the buttonson the transmitter are pressed.
The lock/unlock and trunk buttons will not operate andthe theft-deterrent system will not activate while thekey is in the ignition.
Matching Transmitter(s) to Your VehicleEach remote keyless entry transmitter is coded toprevent another transmitter from unlocking your vehicle.If a transmitter is lost or stolen, a replacement canbe purchased through your dealer. Remember to bringany remaining transmitters with you when you go toyour dealer. When the dealer matches the replacementtransmitter to your vehicle, any remaining transmittersmust also be matched. Once your dealer has codedthe new transmitter, the lost transmitter will not unlockyour vehicle. Each vehicle can have a maximum oftwo transmitters matched to it.
2-5

Battery ReplacementUnder normal use, the battery in your remote keylessentry transmitter should last about two years.
You can tell the battery is weak if the LED fails toilluminate or if the transmitter will not work at the normalrange in any location. If you have to get close to yourvehicle before the transmitter works, it is probablytime to change the battery.
Notice: When replacing the battery, use care notto touch any of the circuitry. Static from your bodytransferred to these surfaces may damage thetransmitter.
To replace the battery in the remote keyless entrytransmitter, do the following:
1. Remove the screw from the back of the cover andopen the cover of the transmitter.
2. Pull the transmitter out of the cover and carefullydetach the sticker from the unit. Keep the stickerclean.
3. Remove the battery and replace it with the newone. Make sure the positive side of the batteryfaces up. Use one three-volt, CR1620, orequivalent, type battery.
4. Attach the sticker and put the transmitter unit inthe cover.
5. Put the two halves back together and replace thescrew. Make sure the cover is on tightly, so waterwill not get in.
6. Test the transmitter operation.
2-6
Doors and Locks
Door Locks
{CAUTION:
Unlocked doors can be dangerous.• Passengers — especially children — can
easily open the doors and fall out of amoving vehicle. When a door is locked,the handle will not open it. You increasethe chance of being thrown out of thevehicle in a crash if the doors are notlocked. So, wear safety belts properly andlock the doors whenever you drive.
• Young children who get into unlockedvehicles may be unable to get out. A childcan be overcome by extreme heat and cansuffer permanent injuries or even deathfrom heat stroke. Always lock your vehiclewhenever you leave it.
CAUTION: (Continued)
CAUTION: (Continued)
• Outsiders can easily enter through anunlocked door when you slow down orstop your vehicle. Locking your doors canhelp prevent this from happening.
There are several ways to lock and unlock your vehicle.
From the outside, use your key or the remote keylessentry transmitter. See Remote Keyless Entry SystemOperation on page 2-5.
To manually unlock the doors from the outside, insertthe key and turn it toward the front of the vehicle.To manually lock the doors from the outside, insert thekey and turn it toward the rear of the vehicle.
All doors, except the driver’s door, can be locked fromthe outside by pushing down the manual door lockand then closing the door. The driver’s door lock cannotbe pushed in while the door is opened.
Upon leaving the vehicle, the driver’s door can only belocked from the outside by using the key or theremote keyless entry transmitter.
2-7
From the inside, you can lock and unlock all of thedoors by pushing or pulling the manual door lock locatedon the window sill on each door.
From the inside, you can also lock and unlock the doorswith the power door lock switches located on eachfront door trim pad.
Central Door Unlocking SystemThe central door unlocking system is activated from thedriver’s door.
From the outside, you can lock or unlock all of thedoors on your vehicle from the driver’s door by usingeither the key or the remote keyless entry transmitter.From the inside, you can lock or unlock all of the doorsusing the driver’s or the passenger’s power door lockswitch. You can also lock or unlock all of the doorsby using the manual door lock on the driver’s door.
2-8
Power Door Locks
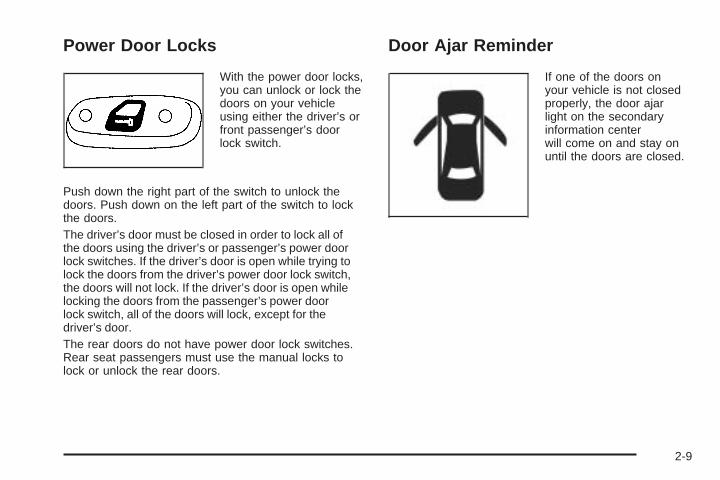
With the power door locks,you can unlock or lock thedoors on your vehicleusing either the driver’s orfront passenger’s doorlock switch.
Push down the right part of the switch to unlock thedoors. Push down on the left part of the switch to lockthe doors.The driver’s door must be closed in order to lock all ofthe doors using the driver’s or passenger’s power doorlock switches. If the driver’s door is open while trying tolock the doors from the driver’s power door lock switch,the doors will not lock. If the driver’s door is open whilelocking the doors from the passenger’s power doorlock switch, all of the doors will lock, except for thedriver’s door.The rear doors do not have power door lock switches.Rear seat passengers must use the manual locks tolock or unlock the rear doors.
Door Ajar Reminder
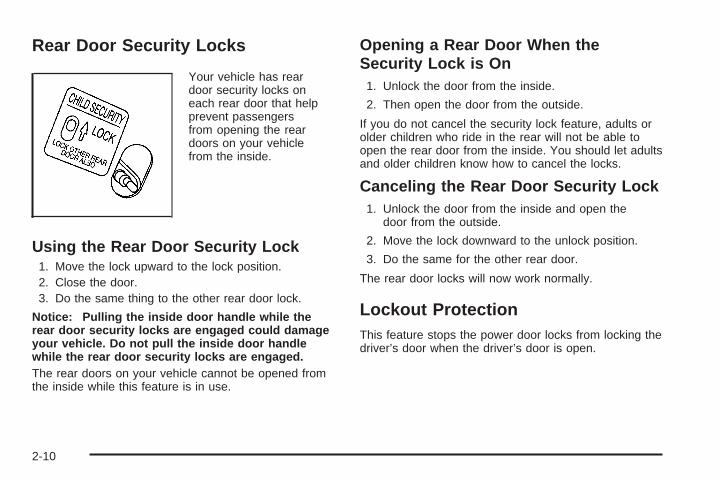
If one of the doors onyour vehicle is not closedproperly, the door ajarlight on the secondaryinformation centerwill come on and stay onuntil the doors are closed.
2-9
Rear Door Security Locks
Your vehicle has reardoor security locks oneach rear door that helpprevent passengersfrom opening the reardoors on your vehiclefrom the inside.
Using the Rear Door Security Lock1. Move the lock upward to the lock position.2. Close the door.3. Do the same thing to the other rear door lock.
Notice: Pulling the inside door handle while therear door security locks are engaged could damageyour vehicle. Do not pull the inside door handlewhile the rear door security locks are engaged.The rear doors on your vehicle cannot be opened fromthe inside while this feature is in use.
Opening a Rear Door When theSecurity Lock is On
1. Unlock the door from the inside.
2. Then open the door from the outside.
If you do not cancel the security lock feature, adults orolder children who ride in the rear will not be able toopen the rear door from the inside. You should let adultsand older children know how to cancel the locks.
Canceling the Rear Door Security Lock1. Unlock the door from the inside and open the
door from the outside.
2. Move the lock downward to the unlock position.
3. Do the same for the other rear door.
The rear door locks will now work normally.
Lockout ProtectionThis feature stops the power door locks from locking thedriver’s door when the driver’s door is open.
2-10
Leaving Your VehicleIf you are leaving your vehicle, take your keys. All ofthe doors, except for the driver’s door, can be lockedfrom the outside by pushing down the door lock and thenclosing the door. The driver’s door can only be lockedfrom the outside by using the key or the remote keylessentry transmitter.
TrunkTo unlock the trunk from the outside, insert the key andturn the trunk lock cylinder or use the remote keylessentry transmitter.
When closing the trunk, close from the center to ensureit fully latches. Although you may use one hand tounlock the trunk, it is recommended that two hands onthe upper surface be used to close the trunk.
{CAUTION:
It can be dangerous to drive with the trunk lidopen because carbon monoxide (CO) gas cancome into your vehicle. You can not see orsmell CO. It can cause unconsciousness andeven death. If you must drive with the trunk lidopen or if electrical wiring or other cableconnections must pass through the sealbetween the body and the trunk lid:
• Make sure all other windows are shut.• Turn the fan on your heating or cooling
system to its highest speed and select thecontrol setting that will force outside airinto your vehicle. See Climate ControlSystem in the Index.
• If you have air outlets on or under theinstrument panel, open them all the way.
See Engine Exhaust on page 2-29.
2-11
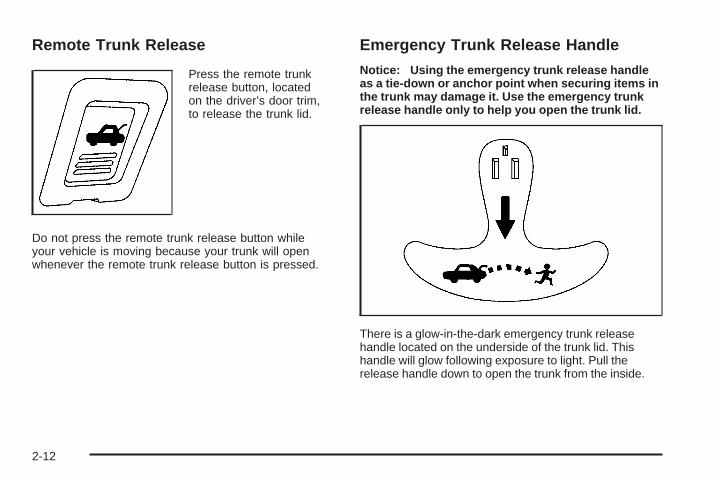
Remote Trunk Release
Press the remote trunkrelease button, locatedon the driver’s door trim,to release the trunk lid.
Do not press the remote trunk release button whileyour vehicle is moving because your trunk will openwhenever the remote trunk release button is pressed.
Emergency Trunk Release Handle
Notice: Using the emergency trunk release handleas a tie-down or anchor point when securing items inthe trunk may damage it. Use the emergency trunkrelease handle only to help you open the trunk lid.
There is a glow-in-the-dark emergency trunk releasehandle located on the underside of the trunk lid. Thishandle will glow following exposure to light. Pull therelease handle down to open the trunk from the inside.
2-12
Windows
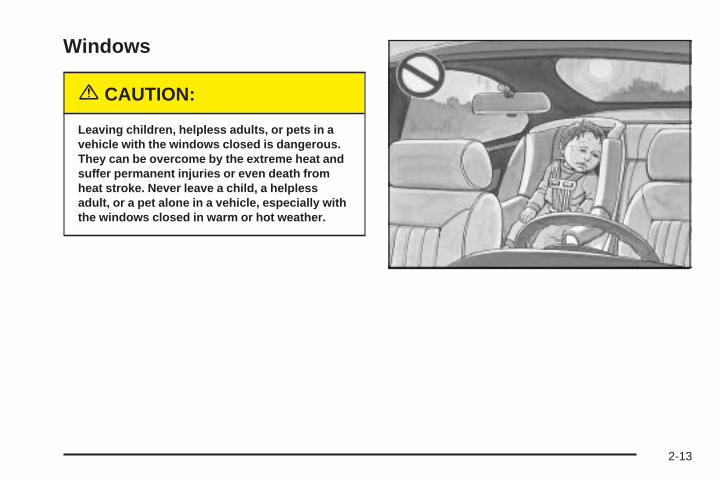
{CAUTION:
Leaving children, helpless adults, or pets in avehicle with the windows closed is dangerous.They can be overcome by the extreme heat andsuffer permanent injuries or even death fromheat stroke. Never leave a child, a helplessadult, or a pet alone in a vehicle, especially withthe windows closed in warm or hot weather.
2-13
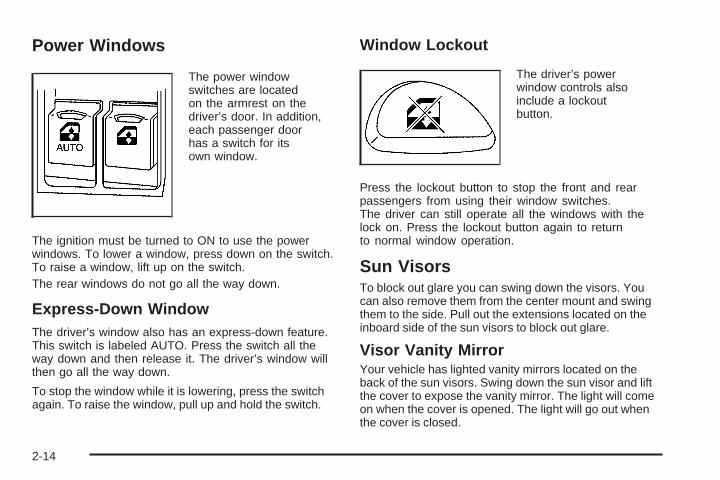
Power Windows
The power windowswitches are locatedon the armrest on thedriver’s door. In addition,each passenger doorhas a switch for itsown window.
The ignition must be turned to ON to use the powerwindows. To lower a window, press down on the switch.To raise a window, lift up on the switch.The rear windows do not go all the way down.
Express-Down WindowThe driver’s window also has an express-down feature.This switch is labeled AUTO. Press the switch all theway down and then release it. The driver’s window willthen go all the way down.
To stop the window while it is lowering, press the switchagain. To raise the window, pull up and hold the switch.
Window Lockout
The driver’s powerwindow controls alsoinclude a lockoutbutton.
Press the lockout button to stop the front and rearpassengers from using their window switches.The driver can still operate all the windows with thelock on. Press the lockout button again to returnto normal window operation.
Sun VisorsTo block out glare you can swing down the visors. Youcan also remove them from the center mount and swingthem to the side. Pull out the extensions located on theinboard side of the sun visors to block out glare.
Visor Vanity MirrorYour vehicle has lighted vanity mirrors located on theback of the sun visors. Swing down the sun visor and liftthe cover to expose the vanity mirror. The light will comeon when the cover is opened. The light will go out whenthe cover is closed.
2-14
Theft-Deterrent SystemsVehicle theft is big business, especially in some cities.Although your vehicle has a number of theft-deterrentfeatures, we know that nothing we put on it can makeit impossible to steal.
Theft-Deterrent SystemYour vehicle has a theft-deterrent system.
The theft-deterrent system will not arm when you lock thedoors using the key or the manual door lock. It activatesonly when you use the remote keyless entry transmitter.
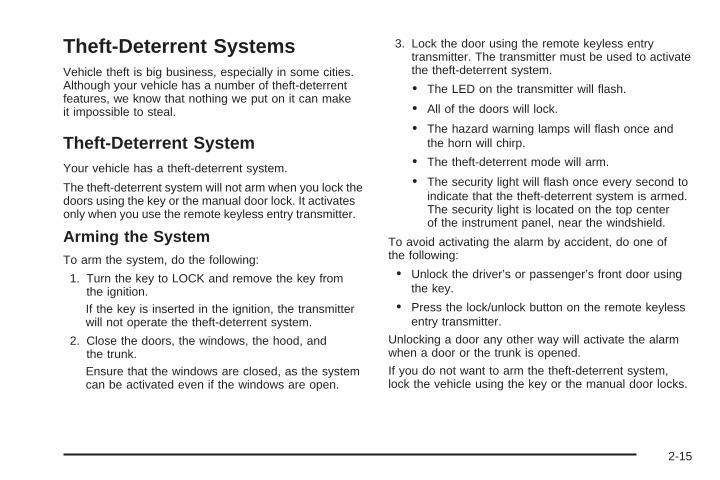
Arming the SystemTo arm the system, do the following:
1. Turn the key to LOCK and remove the key fromthe ignition.If the key is inserted in the ignition, the transmitterwill not operate the theft-deterrent system.
2. Close the doors, the windows, the hood, andthe trunk.Ensure that the windows are closed, as the systemcan be activated even if the windows are open.
3. Lock the door using the remote keyless entrytransmitter. The transmitter must be used to activatethe theft-deterrent system.
• The LED on the transmitter will flash.
• All of the doors will lock.
• The hazard warning lamps will flash once andthe horn will chirp.
• The theft-deterrent mode will arm.
• The security light will flash once every second toindicate that the theft-deterrent system is armed.The security light is located on the top centerof the instrument panel, near the windshield.
To avoid activating the alarm by accident, do one ofthe following:
• Unlock the driver’s or passenger’s front door usingthe key.
• Press the lock/unlock button on the remote keylessentry transmitter.
Unlocking a door any other way will activate the alarmwhen a door or the trunk is opened.
If you do not want to arm the theft-deterrent system,lock the vehicle using the key or the manual door locks.
2-15
Disarming the SystemTo disarm the system, do one of the following:
• Unlock the driver’s or passenger’s front door usingthe key.
• Press the lock/unlock button on the transmitter.
− The LED on the transmitter will flash.− All of the doors will unlock.− The hazard warning lamps will flash twice.− The theft-deterrent mode will disarm.
If the door is not opened or if the engine is not startedwithin 30 seconds after disarming the system withthe transmitter, all of the doors will automatically lockand the theft-deterrent mode will re-arm.
How the System Alarm is ActivatedIf a door or the trunk is opened without using the keyor the remote keyless entry transmitter, the hornwill sound and the lamps will flash for up to 30 seconds.
How to Turn Off the System AlarmIf the system alarm is active, it can be deactivated usingone of the following methods:
• Press the lock/unlock button on the remote keylessentry transmitter.
• Unlock the driver’s or passenger’s front door usingthe key.
Otherwise, the alarm will automatically stop after30 seconds. The system will then lock the doors andreactivate the theft-deterrent system.
How to Detect a Tamper ConditionIf the hazard lamps flash once when the lock/unlockbutton on the remote keyless entry transmitter ispressed, the theft-deterrent system alarm was activatedwhile you were away.
2-16
ImmobilizerThis device complies with Part 15 of the FCC Rules.Operation is subject to the following two conditions:
1. this device may not cause interference, and
2. this device must accept any interference received,including interference that may cause undesiredoperation.
This device complies with RSS-210 of Industry Canada.Operation is subject to the following two conditions:
1. this device may not cause interference, and
2. this device must accept any interference received,including interference that may cause undesiredoperation of the device.
Changes or modifications to this system by other thanan authorized service facility could void authorization touse this equipment.
Immobilizer OperationYour vehicle may have a passive theft-deterrent system.The immobilizer system prevents your vehicle frombeing started by unauthorized persons.
If your vehicle has an immobilizer system, your vehiclehas a special key that works with the theft-deterrentsystem. There is a transponder in the key head that iselectronically coded. The correct key will start thevehicle. An invalid key immobilizes the engine. Theimmobilizer system isolates the power supply tothe ignition system, the fuel pump and the fuel injectors.
The engine immobilizer is activated after the key is turnedto LOCK and removed from the ignition. The security lightlocated on the top center of the instrument panel, nearthe windshield, will flash when the immobilizer is active. Ifthe light does not flash after removing the key, have thesystem checked by your dealer.
The immobilizer system works when you turn the key toSTART. If the immobilizer system does not recognize theelectronic code, the engine will not start and the securityindicator will continue blinking. If your key is everdamaged, you may not be able to start your vehicle.
2-17
When trying to start the vehicle, if the engine doesnot start and the security light continues flashing, thekey may have a damaged transponder. Turn the ignitionoff and try again.
If the engine still does not start, and the key appears tobe undamaged, try another key. At this time, you mayalso want to check the fuse. See Fuses and CircuitBreakers on page 5-79. If the engine still does not startwith the other key, your vehicle needs service. If yourvehicle does start, the first key may be faulty. See yourdealer who can service the theft-deterrent system tohave a new key made.
Up to four keys may be programmed for the vehicle.If you lose or damage your keys, only a GM dealercan service the theft-deterrent system to have newkeys made.
If you are ever driving and the security light comes onand stays on, you will be able to restart your engineif you turn it off. The theft-deterrent system, however,is not working properly and must be serviced byyour dealer. Your vehicle is not protected by thetheft-deterrent system at this time.
In an emergency, contact Chevrolet RoadsideAssistance. See Roadside Assistance Programon page 7-6.
Starting and Operating YourVehicle
New Vehicle Break-InNotice: Your vehicle does not need an elaborate“break-in.” But it will perform better in the long runif you follow these guidelines:
• Do not drive at any one speed — fast orslow — for the first 500 miles (805 km).Do not make full-throttle starts.
• Avoid making hard stops for the first200 miles (322 km) or so. During this timeyour new brake linings are not yet broken in.Hard stops with new linings can meanpremature wear and earlier replacement.Follow this breaking-in guideline every timeyou get new brake linings.
• Do not tow a trailer during break-in.See Towing a Trailer on page 4-35 formore information.
2-18
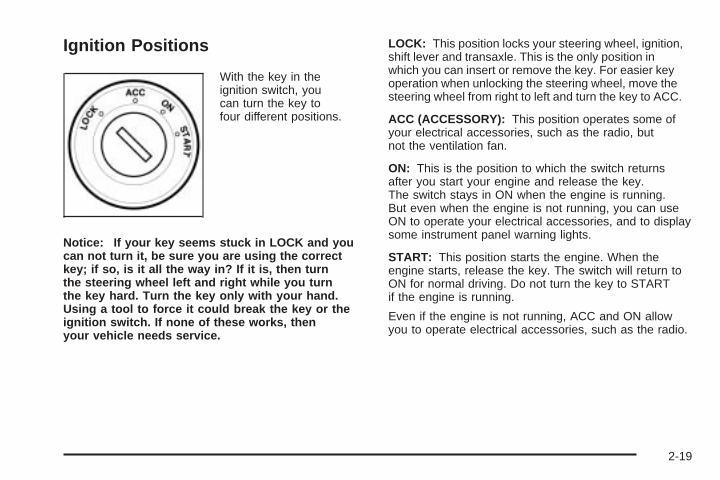
Ignition Positions
With the key in theignition switch, youcan turn the key tofour different positions.
Notice: If your key seems stuck in LOCK and youcan not turn it, be sure you are using the correctkey; if so, is it all the way in? If it is, then turnthe steering wheel left and right while you turnthe key hard. Turn the key only with your hand.Using a tool to force it could break the key or theignition switch. If none of these works, thenyour vehicle needs service.
LOCK: This position locks your steering wheel, ignition,shift lever and transaxle. This is the only position inwhich you can insert or remove the key. For easier keyoperation when unlocking the steering wheel, move thesteering wheel from right to left and turn the key to ACC.
ACC (ACCESSORY): This position operates some ofyour electrical accessories, such as the radio, butnot the ventilation fan.
ON: This is the position to which the switch returnsafter you start your engine and release the key.The switch stays in ON when the engine is running.But even when the engine is not running, you can useON to operate your electrical accessories, and to displaysome instrument panel warning lights.
START: This position starts the engine. When theengine starts, release the key. The switch will return toON for normal driving. Do not turn the key to STARTif the engine is running.
Even if the engine is not running, ACC and ON allowyou to operate electrical accessories, such as the radio.
2-19
Starting Your EngineMove your shift lever to PARK (P) or NEUTRAL (N).Your engine will not start in any other position — thatis a safety feature. To restart when you are alreadymoving, use NEUTRAL (N) only.
Notice: Shifting into PARK (P) with the vehiclemoving could damage the transaxle. Shift intoPARK (P) only when your vehicle is stopped.
1. With your foot off the accelerator pedal, turn yourignition key to START. When the engine starts,let go of the key. The idle speed will go down asyour engine gets warm.
Notice: Holding your key in START for longerthan 15 seconds at a time will cause your batteryto be drained much sooner. And the excessiveheat can damage your starter motor. Wait about15 seconds between each try to help avoid drainingyour battery or damaging your starter.
2. If it does not start, wait about 15 seconds and tryagain to start the engine by turning the ignition key toSTART. Wait about 15 seconds between each try.
When your engine has run about 10 seconds towarm up, your vehicle is ready to be driven.Do not race your engine when it is cold.If the weather is below freezing (32°F or 0°C),let the engine run for a few minutes to warm up.
3. If your engine still will not start or starts but thenstops, it could be flooded with too much gasoline.Try pushing your accelerator pedal all the way to thefloor and holding it there as you hold the key inSTART for about three seconds. If the vehicle startsbriefly but then stops again, do the same thing,but this time keep the pedal down for five orsix seconds. This clears the extra gasoline fromthe engine.
Notice: Your engine is designed to work with theelectronics in your vehicle. If you add electricalparts or accessories, you could change the way theengine operates. Before adding electrical equipment,check with your dealer. If you do not, your enginemight not perform properly.
2-20
Engine Coolant HeaterYour vehicle has an engine coolant heater. In very coldweather 0°F (−18°C) or colder, the engine coolant heatercan help. You will get easier starting and better fueleconomy during engine warm-up. Usually, the coolantheater should be plugged in a minimum of four hoursprior to starting your vehicle. At temperatures above32°F (0°C), use of the coolant heater is not required.
To Use the Engine Coolant Heater1. Turn off the engine.
2. Open the hood and unwrap the electrical cord.The electrical cord is located near the battery.
3. Plug the cord into a normal, grounded 110-voltAC outlet.
{CAUTION:
Plugging the cord into an ungrounded outletcould cause an electrical shock. Also, thewrong kind of extension cord could overheatand cause a fire. You could be seriouslyinjured.Plug the cord into a properly groundedthree-prong 110-volt AC outlet. If the cord willnot reach, use a heavy-duty three-prongextension cord rated for at least 15 amps.
4. Before starting the engine, be sure to unplug andstore the cord as it was before to keep it awayfrom moving engine parts. If you do not, it couldbe damaged.
How long should you keep the coolant heater pluggedin? The answer depends on the outside temperature,the kind of oil you have, and some other things.Instead of trying to list everything here, we ask thatyou contact your dealer in the area where you will beparking your vehicle. The dealer can give you thebest advice for that particular area.
2-21
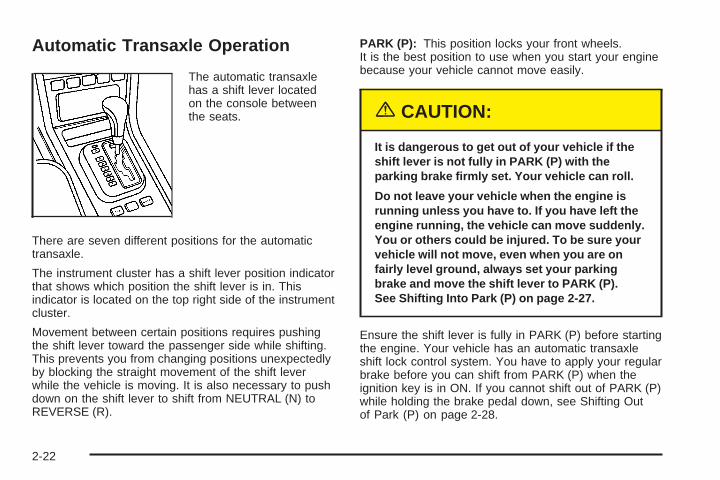
Automatic Transaxle Operation
The automatic transaxlehas a shift lever locatedon the console betweenthe seats.
There are seven different positions for the automatictransaxle.
The instrument cluster has a shift lever position indicatorthat shows which position the shift lever is in. Thisindicator is located on the top right side of the instrumentcluster.
Movement between certain positions requires pushingthe shift lever toward the passenger side while shifting.This prevents you from changing positions unexpectedlyby blocking the straight movement of the shift leverwhile the vehicle is moving. It is also necessary to pushdown on the shift lever to shift from NEUTRAL (N) toREVERSE (R).
PARK (P): This position locks your front wheels.It is the best position to use when you start your enginebecause your vehicle cannot move easily.
{CAUTION:
It is dangerous to get out of your vehicle if theshift lever is not fully in PARK (P) with theparking brake firmly set. Your vehicle can roll.
Do not leave your vehicle when the engine isrunning unless you have to. If you have left theengine running, the vehicle can move suddenly.You or others could be injured. To be sure yourvehicle will not move, even when you are onfairly level ground, always set your parkingbrake and move the shift lever to PARK (P).See Shifting Into Park (P) on page 2-27.
Ensure the shift lever is fully in PARK (P) before startingthe engine. Your vehicle has an automatic transaxleshift lock control system. You have to apply your regularbrake before you can shift from PARK (P) when theignition key is in ON. If you cannot shift out of PARK (P)while holding the brake pedal down, see Shifting Outof Park (P) on page 2-28.
2-22
REVERSE (R): Use this gear to back up.When shifting from NEUTRAL (N) to REVERSE (R), youmust press down on the shift lever and push it towardthe passenger side of the vehicle while shifting.
Notice: Shifting to REVERSE (R) while your vehicleis moving forward could damage the transaxle. Therepairs would not be covered by your warranty. Shiftto REVERSE (R) only after your vehicle is stopped.To rock your vehicle back and forth to get out of snow,ice or sand without damaging your transaxle, see If YouAre Stuck: In Sand, Mud, Ice or Snow on page 4-28.
NEUTRAL (N): In this position, your engine does notconnect with the wheels. To restart while you arealready moving, use NEUTRAL (N) only. Also, useNEUTRAL (N) when your vehicle is being towed.
{CAUTION:
Shifting into a drive gear while your engine isrunning at high speed is dangerous. Unlessyour foot is firmly on the brake pedal, yourvehicle could move very rapidly. You couldlose control and hit people or objects. Do notshift into a drive gear while your engine isrunning at high speed.
Notice: Shifting out of PARK (P) or NEUTRAL (N)with the engine racing may damage the transaxle.The repairs would not be covered by your warranty.Be sure the engine is not racing when shiftingyour vehicle.
AUTOMATIC OVERDRIVE (D): This position is fornormal driving.
THIRD (3): This position gives you more power andlower fuel economy than AUTOMATIC OVERDRIVE (D).Here are some times you might choose THIRD (3)instead of AUTOMATIC OVERDRIVE (D):
• When driving on hilly, winding roads.
• When going down a steep hill.
SECOND (2): This position gives you more power butlower fuel economy. You can use SECOND (2) onhills. It can help control your speed as you go downsteep mountain roads, but then you would also want touse your brakes off and on.
Notice: Do not drive in SECOND (2) at speeds over65 mph (105 km/h), or you can damage the transaxle.Use THIRD (3) or AUTOMATIC OVERDRIVE (D) asmuch as possible. Do not shift into SECOND (2)unless you are going slower than 65 mph (105 km/h)or you can damage your engine.
2-23
FIRST (1): This position gives you even more powerbut lower fuel economy than SECOND (2). You can useit on very steep hills, or in deep snow or mud. If theshift lever is put in FIRST (1), the transaxle will not shiftinto first gear until the vehicle is going slowly enough.
Notice: Spinning the tires or holding the vehicle inone place on a hill using only the acceleratorpedal may damage the transaxle. If you are stuck,do not spin the tires. When stopping on a hill,use the brakes to hold the vehicle in place.
Adaptive Shift LogicYour automatic transaxle will automatically select fromthree adaptive shift patterns based upon driver behavior:
• Economy mode provides a softer shift feel andoptimizes fuel economy.
• Normal mode provides a solid shift feel and is usedfor normal driving conditions.
• Sport mode provides a firm shift feel and optimizesperformance.
The driver cannot manually select the shift pattern. Theadaptive shift logic tries to operate in economy modeas much as possible. Normal and sport modes are usedas little as possible in order to maximize fuel economy.
The first few shifts of every drive cycle may besomewhat rough until the adaptive shift logic haslearned the driver’s behavior. This is normal.
The transaxle also has the ability to adapt to changingroad grade conditions. It will shift between threedifferent load settings:
• Load 1 is designed for driving on moderate roadgrades.
• Load 2 is designed for driving on steep roadgrades.
• Load 3 is designed for driving downhill and allowsfor better engine braking.
If there is a malfunction with the automatic transaxle, themalfunction indicator lamp (MIL) or the HOLD indicatorlight will turn on or flash. See Malfunction Indicator Lampon page 3-39 or Hold Mode Light on page 3-38.
Have your vehicle fixed as soon as possible.
2-24
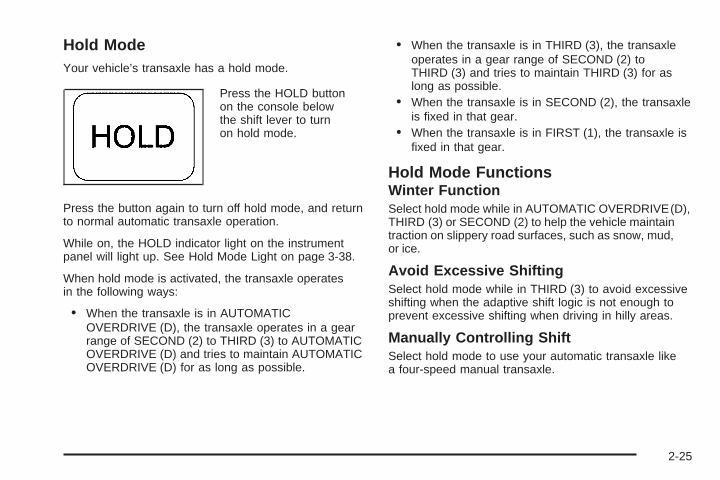
Hold ModeYour vehicle’s transaxle has a hold mode.
Press the HOLD buttonon the console belowthe shift lever to turnon hold mode.
Press the button again to turn off hold mode, and returnto normal automatic transaxle operation.
While on, the HOLD indicator light on the instrumentpanel will light up. See Hold Mode Light on page 3-38.
When hold mode is activated, the transaxle operatesin the following ways:
• When the transaxle is in AUTOMATICOVERDRIVE (D), the transaxle operates in a gearrange of SECOND (2) to THIRD (3) to AUTOMATICOVERDRIVE (D) and tries to maintain AUTOMATICOVERDRIVE (D) for as long as possible.
• When the transaxle is in THIRD (3), the transaxleoperates in a gear range of SECOND (2) toTHIRD (3) and tries to maintain THIRD (3) for aslong as possible.
• When the transaxle is in SECOND (2), the transaxleis fixed in that gear.
• When the transaxle is in FIRST (1), the transaxle isfixed in that gear.
Hold Mode FunctionsWinter FunctionSelect hold mode while in AUTOMATIC OVERDRIVE(D),THIRD (3) or SECOND (2) to help the vehicle maintaintraction on slippery road surfaces, such as snow, mud,or ice.
Avoid Excessive ShiftingSelect hold mode while in THIRD (3) to avoid excessiveshifting when the adaptive shift logic is not enough toprevent excessive shifting when driving in hilly areas.
Manually Controlling ShiftSelect hold mode to use your automatic transaxle likea four-speed manual transaxle.
2-25
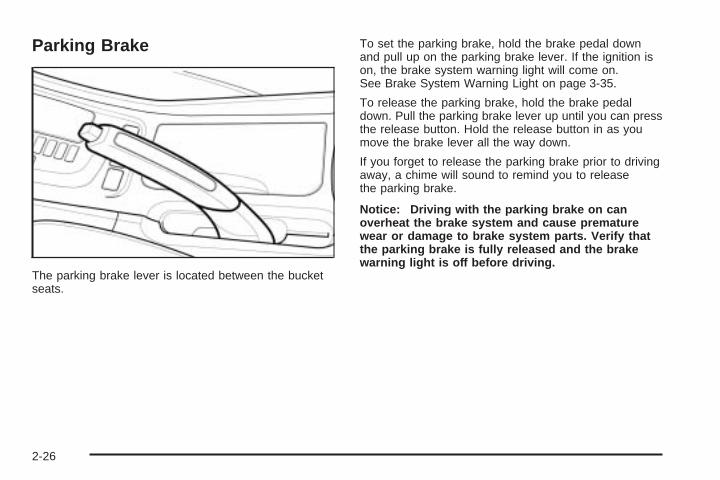
Parking Brake
The parking brake lever is located between the bucketseats.
To set the parking brake, hold the brake pedal downand pull up on the parking brake lever. If the ignition ison, the brake system warning light will come on.See Brake System Warning Light on page 3-35.
To release the parking brake, hold the brake pedaldown. Pull the parking brake lever up until you can pressthe release button. Hold the release button in as youmove the brake lever all the way down.
If you forget to release the parking brake prior to drivingaway, a chime will sound to remind you to releasethe parking brake.
Notice: Driving with the parking brake on canoverheat the brake system and cause prematurewear or damage to brake system parts. Verify thatthe parking brake is fully released and the brakewarning light is off before driving.
2-26
Shifting Into Park (P)
{CAUTION:
It can be dangerous to get out of your vehicleif the shift lever is not fully in PARK (P) withthe parking brake firmly set. Your vehicle canroll. If you have left the engine running, thevehicle can move suddenly. You or otherscould be injured. To be sure your vehicle willnot move, even when you are on fairly levelground, use the steps that follow.
1. Hold the brake pedal down and set the parkingbrake.
2. Move the shift lever into PARK (P) by pushing thelever up and toward the driver’s side of the vehicle.
3. Turn the ignition key to LOCK.
4. Remove the key and take it with you. If you canleave your vehicle with the ignition key in yourhand, your vehicle is in PARK (P).
Leaving Your Vehicle With the EngineRunning
{CAUTION:
It can be dangerous to leave your vehicle withthe engine running. Your vehicle could movesuddenly if the shift lever is not fully inPARK (P) with the parking brake firmly set.And, if you leave the vehicle with the enginerunning, it could overheat and even catch fire.You or others could be injured. Do not leaveyour vehicle with the engine running.
If you have to leave your vehicle with the enginerunning, be sure your vehicle is in PARK (P) and yourparking brake is firmly set before you leave it. After youhave moved the shift lever into PARK (P), hold theregular brake pedal down. Then, see if you can movethe shift lever away from PARK (P). If you can, it meansthat the shift lever was not fully locked into PARK (P).
2-27
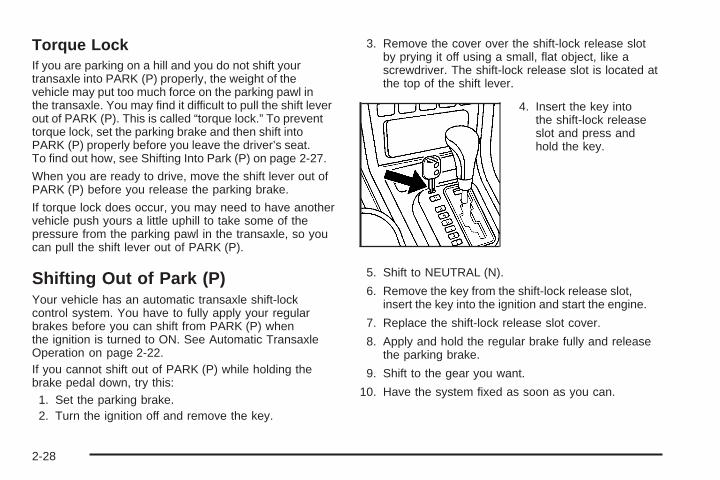
Torque LockIf you are parking on a hill and you do not shift yourtransaxle into PARK (P) properly, the weight of thevehicle may put too much force on the parking pawl inthe transaxle. You may find it difficult to pull the shift leverout of PARK (P). This is called “torque lock.” To preventtorque lock, set the parking brake and then shift intoPARK (P) properly before you leave the driver’s seat.To find out how, see Shifting Into Park (P) on page 2-27.
When you are ready to drive, move the shift lever out ofPARK (P) before you release the parking brake.
If torque lock does occur, you may need to have anothervehicle push yours a little uphill to take some of thepressure from the parking pawl in the transaxle, so youcan pull the shift lever out of PARK (P).
Shifting Out of Park (P)Your vehicle has an automatic transaxle shift-lockcontrol system. You have to fully apply your regularbrakes before you can shift from PARK (P) whenthe ignition is turned to ON. See Automatic TransaxleOperation on page 2-22.If you cannot shift out of PARK (P) while holding thebrake pedal down, try this:
1. Set the parking brake.2. Turn the ignition off and remove the key.
3. Remove the cover over the shift-lock release slotby prying it off using a small, flat object, like ascrewdriver. The shift-lock release slot is located atthe top of the shift lever.
4. Insert the key intothe shift-lock releaseslot and press andhold the key.
5. Shift to NEUTRAL (N).
6. Remove the key from the shift-lock release slot,insert the key into the ignition and start the engine.
7. Replace the shift-lock release slot cover.
8. Apply and hold the regular brake fully and releasethe parking brake.
9. Shift to the gear you want.
10. Have the system fixed as soon as you can.
2-28
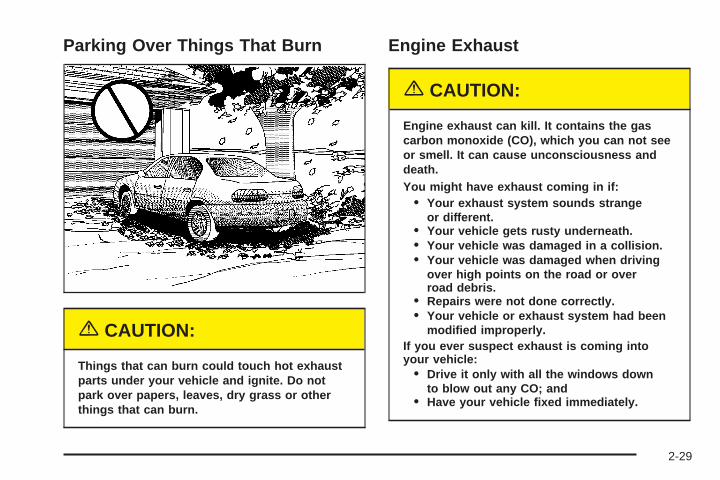
Parking Over Things That Burn
{CAUTION:
Things that can burn could touch hot exhaustparts under your vehicle and ignite. Do notpark over papers, leaves, dry grass or otherthings that can burn.
Engine Exhaust
{CAUTION:
Engine exhaust can kill. It contains the gascarbon monoxide (CO), which you can not seeor smell. It can cause unconsciousness anddeath.You might have exhaust coming in if:
• Your exhaust system sounds strangeor different.
• Your vehicle gets rusty underneath.• Your vehicle was damaged in a collision.• Your vehicle was damaged when driving
over high points on the road or overroad debris.
• Repairs were not done correctly.• Your vehicle or exhaust system had been
modified improperly.If you ever suspect exhaust is coming intoyour vehicle:
• Drive it only with all the windows downto blow out any CO; and
• Have your vehicle fixed immediately.
2-29
Running Your Engine While YouAre ParkedIt is better not to park with the engine running. But ifyou ever have to, here are some things to know.
{CAUTION:
Idling the engine with the climate controlsystem off could allow dangerous exhaust intoyour vehicle. See the earlier Caution underEngine Exhaust on page 2-29.
Also, idling in a closed-in place can let deadlycarbon monoxide (CO) into your vehicle evenif the climate control fan is at the highestsetting. One place this can happen is a garage.Exhaust — with CO — can come in easily.NEVER park in a garage with the enginerunning.
Another closed-in place can be a blizzard.See Winter Driving on page 4-24.
{CAUTION:
It can be dangerous to get out of your vehicleif the shift lever is not fully in PARK (P) withthe parking brake firmly set. Your vehicle canroll. Do not leave your vehicle when the engineis running unless you have to. If you have leftthe engine running, the vehicle can movesuddenly. You or others could be injured.To be sure your vehicle will not move, evenwhen you are on fairly level ground, alwaysset your parking brake and move the shiftlever to PARK (P).
Follow the proper steps to be sure your vehicle will notmove. See Shifting Into Park (P) on page 2-27.
If you are parking on a hill and if you are pulling atrailer, also see Towing a Trailer on page 4-35.
2-30
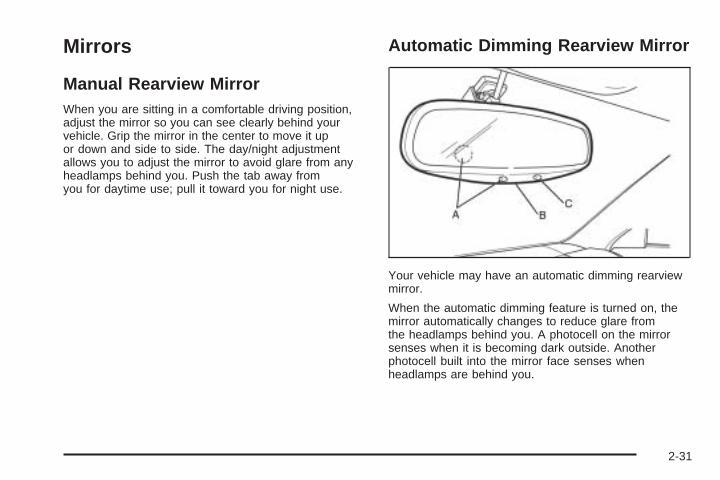
Mirrors
Manual Rearview MirrorWhen you are sitting in a comfortable driving position,adjust the mirror so you can see clearly behind yourvehicle. Grip the mirror in the center to move it upor down and side to side. The day/night adjustmentallows you to adjust the mirror to avoid glare from anyheadlamps behind you. Push the tab away fromyou for daytime use; pull it toward you for night use.
Automatic Dimming Rearview Mirror
Your vehicle may have an automatic dimming rearviewmirror.
When the automatic dimming feature is turned on, themirror automatically changes to reduce glare fromthe headlamps behind you. A photocell on the mirrorsenses when it is becoming dark outside. Anotherphotocell built into the mirror face senses whenheadlamps are behind you.
2-31
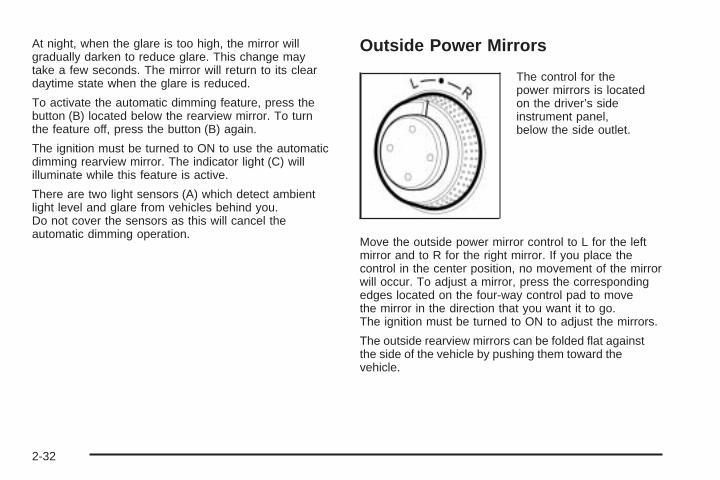
At night, when the glare is too high, the mirror willgradually darken to reduce glare. This change maytake a few seconds. The mirror will return to its cleardaytime state when the glare is reduced.
To activate the automatic dimming feature, press thebutton (B) located below the rearview mirror. To turnthe feature off, press the button (B) again.
The ignition must be turned to ON to use the automaticdimming rearview mirror. The indicator light (C) willilluminate while this feature is active.
There are two light sensors (A) which detect ambientlight level and glare from vehicles behind you.Do not cover the sensors as this will cancel theautomatic dimming operation.
Outside Power Mirrors
The control for thepower mirrors is locatedon the driver’s sideinstrument panel,below the side outlet.
Move the outside power mirror control to L for the leftmirror and to R for the right mirror. If you place thecontrol in the center position, no movement of the mirrorwill occur. To adjust a mirror, press the correspondingedges located on the four-way control pad to movethe mirror in the direction that you want it to go.The ignition must be turned to ON to adjust the mirrors.
The outside rearview mirrors can be folded flat againstthe side of the vehicle by pushing them toward thevehicle.
2-32
Outside Convex MirrorYour passenger’s side mirror is convex. A convexmirror’s surface is curved so you can see more fromthe driver’s seat.
{CAUTION:
A convex mirror can make things (like othervehicles) look farther away than they really are.If you cut too sharply into the right lane, youcould hit a vehicle on your right. Check yourinside mirror or glance over your shoulderbefore changing lanes.
Outside Heated MirrorsWhen you operate the rear window defogger, the heateddriver’s and passenger’s outside power mirrors arewarmed to help clear them of ice and snow. See “RearWindow and Outside Mirror Defogger” under ClimateControl System on page 3-18 or Automatic ClimateControl System on page 3-22 for more information.
Storage Areas
Glove BoxOpen the glove box by pulling the bottom of the handleupward. Close the glove box with a firm push.
Cupholder(s)The cupholders are located in the center console and inthe rear seat center armrest. To use the front cupholder,pull up on the edge of the opening. To use the rearcupholder, pull down the rear seat center armrest.
Coinholder(s)Your vehicle has a coinholder located to the left ofthe steering wheel on the instrument panel. There isalso a card holder located at the top of the coinholder.To use these feature, pull out the coinholder drawer.
2-33
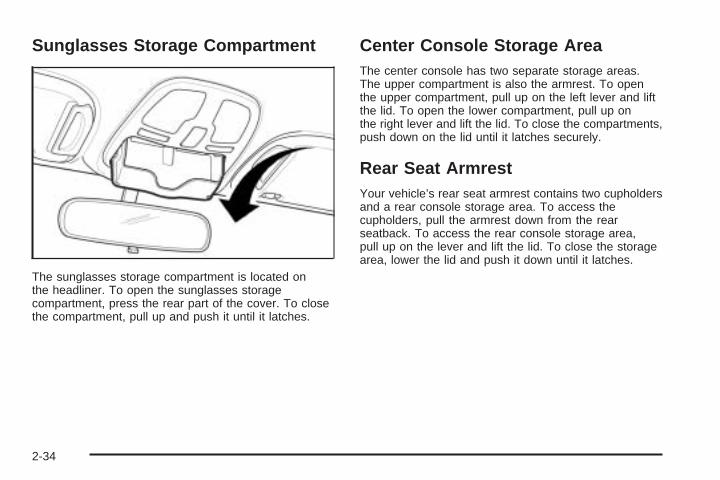
Sunglasses Storage Compartment
The sunglasses storage compartment is located onthe headliner. To open the sunglasses storagecompartment, press the rear part of the cover. To closethe compartment, pull up and push it until it latches.
Center Console Storage AreaThe center console has two separate storage areas.The upper compartment is also the armrest. To openthe upper compartment, pull up on the left lever and liftthe lid. To open the lower compartment, pull up onthe right lever and lift the lid. To close the compartments,push down on the lid until it latches securely.
Rear Seat ArmrestYour vehicle’s rear seat armrest contains two cupholdersand a rear console storage area. To access thecupholders, pull the armrest down from the rearseatback. To access the rear console storage area,pull up on the lever and lift the lid. To close the storagearea, lower the lid and push it down until it latches.
2-34
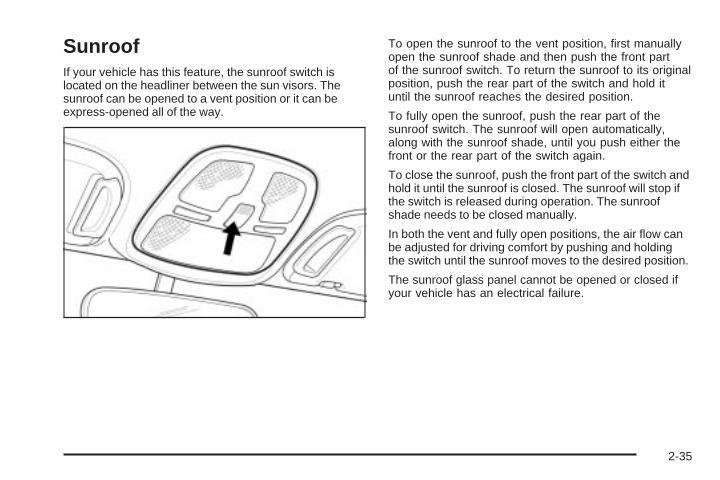
SunroofIf your vehicle has this feature, the sunroof switch islocated on the headliner between the sun visors. Thesunroof can be opened to a vent position or it can beexpress-opened all of the way.
To open the sunroof to the vent position, first manuallyopen the sunroof shade and then push the front partof the sunroof switch. To return the sunroof to its originalposition, push the rear part of the switch and hold ituntil the sunroof reaches the desired position.
To fully open the sunroof, push the rear part of thesunroof switch. The sunroof will open automatically,along with the sunroof shade, until you push either thefront or the rear part of the switch again.
To close the sunroof, push the front part of the switch andhold it until the sunroof is closed. The sunroof will stop ifthe switch is released during operation. The sunroofshade needs to be closed manually.
In both the vent and fully open positions, the air flow canbe adjusted for driving comfort by pushing and holdingthe switch until the sunroof moves to the desired position.
The sunroof glass panel cannot be opened or closed ifyour vehicle has an electrical failure.
2-35

✍ NOTES
2-36
Instrument Panel Overview ...............................3-4Hazard Warning Flashers ................................3-6Other Warning Devices ...................................3-6Horn .............................................................3-6Tilt Wheel .....................................................3-7Turn Signal/Multifunction Lever .........................3-7Windshield Wiper Lever ...................................3-9Cruise Control ..............................................3-10Exterior Lamps .............................................3-13Interior Lamps ..............................................3-15Accessory Power Outlets ...............................3-17Ashtrays and Cigarette Lighter ........................3-18
Climate Controls ............................................3-18Climate Control System .................................3-18Automatic Climate Control System ...................3-22Outlet Adjustment .........................................3-28Passenger Compartment Air Filter ...................3-28
Warning Lights, Gages, and Indicators ............3-30Instrument Panel Cluster ................................3-31Speedometer and Odometer ...........................3-32Trip Odometer ..............................................3-32
Tachometer .................................................3-32Safety Belt Reminder Light .............................3-33Safety Belt Reminder Tone ............................3-33Air Bag Readiness Light ................................3-33Charging System Light ..................................3-34Brake System Warning Light ..........................3-35Anti-Lock Brake System Warning Light .............3-36Speed Sensitive Power Steering (SSPS)
Warning Light ...........................................3-36Traction Control System (TCS)
Warning Light ...........................................3-37Traction Control System Active Light ...............3-38Hold Mode Light ...........................................3-38Engine Coolant Temperature Gage ..................3-39Malfunction Indicator Lamp .............................3-39Oil Pressure Light .........................................3-42Cruise Control Light ......................................3-43Highbeam On Light .......................................3-43Daytime Running Lamps
Indicator Light ...........................................3-44Fuel Gage ...................................................3-44Low Fuel Warning Light .................................3-45
Section 3 Instrument Panel
3-1
Secondary Information Center (SIC) .................3-46Clock ..........................................................3-46Door Ajar Light .............................................3-47Trunk Ajar Light ............................................3-47
Audio System(s) .............................................3-48Radio with CD ..............................................3-48Trunk-Mounted CD Changer ...........................3-55
Theft-Deterrent Feature ..................................3-58Audio Steering Wheel Controls .......................3-59Radio Reception ...........................................3-59Care of Your CDs .........................................3-59Care of Your CD Player ................................3-60Backglass Antenna .......................................3-60
Section 3 Instrument Panel
3-2

✍ NOTES
3-3
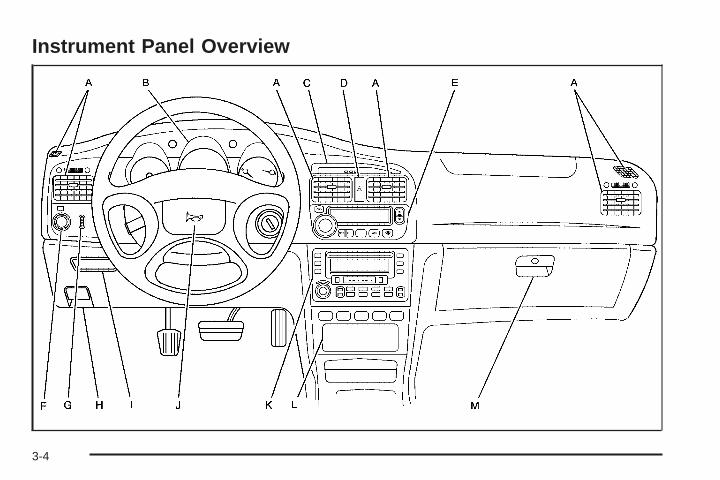
Instrument Panel Overview
3-4
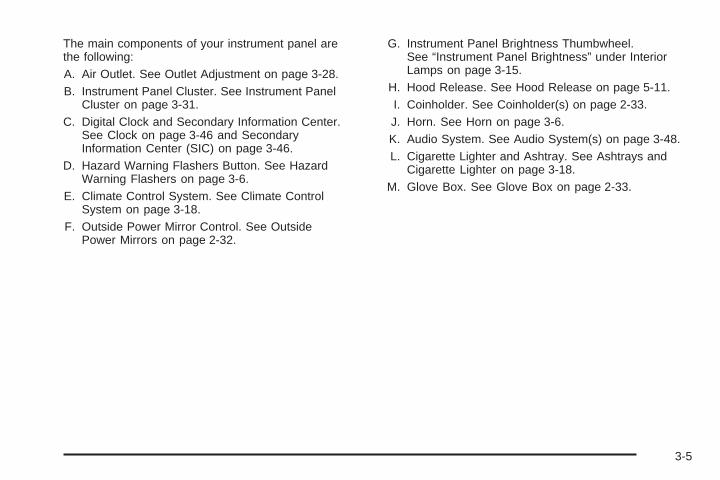
The main components of your instrument panel arethe following:A. Air Outlet. See Outlet Adjustment on page 3-28.B. Instrument Panel Cluster. See Instrument Panel
Cluster on page 3-31.C. Digital Clock and Secondary Information Center.
See Clock on page 3-46 and SecondaryInformation Center (SIC) on page 3-46.
D. Hazard Warning Flashers Button. See HazardWarning Flashers on page 3-6.
E. Climate Control System. See Climate ControlSystem on page 3-18.
F. Outside Power Mirror Control. See OutsidePower Mirrors on page 2-32.
G. Instrument Panel Brightness Thumbwheel.See “Instrument Panel Brightness” under InteriorLamps on page 3-15.
H. Hood Release. See Hood Release on page 5-11.I. Coinholder. See Coinholder(s) on page 2-33.J. Horn. See Horn on page 3-6.K. Audio System. See Audio System(s) on page 3-48.L. Cigarette Lighter and Ashtray. See Ashtrays and
Cigarette Lighter on page 3-18.M. Glove Box. See Glove Box on page 2-33.
3-5
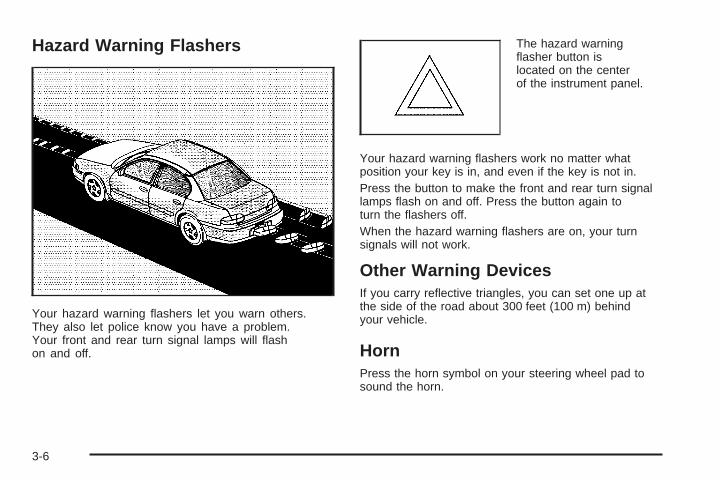
Hazard Warning Flashers
Your hazard warning flashers let you warn others.They also let police know you have a problem.Your front and rear turn signal lamps will flashon and off.
The hazard warningflasher button islocated on the centerof the instrument panel.
Your hazard warning flashers work no matter whatposition your key is in, and even if the key is not in.Press the button to make the front and rear turn signallamps flash on and off. Press the button again toturn the flashers off.When the hazard warning flashers are on, your turnsignals will not work.
Other Warning DevicesIf you carry reflective triangles, you can set one up atthe side of the road about 300 feet (100 m) behindyour vehicle.
HornPress the horn symbol on your steering wheel pad tosound the horn.
3-6
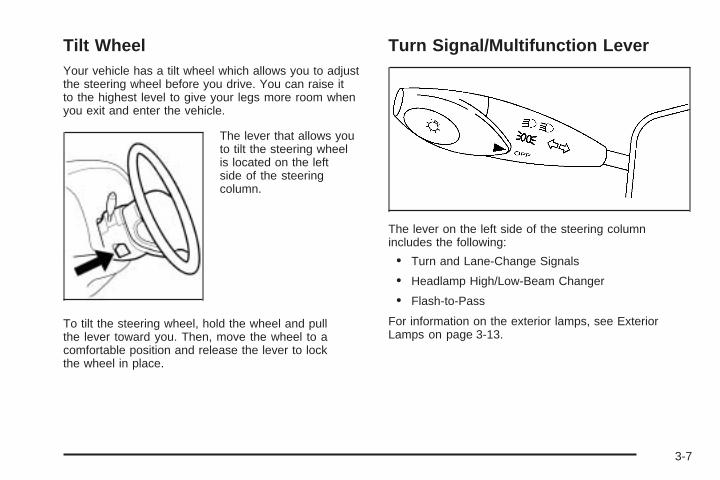
Tilt WheelYour vehicle has a tilt wheel which allows you to adjustthe steering wheel before you drive. You can raise itto the highest level to give your legs more room whenyou exit and enter the vehicle.
The lever that allows youto tilt the steering wheelis located on the leftside of the steeringcolumn.
To tilt the steering wheel, hold the wheel and pullthe lever toward you. Then, move the wheel to acomfortable position and release the lever to lockthe wheel in place.
Turn Signal/Multifunction Lever
The lever on the left side of the steering columnincludes the following:
• Turn and Lane-Change Signals
• Headlamp High/Low-Beam Changer
• Flash-to-Pass
For information on the exterior lamps, see ExteriorLamps on page 3-13.
3-7
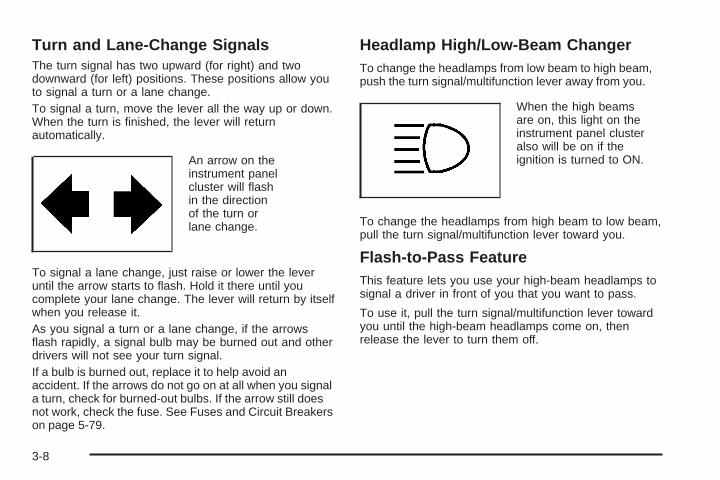
Turn and Lane-Change SignalsThe turn signal has two upward (for right) and twodownward (for left) positions. These positions allow youto signal a turn or a lane change.To signal a turn, move the lever all the way up or down.When the turn is finished, the lever will returnautomatically.
An arrow on theinstrument panelcluster will flashin the directionof the turn orlane change.
To signal a lane change, just raise or lower the leveruntil the arrow starts to flash. Hold it there until youcomplete your lane change. The lever will return by itselfwhen you release it.As you signal a turn or a lane change, if the arrowsflash rapidly, a signal bulb may be burned out and otherdrivers will not see your turn signal.If a bulb is burned out, replace it to help avoid anaccident. If the arrows do not go on at all when you signala turn, check for burned-out bulbs. If the arrow still doesnot work, check the fuse. See Fuses and Circuit Breakerson page 5-79.
Headlamp High/Low-Beam ChangerTo change the headlamps from low beam to high beam,push the turn signal/multifunction lever away from you.
When the high beamsare on, this light on theinstrument panel clusteralso will be on if theignition is turned to ON.
To change the headlamps from high beam to low beam,pull the turn signal/multifunction lever toward you.
Flash-to-Pass FeatureThis feature lets you use your high-beam headlamps tosignal a driver in front of you that you want to pass.
To use it, pull the turn signal/multifunction lever towardyou until the high-beam headlamps come on, thenrelease the lever to turn them off.
3-8
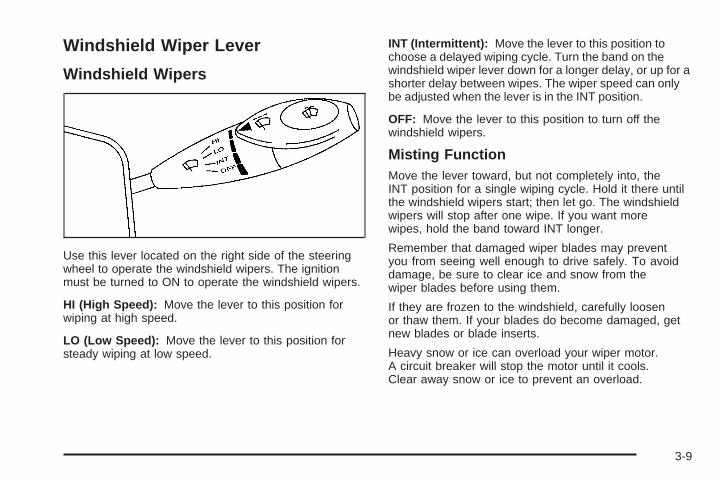
Windshield Wiper Lever
Windshield Wipers
Use this lever located on the right side of the steeringwheel to operate the windshield wipers. The ignitionmust be turned to ON to operate the windshield wipers.
HI (High Speed): Move the lever to this position forwiping at high speed.
LO (Low Speed): Move the lever to this position forsteady wiping at low speed.
INT (Intermittent): Move the lever to this position tochoose a delayed wiping cycle. Turn the band on thewindshield wiper lever down for a longer delay, or up for ashorter delay between wipes. The wiper speed can onlybe adjusted when the lever is in the INT position.
OFF: Move the lever to this position to turn off thewindshield wipers.
Misting FunctionMove the lever toward, but not completely into, theINT position for a single wiping cycle. Hold it there untilthe windshield wipers start; then let go. The windshieldwipers will stop after one wipe. If you want morewipes, hold the band toward INT longer.
Remember that damaged wiper blades may preventyou from seeing well enough to drive safely. To avoiddamage, be sure to clear ice and snow from thewiper blades before using them.
If they are frozen to the windshield, carefully loosenor thaw them. If your blades do become damaged, getnew blades or blade inserts.
Heavy snow or ice can overload your wiper motor.A circuit breaker will stop the motor until it cools.Clear away snow or ice to prevent an overload.
3-9

Windshield WasherTo wash your windshield, pull the windshield wiper/washer lever toward you with the ignition turned to ON.
{CAUTION:
In freezing weather, do not use your washeruntil the windshield is warmed. Otherwise thewasher fluid can form ice on the windshield,blocking your vision.
When you release the lever, the washers will stop, butthe wipers will continue to wipe for about three cyclesand will either stop or will resume at the speed you wereusing before.
Cruise ControlIf your vehicle has cruise control, you can maintaina speed of about 18 mph (29 km/h) or more withoutkeeping your foot on the accelerator. This can really helpon long trips. Cruise control does not work at speedsbelow 18 mph (29 km/h).
When you apply your brakes, the cruise control shuts off.
{CAUTION:
Cruise control can be dangerous where youcan not drive safely at a steady speed. So, donot use your cruise control on winding roadsor in heavy traffic.
Cruise control can be dangerous on slipperyroads. On such roads, fast changes in tiretraction can cause needless wheel spinning,and you could lose control. Do not use cruisecontrol on slippery roads.
If your vehicle is in cruise control when the optionaltraction control system begins to limit wheel spin,the cruise control will automatically disengage.See Traction Control System (TCS) on page 4-8.When road conditions allow you to safely use it again,you may turn the cruise control back on.
3-10
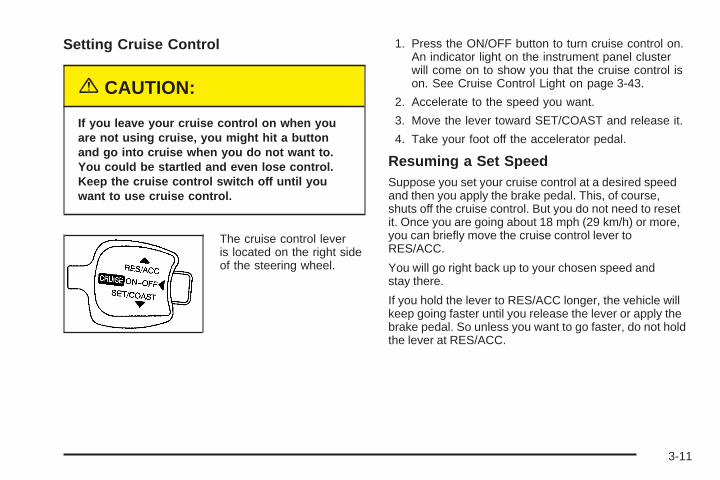
Setting Cruise Control
{CAUTION:
If you leave your cruise control on when youare not using cruise, you might hit a buttonand go into cruise when you do not want to.You could be startled and even lose control.Keep the cruise control switch off until youwant to use cruise control.
The cruise control leveris located on the right sideof the steering wheel.
1. Press the ON/OFF button to turn cruise control on.An indicator light on the instrument panel clusterwill come on to show you that the cruise control ison. See Cruise Control Light on page 3-43.
2. Accelerate to the speed you want.
3. Move the lever toward SET/COAST and release it.
4. Take your foot off the accelerator pedal.
Resuming a Set SpeedSuppose you set your cruise control at a desired speedand then you apply the brake pedal. This, of course,shuts off the cruise control. But you do not need to resetit. Once you are going about 18 mph (29 km/h) or more,you can briefly move the cruise control lever toRES/ACC.
You will go right back up to your chosen speed andstay there.
If you hold the lever to RES/ACC longer, the vehicle willkeep going faster until you release the lever or apply thebrake pedal. So unless you want to go faster, do not holdthe lever at RES/ACC.
3-11
Increasing Speed While Using CruiseControlThere are two ways to go to a higher speed.
• Use the accelerator pedal to get to a higher speed.Move the cruise control lever to SET/COAST,then release the lever and the accelerator pedal.You will now cruise at the higher speed.
• Move the cruise control lever to RES/ACC. Hold itthere until you get up to the speed you want, andthen release the lever. To increase your speed invery small amounts, briefly move the lever toRES/ACC and then release it. Each time you do this,your vehicle will go about 1 mph (1.6 km/h) faster.
The accelerate feature will only work after you have setthe cruise control speed by moving the cruise controllever to SET/COAST.
Reducing Speed While Using CruiseControlThere are two ways to reduce your speed while usingcruise control:
• Move the cruise control lever to SET/COAST untilyou reach the lower speed you want, then release it.
• To slow down in very small amounts, briefly movethe lever to SET/COAST. Each time you do this, youwill go about 1 mph (1.6 km/h) slower.
Passing Another Vehicle While UsingCruise ControlUse the accelerator pedal to increase your speed.When you take your foot off the pedal, your vehicle willslow down to the cruise control speed you set earlier.
3-12
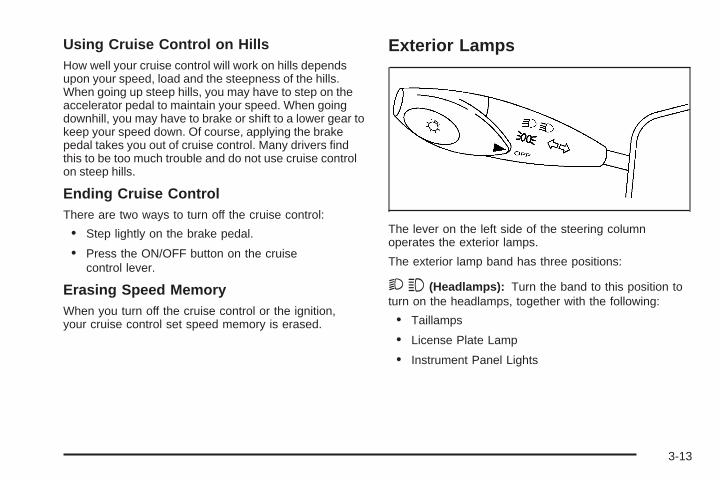
Using Cruise Control on HillsHow well your cruise control will work on hills dependsupon your speed, load and the steepness of the hills.When going up steep hills, you may have to step on theaccelerator pedal to maintain your speed. When goingdownhill, you may have to brake or shift to a lower gear tokeep your speed down. Of course, applying the brakepedal takes you out of cruise control. Many drivers findthis to be too much trouble and do not use cruise controlon steep hills.
Ending Cruise ControlThere are two ways to turn off the cruise control:
• Step lightly on the brake pedal.
• Press the ON/OFF button on the cruisecontrol lever.
Erasing Speed MemoryWhen you turn off the cruise control or the ignition,your cruise control set speed memory is erased.
Exterior Lamps
The lever on the left side of the steering columnoperates the exterior lamps.
The exterior lamp band has three positions:
23(Headlamps): Turn the band to this position toturn on the headlamps, together with the following:
• Taillamps
• License Plate Lamp
• Instrument Panel Lights
3-13

Your headlamps only work when your key is turnedto ON.
; (Parking Lamps): Turn the band to this position toturn on the parking lamps, together with the previouslylisted lamps and lights.
OFF: Turn the band to this position to turn all lamps off,except the Daytime Running Lamps (DRL).
Lamps On ReminderIf you open the driver’s door with the ignition off andthe lamps on, you will hear a warning chime.
Auto-Off HeadlampsYour headlamps will automatically turn off when theheadlamps are on and you turn the key to ACC or LOCK.
Daytime Running Lamps (DRL)Daytime Running Lamps (DRL) can make it easier forothers to see the front of your vehicle during theday. DRL can be helpful in many different drivingconditions, but they can be especially helpful in the shortperiods after dawn and before sunset. Fully functionaldaytime running lamps are required on all vehiclesfirst sold in Canada.
The DRL system will make your low-beam headlampscome on at a reduced brightness in daylight whenthe following conditions are met:
• The ignition is on.
• The exterior lamp band is in OFF or in the parkinglamp position.
• The parking brake is released.
When the DRL system is on, the taillamps, parkinglamps and instrument panel lights will not be illuminatedunless you have turned the exterior lamps control tothe parking lamp or headlamp position.
An indicator light on the instrument panel cluster willcome on when the DRL are on. See Daytime RunningLamps Indicator Light on page 3-44.
The DRL system will turn off when one of the followingconditions are met:
• The ignition is off.
• The parking brakes are on.
• The high-beam headlamps are on.
• The low-beam headlamps are on.
As with any vehicle, you should turn on the regularheadlamp system when you need it.
3-14

Fog LampsIf your vehicle has this feature, use your fog lamps forbetter visibility in foggy or misty conditions.
The button for the foglamps is located on thecenter of the instrumentpanel, above the frontashtray.
Press the button to turn the fog lamps on. An indicatorlight in the button will illuminate while the fog lampsare on. Press the button again to turn the fog lamps off.
While using the fog lamps, the ignition must be turnedto ACC or ON and the parking lamps or the low-beamheadlamps must be on.
The fog lamps will turn off while the high-beamheadlamps are turned on. When the high-beamheadlamps are turned off, the fog lamps will comeon again.
Continuous use of the fog lamps will shorten bulb life.Limit use as necessary.
Interior Lamps
Instrument Panel BrightnessThis feature controls the brightness of the instrumentpanel lights.
The thumbwheel for thisfeature is located on theinstrument panel to theleft of the steering wheel.
Turn the thumbwheel up to brighten the lights or downto dim them.
3-15
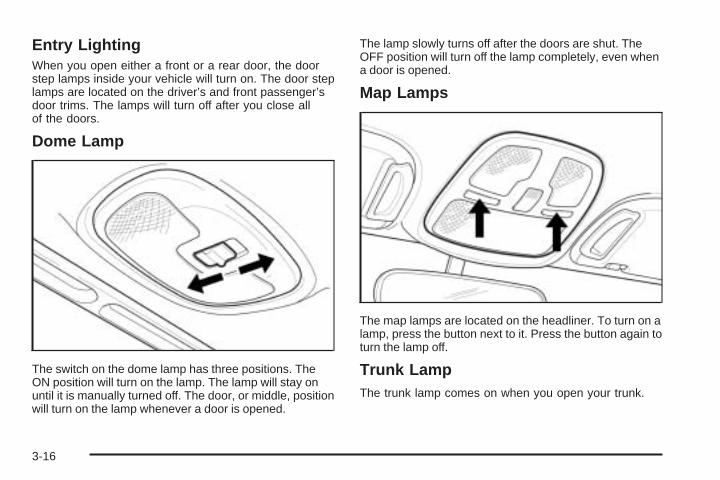
Entry LightingWhen you open either a front or a rear door, the doorstep lamps inside your vehicle will turn on. The door steplamps are located on the driver’s and front passenger’sdoor trims. The lamps will turn off after you close allof the doors.
Dome Lamp
The switch on the dome lamp has three positions. TheON position will turn on the lamp. The lamp will stay onuntil it is manually turned off. The door, or middle, positionwill turn on the lamp whenever a door is opened.
The lamp slowly turns off after the doors are shut. TheOFF position will turn off the lamp completely, even whena door is opened.
Map Lamps
The map lamps are located on the headliner. To turn on alamp, press the button next to it. Press the button again toturn the lamp off.
Trunk LampThe trunk lamp comes on when you open your trunk.
3-16
Accessory Power OutletsYour vehicle has an accessory power outlet. With anaccessory power outlet, you can plug in auxiliaryelectrical equipment such as a cellular telephone orCB radio.
The accessory power outlet is located on the front ofthe center console below the front ashtray.
To use the outlet, remove the protective cap. When notin use, always cover the outlet with the protectivecap. The accessory power outlet is operational whenthe ignition is turned to ACC or ON.
Notice: Leaving electrical equipment on forextended periods will drain the battery. Always turnoff electrical equipment when not in use and donot plug in equipment that exceeds the maximumamperage rating.
Certain electrical accessories may not be compatiblewith the accessory power outlet and could resultin blown vehicle or adapter fuses. If you experience aproblem, see your dealer for additional informationon the accessory power outlet.
Notice: Adding any electrical equipment to yourvehicle may damage it or keep other componentsfrom working as they should. The repairs would notbe covered by your warranty. Check with yourdealer before adding electrical equipment.
When adding electrical equipment, be sure to followthe proper installation instructions included withthe equipment.
Notice: Improper use of the power outlet can causedamage not covered by your warranty. Do nothang any type of accessory or accessory bracketfrom the plug because the power outlets aredesigned for accessory power plugs only.
3-17
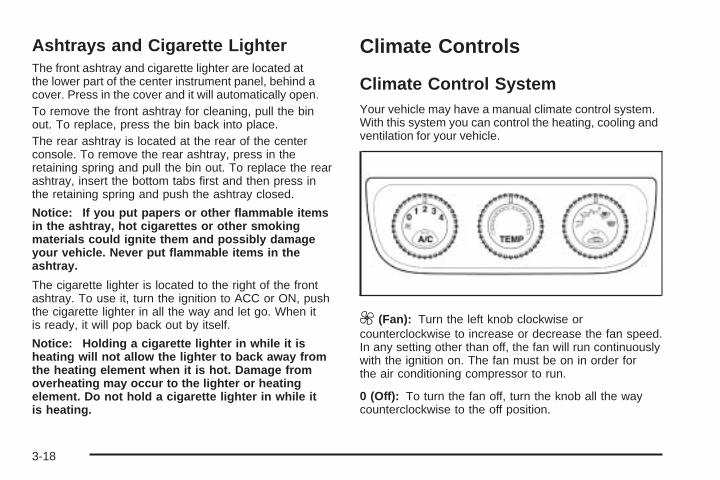
Ashtrays and Cigarette LighterThe front ashtray and cigarette lighter are located atthe lower part of the center instrument panel, behind acover. Press in the cover and it will automatically open.To remove the front ashtray for cleaning, pull the binout. To replace, press the bin back into place.The rear ashtray is located at the rear of the centerconsole. To remove the rear ashtray, press in theretaining spring and pull the bin out. To replace the rearashtray, insert the bottom tabs first and then press inthe retaining spring and push the ashtray closed.
Notice: If you put papers or other flammable itemsin the ashtray, hot cigarettes or other smokingmaterials could ignite them and possibly damageyour vehicle. Never put flammable items in theashtray.
The cigarette lighter is located to the right of the frontashtray. To use it, turn the ignition to ACC or ON, pushthe cigarette lighter in all the way and let go. When itis ready, it will pop back out by itself.
Notice: Holding a cigarette lighter in while it isheating will not allow the lighter to back away fromthe heating element when it is hot. Damage fromoverheating may occur to the lighter or heatingelement. Do not hold a cigarette lighter in while itis heating.
Climate Controls
Climate Control SystemYour vehicle may have a manual climate control system.With this system you can control the heating, cooling andventilation for your vehicle.
9(Fan): Turn the left knob clockwise orcounterclockwise to increase or decrease the fan speed.In any setting other than off, the fan will run continuouslywith the ignition on. The fan must be on in order forthe air conditioning compressor to run.
0 (Off): To turn the fan off, turn the knob all the waycounterclockwise to the off position.
3-18
TEMP (Temperature): Turn the middle knob clockwiseor counterclockwise to manually increase or decreasethe temperature inside your vehicle. Turn the knob to theblue area to get cool air and to the red area to getwarm air.
To change the current mode, select one of the followingfrom the right knob:
E (Vent): This mode directs air to the instrumentpanel outlets.
( (Bi-Level): This mode directs about half of the airto the instrument panel outlets, and then directs theremaining air to the floor outlets.
5 (Floor): This mode directs most of the air to thefloor outlets. If your vehicle has rear outlets, some of theair will also be directed to them. Be sure to keep thearea under the front seats clear to allow the flow of air tothe rear compartment.
The right knob can also be used to select the defog anddefrost modes. Information on defogging and defrostingcan be found later in this section.
? (Recirculation): This mode keeps outside air fromcoming in the vehicle. It can be used to prevent outsideair and odors from entering your vehicle or to helpheat or cool the air inside your vehicle more quickly.Press this button to turn the recirculation mode on or off.When the button is pressed, an indicator light in thebutton will come on. Using the recirculation mode forextended periods may cause your windows to fog.If this happens, select the defrost mode.
A/C (Air Conditioning): Press this button to turn theair conditioning compressor on and off. When A/Cis pressed, an indicator light in the button will come onto let you know that air conditioning is activated.
On hot days, open the windows to let hot inside airescape; then close them. This helps to reduce the timeit takes for your vehicle to cool down. It also helpsthe system to operate more efficiently.
For quick cool down on hot days, do the following:1. Select the vent mode.2. Select the highest fan speed.3. Press the A/C button.4. Select the recirculation mode.5. Select the coolest temperature.
3-19
Using these settings together for long periods of timemay cause the air inside of your vehicle to become toodry. To prevent this from happening, after the air inyour vehicle has cooled, turn the recirculation mode off.
The air conditioning system removes moisture fromthe air, so you may sometimes notice a small amount ofwater dripping underneath your vehicle while idling orafter turning off the engine. This is normal.
Defogging and DefrostingFog on the inside of windows is a result of high humidityor moisture condensing on the cool window glass. Thiscan be minimized if the climate control system is usedproperly. There are two modes to clear fog or frost fromyour windshield. Use the defog mode to clear thewindows of fog or moisture and warm the passengers.Use the defrost mode to remove fog or frost from thewindshield more quickly.
Select one of these available modes from theright knob.
É (Defog): This mode directs most of the air to thewindshield and the floor outlets. A small amount of air isalso directed to the outboard outlets for the sidewindows.
To help clear the side windows quickly, do the following:1. Select the bi-level mode.2. Select the highest fan speed.3. Select A/C.4. Select the temperature.
0 (Defrost): This mode directs the air to thewindshield and the outboard outlets for the sidewindows.
To help clear the windshield quickly, do the following:1. Select the defrost mode.2. Select the highest temperature.3. Select the highest fan speed.
Do not drive the vehicle until all windows are clear.
3-20
Rear Window and Outside MirrorDefoggerYour vehicle has a rear window and outside mirrordefogger. This feature will only work when the ignition isturned to ON.
The rear window defogger uses a warming grid toremove fog or frost from the rear window. Before usingthis feature, clear as much snow from the rearwindow as possible.
<T (Rear): Press this button to turn the rearwindow and outside mirror defogger on or off. Thebutton is located below the audio system. An indicatorlight in the button will come on to let your know thatthe feature is activated.
The rear window and outside mirror defogger will turnoff about 15 minutes after the button is pressed.The defogger can also be turned off by pressing thebutton again or by turning off the engine.
Notice: Don’t use anything sharp on the inside ofthe rear window. If you do, you could cut or damagethe warming grid, and the repairs wouldn’t becovered by your warranty. Do not attach a temporaryvehicle license, tape, a decal or anything similarto the defogger grid.
3-21
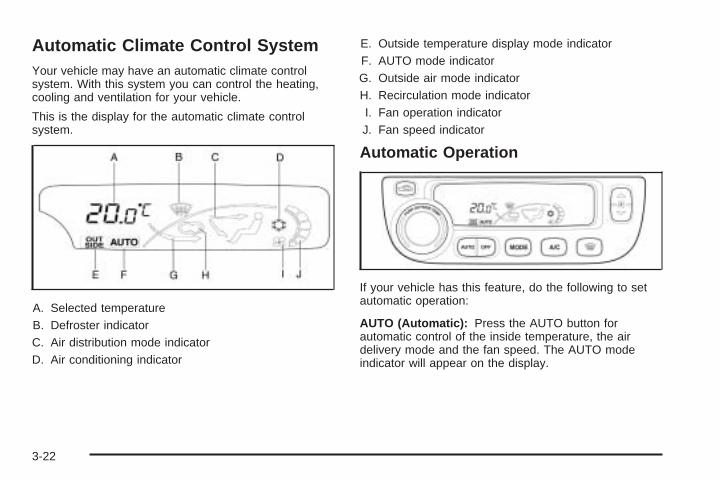
Automatic Climate Control SystemYour vehicle may have an automatic climate controlsystem. With this system you can control the heating,cooling and ventilation for your vehicle.
This is the display for the automatic climate controlsystem.
A. Selected temperatureB. Defroster indicatorC. Air distribution mode indicatorD. Air conditioning indicator
E. Outside temperature display mode indicatorF. AUTO mode indicatorG. Outside air mode indicatorH. Recirculation mode indicatorI. Fan operation indicatorJ. Fan speed indicator
Automatic Operation
If your vehicle has this feature, do the following to setautomatic operation:
AUTO (Automatic): Press the AUTO button forautomatic control of the inside temperature, the airdelivery mode and the fan speed. The AUTO modeindicator will appear on the display.
3-22
OFF: Press this button to turn the system off.
To set the desired temperature, do the following:
Press the AUTO button.
Turn the temperature control knob until the desiredtemperature is displayed. You can set the desiredtemperature between 64°F (18°C) and 90°F (32°C).
Turn the knob clockwise to increase the desiredtemperature by 1°F (0.5°C). Turn the knobcounterclockwise to decrease the desired temperatureby 1°F (0.5°C).
Do not cover the solar sensor located in the center ofthe instrument panel, near the windshield. For moreinformation on the solar sensor, see “Sensors” laterin this section.
Manual Operation
w9x (Fan): Press the up arrow to increase thefan speed and the down arrow to decrease the fanspeed. AUTO mode is cancelled when this button ispressed.
MODE: Press this button repeatedly to cycle throughand choose the mode of air delivery into the vehicle.The system will stay in the selected mode until MODE ispressed again or until the AUTO button is pressed.
Whenever MODE is pressed, the display will showthe current system settings for five seconds beforereturning the display to the exterior temperature.
E(Vent): This mode directs air to the instrument paneloutlets.
( (Bi-level): This mode directs about half of the air tothe instrument panel outlets, and then directs theremaining air to the floor outlets.
5 (Floor): This mode directs most of the air to thefloor outlets. If your vehicle has rear outlets, some of theair will also be directed to them. Be sure to keep thearea under the front seats clear to allow the flow of air tothe rear compartment.
The mode button can also be used to select the defogmode. Information on defogging and defrosting canbe found later in this section.
3-23
? (Recirculation): Press this button to keepoutside air from coming in the vehicle. It can be usedto prevent outside air and odors from entering yourvehicle or to help heat or cool the air inside your vehiclemore quickly. Press this button to turn the recirculationmode on or off.
Using the recirculation mode for extended periods maycause your windows to fog. If this happens, selectthe defrost mode.
A/C (Air Conditioning): Press this button to overridethe automatic system and turn the air conditioningsystem on or off. When A/C is pressed, the indicatorlight on the display panel will come on to let you knowthat it is activated.
Press this button again to turn the air conditioningsystem off, or press the OFF button to turn the entiresystem off.
On hot days, open the windows to let hot inside airescape; then close them. This helps to reduce the timeit takes for your vehicle to cool down. It also helpsthe system to operate more efficiently.
For quick cool down on hot days, press the AUTO buttonand the system will automatically enter recirculationmode and the temperature will be at the full cold positionfor maximum cooling.
Using these settings together for long periods of time maycause the air inside of your vehicle to become too dry.To prevent this from happening, after the air in yourvehicle has cooled, turn the recirculation mode off.
The air conditioning system removes moisture from theair, so you may sometimes notice a small amount ofwater dripping underneath your vehicle while idling orafter turning off the engine. This is normal.
Outside Temperature: To display the outsidetemperature, press the temperature control knob.Pressing this knob again will cancel the outsidetemperature display, otherwise the display will returnto the temperature inside of the vehicle after aboutfive seconds.
The outside temperature sensor is located near thefront bumper, so the displayed temperature maybe affected by road or engine heat while the vehicleis idling or traveling at slow speeds. For this reason,the displayed temperature will be most accurateat speeds over 25 mph (40 km/h).
3-24
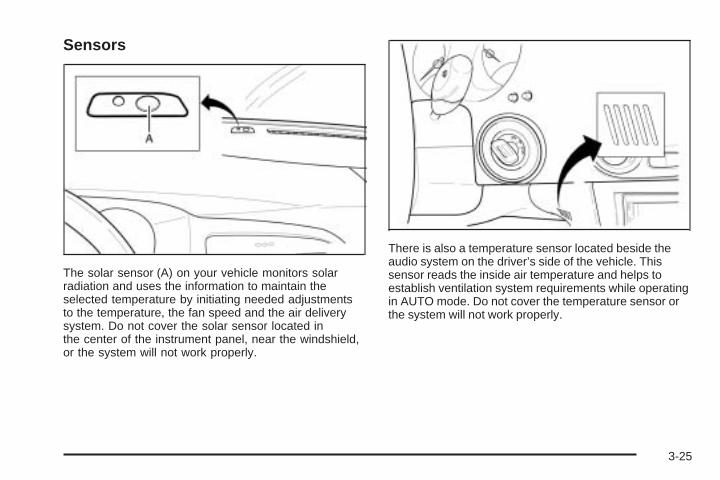
Sensors
The solar sensor (A) on your vehicle monitors solarradiation and uses the information to maintain theselected temperature by initiating needed adjustmentsto the temperature, the fan speed and the air deliverysystem. Do not cover the solar sensor located inthe center of the instrument panel, near the windshield,or the system will not work properly.
There is also a temperature sensor located beside theaudio system on the driver’s side of the vehicle. Thissensor reads the inside air temperature and helps toestablish ventilation system requirements while operatingin AUTO mode. Do not cover the temperature sensor orthe system will not work properly.
3-25
Defogging and DefrostingFog on the inside of windows is a result of high humidityor moisture condensing on the cool window glass. Thiscan be minimized if the climate control system is usedproperly. There are two modes to clear fog or frost fromyour windshield. Use the defog mode to clear thewindows of fog or moisture and warm the passengers.Use the defrost mode to remove fog or frost from thewindshield more quickly.
É (Defog): Press the MODE button until the defogsymbol appears on the automatic climate control systemdisplay.
This mode directs most of the air to the windshield andthe floor outlets. A small amount of air is also directedto the outboard outlets for the side windows.
To help clear the side windows quickly, do the following:
1. Select the bi-level mode.2. Select the highest fan speed.3. Select A/C.4. Select the temperature.
1 (Defrost): Press the defrost button to select thedefrost function.
Pressing this button directs the air to the windshield andthe outboard outlets for the side windows.
To help clear the windshield quickly, do the following:
1. Select the defrost mode.
2. Select the highest temperature.
3. Select the highest fan speed.
Do not drive the vehicle until all windows are clear.
To cancel defrost, press the MODE or AUTO buttons.If you press the AUTO button, the system will operateautomatically.
3-26
Rear Window and Outside MirrorDefoggerYour vehicle has a rear window and outside mirrordefogger. This feature will only work when the ignitionis turned to ON.
The rear window defogger uses a warming grid toremove fog or frost from the rear window. Before usingthis feature, clear as much snow from the rearwindow as possible.
<T (Rear): Press this button to turn the rearwindow and outside mirror defogger on or off. Thebutton is located below the audio system. An indicatorlight in the button will come on to let your know thatthe feature is activated.
The rear window and outside mirror defogger will turnoff about 15 minutes after the button is pressed.The defogger can also be turned off by pressing thebutton again or by turning off the engine.
Notice: Don’t use anything sharp on the inside ofthe rear window. If you do, you could cut or damagethe warming grid, and the repairs wouldn’t becovered by your warranty. Do not attach a temporaryvehicle license, tape, a decal or anything similarto the defogger grid.
3-27
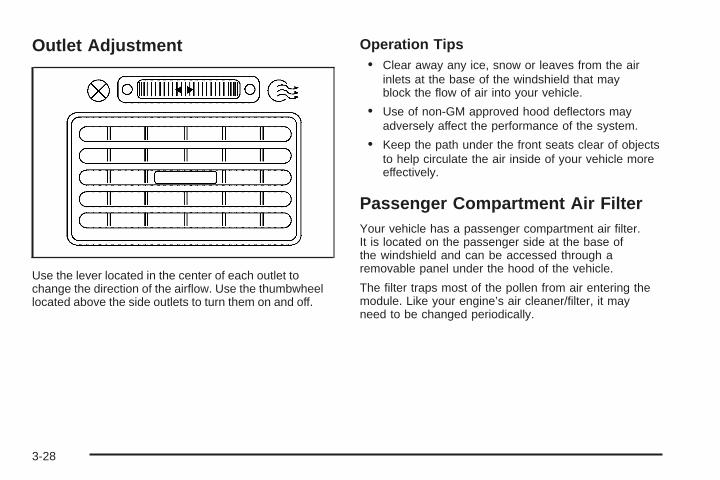
Outlet Adjustment
Use the lever located in the center of each outlet tochange the direction of the airflow. Use the thumbwheellocated above the side outlets to turn them on and off.
Operation Tips• Clear away any ice, snow or leaves from the air
inlets at the base of the windshield that mayblock the flow of air into your vehicle.
• Use of non-GM approved hood deflectors mayadversely affect the performance of the system.
• Keep the path under the front seats clear of objectsto help circulate the air inside of your vehicle moreeffectively.
Passenger Compartment Air FilterYour vehicle has a passenger compartment air filter.It is located on the passenger side at the base ofthe windshield and can be accessed through aremovable panel under the hood of the vehicle.
The filter traps most of the pollen from air entering themodule. Like your engine’s air cleaner/filter, it mayneed to be changed periodically.
3-28
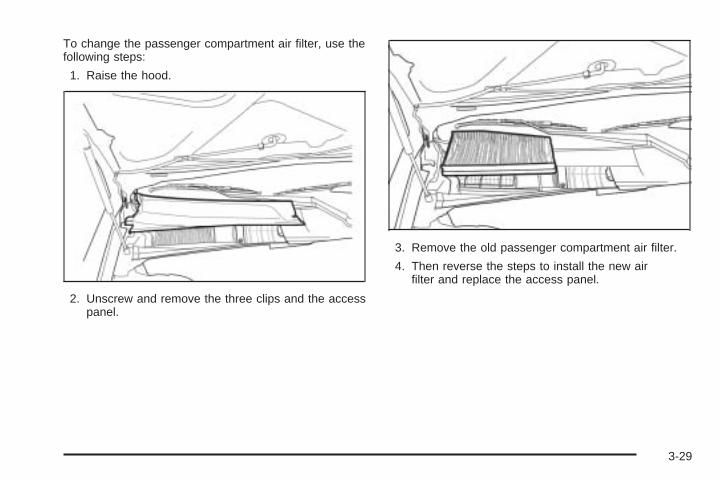
To change the passenger compartment air filter, use thefollowing steps:
1. Raise the hood.
2. Unscrew and remove the three clips and the accesspanel.
3. Remove the old passenger compartment air filter.
4. Then reverse the steps to install the new airfilter and replace the access panel.
3-29
Warning Lights, Gages, andIndicatorsThis part describes the warning lights and gages that maybe on your vehicle. The pictures will help you locate them.
Warning lights and gages can signal that something iswrong before it becomes serious enough to cause anexpensive repair or replacement. Paying attention to yourwarning lights and gages could also save you or othersfrom injury.
Warning lights come on when there may be or is aproblem with one of your vehicle’s functions. As you willsee in the details on the next few pages, some warninglights come on briefly when you start the engine just to letyou know they’re working. If you are familiar with thissection, you should not be alarmed when this happens.
Gages can indicate when there may be or is a problemwith one of your vehicle’s functions. Often gages andwarning lights work together to let you know when there’sa problem with your vehicle.
When one of the warning lights comes on and stays onwhen you are driving, or when one of the gages showsthere may be a problem, check the section that tells youwhat to do about it. Please follow this manual’s advice.Waiting to do repairs can be costly — and evendangerous. So please get to know your warning lightsand gages. They’re a big help.
3-30
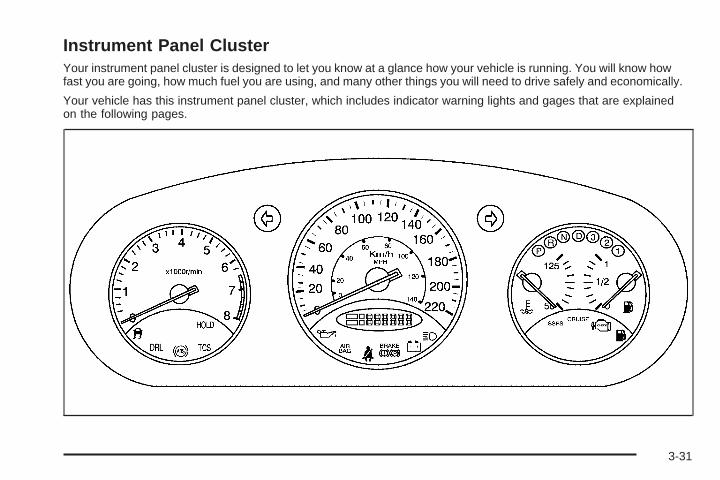
Instrument Panel ClusterYour instrument panel cluster is designed to let you know at a glance how your vehicle is running. You will know howfast you are going, how much fuel you are using, and many other things you will need to drive safely and economically.
Your vehicle has this instrument panel cluster, which includes indicator warning lights and gages that are explainedon the following pages.
3-31
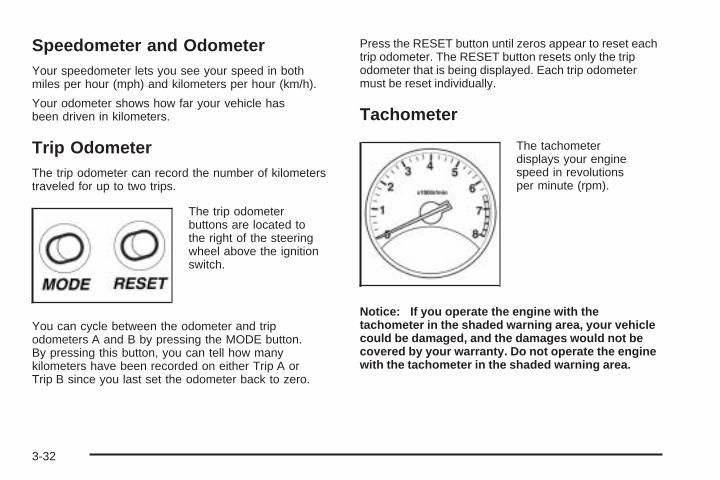
Speedometer and OdometerYour speedometer lets you see your speed in bothmiles per hour (mph) and kilometers per hour (km/h).
Your odometer shows how far your vehicle hasbeen driven in kilometers.
Trip OdometerThe trip odometer can record the number of kilometerstraveled for up to two trips.
The trip odometerbuttons are located tothe right of the steeringwheel above the ignitionswitch.
You can cycle between the odometer and tripodometers A and B by pressing the MODE button.By pressing this button, you can tell how manykilometers have been recorded on either Trip A orTrip B since you last set the odometer back to zero.
Press the RESET button until zeros appear to reset eachtrip odometer. The RESET button resets only the tripodometer that is being displayed. Each trip odometermust be reset individually.
Tachometer
The tachometerdisplays your enginespeed in revolutionsper minute (rpm).
Notice: If you operate the engine with thetachometer in the shaded warning area, your vehiclecould be damaged, and the damages would not becovered by your warranty. Do not operate the enginewith the tachometer in the shaded warning area.
3-32
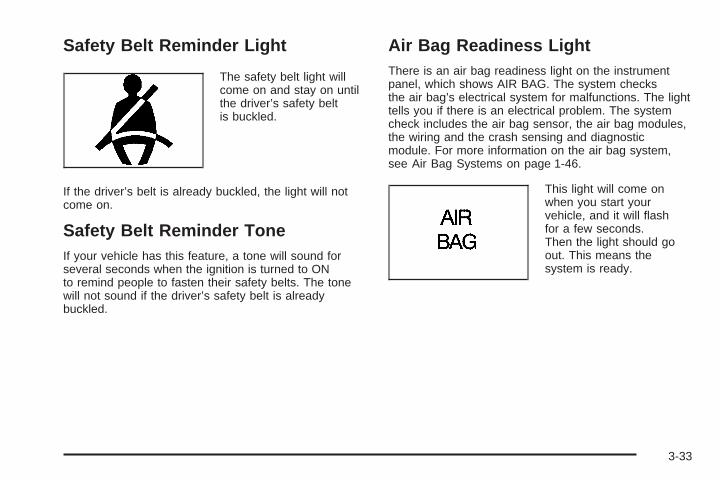
Safety Belt Reminder Light
The safety belt light willcome on and stay on untilthe driver’s safety beltis buckled.
If the driver’s belt is already buckled, the light will notcome on.
Safety Belt Reminder ToneIf your vehicle has this feature, a tone will sound forseveral seconds when the ignition is turned to ONto remind people to fasten their safety belts. The tonewill not sound if the driver’s safety belt is alreadybuckled.
Air Bag Readiness LightThere is an air bag readiness light on the instrumentpanel, which shows AIR BAG. The system checksthe air bag’s electrical system for malfunctions. The lighttells you if there is an electrical problem. The systemcheck includes the air bag sensor, the air bag modules,the wiring and the crash sensing and diagnosticmodule. For more information on the air bag system,see Air Bag Systems on page 1-46.
This light will come onwhen you start yourvehicle, and it will flashfor a few seconds.Then the light should goout. This means thesystem is ready.
3-33
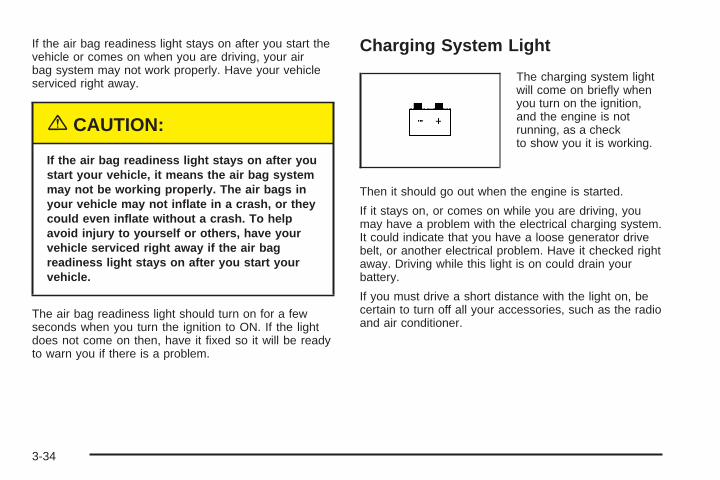
If the air bag readiness light stays on after you start thevehicle or comes on when you are driving, your airbag system may not work properly. Have your vehicleserviced right away.
{CAUTION:
If the air bag readiness light stays on after youstart your vehicle, it means the air bag systemmay not be working properly. The air bags inyour vehicle may not inflate in a crash, or theycould even inflate without a crash. To helpavoid injury to yourself or others, have yourvehicle serviced right away if the air bagreadiness light stays on after you start yourvehicle.
The air bag readiness light should turn on for a fewseconds when you turn the ignition to ON. If the lightdoes not come on then, have it fixed so it will be readyto warn you if there is a problem.
Charging System Light
The charging system lightwill come on briefly whenyou turn on the ignition,and the engine is notrunning, as a checkto show you it is working.
Then it should go out when the engine is started.
If it stays on, or comes on while you are driving, youmay have a problem with the electrical charging system.It could indicate that you have a loose generator drivebelt, or another electrical problem. Have it checked rightaway. Driving while this light is on could drain yourbattery.
If you must drive a short distance with the light on, becertain to turn off all your accessories, such as the radioand air conditioner.
3-34
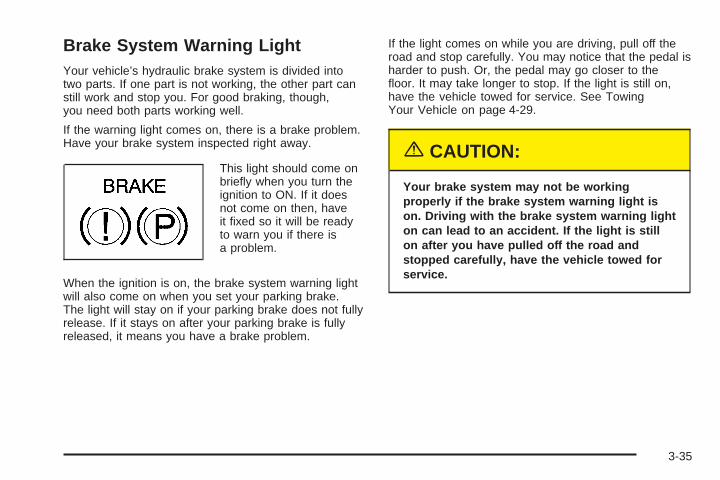
Brake System Warning LightYour vehicle’s hydraulic brake system is divided intotwo parts. If one part is not working, the other part canstill work and stop you. For good braking, though,you need both parts working well.
If the warning light comes on, there is a brake problem.Have your brake system inspected right away.
This light should come onbriefly when you turn theignition to ON. If it doesnot come on then, haveit fixed so it will be readyto warn you if there isa problem.
When the ignition is on, the brake system warning lightwill also come on when you set your parking brake.The light will stay on if your parking brake does not fullyrelease. If it stays on after your parking brake is fullyreleased, it means you have a brake problem.
If the light comes on while you are driving, pull off theroad and stop carefully. You may notice that the pedal isharder to push. Or, the pedal may go closer to thefloor. It may take longer to stop. If the light is still on,have the vehicle towed for service. See TowingYour Vehicle on page 4-29.
{CAUTION:
Your brake system may not be workingproperly if the brake system warning light ison. Driving with the brake system warning lighton can lead to an accident. If the light is stillon after you have pulled off the road andstopped carefully, have the vehicle towed forservice.
3-35
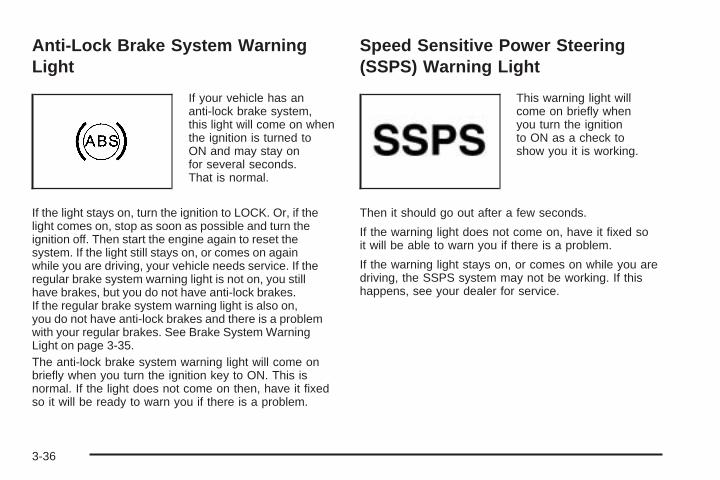
Anti-Lock Brake System WarningLight
If your vehicle has ananti-lock brake system,this light will come on whenthe ignition is turned toON and may stay onfor several seconds.That is normal.
If the light stays on, turn the ignition to LOCK. Or, if thelight comes on, stop as soon as possible and turn theignition off. Then start the engine again to reset thesystem. If the light still stays on, or comes on againwhile you are driving, your vehicle needs service. If theregular brake system warning light is not on, you stillhave brakes, but you do not have anti-lock brakes.If the regular brake system warning light is also on,you do not have anti-lock brakes and there is a problemwith your regular brakes. See Brake System WarningLight on page 3-35.The anti-lock brake system warning light will come onbriefly when you turn the ignition key to ON. This isnormal. If the light does not come on then, have it fixedso it will be ready to warn you if there is a problem.
Speed Sensitive Power Steering(SSPS) Warning Light
This warning light willcome on briefly whenyou turn the ignitionto ON as a check toshow you it is working.
Then it should go out after a few seconds.
If the warning light does not come on, have it fixed soit will be able to warn you if there is a problem.
If the warning light stays on, or comes on while you aredriving, the SSPS system may not be working. If thishappens, see your dealer for service.
3-36
Traction Control System (TCS)Warning Light
If your vehicle has theTraction Control System(TCS), this light comeson for a few secondswhen the ignition isturned to ON.
If the light does not come on, then have it fixed so it willbe ready to warn you if there is a problem.
The TCS warning light may also come on for thefollowing reasons:
• If you turn the system off by pressing the TCS buttonlocated below the shift lever, the light will come onand stay on. To turn the system back on, press thebutton again and the warning light should go out.
• If there is a brake system problem that is specificallyrelated to traction control, the TCS will turn off andthe warning light will come on. If your brakes begin tooverheat, the TCS will turn off and the warning lightwill come on until the brakes cool down.
If the TCS warning light comes on and stays on for anextended period of time when the system is turnedon, there may be a problem with your TCS and yourvehicle needs service.
When the TCS warning light is on, the system will notlimit wheel spin. Adjust your driving accordingly.
3-37
Traction Control System ActiveLight
If your vehicle has theTraction Control System(TCS), the TCS activelight comes on for afew seconds when theignition is turned to ON.
If the light does not come on, then have it fixed so it willbe ready to tell you when the system is active.
The TCS active light turns on while the traction controlfunction is actively operating.
Hold Mode Light
If your vehicle has thisfeature, this light will comeon when the hold modeis active.
If the HOLD mode light flashes, have your vehiclechecked. See “Hold Mode” under Automatic TransaxleOperation on page 2-22 for additional informationon this feature.
3-38
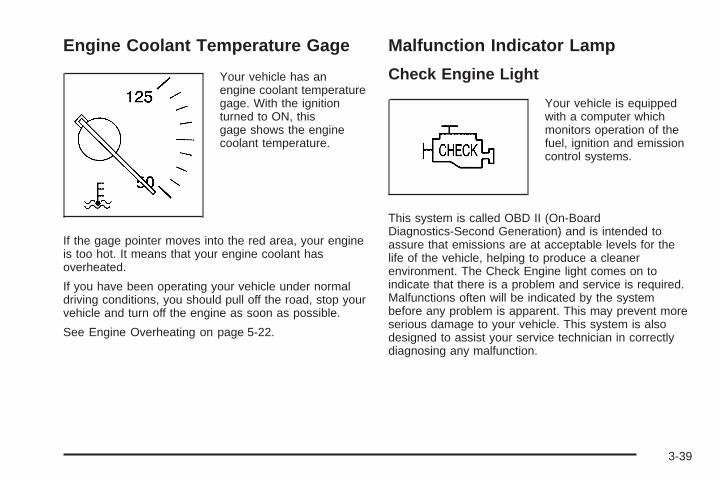
Engine Coolant Temperature Gage
Your vehicle has anengine coolant temperaturegage. With the ignitionturned to ON, thisgage shows the enginecoolant temperature.
If the gage pointer moves into the red area, your engineis too hot. It means that your engine coolant hasoverheated.
If you have been operating your vehicle under normaldriving conditions, you should pull off the road, stop yourvehicle and turn off the engine as soon as possible.
See Engine Overheating on page 5-22.
Malfunction Indicator Lamp
Check Engine Light
Your vehicle is equippedwith a computer whichmonitors operation of thefuel, ignition and emissioncontrol systems.
This system is called OBD II (On-BoardDiagnostics-Second Generation) and is intended toassure that emissions are at acceptable levels for thelife of the vehicle, helping to produce a cleanerenvironment. The Check Engine light comes on toindicate that there is a problem and service is required.Malfunctions often will be indicated by the systembefore any problem is apparent. This may prevent moreserious damage to your vehicle. This system is alsodesigned to assist your service technician in correctlydiagnosing any malfunction.
3-39
Notice: If you keep driving your vehicle with thislight on, after a while, your emission controls maynot work as well, your fuel economy may not be asgood and your engine may not run as smoothly.This could lead to costly repairs that may not becovered by your warranty.
Notice: Modifications made to the engine, transaxle,exhaust, intake or fuel system of your vehicle orreplacement tires that do not match your vehicle’soriginal tires can affect your vehicle’s emissioncontrols and may cause this light to come on.Modifications to these systems could lead to costlyrepairs not covered by your warranty. This may alsoresult in a failure to pass a required EmissionInspection/Maintenance test.
When the ignition is on, this light should come onand should go out after a few seconds as a check toshow you it is working. If the light does not comeon, have it repaired.
This light will also come on during a malfunction inone of two ways:
• Light Flashing — A misfire condition has beendetected. A misfire increases vehicle emissions andmay damage the emission control system on yourvehicle. Diagnosis and service may be required.
• Light On Steady — An emission control systemmalfunction has been detected on your vehicle.Diagnosis and service may be required.
If the Light Is FlashingThe following may prevent more serious damage toyour vehicle:
• Reducing vehicle speed.
• Avoiding hard accelerations.
• Avoiding steep uphill grades.
If the light stops flashing and remains on steady,see “If the Light Is On Steady” following.
If the light continues to flash, when it is safe to do so,stop the vehicle. Find a safe place to park your vehicle.Turn the key off, wait at least 10 seconds and restart theengine. If the light remains on steady, see “If the Light IsOn Steady” following. If the light is still flashing, follow theprevious steps, and see your dealer for service as soonas possible.
If the Light Is On SteadyYou also may be able to correct the emission systemmalfunction by considering the following:
3-40
Did you recently put fuel into your vehicle?
If so, reinstall the fuel cap, making sure to fully installthe cap. See Filling Your Tank on page 5-7. Thediagnostic system can determine if the fuel cap hasbeen left off or improperly installed. A loose or missingfuel cap will allow fuel to evaporate into the atmosphere.A few driving trips with the cap properly installedshould turn the light off.
Did you just drive through a deep puddle of water?
If so, your electrical system may be wet. The conditionwill usually be corrected when the electrical systemdries out. A few driving trips should turn the light off.
Have you recently changed brands of fuel?
If so, be sure to fuel your vehicle with quality fuel. SeeGasoline Octane on page 5-5. Poor fuel quality willcause your engine not to run as efficiently as designed.You may notice this as stalling after start-up, stallingwhen you put the vehicle into gear, misfiring, hesitationon acceleration or stumbling on acceleration. (Theseconditions may go away once the engine is warmed up.)This will be detected by the system and cause thelight to turn on.
If you experience one or more of these conditions,change the fuel brand you use. It will require at leastone full tank of the proper fuel to turn the light off.
If none of the above steps have made the light turn off,your dealer can check the vehicle. Your dealer hasthe proper test equipment and diagnostic tools to fix anymechanical or electrical problems that may havedeveloped.
Emissions Inspection and MaintenanceProgramsSome state/provincial and local governments have ormay begin programs to inspect the emission controlequipment on your vehicle. Failure to pass this inspectioncould prevent you from getting a vehicle registration.Here are some things you need to know to help yourvehicle pass an inspection:Your vehicle will not pass this inspection if the CheckEngine light is on or not working properly.Your vehicle will not pass this inspection if the OBD(on-board diagnostic) system determines that criticalemission control systems have not been completelydiagnosed by the system. The vehicle would beconsidered not ready for inspection. This can happen ifyou have recently replaced your battery or if your batteryhas run down. The diagnostic system is designed toevaluate critical emission control systems during normaldriving. This may take several days of routine driving.If you have done this and your vehicle still does not passthe inspection for lack of OBD system readiness, yourGM dealer can prepare the vehicle for inspection.
3-41
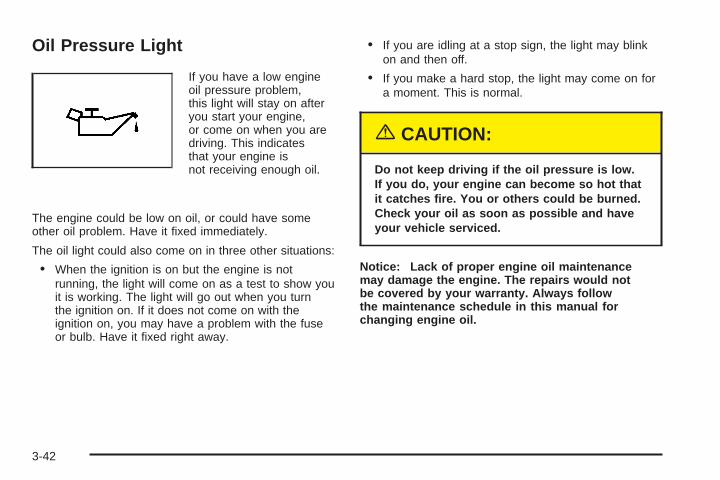
Oil Pressure Light
If you have a low engineoil pressure problem,this light will stay on afteryou start your engine,or come on when you aredriving. This indicatesthat your engine isnot receiving enough oil.
The engine could be low on oil, or could have someother oil problem. Have it fixed immediately.
The oil light could also come on in three other situations:
• When the ignition is on but the engine is notrunning, the light will come on as a test to show youit is working. The light will go out when you turnthe ignition on. If it does not come on with theignition on, you may have a problem with the fuseor bulb. Have it fixed right away.
• If you are idling at a stop sign, the light may blinkon and then off.
• If you make a hard stop, the light may come on fora moment. This is normal.
{CAUTION:
Do not keep driving if the oil pressure is low.If you do, your engine can become so hot thatit catches fire. You or others could be burned.Check your oil as soon as possible and haveyour vehicle serviced.
Notice: Lack of proper engine oil maintenancemay damage the engine. The repairs would notbe covered by your warranty. Always followthe maintenance schedule in this manual forchanging engine oil.
3-42
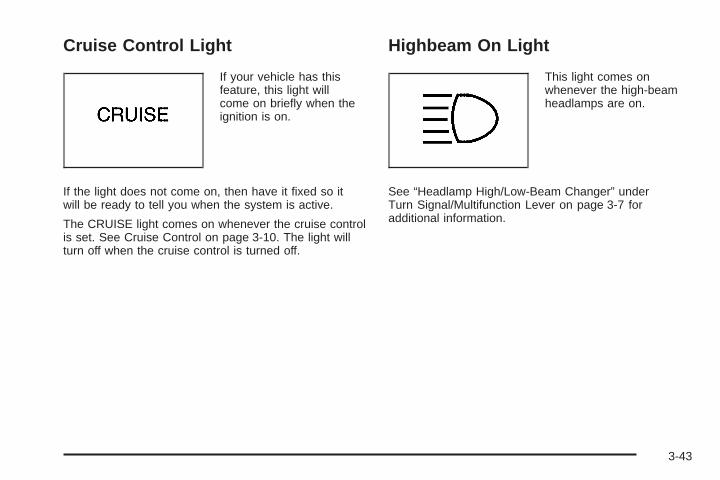
Cruise Control Light
If your vehicle has thisfeature, this light willcome on briefly when theignition is on.
If the light does not come on, then have it fixed so itwill be ready to tell you when the system is active.
The CRUISE light comes on whenever the cruise controlis set. See Cruise Control on page 3-10. The light willturn off when the cruise control is turned off.
Highbeam On Light
This light comes onwhenever the high-beamheadlamps are on.
See “Headlamp High/Low-Beam Changer” underTurn Signal/Multifunction Lever on page 3-7 foradditional information.
3-43
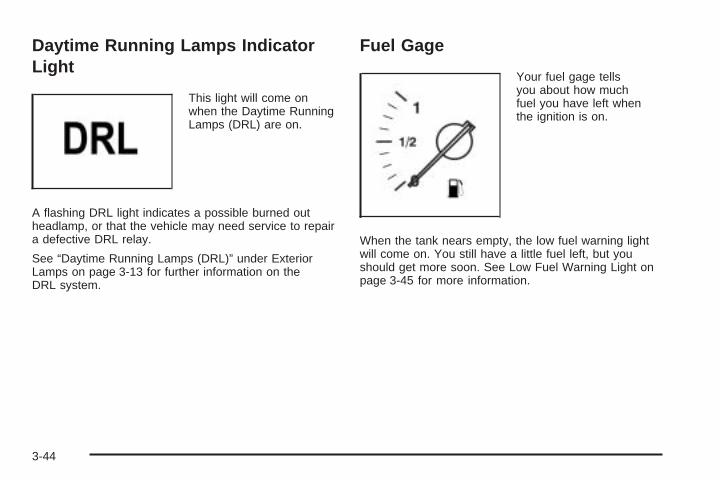
Daytime Running Lamps IndicatorLight
This light will come onwhen the Daytime RunningLamps (DRL) are on.
A flashing DRL light indicates a possible burned outheadlamp, or that the vehicle may need service to repaira defective DRL relay.
See “Daytime Running Lamps (DRL)” under ExteriorLamps on page 3-13 for further information on theDRL system.
Fuel Gage
Your fuel gage tellsyou about how muchfuel you have left whenthe ignition is on.
When the tank nears empty, the low fuel warning lightwill come on. You still have a little fuel left, but youshould get more soon. See Low Fuel Warning Light onpage 3-45 for more information.
3-44
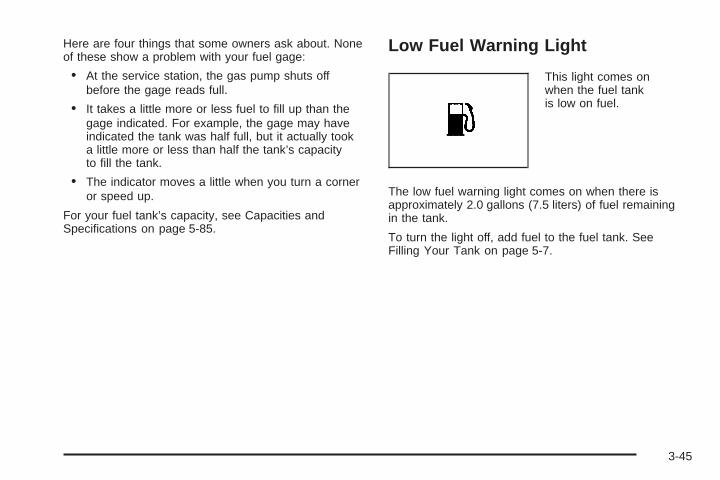
Here are four things that some owners ask about. Noneof these show a problem with your fuel gage:
• At the service station, the gas pump shuts offbefore the gage reads full.
• It takes a little more or less fuel to fill up than thegage indicated. For example, the gage may haveindicated the tank was half full, but it actually tooka little more or less than half the tank’s capacityto fill the tank.
• The indicator moves a little when you turn a corneror speed up.
For your fuel tank’s capacity, see Capacities andSpecifications on page 5-85.
Low Fuel Warning Light
This light comes onwhen the fuel tankis low on fuel.
The low fuel warning light comes on when there isapproximately 2.0 gallons (7.5 liters) of fuel remainingin the tank.
To turn the light off, add fuel to the fuel tank. SeeFilling Your Tank on page 5-7.
3-45
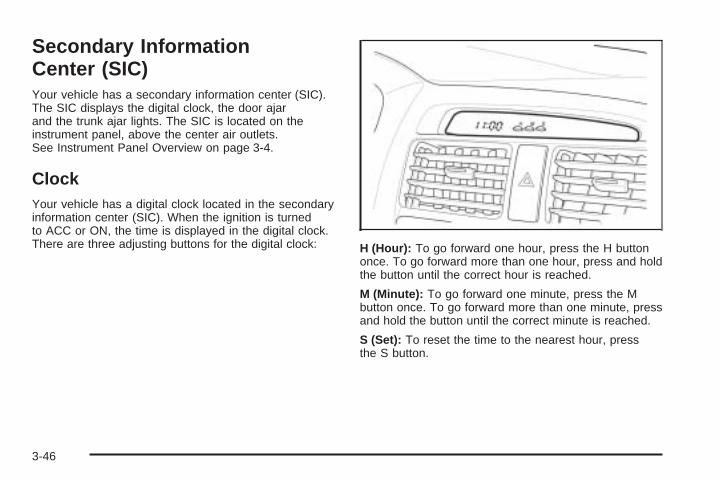
Secondary InformationCenter (SIC)Your vehicle has a secondary information center (SIC).The SIC displays the digital clock, the door ajarand the trunk ajar lights. The SIC is located on theinstrument panel, above the center air outlets.See Instrument Panel Overview on page 3-4.
ClockYour vehicle has a digital clock located in the secondaryinformation center (SIC). When the ignition is turnedto ACC or ON, the time is displayed in the digital clock.There are three adjusting buttons for the digital clock: H (Hour): To go forward one hour, press the H button
once. To go forward more than one hour, press and holdthe button until the correct hour is reached.
M (Minute): To go forward one minute, press the Mbutton once. To go forward more than one minute, pressand hold the button until the correct minute is reached.
S (Set): To reset the time to the nearest hour, pressthe S button.
3-46
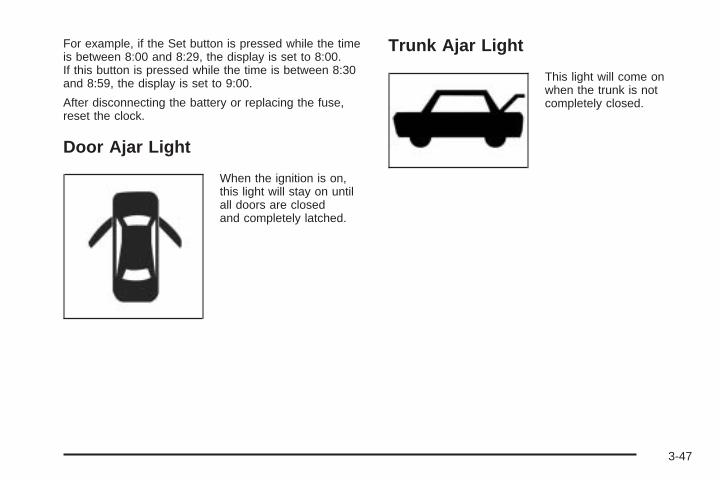
For example, if the Set button is pressed while the timeis between 8:00 and 8:29, the display is set to 8:00.If this button is pressed while the time is between 8:30and 8:59, the display is set to 9:00.
After disconnecting the battery or replacing the fuse,reset the clock.
Door Ajar Light
When the ignition is on,this light will stay on untilall doors are closedand completely latched.
Trunk Ajar Light
This light will come onwhen the trunk is notcompletely closed.
3-47
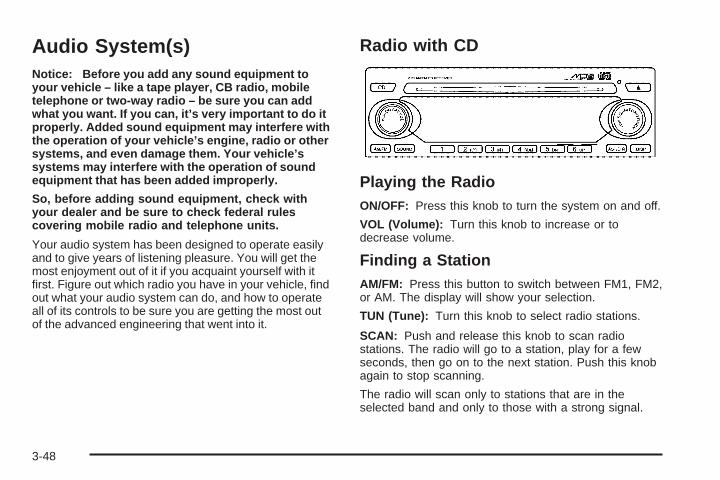
Audio System(s)Notice: Before you add any sound equipment toyour vehicle – like a tape player, CB radio, mobiletelephone or two-way radio – be sure you can addwhat you want. If you can, it’s very important to do itproperly. Added sound equipment may interfere withthe operation of your vehicle’s engine, radio or othersystems, and even damage them. Your vehicle’ssystems may interfere with the operation of soundequipment that has been added improperly.
So, before adding sound equipment, check withyour dealer and be sure to check federal rulescovering mobile radio and telephone units.
Your audio system has been designed to operate easilyand to give years of listening pleasure. You will get themost enjoyment out of it if you acquaint yourself with itfirst. Figure out which radio you have in your vehicle, findout what your audio system can do, and how to operateall of its controls to be sure you are getting the most outof the advanced engineering that went into it.
Radio with CD
Playing the RadioON/OFF: Press this knob to turn the system on and off.
VOL (Volume): Turn this knob to increase or todecrease volume.
Finding a StationAM/FM: Press this button to switch between FM1, FM2,or AM. The display will show your selection.
TUN (Tune): Turn this knob to select radio stations.
SCAN: Push and release this knob to scan radiostations. The radio will go to a station, play for a fewseconds, then go on to the next station. Push this knobagain to stop scanning.
The radio will scan only to stations that are in theselected band and only to those with a strong signal.
3-48
Setting Preset StationsThe six numbered pushbuttons let you return to yourfavorite stations. You can set up to 18 stations (six FM1,six FM2, and six AM), by performing the following steps:
1. Turn the radio on.
2. Press AM/FM to select FM1, FM2, or AM.
3. Tune in the desired station.
4. Press and hold one of the six numbered pushbuttonsfor longer than two seconds. The pushbutton numberwill flash on the display when the station has beenset. Whenever you press that numbered pushbutton,the station you set will return.
5. Repeat the steps for each pushbutton.
Automatic StoreYou can also automatically store six FM1 preset stationswith the strongest reception in the region. Press the ASTbutton for longer than one second. Once the stations arestored, the radio will switch to FM1 and the first presetstation will begin to play. FM-A will appear on the displaywhen listening to the automatic stored stations. Press theAM-FM button to cancel automatic store.
Setting the Tone (Bass/Treble)
SOUND (Bass/Treble): Press this button until BASappears on the display. Then turn the volume knob toincrease or to decrease the bass. The display will showthe bass level. When finished making your selection,press this button to select the bass level.
Press this button until TRE appears on the display.Then turn the volume knob to increase or to decreasethe treble. The display will show the treble level.When finished making your selection, press this buttonto select the treble level. If a station is weak or noisy,you may want to decrease the treble.
SOUND (Equalization): Press this button until EQ OFFappears on the display to select customized equalizationsettings designed for classic, pop, rock, jazz, and voice.Then turn the volume knob until the desired equalizationsetting appears on the display. When finished makingyour selection, press the SOUND button to select theequalization setting.
To cancel an equalization setting, press the SOUNDbutton until EQ OFF appears on the display, turn thevolume knob until OFF appears on the display, thenpress the SOUND button again to select the equalizationsetting.
3-49
Adjusting the Speakers (Balance/Fade)SOUND (Balance/Fade): To adjust the balancebetween the right and the left speakers, press this buttonuntil BAL appears on the display. Then turn the volumeknob to increase or to decrease the balance between theright and the left speakers. The display will show thebalance level. When finished making your selection,press this button to select the balance level.To adjust the fade between the front and the rearspeakers, press this button until FAD appears on thedisplay. Then turn the volume knob to increase or todecrease the fade between the front and the rearspeakers. The display will show the fade level. Whenfinished making your selection, press this button toselect the fade level.
Playing a CDInsert a CD partway into the slot, label side up. Theplayer will pull it in and the CD should begin playing.You can insert a CD with the ignition off.When the CD is inserted, CDP will appear on thedisplay. As the CD is loading Filecheck will appear onthe display. As each new track starts to play, Trackand the track number will appear on the display.If you turn off the ignition or radio with a CD in theplayer, it will stay in the player. When you turn on theignition or radio, the CD will start playing where itstopped, if it was the last selected audio source.
The CD player can play the smaller 8 cm single CDswith an adapter ring. Full-size CDs and the smaller CDsare loaded in the same manner.
If playing a CD-R the sound quality may be reduceddue to CD-R quality, the method of recording, the qualityof the music that has been recorded, and the way theCD-R has been handled. You may experience anincrease in skipping, difficulty in finding tracks, and/ordifficulty in loading and ejecting. If these problems occurtry a known good CD.
Do not add paper labels to CDs, they could get caughtin the CD player.
Do not play 3 inch CDs without a standard adapter CD.
If an error appears on the display, see “CD Messages”later in this section.
2 RPT (Repeat): Press this pushbutton to repeat thecurrent track. RPT will appear on the display. Press thispushbutton again to turn off repeat play.
3 INT (SCAN): Press this button to listen to the first fewseconds of each track on each CD inserted. INTROwill appear on the display. To stop scanning press thisbutton again. The current track will begin to play.
3-50
4 RDM (Random): Press this pushbutton to hear thetracks in random, rather than sequential, order. RDMwill appear on the display. Press this pushbutton againto turn off random play.
TRACK (Previous/Next Track): Turn this knob onenotch to go to the start of the current track or to go tothe next track. The track number will appear on thedisplay. The player will continue moving backward orforward through the CD with each turn of the knob.
TUN (Forward/Reverse): Push and hold this knob tofast forward or to reverse through the current track.
AM/FM: Press this button to listen to the radio whena CD is playing. The inactive CD will remain safelyinside the radio for future listening.
CD: Press this button to play a CD when listening tothe radio. CDP will appear on the display when theCD player has been selected.
Press this button while a CD is playing to pause theCD. Track and the track number will flash on the display.Press this button again to start playing the CD.
X (Eject): Press this button to eject a CD. Eject maybe activated with either the ignition or radio off.
Using an MP3 CDMP3 FormatThis MP3 player will accept MP3 files that were recordedon an up to 700 MB CD-R CD. The files can be recordedwith the following fixed bit rates: 32 kbps, 40 kpbs,56 kpbs, 64 kpbs, 80 kpbs, 96 kpbs, 112 kpbs, 128 kpbs,160 kpbs, 192 kpbs, 224 kpbs, 256 kpbs, and 320 kpbsor a variable bit rate. Song title, artist name, and albumwill be available when recorded using ID3 tags versions1 and 2.
The player will be able to read and play a maximum of50 folders, 50 playlists, 10 sessions, and 255 files. Longfile, folder, or playlist names or a combination of a largenumber of files and folders or playlists may cause theplayer to be unable to play up to the maximum numberof files, folders, playlists, or sessions. If you wish to playlarge numbers of files, folders, playlists or sessionsminimize the length of the file, folder or playlist name.You can also play an MP3 CD that was recorded using nofile folders. The system can support up to 11 folders indepth, though, keep the depth of the folders to a minimumin order to keep down the complexity and confusion intrying to locate a particular folder during playback. If aCD contains more than the maximum of 50 folders,50 playlists, 10 sessions, and 255 files the player will letyou access and navigate up to the maximum, but allitems over the maximum will be ignored.
3-51
Root DirectoryThe root directory will be treated as a folder. If the rootdirectory has compressed audio files, the directorywill be displayed as F1 ROOT. All files contained directlyunder the root directory will be accessed prior to anyroot directory folders. However, playlists (Px) will alwaysbe accessed before root folders or files.
Empty Directory or FolderIf a root directory or a folder exists somewhere in thefile structure that contains only folders/subfolders and nocompressed files directly beneath them, the player willadvance to the next folder in the file structure thatcontains compressed audio files and the empty folderwill not be displayed or numbered.
No FolderWhen the CD contains only compressed files, the files willbe located under the root folder. The next and previousfolder functions will have no function on a CD that wasrecorded without folders or playlists. When displaying thename of the folder the radio will display ROOT.
When the CD contains only playlists and compressedaudio files, but no folders, all files will be located underthe root folder. The folder down and the folder up buttonswill search playlists (Px) first and then go to the rootfolder. When the radio displays the name of the folder theradio will display ROOT.
Order of PlayTracks will be played in the following order:
• Play will begin from the first track in the first playlistand will continue sequentially through all tracks ineach playlist. When the last track of the last playlisthas been played, play will continue from the firsttrack of the first playlist.
• If the CD does not contain any playlists, then playwill begin from the first track under the rootdirectory. When all tracks from the root directoryhave been played, play will continue from filesaccording to their numerical listing. After playing thelast track from the last folder, play will beginagain at the first track of the first folder or rootdirectory.
When play enters a new folder, the display will notautomatically show the new folder name unlessyou have chosen the folder mode as the default display,see DISPL later in this section. The new track namewill be displayed.
3-52
File System and NamingThe song name that will be displayed will be the songname that is contained in the ID3 tag. If the song nameis not present in the ID3 tag, then the radio willdisplay the file name without the extension (suchas.mp3) as the track name.
Track names longer than 32 characters or 4 pageswill be shortened. The display will not show partsof words on the last page of text and the extension ofthe filename will not be displayed.
Preprogrammed PlaylistsYou can access preprogrammed playlists which werecreated by WinAmp™, MusicMatch™, or RealJukebox™ software, however, you will not have editingcapability. These playlists will be treated as specialfolders containing compressed audio song files.
Playing an MP3With the ignition on, insert a CD partway into the slot,label side up. The player will pull it in, Loading, thenFilecheck, then MP3 will appear on the display. TheCD should begin playing. You can insert a CD withthe ignition off.
As each new track starts to play, F001, the tracknumber, and the song name will appear on the display.
If you turn off the ignition or radio with a CD in theplayer, it will stay in the player. When you turn on theignition or radio, the CD will start playing where itstopped, if it was the last selected audio source.
The CD player can play the smaller 8cm single CDswith an adapter ring. Full-size CDs and the smallerCDs are loaded in the same manner.
If playing a CD-R the sound quality may be reduceddue to CD-R quality, the method of recording, the qualityof the music that has been recorded, and the way theCD-R has been handled. You may experience anincrease in skipping, difficulty in finding tracks and/ordifficulty in loading and ejecting. If these problems occurtry a known good CD.
Do not add paper labels to CDs, they could get caughtin the CD player.
Do not play 3 inch CDs without a standard adapter CD.
If an error appears on the display, see “CD Messages”later in this section.
3-53
All of the CD functions work the same while playingan MP3, except for those listed here. See “Playing a CD”earlier for more information.
5 DN (Down): Press this pushbutton to go to theprevious directory.
6 UP: Press this pushbutton to go to the next directory.
TRACK (Previous/Next File): Turn this knob onenotch to go to the first track in the previous or to goto the next folder. The player will continue movingbackward or forward through the CD with each turnof the knob.
DIR (Directory): Press and release this button to repeatthe tracks in the current directory. DIR will appear on thedisplay.
Press and release this button twice to repeat the tracksin all of the directories. ALL will appear on the display.
Press and release this button again to turn offrepeat play.
CD MessagesCHECK CD: If this message appears on the displayand the CD comes out, it could be for one of thefollowing reasons:
• It is very hot. When the temperature returns tonormal, the CD should play.
• You are driving on a very rough road. When theroad becomes smooth, the CD should play.
• The CD is dirty, scratched, wet, or upside down.
• The air is very humid. If so, wait about an hourand try again.
• The format of the CD may not be compatible.See “MP3 Format” earlier in this section.
• There may have been a problem while burningthe CD.
• The label may be caught in the CD player.
If the CD is not playing correctly, for any other reason,try a known good CD.
If any error occurs repeatedly or if an error cannot becorrected, contact your dealer. If the radio displaysan error message, write it down and provide it to yourdealer when reporting the problem.
3-54
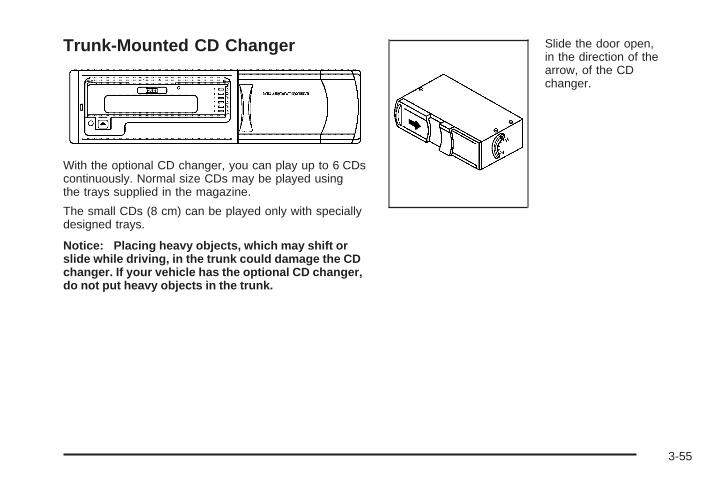
Trunk-Mounted CD Changer
With the optional CD changer, you can play up to 6 CDscontinuously. Normal size CDs may be played usingthe trays supplied in the magazine.
The small CDs (8 cm) can be played only with speciallydesigned trays.
Notice: Placing heavy objects, which may shift orslide while driving, in the trunk could damage the CDchanger. If your vehicle has the optional CD changer,do not put heavy objects in the trunk.
Slide the door open,in the direction of thearrow, of the CDchanger.
3-55
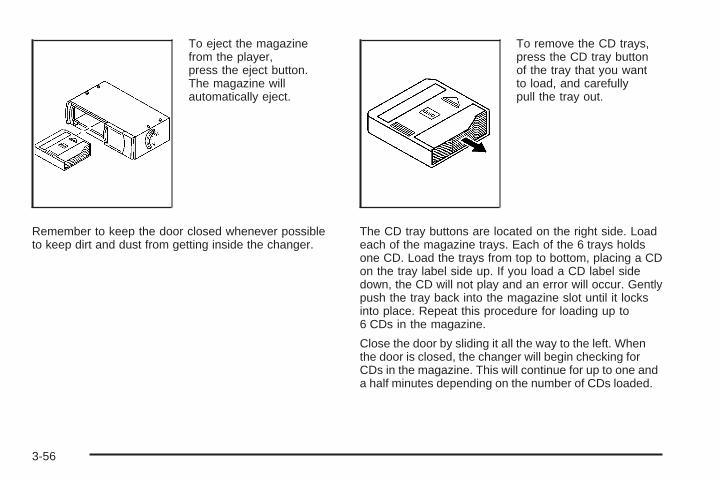
To eject the magazinefrom the player,press the eject button.The magazine willautomatically eject.
Remember to keep the door closed whenever possibleto keep dirt and dust from getting inside the changer.
To remove the CD trays,press the CD tray buttonof the tray that you wantto load, and carefullypull the tray out.
The CD tray buttons are located on the right side. Loadeach of the magazine trays. Each of the 6 trays holdsone CD. Load the trays from top to bottom, placing a CDon the tray label side up. If you load a CD label sidedown, the CD will not play and an error will occur. Gentlypush the tray back into the magazine slot until it locksinto place. Repeat this procedure for loading up to6 CDs in the magazine.
Close the door by sliding it all the way to the left. Whenthe door is closed, the changer will begin checking forCDs in the magazine. This will continue for up to one anda half minutes depending on the number of CDs loaded.
3-56
Whenever a CD magazine with CDs is loaded in thechanger and the door is closed, the CD symbol willappear on the radio display. If the CD changer ischecking the magazine for CDs, the CD symbol will flashon the display until the changer is ready to play. If CDchanger mode is entered during initialization, LOADINGwill appear on the display. When a CD begins playing,a CD and track number will appear on the radio display.The CD numbers are listed on the front of the magazine.All of the CD functions are controlled by the radiopushbuttons except for ejecting the magazine.
Playing a CDIf an error appears on the display, see “CD Messages”later in this section.The following buttons are used for the trunk-mountedCD changer.
TRACK (Reverse/Fast Forward): Turn this knobcounterclockwise or clockwise to select the previous ornext track on the current CD.
Push and hold this knob counterclockwise to quicklyreverse or clockwise to quickly advance within a track.As the CD advances, the elapsed time of the trackwill appear on the display.
5 DN (Previous): Press and hold this pushbutton toselect the previous CD in the magazine.
6 UP (Next): Press and hold this pushbutton to selectthe next CD in the magazine.
2 RPT (Repeat): Press this pushbutton to repeat thecurrent track RPT will appear on the display. Press thispushbutton again to turn off repeat play.
3 INT (Scan): To scan the tracks on the current CD,press this pushbutton until INTRO appears on thedisplay. You will hear the first ten seconds of each trackon the CD. To stop scanning, press this pushbuttonagain.
4 RDM (Random): Press this pushbutton to listen tothe tracks on the current CD in random, rather thansequential, order. RDM will appear on the display.Press this pushbutton again to turn off random play.While in random, you can turn the tune knob to selectanother track.
AM/FM: Press this button to listen to the radio whenplaying a CD.
CD: Press this button to play a CD when listening tothe radio. CDC will appear on the display when the CDchanger has been selected.
Press this button while a CD is playing to pause theCD. Press this button again to resume play.
3-57
CD Messages
No Maga: An empty magazine is inserted in the CDchanger. Try the magazine again with a CD loadedin one of the trays.
If the CD is not playing correctly, for any other reason,try a known good CD.
If any error occurs repeatedly or if an error cannot becorrected, contact your dealer. If your radio displays anerror message, write it down and provide it to yourdealer when reporting the problem.
Theft-Deterrent FeatureThe theft-deterrent system is designed to discouragetheft of your radio. When the radio and vehicle areturned off, your radio has a blinking red light to indicatethat the theft-deterrent system is activated.
The theft-deterrent system also activates when theaudio system has been disconnected from the battery.When this occurs, the AF code and security codewill have to be entered in order to operate your radio.An identification card stamped with the AF codeand security code will be provided with the vehicle.Keep it in a safe place, not in the vehicle.
To enter the security code do the following:
1. Turn the ignition to ACC or ON.
2. Turn the radio on. AF or COdE will flash on thedisplay. If AF flashes on the display, go to Step2. If COdE flashes on the display, go to Step 4.
3. Enter the AF code by using the preset pushbuttons.COdE will flash on the display.
4. Enter the security code by using the presetpushbuttons. When the complete security code isentered, the code will flash three times.If the security code is not entered correctly, Err willappear on the display for a few seconds. WhenCOdE appears back on the display, repeat Step 4.If the incorrect AF code is entered, an incorrectfrequency level may be chosen and the radioreception may be affected. If this occurs, reset theaudio system by removing and re-installing theAUDIO fuse. See “Instrument Panel Fuse Block”under Fuses and Circuit Breakers on page 5-79 formore information. Then repeat Steps 1 through 4.
3-58
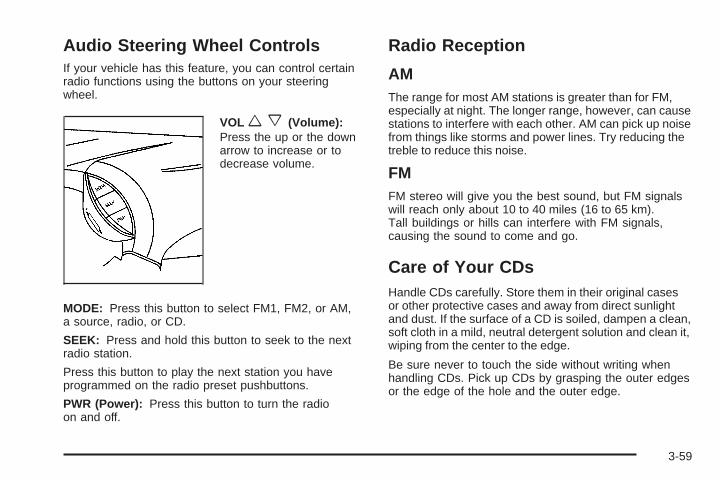
Audio Steering Wheel ControlsIf your vehicle has this feature, you can control certainradio functions using the buttons on your steeringwheel.
VOLwx (Volume):Press the up or the downarrow to increase or todecrease volume.
MODE: Press this button to select FM1, FM2, or AM,a source, radio, or CD.
SEEK: Press and hold this button to seek to the nextradio station.
Press this button to play the next station you haveprogrammed on the radio preset pushbuttons.
PWR (Power): Press this button to turn the radioon and off.
Radio Reception
AMThe range for most AM stations is greater than for FM,especially at night. The longer range, however, can causestations to interfere with each other. AM can pick up noisefrom things like storms and power lines. Try reducing thetreble to reduce this noise.
FMFM stereo will give you the best sound, but FM signalswill reach only about 10 to 40 miles (16 to 65 km).Tall buildings or hills can interfere with FM signals,causing the sound to come and go.
Care of Your CDsHandle CDs carefully. Store them in their original casesor other protective cases and away from direct sunlightand dust. If the surface of a CD is soiled, dampen a clean,soft cloth in a mild, neutral detergent solution and clean it,wiping from the center to the edge.
Be sure never to touch the side without writing whenhandling CDs. Pick up CDs by grasping the outer edgesor the edge of the hole and the outer edge.
3-59
Care of Your CD PlayerThe use of CD lens cleaners for CD players is notadvised, due to the risk of contaminating the lens of theCD optics with lubricants internal to the CD mechanism.
Backglass AntennaThe AM-FM antenna is integrated with the rear windowdefogger, located in the rear window. Be sure that theinside surface of the rear window is not scratched andthat the lines on the glass are not damaged. If theinside surface is damaged, it could interfere with radioreception. Also, for proper radio reception, the antennaconnector at the top-center of the rear window needsto be properly attached to the post on the glass.
Notice: Using a razor blade or sharp object to clearthe inside rear window may damage the rear windowantenna and/or the rear window defogger. Repairswould not be covered by your warranty. Do not clearthe inside rear window with sharp objects.
Notice: Do not apply aftermarket glass tinting withmetallic film. The metallic film in some tintingmaterials will interfere with or distort the incomingradio reception. Any damage caused to yourbackglass antenna due to metallic tinting materialswill not be covered by your warranty.
Because this antenna is built into your rear window, thereis a reduced risk of damage caused by car washes andvandals.
If you choose to add a cellular telephone to your vehicle,and the antenna needs to be attached to the glass, besure that you do not damage the grid lines for the AM-FMantenna. There is enough space between the lines toattach a cellular telephone antenna without interferingwith radio reception.
Do not apply aftermarket glass tinting to the back glass.The metallic film in some tinting materials will interferewith or distort the incoming radio reception. Caremust be taken when cleaning the rear window becauseit breaks in the resistive material heating elementand will adversely affect radio and defoggerperformance. See your dealer for details.
3-60
Your Driving, the Road, and Your Vehicle ..........4-2Defensive Driving ...........................................4-2Drunken Driving .............................................4-2Control of a Vehicle ........................................4-5Braking .........................................................4-6Traction Control System (TCS) .........................4-8Steering ......................................................4-10Off-Road Recovery .......................................4-12Passing .......................................................4-12Loss of Control .............................................4-14Driving at Night ............................................4-15Driving in Rain and on Wet Roads ..................4-16City Driving ..................................................4-19
Freeway Driving ...........................................4-20Before Leaving on a Long Trip .......................4-21Highway Hypnosis ........................................4-22Hill and Mountain Roads ................................4-22Winter Driving ..............................................4-24If You Are Stuck: In Sand, Mud,
Ice or Snow ..............................................4-28Towing ..........................................................4-29
Towing Your Vehicle .....................................4-29Recreational Vehicle Towing ...........................4-29Loading Your Vehicle ....................................4-31Towing a Trailer ...........................................4-35
Section 4 Driving Your Vehicle
4-1
Your Driving, the Road, andYour VehicleDefensive DrivingThe best advice anyone can give about driving is: Drivedefensively.
Please start with a very important safety device in yourvehicle: Buckle up. See Safety Belts: They Are forEveryone on page 1-10.
Defensive driving really means “be ready for anything.”On city streets, rural roads or freeways, it means“always expect the unexpected.”
Assume that pedestrians or other drivers are going to becareless and make mistakes. Anticipate what they mightdo. Be ready for their mistakes.
Rear-end collisions are about the most preventable ofaccidents. Yet they are common. Allow enough followingdistance. It is the best defensive driving maneuver, inboth city and rural driving. You never know when thevehicle in front of you is going to brake or turn suddenly.
Defensive driving requires that a driver concentrate onthe driving task. Anything that distracts from thedriving task — such as concentrating on a cellulartelephone call, reading, or reaching for something onthe floor — makes proper defensive driving more difficultand can even cause a collision, with resulting injury.
Ask a passenger to help do things like this, or pull offthe road in a safe place to do them yourself. Thesesimple defensive driving techniques could save your life.
Drunken DrivingDeath and injury associated with drinking and drivingis a national tragedy. It is the number one contributor tothe highway death toll, claiming thousands of victimsevery year.
Alcohol affects four things that anyone needs to drivea vehicle:
• Judgment
• Muscular Coordination
• Vision
• Attentiveness.
Police records show that almost half of all motorvehicle-related deaths involve alcohol. In most cases,these deaths are the result of someone who wasdrinking and driving. In recent years, more than16,000 annual motor vehicle-related deaths have beenassociated with the use of alcohol, with more than300,000 people injured.
4-2

Many adults — by some estimates, nearly half the adultpopulation — choose never to drink alcohol, so theynever drive after drinking. For persons under 21, it isagainst the law in every U.S. state to drink alcohol.There are good medical, psychological anddevelopmental reasons for these laws.
The obvious way to eliminate the leading highway safetyproblem is for people never to drink alcohol and thendrive. But what if people do? How much is “too much” ifsomeone plans to drive? It is a lot less than many mightthink. Although it depends on each person and situation,here is some general information on the problem.
The Blood Alcohol Concentration (BAC) of someonewho is drinking depends upon four things:
• The amount of alcohol consumed
• The drinker’s body weight
• The amount of food that is consumed before andduring drinking
• The length of time it has taken the drinker toconsume the alcohol.
According to the American Medical Association, a 180 lb(82 kg) person who drinks three 12 ounce (355 ml)bottles of beer in an hour will end up with a BAC of about0.06 percent. The person would reach the same BAC bydrinking three 4 ounce (120 ml) glasses of wine or threemixed drinks if each had 1-1/2 ounces (45 ml) of liquorslike whiskey, gin or vodka.
It is the amount of alcohol that counts. For example, ifthe same person drank three double martinis (3 ouncesor 90 ml of liquor each) within an hour, the person’sBAC would be close to 0.12 percent. A personwho consumes food just before or during drinking willhave a somewhat lower BAC level.
4-3
There is a gender difference, too. Women generallyhave a lower relative percentage of body waterthan men. Since alcohol is carried in body water, thismeans that a woman generally will reach a higher BAClevel than a man of her same body weight will wheneach has the same number of drinks.
The law in an increasing number of U.S. states, andthroughout Canada, sets the legal limit at 0.08 percent.In some other countries, the limit is even lower. Forexample, it is 0.05 percent in both France and Germany.The BAC limit for all commercial drivers in the UnitedStates is 0.04 percent.
The BAC will be over 0.10 percent after three tosix drinks (in one hour). Of course, as we have seen,it depends on how much alcohol is in the drinks,and how quickly the person drinks them.
But the ability to drive is affected well below a BAC of0.10 percent. Research shows that the driving skillsof many people are impaired at a BAC approaching0.05 percent, and that the effects are worse at night. Alldrivers are impaired at BAC levels above 0.05 percent.
Statistics show that the chance of being in a collisionincreases sharply for drivers who have a BAC of0.05 percent or above. A driver with a BAC level of0.06 percent has doubled his or her chance of having acollision. At a BAC level of 0.10 percent, the chanceof this driver having a collision is 12 times greater; at alevel of 0.15 percent, the chance is 25 times greater!
The body takes about an hour to rid itself of the alcoholin one drink. No amount of coffee or number of coldshowers will speed that up. “I will be careful” is not theright answer. What if there is an emergency, a need totake sudden action, as when a child darts into the street?A person with even a moderate BAC might not be able toreact quickly enough to avoid the collision.
There is something else about drinking and driving thatmany people do not know. Medical research shows thatalcohol in a person’s system can make crash injuriesworse, especially injuries to the brain, spinal cord orheart. This means that when anyone who has beendrinking — driver or passenger — is in a crash, thatperson’s chance of being killed or permanently disabledis higher than if the person had not been drinking.
4-4
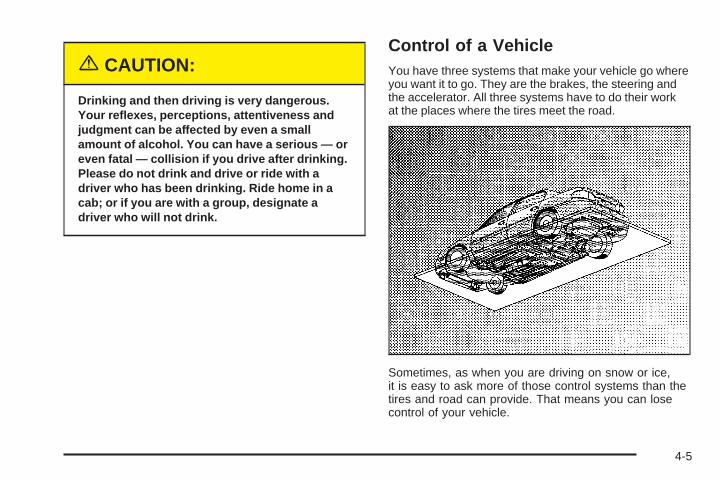
{CAUTION:
Drinking and then driving is very dangerous.Your reflexes, perceptions, attentiveness andjudgment can be affected by even a smallamount of alcohol. You can have a serious — oreven fatal — collision if you drive after drinking.Please do not drink and drive or ride with adriver who has been drinking. Ride home in acab; or if you are with a group, designate adriver who will not drink.
Control of a VehicleYou have three systems that make your vehicle go whereyou want it to go. They are the brakes, the steering andthe accelerator. All three systems have to do their workat the places where the tires meet the road.
Sometimes, as when you are driving on snow or ice,it is easy to ask more of those control systems than thetires and road can provide. That means you can losecontrol of your vehicle.
4-5
BrakingBraking action involves perception time andreaction time.
First, you have to decide to push on the brake pedal.That is perception time. Then you have to bring up yourfoot and do it. That is reaction time.
Average reaction time is about 3/4 of a second. But thatis only an average. It might be less with one driver andas long as two or three seconds or more with another.Age, physical condition, alertness, coordination andeyesight all play a part. So do alcohol, drugs andfrustration. But even in 3/4 of a second, a vehicle movingat 60 mph (100 km/h) travels 66 feet (20 m). That couldbe a lot of distance in an emergency, so keeping enoughspace between your vehicle and others is important.
And, of course, actual stopping distances vary greatlywith the surface of the road (whether it is pavementor gravel); the condition of the road (wet, dry, icy);tire tread; the condition of your brakes; the weight ofthe vehicle and the amount of brake force applied.
Avoid needless heavy braking. Some people drive inspurts — heavy acceleration followed by heavybraking — rather than keeping pace with traffic. This isa mistake. Your brakes may not have time to coolbetween hard stops. Your brakes will wear out muchfaster if you do a lot of heavy braking. If you keep pace
with the traffic and allow realistic following distances,you will eliminate a lot of unnecessary braking.That means better braking and longer brake life.If your engine ever stops while you are driving, brakenormally but do not pump your brakes. If you do,the pedal may get harder to push down. If your enginestops, you will still have some power brake assist.But you will use it when you brake. Once the powerassist is used up, it may take longer to stop andthe brake pedal will be harder to push.
Anti-lock Brake System (ABS)Your vehicle has anti-lock brakes. ABS is an advancedelectronic braking system that will help prevent abraking skid.When you start your engine and begin to drive away,your anti-lock brake system will check itself. Youmay hear a momentary motor or clicking noise whilethis test is going on, and you may even notice that yourbrake pedal moves a little. This is normal.
If there is a problemwith the anti-lock brakesystem, this warninglight will stay on.See Anti-Lock BrakeSystem Warning Lighton page 3-36.
4-6
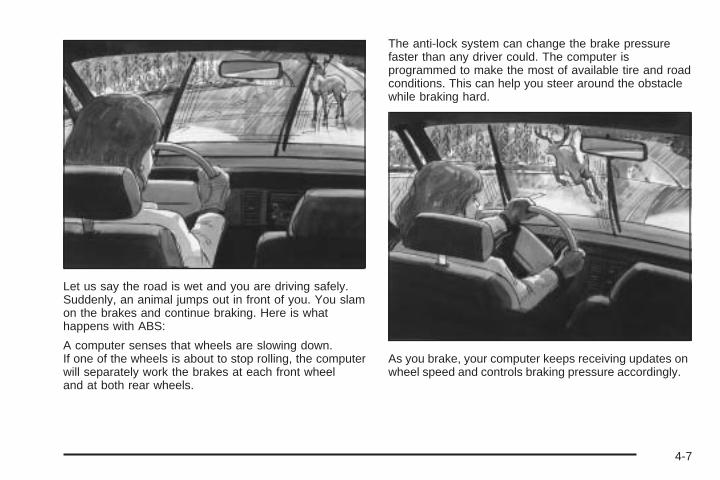
Let us say the road is wet and you are driving safely.Suddenly, an animal jumps out in front of you. You slamon the brakes and continue braking. Here is whathappens with ABS:
A computer senses that wheels are slowing down.If one of the wheels is about to stop rolling, the computerwill separately work the brakes at each front wheeland at both rear wheels.
The anti-lock system can change the brake pressurefaster than any driver could. The computer isprogrammed to make the most of available tire and roadconditions. This can help you steer around the obstaclewhile braking hard.
As you brake, your computer keeps receiving updates onwheel speed and controls braking pressure accordingly.
4-7
Remember: Anti-lock does not change the time youneed to get your foot up to the brake pedal or alwaysdecrease stopping distance. If you get too close tothe vehicle in front of you, you will not have time to applyyour brakes if that vehicle suddenly slows or stops.Always leave enough room up ahead to stop, eventhough you have anti-lock brakes.
Using Anti-LockDo not pump the brakes. Just hold the brake pedal downfirmly and let anti-lock work for you. You may hear theanti-lock pump or motor operate, and feel the brake pedalpulsate, but this is normal.
Braking in EmergenciesWith anti-lock, you can steer and brake at the sametime. In many emergencies, steering can help you morethan even the very best braking.
Traction Control System (TCS)Your vehicle may have a Traction Control System (TCS)that limits wheel spin. This is especially useful inslippery road conditions. The system operates only if itsenses that one or both of the front wheels are spinningor beginning to lose traction. When this happens, thesystem works the front brakes to limit wheel spin.
This light will come onbriefly when the ignitionis turned to ON alongwith the anti-lock brakesystem warning light.This light will blink whenyour Traction ControlSystem is limitingwheel spin.
You may feel or hear the system working, but this isnormal. This light will also come on when the anti-lockbrake system is working.
4-8
If your vehicle is in cruise control when the enhancedtraction system begins to limit wheel spin, the cruisecontrol will automatically disengage. When roadconditions allow you to safely use it again, you mayre-engage the cruise control. See Cruise Controlon page 3-10.
The Traction Control System operates in all transaxleshift lever positions. But the system can upshift thetransaxle only as high as the shift lever positionyou have chosen, so you should use the lower gearsonly when necessary.
This light will come onbriefly when the ignitionis turned to ON alongwith the anti-lock brakesystem warning light.
When the system is on and the parking brake is fullyreleased, this warning light will also come on to let youknow if there is a problem.
When this warning light is on, the system will not limitwheel spin. Adjust your driving accordingly.
To limit wheel spin, especially in slippery road conditions,you should always leave the Traction Control System on.But you can turn the system off if you prefer.
To turn the systemon or off, press theTCS button locatedon the console belowthe shift lever.
When you turn the system off, the Traction ControlSystem warning light will come on and stay on. If theTraction Control System is limiting wheel spin when youpress the button to turn the system off, the warninglight will come on, but the system will not turn off rightaway. It will wait until there is no longer a currentneed to limit wheel spin.
You can turn the system back on at any time by pressingthe button again. The Traction Control System warninglight should go off.
4-9
Steering
Power SteeringIf you lose power steering assist because the enginestops or the system is not functioning, you can steerbut it will take much more effort.
Steering TipsDriving on CurvesIt is important to take curves at a reasonable speed.
A lot of the “driver lost control” accidents mentionedon the news happen on curves. Here is why:
Experienced driver or beginner, each of us is subjectto the same laws of physics when driving on curves.The traction of the tires against the road surface makesit possible for the vehicle to change its path whenyou turn the front wheels. If there is no traction, inertiawill keep the vehicle going in the same direction.If you have ever tried to steer a vehicle on wet ice,you will understand this.
The traction you can get in a curve depends on thecondition of your tires and the road surface, the angle atwhich the curve is banked, and your speed. While youare in a curve, speed is the one factor you can control.
Suppose you are steering through a sharp curve.Then you suddenly accelerate. Both controlsystems — steering and acceleration — have to do theirwork where the tires meet the road. Adding the suddenacceleration can demand too much of those places.You can lose control. See Traction Control System (TCS)on page 4-8.
What should you do if this ever happens? Ease up onthe accelerator pedal, steer the vehicle the way youwant it to go, and slow down.
Speed limit signs near curves warn that you shouldadjust your speed. Of course, the posted speedsare based on good weather and road conditions. Underless favorable conditions you will want to go slower.
If you need to reduce your speed as you approacha curve, do it before you enter the curve, while your frontwheels are straight ahead.
Try to adjust your speed so you can “drive” through thecurve. Maintain a reasonable, steady speed. Wait toaccelerate until you are out of the curve, and thenaccelerate gently into the straightaway.
4-10
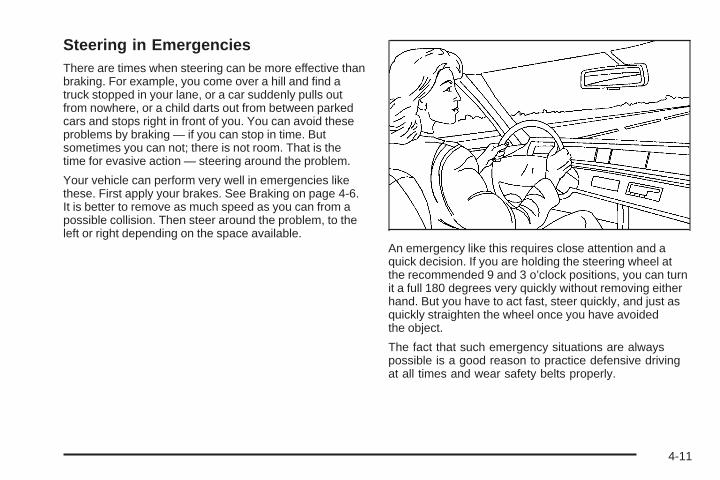
Steering in EmergenciesThere are times when steering can be more effective thanbraking. For example, you come over a hill and find atruck stopped in your lane, or a car suddenly pulls outfrom nowhere, or a child darts out from between parkedcars and stops right in front of you. You can avoid theseproblems by braking — if you can stop in time. Butsometimes you can not; there is not room. That is thetime for evasive action — steering around the problem.
Your vehicle can perform very well in emergencies likethese. First apply your brakes. See Braking on page 4-6.It is better to remove as much speed as you can from apossible collision. Then steer around the problem, to theleft or right depending on the space available.
An emergency like this requires close attention and aquick decision. If you are holding the steering wheel atthe recommended 9 and 3 o’clock positions, you can turnit a full 180 degrees very quickly without removing eitherhand. But you have to act fast, steer quickly, and just asquickly straighten the wheel once you have avoidedthe object.
The fact that such emergency situations are alwayspossible is a good reason to practice defensive drivingat all times and wear safety belts properly.
4-11
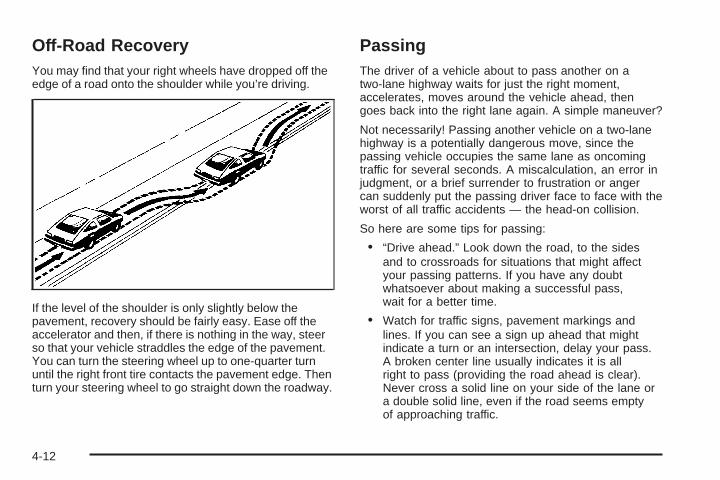
Off-Road RecoveryYou may find that your right wheels have dropped off theedge of a road onto the shoulder while you’re driving.
If the level of the shoulder is only slightly below thepavement, recovery should be fairly easy. Ease off theaccelerator and then, if there is nothing in the way, steerso that your vehicle straddles the edge of the pavement.You can turn the steering wheel up to one-quarter turnuntil the right front tire contacts the pavement edge. Thenturn your steering wheel to go straight down the roadway.
PassingThe driver of a vehicle about to pass another on atwo-lane highway waits for just the right moment,accelerates, moves around the vehicle ahead, thengoes back into the right lane again. A simple maneuver?
Not necessarily! Passing another vehicle on a two-lanehighway is a potentially dangerous move, since thepassing vehicle occupies the same lane as oncomingtraffic for several seconds. A miscalculation, an error injudgment, or a brief surrender to frustration or angercan suddenly put the passing driver face to face with theworst of all traffic accidents — the head-on collision.
So here are some tips for passing:
• “Drive ahead.” Look down the road, to the sidesand to crossroads for situations that might affectyour passing patterns. If you have any doubtwhatsoever about making a successful pass,wait for a better time.
• Watch for traffic signs, pavement markings andlines. If you can see a sign up ahead that mightindicate a turn or an intersection, delay your pass.A broken center line usually indicates it is allright to pass (providing the road ahead is clear).Never cross a solid line on your side of the lane ora double solid line, even if the road seems emptyof approaching traffic.
4-12

• Do not get too close to the vehicle you want to passwhile you are awaiting an opportunity. For one thing,following too closely reduces your area of vision,especially if you are following a larger vehicle. Also,you will not have adequate space if the vehicleahead suddenly slows or stops. Keep back areasonable distance.
• When it looks like a chance to pass is coming up,start to accelerate but stay in the right lane and donot get too close. Time your move so you will beincreasing speed as the time comes to move into theother lane. If the way is clear to pass, you will havea “running start” that more than makes up for thedistance you would lose by dropping back. And ifsomething happens to cause you to cancel yourpass, you need only slow down and drop back againand wait for another opportunity.
• If other vehicles are lined up to pass a slow vehicle,wait your turn. But take care that someone is nottrying to pass you as you pull out to pass the slowvehicle. Remember to glance over your shoulderand check the blind spot.
• Check your mirrors, glance over your shoulder, andstart your left lane change signal before moving outof the right lane to pass. When you are far enoughahead of the passed vehicle to see its front in yourinside mirror, activate your right lane change signaland move back into the right lane. (Rememberthat your right outside mirror is convex. The vehicleyou just passed may seem to be farther away fromyou than it really is.)
• Try not to pass more than one vehicle at a time ontwo-lane roads. Reconsider before passing thenext vehicle.
• Do not overtake a slowly moving vehicle too rapidly.Even though the brake lamps are not flashing, it maybe slowing down or starting to turn.
• If you are being passed, make it easy for thefollowing driver to get ahead of you. Perhaps youcan ease a little to the right.
4-13
Loss of ControlLet us review what driving experts say about whathappens when the three control systems (brakes,steering and acceleration) do not have enough frictionwhere the tires meet the road to do what the driverhas asked.
In any emergency, do not give up. Keep trying to steerand constantly seek an escape route or area of lessdanger.
SkiddingIn a skid, a driver can lose control of the vehicle.Defensive drivers avoid most skids by taking reasonablecare suited to existing conditions, and by not “overdriving”those conditions. But skids are always possible.
The three types of skids correspond to your vehicle’sthree control systems. In the braking skid, your wheelsare not rolling. In the steering or cornering skid, too muchspeed or steering in a curve causes tires to slip and losecornering force. And in the acceleration skid, too muchthrottle causes the driving wheels to spin.
A cornering skid is best handled by easing your foot offthe accelerator pedal.
Remember: Any traction control system helps avoid onlythe acceleration skid. If your TCS system is off, thenan acceleration skid is also best handled by easing yourfoot off the accelerator pedal.
If your vehicle starts to slide, ease your foot off theaccelerator pedal and quickly steer the way you wantthe vehicle to go. If you start steering quickly enough,your vehicle may straighten out. Always be readyfor a second skid if it occurs.
Of course, traction is reduced when water, snow, ice,gravel or other material is on the road. For safety,you will want to slow down and adjust your driving tothese conditions. It is important to slow down on slipperysurfaces because stopping distance will be longer andvehicle control more limited.
While driving on a surface with reduced traction, try yourbest to avoid sudden steering, acceleration or braking(including engine braking by shifting to a lower gear).Any sudden changes could cause the tires to slide. Youmay not realize the surface is slippery until your vehicle isskidding. Learn to recognize warning clues — such asenough water, ice or packed snow on the road to makea “mirrored surface” — and slow down when you haveany doubt.
Remember: Any anti-lock brake system (ABS) helpsavoid only the braking skid.
4-14
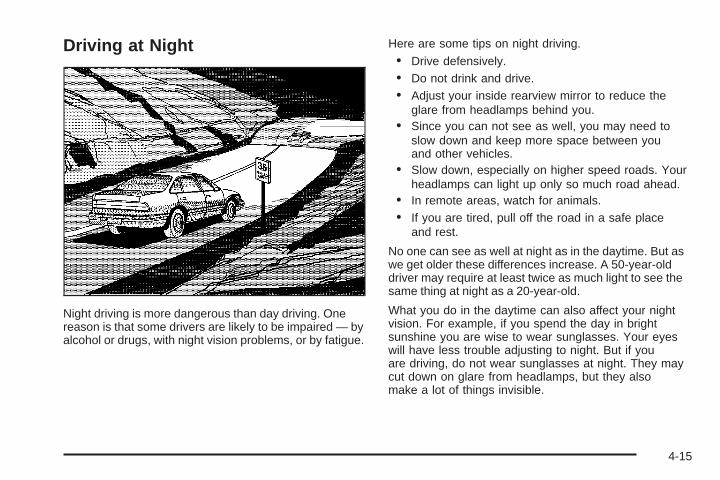
Driving at Night
Night driving is more dangerous than day driving. Onereason is that some drivers are likely to be impaired — byalcohol or drugs, with night vision problems, or by fatigue.
Here are some tips on night driving.
• Drive defensively.• Do not drink and drive.• Adjust your inside rearview mirror to reduce the
glare from headlamps behind you.• Since you can not see as well, you may need to
slow down and keep more space between youand other vehicles.
• Slow down, especially on higher speed roads. Yourheadlamps can light up only so much road ahead.
• In remote areas, watch for animals.• If you are tired, pull off the road in a safe place
and rest.
No one can see as well at night as in the daytime. But aswe get older these differences increase. A 50-year-olddriver may require at least twice as much light to see thesame thing at night as a 20-year-old.
What you do in the daytime can also affect your nightvision. For example, if you spend the day in brightsunshine you are wise to wear sunglasses. Your eyeswill have less trouble adjusting to night. But if youare driving, do not wear sunglasses at night. They maycut down on glare from headlamps, but they alsomake a lot of things invisible.
4-15
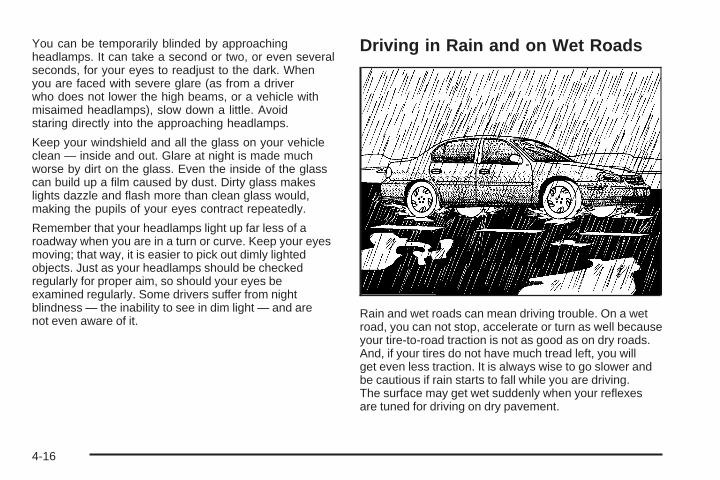
You can be temporarily blinded by approachingheadlamps. It can take a second or two, or even severalseconds, for your eyes to readjust to the dark. Whenyou are faced with severe glare (as from a driverwho does not lower the high beams, or a vehicle withmisaimed headlamps), slow down a little. Avoidstaring directly into the approaching headlamps.
Keep your windshield and all the glass on your vehicleclean — inside and out. Glare at night is made muchworse by dirt on the glass. Even the inside of the glasscan build up a film caused by dust. Dirty glass makeslights dazzle and flash more than clean glass would,making the pupils of your eyes contract repeatedly.
Remember that your headlamps light up far less of aroadway when you are in a turn or curve. Keep your eyesmoving; that way, it is easier to pick out dimly lightedobjects. Just as your headlamps should be checkedregularly for proper aim, so should your eyes beexamined regularly. Some drivers suffer from nightblindness — the inability to see in dim light — and arenot even aware of it.
Driving in Rain and on Wet Roads
Rain and wet roads can mean driving trouble. On a wetroad, you can not stop, accelerate or turn as well becauseyour tire-to-road traction is not as good as on dry roads.And, if your tires do not have much tread left, you willget even less traction. It is always wise to go slower andbe cautious if rain starts to fall while you are driving.The surface may get wet suddenly when your reflexesare tuned for driving on dry pavement.
4-16
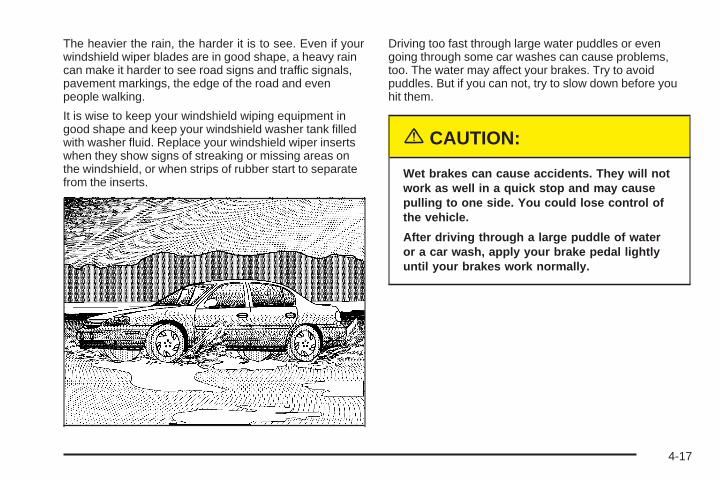
The heavier the rain, the harder it is to see. Even if yourwindshield wiper blades are in good shape, a heavy raincan make it harder to see road signs and traffic signals,pavement markings, the edge of the road and evenpeople walking.
It is wise to keep your windshield wiping equipment ingood shape and keep your windshield washer tank filledwith washer fluid. Replace your windshield wiper insertswhen they show signs of streaking or missing areas onthe windshield, or when strips of rubber start to separatefrom the inserts.
Driving too fast through large water puddles or evengoing through some car washes can cause problems,too. The water may affect your brakes. Try to avoidpuddles. But if you can not, try to slow down before youhit them.
{CAUTION:
Wet brakes can cause accidents. They will notwork as well in a quick stop and may causepulling to one side. You could lose control ofthe vehicle.
After driving through a large puddle of wateror a car wash, apply your brake pedal lightlyuntil your brakes work normally.
4-17
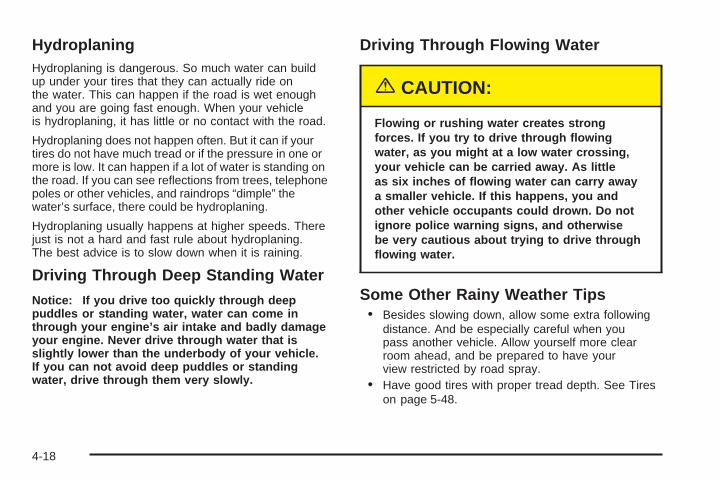
HydroplaningHydroplaning is dangerous. So much water can buildup under your tires that they can actually ride onthe water. This can happen if the road is wet enoughand you are going fast enough. When your vehicleis hydroplaning, it has little or no contact with the road.
Hydroplaning does not happen often. But it can if yourtires do not have much tread or if the pressure in one ormore is low. It can happen if a lot of water is standing onthe road. If you can see reflections from trees, telephonepoles or other vehicles, and raindrops “dimple” thewater’s surface, there could be hydroplaning.
Hydroplaning usually happens at higher speeds. Therejust is not a hard and fast rule about hydroplaning.The best advice is to slow down when it is raining.
Driving Through Deep Standing Water
Notice: If you drive too quickly through deeppuddles or standing water, water can come inthrough your engine’s air intake and badly damageyour engine. Never drive through water that isslightly lower than the underbody of your vehicle.If you can not avoid deep puddles or standingwater, drive through them very slowly.
Driving Through Flowing Water
{CAUTION:
Flowing or rushing water creates strongforces. If you try to drive through flowingwater, as you might at a low water crossing,your vehicle can be carried away. As littleas six inches of flowing water can carry awaya smaller vehicle. If this happens, you andother vehicle occupants could drown. Do notignore police warning signs, and otherwisebe very cautious about trying to drive throughflowing water.
Some Other Rainy Weather Tips• Besides slowing down, allow some extra following
distance. And be especially careful when youpass another vehicle. Allow yourself more clearroom ahead, and be prepared to have yourview restricted by road spray.
• Have good tires with proper tread depth. See Tireson page 5-48.
4-18
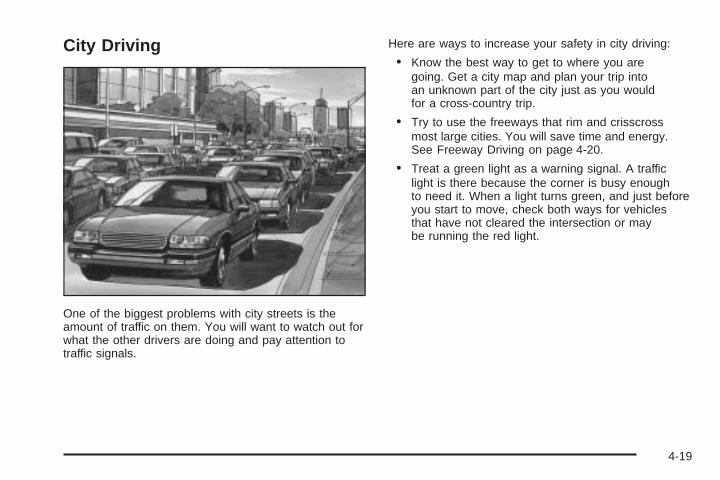
City Driving
One of the biggest problems with city streets is theamount of traffic on them. You will want to watch out forwhat the other drivers are doing and pay attention totraffic signals.
Here are ways to increase your safety in city driving:
• Know the best way to get to where you aregoing. Get a city map and plan your trip intoan unknown part of the city just as you wouldfor a cross-country trip.
• Try to use the freeways that rim and crisscrossmost large cities. You will save time and energy.See Freeway Driving on page 4-20.
• Treat a green light as a warning signal. A trafficlight is there because the corner is busy enoughto need it. When a light turns green, and just beforeyou start to move, check both ways for vehiclesthat have not cleared the intersection or maybe running the red light.
4-19
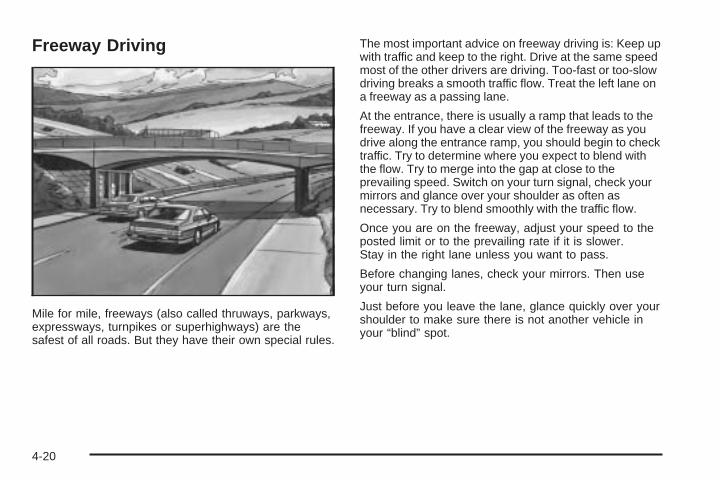
Freeway Driving
Mile for mile, freeways (also called thruways, parkways,expressways, turnpikes or superhighways) are thesafest of all roads. But they have their own special rules.
The most important advice on freeway driving is: Keep upwith traffic and keep to the right. Drive at the same speedmost of the other drivers are driving. Too-fast or too-slowdriving breaks a smooth traffic flow. Treat the left lane ona freeway as a passing lane.
At the entrance, there is usually a ramp that leads to thefreeway. If you have a clear view of the freeway as youdrive along the entrance ramp, you should begin to checktraffic. Try to determine where you expect to blend withthe flow. Try to merge into the gap at close to theprevailing speed. Switch on your turn signal, check yourmirrors and glance over your shoulder as often asnecessary. Try to blend smoothly with the traffic flow.
Once you are on the freeway, adjust your speed to theposted limit or to the prevailing rate if it is slower.Stay in the right lane unless you want to pass.
Before changing lanes, check your mirrors. Then useyour turn signal.
Just before you leave the lane, glance quickly over yourshoulder to make sure there is not another vehicle inyour “blind” spot.
4-20
Once you are moving on the freeway, make certainyou allow a reasonable following distance.
Expect to move slightly slower at night.
When you want to leave the freeway, move to the properlane well in advance. If you miss your exit, do not, underany circumstances, stop and back up. Drive on to thenext exit.
The exit ramp can be curved, sometimes quite sharply.The exit speed is usually posted. Reduce your speedaccording to your speedometer, not to your senseof motion. After driving for any distance at higherspeeds, you may tend to think you are going slowerthan you actually are.
Before Leaving on a Long TripMake sure you are ready. Try to be well rested. If youmust start when you are not fresh — such as aftera day’s work — do not plan to make too many miles thatfirst part of the journey. Wear comfortable clothingand shoes you can easily drive in.
Is your vehicle ready for a long trip? If you keep itserviced and maintained, it is ready to go. If it needsservice, have it done before starting out. Of course, youwill find experienced and able service experts in GMdealerships all across North America. They will be readyand willing to help if you need it.
Here are some things you can check before a trip:
• Windshield Washer Fluid: Is the reservoir full?Are all windows clean inside and outside?
• Wiper Blades: Are they in good shape?• Fuel, Engine Oil, Other Fluids: Have you checked
all levels?• Lamps: Are they all working? Are the lenses clean?• Tires: They are vitally important to a safe,
trouble-free trip. Is the tread good enough forlong-distance driving? Are the tires all inflated tothe recommended pressure?
• Weather Forecasts: What is the weather outlookalong your route? Should you delay your trip ashort time to avoid a major storm system?
• Maps: Do you have up-to-date maps?
4-21
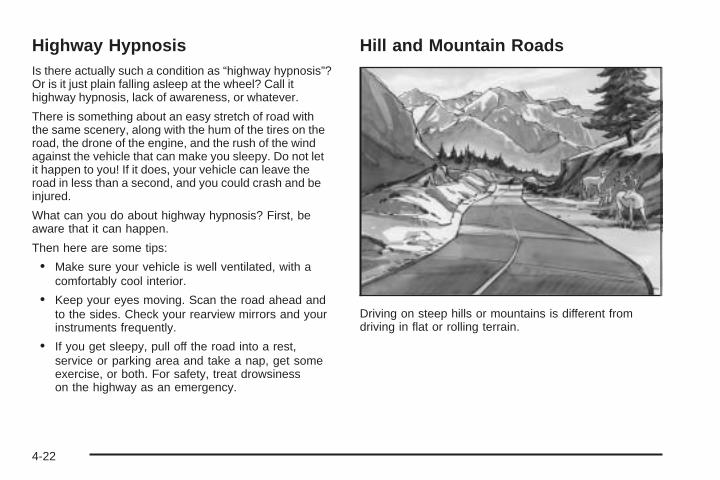
Highway HypnosisIs there actually such a condition as “highway hypnosis”?Or is it just plain falling asleep at the wheel? Call ithighway hypnosis, lack of awareness, or whatever.
There is something about an easy stretch of road withthe same scenery, along with the hum of the tires on theroad, the drone of the engine, and the rush of the windagainst the vehicle that can make you sleepy. Do not letit happen to you! If it does, your vehicle can leave theroad in less than a second, and you could crash and beinjured.
What can you do about highway hypnosis? First, beaware that it can happen.
Then here are some tips:
• Make sure your vehicle is well ventilated, with acomfortably cool interior.
• Keep your eyes moving. Scan the road ahead andto the sides. Check your rearview mirrors and yourinstruments frequently.
• If you get sleepy, pull off the road into a rest,service or parking area and take a nap, get someexercise, or both. For safety, treat drowsinesson the highway as an emergency.
Hill and Mountain Roads
Driving on steep hills or mountains is different fromdriving in flat or rolling terrain.
4-22
If you drive regularly in steep country, or if you areplanning to visit there, here are some tips that can makeyour trips safer and more enjoyable.
• Keep your vehicle in good shape. Check all fluidlevels and also the brakes, tires, cooling systemand transaxle. These parts can work hard onmountain roads.
• Know how to go down hills. The most importantthing to know is this: let your engine do some ofthe slowing down. Shift to a lower gear when yougo down a steep or long hill.
{CAUTION:
If you do not shift down, your brakes could getso hot that they would not work well. You wouldthen have poor braking or even none goingdown a hill. You could crash. Shift down to letyour engine assist your brakes on a steepdownhill slope.
{CAUTION:
Coasting downhill in NEUTRAL (N) or with theignition off is dangerous. Your brakes will haveto do all the work of slowing down. They couldget so hot that they would not work well. Youwould then have poor braking or even nonegoing down a hill. You could crash. Always haveyour engine running and your vehicle in gearwhen you go downhill.
• Know how to go uphill. Drive in the highest gearpossible.
• Stay in your own lane when driving on two-laneroads in hills or mountains. Do not swing wide or cutacross the center of the road. Drive at speeds that letyou stay in your own lane.
• As you go over the top of a hill, be alert. There couldbe something in your lane, like a stalled car or anaccident.
• You may see highway signs on mountains that warnof special problems. Examples are long grades,passing or no-passing zones, a falling rocks area orwinding roads. Be alert to these and take appropriateaction.
4-23
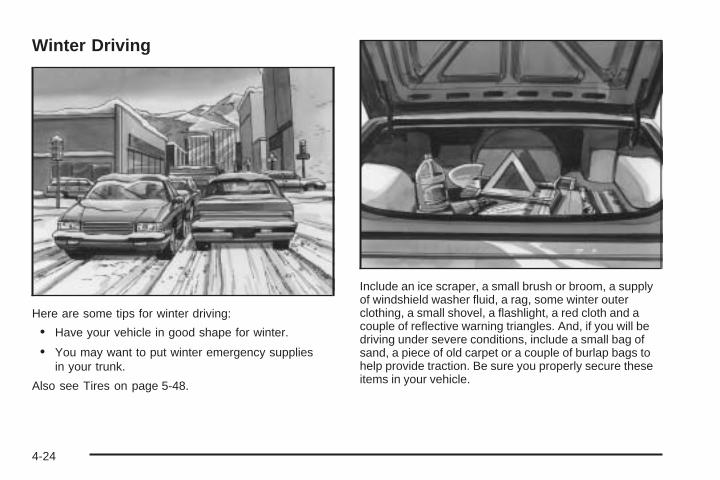
Winter Driving
Here are some tips for winter driving:
• Have your vehicle in good shape for winter.
• You may want to put winter emergency suppliesin your trunk.
Also see Tires on page 5-48.
Include an ice scraper, a small brush or broom, a supplyof windshield washer fluid, a rag, some winter outerclothing, a small shovel, a flashlight, a red cloth and acouple of reflective warning triangles. And, if you will bedriving under severe conditions, include a small bag ofsand, a piece of old carpet or a couple of burlap bags tohelp provide traction. Be sure you properly secure theseitems in your vehicle.
4-24
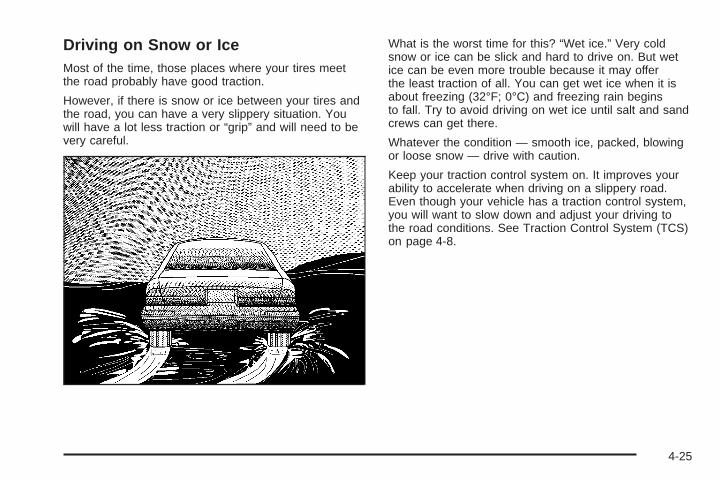
Driving on Snow or IceMost of the time, those places where your tires meetthe road probably have good traction.
However, if there is snow or ice between your tires andthe road, you can have a very slippery situation. Youwill have a lot less traction or “grip” and will need to bevery careful.
What is the worst time for this? “Wet ice.” Very coldsnow or ice can be slick and hard to drive on. But wetice can be even more trouble because it may offerthe least traction of all. You can get wet ice when it isabout freezing (32°F; 0°C) and freezing rain beginsto fall. Try to avoid driving on wet ice until salt and sandcrews can get there.
Whatever the condition — smooth ice, packed, blowingor loose snow — drive with caution.
Keep your traction control system on. It improves yourability to accelerate when driving on a slippery road.Even though your vehicle has a traction control system,you will want to slow down and adjust your driving tothe road conditions. See Traction Control System (TCS)on page 4-8.
4-25
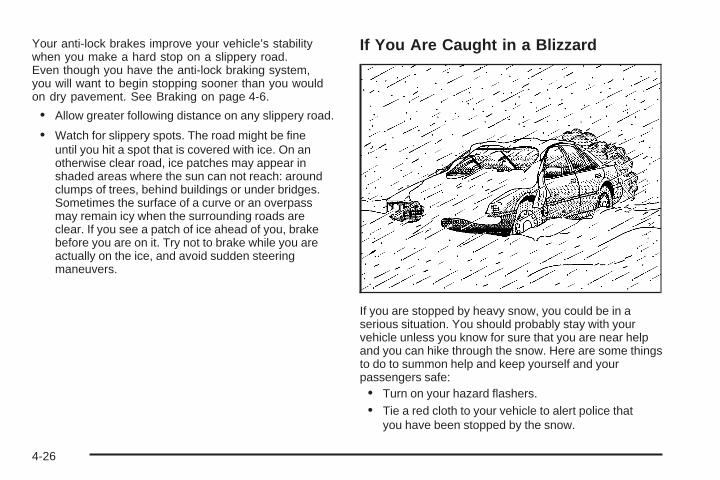
Your anti-lock brakes improve your vehicle’s stabilitywhen you make a hard stop on a slippery road.Even though you have the anti-lock braking system,you will want to begin stopping sooner than you wouldon dry pavement. See Braking on page 4-6.
• Allow greater following distance on any slippery road.
• Watch for slippery spots. The road might be fineuntil you hit a spot that is covered with ice. On anotherwise clear road, ice patches may appear inshaded areas where the sun can not reach: aroundclumps of trees, behind buildings or under bridges.Sometimes the surface of a curve or an overpassmay remain icy when the surrounding roads areclear. If you see a patch of ice ahead of you, brakebefore you are on it. Try not to brake while you areactually on the ice, and avoid sudden steeringmaneuvers.
If You Are Caught in a Blizzard
If you are stopped by heavy snow, you could be in aserious situation. You should probably stay with yourvehicle unless you know for sure that you are near helpand you can hike through the snow. Here are some thingsto do to summon help and keep yourself and yourpassengers safe:• Turn on your hazard flashers.• Tie a red cloth to your vehicle to alert police that
you have been stopped by the snow.
4-26
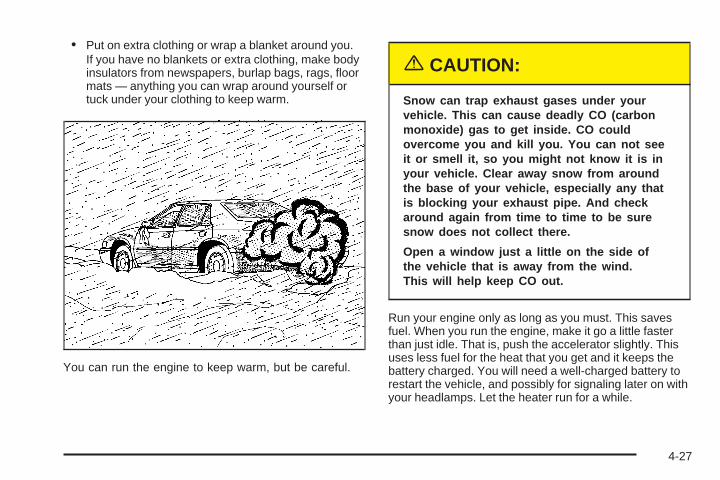
• Put on extra clothing or wrap a blanket around you.If you have no blankets or extra clothing, make bodyinsulators from newspapers, burlap bags, rags, floormats — anything you can wrap around yourself ortuck under your clothing to keep warm.
You can run the engine to keep warm, but be careful.
{CAUTION:
Snow can trap exhaust gases under yourvehicle. This can cause deadly CO (carbonmonoxide) gas to get inside. CO couldovercome you and kill you. You can not seeit or smell it, so you might not know it is inyour vehicle. Clear away snow from aroundthe base of your vehicle, especially any thatis blocking your exhaust pipe. And checkaround again from time to time to be suresnow does not collect there.
Open a window just a little on the side ofthe vehicle that is away from the wind.This will help keep CO out.
Run your engine only as long as you must. This savesfuel. When you run the engine, make it go a little fasterthan just idle. That is, push the accelerator slightly. Thisuses less fuel for the heat that you get and it keeps thebattery charged. You will need a well-charged battery torestart the vehicle, and possibly for signaling later on withyour headlamps. Let the heater run for a while.
4-27
Then, shut the engine off and close the window almostall the way to preserve the heat. Start the engine againand repeat this only when you feel really uncomfortablefrom the cold. But do it as little as possible. Preserve thefuel as long as you can. To help keep warm, you can getout of the vehicle and do some fairly vigorous exercisesevery half hour or so until help comes.
If You Are Stuck: In Sand, Mud,Ice or SnowIn order to free your vehicle when it is stuck, you willneed to spin the wheels, but you do not want to spin yourwheels too fast. The method known as “rocking” can helpyou get out when you are stuck, but you must usecaution.
{CAUTION:
If you let your tires spin at high speed, they canexplode, and you or others could be injured.And, the transaxle or other parts of the vehiclecan overheat. That could cause an enginecompartment fire or other damage. When youare stuck, spin the wheels as little as possible.Do not spin the wheels above 35 mph (55 km/h)as shown on the speedometer.
Notice: Spinning your wheels can destroy partsof your vehicle as well as the tires. If you spinthe wheels too fast while shifting your transaxleback and forth, you can destroy your transaxle.See “Rocking Your Vehicle To Get It Out.”
For information about using tire chains on your vehicle,see Tire Chains on page 5-60.
4-28
Rocking Your Vehicle To Get It OutFirst, turn your steering wheel left and right. That willclear the area around your front wheels. Then shift backand forth between REVERSE (R) and a forward gear,spinning the wheels as little as possible. Release theaccelerator pedal while you shift, and press lightly onthe accelerator pedal when the transaxle is in gear.By slowly spinning your wheels in the forward andreverse directions, you will cause a rocking motion thatmay free your vehicle. If that does not get you out after afew tries, you may need to be towed out. If you do needto be towed out, see Towing Your Vehicle on page 4-29.
Towing
Towing Your VehicleConsult your dealer or a professional towing serviceif you need to have your disabled vehicle towed.See Roadside Assistance Program on page 7-6.
If you want to tow your vehicle behind another vehiclefor recreational purposes (such as behind a motorhome),see “Recreational Vehicle Towing” following.
Recreational Vehicle TowingRecreational vehicle towing means towing your vehiclebehind another vehicle, such as behind a motorhome.The two most common types of recreational vehicletowing are known as “dinghy towing” (towing your vehiclewith all four wheels on the ground) and “dolly towing”(towing your vehicle with two wheels on the ground andtwo wheels up on a device known as a “dolly”).With the proper preparation and equipment, manyvehicles can be towed in these ways. See “DinghyTowing” and “Dolly Towing,” following.Here are some important things to consider before youdo recreational vehicle towing:• What is the towing capacity of the towing vehicle?
Be sure you read the tow vehicle manufacturer’srecommendations.
• How far will you tow? Some vehicles haverestrictions on how far and how long they can tow.
• Do you have the proper towing equipment?See your dealer or trailering professional foradditional advice and equipment recommendations.
• Is your vehicle ready to be towed? Just as youwould prepare your vehicle for a long trip, youwill want to make sure your vehicle is prepared tobe towed. See Before Leaving on a Long Tripon page 4-21.
4-29
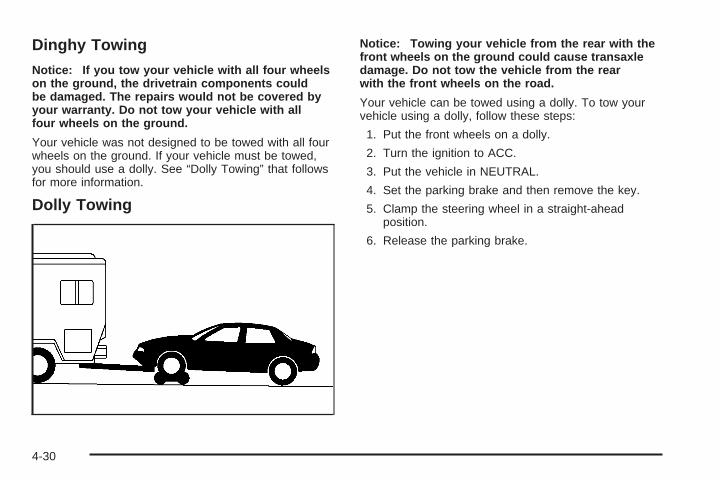
Dinghy Towing
Notice: If you tow your vehicle with all four wheelson the ground, the drivetrain components couldbe damaged. The repairs would not be covered byyour warranty. Do not tow your vehicle with allfour wheels on the ground.
Your vehicle was not designed to be towed with all fourwheels on the ground. If your vehicle must be towed,you should use a dolly. See “Dolly Towing” that followsfor more information.
Dolly Towing
Notice: Towing your vehicle from the rear with thefront wheels on the ground could cause transaxledamage. Do not tow the vehicle from the rearwith the front wheels on the road.
Your vehicle can be towed using a dolly. To tow yourvehicle using a dolly, follow these steps:
1. Put the front wheels on a dolly.
2. Turn the ignition to ACC.
3. Put the vehicle in NEUTRAL.
4. Set the parking brake and then remove the key.
5. Clamp the steering wheel in a straight-aheadposition.
6. Release the parking brake.
4-30
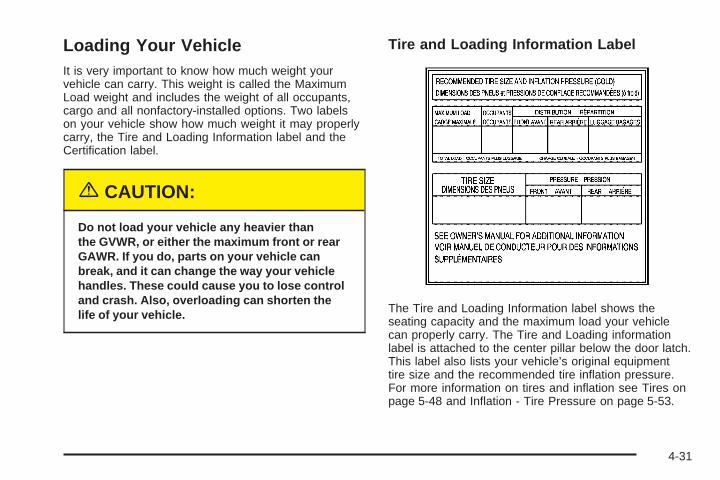
Loading Your VehicleIt is very important to know how much weight yourvehicle can carry. This weight is called the MaximumLoad weight and includes the weight of all occupants,cargo and all nonfactory-installed options. Two labelson your vehicle show how much weight it may properlycarry, the Tire and Loading Information label and theCertification label.
{CAUTION:
Do not load your vehicle any heavier thanthe GVWR, or either the maximum front or rearGAWR. If you do, parts on your vehicle canbreak, and it can change the way your vehiclehandles. These could cause you to lose controland crash. Also, overloading can shorten thelife of your vehicle.
Tire and Loading Information Label
The Tire and Loading Information label shows theseating capacity and the maximum load your vehiclecan properly carry. The Tire and Loading informationlabel is attached to the center pillar below the door latch.This label also lists your vehicle’s original equipmenttire size and the recommended tire inflation pressure.For more information on tires and inflation see Tires onpage 5-48 and Inflation - Tire Pressure on page 5-53.
4-31
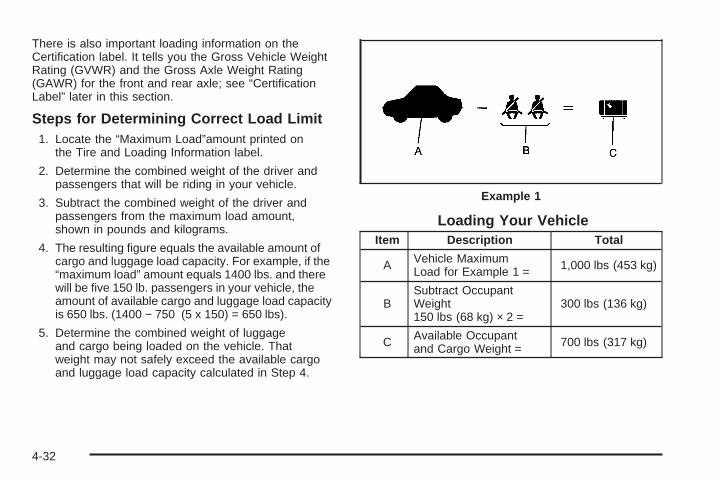
There is also important loading information on theCertification label. It tells you the Gross Vehicle WeightRating (GVWR) and the Gross Axle Weight Rating(GAWR) for the front and rear axle; see “CertificationLabel” later in this section.
Steps for Determining Correct Load Limit1. Locate the “Maximum Load”amount printed on
the Tire and Loading Information label.
2. Determine the combined weight of the driver andpassengers that will be riding in your vehicle.
3. Subtract the combined weight of the driver andpassengers from the maximum load amount,shown in pounds and kilograms.
4. The resulting figure equals the available amount ofcargo and luggage load capacity. For example, if the“maximum load” amount equals 1400 lbs. and therewill be five 150 lb. passengers in your vehicle, theamount of available cargo and luggage load capacityis 650 lbs. (1400 − 750 (5 x 150) = 650 lbs).
5. Determine the combined weight of luggageand cargo being loaded on the vehicle. Thatweight may not safely exceed the available cargoand luggage load capacity calculated in Step 4.
Loading Your VehicleItem Description Total
A Vehicle MaximumLoad for Example 1 = 1,000 lbs (453 kg)
BSubtract OccupantWeight150 lbs (68 kg) × 2 =
300 lbs (136 kg)
C Available Occupantand Cargo Weight = 700 lbs (317 kg)
Example 1
4-32
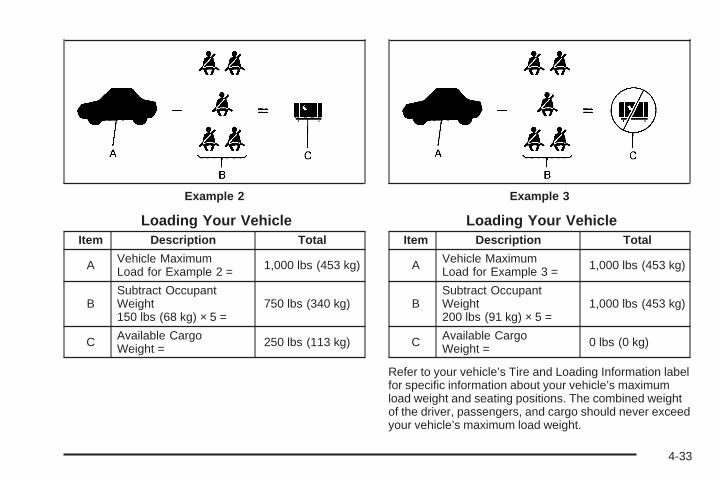
Loading Your VehicleItem Description Total
A Vehicle MaximumLoad for Example 2 = 1,000 lbs (453 kg)
BSubtract OccupantWeight150 lbs (68 kg) × 5 =
750 lbs (340 kg)
C Available CargoWeight = 250 lbs (113 kg)
Loading Your VehicleItem Description Total
A Vehicle MaximumLoad for Example 3 = 1,000 lbs (453 kg)
BSubtract OccupantWeight200 lbs (91 kg) × 5 =
1,000 lbs (453 kg)
C Available CargoWeight = 0 lbs (0 kg)
Refer to your vehicle’s Tire and Loading Information labelfor specific information about your vehicle’s maximumload weight and seating positions. The combined weightof the driver, passengers, and cargo should never exceedyour vehicle’s maximum load weight.
Example 2 Example 3
4-33
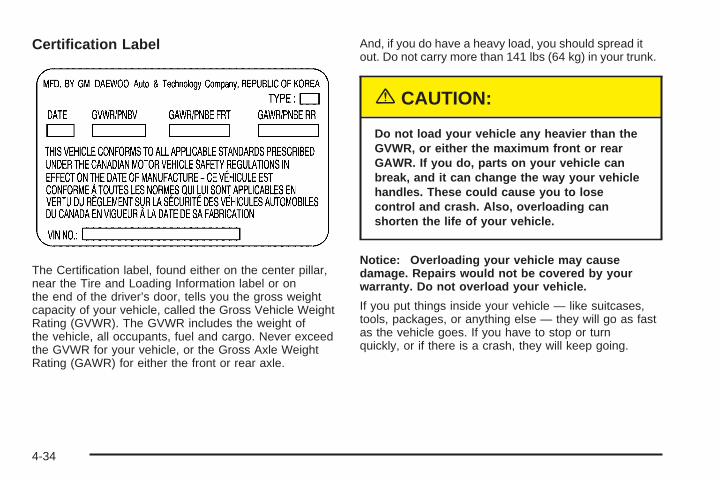
Certification Label
The Certification label, found either on the center pillar,near the Tire and Loading Information label or onthe end of the driver’s door, tells you the gross weightcapacity of your vehicle, called the Gross Vehicle WeightRating (GVWR). The GVWR includes the weight ofthe vehicle, all occupants, fuel and cargo. Never exceedthe GVWR for your vehicle, or the Gross Axle WeightRating (GAWR) for either the front or rear axle.
And, if you do have a heavy load, you should spread itout. Do not carry more than 141 lbs (64 kg) in your trunk.
{CAUTION:
Do not load your vehicle any heavier than theGVWR, or either the maximum front or rearGAWR. If you do, parts on your vehicle canbreak, and it can change the way your vehiclehandles. These could cause you to losecontrol and crash. Also, overloading canshorten the life of your vehicle.
Notice: Overloading your vehicle may causedamage. Repairs would not be covered by yourwarranty. Do not overload your vehicle.
If you put things inside your vehicle — like suitcases,tools, packages, or anything else — they will go as fastas the vehicle goes. If you have to stop or turnquickly, or if there is a crash, they will keep going.
4-34
{CAUTION:
Things you put inside your vehicle can strikeand injure people in a sudden stop or turn,or in a crash.
• Put things in the trunk of your vehicle.In a trunk, put them as far forward as youcan. Try to spread the weight evenly.
• Never stack heavier things, like suitcases,inside the vehicle so that some of themare above the tops of the seats.
• Do not leave an unsecured child restraintin your vehicle.
• When you carry something inside thevehicle, secure it whenever you can.
• Do not leave a seat folded down unlessyou need to.
Towing a TrailerDo not use your vehicle to tow a trailer. The vehicle isnot designed or intended for such a use. Towing a trailercan adversely affect handling, durability and fueleconomy.
4-35

✍ NOTES
4-36
Service ............................................................5-3Doing Your Own Service Work .........................5-4Adding Equipment to the Outside of
Your Vehicle ..............................................5-5Fuel ................................................................5-5
Gasoline Octane ............................................5-5Gasoline Specifications ....................................5-5California Fuel ...............................................5-6Additives .......................................................5-6Fuels in Foreign Countries ...............................5-7Filling Your Tank ............................................5-7Filling a Portable Fuel Container .....................5-10
Checking Things Under the Hood ....................5-10Hood Release ..............................................5-11Engine Compartment Overview .......................5-12Engine Oil ...................................................5-13Engine Air Cleaner/Filter ................................5-17Automatic Transaxle Fluid ..............................5-19Engine Coolant .............................................5-19Coolant Surge Tank Pressure Cap ..................5-21Engine Overheating .......................................5-22Cooling System ............................................5-24Power Steering Fluid .....................................5-30Windshield Washer Fluid ................................5-31Brakes ........................................................5-32
Battery ........................................................5-35Jump Starting ...............................................5-36
Headlamp Aiming ...........................................5-40
Bulb Replacement ..........................................5-41Halogen Bulbs ..............................................5-41Headlamps ..................................................5-41Front Turn Signal Lamps ...............................5-43Center High-Mounted Stoplamp (CHMSL) .........5-44Parking Lamps .............................................5-45Taillamps, Turn Signal, Stoplamps and
Back-up Lamps .........................................5-46
Windshield Wiper Blade Replacement ..............5-47
Tires ..............................................................5-48Inflation - Tire Pressure .................................5-53Tire Inspection and Rotation ...........................5-54When It Is Time for New Tires .......................5-55Buying New Tires .........................................5-56Uniform Tire Quality Grading ..........................5-57Wheel Alignment and Tire Balance ..................5-58Wheel Replacement ......................................5-59Tire Chains ..................................................5-60If a Tire Goes Flat ........................................5-61Changing a Flat Tire .....................................5-62Spare Tire ...................................................5-68
Section 5 Service and Appearance Care
5-1
Appearance Care ............................................5-68Cleaning the Inside of Your Vehicle .................5-69Care of Safety Belts ......................................5-72Weatherstrips ...............................................5-72Cleaning the Outside of Your Vehicle .................5-72Sheet Metal Damage .....................................5-74Finish Damage .............................................5-74Underbody Maintenance ................................5-75Chemical Paint Spotting .................................5-75Vehicle Care/Appearance Materials ..................5-75
Vehicle Identification ......................................5-77Vehicle Identification Number (VIN) .................5-77Service Parts Identification Label .....................5-77
Electrical System ............................................5-78Add-On Electrical Equipment ..........................5-78Headlamp Wiring ..........................................5-78Windshield Wiper Fuses ................................5-78Power Windows and Other Power Options .......5-78Fuses and Circuit Breakers ............................5-79
Capacities and Specifications ..........................5-85
Section 5 Service and Appearance Care
5-2
ServiceYour dealer knows your vehicle best and wants you tobe happy with it. We hope you will go to your dealerfor all your service needs. You will get genuine GM partsand GM-trained and supported service people.
We hope you will want to keep your GM vehicle all GM.Genuine GM parts have one of these marks:
California Proposition 65 WarningMost motor vehicles, including this one, contain and/oremit chemicals known to the State of California tocause cancer and birth defects or other reproductiveharm. Engine exhaust, many parts and systems(including some inside the vehicle), many fluids, andsome component wear by-products contain and/or emitthese chemicals.
5-3
Doing Your Own Service WorkIf you want to do some of your own service work, youwill want to use the proper service manual. It tellsyou much more about how to service your vehicle thanthis manual can. To order the proper service manual,see Service Publications Ordering Information onpage 7-12.
Your vehicle has an air bag system. Before attemptingto do your own service work, see Servicing Your AirBag-Equipped Vehicle on page 1-54.
You should keep a record with all parts receipts and listthe mileage and the date of any service work youperform. See Part E: Maintenance Record on page 6-25.
{CAUTION:
You can be injured and your vehicle could bedamaged if you try to do service work on avehicle without knowing enough about it.
• Be sure you have sufficient knowledge,experience, the proper replacement partsand tools before you attempt any vehiclemaintenance task.
• Be sure to use the proper nuts, bolts andother fasteners. “English” and “metric”fasteners can be easily confused. If youuse the wrong fasteners, parts can laterbreak or fall off. You could be hurt.
5-4
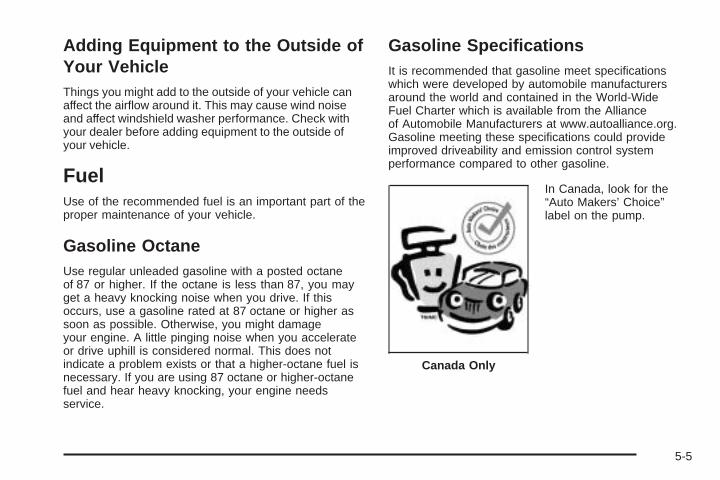
Adding Equipment to the Outside ofYour VehicleThings you might add to the outside of your vehicle canaffect the airflow around it. This may cause wind noiseand affect windshield washer performance. Check withyour dealer before adding equipment to the outside ofyour vehicle.
FuelUse of the recommended fuel is an important part of theproper maintenance of your vehicle.
Gasoline OctaneUse regular unleaded gasoline with a posted octaneof 87 or higher. If the octane is less than 87, you mayget a heavy knocking noise when you drive. If thisoccurs, use a gasoline rated at 87 octane or higher assoon as possible. Otherwise, you might damageyour engine. A little pinging noise when you accelerateor drive uphill is considered normal. This does notindicate a problem exists or that a higher-octane fuel isnecessary. If you are using 87 octane or higher-octanefuel and hear heavy knocking, your engine needsservice.
Gasoline SpecificationsIt is recommended that gasoline meet specificationswhich were developed by automobile manufacturersaround the world and contained in the World-WideFuel Charter which is available from the Allianceof Automobile Manufacturers at www.autoalliance.org.Gasoline meeting these specifications could provideimproved driveability and emission control systemperformance compared to other gasoline.
In Canada, look for the“Auto Makers’ Choice”label on the pump.
Canada Only
5-5
California FuelIf your vehicle is certified to meet California EmissionStandards (see the underhood emission control label),it is designed to operate on fuels that meet Californiaspecifications. If this fuel is not available in statesadopting California emissions standards, your vehiclewill operate satisfactorily on fuels meeting federalspecifications, but emission control system performancemay be affected. The malfunction indicator lamp mayturn on (see Malfunction Indicator Lamp on page 3-39 )and your vehicle may fail a smog-check test. If thisoccurs, return to your authorized GM dealer fordiagnosis. If it is determined that the condition is causedby the type of fuel used, repairs may not be coveredby your warranty.
AdditivesTo provide cleaner air, all gasolines in the United Statesare now required to contain additives that will helpprevent engine and fuel system deposits from forming,allowing your emission control system to workproperly. You should not have to add anything to yourfuel. However, some gasolines contain only theminimum amount of additive required to meet U.S.Environmental Protection Agency regulations.
General Motors recommends that you buy gasolines thatare advertised to help keep fuel injectors and intakevalves clean. If your vehicle experiences problems due todirty injectors or valves, try a different brand of gasoline.
Gasolines containing oxygenates, such as ethers andethanol, and reformulated gasolines may be available inyour area to contribute to clean air. General Motorsrecommends that you use these gasolines, particularly ifthey comply with the specifications described earlier.
Notice: Your vehicle was not designed for fuel thatcontains methanol. Do not use fuel containingmethanol. It can corrode metal parts in your fuelsystem and also damage the plastic and rubberparts. That damage would not be covered underyour warranty.
Some gasolines that are not reformulated for lowemissions may contain an octane-enhancing additivecalled methylcyclopentadienyl manganese tricarbonyl(MMT); ask the attendant where you buy gasolinewhether the fuel contains MMT. General Motors doesnot recommend the use of such gasolines. Fuelscontaining MMT can reduce the life of spark plugs andthe performance of the emission control system maybe affected. The malfunction indicator lamp may turn on.If this occurs, return to your authorized GM dealer forservice.
5-6
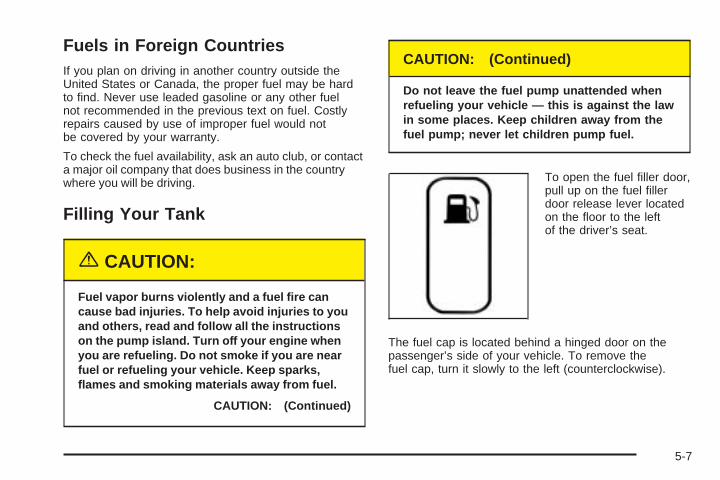
Fuels in Foreign CountriesIf you plan on driving in another country outside theUnited States or Canada, the proper fuel may be hardto find. Never use leaded gasoline or any other fuelnot recommended in the previous text on fuel. Costlyrepairs caused by use of improper fuel would notbe covered by your warranty.
To check the fuel availability, ask an auto club, or contacta major oil company that does business in the countrywhere you will be driving.
Filling Your Tank
{CAUTION:
Fuel vapor burns violently and a fuel fire cancause bad injuries. To help avoid injuries to youand others, read and follow all the instructionson the pump island. Turn off your engine whenyou are refueling. Do not smoke if you are nearfuel or refueling your vehicle. Keep sparks,flames and smoking materials away from fuel.
CAUTION: (Continued)
CAUTION: (Continued)
Do not leave the fuel pump unattended whenrefueling your vehicle — this is against the lawin some places. Keep children away from thefuel pump; never let children pump fuel.
To open the fuel filler door,pull up on the fuel fillerdoor release lever locatedon the floor to the leftof the driver’s seat.
The fuel cap is located behind a hinged door on thepassenger’s side of your vehicle. To remove thefuel cap, turn it slowly to the left (counterclockwise).
5-7
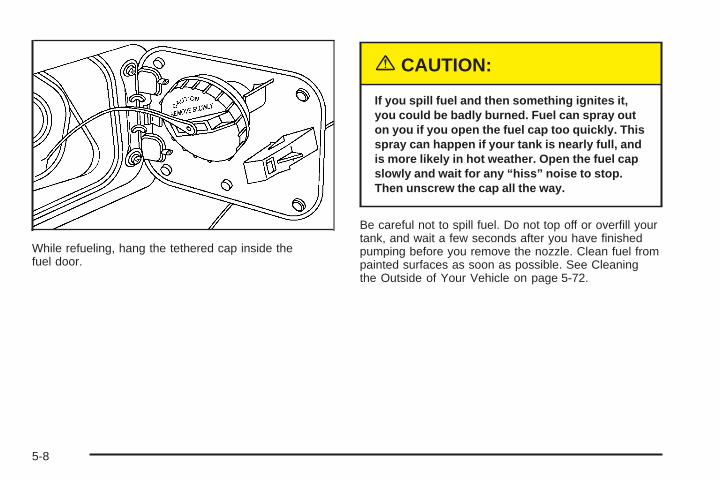
While refueling, hang the tethered cap inside thefuel door.
{CAUTION:
If you spill fuel and then something ignites it,you could be badly burned. Fuel can spray outon you if you open the fuel cap too quickly. Thisspray can happen if your tank is nearly full, andis more likely in hot weather. Open the fuel capslowly and wait for any “hiss” noise to stop.Then unscrew the cap all the way.
Be careful not to spill fuel. Do not top off or overfill yourtank, and wait a few seconds after you have finishedpumping before you remove the nozzle. Clean fuel frompainted surfaces as soon as possible. See Cleaningthe Outside of Your Vehicle on page 5-72.
5-8
When you put the fuel cap back on, turn it to the right(clockwise) until you hear a clicking sound. Makesure you fully install the cap. The diagnostic system candetermine if the fuel cap has been left off or improperlyinstalled. This would allow fuel to evaporate into theatmosphere. See Malfunction Indicator Lamp onpage 3-39.
{CAUTION:
If a fire starts while you are refueling, do notremove the nozzle. Shut off the flow of fuel byshutting off the pump or by notifying thestation attendant. Leave the area immediately.
Notice: If you need a new fuel cap, be sure to getthe right type. Your dealer can get one for you.If you get the wrong type, it may not fit properly.This may cause your malfunction indicator lamp tolight and may damage your fuel tank and emissionssystem. See Malfunction Indicator Lamp onpage 3-39.
5-9
Filling a Portable Fuel Container
{CAUTION:
Never fill a portable fuel container while it is inyour vehicle. Static electricity discharge fromthe container can ignite the gasoline vapor.You can be badly burned and your vehicledamaged if this occurs. To help avoid injuryto you and others:
• Dispense gasoline only into approvedcontainers.
• Do not fill a container while it is inside avehicle, in a vehicle’s trunk, pickup bedor on any surface other than the ground.
• Bring the fill nozzle in contact with theinside of the fill opening before operatingthe nozzle. Contact should be maintaineduntil the filling is complete.
• Do not smoke while pumping gasoline.
Checking Things Underthe Hood
{CAUTION:
An electric fan under the hood can start upand injure you even when the engine is notrunning. Keep hands, clothing and tools awayfrom any underhood electric fan.
{CAUTION:
Things that burn can get on hot engine partsand start a fire. These include liquids like fuel,oil, coolant, brake fluid, windshield washer andother fluids, and plastic or rubber. You orothers could be burned. Be careful not to dropor spill things that will burn onto a hot engine.
5-10
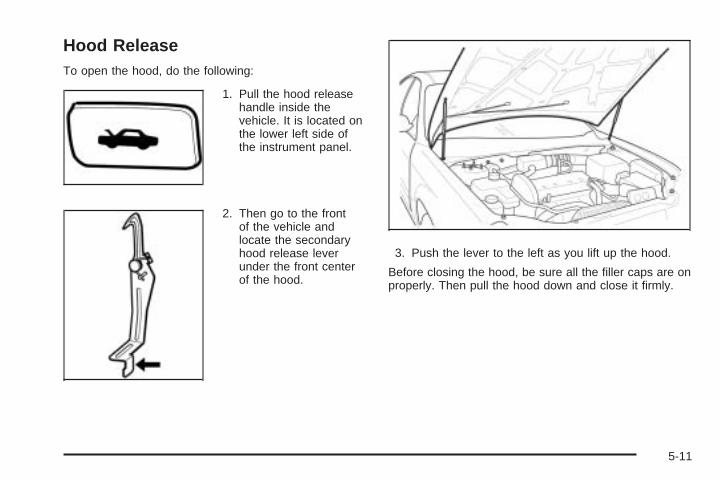
Hood ReleaseTo open the hood, do the following:
1. Pull the hood releasehandle inside thevehicle. It is located onthe lower left side ofthe instrument panel.
2. Then go to the frontof the vehicle andlocate the secondaryhood release leverunder the front centerof the hood.
3. Push the lever to the left as you lift up the hood.
Before closing the hood, be sure all the filler caps are onproperly. Then pull the hood down and close it firmly.
5-11
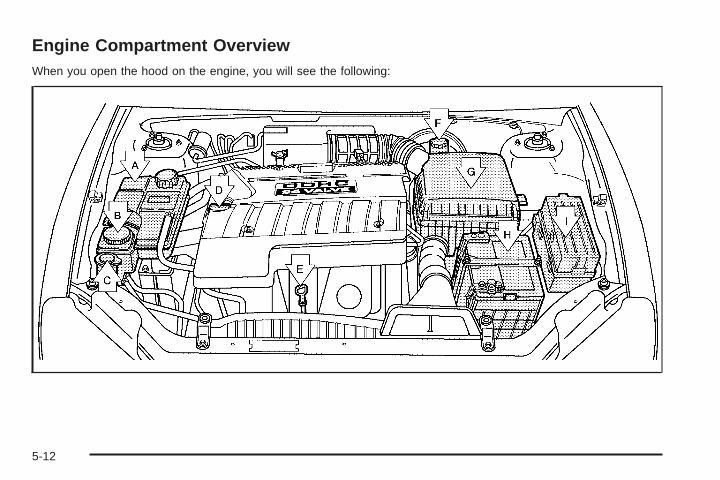
Engine Compartment OverviewWhen you open the hood on the engine, you will see the following:
5-12
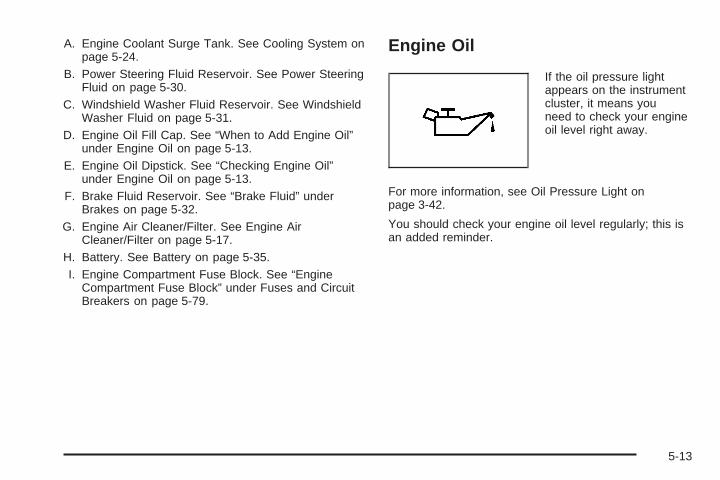
A. Engine Coolant Surge Tank. See Cooling System onpage 5-24.
B. Power Steering Fluid Reservoir. See Power SteeringFluid on page 5-30.
C. Windshield Washer Fluid Reservoir. See WindshieldWasher Fluid on page 5-31.
D. Engine Oil Fill Cap. See “When to Add Engine Oil”under Engine Oil on page 5-13.
E. Engine Oil Dipstick. See “Checking Engine Oil”under Engine Oil on page 5-13.
F. Brake Fluid Reservoir. See “Brake Fluid” underBrakes on page 5-32.
G. Engine Air Cleaner/Filter. See Engine AirCleaner/Filter on page 5-17.
H. Battery. See Battery on page 5-35.I. Engine Compartment Fuse Block. See “Engine
Compartment Fuse Block” under Fuses and CircuitBreakers on page 5-79.
Engine Oil
If the oil pressure lightappears on the instrumentcluster, it means youneed to check your engineoil level right away.
For more information, see Oil Pressure Light onpage 3-42.
You should check your engine oil level regularly; this isan added reminder.
5-13
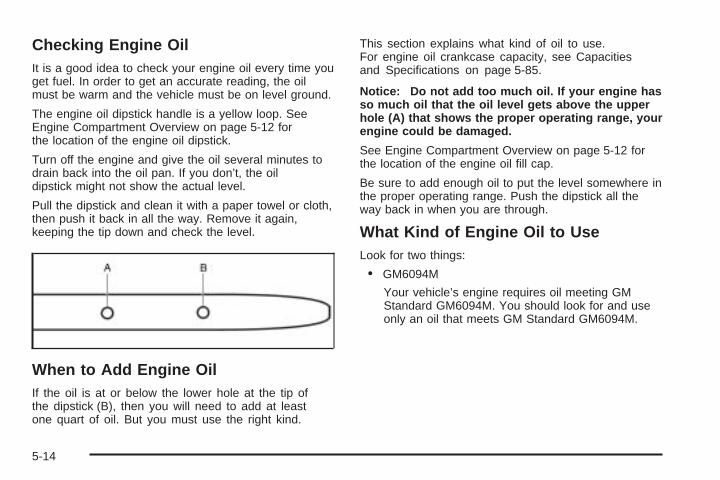
Checking Engine OilIt is a good idea to check your engine oil every time youget fuel. In order to get an accurate reading, the oilmust be warm and the vehicle must be on level ground.
The engine oil dipstick handle is a yellow loop. SeeEngine Compartment Overview on page 5-12 forthe location of the engine oil dipstick.
Turn off the engine and give the oil several minutes todrain back into the oil pan. If you don’t, the oildipstick might not show the actual level.
Pull the dipstick and clean it with a paper towel or cloth,then push it back in all the way. Remove it again,keeping the tip down and check the level.
When to Add Engine OilIf the oil is at or below the lower hole at the tip ofthe dipstick (B), then you will need to add at leastone quart of oil. But you must use the right kind.
This section explains what kind of oil to use.For engine oil crankcase capacity, see Capacitiesand Specifications on page 5-85.
Notice: Do not add too much oil. If your engine hasso much oil that the oil level gets above the upperhole (A) that shows the proper operating range, yourengine could be damaged.
See Engine Compartment Overview on page 5-12 forthe location of the engine oil fill cap.
Be sure to add enough oil to put the level somewhere inthe proper operating range. Push the dipstick all theway back in when you are through.
What Kind of Engine Oil to UseLook for two things:
• GM6094M
Your vehicle’s engine requires oil meeting GMStandard GM6094M. You should look for and useonly an oil that meets GM Standard GM6094M.
5-14
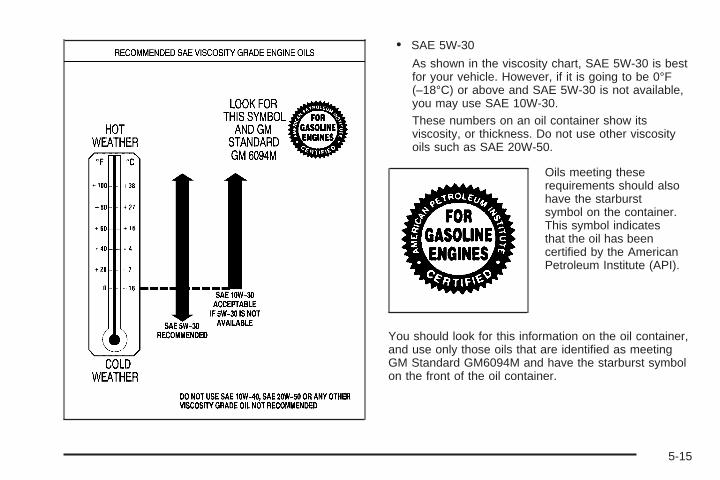
• SAE 5W-30
As shown in the viscosity chart, SAE 5W-30 is bestfor your vehicle. However, if it is going to be 0°F(–18°C) or above and SAE 5W-30 is not available,you may use SAE 10W-30.These numbers on an oil container show itsviscosity, or thickness. Do not use other viscosityoils such as SAE 20W-50.
Oils meeting theserequirements should alsohave the starburstsymbol on the container.This symbol indicatesthat the oil has beencertified by the AmericanPetroleum Institute (API).
You should look for this information on the oil container,and use only those oils that are identified as meetingGM Standard GM6094M and have the starburst symbolon the front of the oil container.
5-15
Notice: Use only engine oil identified as meetingGM Standard GM6094M and showing the AmericanPetroleum Institute Certified For Gasoline Enginesstarburst symbol. Failure to use the recommendedoil can result in engine damage not covered byyour warranty.
GM Goodwrench® oil meets all the requirements foryour vehicle.
If you are in an area of extreme cold, where thetemperature falls below −20°F (−29°C), it isrecommended that you use either an SAE 5W-30synthetic oil or an SAE 0W-30 oil. Both will provideeasier cold starting and better protection for yourengine at extremely low temperatures.
Engine Oil AdditivesDo not add anything to your oil. The recommendedoils with the starburst symbol that meet GM StandardGM6094M are all you will need for good performanceand engine protection.
When to Change Engine OilIf any one of these is true for you, use the short trip/citymaintenance schedule:
• Most trips are less than 5 miles (8 km). This isparticularly important when outside temperaturesare below freezing.
• Most trips include extensive idling (such as frequentdriving in stop-and-go traffic).
• You frequently tow a trailer or use a carrier on topof your vehicle.
• The vehicle is used for delivery service, police,taxi or other commercial application.
Driving under these conditions causes engine oil tobreak down sooner. If any one of these is true for yourvehicle, then you need to change your oil and filterevery 3,000 miles (5 000 km) or 3 months — whicheveroccurs first.
If none of them is true, use the long trip/highwaymaintenance schedule. Change oil and filter every7,500 miles (12 500 km) or 12 months — whicheveroccurs first. Driving a vehicle with a fully warmed engineunder highway conditions will cause engine oil tobreak down slower.
5-16
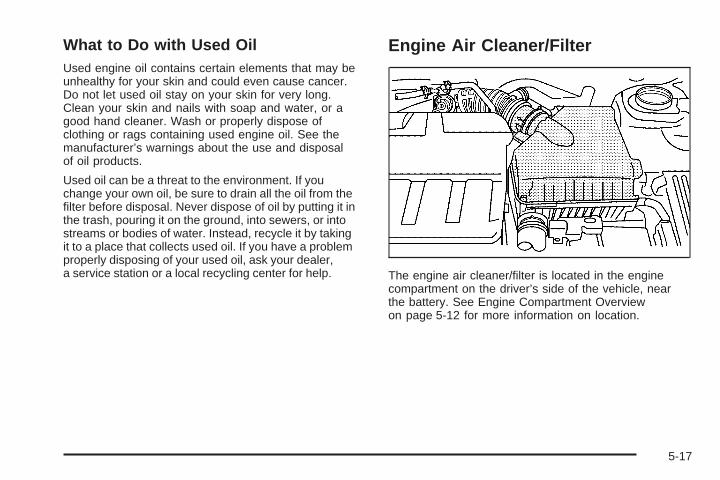
What to Do with Used OilUsed engine oil contains certain elements that may beunhealthy for your skin and could even cause cancer.Do not let used oil stay on your skin for very long.Clean your skin and nails with soap and water, or agood hand cleaner. Wash or properly dispose ofclothing or rags containing used engine oil. See themanufacturer’s warnings about the use and disposalof oil products.
Used oil can be a threat to the environment. If youchange your own oil, be sure to drain all the oil from thefilter before disposal. Never dispose of oil by putting it inthe trash, pouring it on the ground, into sewers, or intostreams or bodies of water. Instead, recycle it by takingit to a place that collects used oil. If you have a problemproperly disposing of your used oil, ask your dealer,a service station or a local recycling center for help.
Engine Air Cleaner/Filter
The engine air cleaner/filter is located in the enginecompartment on the driver’s side of the vehicle, nearthe battery. See Engine Compartment Overviewon page 5-12 for more information on location.
5-17
When to Inspect the Engine AirCleaner/FilterInspect the engine air cleaner/filter every 15,000 miles(25 000 km) and replace every 30,000 miles (50 000 km).If you are driving in dusty/dirty conditions, inspect thefilter at each engine oil change.
How to Inspect the Engine AirCleaner/FilterTo inspect the engine air cleaner/filter remove the filterfrom the vehicle and lightly shake the filter to releaseloose dust and dirt. If the filter remains caked with dirt,a new filter is required.
To inspect or replace the filter, do the following:
1. Open the latches that hold the cover on.
2. Lift off the cover.
3. Check or replace the engine air cleaner/filter.
4. Put the cover back on tightly and close the latches.
See Using Your Maintenance Schedule on page 6-4for replacement intervals.
{CAUTION:
Operating the engine with the air cleaner/filteroff can cause you or others to be burned.The air cleaner not only cleans the air, it helpsto stop flame if the engine backfires. If it isnot there and the engine backfires, you couldbe burned. Do not drive with it off, and becareful working on the engine with the aircleaner/filter off.
Notice: If the air cleaner/filter is off, a backfire cancause a damaging engine fire. And, dirt can easily getinto your engine, which will damage it. Always havethe air cleaner/filter in place when you are driving.
5-18
Automatic Transaxle FluidIt is not necessary to check the transaxle fluid level.If a leak occurs, take the vehicle to the dealershipservice department and have it repaired as soon aspossible. You may also have your fluid level checkedby your dealer or service center when you have youroil changed.
Have your dealer or service center change both the fluidand filter every 50,000 miles (83 000 km) if the vehicleis mainly driven under one or more of these conditions:
• In heavy city traffic where the outside temperatureregularly reaches 90°F (32°C) or higher.
• In hilly or mountainous terrain.
• Uses such as found in taxi, police or deliveryservice.
If you do not use your vehicle under any of theseconditions, the fluid and filter do not require changing.
Notice: Use of automatic transaxle fluid labeledother than ESSO LT71141 or TOTAL ATF H50235may damage your vehicle, and the damages maynot be covered by your warranty. Always useESSO LT71141 or TOTAL ATF H50235 labeledautomatic transaxle fluid.
Engine CoolantThe following explains your cooling system and howto add coolant when it is low. If you have a problem withengine overheating, see Engine Overheating onpage 5-22.
A 50/50 mixture of clean, drinkable water and propercoolant will:
• Give freezing protection down to −22°F (−30°C).
• Give boiling protection up to 268°F (131°C).
• Protect against rust and corrosion.
• Help keep the proper engine temperature.
• Let the warning lights and gages work as theyshould.
What to UseUse a 50/50 mixture of clean, drinkable water and coolantthat meets GM specification 1825M, which will notdamage aluminum parts. You can also use a recycledcoolant confirming to GM specification 1825M with acomplete coolant flush and refill. If you use this coolantmixture, you do not need to add anything else.
5-19
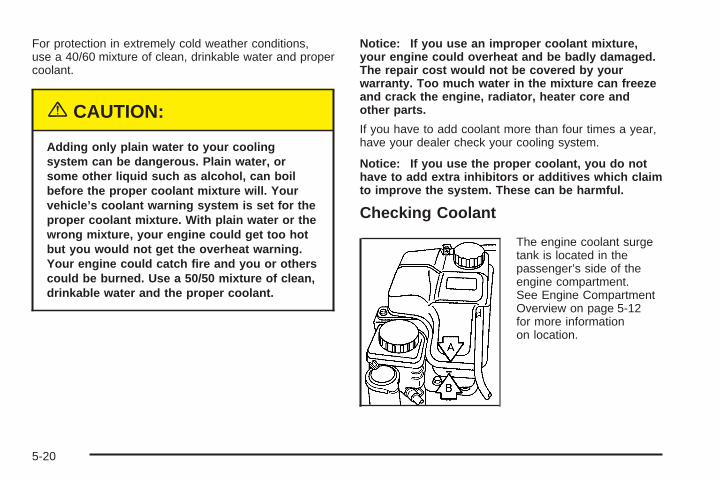
For protection in extremely cold weather conditions,use a 40/60 mixture of clean, drinkable water and propercoolant.
{CAUTION:
Adding only plain water to your coolingsystem can be dangerous. Plain water, orsome other liquid such as alcohol, can boilbefore the proper coolant mixture will. Yourvehicle’s coolant warning system is set for theproper coolant mixture. With plain water or thewrong mixture, your engine could get too hotbut you would not get the overheat warning.Your engine could catch fire and you or otherscould be burned. Use a 50/50 mixture of clean,drinkable water and the proper coolant.
Notice: If you use an improper coolant mixture,your engine could overheat and be badly damaged.The repair cost would not be covered by yourwarranty. Too much water in the mixture can freezeand crack the engine, radiator, heater core andother parts.
If you have to add coolant more than four times a year,have your dealer check your cooling system.
Notice: If you use the proper coolant, you do nothave to add extra inhibitors or additives which claimto improve the system. These can be harmful.
Checking Coolant
The engine coolant surgetank is located in thepassenger’s side of theengine compartment.See Engine CompartmentOverview on page 5-12for more informationon location.
5-20
{CAUTION:
Turning the surge tank pressure cap when theengine and radiator are hot can allow steamand scalding liquids to blow out and burn youbadly. Never turn the surge tank pressurecap — even a little — when the engine andradiator are hot.
The vehicle must be on a level surface. When yourengine is cold, the coolant level should be between theMAX (A) and MIN (B) marks on the coolant surgetank. The level rises at engine operation temperatureand drops again when the engine cools down.
Adding CoolantIf the level falls below the MIN (B) mark, add the propercoolant mixtureat the surge tank, but only when theengine is cool. If the surge tank is empty, a special fillprocedure is necessary. See Cooling System onpage 5-24 for instructions on “How to Add Coolant tothe Coolant Surge Tank.”
{CAUTION:
You can be burned if you spill coolant on hotengine parts. Coolant contains ethylene glycol,and it will burn if the engine parts are hotenough. Do not spill coolant on a hot engine.
When replacing the pressure cap, make sure it ishand-tight.
Coolant Surge Tank Pressure CapNotice: If the pressure cap is not tightly installed,coolant loss and possible engine damage mayoccur. Be sure the cap is properly and tightlysecured.
5-21
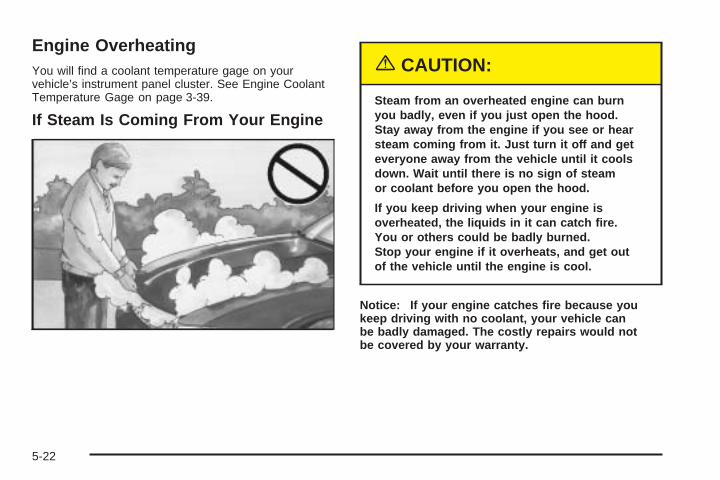
Engine OverheatingYou will find a coolant temperature gage on yourvehicle’s instrument panel cluster. See Engine CoolantTemperature Gage on page 3-39.
If Steam Is Coming From Your Engine
{CAUTION:
Steam from an overheated engine can burnyou badly, even if you just open the hood.Stay away from the engine if you see or hearsteam coming from it. Just turn it off and geteveryone away from the vehicle until it coolsdown. Wait until there is no sign of steamor coolant before you open the hood.
If you keep driving when your engine isoverheated, the liquids in it can catch fire.You or others could be badly burned.Stop your engine if it overheats, and get outof the vehicle until the engine is cool.
Notice: If your engine catches fire because youkeep driving with no coolant, your vehicle canbe badly damaged. The costly repairs would notbe covered by your warranty.
5-22
If No Steam Is Coming From YourEngineIf you get an engine overheat warning, but see or hearno steam, the problem may not be too serious.Sometimes the engine can get a little too hot when you:
• Climb a long hill on a hot day.
• Stop after high-speed driving.
• Idle for long periods in traffic.
If you get the overheat warning with no sign of steam,try this for a minute or so:
1. In heavy traffic, let the engine idle in NEUTRALwhile stopped. If it is safe to do so, pull off theroad, shift to PARK (P) or NEUTRAL and let theengine idle.
2. Turn on your heater to full hot at the highest fanspeed and open the window as necessary.
If you no longer have the overheat warning, you candrive. Just to be safe, drive slower for about 10 minutes.If the warning does not come back on, you can drivenormally.
If the warning continues and you have not stopped, pullover, stop, and park your vehicle right away.
If there is still no sign of steam, you can idle the enginefor three minutes while you are parked. If you stillhave the warning, turn off the engine and get everyoneout of the vehicle until it cools down.
You may decide not to lift the hood, but to get servicehelp right away.
5-23
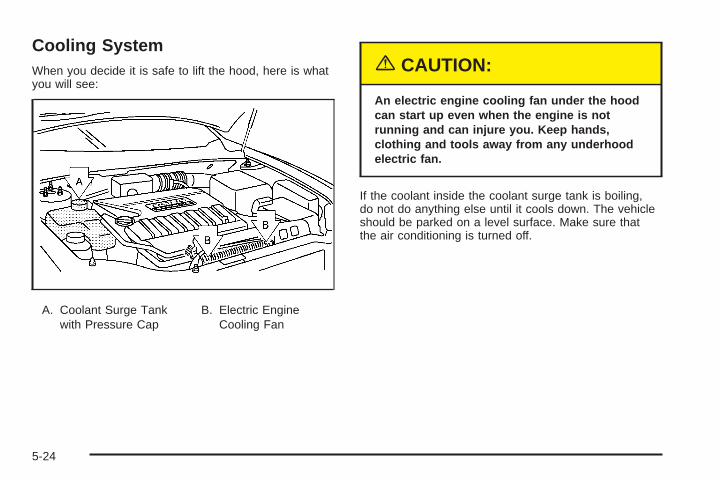
Cooling SystemWhen you decide it is safe to lift the hood, here is whatyou will see:
A. Coolant Surge Tankwith Pressure Cap
B. Electric EngineCooling Fan
{CAUTION:
An electric engine cooling fan under the hoodcan start up even when the engine is notrunning and can injure you. Keep hands,clothing and tools away from any underhoodelectric fan.
If the coolant inside the coolant surge tank is boiling,do not do anything else until it cools down. The vehicleshould be parked on a level surface. Make sure thatthe air conditioning is turned off.
5-24
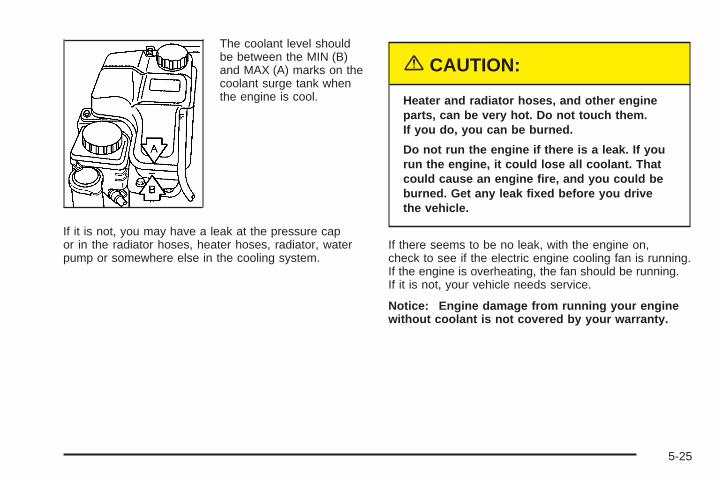
The coolant level shouldbe between the MIN (B)and MAX (A) marks on thecoolant surge tank whenthe engine is cool.
If it is not, you may have a leak at the pressure capor in the radiator hoses, heater hoses, radiator, waterpump or somewhere else in the cooling system.
{CAUTION:
Heater and radiator hoses, and other engineparts, can be very hot. Do not touch them.If you do, you can be burned.
Do not run the engine if there is a leak. If yourun the engine, it could lose all coolant. Thatcould cause an engine fire, and you could beburned. Get any leak fixed before you drivethe vehicle.
If there seems to be no leak, with the engine on,check to see if the electric engine cooling fan is running.If the engine is overheating, the fan should be running.If it is not, your vehicle needs service.
Notice: Engine damage from running your enginewithout coolant is not covered by your warranty.
5-25
How to Add Coolant to the CoolantSurge Tank
Notice: This vehicle has a specific coolant fillprocedure. Failure to follow this procedure couldcause your engine to overheat and be severelydamaged.
If you have not found a problem yet, check to see ifcoolant is visible in the surge tank. If coolant is visiblebut the coolant level is not between the MIN (B)and MAX (A) marks, add a 50/50 mixture of clean,drinkable water and proper coolant at the coolant surgetank, but be sure the cooling system, including thecoolant surge tank pressure cap, is cool before you doit. See Engine Coolant on page 5-19 for moreinformation.
If no coolant is visible in the surge tank, add coolant asfollows:
{CAUTION:
Steam and scalding liquids from a hot coolingsystem can blow out and burn you badly. Theyare under pressure, and if you turn the coolantsurge tank pressure cap — even a little — theycan come out at high speed. Never turn thecap when the cooling system, including thecoolant surge tank pressure cap, is hot. Waitfor the cooling system and coolant surge tankpressure cap to cool if you ever have to turnthe pressure cap.
5-26
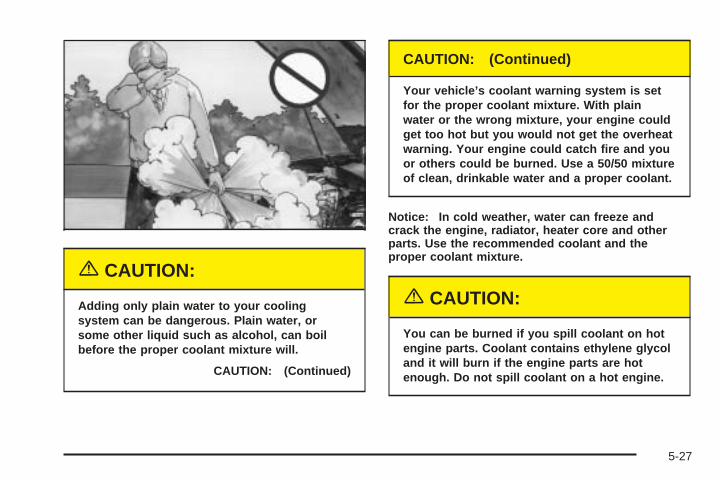
{CAUTION:
Adding only plain water to your coolingsystem can be dangerous. Plain water, orsome other liquid such as alcohol, can boilbefore the proper coolant mixture will.
CAUTION: (Continued)
CAUTION: (Continued)
Your vehicle’s coolant warning system is setfor the proper coolant mixture. With plainwater or the wrong mixture, your engine couldget too hot but you would not get the overheatwarning. Your engine could catch fire and youor others could be burned. Use a 50/50 mixtureof clean, drinkable water and a proper coolant.
Notice: In cold weather, water can freeze andcrack the engine, radiator, heater core and otherparts. Use the recommended coolant and theproper coolant mixture.
{CAUTION:
You can be burned if you spill coolant on hotengine parts. Coolant contains ethylene glycoland it will burn if the engine parts are hotenough. Do not spill coolant on a hot engine.
5-27
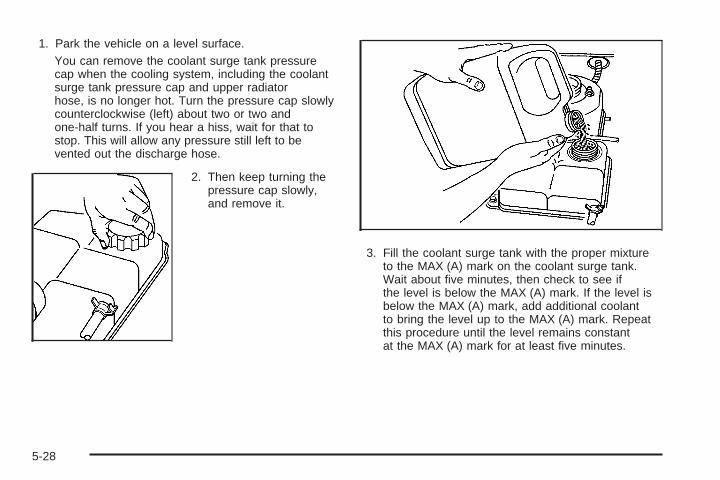
1. Park the vehicle on a level surface.You can remove the coolant surge tank pressurecap when the cooling system, including the coolantsurge tank pressure cap and upper radiatorhose, is no longer hot. Turn the pressure cap slowlycounterclockwise (left) about two or two andone-half turns. If you hear a hiss, wait for that tostop. This will allow any pressure still left to bevented out the discharge hose.
2. Then keep turning thepressure cap slowly,and remove it.
3. Fill the coolant surge tank with the proper mixtureto the MAX (A) mark on the coolant surge tank.Wait about five minutes, then check to see ifthe level is below the MAX (A) mark. If the level isbelow the MAX (A) mark, add additional coolantto bring the level up to the MAX (A) mark. Repeatthis procedure until the level remains constantat the MAX (A) mark for at least five minutes.
5-28
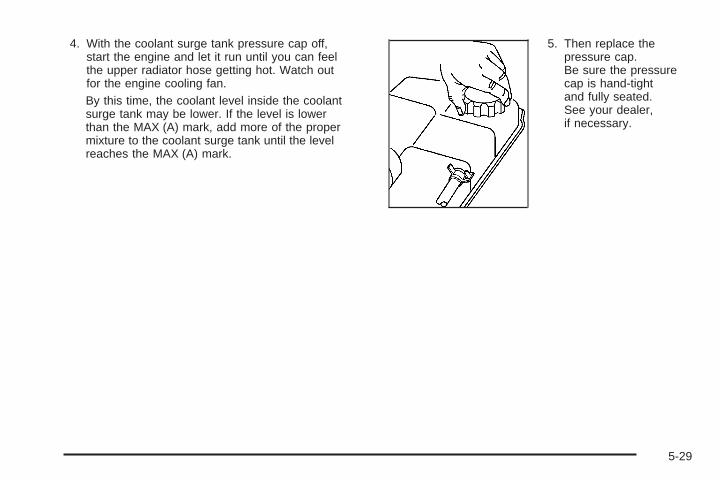
4. With the coolant surge tank pressure cap off,start the engine and let it run until you can feelthe upper radiator hose getting hot. Watch outfor the engine cooling fan.By this time, the coolant level inside the coolantsurge tank may be lower. If the level is lowerthan the MAX (A) mark, add more of the propermixture to the coolant surge tank until the levelreaches the MAX (A) mark.
5. Then replace thepressure cap.Be sure the pressurecap is hand-tightand fully seated.See your dealer,if necessary.
5-29
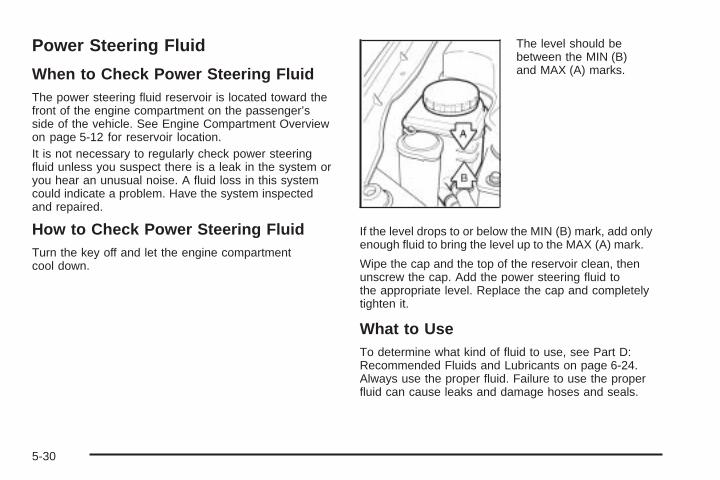
Power Steering Fluid
When to Check Power Steering FluidThe power steering fluid reservoir is located toward thefront of the engine compartment on the passenger’sside of the vehicle. See Engine Compartment Overviewon page 5-12 for reservoir location.It is not necessary to regularly check power steeringfluid unless you suspect there is a leak in the system oryou hear an unusual noise. A fluid loss in this systemcould indicate a problem. Have the system inspectedand repaired.
How to Check Power Steering FluidTurn the key off and let the engine compartmentcool down.
The level should bebetween the MIN (B)and MAX (A) marks.
If the level drops to or below the MIN (B) mark, add onlyenough fluid to bring the level up to the MAX (A) mark.
Wipe the cap and the top of the reservoir clean, thenunscrew the cap. Add the power steering fluid tothe appropriate level. Replace the cap and completelytighten it.
What to UseTo determine what kind of fluid to use, see Part D:Recommended Fluids and Lubricants on page 6-24.Always use the proper fluid. Failure to use the properfluid can cause leaks and damage hoses and seals.
5-30
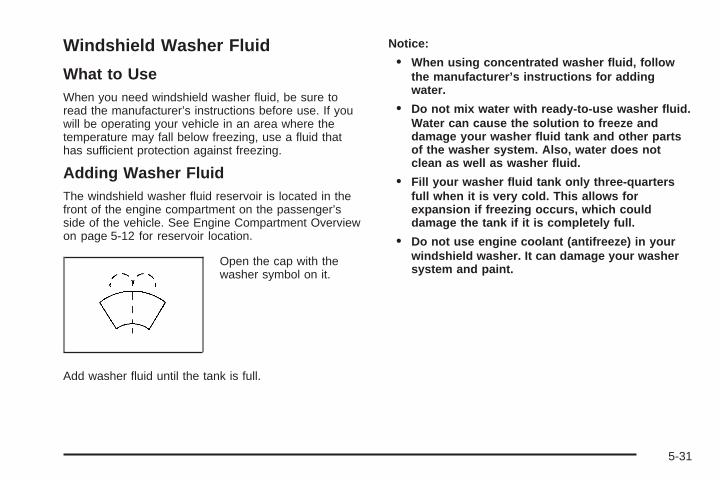
Windshield Washer Fluid
What to UseWhen you need windshield washer fluid, be sure toread the manufacturer’s instructions before use. If youwill be operating your vehicle in an area where thetemperature may fall below freezing, use a fluid thathas sufficient protection against freezing.
Adding Washer FluidThe windshield washer fluid reservoir is located in thefront of the engine compartment on the passenger’sside of the vehicle. See Engine Compartment Overviewon page 5-12 for reservoir location.
Open the cap with thewasher symbol on it.
Add washer fluid until the tank is full.
Notice:
• When using concentrated washer fluid, followthe manufacturer’s instructions for addingwater.
• Do not mix water with ready-to-use washer fluid.Water can cause the solution to freeze anddamage your washer fluid tank and other partsof the washer system. Also, water does notclean as well as washer fluid.
• Fill your washer fluid tank only three-quartersfull when it is very cold. This allows forexpansion if freezing occurs, which coulddamage the tank if it is completely full.
• Do not use engine coolant (antifreeze) in yourwindshield washer. It can damage your washersystem and paint.
5-31
Brakes
Brake FluidYour brake master cylinder reservoir is located near theback of the engine compartment on the driver’s sideof the vehicle. It is filled with DOT-3 brake fluid.See Engine Compartment Overview on page 5-12.
There are only two reasons why the brake fluid levelin the reservoir might go down. The first is that the brakefluid goes down to an acceptable level during normalbrake lining wear. When new linings are put in, the fluidlevel goes back up. The other reason is that fluid isleaking out of the brake system. If it is, you shouldhave your brake system fixed, since a leak means thatsooner or later your brakes will not work well, or willnot work at all.
So, it is not a good idea to “top off” your brake fluid.Adding brake fluid will not correct a leak. If you add fluidwhen your linings are worn, then you will have toomuch fluid when you get new brake linings. You shouldadd (or remove) brake fluid, as necessary, only whenwork is done on the brake hydraulic system.
{CAUTION:
If you have too much brake fluid, it can spill onthe engine. The fluid will burn if the engine ishot enough. You or others could be burned,and your vehicle could be damaged. Add brakefluid only when work is done on the brakehydraulic system.
When your brake fluidfalls to a low level,your brake warninglight will come on.See Brake SystemWarning Light onpage 3-35.
What to AddWhen you do need brake/clutch fluid, use only DOT-3brake fluid. Use new brake fluid from a sealed containeronly. See Part D: Recommended Fluids and Lubricantson page 6-24.
5-32
Always clean the brake/clutch fluid reservoir cap and thearea around the cap before removing it. This will helpkeep dirt from entering the reservoir.
{CAUTION:
With the wrong kind of fluid in your brakesystem, your brakes may not work well, or theymay not even work at all. This could cause acrash. Always use the proper brake fluid.
Notice:
• Using the wrong fluid can badly damage brakesystem parts. For example, just a few dropsof mineral-based oil, such as engine oil, in yourbrake system can damage brake system partsso badly that they will have to be replaced.Do not let someone put in the wrong kindof fluid.
• If you spill brake fluid on your vehicle’spainted surfaces, the paint finish can bedamaged. Be careful not to spill brake fluid onyour vehicle. If you do, wash it off immediately.See Appearance Care on page 5-68.
Brake WearYour vehicle has four-wheel disc brakes.
Disc brake pads have built-in wear indicators thatmake a high-pitched warning sound when the brakepads are worn and new pads are needed. The soundmay come and go or be heard all the time your vehicleis moving (except when you are pushing on thebrake pedal firmly).
{CAUTION:
The brake wear warning sound means thatsoon your brakes will not work well. Thatcould lead to an accident. When you hear thebrake wear warning sound, have your vehicleserviced.
Notice: Continuing to drive with worn-out brakepads could result in costly brake repair.
5-33
Some driving conditions or climates may cause a brakesqueal when the brakes are first applied or lightlyapplied. This does not mean something is wrong withyour brakes.
Properly torqued wheel nuts are necessary to helpprevent brake pulsation. When tires are rotated, inspectbrake pads for wear and evenly tighten wheel nuts inthe proper sequence to GM torque specifications.
Brake linings should always be replaced as completeaxle sets.
See Brake System Inspection on page 6-23.
Brake Pedal TravelSee your dealer if the brake pedal does not return tonormal height, or if there is a rapid increase inpedal travel. This could be a sign of brake trouble.
Brake AdjustmentEvery time you apply your brakes, with or without thevehicle moving, your brakes adjust for wear.
Replacing Brake System PartsThe braking system on a vehicle is complex. Its manyparts have to be of top quality and work well together ifthe vehicle is to have really good braking. Your vehiclewas designed and tested with top-quality GM brake parts.When you replace parts of your braking system — forexample, when your brake linings wear down and youneed new ones put in — be sure you get new approvedGM replacement parts. If you do not, your brakes may nolonger work properly. For example, if someone puts inbrake linings that are wrong for your vehicle, the balancebetween your front and rear brakes can change — for theworse. The braking performance you have come toexpect can change in many other ways if someone putsin the wrong replacement brake parts.
5-34
BatteryYour new vehicle comes with a maintenance freebattery. When it is time for a new battery, get one thathas the replacement number shown on the originalbattery’s label. See Engine Compartment Overviewon page 5-12 for battery location.
Warning: Battery posts, terminals and relatedaccessories contain lead and lead compounds,chemicals known to the State of California to causecancer and reproductive harm. Wash hands afterhandling.
Vehicle StorageIf you are not going to drive your vehicle for 25 daysor more, remove the black, negative (−) cablefrom the battery. This will help keep your batteryfrom running down.
{CAUTION:
Batteries have acid that can burn you andgas that can explode. You can be badly hurt ifyou are not careful. See Jump Starting onpage 5-36 for tips on working around a batterywithout getting hurt.
Contact your dealer to learn how to prepare yourvehicle for longer storage periods.
5-35
Jump StartingIf your battery has run down, you may want to useanother vehicle and some jumper cables to start yourvehicle. Be sure to follow the steps below to do it safely.
{CAUTION:
Batteries can hurt you. They can be dangerousbecause:
• They contain acid that can burn you.• They contain gas that can explode
or ignite.• They contain enough electricity to
burn you.
If you do not follow these steps exactly, someor all of these things can hurt you.
Notice: Ignoring these steps could result in costlydamage to your vehicle that would not be coveredby your warranty.
Trying to start your vehicle by pushing or pulling itwill not work, and it could damage your vehicle.
1. Check the other vehicle. It must have a 12-voltbattery with a negative ground system.
Notice: If the other vehicle’s system is not a 12-voltsystem with a negative ground, both vehicles canbe damaged. Only use vehicles with 12-volt systemswith negative grounds to jump start your vehicle.
2. Get the vehicles close enough so the jumper cablescan reach, but be sure the vehicles are not touchingeach other. If they are, it could cause a groundconnection you do not want. You would not be ableto start your vehicle, and the bad groundingcould damage the electrical systems.To avoid the possibility of the vehicles rolling, setthe parking brake firmly on both vehicles involvedin the jump start procedure. Put an automatictransaxle in PARK (P) or a manual transaxle inNEUTRAL before setting the parking brake.
Notice: If you leave your radio or other accessorieson during the jump starting procedure, they couldbe damaged. The repairs would not be coveredby your warranty. Always turn off your radio andother accessories when jump starting your vehicle.
3. Turn off the ignition on both vehicles. Unplugunnecessary accessories plugged into the cigarettelighter or in the accessory power outlet. Turn offthe radio and all lamps that are not needed. This willavoid sparks and help save both batteries. And itcould save your radio!
5-36
4. Open the hoods and locate the batteries. Find thepositive (+) and negative (−) terminal locations oneach vehicle. Your vehicle’s positive (+) terminal islocated under a red tethered cap on the battery.The negative (−) terminal is located under ablack tethered cap on the battery. See EngineCompartment Overview on page 5-12 for moreinformation on location.Flip the caps up to access the positive (+) andnegative (−) terminals.
{CAUTION:
An electric fan can start up even when theengine is not running and can injure you.Keep hands, clothing and tools away fromany underhood electric fan.
{CAUTION:
Using a match near a battery can cause batterygas to explode. People have been hurt doingthis, and some have been blinded. Use aflashlight if you need more light.
Be sure the battery has enough water. You donot need to add water to the battery installedin your new vehicle. But if a battery has fillercaps, be sure the right amount of fluid is there.If it is low, add water to take care of that first.If you don’t, explosive gas could be present.
Battery fluid contains acid that can burn you.Do not get it on you. If you accidentally get itin your eyes or on your skin, flush the placewith water and get medical help immediately.
5-37
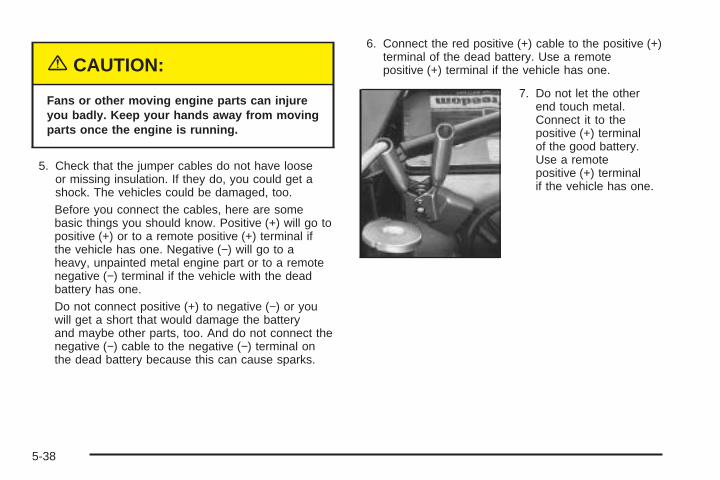
{CAUTION:
Fans or other moving engine parts can injureyou badly. Keep your hands away from movingparts once the engine is running.
5. Check that the jumper cables do not have looseor missing insulation. If they do, you could get ashock. The vehicles could be damaged, too.Before you connect the cables, here are somebasic things you should know. Positive (+) will go topositive (+) or to a remote positive (+) terminal ifthe vehicle has one. Negative (−) will go to aheavy, unpainted metal engine part or to a remotenegative (−) terminal if the vehicle with the deadbattery has one.Do not connect positive (+) to negative (−) or youwill get a short that would damage the batteryand maybe other parts, too. And do not connect thenegative (−) cable to the negative (−) terminal onthe dead battery because this can cause sparks.
6. Connect the red positive (+) cable to the positive (+)terminal of the dead battery. Use a remotepositive (+) terminal if the vehicle has one.
7. Do not let the otherend touch metal.Connect it to thepositive (+) terminalof the good battery.Use a remotepositive (+) terminalif the vehicle has one.
5-38
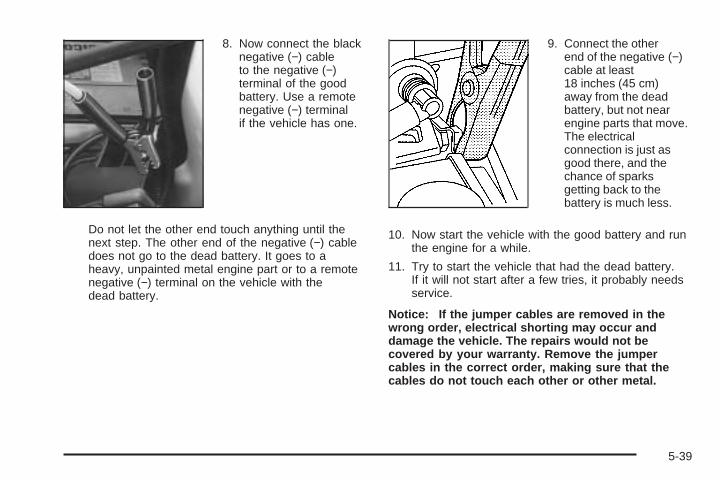
8. Now connect the blacknegative (−) cableto the negative (−)terminal of the goodbattery. Use a remotenegative (−) terminalif the vehicle has one.
Do not let the other end touch anything until thenext step. The other end of the negative (−) cabledoes not go to the dead battery. It goes to aheavy, unpainted metal engine part or to a remotenegative (−) terminal on the vehicle with thedead battery.
9. Connect the otherend of the negative (−)cable at least18 inches (45 cm)away from the deadbattery, but not nearengine parts that move.The electricalconnection is just asgood there, and thechance of sparksgetting back to thebattery is much less.
10. Now start the vehicle with the good battery and runthe engine for a while.
11. Try to start the vehicle that had the dead battery.If it will not start after a few tries, it probably needsservice.
Notice: If the jumper cables are removed in thewrong order, electrical shorting may occur anddamage the vehicle. The repairs would not becovered by your warranty. Remove the jumpercables in the correct order, making sure that thecables do not touch each other or other metal.
5-39
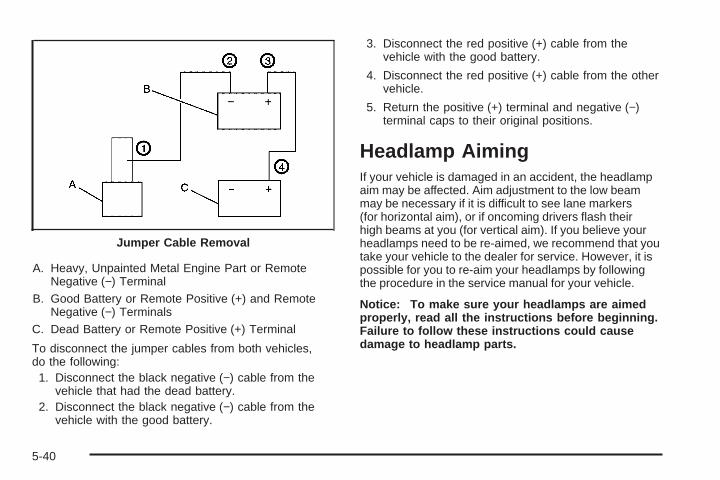
A. Heavy, Unpainted Metal Engine Part or RemoteNegative (−) Terminal
B. Good Battery or Remote Positive (+) and RemoteNegative (−) Terminals
C. Dead Battery or Remote Positive (+) Terminal
To disconnect the jumper cables from both vehicles,do the following:
1. Disconnect the black negative (−) cable from thevehicle that had the dead battery.
2. Disconnect the black negative (−) cable from thevehicle with the good battery.
3. Disconnect the red positive (+) cable from thevehicle with the good battery.
4. Disconnect the red positive (+) cable from the othervehicle.
5. Return the positive (+) terminal and negative (−)terminal caps to their original positions.
Headlamp AimingIf your vehicle is damaged in an accident, the headlampaim may be affected. Aim adjustment to the low beammay be necessary if it is difficult to see lane markers(for horizontal aim), or if oncoming drivers flash theirhigh beams at you (for vertical aim). If you believe yourheadlamps need to be re-aimed, we recommend that youtake your vehicle to the dealer for service. However, it ispossible for you to re-aim your headlamps by followingthe procedure in the service manual for your vehicle.
Notice: To make sure your headlamps are aimedproperly, read all the instructions before beginning.Failure to follow these instructions could causedamage to headlamp parts.
Jumper Cable Removal
5-40

Bulb ReplacementFor any bulb changing procedures not listed in thissection, contact your dealer.
Halogen Bulbs
{CAUTION:
Halogen bulbs have pressurized gas inside andcan burst if you drop or scratch the bulb. Youor others could be injured. Be sure to read andfollow the instructions on the bulb package.
Headlamps
A. Low-Beam Headlamp B. High-Beam Headlamp
1. Open the hood.
2. Remove the three bolts from the headlampassembly.
3. Remove the headlamp assembly.
4. Release the two wire bars that retain theheadlamp cap.
5-41
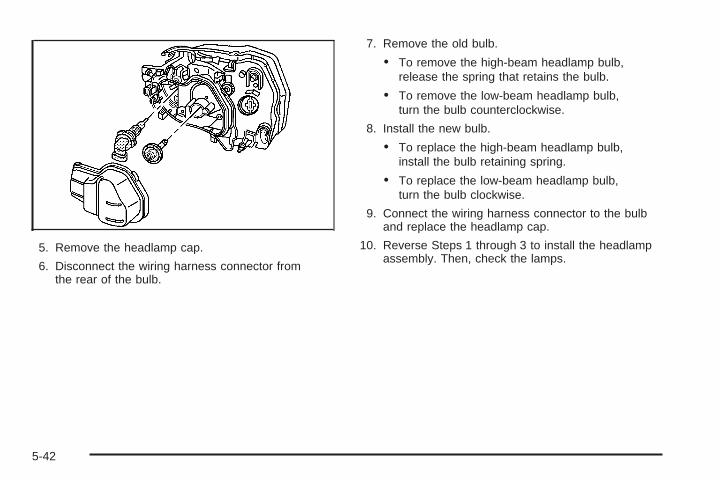
5. Remove the headlamp cap.
6. Disconnect the wiring harness connector fromthe rear of the bulb.
7. Remove the old bulb.
• To remove the high-beam headlamp bulb,release the spring that retains the bulb.
• To remove the low-beam headlamp bulb,turn the bulb counterclockwise.
8. Install the new bulb.
• To replace the high-beam headlamp bulb,install the bulb retaining spring.
• To replace the low-beam headlamp bulb,turn the bulb clockwise.
9. Connect the wiring harness connector to the bulband replace the headlamp cap.
10. Reverse Steps 1 through 3 to install the headlampassembly. Then, check the lamps.
5-42
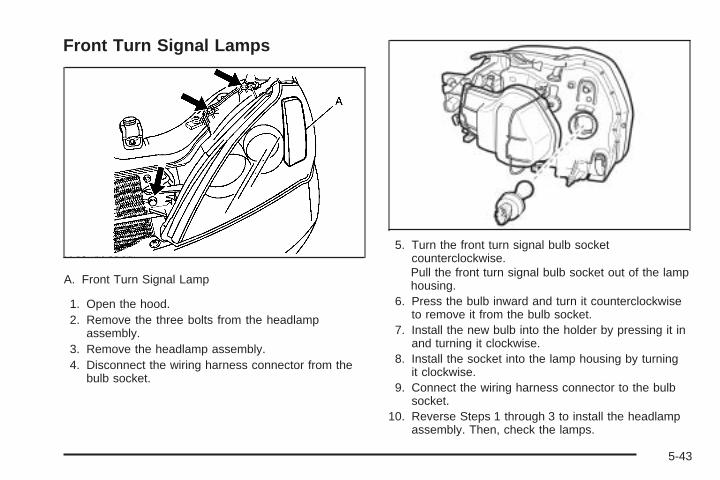
Front Turn Signal Lamps
A. Front Turn Signal Lamp
1. Open the hood.2. Remove the three bolts from the headlamp
assembly.3. Remove the headlamp assembly.4. Disconnect the wiring harness connector from the
bulb socket.
5. Turn the front turn signal bulb socketcounterclockwise.Pull the front turn signal bulb socket out of the lamphousing.
6. Press the bulb inward and turn it counterclockwiseto remove it from the bulb socket.
7. Install the new bulb into the holder by pressing it inand turning it clockwise.
8. Install the socket into the lamp housing by turningit clockwise.
9. Connect the wiring harness connector to the bulbsocket.
10. Reverse Steps 1 through 3 to install the headlampassembly. Then, check the lamps.
5-43
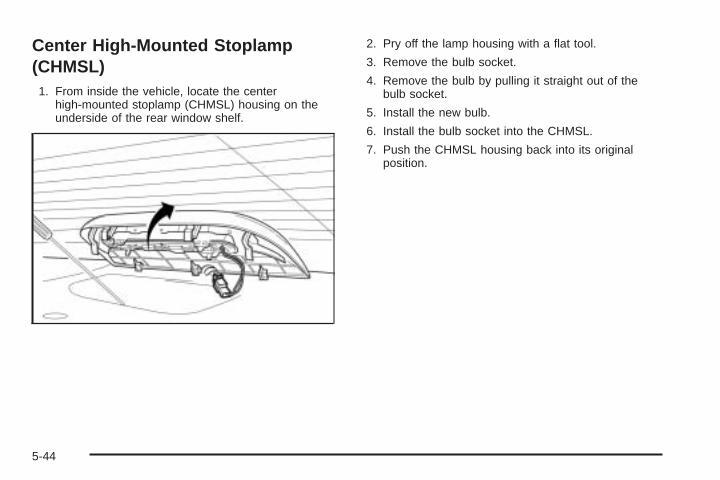
Center High-Mounted Stoplamp(CHMSL)
1. From inside the vehicle, locate the centerhigh-mounted stoplamp (CHMSL) housing on theunderside of the rear window shelf.
2. Pry off the lamp housing with a flat tool.
3. Remove the bulb socket.
4. Remove the bulb by pulling it straight out of thebulb socket.
5. Install the new bulb.
6. Install the bulb socket into the CHMSL.
7. Push the CHMSL housing back into its originalposition.
5-44
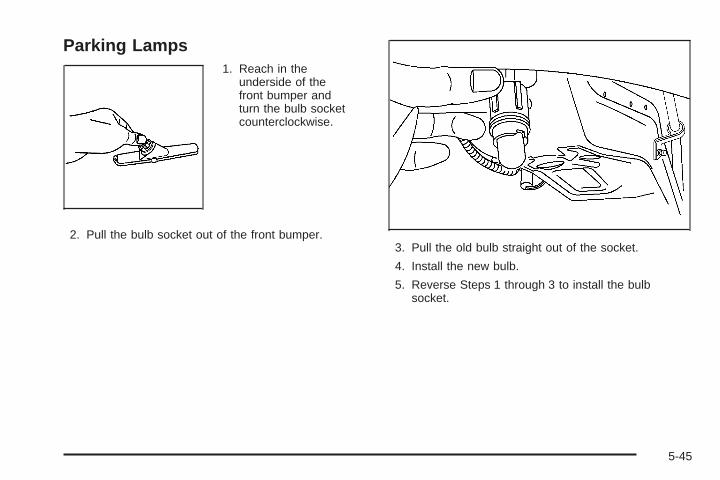
Parking Lamps1. Reach in the
underside of thefront bumper andturn the bulb socketcounterclockwise.
2. Pull the bulb socket out of the front bumper.3. Pull the old bulb straight out of the socket.
4. Install the new bulb.
5. Reverse Steps 1 through 3 to install the bulbsocket.
5-45
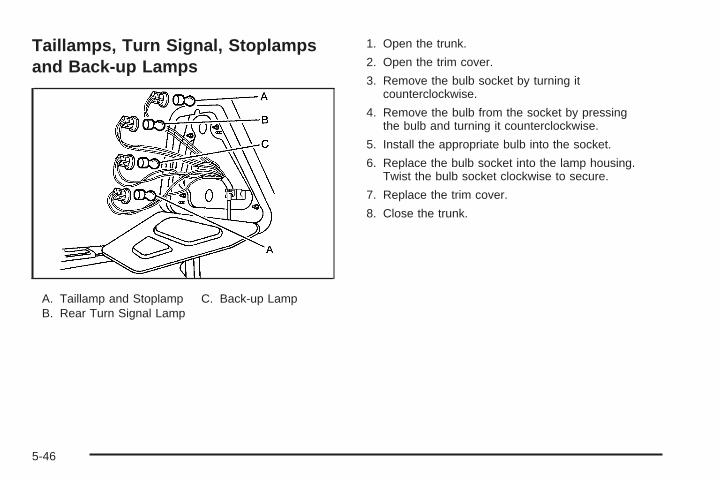
Taillamps, Turn Signal, Stoplampsand Back-up Lamps
A. Taillamp and StoplampB. Rear Turn Signal Lamp
C. Back-up Lamp
1. Open the trunk.
2. Open the trim cover.
3. Remove the bulb socket by turning itcounterclockwise.
4. Remove the bulb from the socket by pressingthe bulb and turning it counterclockwise.
5. Install the appropriate bulb into the socket.
6. Replace the bulb socket into the lamp housing.Twist the bulb socket clockwise to secure.
7. Replace the trim cover.
8. Close the trunk.
5-46
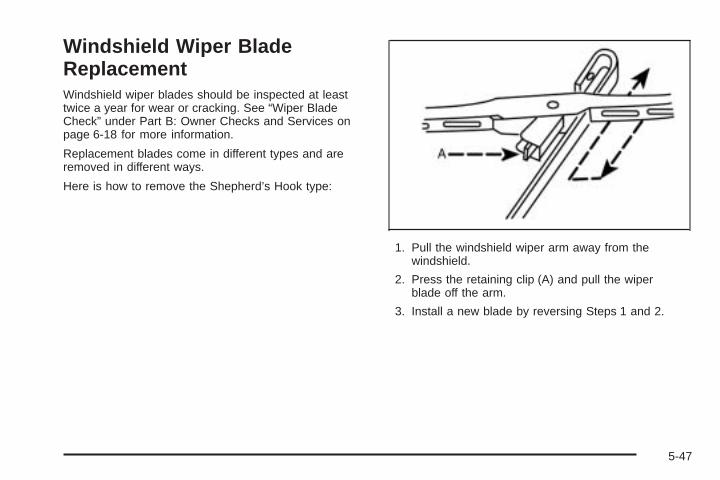
Windshield Wiper BladeReplacementWindshield wiper blades should be inspected at leasttwice a year for wear or cracking. See “Wiper BladeCheck” under Part B: Owner Checks and Services onpage 6-18 for more information.
Replacement blades come in different types and areremoved in different ways.
Here is how to remove the Shepherd’s Hook type:
1. Pull the windshield wiper arm away from thewindshield.
2. Press the retaining clip (A) and pull the wiperblade off the arm.
3. Install a new blade by reversing Steps 1 and 2.
5-47
TiresYour new vehicle comes with high-quality tires made bya leading tire manufacturer. If you ever have questionsabout your tire warranty and where to obtain service,see your GM Warranty booklet for details. For additionalinformation refer to the tire manufacturer’s bookletincluded with your vehicle’s Owner Manual.
{CAUTION:
Poorly maintained and improperly used tiresare dangerous.
• Overloading your tires can causeoverheating as a result of too much friction.You could have an air-out and a seriousaccident. See “Loading Your Vehicle”in the Index.
CAUTION: (Continued)
CAUTION: (Continued)
• Underinflated tires pose the same dangeras overloaded tires. The resulting accidentcould cause serious injury. Check all tiresfrequently to maintain the recommendedpressure. Tire pressure should be checkedwhen your tires are cold.
• Overinflated tires are more likely to becut, punctured or broken by a suddenimpact — such as when you hit a pothole.Keep tires at the recommended pressure.
• Worn, old tires can cause accidents. If yourtread is badly worn, or if your tires havebeen damaged, replace them.
Tire Sidewall LabelingUseful information about a tire is molded into its sidewall.The examples below show a typical passenger car tiresidewall.
5-48
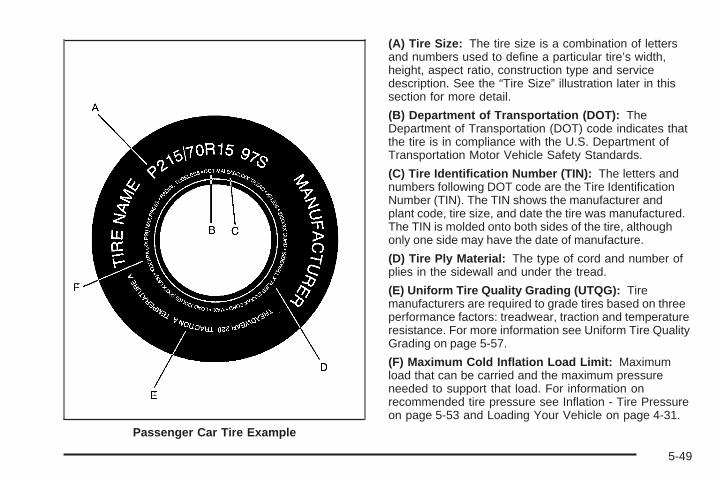
(A) Tire Size: The tire size is a combination of lettersand numbers used to define a particular tire’s width,height, aspect ratio, construction type and servicedescription. See the “Tire Size” illustration later in thissection for more detail.
(B) Department of Transportation (DOT): TheDepartment of Transportation (DOT) code indicates thatthe tire is in compliance with the U.S. Department ofTransportation Motor Vehicle Safety Standards.
(C) Tire Identification Number (TIN): The letters andnumbers following DOT code are the Tire IdentificationNumber (TIN). The TIN shows the manufacturer andplant code, tire size, and date the tire was manufactured.The TIN is molded onto both sides of the tire, althoughonly one side may have the date of manufacture.
(D) Tire Ply Material: The type of cord and number ofplies in the sidewall and under the tread.
(E) Uniform Tire Quality Grading (UTQG): Tiremanufacturers are required to grade tires based on threeperformance factors: treadwear, traction and temperatureresistance. For more information see Uniform Tire QualityGrading on page 5-57.
(F) Maximum Cold Inflation Load Limit: Maximumload that can be carried and the maximum pressureneeded to support that load. For information onrecommended tire pressure see Inflation - Tire Pressureon page 5-53 and Loading Your Vehicle on page 4-31.
Passenger Car Tire Example
5-49

Tire SizeThe following illustration shows an example of a typicalpassenger car tire size.
(A) Passenger (P-Metric) Tire: The United Statesversion of a metric tire sizing system. The letter “P” asthe first character in the tire size means a passengervehicle tire engineered to standards set by the U. S. Tireand Rim Association.
(B) Tire Width: The three-digit number indicates thetire section width in millimeters from sidewall to sidewall.
(C) Aspect Ratio: A two-digit number that indicatesthe tire height-to-width measurements. For example, ifthe tire size aspect ratio is “70,” as shown in item “C”of the illustration, it would mean that the tire’s sidewallis 70% as high as it is wide.
(D) Construction Code: A letter code is used toindicate the type of ply construction in the tire. The letter“R” means radial ply construction; the letter “D” meansdiagonal or bias ply construction; and the letter “B”means belted-bias ply construction.
(E) Rim Diameter: Diameter of the wheel in inches.
(F) Service Description: These characters representthe load range and the speed rating of a tire. The loadrange represents the load carry capacity a tire is certifiedto carry. The speed rating is the maximum speed a tireis certified to carry a load. Speed ratings range from“A” to “Z”.
Tire Terminology and Definitions
Air Pressure: The amount of air inside the tire pressingoutward on each square inch of the tire. Air pressureis expressed in pounds per square inch (psi) orkilopascal (kPa).
Accessory Weight: This means the combined weightof optional accessories. Some examples of optionalaccessories are, automatic transmission, power steering,power brakes, power windows, power seats, and airconditioning.
Aspect Ratio: The relationship of a tire’s height toits width.
5-50
Belt: A rubber coated layer of cords that is locatedbetween the plies and the tread. Cords may be madefrom steel or other reinforcing materials.
Bead: The tire bead contains steel wires that hold thetire onto the rim.
Bias Ply Tire: A pneumatic tire in which the plies arelaid at alternate angles, less than 90 degrees to thecenterline of the tread.
Cold Inflation Pressure: The amount of air pressurein a tire, measured in pounds per square inch (psi)or kilopascal (kPa), before a tire has built up heat fromdriving. See Inflation - Tire Pressure on page 5-53.
Curb Weight: This means the weight of a motor vehiclewith standard and optional equipment including themaximum capacity of fuel, oil and coolant, but withoutpassengers and cargo.
DOT Markings: A code molded into the sidewall of atire signifying that the tire is in compliance with theU.S. Department of Transportation motor vehicle safetystandards. The DOT code includes the Tire IdentificationNumber (TIN), an alphanumeric designator which canalso identify the tire manufacturer, production plant,brand and date of production.
GVWR: Gross Vehicle Weight Rating, see LoadingYour Vehicle on page 4-31.
GAWR FRT: Gross Axle Weight Rating for the frontaxle, see Loading Your Vehicle on page 4-31.
GAWR RR: Gross Axle Weight Rating for the rear axle,see Loading Your Vehicle on page 4-31.
Intended Outboard Sidewall: The side of anasymmetrical tire that must always face outward whenmounted on a vehicle.
Kilopascal (kPa): The metric unit for air pressure.There are 6.9 kPa’s to one psi.
Light Truck (LT-Metric) Tire: A tire used on light dutytrucks and some multipurpose passenger vehicles.
Load Index: An assigned number ranging from 1 to 279that corresponds to the load carrying capacity of a tire.
Maximum Inflation Pressure: The maximum coldinflation pressure to which a tire may be inflated.
Maximum Load Rating: The load rating for a tire atthe maximum permissible inflation pressure for that tire.
Maximum Loaded Vehicle Weight: The sum ofcurb weight; accessory weight; vehicle capacity weight;and production options weight.
Normal Occupant Weight: The number of occupants avehicle is designed to seat multiplied by 150 pounds(68 kg). See Loading Your Vehicle on page 4-31.
Occupant Distribution: Designated seating positions.
5-51
Outward Facing Sidewall: The side of a asymmetricaltire that has a particular side that faces outward whenmounted on a vehicle. The side of the tire that containsa whitewall, bears white lettering or bears manufacturer,brand and or model name molding that is higher ordeeper than the same moldings on the other sidewallof the tire.
Passenger (P-Metric) Tire: A tire used on passengercars and some light duty trucks and multipurposevehicles.
Recommended Inflation Pressure: Vehiclemanufacturer’s recommended tire inflation pressureshown on the tire placard. See Inflation - Tire Pressureon page 5-53 and Loading Your Vehicle on page 4-31.
Radial Ply tire: A pneumatic tire in which the ply cordsthat extend to the beads are laid at 90 degrees to thecenterline of the tread.
Rim: A metal support for a tire and upon which thetire beads are seated.
Sidewall: The portion of a tire between the tread andthe bead.
Speed Rating: An alphanumeric code assigned to atire indicating the maximum speed at which a tirecan operate.
Traction: The friction between the tire and the roadsurface. The amount of grip provided.
Tread: The portion of a tire that comes into contactwith the road.
Treadwear Indicators: Narrow bands, sometimescalled “wear bars,” that show across the tread of a tirewhen only 2/32 inch of tread remains. See When ItIs Time for New Tires on page 5-55.
Tread Width: The width of the tire’s tread.
UTQGS: Uniform Tire Quality Grading Standards,a tire information system that provides consumers withratings for a tire’s traction, temperature and treadwear.Ratings are determined by tire manufacturers usinggovernment testing procedures. The ratings are moldedinto the sidewall of the tire. See Uniform Tire QualityGrading on page 5-57.
Vehicle Capacity Weight: The number of designatedseating positions multiplied by 150 pounds (68 kg)plus the rated cargo load. See Loading Your Vehicleon page 4-31.
Vehicle Maximum Load on the Tire: Load on anindividual tire due to curb weight, accessory weight,occupant weight and cargo weight.
Vehicle Placard: A label permanently attached to avehicle showing original equipment tire size andthe recommended cold inflation pressure. See LoadingYour Vehicle on page 4-31.
5-52
Inflation - Tire PressureThe tire and loading information label, shows the correctinflation pressures for your tires when they’re cold.“Cold” means your vehicle has been sitting for at leastthree hours or driven no more than 1 mile (1.6 km).See Loading Your Vehicle on page 4-31, for the locationof your vehicle’s tire and loading information label.
Notice: Don’t let anyone tell you that underinflationor overinflation is all right. It’s not. If your tiresdon’t have enough air (underinflation), you can getthe following:• Too much flexing
• Too much heat
• Tire overloading
• Bad wear
• Bad handling
• Bad fuel economy
If your tires have too much air (overinflation),you can get the following:• Unusual wear
• Bad handling
• Rough ride
• Needless damage from road hazards
When to CheckCheck your tires once a month or more.
Also, check the pressure of the spare tire.
How to CheckUse a good quality pocket-type gage to check tirepressure. You can’t tell if your tires are properly inflatedsimply by looking at them. Radial tires may look properlyinflated even when they’re underinflated. Check the tire’sinflation pressure when the tires are cold. Cold meansyour vehicle has been sitting for at least three hours ordriven no more than 1 mile (1.6 km).
Remove the valve cap from the tire valve stem. Pressthe tire gage firmly onto the valve to get a pressuremeasurement. If the cold tire inflation pressure matchesthe recommended pressure on the Tire and LoadingInformation label, no further adjustment is necessary.If the inflation pressure is low, add air until you reach therecommended amount.
If you overfill the tire, release air by pushing on themetal stem in the center of the tire valve. Recheck thetire pressure with the tire gage.
Be sure to put the valve caps back on the valve stems.They help prevent leaks by keeping out dirt andmoisture.
5-53
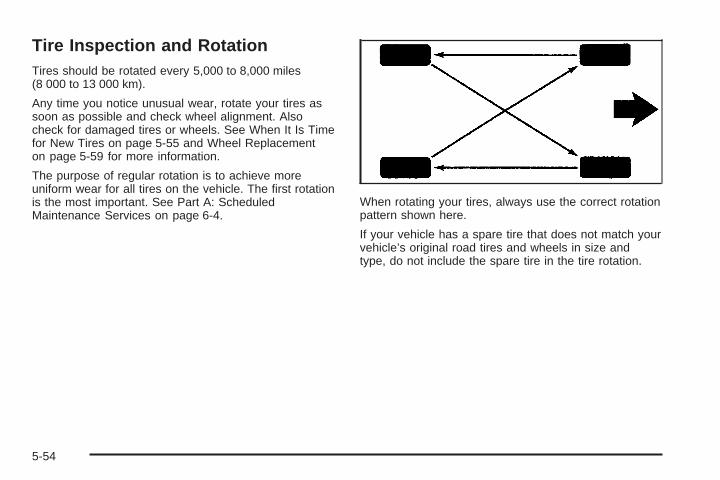
Tire Inspection and RotationTires should be rotated every 5,000 to 8,000 miles(8 000 to 13 000 km).
Any time you notice unusual wear, rotate your tires assoon as possible and check wheel alignment. Alsocheck for damaged tires or wheels. See When It Is Timefor New Tires on page 5-55 and Wheel Replacementon page 5-59 for more information.
The purpose of regular rotation is to achieve moreuniform wear for all tires on the vehicle. The first rotationis the most important. See Part A: ScheduledMaintenance Services on page 6-4.
When rotating your tires, always use the correct rotationpattern shown here.
If your vehicle has a spare tire that does not match yourvehicle’s original road tires and wheels in size andtype, do not include the spare tire in the tire rotation.
5-54
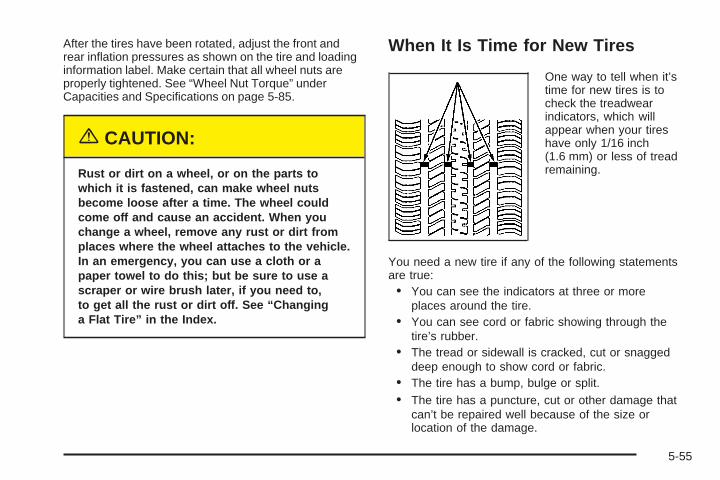
After the tires have been rotated, adjust the front andrear inflation pressures as shown on the tire and loadinginformation label. Make certain that all wheel nuts areproperly tightened. See “Wheel Nut Torque” underCapacities and Specifications on page 5-85.
{CAUTION:
Rust or dirt on a wheel, or on the parts towhich it is fastened, can make wheel nutsbecome loose after a time. The wheel couldcome off and cause an accident. When youchange a wheel, remove any rust or dirt fromplaces where the wheel attaches to the vehicle.In an emergency, you can use a cloth or apaper towel to do this; but be sure to use ascraper or wire brush later, if you need to,to get all the rust or dirt off. See “Changinga Flat Tire” in the Index.
When It Is Time for New Tires
One way to tell when it’stime for new tires is tocheck the treadwearindicators, which willappear when your tireshave only 1/16 inch(1.6 mm) or less of treadremaining.
You need a new tire if any of the following statementsare true:• You can see the indicators at three or more
places around the tire.• You can see cord or fabric showing through the
tire’s rubber.• The tread or sidewall is cracked, cut or snagged
deep enough to show cord or fabric.• The tire has a bump, bulge or split.• The tire has a puncture, cut or other damage that
can’t be repaired well because of the size orlocation of the damage.
5-55
Buying New TiresTo find out what kind and size of tires you need, look atthe Tire and Loading Information label. For an exampleof this label and its location on your vehicle, seeLoading Your Vehicle on page 4-31.
Make sure the replacement tires are the same size,load range, speed rating and construction type (bias,bias-belted or radial) as your vehicle’s originalequipment tires.
{CAUTION:
Mixing tires could cause you to lose controlwhile driving. If you mix tires of different sizesor types (radial and bias-belted tires), thevehicle may not handle properly, and you couldhave a crash. Using tires of different sizes mayalso cause damage to your vehicle. Be sure touse the same size and type tires on all wheels.
CAUTION: (Continued)
CAUTION: (Continued)
Your vehicle may be equipped with a differentsize spare than the road tires (those originallyinstalled on your vehicle). When new, yourvehicle included a spare tire and wheelassembly with a similar overall diameter as yourvehicle’s road tires and wheels, so it is all rightto drive on it. Because this spare was developedfor use on your vehicle, it will not affect vehiclehandling.
{CAUTION:
If you use bias-ply tires on your vehicle, thewheel rim flanges could develop cracks aftermany miles of driving. A tire and/or wheelcould fail suddenly, causing a crash. Use onlyradial-ply tires with the wheels on your vehicle.
5-56
Uniform Tire Quality GradingQuality grades can be found where applicable on thetire sidewall between tread shoulder and maximumselection width. For example:
Treadwear 200 Traction AA Temperature AThe following information relates to the system developedby the Unites States National Highway Traffic SafetyAdministration, which grades tires by treadwear, tractionand temperature performance. (This applies only tovehicles sold in the United States.) The grades aremolded on the sidewalls of most passenger car tires.The Uniform Tire Quality Grading system does notapply to deep tread, winter-type snow tires, space-saveror temporary use spare tires, tires with nominal rimdiameters of 10 to 12 inches (25 to 30 cm), or to somelimited-production tires.
While the tires available on General Motors passengercars and light trucks may vary with respect to thesegrades, they must also conform to federal safetyrequirements.
TreadwearThe treadwear grade is a comparative rating based onthe wear rate of the tire when tested under controlledconditions on a specified government test course.For example, a tire graded 150 would wear one anda half (11⁄2) times as well on the government course asa tire graded 100. The relative performance of tiresdepends upon the actual conditions of their use,however, and may depart significantly from the normdue to variations in driving habits, service practices anddifferences in road characteristics and climate.
Traction — AA, A, B, CThe traction grades, from highest to lowest, are AA, A,B, and C. Those grades represent the tire’s abilityto stop on wet pavement as measured under controlledconditions on specified government test surfaces ofasphalt and concrete. A tire marked C may have poortraction performance. Warning: The traction gradeassigned to this tire is based on straight-ahead brakingtraction tests, and does not include acceleration,cornering, hydroplaning, or peak traction characteristics.
5-57
Temperature — A, B, CThe temperature grades are A (the highest), B, and C,representing the tire’s resistance to the generationof heat and its ability to dissipate heat when testedunder controlled conditions on a specified indoorlaboratory test wheel. Sustained high temperature cancause the material of the tire to degenerate andreduce tire life, and excessive temperature can lead tosudden tire failure. The grade C corresponds to alevel of performance which all passenger car tires mustmeet under the Federal Motor Vehicle Safety StandardNo. 109. Grades B and A represent higher levels ofperformance on the laboratory test wheel than theminimum required by law.
Warning: The temperature grade for this tire isestablished for a tire that is properly inflated and notoverloaded. Excessive speed, underinflation, orexcessive loading, either separately or in combination,can cause heat buildup and possible tire failure.
Wheel Alignment and Tire BalanceThe wheels on your vehicle were aligned and balancedcarefully at the factory to give you the longest tire lifeand best overall performance.
Scheduled wheel alignment and wheel balancing arenot needed. However, if you notice unusual tire wear oryour vehicle pulling one way or the other, the alignmentmay need to be reset. If you notice your vehiclevibrating when driving on a smooth road, your wheelsmay need to be rebalanced.
5-58
Wheel ReplacementReplace any wheel that is bent, cracked or badlyrusted or corroded. If wheel nuts keep coming loose,the wheel, wheel bolts and wheel nuts should bereplaced. If the wheel leaks air, replace it (except somealuminum wheels, which can sometimes be repaired).See your dealer if any of these conditions exist.
Your dealer will know the kind of wheel you need.
Each new wheel should have the same load-carryingcapacity, diameter, width, offset and be mountedthe same way as the one it replaces.
If you need to replace any of your wheels, wheelbolts or wheel nuts, replace them only with new GMoriginal equipment parts. This way, you will be sure tohave the right wheel, wheel bolts and wheel nutsfor your vehicle.
{CAUTION:
Using the wrong replacement wheels, wheelbolts or wheel nuts on your vehicle can bedangerous. It could affect the braking andhandling of your vehicle, make your tires loseair and make you lose control. You could havea collision in which you or others could beinjured. Always use the correct wheel, wheelbolts and wheel nuts for replacement.
Notice: The wrong wheel can also cause problemswith bearing life, brake cooling, speedometer orodometer calibration, headlamp aim, bumper height,vehicle ground clearance and tire or tire chainclearance to the body and chassis.
See Changing a Flat Tire on page 5-62 for moreinformation.
5-59

Used Replacement Wheels
{CAUTION:
Putting a used wheel on your vehicle isdangerous. You can’t know how it’s been usedor how far it’s been driven. It could fail suddenlyand cause a crash. If you have to replace awheel, use a new GM original equipment wheel.
Tire ChainsNotice: Use tire chains only where legal and onlywhen you must. Use only SAE Class “S” type chainsthat are the proper size for your tires. Install them onthe front tires and tighten them as tightly as possiblewith the ends securely fastened. Drive slowly andfollow the chain manufacturer’s instructions. If youcan hear the chains contacting your vehicle, stop andretighten them. If the contact continues, slow downuntil it stops. Driving too fast or spinning the wheelswith chains on will damage your vehicle.
5-60
If a Tire Goes FlatIt’s unusual for a tire to “blowout” while you’re driving,especially if you maintain your tires properly. If air goesout of a tire, it’s much more likely to leak out slowly.But if you should ever have a “blowout,” here are a fewtips about what to expect and what to do:
If a front tire fails, the flat tire will create a drag thatpulls the vehicle toward that side. Take your foot off theaccelerator pedal and grip the steering wheel firmly.Steer to maintain lane position, and then gently braketo a stop well out of the traffic lane.
A rear blowout, particularly on a curve, acts much likea skid and may require the same correction you’d use ina skid. In any rear blowout, remove your foot from theaccelerator pedal. Get the vehicle under control bysteering the way you want the vehicle to go. It may bevery bumpy and noisy, but you can still steer. Gentlybrake to a stop, well off the road if possible.
{CAUTION:
Lifting a vehicle and getting under it to domaintenance or repairs is dangerous withoutthe appropriate safety equipment and training.The jack provided with your vehicle is designedonly for changing a flat tire. If it is used foranything else, you or others could be badlyinjured or killed if the vehicle slips off the jack.Use the jack provided with your vehicle only forchanging a flat tire.
If a tire goes flat, the next part shows how to use yourjacking equipment to change a flat tire safely.
5-61
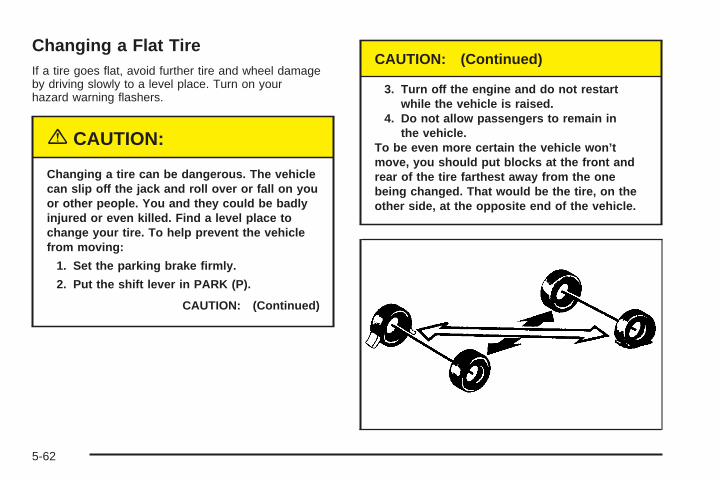
Changing a Flat TireIf a tire goes flat, avoid further tire and wheel damageby driving slowly to a level place. Turn on yourhazard warning flashers.
{CAUTION:
Changing a tire can be dangerous. The vehiclecan slip off the jack and roll over or fall on youor other people. You and they could be badlyinjured or even killed. Find a level place tochange your tire. To help prevent the vehiclefrom moving:
1. Set the parking brake firmly.
2. Put the shift lever in PARK (P).
CAUTION: (Continued)
CAUTION: (Continued)
3. Turn off the engine and do not restartwhile the vehicle is raised.
4. Do not allow passengers to remain inthe vehicle.
To be even more certain the vehicle won’tmove, you should put blocks at the front andrear of the tire farthest away from the onebeing changed. That would be the tire, on theother side, at the opposite end of the vehicle.
5-62
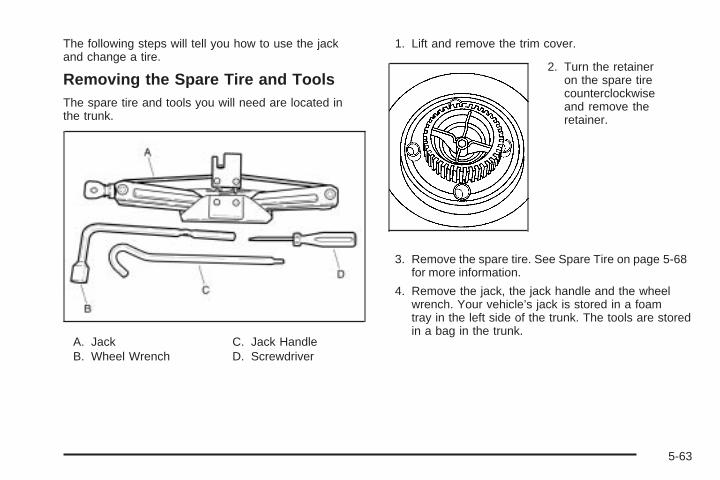
The following steps will tell you how to use the jackand change a tire.
Removing the Spare Tire and ToolsThe spare tire and tools you will need are located inthe trunk.
A. JackB. Wheel Wrench
C. Jack HandleD. Screwdriver
1. Lift and remove the trim cover.
2. Turn the retaineron the spare tirecounterclockwiseand remove theretainer.
3. Remove the spare tire. See Spare Tire on page 5-68for more information.
4. Remove the jack, the jack handle and the wheelwrench. Your vehicle’s jack is stored in a foamtray in the left side of the trunk. The tools are storedin a bag in the trunk.
5-63
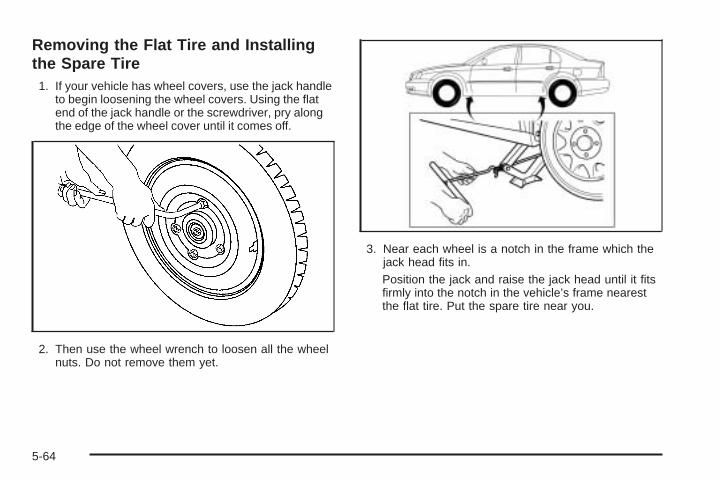
Removing the Flat Tire and Installingthe Spare Tire
1. If your vehicle has wheel covers, use the jack handleto begin loosening the wheel covers. Using the flatend of the jack handle or the screwdriver, pry alongthe edge of the wheel cover until it comes off.
2. Then use the wheel wrench to loosen all the wheelnuts. Do not remove them yet.
3. Near each wheel is a notch in the frame which thejack head fits in.Position the jack and raise the jack head until it fitsfirmly into the notch in the vehicle’s frame nearestthe flat tire. Put the spare tire near you.
5-64
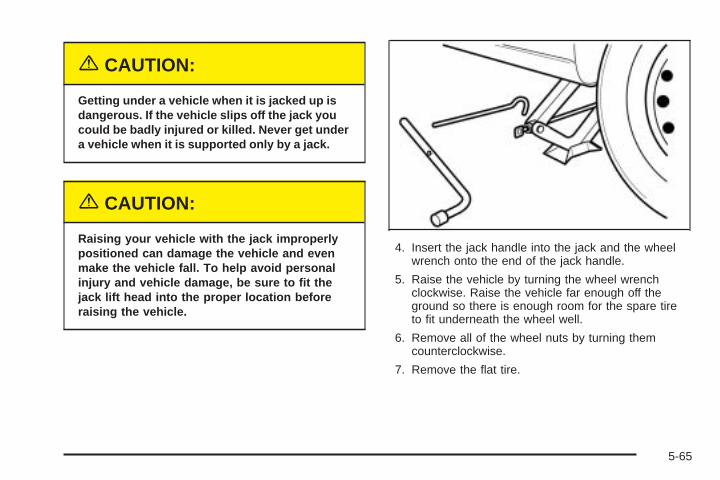
{CAUTION:
Getting under a vehicle when it is jacked up isdangerous. If the vehicle slips off the jack youcould be badly injured or killed. Never get undera vehicle when it is supported only by a jack.
{CAUTION:
Raising your vehicle with the jack improperlypositioned can damage the vehicle and evenmake the vehicle fall. To help avoid personalinjury and vehicle damage, be sure to fit thejack lift head into the proper location beforeraising the vehicle.
4. Insert the jack handle into the jack and the wheelwrench onto the end of the jack handle.
5. Raise the vehicle by turning the wheel wrenchclockwise. Raise the vehicle far enough off theground so there is enough room for the spare tireto fit underneath the wheel well.
6. Remove all of the wheel nuts by turning themcounterclockwise.
7. Remove the flat tire.
5-65
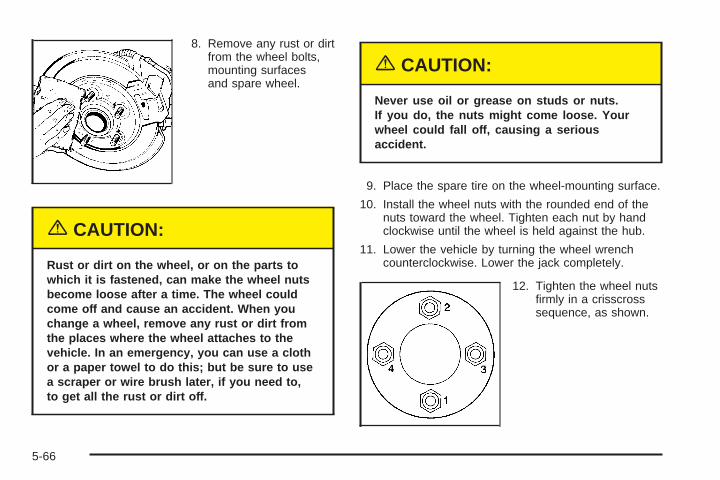
8. Remove any rust or dirtfrom the wheel bolts,mounting surfacesand spare wheel.
{CAUTION:
Rust or dirt on the wheel, or on the parts towhich it is fastened, can make the wheel nutsbecome loose after a time. The wheel couldcome off and cause an accident. When youchange a wheel, remove any rust or dirt fromthe places where the wheel attaches to thevehicle. In an emergency, you can use a clothor a paper towel to do this; but be sure to usea scraper or wire brush later, if you need to,to get all the rust or dirt off.
{CAUTION:
Never use oil or grease on studs or nuts.If you do, the nuts might come loose. Yourwheel could fall off, causing a seriousaccident.
9. Place the spare tire on the wheel-mounting surface.
10. Install the wheel nuts with the rounded end of thenuts toward the wheel. Tighten each nut by handclockwise until the wheel is held against the hub.
11. Lower the vehicle by turning the wheel wrenchcounterclockwise. Lower the jack completely.
12. Tighten the wheel nutsfirmly in a crisscrosssequence, as shown.
5-66
{CAUTION:
Incorrect wheel nuts or improperly tightenedwheel nuts can cause the wheel to come looseand even come off. This could lead to anaccident. Be sure to use the correct wheelnuts. If you have to replace them, be sure toget new GM original equipment wheel nuts.Stop somewhere as soon as you can and havethe nuts tightened with a torque wrench to theproper torque specification. See “Capacitiesand Specifications” in the Index for wheel nuttorque specification.
Notice: Improperly tightened wheel nuts can leadto brake pulsation and rotor damage. To avoidexpensive brake repairs, evenly tighten the wheelnuts in the proper sequence and to the proper torquespecification. See “Capacities and Specifications”in the index for the wheel nut torque specification.
Storing the Flat Tire and Tools
{CAUTION:
Storing a jack, a tire, or other equipment in thepassenger compartment of the vehicle couldcause injury. In a sudden stop or collision,loose equipment could strike someone. Storeall these in the proper place.
Store the flat tire in the spare tire compartment. Placethe tire in the compartment, then secure the retainer.Store the jack in its foam tray in the trunk. Storethe tools securely in the trunk. Replace the trim cover.
5-67
Storing the Spare Tire and Tools
{CAUTION:
Storing a jack, a tire, or other equipment in thepassenger compartment of the vehicle couldcause injury. In a sudden stop or collision,loose equipment could strike someone. Storeall these in the proper place.
Store the spare tire in the spare tire compartment. Placethe tire in the compartment, then secure the retainer.Store the jack in its foam tray in the trunk. Store the toolssecurely in the trunk. Replace the trim cover.
Spare TireYour vehicle, when new, had a fully inflated spare tire.A spare tire may lose air over time, so check itsinflation pressure regularly. See Inflation - Tire Pressureon page 5-53 and “Loading Your Vehicle” for informationregarding proper tire inflation and loading your vehicle.For instruction on how to remove, install or store a sparetire, see Changing a Flat Tire on page 5-62.
After installing the spare tire on your vehicle, you shouldstop as soon as possible and make sure the spare iscorrectly inflated. Have the damaged or flat roadtire repaired or replaced as soon as you can andinstalled back onto your vehicle. This way, a spare tirewill be available in case you need it again.
Your vehicle may have a different size spare tire thanthe road tires that were originally installed on yourvehicle. This spare tire was developed for use on yourvehicle, so you can drive on it.
If your vehicle has a spare tire that does not match yourvehicle’s original road tires and wheels in size andtype, do not include the spare tire in the tire rotation.See Tire Inspection and Rotation on page 5-54.
Appearance CareRemember, cleaning products can be hazardous. Someare toxic. Others can burst into flames if you strike amatch or get them on a hot part of the vehicle. Some aredangerous if you breathe their fumes in a closed space.When you use anything from a container to clean yourvehicle, be sure to follow the manufacturer’s warningsand instructions. And always open your doors or windowswhen you are cleaning the inside.
5-68
Never use these to clean your vehicle:
• Gasoline
• Benzene
• Naphtha
• Carbon Tetrachloride
• Acetone
• Paint Thinner
• Turpentine
• Lacquer Thinner
• Nail Polish Remover
They can all be hazardous — some more thanothers — and they can all damage your vehicle, too.
Do not use any of these unless this manual saysyou can. In many uses, these will damage your vehicle:
• Alcohol
• Laundry Soap
• Bleach
• Reducing Agents
Cleaning the Inside of Your VehicleUse a vacuum cleaner often to get rid of dust andloose dirt. Wipe vinyl, leather, plastic and paintedsurfaces with a clean, damp cloth.
Cleaning Fabric/CarpetYour dealer has cleaners for the cleaning of fabric andcarpet. They will clean normal spots and stains very well.
You can get GM-approved cleaning products from yourdealer. See Vehicle Care/Appearance Materials onpage 5-75.
Here are some cleaning tips:
• Always read the instructions on the cleaner label.
• Clean up stains as soon as you can — beforethey set.
• Carefully scrape off any excess stain.
• Use a clean cloth or sponge, and change to a cleanarea often. A soft brush may be used if stains arestubborn.
• If a ring forms on fabric after spot cleaning, cleanthe entire area immediately or it will set.
5-69
Using Cleaner on Fabric1. Vacuum and brush the area to remove any
loose dirt.
2. Always clean a whole trim panel or section.Mask surrounding trim along stitch or welt lines.
3. Follow the directions on the container label.
4. Apply cleaner with a clean sponge. Do not saturatethe material and do not rub it roughly.
5. As soon as you have cleaned the section, use asponge to remove any excess cleaner.
6. Wipe cleaned area with a clean, water-dampenedtowel or cloth.
7. Wipe with a clean cloth and let dry.
Special Fabric Cleaning ProblemsStains caused by such things as catsup, coffee (black),egg, fruit, fruit juice, milk, soft drinks, vomit, urineand blood can be removed as follows:
1. Carefully scrape off excess stain, then sponge thesoiled area with cool water.
2. If a stain remains, follow the cleaning instructionsdescribed earlier.
3. If an odor lingers after cleaning vomit or urine, treatthe area with a water and baking soda solution:1 teaspoon (5 ml) of baking soda to 1 cup (250 ml)of lukewarm water.
4. Let dry.
Stains caused by candy, ice cream, mayonnaise, chilisauce and unknown stains can be removed as follows:
1. Carefully scrape off excess stain.
2. Clean with cool water and allow to dry completely.
3. If a stain remains, follow the cleaner instructionsdescribed earlier.
Cleaning VinylUse warm water and a clean cloth.
• Rub with a clean, damp cloth to remove dirt.You may have to do this more than once.
• Things like tar, asphalt and shoe polish will stain ifyou do not get them off quickly. Use a clean clothand vinyl cleaner. See your dealer for this product.
5-70

Cleaning LeatherUse a soft cloth with lukewarm water and a mild soapor saddle soap and wipe dry with a soft cloth. Then,let the leather dry naturally. Do not use heat to dry.
• For stubborn stains, use a leather cleaner.
• Never use oils, varnishes, solvent-based or abrasivecleaners, furniture polish or shoe polish on leather.
• Soiled or stained leather should be cleanedimmediately. If dirt is allowed to work into the finish,it can harm the leather.
Cleaning the Top of the InstrumentPanelUse only mild soap and water to clean the top surfacesof the instrument panel. Sprays containing siliconesor waxes may cause annoying reflections in thewindshield and even make it difficult to see throughthe windshield under certain conditions.
Cleaning Interior Plastic ComponentsUse only a mild soap and water solution on a softcloth or sponge. Commercial cleaners may affect thesurface finish.
Cleaning Glass SurfacesGlass should be cleaned often. GM Glass Cleaner ora liquid household glass cleaner will remove normaltobacco smoke and dust films on interior glass.See Vehicle Care/Appearance Materials on page 5-75.
Notice: If you use abrasive cleaners whencleaning glass surfaces on your vehicle, you couldscratch the glass and/or cause damage to therear window defogger and the integrated radioantenna. When cleaning the glass on your vehicle,use only a soft cloth and glass cleaner.
5-71
Care of Safety BeltsKeep belts clean and dry.
{CAUTION:
Do not bleach or dye safety belts. If you do,it may severely weaken them. In a crash,they might not be able to provide adequateprotection. Clean safety belts only with mildsoap and lukewarm water.
WeatherstripsSilicone grease on weatherstrips will make them lastlonger, seal better, and not stick or squeak. Applysilicone grease with a clean cloth at least everysix months. During very cold, damp weather morefrequent application may be required. See Part D:Recommended Fluids and Lubricants on page 6-24.
Cleaning the Outside of Your VehicleThe paint finish on your vehicle provides beauty, depthof color, gloss retention and durability.
Washing Your VehicleThe best way to preserve your vehicle’s finish is to keep itclean by washing it often with lukewarm or cold water.
Do not wash your vehicle in the direct rays of the sun.Use a car washing soap. Do not use strong soapsor chemical detergents. Be sure to rinse the vehicle well,removing all soap residue completely. You can getGM-approved cleaning products from your dealer.See Vehicle Care/Appearance Materials on page 5-75.Do not use cleaning agents that are petroleumbased, or that contain acid or abrasives. All cleaningagents should be flushed promptly and not allowedto dry on the surface, or they could stain. Dry the finishwith a soft, clean chamois or an all-cotton towel toavoid surface scratches and water spotting.
High pressure car washes may cause water to enteryour vehicle.
5-72
Cleaning Exterior Lamps/LensesUse only lukewarm or cold water, a soft cloth and acar washing soap to clean exterior lamps and lenses.Follow instructions under “Washing Your Vehicle.”
Finish CareOccasional waxing or mild polishing of your vehicle byhand may be necessary to remove residue from thepaint finish. You can get GM-approved cleaning productsfrom your dealer. See Vehicle Care/AppearanceMaterials on page 5-75.
Your vehicle has a “basecoat/clearcoat” paint finish.The clearcoat gives more depth and gloss to the coloredbasecoat. Always use waxes and polishes that arenon-abrasive and made for a basecoat/clearcoat paintfinish.
Notice: Machine compounding or aggressivepolishing on a basecoat/clearcoat paint finish maydamage it. Use only non-abrasive waxes andpolishes that are made for a basecoat/clearcoatpaint finish on your vehicle.
Foreign materials such as calcium chloride and othersalts, ice melting agents, road oil and tar, tree sap, birddroppings, chemicals from industrial chimneys, etc., candamage your vehicle’s finish if they remain on paintedsurfaces. Wash the vehicle as soon as possible. Ifnecessary, use non-abrasive cleaners that are markedsafe for painted surfaces to remove foreign matter.
Exterior painted surfaces are subject to aging, weatherand chemical fallout that can take their toll over aperiod of years. You can help to keep the paint finishlooking new by keeping your vehicle garaged or coveredwhenever possible.
Cleaning Windshield and Wiper BladesIf the windshield is not clear after using the windshieldwasher, or if the wiper blade chatters when running, wax,sap or other material may be on the blade or windshield.
Clean the outside of the windshield with a full-strengthglass cleaning liquid. The windshield is clean if beads donot form when you rinse it with water.
Grime from the windshield will stick to the wiper bladesand affect their performance. Clean the blade by wipingvigorously with a cloth soaked in full-strength windshieldwasher solvent. Then rinse the blade with water.
Check the wiper blades and clean them as necessary;replace blades that look worn.
5-73
Cleaning Aluminum WheelsKeep your wheels clean using a soft clean clothwith mild soap and water. Rinse with clean water.After rinsing thoroughly, dry with a soft clean towel.A wax may then be applied.
The surface of these wheels is similar to the paintedsurface of your vehicle. Do not use strong soaps,chemicals, abrasive polishes, abrasive cleaners,cleaners with acid, or abrasive cleaning brushes onthem because you could damage the surface.Do not use chrome polish on aluminum wheels.
Do not take your vehicle through an automatic carwash that has silicone carbide tire cleaning brushes.These brushes can also damage the surface ofthese wheels.
Cleaning TiresTo clean your tires, use a stiff brush with tire cleaner.
Notice: Using petroleum-based tire dressingproducts on your vehicle may damage the paintfinish and/or tires. When applying a tire dressing,always wipe off any overspray from all paintedsurfaces on your vehicle.
Sheet Metal DamageIf your vehicle is damaged and requires sheet metalrepair or replacement, make sure the body repair shopapplies anti-corrosion material to parts repaired orreplaced to restore corrosion protection.
Original manufacturer replacement parts will provide thecorrosion protection while maintaining the warranty.
Finish DamageAny stone chips, fractures or deep scratches in thefinish should be repaired right away. Bare metalwill corrode quickly and may develop into major repairexpense.
Minor chips and scratches can be repaired with touch-upmaterials avaliable from your dealer. Larger areas offinish damage can be corrected in your dealer’sbody and paint shop.
5-74
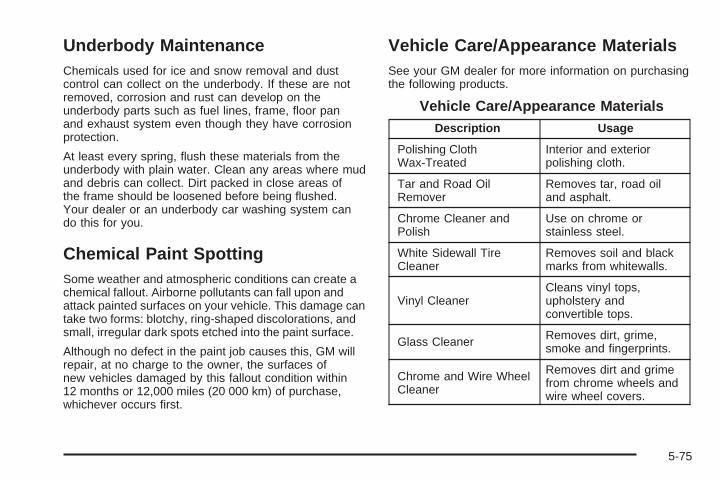
Underbody MaintenanceChemicals used for ice and snow removal and dustcontrol can collect on the underbody. If these are notremoved, corrosion and rust can develop on theunderbody parts such as fuel lines, frame, floor panand exhaust system even though they have corrosionprotection.
At least every spring, flush these materials from theunderbody with plain water. Clean any areas where mudand debris can collect. Dirt packed in close areas ofthe frame should be loosened before being flushed.Your dealer or an underbody car washing system cando this for you.
Chemical Paint SpottingSome weather and atmospheric conditions can create achemical fallout. Airborne pollutants can fall upon andattack painted surfaces on your vehicle. This damage cantake two forms: blotchy, ring-shaped discolorations, andsmall, irregular dark spots etched into the paint surface.
Although no defect in the paint job causes this, GM willrepair, at no charge to the owner, the surfaces ofnew vehicles damaged by this fallout condition within12 months or 12,000 miles (20 000 km) of purchase,whichever occurs first.
Vehicle Care/Appearance MaterialsSee your GM dealer for more information on purchasingthe following products.
Vehicle Care/Appearance MaterialsDescription Usage
Polishing ClothWax-Treated
Interior and exteriorpolishing cloth.
Tar and Road OilRemover
Removes tar, road oiland asphalt.
Chrome Cleaner andPolish
Use on chrome orstainless steel.
White Sidewall TireCleaner
Removes soil and blackmarks from whitewalls.
Vinyl CleanerCleans vinyl tops,upholstery andconvertible tops.
Glass Cleaner Removes dirt, grime,smoke and fingerprints.
Chrome and Wire WheelCleaner
Removes dirt and grimefrom chrome wheels andwire wheel covers.
5-75
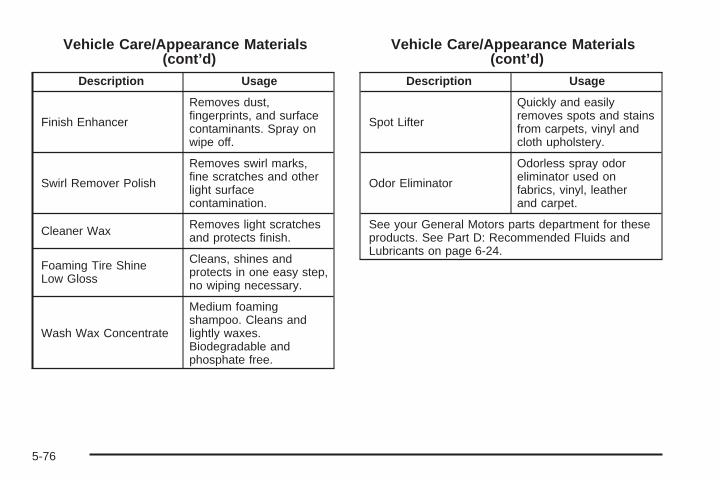
Vehicle Care/Appearance Materials(cont’d)
Description Usage
Finish Enhancer
Removes dust,fingerprints, and surfacecontaminants. Spray onwipe off.
Swirl Remover Polish
Removes swirl marks,fine scratches and otherlight surfacecontamination.
Cleaner Wax Removes light scratchesand protects finish.
Foaming Tire ShineLow Gloss
Cleans, shines andprotects in one easy step,no wiping necessary.
Wash Wax Concentrate
Medium foamingshampoo. Cleans andlightly waxes.Biodegradable andphosphate free.
Vehicle Care/Appearance Materials(cont’d)
Description Usage
Spot Lifter
Quickly and easilyremoves spots and stainsfrom carpets, vinyl andcloth upholstery.
Odor Eliminator
Odorless spray odoreliminator used onfabrics, vinyl, leatherand carpet.
See your General Motors parts department for theseproducts. See Part D: Recommended Fluids andLubricants on page 6-24.
5-76
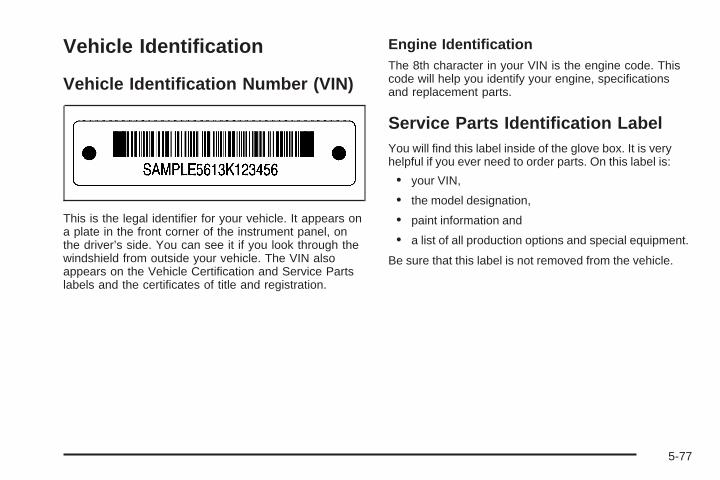
Vehicle Identification
Vehicle Identification Number (VIN)
This is the legal identifier for your vehicle. It appears ona plate in the front corner of the instrument panel, onthe driver’s side. You can see it if you look through thewindshield from outside your vehicle. The VIN alsoappears on the Vehicle Certification and Service Partslabels and the certificates of title and registration.
Engine IdentificationThe 8th character in your VIN is the engine code. Thiscode will help you identify your engine, specificationsand replacement parts.
Service Parts Identification LabelYou will find this label inside of the glove box. It is veryhelpful if you ever need to order parts. On this label is:
• your VIN,
• the model designation,
• paint information and
• a list of all production options and special equipment.
Be sure that this label is not removed from the vehicle.
5-77
Electrical System
Add-On Electrical EquipmentNotice: Don’t add anything electrical to your vehicleunless you check with your dealer first. Someelectrical equipment can damage your vehicle andthe damage wouldn’t be covered by your warranty.Some add-on electrical equipment can keep othercomponents from working as they should.
Your vehicle has an air bag system. Before attemptingto add anything electrical to your vehicle, see ServicingYour Air Bag-Equipped Vehicle on page 1-54.
Headlamp WiringThe headlamp wiring is protected by fuses, one foreach headlamp, in the fuse block. An electrical overloadwill cause the lamps to turn off. If this happens, haveyour headlamp wiring checked right away.
Windshield Wiper FusesThe windshield wiper motor is protected by an internalcircuit breaker and a fuse. If the motor overheats dueto heavy snow, etc., the wiper will stop until themotor cools. If the overload is caused by some electricalproblem and not snow, etc., be sure to get it fixed.
Power Windows and Other PowerOptionsCircuit breakers in the fuse block protect the powerwindows and other power accessories. When the currentload is too heavy, the circuit breaker opens andcloses, protecting the circuit until the problem is fixed orgoes away.
5-78
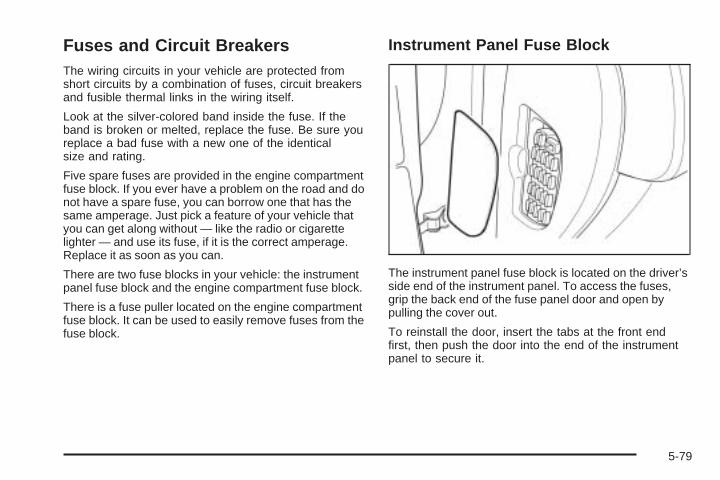
Fuses and Circuit BreakersThe wiring circuits in your vehicle are protected fromshort circuits by a combination of fuses, circuit breakersand fusible thermal links in the wiring itself.
Look at the silver-colored band inside the fuse. If theband is broken or melted, replace the fuse. Be sure youreplace a bad fuse with a new one of the identicalsize and rating.
Five spare fuses are provided in the engine compartmentfuse block. If you ever have a problem on the road and donot have a spare fuse, you can borrow one that has thesame amperage. Just pick a feature of your vehicle thatyou can get along without — like the radio or cigarettelighter — and use its fuse, if it is the correct amperage.Replace it as soon as you can.
There are two fuse blocks in your vehicle: the instrumentpanel fuse block and the engine compartment fuse block.
There is a fuse puller located on the engine compartmentfuse block. It can be used to easily remove fuses from thefuse block.
Instrument Panel Fuse Block
The instrument panel fuse block is located on the driver’sside end of the instrument panel. To access the fuses,grip the back end of the fuse panel door and open bypulling the cover out.
To reinstall the door, insert the tabs at the front endfirst, then push the door into the end of the instrumentpanel to secure it.
5-79
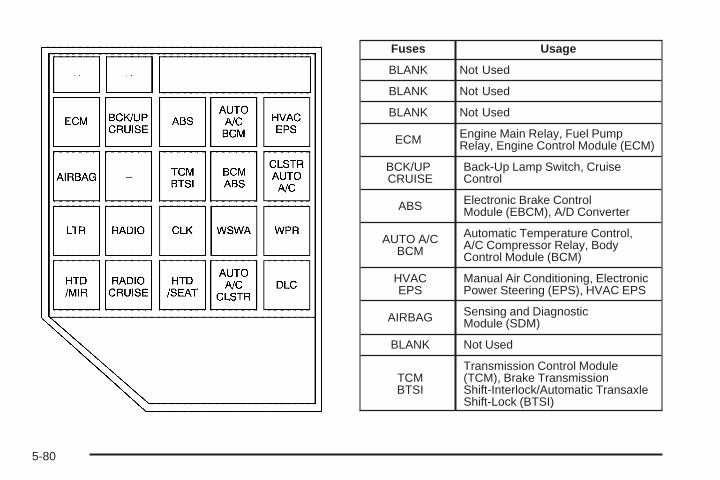
Fuses Usage
BLANK Not Used
BLANK Not Used
BLANK Not Used
ECM Engine Main Relay, Fuel PumpRelay, Engine Control Module (ECM)
BCK/UPCRUISE
Back-Up Lamp Switch, CruiseControl
ABS Electronic Brake ControlModule (EBCM), A/D Converter
AUTO A/CBCM
Automatic Temperature Control,A/C Compressor Relay, BodyControl Module (BCM)
HVACEPS
Manual Air Conditioning, ElectronicPower Steering (EPS), HVAC EPS
AIRBAG Sensing and DiagnosticModule (SDM)
BLANK Not Used
TCMBTSI
Transmission Control Module(TCM), Brake TransmissionShift-Interlock/Automatic TransaxleShift-Lock (BTSI)
5-80
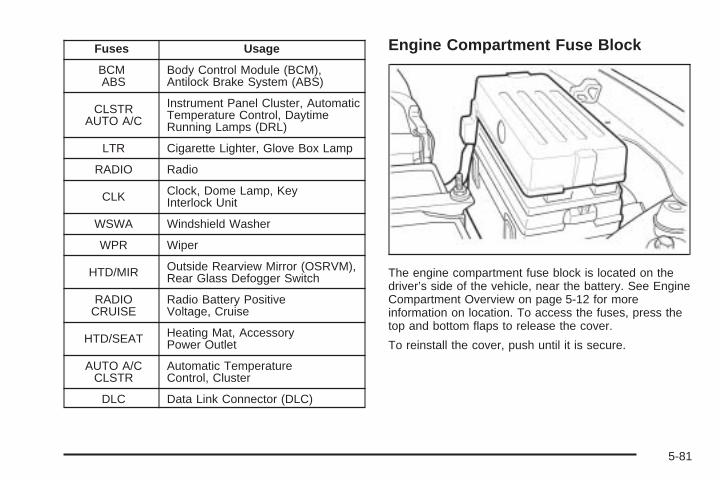
Fuses Usage
BCMABS
Body Control Module (BCM),Antilock Brake System (ABS)
CLSTRAUTO A/C
Instrument Panel Cluster, AutomaticTemperature Control, DaytimeRunning Lamps (DRL)
LTR Cigarette Lighter, Glove Box Lamp
RADIO Radio
CLK Clock, Dome Lamp, KeyInterlock Unit
WSWA Windshield Washer
WPR Wiper
HTD/MIR Outside Rearview Mirror (OSRVM),Rear Glass Defogger Switch
RADIOCRUISE
Radio Battery PositiveVoltage, Cruise
HTD/SEAT Heating Mat, AccessoryPower Outlet
AUTO A/CCLSTR
Automatic TemperatureControl, Cluster
DLC Data Link Connector (DLC)
Engine Compartment Fuse Block
The engine compartment fuse block is located on thedriver’s side of the vehicle, near the battery. See EngineCompartment Overview on page 5-12 for moreinformation on location. To access the fuses, press thetop and bottom flaps to release the cover.
To reinstall the cover, push until it is secure.
5-81
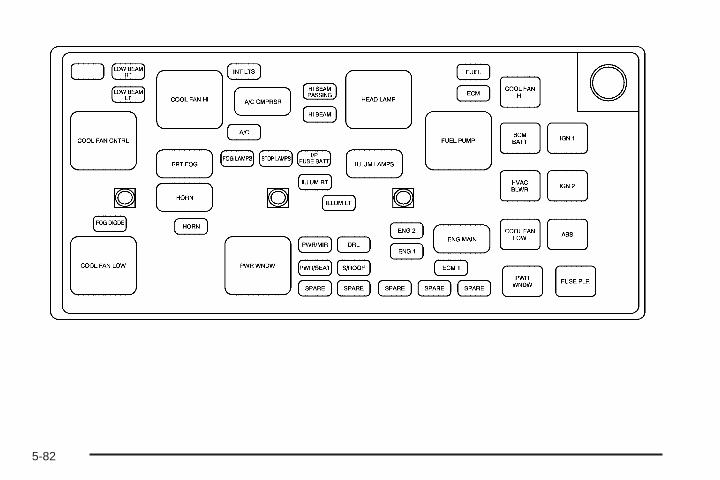
5-82
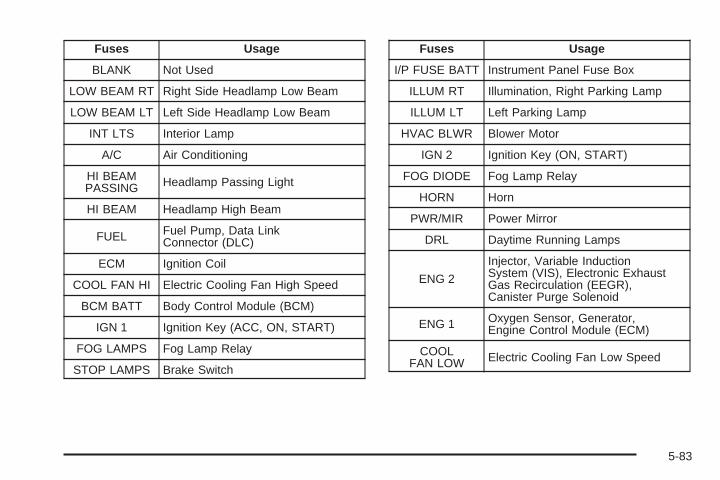
Fuses Usage
BLANK Not Used
LOW BEAM RT Right Side Headlamp Low Beam
LOW BEAM LT Left Side Headlamp Low Beam
INT LTS Interior Lamp
A/C Air Conditioning
HI BEAMPASSING Headlamp Passing Light
HI BEAM Headlamp High Beam
FUEL Fuel Pump, Data LinkConnector (DLC)
ECM Ignition Coil
COOL FAN HI Electric Cooling Fan High Speed
BCM BATT Body Control Module (BCM)
IGN 1 Ignition Key (ACC, ON, START)
FOG LAMPS Fog Lamp Relay
STOP LAMPS Brake Switch
Fuses Usage
I/P FUSE BATT Instrument Panel Fuse Box
ILLUM RT Illumination, Right Parking Lamp
ILLUM LT Left Parking Lamp
HVAC BLWR Blower Motor
IGN 2 Ignition Key (ON, START)
FOG DIODE Fog Lamp Relay
HORN Horn
PWR/MIR Power Mirror
DRL Daytime Running Lamps
ENG 2
Injector, Variable InductionSystem (VIS), Electronic ExhaustGas Recirculation (EEGR),Canister Purge Solenoid
ENG 1 Oxygen Sensor, Generator,Engine Control Module (ECM)
COOLFAN LOW Electric Cooling Fan Low Speed
5-83
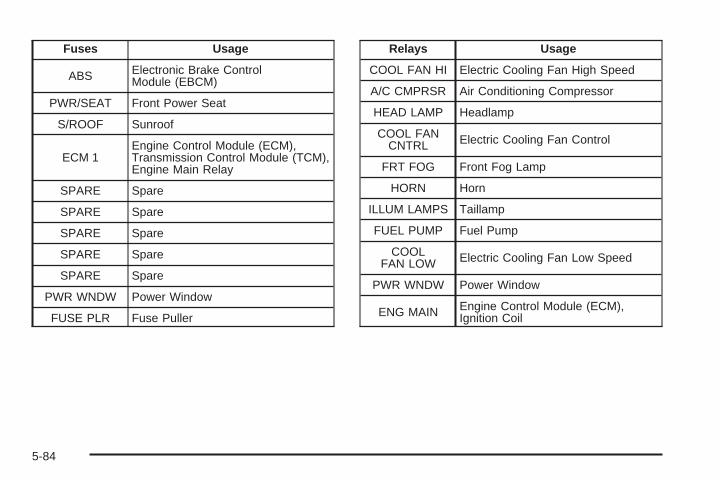
Fuses Usage
ABS Electronic Brake ControlModule (EBCM)
PWR/SEAT Front Power Seat
S/ROOF Sunroof
ECM 1Engine Control Module (ECM),Transmission Control Module (TCM),Engine Main Relay
SPARE Spare
SPARE Spare
SPARE Spare
SPARE Spare
SPARE Spare
PWR WNDW Power Window
FUSE PLR Fuse Puller
Relays Usage
COOL FAN HI Electric Cooling Fan High Speed
A/C CMPRSR Air Conditioning Compressor
HEAD LAMP Headlamp
COOL FANCNTRL Electric Cooling Fan Control
FRT FOG Front Fog Lamp
HORN Horn
ILLUM LAMPS Taillamp
FUEL PUMP Fuel Pump
COOLFAN LOW Electric Cooling Fan Low Speed
PWR WNDW Power Window
ENG MAIN Engine Control Module (ECM),Ignition Coil
5-84
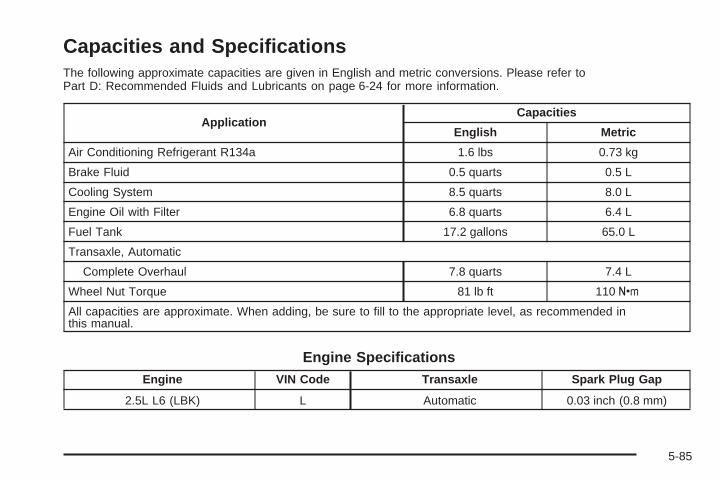
Capacities and SpecificationsThe following approximate capacities are given in English and metric conversions. Please refer toPart D: Recommended Fluids and Lubricants on page 6-24 for more information.
ApplicationCapacities
English Metric
Air Conditioning Refrigerant R134a 1.6 lbs 0.73 kg
Brake Fluid 0.5 quarts 0.5 L
Cooling System 8.5 quarts 8.0 L
Engine Oil with Filter 6.8 quarts 6.4 L
Fuel Tank 17.2 gallons 65.0 L
Transaxle, Automatic
Complete Overhaul 7.8 quarts 7.4 L
Wheel Nut Torque 81 lb ft 110Y
All capacities are approximate. When adding, be sure to fill to the appropriate level, as recommended inthis manual.
Engine SpecificationsEngine VIN Code Transaxle Spark Plug Gap
2.5L L6 (LBK) L Automatic 0.03 inch (0.8 mm)
5-85

✍ NOTES
5-86
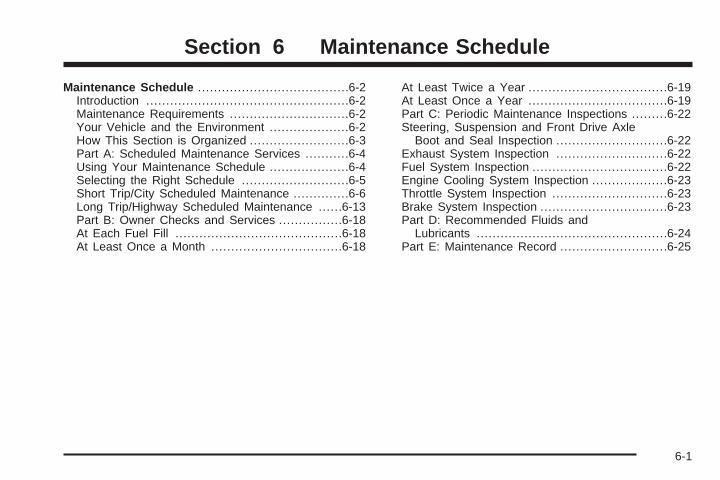
Maintenance Schedule ......................................6-2Introduction ...................................................6-2Maintenance Requirements ..............................6-2Your Vehicle and the Environment ....................6-2How This Section is Organized .........................6-3Part A: Scheduled Maintenance Services ...........6-4Using Your Maintenance Schedule ....................6-4Selecting the Right Schedule ...........................6-5Short Trip/City Scheduled Maintenance ..............6-6Long Trip/Highway Scheduled Maintenance ......6-13Part B: Owner Checks and Services ................6-18At Each Fuel Fill ..........................................6-18At Least Once a Month .................................6-18
At Least Twice a Year ...................................6-19At Least Once a Year ...................................6-19Part C: Periodic Maintenance Inspections .........6-22Steering, Suspension and Front Drive Axle
Boot and Seal Inspection ............................6-22Exhaust System Inspection ............................6-22Fuel System Inspection ..................................6-22Engine Cooling System Inspection ...................6-23Throttle System Inspection .............................6-23Brake System Inspection ................................6-23Part D: Recommended Fluids and
Lubricants ................................................6-24Part E: Maintenance Record ...........................6-25
Section 6 Maintenance Schedule
6-1
Maintenance Schedule
IntroductionImportant: Keep engine oil at the proper level andchange as recommended.
Have you purchased the GM Protection Plan? The Plansupplements your new vehicle warranties. See yourWarranty and Owner Assistance booklet or your dealerfor details.
Maintenance RequirementsMaintenance intervals, checks, inspections andrecommended fluids and lubricants as prescribed in thismanual are necessary to keep your vehicle in goodworking condition. Any damage caused by failureto follow scheduled maintenance may not be coveredby warranty.
Your Vehicle and the EnvironmentProper vehicle maintenance not only helps to keep yourvehicle in good working condition, but also helps theenvironment. Improper vehicle maintenance caneven affect the quality of the air we breathe. Improperfluid levels or the wrong tire inflation can increasethe level of emissions from your vehicle. To help protectour environment, and to keep your vehicle in goodcondition, be sure to maintain your vehicle properly.
6-2
How This Section is OrganizedThis maintenance schedule is divided into five parts:
“Part A: Scheduled Maintenance Services” explainswhat to have done and how often. Some of theseservices can be complex, so unless you are technicallyqualified and have the necessary equipment, you shouldlet your GM dealer’s service department do these jobs.
Your GM dealer has GM-trained and supported servicepeople that will perform the work using genuine GM parts.
{CAUTION:
Performing maintenance work on a vehiclecan be dangerous. In trying to do some jobs,you can be seriously injured. Do your ownmaintenance work only if you have therequired know-how and the proper tools andequipment for the job. If you have any doubt,have a qualified technician do the work.
If you want to get the service information, see ServicePublications Ordering Information on page 7-12.
“Part B: Owner Checks and Services” tells you whatshould be checked and when. It also explains whatyou can easily do to help keep your vehicle in goodcondition.
“Part C: Periodic Maintenance Inspections” explainsimportant inspections that your dealer’s servicedepartment can perform for you.
“Part D: Recommended Fluids and Lubricants”lists some recommended products necessary to helpkeep your vehicle properly maintained. These products,or their equivalents, should be used whether you dothe work yourself or have it done.
“Part E: Maintenance Record” is a place for you torecord and keep track of the maintenance performedon your vehicle. Keep your maintenance receipts.They may be needed to qualify your vehicle forwarranty repairs.
6-3
Part A: Scheduled MaintenanceServicesIn this part are scheduled maintenance services whichare to be performed at the mileage intervals specified.
Using Your Maintenance ScheduleWe at General Motors want to keep your vehicle in goodworking condition. But we do not know exactly how youwill drive it. You may drive short distances only a fewtimes a week. Or you may drive long distances all thetime in very hot, dusty weather. You may use yourvehicle in making deliveries. Or you may drive it to work,to do errands or in many other ways.
Because of the different ways people use their vehicles,maintenance needs may vary. You may need morefrequent checks and replacements. So please read thefollowing and note how you drive. If you have questionson how to keep your vehicle in good condition, see yourdealer.
This part tells you the maintenance services you shouldhave done and when to schedule them.
When you go to your dealer for your service needs,you will know that GM-trained and supported servicepeople will perform the work using genuine GM parts.
The proper fluids and lubricants to use are listed inPart D. Make sure whoever services your vehicle usesthese. All parts should be replaced and all necessaryrepairs done before you or anyone else drives thevehicle.
These schedules are for vehicles that:• carry passengers and cargo within recommended
limits. You will find these on the tire and loadinginformation label. See Loading Your Vehicleon page 4-31.
• are driven on reasonable road surfaces within legaldriving limits.
• use the recommended fuel. See Gasoline Octaneon page 5-5.
6-4
Selecting the Right ScheduleFirst you will need to decide which of the two schedulesis right for your vehicle. Here is how to decide whichschedule to follow:
Short Trip/City DefinitionFollow the Short Trip/City Scheduled Maintenance ifany one of these conditions is true for your vehicle:
• Most trips are less than 5 miles (8 km). Thisis particularly important when outside temperaturesare below freezing.
• Most trips include extensive idling, such as frequentdriving in stop-and-go traffic.
• If the vehicle is used for delivery service, police,taxi or other commercial application.
One of the reasons you should follow this schedule if youoperate your vehicle under any of these conditions is thatthese conditions cause engine oil to break down sooner.
Short Trip/City Intervals
Every 3,000 Miles (5 000 km): Engine Oil and FilterChange (or 3 months, whichever occurs first).
Every 6,000 Miles (10 000 km): Tire Rotation.
Every 15,000 Miles (25 000 km): Engine Air CleanerFilter Inspection. Passenger Compartment Air FilterReplacement. Drive Belts Inspection.
Every 30,000 Miles (50 000 km): Engine Air CleanerFilter Replacement. Fuel Filter Replacement. Spark PlugReplacement. Cooling System Service. EVAP SystemService. PCV System Service. Brake Fluid Change(or 24 months, whichever occurs first).
Every 50,000 Miles (83 000 km): Automatic TransaxleService (severe conditions only).
These intervals only summarize maintenance services.Be sure to follow the complete scheduled maintenanceon the following pages.
6-5
Long Trip/Highway DefinitionFollow this scheduled maintenance only if none ofthe conditions from the Short Trip/City ScheduledMaintenance are true. Do not use this schedule if thevehicle is used for trailer towing, driven in a dusty areaor used off paved roads. Use the Short Trip/Cityschedule for these conditions.
Driving a vehicle with a fully warmed engine underhighway conditions will cause engine oil to breakdown slower.
Long Trip/Highway Intervals
Every 7,500 Miles (12 500 km): Engine Oil and FilterChange (or every 12 months, whichever occurs first).Tire Rotation.
Every 15,000 Miles (25 000 km): Engine Air CleanerFilter Inspection. Passenger Compartment Air FilterReplacement. Drive Belts Inspection.
Every 30,000 Miles (50 000 km): Engine Air CleanerFilter Replacement. Fuel Filter Replacement. Spark PlugReplacement. Cooling System Service. EVAP SystemService. PCV System Service. Brake Fluid Change(or 24 months, whichever occurs first).
Every 50,000 Miles (83 000 km): Automatic TransaxleService (severe conditions only).
These intervals only summarize maintenance services.Be sure to follow the complete scheduled maintenanceon the following pages.
Short Trip/City ScheduledMaintenanceThe services shown in this schedule up to 100,000 miles(166 000 km) should be repeated after 100,000 miles(166 000 km) at the same intervals for the life ofthis vehicle.
See Part B: Owner Checks and Services on page 6-18and Part C: Periodic Maintenance Inspections onpage 6-22.
Footnotes† The U.S. Environmental Protection Agency or theCalifornia Air Resources Board has determined that thefailure to perform this maintenance item will not nullifythe emission warranty or limit recall liability prior tothe completion of the vehicle’s useful life. We, however,urge that all recommended maintenance services beperformed at the indicated intervals and themaintenance be recorded.
+ A good time to check your brakes is during tirerotation. See Brake System Inspection on page 6-23.
6-6
3,000 Miles (5 000 km)❑ Change engine oil and filter (or every 3 months,
whichever occurs first). An Emission Control Service.
6,000 Miles (10 000 km)❑ Change engine oil and filter (or every 3 months,
whichever occurs first). An Emission Control Service.❑ Rotate tires. See Tire Inspection and Rotation
on page 5-54 for proper rotation pattern andadditional information. (See footnote +.)
9,000 Miles (15 000 km)❑ Change engine oil and filter (or every 3 months,
whichever occurs first). An Emission Control Service.
12,000 Miles (20 000 km)❑ Change engine oil and filter (or every 3 months,
whichever occurs first). An Emission Control Service.❑ Rotate tires. See Tire Inspection and Rotation
on page 5-54 for proper rotation pattern andadditional information. (See footnote +.)
15,000 Miles (25 000 km)❑ Change engine oil and filter (or every 3 months,
whichever occurs first). An Emission Control Service.❑ Replace passenger compartment air filter. If you drive
regularly under dusty conditions, the filter mayrequire replacement more often.
❑ Inspect engine air cleaner filter. If necessary, replacethe filter. If vehicle is driven in dusty/dirty conditions,inspect filter at every engine oil change. SeeEngine Air Cleaner/Filter on page 5-17 for moreinformation. An Emission Control Service.(See footnote †.)
❑ Inspect drive belts.
18,000 Miles (30 000 km)❑ Change engine oil and filter (or every 3 months,
whichever occurs first). An Emission Control Service.❑ Rotate tires. See Tire Inspection and Rotation
on page 5-54 for proper rotation pattern andadditional information. (See footnote +.)
6-7

21,000 Miles (35 000 km)❑ Change engine oil and filter (or every 3 months,
whichever occurs first). An Emission Control Service.
24,000 Miles (40 000 km)❑ Change engine oil and filter (or every 3 months,
whichever occurs first). An Emission Control Service.❑ Rotate tires. See Tire Inspection and Rotation
on page 5-54 for proper rotation pattern andadditional information. (See footnote +)
27,000 Miles (45 000 km)❑ Change engine oil and filter (or every 3 months,
whichever occurs first). An Emission Control Service.
30,000 Miles (50 000 km)❑ Change engine oil and filter (or every 3 months,
whichever occurs first). An Emission Control Service.❑ Replace passenger compartment air filter. If you drive
regularly under dusty conditions, the filter mayrequire replacement more often.
❑ Replace engine air cleaner filter. See Engine AirCleaner/Filter on page 5-17 for more information.An Emission Control Service.
❑ Rotate tires. See Tire Inspection and Rotation onpage 5-54 for proper rotation pattern and additionalinformation. (See footnote +.)
❑ Replace spark plugs. An Emission Control Service.❑ Replace fuel filter. An Emission Control Service.
(See footnote †.)❑ Inspect drive belts.❑ Drain, flush and refill cooling system. See Engine
Coolant on page 5-19 for what to use. Inspecthoses. Clean radiator, condenser, pressure cap andneck. Pressure test the cooling system andpressure cap. An Emission Control Service.
❑ Inspect EVAP canister, vapor lines and solenoidvalve filter. An Emission Control Service.(See footnote †.)
❑ Inspect PCV system. An Emission Control Service.(See footnote †.)
❑ Change brake fluid (or every 24 months, whicheveroccurs first).
33,000 Miles (55 000 km)❑ Change engine oil and filter (or every 3 months,
whichever occurs first). An Emission Control Service.
6-8
36,000 Miles (60 000 km)❑ Change engine oil and filter (or every 3 months,
whichever occurs first). An Emission Control Service.❑ Rotate tires. See Tire Inspection and Rotation
on page 5-54 for proper rotation pattern andadditional information. (See footnote +.)
39,000 Miles (65 000 km)❑ Change engine oil and filter (or every 3 months,
whichever occurs first). An Emission Control Service.
42,000 Miles (70 000 km)❑ Change engine oil and filter (or every 3 months,
whichever occurs first). An Emission Control Service.❑ Rotate tires. See Tire Inspection and Rotation
on page 5-54 for proper rotation pattern andadditional information. (See footnote +.)
45,000 Miles (75 000 km)❑ Change engine oil and filter (or every 3 months,
whichever occurs first). An Emission Control Service.❑ Replace passenger compartment air filter. If you drive
regularly under dusty conditions, the filter mayrequire replacement more often.
❑ Inspect engine air cleaner filter. If necessary,replace the filter. If vehicle is driven in dusty/dirtyconditions, inspect filter at every engine oil change.
See Engine Air Cleaner/Filter on page 5-17 formore information. An Emission Control Service.(See footnote †.)
❑ Inspect drive belts.
48,000 Miles (80 000 km)❑ Change engine oil and filter (or every 3 months,
whichever occurs first). An Emission Control Service.❑ Rotate tires. See Tire Inspection and Rotation
on page 5-54 for proper rotation pattern andadditional information. (See footnote +.)
50,000 Miles (83 000 km)❑ Change automatic transaxle fluid and filter if the
vehicle is mainly driven under one or more ofthese conditions:
− In heavy city traffic where the outsidetemperature regularly reaches 90°F (32°C)or higher.
− In hilly or mountainous terrain.− Uses such as found in taxi, police or delivery
service.
If you do not use your vehicle under any of theseconditions, the fluid and filter do not require changing.
6-9
51,000 Miles (85 000 km)❑ Change engine oil and filter (or every 3 months,
whichever occurs first). An Emission Control Service.
54,000 Miles (90 000 km)❑ Change engine oil and filter (or every 3 months,
whichever occurs first). An Emission Control Service.❑ Rotate tires. See Tire Inspection and Rotation
on page 5-54 for proper rotation pattern andadditional information. (See footnote +.)
57,000 Miles (95 000 km)❑ Change engine oil and filter (or every 3 months,
whichever occurs first). An Emission Control Service.
60,000 Miles (100 000 km)❑ Change engine oil and filter (or every 3 months,
whichever occurs first). An Emission Control Service.❑ Replace passenger compartment air filter. If you drive
regularly under dusty conditions, the filter mayrequire replacement more often.
❑ Replace engine air cleaner filter. See Engine AirCleaner/Filter on page 5-17 for more information.An Emission Control Service.
❑ Rotate tires. See Tire Inspection and Rotation onpage 5-54 for proper rotation pattern and additionalinformation. (See footnote +.)
❑ Replace spark plugs. An Emission Control Service.❑ Replace fuel filter. An Emission Control Service.
(See footnote †.)❑ Inspect drive belts.❑ Drain, flush and refill cooling system. See Engine
Coolant on page 5-19 for what to use. Inspecthoses. Clean radiator, condenser, pressure cap andneck. Pressure test the cooling system andpressure cap. An Emission Control Service.
❑ Inspect EVAP canister, vapor lines and solenoidvalve filter. An Emission Control Service.(See footnote †.)
❑ Inspect PCV system. An Emission Control Service.(See footnote †.)
❑ Change brake fluid (or every 24 months, whicheveroccurs first).
63,000 Miles (105 000 km)❑ Change engine oil and filter (or every 3 months,
whichever occurs first). An Emission Control Service.
66,000 Miles (110 000 km)❑ Change engine oil and filter (or every 3 months,
whichever occurs first). An Emission Control Service.❑ Rotate tires. See Tire Inspection and Rotation
on page 5-54 for proper rotation pattern andadditional information. (See footnote +.)
6-10
69,000 Miles (115 000 km)❑ Change engine oil and filter (or every 3 months,
whichever occurs first). An Emission Control Service.
72,000 Miles (120 000 km)❑ Change engine oil and filter (or every 3 months,
whichever occurs first). An Emission Control Service.❑ Rotate tires. See Tire Inspection and Rotation
on page 5-54 for proper rotation pattern andadditional information. (See footnote +.)
75,000 Miles (125 000 km)❑ Change engine oil and filter (or every 3 months,
whichever occurs first). An Emission Control Service.❑ Replace passenger compartment air filter. If you drive
regularly under dusty conditions, the filter mayrequire replacement more often.
❑ Inspect engine air cleaner filter. If necessary, replacethe filter. If vehicle is driven in dusty/dirty conditions,inspect filter at every engine oil change. SeeEngine Air Cleaner/Filter on page 5-17 for moreinformation. An Emission Control Service.(See footnote †.)
❑ Inspect drive belts.
78,000 Miles (130 000 km)❑ Change engine oil and filter (or every 3 months,
whichever occurs first). An Emission Control Service.❑ Rotate tires. See Tire Inspection and Rotation
on page 5-54 for proper rotation pattern andadditional information. (See footnote +.)
81,000 Miles (135 000 km)❑ Change engine oil and filter (or every 3 months,
whichever occurs first). An Emission Control Service.
84,000 Miles (140 000 km)❑ Change engine oil and filter (or every 3 months,
whichever occurs first). An Emission Control Service.❑ Rotate tires. See Tire Inspection and Rotation
on page 5-54 for proper rotation pattern andadditional information. (See footnote +.)
87,000 Miles (145 000 km)❑ Change engine oil and filter (or every 3 months,
whichever occurs first). An Emission Control Service.
6-11
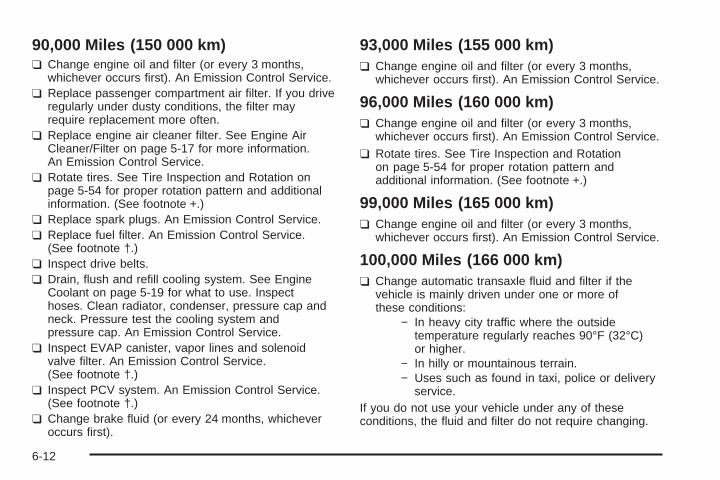
90,000 Miles (150 000 km)❑ Change engine oil and filter (or every 3 months,
whichever occurs first). An Emission Control Service.❑ Replace passenger compartment air filter. If you drive
regularly under dusty conditions, the filter mayrequire replacement more often.
❑ Replace engine air cleaner filter. See Engine AirCleaner/Filter on page 5-17 for more information.An Emission Control Service.
❑ Rotate tires. See Tire Inspection and Rotation onpage 5-54 for proper rotation pattern and additionalinformation. (See footnote +.)
❑ Replace spark plugs. An Emission Control Service.❑ Replace fuel filter. An Emission Control Service.
(See footnote †.)❑ Inspect drive belts.❑ Drain, flush and refill cooling system. See Engine
Coolant on page 5-19 for what to use. Inspecthoses. Clean radiator, condenser, pressure cap andneck. Pressure test the cooling system andpressure cap. An Emission Control Service.
❑ Inspect EVAP canister, vapor lines and solenoidvalve filter. An Emission Control Service.(See footnote †.)
❑ Inspect PCV system. An Emission Control Service.(See footnote †.)
❑ Change brake fluid (or every 24 months, whicheveroccurs first).
93,000 Miles (155 000 km)❑ Change engine oil and filter (or every 3 months,
whichever occurs first). An Emission Control Service.
96,000 Miles (160 000 km)❑ Change engine oil and filter (or every 3 months,
whichever occurs first). An Emission Control Service.❑ Rotate tires. See Tire Inspection and Rotation
on page 5-54 for proper rotation pattern andadditional information. (See footnote +.)
99,000 Miles (165 000 km)❑ Change engine oil and filter (or every 3 months,
whichever occurs first). An Emission Control Service.
100,000 Miles (166 000 km)❑ Change automatic transaxle fluid and filter if the
vehicle is mainly driven under one or more ofthese conditions:
− In heavy city traffic where the outsidetemperature regularly reaches 90°F (32°C)or higher.
− In hilly or mountainous terrain.− Uses such as found in taxi, police or delivery
service.If you do not use your vehicle under any of theseconditions, the fluid and filter do not require changing.
6-12
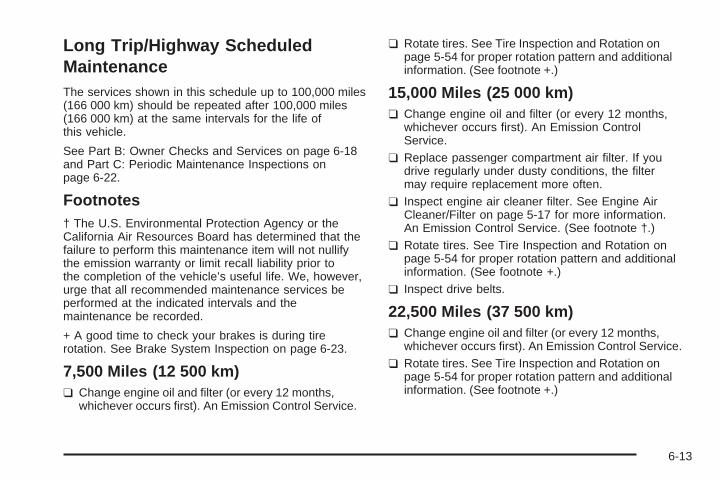
Long Trip/Highway ScheduledMaintenanceThe services shown in this schedule up to 100,000 miles(166 000 km) should be repeated after 100,000 miles(166 000 km) at the same intervals for the life ofthis vehicle.
See Part B: Owner Checks and Services on page 6-18and Part C: Periodic Maintenance Inspections onpage 6-22.
Footnotes† The U.S. Environmental Protection Agency or theCalifornia Air Resources Board has determined that thefailure to perform this maintenance item will not nullifythe emission warranty or limit recall liability prior tothe completion of the vehicle’s useful life. We, however,urge that all recommended maintenance services beperformed at the indicated intervals and themaintenance be recorded.
+ A good time to check your brakes is during tirerotation. See Brake System Inspection on page 6-23.
7,500 Miles (12 500 km)❑ Change engine oil and filter (or every 12 months,
whichever occurs first). An Emission Control Service.
❑ Rotate tires. See Tire Inspection and Rotation onpage 5-54 for proper rotation pattern and additionalinformation. (See footnote +.)
15,000 Miles (25 000 km)❑ Change engine oil and filter (or every 12 months,
whichever occurs first). An Emission ControlService.
❑ Replace passenger compartment air filter. If youdrive regularly under dusty conditions, the filtermay require replacement more often.
❑ Inspect engine air cleaner filter. See Engine AirCleaner/Filter on page 5-17 for more information.An Emission Control Service. (See footnote †.)
❑ Rotate tires. See Tire Inspection and Rotation onpage 5-54 for proper rotation pattern and additionalinformation. (See footnote +.)
❑ Inspect drive belts.
22,500 Miles (37 500 km)❑ Change engine oil and filter (or every 12 months,
whichever occurs first). An Emission Control Service.❑ Rotate tires. See Tire Inspection and Rotation on
page 5-54 for proper rotation pattern and additionalinformation. (See footnote +.)
6-13
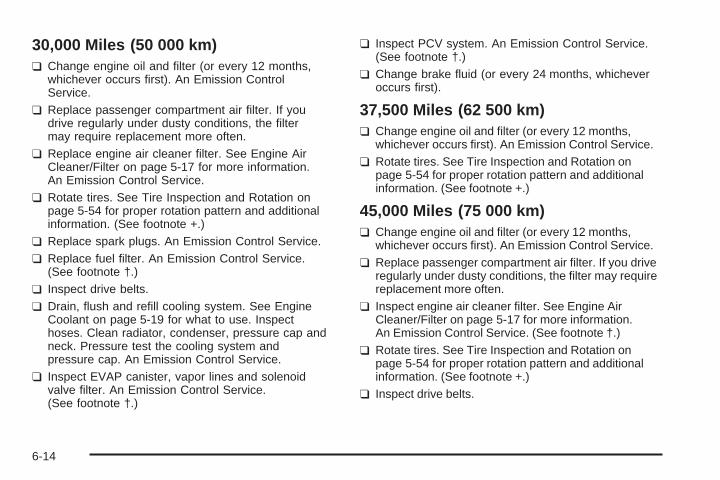
30,000 Miles (50 000 km)❑ Change engine oil and filter (or every 12 months,
whichever occurs first). An Emission ControlService.
❑ Replace passenger compartment air filter. If youdrive regularly under dusty conditions, the filtermay require replacement more often.
❑ Replace engine air cleaner filter. See Engine AirCleaner/Filter on page 5-17 for more information.An Emission Control Service.
❑ Rotate tires. See Tire Inspection and Rotation onpage 5-54 for proper rotation pattern and additionalinformation. (See footnote +.)
❑ Replace spark plugs. An Emission Control Service.❑ Replace fuel filter. An Emission Control Service.
(See footnote †.)❑ Inspect drive belts.❑ Drain, flush and refill cooling system. See Engine
Coolant on page 5-19 for what to use. Inspecthoses. Clean radiator, condenser, pressure cap andneck. Pressure test the cooling system andpressure cap. An Emission Control Service.
❑ Inspect EVAP canister, vapor lines and solenoidvalve filter. An Emission Control Service.(See footnote †.)
❑ Inspect PCV system. An Emission Control Service.(See footnote †.)
❑ Change brake fluid (or every 24 months, whicheveroccurs first).
37,500 Miles (62 500 km)❑ Change engine oil and filter (or every 12 months,
whichever occurs first). An Emission Control Service.❑ Rotate tires. See Tire Inspection and Rotation on
page 5-54 for proper rotation pattern and additionalinformation. (See footnote +.)
45,000 Miles (75 000 km)❑ Change engine oil and filter (or every 12 months,
whichever occurs first). An Emission Control Service.❑ Replace passenger compartment air filter. If you drive
regularly under dusty conditions, the filter may requirereplacement more often.
❑ Inspect engine air cleaner filter. See Engine AirCleaner/Filter on page 5-17 for more information.An Emission Control Service. (See footnote †.)
❑ Rotate tires. See Tire Inspection and Rotation onpage 5-54 for proper rotation pattern and additionalinformation. (See footnote +.)
❑ Inspect drive belts.
6-14
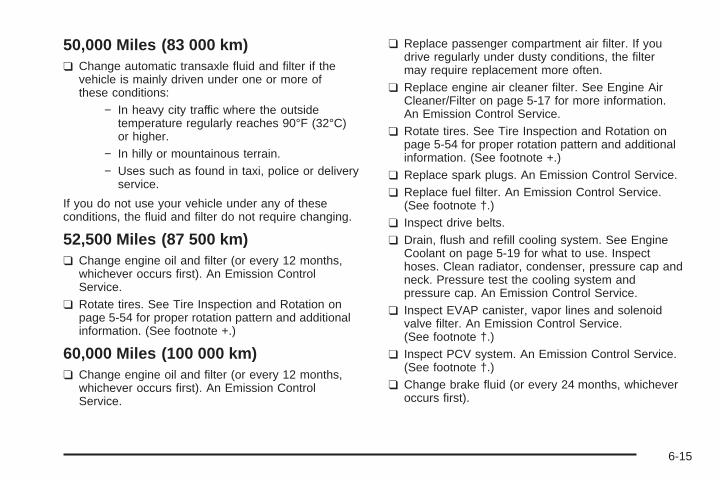
50,000 Miles (83 000 km)❑ Change automatic transaxle fluid and filter if the
vehicle is mainly driven under one or more ofthese conditions:
− In heavy city traffic where the outsidetemperature regularly reaches 90°F (32°C)or higher.
− In hilly or mountainous terrain.− Uses such as found in taxi, police or delivery
service.
If you do not use your vehicle under any of theseconditions, the fluid and filter do not require changing.
52,500 Miles (87 500 km)❑ Change engine oil and filter (or every 12 months,
whichever occurs first). An Emission ControlService.
❑ Rotate tires. See Tire Inspection and Rotation onpage 5-54 for proper rotation pattern and additionalinformation. (See footnote +.)
60,000 Miles (100 000 km)❑ Change engine oil and filter (or every 12 months,
whichever occurs first). An Emission ControlService.
❑ Replace passenger compartment air filter. If youdrive regularly under dusty conditions, the filtermay require replacement more often.
❑ Replace engine air cleaner filter. See Engine AirCleaner/Filter on page 5-17 for more information.An Emission Control Service.
❑ Rotate tires. See Tire Inspection and Rotation onpage 5-54 for proper rotation pattern and additionalinformation. (See footnote +.)
❑ Replace spark plugs. An Emission Control Service.❑ Replace fuel filter. An Emission Control Service.
(See footnote †.)❑ Inspect drive belts.❑ Drain, flush and refill cooling system. See Engine
Coolant on page 5-19 for what to use. Inspecthoses. Clean radiator, condenser, pressure cap andneck. Pressure test the cooling system andpressure cap. An Emission Control Service.
❑ Inspect EVAP canister, vapor lines and solenoidvalve filter. An Emission Control Service.(See footnote †.)
❑ Inspect PCV system. An Emission Control Service.(See footnote †.)
❑ Change brake fluid (or every 24 months, whicheveroccurs first).
6-15
67,500 Miles (112 500 km)❑ Change engine oil and filter (or every 12 months,
whichever occurs first). An Emission ControlService.
❑ Rotate tires. See Tire Inspection and Rotation onpage 5-54 for proper rotation pattern and additionalinformation. (See footnote +.)
75,000 Miles (125 000 km)❑ Change engine oil and filter (or every 12 months,
whichever occurs first). An Emission ControlService.
❑ Replace passenger compartment air filter. If youdrive regularly under dusty conditions, the filtermay require replacement more often.
❑ Inspect engine air cleaner filter. See Engine AirCleaner/Filter on page 5-17 for more information.An Emission Control Service. (See footnote †.)
❑ Rotate tires. See Tire Inspection and Rotation onpage 5-54 for proper rotation pattern and additionalinformation. (See footnote +.)
❑ Inspect drive belts.
82,500 Miles (137 500 km)❑ Change engine oil and filter (or every 12 months,
whichever occurs first). An Emission ControlService.
❑ Rotate tires. See Tire Inspection and Rotation onpage 5-54 for proper rotation pattern and additionalinformation. (See footnote +.)
90,000 Miles (150 000 km)❑ Change engine oil and filter (or every 12 months,
whichever occurs first). An Emission ControlService.
❑ Replace passenger compartment air filter. If youdrive regularly under dusty conditions, the filtermay require replacement more often.
❑ Replace engine air cleaner filter. See Engine AirCleaner/Filter on page 5-17 for more information.An Emission Control Service.
❑ Rotate tires. See Tire Inspection and Rotation onpage 5-54 for proper rotation pattern and additionalinformation. (See footnote +.)
6-16
❑ Replace spark plugs. An Emission Control Service.❑ Replace fuel filter. An Emission Control Service.
(See footnote †.)❑ Inspect drive belts.❑ Drain, flush and refill cooling system. See Engine
Coolant on page 5-19 for what to use. Inspecthoses. Clean radiator, condenser, pressure cap andneck. Pressure test the cooling system andpressure cap.An Emission Control Service.
❑ Inspect EVAP canister, vapor lines and solenoidvalve filter. An Emission Control Service.(See footnote †.)
❑ Inspect PCV system. An Emission Control Service.(See footnote †.)
❑ Change brake fluid (or every 24 months, whicheveroccurs first).
97,500 Miles (162 500 km)❑ Change engine oil and filter (or every 12 months,
whichever occurs first). An Emission ControlService.
❑ Rotate tires. See Tire Inspection and Rotation onpage 5-54 for proper rotation pattern and additionalinformation. (See footnote +.)
100,000 Miles (166 000 km)❑ Change automatic transaxle fluid and filter if the
vehicle is mainly driven under one or more ofthese conditions:
− In heavy city traffic where the outsidetemperature regularly reaches 90°F (32°C)or higher.
− In hilly or mountainous terrain.− Uses such as found in taxi, police or delivery
service.
If you do not use your vehicle under any of theseconditions, the fluid and filter do not require changing.
6-17

Part B: Owner Checks and ServicesListed in this part are owner checks and serviceswhich should be performed at the intervals specifiedto help ensure the safety, dependability and emissioncontrol performance of your vehicle.
Be sure any necessary repairs are completed atonce. Whenever any fluids or lubricants are added toyour vehicle, make sure they are the proper ones,as shown in Part D.
At Each Fuel FillIt is important for you or a service station attendant toperform these underhood checks at each fuel fill.
Engine Oil Level CheckCheck the engine oil level and add the proper oil ifnecessary. See Engine Oil on page 5-13 for furtherdetails.
Engine Coolant Level CheckCheck the engine coolant level and add the propercoolant mixture if necessary. See Engine Coolanton page 5-19 for further details.
Windshield Washer Fluid Level CheckCheck the windshield washer fluid level in the windshieldwasher tank and add the proper fluid if necessary.See Windshield Washer Fluid on page 5-31 for furtherdetails.
At Least Once a Month
Tire Inflation CheckVisually inspect your tires and make sure tires areinflated to the correct pressures. Do not forget to checkyour spare tire. See Tires on page 5-48 for furtherdetails.
Cassette Tape Player ServiceClean cassette tape player. Cleaning should be doneevery 50 hours of tape play. See Audio System(s)on page 3-48 for further details.
6-18
At Least Twice a Year
Restraint System CheckMake sure the safety belt reminder light and all your belts,buckles, latch plates, retractors and anchorages areworking properly. Look for any other loose or damagedsafety belt system parts. If you see anything that mightkeep a safety belt system from doing its job, have itrepaired. Have any torn or frayed safety belts replaced.
Also look for any opened or broken air bag coverings,and have them repaired or replaced. (The air bagsystem does not need regular maintenance.)
Wiper Blade CheckInspect wiper blades for wear or cracking. Replaceblade inserts that appear worn or damaged or thatstreak or miss areas of the windshield. Also seeCleaning the Outside of Your Vehicle on page 5-72.
Weatherstrip LubricationSilicone grease on weatherstrips will make them lastlonger, seal better, and not stick or squeak. Applysilicone grease with a clean cloth. During very cold,damp weather more frequent application may berequired. See Part D: Recommended Fluids andLubricants on page 6-24.
Automatic Transaxle InspectionIt is not necessary to check the transaxle fluid level.A transaxle fluid leak is the only reason for fluid loss.Check for leaks. If a leak occurs, take the vehicle to yourdealer and have it repaired as soon as possible.
At Least Once a Year
Key Lock Cylinders ServiceLubricate the key lock cylinders with the lubricantspecified in Part D.
Body Lubrication ServiceLubricate all key lock cylinders, hood latch assemblies,secondary latches, pivots, spring anchor and releasepawl, hood and door hinges, rear folding seats, fuel doorhinge, liftgate hinges, power sliding door cable andsliding door track(s). Part D tells you what to use. Morefrequent lubrication may be required when exposedto a corrosive environment.
6-19
Starter Switch Check
{CAUTION:
When you are doing this inspection, thevehicle could move suddenly. If the vehiclemoves, you or others could be injured.
1. Before you start, be sure you have enough roomaround the vehicle.
2. Firmly apply both the parking brake and the regularbrake. See Parking Brake on page 2-26 ifnecessary.Do not use the accelerator pedal, and be ready toturn off the engine immediately if it starts.
3. Try to start the engine in each gear. The startershould work only in PARK (P) or NEUTRAL (N).If the starter works in any other position, yourvehicle needs service.
Automatic Transaxle Shift Lock ControlSystem Check
{CAUTION:
When you are doing this inspection, thevehicle could move suddenly. If the vehiclemoves, you or others could be injured.
1. Before you start, be sure you have enough roomaround the vehicle. It should be parked on a levelsurface.
2. Firmly apply the parking brake. See Parking Brakeon page 2-26 if necessary.Be ready to apply the regular brake immediately ifthe vehicle begins to move.
3. With the engine off, turn the key to the RUN position,but do not start the engine. Without applying theregular brake, try to move the shift lever out ofPARK (P) with normal effort. If the shift lever movesout of PARK (P), your vehicle needs service.
6-20
Ignition Transaxle Lock CheckWhile parked, and with the parking brake set, try to turnthe ignition key to LOCK in each shift lever position.
• The key should turn to LOCK only when theshift lever is in PARK (P).
• The key should come out only in LOCK.
Parking Brake and Automatic TransaxlePark (P) Mechanism Check
{CAUTION:
When you are doing this check, your vehiclecould begin to move. You or others couldbe injured and property could be damaged.Make sure there is room in front of yourvehicle in case it begins to roll. Be ready toapply the regular brake at once should thevehicle begin to move.
Park on a fairly steep hill, with the vehicle facing downhill.Keeping your foot on the regular brake, set the parkingbrake.
• To check the parking brake’s holding ability: Withthe engine running and transaxle in NEUTRAL (N),slowly remove foot pressure from the regular brakepedal. Do this until the vehicle is held by theparking brake only.
• To check the PARK (P) mechanism’s holdingability: With the engine running, shift to PARK (P).Then release the parking brake followed by theregular brake.
Underbody Flushing ServiceAt least every spring, use plain water to flush anycorrosive materials from the underbody. Take careto clean thoroughly any areas where mud and otherdebris can collect.
6-21
Part C: Periodic MaintenanceInspectionsListed in this part are inspections and services whichshould be performed at least twice a year (for instance,each spring and fall). You should let your dealer’sservice department do these jobs. Make sure anynecessary repairs are completed at once.
Proper procedures to perform these services may befound in a service manual. See Service PublicationsOrdering Information on page 7-12.
Steering, Suspension and FrontDrive Axle Boot and Seal InspectionInspect the front and rear suspension and steeringsystem for damaged, loose or missing parts, signs ofwear or lack of lubrication. Inspect the power steeringlines and hoses for proper hook-up, binding, leaks,cracks, chafing, etc. Clean and then inspect thedrive axle boot seals for damage, tears or leakage.Replace seals if necessary.
Exhaust System InspectionInspect the complete exhaust system. Inspect the bodynear the exhaust system. Look for broken, damaged,missing or out-of-position parts as well as open seams,holes, loose connections or other conditions whichcould cause a heat build-up in the floor pan or could letexhaust fumes into the vehicle. See Engine Exhauston page 2-29.
Fuel System InspectionInspect the complete fuel system for damage or leaks.
6-22
Engine Cooling System InspectionInspect the hoses and have them replaced if theyare cracked, swollen or deteriorated. Inspect all pipes,fittings and clamps; replace as needed. Clean theoutside of the radiator and air conditioning condenser.To help ensure proper operation, a pressure test ofthe cooling system and pressure cap is recommendedat least once a year.
Throttle System InspectionInspect the throttle system for interference or binding,and for damaged or missing parts. Replace partsas needed. Replace any components that have higheffort or excessive wear. Do not lubricate acceleratorand cruise control cables.
Brake System InspectionInspect the complete system. Inspect brake linesand hoses for proper hook-up, binding, leaks, cracks,chafing, etc. Inspect disc brake pads for wear androtors for surface condition. Inspect other brake parts,including calipers, parking brake, etc. You may needto have your brakes inspected more often if your drivinghabits or conditions result in frequent braking.
6-23
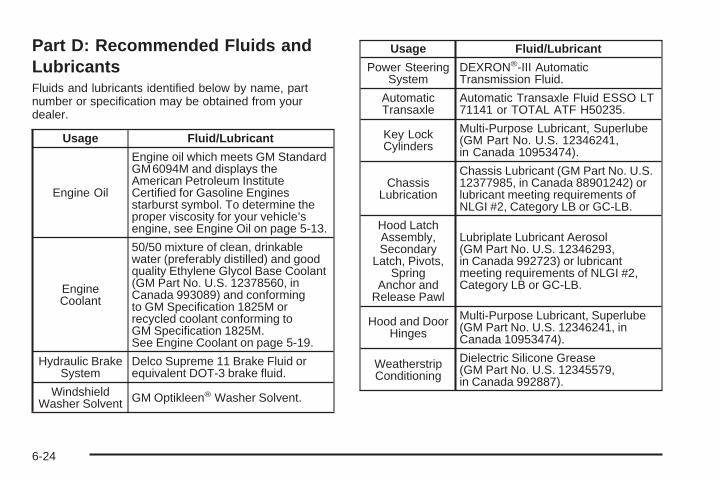
Part D: Recommended Fluids andLubricantsFluids and lubricants identified below by name, partnumber or specification may be obtained from yourdealer.
Usage Fluid/Lubricant
Engine Oil
Engine oil which meets GM StandardGM6094M and displays theAmerican Petroleum InstituteCertified for Gasoline Enginesstarburst symbol. To determine theproper viscosity for your vehicle’sengine, see Engine Oil on page 5-13.
EngineCoolant
50/50 mixture of clean, drinkablewater (preferably distilled) and goodquality Ethylene Glycol Base Coolant(GM Part No. U.S. 12378560, inCanada 993089) and conformingto GM Specification 1825M orrecycled coolant conforming toGM Specification 1825M.See Engine Coolant on page 5-19.
Hydraulic BrakeSystem
Delco Supreme 11 Brake Fluid orequivalent DOT-3 brake fluid.
WindshieldWasher Solvent GM Optikleen® Washer Solvent.
Usage Fluid/Lubricant
Power SteeringSystem
DEXRON®-III AutomaticTransmission Fluid.
AutomaticTransaxle
Automatic Transaxle Fluid ESSO LT71141 or TOTAL ATF H50235.
Key LockCylinders
Multi-Purpose Lubricant, Superlube(GM Part No. U.S. 12346241,in Canada 10953474).
ChassisLubrication
Chassis Lubricant (GM Part No. U.S.12377985, in Canada 88901242) orlubricant meeting requirements ofNLGI #2, Category LB or GC-LB.
Hood LatchAssembly,Secondary
Latch, Pivots,Spring
Anchor andRelease Pawl
Lubriplate Lubricant Aerosol(GM Part No. U.S. 12346293,in Canada 992723) or lubricantmeeting requirements of NLGI #2,Category LB or GC-LB.
Hood and DoorHinges
Multi-Purpose Lubricant, Superlube(GM Part No. U.S. 12346241, inCanada 10953474).
WeatherstripConditioning
Dielectric Silicone Grease(GM Part No. U.S. 12345579,in Canada 992887).
6-24
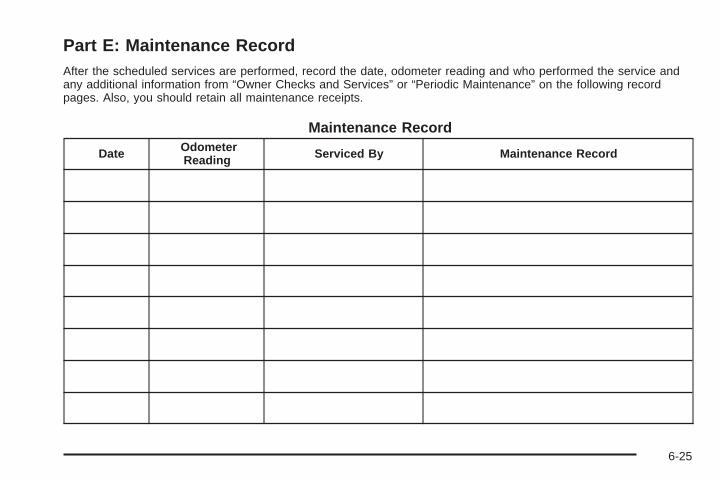
Part E: Maintenance RecordAfter the scheduled services are performed, record the date, odometer reading and who performed the service andany additional information from “Owner Checks and Services” or “Periodic Maintenance” on the following recordpages. Also, you should retain all maintenance receipts.
Maintenance Record
Date OdometerReading Serviced By Maintenance Record
6-25
Maintenance Record (cont’d)
Date OdometerReading Serviced By Maintenance Record
6-26
Maintenance Record (cont’d)
Date OdometerReading Serviced By Maintenance Record
6-27

Maintenance Record (cont’d)
Date OdometerReading Serviced By Maintenance Record
6-28
Customer Assistance and Information ...............7-2Customer Satisfaction Procedure ......................7-2Online Owner Center ......................................7-3Customer Assistance for Text Telephone
(TTY) Users ...............................................7-4Customer Assistance Offices ............................7-4GM Mobility Program for Persons with
Disabilities ..................................................7-5Roadside Assistance Program ..........................7-6Courtesy Transportation ...................................7-7Vehicle Data Collection and Event Data
Recorders ................................................7-10
Reporting Safety Defects ................................7-11Reporting Safety Defects to the United States
Government ..............................................7-11Reporting Safety Defects to the Canadian
Government ..............................................7-11Reporting Safety Defects to
General Motors .........................................7-12Service Publications Ordering Information .........7-12
Section 7 Customer Assistance and Information
7-1
Customer Assistance andInformation
Customer Satisfaction ProcedureYour satisfaction and goodwill are important toyour dealer and to Chevrolet. Normally, any concernswith the sales transaction or the operation of yourvehicle will be resolved by your dealer’s sales or servicedepartments. Sometimes, however, despite the bestintentions of all concerned, misunderstandings canoccur. If your concern has not been resolved to yoursatisfaction, the following steps should be taken:
STEP ONE: Discuss your concern with a member ofdealership management. Normally, concerns canbe quickly resolved at that level. If the matter hasalready been reviewed with the sales, service or partsmanager, contact the owner of the dealership orthe general manager.
STEP TWO: If after contacting a member of dealershipmanagement, it appears your concern cannot beresolved by the dealership without further help, contactthe Chevrolet Customer Assistance Center by calling1-800-222-1020. In Canada, contact GM of CanadaCustomer Communication Centre in Oshawa by calling1-800-263-3777 (English) or 1-800-263-7854 (French).
We encourage you to call the toll-free number in orderto give your inquiry prompt attention. Please havethe following information available to give the CustomerAssistance Representative:
• Vehicle Identification Number (This is available fromthe vehicle registration or title, or the plate at thetop left of the instrument panel and visible throughthe windshield.)
• Dealership name and location
• Vehicle delivery date and present mileage
When contacting Chevrolet, please remember that yourconcern will likely be resolved at a dealer’s facility.That is why we suggest you follow Step One first if youhave a concern.
STEP THREE: Both General Motors and your dealerare committed to making sure you are completelysatisfied with your new vehicle. However, if you continueto remain unsatisfied after following the procedureoutlined in Steps One and Two, you should file with theGM/BBB Auto Line Program to enforce any additionalrights you may have. Canadian owners refer toyour Warranty and Owner Assistance Informationbooklet for information on the Canadian Motor VehicleArbitration Plan (CAMVAP).
7-2
The BBB Auto Line Program is an out of court programadministered by the Council of Better Business Bureausto settle automotive disputes regarding vehicle repairs orthe interpretation of the New Vehicle Limited Warranty.Although you may be required to resort to this informaldispute resolution program prior to filing a court action,use of the program is free of charge and your case willgenerally be heard within 40 days. If you do not agreewith the decision given in your case, you may reject it andproceed with any other venue for relief available to you.
You may contact the BBB using the toll-free telephonenumber or write them at the following address:
BBB Auto LineCouncil of Better Business Bureaus, Inc.4200 Wilson BoulevardSuite 800Arlington, VA 22203-1804
Telephone: 1-800-955-5100
This program is available in all 50 states and the Districtof Columbia. Eligibility is limited by vehicle age, mileageand other factors. General Motors reserves the right tochange eligibility limitations and/or discontinue itsparticipation in this program.
Online Owner CenterThe Owner Center is a resource for your GM ownershipneeds. You can find your specific vehicle informationall in one place.
The Owner Center allows you to:
• Get e-mail service reminders.
• Access information about your specific vehicle,including tips and videos and an electronicversion of this owner’s manual. (United States only)
• Keep track of your vehicle’s service history andmaintenance schedule.
• Find GM dealers for service nationwide.
• Receive special promotions and privileges onlyavailable to members. (United States only)
Refer to the web for updated information.
To register your vehicle, visit www.MyGMLink.com.(United States) or My GM Canada withinwww.gmcanada.com (Canada).
7-3
Customer Assistance for TextTelephone (TTY) UsersTo assist customers who are deaf, hard of hearing, orspeech-impaired and who use Text Telephones (TTYs),Chevrolet has TTY equipment available at its CustomerAssistance Center. Any TTY user can communicatewith Chevrolet by dialing: 1-800-833-CHEV (2438).(TTY users in Canada can dial 1-800-263-3830.)
Customer Assistance OfficesChevrolet encourages customers to call the toll-freenumber for assistance. If a U.S. customer wishesto write to Chevrolet, the letter should be addressed toChevrolet’s Customer Assistance Center.
United States – Customer AssistanceChevrolet Motor DivisionChevrolet Customer Assistance CenterP.O. Box 33170Detroit, MI 48232-5170
1-800-222-10201-800-833-2438 (For Text Telephone devices (TTYs))Roadside Assistance: 1-800-CHEV-USA® (243-8872)Fax Number: 313-381-0022
From Puerto Rico:1-800-496-9992 (English)1-800-496-9993 (Spanish)Fax Number: 313-381-0022
From U.S. Virgin Islands:1-800-496-9994Fax Number: 313-381-0022
7-4
Canada – Customer AssistanceGeneral Motors of Canada LimitedCustomer Communication Centre, 163-0051908 Colonel Sam DriveOshawa, Ontario L1H 8P7
1-800-263-3777 (English)1-800-263-7854 (French)1-800-263-3830 (For Text Telephone devices (TTYs))Roadside Assistance: 1-800-268-6800
Overseas – Customer AssistancePlease contact the local General Motors Business Unit.
Mexico, Central America andCaribbean Islands/Countries(Except Puerto Rico and U.S. VirginIslands) – Customer Assistance
General Motors de Mexico, S. de R.L. de C.V.Customer Assistance CenterPaseo de la Reforma # 2740Col. Lomas de BezaresC.P. 11910, Mexico, D.F.01-800-508-0000Long Distance: 011-52-53 29 0 800
GM Mobility Program for Personswith Disabilities
This program, available toqualified applicants, canreimburse you up to $1,000toward eligible aftermarketdriver or passengeradaptive equipment youmay require for your vehicle(hand controls, wheelchair/scooter lifts, etc.).
This program can also provide you with free resourceinformation, such as area driver assessment centersand mobility equipment installers. The offer is availablefor a limited period of time from the date of vehiclepurchase/lease. For more details, or to determine yourvehicle’s eligibility, see your GM dealer or call theGM Mobility Assistance Center at 1-800-323-9935.Text telephone (TTY) users, call 1-800-833-9935.
GM of Canada also has a Mobility Program. Call1-800-GM-DRIVE (463-7483) for details. All TTY userscall 1-800-263-3830.
7-5
Roadside Assistance Program
Security While You Travel1-800-CHEV-USA (243-8872)As the proud owner of a new Chevrolet vehicle, youare automatically enrolled in the Chevrolet RoadsideAssistance program. This value-added service isintended to provide you with peace of mind as you drivein the city or travel the open road. Chevrolet’s RoadsideAssistance toll-free number is staffed by courteousand capable Roadside Assistance Representatives whoare available 24 hours a day, 365 days a year.We will provide the following services during theBumper-to-Bumper warranty period, at no expenseto you:• Fuel Delivery: Delivery of enough fuel
($5 maximum) for the customer to get to thenearest service station.
• Lock-out Service (identification required):Replacement keys or locksmith service willbe covered at no charge if you are unable to gainentry into your vehicle. Delivery of the replacementkey will be covered within 10 miles.
• Emergency Tow: Tow to the nearest dealership forwarranty service or in the event of a vehicle-disablingaccident. Assistance when the vehicle is mired insand, mud or snow.
• Flat Tire Change: Installation of a spare tire will becovered at no charge. (The customer is responsiblefor the repair or replacement of the tire if not coveredby a warrantable failure.)
• Jump Start: No-start occurrences which require abattery jump start will be covered at no charge.
• Dealer Locator Service
In many instances, mechanical failures are coveredunder Chevrolet’s Bumper-to-Bumper warranty.However, when other services are utilized, our RoadsideAssistance Representatives will explain any paymentobligations you might incur.
7-6
For prompt and efficient assistance when calling, pleaseprovide the following to the Roadside AssistanceRepresentative:
• Your name, home address, and home telephonenumber
• Telephone number of your location
• Location of the vehicle
• Model, year, color, and license plate number
• Mileage, Vehicle Identification Number and deliverydate of the vehicle
• Description of the problem
While we hope you never have the occasion to useour service, it is added security while traveling foryou and your family. Remember, we are only aphone call away. Chevrolet Roadside Assistance:1-800-CHEV-USA (1-800-234-8872), text telephone(TTY) users, call 1-888-889-2438.
Chevrolet reserves the right to limit services orreimbursement to an owner or driver when, inChevrolet’s judgement, the claims become excessivein frequency or type of occurrence.
Roadside Assistance is not part of or included in thecoverage provided by the New Vehicle Limited Warranty.Buick reserves the right to make any changes ordiscontinue the Roadside Assistance program at anytime without notification.
Canadian Roadside AssistanceVehicles purchased in Canada have an extensiveroadside assistance program accessible from anywherein Canada or the United States. Please refer to theWarranty and Owner Assistance Information book.
Courtesy TransportationChevrolet has always exemplified quality and value in itsoffering of motor vehicles. To enhance your ownershipexperience, we and our participating dealers are proud tooffer Courtesy Transportation, a customer supportprogram for new vehicles.
The Courtesy Transportation program is offered toretail purchase/lease customers in conjunction with theBumper-to-Bumper coverage provided by the NewVehicle Limited Warranty. Several transportation optionsare available when warranty repairs are required. This willreduce your inconvenience during warranty repairs.
7-7
Plan Ahead When PossibleWhen your vehicle requires warranty service, youshould contact your dealer and request an appointment.By scheduling a service appointment and advisingyour service consultant of your transportation needs,your dealer can help minimize your inconvenience.
If your vehicle cannot be scheduled into the servicedepartment immediately, keep driving it until it can bescheduled for service, unless, of course, the problem issafety-related. If it is, please call your dealership, letthem know this, and ask for instructions.
If the dealer requests that you simply drop the vehicleoff for service, you are urged to do so as early inthe work day as possible to allow for same day repair.
Transportation OptionsWarranty service can generally be completed while youwait. However, if you are unable to wait Chevrolethelps minimize your inconvenience by providing severaltransportation options. Depending on the circumstances,your dealer can offer you one of the following:
Shuttle ServiceParticipating dealers can provide you with shuttleservice to get you to your destination with minimalinterruption of your daily schedule. This includes a oneway or round trip shuttle service to a destination upto 10 miles from the dealership.
Public Transportation or FuelReimbursementIf your vehicle requires overnight warranty repairs,reimbursement (five day maximum) may be available forthe use of public transportation such as taxi or bus. Inaddition, should you arrange transportation through afriend or relative, reimbursement for reasonable fuelexpenses (five day maximum) may be available.Claim amounts should reflect actual costs and besupported by original receipts.
7-8
Courtesy Rental VehicleYour dealer may arrange to provide you with a courtesyrental vehicle or reimburse you for a rental vehicleyou obtained if your vehicle is kept for a warrantyrepair. Reimbursement will be limited to a maximumof $30.00 a day and must be supported by receipts.This requires that you sign and complete a rentalagreement and meet state, local and rental vehicleprovider requirements. Requirements vary andmay include minimum age requirements, insurancecoverage, credit card, etc. You are responsible forfuel usage charges and may also be responsible fortaxes, levies, usage fees, excessive mileage orrental usage beyond the completion of the repair.
Generally it is not possible to provide a like-vehicle asa courtesy rental.
Additional Program InformationCourtesy Transportation is available during theBumper-to-Bumper warranty coverage period, but itis not part of the New Vehicle Limited Warranty.A separate booklet entitled “Warranty and OwnerAssistance Information” furnished with each new vehicleprovides detailed warranty coverage information.
Courtesy Transportation is available only at participatingdealers and all program options, such as shuttleservice, may not be available at every dealer. Pleasecontact you dealer for specific information aboutavailability. All Courtesy Transportation arrangementswill be administered by appropriate dealer personnel.
Canadian Vehicles: For warranty repairs duringthe Complete Vehicle Coverage period of the GeneralMotors of Canada New Vehicle Limited Warranty,alternative transportation may be available under theCourtesy Transportation Program. Please consultyour dealer for details.
General Motors reserves the right to unilaterally modify,change or discontinue Courtesy Transportation atany time and to resolve all questions of claim eligibilitypursuant to the terms and conditions describedherein at its sole discretion.
7-9
Vehicle Data Collection and EventData RecordersYour vehicle, like other modern motor vehicles, has anumber of sophisticated computer systems thatmonitor and control several aspects of the vehicle’sperformance. Your vehicle uses on-board vehiclecomputers to monitor emission control components tooptimize fuel economy, to monitor conditions for air bagdeployment and, if so equipped, to provide anti-lockbraking and to help the driver control the vehiclein difficult driving situations. Some information may bestored during regular operations to facilitate repairof detected malfunctions; other information is stored onlyin a crash or near crash event by computer systemscommonly called event data recorders (EDR).
In a crash or near crash event, computer systems, suchas the Air Bag Sensing and Diagnostic Module (SDM)in your vehicle may record information about thecondition of the vehicle and how it was operated, suchas engine speed, brake applications, throttle position,vehicle speed, safety belt usage, air bag readiness, airbag performance data, and the severity of a collision.This information has been used to improve vehiclecrash performance and may be used to improve crashperformance of future vehicles and driving safety.Unlike the data recorders on many airplanes, theseon-board systems do not record sounds, such asconversation of vehicle occupants.
To read this information, special equipment is neededand access to the vehicle or the SDM is required.GM will not access information about a crash event orshare it with others other than• with the consent of the vehicle owner or, if the
vehicle is leased, with the consent of the lessee,• in response to an official request of police or similar
government office,• as part of GM’s defense of litigation through the
discovery process, or• as required by law.
In addition, once GM collects or receives data, GM may• use the data for GM research needs,• make it available for research where appropriate
confidentiality is to be maintained and need isshown, or
• share summary data which is not tied to a specificvehicle with non-GM organizations for researchpurposes.
Others, such as law enforcement, may have access tothe special equipment that can read the informationif they have access to the vehicle or SDM.
If your vehicle is equipped with OnStar®, please checkthe OnStar® subscription service agreement or manualfor information on its operations and data collection.
7-10

Reporting Safety Defects
Reporting Safety Defects to theUnited States GovernmentIf you believe that your vehicle has a defect whichcould cause a crash or could cause injury or death,you should immediately inform the National HighwayTraffic Safety Administration (NHTSA), in additionto notifying General Motors.
If NHTSA receives similar complaints, it may open aninvestigation, and if it finds that a safety defect existsin a group of vehicles, it may order a recall and remedycampaign. However, NHTSA cannot become involvedin individual problems between you, your dealer orGeneral Motors.
To contact NHTSA, you may either call the Auto SafetyHotline toll-free at 1-800-424-9393 (or 366-0123 inthe Washington, D.C. area) or write to:
NHTSA, U.S. Department of TransportationWashington, D.C. 20590
You can also obtain other information about motorvehicle safety from the hotline.
Reporting Safety Defects to theCanadian GovernmentIf you live in Canada, and you believe that yourvehicle has a safety defect, you should immediatelynotify Transport Canada, in addition to notifyingGeneral Motors of Canada Limited. You may write to:
Transport Canada330 Sparks StreetTower COttawa, Ontario K1A 0N5
7-11
Reporting Safety Defects toGeneral MotorsIn addition to notifying NHTSA (or Transport Canada)in a situation like this, we certainly hope you’ll notify us.Please call us at 1-800-222-1020, or write:
Chevrolet Motor DivisionChevrolet Customer Assistance CenterP.O. Box 33170Detroit, MI 48232-5170
In Canada, please call us at 1-800-263-3777 (English)or 1-800-263-7854 (French). Or, write:
General Motors of Canada LimitedCustomer Communication Centre, 163-0051908 Colonel Sam DriveOshawa, Ontario L1H 8P7
Service Publications OrderingInformation
Service ManualsService Manuals have the diagnosis and repairinformation on engines, transmission, axle, suspension,brakes, electrical, steering, body, etc.
RETAIL SELL PRICE: $120.00
Transmission, Transaxle, TransferCase Unit Repair ManualThis manual provides information on unit repairservice procedures, adjustments, and specificationsfor GM transmissions, transaxles, and transfer cases.
RETAIL SELL PRICE: $50.00
7-12
Service BulletinsService Bulletins give technical service informationneeded to knowledgeably service General Motors carsand trucks. Each bulletin contains instructions toassist in the diagnosis and service of your vehicle.
In Canada, information pertaining to ProductService Bulletins can be obtained by contacting yourGeneral Motors dealer or by calling 1-800-GM-DRIVE(1-800-463-7483).
Owner’s InformationOwner publications are written specifically for ownersand intended to provide basic operational informationabout the vehicle. The owner’s manual will includethe Maintenance Schedule for all models.
In-Portfolio: Includes a Portfolio, Owner’s Manual,and Warranty Booklet.
RETAIL SELL PRICE: $35.00
Without Portfolio: Owner’s Manual only.
RETAIL SELL PRICE: $25.00
Current and Past Model Order FormsService Publications are available for current andpast model GM vehicles. To request an order form,please specify year and model name of the vehicle.
ORDER TOLL FREE: 1-800-551-4123Monday-Friday 8:00 AM - 6:00 PMEastern TimeFor Credit Card Orders Only(VISA-MasterCard-Discover), visit Helm, Inc. on theWorld Wide Web at: www.helminc.com
Or you can write to:
Helm, IncorporatedP. O. Box 07130Detroit, MI 48207
Prices are subject to change without notice and withoutincurring obligation. Allow ample time for delivery.
Note to Canadian Customers: All listed prices arequoted in U.S. funds. Canadian residents are to makechecks payable in U.S. funds.
7-13

✍ NOTES
7-14
AAccessory Power Outlets ................................. 3-17Adaptive Shift Logic ........................................ 2-24Adding Washer Fluid ....................................... 5-31Additional Program Information ........................... 7-9Additives, Fuel ................................................. 5-6Add-On Electrical Equipment ............................ 5-78Adjusting the Speakers (Balance/Fade) .............. 3-50Air Bag
Readiness Light .......................................... 3-33Air Bag Systems ............................................. 1-46
How Does an Air Bag Restrain? .................... 1-52Servicing Your Air Bag-Equipped Vehicle ......... 1-54What Makes an Air Bag Inflate? .................... 1-52What Will You See After an Air Bag
Inflates? .................................................. 1-53When Should an Air Bag Inflate? ................... 1-51Where Are the Air Bags? .............................. 1-49
Air Cleaner/Filter, Engine ................................. 5-17Airbag Sensing and Diagnostic Module (SDM) .... 7-10AM ............................................................... 3-59Antenna, Backglass ......................................... 3-60Anti-lock Brake System (ABS) ............................ 4-6Anti-Lock Brake, System Warning Light .............. 3-36Appearance Care ............................................ 5-68
Care of Safety Belts .................................... 5-72Chemical Paint Spotting ............................... 5-75
Appearance Care (cont.)Cleaning the Inside of Your Vehicle ................ 5-69Cleaning the Outside of Your Vehicle .............. 5-72Finish Damage ............................................ 5-74Sheet Metal Damage ................................... 5-74Underbody Maintenance ............................... 5-75Vehicle Care/Appearance Materials ................ 5-75Weatherstrips .............................................. 5-72
Arming the System ......................................... 2-15Ashtrays ........................................................ 3-18Audio System(s) ............................................. 3-48
Audio Steering Wheel Controls ...................... 3-59Backglass Antenna ...................................... 3-60Care of Your CD Player ............................... 3-60Care of Your CDs ........................................ 3-59Radio with CD ............................................ 3-48Theft-Deterrent Feature ................................ 3-58Trunk-Mounted CD Changer .......................... 3-55Understanding Radio Reception ..................... 3-59
Automatic Climate Control System ..................... 3-22Automatic Operation ........................................ 3-22Automatic Transaxle
Fluid .......................................................... 5-19Operation ................................................... 2-22
Automatic Transaxle Inspection ......................... 6-19Automatic Transaxle Shift Lock Control
System Check ............................................. 6-20Auto-Off Headlamps ........................................ 3-14
1
BBackglass Antenna .......................................... 3-60Battery .......................................................... 5-35Battery Replacement ......................................... 2-6Before Leaving on a Long Trip ......................... 4-21Body Lubrication Service .................................. 6-19Brake
Parking ...................................................... 2-26System Inspection ....................................... 6-23System Warning Light .................................. 3-35
Brake Adjustment ............................................ 5-34Brake Fluid .................................................... 5-32Brake Pedal Travel ......................................... 5-34Brake Wear ................................................... 5-33Brakes .......................................................... 5-32Braking ........................................................... 4-6Braking in Emergencies ..................................... 4-8Break-In, New Vehicle ..................................... 2-18Bulb Replacement ........................................... 5-41
Center High-Mounted Stoplamp (CHMSL) ........ 5-44Front Turn Signal Lamps .............................. 5-43Halogen Bulbs ............................................ 5-41Headlamp Aiming ........................................ 5-40Headlamps ................................................. 5-41Parking Lamps ............................................ 5-45
Bulb Replacement (cont.)Taillamps, Turn Signal, Stoplamps and
Back-up Lamps ........................................ 5-46Buying New Tires ........................................... 5-56
CCalifornia Fuel .................................................. 5-6Canada – Customer Assistance .......................... 7-5Canadian Owners ................................................ iiCanadian Roadside Assistance ........................... 7-7Canceling the Rear Door Security Lock .............. 2-10Capacities and Specifications ............................ 5-85Carbon Monoxide ................... 4-24, 4-35, 2-11, 2-29Care of
Safety Belts ................................................ 5-72Your CD Player ........................................... 3-60Your CDs ................................................... 3-59
Cassette Tape Player Service ........................... 6-18CD Changer, Trunk-Mounted ............................ 3-55CD Messages ........................................ 3-54, 3-58Center Console Storage Area ........................... 2-34Center High-Mounted Stoplamp (CHMSL) ........... 5-44Chains, Tires .................................................. 5-60Charging System Light .................................... 3-34
2
CheckEngine Light ............................................... 3-39
Check Engine Light ......................................... 3-39Checking Coolant ............................................ 5-20Checking Engine Oil ........................................ 5-14Checking Things Under the Hood ...................... 5-10Checking Your Restraint Systems ...................... 1-55Chemical Paint Spotting ................................... 5-75Child Restraints
Child Restraint Systems ............................... 1-34Infants and Young Children ........................... 1-30Lower Anchorages and Top Tethers for
Children (LATCH System) .......................... 1-40Older Children ............................................. 1-28Securing a Child Restraint Designed for
the LATCH System ................................... 1-43Securing a Child Restraint in a Center Rear
Seat Position ........................................... 1-46Securing a Child Restraint in a Rear Outside
Seat Position ........................................... 1-43Securing a Child Restraint in the Right Front
Seat Position ........................................... 1-46Top Strap ................................................... 1-37Top Strap Anchor Location ............................ 1-39Where to Put the Restraint ........................... 1-37
Cigarette Lighter ............................................. 3-18
CleaningInside of Your Vehicle .................................. 5-69Outside of Your Vehicle ................................ 5-72Underbody Maintenance ............................... 5-75Weatherstrips .............................................. 5-72
Cleaning Aluminum Wheels .............................. 5-74Cleaning Exterior Lamps/Lenses ....................... 5-73Cleaning Fabric/Carpet .................................... 5-69Cleaning Glass Surfaces .................................. 5-71Cleaning Interior Plastic Components ................. 5-71Cleaning Leather ............................................ 5-71Cleaning the Top of the Instrument Panel ........... 5-71Cleaning Tires ................................................ 5-74Cleaning Vinyl ................................................ 5-70Cleaning Windshield and Wiper Blades .............. 5-73Climate Control System ................................... 3-18
Air Filter, Passenger Compartment ................. 3-28Automatic ................................................... 3-22Outlet Adjustment ........................................ 3-28
Clock ............................................................ 3-46Coinholder(s) .................................................. 2-33Control of a Vehicle .......................................... 4-5Coolant
Engine Temperature Gage ............................ 3-39Heater, Engine ............................................ 2-21Surge Tank Pressure Cap ............................. 5-21
3
Coolant (cont.)Cooling System .............................................. 5-24Cruise Control ................................................ 3-10Cruise Control Light ........................................ 3-43Cupholder(s) .................................................. 2-33Current and Past Model Order Forms ................ 7-13Customer Assistance Information
Courtesy Transportation .................................. 7-7Customer Assistance for Text Telephone (TTY)
Users ....................................................... 7-4Customer Assistance Offices ........................... 7-4Customer Satisfaction Procedure ..................... 7-2GM Mobility Program for Persons with
Disabilities ................................................ 7-5Reporting Safety Defects to General Motors .... 7-12Reporting Safety Defects to the Canadian
Government ............................................ 7-11Reporting Safety Defects to the United States
Government ............................................ 7-11Roadside Assistance Program ......................... 7-6Service Publications Ordering Information ........ 7-12
DDaytime Running Lamps (DRL) ......................... 3-14Daytime Running Lamps Indicator Light ............. 3-44Defensive Driving ............................................. 4-2Defogging and Defrosting ......................... 3-20, 3-26Dinghy Towing ................................................ 4-30Disarming the System ..................................... 2-16Doing Your Own Service Work ........................... 5-4Dolly Towing .................................................. 4-30Dome Lamp ................................................... 3-16Door
Ajar Light ................................................... 3-47Central Door Unlocking System ....................... 2-8Door Ajar Reminder ....................................... 2-9Locks .......................................................... 2-7Power Door Locks ......................................... 2-9Rear Door Security Locks ............................. 2-10
DriverPosition, Safety Belt ..................................... 1-16Seat Height Adjuster ...................................... 1-3
4
DrivingAt Night ..................................................... 4-15City ........................................................... 4-19Defensive ..................................................... 4-2Drunken ....................................................... 4-2Freeway ..................................................... 4-20Hill and Mountain Roads .............................. 4-22In Rain and on Wet Roads ........................... 4-16Winter ........................................................ 4-24
Driving on Snow or Ice .................................... 4-25Driving Through Deep Standing Water ............... 4-18Driving Through Flowing Water ......................... 4-18
EElectrical System
Add-On Equipment ...................................... 5-78Fuses and Circuit Breakers ........................... 5-79Headlamp Wiring ......................................... 5-78Power Windows and Other Power Options ...... 5-78Windshield Wiper Fuses ............................... 5-78
Emergency Trunk Release Handle ..................... 2-12
Emissions Inspection and MaintenancePrograms ................................................... 3-41
EngineAir Cleaner/Filter ......................................... 5-17Battery ....................................................... 5-35Check and Service Engine Soon Light ............ 3-39Coolant ...................................................... 5-19Coolant Heater ............................................ 2-21Coolant Temperature Gage ........................... 3-39Cooling System Inspection ............................ 6-23Engine Compartment Overview ...................... 5-12Exhaust ..................................................... 2-29Oil ............................................................. 5-13Overheating ................................................ 5-22Starting ...................................................... 2-20
Engine Compartment Fuse Block ...................... 5-81Engine Coolant Level Check ............................. 6-18Engine Oil Additives ........................................ 5-16Engine Oil Level Check ................................... 6-18Entry Lighting ................................................. 3-16Event Data Recorders (EDR) ............................ 7-10Express-Down Window .................................... 2-14Exterior Lamps ............................................... 3-13
5

FFilter
Engine Air Cleaner ...................................... 5-17Finding a Station ............................................ 3-48Finish Care .................................................... 5-73Finish Damage ............................................... 5-74Flash-to-Pass Feature ....................................... 3-8Flat Tire ........................................................ 5-61Flat Tire, Changing ......................................... 5-62Fluid
Automatic Transaxle ..................................... 5-19Power Steering ........................................... 5-30Windshield Washer ...................................... 5-31
FM ............................................................... 3-59Fog Lamps .................................................... 3-15Folding the Seatback ........................................ 1-9Footnotes ................................................ 6-6, 6-13Fuel ............................................................... 5-5
Additives ...................................................... 5-6California Fuel .............................................. 5-6Filling a Portable Fuel Container .................... 5-10Filling Your Tank ........................................... 5-7Fuels in Foreign Countries .............................. 5-7Gage ......................................................... 3-44Gasoline Octane ........................................... 5-5Gasoline Specifications .................................. 5-5Low Warning Light ....................................... 3-45System Inspection ....................................... 6-22
FusesFuses and Circuit Breakers ........................... 5-79Windshield Wiper ......................................... 5-78
GGage
Engine Coolant Temperature ......................... 3-39Fuel .......................................................... 3-44Speedometer .............................................. 3-32Tachometer ................................................. 3-32
GasolineOctane ........................................................ 5-5Specifications ............................................... 5-5
Glove Box ..................................................... 2-33GM Mobility Program for Persons with
Disabilities .................................................... 7-5
HHazard Warning Flashers ................................... 3-6Head Restraints ............................................... 1-8Headlamp
Aiming ....................................................... 5-40Headlamp High/Low-Beam Changer .................... 3-8Headlamp Wiring ............................................ 5-78
6
Headlamps .................................................... 5-41Bulb Replacement ....................................... 5-41Front Turn Signal Lamps .............................. 5-43Halogen Bulbs ............................................ 5-41
Heated Seats ................................................... 1-5Height Adjuster, Driver Seat ............................... 1-3Highbeam On Light ......................................... 3-43Highway Hypnosis ........................................... 4-22Hill and Mountain Roads .................................. 4-22Hold Mode ..................................................... 2-25Hold Mode Functions ...................................... 2-25Hold Mode Light ............................................. 3-38Hood
Checking Things Under ................................ 5-10Release ..................................................... 5-11
Horn ............................................................... 3-6How the System Alarm is Activated ................... 2-16How to Add Coolant to the Coolant
Surge Tank ................................................. 5-26How to Check ................................................ 5-53How to Check Power Steering Fluid .................. 5-30How to Detect a Tamper Condition .................... 2-16How to Inspect the Engine Air Cleaner/Filter ....... 5-18How to Turn Off the System Alarm .................... 2-16How to Use This Manual ...................................... iiHow to Wear Safety Belts Properly ................... 1-16Hydroplaning .................................................. 4-18
IIf No Steam Is Coming From Your Engine .......... 5-23If Steam Is Coming From Your Engine ............... 5-22If the Light Is Flashing ..................................... 3-40If the Light Is On Steady ................................. 3-40If You Are Caught in a Blizzard ......................... 4-26If You Are Stuck in Sand, Mud, Ice or Snow ....... 4-28Ignition Positions ............................................. 2-19Ignition Transaxle Lock Check .......................... 6-21Immobilizer .................................................... 2-17Immobilizer Operation ...................................... 2-17Infants and Young Children, Restraints ............... 1-30Inflation - Tire Pressure ................................... 5-53Inspection
Brake System ............................................. 6-23Engine Cooling System ................................ 6-23Exhaust System .......................................... 6-22Fuel System ............................................... 6-22Part C - Periodic Maintenance ....................... 6-22Steering, Suspension and Front Drive Axle
Boot and Seal ......................................... 6-22Throttle System ........................................... 6-23
Instrument PanelCluster ....................................................... 3-31Overview ..................................................... 3-4
Instrument Panel Brightness ............................. 3-15Instrument Panel Fuse Block ............................ 5-79Interior Lamps ................................................ 3-15
7
JJump Starting ................................................. 5-36
KKey Lock Cylinders Service .............................. 6-19Keyless Entry System ....................................... 2-4Keys ............................................................... 2-2
LLamps
Exterior ...................................................... 3-13Interior ....................................................... 3-15
Lamps On Reminder ....................................... 3-14Lap-Shoulder Belt ................................... 1-16, 1-25LATCH System
Child Restraints ........................................... 1-40Securing a Child Restraint Designed for
the LATCH System ................................... 1-43Leaving Your Vehicle ....................................... 2-11Leaving Your Vehicle With the Engine Running ... 2-27Light
Air Bag Readiness ....................................... 3-33Anti-Lock Brake System Warning ................... 3-36Brake System Warning ................................. 3-35
Light (cont.)Charging System ......................................... 3-34Cruise Control ............................................. 3-43Daytime Running Lamps Indicator .................. 3-44Door Ajar ................................................... 3-47Highbeam On ............................................. 3-43Hold Mode ................................................. 3-38Low Fuel Warning ....................................... 3-45Malfunction Indicator .................................... 3-39Oil Pressure ............................................... 3-42Safety Belt Reminder ................................... 3-33Safety Belt Reminder Tone ........................... 3-33Speed Sensitive Power Steering (SSPS)
Warning Light .......................................... 3-36TCS Warning Light ...................................... 3-37Traction Control System Active ...................... 3-38Traction Control System (TCS) Warning .......... 3-37Trunk Ajar .................................................. 3-47
Loading Your Vehicle ....................................... 4-31Lockout Protection .......................................... 2-10Locks
Central Door Unlocking System ....................... 2-8Door ........................................................... 2-7Leaving Your Vehicle .................................... 2-11Lockout Protection ....................................... 2-10Power Door .................................................. 2-9Rear Door Security Locks ............................. 2-10
8
Long Trip/Highway Definition .............................. 6-6Long Trip/Highway Intervals ............................... 6-6Long Trip/Highway Scheduled Maintenance ........ 6-13Loss of Control ............................................... 4-14Low Fuel Warning Light ................................... 3-45Lumbar
Manual Controls ............................................ 1-5
MMaintenance Schedule
At Each Fuel Fill ......................................... 6-18At Least Once a Month ................................ 6-18At Least Once a Year .................................. 6-19At Least Twice a Year .................................. 6-19Brake System Inspection .............................. 6-23Engine Cooling System Inspection ................. 6-23Exhaust System Inspection ........................... 6-22Fuel System Inspection ................................ 6-22How This Section is Organized ....................... 6-3Introduction .................................................. 6-2Long Trip/Highway Scheduled Maintenance ..... 6-13Maintenance Requirements ............................. 6-2Part A - Scheduled Maintenance Services ......... 6-4Part B - Owner Checks and Services .............. 6-18Part C - Periodic Maintenance Inspections ....... 6-22
Maintenance Schedule (cont.)Part D - Recommended Fluids and
Lubricants ............................................... 6-24Part E - Maintenance Record ......................... 6-25Selecting the Right Schedule .......................... 6-5Short Trip/City Scheduled Maintenance ............. 6-6Steering, Suspension and Front Drive Axle
Boot and Seal Inspection .......................... 6-22Throttle System Inspection ............................ 6-23Using Your ................................................... 6-4Your Vehicle and the Environment ................... 6-2
Malfunction Indicator Light ................................ 3-39Manual Lumbar Controls .................................... 1-5Manual Operation ........................................... 3-23Manual Seats ................................................... 1-2Map Lamps .................................................... 3-16Matching Transmitter(s) to Your Vehicle ................. 2-5Mexico, Central America and Caribbean Islands/
Countries (Except Puerto Rico and U.S. VirginIslands) – Customer Assistance ....................... 7-5
MirrorsAutomatic Dimming Rearview ........................ 2-31Manual Rearview Mirror ................................ 2-31Outside Convex Mirror ................................. 2-33Outside Heated Mirrors ................................ 2-33Outside Power Mirrors .................................. 2-32
MyGMLink.com ................................................ 7-3
9
NNew Vehicle Break-In ...................................... 2-18
OOdometer ...................................................... 3-32Odometer, Trip ............................................... 3-32Off-Road Recovery .......................................... 4-12Oil
Engine ....................................................... 5-13Pressure Light ............................................. 3-42
Older Children, Restraints ................................ 1-28Online Owner Center ........................................ 7-3Opening a Rear Door When the Security
Lock is On ................................................. 2-10Other Warning Devices ...................................... 3-6Outlet Adjustment ............................................ 3-28Outside
Convex Mirror ............................................. 2-33Heated Mirrors ............................................ 2-33Power Mirrors ............................................. 2-32
Overseas – Customer Assistance ........................ 7-5Owners, Canadian ............................................... iiOwner’s Information ........................................ 7-13
PPark (P)
Shifting Into ................................................ 2-27Shifting Out of ............................................ 2-28
ParkingBrake ........................................................ 2-26Over Things That Burn ................................. 2-29
Parking Brake and Automatic TransaxlePark (P) Mechanism Check ........................... 6-21
Parking Lamps ............................................... 5-45Part A - Scheduled Maintenance Services ............. 6-4Part B - Owner Checks and Services ................. 6-18Part C - Periodic Maintenance Inspections .......... 6-22Part D - Recommended Fluids and
Lubricants .................................................. 6-24Part E - Maintenance Record ............................ 6-25Passenger Compartment Air Filter ..................... 3-28Passing ......................................................... 4-12Plan Ahead When Possible ................................ 7-8Playing a CD ......................................... 3-50, 3-57Playing the Radio ........................................... 3-48Power
Accessory Outlets ........................................ 3-17Door Locks .................................................. 2-9Electrical System ......................................... 5-78
10
Power (cont.)Seat ............................................................ 1-3Steering Fluid ............................................. 5-30Windows .................................................... 2-14
Power Steering ............................................... 4-10Pretensioners, Safety Belt ................................ 1-27
QQuestions and Answers About Safety Belts ......... 1-15
RRadios .......................................................... 3-48
Care of Your CD Player ............................... 3-60Care of Your CDs ........................................ 3-59Radio with CD ............................................ 3-48Theft-Deterrent ............................................ 3-58Trunk-Mounted CD Changer .......................... 3-55Understanding Reception .............................. 3-59
Rear Door Security Locks ................................ 2-10Rear Seat Armrest .......................................... 2-34Rear Seat Operation ......................................... 1-9Rear Seat Passengers, Safety Belts .................. 1-24
Rear Window and Outside MirrorDefogger ............................................ 3-21, 3-27
Rearview Mirror, Automatic Dimming .................. 2-31Rearview Mirrors ............................................. 2-31Reclining Seatbacks .......................................... 1-6Recreational Vehicle Towing ............................. 4-29Remote Keyless Entry System ............................ 2-4Remote Keyless Entry System, Operation ............ 2-5Remote Trunk Release .................................... 2-12Removing the Flat Tire and Installing
the Spare Tire ............................................. 5-64Removing the Spare Tire and Tools ................... 5-63Replacing Brake System Parts .......................... 5-34Replacing Restraint System Parts
After a Crash .............................................. 1-55Reporting Safety Defects
Canadian Government .................................. 7-11General Motors ........................................... 7-12United States Government ............................ 7-11
Restraint System Check ................................... 6-19Checking Your Restraint Systems ................... 1-55Replacing Restraint System Parts
After a Crash .......................................... 1-55Restraint Systems
Checking .................................................... 1-55Replacing Parts ........................................... 1-55
11
Right Front Passenger Position, Safety Belts ...... 1-24Roadside
Assistance Program ....................................... 7-6Rocking Your Vehicle To Get It Out ................... 4-29Running Your Engine While You Are Parked ....... 2-30
SSafety Belt
Pretensioners .............................................. 1-27Reminder Light ............................................ 3-33Reminder Tone ............................................ 3-33
Safety BeltsCare of ...................................................... 5-72Driver Position ............................................ 1-16How to Wear Safety Belts Properly ................ 1-16Questions and Answers About Safety Belts ..... 1-15Rear Seat Passengers ................................. 1-24Right Front Passenger Position ...................... 1-24Safety Belt Use During Pregnancy ................. 1-23Safety Belts Are for Everyone ....................... 1-10
Safety Warnings and Symbols .............................. iii
SeatsDriver Seat Height Adjuster ............................. 1-3Head Restraints ............................................ 1-8Heated Seats ............................................... 1-5Manual ........................................................ 1-2Manual Lumbar ............................................. 1-5Power Seat .................................................. 1-3Rear Seat Operation ...................................... 1-9Reclining Seatbacks ...................................... 1-6
Secondary Information Center (SIC) ................... 3-46Securing a Child Restraint
Center Rear Seat Position ............................ 1-46Designed for the LATCH System ................... 1-43Rear Outside Seat Position ........................... 1-43Right Front Seat Position .............................. 1-46
Security While You Travel .................................. 7-6Selecting the Right Schedule, Maintenance .......... 6-5Sensors ......................................................... 3-25Service ........................................................... 5-3
Adding Equipment to the Outsideof Your Vehicle .......................................... 5-5
Doing Your Own Work ................................... 5-4
12
Service (cont.)Engine Soon Light ....................................... 3-39Publications Ordering Information ................... 7-12
Service Bulletins ............................................. 7-13Service Manuals ............................................. 7-12Setting Preset Stations .................................... 3-49Setting the Tone (Bass/Treble) .......................... 3-49Sheet Metal Damage ....................................... 5-74Shifting Into Park (P) ....................................... 2-27Shifting Out of Park (P) ................................... 2-28Short Trip/City Definition .................................... 6-5Short Trip/City Intervals ..................................... 6-5Short Trip/City Scheduled Maintenance ................ 6-6Shoulder Belt Height Adjuster ........................... 1-18Skidding ........................................................ 4-14Some Other Rainy Weather Tips ....................... 4-18Spare Tire ..................................................... 5-68Special Fabric Cleaning Problems ..................... 5-70Specifications, Capacities ................................. 5-85Speed Sensitive Power Steering (SSPS)
Warning Light ............................................. 3-36Speedometer .................................................. 3-32
Starter Switch Check ....................................... 6-20Starting Your Engine ....................................... 2-20Steering ........................................................ 4-10Steering in Emergencies .................................. 4-11Steering, Suspension and Front Drive Axle
Boot and Seal Inspection .............................. 6-22Steering Tips .................................................. 4-10Steering Wheel Controls, Audio ......................... 3-59Steering Wheel, Tilt Wheel ................................. 3-7Storage Areas
Center Console Storage Area ........................ 2-34Coinholder(s) .............................................. 2-33Cupholder(s) ............................................... 2-33Glove Box .................................................. 2-33Rear Seat Armrest ....................................... 2-34Sunglasses Storage Compartment .................. 2-34
Storing the Flat Tire and Tools .......................... 5-67Storing the Spare Tire and Tools ....................... 5-68Stuck in Sand, Mud, Ice or Snow ...................... 4-28Sun Visors ..................................................... 2-14Sunglasses Storage Compartment ..................... 2-34Sunroof ......................................................... 2-35
13
TTachometer .................................................... 3-32Taillamps
Turn Signal, Stoplamps and Back-up Lamps ...... 5-46TCS Active Light ............................................. 3-38TCS Warning Light .......................................... 3-37Theft-Deterrent, Radio ..................................... 3-58Theft-Deterrent System .................................... 2-15Theft-Deterrent Systems ................................... 2-15
Immobilizer ................................................. 2-17Immobilizer Operation ................................... 2-17
Throttle System Inspection ............................... 6-23Tilt Wheel ........................................................ 3-7Tire Inflation Check ......................................... 6-18Tire Sidewall Labeling ...................................... 5-48Tire Size ....................................................... 5-50Tire Terminology and Definitions ........................ 5-50Tires ............................................................. 5-48
Buying New Tires ........................................ 5-56Chains ....................................................... 5-60Changing a Flat Tire .................................... 5-62If a Tire Goes Flat ....................................... 5-61Inflation - Tire Pressure ................................ 5-53Inspection and Rotation ................................ 5-54Spare Tire .................................................. 5-68Uniform Tire Quality Grading ......................... 5-57Wheel Alignment and Tire Balance ................. 5-58
Tires (cont.)Wheel Replacement ..................................... 5-59When It Is Time for New Tires ...................... 5-55
To Use the Engine Coolant Heater .................... 2-21Top Strap ...................................................... 1-37Top Strap Anchor Location ............................... 1-39Torque Lock ................................................... 2-28Towing
Recreational Vehicle ..................................... 4-29Towing a Trailer .......................................... 4-35Your Vehicle ............................................... 4-29
TractionControl System Active Light .......................... 3-38Control System (TCS) .................................... 4-8Control System Warning Light ....................... 3-37
TransaxleFluid, Automatic ........................................... 5-19
Transaxle Operation, Automatic ......................... 2-22Transmission, Transaxle, Transfer Case Unit
Repair Manual ............................................ 7-12Transportation Options ...................................... 7-8Trip Odometer ................................................ 3-32Trunk ............................................................ 2-11Trunk Ajar Light .............................................. 3-47Trunk Lamp ................................................... 3-16Trunk-Mounted CD Changer ............................. 3-55Turn and Lane-Change Signals .......................... 3-8Turn Signal/Multifunction Lever ........................... 3-7
14
UUnderbody Flushing Service ............................. 6-21Understanding Radio Reception ........................ 3-59Uniform Tire Quality Grading ............................ 5-57United States – Customer Assistance .................. 7-4Used Replacement Wheels .............................. 5-60Using an MP3 CD .......................................... 3-51Using Cleaner on Fabric .................................. 5-70Using the Rear Door Security Lock ................... 2-10
VVehicle
Control ........................................................ 4-5Damage Warnings ........................................... ivLoading ...................................................... 4-31Symbols ......................................................... iv
Vehicle Data Collection and Event DataRecorders .................................................. 7-10
Vehicle IdentificationNumber (VIN) ............................................. 5-77Service Parts Identification Label ................... 5-77
Vehicle Storage .............................................. 5-35Ventilation Adjustment ...................................... 3-28Visor Vanity Mirror .......................................... 2-14Visors ........................................................... 2-14
WWarning Lights, Gages and Indicators ................ 3-30Warnings
Hazard Warning Flashers ............................... 3-6Other Warning Devices .................................. 3-6Safety and Symbols ......................................... iiiVehicle Damage .............................................. iv
Washing Your Vehicle ...................................... 5-72Weatherstrip Lubrication ................................... 6-19What Kind of Engine Oil to Use ........................ 5-14What to Do with Used Oil ................................ 5-17What to Use .................................. 5-19, 5-30, 5-31Wheels
Alignment and Tire Balance .......................... 5-58Replacement ............................................... 5-59
When to Add Engine Oil .................................. 5-14When to Change Engine Oil ............................. 5-16When to Check .............................................. 5-53When to Check Power Steering Fluid ................ 5-30When to Inspect the Engine
Air Cleaner/Filter ......................................... 5-18Where to Put the Restraint ............................... 1-37Why Safety Belts Work .................................... 1-12Window Lockout ............................................. 2-14Windows ....................................................... 2-13
Power ........................................................ 2-14
15
Windshield Washer ......................................... 3-10Fluid .......................................................... 5-31
Windshield Washer Fluid Level Check ................ 6-18Windshield Wiper
Blade Replacement ...................................... 5-47Fuses ........................................................ 5-78
Windshield Wiper Lever ..................................... 3-9
Windshield Wipers ............................................ 3-9Winter Driving ................................................ 4-24Wiper Blade Check ......................................... 6-19
YYour Vehicle and the Environment ....................... 6-2
16


![La cesura epica come problema lirico [1]](https://img.pdfslide.us/doc/110x75/617f6bb2c23bf340232e638b/la-cesura-epica-come-problema-lirico-1.jpg)
