Embed Size (px)
Citation preview
Sales Invoice ManagerSystem
1Sales Invoice Manager
Web based app that allows you to generate,
approve & manage Invoice(s) with ease.
User
Guide
This KnowHow Explains
Overview
Invoice Sections
Raise & Approve Invoice(s)
Invoice Reports
2Sales Invoice Manager

Overview
Web based app that allows you to generate, approve & manage Invoice with ease.
Provides a broad view of the entire Invoice process from a single integrated system.
Add preferred Clients to your client list.
Send Estimate to Clients.
Convert quotations to Invoice(s).
Set the frequency for recurring Invoice(s).
All approvals done online.
Get notified via e-mail on the current status of your Invoice.
Track status of invoices & payments online.
Automated request/response e-mails triggered to requester, approvers & Client.
3Sales Invoice Manager
Invoice Sections
myofficehub Invoice app comprises of the following sections:
1. Client
2. Generate Invoice
3. Reports
4Sales Invoice Manager
Raise & Approve Invoice(s)
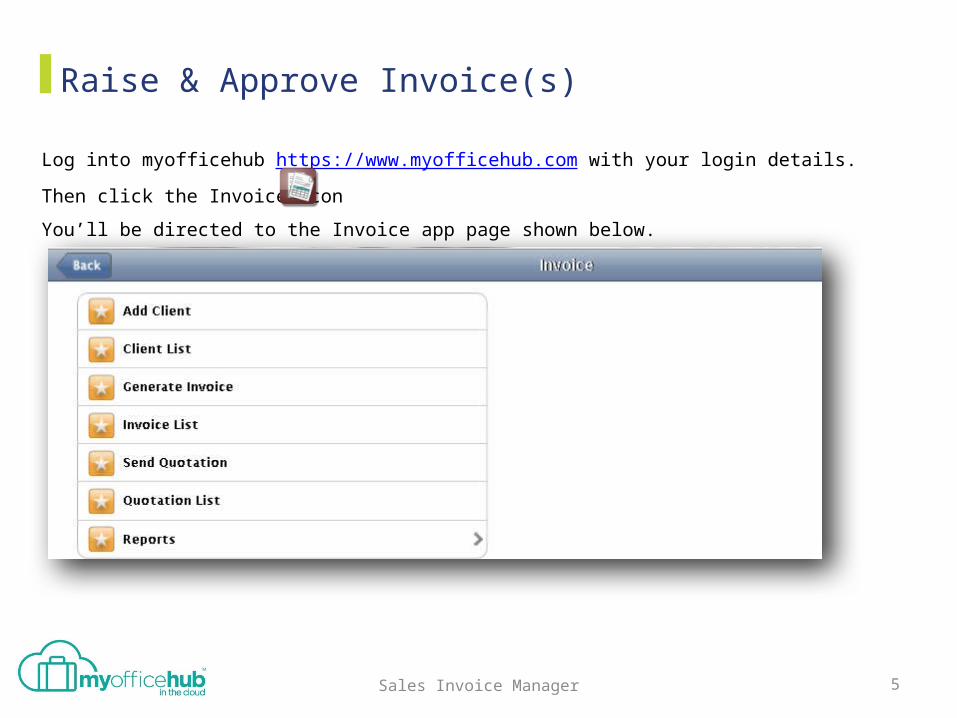
Log into myofficehub https://www.myofficehub.com with your login details.
Then click the Invoice icon
You’ll be directed to the Invoice app page shown below.
5Sales Invoice Manager
Raise & Approve Invoice(s)
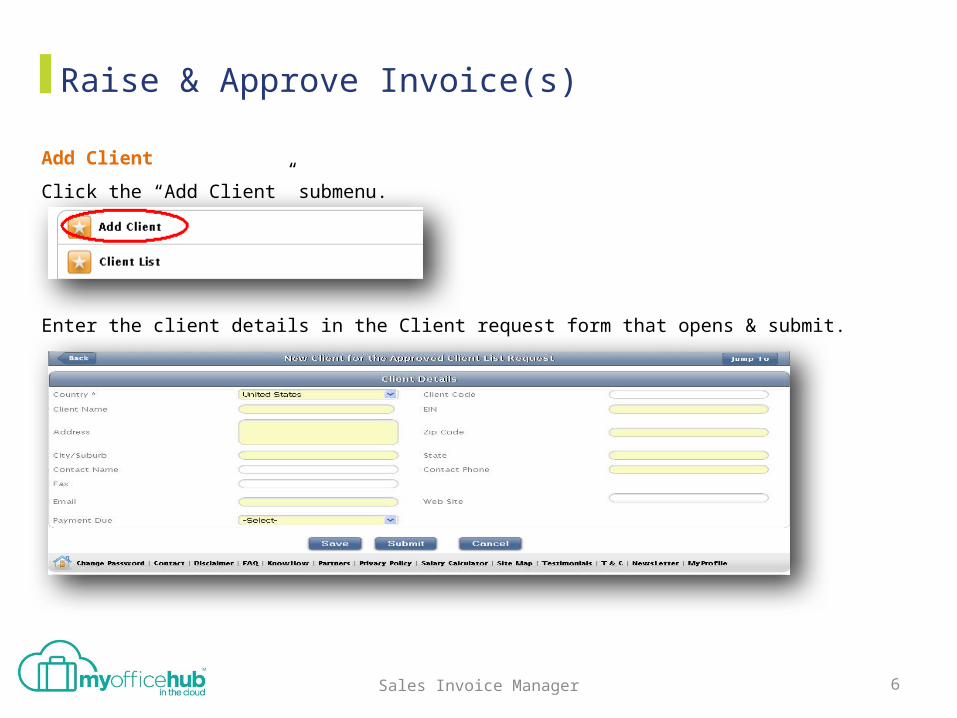
Add Client
Click the “Add Client” submenu.
Enter the client details in the Client request form that opens & submit.
6Sales Invoice Manager
Raise & Approve Invoice(s)
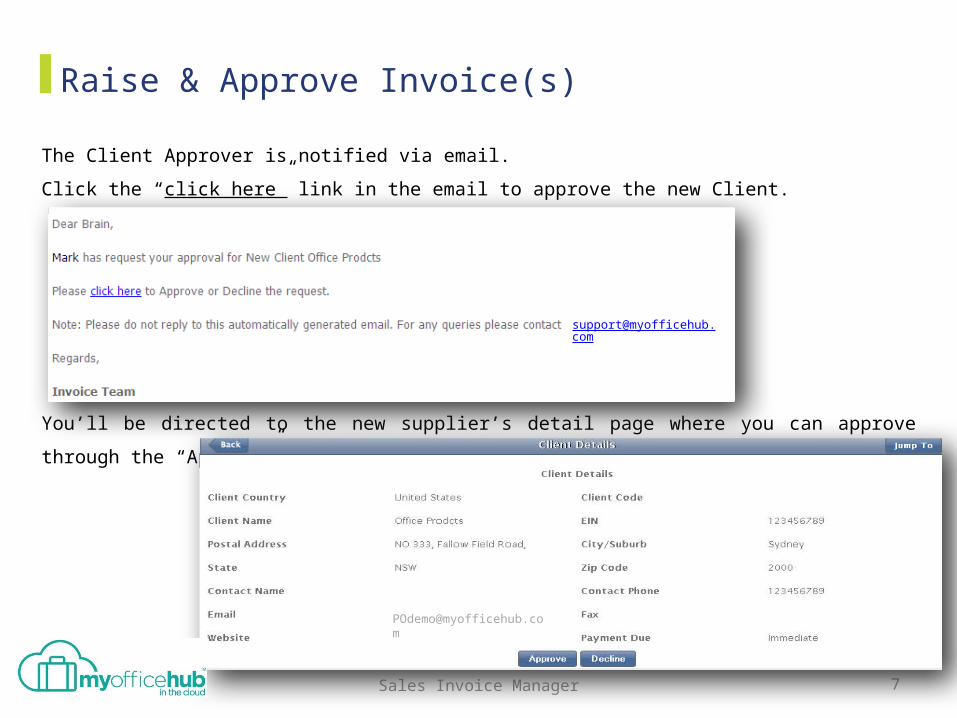
The Client Approver is notified via email.
Click the “click here” link in the email to approve the new Client.
You’ll be directed to the new supplier’s detail page where you can approve through the
“Approve” button provided.
7Sales Invoice Manager
Raise & Approve Invoice(s)
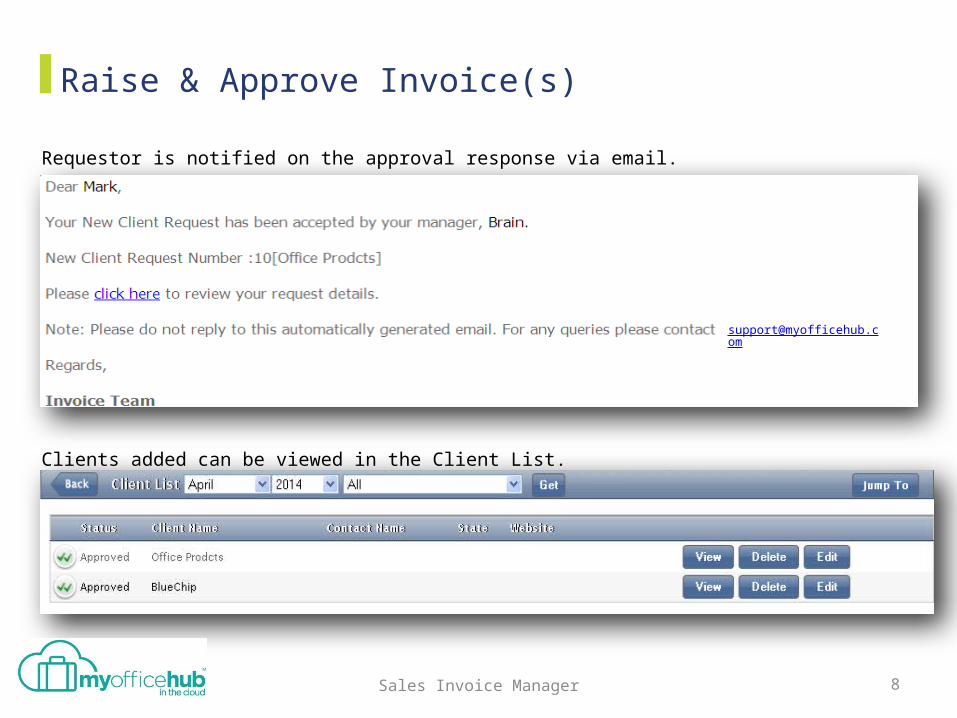
Requestor is notified on the approval response via email.
Clients added can be viewed in the Client List.
8Sales Invoice Manager
Raise & Approve Invoice(s)
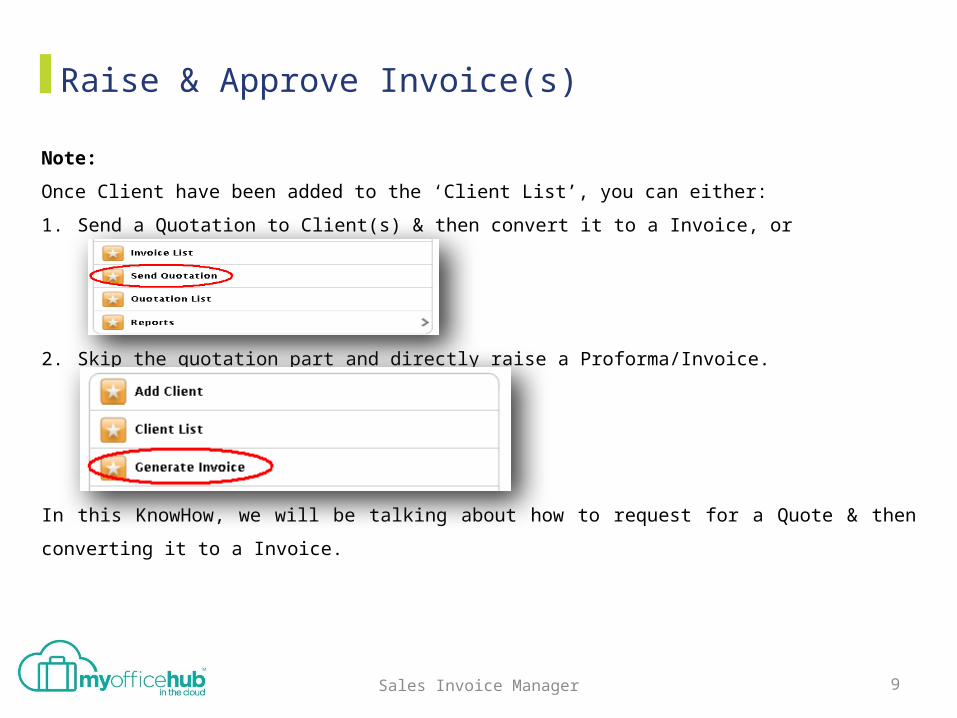
Note:
Once Client have been added to the ‘Client List’, you can either:
1. Send a Quotation to Client(s) & then convert it to a Invoice, or
2. Skip the quotation part and directly raise a Proforma/Invoice.
In this KnowHow, we will be talking about how to request for a Quote & then converting it to
a Invoice.
9Sales Invoice Manager
Raise & Approve Invoice(s)
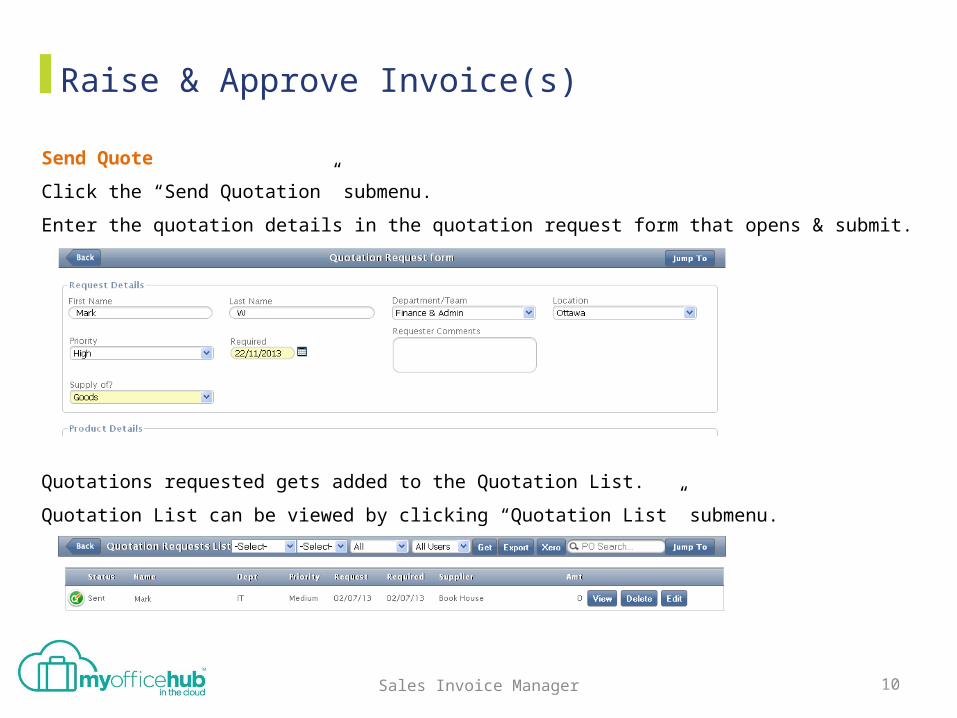
Send Quote
Click the “Send Quotation” submenu.
Enter the quotation details in the quotation request form that opens & submit.
Quotations requested gets added to the Quotation List.
Quotation List can be viewed by clicking “Quotation List” submenu.
10Sales Invoice Manager
Raise & Approve Invoice(s)
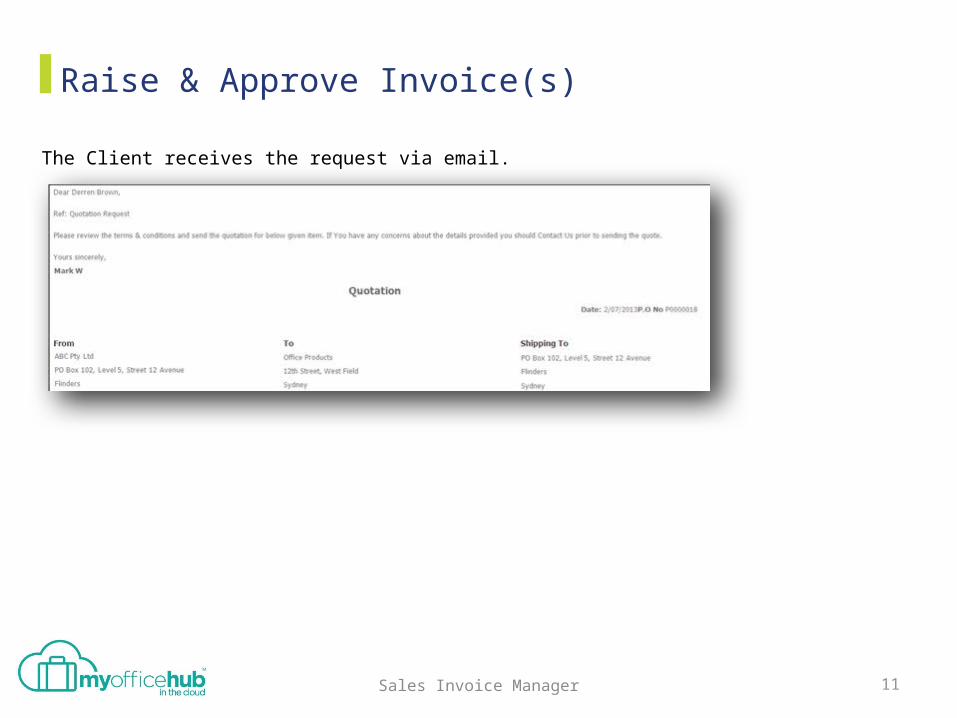
The Client receives the request via email.
11Sales Invoice Manager
Raise & Approve Invoice(s)
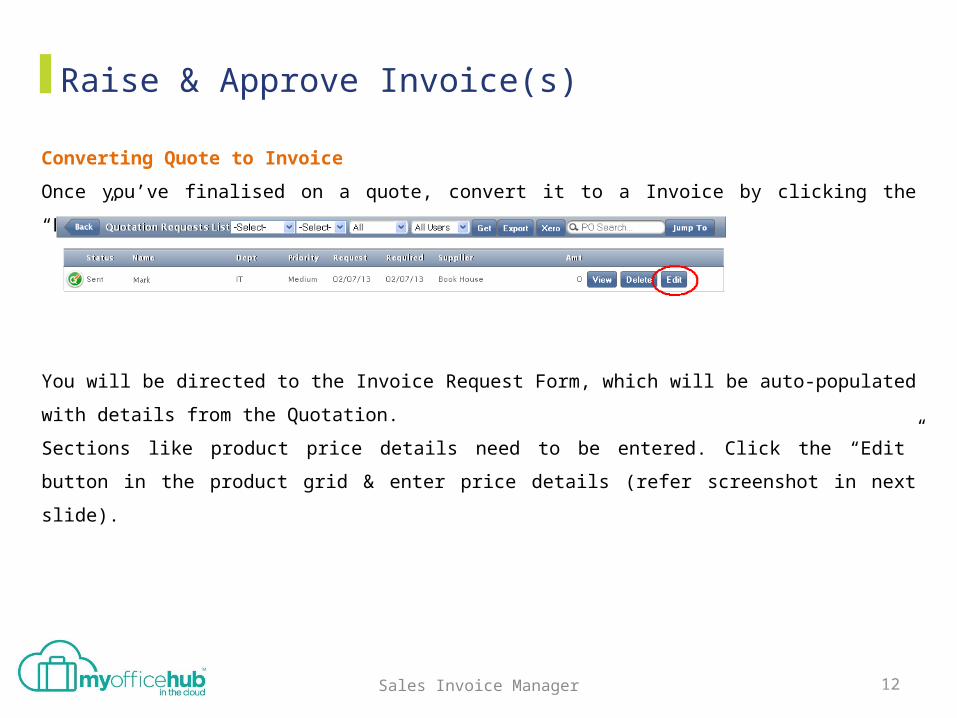
Converting Quote to Invoice
Once you’ve finalised on a quote, convert it to a Invoice by clicking the “Edit” button in the
Quotation List.
You will be directed to the Invoice Request Form, which will be auto-populated with details
from the Quotation.
Sections like product price details need to be entered. Click the “Edit” button in the product
grid & enter price details (refer screenshot in next slide).
12Sales Invoice Manager
Raise & Approve Invoice(s)
13Purchase Order
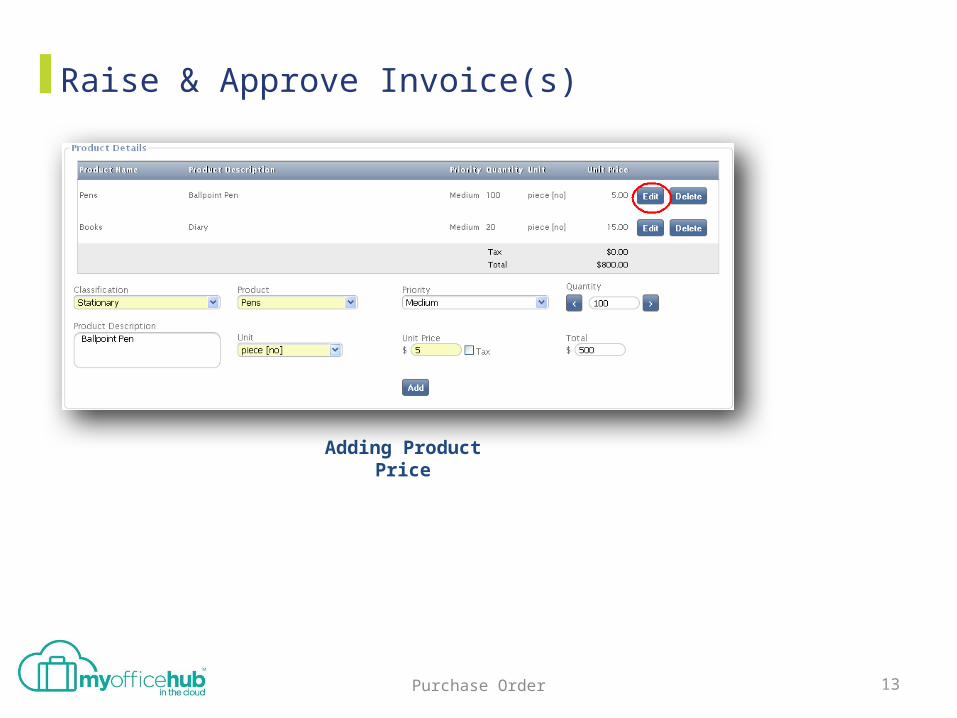
Adding Product Price
Raise & Approve Invoice(s)
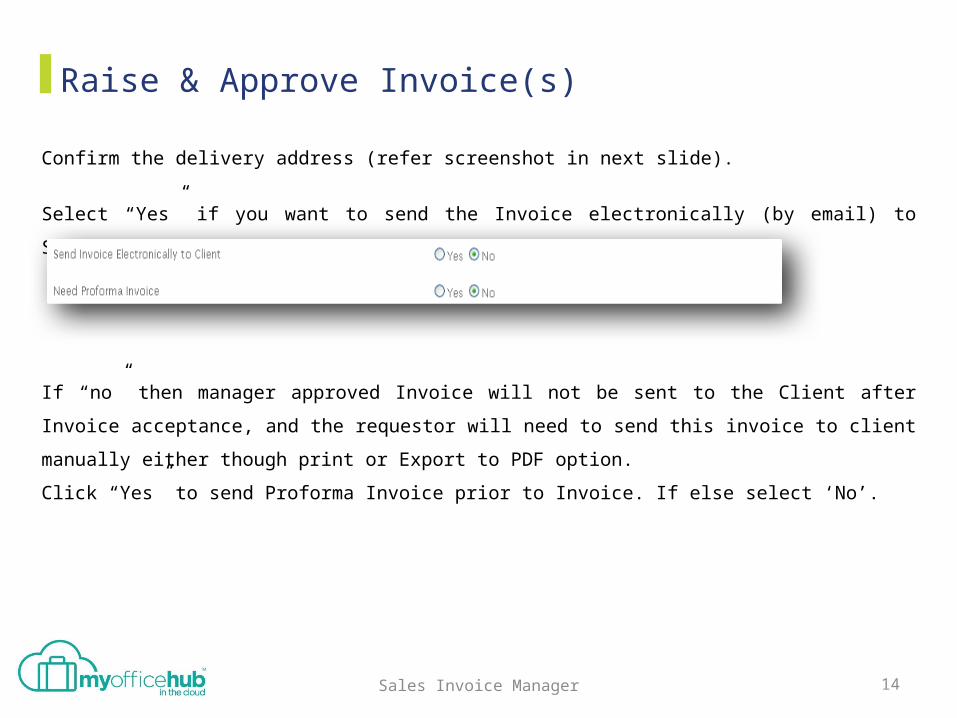
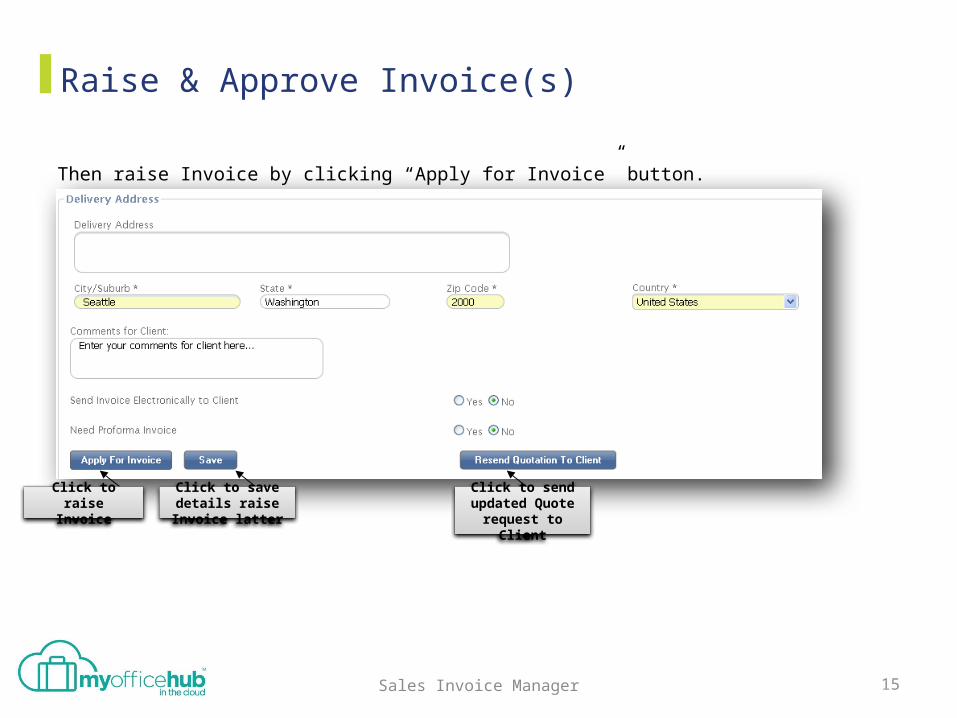
Confirm the delivery address (refer screenshot in next slide).
Select “Yes” if you want to send the Invoice electronically (by email) to Supplier.
If “no” then manager approved Invoice will not be sent to the Client after Invoice
acceptance, and the requestor will need to send this invoice to client manually either though
print or Export to PDF option.
Click “Yes” to send Proforma Invoice prior to Invoice. If else select ‘No’.
14Sales Invoice Manager
Raise & Approve Invoice(s)
15Sales Invoice Manager
Click to raise Invoice
Click to save details raise Invoice latter
Click to send updated Quote
request to Client
Then raise Invoice by clicking “Apply for Invoice” button.
Raise & Approve Invoice(s)
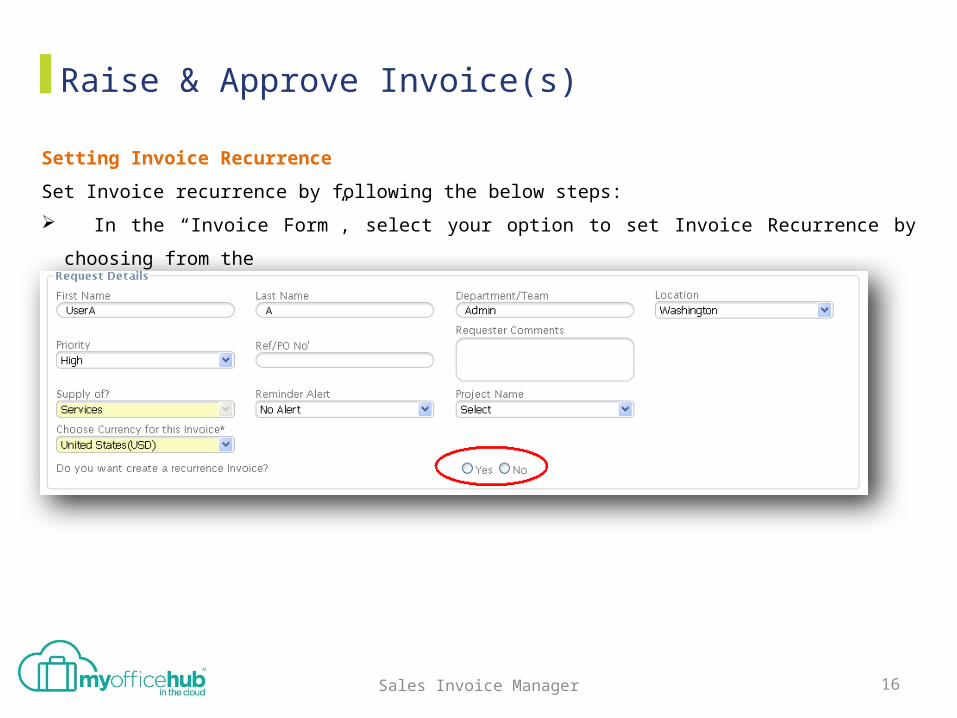
Setting Invoice Recurrence
Set Invoice recurrence by following the below steps:
In the “Invoice Form”, select your option to set Invoice Recurrence by choosing from the
Yes/No option provided.
16Sales Invoice Manager
Raise & Approve Invoice(s)
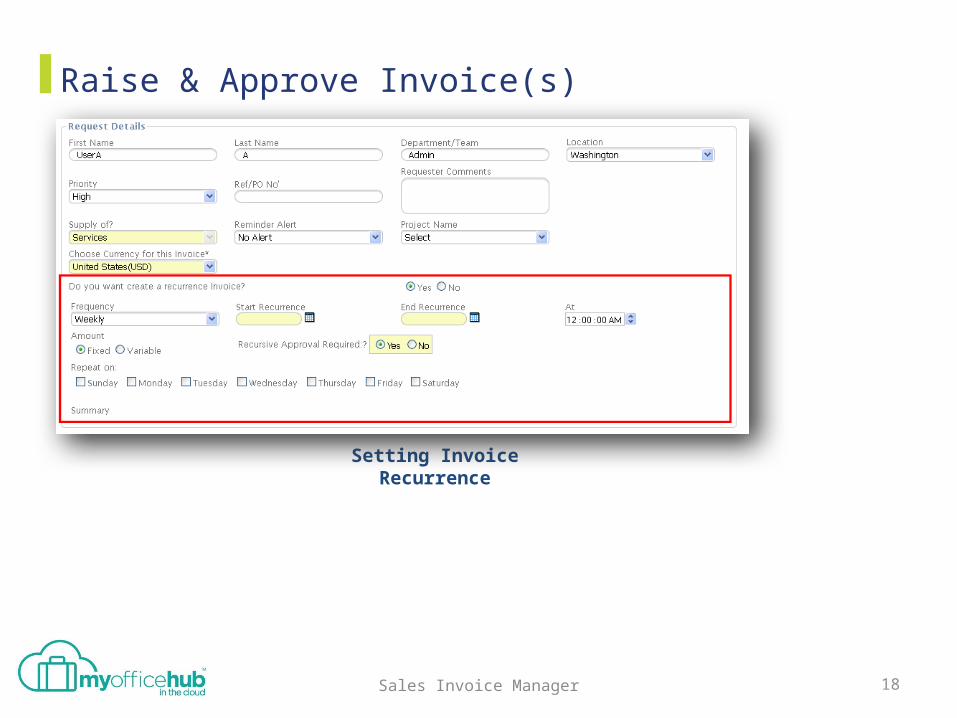
If “yes”, then
o select the recurrence Frequency – Weekly/ Monthly/ Quarterly/ Half Yearly/ Yearly
o set Start & End recurrence period
o select if the recurring Invoice amount is Fixed or Variable
o select if Approval is required for recurring Invoice(s)
If ‘Weekly’ Recurrence Frequency is chosen, then
o select days on which the recurring Invoice(s) need to be triggered.
If ‘Monthly’, ‘Quarterly’, ‘Yearly Recurrence Frequency is chosen, then
o select if the recurring Invoice(s) need to be triggered on the specific day of the month
/ or specific day of the week.
(refer screenshot in next slide)
17Sales Invoice Manager
Raise & Approve Invoice(s)
18Sales Invoice Manager
Setting Invoice Recurrence
Raise & Approve Invoice(s)
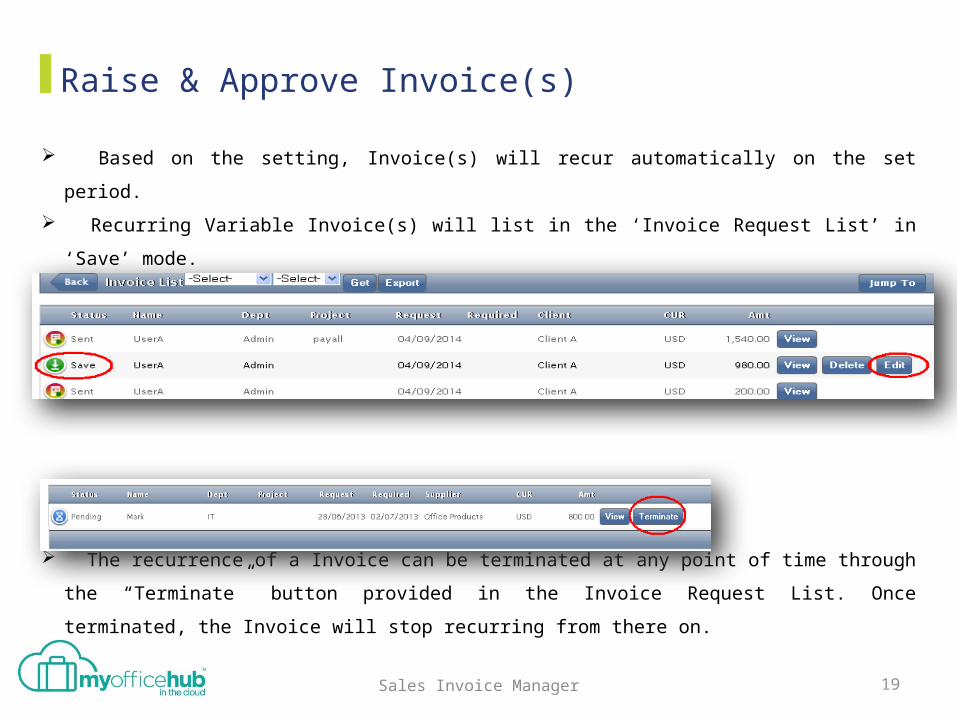
Based on the setting, Invoice(s) will recur automatically on the set period.
Recurring Variable Invoice(s) will list in the ‘Invoice Request List’ in ‘Save’ mode.
Requester receives an email regarding the recurring variable Invoice on the day of
recurrence.
Through the ‘Edit’ option provided, Requester has to update (if required) & submit the
Invoice.
The recurrence of a Invoice can be terminated at any point of time through the
“Terminate” button provided in the Invoice Request List. Once terminated, the Invoice will
stop recurring from there on.
19Sales Invoice Manager

Raise & Approve Invoice(s)
20Sales Invoice Manager
Generate Invoice:
Raise & Approve Invoice(s)
21Sales Invoice Manager
Steps for generating Invoice:
Select the required Client.
Input the Shipping & handling charge if required.
Add the required Classification, Products, Quantity, Price, Unit,
Description, Tax & Discount if required.
Iterate the above process until all the required products are entered.
The Delivery address will be auto populated, amend this address is
required.
If Invoice need to be sent through electronic option select ‘Yes’ for
‘Send Invoice Electronically to Client’. If else select ‘No’.
Click “Yes” to send Proforma Invoice prior to Invoice. If else select
‘No’.

Raise & Approve Invoice(s)
Invoice Approval
Once Invoice is submitted, the Approver is notified by email.
click here link in email directs to the Invoice details page, where you can approve through
the “Approve” button provided.
Alternatively, you can log into myofficehub, then go to Invoice List & approve through the
“View” & “Approve” buttons in the List.
22Sales Invoice Manager
Raise & Approve Invoice(s)
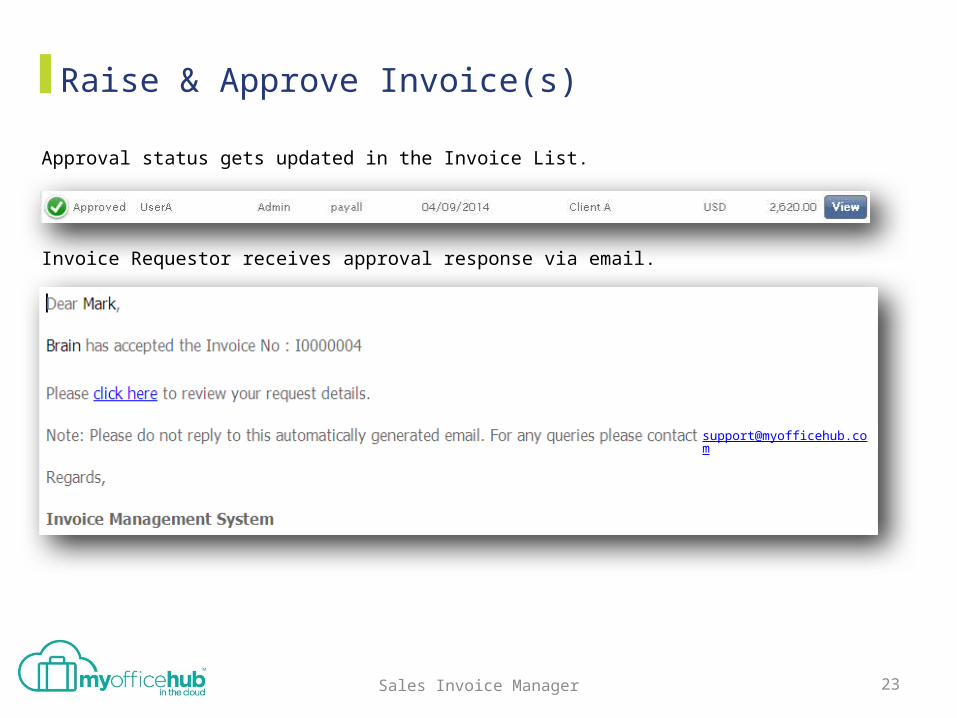
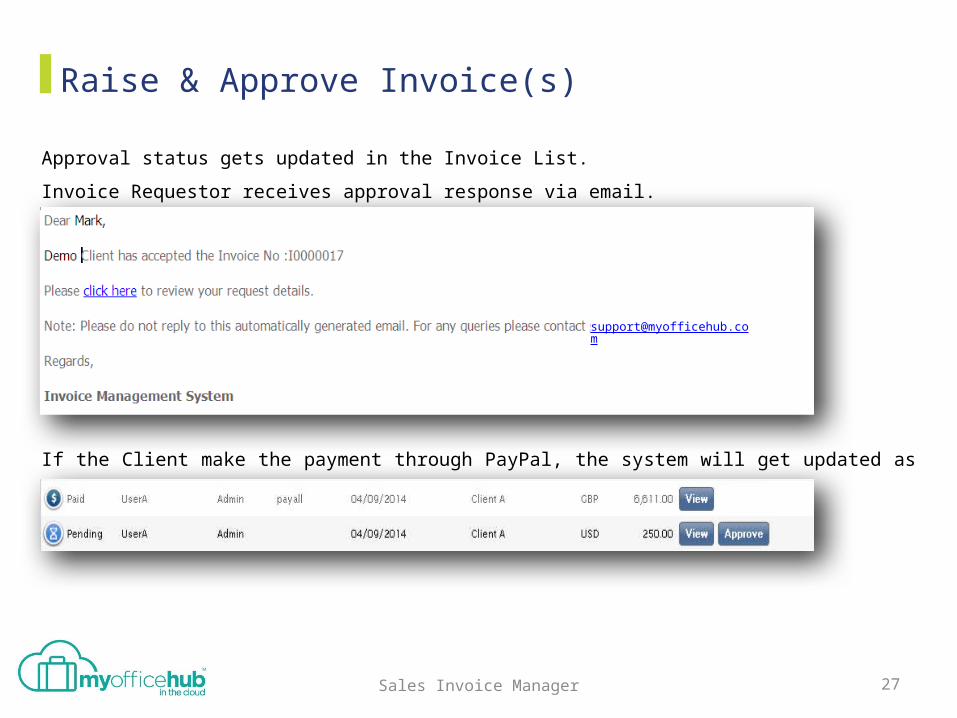
Approval status gets updated in the Invoice List.
Invoice Requestor receives approval response via email.
23Sales Invoice Manager
Raise & Approve Invoice(s)
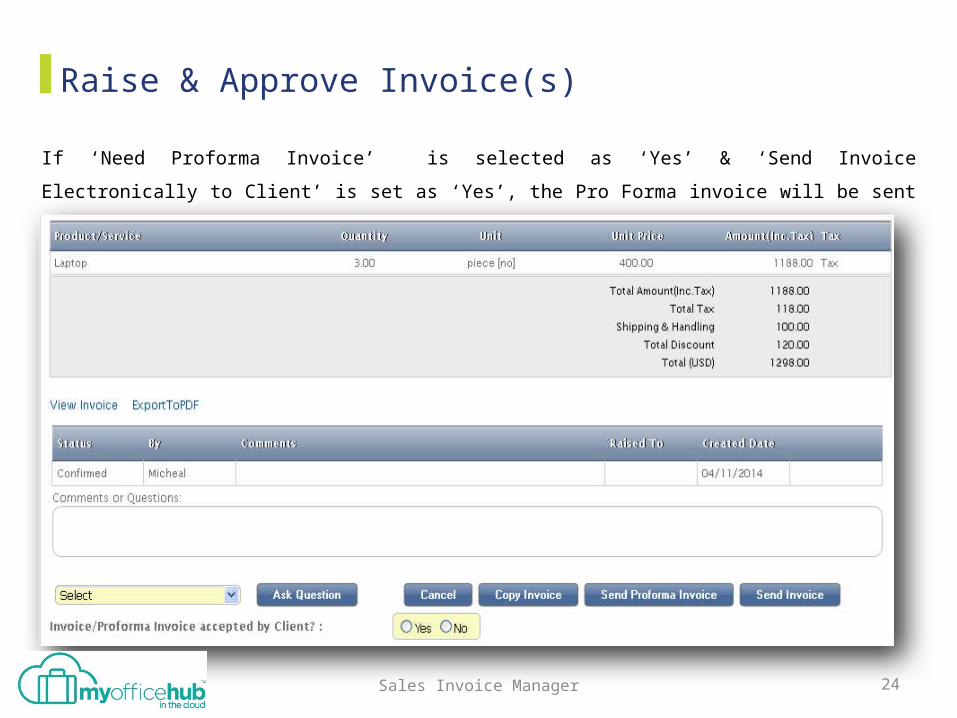
If ‘Need Proforma Invoice’ is selected as ‘Yes’ & ‘Send Invoice Electronically to Client’ is set
as ‘Yes’, the Pro Forma invoice will be sent to the Client automatically once it is approved by
the Manager.
24Sales Invoice Manager
Raise & Approve Invoice(s)
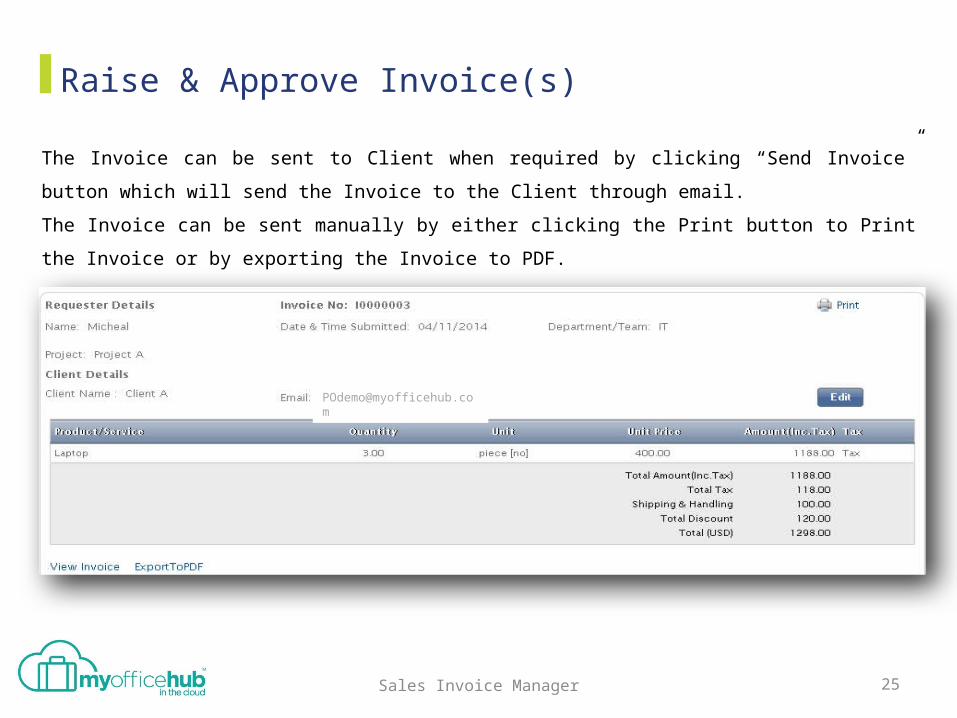
The Invoice can be sent to Client when required by clicking “Send Invoice” button which will
send the Invoice to the Client through email.
The Invoice can be sent manually by either clicking the Print button to Print the Invoice or by
exporting the Invoice to PDF.
25Sales Invoice Manager
Raise & Approve Invoice(s)
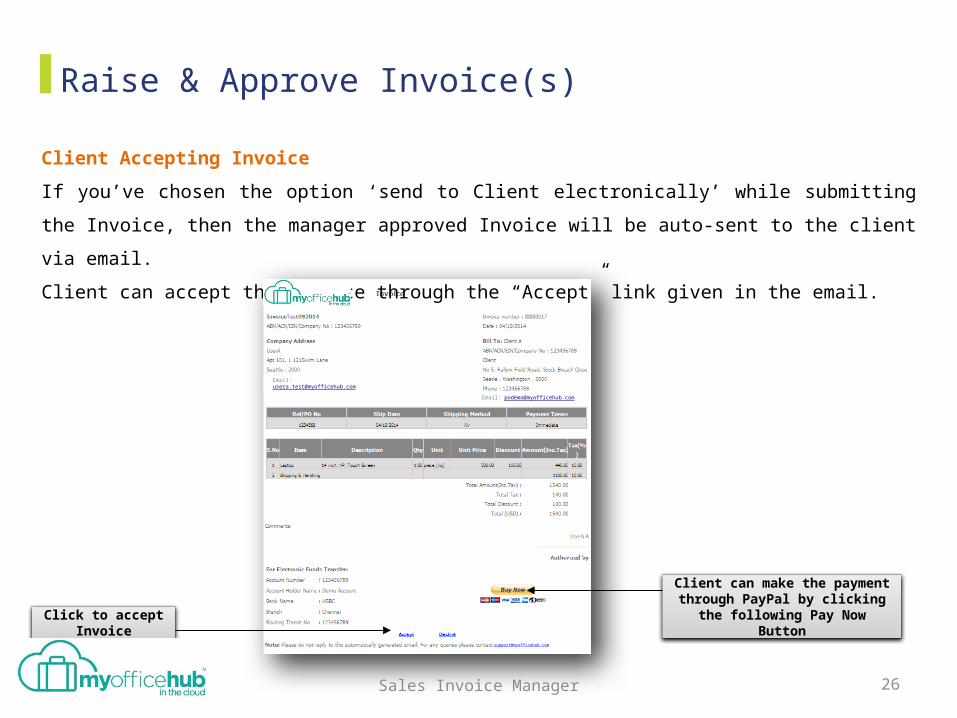
Client Accepting Invoice
If you’ve chosen the option ‘send to Client electronically’ while submitting the Invoice, then
the manager approved Invoice will be auto-sent to the client via email.
Client can accept the Invoice through the “Accept” link given in the email.
26Sales Invoice Manager
Click to accept Invoice
Client can make the payment through PayPal by clicking the following Pay
Now Button
Email: [email protected]
Email: [email protected]
Raise & Approve Invoice(s)
Approval status gets updated in the Invoice List.
Invoice Requestor receives approval response via email.
If the Client make the payment through PayPal, the system will get updated as ‘Paid’
automatically.
27Sales Invoice Manager
Raise & Approve Invoice(s)
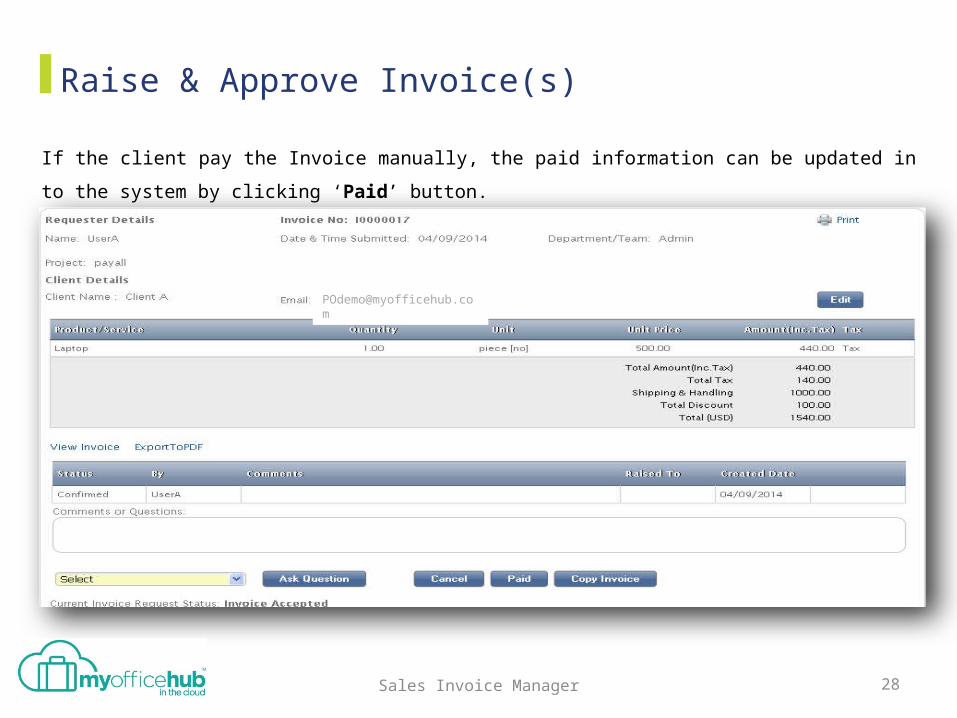
If the client pay the Invoice manually, the paid information can be updated in to the system
by clicking ‘Paid’ button.
28Sales Invoice Manager
Invoice Reports
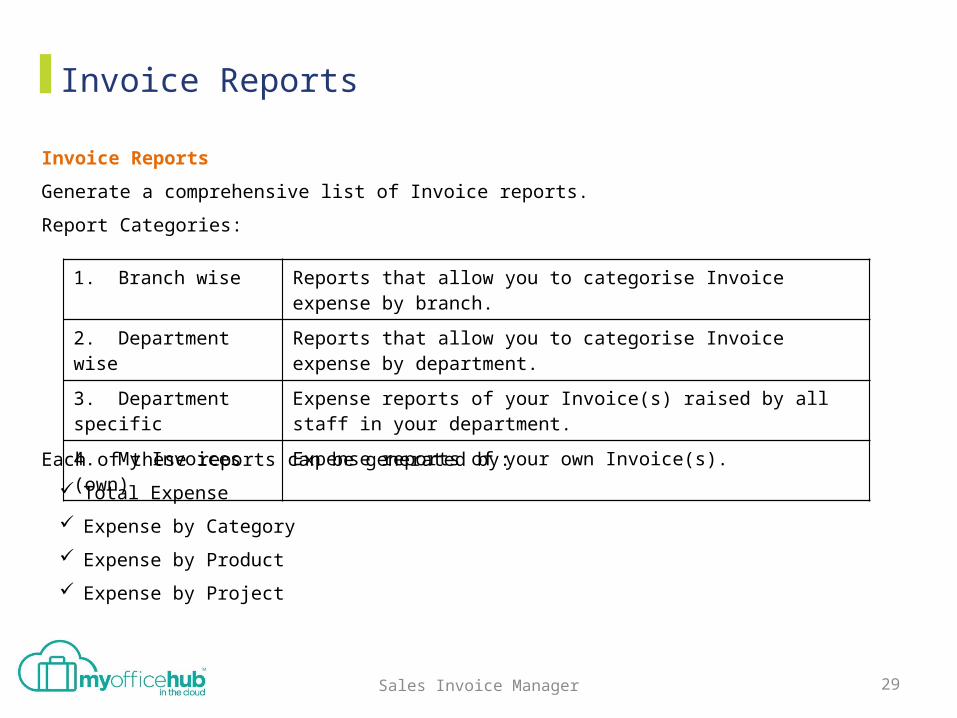
Invoice Reports
Generate a comprehensive list of Invoice reports.
Report Categories:
Each of these reports can be generated by:
Total Expense
Expense by Category
Expense by Product
Expense by Project
29Sales Invoice Manager
1. Branch wise Reports that allow you to categorise Invoice expense by branch.
2. Department wise Reports that allow you to categorise Invoice expense by department.
3. Department specific
Expense reports of your Invoice(s) raised by all staff in your department.
4. My Invoices (own) Expense reports of your own Invoice(s).
Invoice Reports
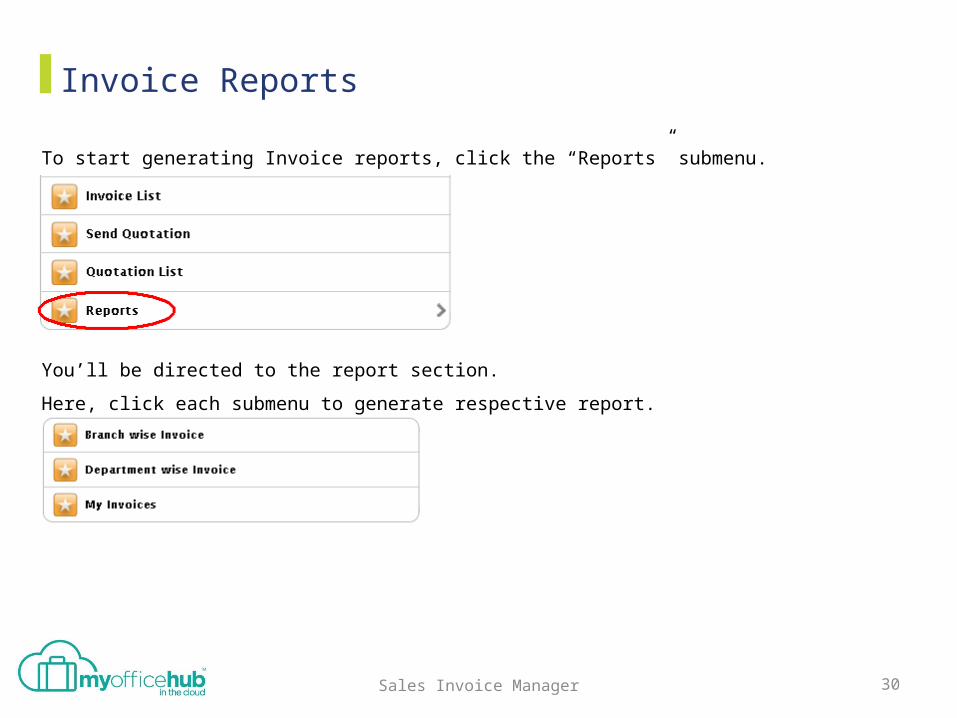
To start generating Invoice reports, click the “Reports” submenu.
You’ll be directed to the report section.
Here, click each submenu to generate respective report.
30Sales Invoice Manager
Invoice Reports
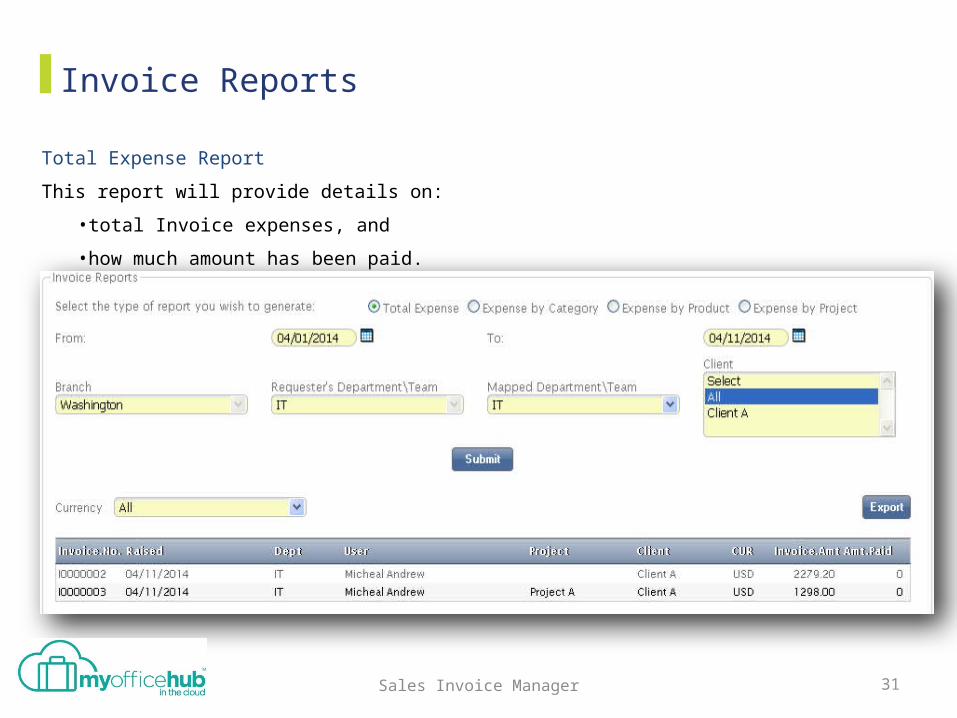
Total Expense Report
This report will provide details on:
•total Invoice expenses, and
•how much amount has been paid.
31Sales Invoice Manager
Invoice Reports
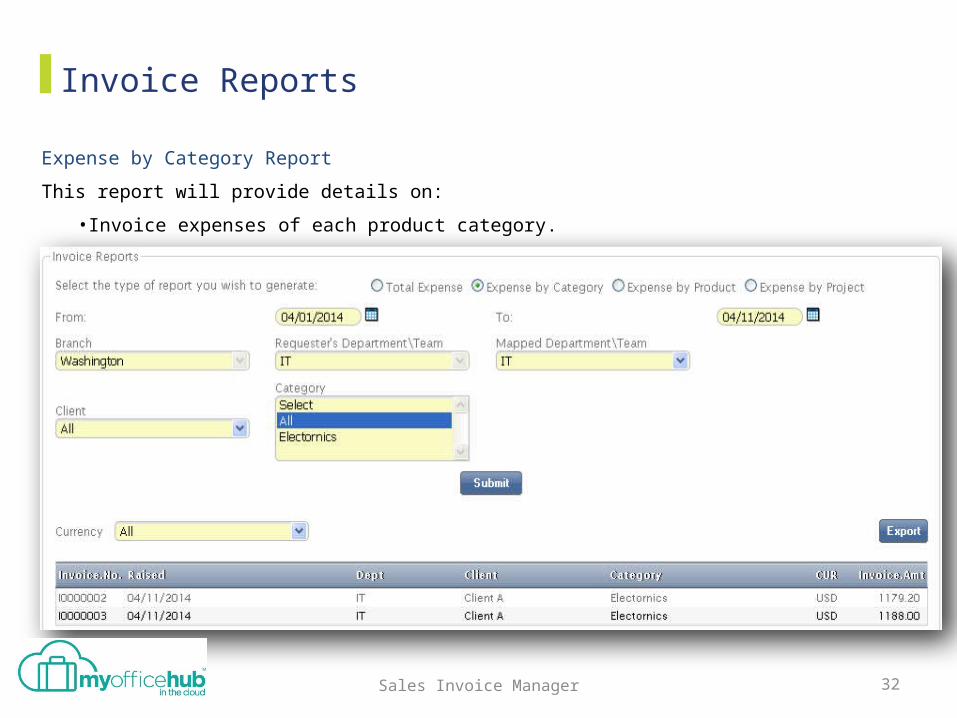
Expense by Category Report
This report will provide details on:
•Invoice expenses of each product category.
32Sales Invoice Manager
Invoice Reports
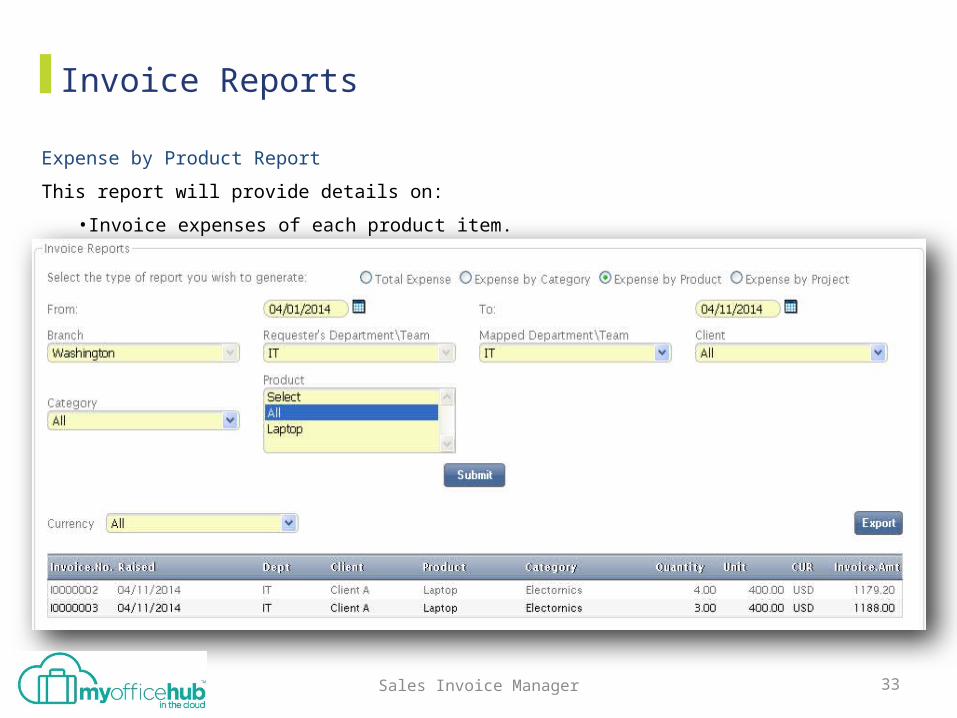
Expense by Product Report
This report will provide details on:
•Invoice expenses of each product item.
33Sales Invoice Manager
Invoice Reports
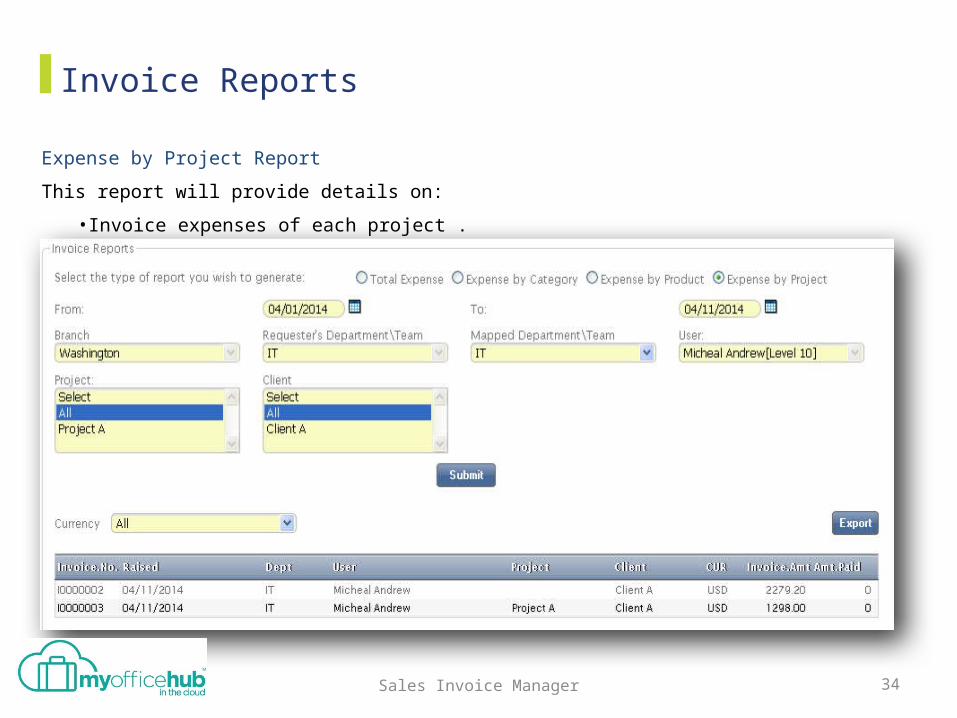
Expense by Project Report
This report will provide details on:
•Invoice expenses of each project .
34Sales Invoice Manager
Sales Invoice Manager
Follow us
THANK YOU!
For further information please contact us:
Telephone : 1300 276 266Email : [email protected]