Embed Size (px)
Citation preview

Derived from Kirill Muzykov’s Rocket Mouse Tutorial
http://www.raywenderlich.com/69392/make-game-like-jetpack-joyride-unity-2d-part-1
@shahedC
WakeUpAndCode.com

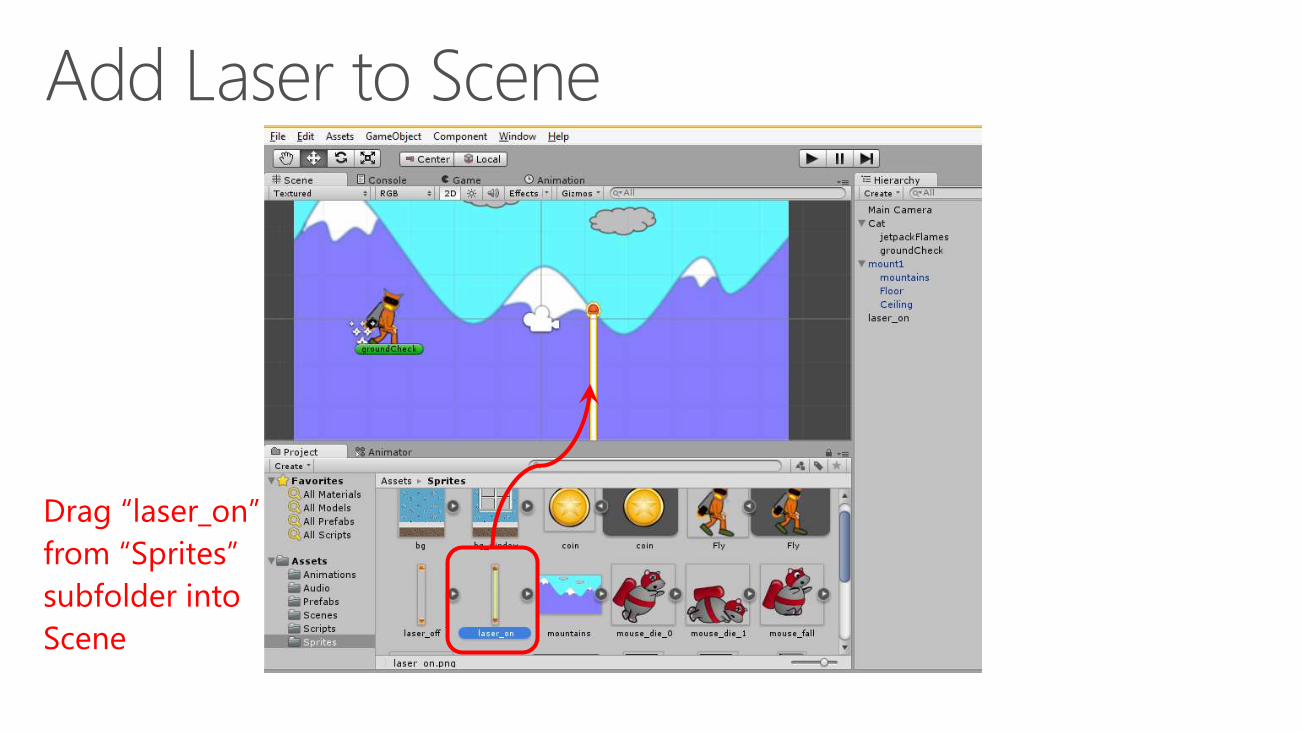
Drag “laser_on”
from “Sprites”
subfolder into
Scene

Rename
“laser_on”
to just “laser”
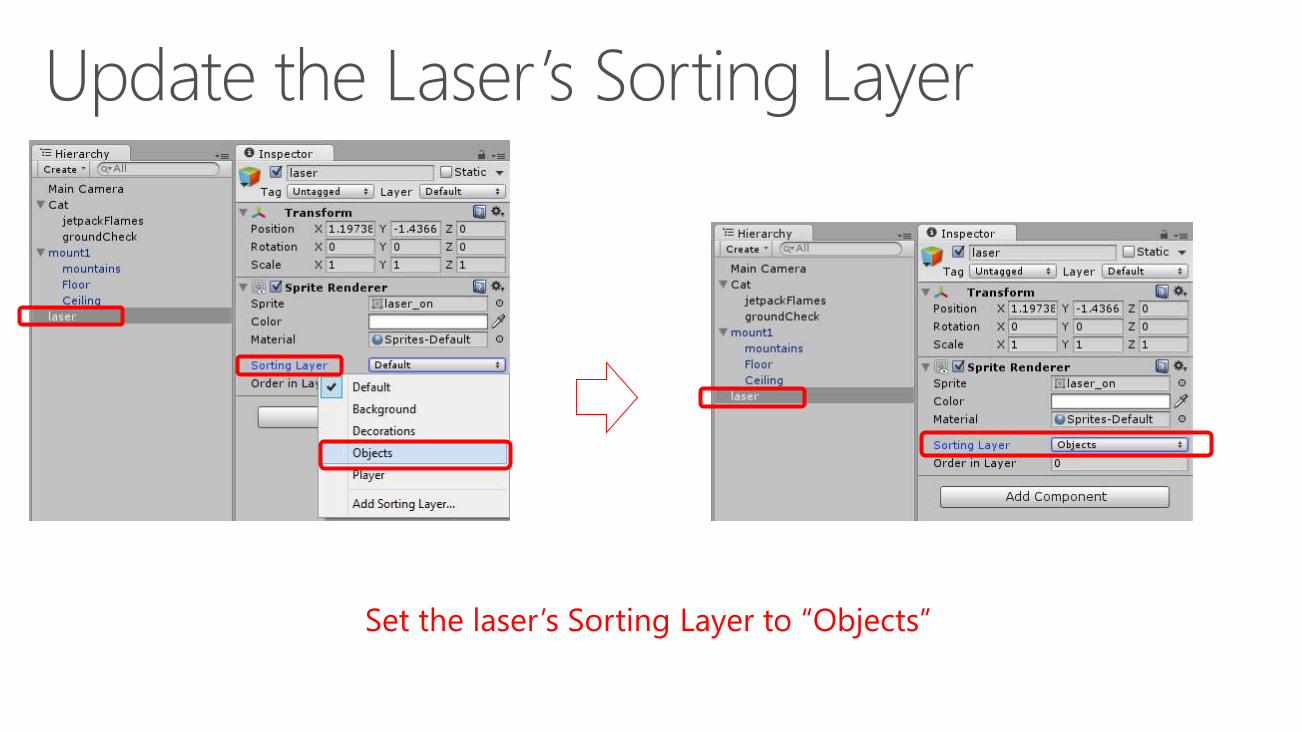
Set the laser’s Sorting Layer to “Objects”
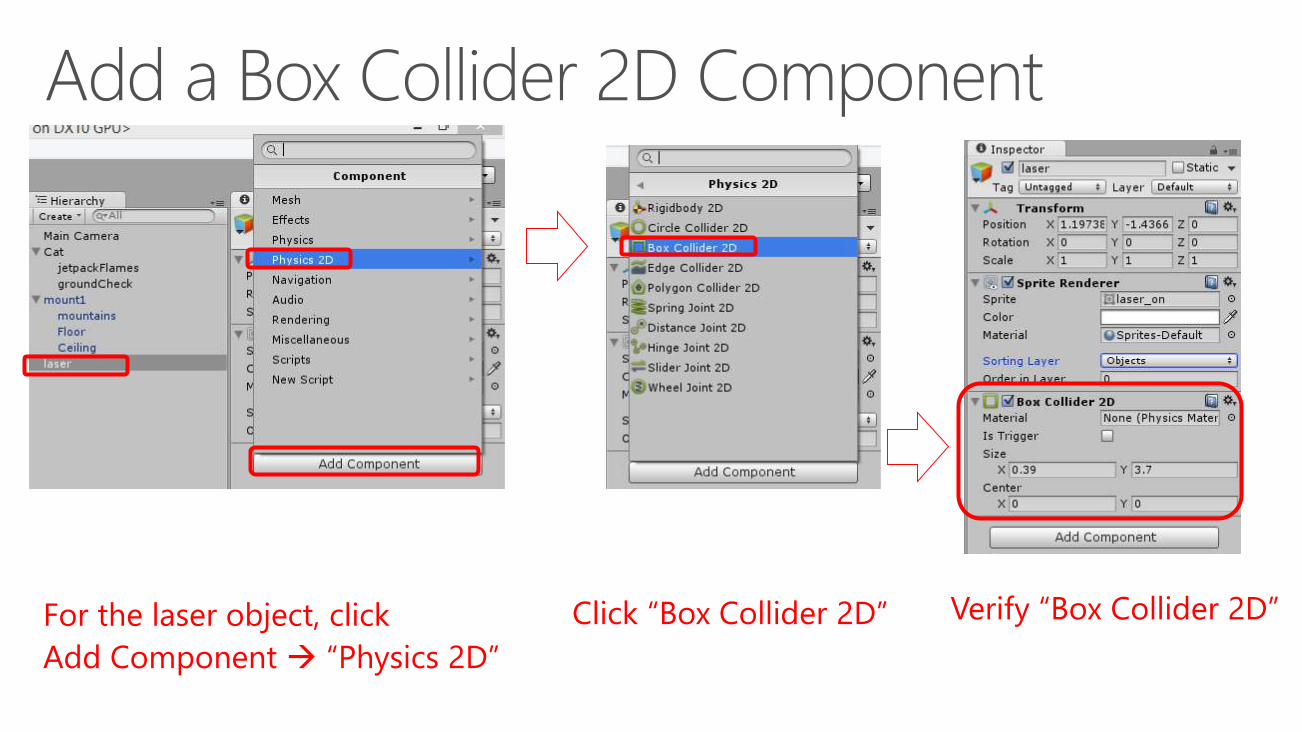
For the laser object, click
Add Component “Physics 2D”
Click “Box Collider 2D” Verify “Box Collider 2D”

Enable “Is Trigger” Checkbox
(This allows you to handle collisions
in your code instead of the Physics engine)
Update Size:
• X = 0.18
• Y = 3.1
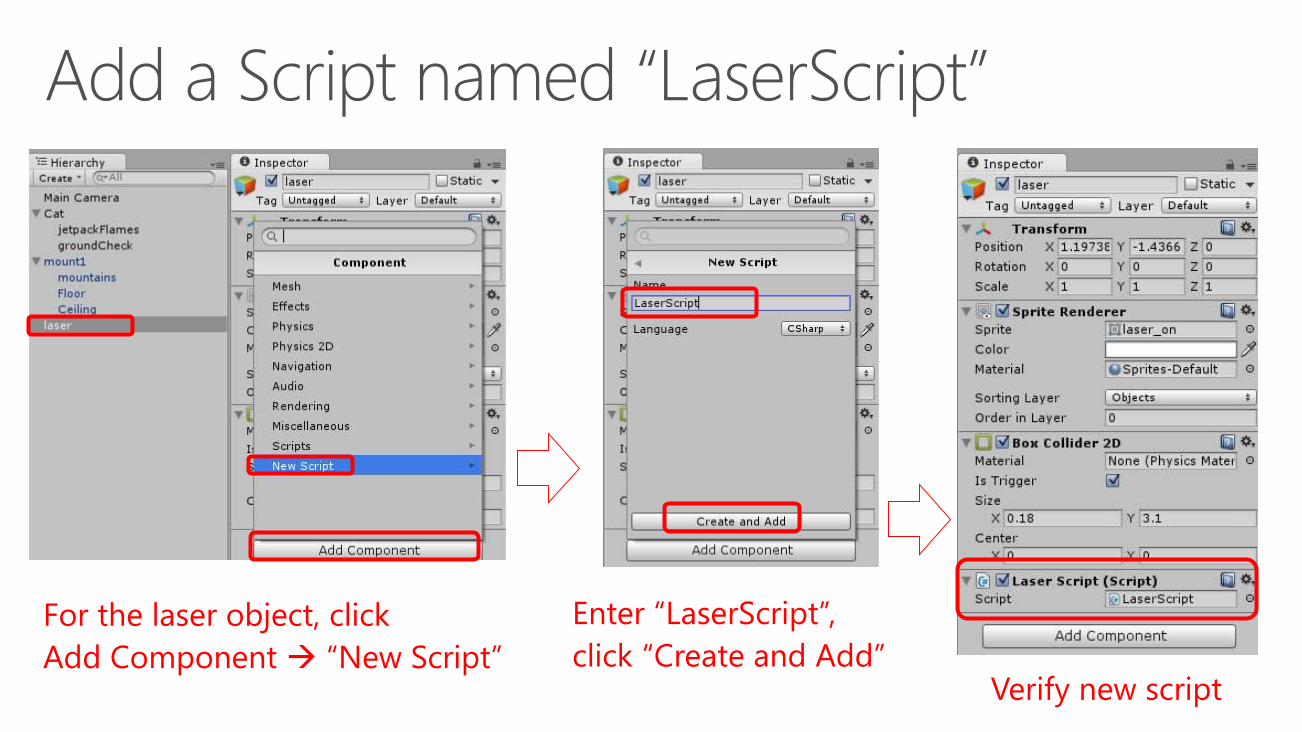
For the laser object, click
Add Component “New Script”
Enter “LaserScript”,
click “Create and Add”Verify new script
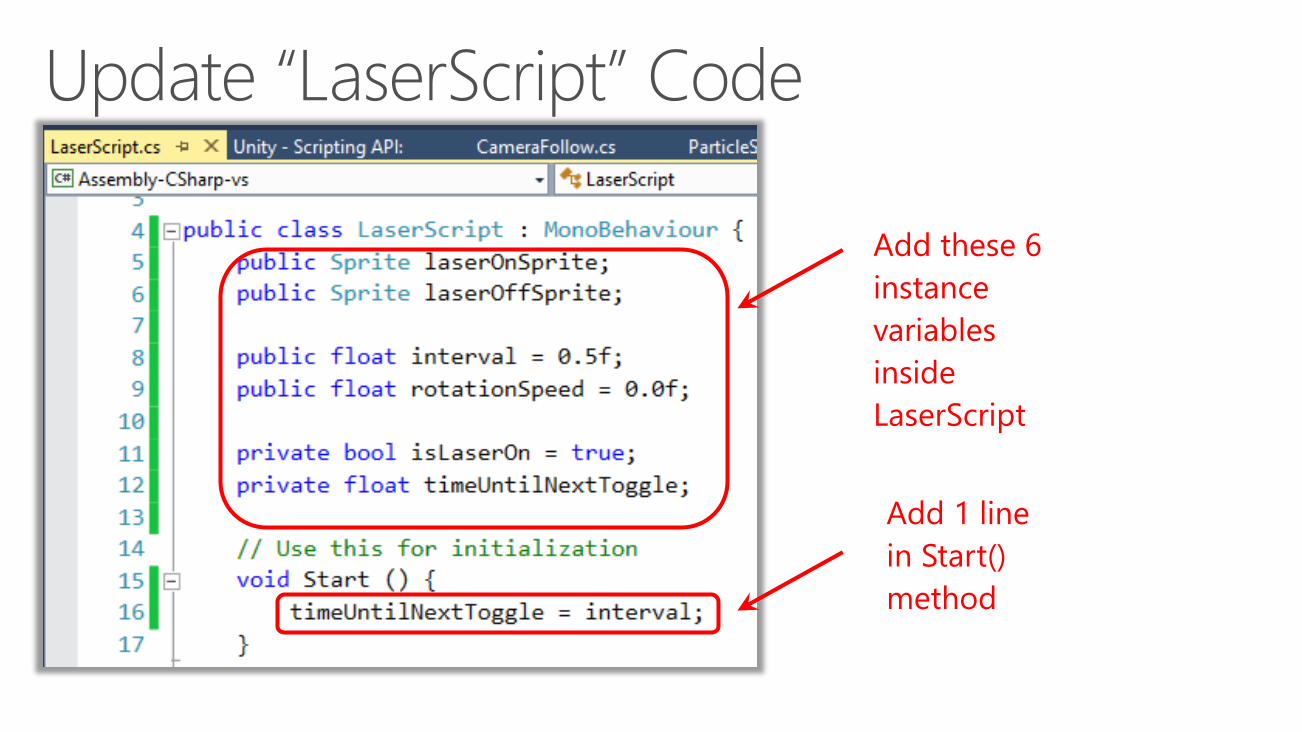
Add these 6
instance
variables
inside
LaserScript
Add 1 line
in Start()
method
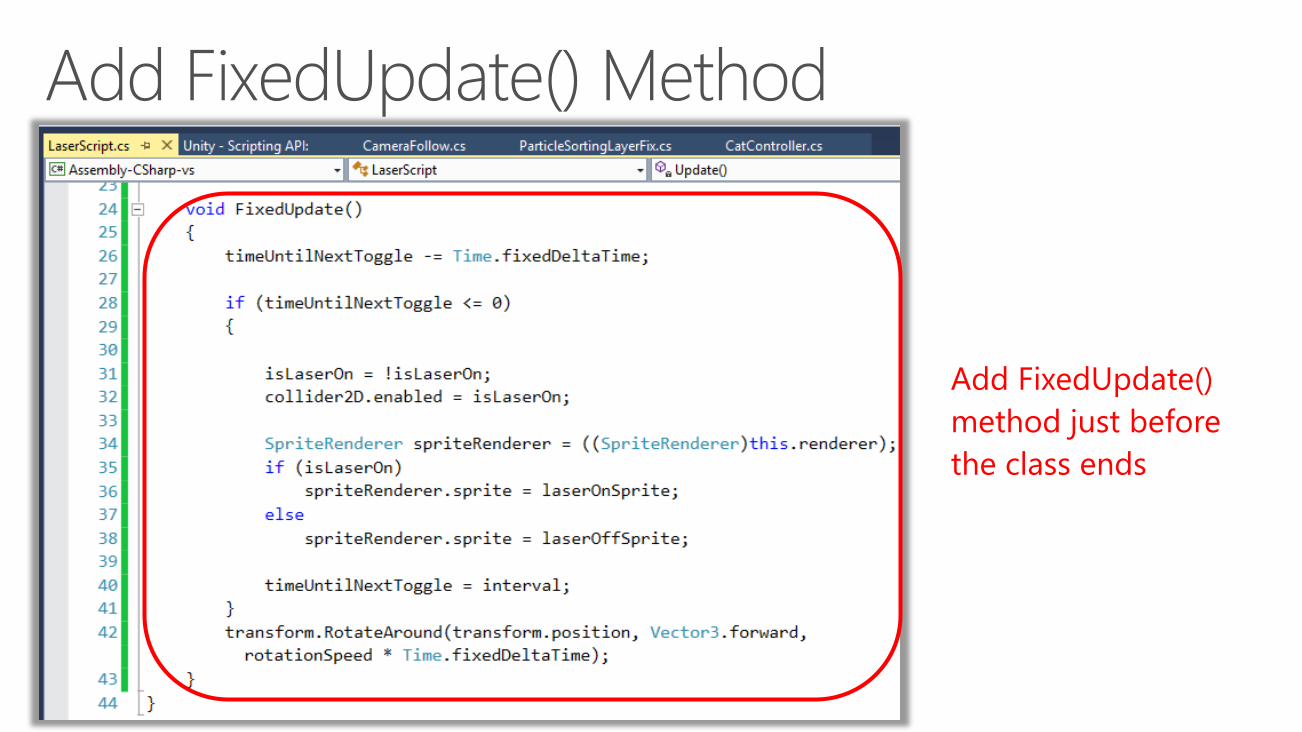
Add FixedUpdate()
method just before
the class ends
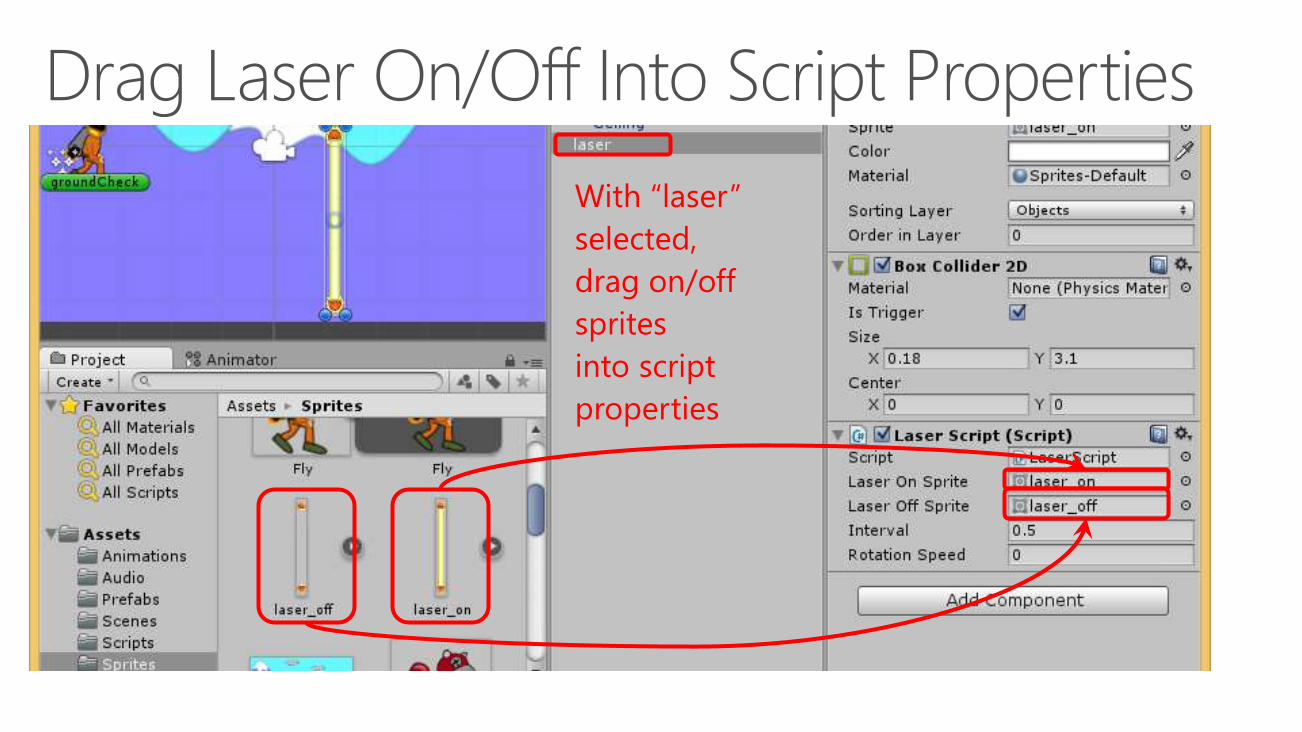
With “laser”
selected,
drag on/off
sprites
into script
properties
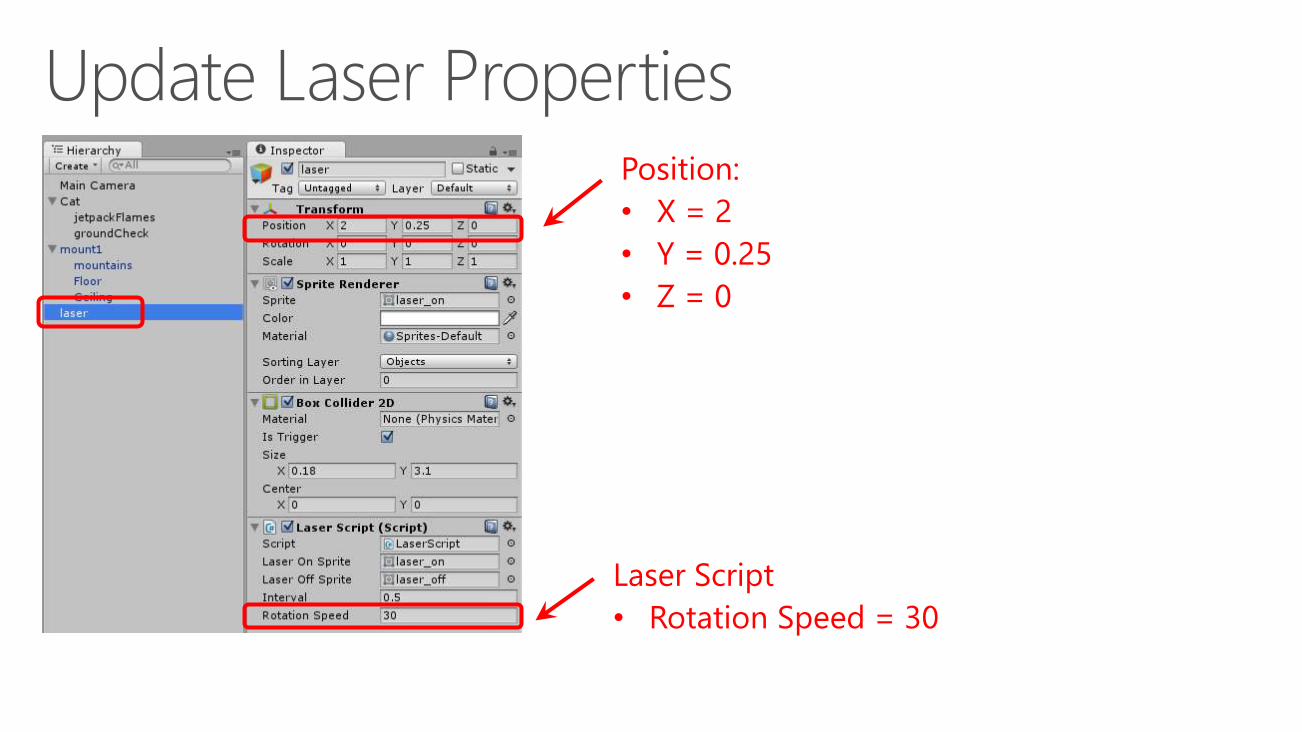
Position:
• X = 2
• Y = 0.25
• Z = 0
Laser Script
• Rotation Speed = 30
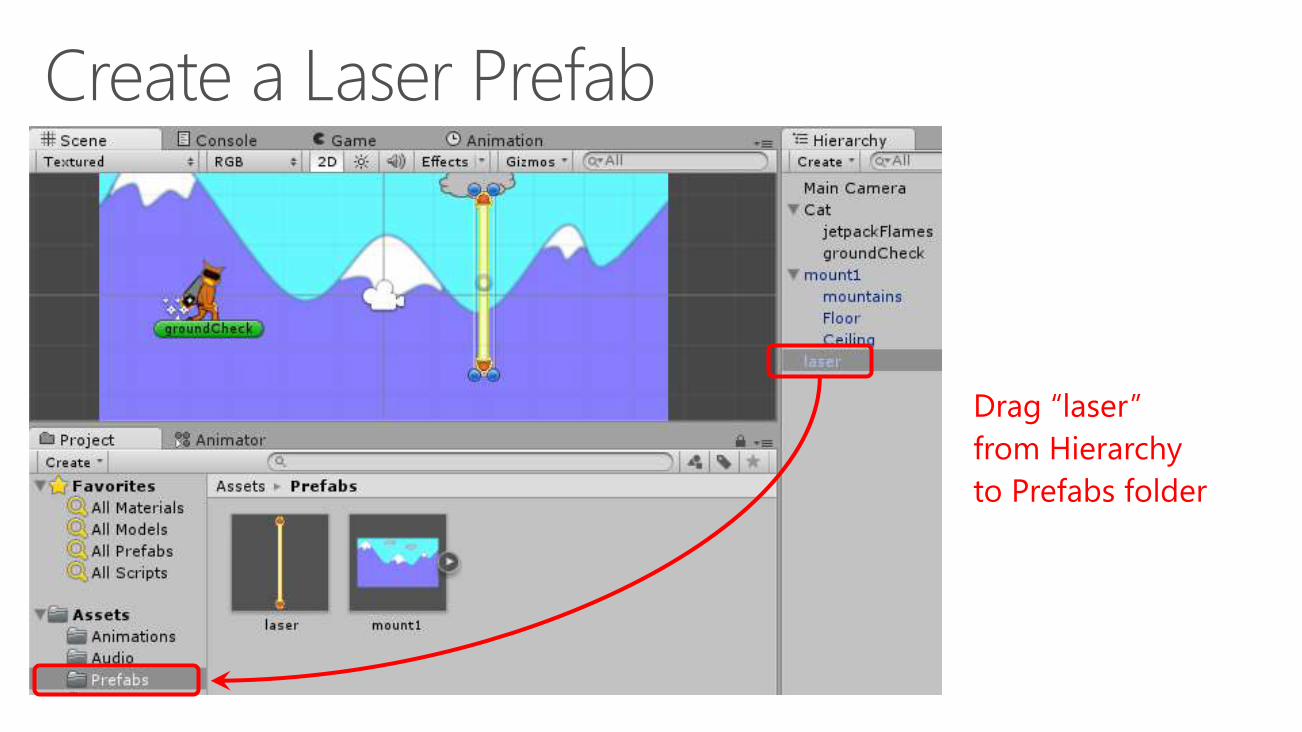
Drag “laser”
from Hierarchy
to Prefabs folder

Run
You should see a rotating laser!


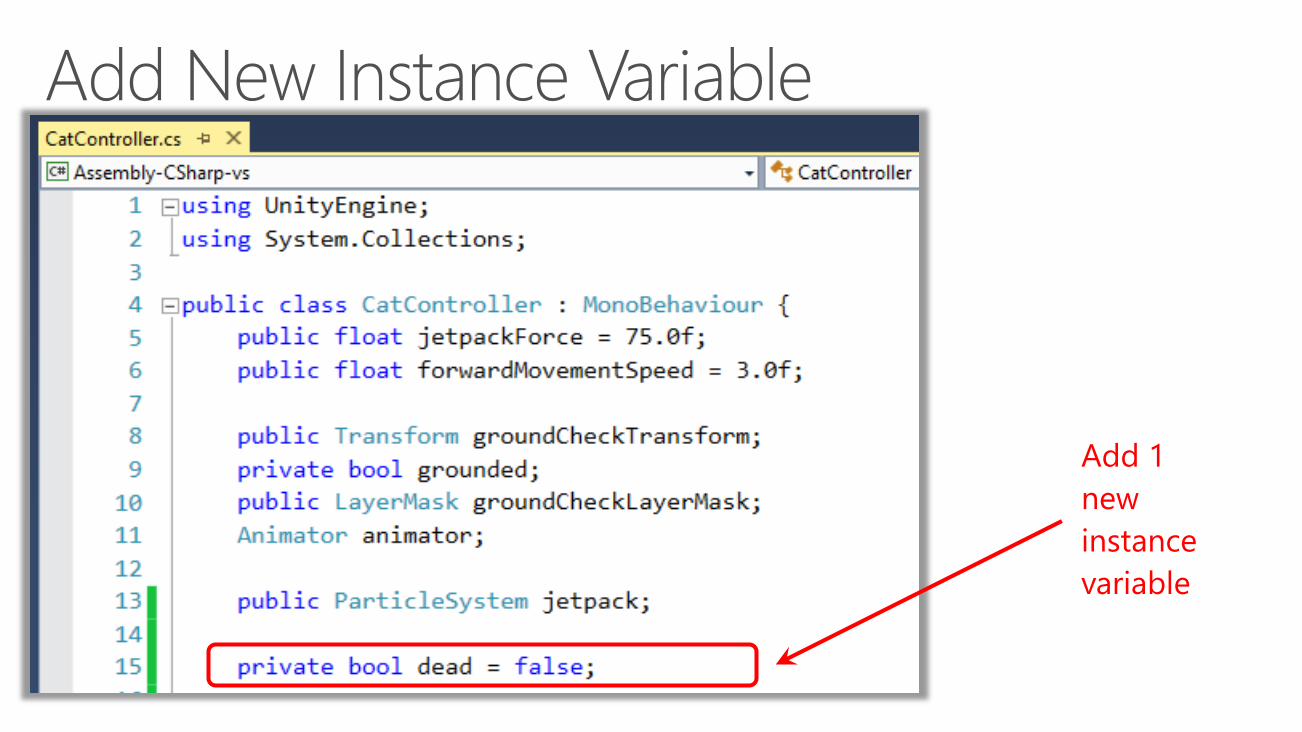
Add 1
new
instance
variable
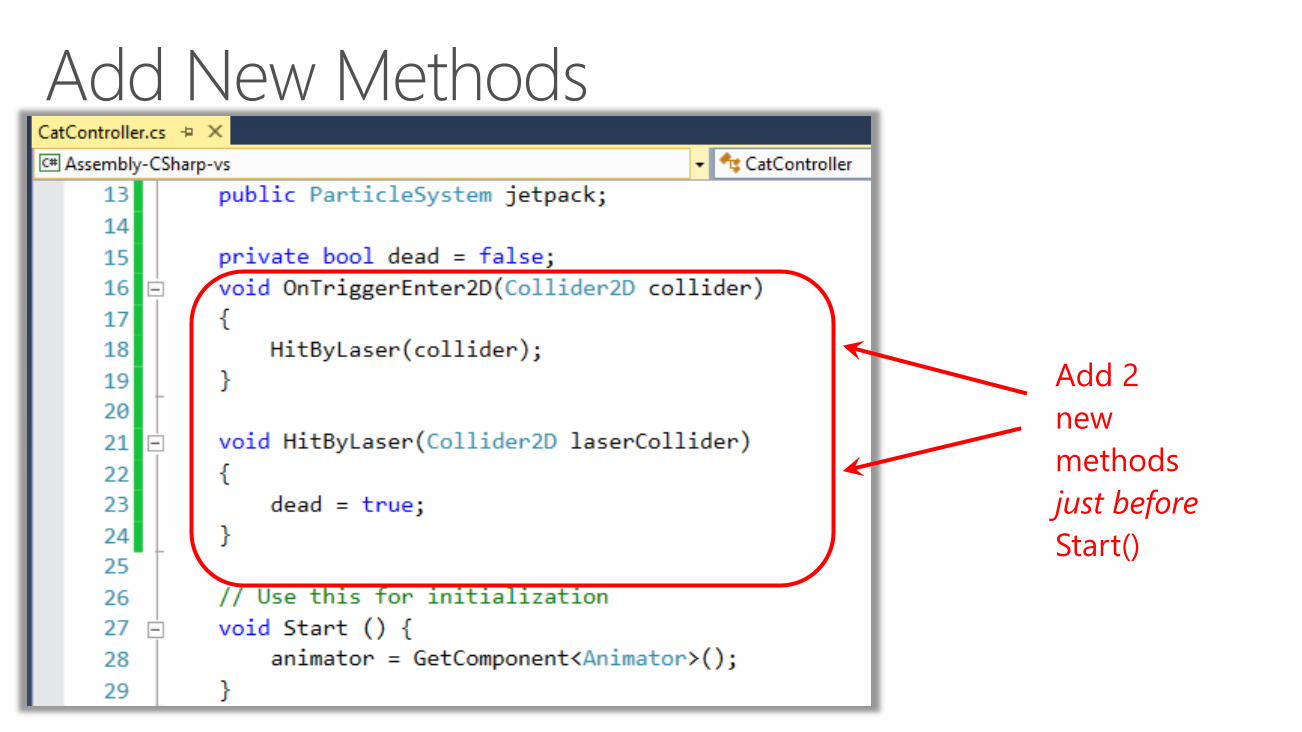
Add 2
new
methods
just before
Start()
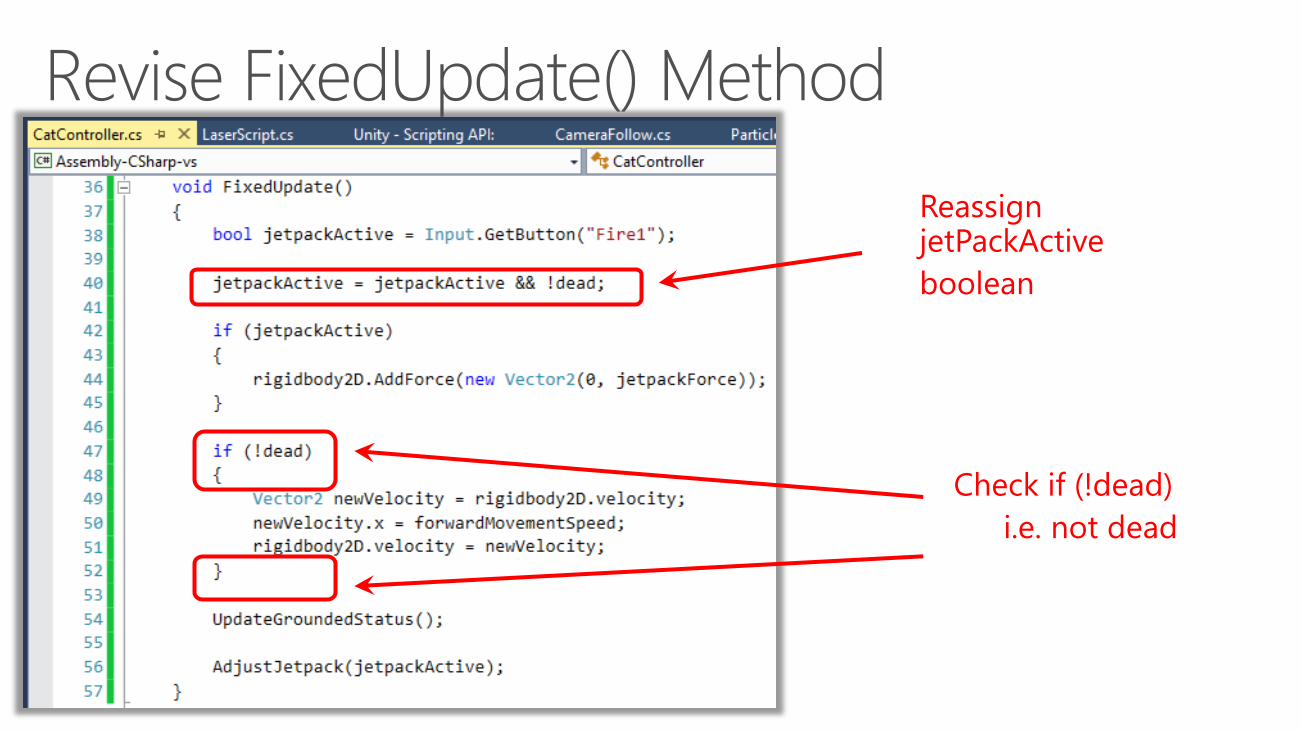
Reassign jetPackActive
boolean
Check if (!dead)
i.e. not dead
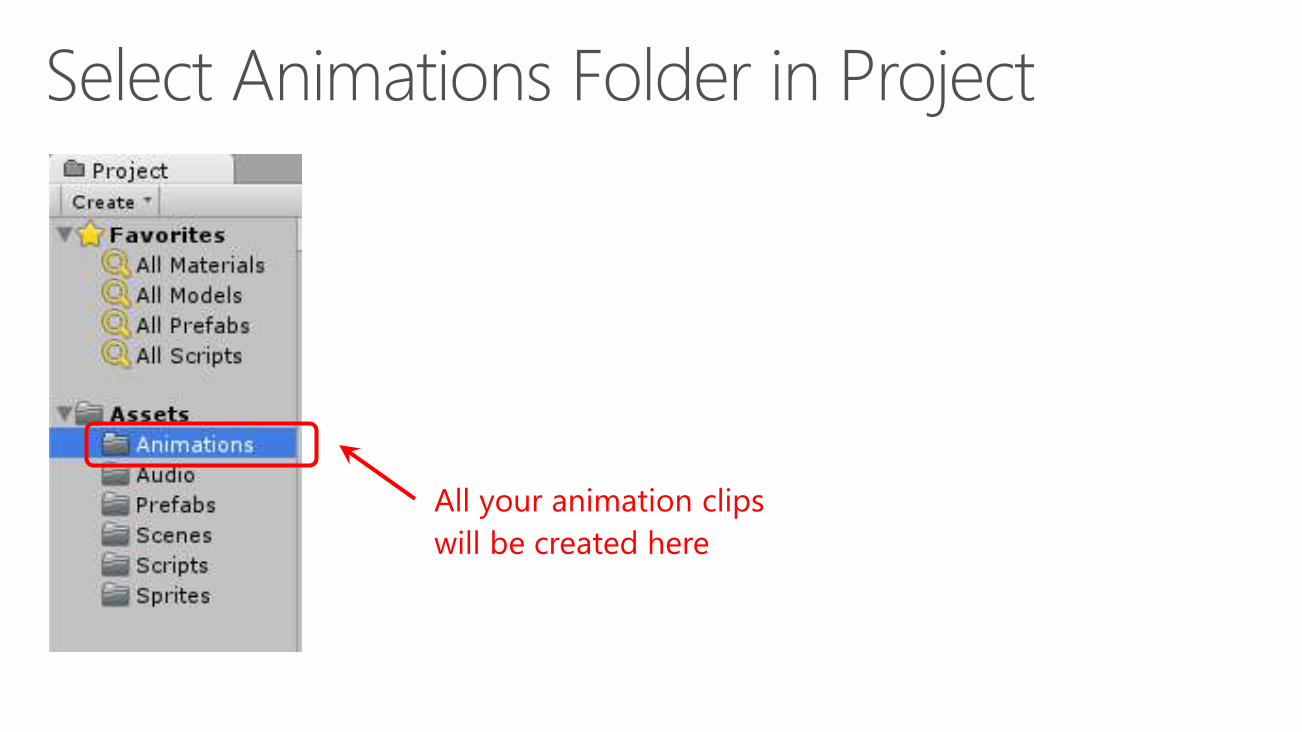
All your animation clips
will be created here
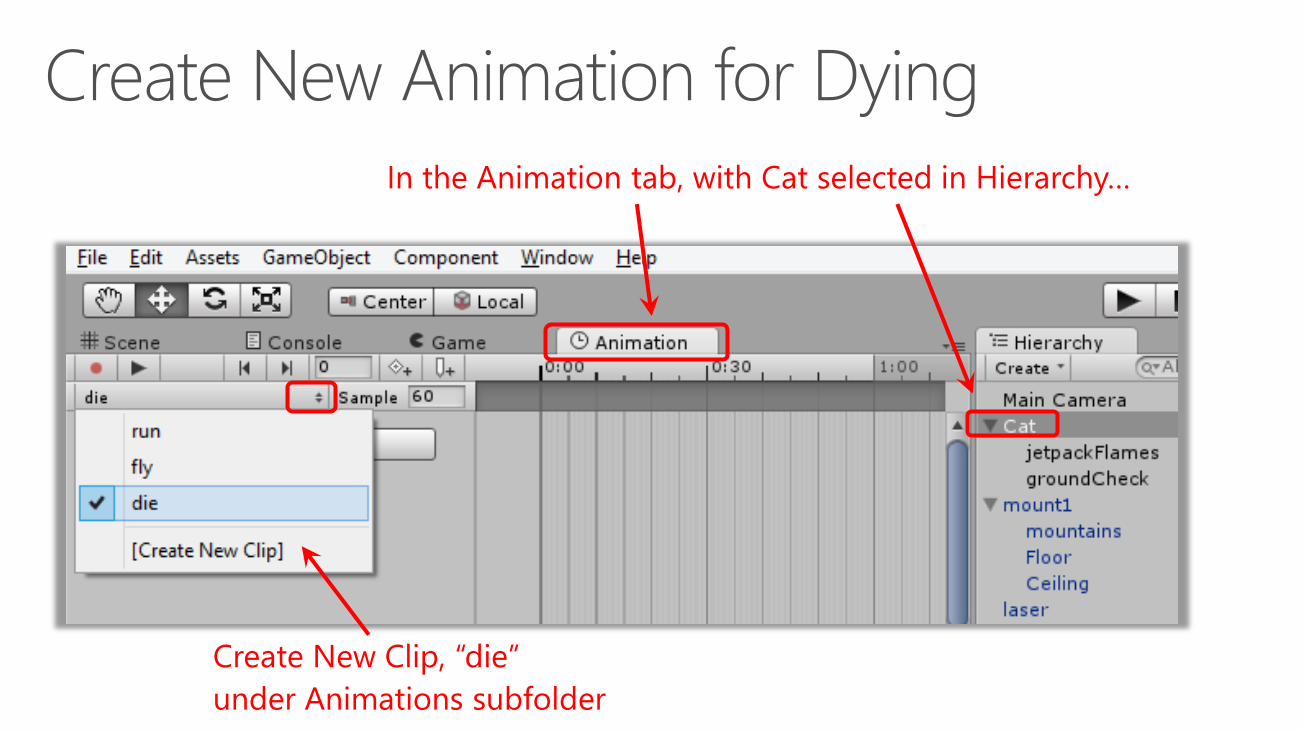
In the Animation tab, with Cat selected in Hierarchy…
Create New Clip, “die”
under Animations subfolder
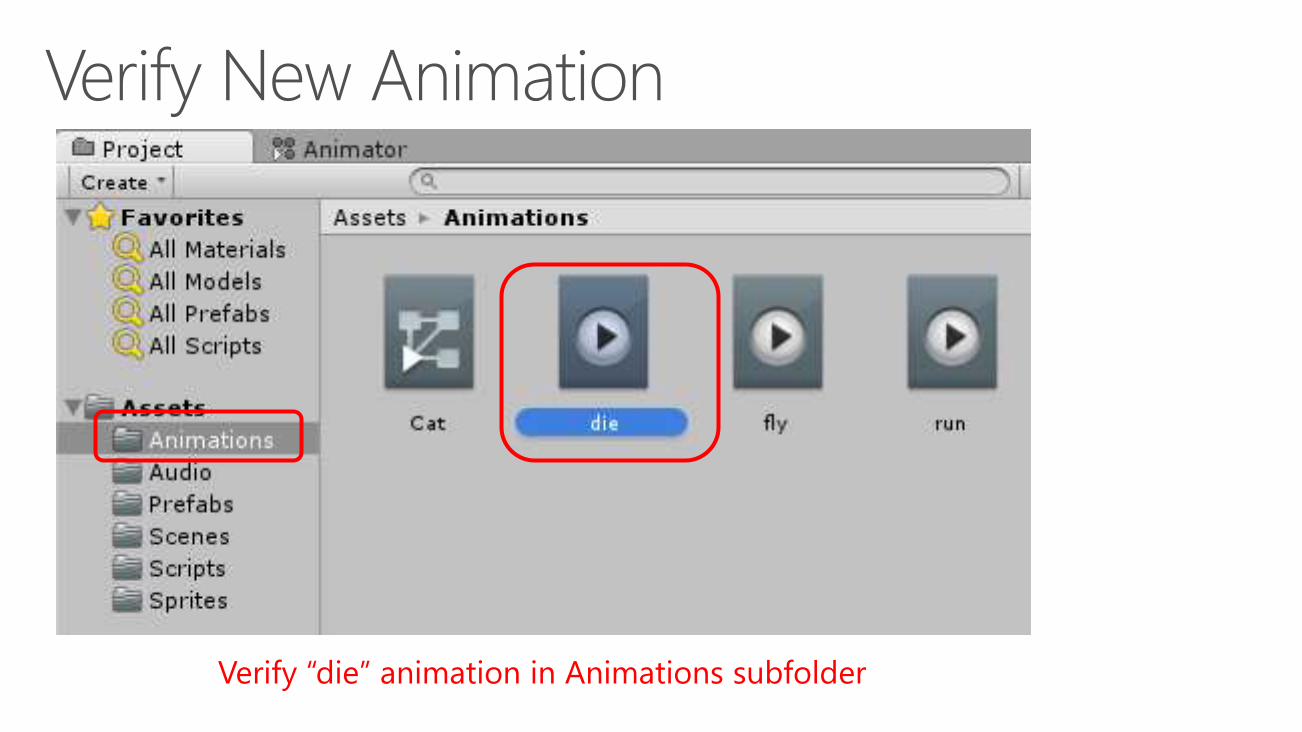
Verify “die” animation in Animations subfolder
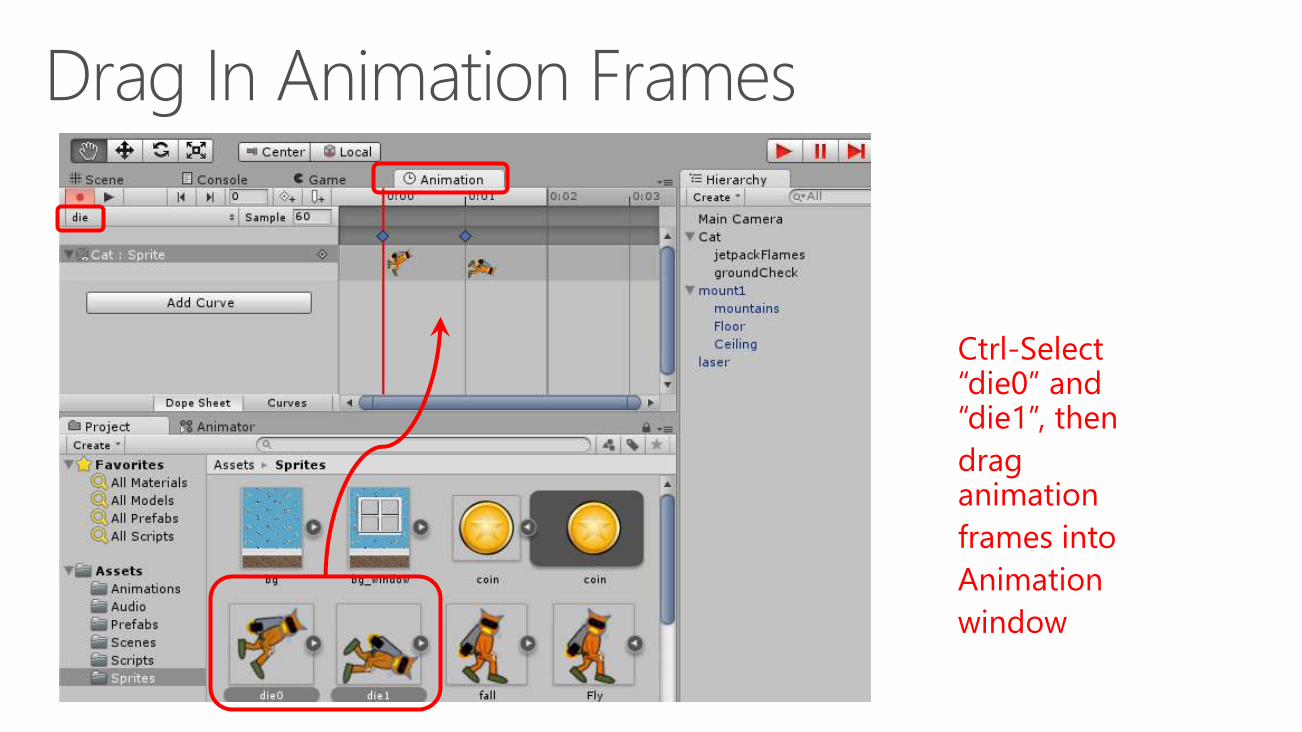
Ctrl-Select “die0” and “die1”, then
drag animation
frames into
Animation
window
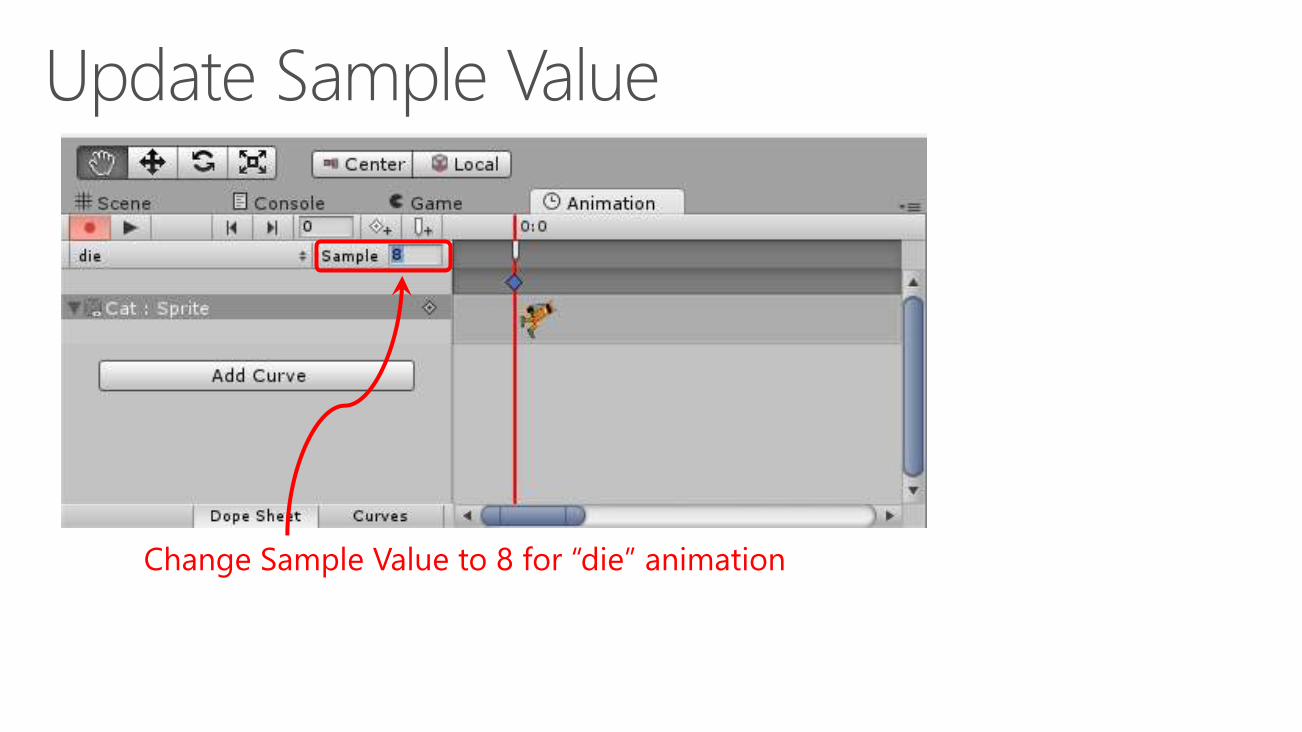
Change Sample Value to 8 for “die” animation
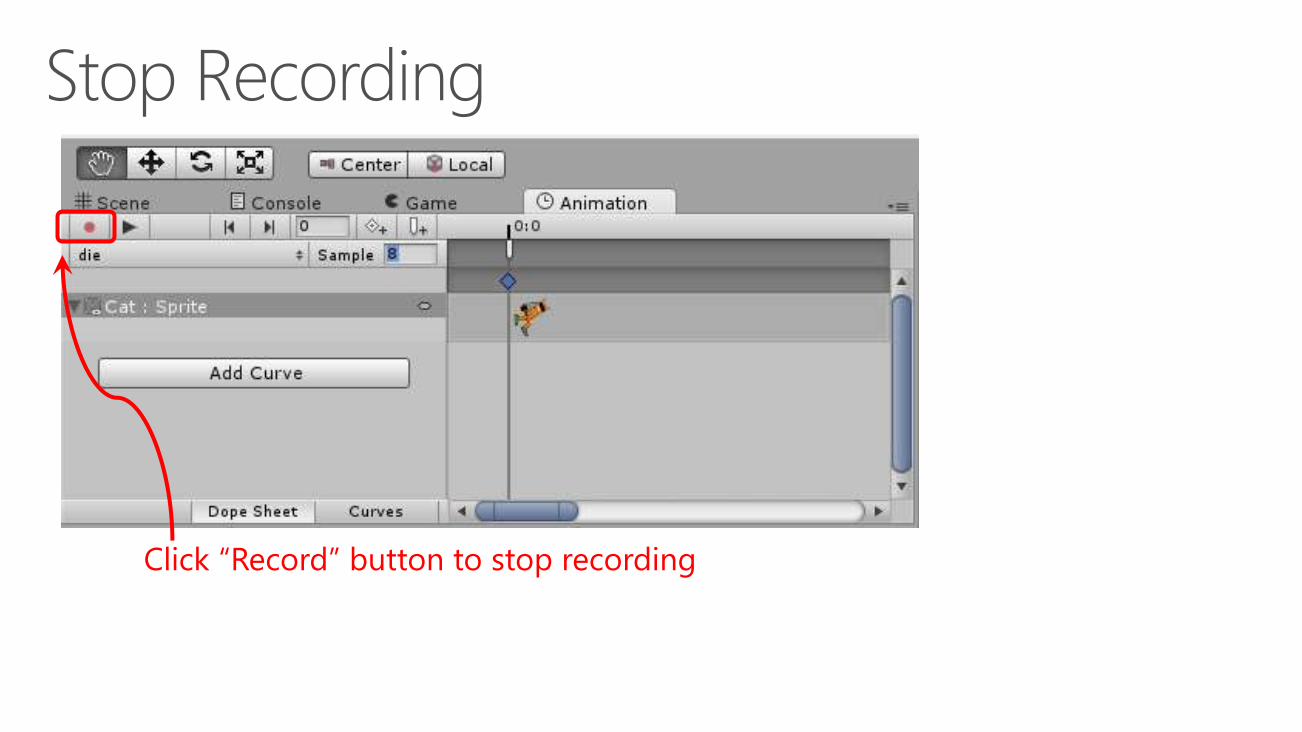
Click “Record” button to stop recording
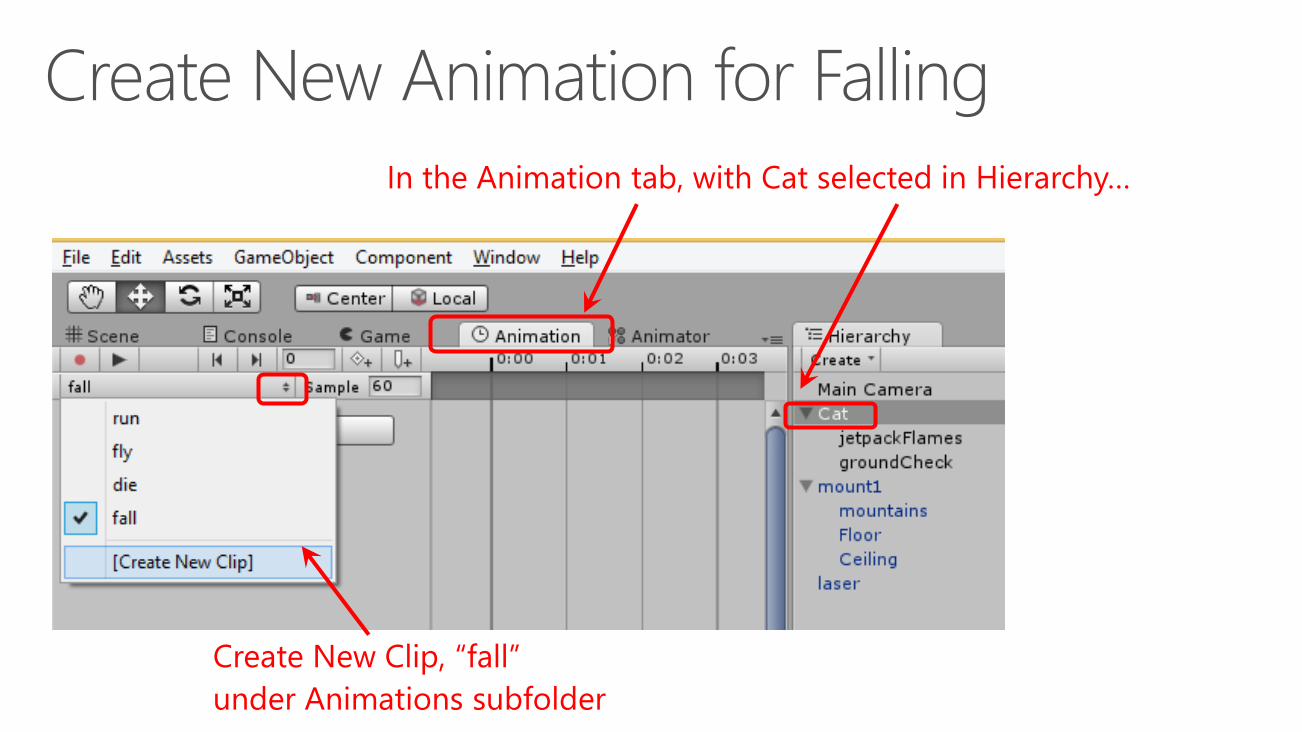
In the Animation tab, with Cat selected in Hierarchy…
Create New Clip, “fall”
under Animations subfolder
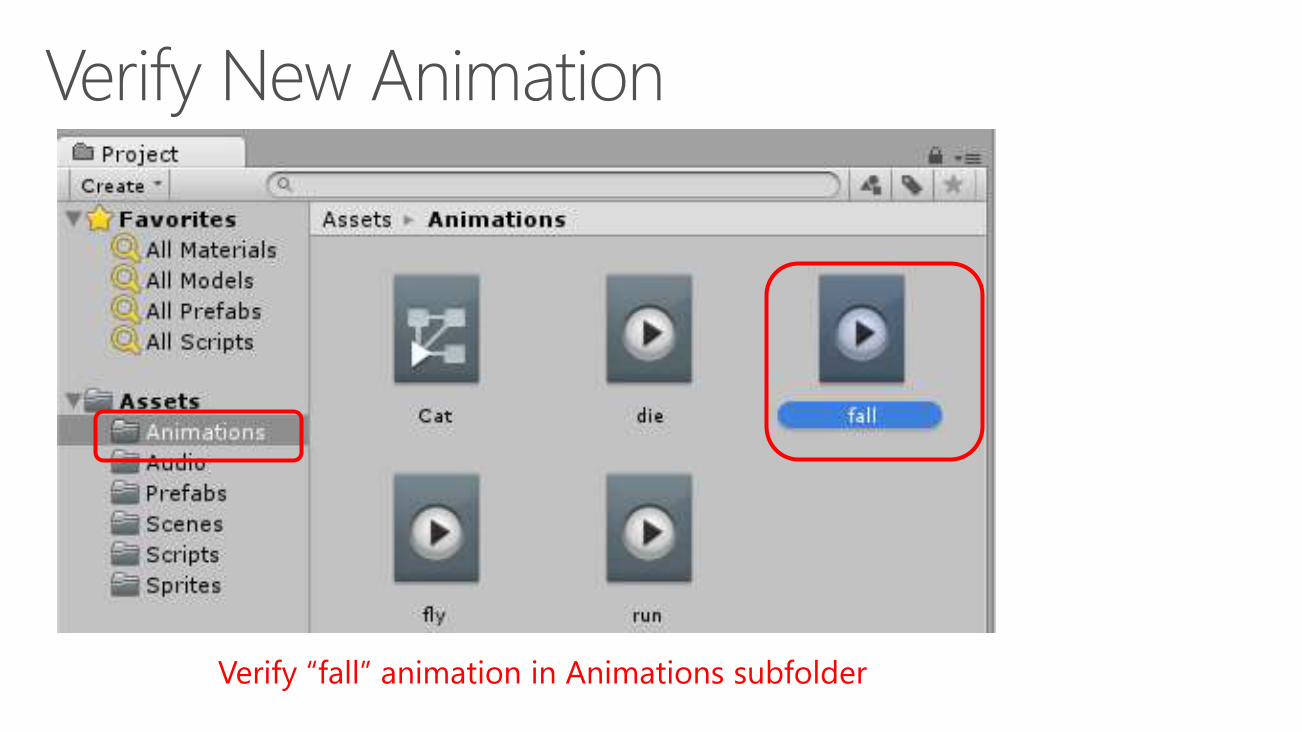
Verify “fall” animation in Animations subfolder
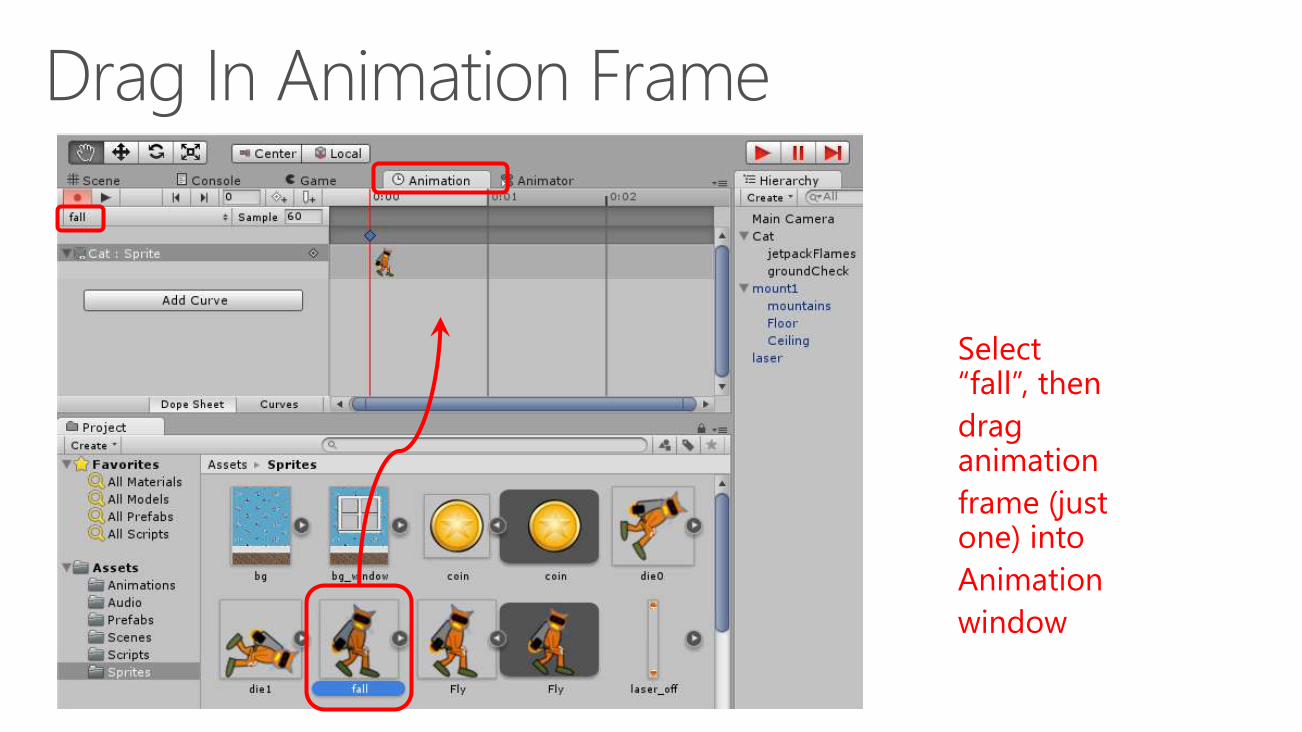
Select “fall”, then
drag animation
frame (just one) into
Animation
window
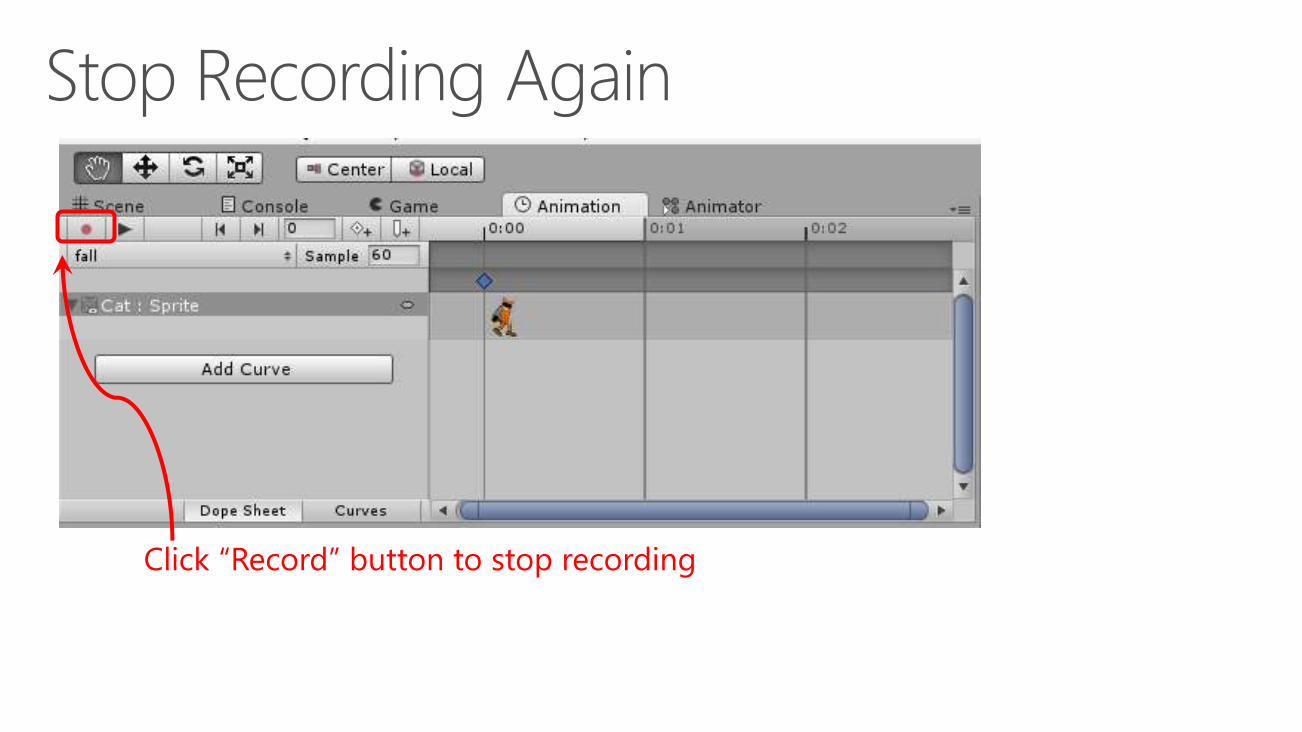
Click “Record” button to stop recording

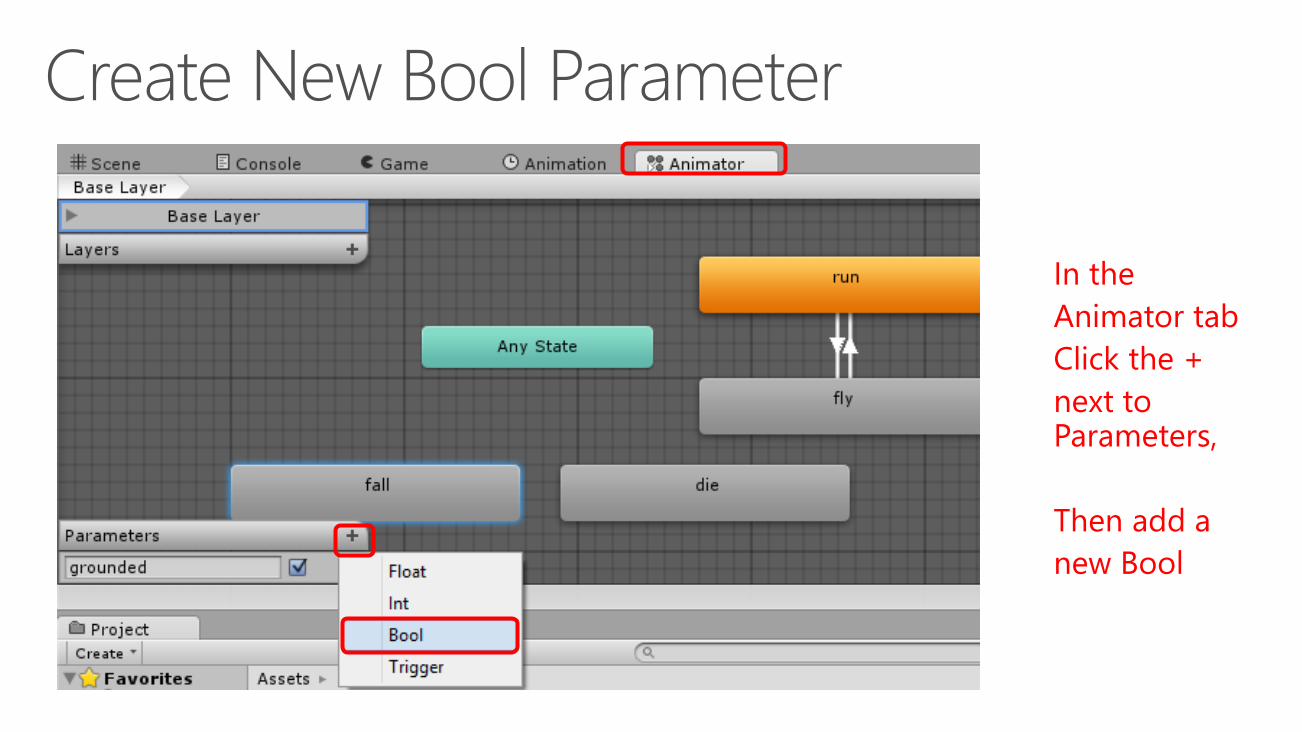
In the
Animator tab
Click the +
next to Parameters,
Then add a
new Bool

Name the new
parameter
“dead”
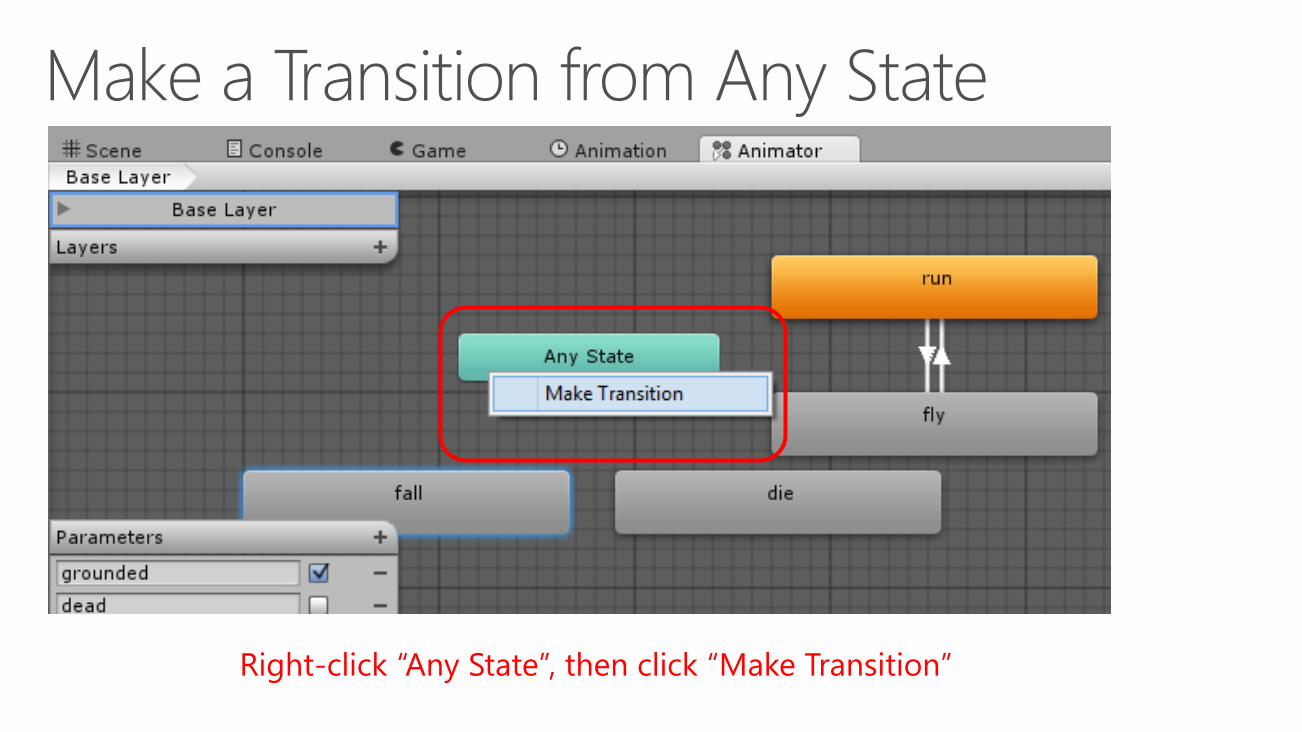
Right-click “Any State”, then click “Make Transition”
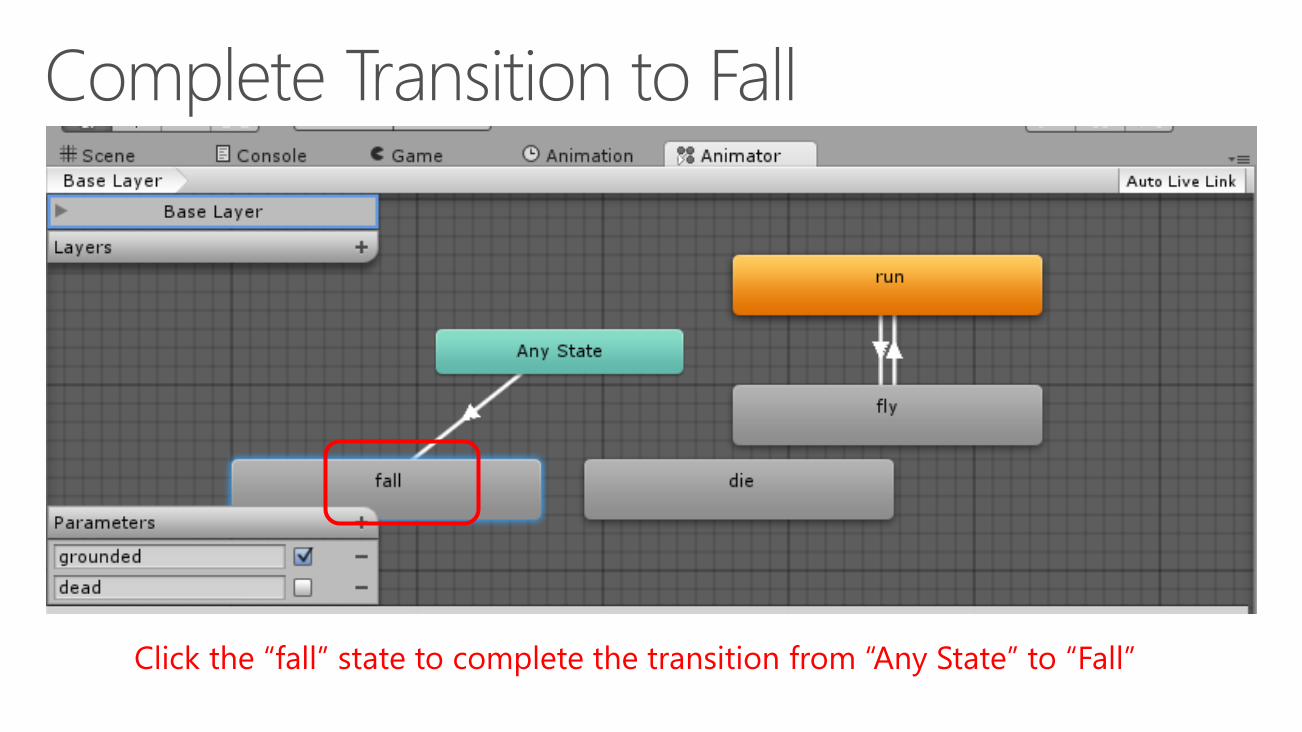
Click the “fall” state to complete the transition from “Any State” to “Fall”
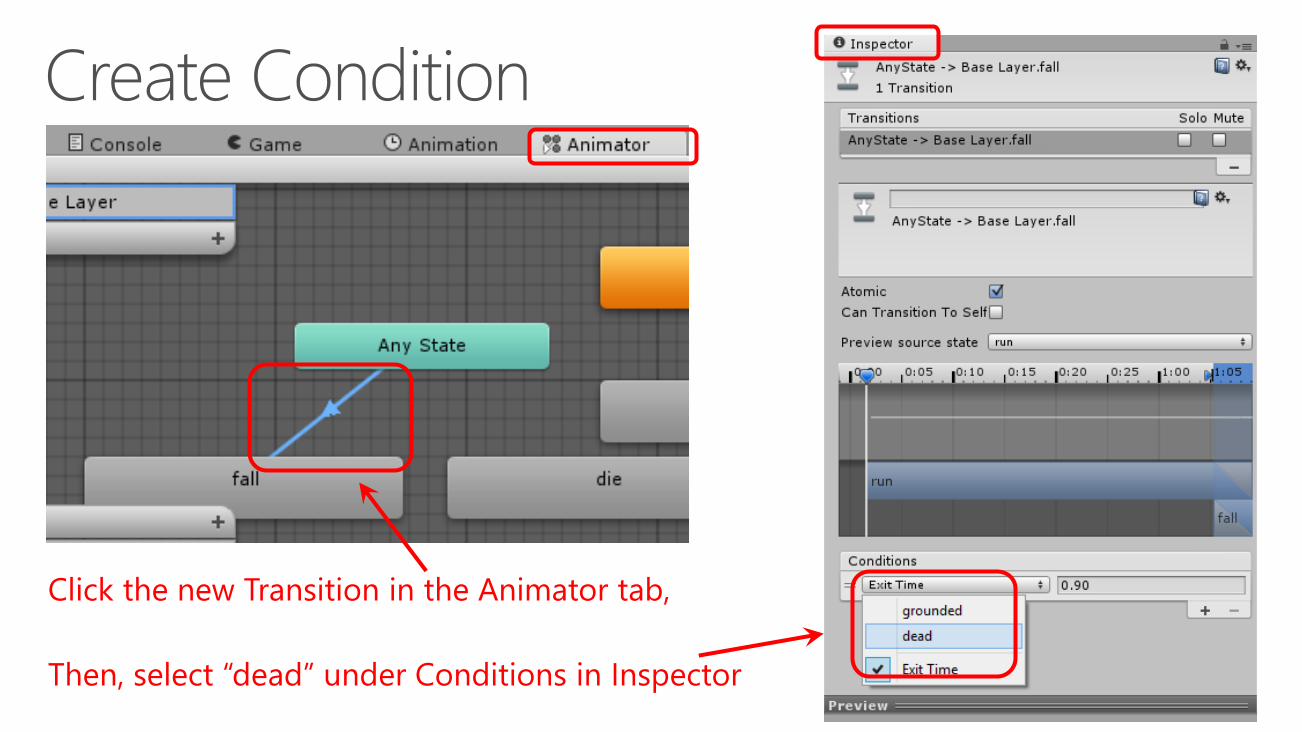
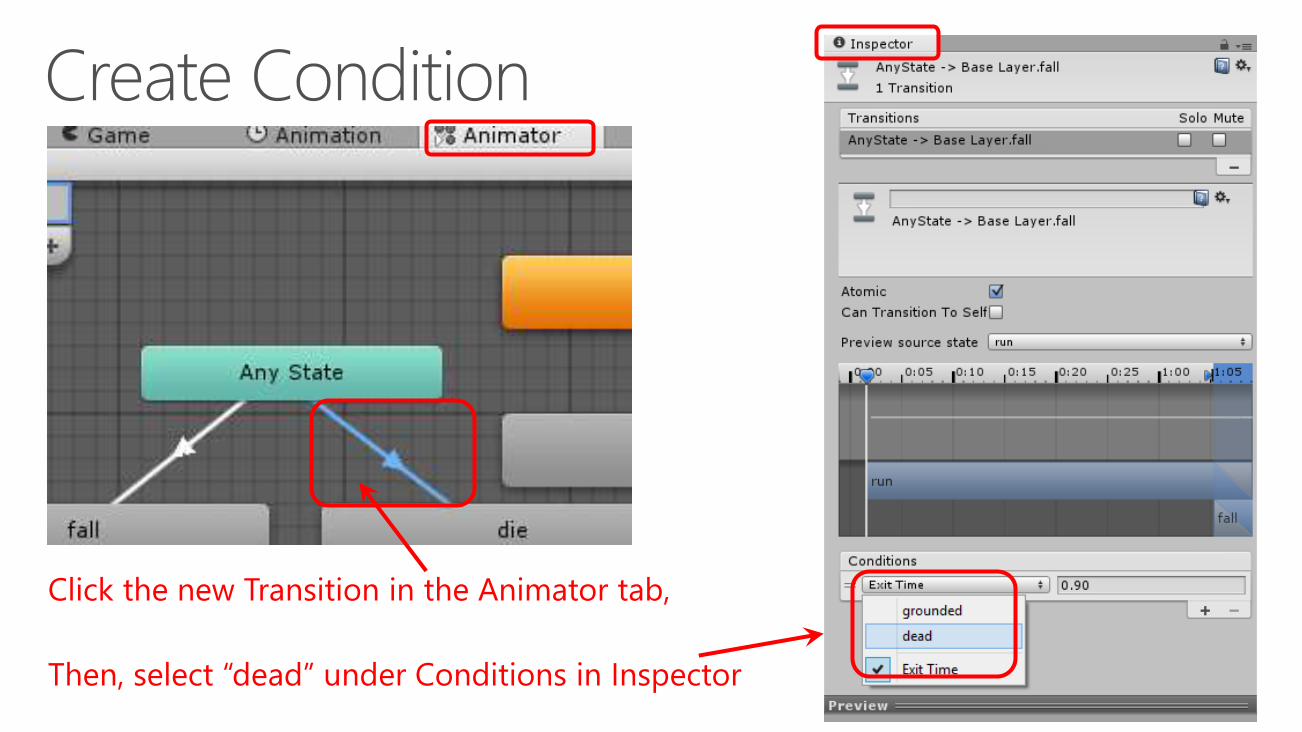
Click the new Transition in the Animator tab,
Then, select “dead” under Conditions in Inspector

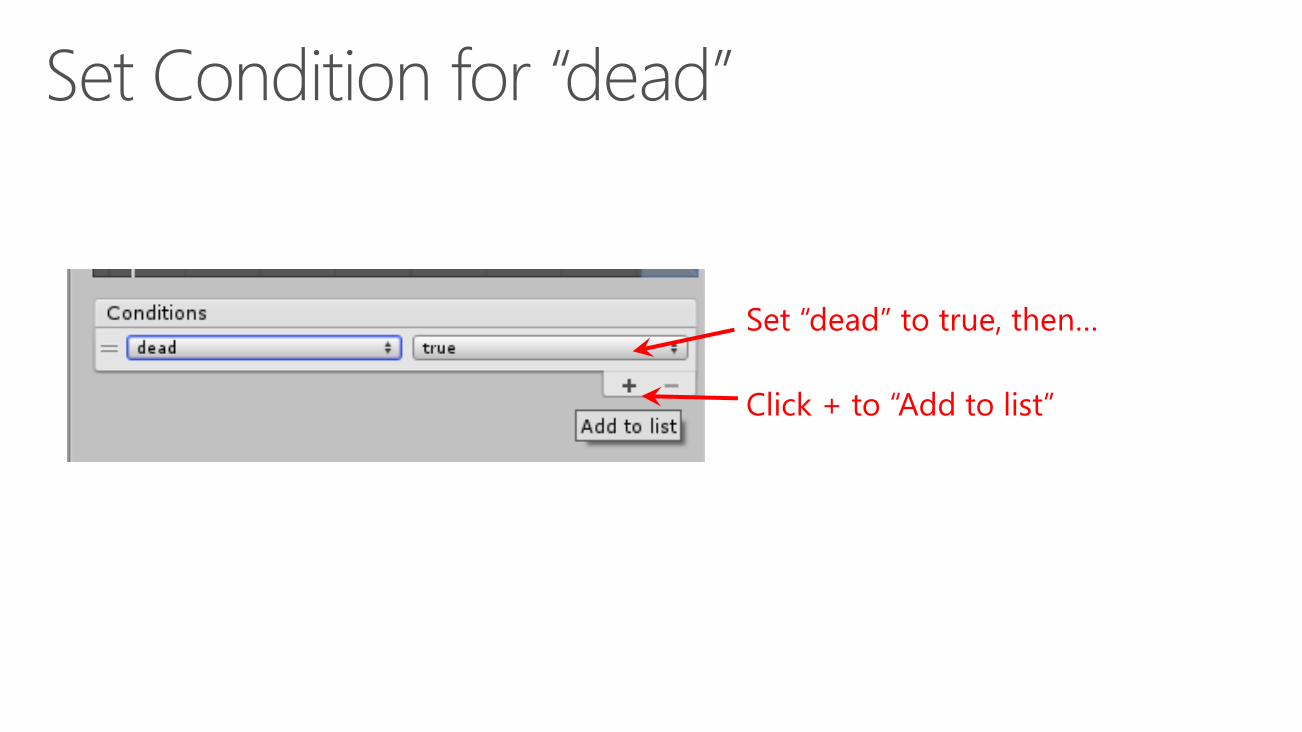
Set “dead” to true, then…
Click + to “Add to list”
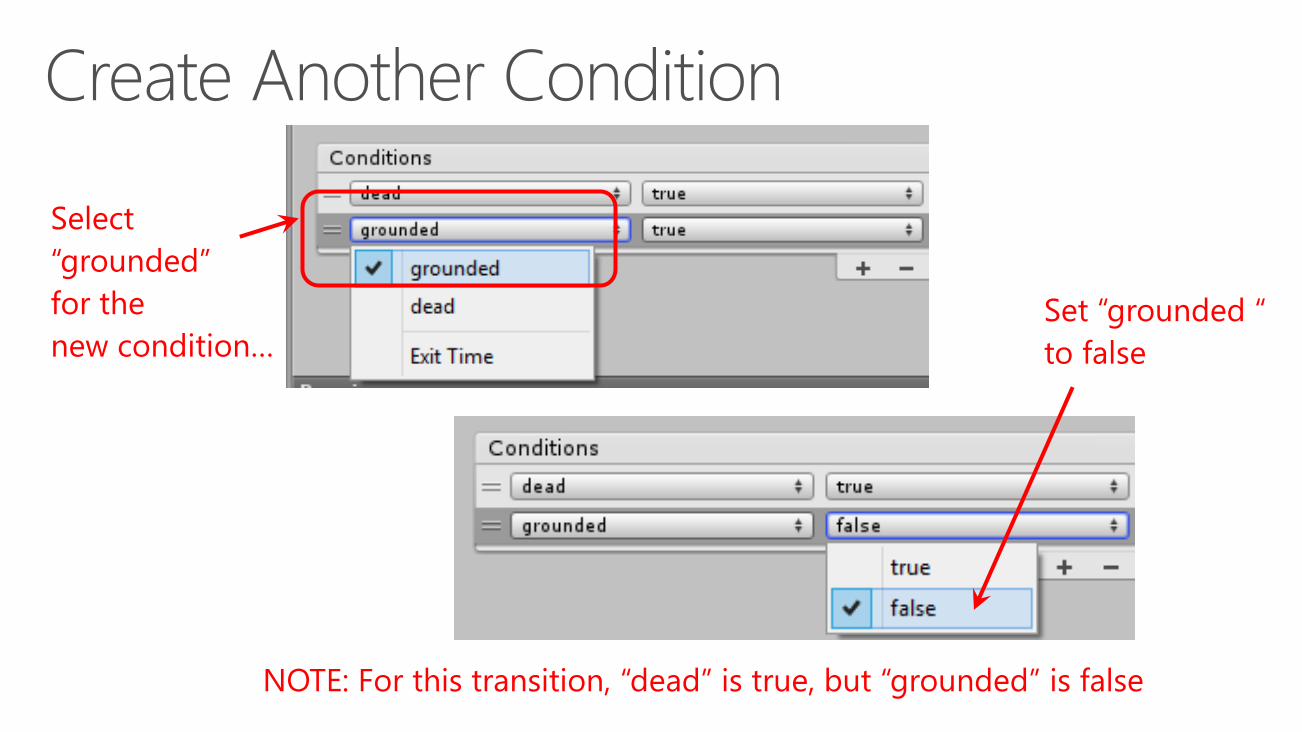
Set “grounded “
to false
Select
“grounded”
for the
new condition…
NOTE: For this transition, “dead” is true, but “grounded” is false

Right-click “Any State”, then click “Make Transition”
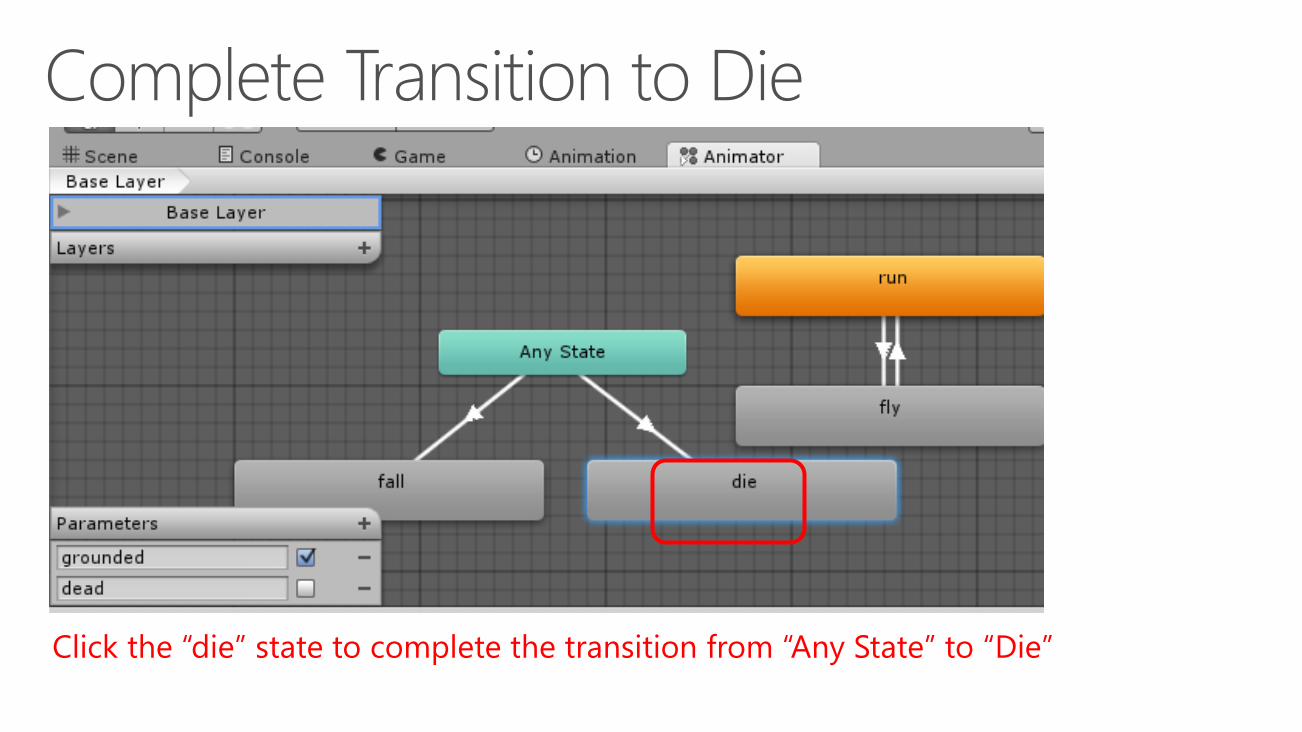
Click the “die” state to complete the transition from “Any State” to “Die”
Click the new Transition in the Animator tab,
Then, select “dead” under Conditions in Inspector
Set “dead” to true, then…
Click + to “Add to list”
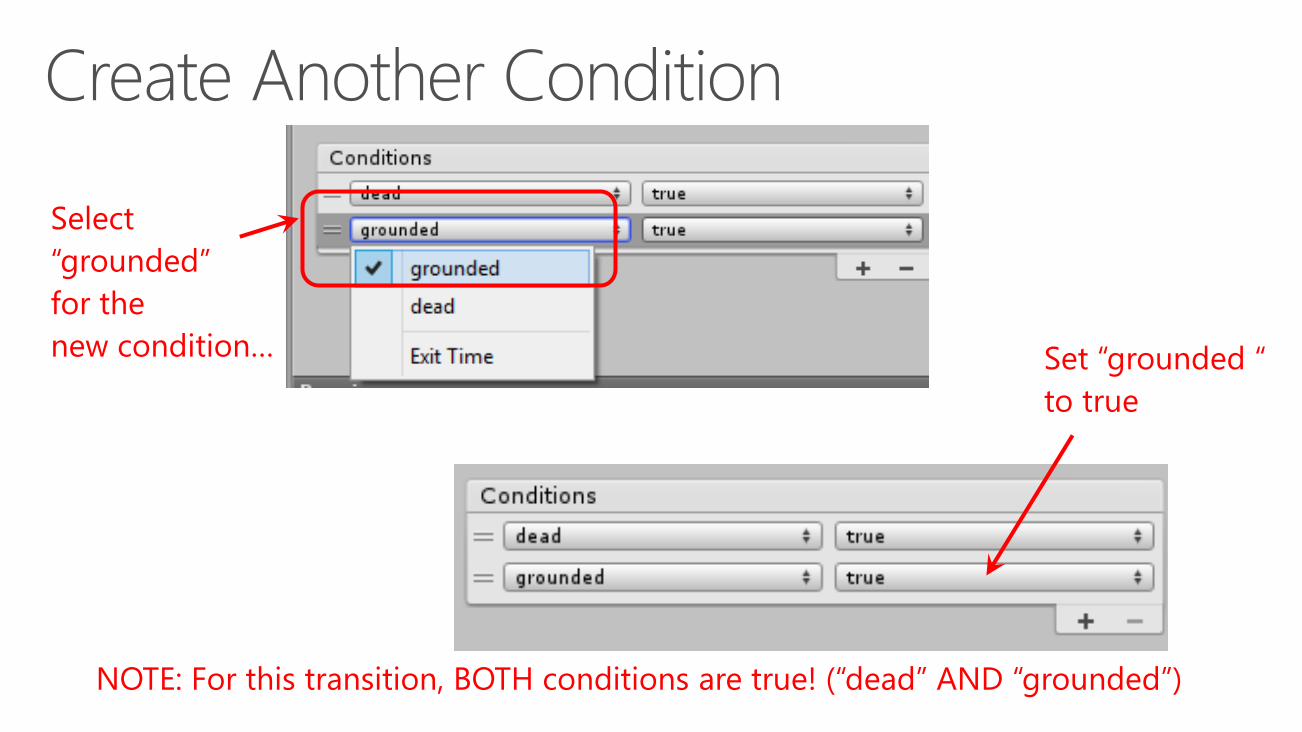
Set “grounded “
to true
Select
“grounded”
for the
new condition…
NOTE: For this transition, BOTH conditions are true! (“dead” AND “grounded”)
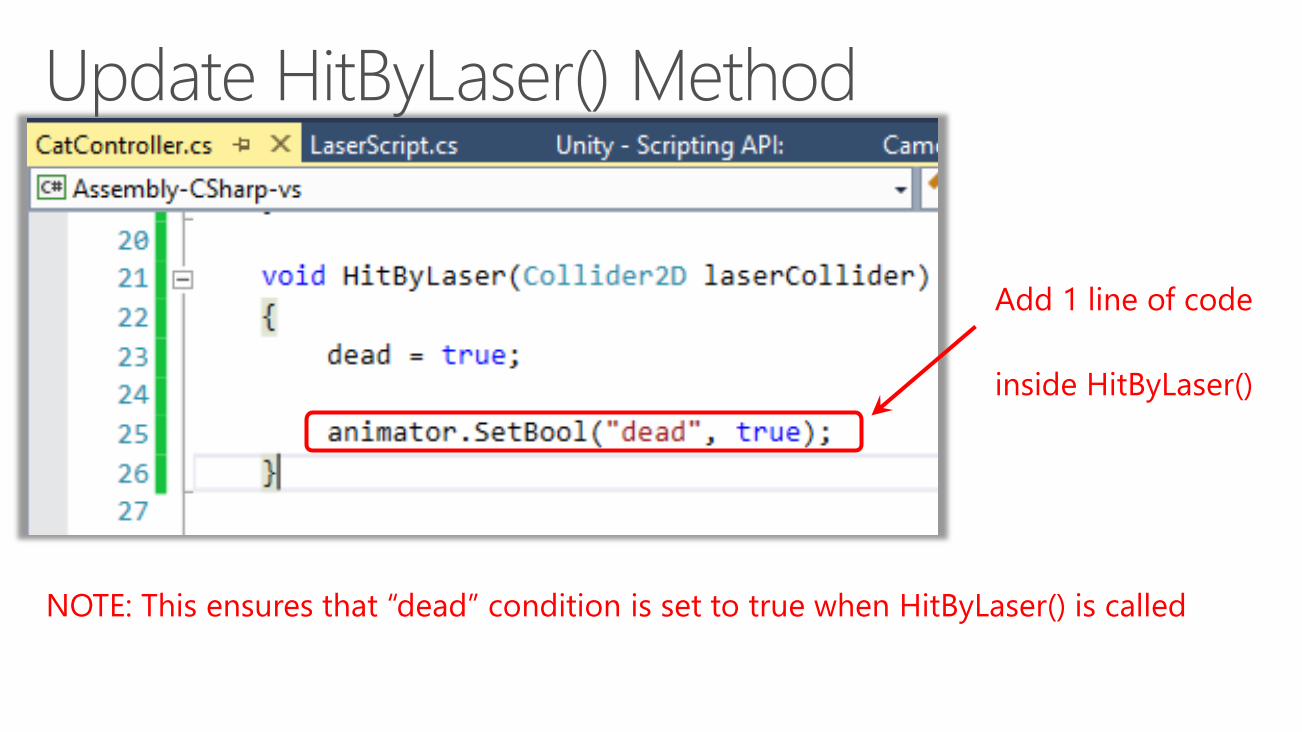
Add 1 line of code
inside HitByLaser()
NOTE: This ensures that “dead” condition is set to true when HitByLaser() is called


In the
Animator tab
Click the +
next to Parameters,
Then add a
new Trigger

Name the new
Trigger parameter
“dieOnceTrigger”

Select the “die” animation in the Project panel
Uncheck Loop Time
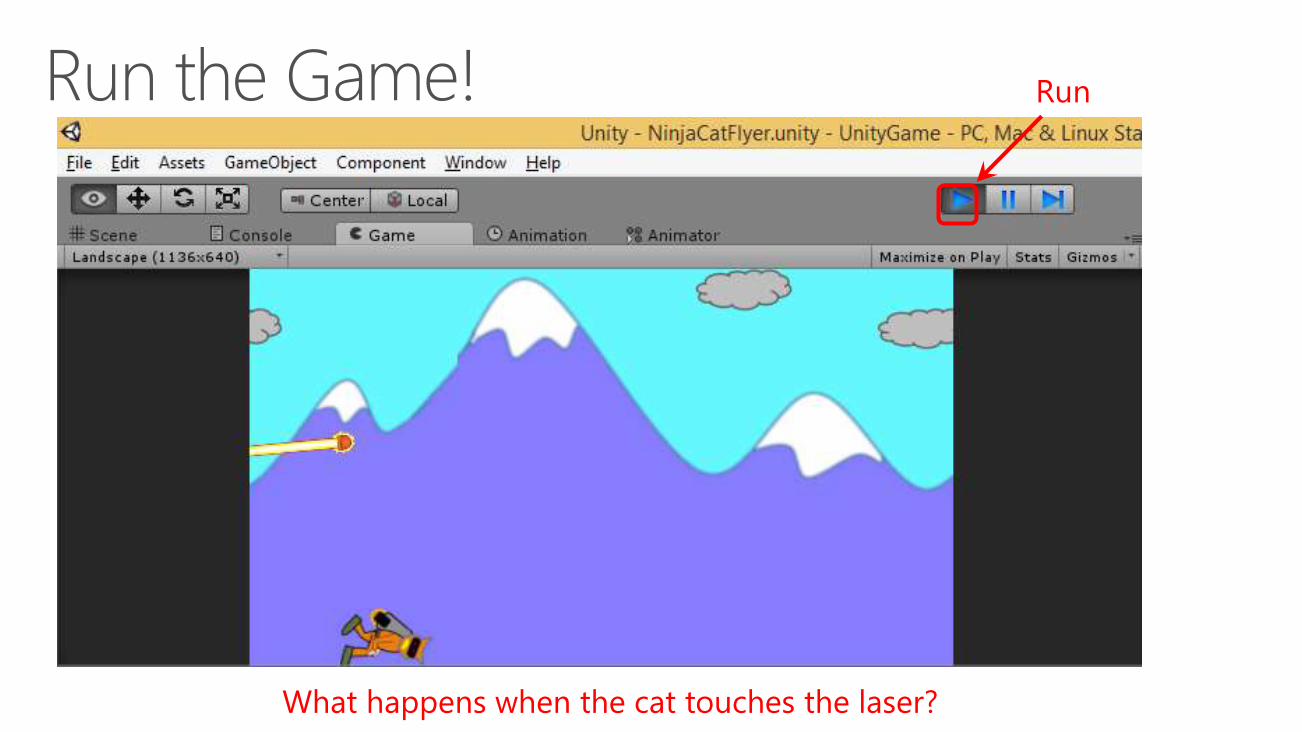
Run
What happens when the cat touches the laser?