Embed Size (px)
Citation preview

Prepared By : CH.SrilakshmiPrasanna Asst.Prof Page 1
PC Hardware
Week 3
Task 3:
Every student should individually install MS windows on the personal computer. Lab instructor
should verify the installation and follow it up with a Viva.
AIM:-
Windows XP Installation Steps.
Requirements:-
• The minimum requirements for installing Windows XP Professional include:
1. An Intel Pentium/Celeron family or AMD K6/Athalon/Duron family 233 MHz processor.
2. 64 MB of RAM.
3. At least one hard disk where the systemroot (usually C:\WINNT) can be located on a
partition.
4. At least 1.5 GB of hard disk space.
• The recommended requirements for installing Windows XP Professional include:
5. A PC with a 300 MHz (single or dual) processor.
6. 128 MB of RAM.
7. Windows XP Professional installation CD.
Procedure:
Step 1:-
Order a Microsoft Windows XP Setup CD from the vendor.

Prepared By : CH.SrilakshmiPrasanna Asst.Prof Page 2
Step 2:

Prepared By : CH.SrilakshmiPrasanna Asst.Prof Page 3
Step 3:-
Put the Setup CD into the drive, and press the Restart button on the computer case.
Step 4:
Make sure the computer prompts you to press a key to start the Setup. If it does not, you need to
set the CD-Drive as the First Boot Device in Boot category in your computer's BIOS.

Prepared By : CH.SrilakshmiPrasanna Asst.Prof Page 4
Step 5:-
Installing Windows:

Prepared By : CH.SrilakshmiPrasanna Asst.Prof Page 5
After your computer reboots, a Black screen will appear showing the message 'Press any key to
Boot from CD.... Press any key.
Step 6:
Wait for a few seconds until the a Blue Screen pops up with the Title Windows Setup.

Prepared By : CH.SrilakshmiPrasanna Asst.Prof Page 6
Step 7:-
Follow the instructions on the screen to install Windows.

Prepared By : CH.SrilakshmiPrasanna Asst.Prof Page 7
Press F8
Prepared By : CH.SrilakshmiPrasanna Asst.Prof Page 8
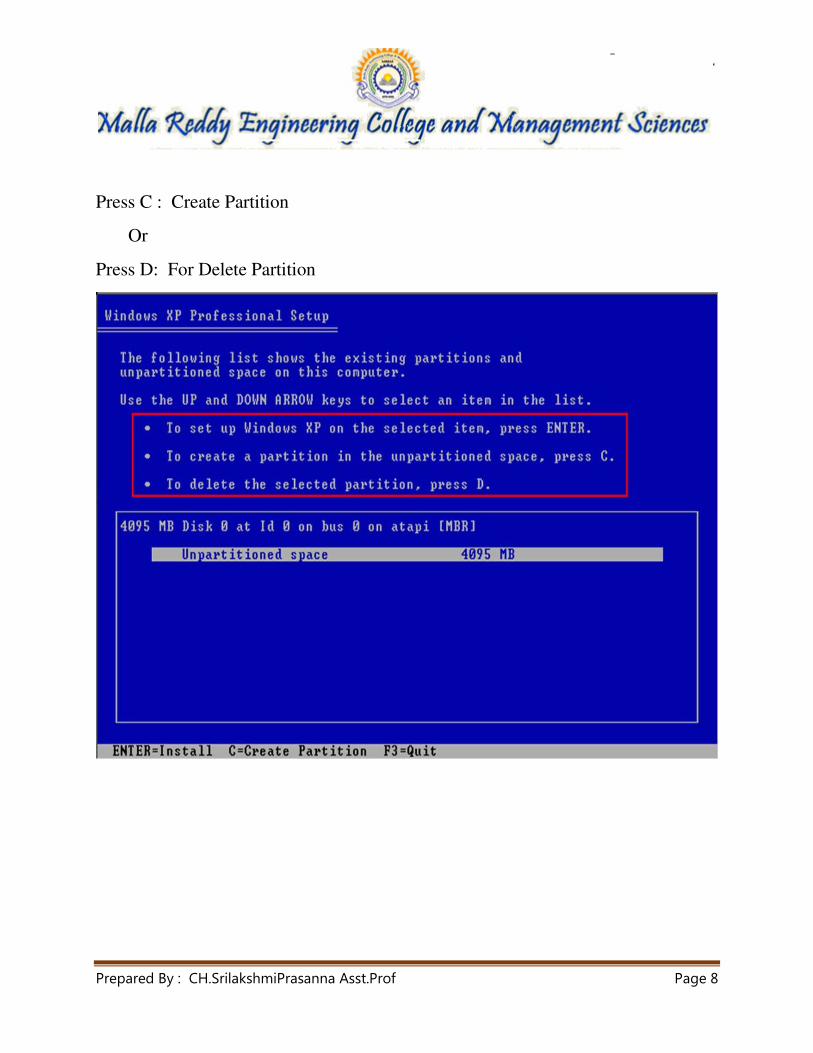
Press C : Create Partition
Or
Press D: For Delete Partition

Prepared By : CH.SrilakshmiPrasanna Asst.Prof Page 9
Step 8:-
Select a drive for Windows to be installed, and choose its File System (FAT32(File Allocation
Table) or NTFS(New Technology File System))
[ OR]

Prepared By : CH.SrilakshmiPrasanna Asst.Prof Page 10
Criteria NTFS5 NTFS FAT32 FAT16
Operating System
Windows 2000
Windows XP
Windows NT
Windows 2000
Windows XP
Windows 98
Windows ME
Windows 2000
Windows XP
DOS
All versions of
Microsoft Windows

Prepared By : CH.SrilakshmiPrasanna Asst.Prof Page 11
step 9:-
Select File System you want,then Click ENTER.

Prepared By : CH.SrilakshmiPrasanna Asst.Prof Page 12

Prepared By : CH.SrilakshmiPrasanna Asst.Prof Page 13

Prepared By : CH.SrilakshmiPrasanna Asst.Prof Page 14

Prepared By : CH.SrilakshmiPrasanna Asst.Prof Page 15
Step 10:-
Set the Regional and Language, and Network Settings, and let the Setup install windows. You
can keep track of the progress on the Green Bar at the left side of the screen.

Prepared By : CH.SrilakshmiPrasanna Asst.Prof Page 16
Type Your Full Name and Your Company Name.

Prepared By : CH.SrilakshmiPrasanna Asst.Prof Page 17
Enter Your Product Key
.

Prepared By : CH.SrilakshmiPrasanna Asst.Prof Page 18
Enter computer name and Administrator password and click Next.

Prepared By : CH.SrilakshmiPrasanna Asst.Prof Page 19
Set the Current Date and Time For Your Computer.
Prepared By : CH.SrilakshmiPrasanna Asst.Prof Page 20
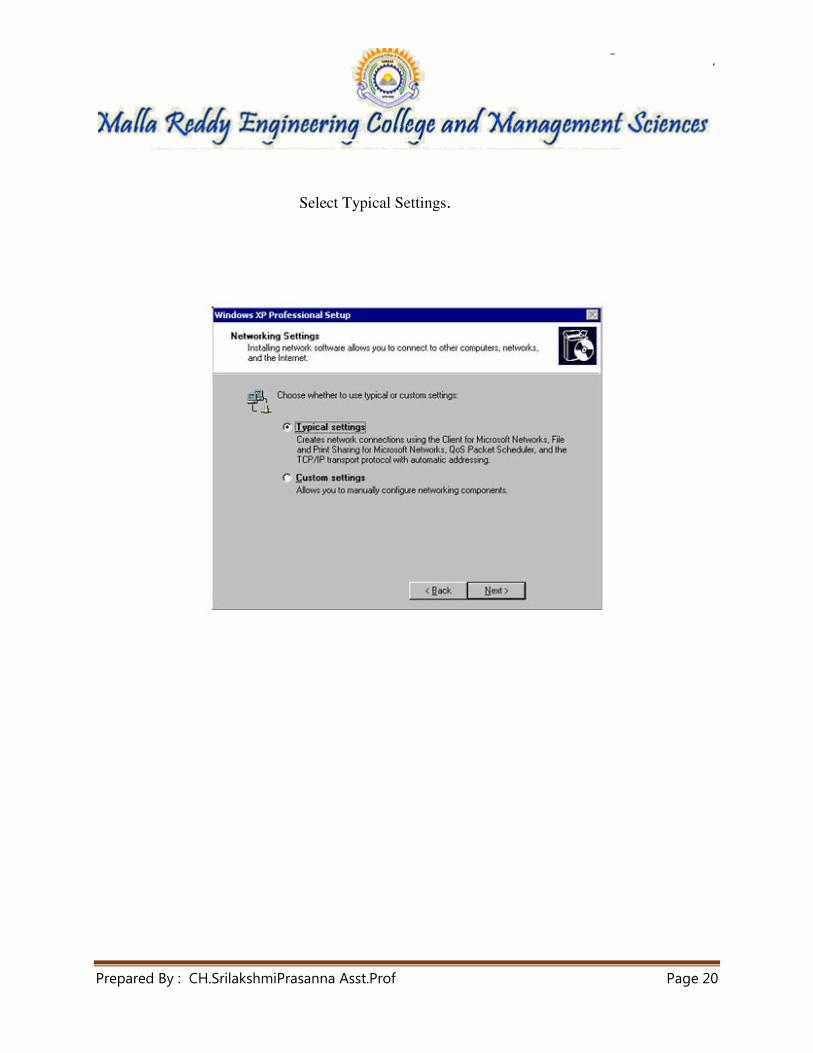
Select Typical Settings.

Prepared By : CH.SrilakshmiPrasanna Asst.Prof Page 21

Prepared By : CH.SrilakshmiPrasanna Asst.Prof Page 22
Step 11:-
Install basic security software such as a firewall, antivirus program, and an anti-spyware
program; the built-in Windows Firewall, microsoft AVG Free, and Safer Networking Spybot S
& D should work fine.

Prepared By : CH.SrilakshmiPrasanna Asst.Prof Page 23

Prepared By : CH.SrilakshmiPrasanna Asst.Prof Page 24
Step 12:-
Update Windows and the security software. This should help protect against some viruses and
improve stability.

Prepared By : CH.SrilakshmiPrasanna Asst.Prof Page 25
Step 13:-
Make sure that all your hardware is working. Unlike OEM installs, there can be some issues
here. You might want to go to the hardware manufacturers' websites for the latest drivers.

Prepared By : CH.SrilakshmiPrasanna Asst.Prof Page 26
Step 14:-
You are done with installing Windows.