Embed Size (px)
Citation preview
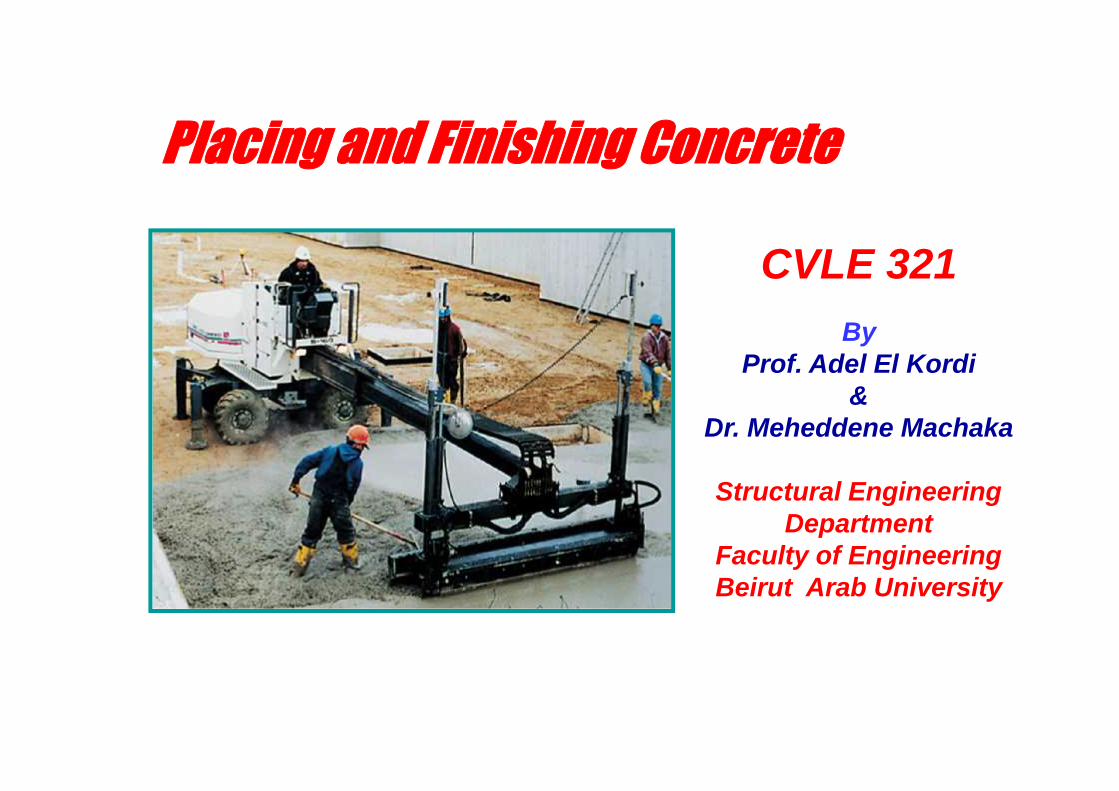
Placing and Finishing Concrete
ByProf. Adel El Kordi
&Dr. Meheddene Machaka
Structural EngineeringDepartment
Faculty of EngineeringBeirut Arab University
CVLE 321
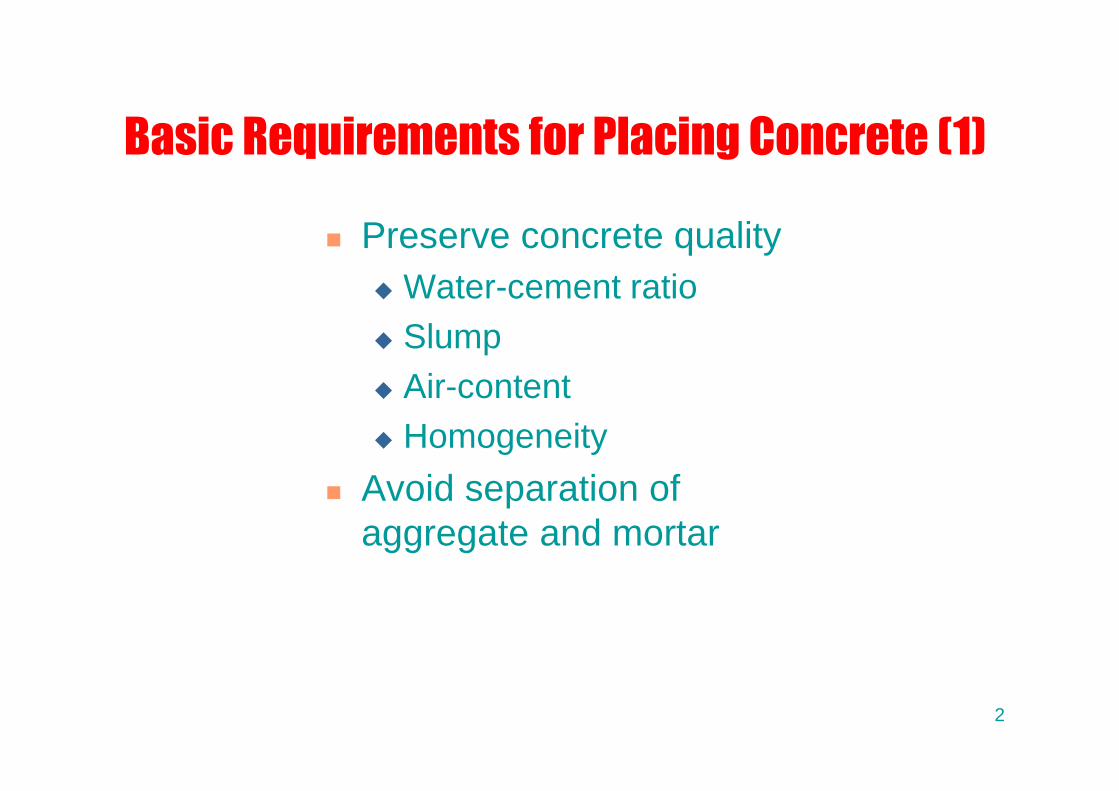
Basic Requirements for Placing Concrete (1)
Preserve concrete quality Water-cement ratio Slump Air-content Homogeneity
Avoid separation ofaggregate and mortar
2
Basic Requirements for Placing Concrete (2)
Avoid excessive horizontalmovement
Consolidate adequately Maintain sufficient placement
capacity Choose the right equipment for
the concrete
3
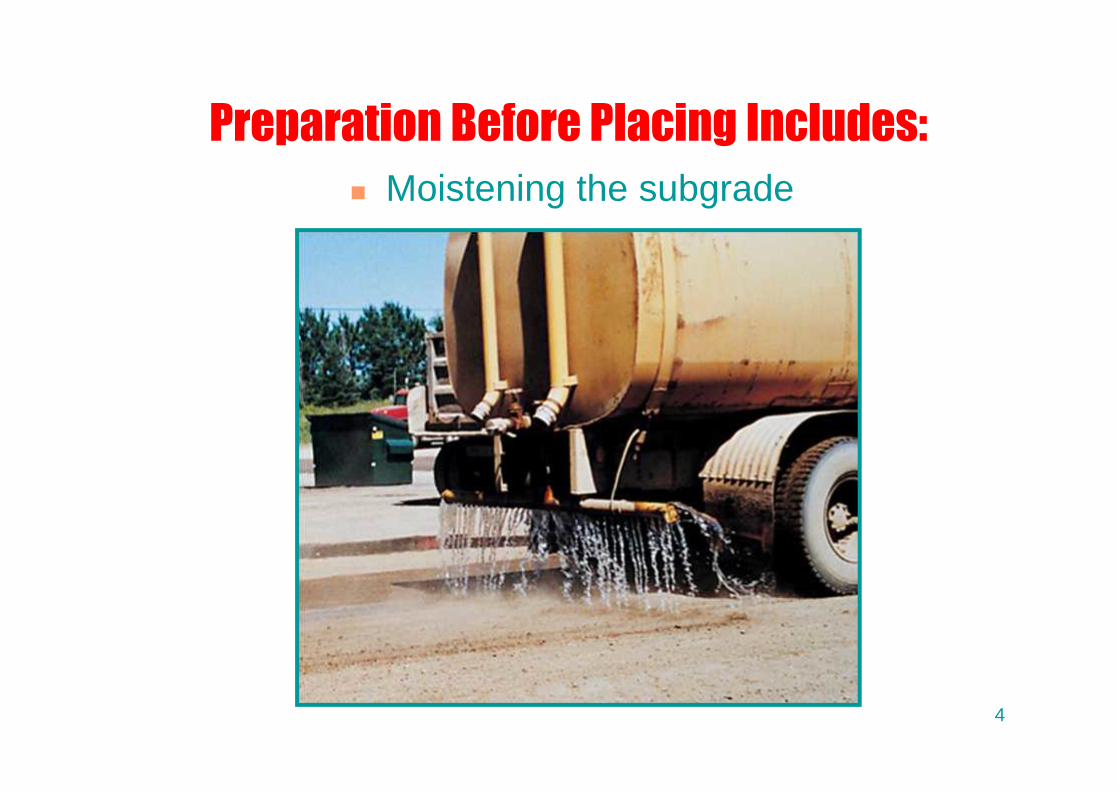
Preparation Before Placing Includes: Moistening the subgrade
4
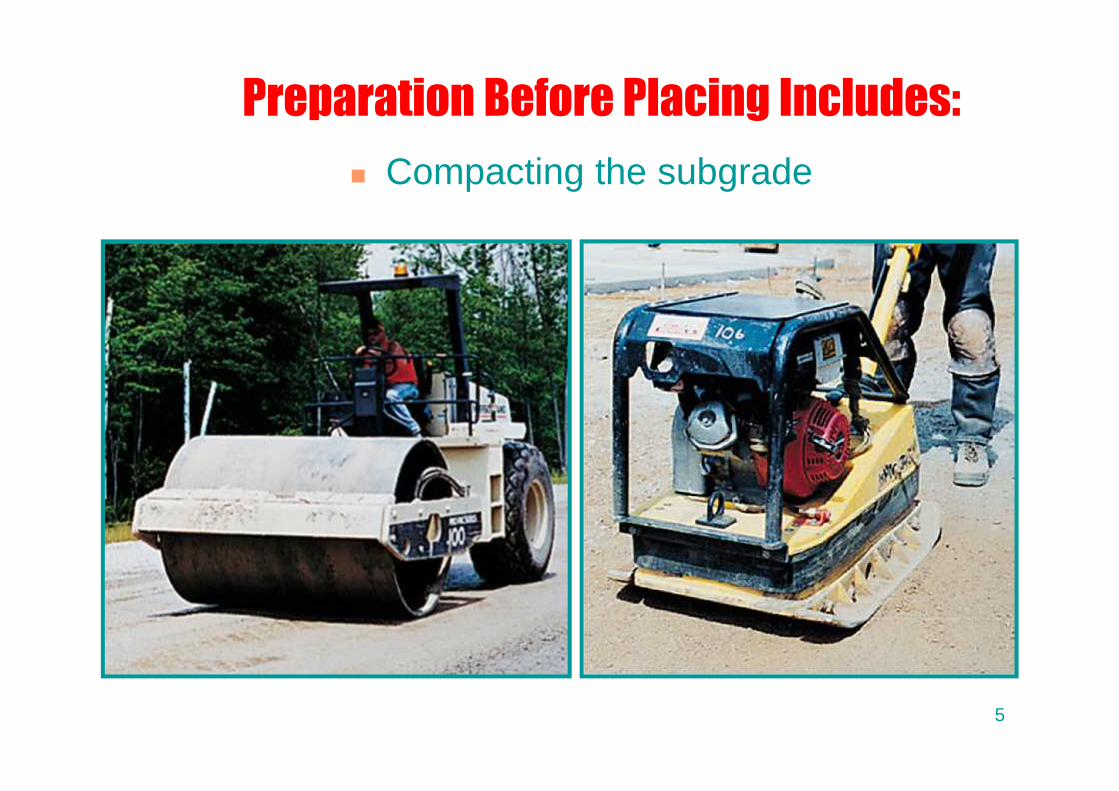
Preparation Before Placing Includes: Compacting the subgrade
5
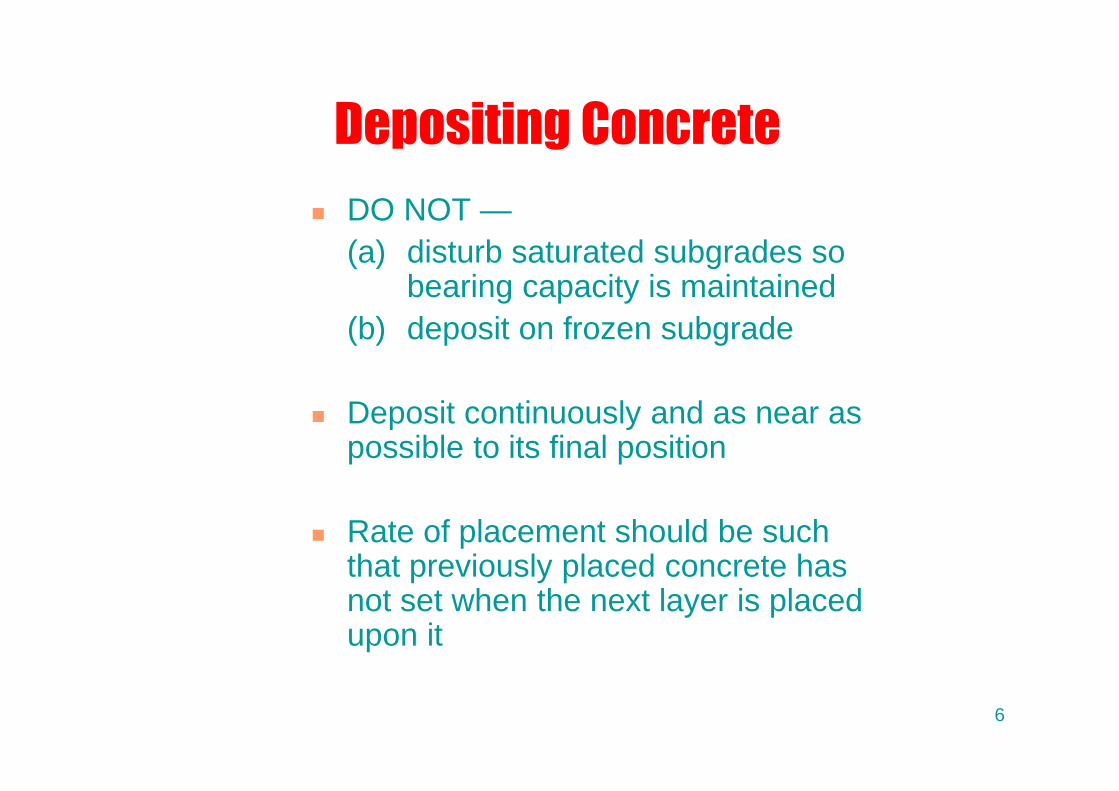
Depositing Concrete DO NOT —
(a) disturb saturated subgrades sobearing capacity is maintained
(b) deposit on frozen subgrade
Deposit continuously and as near aspossible to its final position
Rate of placement should be suchthat previously placed concrete hasnot set when the next layer is placedupon it
6
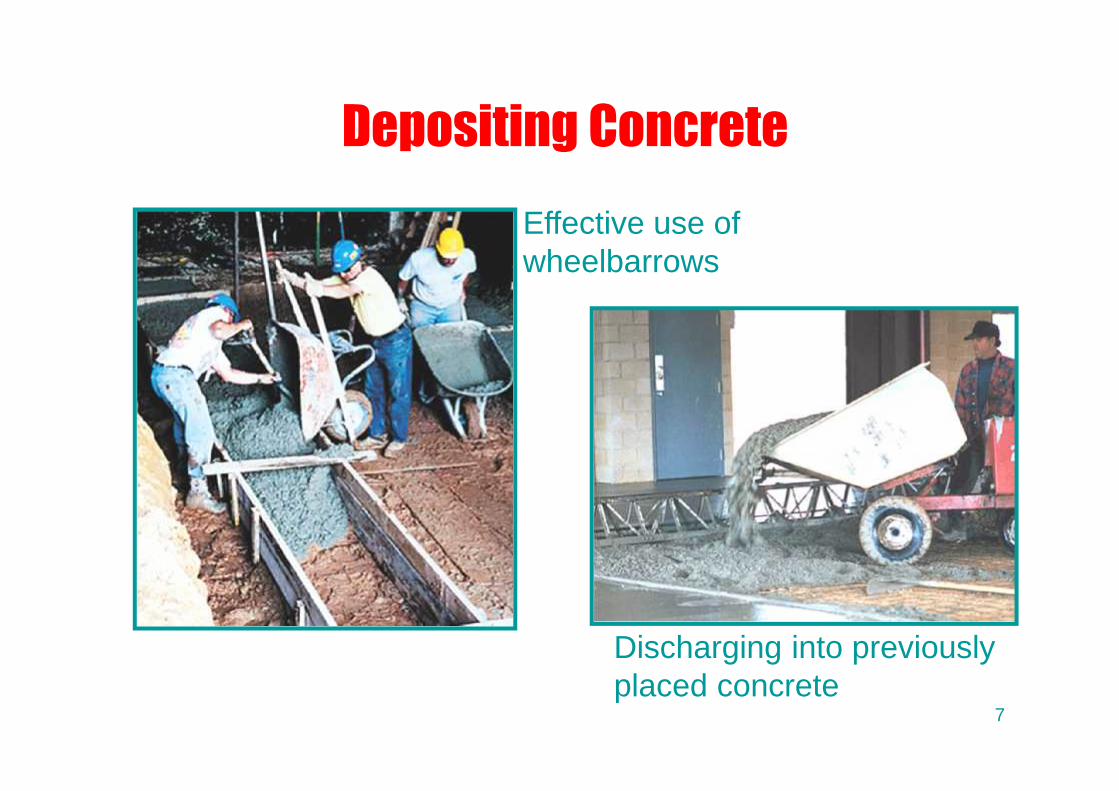
Depositing Concrete
Discharging into previouslyplaced concrete
Effective use ofwheelbarrows
7

Incorrect Placement with Conveyor Belt
Baffle
Mortar Rock Mortar
MortarRock
Shallowhopper
8

Placement with Conveyor Belt
Belt Scraper
NoSeparation
Provide at least 0.6 m(24 in.) headroom fordownpipe, elephanttrunk or equivalent
9
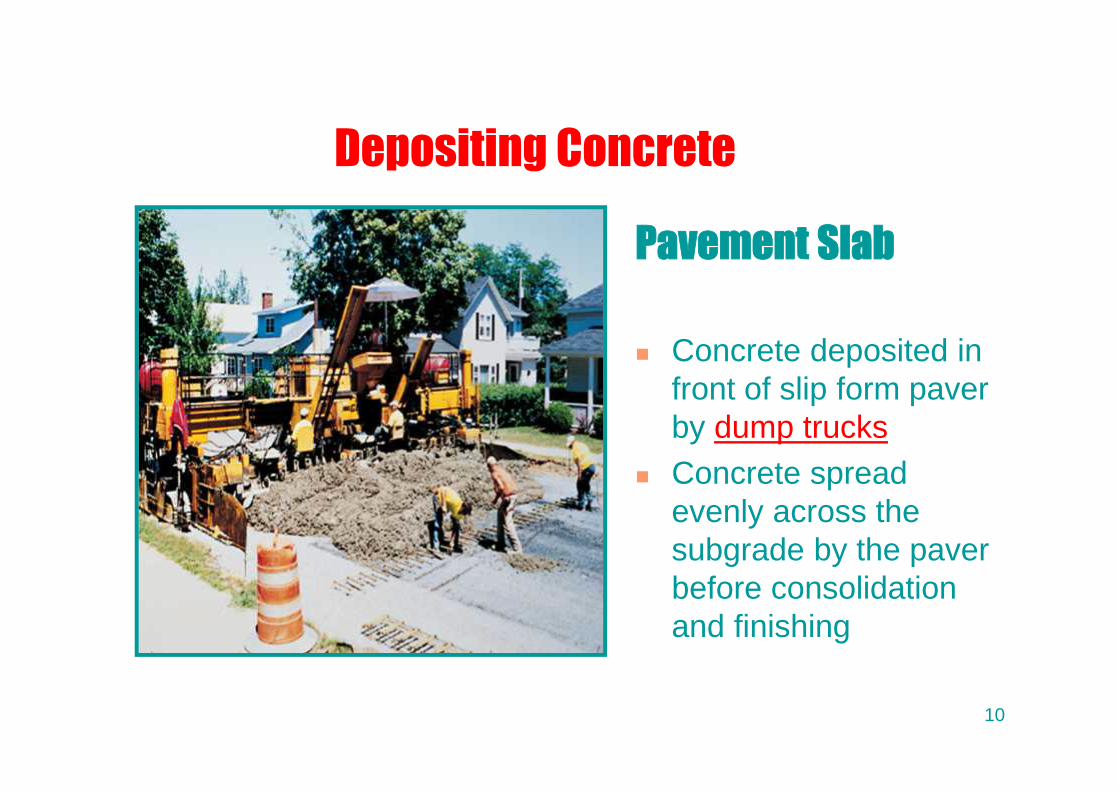
Depositing Concrete
Pavement Slab
Concrete deposited infront of slip form paverby dump trucks
Concrete spreadevenly across thesubgrade by the paverbefore consolidationand finishing
10
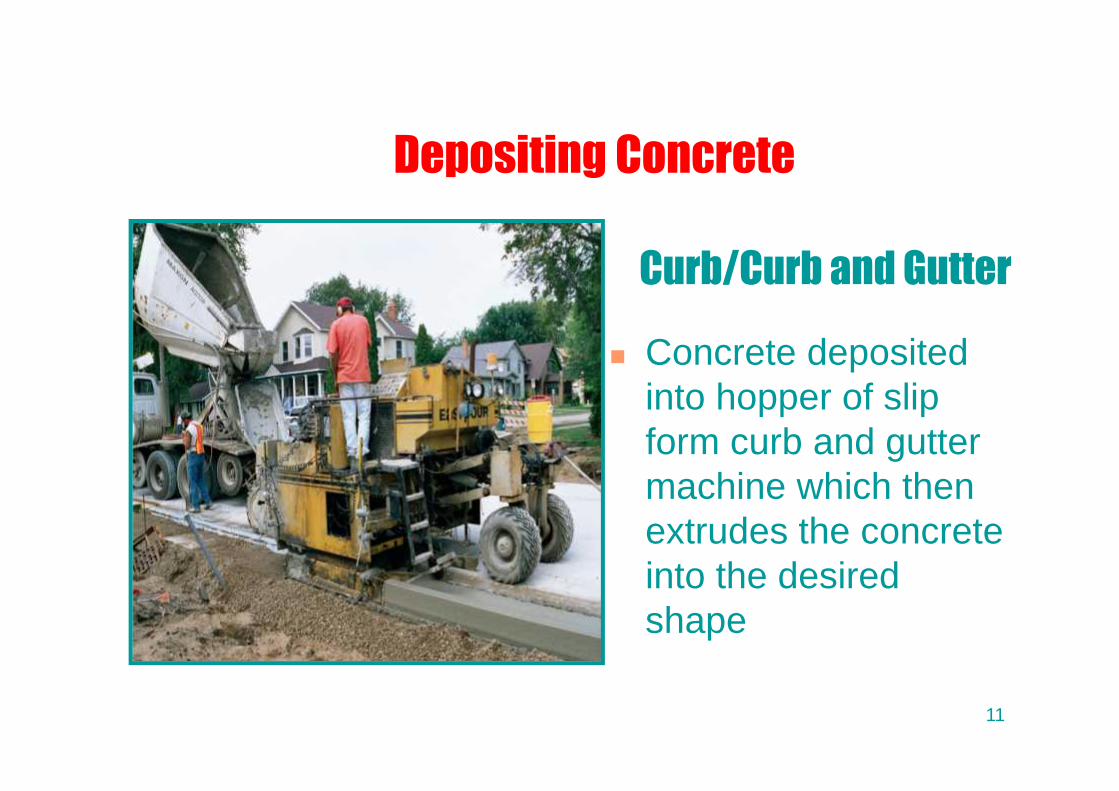
Curb/Curb and Gutter
Depositing Concrete
Concrete depositedinto hopper of slipform curb and guttermachine which thenextrudes the concreteinto the desiredshape
11

Depositing Concrete
Deposit in horizontal layers ofuniform thickness Reinforced — 150 mm to 500 mm Mass — 375 mm to 500 mm
Consolidate each layer beforenext is placed
Timely placement & consolidationprevents flow lines and cold joints
Walls
12
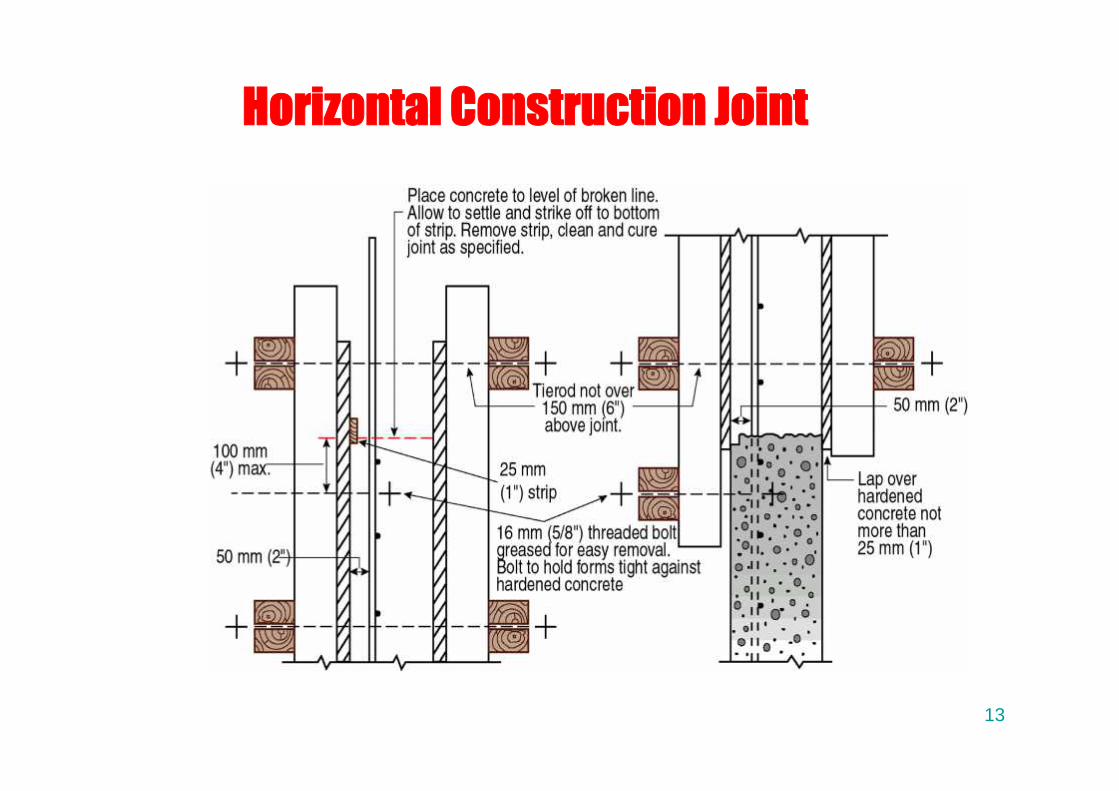
Horizontal Construction Joint
13

Horizontal Construction Joints
14
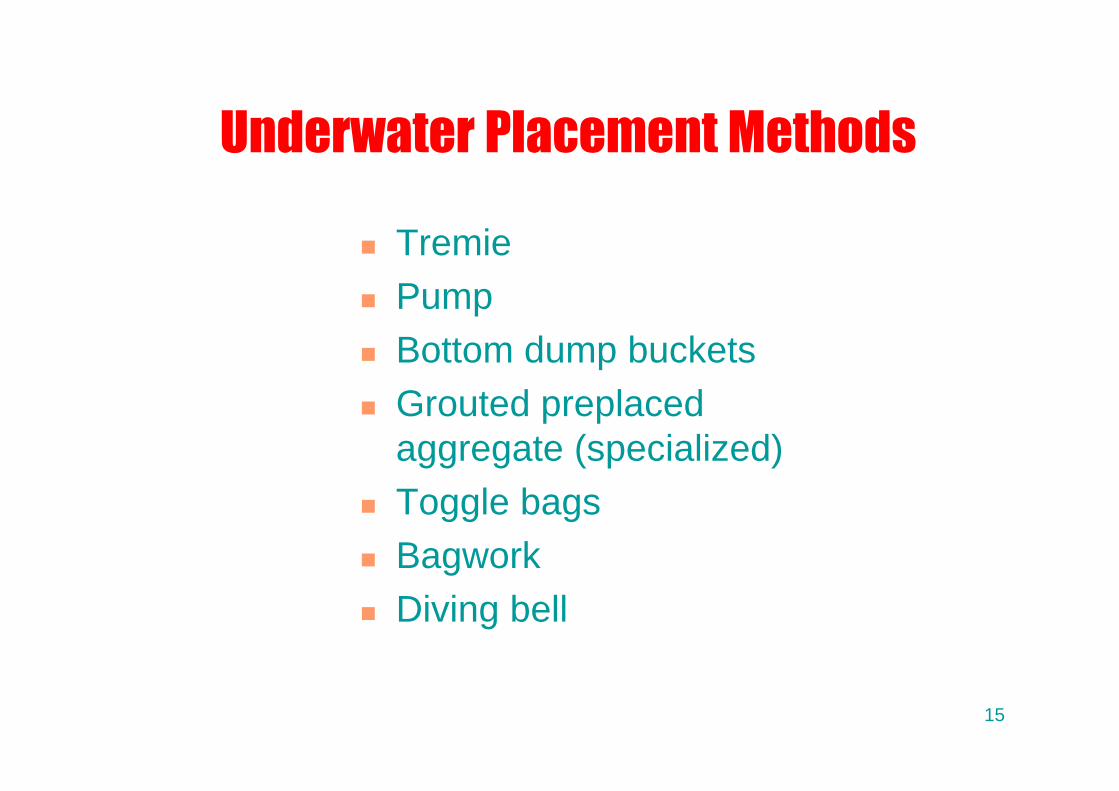
Underwater Placement Methods
Tremie Pump Bottom dump buckets Grouted preplaced
aggregate (specialized) Toggle bags Bagwork Diving bell
15

Placing Concrete Under Water
Water velocity 3 m (10 ft) / min. Water temperature 5°C
(if below — test for strength gain) w/c 0.45 Cementing materials content
390 kg/m3 (600 lb/yd3) Slump range 150 to 225 mm (6 to
10 in.)
Basic Recommendations
16

Placing ConcreteUnderwater
Used: Tremie
Advantages: Can be used tofunnel concrete down throughthe water into the structure.
Watch for: Discharge endalways has to be buried in freshconcrete to ensure sealbetween water and concretemass.
17
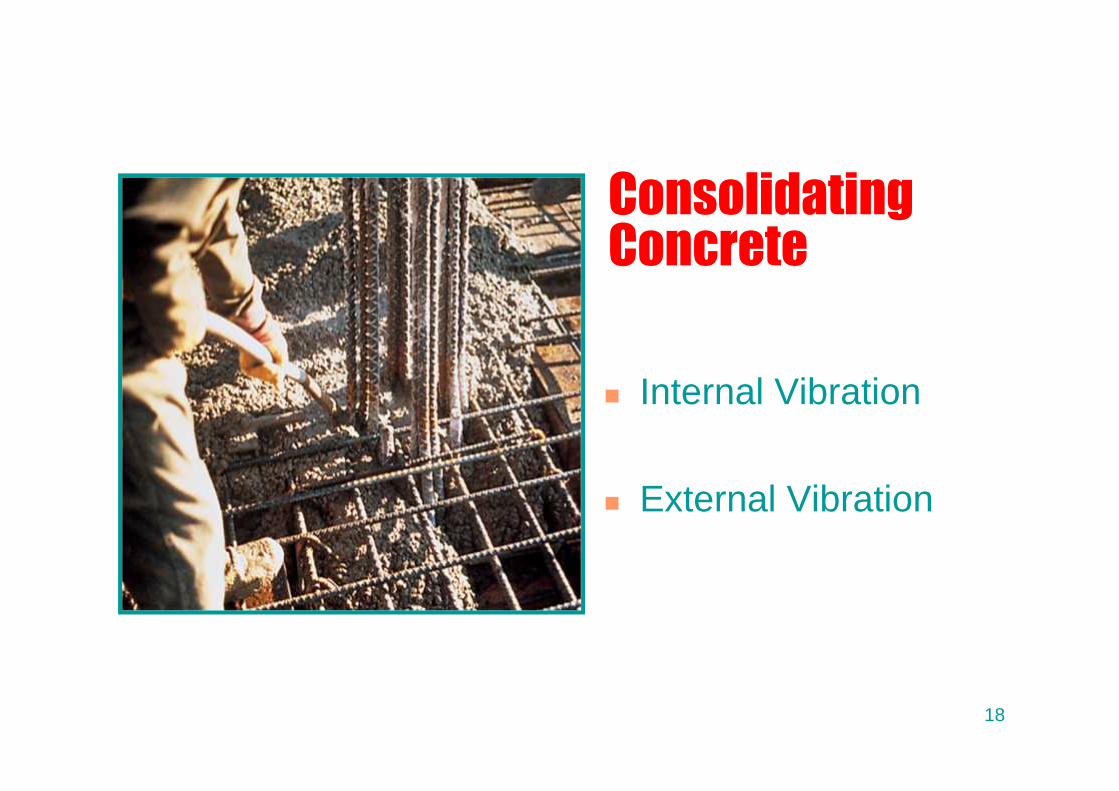
ConsolidatingConcrete
Internal Vibration
External Vibration
18
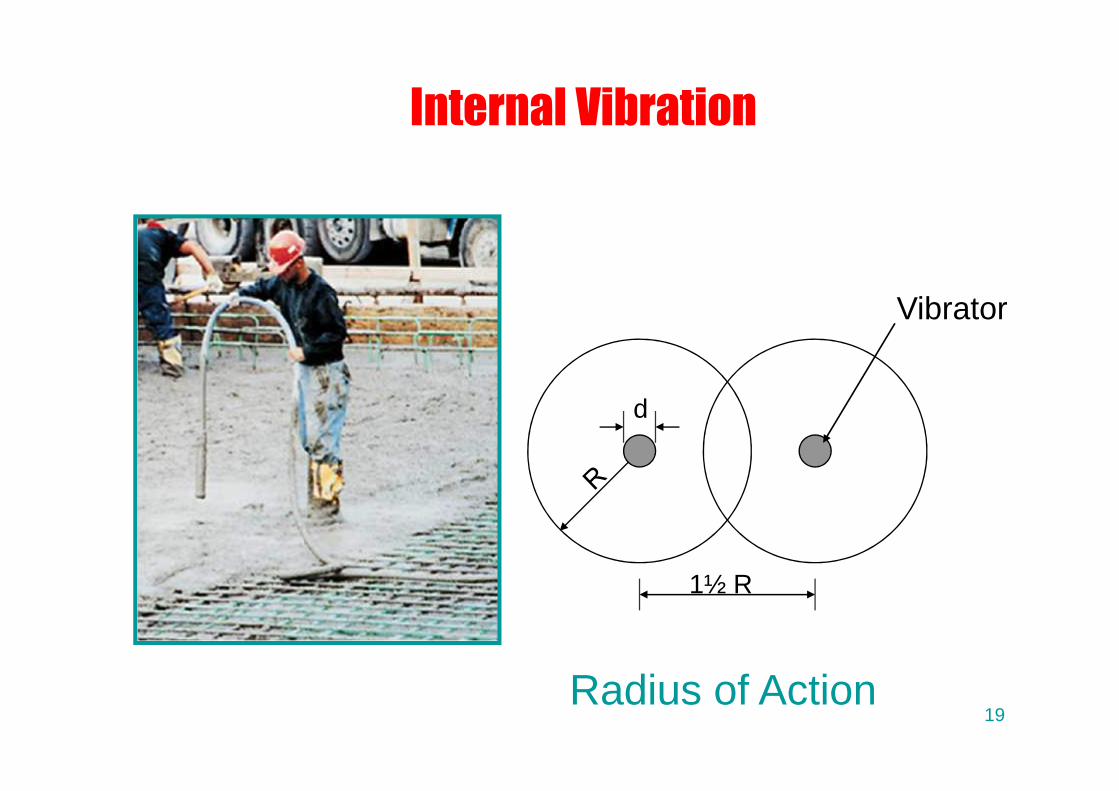
Internal Vibration
d
1½ R
Vibrator
Radius of Action19
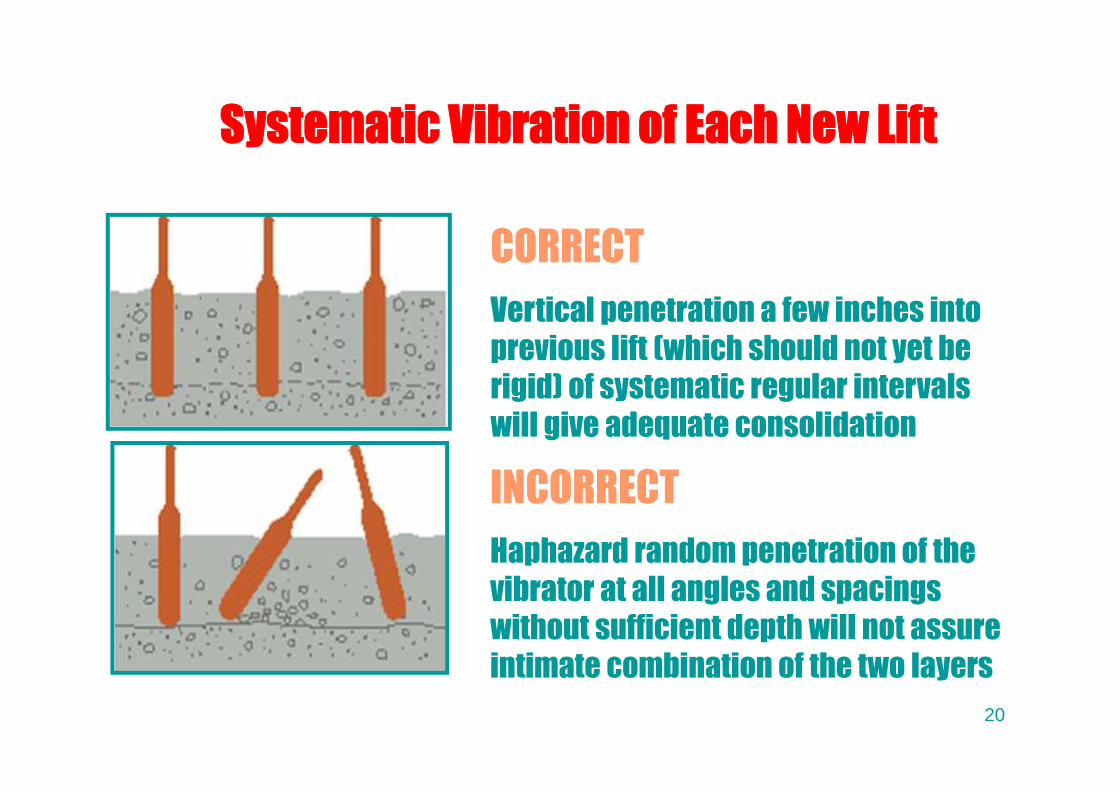
Systematic Vibration of Each New Lift
CORRECTVertical penetration a few inches intoprevious lift (which should not yet berigid) of systematic regular intervalswill give adequate consolidation
INCORRECTHaphazard random penetration of thevibrator at all angles and spacingswithout sufficient depth will not assureintimate combination of the two layers
20
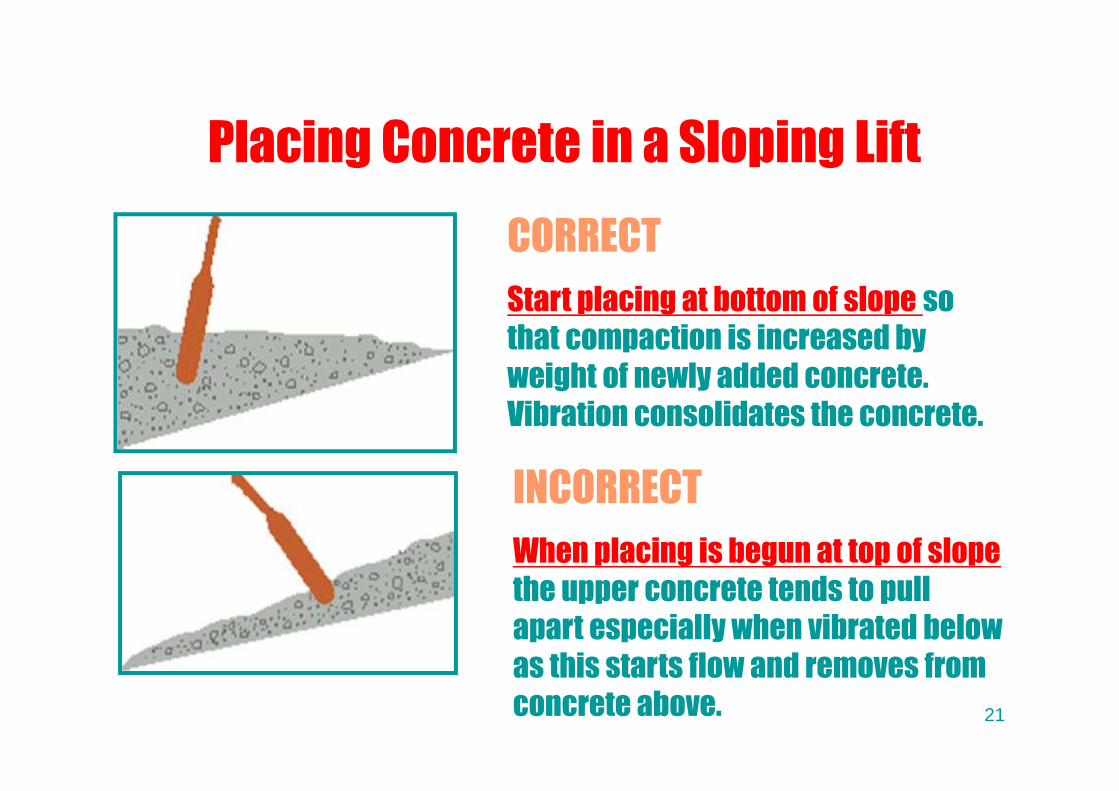
Placing Concrete in a Sloping LiftCORRECTStart placing at bottom of slope sothat compaction is increased byweight of newly added concrete.Vibration consolidates the concrete.
INCORRECTWhen placing is begun at top of slopethe upper concrete tends to pullapart especially when vibrated belowas this starts flow and removes fromconcrete above. 21
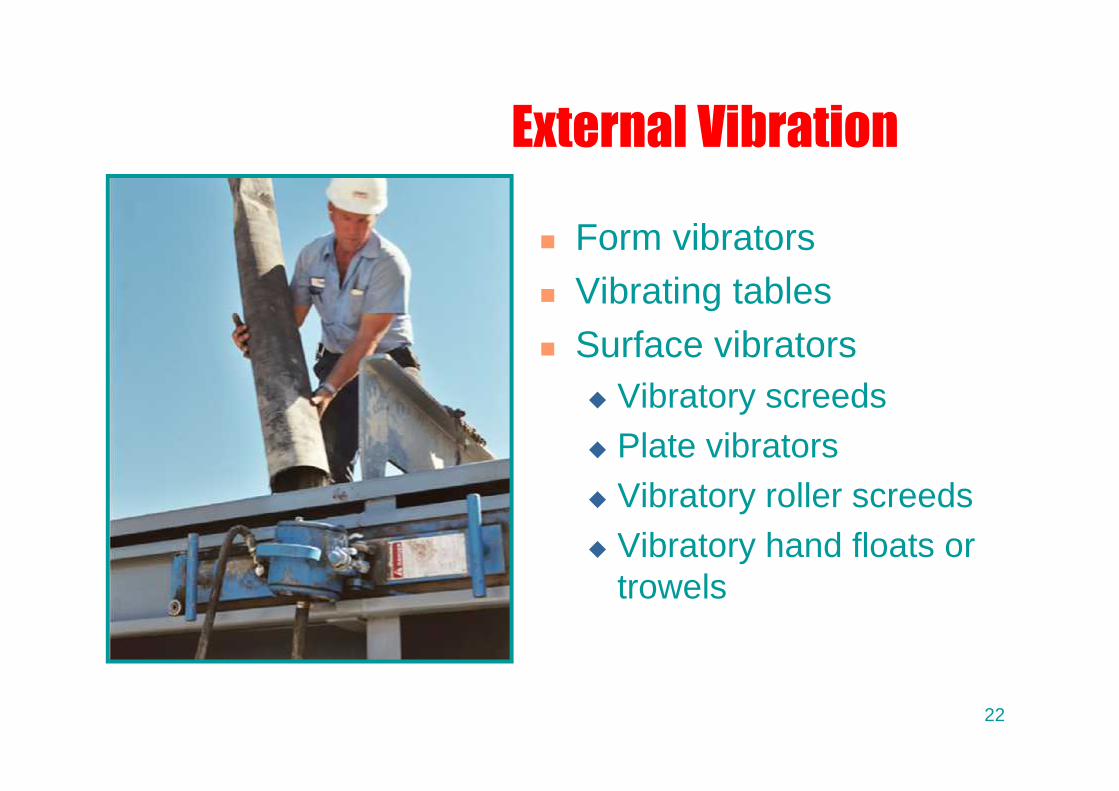
External Vibration
Form vibrators Vibrating tables Surface vibrators
Vibratory screeds Plate vibrators Vibratory roller screeds Vibratory hand floats or
trowels
22
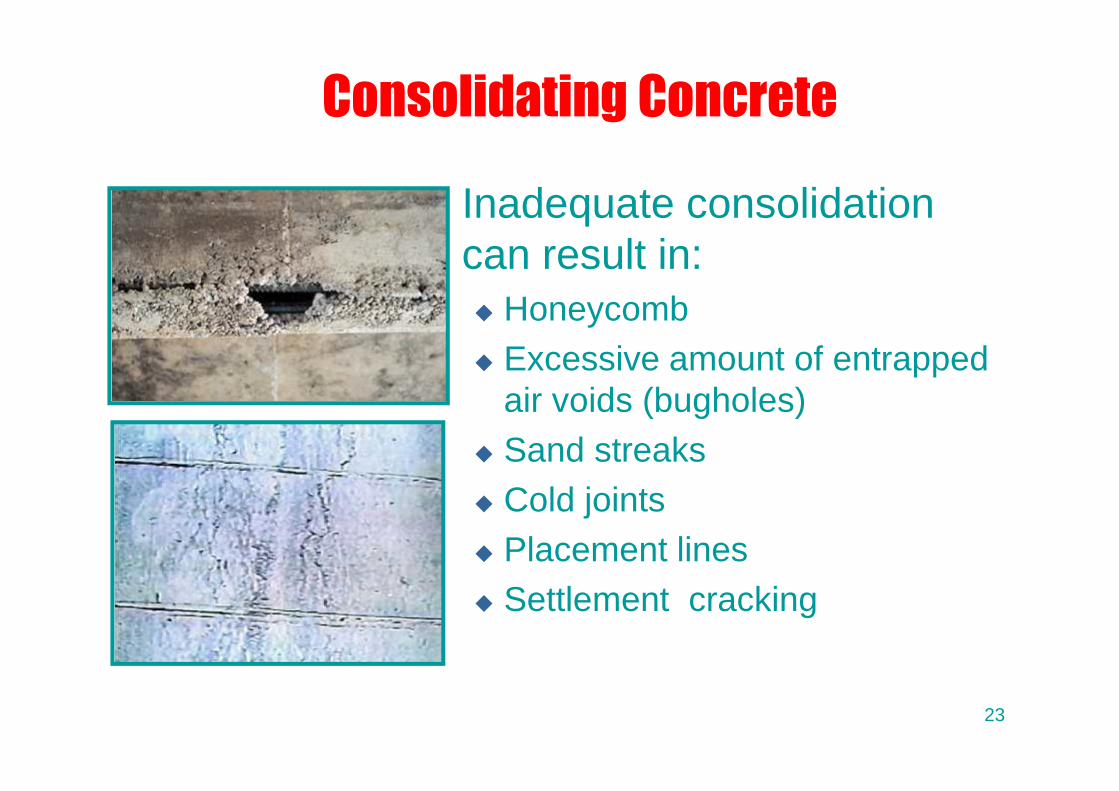
Consolidating Concrete
Inadequate consolidationcan result in: Honeycomb Excessive amount of entrapped
air voids (bugholes) Sand streaks Cold joints Placement lines Settlement cracking
23
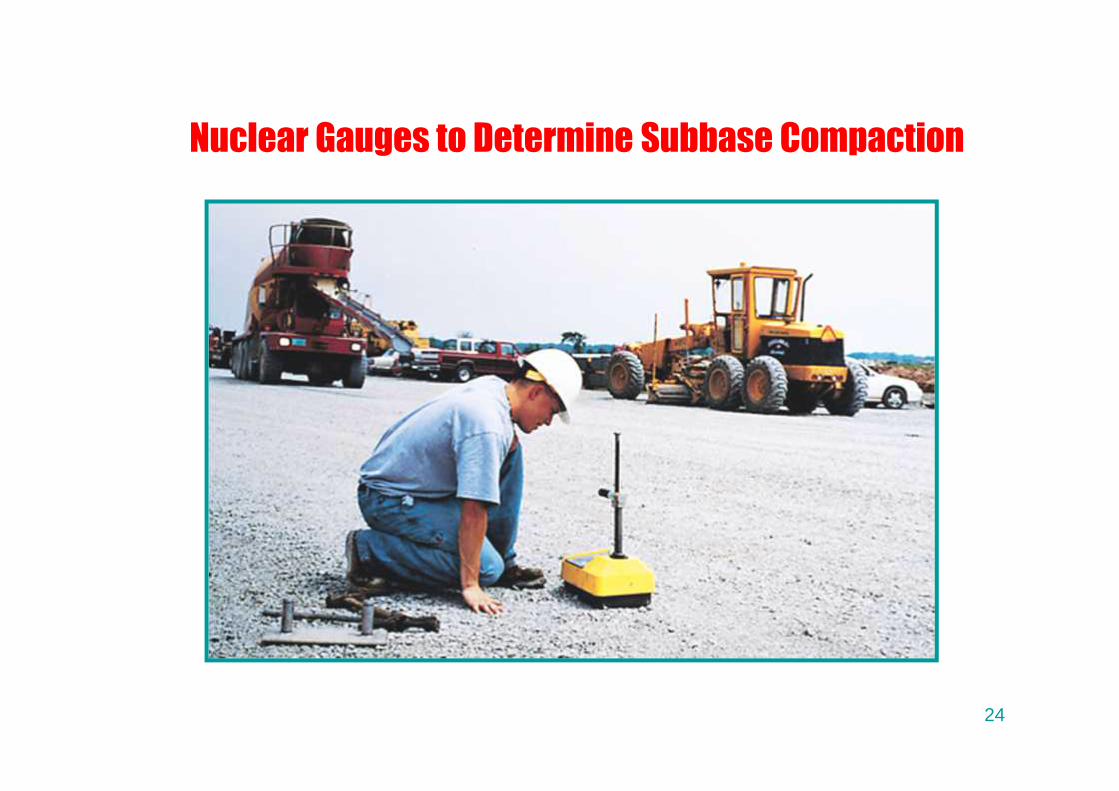
Nuclear Gauges to Determine Subbase Compaction
24

Screeding (Strikeoff)The process of cutting off excessconcrete to bring the top surface of aslab to proper grade
25
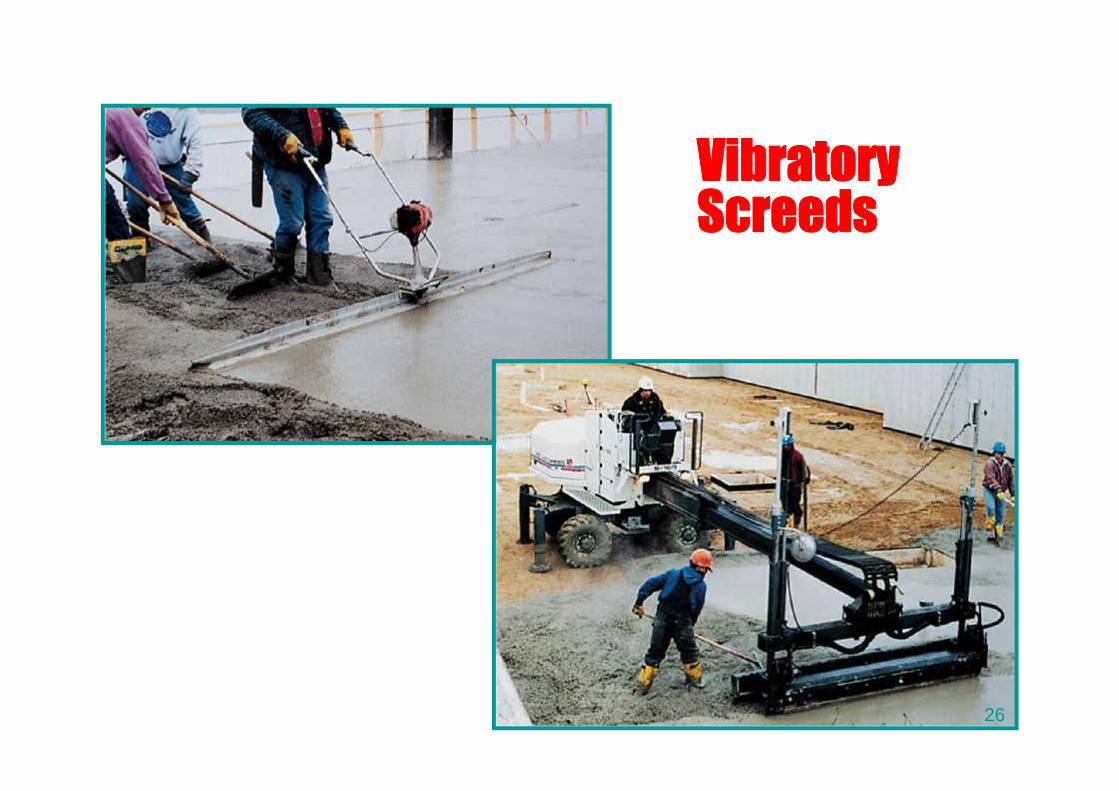
VibratoryScreeds
26
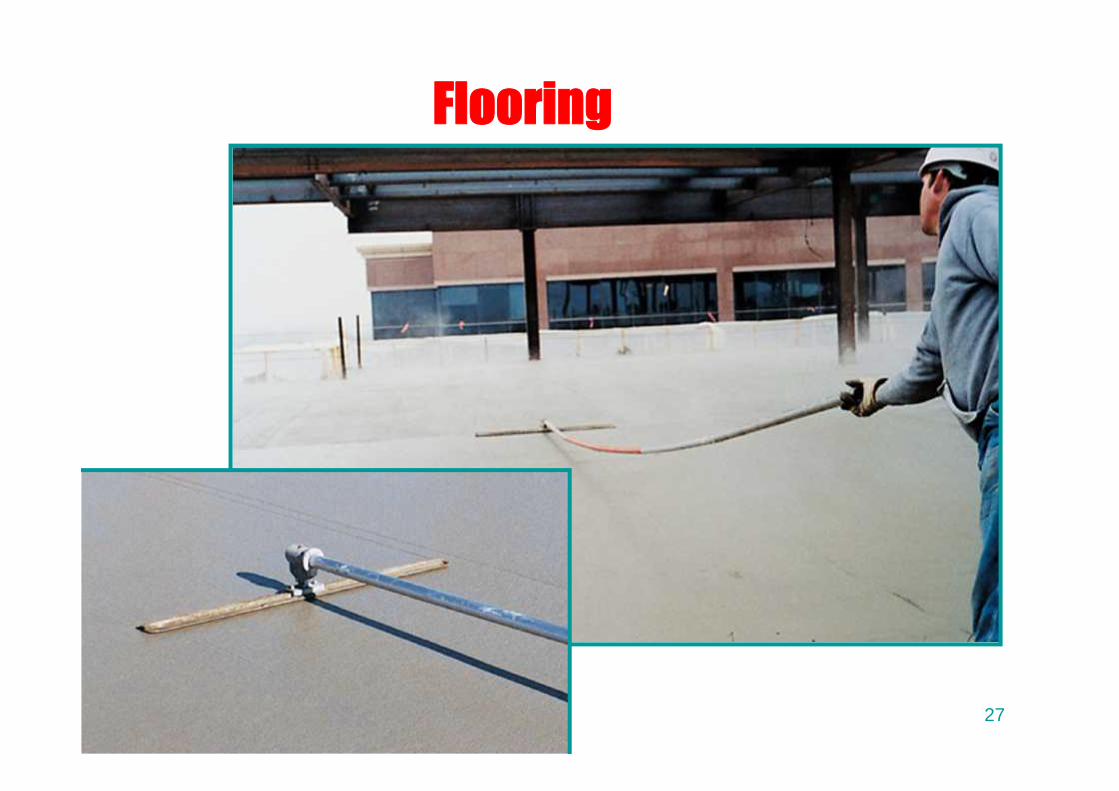
Flooring
27
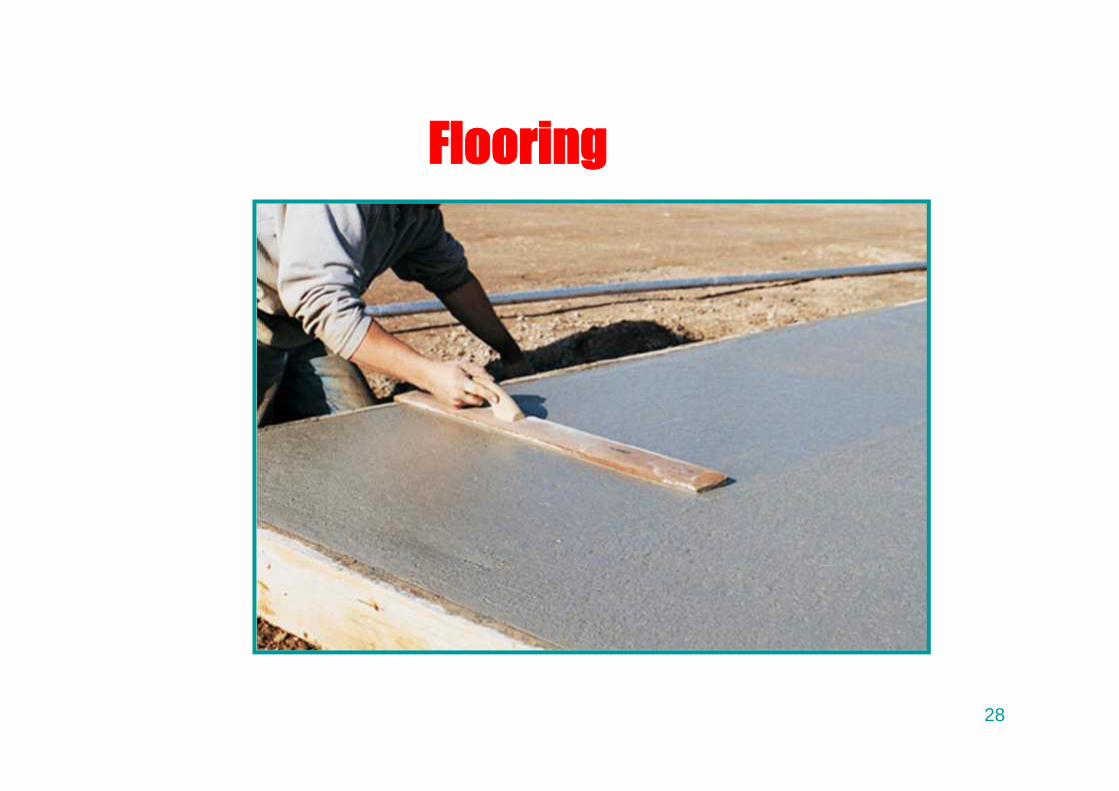
Flooring
28

Edging
Required along all edge forms,isolation and construction jointsin floors and exterior slabs
Cut concrete away from formsto a depth of 25 mm with apointed mason or margin trowel
Edging may be required aftereach subsequent finishingoperation for interior slabs
Edging densifies and compacts concretenext to forms where floating is less effective
29
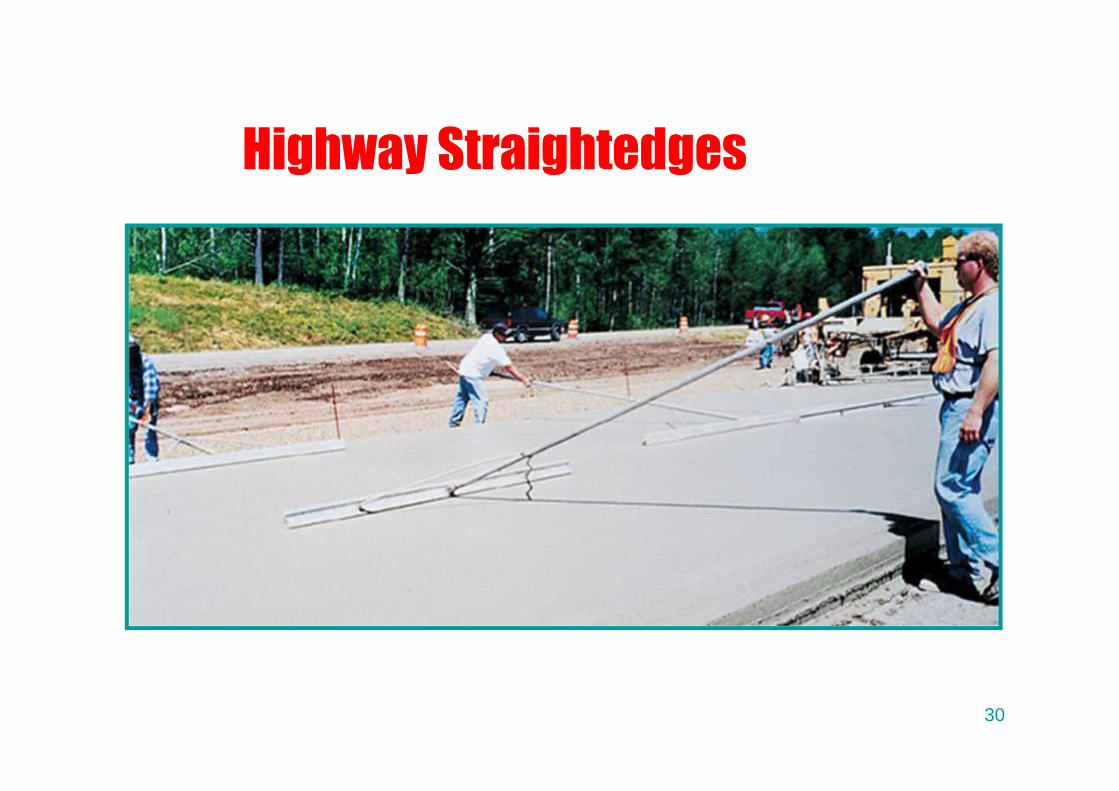
Highway Straightedges
30
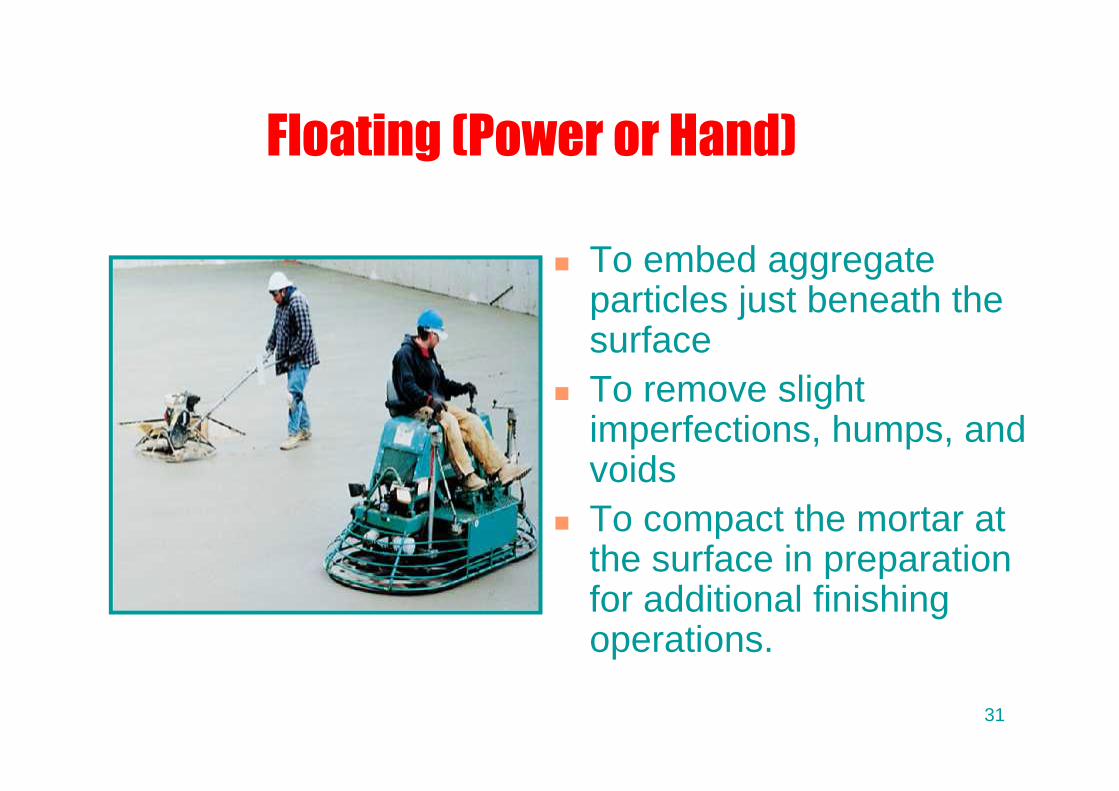
Floating (Power or Hand)
To embed aggregateparticles just beneath thesurface
To remove slightimperfections, humps, andvoids
To compact the mortar atthe surface in preparationfor additional finishingoperations.
31
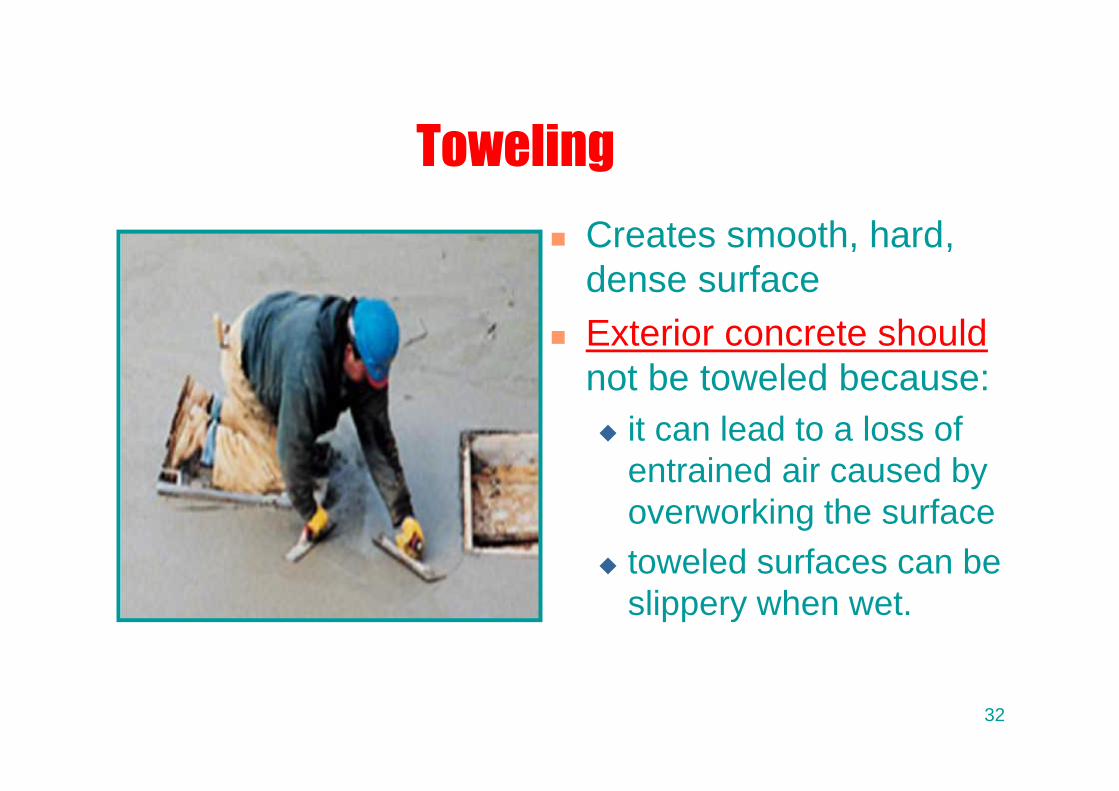
Toweling Creates smooth, hard,
dense surface Exterior concrete should
not be toweled because: it can lead to a loss of
entrained air caused byoverworking the surface
toweled surfaces can beslippery when wet.
32
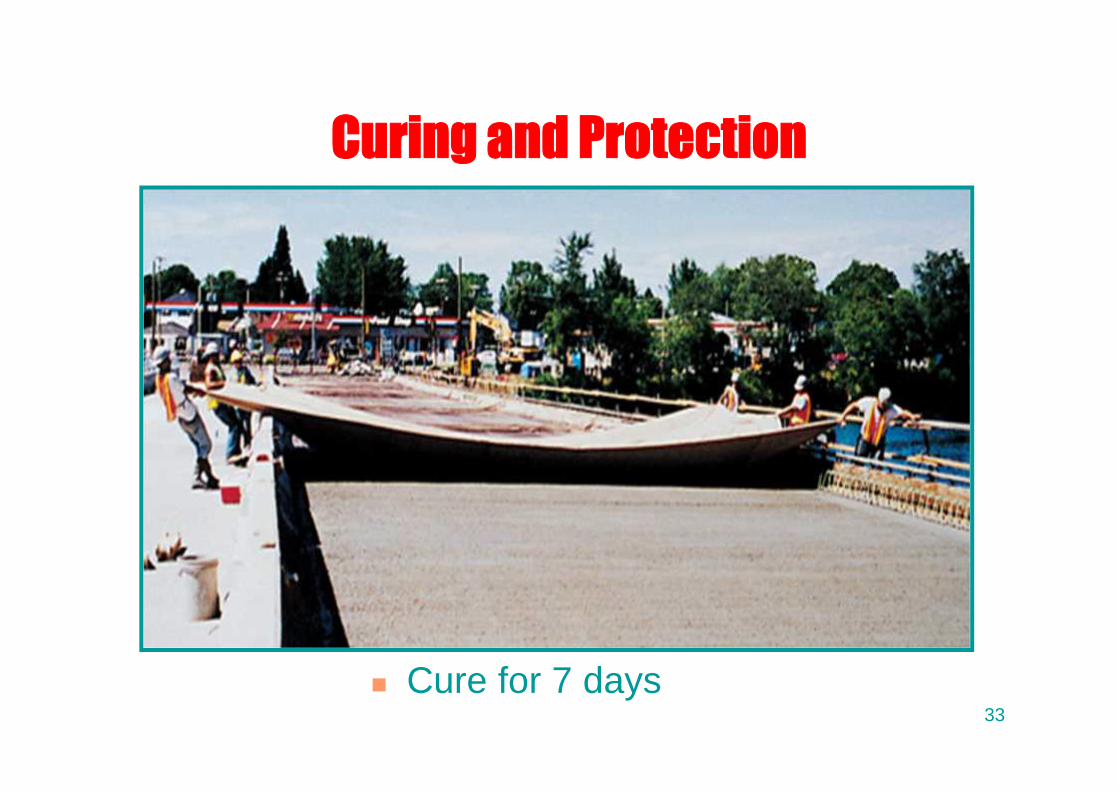
Curing and Protection
Cure for 7 days33
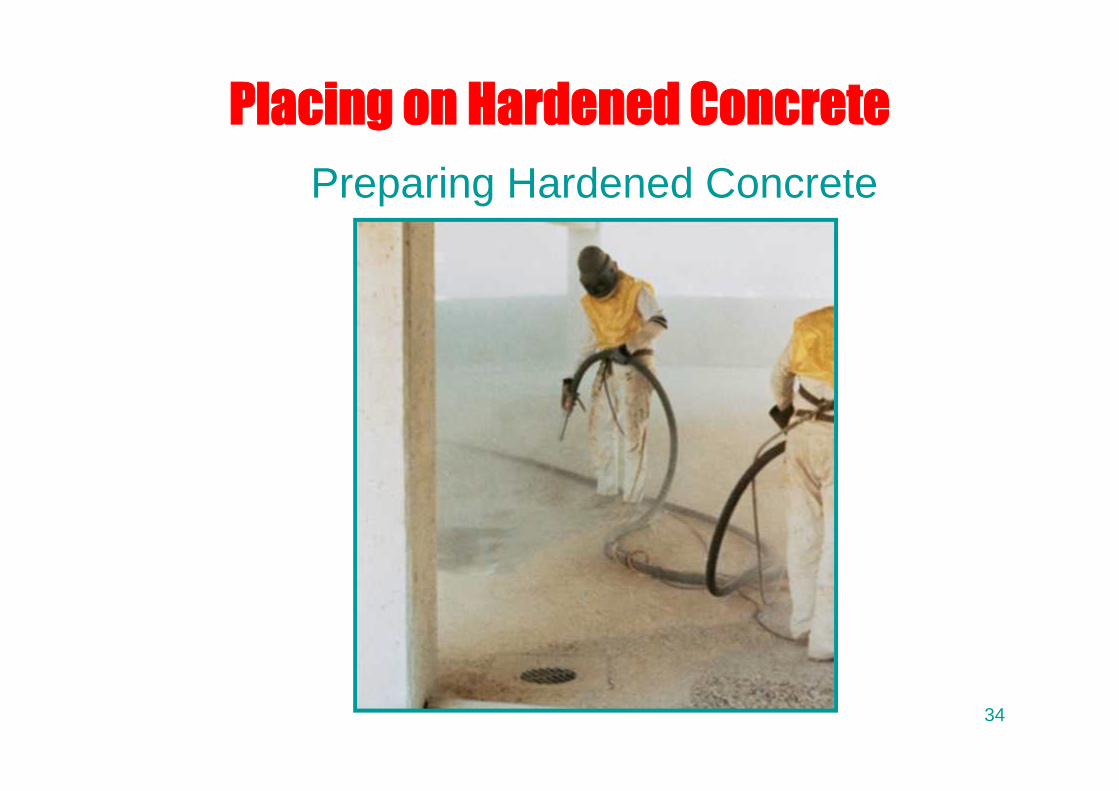
Placing on Hardened ConcretePreparing Hardened Concrete
34
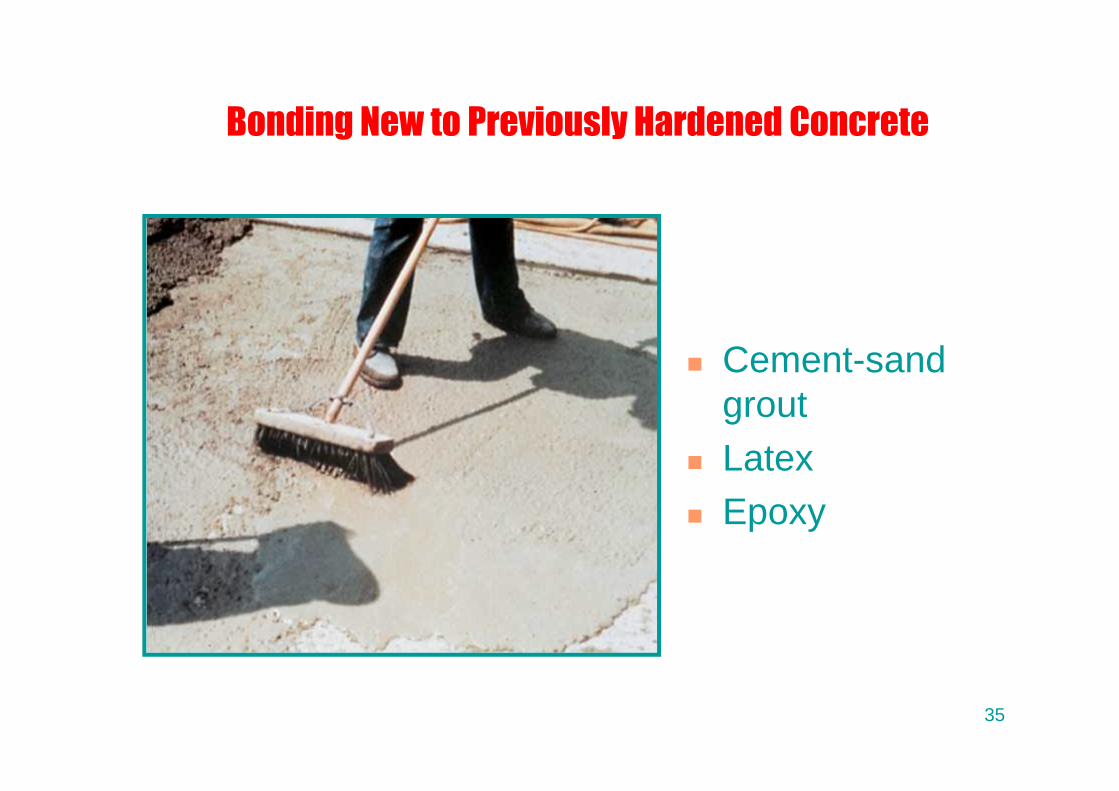
Bonding New to Previously Hardened Concrete
Cement-sandgrout
Latex Epoxy
35
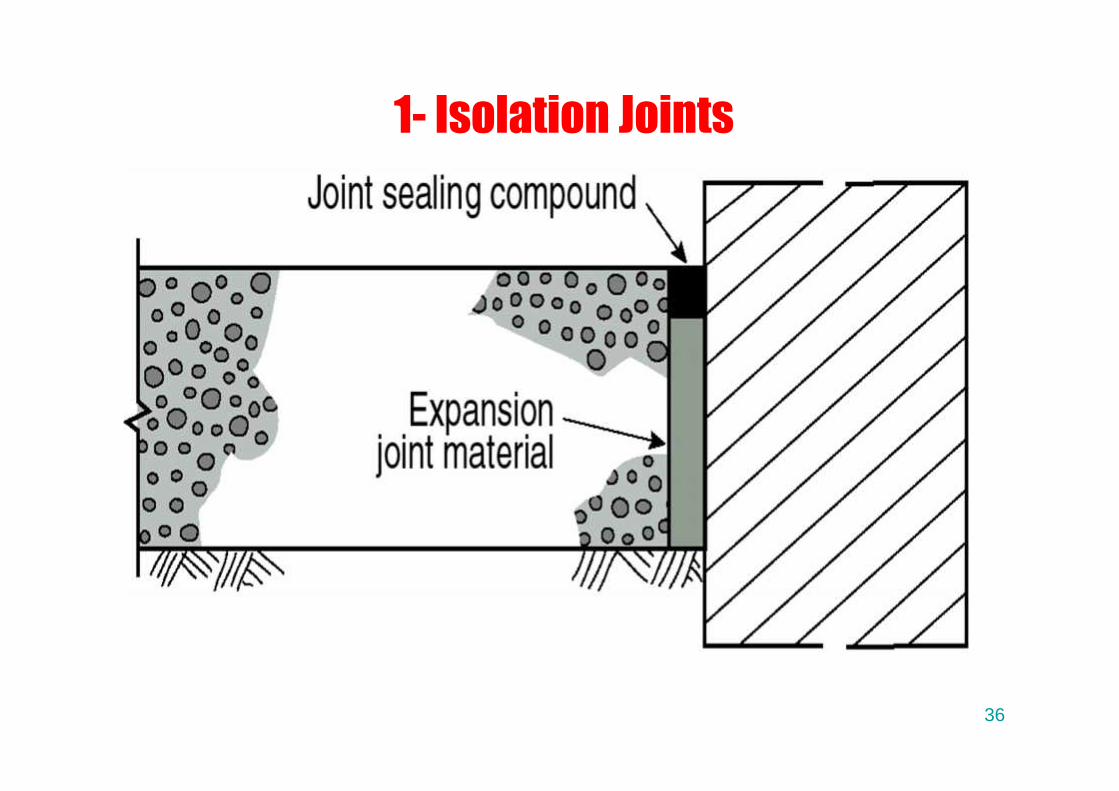
1- Isolation Joints
36
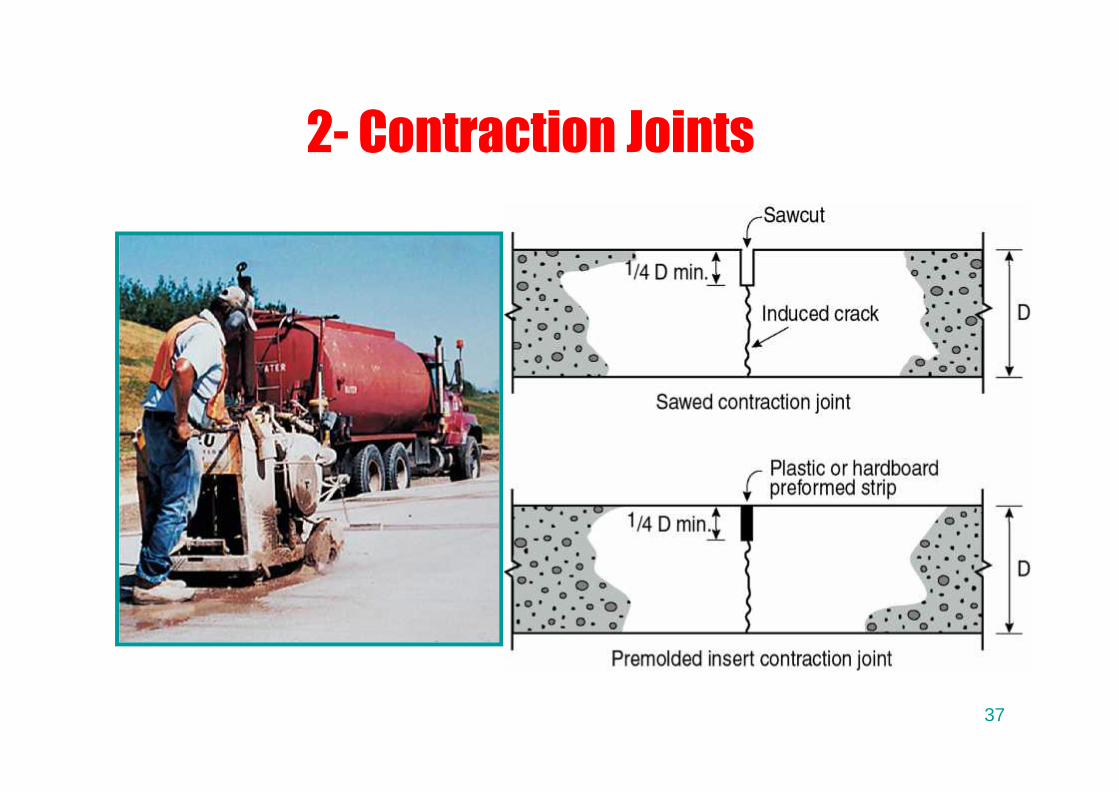
2- Contraction Joints
37

Spacing of Contraction Joints in MetersSlab
thickness,mm
Maximum-sizeaggregate
less than 19 mm
Maximum-sizeaggregate
19 mm and larger100 2.4 3.0125 3.0 3.75150 3.75 4.5175 4.25 5.25200 5.0 6.0225 5.5 6.75250 6.0 7.5
Metric38
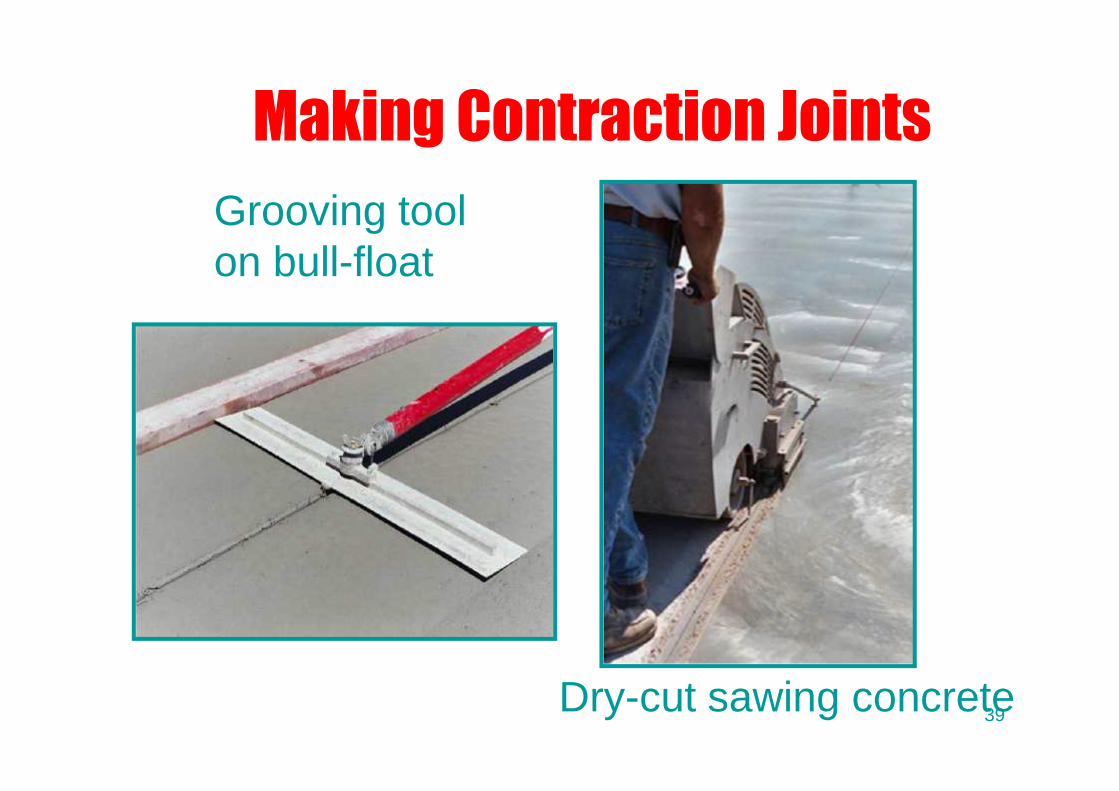
Making Contraction Joints
Dry-cut sawing concrete
Grooving toolon bull-float
39
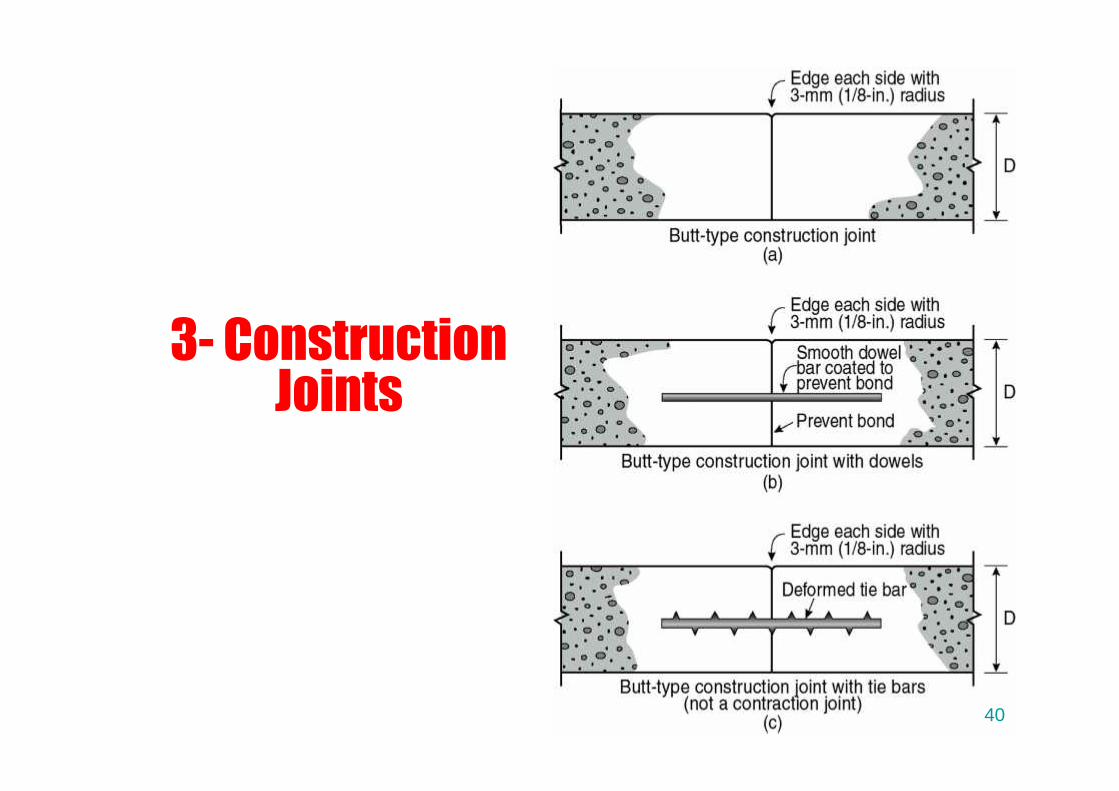
3- ConstructionJoints
40
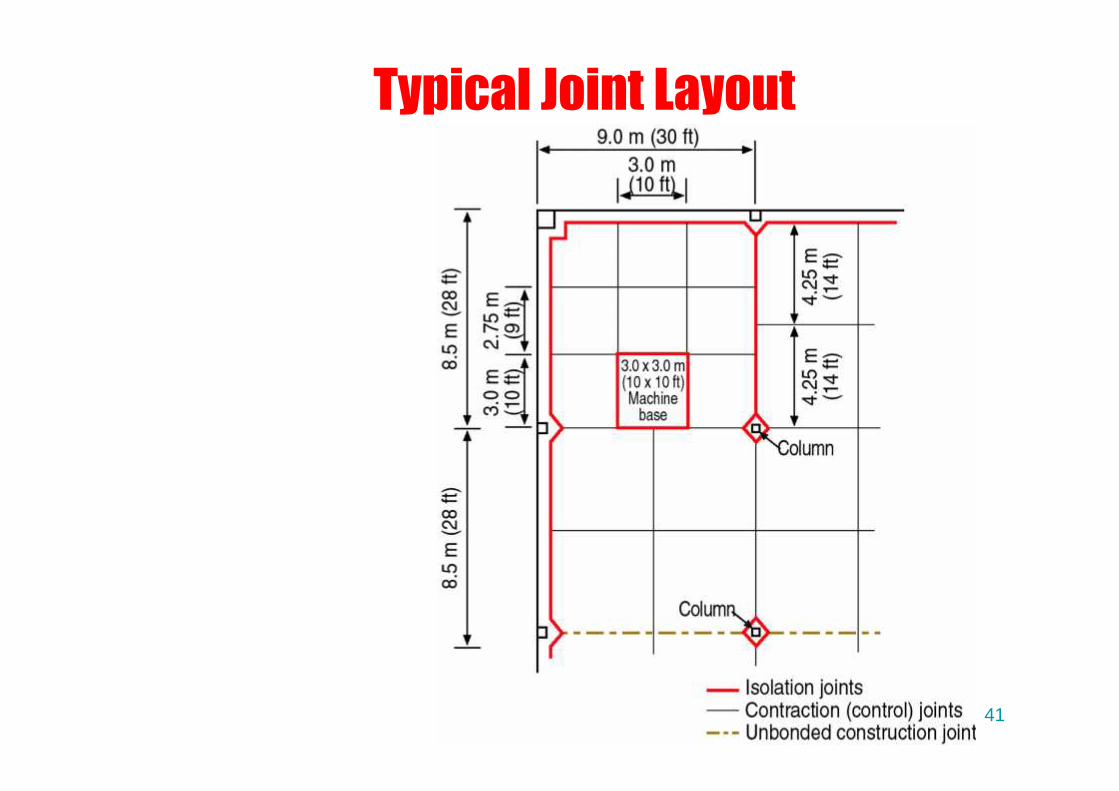
Typical Joint Layout
41
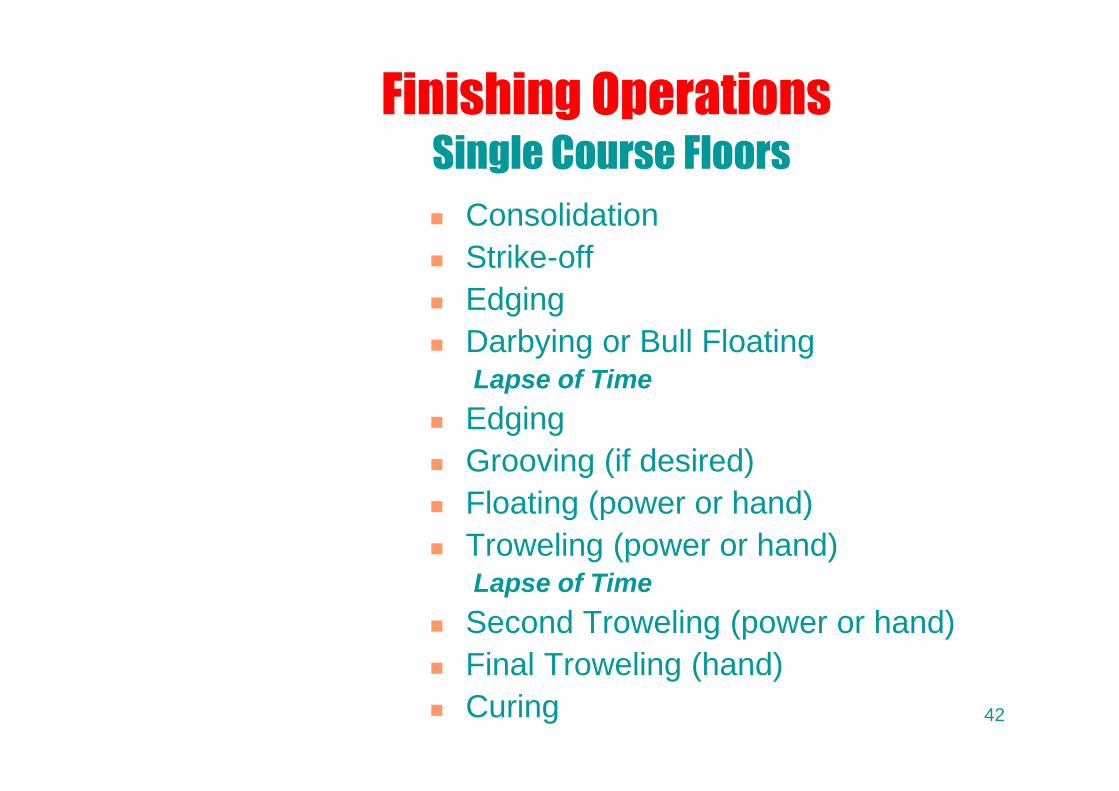
Finishing Operations
Consolidation Strike-off Edging Darbying or Bull Floating
Lapse of Time Edging Grooving (if desired) Floating (power or hand) Troweling (power or hand)
Lapse of Time Second Troweling (power or hand) Final Troweling (hand) Curing
Single Course Floors
42
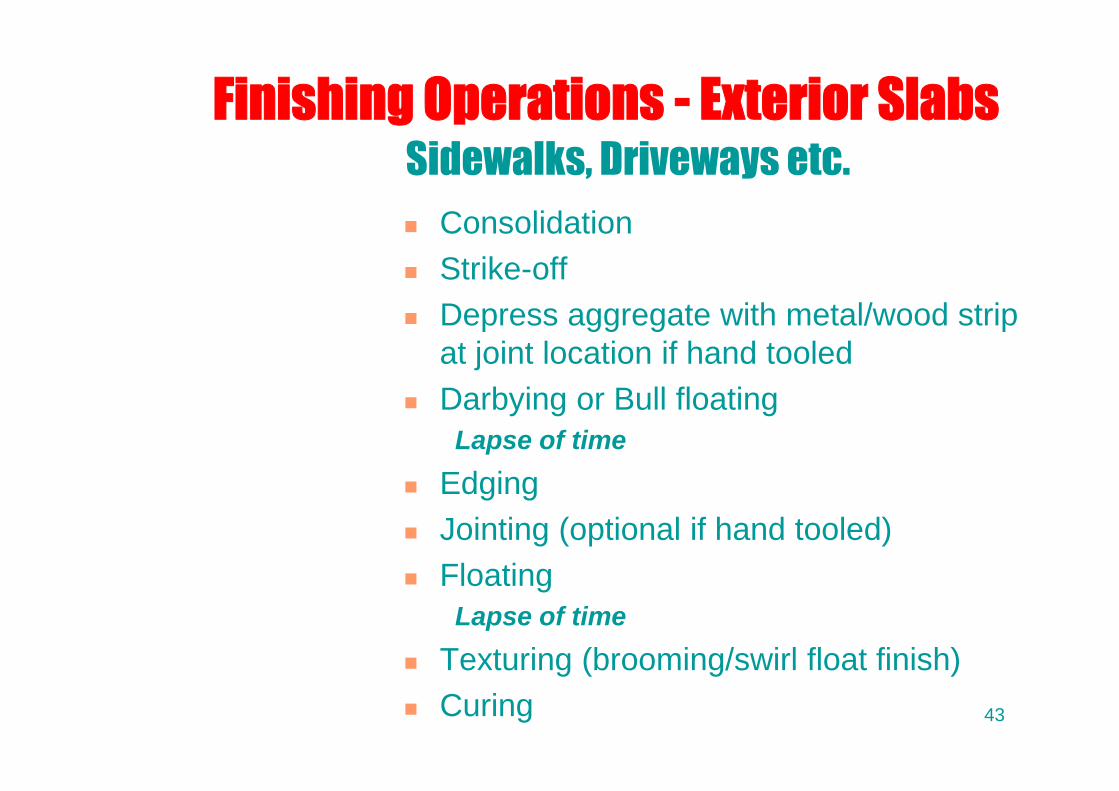
Finishing Operations - Exterior Slabs
Consolidation Strike-off Depress aggregate with metal/wood strip
at joint location if hand tooled Darbying or Bull floating
Lapse of time Edging Jointing (optional if hand tooled) Floating
Lapse of time Texturing (brooming/swirl float finish) Curing
Sidewalks, Driveways etc.
43
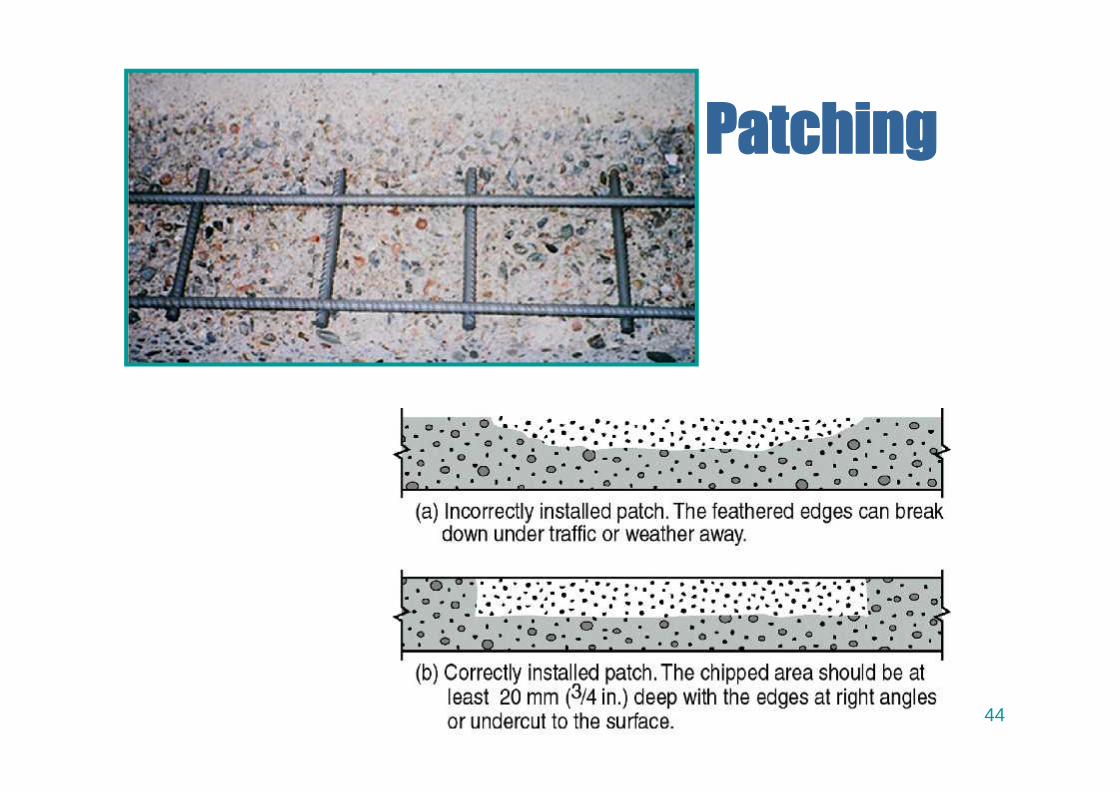
Patching
44
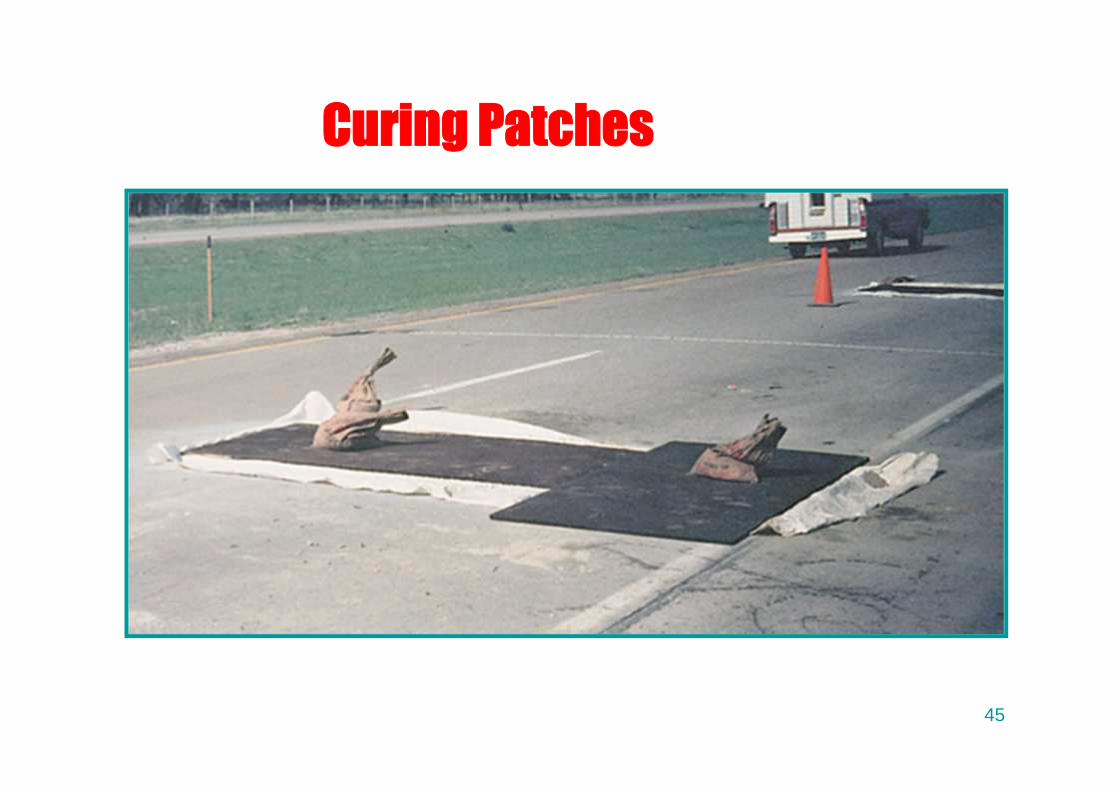
Curing Patches
45

Cleaning Concrete Surfaces
Cleaning methods:
Water
Chemical
Mechanical
46
Special Surface Finishes
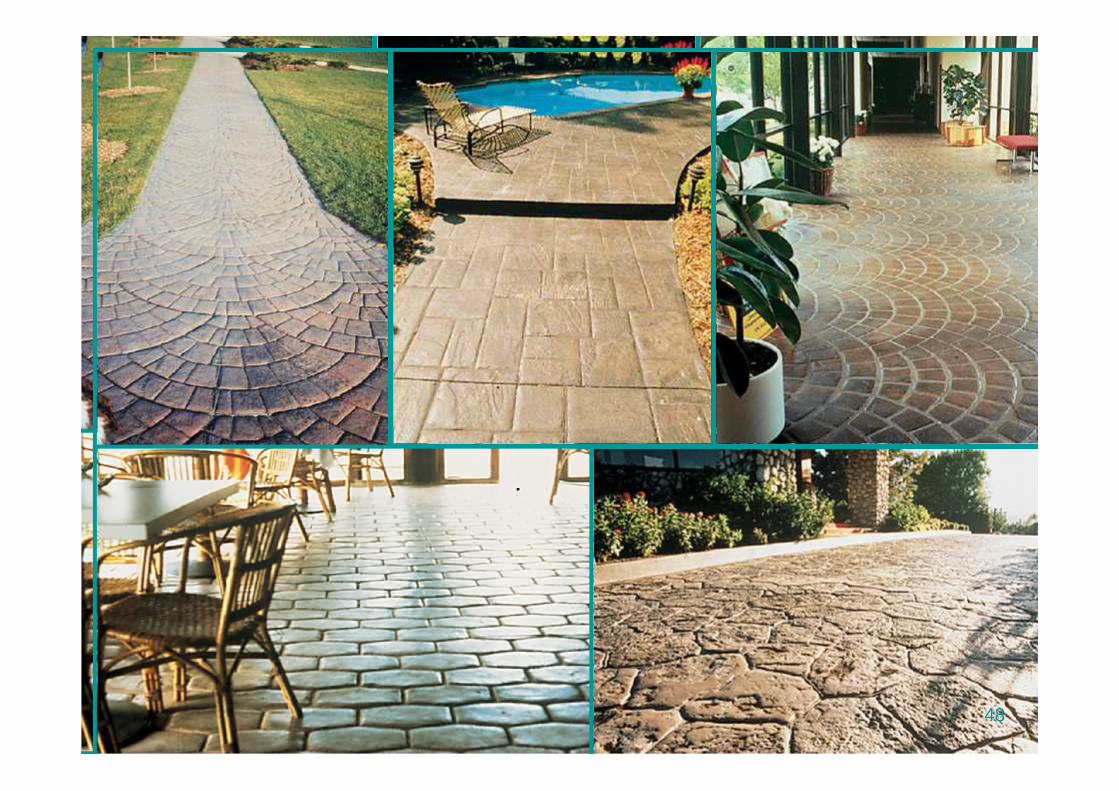
Pattern and Textures
Exposed Aggregate Concrete
Colored Finishes
Stains, Paints and Clear
Coatings
47
Placing andFinishing Concrete
48

Videos 1/4
Placing and Consolidating Vibration
49
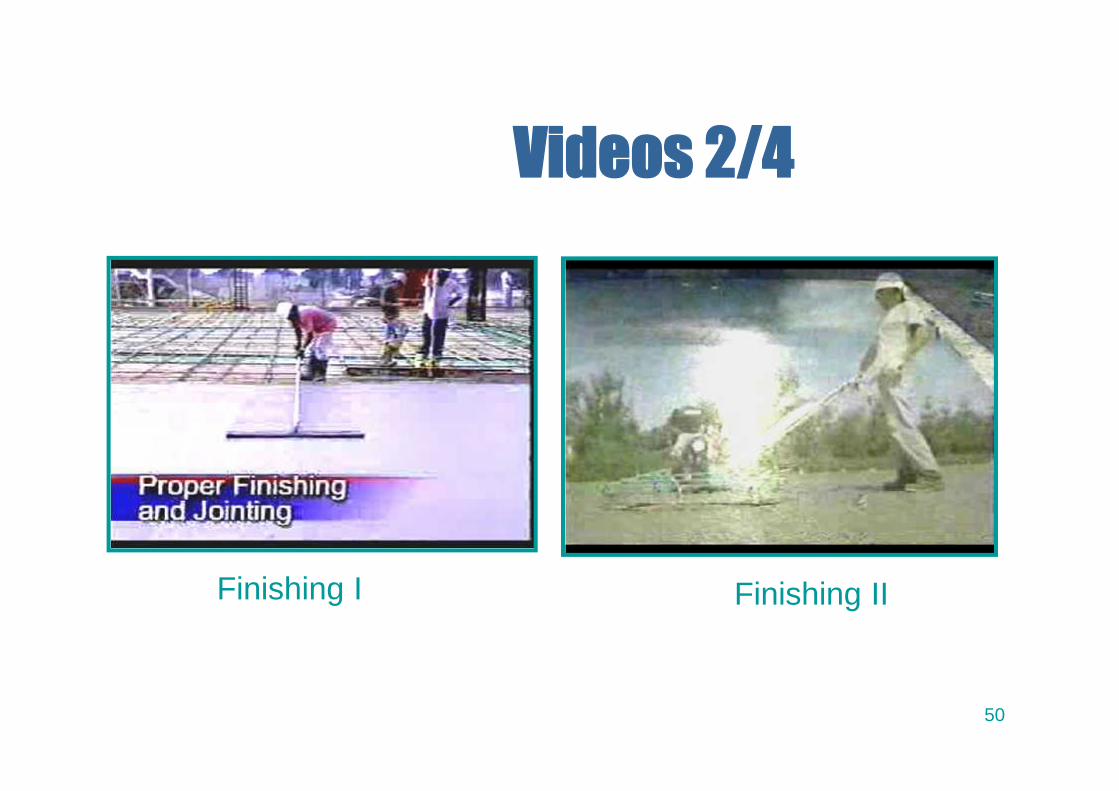
Videos 2/4
Finishing I Finishing II
50

Videos 3/4
Contraction Joints Jointing
51
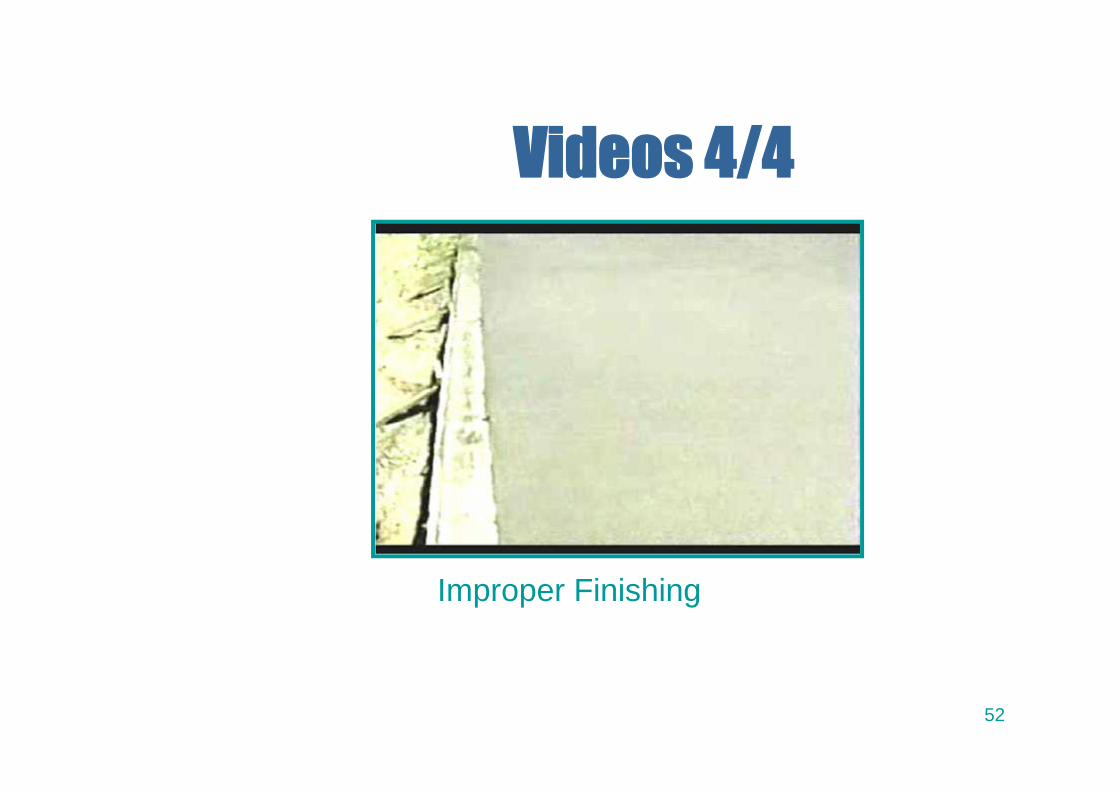
Videos 4/4
Improper Finishing
52