Embed Size (px)
Citation preview
Year 8 Landscape Paintingwith acrylic paints
Fiona Fowler
2012
Step 1. Source 4 Images for Inspiration
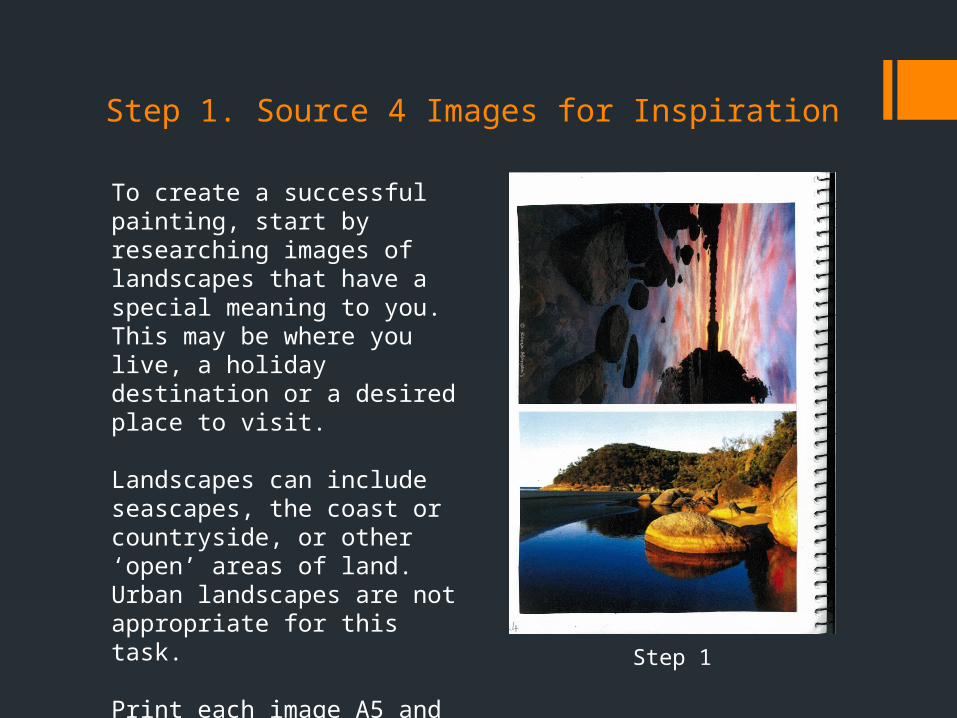
Step 1
To create a successful painting, start by researching images of landscapes that have a special meaning to you. This may be where you live, a holiday destination or a desired place to visit.
Landscapes can include seascapes, the coast or countryside, or other ‘open’ areas of land. Urban landscapes are not appropriate for this task.
Print each image A5 and paste them in your visual diary.

Step 2. Print your chosen image A4.
Step 2

Step 3. Create a New Composition
Step 3
Tape the two shorter edges of the A4 paper together.
In your hand, roll the image until you are happy that you have determined the best composition for your painting.
Fold the paper flat then look at the reverse to check there is nothing important being left out.

Step 4. Prepare the Canvas
Step 4
Using carbon paper, trace the key features and areas of your design onto the canvas provided.
Using acrylic paint diluted with water, cover all of the canvas in a light ‘wash’ of appropriate colours.
You should still be able to see your traced lines through the thin layer of paint.

Step 5. The Background
Step 5
Using a large flat brush, paint in the background area.
In most cases this will be the sky or another large simple area.
Blend analogous colours into your background to create variations in tone and atmosphere.
Only paint the clouds at this stage if part of them will be covered by the land mass in the next step.

Step 6. The Far Horizon
Step 6
Paint the land mass in the background.
Start with the darkest shade of colour in this area of your picture and using a wide flat brush paint the edge of the land that contrasts against the sky.
You will need to overlap the sky to ensure you do not have to go back and try to fix missed areas.
Fill in the land mass with assorted colours to create tone and texture.
Step 7. The Ground
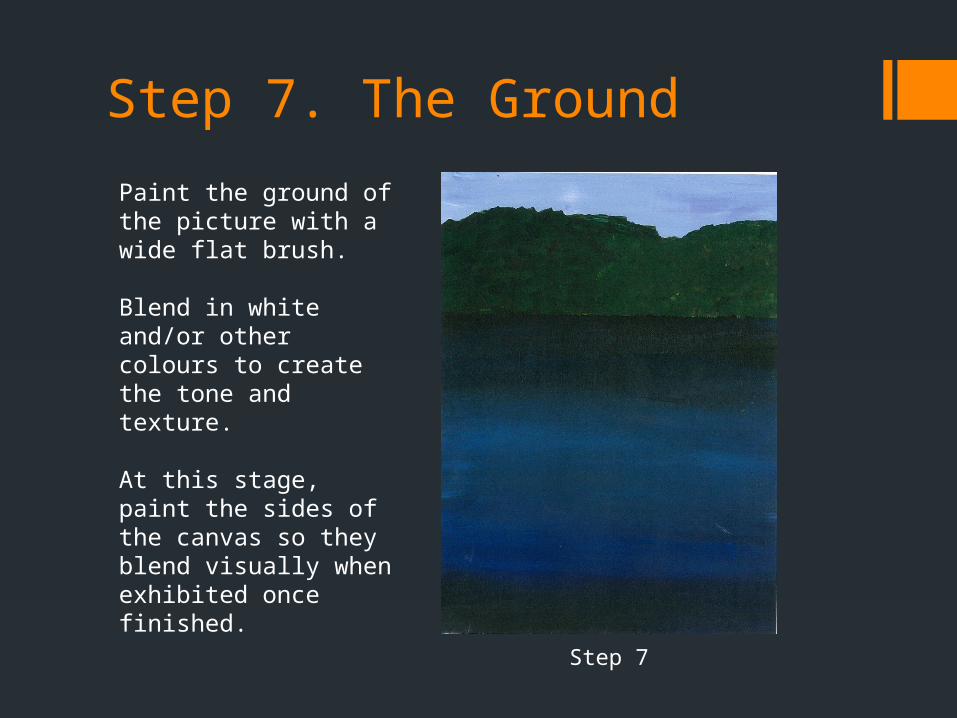
Step 7
Paint the ground of the picture with a wide flat brush.
Blend in white and/or other colours to create the tone and texture.
At this stage, paint the sides of the canvas so they blend visually when exhibited once finished.

Step 8. Complete the Background
Step 8
Complete any visible features in the background using a small pointed brush.
Specific features such as this require focussed attention to detail in order to achieve the best result.
Remember: We are producing a painting. Brush strokes will be visible and should enhance the image.

Step 9. Transfer the Mid-Ground Features
Step 9
To ensure the correct placement of the mid-ground features, use carbon paper to again transfer their outline onto your canvas.
No. You can’t see it in this image! Carbon paper leaves a feint mark which will not interfere with your painting.
You may also need to draw in foreground features at this time.

Step 10. Block in the Mid and Foreground
Step 10
‘Blocking in’ means painting all of this part/stage of the image in a single dark colour.
The colour is determined from the darkest part of the object being painted.
Ensure you paint sharp edges to define the object and contrast it effectively against the background.
Adding a little water to the acrylic paint can help make it flow better to assist with edges.

Step 11. Add Texture to the Mid and Foreground
Step 11
Working carefully within the blocked in features, build up the colours and textures with dabs of paint in assorted colours.
This should be done with a small painted brush.
Reflection of light on the water or other features should be applied with a transparent layer of the appropriate colour. Dilute you paint with water to achieve this.

Step 12. The Finishing Touches
Step 12
Before deemed finished, complete a final inspection of all areas in your painting.
Small amounts of black paint may be used to intensify dark areas and create greater depth.
Small amounts of white paint may be used to enhance reflections and highlights on features.

Trouble Shooting
Try looking at your painting reflected in a mirror to challenge your eyes to see it differently.
This can help identify areas that may still need refinement.

Ta Da!!!A masterpiece!
Rhea Singh 8W 2012

Year 8 2012
Angela Jans Siena Barton
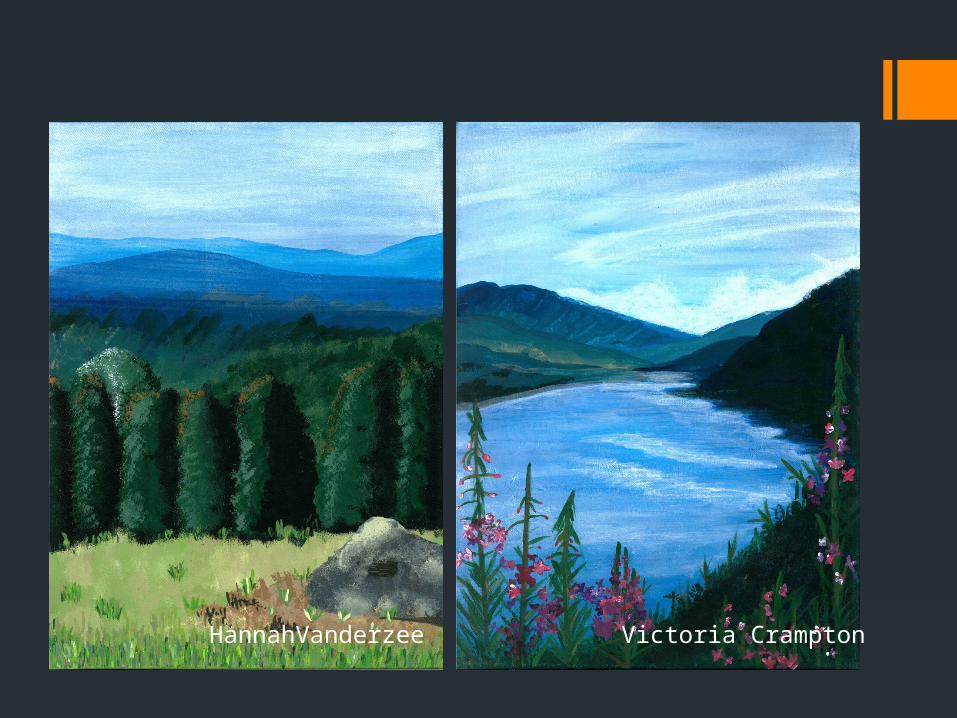
Victoria CramptonHannahVanderzee

Claire Martin Max Whitbread-Phee