Embed Size (px)
Citation preview
Daftar Isi
Rekonstruksi Tutorial 14 ......................................................................................................................... 4
General Setup ..................................................................................................................................... 4
General Step........................................................................................................................................ 6
Results ............................................................................................................................................... 11
Pelaksanaan Tutorial 19 ........................................................................................................................ 13
Pelaksanaan Tutorial 22 ........................................................................................................................ 15
Fungsi Aritmatika .................................................................................................................................. 17
Fungsi Modifikasi File dan Informasi File .............................................................................................. 24
Referensi ............................................................................................................................................... 25
Lampiran ............................................................................................................................................... 25
Kesimpulan ............................................................................................................................................ 46
Saran ..................................................................................................................................................... 46
Pembagian Kerja ................................................................................................................................... 46
Daftar Gambar
Gambar 1 Menambahkan NASM pada W7 32-bit (berlaku sama untuk W8.1 64-bit) ........................... 5
Gambar 2 Instalasi standar ImDisk pada W8.1 64-bit ............................................................................ 5
Gambar 3 Konfigurasi mkbt pada W8.1 64-bit ....................................................................................... 6
Gambar 4 Instalasi Bochs ........................................................................................................................ 6
Gambar 5 Virtual Floppy Disk dengan VFD ............................................................................................. 7
Gambar 6 Build Solution pada VS 2013 .................................................................................................. 9
Gambar 7 Run OS on Bochs .................................................................................................................. 10
Gambar 8 Hasil pada W7 32-bit ............................................................................................................ 11
Gambar 9 Hasil 1 pada W8.1 64-bit ...................................................................................................... 12
Gambar 10 Hasil 2 pada W8.1 64-bit .................................................................................................... 12
Gambar 11 DebugPrintf() ...................................................................................................................... 12
Gambar 12 Hasil Tutorial 14 pada W8.1 64-bit .................................................................................... 13
Gambar 13 Hasil pada W7 32-bit .......................................................................................................... 14
Gambar 14 Hasil Tutorial 19 pada Windows 8.1 64-bit ........................................................................ 14
Gambar 15 Error pada Tutorial 22 ........................................................................................................ 16
Gambar 16 Error Handling Tutorial 22 .................................................................................................. 16
Gambar 17 Hasil Tutorial 22 ................................................................................................................. 17

Rekonstruksi Tutorial 14 Pengerjaan tugas besar kami awali dengan mengulang kembali tugas kecil yang sebelumnya belum
dikerjakan dengan sempurna. Hal ini terjadi karena adanya hambatan dalam build KRNL32.EXE.
Setelah melakukan evaluasi, akhirnya kami dapat menyelesaikan tutorial ini.
Langkah pertama yang kami lakukan adalah memastikan semua tools yang dibutuhkan untuk
melakukan tutorial ini sudah tersedia. Berikut merupakan daftar tools yang dibutuhkan, dalam
tutorial ini maupun tutorial berikutnya, bergantung pada environment yang digunakan.
1. Pengembangan dalam Windows 32-bit
a. NASM
NASM adalah sebuah assembler dari sebuah file dengan ekstensi .asm.
b. VFD
VFD adalah sebuah alat bantu pembuat virtual floppy drive.
c. PartCopy
PartCopy adalah sebuah alat bantu yang dalam tutorial ini digunakan untuk
assigning bootloader pada virtual floppy drive.
d. Bochs
Sebuah PC Emulator untuk mensimulasikan OS yang dibuat dalam tutorial
Brokenthorn.
e. Visual Studio
IDE pengembangan berbasis C++.
2. Pengembangan dalam Windows 64-bit
a. NASM
NASM adalah sebuah assembler dari sebuah file dengan ekstensi .asm.
b. ImDisk
ImDisk adalah sebuah alat bantu pembuat virtual floppy drive.
c. mkbt
mkbt adalah sebuah alat bantu yang dalam tutorial ini digunakan untuk assigning
bootloader pada virtual floppy drive.
d. Bochs
Sebuah PC Emulator untuk mensimulasikan OS yang dibuat dalam tutorial
Brokenthorn.
e. Visual Studio
IDE pengembangan berbasis C++.
Pelaksanaan Tutorial ini dilakukan dalam seluruh laptop dari anggota kelompok dengan spesifikasi
yang berbeda-beda. Salah satu spesifikasi yang paling signifikan adalah environment atau arsitektur
yang digunakan. Ricko menggunakan Windows 7 32-bit. Sedangkan Rizal, Hilman, dan Ghani
menggunakan Windows 8.1 64-bit. Perbedaan ini membuat adanya perbedaan dalam proses yang
dilalui untuk menghasilkan output yang sama. Berikut merupakan tahap-tahap pengembangan dari
masing-masing percobaan.
General Setup Hal umum yang pertama kali harus dilakukan adalah dengan melakukan instalasi seluruh tools yang
dibutuhkan. Berikut merupakan detail dari proses instalasi keseluruhan tools
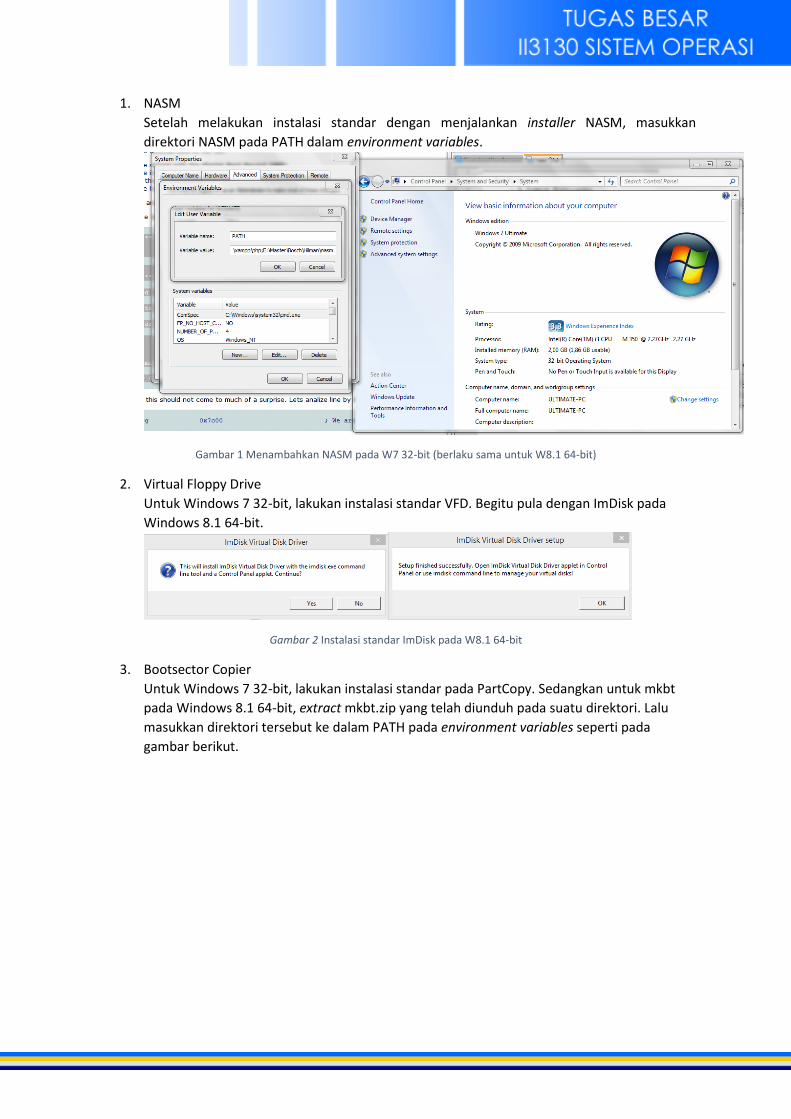
1. NASM
Setelah melakukan instalasi standar dengan menjalankan installer NASM, masukkan
direktori NASM pada PATH dalam environment variables.
Gambar 1 Menambahkan NASM pada W7 32-bit (berlaku sama untuk W8.1 64-bit)
2. Virtual Floppy Drive
Untuk Windows 7 32-bit, lakukan instalasi standar VFD. Begitu pula dengan ImDisk pada
Windows 8.1 64-bit.
Gambar 2 Instalasi standar ImDisk pada W8.1 64-bit
3. Bootsector Copier
Untuk Windows 7 32-bit, lakukan instalasi standar pada PartCopy. Sedangkan untuk mkbt
pada Windows 8.1 64-bit, extract mkbt.zip yang telah diunduh pada suatu direktori. Lalu
masukkan direktori tersebut ke dalam PATH pada environment variables seperti pada
gambar berikut.
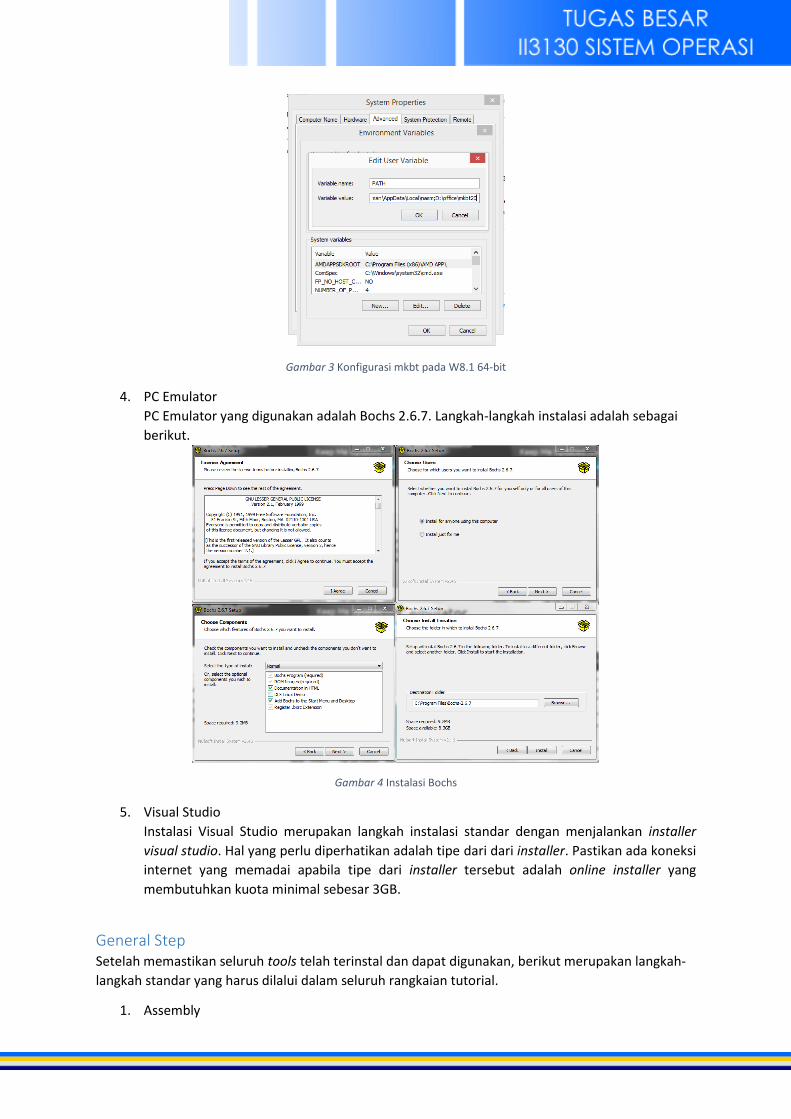
Gambar 3 Konfigurasi mkbt pada W8.1 64-bit
4. PC Emulator
PC Emulator yang digunakan adalah Bochs 2.6.7. Langkah-langkah instalasi adalah sebagai
berikut.
Gambar 4 Instalasi Bochs
5. Visual Studio
Instalasi Visual Studio merupakan langkah instalasi standar dengan menjalankan installer
visual studio. Hal yang perlu diperhatikan adalah tipe dari dari installer. Pastikan ada koneksi
internet yang memadai apabila tipe dari installer tersebut adalah online installer yang
membutuhkan kuota minimal sebesar 3GB.
General Step Setelah memastikan seluruh tools telah terinstal dan dapat digunakan, berikut merupakan langkah-
langkah standar yang harus dilalui dalam seluruh rangkaian tutorial.
1. Assembly
nasm –f bin Boot1.asm –o Boot1.bin
Sintaksis di atas merupakan sintaksis untuk mengubah file Boot1.asm menjadi Boot1.bin
yang merupakan Bootloader dari OS yang akan dikembangkan. Selain Boot1.asm, file lain
yang harus diubah adalah Stage2.asm menjadi KRNLDR.SYS dengan cara sebagai berikut.
nasm –f bin Stage2.asm –o KRNLDR.SYS
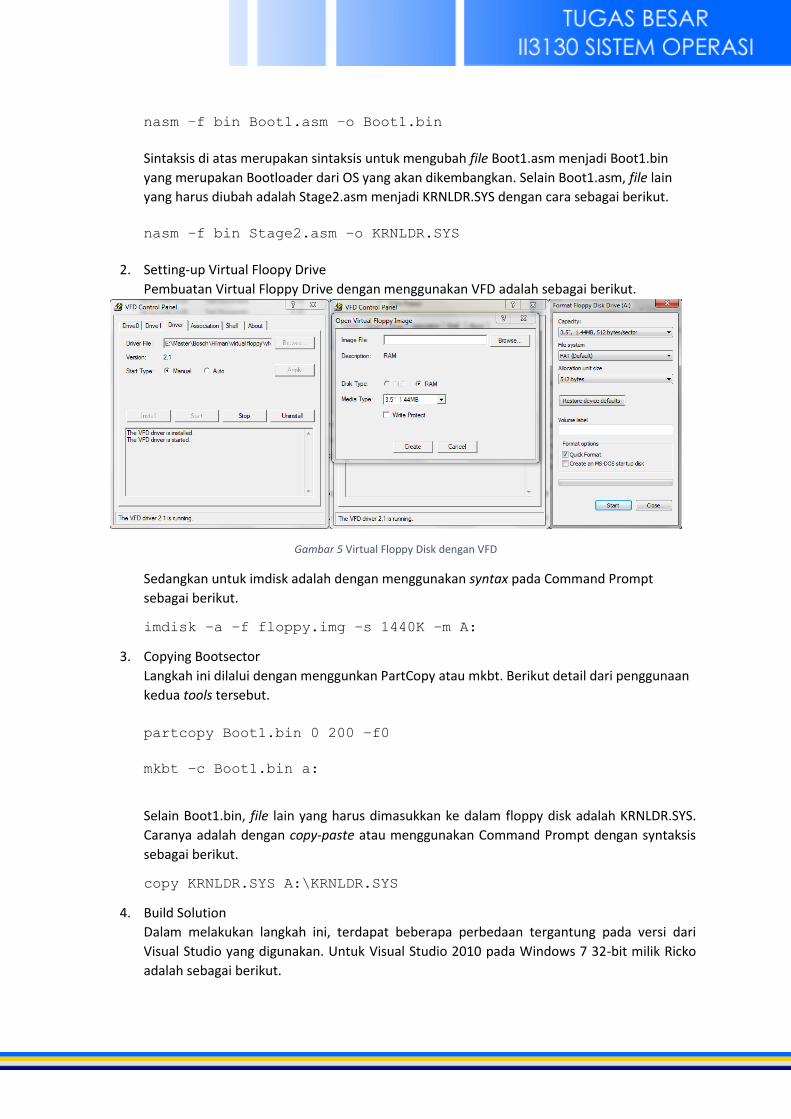
2. Setting-up Virtual Floopy Drive
Pembuatan Virtual Floppy Drive dengan menggunakan VFD adalah sebagai berikut.
Gambar 5 Virtual Floppy Disk dengan VFD
Sedangkan untuk imdisk adalah dengan menggunakan syntax pada Command Prompt
sebagai berikut.
imdisk –a –f floppy.img –s 1440K –m A:
3. Copying Bootsector
Langkah ini dilalui dengan menggunkan PartCopy atau mkbt. Berikut detail dari penggunaan
kedua tools tersebut.
partcopy Boot1.bin 0 200 –f0
mkbt –c Boot1.bin a:
Selain Boot1.bin, file lain yang harus dimasukkan ke dalam floppy disk adalah KRNLDR.SYS.
Caranya adalah dengan copy-paste atau menggunakan Command Prompt dengan syntaksis
sebagai berikut.
copy KRNLDR.SYS A:\KRNLDR.SYS
4. Build Solution
Dalam melakukan langkah ini, terdapat beberapa perbedaan tergantung pada versi dari
Visual Studio yang digunakan. Untuk Visual Studio 2010 pada Windows 7 32-bit milik Ricko
adalah sebagai berikut.

Sedangkan untuk Visual Studio 2013 pada Windows 8.1 64-bit milik Ghani dan Hilman adalah
sebagai berikut.
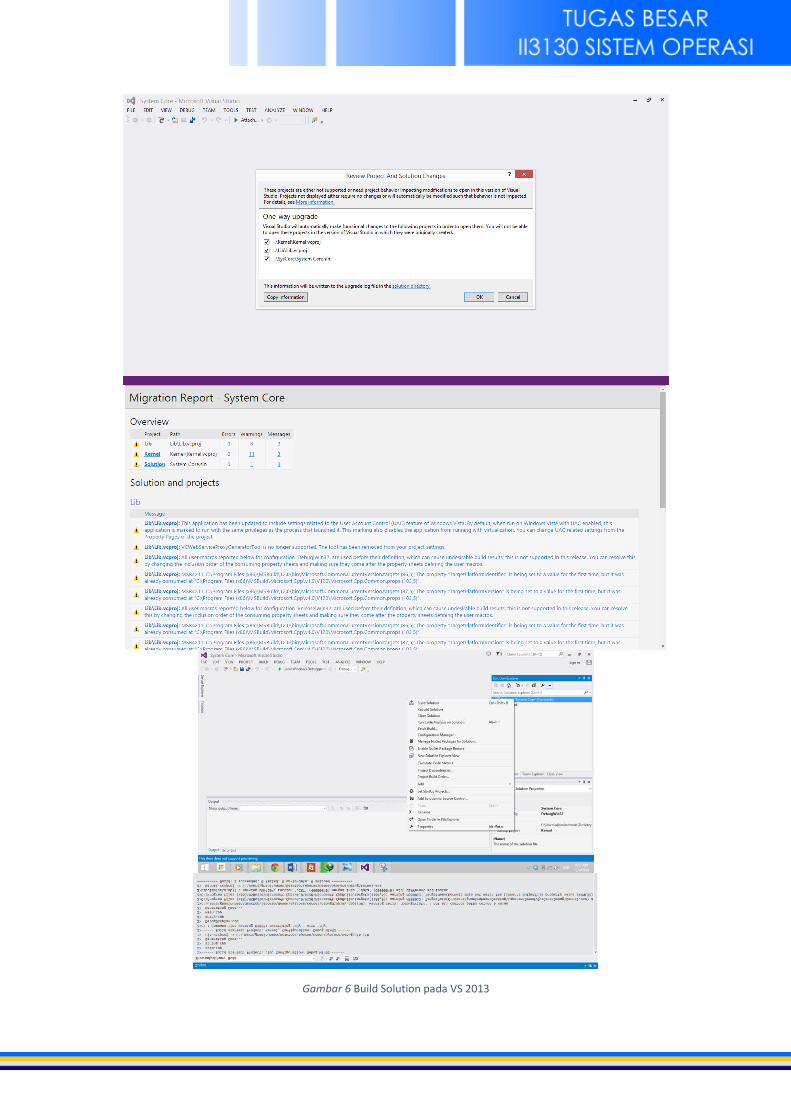
Gambar 6 Build Solution pada VS 2013
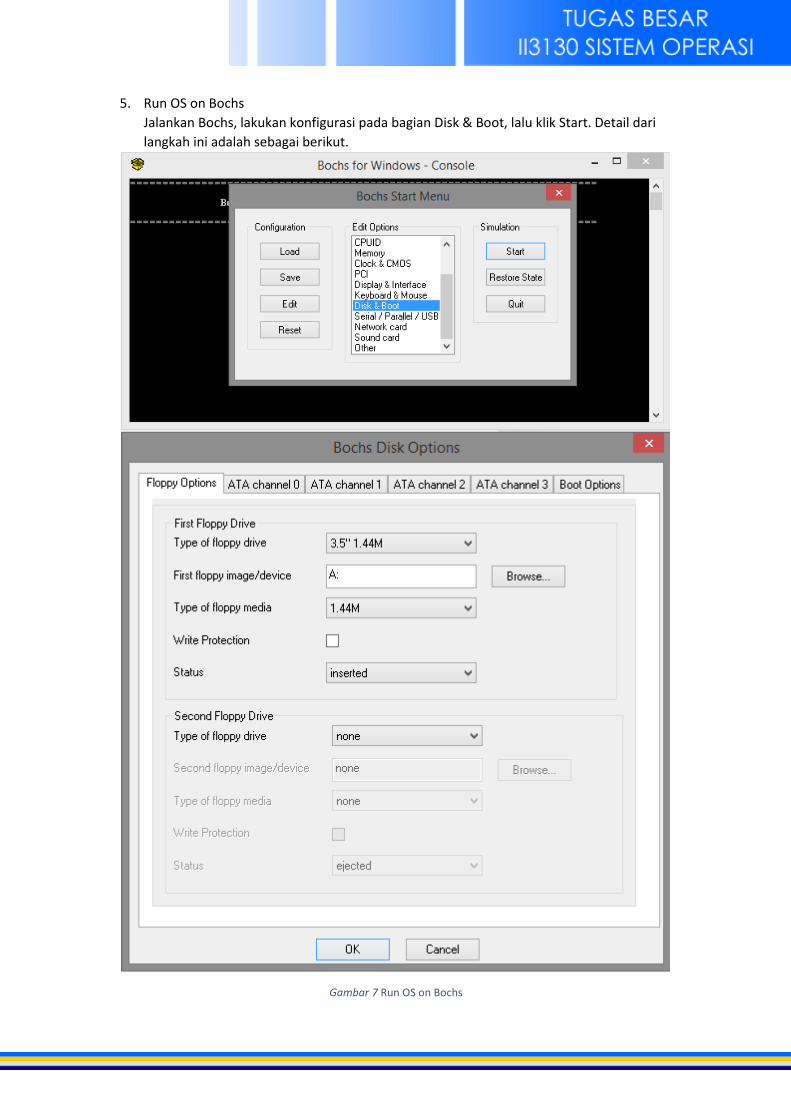
5. Run OS on Bochs
Jalankan Bochs, lakukan konfigurasi pada bagian Disk & Boot, lalu klik Start. Detail dari
langkah ini adalah sebagai berikut.
Gambar 7 Run OS on Bochs
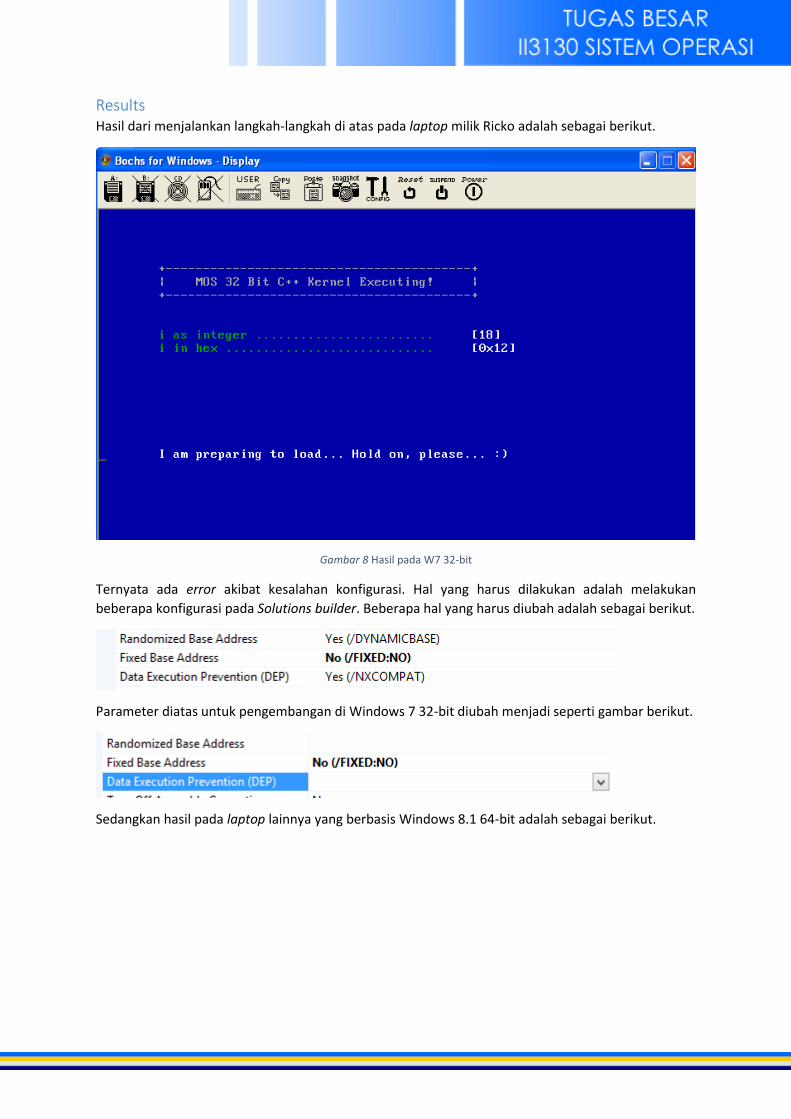
Results Hasil dari menjalankan langkah-langkah di atas pada laptop milik Ricko adalah sebagai berikut.
Gambar 8 Hasil pada W7 32-bit
Ternyata ada error akibat kesalahan konfigurasi. Hal yang harus dilakukan adalah melakukan
beberapa konfigurasi pada Solutions builder. Beberapa hal yang harus diubah adalah sebagai berikut.
Parameter diatas untuk pengembangan di Windows 7 32-bit diubah menjadi seperti gambar berikut.
Sedangkan hasil pada laptop lainnya yang berbasis Windows 8.1 64-bit adalah sebagai berikut.
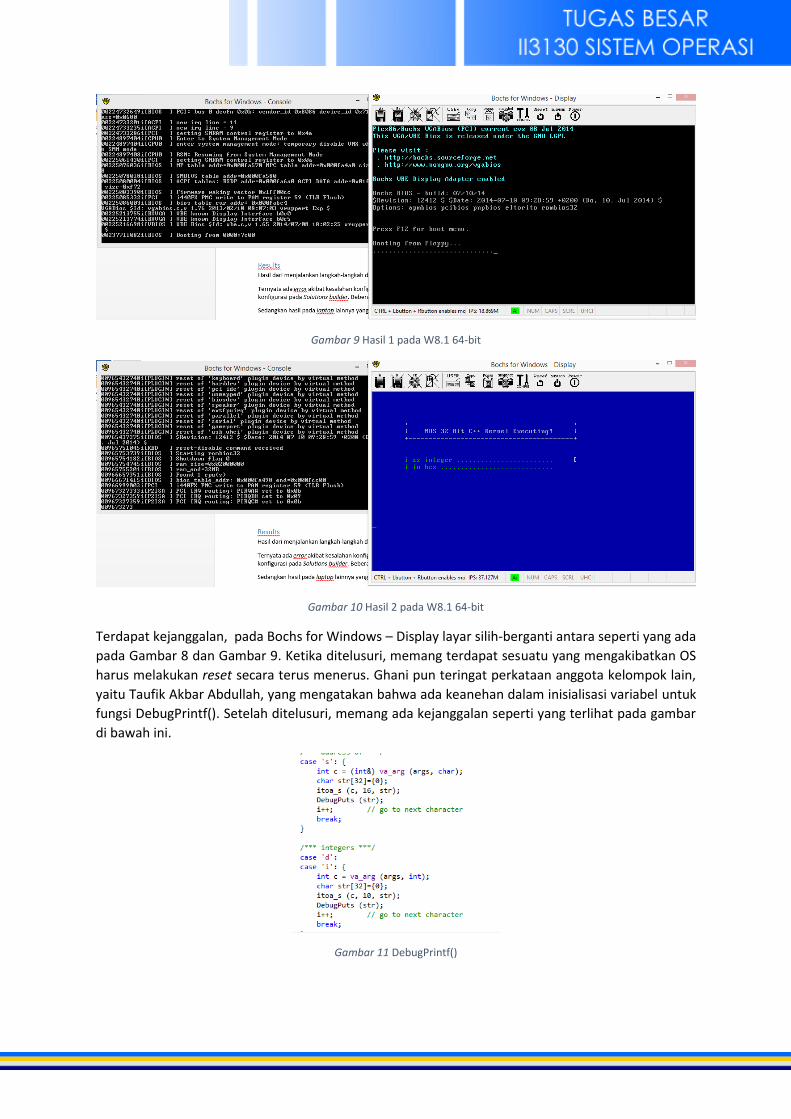
Gambar 9 Hasil 1 pada W8.1 64-bit
Gambar 10 Hasil 2 pada W8.1 64-bit
Terdapat kejanggalan, pada Bochs for Windows – Display layar silih-berganti antara seperti yang ada
pada Gambar 8 dan Gambar 9. Ketika ditelusuri, memang terdapat sesuatu yang mengakibatkan OS
harus melakukan reset secara terus menerus. Ghani pun teringat perkataan anggota kelompok lain,
yaitu Taufik Akbar Abdullah, yang mengatakan bahwa ada keanehan dalam inisialisasi variabel untuk
fungsi DebugPrintf(). Setelah ditelusuri, memang ada kejanggalan seperti yang terlihat pada gambar
di bawah ini.
Gambar 11 DebugPrintf()
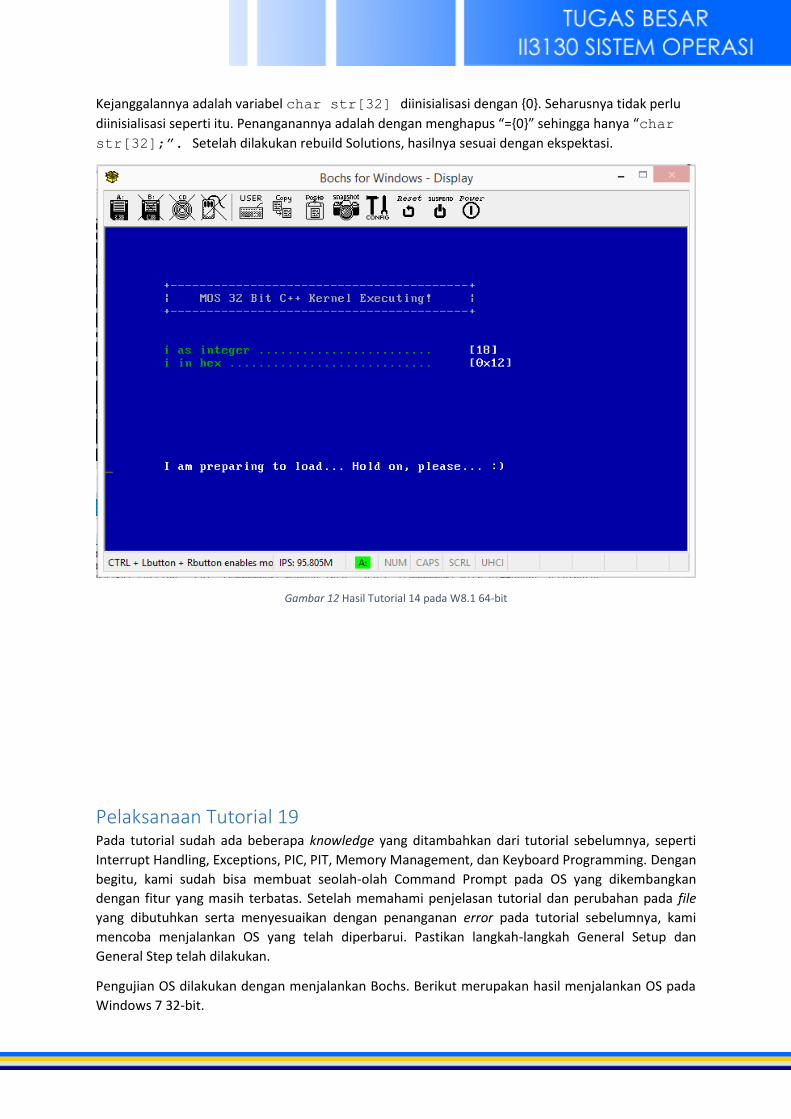
Kejanggalannya adalah variabel char str[32] diinisialisasi dengan {0}. Seharusnya tidak perlu
diinisialisasi seperti itu. Penanganannya adalah dengan menghapus “={0}” sehingga hanya “char
str[32];”. Setelah dilakukan rebuild Solutions, hasilnya sesuai dengan ekspektasi.
Gambar 12 Hasil Tutorial 14 pada W8.1 64-bit
Pelaksanaan Tutorial 19 Pada tutorial sudah ada beberapa knowledge yang ditambahkan dari tutorial sebelumnya, seperti
Interrupt Handling, Exceptions, PIC, PIT, Memory Management, dan Keyboard Programming. Dengan
begitu, kami sudah bisa membuat seolah-olah Command Prompt pada OS yang dikembangkan
dengan fitur yang masih terbatas. Setelah memahami penjelasan tutorial dan perubahan pada file
yang dibutuhkan serta menyesuaikan dengan penanganan error pada tutorial sebelumnya, kami
mencoba menjalankan OS yang telah diperbarui. Pastikan langkah-langkah General Setup dan
General Step telah dilakukan.
Pengujian OS dilakukan dengan menjalankan Bochs. Berikut merupakan hasil menjalankan OS pada
Windows 7 32-bit.
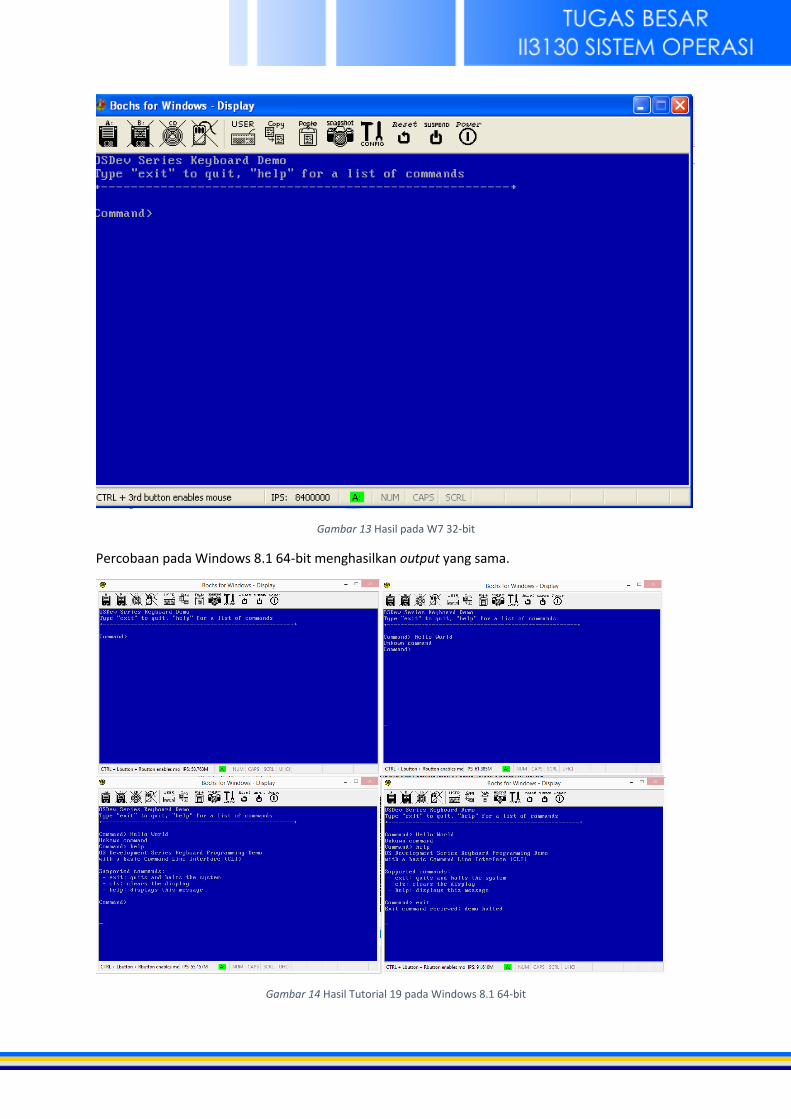
Gambar 13 Hasil pada W7 32-bit
Percobaan pada Windows 8.1 64-bit menghasilkan output yang sama.
Gambar 14 Hasil Tutorial 19 pada Windows 8.1 64-bit
Pelaksanaan Tutorial 22 Pada tutorial sudah ada beberapa knowledge yang ditambahkan dari tutorial sebelumnya, seperti
FDC Programming, DMA Programming, File System, dan VFS. Dengan begitu, kami seharusnya sudah
dapat membuat OS kami membaca file, menuliskan file, menyimpan file, dsb. Setelah memahami
penjelasan tutorial dan perubahan pada file yang dibutuhkan serta menyesuaikan dengan
penanganan error pada tutorial sebelumnya, kami mencoba menjalankan OS yang telah diperbarui.
Pastikan langkah-langkah General Setup dan General Step telah dilakukan.
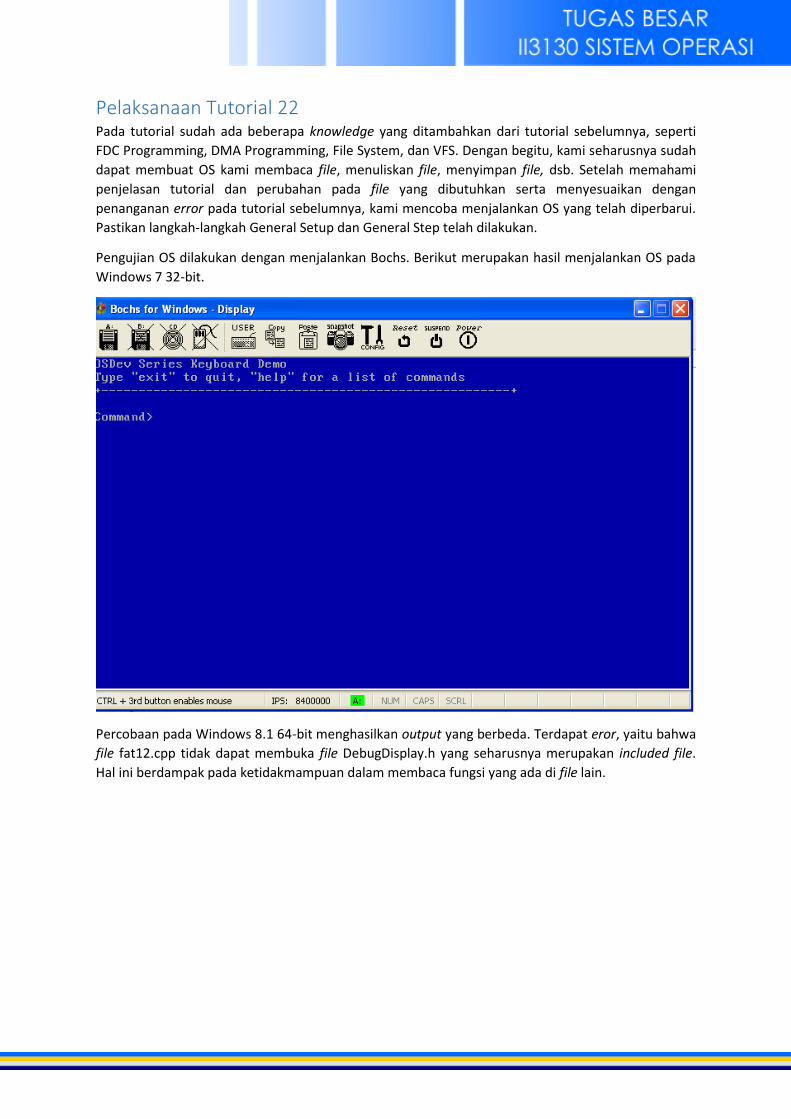
Pengujian OS dilakukan dengan menjalankan Bochs. Berikut merupakan hasil menjalankan OS pada
Windows 7 32-bit.
Percobaan pada Windows 8.1 64-bit menghasilkan output yang berbeda. Terdapat eror, yaitu bahwa
file fat12.cpp tidak dapat membuka file DebugDisplay.h yang seharusnya merupakan included file.
Hal ini berdampak pada ketidakmampuan dalam membaca fungsi yang ada di file lain.
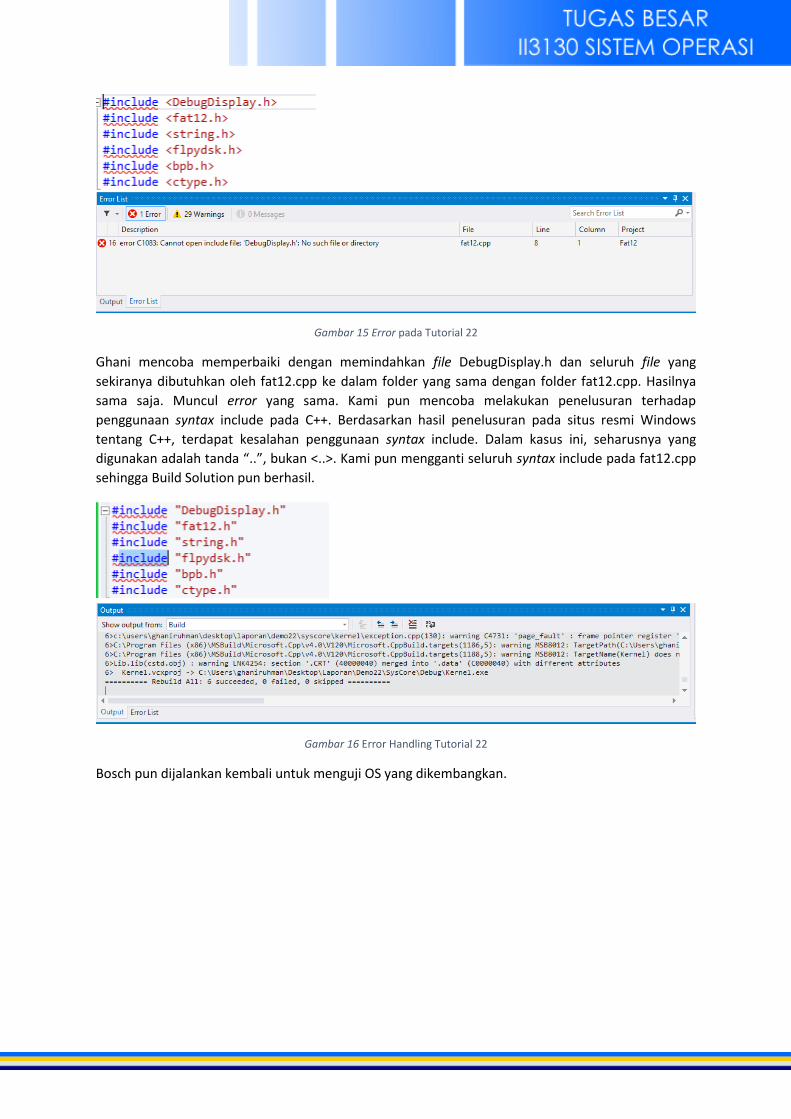
Gambar 15 Error pada Tutorial 22
Ghani mencoba memperbaiki dengan memindahkan file DebugDisplay.h dan seluruh file yang
sekiranya dibutuhkan oleh fat12.cpp ke dalam folder yang sama dengan folder fat12.cpp. Hasilnya
sama saja. Muncul error yang sama. Kami pun mencoba melakukan penelusuran terhadap
penggunaan syntax include pada C++. Berdasarkan hasil penelusuran pada situs resmi Windows
tentang C++, terdapat kesalahan penggunaan syntax include. Dalam kasus ini, seharusnya yang
digunakan adalah tanda “..”, bukan <..>. Kami pun mengganti seluruh syntax include pada fat12.cpp
sehingga Build Solution pun berhasil.
Gambar 16 Error Handling Tutorial 22
Bosch pun dijalankan kembali untuk menguji OS yang dikembangkan.
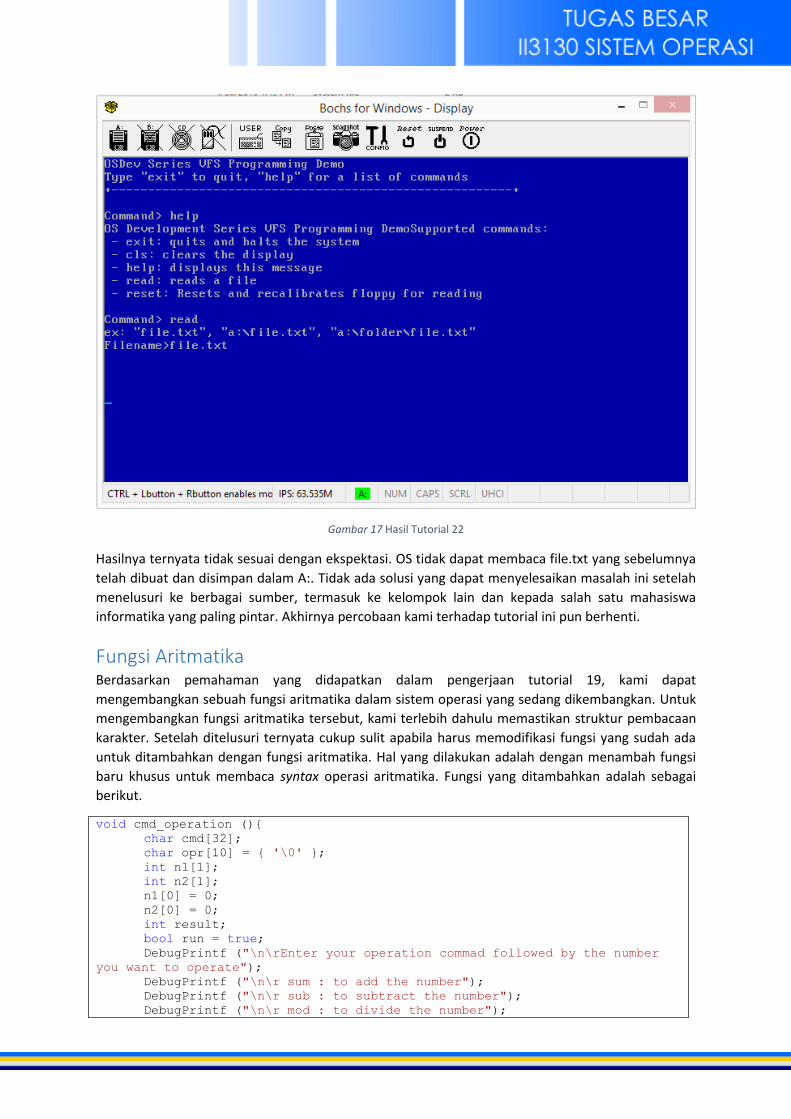
Gambar 17 Hasil Tutorial 22
Hasilnya ternyata tidak sesuai dengan ekspektasi. OS tidak dapat membaca file.txt yang sebelumnya
telah dibuat dan disimpan dalam A:. Tidak ada solusi yang dapat menyelesaikan masalah ini setelah
menelusuri ke berbagai sumber, termasuk ke kelompok lain dan kepada salah satu mahasiswa
informatika yang paling pintar. Akhirnya percobaan kami terhadap tutorial ini pun berhenti.
Fungsi Aritmatika Berdasarkan pemahaman yang didapatkan dalam pengerjaan tutorial 19, kami dapat
mengembangkan sebuah fungsi aritmatika dalam sistem operasi yang sedang dikembangkan. Untuk
mengembangkan fungsi aritmatika tersebut, kami terlebih dahulu memastikan struktur pembacaan
karakter. Setelah ditelusuri ternyata cukup sulit apabila harus memodifikasi fungsi yang sudah ada
untuk ditambahkan dengan fungsi aritmatika. Hal yang dilakukan adalah dengan menambah fungsi
baru khusus untuk membaca syntax operasi aritmatika. Fungsi yang ditambahkan adalah sebagai
berikut.
void cmd_operation (){
char cmd[32];
char opr[10] = { '\0' };
int n1[1];
int n2[1];
n1[0] = 0;
n2[0] = 0;
int result;
bool run = true;
DebugPrintf ("\n\rEnter your operation commad followed by the number
you want to operate");
DebugPrintf ("\n\r sum : to add the number");
DebugPrintf ("\n\r sub : to subtract the number");
DebugPrintf ("\n\r mod : to divide the number");
DebugPrintf ("\n\r mul : to multiply the number");
DebugPrintf ("\n\r <operation> <first number>,<second number>");
DebugPrintf ("\n\r ex: sum 3,4");
DebugPrintf ("\n\r back : to back to the previous menu");
while (run){
DebugPrintf ("\n\rOperation>");
get_opr_cmd (cmd,32,opr,n1,n2);
if (strcmp(cmd,"back")==0){
run = false;
}
else {
if (strcmp(opr,"sum")==0){
result = n1[0]+n2[0];
DebugPrintf ("\n\r %d",result);
} else if (strcmp(opr,"mod")==0){
result = n1[0]%n2[0];
int result2 = n1[0]/n2[0];
DebugPrintf ("\n\r %d sisa %d",result2,result);
} else if (strcmp(opr,"mul")==0){
DebugPrintf ("\n\r %d",n1[0]*n2[0]);
} else if (strcmp(opr,"sub")==0){
DebugPrintf ("\n\r %d",n1[0]-n2[0]);
}
for (int i=0;i<32;i++){
cmd[i] = '\0';
}
for (int i=0;i<12;i++){
opr[i] = '\0';
}
n1[0] = 0;
n2[0] = 0;
}
}
}
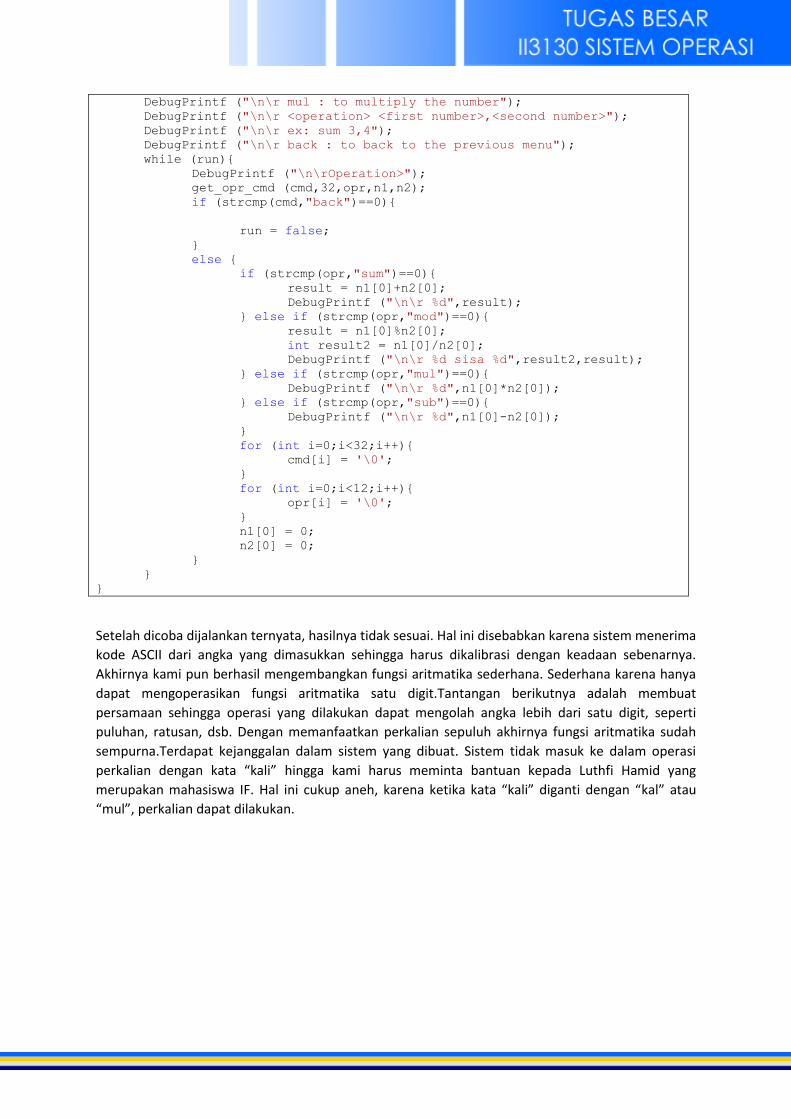
Setelah dicoba dijalankan ternyata, hasilnya tidak sesuai. Hal ini disebabkan karena sistem menerima
kode ASCII dari angka yang dimasukkan sehingga harus dikalibrasi dengan keadaan sebenarnya.
Akhirnya kami pun berhasil mengembangkan fungsi aritmatika sederhana. Sederhana karena hanya
dapat mengoperasikan fungsi aritmatika satu digit.Tantangan berikutnya adalah membuat
persamaan sehingga operasi yang dilakukan dapat mengolah angka lebih dari satu digit, seperti
puluhan, ratusan, dsb. Dengan memanfaatkan perkalian sepuluh akhirnya fungsi aritmatika sudah
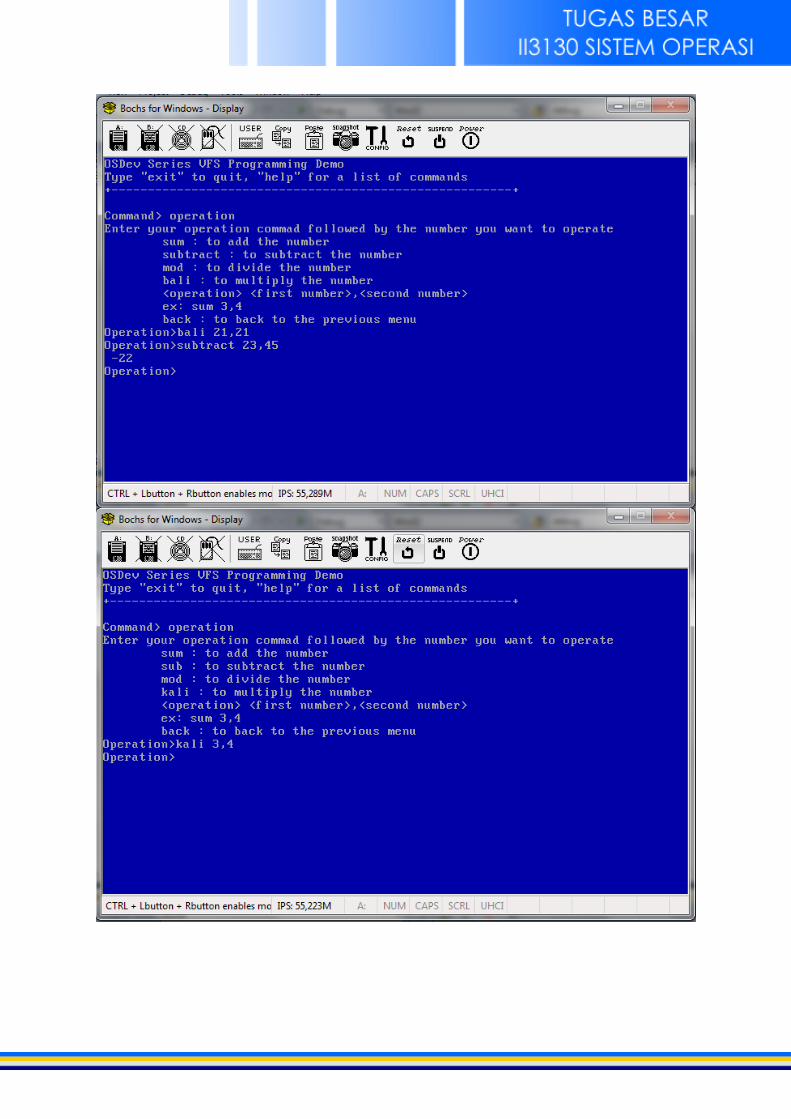
sempurna.Terdapat kejanggalan dalam sistem yang dibuat. Sistem tidak masuk ke dalam operasi
perkalian dengan kata “kali” hingga kami harus meminta bantuan kepada Luthfi Hamid yang
merupakan mahasiswa IF. Hal ini cukup aneh, karena ketika kata “kali” diganti dengan “kal” atau
“mul”, perkalian dapat dilakukan.
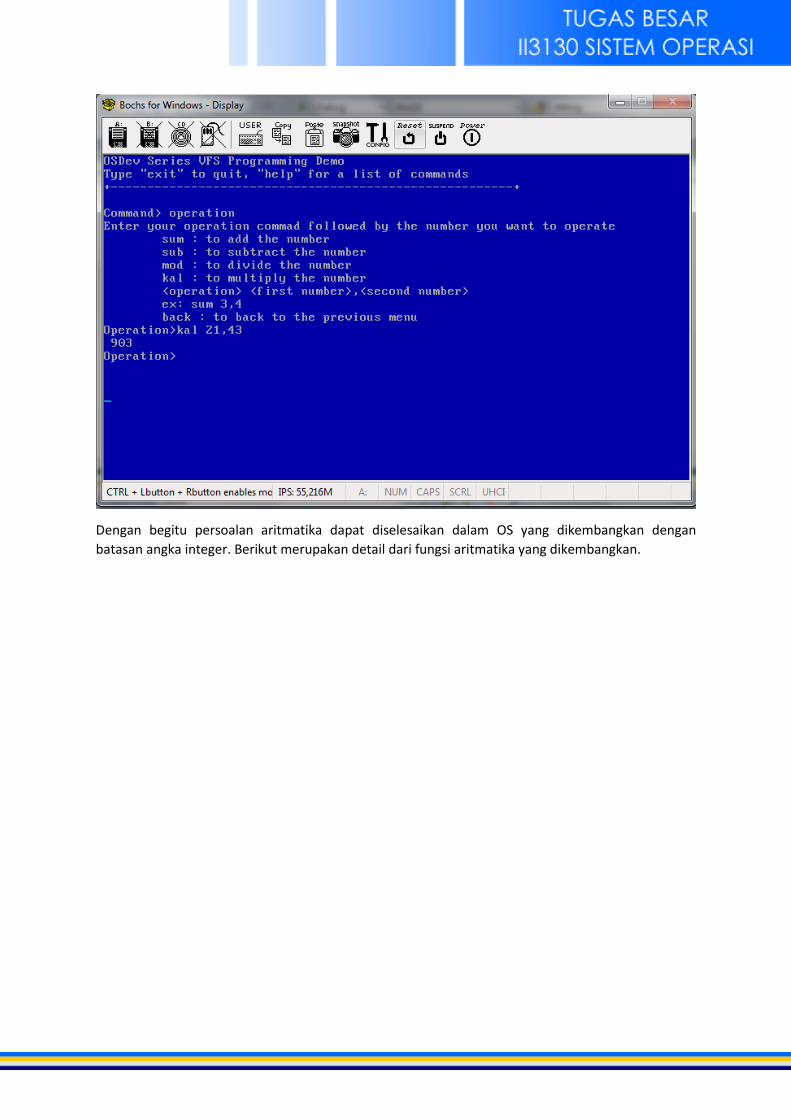
Dengan begitu persoalan aritmatika dapat diselesaikan dalam OS yang dikembangkan dengan
batasan angka integer. Berikut merupakan detail dari fungsi aritmatika yang dikembangkan.
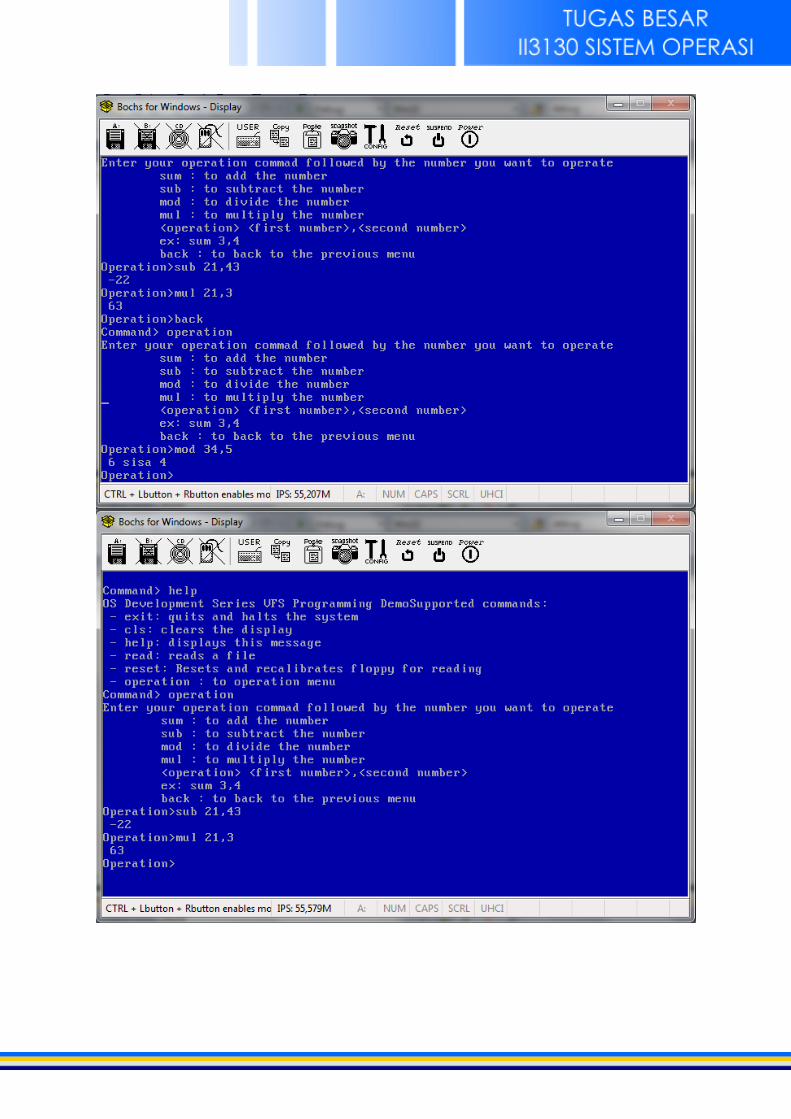
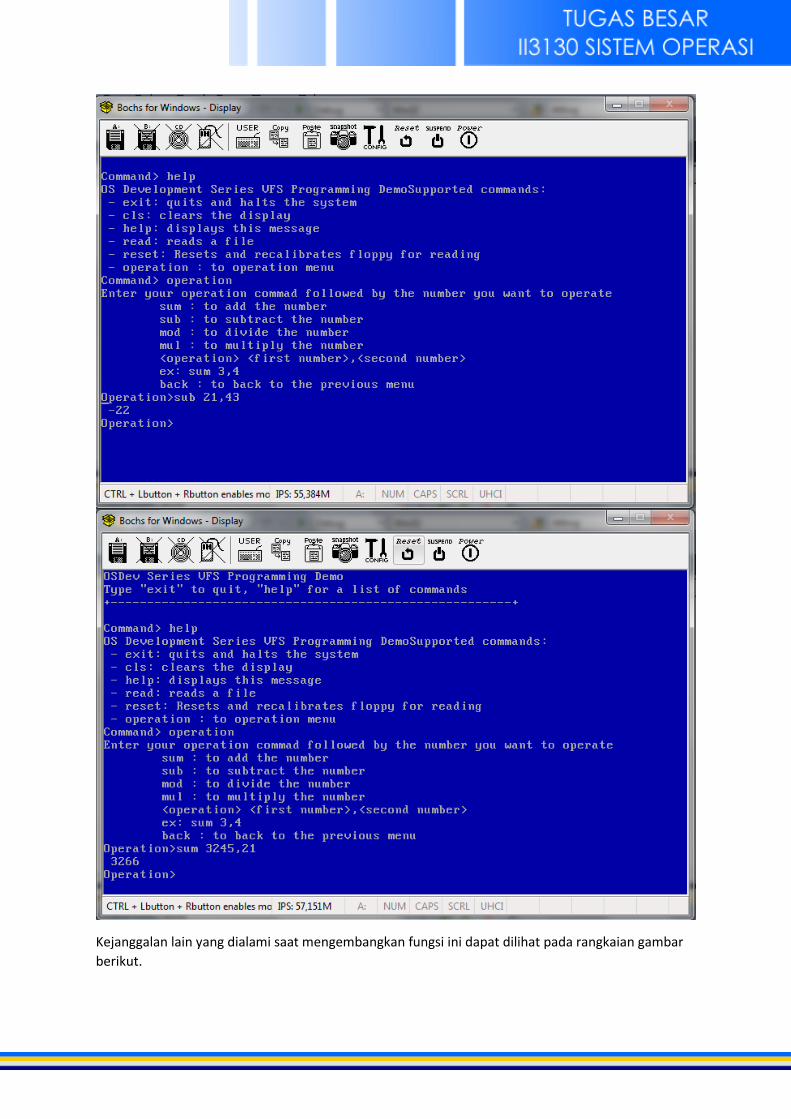
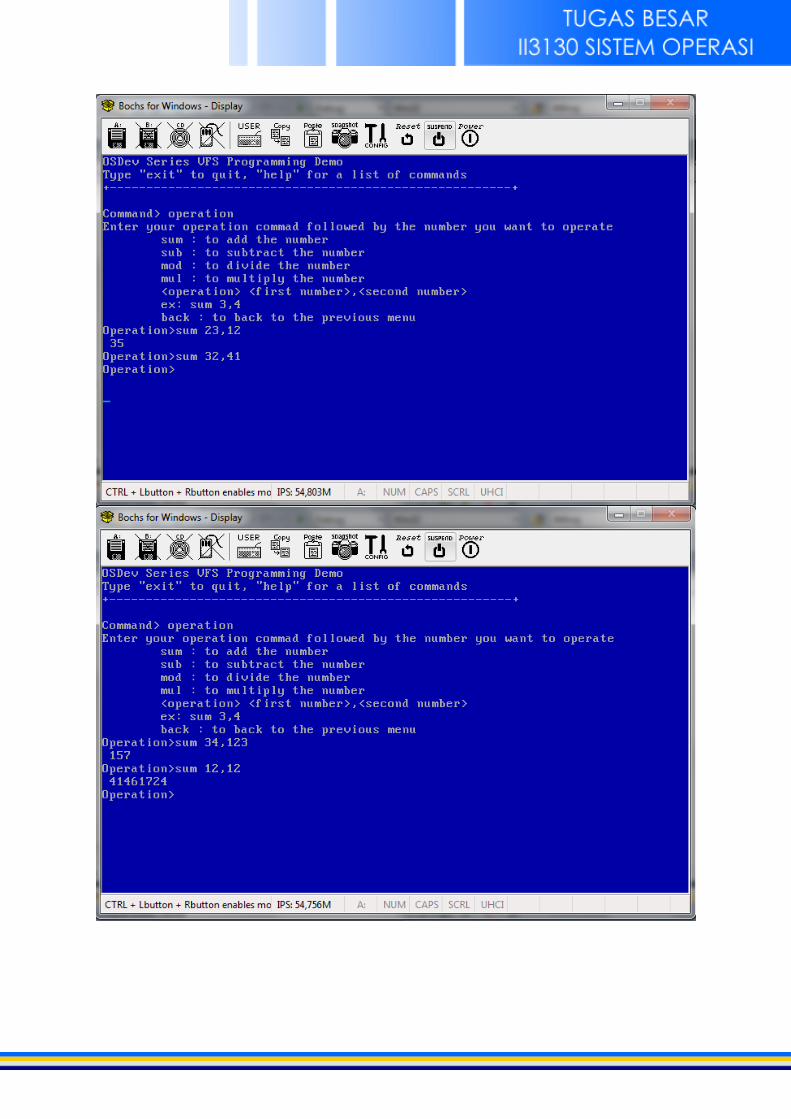
Kejanggalan lain yang dialami saat mengembangkan fungsi ini dapat dilihat pada rangkaian gambar
berikut.
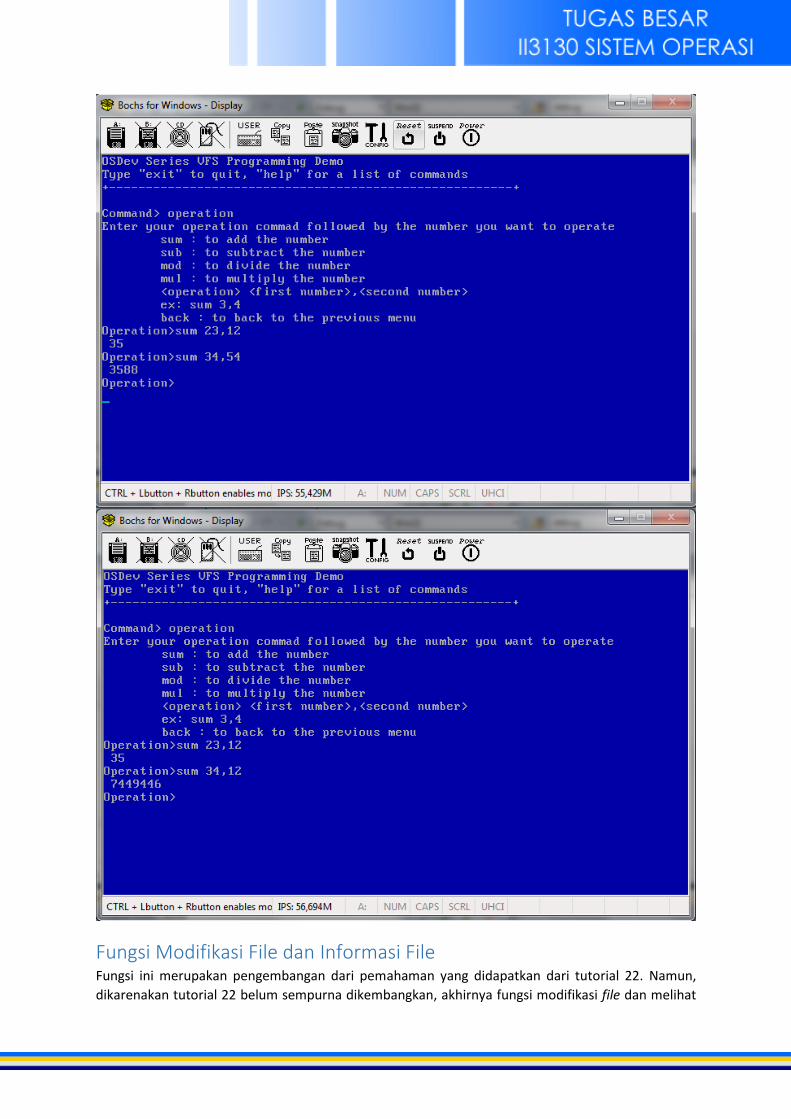
Fungsi Modifikasi File dan Informasi File Fungsi ini merupakan pengembangan dari pemahaman yang didapatkan dari tutorial 22. Namun,
dikarenakan tutorial 22 belum sempurna dikembangkan, akhirnya fungsi modifikasi file dan melihat

informasi file tidak dapat dikembangkan. Usaha yang dilakukan adalah dengan mencoba
berkoordinasi dengan kelompok lain dan menanyakan pada mahasiswa informatika yang ahli dalam
sistem operasi. Hasilnya tetap, fungsi ini tidak dapat dikembangkan. Salah satu penyebabnya yang
kami dapatkan adalah belum stabilnya OS yang dikembangkan oleh Mike (Brokenthorn).
Referensi
Tipe Nama Tautan
Program MKBT http://www.nu2.nu/mkbt
Program NASM http://superuser.com/questions/183335/how-to-create-a-virtual-floppy-drive
Program Bochs http://sourceforge.net/projects/bochs/
Program VFD http://sourceforge.net/projects/vfd/
Program PartCopy http://stahlworks.com/dev/index.php?tool=partcopy
Program VS Community http://www.visualstudio.com/en-us/products/free-developer-offers-vs
Teori Pengembangan OS
http://www.brokenthorn.com/Resources/OSDevIndex.html
Teori C++ (Include) http://msdn.microsoft.com/en-us/library/36k2cdd4.aspx
Lampiran Bagian ini merupakan lampiran atas kode yang paling berpengaruh dalam pengembangan OS dan
yang mengalami perubahan.
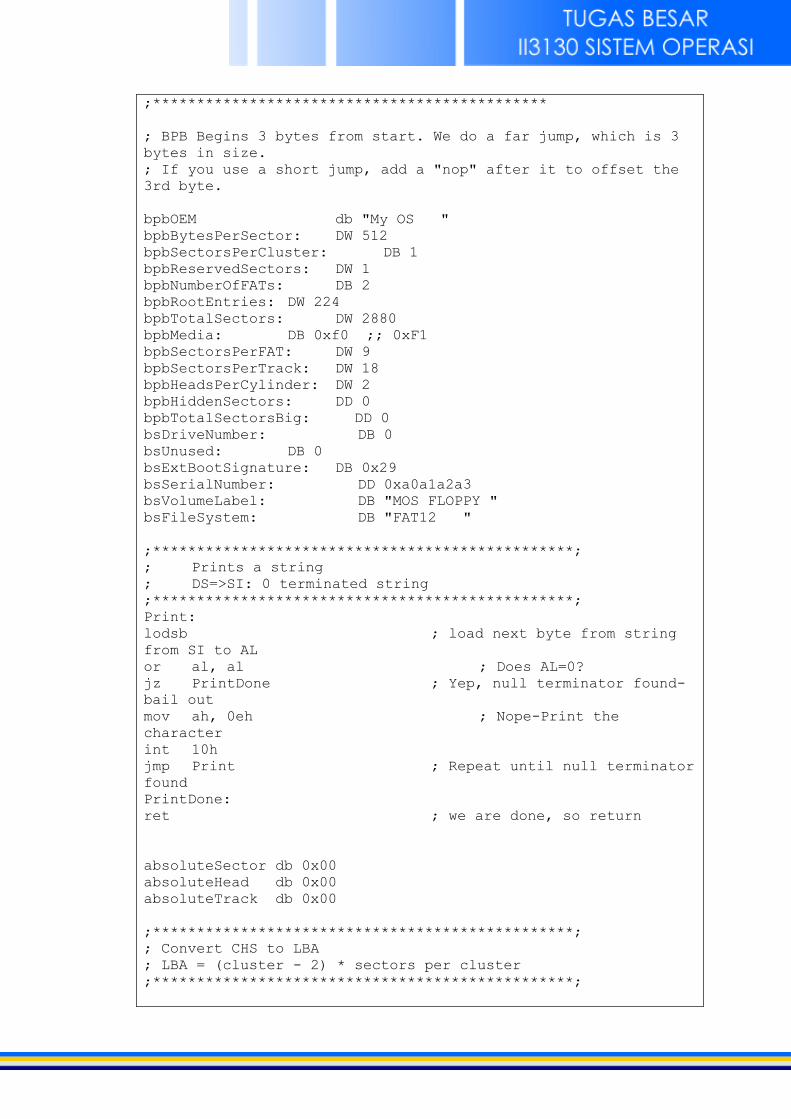
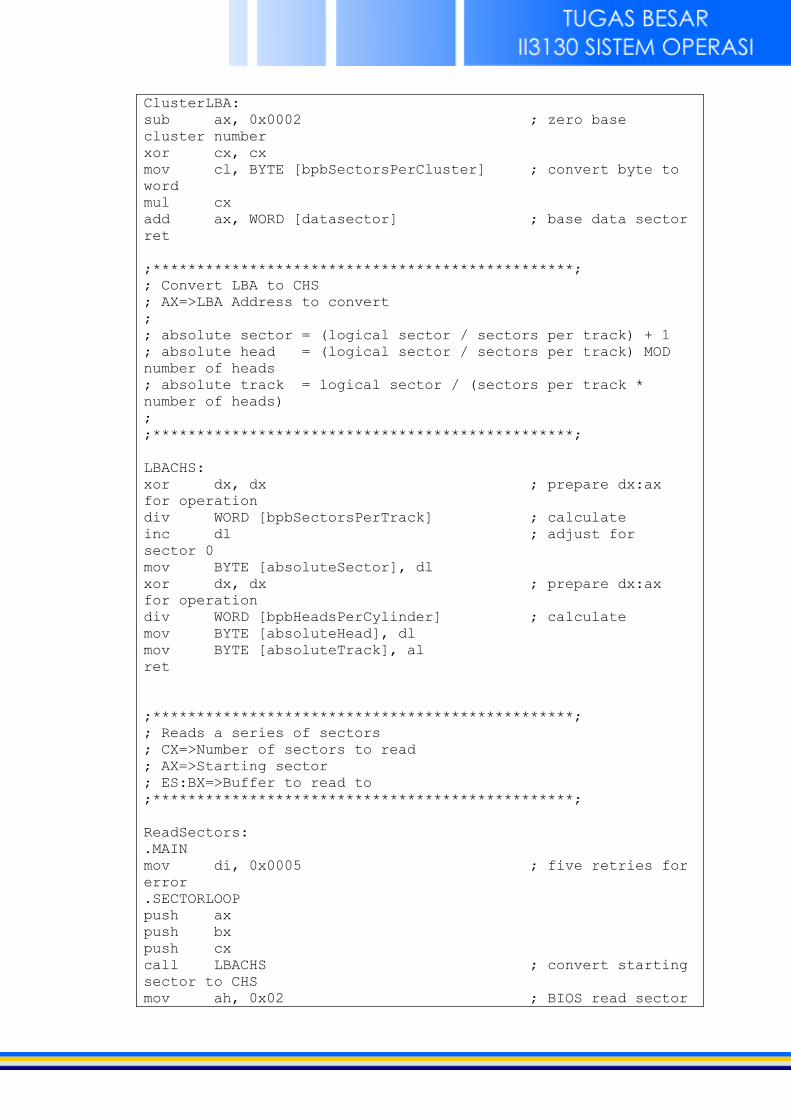
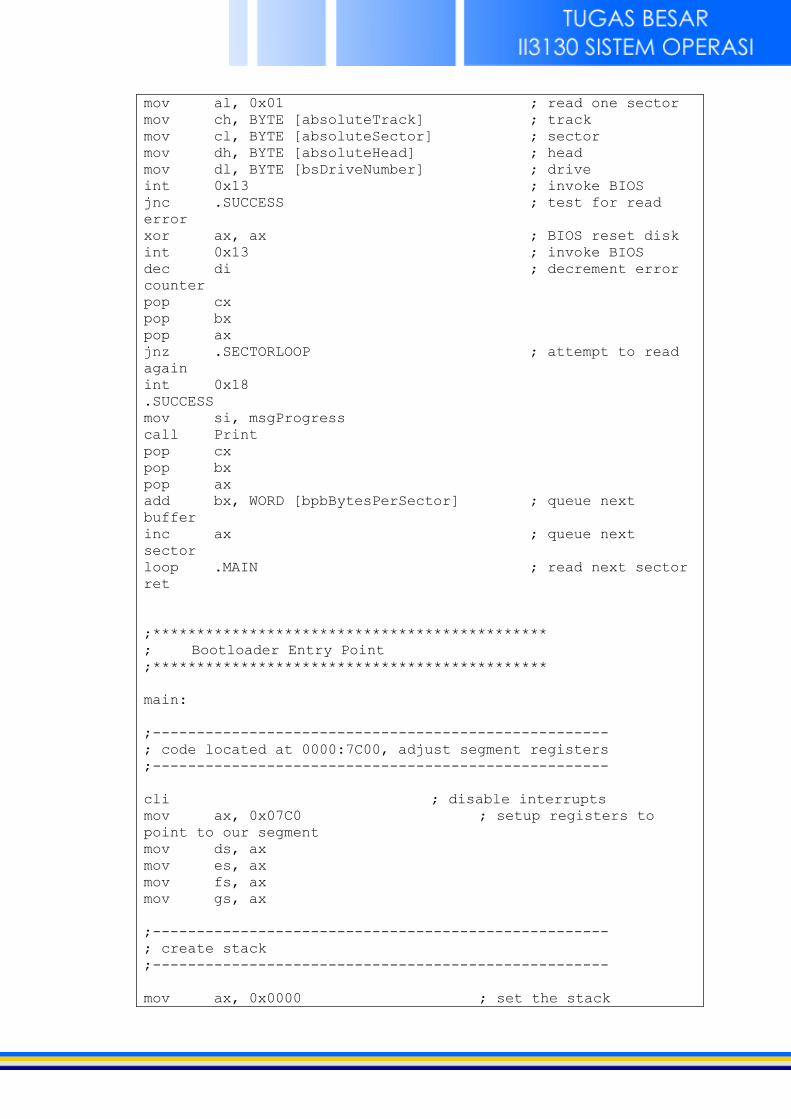
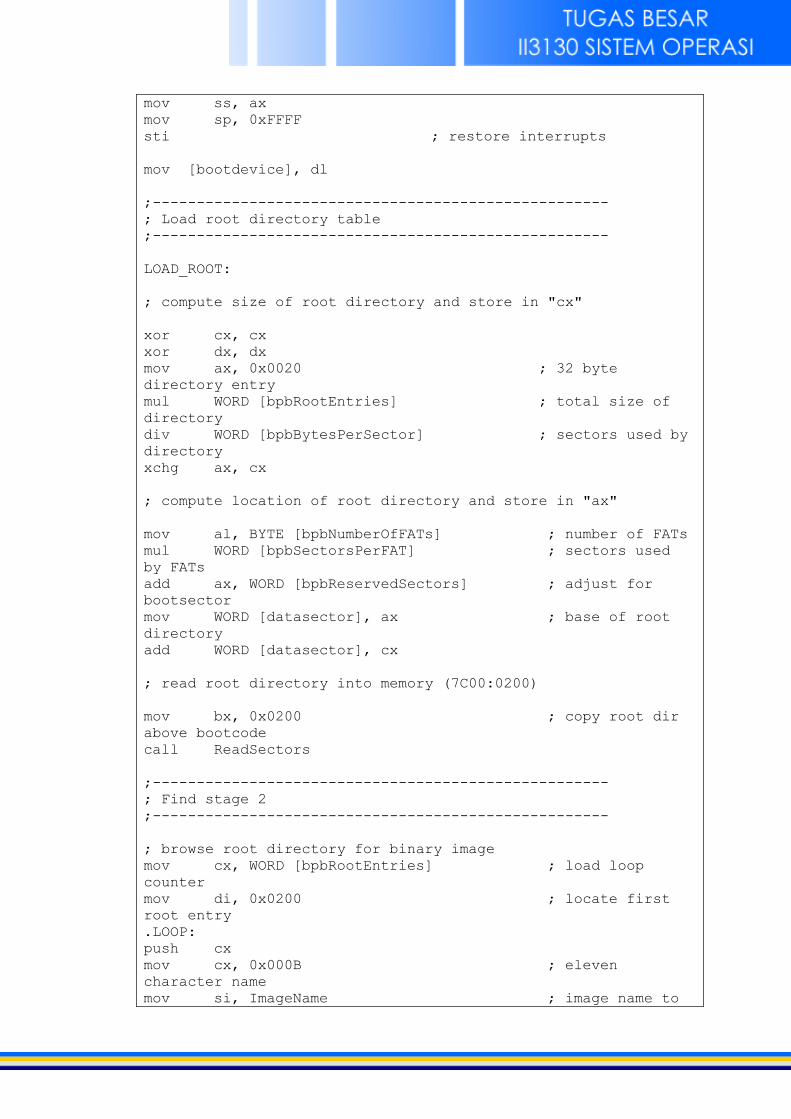
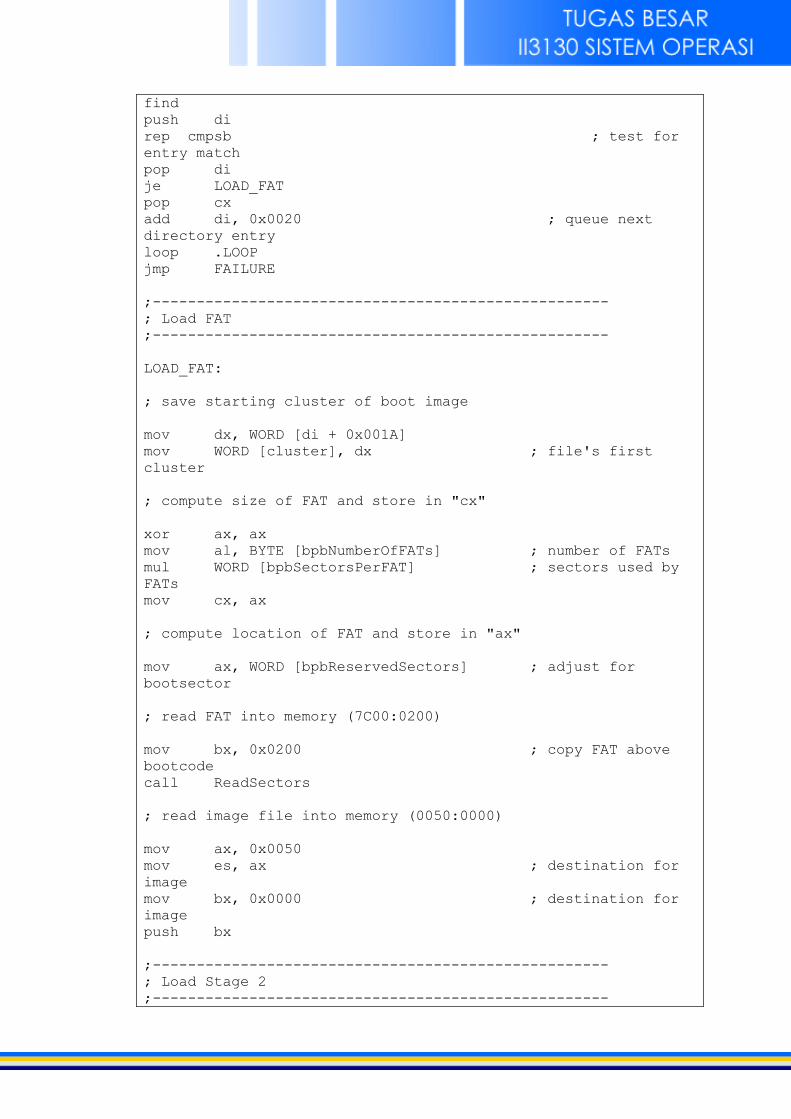
1. Boot1.asm
;*********************************************
; Boot1.asm
; - A Simple Bootloader
;
; Operating Systems Development Tutorial
;*********************************************
bits 16 ; we are in 16 bit real
mode
org 0 ; we will set regisers
later
start: jmp main ; jump to start of
bootloader
;*********************************************
; BIOS Parameter Block
;*********************************************
; BPB Begins 3 bytes from start. We do a far jump, which is 3
bytes in size.
; If you use a short jump, add a "nop" after it to offset the
3rd byte.
bpbOEM db "My OS "
bpbBytesPerSector: DW 512
bpbSectorsPerCluster: DB 1
bpbReservedSectors: DW 1
bpbNumberOfFATs: DB 2
bpbRootEntries: DW 224
bpbTotalSectors: DW 2880
bpbMedia: DB 0xf0 ;; 0xF1
bpbSectorsPerFAT: DW 9
bpbSectorsPerTrack: DW 18
bpbHeadsPerCylinder: DW 2
bpbHiddenSectors: DD 0
bpbTotalSectorsBig: DD 0
bsDriveNumber: DB 0
bsUnused: DB 0
bsExtBootSignature: DB 0x29
bsSerialNumber: DD 0xa0a1a2a3
bsVolumeLabel: DB "MOS FLOPPY "
bsFileSystem: DB "FAT12 "
;************************************************;
; Prints a string
; DS=>SI: 0 terminated string
;************************************************;
Print:
lodsb ; load next byte from string
from SI to AL
or al, al ; Does AL=0?
jz PrintDone ; Yep, null terminator found-
bail out
mov ah, 0eh ; Nope-Print the
character
int 10h
jmp Print ; Repeat until null terminator
found
PrintDone:
ret ; we are done, so return
absoluteSector db 0x00
absoluteHead db 0x00
absoluteTrack db 0x00
;************************************************;
; Convert CHS to LBA
; LBA = (cluster - 2) * sectors per cluster
;************************************************;
ClusterLBA:
sub ax, 0x0002 ; zero base
cluster number
xor cx, cx
mov cl, BYTE [bpbSectorsPerCluster] ; convert byte to
word
mul cx
add ax, WORD [datasector] ; base data sector
ret
;************************************************;
; Convert LBA to CHS
; AX=>LBA Address to convert
;
; absolute sector = (logical sector / sectors per track) + 1
; absolute head = (logical sector / sectors per track) MOD
number of heads
; absolute track = logical sector / (sectors per track *
number of heads)
;
;************************************************;
LBACHS:
xor dx, dx ; prepare dx:ax
for operation
div WORD [bpbSectorsPerTrack] ; calculate
inc dl ; adjust for
sector 0
mov BYTE [absoluteSector], dl
xor dx, dx ; prepare dx:ax
for operation
div WORD [bpbHeadsPerCylinder] ; calculate
mov BYTE [absoluteHead], dl
mov BYTE [absoluteTrack], al
ret
;************************************************;
; Reads a series of sectors
; CX=>Number of sectors to read
; AX=>Starting sector
; ES:BX=>Buffer to read to
;************************************************;
ReadSectors:
.MAIN
mov di, 0x0005 ; five retries for
error
.SECTORLOOP
push ax
push bx
push cx
call LBACHS ; convert starting
sector to CHS
mov ah, 0x02 ; BIOS read sector
mov al, 0x01 ; read one sector
mov ch, BYTE [absoluteTrack] ; track
mov cl, BYTE [absoluteSector] ; sector
mov dh, BYTE [absoluteHead] ; head
mov dl, BYTE [bsDriveNumber] ; drive
int 0x13 ; invoke BIOS
jnc .SUCCESS ; test for read
error
xor ax, ax ; BIOS reset disk
int 0x13 ; invoke BIOS
dec di ; decrement error
counter
pop cx
pop bx
pop ax
jnz .SECTORLOOP ; attempt to read
again
int 0x18
.SUCCESS
mov si, msgProgress
call Print
pop cx
pop bx
pop ax
add bx, WORD [bpbBytesPerSector] ; queue next
buffer
inc ax ; queue next
sector
loop .MAIN ; read next sector
ret
;*********************************************
; Bootloader Entry Point
;*********************************************
main:
;----------------------------------------------------
; code located at 0000:7C00, adjust segment registers
;----------------------------------------------------
cli ; disable interrupts
mov ax, 0x07C0 ; setup registers to
point to our segment
mov ds, ax
mov es, ax
mov fs, ax
mov gs, ax
;----------------------------------------------------
; create stack
;----------------------------------------------------
mov ax, 0x0000 ; set the stack
mov ss, ax
mov sp, 0xFFFF
sti ; restore interrupts
mov [bootdevice], dl
;----------------------------------------------------
; Load root directory table
;----------------------------------------------------
LOAD_ROOT:
; compute size of root directory and store in "cx"
xor cx, cx
xor dx, dx
mov ax, 0x0020 ; 32 byte
directory entry
mul WORD [bpbRootEntries] ; total size of
directory
div WORD [bpbBytesPerSector] ; sectors used by
directory
xchg ax, cx
; compute location of root directory and store in "ax"
mov al, BYTE [bpbNumberOfFATs] ; number of FATs
mul WORD [bpbSectorsPerFAT] ; sectors used
by FATs
add ax, WORD [bpbReservedSectors] ; adjust for
bootsector
mov WORD [datasector], ax ; base of root
directory
add WORD [datasector], cx
; read root directory into memory (7C00:0200)
mov bx, 0x0200 ; copy root dir
above bootcode
call ReadSectors
;----------------------------------------------------
; Find stage 2
;----------------------------------------------------
; browse root directory for binary image
mov cx, WORD [bpbRootEntries] ; load loop
counter
mov di, 0x0200 ; locate first
root entry
.LOOP:
push cx
mov cx, 0x000B ; eleven
character name
mov si, ImageName ; image name to
find
push di
rep cmpsb ; test for
entry match
pop di
je LOAD_FAT
pop cx
add di, 0x0020 ; queue next
directory entry
loop .LOOP
jmp FAILURE
;----------------------------------------------------
; Load FAT
;----------------------------------------------------
LOAD_FAT:
; save starting cluster of boot image
mov dx, WORD [di + 0x001A]
mov WORD [cluster], dx ; file's first
cluster
; compute size of FAT and store in "cx"
xor ax, ax
mov al, BYTE [bpbNumberOfFATs] ; number of FATs
mul WORD [bpbSectorsPerFAT] ; sectors used by
FATs
mov cx, ax
; compute location of FAT and store in "ax"
mov ax, WORD [bpbReservedSectors] ; adjust for
bootsector
; read FAT into memory (7C00:0200)
mov bx, 0x0200 ; copy FAT above
bootcode
call ReadSectors
; read image file into memory (0050:0000)
mov ax, 0x0050
mov es, ax ; destination for
image
mov bx, 0x0000 ; destination for
image
push bx
;----------------------------------------------------
; Load Stage 2
;----------------------------------------------------

LOAD_IMAGE:
mov ax, WORD [cluster] ; cluster to read
pop bx ; buffer to read
into
call ClusterLBA ; convert cluster
to LBA
xor cx, cx
mov cl, BYTE [bpbSectorsPerCluster] ; sectors to read
call ReadSectors
push bx
; compute next cluster
mov ax, WORD [cluster] ; identify current
cluster
mov cx, ax ; copy current
cluster
mov dx, ax ; copy current
cluster
shr dx, 0x0001 ; divide by two
add cx, dx ; sum for (3/2)
mov bx, 0x0200 ; location of FAT
in memory
add bx, cx ; index into FAT
mov dx, WORD [bx] ; read two bytes
from FAT
test ax, 0x0001
jnz .ODD_CLUSTER
.EVEN_CLUSTER:
and dx, 0000111111111111b ; take low twelve
bits
jmp .DONE
.ODD_CLUSTER:
shr dx, 0x0004 ; take high twelve
bits
.DONE:
mov WORD [cluster], dx ; store new
cluster
cmp dx, 0x0FF0 ; test for end of
file
jb LOAD_IMAGE
DONE:
mov si, msgCRLF
call Print
mov dl, [bootdevice]
push WORD 0x0050
push WORD 0x0000
retf
FAILURE:
mov si, msgFailure
call Print
mov ah, 0x00
int 0x16 ; await keypress
int 0x19 ; warm boot
computer
bootdevice db 0
datasector dw 0x0000
cluster dw 0x0000
ImageName db "KRNLDR SYS"
msgCRLF db 0x0D, 0x0A, 0x00
msgProgress db ".", 0x00
msgFailure db 0x0D, 0x0A, "MISSING OR CURRUPT KRNLDR. Press
Any Key to Reboot", 0x0D, 0x0A, 0x00
TIMES 510-($-$$) DB 0
DW 0xAA55
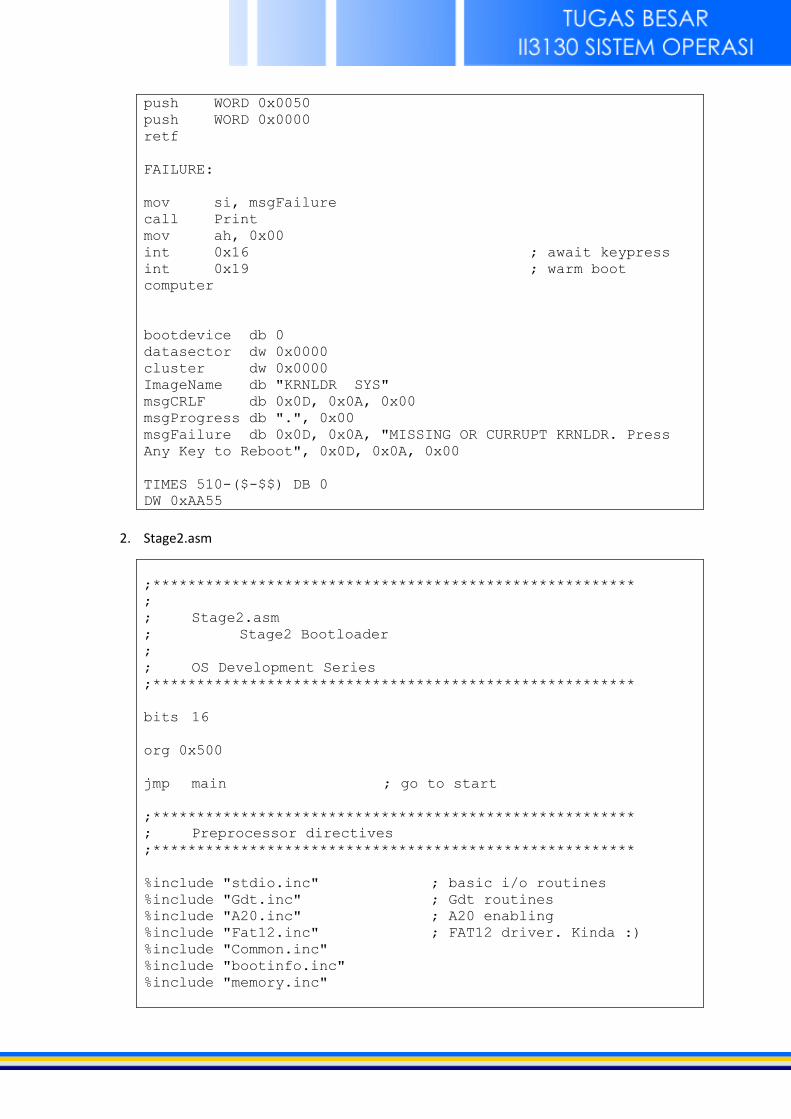
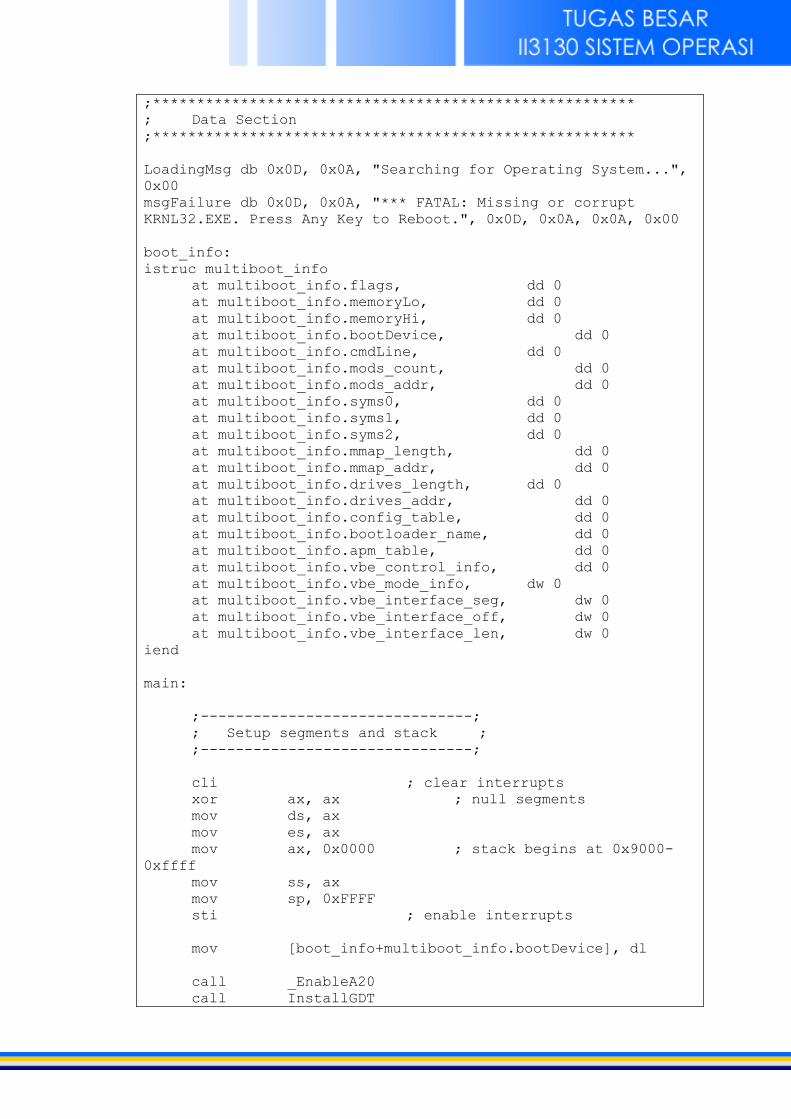
2. Stage2.asm
;*******************************************************
;
; Stage2.asm
; Stage2 Bootloader
;
; OS Development Series
;*******************************************************
bits 16
org 0x500
jmp main ; go to start
;*******************************************************
; Preprocessor directives
;*******************************************************
%include "stdio.inc" ; basic i/o routines
%include "Gdt.inc" ; Gdt routines
%include "A20.inc" ; A20 enabling
%include "Fat12.inc" ; FAT12 driver. Kinda :)
%include "Common.inc"
%include "bootinfo.inc"
%include "memory.inc"
;*******************************************************
; Data Section
;*******************************************************
LoadingMsg db 0x0D, 0x0A, "Searching for Operating System...",
0x00
msgFailure db 0x0D, 0x0A, "*** FATAL: Missing or corrupt
KRNL32.EXE. Press Any Key to Reboot.", 0x0D, 0x0A, 0x0A, 0x00
boot_info:
istruc multiboot_info
at multiboot_info.flags, dd 0
at multiboot_info.memoryLo, dd 0
at multiboot_info.memoryHi, dd 0
at multiboot_info.bootDevice, dd 0
at multiboot_info.cmdLine, dd 0
at multiboot_info.mods_count, dd 0
at multiboot_info.mods_addr, dd 0
at multiboot_info.syms0, dd 0
at multiboot_info.syms1, dd 0
at multiboot_info.syms2, dd 0
at multiboot_info.mmap_length, dd 0
at multiboot_info.mmap_addr, dd 0
at multiboot_info.drives_length, dd 0
at multiboot_info.drives_addr, dd 0
at multiboot_info.config_table, dd 0
at multiboot_info.bootloader_name, dd 0
at multiboot_info.apm_table, dd 0
at multiboot_info.vbe_control_info, dd 0
at multiboot_info.vbe_mode_info, dw 0
at multiboot_info.vbe_interface_seg, dw 0
at multiboot_info.vbe_interface_off, dw 0
at multiboot_info.vbe_interface_len, dw 0
iend
main:
;-------------------------------;
; Setup segments and stack ;
;-------------------------------;
cli ; clear interrupts
xor ax, ax ; null segments
mov ds, ax
mov es, ax
mov ax, 0x0000 ; stack begins at 0x9000-
0xffff
mov ss, ax
mov sp, 0xFFFF
sti ; enable interrupts
mov [boot_info+multiboot_info.bootDevice], dl
call _EnableA20
call InstallGDT
sti
xor eax, eax
xor ebx, ebx
call BiosGetMemorySize64MB
push eax
mov eax, 64
mul ebx
mov ecx, eax
pop eax
add eax, ecx
add eax, 1024 ; the routine doesnt add the
KB between 0-1MB; add it
mov dword [boot_info+multiboot_info.memoryHi], 0
mov dword [boot_info+multiboot_info.memoryLo], eax
mov eax, 0x0
mov ds, ax
mov di, 0x1000
call BiosGetMemoryMap
call LoadRoot
mov ebx, 0
mov ebp, IMAGE_RMODE_BASE
mov esi, ImageName
call LoadFile ; load our file
mov dword [ImageSize], ecx
cmp ax, 0
je EnterStage3
mov si, msgFailure
call Puts16
mov ah, 0
; int 0x16 ; await keypress
; int 0x19 ; warm boot computer
;-------------------------------;
; Go into pmode ;
;-------------------------------;
EnterStage3:
cli ; clear interrupts
mov eax, cr0 ; set bit 0 in cr0--enter
pmode
or eax, 1
mov cr0, eax
jmp CODE_DESC:Stage3 ; far jump to fix
CS. Remember that the code selector is 0x8!
; Note: Do NOT re-enable interrupts! Doing so will triple
fault!
; We will fix this in Stage 3.
;******************************************************
; ENTRY POINT FOR STAGE 3
;******************************************************
bits 32
%include "Paging.inc"
BadImage db "*** FATAL: Invalid or corrupt kernel image.
Halting system.", 0
Stage3:
;-------------------------------;
; Set registers ;
;-------------------------------;
mov ax, DATA_DESC ; set data segments to data
selector (0x10)
mov ds, ax
mov ss, ax
mov es, ax
mov esp, 9000h ; stack begins from 90000h
call ClrScr32
call EnablePaging
CopyImage:
mov eax, dword [ImageSize]
movzx ebx, word [bpbBytesPerSector]
mul ebx
mov ebx, 4
div ebx
cld
mov esi, IMAGE_RMODE_BASE
mov edi, IMAGE_PMODE_BASE
mov ecx, eax
rep movsd ; copy image to its
protected mode address
TestImage:
mov ebx, [IMAGE_PMODE_BASE+60]
add ebx, IMAGE_PMODE_BASE ; ebx now points to
file sig (PE00)
mov esi, ebx
mov edi, ImageSig
cmpsw
je EXECUTE
mov ebx, BadImage
call Puts32
cli
hlt
ImageSig db 'PE'
EXECUTE:
;---------------------------------------;
; Execute Kernel
;---------------------------------------;
; parse the programs header info structures to get its
entry point
add ebx, 24
mov eax, [ebx] ; _IMAGE_FILE_HEADER is
20 bytes + size of sig (4 bytes)
add ebx, 20-4 ; address of entry point
mov ebp, dword [ebx] ; get entry point offset
in code section
add ebx, 12 ; image base is
offset 8 bytes from entry point
mov eax, dword [ebx] ; add image base
add ebp, eax
cli
mov eax, 0x2badb002 ; multiboot specs
say eax should be this
mov ebx, 0
mov edx, [ImageSize]
push dword boot_info
call ebp ; Execute Kernel
add esp, 4
cli
hlt
;-- header information format for PE files -------------------
;typedef struct _IMAGE_DOS_HEADER { // DOS .EXE header
; USHORT e_magic; // Magic number (Should be MZ
; USHORT e_cblp; // Bytes on last page of file
; USHORT e_cp; // Pages in file
; USHORT e_crlc; // Relocations
; USHORT e_cparhdr; // Size of header in paragraphs
; USHORT e_minalloc; // Minimum extra paragraphs
needed
; USHORT e_maxalloc; // Maximum extra paragraphs
needed
; USHORT e_ss; // Initial (relative) SS value
; USHORT e_sp; // Initial SP value
; USHORT e_csum; // Checksum
; USHORT e_ip; // Initial IP value
; USHORT e_cs; // Initial (relative) CS value
; USHORT e_lfarlc; // File address of relocation
table
; USHORT e_ovno; // Overlay number
; USHORT e_res[4]; // Reserved words
; USHORT e_oemid; // OEM identifier (for e_oeminfo)
; USHORT e_oeminfo; // OEM information; e_oemid
specific
; USHORT e_res2[10]; // Reserved words
; LONG e_lfanew; // File address of new exe header
; } IMAGE_DOS_HEADER, *PIMAGE_DOS_HEADER;
;<<------ Real mode stub program -------->>
;<<------ Here is the file signiture, such as PE00 for NT ---
>>
;typedef struct _IMAGE_FILE_HEADER {
; USHORT Machine;
; USHORT NumberOfSections;
; ULONG TimeDateStamp;
; ULONG PointerToSymbolTable;
; ULONG NumberOfSymbols;
; USHORT SizeOfOptionalHeader;
; USHORT Characteristics;
;} IMAGE_FILE_HEADER, *PIMAGE_FILE_HEADER;
;struct _IMAGE_OPTIONAL_HEADER {
; //
; // Standard fields.
; //
; USHORT Magic;
; UCHAR MajorLinkerVersion;
; UCHAR MinorLinkerVersion;
; ULONG SizeOfCode;
; ULONG SizeOfInitializedData;
; ULONG SizeOfUninitializedData;
; ULONG AddressOfEntryPoint; << IMPORTANT!
; ULONG BaseOfCode;
; ULONG BaseOfData;
; //
; // NT additional fields.
; //
; ULONG ImageBase;
; ULONG SectionAlignment;
; ULONG FileAlignment;
; USHORT MajorOperatingSystemVersion;
; USHORT MinorOperatingSystemVersion;
; USHORT MajorImageVersion;
; USHORT MinorImageVersion;
; USHORT MajorSubsystemVersion;
; USHORT MinorSubsystemVersion;
; ULONG Reserved1;
; ULONG SizeOfImage;
; ULONG SizeOfHeaders;
; ULONG CheckSum;
; USHORT Subsystem;
; USHORT DllCharacteristics;
; ULONG SizeOfStackReserve;
; ULONG SizeOfStackCommit;
; ULONG SizeOfHeapReserve;
; ULONG SizeOfHeapCommit;
; ULONG LoaderFlags;
; ULONG NumberOfRvaAndSizes;
; IMAGE_DATA_DIRECTORY
DataDirectory[IMAGE_NUMBEROF_DIRECTORY_ENTRIES];
;} IMAGE_OPTIONAL_HEADER, *PIMAGE_OPTIONAL_HEADER;
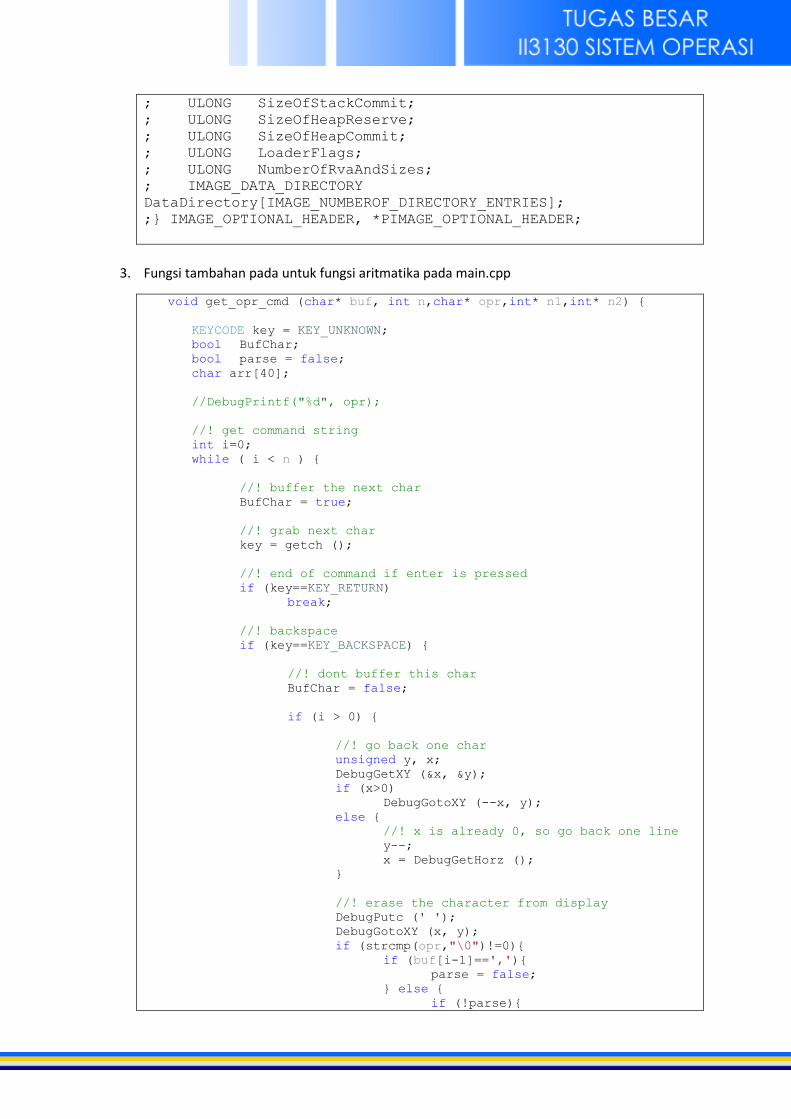
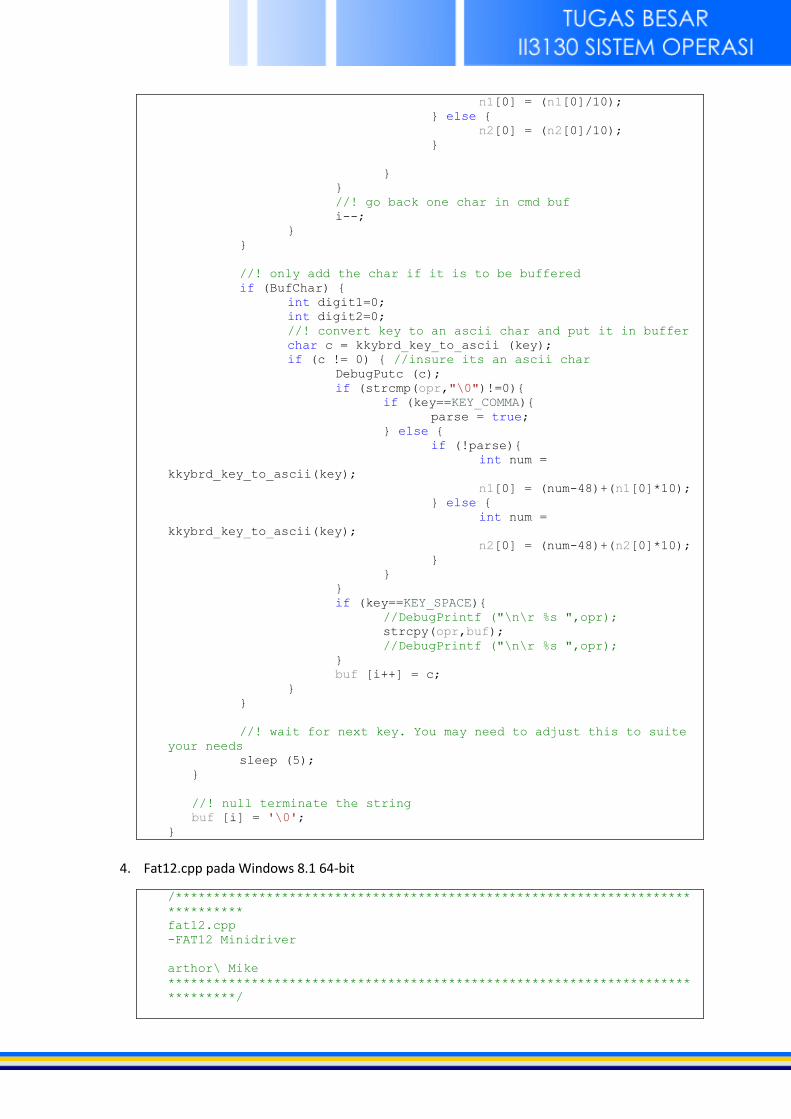
3. Fungsi tambahan pada untuk fungsi aritmatika pada main.cpp
void get_opr_cmd (char* buf, int n,char* opr,int* n1,int* n2) {
KEYCODE key = KEY_UNKNOWN;
bool BufChar;
bool parse = false;
char arr[40];
//DebugPrintf("%d", opr);
//! get command string
int i=0;
while ( i < n ) {
//! buffer the next char
BufChar = true;
//! grab next char
key = getch ();
//! end of command if enter is pressed
if (key==KEY_RETURN)
break;
//! backspace
if (key==KEY_BACKSPACE) {
//! dont buffer this char
BufChar = false;
if (i > 0) {
//! go back one char
unsigned y, x;
DebugGetXY (&x, &y);
if (x>0)
DebugGotoXY (--x, y);
else {
//! x is already 0, so go back one line
y--;
x = DebugGetHorz ();
}
//! erase the character from display
DebugPutc (' ');
DebugGotoXY (x, y);
if (strcmp(opr,"\0")!=0){
if (buf[i-1]==','){
parse = false;
} else {
if (!parse){
n1[0] = (n1[0]/10);
} else {
n2[0] = (n2[0]/10);
}
}
}
//! go back one char in cmd buf
i--;
}
}
//! only add the char if it is to be buffered
if (BufChar) {
int digit1=0;
int digit2=0;
//! convert key to an ascii char and put it in buffer
char c = kkybrd_key_to_ascii (key);
if (c != 0) { //insure its an ascii char
DebugPutc (c);
if (strcmp(opr,"\0")!=0){
if (key==KEY_COMMA){
parse = true;
} else {
if (!parse){
int num =
kkybrd_key_to_ascii(key);
n1[0] = (num-48)+(n1[0]*10);
} else {
int num =
kkybrd_key_to_ascii(key);
n2[0] = (num-48)+(n2[0]*10);
}
}
}
if (key==KEY_SPACE){
//DebugPrintf ("\n\r %s ",opr);
strcpy(opr,buf);
//DebugPrintf ("\n\r %s ",opr);
}
buf [i++] = c;
}
}
//! wait for next key. You may need to adjust this to suite
your needs
sleep (5);
}
//! null terminate the string
buf [i] = '\0';
}
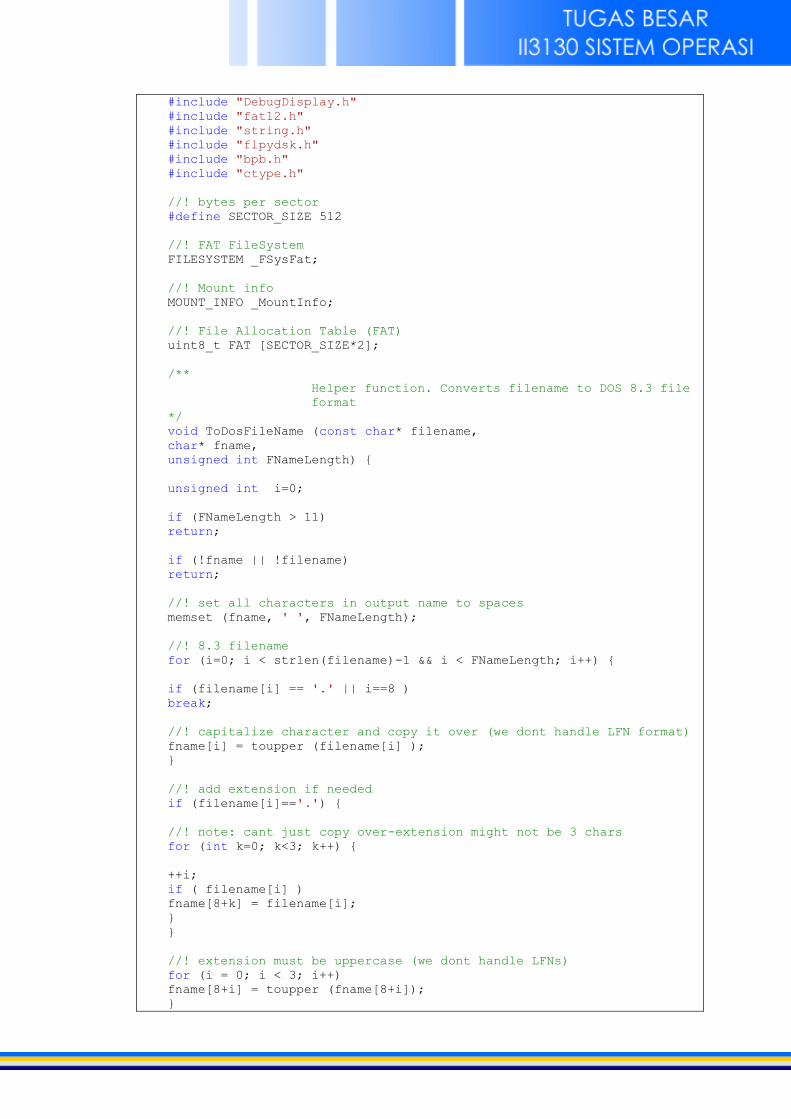
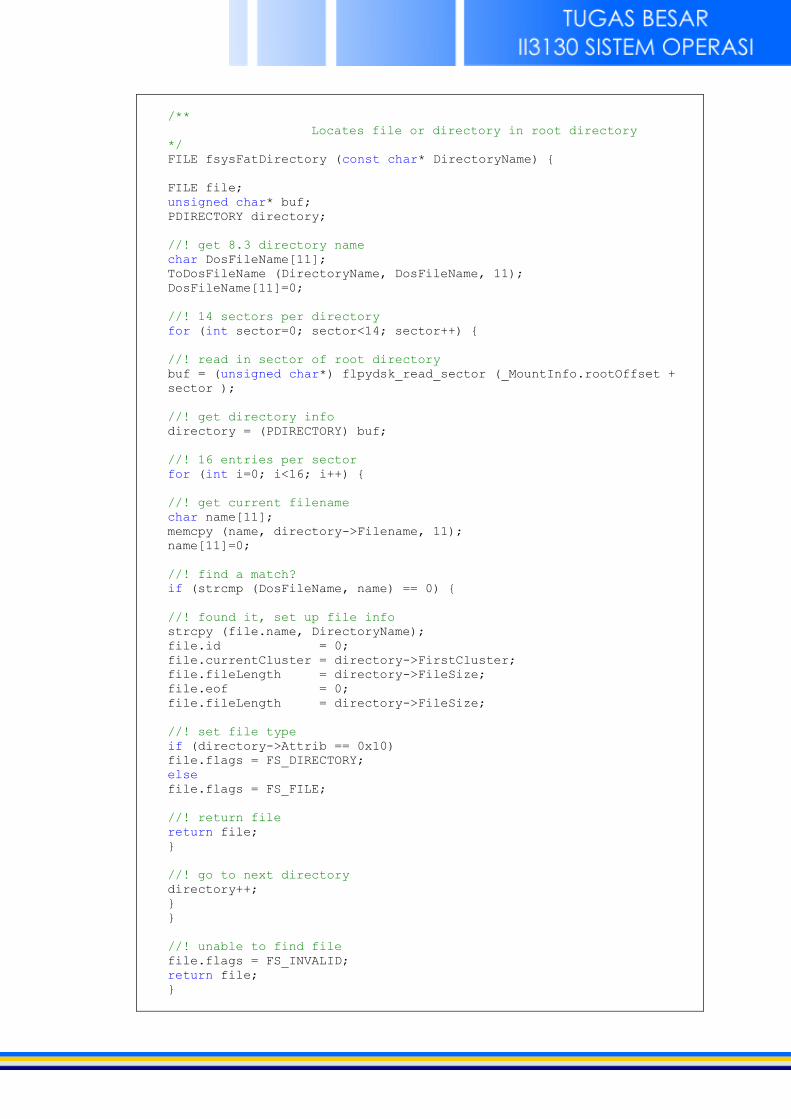
4. Fat12.cpp pada Windows 8.1 64-bit
/********************************************************************
**********
fat12.cpp
-FAT12 Minidriver
arthor\ Mike
*********************************************************************
*********/
#include "DebugDisplay.h"
#include "fat12.h"
#include "string.h"
#include "flpydsk.h"
#include "bpb.h"
#include "ctype.h"
//! bytes per sector
#define SECTOR_SIZE 512
//! FAT FileSystem
FILESYSTEM _FSysFat;
//! Mount info
MOUNT_INFO _MountInfo;
//! File Allocation Table (FAT)
uint8_t FAT [SECTOR_SIZE*2];
/**
Helper function. Converts filename to DOS 8.3 file
format
*/
void ToDosFileName (const char* filename,
char* fname,
unsigned int FNameLength) {
unsigned int i=0;
if (FNameLength > 11)
return;
if (!fname || !filename)
return;
//! set all characters in output name to spaces
memset (fname, ' ', FNameLength);
//! 8.3 filename
for (i=0; i < strlen(filename)-1 && i < FNameLength; i++) {
if (filename[i] == '.' || i==8 )
break;
//! capitalize character and copy it over (we dont handle LFN format)
fname[i] = toupper (filename[i] );
}
//! add extension if needed
if (filename[i]=='.') {
//! note: cant just copy over-extension might not be 3 chars
for (int k=0; k<3; k++) {
++i;
if ( filename[i] )
fname[8+k] = filename[i];
}
}
//! extension must be uppercase (we dont handle LFNs)
for (i = 0; i < 3; i++)
fname[8+i] = toupper (fname[8+i]);
}
/**
Locates file or directory in root directory
*/
FILE fsysFatDirectory (const char* DirectoryName) {
FILE file;
unsigned char* buf;
PDIRECTORY directory;
//! get 8.3 directory name
char DosFileName[11];
ToDosFileName (DirectoryName, DosFileName, 11);
DosFileName[11]=0;
//! 14 sectors per directory
for (int sector=0; sector<14; sector++) {
//! read in sector of root directory
buf = (unsigned char*) flpydsk_read_sector (_MountInfo.rootOffset +
sector );
//! get directory info
directory = (PDIRECTORY) buf;
//! 16 entries per sector
for (int i=0; i<16; i++) {
//! get current filename
char name[11];
memcpy (name, directory->Filename, 11);
name[11]=0;
//! find a match?
if (strcmp (DosFileName, name) == 0) {
//! found it, set up file info
strcpy (file.name, DirectoryName);
file.id = 0;
file.currentCluster = directory->FirstCluster;
file.fileLength = directory->FileSize;
file.eof = 0;
file.fileLength = directory->FileSize;
//! set file type
if (directory->Attrib == 0x10)
file.flags = FS_DIRECTORY;
else
file.flags = FS_FILE;
//! return file
return file;
}
//! go to next directory
directory++;
}
}
//! unable to find file
file.flags = FS_INVALID;
return file;
}
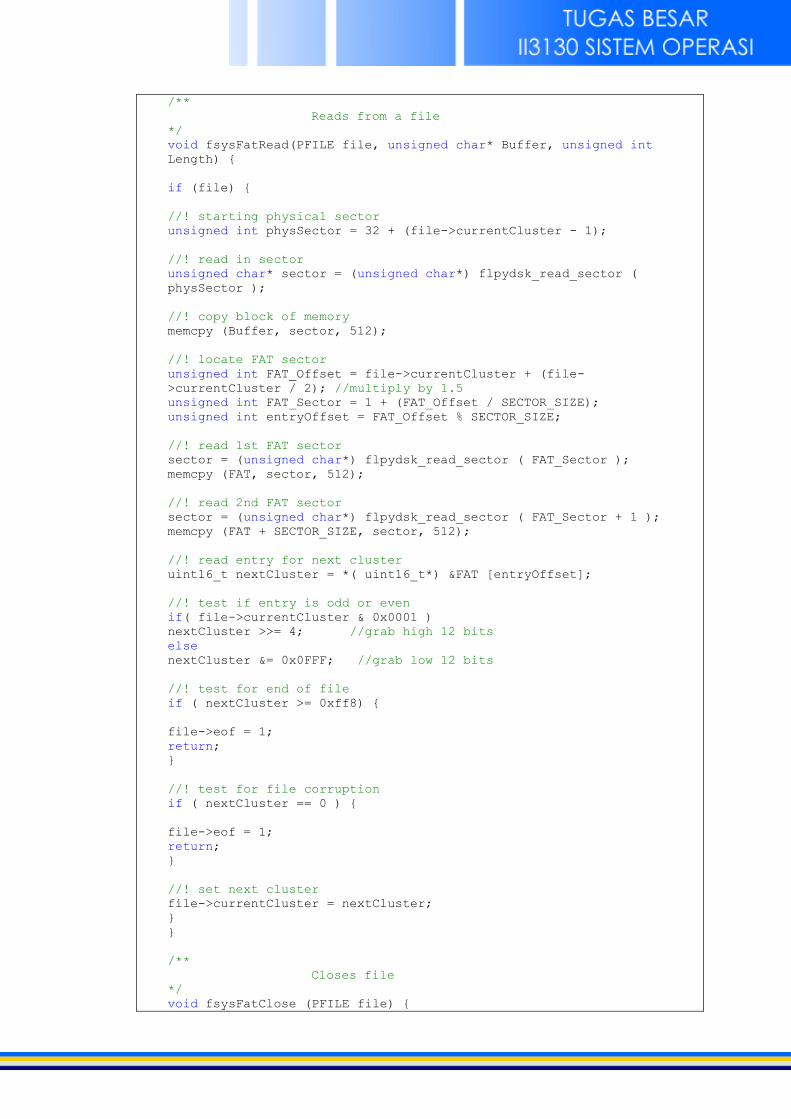
/**
Reads from a file
*/
void fsysFatRead(PFILE file, unsigned char* Buffer, unsigned int
Length) {
if (file) {
//! starting physical sector
unsigned int physSector = 32 + (file->currentCluster - 1);
//! read in sector
unsigned char* sector = (unsigned char*) flpydsk_read_sector (
physSector );
//! copy block of memory
memcpy (Buffer, sector, 512);
//! locate FAT sector
unsigned int FAT_Offset = file->currentCluster + (file-
>currentCluster / 2); //multiply by 1.5
unsigned int FAT_Sector = 1 + (FAT_Offset / SECTOR_SIZE);
unsigned int entryOffset = FAT_Offset % SECTOR_SIZE;
//! read 1st FAT sector
sector = (unsigned char*) flpydsk_read_sector ( FAT_Sector );
memcpy (FAT, sector, 512);
//! read 2nd FAT sector
sector = (unsigned char*) flpydsk_read_sector ( FAT_Sector + 1 );
memcpy (FAT + SECTOR_SIZE, sector, 512);
//! read entry for next cluster
uint16_t nextCluster = *( uint16_t*) &FAT [entryOffset];
//! test if entry is odd or even
if( file->currentCluster & 0x0001 )
nextCluster >>= 4; //grab high 12 bits
else
nextCluster &= 0x0FFF; //grab low 12 bits
//! test for end of file
if ( nextCluster >= 0xff8) {
file->eof = 1;
return;
}
//! test for file corruption
if ( nextCluster == 0 ) {
file->eof = 1;
return;
}
//! set next cluster
file->currentCluster = nextCluster;
}
}
/**
Closes file
*/
void fsysFatClose (PFILE file) {
if (file)
file->flags = FS_INVALID;
}
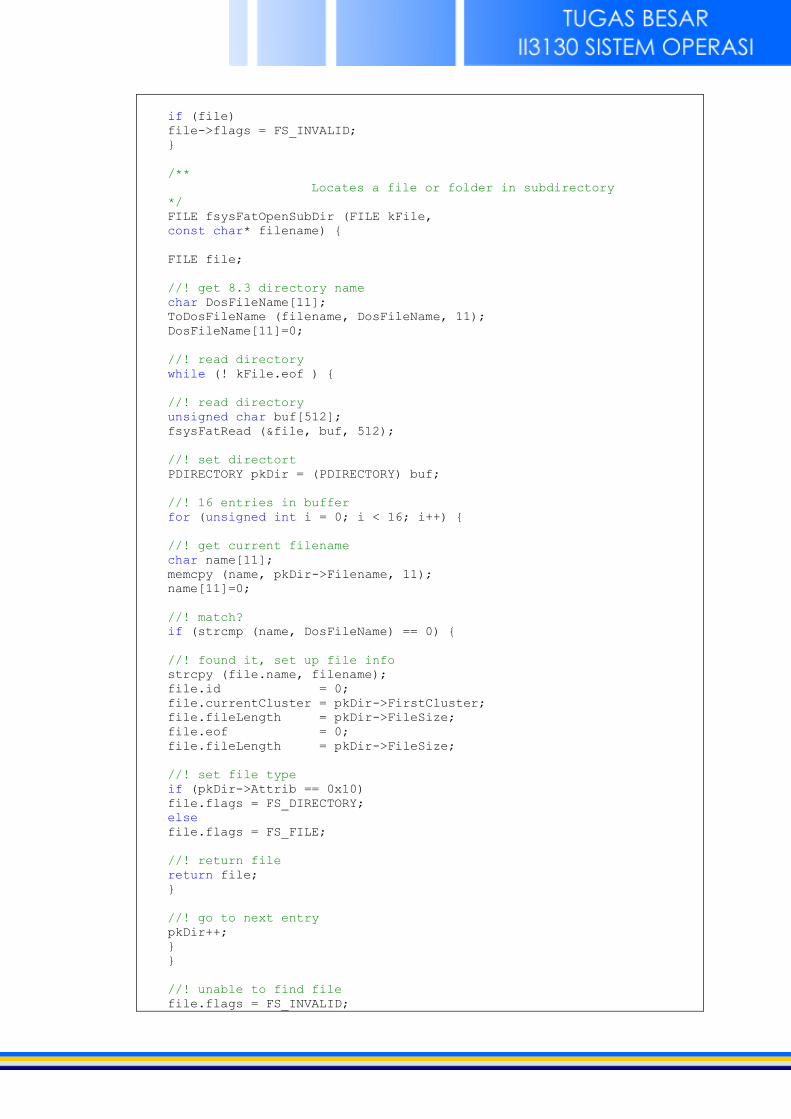
/**
Locates a file or folder in subdirectory
*/
FILE fsysFatOpenSubDir (FILE kFile,
const char* filename) {
FILE file;
//! get 8.3 directory name
char DosFileName[11];
ToDosFileName (filename, DosFileName, 11);
DosFileName[11]=0;
//! read directory
while (! kFile.eof ) {
//! read directory
unsigned char buf[512];
fsysFatRead (&file, buf, 512);
//! set directort
PDIRECTORY pkDir = (PDIRECTORY) buf;
//! 16 entries in buffer
for (unsigned int i = 0; i < 16; i++) {
//! get current filename
char name[11];
memcpy (name, pkDir->Filename, 11);
name[11]=0;
//! match?
if (strcmp (name, DosFileName) == 0) {
//! found it, set up file info
strcpy (file.name, filename);
file.id = 0;
file.currentCluster = pkDir->FirstCluster;
file.fileLength = pkDir->FileSize;
file.eof = 0;
file.fileLength = pkDir->FileSize;
//! set file type
if (pkDir->Attrib == 0x10)
file.flags = FS_DIRECTORY;
else
file.flags = FS_FILE;
//! return file
return file;
}
//! go to next entry
pkDir++;
}
}
//! unable to find file
file.flags = FS_INVALID;
return file;
}
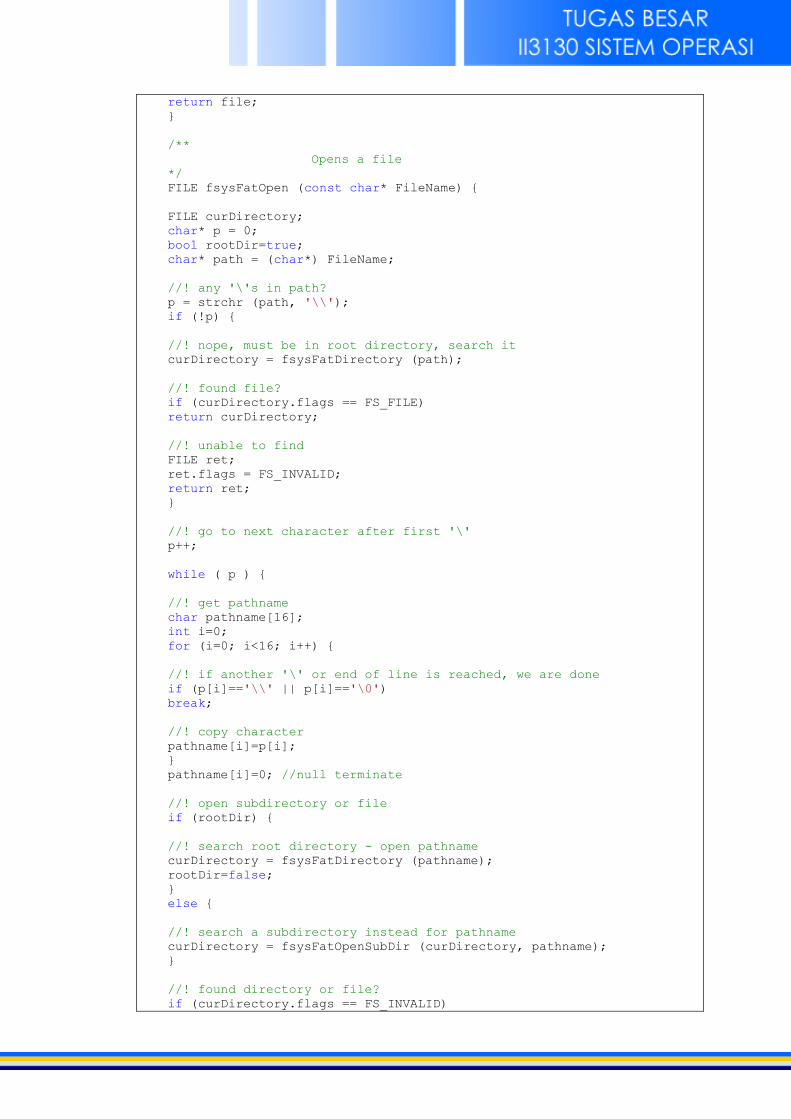
/**
Opens a file
*/
FILE fsysFatOpen (const char* FileName) {
FILE curDirectory;
char* p = 0;
bool rootDir=true;
char* path = (char*) FileName;
//! any '\'s in path?
p = strchr (path, '\\');
if (!p) {
//! nope, must be in root directory, search it
curDirectory = fsysFatDirectory (path);
//! found file?
if (curDirectory.flags == FS_FILE)
return curDirectory;
//! unable to find
FILE ret;
ret.flags = FS_INVALID;
return ret;
}
//! go to next character after first '\'
p++;
while ( p ) {
//! get pathname
char pathname[16];
int i=0;
for (i=0; i<16; i++) {
//! if another '\' or end of line is reached, we are done
if (p[i]=='\\' || p[i]=='\0')
break;
//! copy character
pathname[i]=p[i];
}
pathname[i]=0; //null terminate
//! open subdirectory or file
if (rootDir) {
//! search root directory - open pathname
curDirectory = fsysFatDirectory (pathname);
rootDir=false;
}
else {
//! search a subdirectory instead for pathname
curDirectory = fsysFatOpenSubDir (curDirectory, pathname);
}
//! found directory or file?
if (curDirectory.flags == FS_INVALID)
break;
//! found file?
if (curDirectory.flags == FS_FILE)
return curDirectory;
//! find next '\'
p=strchr (p+1, '\\');
if (p)
p++;
}
//! unable to find
FILE ret;
ret.flags = FS_INVALID;
return ret;
}
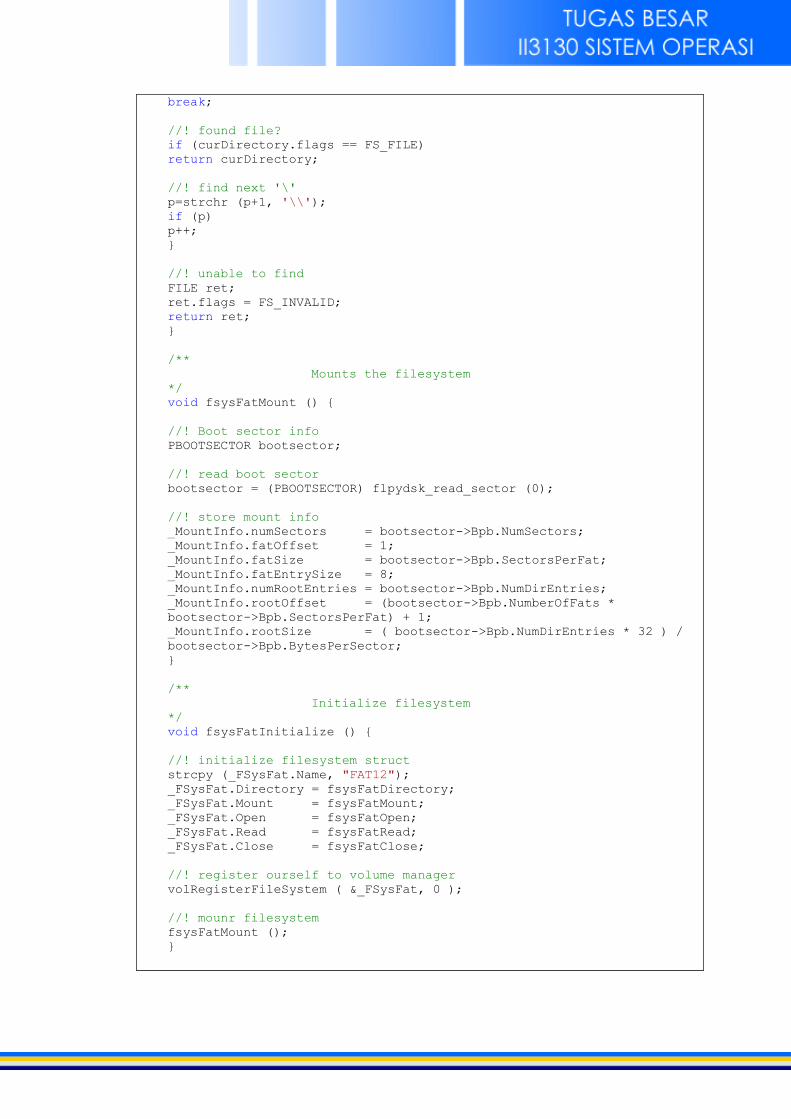
/**
Mounts the filesystem
*/
void fsysFatMount () {
//! Boot sector info
PBOOTSECTOR bootsector;
//! read boot sector
bootsector = (PBOOTSECTOR) flpydsk_read_sector (0);
//! store mount info
_MountInfo.numSectors = bootsector->Bpb.NumSectors;
_MountInfo.fatOffset = 1;
_MountInfo.fatSize = bootsector->Bpb.SectorsPerFat;
_MountInfo.fatEntrySize = 8;
_MountInfo.numRootEntries = bootsector->Bpb.NumDirEntries;
_MountInfo.rootOffset = (bootsector->Bpb.NumberOfFats *
bootsector->Bpb.SectorsPerFat) + 1;
_MountInfo.rootSize = ( bootsector->Bpb.NumDirEntries * 32 ) /
bootsector->Bpb.BytesPerSector;
}
/**
Initialize filesystem
*/
void fsysFatInitialize () {
//! initialize filesystem struct
strcpy (_FSysFat.Name, "FAT12");
_FSysFat.Directory = fsysFatDirectory;
_FSysFat.Mount = fsysFatMount;
_FSysFat.Open = fsysFatOpen;
_FSysFat.Read = fsysFatRead;
_FSysFat.Close = fsysFatClose;
//! register ourself to volume manager
volRegisterFileSystem ( &_FSysFat, 0 );
//! mounr filesystem
fsysFatMount ();
}

Kesimpulan Tutorial yang diberikan Brokenthorn masih memiliki banyak bug dan memiliki keterbatasan
lingkungan pengembangan. Pada situs Brokenthorn dikembangkan pada Windows 32-bit
dengan tools Microsoft Visual Studio 2005 dan tidak mudah untuk beradaptasi dengan
lingkungan pengembangan lainnya, seperti Windows 64-bit dan Microsoft Visual Studio versi
lain.
Fungsi aritmatika dapat dikembangkan secara langsung pada Kernel tanpa memerlukan
interface lain. Pengembangan fungsi ini akan lebih mudah dengan cara membuat fungsi baru
sehingga tidak perlu memodifikasi fungsi yang sudah ada.
File System tidak dapat dikembangkan karena belum stabilnya OS yang dibuat.
Saran Selain saran yang disampaikan pada tugas sebelumnya, saran yang muncul dari pengerjaan tugas ini
adalah akan lebih baik apabila pemberi tugas telah berhasil mengerjakan tugas yang diberikan
terlebih dahulu. Hal ini akan berpengaruh pada efisiensi waktu pengerjaan dan akan ada tempat
bertanya yang pasti.
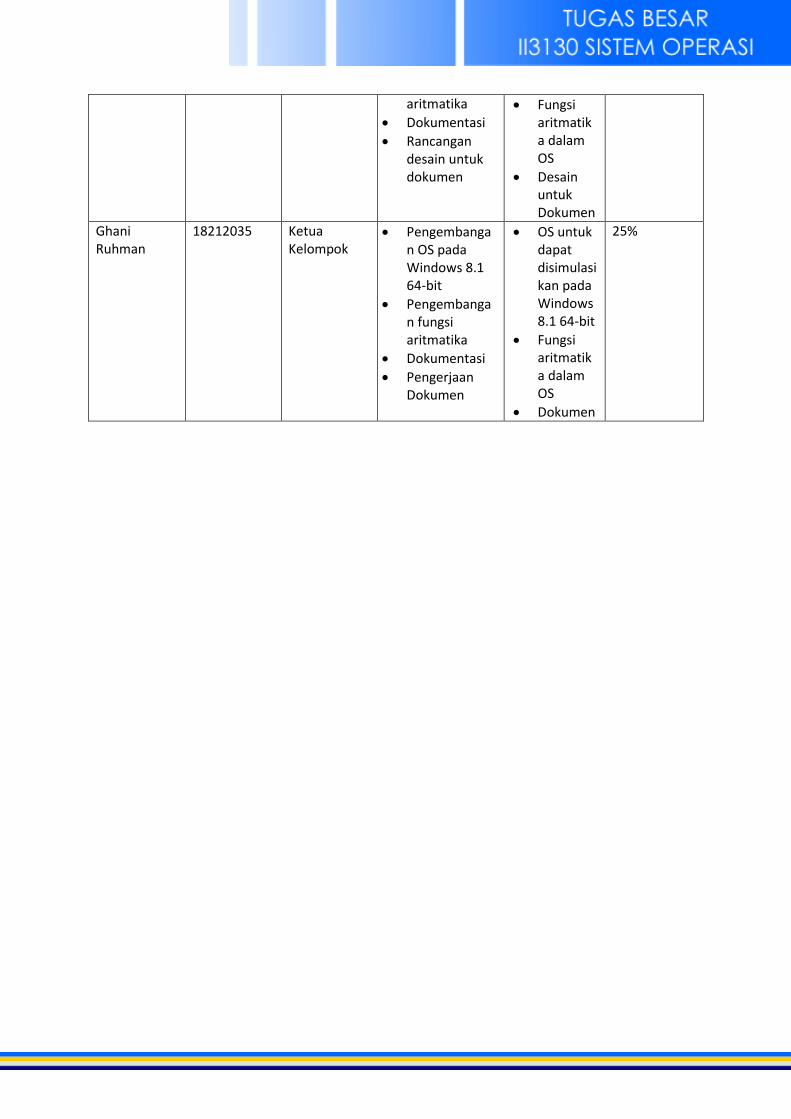
Pembagian Kerja Nama NIM Tanggung
Jawab Pekerjaan Hasil Presentase
Kerja Keseluruhan
Miftakhul Afrizal Ricko Primantara
18212014 Anggota Kelompok
Pengembangan OS pada Windows 7 32-bit
Pengembangan fungsi aritmatika
Dokumentasi
OS untuk dapat disimulasikan pada Windows 7 32-bit
Fungsi aritmatika dalam OS
25%
Rizal Kurnia Rohman
18212015 Anggota Kelompok
Pengembangan OS pada Windows 8.1 64-bit
Finishing Dokumen
Pengumpulan
OS untuk dapat disimulasikan pada Windows 8.1 64-bit
Seluruh deliverables dikumpulkan
25%
Hilman Ramadhan
18212024 Anggota Kelompok
Pengembangan OS pada Windows 8.1 64-bit
Pengembangan fungsi
OS untuk dapat disimulasikan pada Windows 8.1 64-bit
25%
aritmatika
Dokumentasi
Rancangan desain untuk dokumen
Fungsi aritmatika dalam OS
Desain untuk Dokumen
Ghani Ruhman
18212035 Ketua Kelompok
Pengembangan OS pada Windows 8.1 64-bit
Pengembangan fungsi aritmatika
Dokumentasi
Pengerjaan Dokumen
OS untuk dapat disimulasikan pada Windows 8.1 64-bit
Fungsi aritmatika dalam OS
Dokumen
25%