State of New Hampshire
Edraw V 6.8 / 7.0
Getting Started Guide
(Freeware version)
September 2014
Office of Information Services, Lean Team
Edraw 6.8 – 7.0 (Freeware Version) User Manual Page 2
Manual Version 1.1
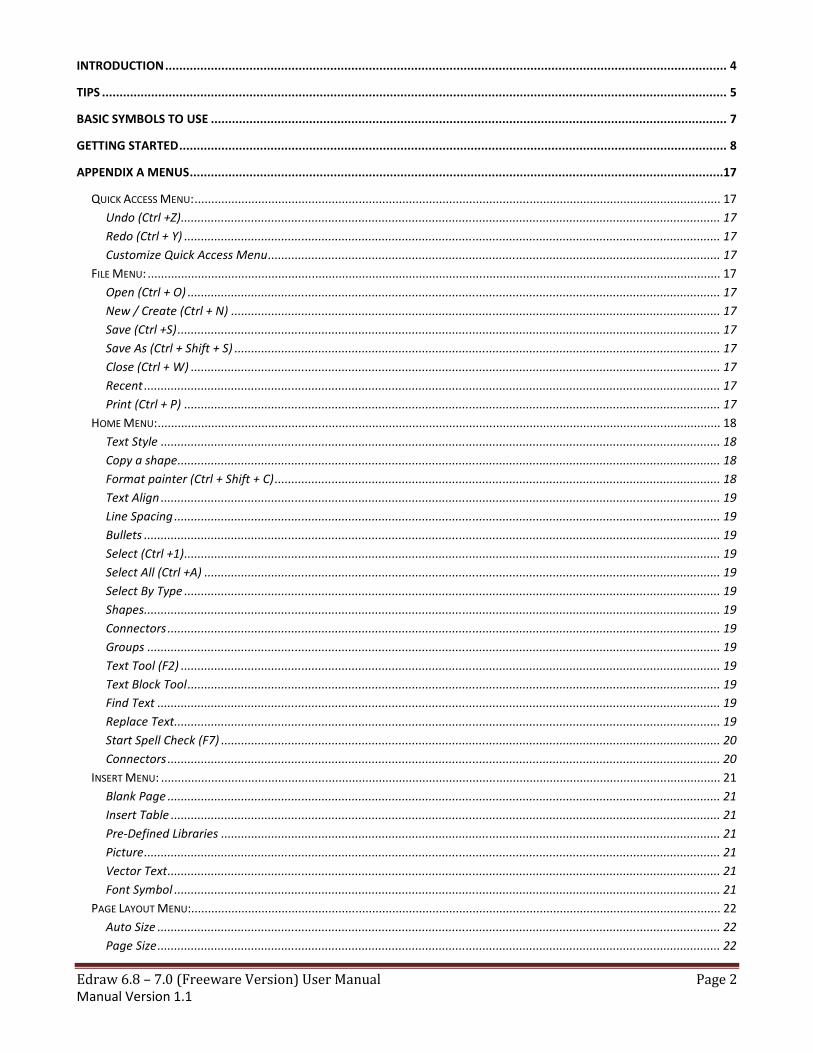
INTRODUCTION ................................................................................................................................................................ 4
TIPS .................................................................................................................................................................................. 5
BASIC SYMBOLS TO USE ................................................................................................................................................... 7
GETTING STARTED ............................................................................................................................................................ 8
APPENDIX A MENUS ........................................................................................................................................................17
QUICK ACCESS MENU: ............................................................................................................................................................. 17
Undo (Ctrl +Z) ................................................................................................................................................................. 17
Redo (Ctrl + Y) ................................................................................................................................................................ 17
Customize Quick Access Menu ....................................................................................................................................... 17
FILE MENU: ........................................................................................................................................................................... 17
Open (Ctrl + O) ............................................................................................................................................................... 17
New / Create (Ctrl + N) .................................................................................................................................................. 17
Save (Ctrl +S) .................................................................................................................................................................. 17
Save As (Ctrl + Shift + S) ................................................................................................................................................. 17
Close (Ctrl + W) .............................................................................................................................................................. 17
Recent ............................................................................................................................................................................ 17
Print (Ctrl + P) ................................................................................................................................................................ 17
HOME MENU: ........................................................................................................................................................................ 18
Text Style ....................................................................................................................................................................... 18
Copy a shape .................................................................................................................................................................. 18
Format painter (Ctrl + Shift + C) ..................................................................................................................................... 18
Text Align ....................................................................................................................................................................... 19
Line Spacing ................................................................................................................................................................... 19
Bullets ............................................................................................................................................................................ 19
Select (Ctrl +1) ................................................................................................................................................................ 19
Select All (Ctrl +A) .......................................................................................................................................................... 19
Select By Type ................................................................................................................................................................ 19
Shapes ............................................................................................................................................................................ 19
Connectors ..................................................................................................................................................................... 19
Groups ........................................................................................................................................................................... 19
Text Tool (F2) ................................................................................................................................................................. 19
Text Block Tool ............................................................................................................................................................... 19
Find Text ........................................................................................................................................................................ 19
Replace Text ................................................................................................................................................................... 19
Start Spell Check (F7) ..................................................................................................................................................... 20
Connectors ..................................................................................................................................................................... 20
INSERT MENU: ....................................................................................................................................................................... 21
Blank Page ..................................................................................................................................................................... 21
Insert Table .................................................................................................................................................................... 21
Pre-Defined Libraries ..................................................................................................................................................... 21
Picture ............................................................................................................................................................................ 21
Vector Text ..................................................................................................................................................................... 21
Font Symbol ................................................................................................................................................................... 21
PAGE LAYOUT MENU: .............................................................................................................................................................. 22
Auto Size ........................................................................................................................................................................ 22
Page Size ........................................................................................................................................................................ 22

Edraw 6.8 – 7.0 (Freeware Version) User Manual Page 3
Manual Version 1.1
Page Orientation............................................................................................................................................................ 22
Unit ................................................................................................................................................................................ 22
Page Margin .................................................................................................................................................................. 22
Set Default Theme ......................................................................................................................................................... 22
Set Default Fill and Line Style ......................................................................................................................................... 22
Spell Checker (F7) ........................................................................................................................................................... 22
VIEW MENU .......................................................................................................................................................................... 23
Libraries (View Libraries) ............................................................................................................................................... 23
Normal View .................................................................................................................................................................. 23
Background View ........................................................................................................................................................... 23
Gridlines (Ctrl + Alt +G) .................................................................................................................................................. 23
Zoom (Ctrl + “+” or Ctrl + “-“) ......................................................................................................................................... 23
SYMBOLS MENU: .................................................................................................................................................................... 24
Drawing Tools ................................................................................................................................................................ 24
HELP MENU (F1):................................................................................................................................................................... 26
About ............................................................................................................................................................................. 26
SHAPE FORMAT MENU (F3) ..................................................................................................................................................... 27
Styles .............................................................................................................................................................................. 27
Shadows ......................................................................................................................................................................... 27
Bring to Front / Back ...................................................................................................................................................... 27
Rotate a shape ............................................................................................................................................................... 27
Group and Ungroup ....................................................................................................................................................... 27
Align Shapes................................................................................................................................................................... 27
Distribute shapes ........................................................................................................................................................... 28
Same size ....................................................................................................................................................................... 28
Center a drawing ........................................................................................................................................................... 28
Resize a shape ................................................................................................................................................................ 28
Change the Arrow of a line ............................................................................................................................................ 28
PRINT SETTINGS (F6): .............................................................................................................................................................. 29
Match the drawing page size to the printer paper size ................................................................................................. 29
Change the drawing page size ....................................................................................................................................... 29
Change the printer paper size ........................................................................................................................................ 29
PAGES: ................................................................................................................................................................................. 29
Add Page ........................................................................................................................................................................ 29
Rename Page ................................................................................................................................................................. 29
Remove Page ................................................................................................................................................................. 29
Reorder pages ................................................................................................................................................................ 29
APPENDIX B KEYBOARD SHORTCUTS ...............................................................................................................................30
APPENDIX C SUGGESTED READING..................................................................................................................................32
APPENDIX D MAP TYPES .................................................................................................................................................33
APPENDIX E SHOULD FLOW CHART BE VERTICAL OR HORIZONTAL .................................................................................34

Edraw 6.8 – 7.0 (Freeware Version) User Manual Page 4
Manual Version 1.1
Introduction
Edraw Mind Map is a free mind mapping freeware with rich examples and templates which
make it easy to create mind maps, brain-storming diagrams, project timeline, life planner,
SWOT analysis, flowcharts and sketch maps.
The current version, Edraw Mind Map for Windows, is available in two editions: Free Version,
Professional Version. The free and professional editions both share the same file format, but
the latter has additional templates and examples for more diagram types.
Edraw Mind Map supports the hyperlink and office export.
An Edraw file may contain more than one page. Each page may represent a main topic and
apply the different theme. The pages have no size limitation.
Edraw Mind Map Free Version is being distributed as Freeware for personal, commercial use,
non-profit organization, and educational purpose.
The Free Version can be downloaded at http://www.edrawsoft.com/download.php
Select the
(Freeware) version
on the link above.
Product/Version Release Date License Platform Language
Edraw Mind Map 7 2013-11-18 Free License Windows English

Edraw 6.8 – 7.0 (Freeware Version) User Manual Page 5
Manual Version 1.1
Tips
� To begin building an Edraw process map, first document the base steps on
paper. � Within Edraw, step one is to establish the expected page size, orientation and
font. � Once a file is started, save the file frequently to ensure the work is properly
secured.
� Avoid using an individual’s name on process maps, staff changes happen more frequently than a process.
� Spell check your work, misspelled words are underlined in red and displayed in the active shape.
� Validate process maps with subject matter experts, check for clarity, content and continuity.
� When sharing a process map with others, save the document as a PDF file. PDF is a universal method to share/view documents. There are free PDF file creation applications available, examples CutePDF.
� Edraw files can be Exported into Word | Excel or Power Point.
� Use the ‘Undo’ button, found on the Quick Access menu to undo previous actions. (See Page 15).
� There are two Edraw file extensions .edx and .edxz. If unable to open an older Edraw document (file) in a newer version of Edraw, rename the files extension to “EDX”.
� Looking for mapping examples/ideas? Run a Google search on ‘Process Map’ and select ‘Images’ instead of Web results.
� Always include a proper Heading, Date Created, and Author in your finished product.
� Keep all project related Process Maps in one file by adding ‘Pages’ within the Edraw file.
� As a final step to the map, apply color and pertinent images to dress up the finished product.

Edraw 6.8 – 7.0 (Freeware Version) User Manual Page 6
Manual Version 1.1
Refer to examples below.
� The direc
� Never crisscross connectors. Crisscross lines make a process map much less
readable. � The direction of connectors is always to either the right, down or up. Follow
the thinking of reading from Left to Right.
� Substitute the ‘Yes’ or ‘No’ outcome direction of Decision shape to select the best route to avoid crisscrossing connectors and/or to reduce the length of the connectors.
� Process mapping is the perfect combination of business insight and art.

Edraw 6.8 – 7.0 (Freeware Version) User Manual Page 7
Manual Version 1.1
Basic Symbols to Use
Start and End symbols indicate the start and end points in the map.
Rectangular boxes are used to indicate Process steps.
Diamonds are used for Decisions. Decisions usually have two branches – one for yes and
another for no, indicated by Y and N respectively.
Sub Process Predefined Process shape indicates a set of steps that combine to create a
sub-process that is defined elsewhere, often on another page of the same drawing.
Circles with a letter or letters are used as page connectors, i.e., if a process spills over onto
another page, then a page connector is connected to the last process step in the first page
and the first process step in the next page with the same letter.
Database indicates a data storage system.
Document indicates paper within a process.

Edraw 6.8 – 7.0 (Freeware Version) User Manual Page 8
Manual Version 1.1
Getting Started
Open Edraw
Select Basic Flowchart and click Create
To assist with lining up shapes, turn on Gridlines
Select View | Show/Hide | Gridlines
To turn on the Dynamic Grid, on the File menu, click Snap &
Glue item in the Option dialog. Select the Dynamic grid check
box, and then click OK. Notice the Red line which intersects
both shapes to indicate alignment.
Select U.S. Unit
Select the either Metric or US
Unit (Inches) as the Ruler Guide
for the document.
Other measures such as
Millimeters, Centimeters, Meter,
Kilometers, Miles, Inches, Feet
and Yards are available under
Page Setup | Unit.

Edraw 6.8 – 7.0 (Freeware Version) User Manual Page 9
Manual Version 1.1
If the box “Main Idea” appears in the middle of the
new blank page, click on it and press delete on the
keyboard. This occurs in the freeware version.
Begin by establishing the environment of the blank page i.e. setting the Page Size,
Orientation and Font for the process map.
Select Page Layout, select Page Size select 8 ½ x 11
Select Orientation select Portrait
Select Fonts and select the font of choice
See other options available on the Page Layout menu

Edraw 6.8 – 7.0 (Freeware Version) User Manual Page 10
Manual Version 1.1
Libraries
Using libraries and templates that include all of the shapes, styles and settings needed to
assemble a particular type of drawing or diagram.
Select View
Select Libraries
The Libraries dropdown
panel will appear containing
various shapes, clipart,
callouts and symbols
(templates).
Select Basic Flowchart Shapes, these are the
primary shapes utilized when building a process
map.
In the drop down box next to Libraries select the Libraries (templates) use most frequently Basic Flowchart Shapes

Edraw 6.8 – 7.0 (Freeware Version) User Manual Page 11
Manual Version 1.1
To begin building a process map, first
document the base steps on paper. The
example used in this manual is an
Incoming Mail process.
Now, let’s map the process in Edraw …
Click the Process shape on the Basic Flowchart Shapes
template in the Libraries area on the left size of the screen. Hold
down the mouse button, and drag the process shape onto your
drawing page
With the new Process shape
added to the gridline page,
enter step one of the incoming
mail process.
Click off the shape to release
the text tool.

Edraw 6.8 – 7.0 (Freeware Version) User Manual Page 12
Manual Version 1.1
Continue the map by adding the
remaining steps using the
Process shape. Include a
Decision point for ‘Urgent Mail’
and continue through mail
delivery/pickup.
Ensure that both a ‘Yes’ and ‘No’
process shape are added as
outcomes from the Decision
shape.
Complete the map using the Start/Terminator shape.
To View the entire process map on one viewable screen,
Select View | Zoom | Fit
Use sizes such as 150% or 200% to zoom in closer to specific areas of a map.

Edraw 6.8 – 7.0 (Freeware Version) User Manual Page 13
Manual Version 1.1
Click shape arrows to add line
Connectors between the
shapes.
Select the first shape in the map,
click on the arrow (located just
outside the shape) in the
direction where the connector will
be located.
Align text within a shape
Select any shape, on the Home menu, select Text Align and
the preferred alignment style.

Edraw 6.8 – 7.0 (Freeware Version) User Manual Page 14
Manual Version 1.1
After all shapes are connected by lines, let’s change the formatting of all shapes in the
map.
1. Press (Ctrl A) to select all shapes at once.
2. Select Shape Format, under Styles change the Color of the shapes.
3. Change the Color of the Lines that surround the shapes.
4. Increase the Weight of the lines.
Conditional (or Decision Points) are represented by a diamond. These typically contain a
Yes/No question or True/False test. This symbol is unique in that it has two arrows coming
out of it, usually from the bottom point and right point, with one corresponding to Yes or
True, and the other one corresponding to No or False.
At a Decision point .i.e. “Urgent?” add ‘Yes’ and
‘No’ to the connectors.
Choose the best route, to avoid crisscrossing
connectors or to reduce the length of the
connectors.
Before After

Edraw 6.8 – 7.0 (Freeware Version) User Manual Page 15
Manual Version 1.1
Align shapes (Vertically & Horizontally)
1. Select the first shape which other shapes should be aligned with.
2. Press CTRL and click the next shapes to be aligned. The primary shape has a thick magenta outline. You can press TAB to switch the primary shape.
3. On the Shape Format tab, in the Arrange group, click Align.
4. Click the specific alignment option Left, Center, Right, Top, Middle and Bottom to align the shapes.
To nudge a single shape, click to select it, and then press an arrow key. To nudge a shape exactly multiple pixels, hold down SHIFT and press an arrow key
Distribute shapes equally
1. Select the shapes to be spaced equally (distribute). Press CTRL and click the other shapes in the group to be distributed. The primary shape has a thick magenta outline. Press TAB to switch the primary shape.
2. On the Shape Format tab, in the Arrange group, click Distribute. 3. Click the alignment option necessary to distribute the shapes equally.
Center the drawing
1. Select all shapes (Ctrl A). 2. On the Shape Format tab, in the
Arrange group, click the Center button.
Insert a Text Block heading
1. Switch to the Text Tool on the Home tab.
2. Click anywhere on the drawing page and drag until the text block is the size you want.
3. Type the text. 4. When you finish typing, click outside
the text block. 5. Click the ‘Select’ pointer tool or
press (Ctrl +1) to return to normal editing.

Edraw 6.8 – 7.0 (Freeware Version) User Manual Page 16
Manual Version 1.1
Insert a Clip Art image that
represents the process, next to the
some of the tasks.
While the clip art item is active, Right
Mouse click on the image and select
Send to Back. This places the
image behind the process task
allowing a layer effect.
Spell Check
Select Page Layout | Spelling
Misspelling will be highlighted in RED
Right mouse click on the misspelled word,
click on Suggestions to display possible
corrections. Click on the correctly spelled
word.
To Print select File | Print
Customizing options available under print are:
Number of Copies
Pages to Print (All Pages, Current Page or Custom Range)
Orientation of either Landscape or Portrait
Paper Size
More Print Options such as Adjust to Fit and Fit To

Edraw 6.8 – 7.0 (Freeware Version) User Manual Page 17
Manual Version 1.1
Appendix A Menus
Quick Access Menu:
Undo (Ctrl +Z)
Undo last action.
Redo (Ctrl + Y)
Redo previous undone
action.
To Undo / Redo several actions at once, click the arrow next to Undo / Redo, select the actions in the list that you want to undo / redo, and then click the list.
Customize Quick Access Menu
Select the menu items used most frequently.
File Menu:
Open (Ctrl + O)
Open an existing document.
New / Create (Ctrl + N)
Create a new document.
Tip: Because it is important to line up the shapes when you create a diagram, turn on Gridlines. Select View, place a ���� next to Gridlines.
Save (Ctrl +S)
Save the active document.
Save As (Ctrl + Shift + S)
Open the Save As dialog to select from all possible file types.
Close (Ctrl + W)
Close the active document.
Recent
Display a list of recently saved documents.
Print (Ctrl + P)
Print the active document.

Edraw 6.8 – 7.0 (Freeware Version) User Manual Page 18
Manual Version 1.1
Home Menu:
To begin, Click any shape on the Basic Flow Chart Shapes
template, hold down the mouse button, and drag the shape onto
your drawing page.
Note: When first building your process map, you could select the
‘Auto Height Text’ process box. However, its size is anchored by
the text within the box.
Text Style
Select a text or multiple text objects. 1. From the Home menu, under Font group. You can change the text font name, font
size, align, bullet, bold, italic, underline, line spacing, text back color and text color.
Note: If you haven't select any objects in a page, the setting will apply to the default format. All new added shapes will apply the default format.
Copy a shape
1. Click to select the shape. 2. Hold down the CTRL key and drag to place the copy where you want it. 3. Release the mouse button.
Format painter (Ctrl + Shift + C)
You can use Format Painter on the Home menu to apply graphics formatting, such as shape outlines and fills. 1. Select the shape that has the formatting that you want to copy. 2. On the Home tab, click Format Painter. The pointer changes to a paint brush icon. 3. Click the shape that you want to format.

Edraw 6.8 – 7.0 (Freeware Version) User Manual Page 19
Manual Version 1.1
Text Align
Align text to the special edge (Left | Center | Right)
Line Spacing
Change the spacing between lines of text or paragraphs.
Bullets
Start a bulleted list.
Select (Ctrl +1)
Select texts or objects in the document. To select multiple shapes, click blank area in
the drawing and drag to the position you want so all the shapes in the rectangle you
drag will be selected. Ctrl + 1 will return the ‘select’ pointer when other pointer tools
are present.
Select All (Ctrl +A)
Select By Type
Shapes
Selects all shapes
Connectors
Selects all connectors
Groups
Selects all groups
Text Tool (F2)
1. Switch to the Text Tool on the Shape Format tab.
2. Click anywhere on the drawing page and drag until the text block is the size you
want.
3. Type the text.
4. When you finish typing, click outside the text block.
5. Click the ‘Select’ pointer tool (Ctrl +1) to return to normal editing.
Tip: To delete a text-only shape, use the Select tool to select the shape, and then press DELETE.
Text Block Tool
Select Text Block to resize, move or delete a text box.
Find Text
Find text within the document.
Replace Text
Replace text within the document.

Edraw 6.8 – 7.0 (Freeware Version) User Manual Page 20
Manual Version 1.1
Start Spell Check (F7)
Spell check the current document.
Connectors
Right Angle (Ctrl +3)
Add the right-angle connector or change the selected connector to right-angle connector.
Curved (Ctrl + Shift + 3)
Add the curved connector or change the selected connector to curved connector.
Straight (Ctrl + Shift +4)
Add the straight connector or change the selected connector to straight connector.
Freeform (Ctrl +7)
Add the freeform connector.

Edraw 6.8 – 7.0 (Freeware Version) User Manual Page 21
Manual Version 1.1
Insert Menu:
Blank Page
Insert a new blank page after the current active page.
Insert Table
Insert or draw a table into the document.
1. Select Insert | Table 2. Move the pointer to select the number of rows and columns that you want, and then
click. Click Insert Table, and then enter a number in the Number of columns and Number of rows lists.
3. To add text to the table cells, click a cell, and then enter your text. After you enter your text, click outside the table.
Move a table
Click the table that you want to move. Rest the pointer on the outer most border of the table (but not on the dots), and then when the pointer becomes a move cursor, click and drag the border to move the table.
Resize a column or row
Click the table that contains the column or row that you want to resize. To change the width of a column, rest the pointer over the border of the column that you want to resize, and then when the pointer becomes a, drag the column to the right or left. To change the height of a row, rest the pointer over the border of the row that you want to resize, and then when the pointer becomes a, drag the row up or down.
Add a row
Click the border to select a row in a table. Then click the Insert Above or Insert Below button in the Table Context Menu.
Add a column
Select a column then click the Insert Left or Insert Right.
Delete Rows or Delete Columns
Select the rows or columns then click the Delete Rows or Delete Columns button.
Pre-Defined Libraries
Open the Library Window.
Picture
Insert a picture from a file.
Vector Text
You can change the fill color, style and outline.
Font Symbol
Insert a Font Symbol into the document

Edraw 6.8 – 7.0 (Freeware Version) User Manual Page 22
Manual Version 1.1
Page Layout Menu:
Auto Size
Automatically resize the page as you draw.
Page Size
Choose a paper size for the current document.
Page Orientation
Switch the pages between Portrait and Landscape layouts.
Unit
Select the unit to be displayed on the Ruler. Millimeters, Centimeters, Meter, Kilometers,
Miles, Inches, Feet and Yards.
Page Margin
Set the page margin in the current document.
Set Default Theme
1. On the Page Layout menu, select one of build-in theme.
2. Use the Colors, Fonts and Effects to change the default theme style.
Set Default Fill and Line Style
1. Don't select any shape in a page. 2. Right click the drawing page. Click the "Set Default
Theme, Arrow..." item.
Spell Checker (F7)
Check the spelling of text.

Edraw 6.8 – 7.0 (Freeware Version) User Manual Page 23
Manual Version 1.1
View Menu
Libraries (View Libraries)
Show or hide the Library panel. 1. Switch to Insert tab. 2. Select Libraries; customize to display the Libraries use most frequently.
Normal View
View the presentation in a normal view.
Background View
Switch to background edit view.
Gridlines (Ctrl + Alt +G)
Turn on gridlines which you can align objects in the document.
Zoom (Ctrl + “+” or Ctrl + “-“)
Open the Zoom dialog box to specify the Zoom level of the document.

Edraw 6.8 – 7.0 (Freeware Version) User Manual Page 24
Manual Version 1.1
Symbols Menu:
Drawing Tools
If the tool has been selected, double click to bring focus to the drawing area. Once you have
a drawing area box you may select another drawing tool.
Select
Select texts or objects in the document.
Pencil Tool
Draw open and closed paths as if you were drawing with a pencil and paper.
Pen Tool
Draw open and closed Bezier curves or straight lines.
Move Anchor
To edit a path, drag around modes to select them, and then drag nodes and handles.
Add Anchor
To add an anchor point, position the pointer over the path segment and click.
Delete Anchor
To delete an anchor point, position the pointer over the anchor point and click.
Convert Anchor
Drag a direction point out of a corner point to create a smooth point; Clicking a smooth
point to create a corner point.
Line
Position the pointer where you want the line to being, and drag to where you want the
line to end. Draw a line
Arc
Draw an Arc
Spiral
Draw a Spiral
Rectangle
Draw a Rectangle

Edraw 6.8 – 7.0 (Freeware Version) User Manual Page 25
Manual Version 1.1
Rounded
1. To draw a Rounded Rectangle, drag diagonally until the rectangle is the desired
size.
2. To draw a rounded square, hold down the Shift key while you drag diagonally
until the square is the desired size.
3. To create a rounded square or rounded rectangle using values, double click
where you want the center to be.
Oval
Draw an Oval
Polygon
Draw a Polygon
Star
Draw a Star

Edraw 6.8 – 7.0 (Freeware Version) User Manual Page 26
Manual Version 1.1
Help Menu (F1):
About

Edraw 6.8 – 7.0 (Freeware Version) User Manual Page 27
Manual Version 1.1
Shape Format Menu (F3)
Styles
Colors, Fills, Lines, Weight, Dashes, Arrows.
Shadows
Add shadows to a shape.
Bring to Front / Back
Bring the selected shape in front or in back of all other shapes.
Rotate a shape
1. Click to select the shape and then move the pointer over the rotation handle () until your pointer becomes a circle.
2. Drag the handle to the rotation you want. 3. To rotate a shape by a fixed amount: Click to select the
shape. On the Shape Format tab, in the Arrange group, click Geometry button. In the Angle box, type the angle you want, and then press Enter.
Group and Ungroup
1. Select the shapes you want to group. 2. On the Shape Format tab, in the Arrange group, point to Grouping, and then click
Group (Ctrl+Shift+G). 3. To ungroup shapes, select the group. On the Shape Format tab, in the Arrange group,
point to Grouping, and then click Ungroup (Ctrl+Shift+U).
Align Shapes
5. Select the shape to which you want to align other shapes, and then press CTRL and click the shapes you want to align to it.
6. The primary shape has a thick magenta outline. You can press TAB to switch the primary shape.
7. On the Shape Format tab, in the Arrange group, click Align. 8. Click the alignment options you want.

Edraw 6.8 – 7.0 (Freeware Version) User Manual Page 28
Manual Version 1.1
Distribute shapes
1. Select three or more shapes. 2. On the Shape Format tab, in the Arrange group, click Distribute. 3. Choose a distribution option Vertical distribution, the boundaries are defined by the top and bottom shapes in the selection. Horizontal distribution, the boundaries are defined by the leftmost and rightmost shapes in the selection.
Same size
Make shapes same size or angle to the primary shape.
1. Select two or more shapes. 2. The primary shape has a thick magenta outline; you can press TAB to switch the
primary shape. 3. On the Shape Format tab, in the Arrange group, click the Size button. Options are Width, Height, Angle, and Size.
Center a drawing
3. Select all shapes (Ctrl A). 4. On the Shape Format tab, in the Arrange group, click the Center button.
Resize a shape
1. Select a shape. 2. If the shape has selection handles, drag a selection handle until the shape is the size
you want. To resize the shape proportionally, drag a corner handle. 3. If the shape has endpoints, drag an endpoint to the length you want. Note: Locked corners shapes cannot be resized manually. i.e. ‘Auto Height Text’ shapes.
Change the Arrow of a line
1. Select the line that you want to change. 2. If you want to change multiple lines, select the first line, and then press and hold CTRL
while you select the other lines. 3. On the Shape Format menu, click the Line button, then choose the Arrow styles that
you want. Note: To change Arrow of Connectors, right mouse click on the Connector select Shape Format then Line Style.

Edraw 6.8 – 7.0 (Freeware Version) User Manual Page 29
Manual Version 1.1
Print Settings (F6):
Match the drawing page size to the printer paper size
1. Press F6 key to open the Page Setup dialog. 2. Click the Page Size tab, and under Page size, select the same as printer paper size
option.
Change the drawing page size
1. Switch to the page you want to resize. 2. Press F6 key to open the Page Setup dialog. 3. Click the Page Size tab, and under Page size, click the preset paper size you want. 4. You can also set the customize size for the page.
Change the printer paper size
1. Click File menu. 2. Click Print. 3. Choose the paper size on right panel.
Pages:
On the lower left, bottom right; click a Page label, a popup menu appears.
Add Page
Add a page to the document.
Rename Page
Rename an existing page.
Remove Page
Remove the current page.
Reorder pages
To reorder pages, right-click a page label and click Reorder Page. If you have used the default page names, such as Page-1, when you reorder the pages, Edraw renumbers the page names to reflect the new order when you check the Update the page name automatically.
Edraw 6.8 – 7.0 (Freeware Version) User Manual Page 30
Manual Version 1.1
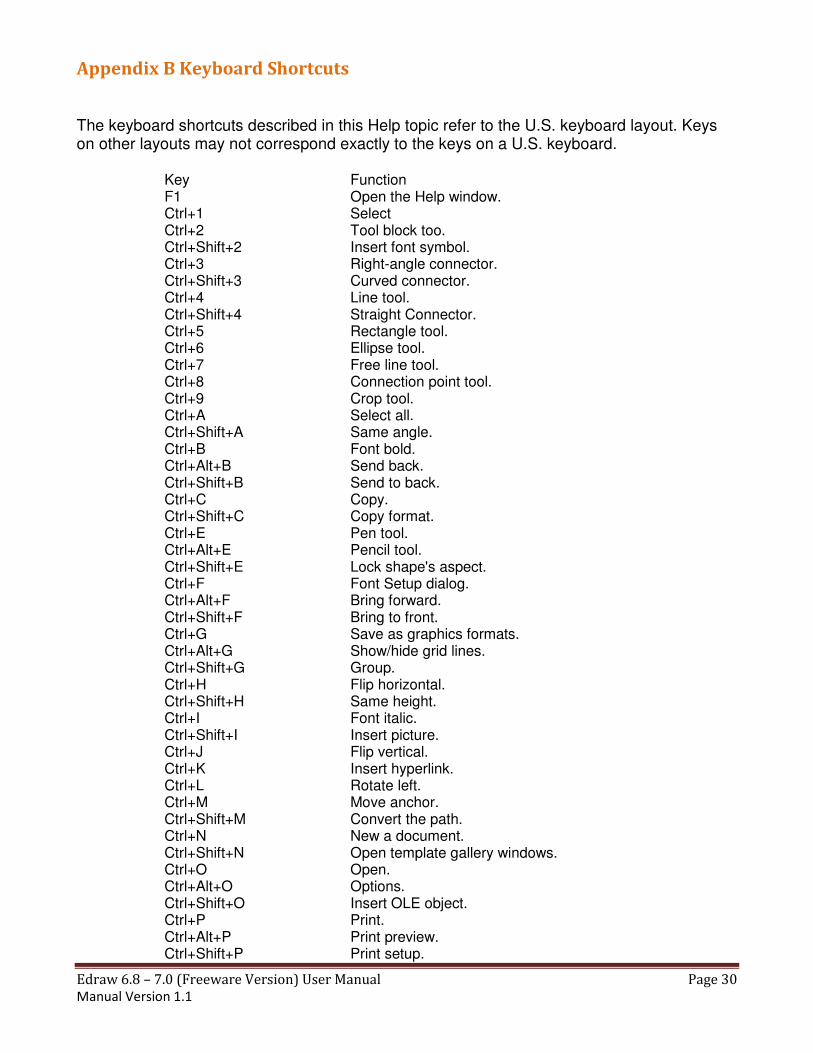
Appendix B Keyboard Shortcuts
The keyboard shortcuts described in this Help topic refer to the U.S. keyboard layout. Keys on other layouts may not correspond exactly to the keys on a U.S. keyboard.
Key Function F1 Open the Help window. Ctrl+1 Select Ctrl+2 Tool block too. Ctrl+Shift+2 Insert font symbol. Ctrl+3 Right-angle connector. Ctrl+Shift+3 Curved connector. Ctrl+4 Line tool. Ctrl+Shift+4 Straight Connector. Ctrl+5 Rectangle tool. Ctrl+6 Ellipse tool. Ctrl+7 Free line tool. Ctrl+8 Connection point tool. Ctrl+9 Crop tool. Ctrl+A Select all. Ctrl+Shift+A Same angle. Ctrl+B Font bold. Ctrl+Alt+B Send back. Ctrl+Shift+B Send to back. Ctrl+C Copy. Ctrl+Shift+C Copy format. Ctrl+E Pen tool. Ctrl+Alt+E Pencil tool. Ctrl+Shift+E Lock shape's aspect. Ctrl+F Font Setup dialog. Ctrl+Alt+F Bring forward. Ctrl+Shift+F Bring to front. Ctrl+G Save as graphics formats. Ctrl+Alt+G Show/hide grid lines. Ctrl+Shift+G Group. Ctrl+H Flip horizontal. Ctrl+Shift+H Same height. Ctrl+I Font italic. Ctrl+Shift+I Insert picture. Ctrl+J Flip vertical. Ctrl+K Insert hyperlink. Ctrl+L Rotate left. Ctrl+M Move anchor. Ctrl+Shift+M Convert the path. Ctrl+N New a document. Ctrl+Shift+N Open template gallery windows. Ctrl+O Open. Ctrl+Alt+O Options. Ctrl+Shift+O Insert OLE object. Ctrl+P Print. Ctrl+Alt+P Print preview. Ctrl+Shift+P Print setup.

Edraw 6.8 – 7.0 (Freeware Version) User Manual Page 31
Manual Version 1.1
Ctrl+R Rotate right. Ctrl+Alt+R Show/hide rulers. Ctrl+S Save. Ctrl+Shift+S Save as. Ctrl+Alt+T Show/hide connection points. Ctrl+U Font underline. Ctrl+Alt+U Show/hide guidelines. Ctrl+Shift+U Ungroup. Ctrl+V Paste. Ctrl+Alt+V Paste special. Ctrl+Shift+V Insert vector text. Ctrl+W Close. Ctrl+Shift+W Same width. Ctrl+X Cut. Ctrl+Y Redo. Ctrl+Z Undo. Ctrl+Shift+Z Same size. F2 Text tool. F3 Shape Format dialog. F4 Property dialog. F5 Play slideshow from current page. Shift+F5 Play slideshow from first page. F6 Page Setup dialog. F7 Spelling Check. F8 Hand Move tool. F9 Shape Sheet window. F10 Show/Hide Zoom Pan. Ctrl++ Zoom in. Ctrl+- Zoom out. Ctrl+F1 Show/Hide menu bar.

Edraw 6.8 – 7.0 (Freeware Version) User Manual Page 32
Manual Version 1.1
Appendix C Suggested Reading
Practical Guide to Creating Better looking Process Maps http://www.isixsigma.com/tools-templates/process-mapping/practical-guide-creating-better-looking-process-maps/

Edraw 6.8 – 7.0 (Freeware Version) User Manual Page 33
Manual Version 1.1
Appendix D Map Types
The Top Down chart provides an excellent starting place. Start by describing the three to five main activities that occur in your process, across the top. These are your "macro" steps. Now describe the "micro" or detailed steps that make up each of those macro steps, downward. This tool is great for orientation to a process. Use it to give a thorough description of what is getting done in the process.
The Swim Lane (Cross Functional) chart tells a robust story about who does what and when. By listing the functional participants along the left side, it clarifies what each function does and their interactions. It demonstrates when hand-offs occur and shows relative timing. This chart provides a big-picture perspective and cross-functional teams appreciate understanding how they intermingle.
The Logic Flow (Left to Right) presents the flow of work in the same manner as we in western society read, that is, left to right. This natural representation eases understanding. Your placement of key Decision points makes the chart valuable. The decision diamonds and arrows guide the reader toward what activities follow if the decision is "yes" or "no."
The Flow Process chart, also called an Activity chart, provides detailed task-level information. After listing the steps down the page, the chart provides an area for you to value each step. Specifically, it looks at value-added operational steps and illuminates potential non-value-added transportation, inspection, delay, rework, or storage. This perspective provides depth to the steps and challenges how they contribute to the overall process; whether the step is necessary or not. In conjunction with the Cycle vs. Process chart, it reveals why elapsed time and transformation time differ and it facilitates activity based costing. Think of your Lean Brown Paper.

Edraw 6.8 – 7.0 (Freeware Version) User Manual Page 34
Manual Version 1.1
Appendix E Should Flow Chart Be Vertical or Horizontal
Cross-functional process can be represented either vertically or horizontally.
A vertical layout places slightly more emphasis on the functional units.
A horizontal layout emphasizes the process.
The orientation option you choose often depends on personal taste, rather than a strict
requirement or guideline. You can also choose the number of bands that appears in the
diagram when you create it. The best practice is to create enough bands to hold each step of
the process to be documented.
Flowchart
type Sample Purpose
Cross-
Functional
Flowchart
Horizontal
In a horizontal layout, bands representing functional
units run horizontally across the drawing page,
highlighting the process.
Cross-
Functional
Flowchart
Vertical
In a vertical layout, bands representing the
functional units run vertically from the top to the
bottom of the page, highlighting the functional units.

Edraw 6.8 – 7.0 (Freeware Version) User Manual Page 35
Manual Version 1.1
Recommended