Qpad X5 User Guide
Hi-Target Surveying Instrument Co., Ltd.
All Rights Reserved
Preface
II
Manual Revision
File number:
Revision Date Revision Level Description
2016-06-03 1 Qpad X5 User Guide
Qpad X5 User Guide
Preface
Introduction
Welcome to use Hi-Target Qpad X5 GIS data collector. This introduction
describes how to use this product.
Experience Requirement
In order to help you use Hi-Target series products better, Hi-Target suggests
you carefully read the instruction. If you are unfamiliar with the products,
please refer to www.hi-target.com.cn
Tips for safe use
Notice: The contents here generally are special operations,
and need your special attention. Please read the contents
carefully.
Warning: The contents here generally are very important.
Such wrong operation may make the machine damaged,
make the data lost, even breaks down the system and
endangers personal safety.
Preface
IV
Exclusion
Before using the products, please carefully read the operating instruction, and it
will help you better use it. Hi-Target Surveying Instrument Co., Ltd will not
assume the responsibilities if you fail to operate the product according to the
requirements in operating instruction, or operate the product wrongly because
of failing to understand the operating instruction.
Hi-Target is committed to constantly perfect product functions and
performance, improve service quality and reserve the rights to change the
contents in operating instruction without separate notice.
We have checked the consistency between contents in instruction and software
& hardware, without eliminating the possibility of deviation. The pictures in
operating instruction are only used for reference. In case of inconformity with
products, the products shall prevail.
Technology and Service
If you have any technical issues, you can call Hi-Target technology department
for help, we will answer your question in time.
Relevant Information
You can get this introduction in the following ways:
1. After purchasing hi-target receivers, you can find this manual in the
instrument container to guide you how to operate instrument.
Qpad X5 User Guide
2. Log in hi-target official website, download the electronic version
introduction in “Download Center” → “Manual” → “Surveying
Products”
Advice
If you have any comments and suggestions, please call us or Dial the national
hotline: +86 400-678-6690. Your feedback information will help us to improve
the quality of the product and service.
Contents
Contents
Preface ........................................................... III
Chapter 1: Hardware ...................................... 1
Design ......................................................... 2 1.1.
Key functions .............................................. 5 1.2.
Technical Specification .............................. 7 1.3.
Accessories ................................................ 9 1.4.
Chapter 2: Software ..................................... 13
2.1. Operation System ..................................... 14
2.1.1. Android 5.0 ..................................................... 14
2.1.2. Wi-Fi & Bluetooth ........................................... 15
2.1.3. GPS ............................................................... 16
2.1.4. Charging ........................................................ 16
2.1.5. Notification and Control Center ...................... 17
2.1.6. USB debugging .............................................. 18
2.1.7. Short Cut Menu .............................................. 20
2.1. Hi-QⅡ ........................................................ 21
2.1.1. Software Introduction and Installing ............... 21
Qpad X5 User Guide
2.1.2. Main Functions ............................................... 23
2.3. SurperSurv ................................................ 25
2.4. Firmware Upgrade .................................... 27
2.4.1. Upgrade by USB Cable ................................. 27
2.4.2. Upgrade by SD Card...................................... 33

Qpad X5 User Guide
1
Hardware
This chapter describes:
Design
Key Functions
Technical Specification
Accessories
C H A P T E R
1
Hardware
2
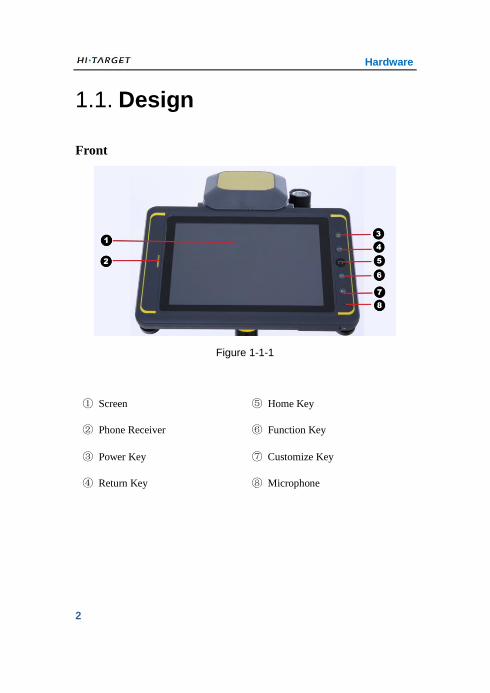
Design 1.1.
Front
Figure 1-1-1
① Screen ⑤ Home Key
② Phone Receiver ⑥ Function Key
③ Power Key ⑦ Customize Key
④ Return Key ⑧ Microphone

Qpad X5 User Guide
3
Side
Figure 1-1-2
⑨ Charging Socket
⑩ Micro USB Socket
⑪ Earphone Socket
⑫ Battery Lock
Hardware
4
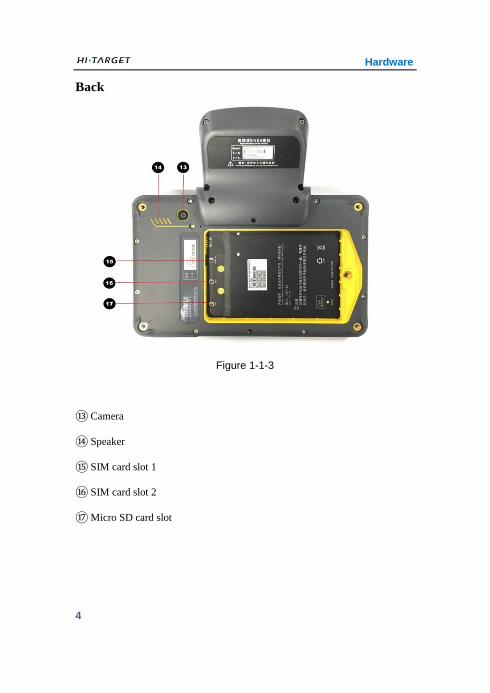
Back
Figure 1-1-3
⑬ Camera
⑭ Speaker
⑮ SIM card slot 1
⑯ SIM card slot 2
⑰ Micro SD card slot
Qpad X5 User Guide
5
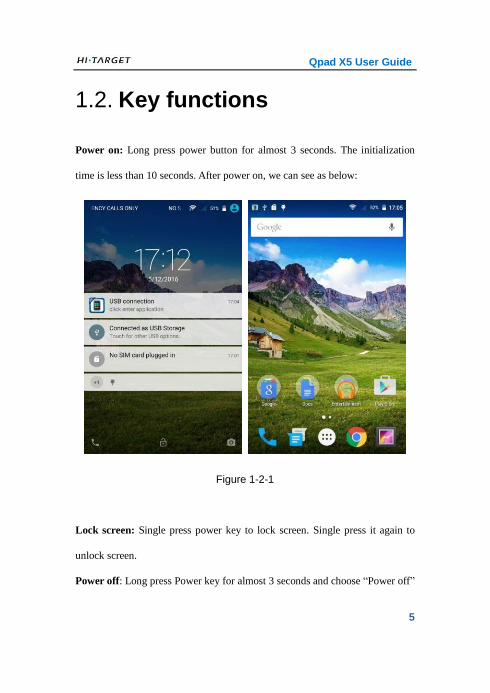
Key functions 1.2.
Power on: Long press power button for almost 3 seconds. The initialization
time is less than 10 seconds. After power on, we can see as below:
Figure 1-2-1
Lock screen: Single press power key to lock screen. Single press it again to
unlock screen.
Power off: Long press Power key for almost 3 seconds and choose “Power off”

Hardware
6
to shut down the device.
Screen shot: Press Funtion key and Power key simultaneously.
Qpad X5 User Guide
7
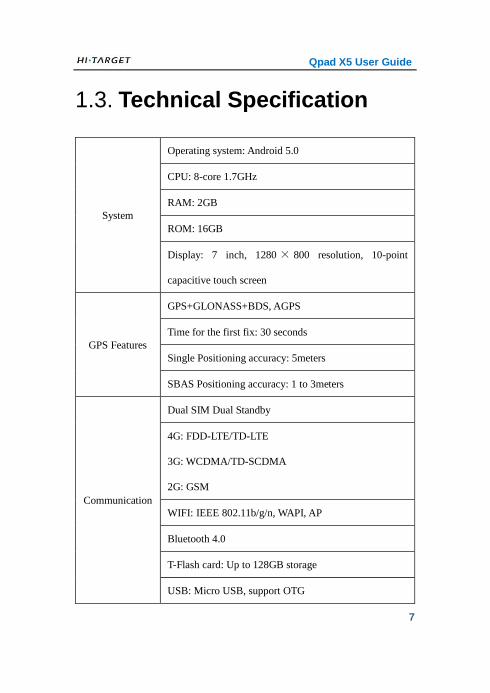
Technical Specification 1.3.
System
Operating system: Android 5.0
CPU: 8-core 1.7GHz
RAM: 2GB
ROM: 16GB
Display: 7 inch, 1280 × 800 resolution, 10-point
capacitive touch screen
GPS Features
GPS+GLONASS+BDS, AGPS
Time for the first fix: 30 seconds
Single Positioning accuracy: 5meters
SBAS Positioning accuracy: 1 to 3meters
Communication
Dual SIM Dual Standby
4G: FDD-LTE/TD-LTE
3G: WCDMA/TD-SCDMA
2G: GSM
WIFI: IEEE 802.11b/g/n, WAPI, AP
Bluetooth 4.0
T-Flash card: Up to 128GB storage
USB: Micro USB, support OTG
Hardware
8
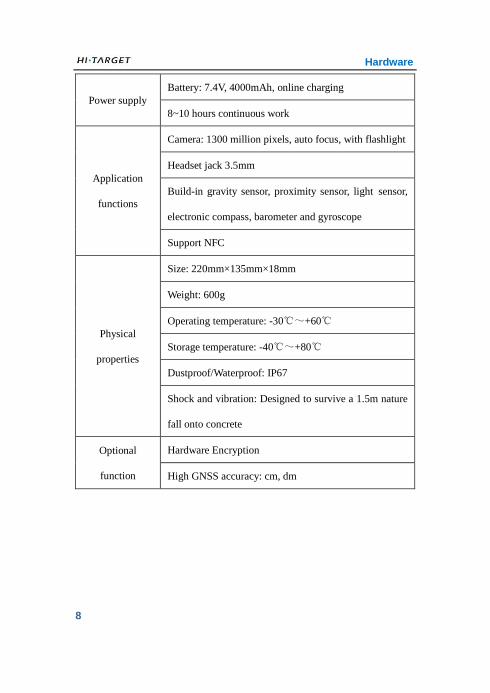
Power supply
Battery: 7.4V, 4000mAh, online charging
8~10 hours continuous work
Application
functions
Camera: 1300 million pixels, auto focus, with flashlight
Headset jack 3.5mm
Build-in gravity sensor, proximity sensor, light sensor,
electronic compass, barometer and gyroscope
Support NFC
Physical
properties
Size: 220mm×135mm×18mm
Weight: 600g
Operating temperature: -30℃~+60℃
Storage temperature: -40℃~+80℃
Dustproof/Waterproof: IP67
Shock and vibration: Designed to survive a 1.5m nature
fall onto concrete
Optional
function
Hardware Encryption
High GNSS accuracy: cm, dm
Qpad X5 User Guide
9
Accessories 1.4.
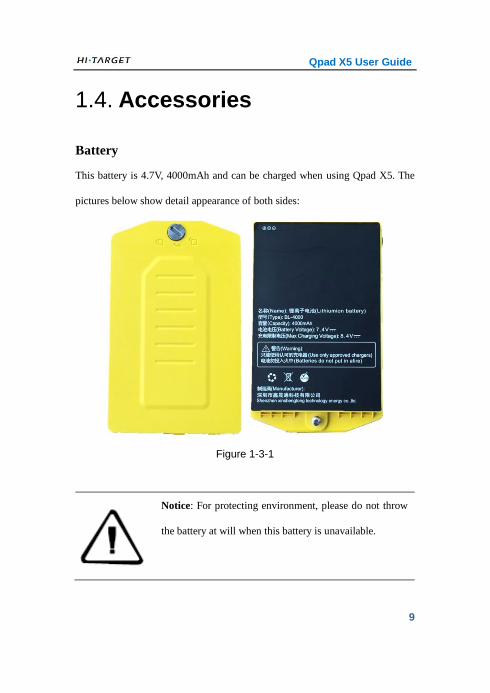
Battery
This battery is 4.7V, 4000mAh and can be charged when using Qpad X5. The
pictures below show detail appearance of both sides:
Figure 1-3-1
Notice: For protecting environment, please do not throw
the battery at will when this battery is unavailable.
Hardware
10
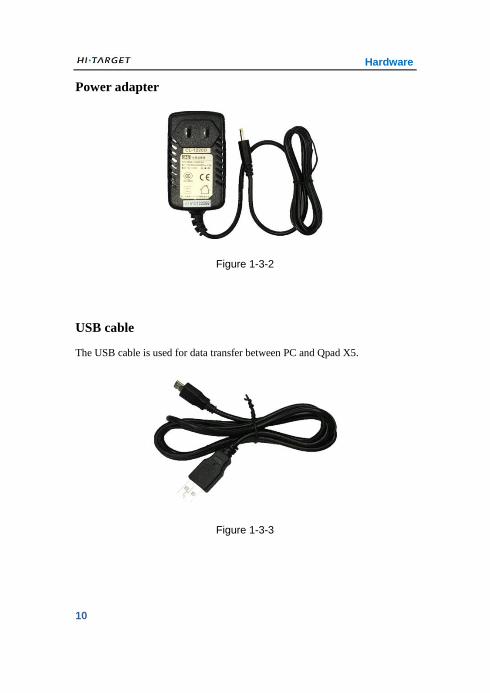
Power adapter
Figure 1-3-2
USB cable
The USB cable is used for data transfer between PC and Qpad X5.
Figure 1-3-3
Qpad X5 User Guide
11
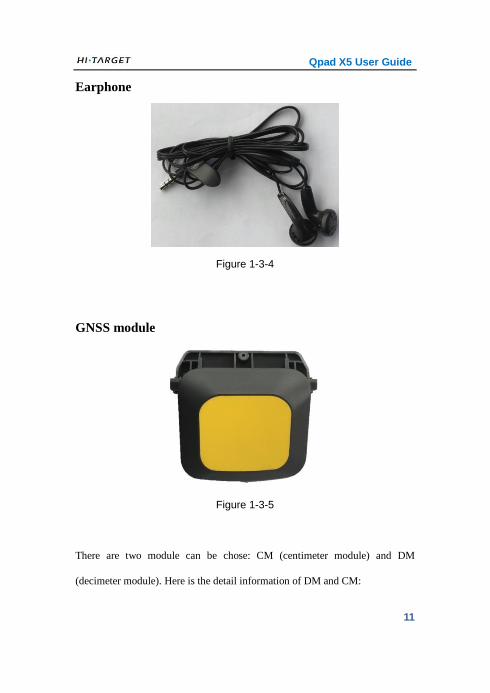
Earphone
Figure 1-3-4
GNSS module
Figure 1-3-5
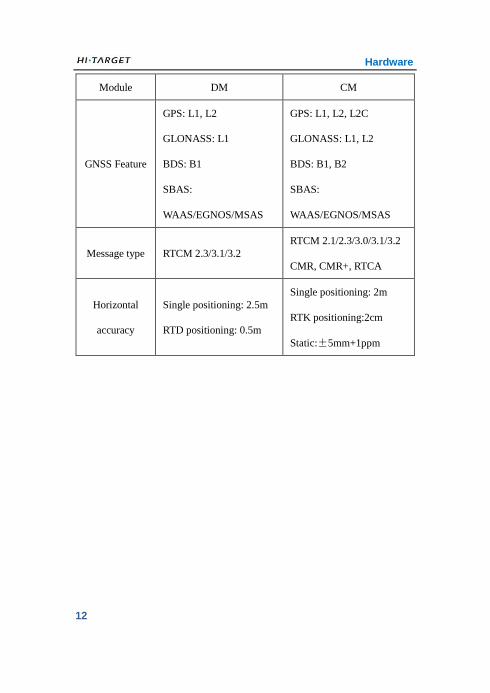
There are two module can be chose: CM (centimeter module) and DM
(decimeter module). Here is the detail information of DM and CM:
Hardware
12
Module DM CM
GNSS Feature
GPS: L1, L2
GLONASS: L1
BDS: B1
SBAS:
WAAS/EGNOS/MSAS
GPS: L1, L2, L2C
GLONASS: L1, L2
BDS: B1, B2
SBAS:
WAAS/EGNOS/MSAS
Message type RTCM 2.3/3.1/3.2
RTCM 2.1/2.3/3.0/3.1/3.2
CMR, CMR+, RTCA
Horizontal
accuracy
Single positioning: 2.5m
RTD positioning: 0.5m
Single positioning: 2m
RTK positioning:2cm
Static:±5mm+1ppm
Qpad X5 User Guide
13
Software
This chapter describes:
Operation System
Hi-QⅡ
SuperSurv
Firmware Upgrade
C H A P T E R
2
Software
14
2.1. Operation System
2.1.1. Android 5.0
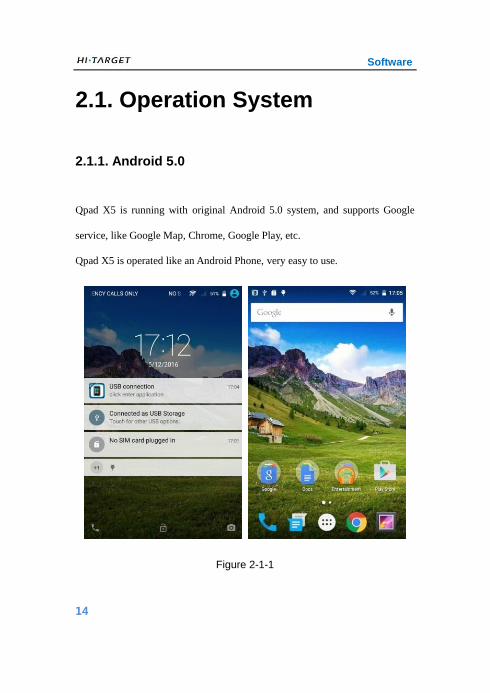
Qpad X5 is running with original Android 5.0 system, and supports Google
service, like Google Map, Chrome, Google Play, etc.
Qpad X5 is operated like an Android Phone, very easy to use.
Figure 2-1-1
Qpad X5 User Guide
15
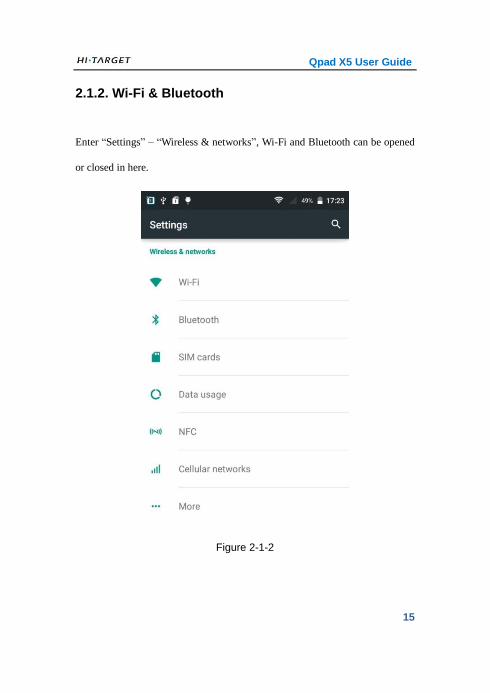
2.1.2. Wi-Fi & Bluetooth
Enter “Settings” – “Wireless & networks”, Wi-Fi and Bluetooth can be opened
or closed in here.
Figure 2-1-2
Software
16
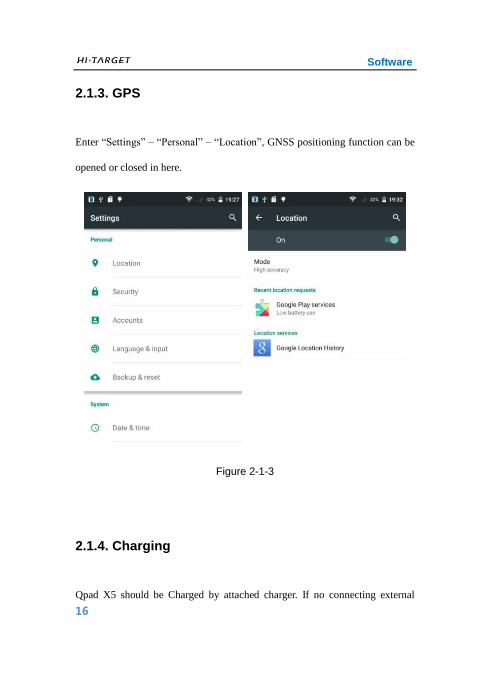
2.1.3. GPS
Enter “Settings” – “Personal” – “Location”, GNSS positioning function can be
opened or closed in here.
Figure 2-1-3
2.1.4. Charging
Qpad X5 should be Charged by attached charger. If no connecting external
Qpad X5 User Guide
17
GNSS module, the charging LED shows orange and will be green when full
charged in power on status, while it shows red and will be off when full
charged in power off status. If connecting external GNSS module, the charging
LED shows orange with red flashing and will be green when full charged in
power on status.
Tip: Qpad X5 can not be charged by USB.
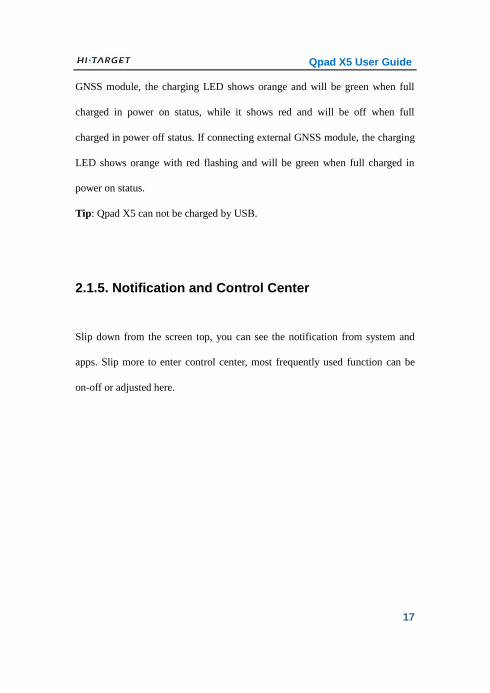
2.1.5. Notification and Control Center
Slip down from the screen top, you can see the notification from system and
apps. Slip more to enter control center, most frequently used function can be
on-off or adjusted here.
Software
18
Figure 2-1-4
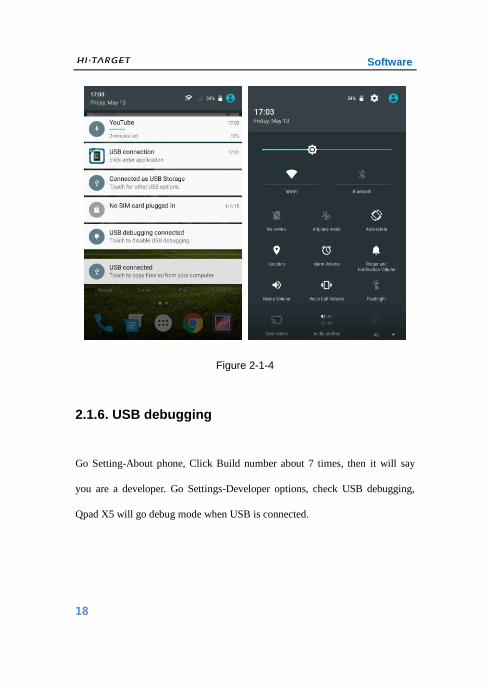
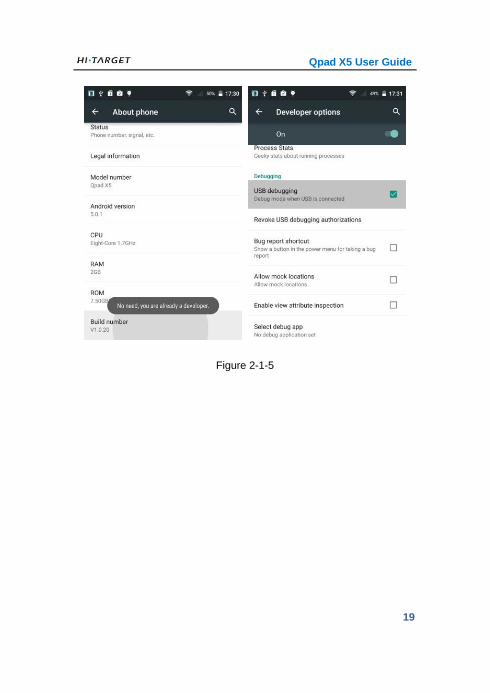
2.1.6. USB debugging
Go Setting-About phone, Click Build number about 7 times, then it will say
you are a developer. Go Settings-Developer options, check USB debugging,
Qpad X5 will go debug mode when USB is connected.
Qpad X5 User Guide
19
Figure 2-1-5
Software
20
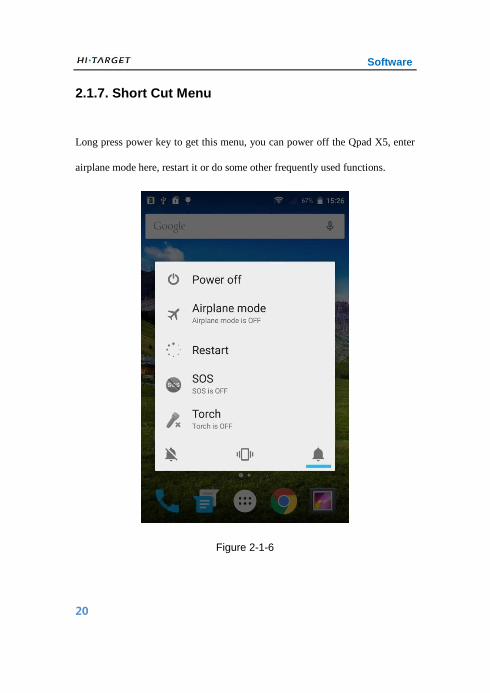
2.1.7. Short Cut Menu
Long press power key to get this menu, you can power off the Qpad X5, enter
airplane mode here, restart it or do some other frequently used functions.
Figure 2-1-6
Qpad X5 User Guide
21
2.1. Hi-QⅡ
2.1.1. Software Introduction and Installing
Hi-Q II is an universal GIS data collecting software, absorbed advantages of
original Hi-Q, at the same time, increase the support of a large amount of data,
improve the speed of image display, optimizing the acquisition process, and
through the Hi-Q tools II of flexible configuration options to use the function.
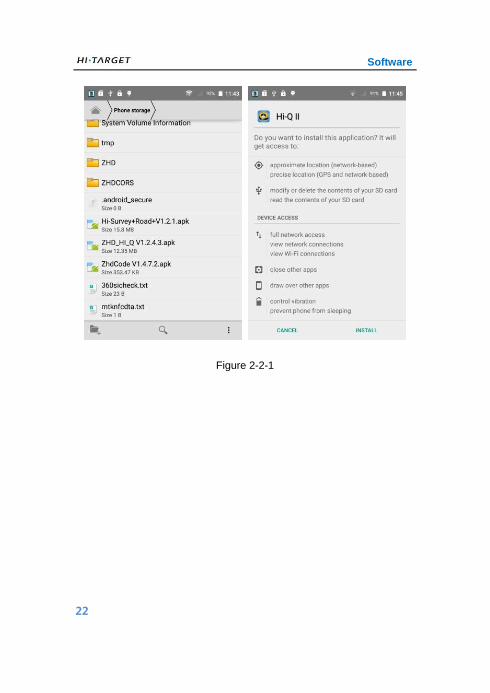
Copy the .apk to Qpad X5, then click it on Qpad X5, click next and install, start
installing.
Software
22
Figure 2-2-1
Qpad X5 User Guide
23
2.1.2. Main Functions
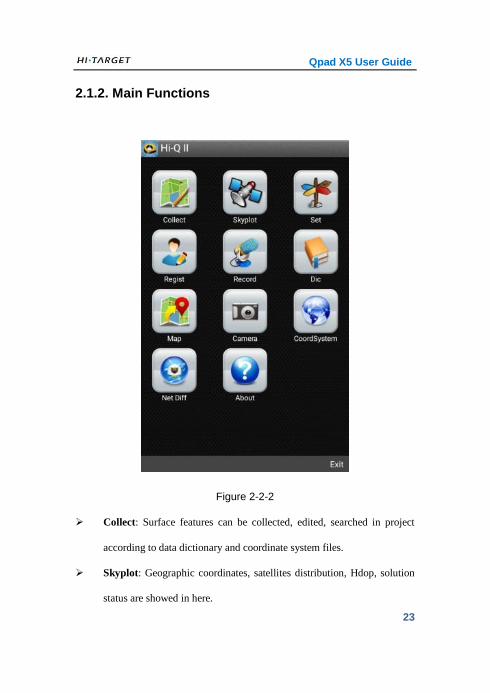
Figure 2-2-2
Collect: Surface features can be collected, edited, searched in project
according to data dictionary and coordinate system files.
Skyplot: Geographic coordinates, satellites distribution, Hdop, solution
status are showed in here.
Software
24
Set: Including System set, Demo set and Navigation set.
Regist: Register Qpad X5.
Record: Record voice and play.
Dic: Create or edit data dictionary.
Map: Show position on Baidu map.
Camera: Take photos, record a video, also you can view them.
CoordSystem: Create a new coordinate system or edit one.
Net Diff: When using high accuracy module, Qpad X5 can receive
correction message by operating in here.
About: Software version, system version, telephone and official website
are showed in here.
Qpad X5 User Guide
25
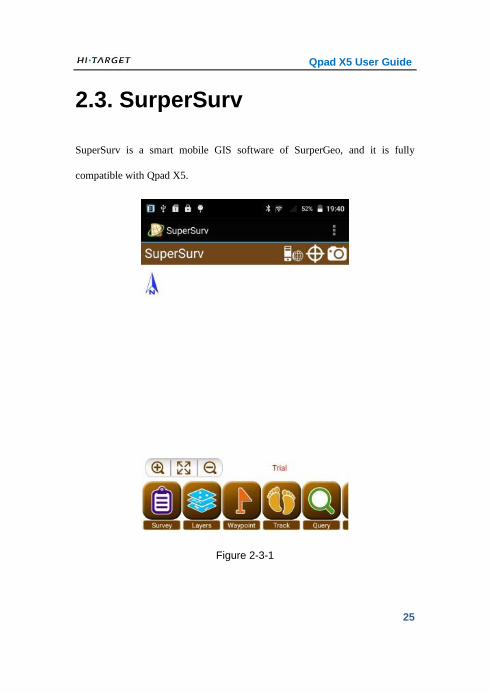
2.3. SurperSurv
SuperSurv is a smart mobile GIS software of SurperGeo, and it is fully
compatible with Qpad X5.
Figure 2-3-1
Software
26
Smart Survey App designed for Android and iOS
Integrating with latest GIS and GNSS tech
Easily capturing and handling spatial data in the field
Efficiently collect point, line, polygon data
Support offline & online editing
Display map data with global coordinate system
Create and manage waypoints
Query and measure on the map
Fully compatible with other SuperGIS product lines
Qpad X5 User Guide
27
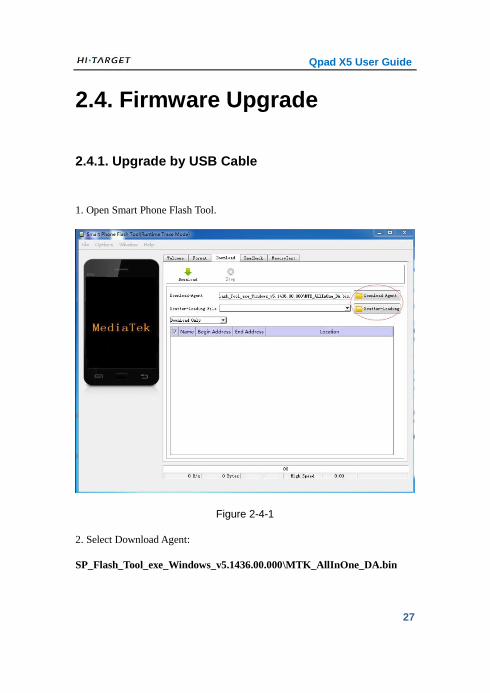
2.4. Firmware Upgrade
2.4.1. Upgrade by USB Cable
1. Open Smart Phone Flash Tool.
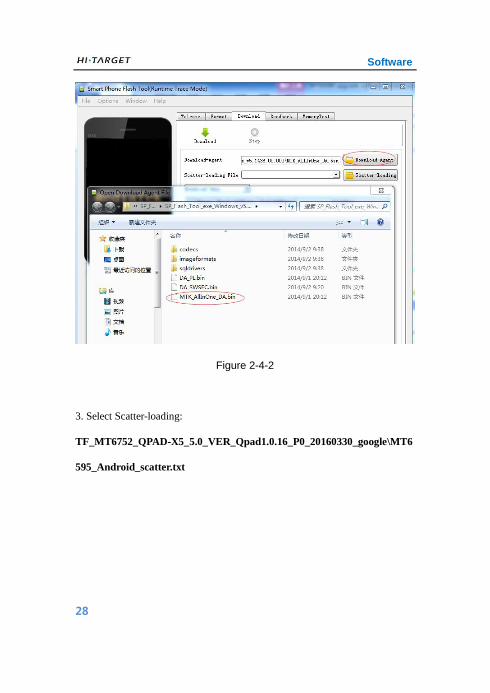
Figure 2-4-1
2. Select Download Agent:
SP_Flash_Tool_exe_Windows_v5.1436.00.000\MTK_AllInOne_DA.bin
Software
28
Figure 2-4-2
3. Select Scatter-loading:
TF_MT6752_QPAD-X5_5.0_VER_Qpad1.0.16_P0_20160330_google\MT6
595_Android_scatter.txt

Qpad X5 User Guide
29
Figure 2-4-3
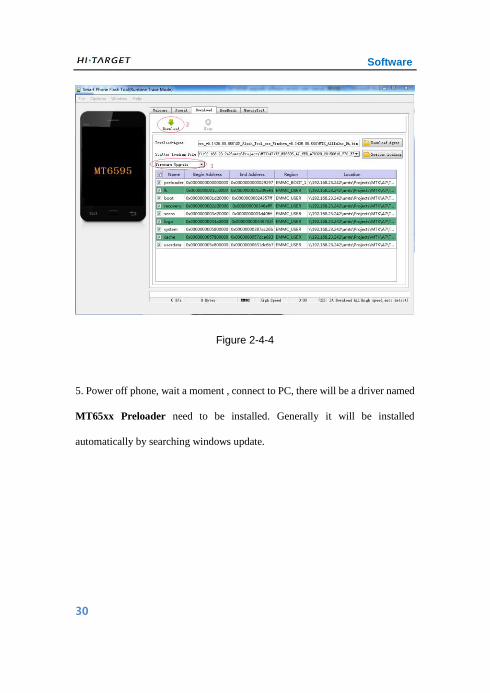
4. Select “Firmware->Upgrade” option, then select “Download” option.
Software
30
Figure 2-4-4
5. Power off phone, wait a moment , connect to PC, there will be a driver named
MT65xx Preloader need to be installed. Generally it will be installed
automatically by searching windows update.
Qpad X5 User Guide
31
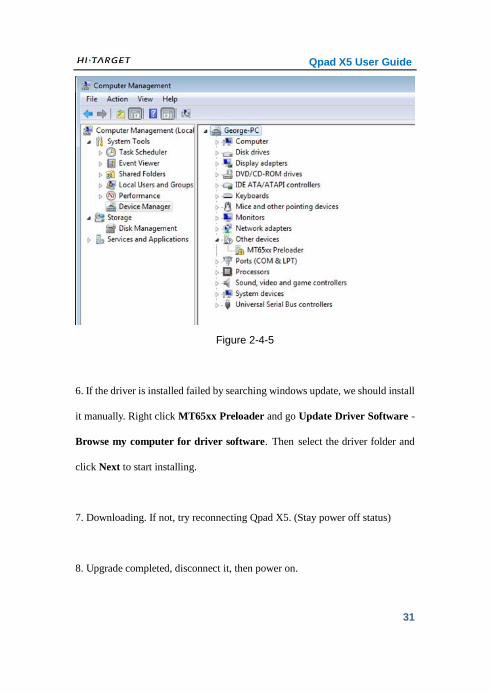
Figure 2-4-5
6. If the driver is installed failed by searching windows update, we should install
it manually. Right click MT65xx Preloader and go Update Driver Software -
Browse my computer for driver software. Then select the driver folder and
click Next to start installing.
7. Downloading. If not, try reconnecting Qpad X5. (Stay power off status)
8. Upgrade completed, disconnect it, then power on.
Software
32
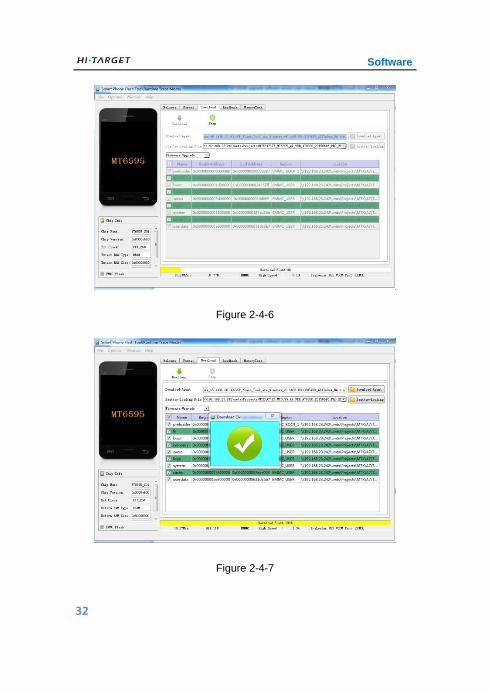
Figure 2-4-6
Figure 2-4-7
Qpad X5 User Guide
33
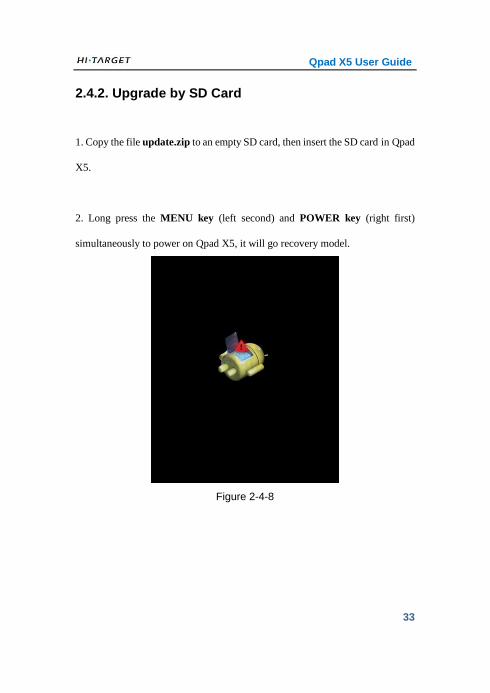
2.4.2. Upgrade by SD Card
1. Copy the file update.zip to an empty SD card, then insert the SD card in Qpad
X5.
2. Long press the MENU key (left second) and POWER key (right first)
simultaneously to power on Qpad X5, it will go recovery model.
Figure 2-4-8
Software
34
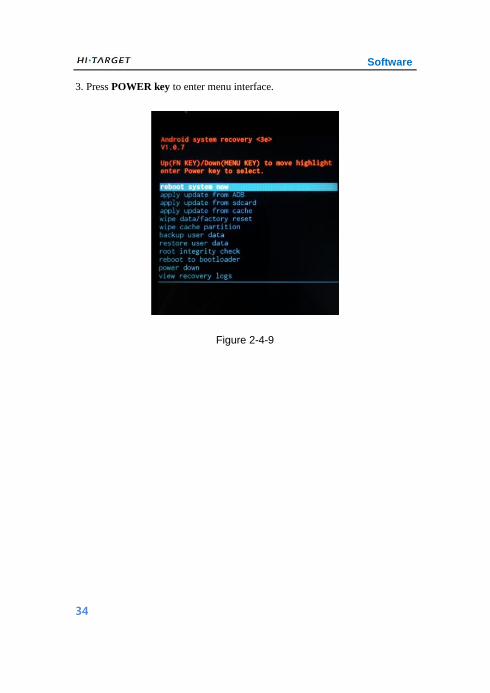
3. Press POWER key to enter menu interface.
Figure 2-4-9
Qpad X5 User Guide
35
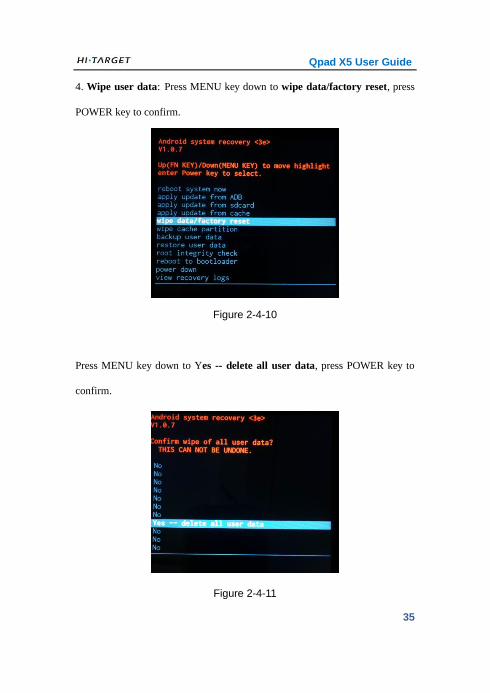
4. Wipe user data: Press MENU key down to wipe data/factory reset, press
POWER key to confirm.
Figure 2-4-10
Press MENU key down to Yes -- delete all user data, press POWER key to
confirm.
Figure 2-4-11
Software
36
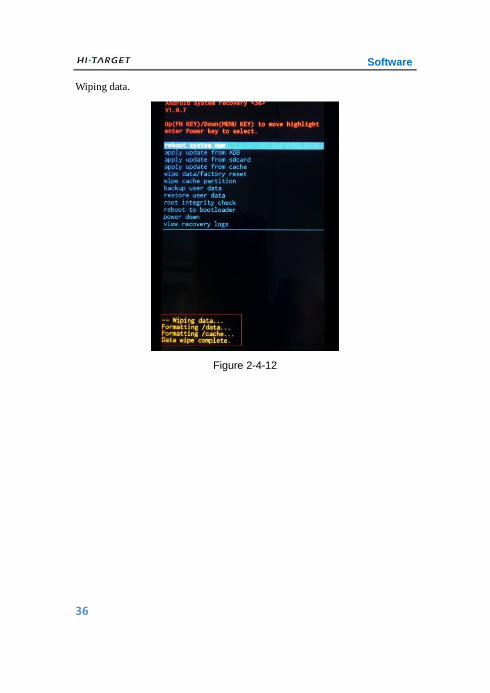
Wiping data.
Figure 2-4-12

Qpad X5 User Guide
37
5. Wipe cache partition: Press MENU key down to wipe cache partition,
press POWER key to confirm.
Figure 2-4-13
Wiping cache.
Software
38
Figure 2-4-14
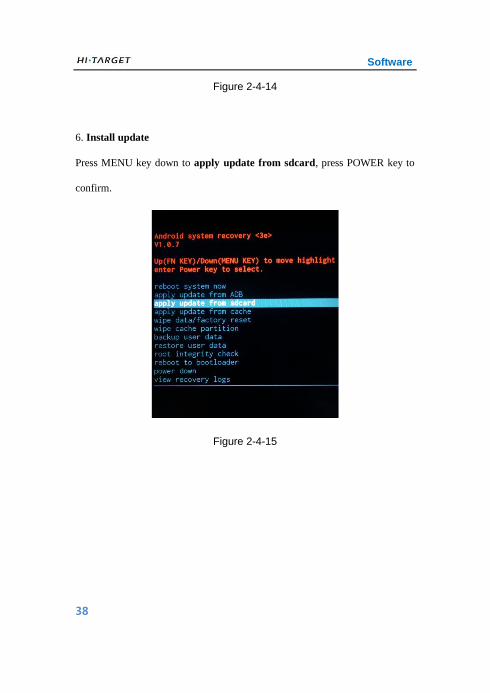
6. Install update
Press MENU key down to apply update from sdcard, press POWER key to
confirm.
Figure 2-4-15
Qpad X5 User Guide
39
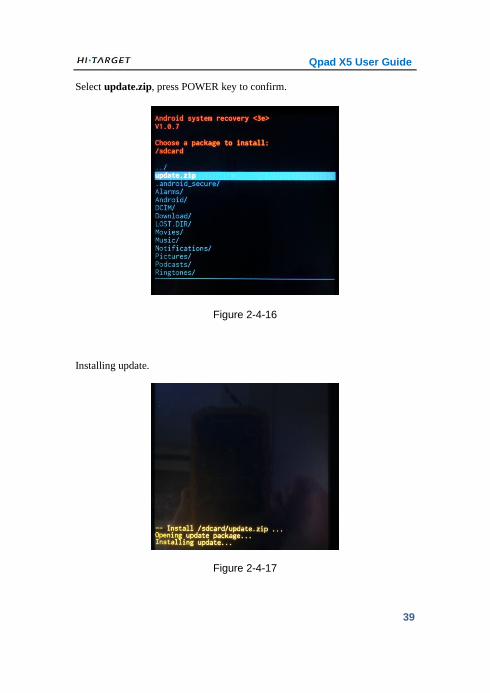
Select update.zip, press POWER key to confirm.
Figure 2-4-16
Installing update.
Figure 2-4-17
Software
40
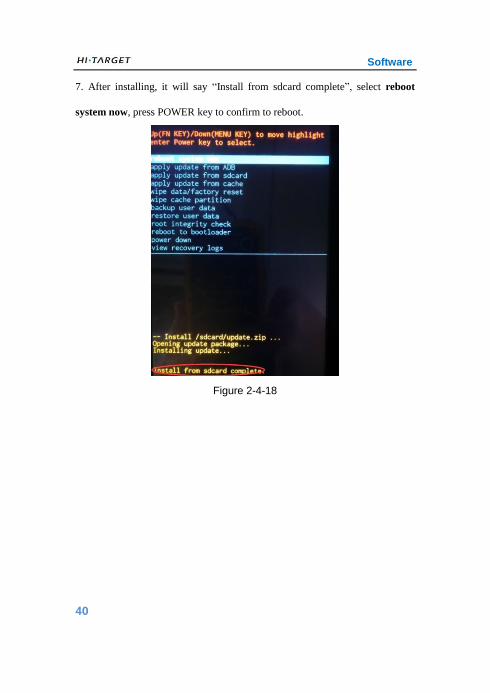
7. After installing, it will say “Install from sdcard complete”, select reboot
system now, press POWER key to confirm to reboot.
Figure 2-4-18
Recommended