Last Chance Archery 706-654-1961�
www.lastchancearchery.com�

Last Chance Archery 706-654-1961�
www.lastchancearchery.com�
Last Chance Archery 706-654-1961�
www.lastchancearchery.com�
Be sure to check the tightness�of bolts regularly�
Management of the press is�the owner’s responsibility�
For any additional information please contact�Last Chance Archery at (706) 654-1961�
Thank you for your purchase�
Power Press and or EZ Press will not stand up on�it’s own, always bolt or clamp bow press to table or�
wall�
Never Press bow without adjusting fingers for cam�width first. Make sure fingers are configured and�
adjusted to match bow before using�
Never remove cams from bow while bow is pressed.�Remove strings and cables and release pressure�
before removing cams�
Always check to be sure there is nothing between�limb and tips before you apply pressure�
Power Press (motorized version) is designed to�press bow weight up to 70 lbs. Bows over this�
weight could damage motor�
EZ Press (manual version) has been tested to press�bows up to 90 lbs�
Warning�

Last Chance Archery 706-654-1961�
www.lastchancearchery.com�

Last Chance Archery 706-654-1961�
www.lastchancearchery.com�
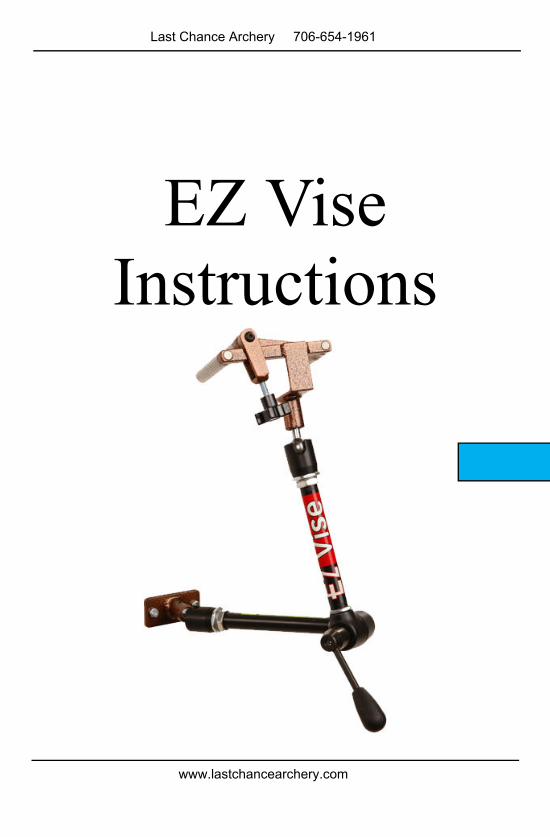
EZ Vise Instructions�
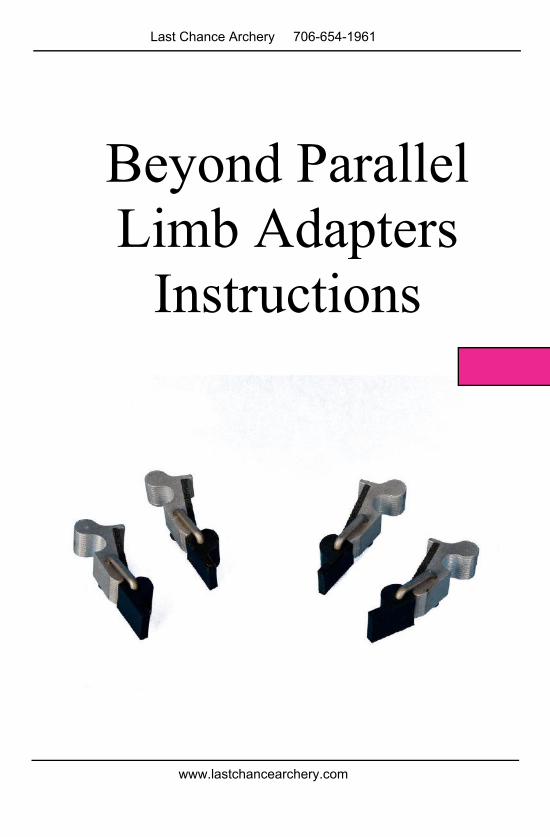
Beyond Parallel Limb�Adapters Instructions�
General Instructions�
Ultimate EZ Press Instructions�

Last Chance Archery 706-654-1961�
www.lastchancearchery.com�

Last Chance Archery 706-654-1961�
www.lastchancearchery.com�
General�Instructions�

Last Chance Archery 706-654-1961�
www.lastchancearchery.com�
Last Chance Archery 706-654-1961�
www.lastchancearchery.com�
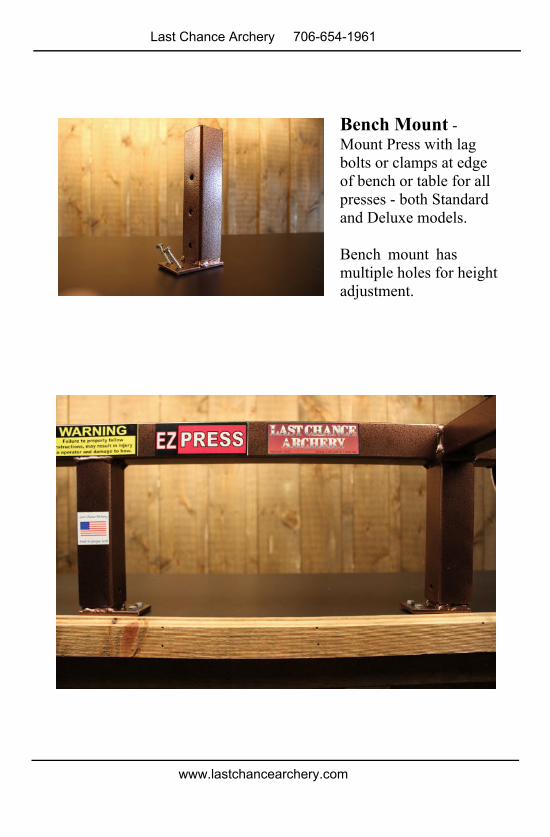
Bench Mount� -�Mount Press with lag�bolts or clamps at edge�of bench or table for all�presses - both Standard�and Deluxe models.�
Bench mount has�multiple holes for height�adjustment.�
Last Chance Archery 706-654-1961�
www.lastchancearchery.com�
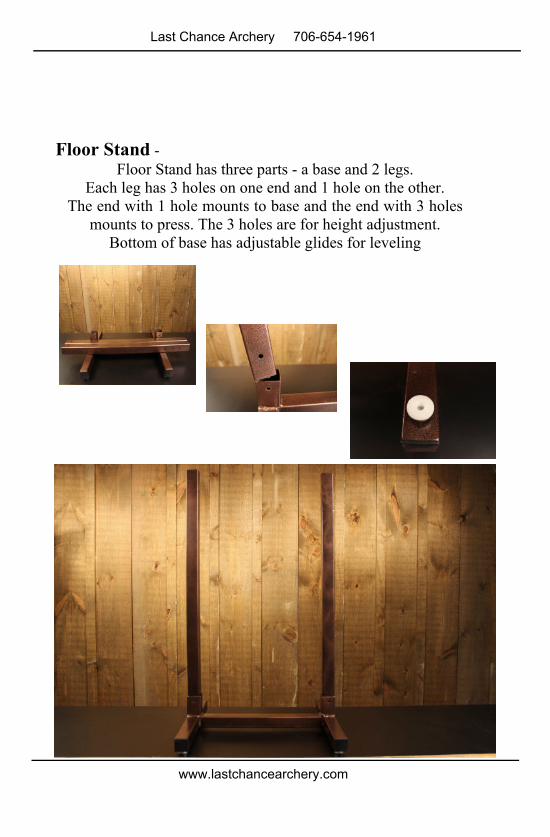
Floor Stand� -�Floor Stand has three parts - a base and 2 legs.�
Each leg has 3 holes on one end and 1 hole on the other.�The end with 1 hole mounts to base and the end with 3 holes�
mounts to press. The 3 holes are for height adjustment.�Bottom of base has adjustable glides for leveling�
Last Chance Archery 706-654-1961�
www.lastchancearchery.com�
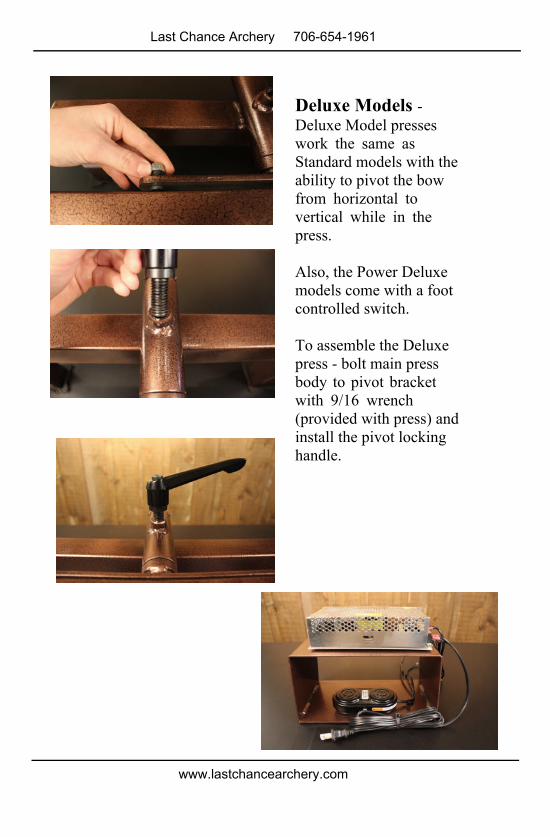
Deluxe Models�-�Deluxe Model presses�work the same as�Standard models with the�ability to pivot the bow�from horizontal to�vertical while in the�press.�
Also, the Power Deluxe�models come with a foot�controlled switch.�
To assemble the Deluxe�press - bolt main press�body to pivot bracket�with 9/16 wrench�(provided with press) and�install the pivot locking�handle.�
Last Chance Archery 706-654-1961�
www.lastchancearchery.com�
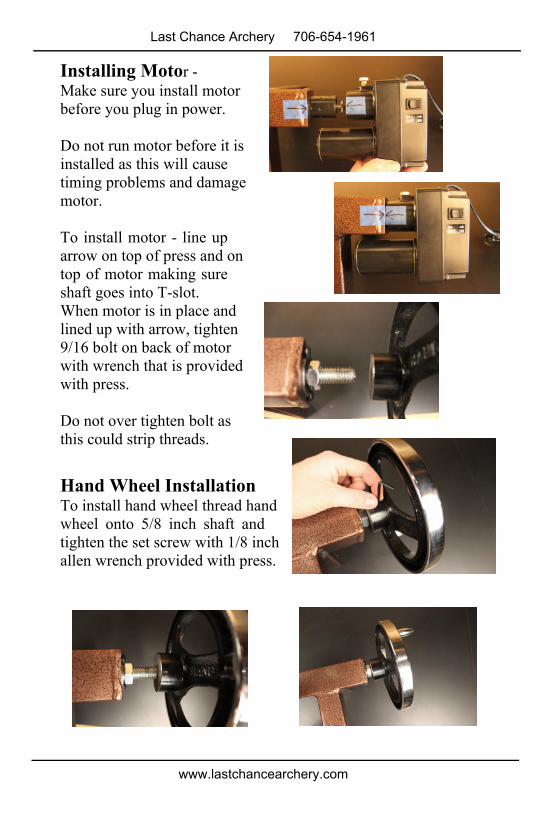
Installing Moto�r -�Make sure you install motor�before you plug in power.�
Do not run motor before it is�installed as this will cause�timing problems and damage�motor.�
To install motor - line up�arrow on top of press and on�top of motor making sure�shaft goes into T-slot.�When motor is in place and�lined up with arrow, tighten�9/16 bolt on back of motor�with wrench that is provided�with press.�
Do not over tighten bolt as�this could strip threads.�
Hand Wheel Installation�To install hand wheel thread hand�wheel onto 5/8 inch shaft and�tighten the set screw with 1/8 inch�allen wrench provided with press.�
Last Chance Archery 706-654-1961�
www.lastchancearchery.com�
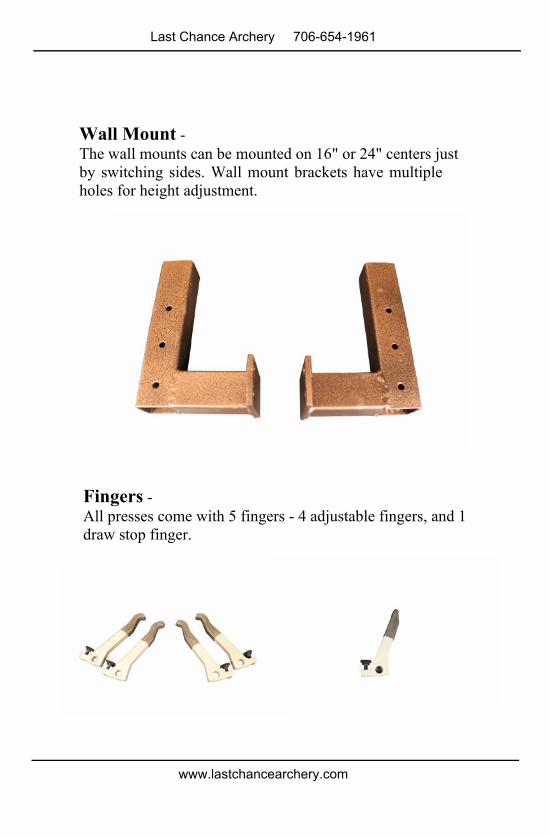
Wall Mount� -�The wall mounts can be mounted on 16" or 24" centers just�by switching sides. Wall mount brackets have multiple�holes for height adjustment.�
Fingers� -�All presses come with 5 fingers - 4 adjustable fingers, and 1�draw stop finger.�
Last Chance Archery 706-654-1961�
www.lastchancearchery.com�
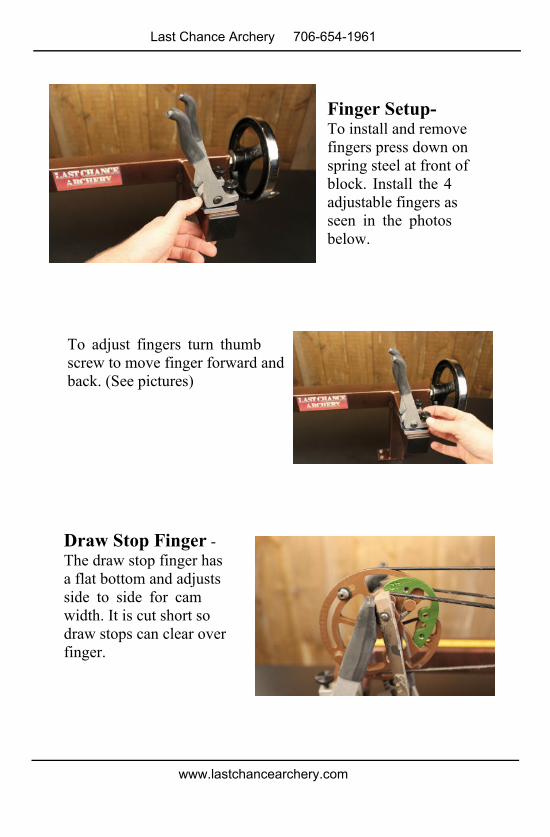
Finger Setup-�To install and remove�fingers press down on�spring steel at front of�block. Install the 4�adjustable fingers as�seen in the photos�below.�
To adjust fingers turn thumb�screw to move finger forward and�back. (See pictures)�
Draw Stop Finger� -�The draw stop finger has�a flat bottom and adjusts�side to side for cam�width. It is cut short so�draw stops can clear over�finger.�
Last Chance Archery 706-654-1961�
www.lastchancearchery.com�
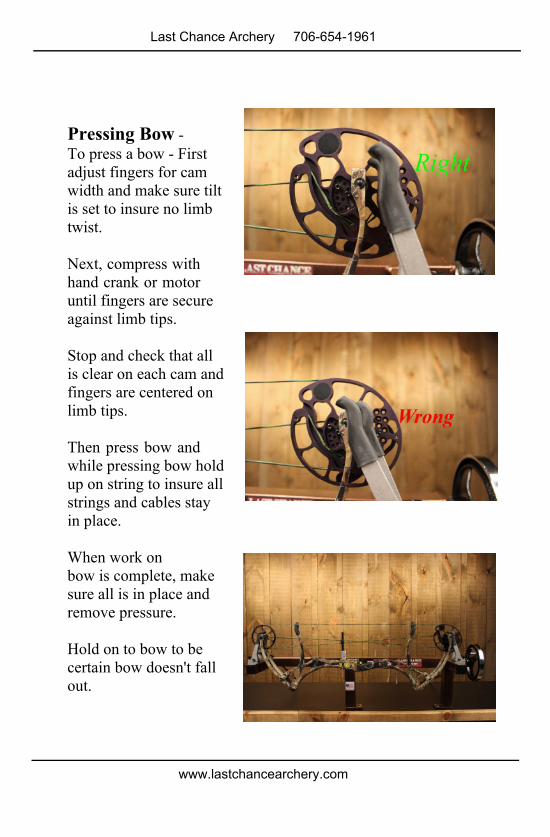
Pressing Bow� -�To press a bow - First�adjust fingers for cam�width and make sure tilt�is set to insure no limb�twist.�
Next, compress with�hand crank or motor�until fingers are secure�against limb tips.�
Stop and check that all�is clear on each cam and�fingers are centered on�limb tips.�
Then press bow and�while pressing bow hold�up on string to insure all�strings and cables stay�in place.�
When work on�bow is complete, make�sure all is in place and�remove pressure.�
Hold on to bow to be�certain bow doesn't fall�out.�

Last Chance Archery 706-654-1961�
www.lastchancearchery.com�

Last Chance Archery 706-654-1961�
www.lastchancearchery.com�
Ultimate EZ Press�Instructions�

Last Chance Archery 706-654-1961�
www.lastchancearchery.com�
Last Chance Archery 706-654-1961�
www.lastchancearchery.com�
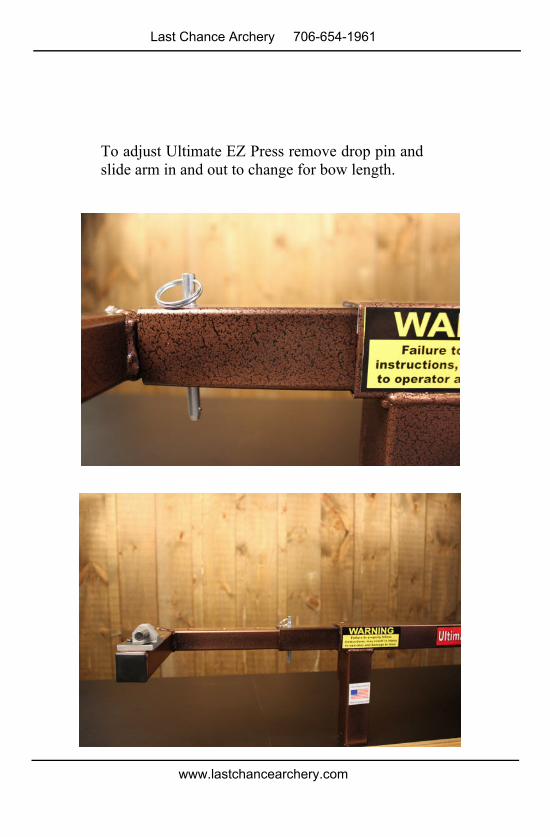
To adjust Ultimate EZ Press remove drop pin and�slide arm in and out to change for bow length.�
Last Chance Archery 706-654-1961�
www.lastchancearchery.com�
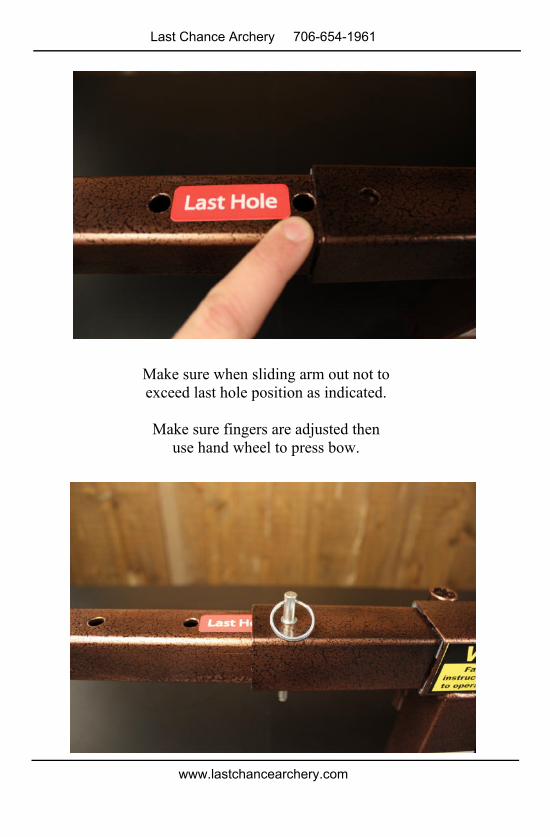
Make sure when sliding arm out not to�exceed last hole position as indicated.�
Make sure fingers are adjusted then�use hand wheel to press bow.�
Last Chance Archery 706-654-1961�
www.lastchancearchery.com�
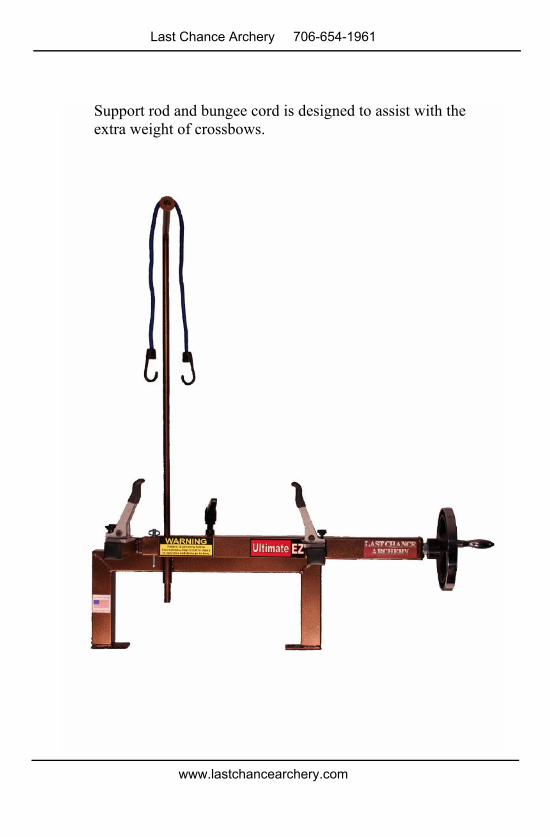
Support rod and bungee cord is designed to assist with the�extra weight of crossbows.�

Last Chance Archery 706-654-1961�
www.lastchancearchery.com�
Last Chance Archery 706-654-1961�
www.lastchancearchery.com�
Beyond Parallel�Limb Adapters�
Instructions�

Last Chance Archery 706-654-1961�
www.lastchancearchery.com�
Last Chance Archery 706-654-1961�
www.lastchancearchery.com�
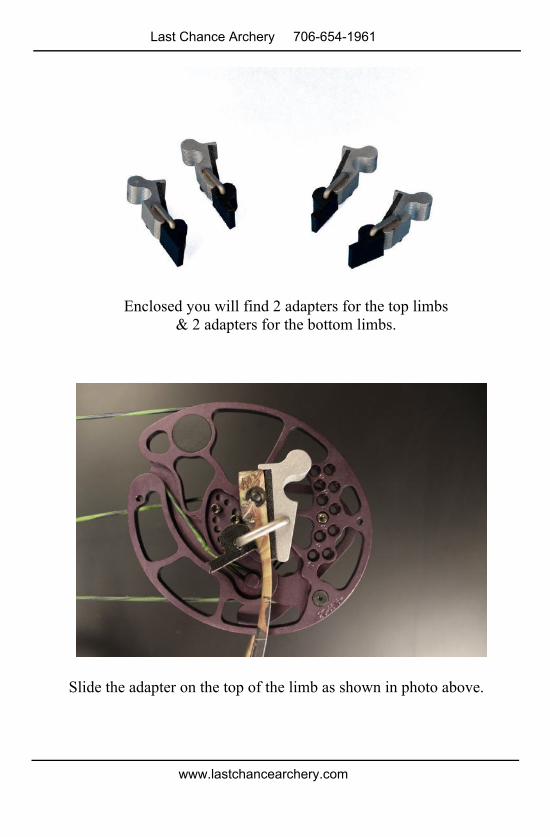
Enclosed you will find 2 adapters for the top limbs�& 2 adapters for the bottom limbs.�
Slide the adapter on the top of the limb as shown in photo above.�
Last Chance Archery 706-654-1961�
www.lastchancearchery.com�
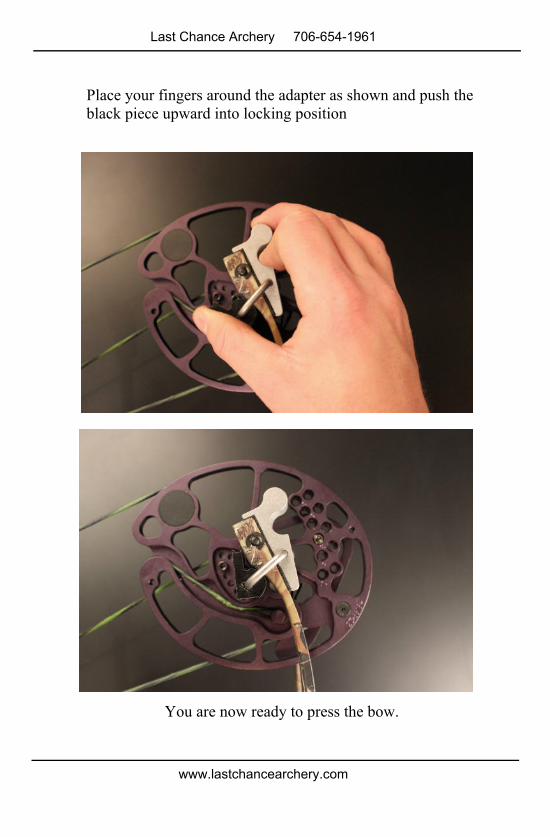
Place your fingers around the adapter as shown and push the�black piece upward into locking position�
You are now ready to press the bow.�
Last Chance Archery 706-654-1961�
www.lastchancearchery.com�
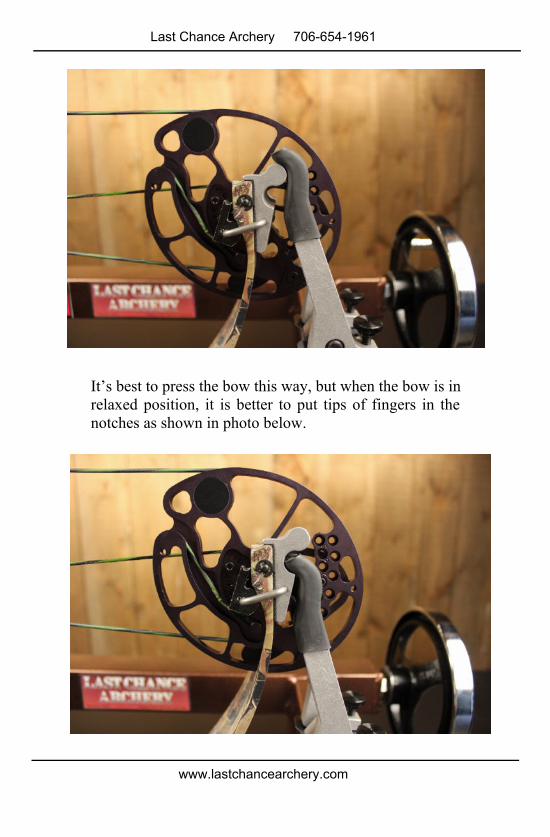
It’s best to press the bow this way, but when the bow is in�relaxed position, it is better to put tips of fingers in the�notches as shown in photo below.�

Last Chance Archery 706-654-1961�
www.lastchancearchery.com�
Last Chance Archery 706-654-1961�
www.lastchancearchery.com�
EZ Vise�Instructions�

Last Chance Archery 706-654-1961�
www.lastchancearchery.com�
Last Chance Archery 706-654-1961�
www.lastchancearchery.com�
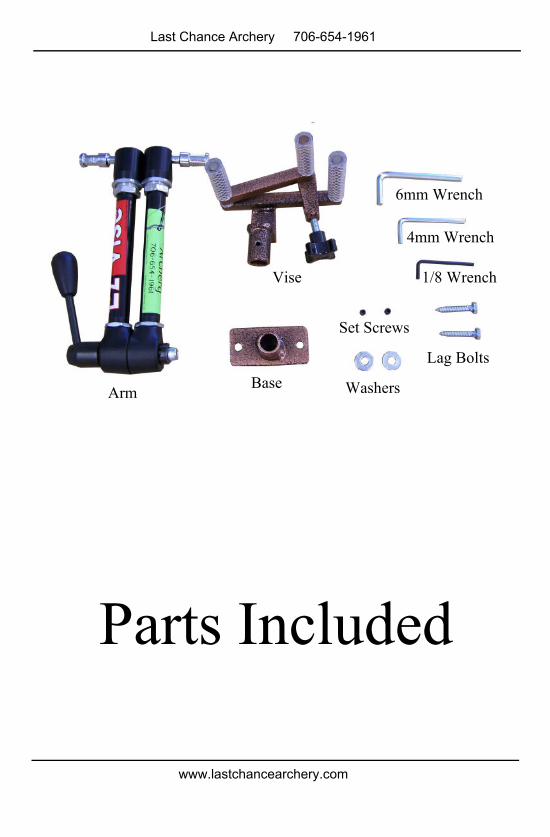
Parts Included�
Arm�
Vise�
Base�
Set Screws�
Washers�
6mm Wrench�
4mm Wrench�
1/8 Wrench�
Lag Bolts�

Last Chance Archery 706-654-1961�
www.lastchancearchery.com�

Last Chance Archery 706-654-1961�
www.lastchancearchery.com�
Assembly�
Step 1: To begin, when attaching the vise to the arm, make�sure and line the set screw hole with the flat part on the stud�of the arm to ensure that it does not rotate�(See photos above)�
Flat Part on Stud�
Last Chance Archery 706-654-1961�
www.lastchancearchery.com�
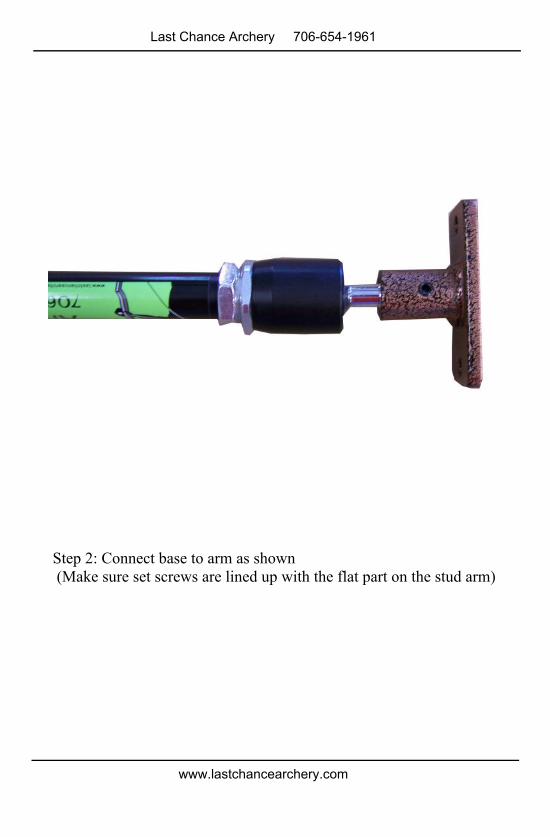
Step 2: Connect base to arm as shown� (Make sure set screws are lined up with the flat part on the stud arm)�
Last Chance Archery 706-654-1961�
www.lastchancearchery.com�
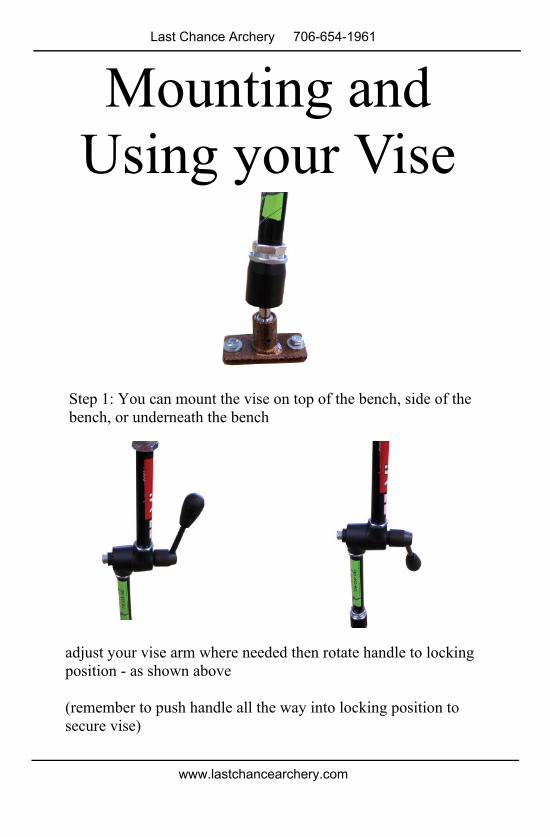
Mounting and�Using your Vise�
Step 1: You can mount the vise on top of the bench, side of the�bench, or underneath the bench�
adjust your vise arm where needed then rotate handle to locking�position - as shown above�
(remember to push handle all the way into locking position to�secure vise)�
Last Chance Archery 706-654-1961�
www.lastchancearchery.com�
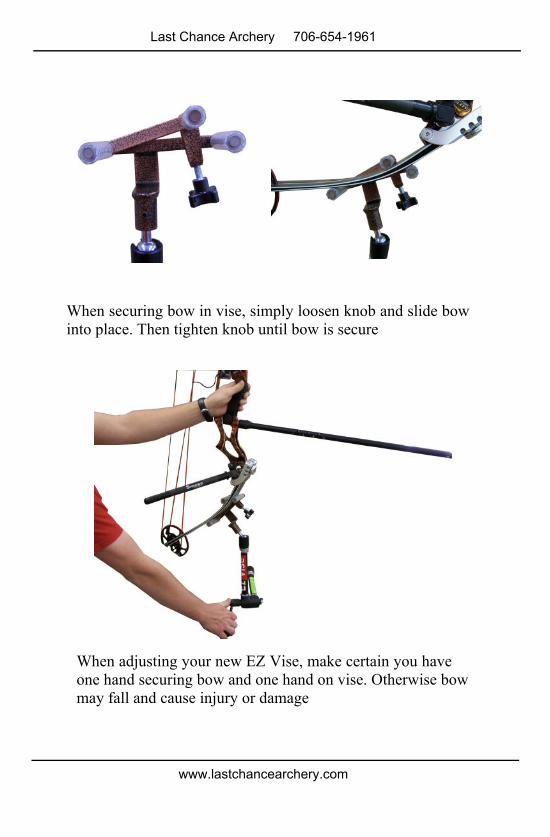
When securing bow in vise, simply loosen knob and slide bow�into place. Then tighten knob until bow is secure�
When adjusting your new EZ Vise, make certain you have�one hand securing bow and one hand on vise. Otherwise bow�may fall and cause injury or damage�

Last Chance Archery 706-654-1961�
www.lastchancearchery.com�

Last Chance Archery 706-654-1961�
www.lastchancearchery.com�

Last Chance Archery 706-654-1961�
www.lastchancearchery.com�

Last Chance Archery 706-654-1961�
www.lastchancearchery.com�
Recommended