P a g e | 1
SMART Notebook for EveryoneEducator Professional Development
Lisa Reed
Michele DoerhoffJulie McCoyRobin Yates
December 12, 2011
P a g e | 2
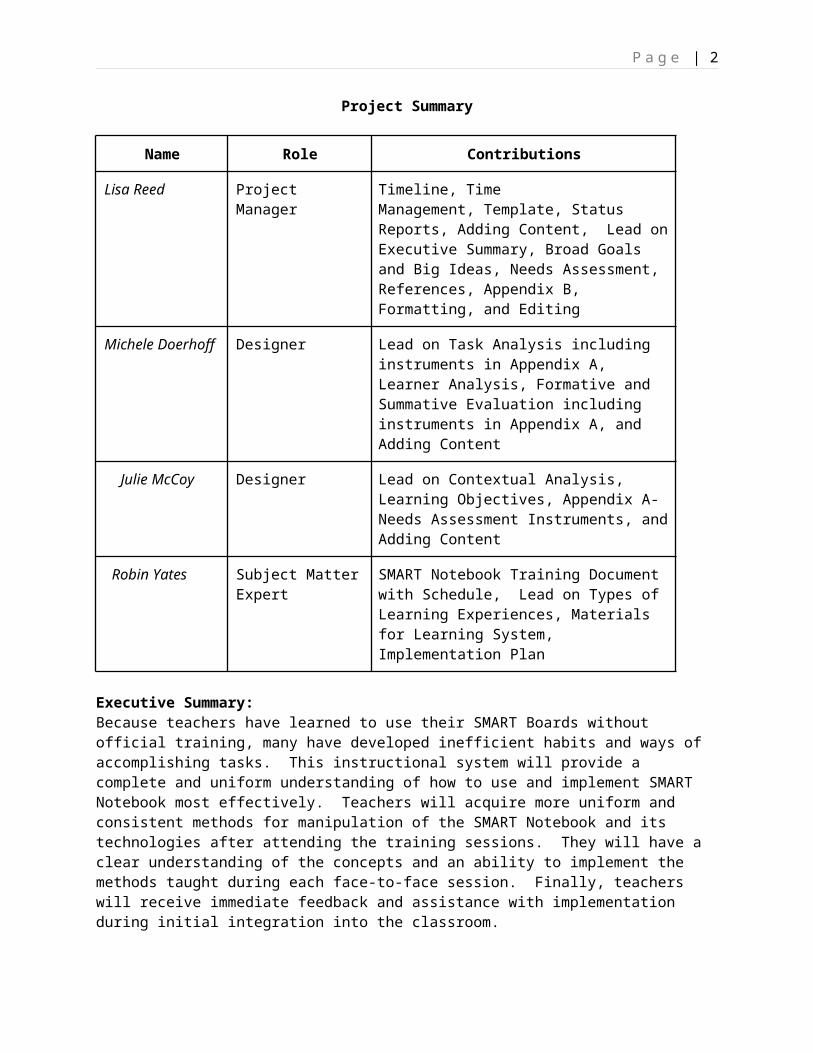
Project Summary
Name Role Contributions
Lisa Reed Project Manager Timeline, Time Management, Template, Status Reports, Adding Content, Lead on Executive Summary, Broad Goals and Big Ideas, Needs Assessment, References, Appendix B, Formatting, and Editing
Michele Doerhoff Designer Lead on Task Analysis including instruments in Appendix A, Learner Analysis, Formative and Summative Evaluation including instruments in Appendix A, and Adding Content
Julie McCoy Designer Lead on Contextual Analysis, Learning Objectives, Appendix A-Needs Assessment Instruments, and Adding Content
Robin Yates Subject Matter Expert
SMART Notebook Training Document with Schedule, Lead on Types of Learning Experiences, Materials for Learning System, Implementation Plan
Executive Summary:Because teachers have learned to use their SMART Boards without official training, many have developed inefficient habits and ways of accomplishing tasks. This instructional system will provide a complete and uniform understanding of how to use and implement SMART Notebook most effectively. Teachers will acquire more uniform and consistent methods for manipulation of the SMART Notebook and its technologies after attending the training sessions. They will have a clear understanding of the concepts and an ability to implement the methods taught during each face-to-face session. Finally, teachers will receive immediate feedback and assistance with implementation during initial integration into the classroom.Using a needs assessment, trainers will determine current expectations for use, buy-in from educators, current ability levels of the teachers, as well as use in development of the topic analysis in order to define the facts, concepts, principles, and rules that make up the final instruction. The procedural analysis will determine instructional steps needed to achieve the goals. The Level One instruction will focus on the entry level SMART Notebook skills, Level Two instruction addresses advanced skills.A formative evaluation will focus on answering questions that help in forming the instructional system. These questions will be geared toward determining skill level, learning style, and improving the system. Additionally, a summative evaluation will be completed to determine improvements in understanding, level of implementation, and the overall effectiveness of the sessions.An analysis of the learners will be completed to assist with creating learner specific sessions. This analysis will cover background, experience, training, learning style, teacher goals and motivations. Additionally, a contextual analysis will be used to develop an appropriate training for the learners’ needs. This analysis will focus on logistics, availability, training site, equipment needs, and other such instructional needs.

P a g e | 3
There will be two levels of training divided into six 1-hour sessions each. The sessions will occur approximately every two weeks. They will begin by activating prior knowledge, then demonstrating new concepts, and finally, applying newly acquired information. Participants will also be made aware of availability of trainers, the IT department, technology coordinators, and other resources to support their use of SMART Notebook software.

P a g e | 4
Table of Contents
Section Page # I. Desired Results…………………………………………………………………………………………… 5
A. Broad Goals and Big IdeasB. Learning ObjectivesC. Needs AssessmentD. Task Analysis, Topic Analysis, and Procedural Analysis
II. Evidence of Acceptable Results…………………………………………………………………. 12
A. Formative EvaluationB. Summative Evaluation (including Assessment of Learning)
III. Learning Experiences and/or Instruction…………………………………………………… 14A. Learner AnalysisB. Contextual AnalysisC. Types of Learning Experiences and/or InstructionD. Materials for Training Program or Learning SystemE. Implementation Plan, including Schedule
IV. References………………………………………………………………………………………………… 19
V. AppendicesA. Needs Assessment Instruments and Evaluation Materials……………. 20B. Materials, Schedules, etc………………………………………………………………. 42

P a g e | 5
Desired Results:I-A Broad Goals and Big Ideas Many teachers are forced to learn how to use their SMART Notebook and the technology that accompanies it either on their own, or with the help of someone who learned in that manner. Generally teachers are not given the opportunity to be trained by someone who has had official SMART Notebook training. Because of this, teachers may have developed habits and ways of accomplishing tasks that may not be the easiest or most efficient route.
The intent of this face-to-face instructional system is to provide both a complete and uniform understanding of how to use and implement SMART Notebook in the most effective manner. We seek to educate K-12 teachers on the features of the SMART Notebook and components of its peripheral technologies, in order to facilitate increased student involvement, engagement, interactivity, and - in the end - increased student achievement. Each teacher will begin at Level One in order to ensure manipulations of the board and its technologies are completed in the most efficient manner. Upon completion of each training session, teachers will be given time to practice the covered materials, and will be observed implementing them before the next session to guarantee understanding before moving on.
Goal 1: Teachers will acquire more uniform and consistent methods for manipulation of the SMART Notebook and its technologies after attending the training sessions.
Goal 2: Teachers will have a clear understanding of the concepts and an ability to implement the methods taught during each face-to-face session.
Goal 3: Teachers will be provided with immediate feedback and assistance with implementation during initial integration into the classroom.
I-B Learning Objectives
Goal 1: Teachers will acquire more uniform and consistent methods for manipulation of the SMART Notebook and its technologies after attending the training sessions.
Level 1 Schedule Objectives
Objective 1: After completing session 1, teachers will be able to create and manipulate text and images in SMART Notebook independently with 90% accuracy.
Objective 2: After completing session 1, teachers will be able to differentiate between SMART Notebook tabs and explain their functions with 90% accuracy.
Objective 3: After completing session 1, teachers will be able to write, save, and highlight notes in SMART Notebook independently with 90% accuracy.
Objective 4: After completing session 2, teachers will be able to differentiate between and explain the use of each of the side tabs with 90% accuracy.
Objective 5: After completing session 2, teachers will be able to effectively navigate, use, and create SMART Notebook gallery collections with 90% accuracy.

P a g e | 6
Objective 6: After completing session 3, teachers will be able to manipulate drop-down menus, menu bar, toolbar, and properties side tab to effectively change the properties of objects with 90% accuracy.
Objective 7: After completing session 3, teachers will be able to insert graphics into a SMART Notebook lesson independently with 90% accuracy.
Objective 8: After completing session 3, teachers will be able to export contents of a SMART Notebook file into a variety of formats including web page, image files, PDF, CFF, and PowerPoint independently with 90% accuracy.
Objective 9: After completing session 3, teachers will be able to create and manipulate objects in a SMART Notebook file independently with 90% accuracy.
Objective 10: After completing session 5, teachers will be able to use ink aware applications in Microsoft Office programs to insert writing as text with 90% accuracy.
Level 2 Learning Objectives
Objective 1: After completing session 2, teachers will be able to add a title page to a lesson in SMART Notebook in order to clearly state the topic of the lesson with 90% accuracy.
Objective 2: After completing session 2, teachers will be able to use the page grouping feature to organize pages in a file with 90% accuracy.
Objective 3: After completing session 3, teachers will be able to locate, apply, create, and save themes in SMART Notebook independently with 90% accuracy.
Objective 4: After completing session 3, teachers will be able to use the Properties tab to modify an object’s properties so that it changes color with 90% accuracy.
Objective 5: After completing session 3, teachers will be able to apply table properties to create, move, modify, and re-size a table with 90% accuracy.
Objective 6: After completing session 4, teachers will be able to describe and enable Dual Page Display to view two pages side by side with 90% accuracy.
Objective 7: After completing session 4, teachers will be able to effectively use the Pin Page feature while in Dual Page Display to freeze a page while being able to change the other with 90% accuracy.
Objective 8: After completing session 4, teachers will be able to attach sound file to an object that will play the sound when activated with 90% accuracy.
Objective 9: After completing session 4, teachers will be able to add and modify animation settings to independently animate an object with 90% accuracy.
Objective 10: After completing session 4, teachers will be able to create and use a pull tab to reveal information on a page with 90% accuracy.
Objective 11: After completing session 5, teachers will be able to use the page recorder and SMART Recorder tools to record a lesson with 90% accuracy.

P a g e | 7
Objective 12: After completing session 5, teachers will be able to use the Print Capture feature to import a document into SMART Notebook with 90% accuracy.
Objective 13: After completing session 5, teachers will be able to import image files into SMART Notebook from a saved folder on their computer with 90% accuracy.
Goal 2: Teachers will have a clear understanding of the concepts and an ability to implement the methods taught during each face-to-face session.
Level 1 Schedule Objectives
Objective 1: After completing session 1, teachers will be able to effectively describe the role, and use SMART Notebook in the classroom to support student learning with 100% accuracy.
Objective 2: After completing session 1, teachers will be able to identify lesson creation techniques that support student learning with 90% accuracy.
Objective 3: After completing session 4, teachers will be able to accurately describe best practices of creating an interactive lesson with 90% accuracy.
Objective 4: After completing session 4, teachers will be able to create a hide-and-reveal and an identification activity independently with 90% accuracy.
Objective 5: After completing session 6, teachers will be able to demonstrate their understanding of how to care for, orient, and troubleshoot in SMART Notebook to the other learners attending the session with 90% accuracy.
Level 2 Learning Objectives
Objective 1: After completing session 1, teachers will be able to access the SMART Exchange website and find and download relevant lesson activities with 100% accuracy.
Objective 2: After completing session 1, teachers will be able to read and post comments on the SMART Exchange forum that facilitate discussion or ask relevant questions with 100% accuracy.
Objective 3: After completing session 2, teachers will be able to use links that improve flow and organization of lessons with 100% accuracy.
Objective 4: After completing session 2, teachers will be able to appropriately determine when to insert an attachment or copy as a shortcut with 100% accuracy.
Objective 5: After completing session 2, teachers will be able to organize their My Content Folder to easily access saved items with 90% accuracy.
Objective 6: After completing session 3, teachers will be able to use the Lesson Activity Toolkit to find graphics and lesson pages and to customize and use games, activities, and tools with 100% accuracy.
Objective 7: After completing session 5, teachers will be able to use the transparent background tool

P a g e | 8
to display their desktop or open an application with 100% accuracy.
Objective 8: After completing session 5, teachers will be able to play a video using SMART Video Player and make notes over the video while playing with 90% accuracy.
Goal 3: Teachers will be provided with immediate feedback and assistance with implementation during initial integration into the classroom.
Level 1 Learning Objectives
Objective 1: After completing session 4, teachers will demonstrate appropriate interactive lesson activities with 100% accuracy.
Level 2 Learning Objectives
Objective 1: After completing session 5, teachers will be able to locate teacher-recommended websites to assist with interactive lesson planning with 100% accuracy.
Objective 2: After completing session 6, teachers will be able to organize and design lessons to enhance their delivery during instruction in the classroom with 100% accuracy.
Objective 3: After completing session 6, teachers will be able to demonstrate interactive whiteboard delivery skills in the classroom with 100% accuracy.
Objective 4: After completing session 6, teachers will be able to recognize responsive lesson delivery opportunities and implement them in the classroom as enrichment, extensions, and unplanned review with 90% accuracy.
I-C Needs Assessment
Type of Information
What do you need to know?
Why do you need to know this?
Information source
Types of Procedures (Instruments)
Optimal
1. What are the most important things teachers can do with SMART Notebook at the beginner level? advanced level?
Identifying the ideal performance for the use of SMART Notebook can help narrow content to those points which users must know to successfully use this product
SMART Notebook manual and product guide, and SMART website
Checklist of features within SMART Notebook

P a g e | 9
without overwhelming the learners.
2. What skills will teachers need to implement SMART Notebook?
The necessary skills will need to be part of the lesson if teachers do not already possess these skills.
SMART Notebook manual and product guide, and SMART website
Checklist of features within SMART Notebook, interview of administrators
3. How are teachers expected to implement SMART Notebook into their classrooms?
Understanding how the technology is expected to be implemented will allow for the training to be tailored to different schools' needs
School administration, technology curriculum coordinators
Interview of administration and/or technology curriculum coordinator
Actuals
1. How are teachers currently using the SMART Notebook?
Training can be designed based on how teachers are currently using SMART Notebook and what needs they have to improve learning for their students
SMART Notebook users
Survey of SMART Notebook users
2. What SMART features are most commonly used?
After identifying the areas, training can be adjusted to challenge teachers to use features that they have not commonly used in the past.
SMART Notebook users
Survey of SMART Notebook users
Determining Causes
1. What are the teachers’ incentives to use
It is important to understand what
SMART Notebook users,
Survey of SMART Notebook users,

P a g e | 10
SMART Notebook? motivations teachers have for improving their knowledge of SMART Notebook.
administration, technology curriculum coordinator
interview with administration and technology curriculum coordinator
2. What is the difference, or gap, between how teachers are using SMART Notebook in their classrooms and the expectation for use?
It is important to understand the difference between the expectations and the actual use of the products in the classroom.
SMART Notebook users, administration, technology curriculum coordinator
Survey of SMART Notebook users, interview with administration and technology curriculum coordinator
Feelings
1. What are the teachers’ feelings about the SMART Notebook?
This is necessary in order to understand if the teachers are truly interested in learning new technologies.
SMART Notebook users.
Survey of SMART Notebook users.
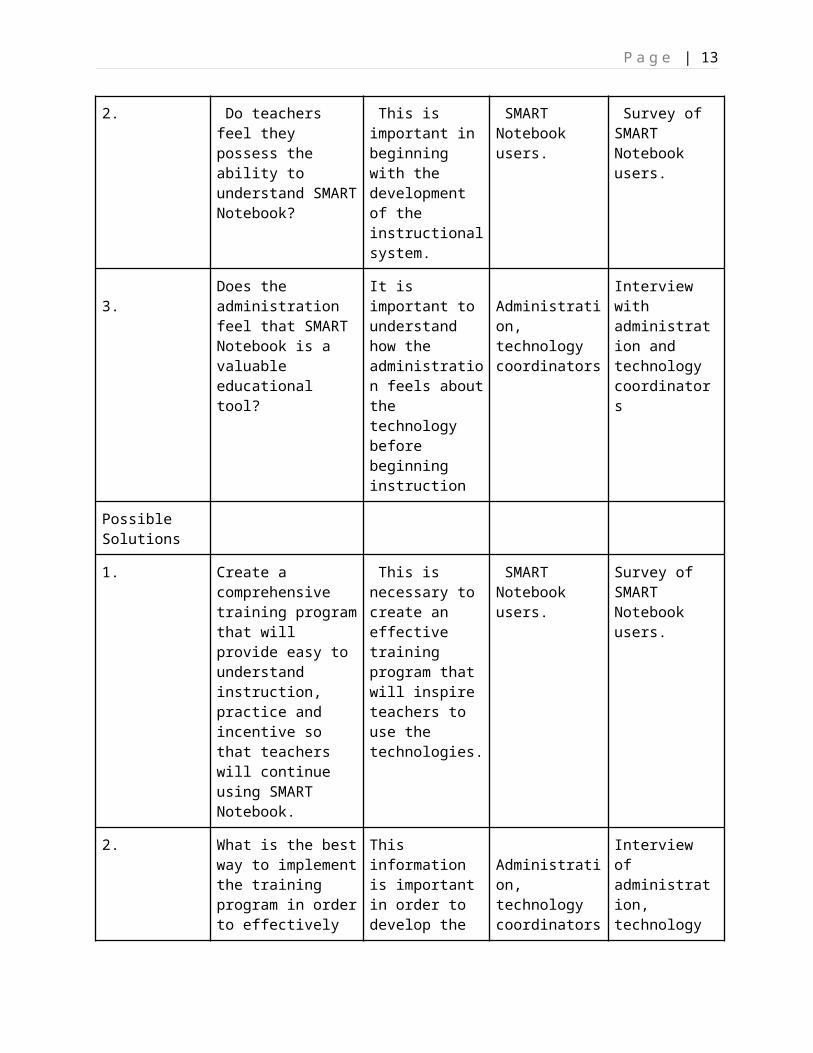
2. Do teachers feel they possess the ability to understand SMART Notebook?
This is important in beginning with the development of the instructional system.
SMART Notebook users.
Survey of SMART Notebook users.
3.
Does the administration feel that SMART Notebook is a valuable educational tool?
It is important to understand how the administration feels about the technology before beginning instruction
Administration, technology coordinators
Interview with administration and technology coordinators
Possible Solutions
1. Create a comprehensive training program that will provide easy to understand instruction, practice and incentive so that teachers will
This is necessary to create an effective training program that will inspire teachers to use the technologies.
SMART Notebook users.
Survey of SMART Notebook users.

P a g e | 11
continue using SMART Notebook.
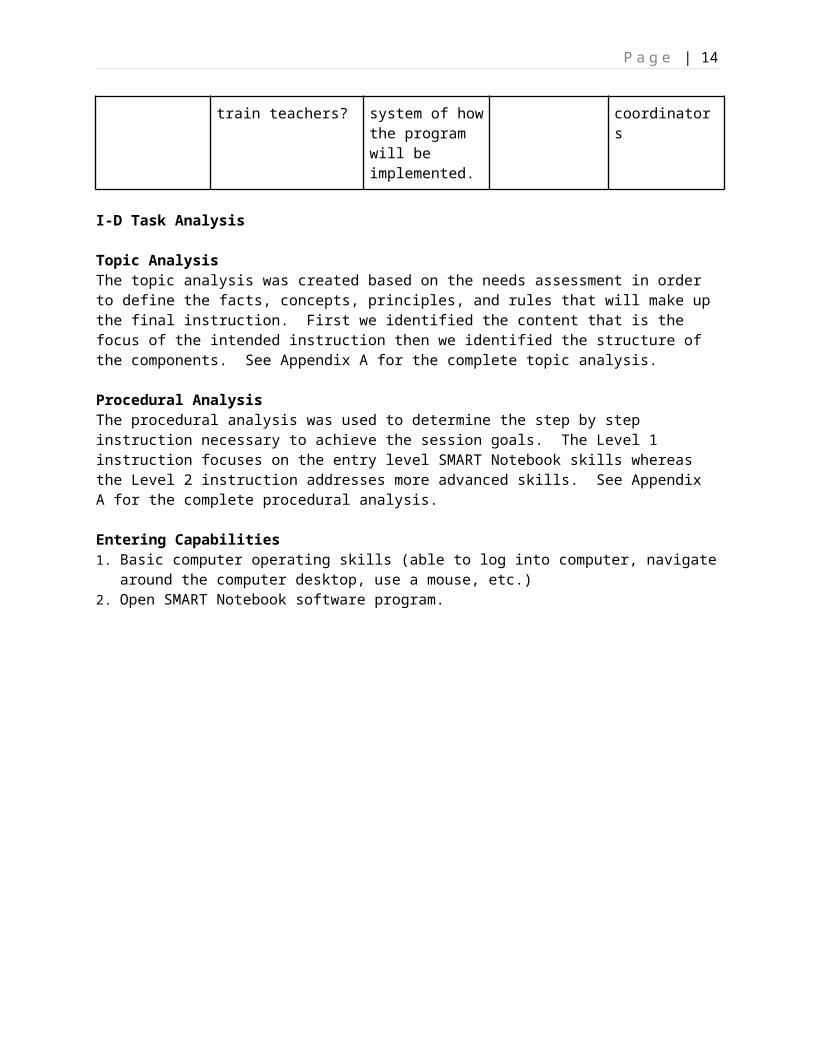
2. What is the best way to implement the training program in order to effectively train teachers?
This information is important in order to develop the system of how the program will be implemented.
Administration, technology coordinators
Interview of administration, technology coordinators
I-D Task Analysis
Topic Analysis The topic analysis was created based on the needs assessment in order to define the facts, concepts, principles, and rules that will make up the final instruction. First we identified the content that is the focus of the intended instruction then we identified the structure of the components. See Appendix A for the complete topic analysis.
Procedural Analysis The procedural analysis was used to determine the step by step instruction necessary to achieve the session goals. The Level 1 instruction focuses on the entry level SMART Notebook skills whereas the Level 2 instruction addresses more advanced skills. See Appendix A for the complete procedural analysis.
Entering Capabilities 1. Basic computer operating skills (able to log into computer, navigate around the computer desktop,
use a mouse, etc.)2. Open SMART Notebook software program.

P a g e | 12
Evidence of Acceptable Results:II-A Formative EvaluationKey Questions:
1. Is the instructional content of the training appropriate to the teachers skill level?2. Is the level of learning acceptable?3. Have you been able to incorporate the skills presented in the training as interactive lessons in
your classroom?4. What revisions in the training seem necessary?5. Were all possible questions answered during the training?6. What is currently missing from the training that you feel would be useful?
Approach one: Survey of Participating TeachersParticipating teachers will complete an online survey after the second, forth, and sixth session for both Level 1 and Level 2 training. The intention of the survey is to gather information about the training sessions themselves and to get answers to the key questions above. An example of one of the online surveys can be found in Appendix A. Approach two: Trainer Observation and Interviews with Teacher ParticipantsDuring the school year while teachers are taking the level one or level two training, one of the trainers will observe a lesson being presented by the participants in their classroom. The trainer will meet with the participant afterward and discuss interactive lesson creation, technique, and presentation. The trainer will offer suggestions as well as give the participant an opportunity to ask questions. Trainers will complete an observation and interview form during their classroom visit. This will include a section for the trainer to complete regarding the effectiveness of the training, student misconceptions and suggested changes to the training. The form can be found in Appendix A. II-B Summative EvaluationKey Questions:
1. Have teachers improved their understanding of the SMART Notebook program?2. Have teachers implemented the skills taught in the training sessions?3. Were the trainer observation and interview sessions helpful?4. Were there any specific Notebook skills that you wanted to learn about that were not covered in
the training sessions?5. What is your opinion of the format of the training? (Six one hour sessions for each level spaced
two weeks apart.)6. Are teachers using the available resources to get help when thy have questions?7. What do you feel will be the long-term benefits to this training and using the SMART Notebook
program?
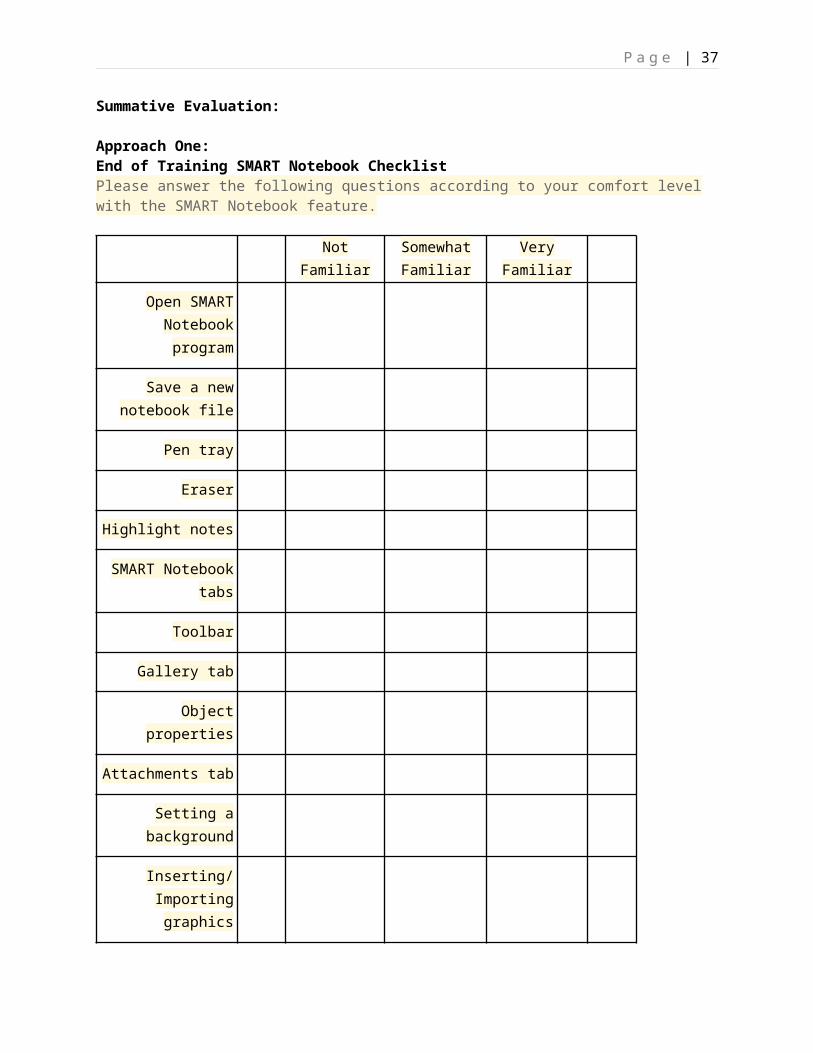
Approach one: Repeat Skills SurveyParticipating teachers will be sent an end of training SMART Notebook checklist similar to the original checklist sent to the same teachers when determine the training needs. The checklist encompasses different aspects of the SMART Notebook program that were addressed during the training. Teachers will receive the repeat skills survey after completion of Level 2 training and again six weeks later. This checklist will ask teachers to rate their understanding of each skills area as either not familiar, somewhat familiar, or very familiar. Comparison of the before and after training checklists will be used to make modifications to the sessions. The additional survey, sent six weeks after the end of training, will show the long term effects of the training.
P a g e | 13
Approach two: Small Group Guided Discussion with Participating TeachersAfter completion of the Level 1 or Level 2 training, a random group of ten teachers will be chosen to participate in a guided small group discussion. The discussion will be lead by the trainers who will pose questions then record the group’s discussion. After analyzing the responses, necessary revisions will be made to the training. See Appendix A for a script.
P a g e | 14
Learning Experiences and/or Instruction:III-A Learner Analysis
Learner Analysis: Orienting Context Data Collection for Information
What kind of technology background knowledgedo the teachers have?
Survey teachers about their current use of technology in their classroom to determine which types of technology they are using and how often they are using technology to engage students.
How much experience do teachers have using SMART Notebook?
Survey teachers to determine how long they have been using SMART Notebook. Also provide a checklist of Notebook software features in the survey where teachers can indicate which features they use and how often they use these program features.
Do teachers believe that this training will beuseful professionally?
Survey teachers to determine the general consensus about the usefulness of attending SMART Notebook training.
Learner Analysis: Instructional Context Data Collection for Information
How do the teachers best learn? Should there be handouts and/or a hands-on portion?
Survey teachers to determine particular learning styles and learner needs.
Does the content of the training coincide with the teachers’ goals for using SMART Notebook? Are the teachers motivated to create a moreinteractive learning environment in their classrooms?
Survey teachers to determine if the instructional content will meet their personal goals for using SMART Notebook in their classroom.
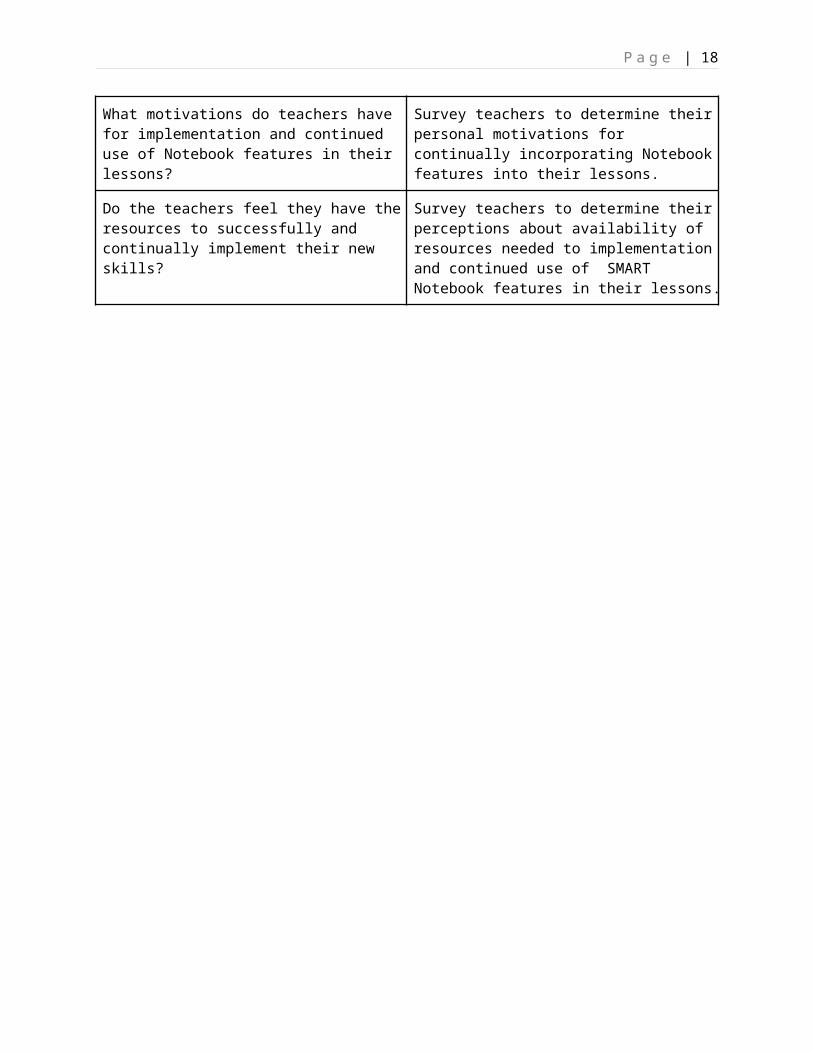
Learner Analysis: Transfer Context Data Collection for Information
What motivations do teachers have for implementation and continued use of Notebook features in their lessons?
Survey teachers to determine their personal motivations for continually incorporating Notebook features into their lessons.
Do the teachers feel they have the resources to successfully and continually implement their new skills?
Survey teachers to determine their perceptions about availability of resources needed to implementation and continued use of SMART Notebook features in their lessons.

P a g e | 15
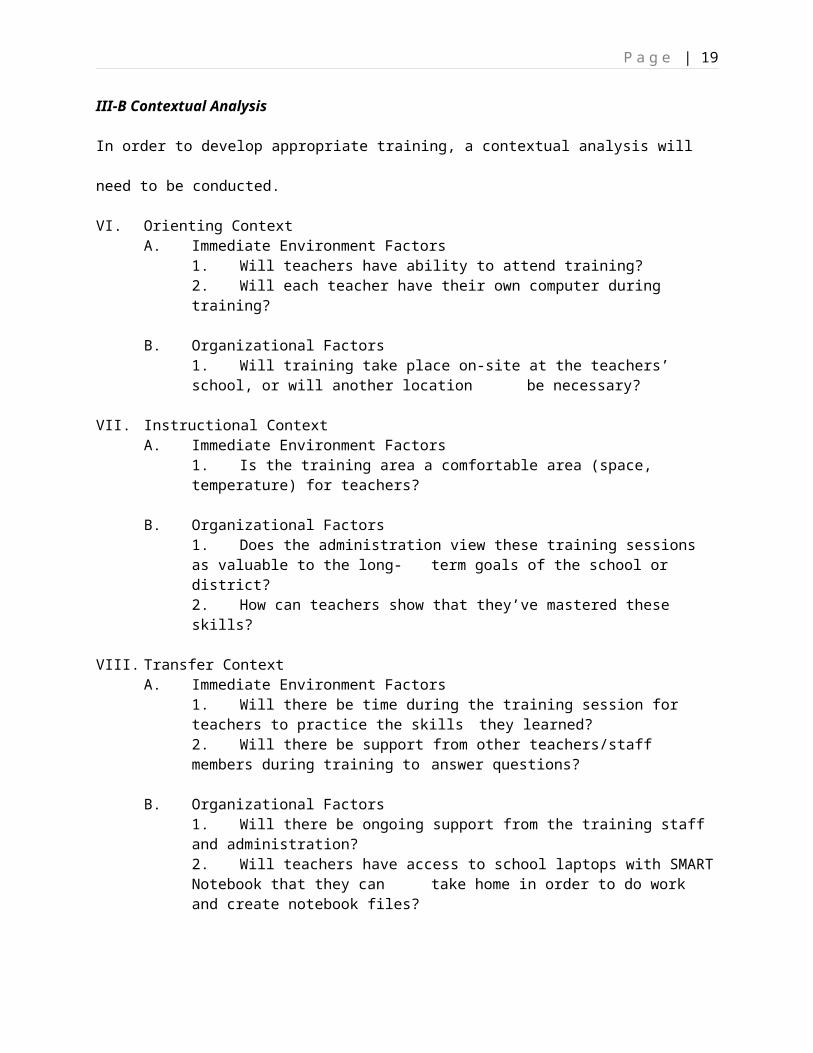
III-B Contextual Analysis
In order to develop appropriate training, a contextual analysis will need to be conducted.
VI. Orienting ContextA. Immediate Environment Factors
1. Will teachers have ability to attend training?2. Will each teacher have their own computer during training?
B. Organizational Factors1. Will training take place on-site at the teachers’ school, or will another location
be necessary?
VII. Instructional ContextA. Immediate Environment Factors
1. Is the training area a comfortable area (space, temperature) for teachers?
B. Organizational Factors1. Does the administration view these training sessions as valuable to the long-
term goals of the school or district?2. How can teachers show that they’ve mastered these skills?
VIII. Transfer ContextA. Immediate Environment Factors
1. Will there be time during the training session for teachers to practice the skills they learned?
2. Will there be support from other teachers/staff members during training to answer questions?
B. Organizational Factors1. Will there be ongoing support from the training staff and administration?2. Will teachers have access to school laptops with SMART Notebook that they can
take home in order to do work and create notebook files?
The previous information will be obtained through surveys and interviews. A survey will be given to members of the administration involved in SMART Training. This could include principals, vice principals, and technology coordinators. Interviews will be conducted with the trainer and administration to assess the variables that need to be addressed before beginning training.
AssumptionsIn order to develop the training, it will be assumed that each teacher has access to a SMART Board and SMART Notebook in their classroom. Teachers will also have a background knowledge of basic computer skills.

P a g e | 16
III-C Types of Learning Experiences and/or InstructionThe participants for this professional development have a wide range of entering knowledge using SMART Notebooks in their classroom. Some teachers have had their boards for over many years. Several teachers have never received formal training in SMART Notebook software. They have learned different techniques with their boards through trial and error and peer teaching. This professional development plan will begin with the basics of using a SMART interactive white board including setup and hardware. Level One training will be basic use of the SMART Notebook software. Level Two training will have more advanced techniques and focus on interactive lesson development and delivery. Each session will follow M. D. Merrill's principles of instruction (Merrill, 2009).
Activation Principle ● Instruction should activate relevant cognitive structures in learners by having them recall,
describe, or demonstrate relevant prior knowledge or experience. ● Instruction should have learners share previous experience with each other. ● Instruction should have learners recall or acquire a structure for organizing new knowledge.
Demonstration Principle ● Instruction should provide a demonstration of the skill consistent with the type of component
skill: kinds-of, how-to, and what-happens. ● Instruction should provide guidance that relates the demonstration to generalities. ● Instruction should engage learners in peer-discussion and peer-demonstration. ● Instruction should allow learners to observe the demonstration through media that are
appropriate to the content.
Application Principle ● Instruction should have the learner apply learning consistent with the type of component skill:
kinds-of, how-to, and what-happens. ● Instruction should provide intrinsic or corrective feedback. ● Instruction should provide coaching, which should be gradually withdrawn to enhance
application. ● Instruction should engage learners in peer-collaboration.

P a g e | 17
There will be trainers available either by email or phone to assist participants outside of the training sessions. If the teacher is having hardware issues, they may also contact their IT department. Technology technicians are available on a priority basis.
Participants will also be introduced to additional resources that support their use of SMARTNotebook software including:
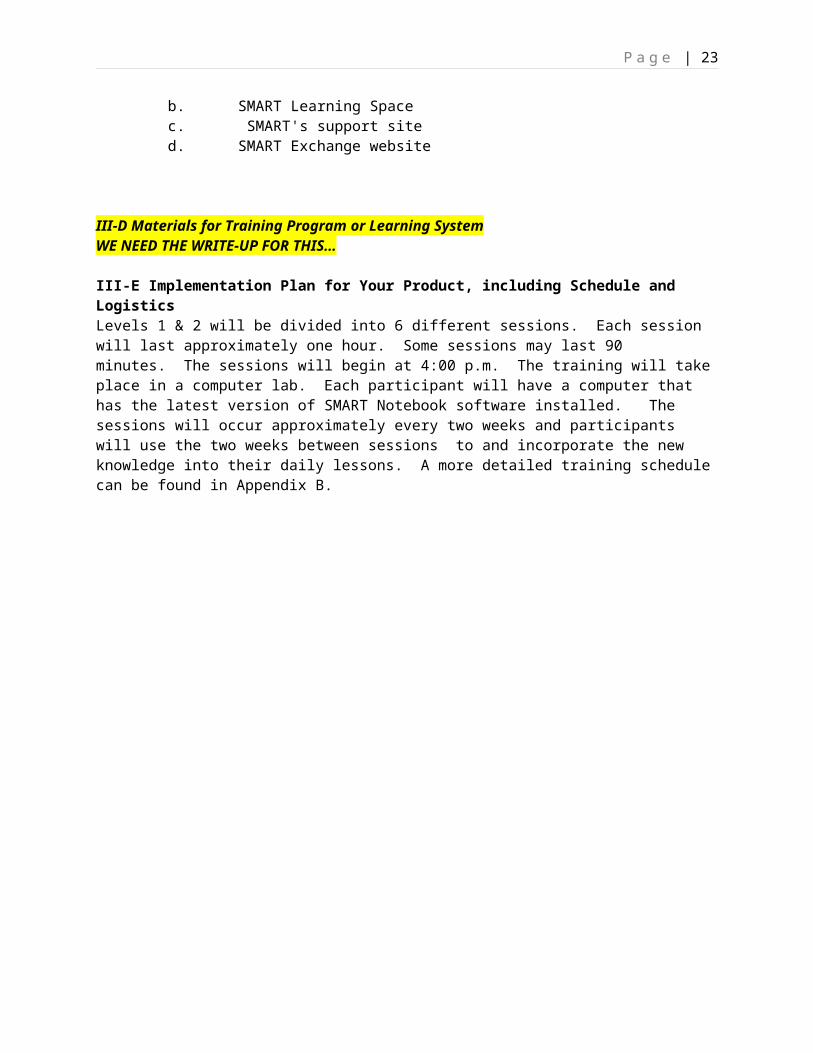
a. SMART's Training Centerb. SMART Learning Spacec. SMART's support sited. SMART Exchange website
Activate: Ask the learner to recall existing knowledge or experience. The facilitator then relates any new concepts to the learner's existing knowledge. This activation builds a relationship between the new knowledge and what the learner already knows.
Activate: Ask the learner to recall existing knowledge or experience. The facilitator then relates any new concepts to the learner's existing knowledge. This activation builds a relationship between the new knowledge and what the learner already knows.
Demonstrate: The facilitator demonstrates or models the new knowledge to the learner.
Apply:The learners is provided an opportunity to use the new knowledge through hands-on activities or
group discussions. These activities will reinforce the new concept as well as giving them an opportunity to consider how to use the knowledge in their classroom.
P a g e | 18
III-D Materials for Training Program or Learning SystemWE NEED THE WRITE-UP FOR THIS…
III-E Implementation Plan for Your Product, including Schedule and LogisticsLevels 1 & 2 will be divided into 6 different sessions. Each session will last approximately one hour. Some sessions may last 90 minutes. The sessions will begin at 4:00 p.m. The training will take place in a computer lab. Each participant will have a computer that has the latest version of SMART Notebook software installed. The sessions will occur approximately every two weeks and participants will use the two weeks between sessions to and incorporate the new knowledge into their daily lessons. A more detailed training schedule can be found in Appendix B.
P a g e | 19
ReferencesMerrill, M. D. (2009). First Principles of Instruction. In C. M. Reigeluth & A. Carr (Eds.), Instructional
Design Theories and Models: Building a Common Knowledge Base (Vol. III). New York: Routledge Publishers.

P a g e | 20
Appendices
Appendix A. Needs Assessment Instruments and Evaluation Materials
Educator Survey
The following is a survey of educators that would possibly attend the training sessions. The instrument would be emailed to educators as a link to the Google form. The purpose of the survey is to assess the attitude educators have towards SMART Notebook and educational technology, and what they would like to learn. Follow this link to access the live form: https :// docs . google . com / spreadsheet / viewform ? formkey = dFVLV 1 hqNUt 1 MGRvdWJmVllDbnhULWc 6 MQ How much experience do you have using SMART Notebook?
1 2 3 4 5
None-I've never used the product
Lots-I use it every day in the classroom
If you are currently using SMART Notebook, how are you using the program in the classroom?
How valuable do you view SMART Notebook as a tool to enhance the education of students?1 2 3 4 5
Not important at all
Very Important
Do you believe SMART Notebook is a valuable program? Why or why not?
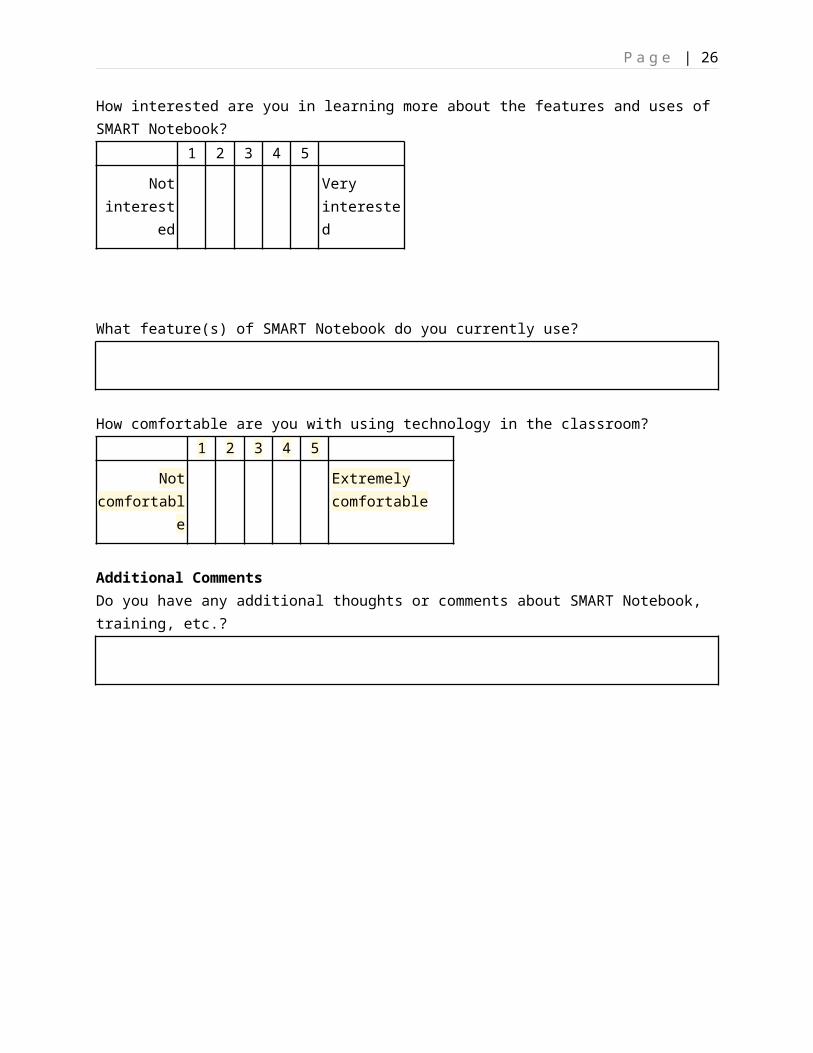
How interested are you in learning more about the features and uses of SMART Notebook?1 2 3 4 5
Not interested
Very interested
What feature(s) of SMART Notebook do you currently use?

P a g e | 21
How comfortable are you with using technology in the classroom?1 2 3 4 5
Not comfortable
Extremely comfortable
Additional Comments Do you have any additional thoughts or comments about SMART Notebook, training, etc.?

P a g e | 22
SMART Notebook ChecklistThe following is a checklist encompassing different aspects of SMART Notebook. This survey will be emailed as a Google Form to educators along with the survey found above. Educators will be directed to complete the entire checklist. The same checklist will be sent to administrators (principal, technology coordinators). Administrators will be directed to complete the first portion of the checklist. The live version of this checklist can be accessed at https :// docs . google . com / spreadsheet / viewform ? formkey = dGdqRjVNb 0 pzUWNPd 3 U 4 QkNkUkdNU 2 c 6 MQ
At what level do you view the following skills?Beginner Advanced
Open SMART Notebook program
Save a new notebook file
Pen tray
Eraser
Highlight notes
SMART Notebook tabs
Toolbar
Gallery tab
Object properties
Attachments tab
Setting a background
Inserting/Importing graphics
Exporting contents
Orienting SMART Notebook
Ink Aware Applications
Transparent background
Inserting/Manipulating Tables
P a g e | 23
Creative/Magic Pens
Screen capture
Document Camera
Inserting Shapes
Shape recognition
Adding Text
Title Page
Page grouping
Links
Themes
Dual Page Display
Sound files
Pull tabs
Animation effects
Page Recorder
SMART recorder
SMART Video Player
How familiar are you with the following skills?

P a g e | 24
Please answer the following questions according to your comfort level with the SMART Notebook feature.
Not Familiar Somewhat Familiar
Very Familiar
Open SMART Notebook program
Save a new notebook file
Pen tray
Eraser
Highlight notes
SMART Notebook tabs
Toolbar
Gallery tab
Object properties
Attachments tab
Setting a background
Inserting/Importing graphics
Exporting contents
Orienting SMART Notebook
Ink Aware Appliccations
Transparent background

P a g e | 25
Inserting/Manipulating Tables
Creative/Magic Pens
Screen capture
Document Camera
Inserting Shapes
Shape recognition
Adding Text
Title Page
Page grouping
Links
Themes
Dual Page Display
Sound files
Pull tabs
Animation effects
Page Recorder
SMART recorder
SMART Video Player
P a g e | 26
School Administrator InterviewIn order to assess the needs of each group to be trained, the instructor will interview building personnel which could include, principal, vice principal, technology coordinator. The following interview questions are open-ended type questions to allow for more qualitative analysis. 1. What kind of accessibility do educators in the building have to SMART Notebook? 2. How much experience do educators have using SMART Notebook? 3. How are educators expected to implement SMART Notebook features in the classroom? 4. How have you observed educators using SMART Notebook in the classroom? - What features do you notice being most often used? 5. What are educators’ incentives or benefits for using SMART Notebook? 6. Do educators seem comfortable and confident using SMART Notebook? 7. What are the benefits of using SMART Notebook in the classroom? 8. How would you like to see a training program implemented? - How frequently should there be training? - Who should be involved in the training? - Where would the training be held?

P a g e | 27
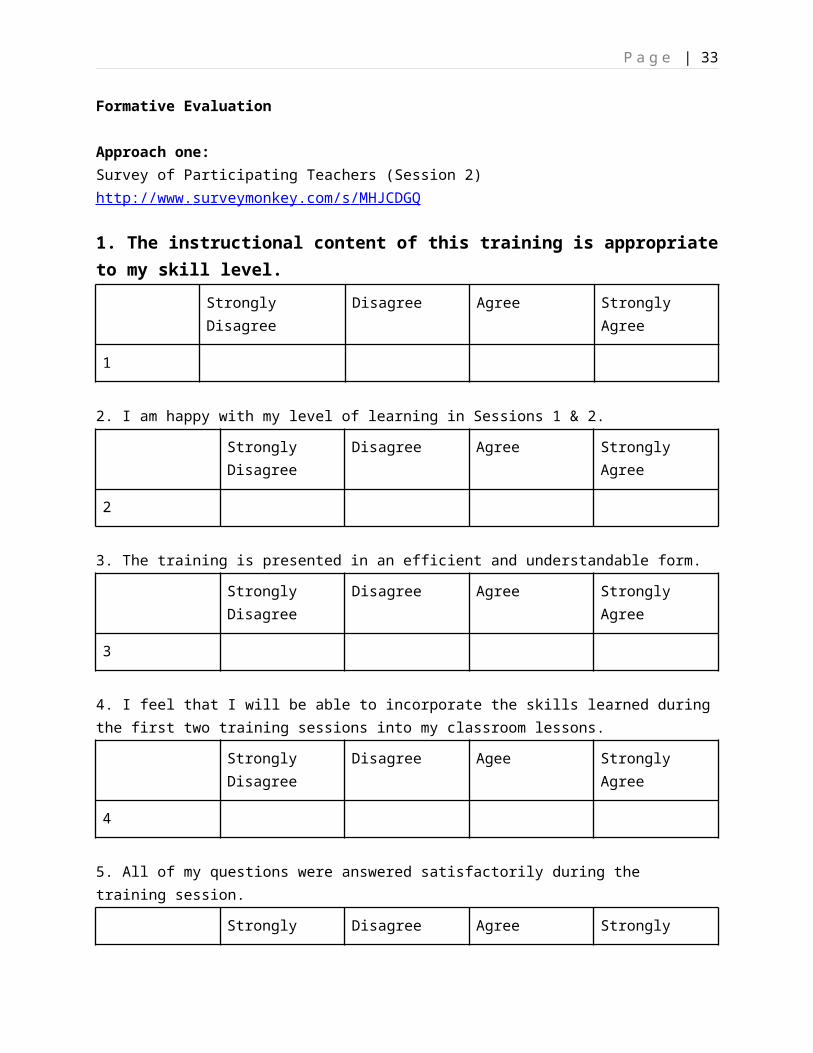
Formative Evaluation
Approach one:Survey of Participating Teachers (Session 2)http :// www . surveymonkey . com / s / MHJCDGQ
1. The instructional content of this training is appropriate to my skill level.Strongly Disagree Disagree Agree Strongly Agree
1
2. I am happy with my level of learning in Sessions 1 & 2.
Strongly Disagree Disagree Agree Strongly Agree
2
3. The training is presented in an efficient and understandable form.
Strongly Disagree Disagree Agree Strongly Agree
3
4. I feel that I will be able to incorporate the skills learned during the first two training sessions into my classroom lessons.
Strongly Disagree Disagree Agee Strongly Agree
4
5. All of my questions were answered satisfactorily during the training session.
Strongly Disagree Disagree Agree Strongly Agree
5
6. What is currently missing or needs to be revised in the training of Sessions 1 & 2?

P a g e | 28
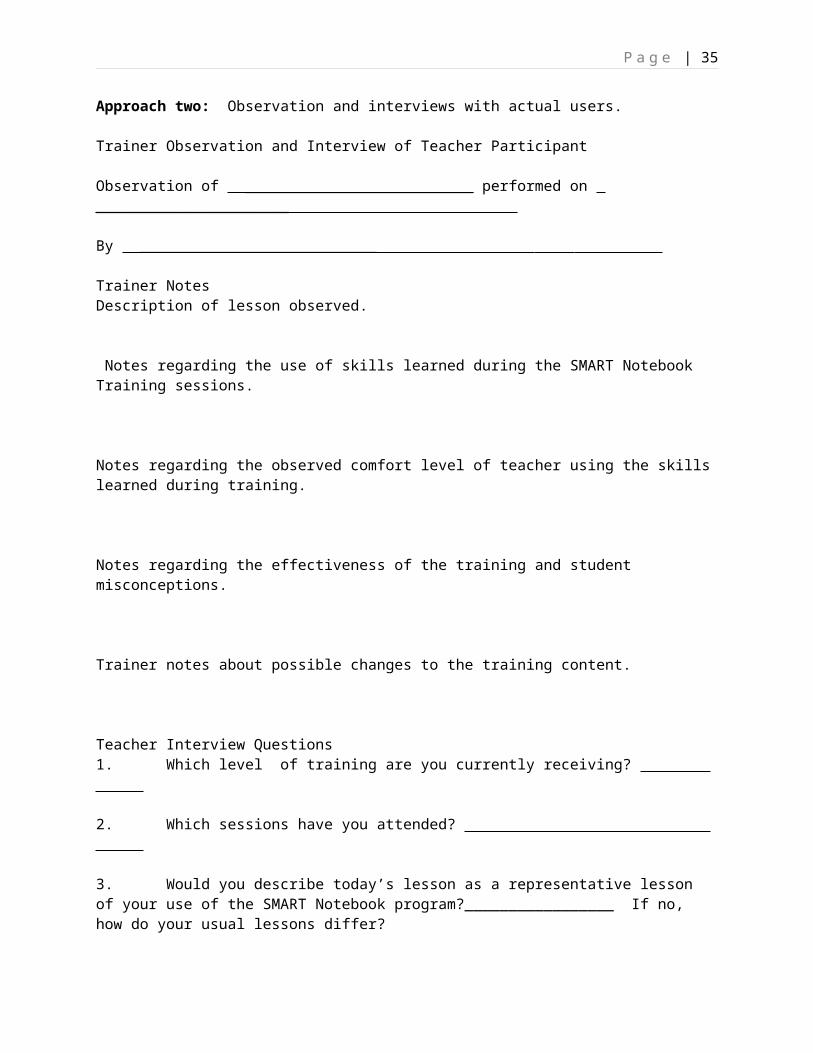
Approach two: Observation and interviews with actual users. Trainer Observation and Interview of Teacher Participant Observation of __________________________ performed on ______________________
By ___________________________ Trainer NotesDescription of lesson observed.
Notes regarding the use of skills learned during the SMART Notebook Training sessions. Notes regarding the observed comfort level of teacher using the skills learned during training. Notes regarding the effectiveness of the training and student misconceptions. Trainer notes about possible changes to the training content. Teacher Interview Questions1. Which level of training are you currently receiving?
2. Which sessions have you attended?
3. Would you describe today’s lesson as a representative lesson of your use of the SMART Notebook program?_________________ If no, how do your usual lessons differ?
4. On a scale of one to five with five being the most comfortable, how would you rank your comfort level with using the skills you learned during your training? ________________ Why? 5. Do you have any questions about using the skills that you have learned?

P a g e | 29
Summative Evaluation:
Approach One: End of Training SMART Notebook Checklist Please answer the following questions according to your comfort level with the SMART Notebook feature.
Not Familiar Somewhat Familiar
Very Familiar
Open SMART Notebook program
Save a new notebook file
Pen tray
Eraser
Highlight notes
SMART Notebook tabs
Toolbar
Gallery tab
Object properties
Attachments tab
Setting a background
Inserting/Importing graphics
Exporting contents
Orienting SMART Notebook
Ink Aware Appliccations

P a g e | 30
Transparent background
Inserting/Manipulating Tables
Creative/Magic Pens
Screen capture
Document Camera
Inserting Shapes
Shape recognition
Adding Text
Title Page
Page grouping
Links
Themes
Dual Page Display
Sound files
Pull tabs
Animation effects
Page Recorder
SMART recorder
SMART Video Player

P a g e | 31
Approach Two: Small Group Guided Discussion with Participating TeachersScript: Welcome to the SMART Notebook small group discussion for Level (1 or 2) . The purpose of this discussion is to allow teachers to voice their opinion of the training in order to improve the training. This discussion will focus on specific questions with time given to discuss your opinions.
Question 1: Has the SMART Notebook training improved their understanding of the SMART Notebook program?
Question 2: Have you implemented the skills taught in the training sessions in your lessons? If so which ones and how often?
Question 3: Were the trainer observation and interview sessions helpful?
Question 4: Were there any specific Notebook skills that you wanted to learn about that were not covered in the training sessions.
Question 5: What is your opinion of the format of the training? (Six, one hour sessions for each level spaced two weeks apart.)
Question 6: Are teachers using the available resources to get help when they have questions?
Question 7: What do you feel will be the long-term benefits to this training and using the SMART Notebook program?

P a g e | 32
Topic Analysis
Topic 1: Role of SMART Notebook software in the classroom and lesson planning and delivery.1. Identify lesson creation techniques that support student learning outcomes
a. Active learningb. Differentiation for learning stylesc. Assessment of prior knowledge
2. Design and layout best practicesa. Effective background colorb. Effective font color, size, and style
3. Creating a hide-and-reveal activitya. Move and revealb. Order and revealc. Erase and reveald. Screen shade and reveal
4. Creating an identification activitya. Drag and dropb. Infinite clonerc. Keeping information in context
5. Structuring and organizing lessonsa. Adding title pages describing a lesson activity.
i. Reasons to include title pagesii. Add a title page from Lesson Activity Toolkitiii. Edit a title page
b. Using the Page Grouping feature to organize pages in a filei. Name page groupii. Rearrange groupsiii. Delete a page or group of pagesiv. Combine pages
c. Using links to improve flow and organization of a lessoni. How to use linksii. When to linkiii. Corner iconiv. Pressing an objectv. Creating a back button
d. Adding attachmentsi. Usefulness of linking to an attachmentii. Insert an attachmentiii. Link to an attachment
e. Building interactive lesson activitiesi. Describe and enable dual page displayii. Pin page featureiii. Locate and distinguish various types of objects in the galleryiv. Attach a sound file to an objectv. Add or modify object animation settingsvi. Create and use a pull tabvii. Customize and use games, activities, and tools from the Lesson Activity Toolkit
6. Delivering Lessons and Leveraging Interactive Tools
P a g e | 33
a. Organize and design lessons to enhance their deliveryi. Floating tools toolbarii. Toolbar buttonsiii. Placement of toolbar and side tabs
b. Demonstration of interactive whiteboard delivery skillsi. Body placement while speaking, navigating, and writingii. Rotate, resize, zoom, pan, swipe, and circle-tap gestures
c. Recognize and take advantage of responsive lesson delivery opportunitiesi. Enrichment tasksii. Transition activitiesiii. Impromptu explanations or demonstrationsiv. Extensions onto planned lessonsv. Unplanned review of previous material
Topic 2: Using the SMART Notebook interactive whiteboard.1. Touch2. Write, save and highlight notes
a. Magic peni. Spotlightii. Disappearing inkiii. Magnify
3. Pen tray buttons
Topic 3: SMART Notebook Tabs and Folders.1. Differentiate between different SMART Notebook tabs and their functions
a. Gallery tabi. Add a page from the Galleryii. Difference between pages and backgrounds and what each doesiii. How to remove a page or change backgroundiv. Interactive and multimedia areav. Locate themes in the Gallery
1. Apply a theme to pagesvi. Create and save new themesvii. My content folder
1. Organize My Content foldera. Add an object or page b. Create subfoldersc. How and why to add keywords to an objectd. How to back-up or share My Content folder through exporting
as a collection filee. Team content folder
b. Properties tabi. Fonts
1. Type2. Size3. style
ii. Create a shape

P a g e | 34
iii. Change line styles1. Line color2. Line thickness 3. Line style
iv. Fill effects1. Fill types2. Image fill
c. Attachments tabi. Attach a file or hyperlinkii. Open a file from the attachments tab
d. Page Sorter tabi. Add blank pagesii. Thumbnail drop-down menuiii. Reorder pages and identify active pageiv. Resize tabv. Auto-hide function
Topic 4: Create and manipulate text, objects, tables, and images.1. Text
a. Type textb. Write and recognize handwritingc. Calligraphic ink
2. Objectsa. Add objectsb. Move, resize and rotatec. Drag object from one page to anotherd. Creating objects
i. Drawing toolsii. Typed text, font toolbar, and symbolsiii. Measurement toolsiv. Inserting imagesv. The Capture toolbar
e. Manipulating objectsi. Object drop-down menuii. Locking and groupingiii. Infinite cloneriv. Flipv. Ordervi. linking
3. Tablesa. Active alignment, alignment guidesb. Create, move and resize a tablec. Modify the table
i. Quantityii. Row and column width and heightiii. Split or merge cellsiv. Add text, objects, or cell shades
P a g e | 35
Topic 5: Using SMART Ink Aware applications.1. Microsoft Word
a. Insert notes as graphics or text2. Microsoft Excel
a. Insert notes as graphics or text3. Microsoft PowerPoint
a. Present a PowerPoint slide show on the boardb. Save notes in a PowerPoint presentation
4. Capture notes from a PowerPoint presentation into SMART Notebook software
Topic 6: Using SMART Exchange website.1. Access the SMART Exchange website
a. Sign in or join SMART Exchangeb. Find and download relevant lesson activities
i. Perform a general searchii. Narrow search by resource type, subject or gradeiii. Preview download and share resources
c. Read and post comments on the SMART Exchange forumi. Connect with teachers
1. Forum topics2. Join and sign in buttons3. F.A.Q. button4. Popular tags5. Most active sections
Topic 7: Care and maintenance.1. Perform basic SMART Notebook care and maintenance
a. How to clean the whiteboardb. How to clean the pen tray sensorsc. How to remove permanent marker ink
2. Orient the SMART Notebooka. Initiate the orientation sequenceb. Orient the board
3. Understand SMART Notebook ready light messages4. Analyze basic SMART Notebook problems and apply a troubleshooting sequence

P a g e | 36
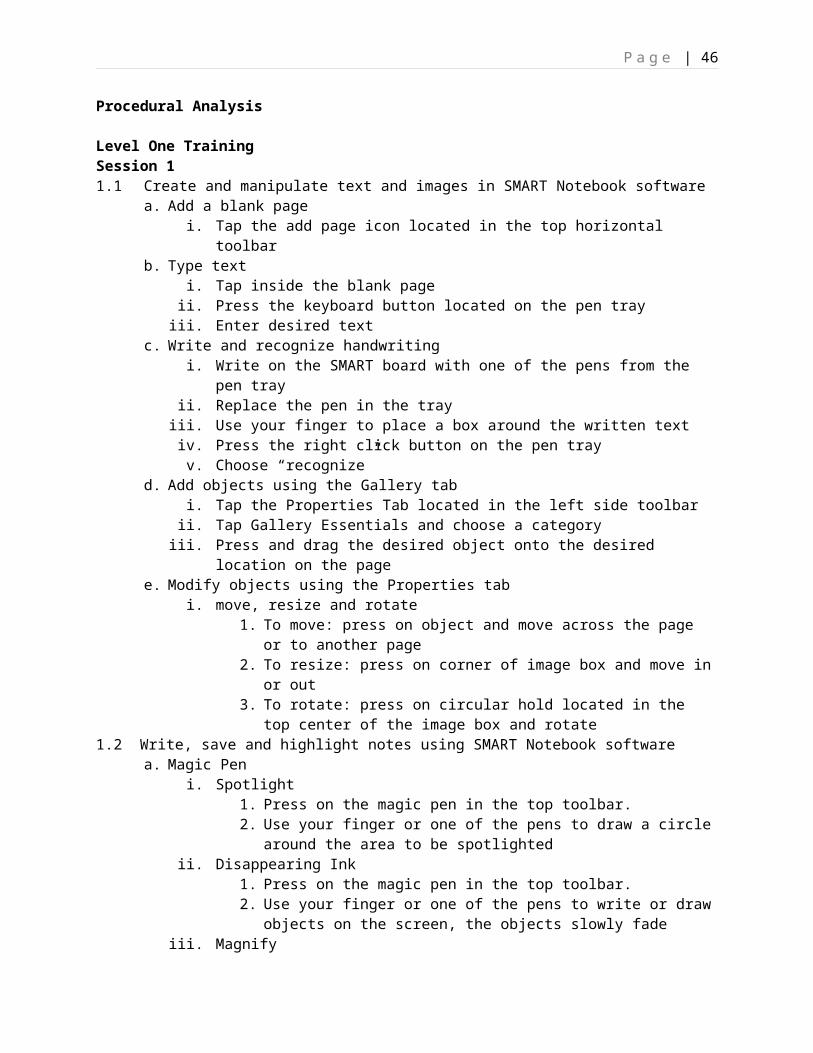
Procedural Analysis
Level One TrainingSession 1 1.1 Create and manipulate text and images in SMART Notebook software
a. Add a blank pagei. Tap the add page icon located in the top horizontal toolbar
b. Type texti. Tap inside the blank pageii. Press the keyboard button located on the pen trayiii. Enter desired text
c. Write and recognize handwritingi. Write on the SMART board with one of the pens from the pen trayii. Replace the pen in the trayiii. Use your finger to place a box around the written textiv. Press the right click button on the pen trayv. Choose “recognize”
d. Add objects using the Gallery tabi. Tap the Properties Tab located in the left side toolbarii. Tap Gallery Essentials and choose a category iii. Press and drag the desired object onto the desired location on the page
e. Modify objects using the Properties tabi. move, resize and rotate
1. To move: press on object and move across the page or to another page2. To resize: press on corner of image box and move in or out3. To rotate: press on circular hold located in the top center of the image box
and rotate1.2 Write, save and highlight notes using SMART Notebook software
a. Magic Peni. Spotlight
1. Press on the magic pen in the top toolbar.2. Use your finger or one of the pens to draw a circle around the area to be
spotlightedii. Disappearing Ink
1. Press on the magic pen in the top toolbar.2. Use your finger or one of the pens to write or draw objects on the screen,
the objects slowly fadeiii. Magnify
1. Press on the magic pen in the top toolbar.2. Use your finger or one of the pens to draw a square or rectangle around the
area to be spotlighted
Session 2 2.1 Understanding SMART Notebook side tabs
a. Page Sorter Tabi. Reorder pages and identify active page
1. Press on the Page Sorter Tab located in the left side toolbar.
P a g e | 37
2. Reorder page by pressing on page in the drop-down page menu and moving to desired location
ii. Resize the Page Sorter tab1. Resize by pressing onto the right margin of the drop-down page menu box
and slide to the right to make the menu box larger.b. Gallery Tab
i. Add a page from the Gallery1. Press on the Gallery Tab located in the left side toolbar2. Press on Gallery Essentials and choose a category3. Press on Notebook Files and Pages from the drop-down box (pages can also
be distinguished from images by the folded upper right corner on the thumbnail image)
4. Choose a page image, press and drag the image to the page.ii. interactive and multimedia area (interactive, video, sound)
1. Under the Gallery Tab, press on the Interactive and Multimedia from the drop-down box
2. Press and drag the desired video clip or sound onto the pagec. Attachment Tab
i. Attach a file or hyperlink1. Press Attachment tab located in the left side toolbar2. Press insert and choose:
a. Insert copy of fileb. Insert hyperlinkc. Insert shortcut to file
ii. Open a file from the Attachments tab1. Press Attachment tab 2. Double-click on the name of the desired attached file from the list of current
files d. Properties Tab
i. Change line style of an object1. Select the object2. Press Properties tab located in the left side toolbar3. Press line style4. Select a color, thickness and style
ii. Change fill effects of an object1. Select the object2. Press Properties tab located in the left side toolbar3. Press Fill Effect4. Select a fill style
Session 3 3.1 Manipulating objects
a. Object drop-down menui. Select an objectii. Press on drop-down arrow to open manipulation choices
1. Choose Infinite Cloner to create multiple copies of the imagea. Selected object will display the infinity symbolb. Drag the object to another position on the page

P a g e | 38
c. Repeat until the desired number of cloned objects have been created
2. Choose Flip optiona. Choose: left/right flip or up/down flip
3. Choose Order optiona. Choose: bring to front, send to back, bring forward, send backward
4. Choose Linking optiona. Choose: web page, page in this file, file on this computer, current
attachmentsb. Locking object
i. Select objectii. Press the menu arrow and choose Locking then Lock in place
c. Grouping objectsi. Select multiple objectsii. Press the menu arrow and choose Grouping then Group
Session 44.1 Creating a hide-and-reveal activity
a. Move and reveali. Type your question and answerii. Use the object drop-down list to lock in place the object that you plan to labeliii. Draw a rectangle and fill it with color to hide the answeriv. Double-press the shape and type the text you want to add to the rectanglev. Type “move the box to reveal the answervi. Choose order, bring to front from the drop-down list on any object that you plan to
use to cover an answervii. Move the shape to reveal the answer
4.2 Creating an identification activitya. Drag and drop
i. Add the object that you want to label to the work areaii. Use the object drop-down list to lock in place the object that you plan to labeliii. Make the labels for your diagram and line them up at the bottom of the Notebook
page
Session 5 5.1 Using Ink Aware applications
a. Microsoft Word and Exceli. Insert notes as graphics or text
1. Display the Word document2. Write or draw using SMART Board pens3. The Aware Tools toolbar appears
a. Press pen icon to insert your notes into the Word document as graphics
b. Press letter icon to insert your notes into the Word document as typed text
c. Press camera letter icon to take a screen capture of your notes and the Word document which will appear in a .notebook file
b. Microsoft PowerPoint

P a g e | 39
i. Present a PP slide show on the board1. Start PowerPoint file in slide show view2. Slide show toolbar appears
a. Right arrow moves the presentation forward one slideb. Left arrow moves the presentation back one slide
ii. Save notes in a PP presentation1. Write on the PowerPoint slide using the interactive pens2. To insert writing into the slide show as typed text
a. Right-click the writing and then select the Inject…here option3. To insert a drawing into the slide show as an image
a. Press the menu tab on the slide show toolbar b. Select drawing as image
iii. Capture notes from a PP presentation into SMART Notebook software1. Write on the PowerPoint slide using the interactive pens2. Press the Menu button on the slide show toolbar and select Capture to
Notebook3. Select save as to create a second, marked-up copy of the slide show
Session 66.1 Perform basic SMART Board care and maintenance
a. How to clean the whiteboardi. Remove dust with a damp clothii. Use a household glass cleaner weekly
b. How to clean the pen tray sensorsi. Use a damp cloth or a cloth sprayed with glass cleaner. Never spray directly onto
the pen tray sensors.6.2 Orient the SMART Notebook
a. Initiate the orientation sequencei. Press both pen tray buttons simultaneously to start the orientation processii. Press the center of each target in the order indicated on the screen
Level Two Training (Additional procedural analysis will be undertaken to complete training)Session 11.1 Access the SMART Exchange website
a. Gallery tab to access SMART Exchange websiteb. Sign in or join SMART Exchange
1.2 Find and download relevant lesson activities from SMART Exchangea. Perform a general searchb. Narrow search by resource type, subject or gradec. Preview, download and share resources
Session 22.1 Add title pages describing a lesson activity in SMART Notebook
a. Add a title page from Lesson Activity Toolkitb. Edit a title pagec. Download or update the lesson Activity Toolkit
2.2 Use the Page Grouping feature to organize pages in a filea. Make page groups from sample file

P a g e | 40
b. Name page groupsc. Rearrange groupsd. Delete a page from a groupe. Delete a group of pagesf. Combine groups
2.3 Use links to improve flow and organization of a lesson activitya. Corner iconb. Pressing an objectc. Create a "back" button using the shape and text toolsd. Show All Links
2.4 Determine when to insert an attachment as a copy or a shortcuta. Insert an attachmentb. Link to an attachment
2.5 Organize their My Content foldera. Add an object or page to the My Content folderb. Create subfolders within the My Content folderc. How to add keywords to an objectd. How to back-up or share My Content folder through exporting as a collection file
Session 3 3.1 Modify object properties using the Properties tab
a. Changing fill typesb. Changing Image fillc. Changing line color, thickness and styled. Changing Font type, size and style
2.3 Tables a. Create a tableb. Modify a table
i. Quantityii. Row and column width and heightiii. Split or merge cellsiv. Add text, objects or cell shades
Session 4 4.1 Building interactive lesson activities
a. Describe and enable Dual Page Displayb. Pin Page featurec. Attach a sound file to an objectd. Add or modify object animation settingse. Create and use a pull tab
Session 5 – 5.1 Integrating Rich media
a. Locate teacher-recommended websitesb. Transparent Background view to display their desktop or open an applicationc. Page Recorderd. SMART Recorder and configuratione. Make notes over video using the SMART Video Player

P a g e | 41
f. Import image files into SMART Notebookg. Import a document into Notebook using Print Capture
Session 6 - 6.1 Customize the SMART Notebook software interface
a. Floating Tools toolbarb. Toolbar buttonsc. Placement of the toolbar and side tabs

P a g e | 42
Appendix B. Materials & Schedules
Floating Tool Bar Handout/Presentation Samples

P a g e | 43

P a g e | 44
Tool Bar Handout/Presentation Samples

P a g e | 45
P a g e | 46

P a g e | 47

P a g e | 48
Presentation Samples

P a g e | 49

P a g e | 50

P a g e | 51

P a g e | 52

P a g e | 53

P a g e | 54
Schedule: Level One
Session 1 - Welcome and Getting Started:By the end of this module learners will be able to:
Describe the role of SMART Notebook software in the classroom Identify lesson creation techniques that support student learning outcomes
o Active Learningo Differentiation for learning styleso Assessment of prior knowledge
Use the SMART Notebook interactive whiteboardo Toucho Noteso Pen tray buttons
Differentiate between different SMART Notebook tabs and their functionso Gallery Tabo Properties Tabo Attachments Tabo Page Sorter Tab
Create and manipulate text and images in SMART Notebook softwareo Add a blank pageo Type texto Write and recognize handwritingo Calligraphic inko Add objects using the Gallery tabo Modify objects using the Properties tab
move, resize and rotate drag object from one page to another text is an object
Write, save and highlight notes using SMART Notebook softwareo Magic Pen
�� Spotlight Disappearing Ink Magnify
Session 2 – Basics:By the end of this module learners will be able to:
Demonstrate a deeper understanding of SMART Notebook side tabso Page Sorter Tab
Add blank pages thumbnail drop-down menu reorder pages and identify active page resize the Page Sorter tab, return to normal width Auto-hide function
o Gallery Tab add a page from the Gallery difference between pages and backgrounds and what each does how to remove a page or change background interactive and multimedia area (interactive, video, sound)

P a g e | 55
My Contento Attachment Tab
attach a file or hyperlink�� open a file from the Attachments tab
o Properties Tab create a shape change line style fill effects
Navigate, use and create SMART Notebook Gallery collections Session 3 – Objects:By the end of this module learners will be able to:
Use drop-down menus, the SMART Notebook menu bar, the SMART Notebook toolbar and the Properties side tab to change the properties of objects
Insert graphics files into SMART Notebook lessons Export the contents of a SMART Notebook file to a variety of formats Creating objects
o Drawing toolso Typed text, font toolbar, and symbolso Measurement toolso Inserting imageso The Capture toolbar
Manipulating objectso Object drop-down menuo Locking and groupingo Infinite Clonero Flipo Ordero Linking
Session Four - Creating Interactive Lesson Activities:By the end of this module learners will be able to:
Design and layout best practiceso Effective background coloro effective font color, size and style
Creating a hide-and-reveal activityo Move and revealo Order and revealo Erase and revealo Screen Shade and reveal
Creating an identification activityo Drag and dropo Infinite Clonero Keeping information in context
Session Five - Ink Aware Applications:By the end of this module learners will be able t o:

P a g e | 56
SMART Ink Aware applications Using Ink Aware applications
o Microsoft Word Insert notes as graphics or text
o Microsoft Excel Insert notes as graphics or text
o Microsoft PowerPoint Present a PP slide show on the board Save notes in a PP presentation
o Capture notes from a PP presentation into SMART Notebook software Session Six - Care and maintenance, Share:By the end of this module learners will be able to:
Perform basic SMART Notebook care and maintenance How to clean the whiteboard How to clean the pen tray sensors How to remove permanent marker ink
Orient the SMART Notebook Initiate the orientation sequence Orient the board
Understand SMART Notebook Ready light messages Analyze basic SMART Notebook problems and apply a troubleshooting sequence
Schedule: Level Two
Session One - Review of SMART Notebook Basics and Best Practices and Tools:By the end of this module learners will be able to:
Recall the functions and uses of a variety of tools in SMART Notebook softwareo SMART Notebook software basicso Keystroke shortcutso Hands-on practice
Discuss lesson creation best practices Access the SMART Exchange website
o Gallery tab to access SMART Exchange websiteo Sign in or join SMART Exchange
Find and download relevant lesson activities from SMART Exchangeo Perform a general searcho Narrow search by resource type, subject or gradeo Preview, download and share resourceso Importance of adding relevant keywords when sharing resources
Read and post comments on the SMART Exchange forumo Connect with Teachers
Forum topics Join and sign in buttons F.A.Q. button Popular Tags Most active sections

P a g e | 57
Session Two - Structuring & Organizing Lessons:By the end of this module learners will be able to:
Add title pages describing a lesson activity in SMART Notebooko Why it is a good practice to include title pageso Lesson Activity Toolkito Add a title page from Lesson Activity Toolkito Edit a title pageo Download or update the lesson Activity Toolkito Have learners consider:
Lesson objectives Resources State Standards
Use the Page Grouping feature to organize pages in a fileo Make page groups from sample fileo Name page groupso Rearrange groupso Delete a page from a groupo Delete a group of pageso Combine groups
Use links to improve flow and organization of a lesson activityo Corner icono Pressing an objecto When to link with object rather than icono How to use linkso Create a "back" button using the shape and text toolso Show All Links
Determine when to insert an attachment as a copy or a shortcuto Insert an attachmento When to attach as a "shortcut to a file" rather than "copy of a file"o Link to an attachmento When is it useful to link to an attachment
Organize their My Content foldero Add an object or page to the My Content foldero Create subfolders within the My Content foldero How and why to add keywords to an objecto How to back-up or share My Content folder through exporting as a collection fileo Team Content folder
Session Three - Adding Style to Lesson Activities:By the end of this module learners will be able to:
Locate Themes in the Gallery and apply a theme to pages Create and save a new theme Modify object properties using the Properties tab
o Fill typeso Image fillo Line color, thickness and styleo Font type, size and style
Active alignment, alignment guides

P a g e | 58
Create, move and resize a table Modify the table
o Quantityo Row and column width and heighto Split or merge cellso Add text, objects or cell shades
Use graphics and lesson pages from the Lesson Activity Toolkit Session Four - Building Interactive Lesson Activities:By the end of this module learners will be able to:
Describe and enable Dual Page Display Pin Page feature Locate relevant content in the Gallery Distinguish between the various types of objects in the Gallery Attach a sound file to an object Add or modify object animation settings Create and use a pull tab Customize and use games, activities and tools from the Lesson Activity Toolkit
Session Five - Integrating Rich media:By the end of this module learners will be able to:
Locate teacher-recommended websites Transparent Background view to display their desktop or open an application Page Recorder SMART Recorder and configuration Make notes over video using the SMART Video Player Import image files into SMART Notebook Import a document into Notebook using Print Capture
Session Six - Delivering Lessons and Leveraging Interactive Tools: By the end of this module learners will be able to:
Organize and design their lessons to enhance their delivery Customize the SMART Notebook software interface
o Floating Tools toolbaro Toolbar buttonso Placement of the toolbar and side tabs
Demonstrate interactive whiteboard delivery skillso Body placement while speaking, navigating, and writingo Rotate, resize, zoom, pan, swipe, and circle-tap gestures
Leverage interactive tools in their lesson deliveryo Group activity using form provided (pg. 89 in facilitator's guide)
Recognize and take advantage of responsive lesson delivery opportunitieso Enrichment tasks for students who finish earlyo Transition activities for in-between timeo Impromptu explanations or demonstrationso Extensions onto planned lessonso Unplanned review of previous material

Recommended