Embed Size (px)
Citation preview
XenApp/Citrix Program Neighborhood Installation
Program Neighborhood Page 1 of 23
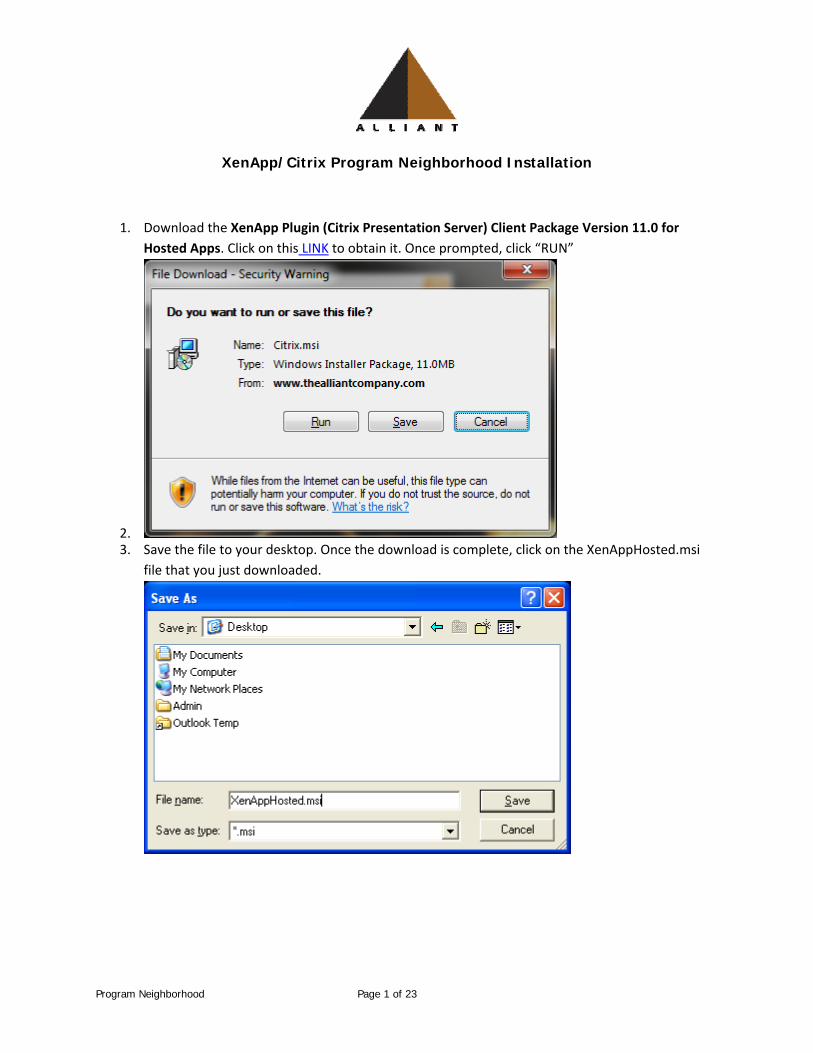
1. Download the XenApp Plugin (Citrix Presentation Server) Client Package Version 11.0 for Hosted Apps. Click on this LINK to obtain it. Once prompted, click “RUN”
2. 3. Save the file to your desktop. Once the download is complete, click on the XenAppHosted.msi
file that you just downloaded.
XenApp/Citrix Program Neighborhood Installation
Program Neighborhood Page 2 of 23
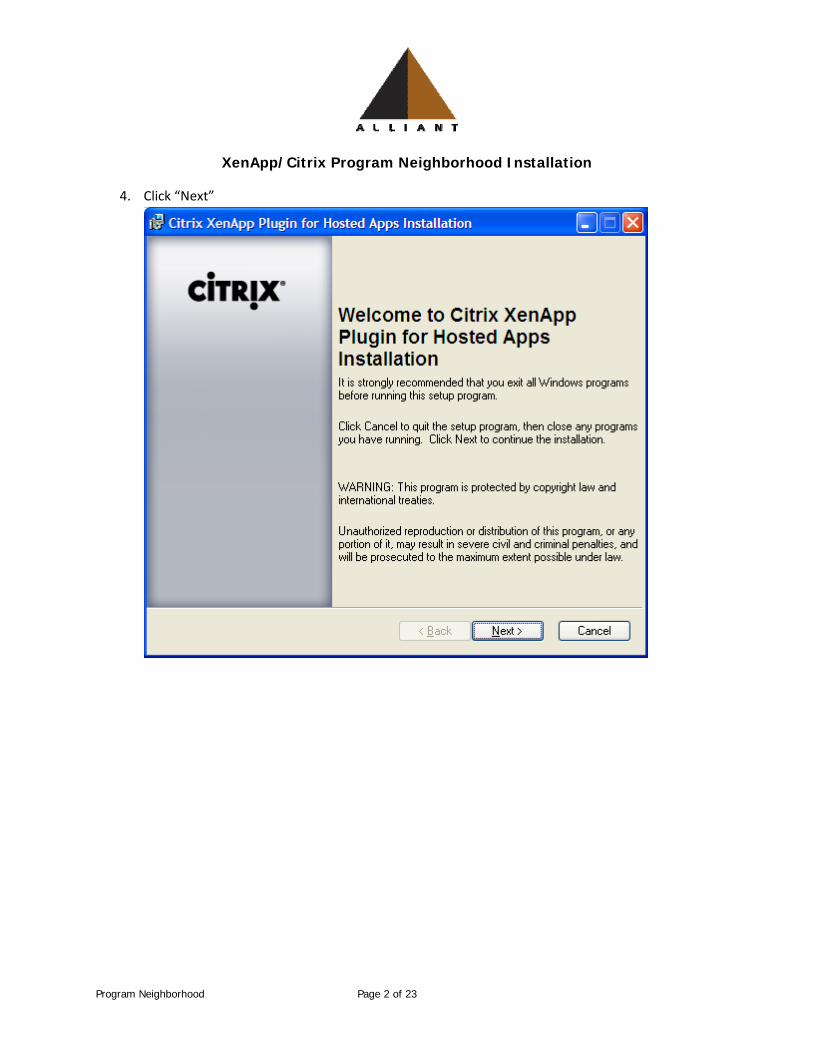
4. Click “Next”

XenApp/Citrix Program Neighborhood Installation
Program Neighborhood Page 3 of 23
5. If you currently have a Citrix Client, you will be prompted to upgrade. Otherwise, skip to the next step.
XenApp/Citrix Program Neighborhood Installation
Program Neighborhood Page 4 of 23
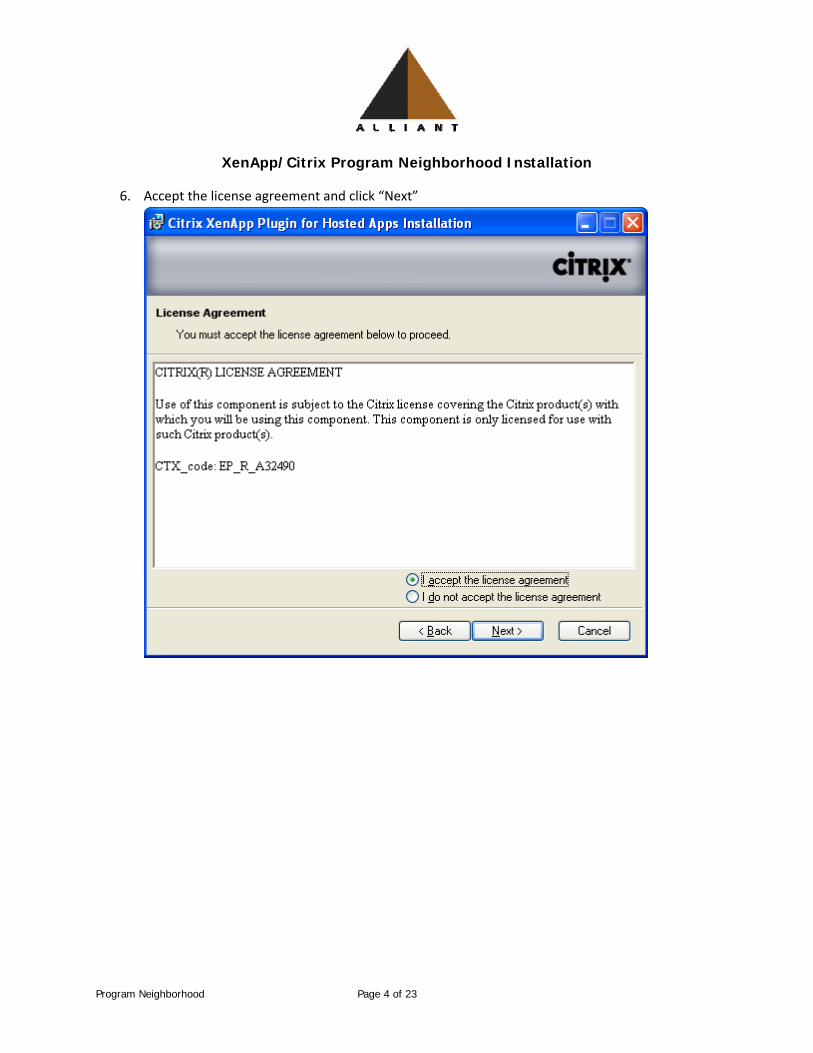
6. Accept the license agreement and click “Next”
XenApp/Citrix Program Neighborhood Installation
Program Neighborhood Page 5 of 23
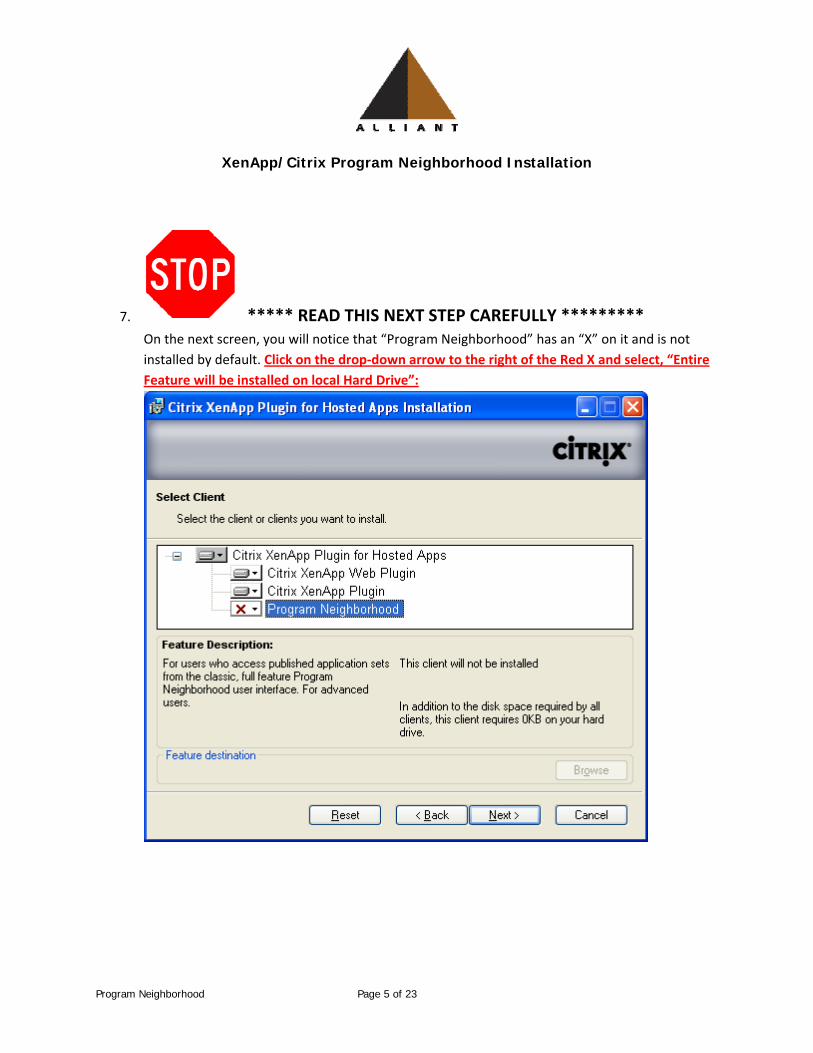
7. ***** READ THIS NEXT STEP CAREFULLY ********* On the next screen, you will notice that “Program Neighborhood” has an “X” on it and is not installed by default. Click on the drop‐down arrow to the right of the Red X and select, “Entire Feature will be installed on local Hard Drive”:
XenApp/Citrix Program Neighborhood Installation
Program Neighborhood Page 6 of 23
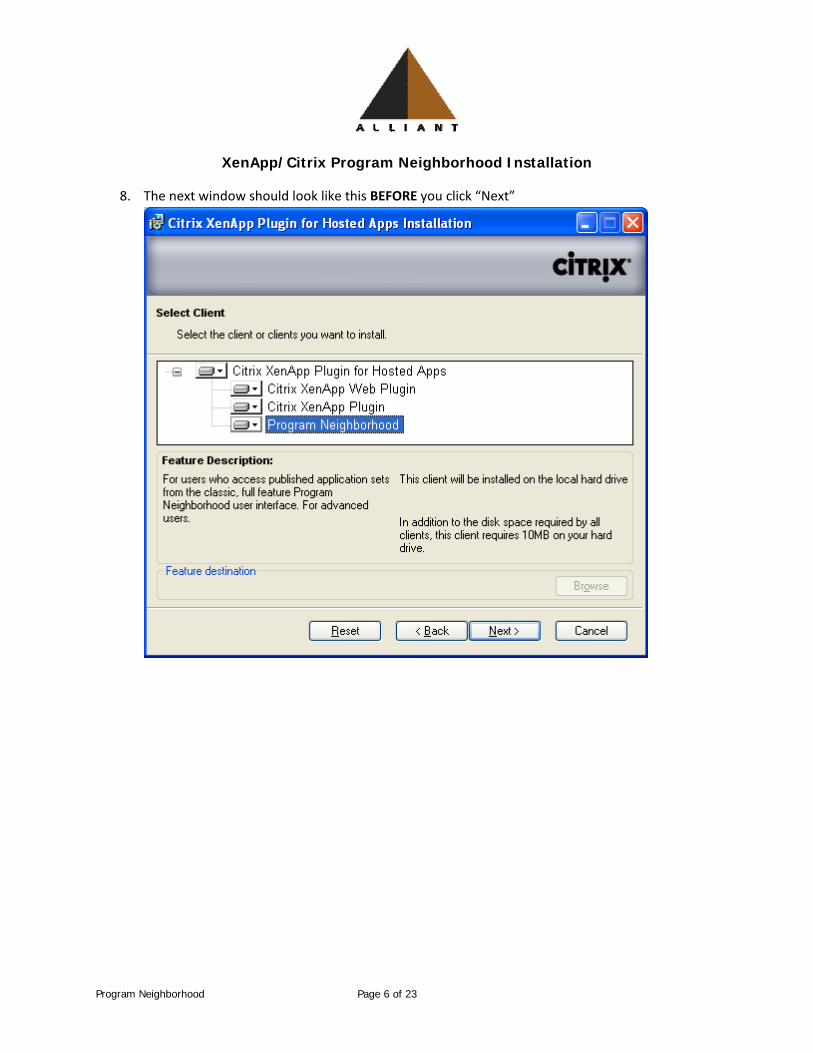
8. The next window should look like this BEFORE you click “Next”
XenApp/Citrix Program Neighborhood Installation
Program Neighborhood Page 7 of 23
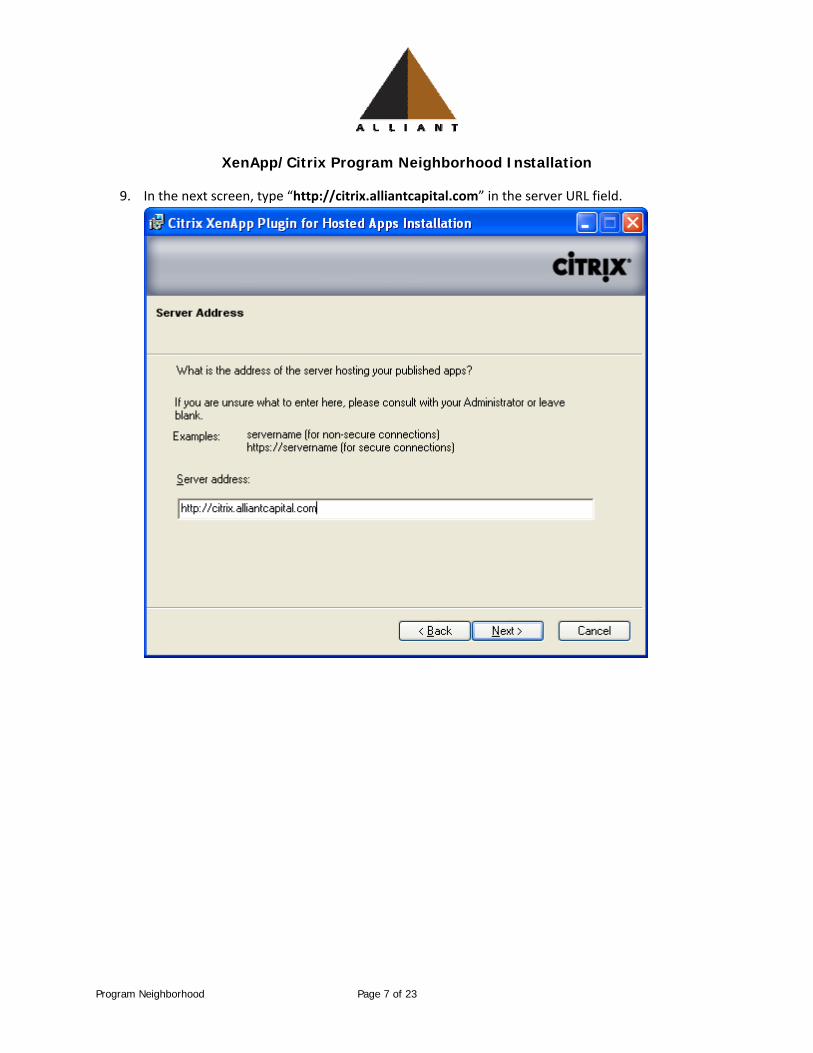
9. In the next screen, type “http://citrix.alliantcapital.com” in the server URL field.
XenApp/Citrix Program Neighborhood Installation
Program Neighborhood Page 8 of 23
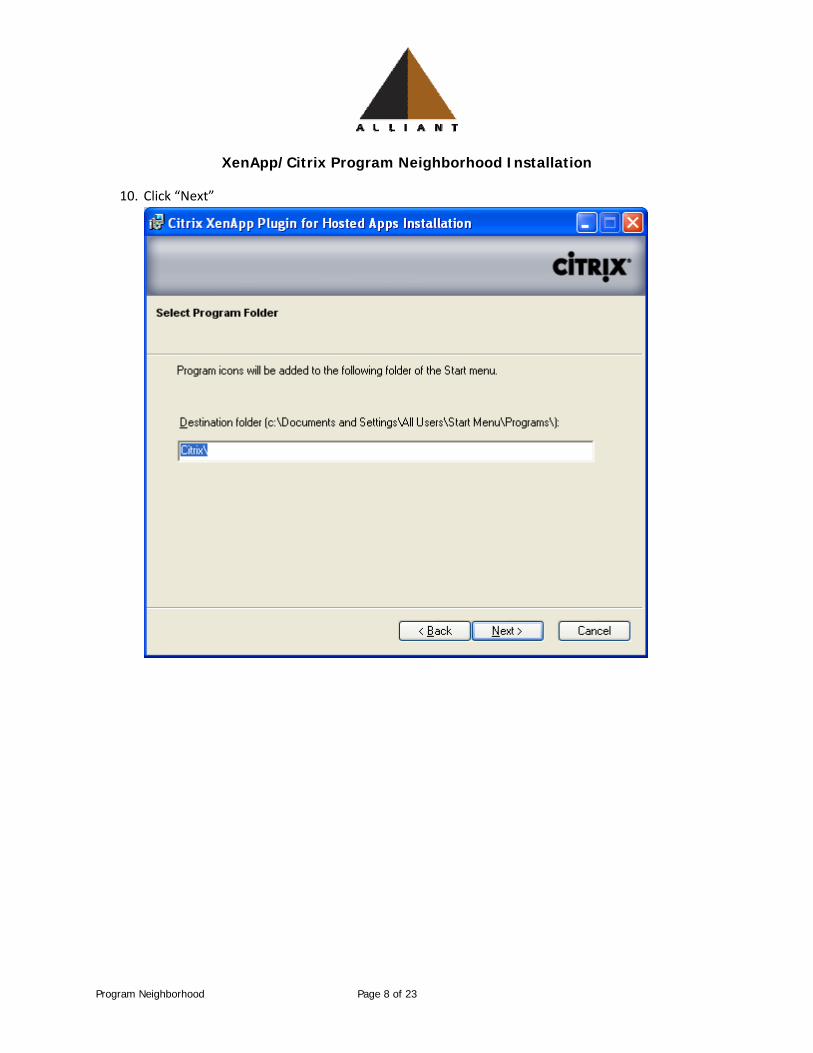
10. Click “Next”

XenApp/Citrix Program Neighborhood Installation
Program Neighborhood Page 9 of 23
11. Click on Next and make sure to select “use machine name as client name”
XenApp/Citrix Program Neighborhood Installation
Program Neighborhood Page 10 of 23
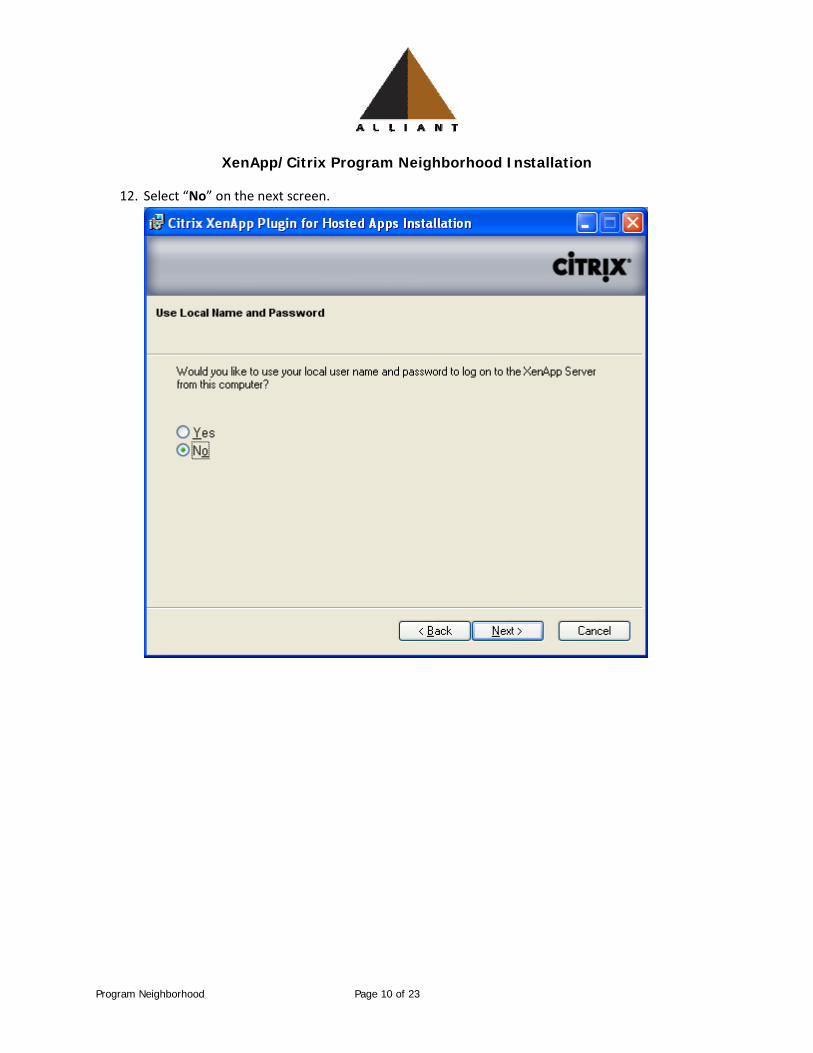
12. Select “No” on the next screen.
XenApp/Citrix Program Neighborhood Installation
Program Neighborhood Page 11 of 23
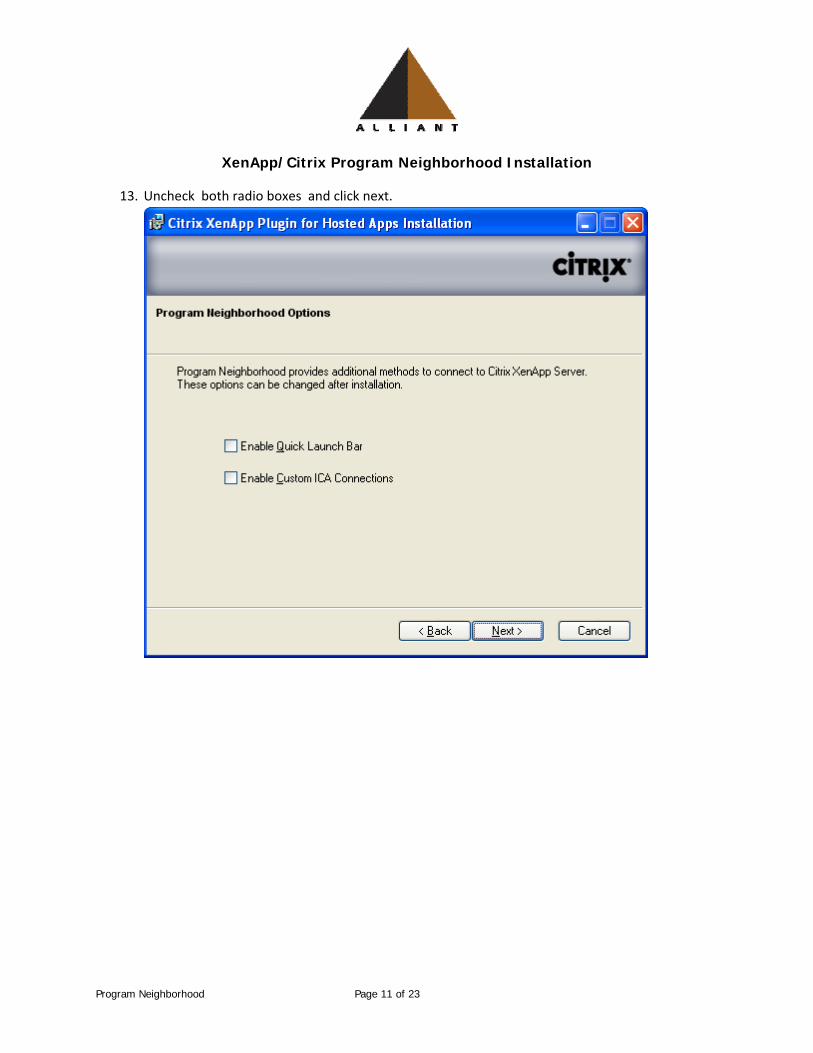
13. Uncheck both radio boxes and click next.
XenApp/Citrix Program Neighborhood Installation
Program Neighborhood Page 12 of 23
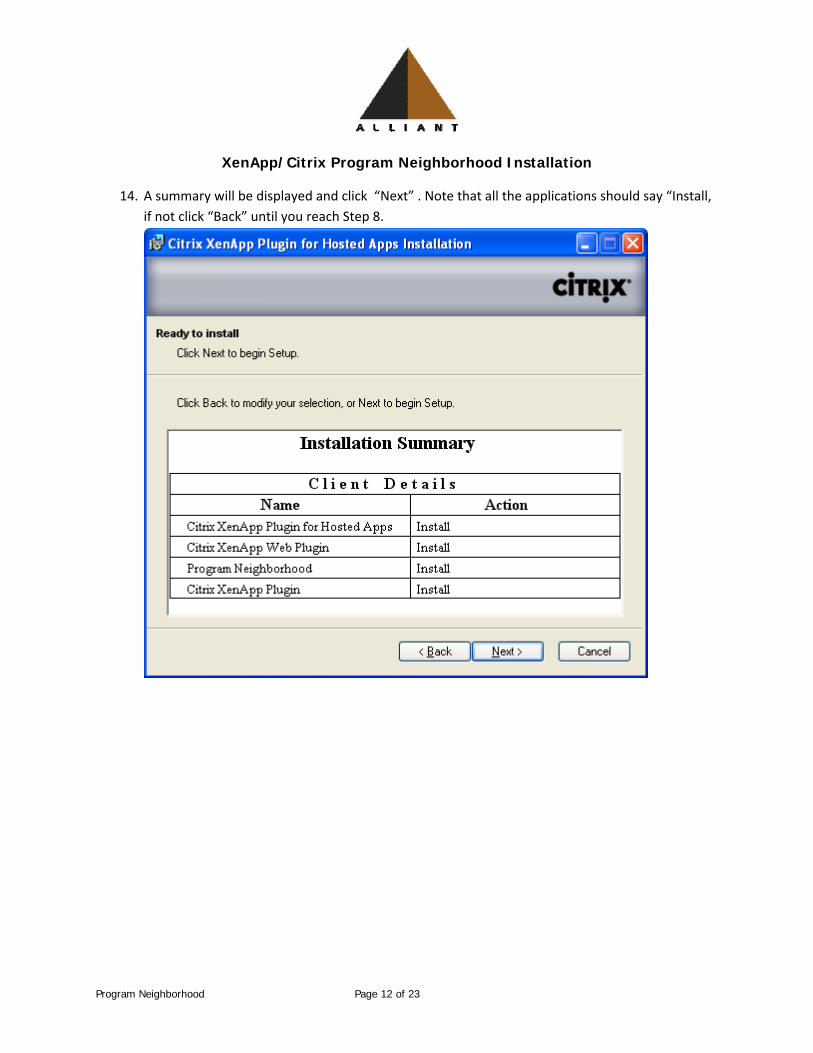
14. A summary will be displayed and click “Next” . Note that all the applications should say “Install, if not click “Back” until you reach Step 8.

XenApp/Citrix Program Neighborhood Installation
Program Neighborhood Page 13 of 23
15. Pretend you are watching a pot of water boil…
XenApp/Citrix Program Neighborhood Installation
Program Neighborhood Page 14 of 23
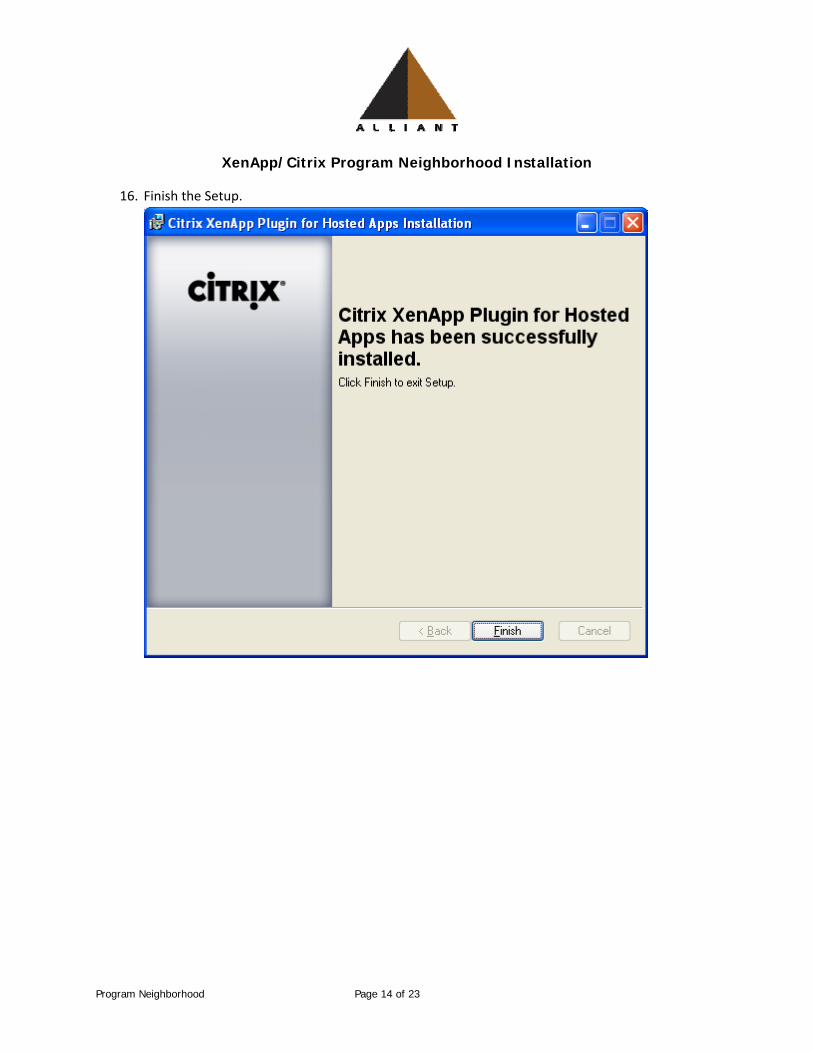
16. Finish the Setup.
XenApp/Citrix Program Neighborhood Installation
Program Neighborhood Page 15 of 23
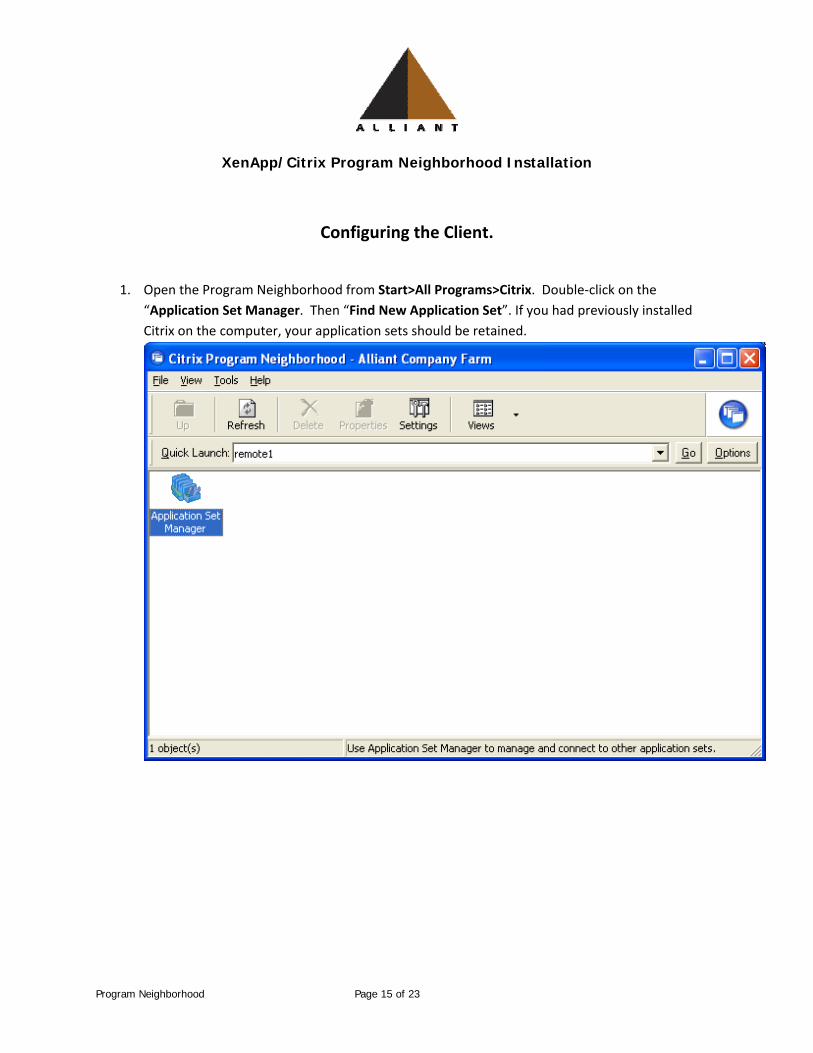
Configuring the Client.
1. Open the Program Neighborhood from Start>All Programs>Citrix. Double‐click on the
“Application Set Manager. Then “Find New Application Set”. If you had previously installed Citrix on the computer, your application sets should be retained.

XenApp/Citrix Program Neighborhood Installation
Program Neighborhood Page 16 of 23
2. Select “Local Area Network”
3. In the next Screen, Click on “Server Location”
XenApp/Citrix Program Neighborhood Installation
Program Neighborhood Page 17 of 23
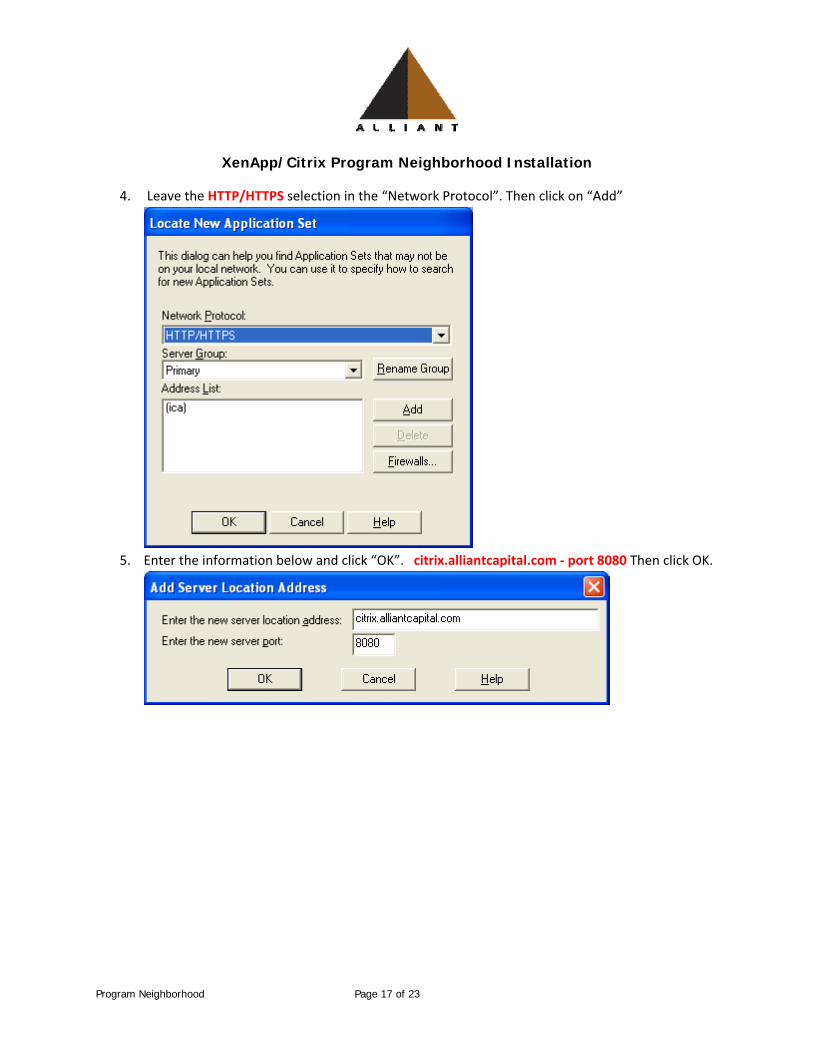
4. Leave the HTTP/HTTPS selection in the “Network Protocol”. Then click on “Add”
5. Enter the information below and click “OK”. citrix.alliantcapital.com ‐ port 8080 Then click OK.
XenApp/Citrix Program Neighborhood Installation
Program Neighborhood Page 18 of 23
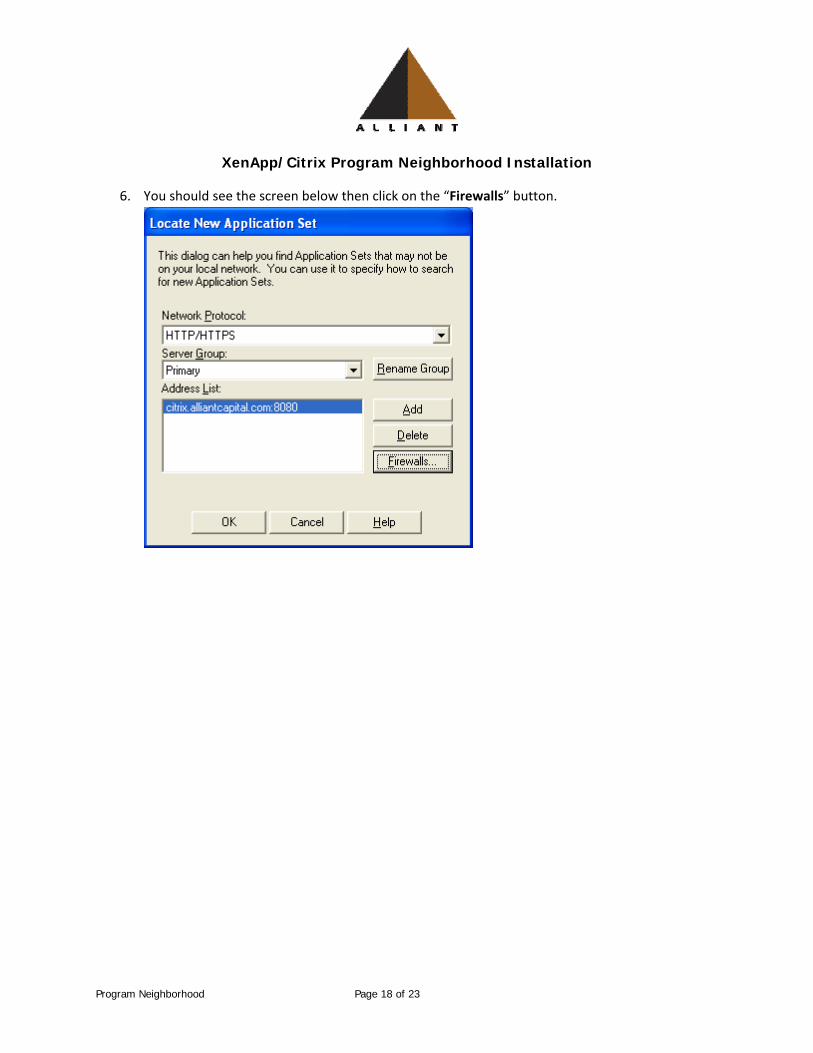
6. You should see the screen below then click on the “Firewalls” button.
XenApp/Citrix Program Neighborhood Installation
Program Neighborhood Page 19 of 23
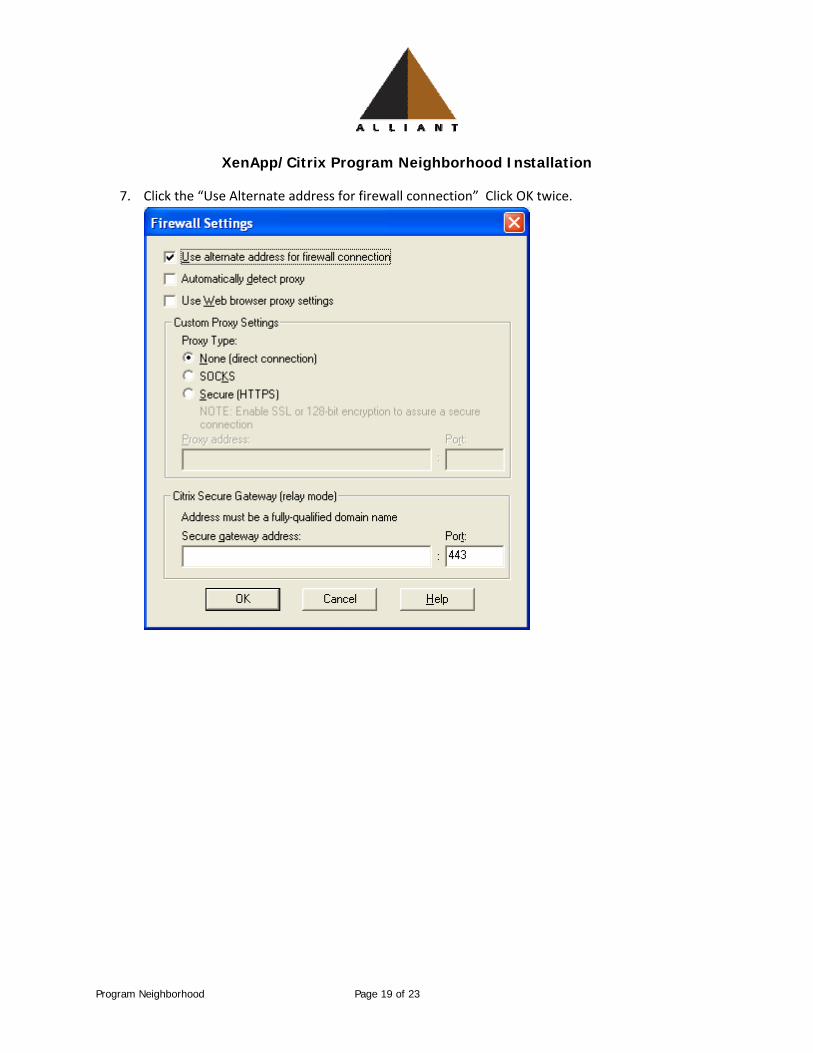
7. Click the “Use Alternate address for firewall connection” Click OK twice.
XenApp/Citrix Program Neighborhood Installation
Program Neighborhood Page 20 of 23
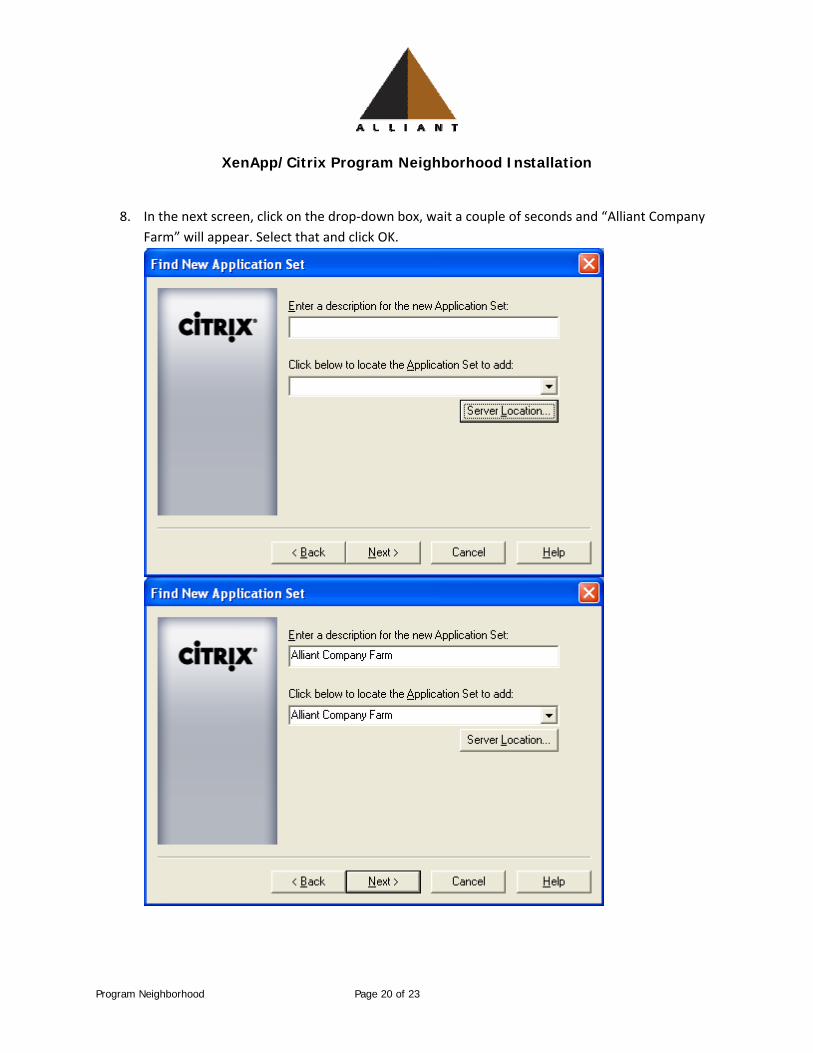
8. In the next screen, click on the drop‐down box, wait a couple of seconds and “Alliant Company
Farm” will appear. Select that and click OK.

XenApp/Citrix Program Neighborhood Installation
Program Neighborhood Page 21 of 23
9. You should now see the screen below, Right‐click on the “Alliant Company Farm” icon and select “Set as default”. A Checkmark will indicate th it is now the default.

XenApp/Citrix Program Neighborhood Installation
Program Neighborhood Page 22 of 23
10. Right‐Click on the “Alliant Company Farm” and select “Application Set Settings” then Select the “Default Options” tab. Make sure the screenshot below is duplicated.
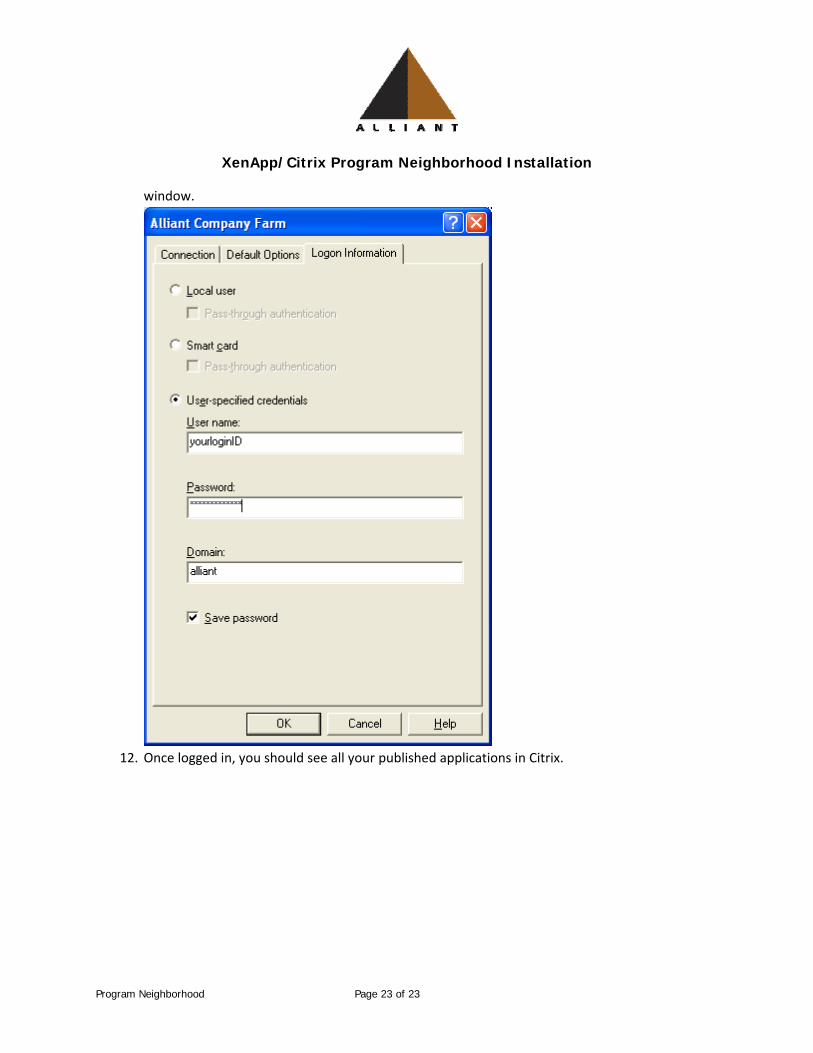
11. Next, Click on the “Logon Information” tab and enter your credentials. You will not be able ot
enter your password unless you click on the “Save Password” radio box. Click OK and close the
XenApp/Citrix Program Neighborhood Installation
Program Neighborhood Page 23 of 23
window.
12. Once logged in, you should see all your published applications in Citrix.