Embed Size (px)
Citation preview
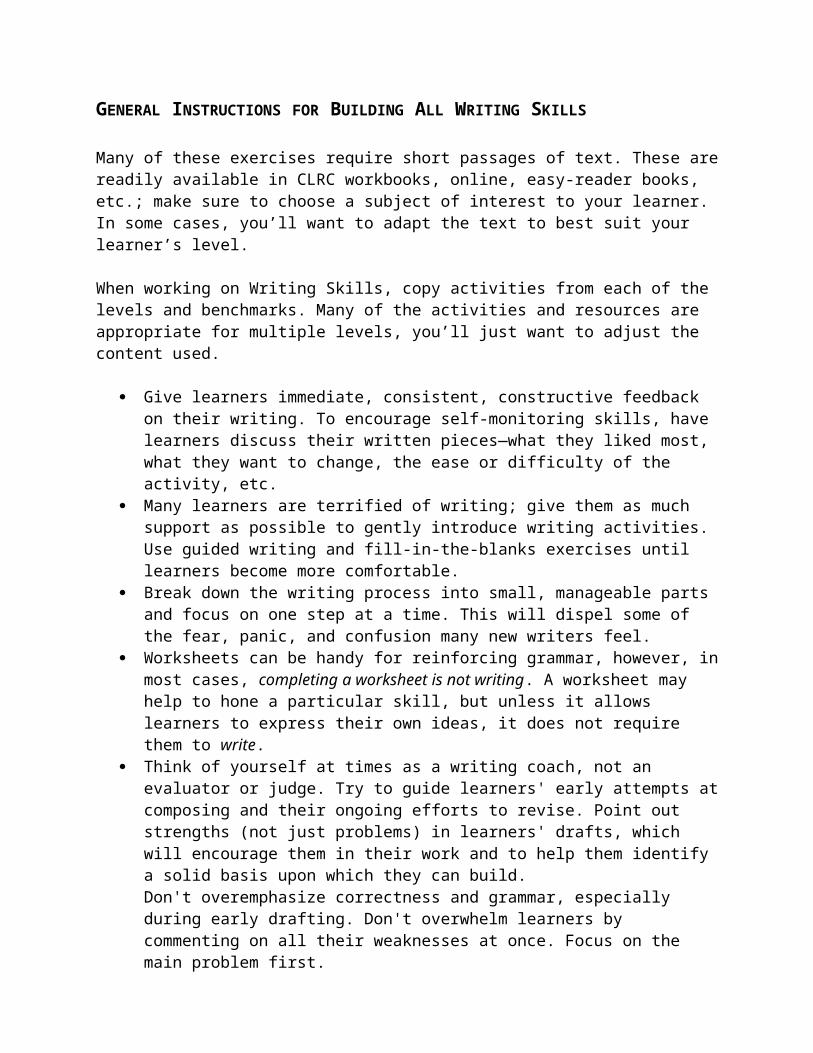
GENERAL INSTRUCTIONS FOR BUILDING ALL WRITING SKILLS
Many of these exercises require short passages of text. These are readily available in CLRC workbooks, online, easy-reader books, etc.; make sure to choose a subject of interest to your learner. In some cases, you’ll want to adapt the text to best suit your learner’s level.
When working on Writing Skills, copy activities from each of the levels and benchmarks. Many of the activities and resources are appropriate for multiple levels, you’ll just want to adjust the content used.
Give learners immediate, consistent, constructive feedback on their writing. To encourage self-monitoring skills, have learners discuss their written pieces—what they liked most, what they want to change, the ease or difficulty of the activity, etc.
Many learners are terrified of writing; give them as much support as possible to gently introduce writing activities. Use guided writing and fill-in-the-blanks exercises until learners become more comfortable.
Break down the writing process into small, manageable parts and focus on one step at a time. This will dispel some of the fear, panic, and confusion many new writers feel.
Worksheets can be handy for reinforcing grammar, however, in most cases, completing a worksheet is not writing. A worksheet may help to hone a particular skill, but unless it allows learners to express their own ideas, it does not require them to write.
Think of yourself at times as a writing coach, not an evaluator or judge. Try to guide learners' early attempts at composing and their ongoing efforts to revise. Point out strengths (not just problems) in learners' drafts, which will encourage them in their work and to help them identify a solid basis upon which they can build.Don't overemphasize correctness and grammar, especially during early drafting. Don't overwhelm learners by commenting on all their weaknesses at once. Focus on the main problem first.
With every writing activity, include: Motivation--It's important to create a strong, engaging context. This will generate the
motivation for learners to write. Pictures, music, dialogue, and story will all help to create context and motivation.
Challenge--Writing is not easy. Adult learners can get discouraged if they think they have to write a lot. It's challenging, and often more interesting, to write within a time limit, or a word limit.
Follow-up--Creating real communicative follow-up is better than simple correction. Unless the intent of the activity is specifically grammar or spelling instruction, comment more on the content of learner writing for encouragement; correction can come later.
Free Writing Free writing is a simple process that is the basis for other discovery techniques. Basic free
writing follows these guidelines: Encourage learners to write nonstop for a set period of time (10–20 minutes). Do not make corrections as they write. Keep writing, even if they have to write something like, "I don't know what to write." Have them write whatever comes into their minds.
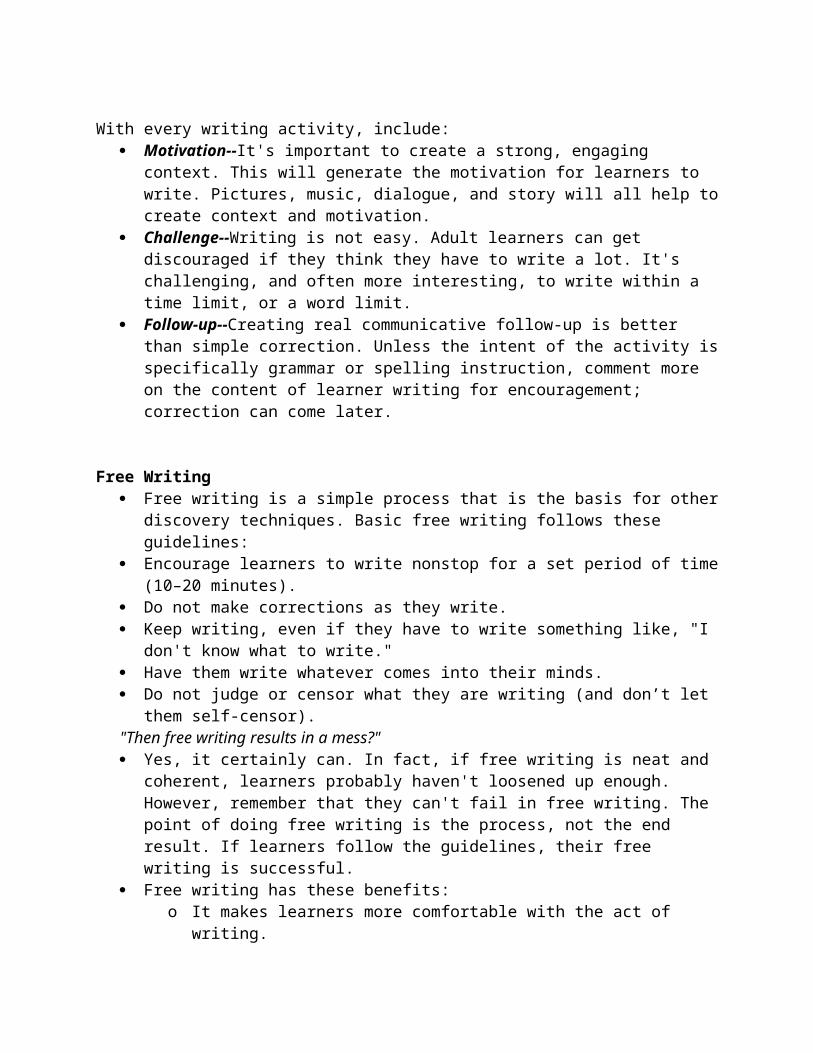
Do not judge or censor what they are writing (and don’t let them self-censor). "Then free writing results in a mess?" Yes, it certainly can. In fact, if free writing is neat and coherent, learners probably haven't
loosened up enough. However, remember that they can't fail in free writing. The point of doing free writing is the process, not the end result. If learners follow the guidelines, their free writing is successful.
Free writing has these benefits: o It makes learners more comfortable with the act of writing. o It helps them bypass the "inner critic" who tells them they can't write. o It can be a valve to release inner tensions. o It can help learners discover things to write about. o It can indirectly improve their formal writing. o It can be fun.
Some final suggestions for free writing: Use the writing tool that is most comfortable for learners— pencil, computer, or
whatever. Don't cross anything out: Write the new idea down; leave the old one. Drop all punctuation. That can make free writing faster and more fluent.
The textbook used in new tutor training (Teaching Adults: A Literacy Resource Book) contains more strategies; use it often!

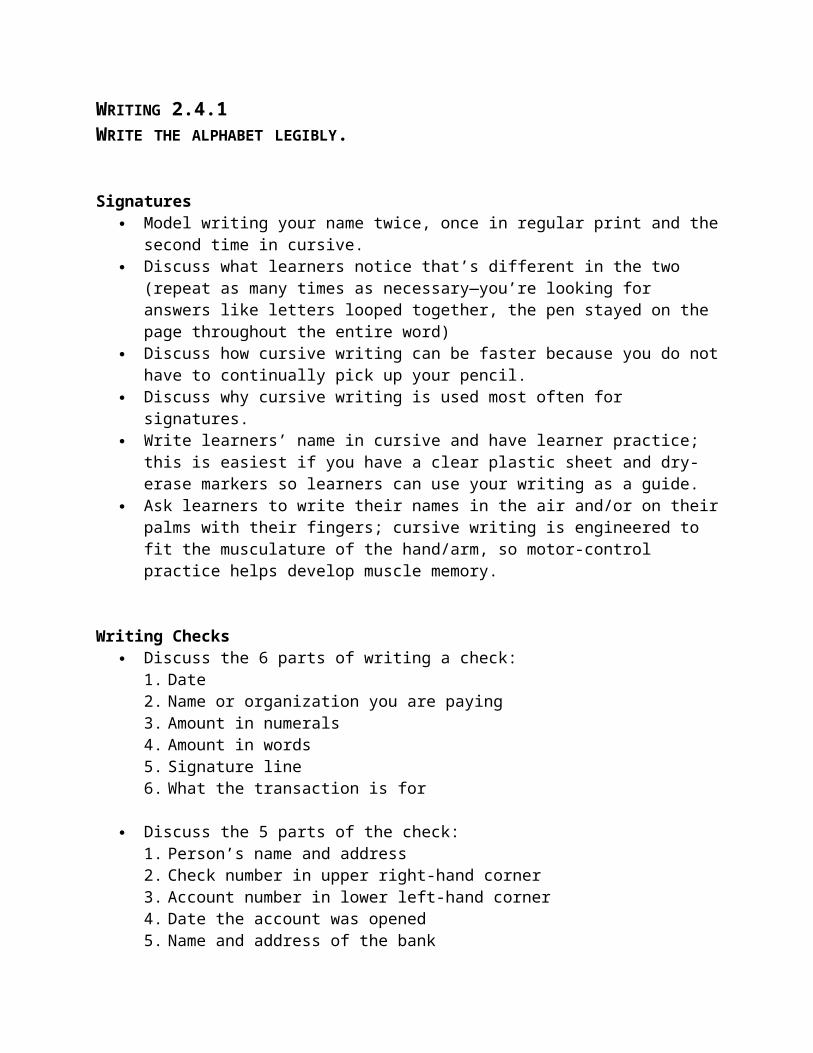
WRITING 2.4.1WRITE THE ALPHABET LEGIBLY.
Signatures Model writing your name twice, once in regular print and the second time in cursive. Discuss what learners notice that’s different in the two (repeat as many times as
necessary—you’re looking for answers like letters looped together, the pen stayed on the page throughout the entire word)
Discuss how cursive writing can be faster because you do not have to continually pick up your pencil.
Discuss why cursive writing is used most often for signatures. Write learners’ name in cursive and have learner practice; this is easiest if you have a
clear plastic sheet and dry-erase markers so learners can use your writing as a guide. Ask learners to write their names in the air and/or on their palms with their fingers;
cursive writing is engineered to fit the musculature of the hand/arm, so motor-control practice helps develop muscle memory.
Writing Checks Discuss the 6 parts of writing a check:
1. Date 2. Name or organization you are paying 3. Amount in numerals 4. Amount in words 5. Signature line 6. What the transaction is for
Discuss the 5 parts of the check: 1. Person’s name and address 2. Check number in upper right-hand corner 3. Account number in lower left-hand corner 4. Date the account was opened 5. Name and address of the bank
Model how to correctly fill out a check (samples are available online Explain each step in good detail as the check is being completed. Check for understanding; make sure learners understand why you wrote the check as you
did (spelling out the amount, using your signature on the signature line, including what the check is for, etc.)
Discuss something learners would write a check for (rent, phone bill). Ask learners to copy the list above (6 parts of writing a check) and write what they’ll be
putting on the check next to each part on the list. Give learners a practice check to fill out; offer feedback. Once learners are able to fill out practice checks independently, discuss a new check they
wish to write and have them go through the process without your prompting.
Addressing Envelopes Create a K-W-L (know, want to know and learned) chart entitled, How to Address an
Envelope. Review learners’ answers and create your lesson depending upon their prior knowledge and what they want/need to know.
Show learners how to address the envelope using the How to Address an Envelope printable as a guide.
Explain that the cost to send the envelope will vary depending upon the size and weight of the envelope. If sending a heavy or large envelope, we may have to pay for extra postage. If the post office has a self-service machine we can weigh the envelope there, print out the postage and drop it in the box on our own. If the post office doesn’t, we have to stand in line and wait.
Explain what the current postage rate is for a regular size envelope. You may also want to explain Forever Stamps, which can be used to mail a one-ounce letter regardless of when the stamps are purchased or used and no matter how prices may change in the future.
Practice addressing envelopes, choosing random addresses from the phone book if desired.
Ask learners to complete the “L” (learned) part of the K-W-L chart.
Online Resources:http://trcabcwww.s3.amazonaws.com/wp-content/uploads/HowToAddressAnEnvelope.pdfhttp://donnayoung.org/penmanship/cursive.htmhttp://www.moneyinstructor.com/wsp/writecheck.asphttp://www.moneyinstructor.com/wsp/printchecks.asphttp://www.moneyinstructor.com/wsp/printregister.asphttp://www.moneyinstructor.com/wsp/checkbook.asp
Printed Resources:Passage to ESL Literacy Student WorkbookWriting It Down: Writing Skills for Everyday LifeWrite Soon!From Process to Product

WRITING 2.4.2PRODUCE A VARIETY OF WRITINGS.
Let Your Fingers So the Walking The telephone book contains a wealth of information and is a good tool for reading and
writing. Have learners look through the yellow pages of the telephone directory and select a
particular service Ask them to write a clever or funny ad for it.
Paint Sample Storytelling Telling a story is like painting a picture, using words instead of paint. Paint samples often have unique and interesting names such as Western Sand, Beach
Basket, and Mermaid Tear. These names make the perfect story-starters to inspire creative storytelling.
Collect several paint color sample cards with interesting names (free at most paint and hardware stores)
Ask learners to pick five color samples with interesting names that they think they’ll be able to use together in a story. Or, to make things interesting, urge them to pick random samples without looking at the names.
If they come across words in the samples they doesn’t know (for example: pinafore), have them use the dictionary to look up word meanings.
Have learners brainstorm how to link the five paint chip color names into a story. For example, if they picked the five names of Madeleine, Skating Pond, Lavender Lipstick, Mother of Pearl, and Hatband, he'll need to think of a story that would use all of these words.
You may suggest that they start by writing one sentence that incorporates each word. For example, the first paragraph could introduce a character “Madeleine”; Madeleine might visit a skating pond in paragraph two; she loses her lavender lipstick in the third paragraph; a friend remembers losing a mother of pearl ring in paragraph four; a girl with a hatband finds the lipstick in the fifth paragraph. Remind learners to make sure the paragraphs link together as a story.
Content Clues: Writing with Pictures Collect 5-10 pictures, cut from magazines Glue each picture onto the top of its own page and spread the pages out across a table. Invite learners to choose a picture, then tell you what’s happening in it. For example, if
they choose the picture of the dog running in the water, he might say, “This dog is being chased by its owner. They just came to the beach because they’re having a picnic. The dog is happy because he loves to play and get wet.”
Take notes of key words as learners are telling the story, then have them use the key words to write several sentences about the picture.

Or ask learners to write one or two sentences about the picture. If they are unsure of how to form their sentences, ask them to imagine that they were describing the picture to a friend.
Or ask learners to think about what they would see, hear, taste, smell, and touch if they were actually in the image and use those prompts to write their sentences.
Five-Finger Technique Explain to learners that before they write, they need a plan. Help them begin to
brainstorm by asking: What’s going to happen in the story? In what order will the events occur? How will the story end?
Model the “Give Me Five” method by re-telling a familiar tale, such as Little Red Riding Hood. Start with a closed hand, and open one finger at a time as you re-tell each story event in sequence:
1. At the beginning of the story, Red Riding Hood finds out that her grandmother is sick, so she takes some food to her grandmother’s house in the woods.
2. Along the way, Red Riding Hood meets a wolf, and tells him where she is going.3. Next, the wolf goes ahead of her and disguises himself as her grandmother.4. Then, when Red Riding Hood arrives at her grandmother’s house, she notices that
her “grandmother” has big ears, big eyes, and big teeth.5. Just as the wolf pounces on Red Riding Hood, a woodsman comes in and kills the
wolf, saving Red Riding Hood and her grandmother. With Little Red Riding Hood fresh in their minds, have learners child think about their
story, and have them share their story outline aloud using the same five-finger technique. Encourage them to use words like “first,” "next," “then,” and “finally” to create a clear
sequence of events. Be sure learners are pacing out the story in five broad, rather than detailed, steps. When learners reach their fourth finger, for example, they should have reached the high
point of the story, and should be very close to the ending. You may wish to have learners repeat their story plan on their fingers, just to be sure they
are ready to write.
E-mailing Friends Encourage learners to e-mail friends and family. During your lessons, have learners brainstorm a list of questions they can use in their
correspondence. Ask them to write an e-mail to an acquaintance that poses three or four questions. If they don’t mind, have them bring printouts of all the correspondence to your lessons
for feedback and discussion.
Dialoging Dialoging is the most basic way to use e-mail. It's simply one more way to increase the
frequency of communication between tutors and learners. Below are examples of different kinds of dialoging that can take place.
Learner to Tutoro journal writing

o asking and answering questionso progress reports and updates
Tutor to Learnero announcementso assignmentso homework
The Five Ws The five Ws are who, what, where, when, and why. Use a sentence with the five Ws to show how to create these sentences. An example is
The kids ran down the street today to see the parade. Have learners trace their hands on a piece of paper. On the palm of the hand have them write the title "Five Ws". Use dot stickers and place on the tips of the paper fingers. On each dot write a W word.
This will help learners memorize the five Ws. When you’re writing practice sentences for spelling and grammar, ask learners to use at
least 3 Ws to complete the sentences. Increase the required number as the months go by.
Noun and Verb Bags Use noun and verb bags to teach learners proper sentence structure. Write lists of nouns and verbs, cut them out into individual strips, and place them in
separate bags. Have learners pick out one word from each bag and form a sentence including the two
words. As learners become more advanced, you can create adjective and adverb bags.
Pick Words You might want to try this activity for learners who struggle with thinking up words. You will need 5 containers like butter tubs or coffee cans. Label each container with one
of these words: Nouns, Verbs, Adjectives, Adverbs, Phrases. Use small slips of paper for writing words; they can be plain white or color-coded for
each container. With learners, brainstorm 10 – 15 words that will go in each container. Write one word
or phrase on each small piece of paper. Here are some suggestions for each one.o Nouns: aardvark, clown, rainbow, Matilda, computero Verbs: flip, dance, munch, yodel, hiccupo Adjectives: striped, magenta, itsy-bitsy, scrawny, sleepyo Adverbs: boldly, merrily, excitedly, miraculously, lightlyo Phrases: over the stump, under the moonbeams, every weekend, in the lake, on
Christmas Fold each piece of paper twice so the word can’t be seen and toss it into its container. . Ask learners to draw one from each container and create a silly sentence from the words.
Here’s how it might look. Suppose they draw “aardvark”, “yodel”, “itsy-bitsy”, “boldly”,
and “under the moonbeams”. They could write a sentence: The itsy-bitsy aardvark yodeled boldly under the moonbeams.
Verbs can be in any tense they want. If they draw a verb that needs a direct object, like munch, they can draw an extra noun.
This activity can be used for fun dictation as well. In that case, you can pull the words from the containers and assemble them into humorous sentences to dictate to learners.
Online Resources:
http://www.rong-chang.com/writing/indexhttp://www.bbc.co.uk/skillswise/topic/writing-a-letterhttps://186734.wikispaces.com/file/view/Email+Writing+-+Mercy.pdfhttp://www.berghuis.co.nz/abiator/lang/lscr/lscrindex.htmlhttp://www.spellingcity.com/sentence-writing-practice.htmlhttp://www.time4writing.com/sentence-writing/types-of-sentences/http://www.teach-nology.com/worksheets/language_arts/sentence/
Printed Resources:Ready to WriteWriting to OthersWriting TalkESL Writing IntermediateWrite to the Point
WRITING 2.4.3CREATE POETRY BASED ON LIFE EXPERIENCE.
Diamante Poems A diamante is a special poem that makes use of a simple structure, resulting in a
diamond-shaped poem; they are fun and easy to write. Write a poem of your own as a model. Here’s the basic structure: The first line is one word, and is the topic. It is a singular or plural noun. The 7th line is
also one word, and a noun. The 1st and 7th lines should be in contrast to one another. The second line is made up of two adjectives that describe the noun from the first line. The third line is three –ing verbs that tell actions associated with the noun from the first
line. The fourth line is the longest of the entire poem, and is the turning point of the poem.
This line has four more nouns. The first two nouns are words that are associated with the noun of the first line, and the second pair of nouns are words that are associated with the noun of the seventh line.
The fifth line is three –ing verbs that are associated with the noun from the seventh line. The sixth line has two adjectives that describe the noun in the seventh line. The last line of the poem is a singular or plural noun that contrasts with the one from the
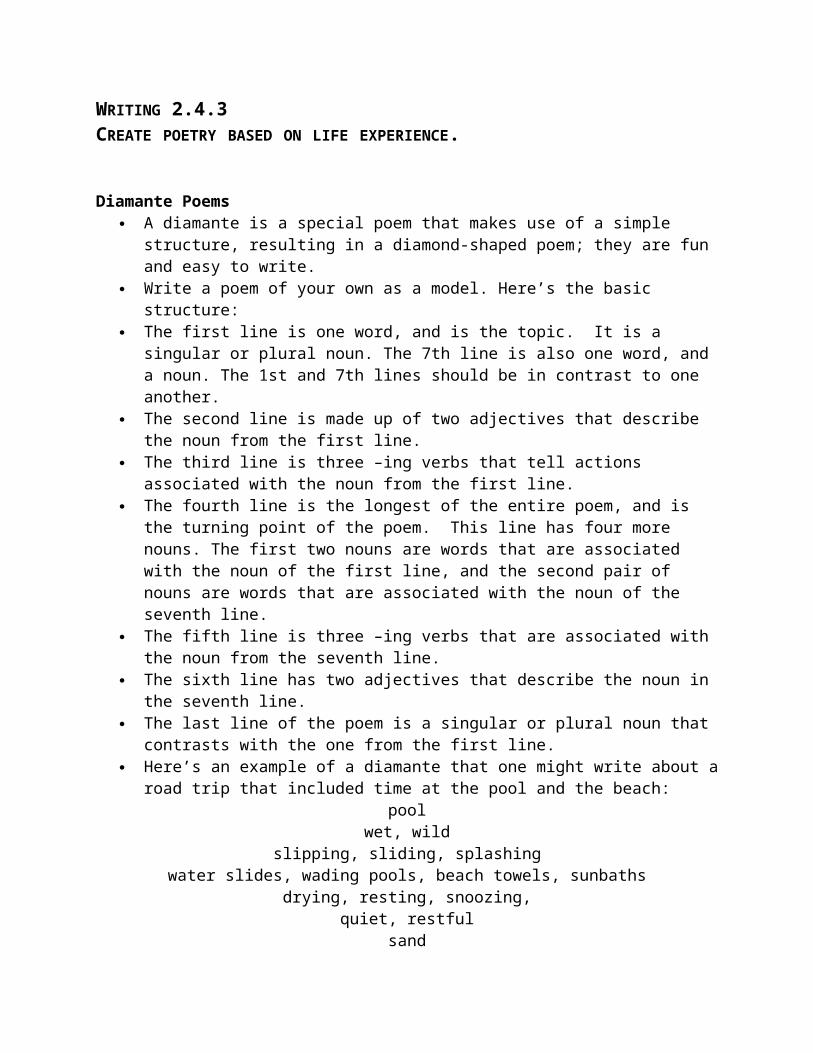
first line. Here’s an example of a diamante that one might write about a road trip that included time
at the pool and the beach:pool
wet, wildslipping, sliding, splashing
water slides, wading pools, beach towels, sunbathsdrying, resting, snoozing,
quiet, restfulsand
Poetry in Song Literature can be tough to decipher, and poetry especially can confuse and intimidate
learners. One way to overcome that fear is to relate poetry to music. Songwriters understand poetry, so the lyrics fit the beat of the music.
Ask learners for a favorite song, and write down the lyrics, trying to make line breaks where it sounds like the singer is pausing for breath. Most lyrics are available online.
Read the written lyrics, and notate the rhyme structure. To determine the rhyme scheme of a poem or song lyrics, look at the last word of each line and letter them beginning with “a.”
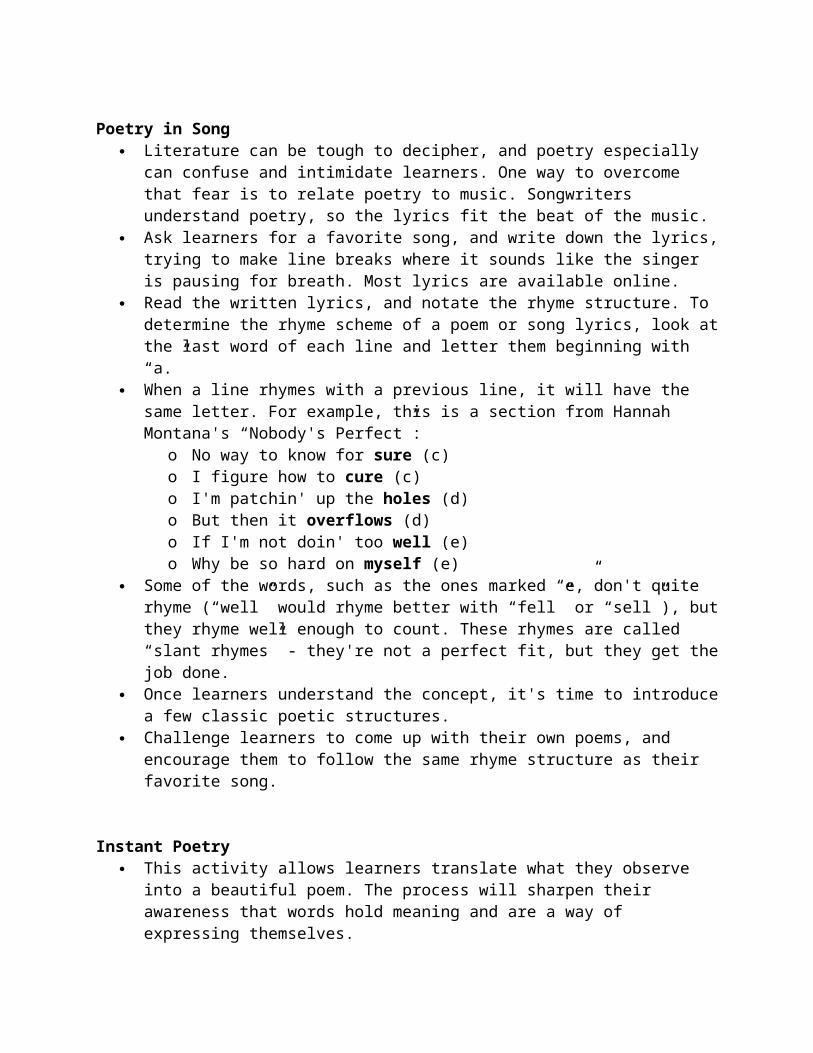
When a line rhymes with a previous line, it will have the same letter. For example, this is a section from Hannah Montana's “Nobody's Perfect”:
o No way to know for sure (c)o I figure how to cure (c)o I'm patchin' up the holes (d)o But then it overflows (d)

o If I'm not doin' too well (e)o Why be so hard on myself (e)
Some of the words, such as the ones marked “e,”don't quite rhyme (“well” would rhyme better with “fell” or “sell”), but they rhyme well enough to count. These rhymes are called “slant rhymes” - they're not a perfect fit, but they get the job done.
Once learners understand the concept, it's time to introduce a few classic poetic structures.
Challenge learners to come up with their own poems, and encourage them to follow the same rhyme structure as their favorite song.
Instant Poetry This activity allows learners translate what they observe into a beautiful poem. The
process will sharpen their awareness that words hold meaning and are a way of expressing themselves.
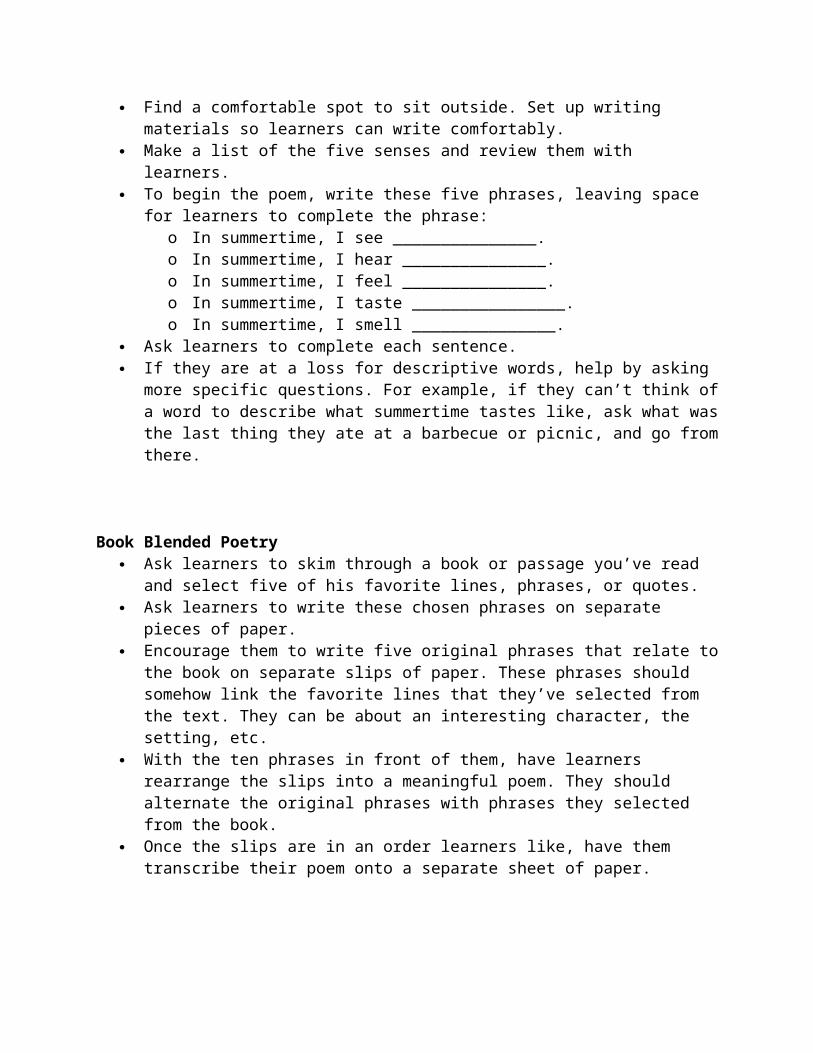
Find a comfortable spot to sit outside. Set up writing materials so learners can write comfortably.
Make a list of the five senses and review them with learners. To begin the poem, write these five phrases, leaving space for learners to complete the
phrase: o In summertime, I see _______________.o In summertime, I hear _______________.o In summertime, I feel _______________.o In summertime, I taste ________________.o In summertime, I smell _______________.
Ask learners to complete each sentence. If they are at a loss for descriptive words, help by asking more specific questions. For
example, if they can’t think of a word to describe what summertime tastes like, ask what was the last thing they ate at a barbecue or picnic, and go from there.
Book Blended Poetry Ask learners to skim through a book or passage you’ve read and select five of his favorite
lines, phrases, or quotes. Ask learners to write these chosen phrases on separate pieces of paper. Encourage them to write five original phrases that relate to the book on separate slips of
paper. These phrases should somehow link the favorite lines that they’ve selected from the text. They can be about an interesting character, the setting, etc.
With the ten phrases in front of them, have learners rearrange the slips into a meaningful poem. They should alternate the original phrases with phrases they selected from the book.
Once the slips are in an order learners like, have them transcribe their poem onto a separate sheet of paper.

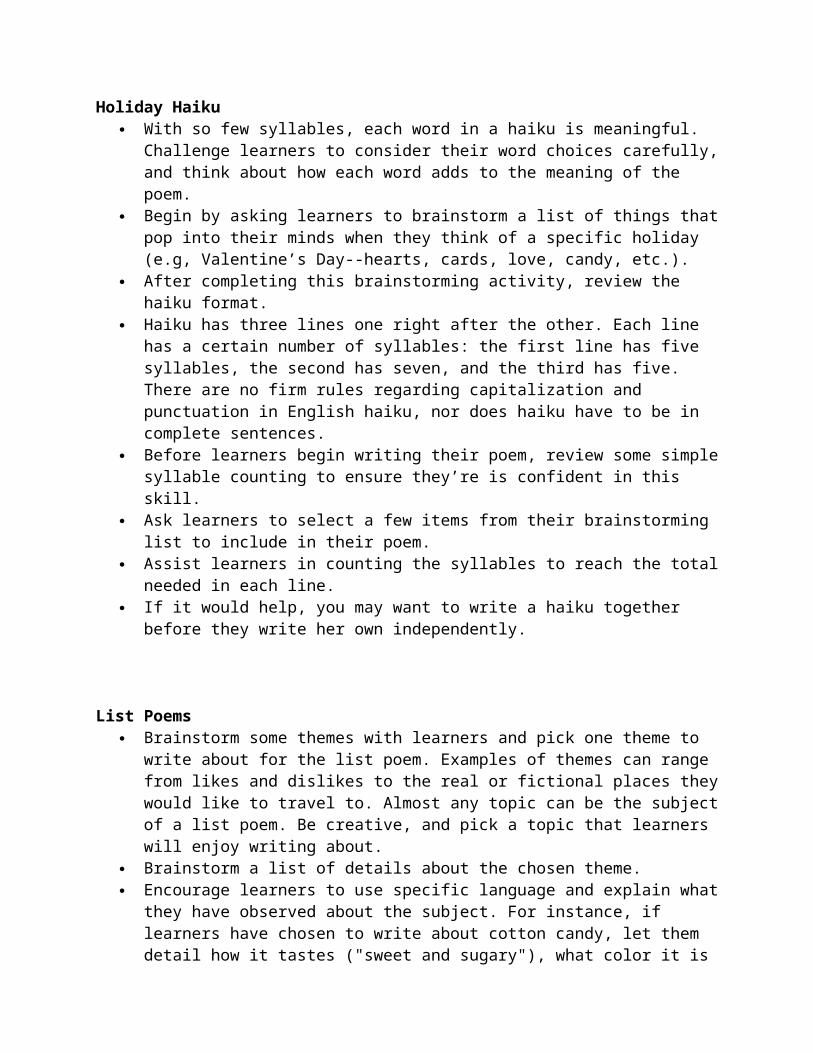
Holiday Haiku With so few syllables, each word in a haiku is meaningful. Challenge learners to consider
their word choices carefully, and think about how each word adds to the meaning of the poem.
Begin by asking learners to brainstorm a list of things that pop into their minds when they think of a specific holiday (e.g, Valentine’s Day--hearts, cards, love, candy, etc.).
After completing this brainstorming activity, review the haiku format. Haiku has three lines one right after the other. Each line has a certain number of
syllables: the first line has five syllables, the second has seven, and the third has five. There are no firm rules regarding capitalization and punctuation in English haiku, nor does haiku have to be in complete sentences.
Before learners begin writing their poem, review some simple syllable counting to ensure they’re is confident in this skill.
Ask learners to select a few items from their brainstorming list to include in their poem. Assist learners in counting the syllables to reach the total needed in each line. If it would help, you may want to write a haiku together before they write her own
independently.
List Poems Brainstorm some themes with learners and pick one theme to write about for the list
poem. Examples of themes can range from likes and dislikes to the real or fictional places they would like to travel to. Almost any topic can be the subject of a list poem. Be creative, and pick a topic that learners will enjoy writing about.
Brainstorm a list of details about the chosen theme. Encourage learners to use specific language and explain what they have observed about
the subject. For instance, if learners have chosen to write about cotton candy, let them detail how it tastes ("sweet and sugary"), what color it is ("baby blue"), how it feels ("soft like spun wool"), and what they associate it with ("the summer fair").
Remind learners to use all their senses to make as detailed a list as possible. This list can be a series of words ("pink", "fluffy") or of descriptive phrases ("as soft as a cloud", "feathery light").
Write the poem. The title of the poem states the poem's theme and can be as simple as "What I Did Today" or "Things That Are Red".
The actual poem itself is composed of the details learners have brainstormed for the theme.
The list poem is simple and doesn't require rhyme or rhythm, so encourage learners to change words and experiment with phrasing to their hearts’ content.
Variations: Once learners have practiced the basic form of the list poem, encourage them to select a phrase to include in every line. An example of such a phrase might be: "I remember when _" or "At night, _". Learners can also write a new list poem where they rhyme certain lines together.

Online Resources:http://pages.uoregon.edu/leslieob/pizzaz.htmlhttp://www.sd40.bc.ca/kelvin/webpoetry.htmhttp://www.adifferentplace.org/poetry.htmhttp://www.funenglishgames.com/readinggames/poem.htmlhttp://performapoem.lgfl.org.uk/writing.aspx
Printed Resources:Ready to Write101 African-American Read-Aloud StoriesChanges: Readings for ESL WritersIn Our Own Words: A Guide with Readings for Student Writers
WRITING 2.4.4ORGANIZE INFORMATION USING KEY IDEAS.
Sequencing Provide learners with a sequence of pictures that are scrambled (e.g., building a fire). Ask learners to put the pictures in order Then have them write out the process in the correct order.
Timelines Use a time line to describe any event. Brainstorm together; it can be something that happened over the weekend or a favorite
movie or television program. As you’re brainstorming, write key words. Ask learners to use the key words as a guide and write out the timeline as a narrative. Biographies of individuals or even the learners themselves are a powerful writing activity
and timelines are a great way to get them started.
Sequence Sandwich Explain to learners that you’re going to read the directions for making a sandwich, but
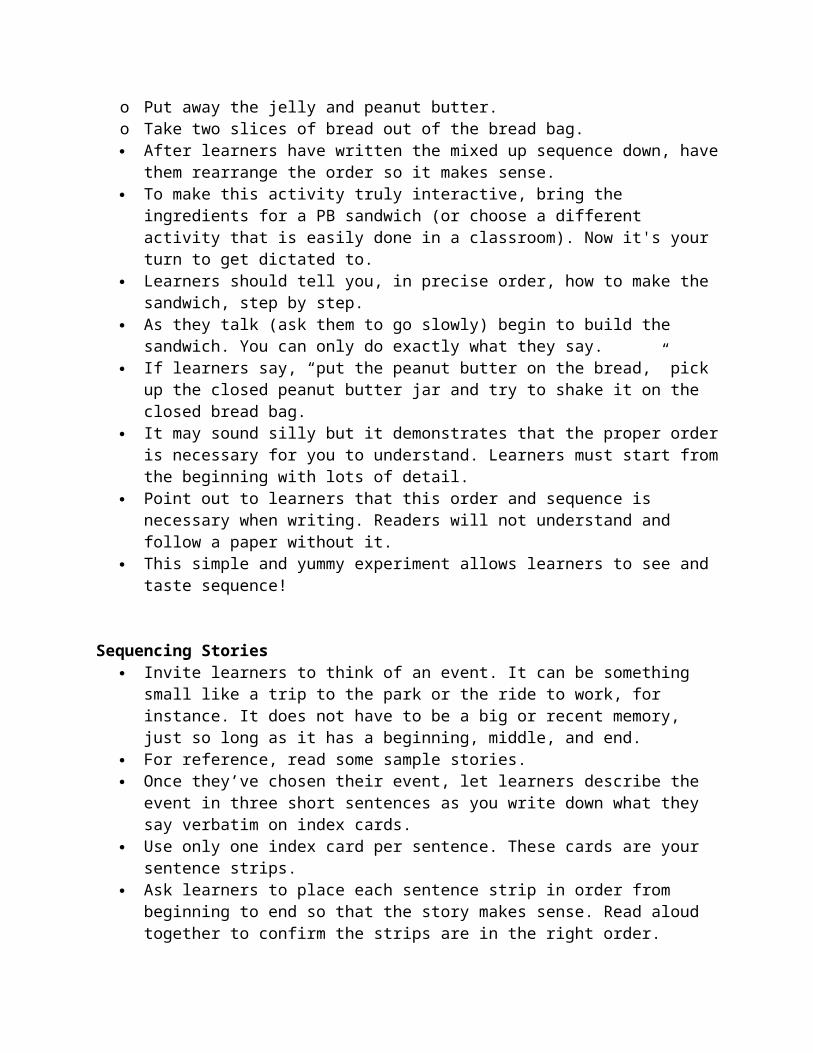
that they will be all mixed up. They will have to write the directions. Here's the mixed up sequence to dictate out loud:o Dip the knife into the jelly jar.o Eat.o Close the sandwich.o Dip the knife into the peanut butter jar.o Put them on a plate.o Spread the jelly on one slice of bread.o Get out a plate and butter knife and put them on the counter.o Spread the peanut butter on one slice of bread.o Get out the jelly and peanut butter jars and put them on the counter.o Pick up a butter knife with your right hand.o Put away the jelly and peanut butter.o Take two slices of bread out of the bread bag. After learners have written the mixed up sequence down, have them rearrange the order
so it makes sense. To make this activity truly interactive, bring the ingredients for a PB sandwich (or choose
a different activity that is easily done in a classroom). Now it's your turn to get dictated to.
Learners should tell you, in precise order, how to make the sandwich, step by step. As they talk (ask them to go slowly) begin to build the sandwich. You can only do
exactly what they say. If learners say, “put the peanut butter on the bread,” pick up the closed peanut butter jar
and try to shake it on the closed bread bag.
It may sound silly but it demonstrates that the proper order is necessary for you to understand. Learners must start from the beginning with lots of detail.
Point out to learners that this order and sequence is necessary when writing. Readers will not understand and follow a paper without it.
This simple and yummy experiment allows learners to see and taste sequence!
Sequencing Stories Invite learners to think of an event. It can be something small like a trip to the park or the
ride to work, for instance. It does not have to be a big or recent memory, just so long as it has a beginning, middle, and end.
For reference, read some sample stories. Once they’ve chosen their event, let learners describe the event in three short sentences as
you write down what they say verbatim on index cards. Use only one index card per sentence. These cards are your sentence strips. Ask learners to place each sentence strip in order from beginning to end so that the story
makes sense. Read aloud together to confirm the strips are in the right order. Once learners have the hang of this, you can write and sequence more stories together. Vary this activity by increasing the story to four or five cards or adding more vocabulary
words.
Main Idea Tell learners that the main idea of the passage is what the text is mainly about; the big
idea. Details are the part of the text that support the main idea and make the text interesting. Show a four-sentence paragraph as an example; read each sentence. As part of a think-aloud, say why three of the sentences are supporting sentences and why
one of them is the main idea. Learners need to hear your thinking. Repeat the same activity with a different paragraph. Keep repeating until learners can correctly identify the main idea and supporting details. For extra practice, give learners several picture selections. Using the details in the picture,
have them write what they think the main idea of each of the pictures could be.
Two-Word Weekend Challenge learners to tell you what they did over the weekend with only two words. For example, "Sister-Birthday" means that a learner's sister had a birthday party. This gives learners practice with Main Idea.
Sort and Share Select a short non-fiction reading passage and write 5-6 relevant topics on separate pieces
of paper placed throughout the room. Give learners the text and some sticky notes (short articles work best for this activity).
Ask them to read the text. Next, ask learners to write 4-5 sticky notes with an interesting fact on each one.
Once they have written their sticky notes, they will need to go around the room and find the appropriate main idea heading to put their sticky note on.
Ask learners to choose one of the sheets. Have them to write a paragraph about their topic that includes the sticky note details.
Online Resources:http://www.eduplace.com/graphicorganizer/http://www.writedesignonline.com/organizers/http://www.harcourtschool.com/activity/language_arts/ideasforwriters_preview/gr4/prompts/prompts_pictures.htmlhttp://www.internet4classrooms.com/links_grades_kindergarten_12/writing_prompts_language_arts_writing_elem.htm
Printed Resources:Painless WritingWriting Skills Reproducible WorkbookInteractions II: A Writing Process BookBasic Composition for ESL
WRITING 2.4.5USE THE WRITING PROCESS TO PRODUCE A PARAGRAPH.
5 Boxes to a Paragraph The five-step process presented in this program helps learners organize their thoughts.
Draw five boxes on a paper to help learners frame their paragraph. The steps are:
1. Read the question. Ask learners to carefully read the question. Encourage them to whisper the question to themselves. This technique often helps auditory learners to process information.
2. Write a topic sentence that rephrases the question. The topic sentence helps the reader understand or identify the main idea of the paragraph. It should repeat the question being asked. Once learners have written their topic sentence, tell them to read the question and the topic sentence to themselves. Ask them if the topic sentence rephrases the question.
3. Write three detail sentences. Tell learners that the next three sentences make up the body of the paragraph. The three sentences after the topic sentence are called the detail sentences. Each of these sentences explains or gives an example of the topic sentence. Tell learners to brainstorm three things that support the topic sentence.
4. Write a concluding sentence that rephrases the topic sentence. The concluding sentence is the last sentence of the paragraph. In this sentence, learners should rephrase the topic sentence. Once they have written their concluding sentence, tell them to read the topic sentence and the concluding sentence to themselves. Ask them if the concluding sentence rephrases the topic sentence.
5. Rewrite the sentences in paragraph form, making sure to indent the first sentence of the paragraph.
Ask learners to read over the sentences in the boxes to make sure they are happy with what they have written. If necessary, give them a few minutes to make changes.
Ask learners to rewrite the five sentences in a complete paragraph, making sure to indent the first line and to have all the sentences follow each other, leaving no blank spaces in between them.
Rewriting the sentences helps learners become comfortable writing a block of text. It also helps them understand how the sentences relate to each other. Each sentence has a
purpose, and together they are parts of a whole: the paragraph.
Traffic Signal System Make a chart that says: (green) GO = Topic Sentence: The sentence that tells what the paragraph will be about.
(yellow) CONTINUE = Supporting Sentences: These sentences add details to the topic sentence.(red) STOP = Ending Sentence: This sentence closes the paragraph. It tells the reader that the paragraph is finished.
Make green, yellow, and red paper strips, giving learners 1 green, 1 red, and 3 yellow.
Brainstorm topics for a short essay and write onto a chart.Ask learners to choose a topic (tutor chooses one as well and models this entire activity)
Explain that learners are going to learn how to write a paragraph using the Traffic Light System.
Point to the chart and discuss that there are three parts to a paragraph-- a beginning (topic sentence), a middle (supporting sentences), and an end (ending sentence).Take out a green strip and have learners come up with a topic sentence based on the topic they have chosen.
Ask them to write their sentence on the green strip. Explain that green means "go" and we have begun our paragraph. Have learners take out their 3 yellow strips. Explain that they have to think of three
supporting sentences, or sentences that will are about the topic sentence. Have learners write the three sentences onto their yellow strips. Explain that they now have to close/finish/end the paragraph or STOP. Ending sentences
can (a) repeat the topic sentence in a different way, (b) express how we feel about the topic, (c) express what we think about the topic.
Have learners place the strips one under the other. Remind learners that their strips represent the traffic light. Have learners read aloud their paragraph. Explain that the yellow strips (supporting
sentences) can be moved around so that the paragraph is in order or makes more sense.
Paragraph Sequence Write the sentences of a paragraph onto separate sentence strips. Place strips into a large envelope. Learners need to place the sentence strips in the correct order to create a paragraph. They then can copy the paragraph and change it if they wish.
Cross Out Give learners paragraphs that have some sentences that are out of place (i.e. don’t belong
in that paragraph.) Ask learners to cross out those sentences and replace them with original writing that fits
better.
Product Descriptions Test learners’ non-fiction skills by composing product descriptions. To complete this activity, open your household junk drawer. Without looking, pull a handful of objects out of the drawer and bring them to your
lesson. Lay the objects out in front of learners and contemplate how they could describe them. Ask learners to pretend they are charged with preparing catalog descriptions. Write a concise yet enticing description of each object that would encourage readers to
purchase the featured product. Encourage them to use lively adjectives and clear prose to make the product descriptions
shine.

Online Resources:http://grammar.ccc.commnet.edu/grammar/quiz_list.htmhttp://www.daily-writing-prompt.com/index.htmlhttp://grammarandcomposition.wikispaces.com/Basic+Paragraph+Structurehttp://www.palmbeachschools.org/multicultural/documents/FramedParagraphs.pdfhttp://www.spellingcity.com/paragraph-writing-practice.htmlhttp://www.bbc.co.uk/skillswise/topic/building-up-paragraphshttp://www.eslgold.com/writing/topics.html
Printed Resources:Write Away 3: A Course for Writing EnglishWriting Skills Reproducible WorkbookBasic English BrushupExercising Your English Book 3Pre-GED Writing Skills
WRITING 2.4.6USE THE WRITING PROCESS TO DEVELOP A MULTI-PARAGRAPH PIECE.
Pre-Writing Activities Freewrite:
o Without referring to the text their notes, ask learners to write for five to ten minutes on all the images they can recall about a piece of reading, movie, or event. This will provide an initial list that will make up their body of evidence.
Review:o Ask learners to look back through the text and their notes to further identify
evidence, keeping focused on the particular topic they want to discuss. Research
o Once they've identified enough evidence for their paper, they may want to do additional research.
Evaluateo Learners might generate more evidence than they can use. One way to decide
which evidence to take and which to leave is to limit their choices to the best, most illustrative examples they can find. Focus on how the devices are used to develop major characters, major scenes, and major turning points in the work. Help learners evaluate which pieces of evidence to use.
Generating Ideas Through Pre-writing Pre-writing strategies help develop ideas on a topic. They are useful in helping learners
narrow down a topic that is too big or broaden a topic that is too small. There are several different, and useful, pre-writing techniques. Two of the simplest types are brainstorming and clustering.
Brainstorming is simply writing on paper all the ideas that come to mind about a topic. There is no right or wrong way to brainstorm. Learners just write anything they think of in no particular order or sequence.
How to Brainstorm a Topic: Have learners choose the topic they’re interested in writing about and write it at the top of the paper. Write as many words, phrases, or sentences as they can think of underneath the topic. Once they’ve finished writing down as many ideas as they can, examine the ideas to see if any of them have anything in common. They’re likely to see that some of the ideas are related and have things in common. Have them identify these relationships, or similarities, and create several categories for the ideas. Write those on the backside of the paper. Have learners look at the brainstorming list and lump the ideas into the categories.
Clustering is an idea web. Once learners have their topics, clustering can help generate ideas about that topic and recognize relationships between ideas. These relationships become categories that eventually could make up the bulk of an essay. Clustering will also help learners weed out ideas that are weak and spotlight ideas that are strong.

How to Cluster a Topic: Ask learners to write their topic on the top of the page. Generate ideas by writing down everything that comes to mind about that topic and circle those ideas. They should be scattered over the page. Once learners have finished generating ideas, have them examine what they’ve written and draw lines between those ideas that share a connection. Any connection will do, and they may add new ideas to the cluster if they come up with more while making connections. Single out those ideas that have the most lines connecting them to other ideas. Learners should aim for three or more. Learners should ask themselves what the relationships or connections are between the ideas they chose. These become categories. Aim for three or more categories and write them on a separate page. Beneath each category, have learners write the ideas that they felt fell into each category. These categories and ideas can be used later to make up the paragraphs of the essay.
Descriptive Essay Choose a topic that is familiar and personally relevant to learners; make them experts on
the subject matter Ask them to describe a person, place or thing When possible, learners should describe it as experiences through all five senses; sight,
smell, sound, touch, taste should be shared as vivid images
It’s In The Bag Put an object in a paper bag and close the top. Ask learners to reach in and touch the item, then describe what they feel After they’ve written some adjectives describing the feel, have them take the object out
of the bag and describe it using the other four senses (taste only if applicable) Ask them to translate their descriptive words into sentences, then paragraphs. Have them organize the essay according to the sense descriptions.
Getting Started Before beginning the paper, have learners ask themselves several questions:
Who is the audience? 2. How much do the readers know about the topic? 3. How do the readers feel about the topic? 4. How do the readers expect me to treat the topic?
Next, brainstorm about your topic. Then, think about the organization process:
What points from my brainstorming can I use in my essay?How do I want to arrange them?Do any points fall into categories?Do I have enough details to support my points?Can I explain my major points?What does all this mean, and why is my topic important?
Methods of Organizing the Main Points Chronological order: Follow the order of events in time.
o Use this method to explain a procedure, describe a natural process, or create a narrative. Use words such as first, second, third, next, and finally to show the passage of time.
Spatial Order: Follow the movements of an imaginary eye surveying a scene. Cause and effect: Explain one point as the result of or reason for another. Order of importance: Arrange the paragraphs in order of ascending or descending
importance. Opposition order: Oppose one point to another. Opposition arrangement works well at the
beginning of a persuasive essay and in compare and contrast essays. Categorical order: Explain one large group by describing its sub-groups.
Post the major stages of a writing process (pre-writing, planning, drafting, post-writing) and brief information about each so learners can determine where they are at any time in the process.
Online Resources:http://stickyball.net/writing.htmlhttp://grammar.ccc.commnet.edu/grammar/quiz_list.htmhttp://www.enchantedlearning.com/essay/index.shtmlhttp://www.bbc.co.uk/skillswise/topic/planning-your-writing
Printed Resources:Writing Center Manual for Basic WritingWriting It DownWrite Soon!Ready to WriteWriting Talk: Sentences and Paragraphs with ReadingsKeys to Good Language

WRITING 2.4.7USE REVISION STRATEGIES.
Rainbow Editing Reread the rough draft with learners Make sure you have one colored pencil for each color in the rainbow. Let learners know that rainbow editing isn't used just for pointing out mistakes -- it also
can show what works really well. Have learners edit the rough draft using the color key below. (Feel free to adapt the color
key to suit learners’ needs.)o Use a red pencil to circle misspelled words.o Use an orange pencil to underline descriptive words.o Use a yellow pencil to circle transition words.o Use a green pencil to underline the topic sentence and the concluding sentence.o Use a blue pencil to mark words that should be capitalized or to add in
punctuation.o Use a purple pencil to circle boring words that could be replaced.
If learners have a tough time getting used to the technique, help them out. This can be a team effort. You can even try taking turns to spot words or phrases that need to be marked.
After the editing is finished, have learners write out their final draft on a separate sheet of paper.
Editing 101 On a separate sheet of paper, write the following acronym, with each letter written in a
different color:o C ___o U ___o P ___o S ___
Begin with “C”. Scan learners’ essay together (each with your own copy) looking only for capitalization errors. Make corrections in the “C” color. Once all capitalization errors have been identified and corrected, put a check next to the “C”.
Move on to “U”. Follow the same process, but have learners read the writing piece aloud. If there are errors, ask, “Does that sound right? Did you use the correct words? How can you make it sound better?”. Make corrections in the “U” color and put a check next to the “U”.
Follow the same process for “P” and “S”. Use corresponding colors when fixing punctuation and spelling errors.
CUPS is a useful strategy for helping learners become independent writers. It is a quick acronym learners can jot down at the bottom of any piece of writing to help narrow their focus when making corrections. In this way, revising and editing are made simple — and the steps are easy to remember — C-U-P-S!
Make A New Ending Go over the rules for commas and periods with learners. Have learners look at the use of character dialog in their favorite book or story. Ask them
to point out examples of how the author correctly used quotation marks and commas. Now put this skill to good use: have learners compose an alternate ending to the book or
story, rich with lines of character dialog requiring quotation marks and commas. When finished, read the new ending together with learners to be sure they used quotation
marks and commas properly.
What’s Wrong With It? Provide written sentences from learners’ writing (an old LEA works well for this) Have learners rewrite the sentences correctly. They should then give explanations as to why they made certain changes. Focus on one area at a time (you may want to provide a list of brief rules for reference) Alternatively, use random sentences from articles you’ve previously read and insert
mistakes.
Accuracy When Checking Learners often aren't very good at looking for mistakes in what they have written when
comparing it to the original text. It can often be easier to check the errors in someone else's text rather than in our own. It’s a good idea to leave some time between completing the dictation and checking the
text against a correct version as learners are often better able to find their errors with 'fresh' eyes.
Doing this will also be good training for learners, giving them strategies for checking their own written work.
One Perfect Paragraph This is a simple e-mail activity that helps learners practice editing short paragraphs
looking for grammar, agreement, spelling, and structural mistakes. Prepare one practice paragraph or two with several mistakes and sends it to learners.
Explain, “This paragraph has about 9-10 mistakes. Find and correct them. Drag and select the paragraph with mistakes, then copy from the Edit menu. Click on Reply. Then paste from the Edit menu into your reply. Find and fix the mistakes. Send back the corrected paragraph to me. Continue this until the paragraph is perfect.”
Editing ParagraphsExplain that the editing stage is when learners check their paragraphs for mistakes and correct them. Grammar and Spelling 1. Check your spelling.2. Check your grammar.
3. Read your essay again.4. Make sure each sentence has a subject.5. See if your subjects and verbs agree with each other.6. Check the verb tenses of each sentence.7. Make sure that each sentence makes sense.Style and Organization 1. Make sure your paragraph has a topic sentence.2. Make sure your supporting sentences focus on the main idea.3. Make sure you have a closing sentence.4. Check that all your sentences focus on the main idea.5. See if your paragraph is interesting.Self-Conference ChecklistAs you write ... Ask yourself some of these questions: - How do I feel about what I've written so far? - What is good that I can enhance? - Is there anything about it that concerns me, does not fit, or seems wrong? - What am I discovering as I write this piece? - What surprises me? Where is it leading? - What is my purpose? - What is the one most important thing that I am trying to convey? - How can I build this idea? Are there places that I wander away from my key idea? - Who is my audience?
Verbalizing Explain to learners that after they write their reports, it is important that they go through
an editing process to ensure the information is communicated efficiently and correctly. Reading the material aloud will help them find any errors they may not have noticed
while writing. Pronouncing the words individually helps find any errors. They may also want to read each sentence individually starting from the last sentence and
working their way back. This will help to objectify the text because they won't become focused on the flow of
information, but rather the words and sentences.
Online Resources:http://grammar.ccc.commnet.edu/grammar/quiz_list.htmhttp://www.oswego.org/ocsd-web/quiz/mquiz.asp?filename=tandersoquoteshttp://www.primaryresources.co.uk/online/speechmarks.htmhttp://www.english-the-easy-way.com/Editing_Proofreading/Editing_Proofreading_List.htm
Printed Resources:Write to the PointPut It In WritingInteractions II: A Writing Process BookMosaic I: A Content-Based Writing BookIn Our Own Words

Write Away 3

WRITING 2.4.8CORRECTLY USE GRAMMAR PATTERNS.
Color Coding The following simplified example demonstrates a technique that can be applied to more
complex language forms. Give learners highlighters. Use different colors to represent the parts of speech. Walk through an example sentence and then have learners highlight the nouns, verb and
adjectives with different colors. Next, give them cloze sentences that isolate a targeted part of speech. For example:
o "The _______ ball bounced to the girl." Have learners color code the parts of speech they recognize. Ask questions about the
sentence. "What part of speech is missing from the sentence? Can you think of a word to fill the blank?"
Transition-Action-Details The Transition-Action-Details strategy is very useful. Opportunities to describe a
sequence of events come up all the time: in narrative fiction and non-fiction writing, in plot summaries for reading, in the steps of solving a math problem, in social studies when learners recount an historical event, in science when they study chemical processes, and so on.
Create a chart that has three columns: Transition-Action-Details When filling out the Transition-Action-Details chart, start in the “Action” column first. Encourage learners to fill in the first box with the first thing that happens. Then, go to the last “Action” box and write the end. Now, fill in everything in between. When learners finish the “Action” column, add a
couple of details for each action. Finally, come up with simple phrases in the “Transition” column that introduce each
action. When learners describe something as a sequence of events, they can use the same basic
structure every time. That structure has three parts:o Transitions. These are short phrases like “Then” or “After a while” or “In the
beginning” that help to introduce each new action in the sequence. Learners don’t have to have a transition for each action, but they can be very helpful at making the sequence flow smoothly.
o Actions. These are the actual events (the things that happened) listed in the order in which they occurred.
o Details. This is additional information about each action. For each action, the audience will probably have two or three important questions the writing needs to answer. These answers are the details.
Past, Present, Future Create a chart that’s labeled Past, Present, Future Ask learners to place the following events in the correct column.

Write the events on the chart as the learners suggest where they should go. Learners may suggest that some of the events may belong in more than one column (e.g.,
baseball season): o My birtho December of 2008o George W. Bush’s presidencyo First manned space flight to Venuso George Washington’s presidencyo First woman presidento Baseball seasono Discovery of electricityo The force of gravityo Class in sessiono First man on the moon
When learners have placed all the events on the chart, ask them to choose a few of the events from the columns and compose sentences about the events. Ask them to read it aloud, and as they do so, write the verbs from the sentences on the board.
When a variety of verbs (past, present, and future) have been listed on the board, ask learners to point out the verbs that tell that something happened in the past, the ones that tell that something is happening in the present, and those that tell something will happen in the future.
Point out that the verb(s) in a sentence tell, not only what happens, but also when. Ask learners to consider the verb run. Today I run around the field. Yesterday, I ran
around the field. Tomorrow, I will run around the field. Point out that past, present, and future are not the only verb tenses. For example, if
players want to let the coach know that they have been following his advice about running around the field each day, they can say:
We have been running around the field every day for a month. Explain that the verb (have been running) indicates an on-going process. The words
have and been are parts of the verb that help to make the meaning clear. There are many other tenses. For today, focus on past, present, and future.
Explain that writers sometimes confuse their readers by changing verb tenses when they should be consistent (keep the same verb tense). For example, write the following sentence on the board:
o I work on my math homework as I talked on the phone.o Ask learners whether the verb work is past, present, or future. (Present)o Ask learners whether the verb talked is past, present, or future.(Past)o Point out the fact that the verb tenses in this sentence are not consistent (the
same), and readers will likely become confused. Did the writer do his/her homework while they were on the phone, before they got on the phone, or after they got off the phone?
o Show learners two versions of the above sentence with consistent verb tense:o I worked on my math homework as I talked on the phone.
I work on my math homework as I talk on the phone. Discuss how the different verb tenses change the meaning of the sentence.
Online Resources:http://grammar.ccc.commnet.edu/grammar/quiz_list.htmhttp://classroom.jc-schools.net/basic/la-grammar.htmlhttp://www.cengage.com/devenglish/discipline_content/grammarquizzes.htmlhttp://resources.woodlands-junior.kent.sch.uk/interactive/literacy2.htmhttp://www.k12reader.com/punctuation-worksheets/http://www.wartgames.com/themes/punctuation.htmlhttp://www.ego4u.com/en/cram-up/grammarhttp://www.dailygrammar.com/archive.htmlhttp://grammar.ccc.commnet.edu/grammar/quiz_list.htmhttp://ethemes.missouri.edu/themes/1567http://xnet.rrc.mb.ca/leshanson/writing_resources.htm
Printed Resources:Great American Stories 1Quick Write Handbook for Everyday WritersWriting TalkKeys to Good LanguageSurvival English: English Through Conversations
WRITING 2.4.9SPELL WORDS USING STRUCTURAL CUES AND APPROPRIATE RESOURCES.
WORD SORT AND WORD HUNT Ask learners to sort their sight words into categories. You may wish to model how it is
done first. First sort the words according to how they sound. Words with like sounds or patterns
should be placed in the same category. Words can be sorted in more than one way using different categories. Depending on the
abilities of learners, you may wish to provide the categories or have learners determine categories on their own.
Ask learners to identify the spelling patterns that dictated how they sorted their words into each of the categories. For example, words with the short /a/ sound usually end in a consonant versus words with the long /a/ sound usually end with the letter –e.
Ask learners to write a summary that explains how they sorted their words into the various categories.
After the word sort is completed, learners will begin the word hunt. The word hunt will help learners apply generalizations that they just learned through the word sort activity. It also helps them see how the word patterns that they are learning are used in a variety of texts.During the word hunt, learners should search through print materials to locate other words that fit the spelling patterns they are currently studying. Print materials may include dictionaries, thesauri, novels, newspapers, magazines, content area texts, and trade books.
Learners should make a list of the words they find during the word hunt that fit the patterns they are studying.
USING THE WORDS IN CONTEXT
Using their word lists, ask learners to create written texts that use their words in context. You may wish to model the process for them; also model and discuss what to do if they do not know the definition of a word.
Texts can be written in any form, such as poems, stories, jokes, riddles, and so on. Anything goes, as long as they use a specified number of spelling/vocabulary/sight words.
After the texts are written, ask learners to revise and edit their texts.
Finding Misspelled WordsHelp develop more independence in learners’ editing skills.
Instead of correcting misspelled words, tell learners how many words they misspelled. Ask them to find the mistakes themselves, forcing them to study the words more
carefully.

Story Puzzles Write a short story together, from 5 sentences up to 3 paragraphs in length will work
well. Use as many spelling words as possible. Read the story aloud together two or three times. Erase the spelling words in the story (or cover with post-its). Ask learners to read the story aloud, remembering to add in the words that were erased. Ask learners to fill in the missing words, being careful to spell them correctly.
Using a Dictionary to Aid Spelling Have learners write down the ways they think the word might be spelled and begin
checking in the dictionary from the one that looks the most right. Teach learners to find related words and hope the word is listed. Can't spell colonel? Try
major or general. Most dictionaries have a section of commonly misspelled words. Teach your learners to
use it. If learners use a computer to write, teach them to do what you probably do: give their
best guess at spelling and see what spelling checker suggests. It's always a good idea to confirm with a dictionary that the suggested word is actually what the learners wanted.
Print out the handy sound to letter chart for spelling as a reference for your students. (It's a pdf from The Phonics Page)
Online Resources:
http://www.bbc.co.uk/skillswise/topic-group/spellinghttp://grammar.ccc.commnet.edu/grammar/quiz_list.htmhttp://www.kidsspell.com/http://classroom.jc-schools.net/basic/la-spell.htmlhttp://www.spelling.hemscott.net/#tophttp://resources.woodlands-junior.kent.sch.uk/interactive/literacy.html#10
Printed Resources:Writing TalkPower EnglishExercising Your English: Book 2Dr. Fry’s 1000 Instant WordsPatterns in SpellingWord Book for Beginning WritersThe Spell of Words

WRITING 2.4.10WRITE A NARRATIVE PIECE USING PERSONIFICATION, SETTING, ACTIONS, AND THOUGHTS THAT REVEAL IMPORTANT CHARACTER TRAITS.
Action-Feelings-Setting Every time learners begin writing about a new scene in a fiction or non-fiction narrative,
make sure their readers get three types of information:o Action. There’s something important happening in this scene. If there wasn’t,
learners wouldn’t be writing about it. Readers are following the action closely. Learners need to describe the action simply and completely so people will know what’s going on.
o Feelings. There are important people in this scene and they have feelings about what is happening. The writer wants readers to care about the story. The best way to do that is to describe how people feel and why they feel the way they do.
o Setting. Readers sometimes get confused if they don’t know where and when something is taking place. They also like to know about things that led up to what the writer is writing about.
Every narrative story learners write, fiction or non-fiction, is made up of scenes. And in every single scene, readers need to understand the action, feelings, and setting information in order to enjoy and appreciate your work.
FEELINGS-- Describe the feelings of the important people in this scene. Tell what they are feeling and why they feel that way.
SETTING-- Tell where and when this is taking place. Also, include a detail or two that tells something interesting about what led up to this situation.
ACTION-- Describe what it is happening. A sentence or two about the main action is all you really need. If this story is about you, describe what you are doing.
Go Direct Learners are asked to write a variety of paragraphs, but often aren’t sure how to structure
the sentences within them. They know what they want to say, but may need help putting it in order. “Transition words” are tools that will help learners align their sentences and improve the overall flow of paragraphs.
If your learners’ paragraphs need to transition from out-of-order to organized and smooth, try this simple, real-life activity.
Begin by asking learners about their favorite local destination spot. Next, ask them to write the driving directions for you. Ask learners to say the directions aloud first and write them in a short list. For example,
go left on Washington Street, drive for two miles, turn right on Jefferson Avenue. At the third light, turn left into the mall.
Show learners common transition words used to structure paragraphs and make them flow smoothly. Some examples of transitions are “first,” “next,” “then,” “also,” “in addition,” and “finally.”
Ask learners to write the directions in paragraph form, but use a transition word before each sentence.

Guide learners through the process and have them use a red pen or marker to write the transitions.
When they’re finished, ask them to read it out loud to check for errors and to make sure it sounds smooth.
Extension: Continually ask learners to give you verbal directions using transition words. The more they practice using transitions, the more automatic sentence order will become.
New Narrative This activity focuses on writing narrative paragraphs. Choose a short story to read and
discuss. Provide learners with a copy of the story and ask them to highlight the part they liked the
least. Then have them rewrite that section on a piece of notebook paper. The narrative they write should fit exactly in the spot they highlighted, meaning if there is
dialogue in the highlighted section, they should include dialogue as well. Their new paragraph should flow into the next part of the story. When they are finished, ask them to read the new story aloud.
Interrupted Writing Interrupted writing is a fast-paced writing game that forces writers to move their stories
from point A to point B swiftly. It is a game that generates raw material. Any prompts can be given as long as the writing window between them is no longer than
five minutes and at least one of the prompts invites conflict into the scene. Here is an example of how to lead interrupted writing:
"There is a man or woman alone in a room. Describe the room, the person and why the person is alone in the room. You have four minutes."
After three and a half minutes, give a 30-second warning. At four minutes, say, "stop writing" and give the next prompt. For example, "A second person walks into the room. Write about it for three minutes."
After another 30-second warning and the call of time, give a third prompt: "Suddenly there is a loud noise. Write about it for three minutes."
The exercise can go on for three to five prompts. After that, participants become tired. After the last prompt's writing time is complete, give participants five minutes to revise what they wrote.
Characterization Game Ask participants to choose a character, real or imagined. The only rule is that they cannot
choose themselves. Ask them to close their eyes and visualize their character, remaining totally quiet. What is
he wearing, or how does she walk across a room? How does he smile, or how does she interact with her hair? How old is he, or how tall is she?
Then ask participants to shift in their seats so that they are sitting as their character would sit.
Lead participants in several embodiment exercises like "walk around the room with the same walk and pace that you imagine your character would use" or "pretend I am your
character's mother and look at me with the expression your character would have if his or her mother entered the room."
Tell participants that as of now, they are no longer their real selves and are instead their characters. Give them an imagined scene like a barbecue and ask them to pretend they are guests at the scene and have come to meet new people.
Tutor should play bartender or chef to help get dialogue moving (inviting quiet characters to have a burger or a lemonade, for example).
Characters should be directed to ask one another personal "get to know you" questions. After four minutes, shout "stop" and ask participants to quickly write down interesting things they have learned or pieces of dialogue they found memorable.
After two minutes, re-start the party. After three or four takes, ask participants to become themselves again and use the notes they gathered to write a narrative about their experience at the barbecue. Tell participants to use sensory details, specific pieces of dialogue and actual characters they met to write their narrative.
Online Resources:http://grammar.ccc.commnet.edu/grammar/quiz_list.htmhttp://www.custom-essays.org/Essay_Structure.htmlhttp://grammar.about.com/od/developingessays/a/topnarrative07.htmhttp://www.harcourtschool.com/activity/trophies/ideasforwriters/gr4/ideas_narratives_pre/ideas_narratives.htmlhttp://www.myteacherpages.com/webpages/ttravis/writing_class.cfm?subpage=641646
Printed Resources:Reading by All Means: Reading Improvement StrategiesIn Our Own WordsChanges: Readings for ESL WritersWriting Skills Reproducible WorkbookInteractions IIMosaic I

WRITING 2.4.11WRITE A REPORT DEMONSTRATING THE UNDERSTANDING OF CENTRAL IDEAS AND SUPPORTING DETAILS USING AN EFFECTIVE ORGANIZATIONAL PATTERN.
The Classification Essay This activity helps learners understand how to organize thoughts into different categories,
categorize according to a single organizing principle, and offer balanced examples in each category.
Bring a bag of mixed candies to your lesson. Ask learners to sort the bag according to different types of candy (candy flavor, color,
shape, etc.) Once they’re sorted, have learners write a few sentences describing each type and sort
into a paragraph. Use this method for any type of categorizing.
Expository Essay Expository essays can take a variety of forms. They may tell how to make or do
something, report on an experience, or explore an idea. Expository writing conveys information to the reader in such a way as to bring about understanding, whether it be of a process or procedure, or of the writer's ideas about a concept. The purpose of this type of writing is to inform, clarify, explain, define, or instruct by giving information, explaining why or how, clarifying a process, or defining a concept. Well-written exposition has a clear, central presentation of ideas, examples or definitions that enhance the focus developed through a carefully crafted reader's understanding. These facts, examples, and definitions are objective and not dependent on emotion, although the writing may be lively, engaging, and reflective of the writer's underlying commitment to the topic.
Example of an Expository Prompt Below is an example of an expository prompt. The first component orients learners to the
topic: jobs or chores. The second component suggests that learners think about various jobs or chores and then explain why a particular job or chore is done.
Writing Situation: Everyone has jobs or chores.
Directions for Writing: Before you begin writing, think about one of your jobs or chores.
Now explain why you do your job or chore. What to consider when writing an expository essay:
o What process are you trying to explain? Why is it important?o Who or what does the process affect?o Are there different ways of doing the process? If so, what are they?o Who are the readers? What knowledge do they need to understand this process?o What skills/equipment are needed for this?o How long does the process take? Is the outcome always the same?o How many steps are there in the process?o Why is each step important?

o What difficulties are involved in each step? How can they be overcome?o Do any cautions need to be given?o Does the process have definitions that need to be clarified?o Are there other processes that are similar and could help illustrate the process that
you are writing about?o If needed, tell what should not be done or why something should be done.o Responses to these questions and statements should enable learners to write an
effective expository essay.
Word Web Encouraging learners to write down everything they know about the report topic will give
them the starting ground they need to know if they have to investigate the material further.
A word web provides a guide and can trigger ideas as the words interlink. Divide a piece of paper into 6 sections; these will help learners outline information that
deals with each theme of the report. For example, a book report could include sections such as setting, characters, problem,
first and second event and then the solution. This activity essentially breaks up ideas into sections and should allow learners to point
out the most important aspects of the report. With this outline as a reference, learners can begin to write each section of the report.
All the Bases Six questions should be answered in any complete report: who, what, when, where, why
and how. Draw a star with a section in the middle for any ideas that don't fall in one of the six
categories. Place each of the questions in a point on the star. The star will help learners recognize any questions that need to be answered. It will also help learners organize their thoughts. After adding the information to the star, learners may want to jot down further ideas in
their six-division outline.
Index Card Method Ask learners to write down everything they can think of on their topic, using a separate
card for each thought. Do it quickly, without stopping to think. Spread the index cards out in a large rectangle of columns and rows. Separate the main ideas from the rest, marking those cards with a different color. Gather
up the rest of the cards. Use the marked main idea cards to form the tops of new columns. These can be thought
of as categories or labels. Lay the other cards under the column cards to which they're related. Make any leftover cards heading cards---main ideas---if appropriate, or create new
headings under which they might go.

Take stock of the work, rearranging to better group batches of related cards. Decide whether there is too much of one idea, not enough of another and where more research or thought into the topic might be called for.
Order the thoughts in preparation for writing, using one of the methods below.
Choose How To Order Thoughts When Writing Consider a spatial approach to the writing: A spatial approach might be appropriate if
writing about a place or about something that has dimensions, like a house. Start writing at point A, moving to adjoining areas until you've written about all the spaces and places of your subject. If you choose this approach, determine the first and last things you'll write about, and plot a writing path between them by numbering the major topics--the subtopics will be written about before moving to the next major idea.
Consider a chronological approach, which would have you start at the beginning of events, moving through time until the end of the story is reached. Fiction usually employs this approach, as might a history topic. Prepare by ordering the cards from beginning to end or numbering the main idea bubbles in the order in which you'll use them.
Consider starting with the general topics, then moving to those with more specific information. This might be appropriate if your material has few major ideas, but a lot of specific information that supports those ideas. Decide in what order you'll cover those few general topics, along with the more specific supporting information.
Consider starting with the specific topics, then moving to the more general. This might be appropriate if you have specific thoughts that serve as essential examples that illustrate the general ideas or themes. Decide in what order you'll cover the general topics--you'll lead into them with the specific examples.
Consider arranging the ideas (or numbering them) according to a logical order. This is the approach to choose if a reader needs to understand one idea's information before he or she can comprehend another.
Arrange the ideas--moving the cards or numbering the bubbles--in cause-and-effect order, if appropriate, as might be the case when writing about something like a lab experiment or a sequence of events that occur one after another like falling dominoes.
Online Resources:http://grammar.ccc.commnet.edu/grammar/quiz_list.htmhttp://grammar.about.com/od/developingessays/a/topicsprocanal.htmhttp://www.essaypunch.com/writing_prompts.phphttp://www.scholastic.com/teachers/lesson-plan/graphic-organizers-reading-comprehensionhttp://www.educationoasis.com/curriculum/graphic_organizers.htm
Printed Resources:Put It In WritingIntermediate Composition Practice Book 1Basic Composition for ESLWriting By ChoiceESL Writing Intermediate and Advanced
WRITING 2.4.12USE A VARIETY OF RESOURCES TO GATHER AND ORGANIZE INFORMATION.
Composition Based on Oral Interview Have learners interview tutor and write a composition to tell what they had learned about
this partner. Sample topics: 1. Talk about yourself and your family (i.e., where are you from, where your family lives, your hobbies, etc…). 2. Talk about what you like and dislike about your school. 3. Describe a memorable event. 4. Describe your goals and future plans. 5. Describe a recent vacation.
Written Reponses Divide a page into three sections and color code if possible Yellow--Plot Summary—Just the Facts
o What is obvious? Green-Supporting Detail
o Examples, Evidence Blue—Commentary
o Deeper thinking, interpretations, conclusions, so what?, opinions Have learners jot ideas while reading/listening Go back and refine on the chart Turn those ideas into an outline, sentences, essay After learners write the essay, have them go back with highlighters and highlight the
yellow, green, blue areas of their essay to see how they’re organized and adjust if needed
Character Study Ask learners to read (or listen to) a story or article with a compelling character (this
works well if learners have outspoken opinions about someone in the news) Have them outline the character’s most important qualities and find direct evidence from
the text to find proof for their statements Go back and refine their outline, turning their notes into sentences Ask learners to expand on their sentences to craft an essay. Reread the essay—is it well organized? Does it support learners’ original opinion of the
character? Were learners surprised by anything in the article? It’s also fun to compare a fictional character to someone learners know well.
Online Resources:http://englishinteractive.net/Writing/http://grammar.about.com/od/developingessays/a/topicsexamples.htmhttp://www.ohio.edu/linguistics/esl/writing/activities2.htmlhttp://eslbee.com/http://web2.uvcs.uvic.ca/elc/studyzone/
Printed Resources:Pre-GED Skills WorkbookGED Skill WorkbookGED ScoreboostWrite Soon!First Steps in Academic Writing
WRITING 2.4.13WRITE A VARIETY OF SENTENCES.
Compound Sentences Explain to learners that there are two main ways independent clauses can be joined
together to make more interesting sentences.1. Use a semicolon between the two independent clauses.To use a semicolon, the sentences should be very closely related in meaning. 2. Use a comma and a coordinating conjunction between the two independent clauses.This rule is so simple, yet people will ruin it by forgetting the comma or by forgetting the coordinating conjunction..A sentence that has two independent clauses joined together correctly is called a compound sentence. Encourage learners to try to use some of these in their writing.
Use a list of simple sentences learners have written. Ask learners to rewrite the sentences, but this time add a semicolon and another closely related independent clause at the end to form a compound sentence.Then ask them to convert their original simple sentences into complex sentences by adding a dependent clause.
First add the dependent clause to the beginning of the sentence. Then using the complex sentences learners just made, rewrite them by rearranging; now
put the dependent clause at the end.
Revision Exercise Using a simple paragraph learners have already written, ask learners to read it aloud.
Chose a paragraph that has very little sentence variation. Underline each sentence in alternating colors. Discuss different ways to vary sentence patterns. Instruct learners to revise the paragraph by making the sentences more complex. If you are working on the writing process, have learners do the same activity with all
their rough drafts.
Alphabetizing Fairy Tales Show learners how one way to make their stories more interesting is to use a variety of
sentences of different lengths and starting with different words. Explain they are going practice writing a variety of sentences by rewriting a fairytale so
that every sentence starts with a different letter of the alphabet. Provide learners with fairy tale collections and picture books to help them select a fairy
tale. Tell learners they will be choosing a fairy tale to rewrite. Have learners write the alphabet running vertically down the left side of their paper. Ask learners to rewrite the story in 26 sentences. Each sentence must begin with the next letter of the alphabet. Compound sentences count as one sentence; the second sentence in the compound cannot
be used for the next letter.
Learners also need to use a variety of parts of speech for their first words, not just nouns. The dictionary/thesaurus may be useful when learners reach a “block” in their writing.
Online Resources:http://grammar.ccc.commnet.edu/grammar/quiz_list.htmhttp://www.uhv.edu/ac/grammar/pdf/sentence.patterns.pdfhttp://www.towson.edu/ows/sentpatt.htmhttp://www.teacherjoe.us/Grammar.htmlhttp://www.manythings.org/e/patterns.html
Printed Resources:Write to the PointPut it in WritingKaleidoscope Reading and Writing 4Lessons in Writing Sentences Book 2Word Strategies: Building a Strong Vocabulary

WRITING 2.4.14SPELL LESS FREQUENTLY ENCOUNTERED WORDS CORRECTLY USING LEARNED STRATEGIES.
Mnemonic Clues "Sounding it out" does not always work when spelling difficult words. Whether it is by
stacking words or finding smaller words within larger words or something else, learners will enjoy creating ways to remember their spelling words.
Talk about mnemonic clues. Give them some examples (The principal of your school is your 'pal' or you write on stationery and then you put it in an 'e'nvelope.)
Have learners choose 2-3 words they’ve struggled with. Together, brainstorm different mnemonic clues to help learners remember how to spell
the word. Review the clues often during lessons to help learners remember them. People use mnemonic tricks all the time to remember things. Teaching learners to use this
technique will benefit them throughout their lives.
Prefix/Suffix Cards Write the most common prefixes and suffixes on individual index cards and review
meanings with learners Place them face down in a stack Dealer turns the top card over so all players can see the prefix or suffix. The first person who shouts a word that uses that word part gets to try to spell the word. If players are able to write the word correctly, they keep the card. If they can’t write the word, the card goes to the bottom of the deck and play resumes. The person with the most cards at the end of a designated time wins.
Sentence Change Review the prefixes and suffixes learners have learned so far. Explain, Today we will learn more about prefixes and suffixes by changing sentences. Model how to do the activity. Complete each step together with learners. I am going to write a sentence on my sentence strip. I’m going to make sure that at least
one word in my sentence can have a prefix or a suffix added to it. Ok, here is my sentence: “John agrees with me.”
Write sentence on sentence strip. Now, I am going to give my sentence to you. Give strip to learners. Learners will need to change the sentence by adding a prefix or suffix to one of the
words. They are going to use a different color marker so the prefix or suffix stands out. Allow student to add prefix or suffix. Great! The new sentence reads: “John disagrees with me.” This new sentence has a very
different meaning. Continue trading sentences.

Online Resources:
http://www.aasd.k12.wi.us/staff/boldtkatherine/readingfun3-6/readingfun_prefixessuffixesroots.htmhttp://firstschoolyears.com/literacy/word/other/prefixes/prefixes.htmhttp://grammar.ccc.commnet.edu/grammar/quiz_list.htmhttp://www.studyzone.org/testprep/ela4/b/prefix3p.cfmhttp://www.vocabulary.co.il/suffixes/http://www.manythings.org/wbg/prefixes-mw.htmlhttp://www.studyzone.org/testprep/ela4/h/prefixp.cfmhttp://languageartsgames.4you4free.com/affixes_prefixes_suffixes.html
Printed Resources:Longman Dictionary of American English WorkbookTarget Spelling CSay the Word! A Guide to Improving Word Recognition SkillsBuilding Basic Literacy Skills: Book 7Pre-GED Skill Workbook: Writing 1Writing TalkPower English


![FILL IN THE BLANKS - prepadda.comprepadda.com/.../new/SSC-ENG-Fill-in-the-blanks[]-.pdf · FILL IN THE BLANKS Fill in the blanks are asked in tier1 as ... makes (b)puts (c) relies](https://img.pdfslide.us/doc/110x75/5af067447f8b9abc788d1c8e/fill-in-the-blanks-pdffill-in-the-blanks-fill-in-the-blanks-are-asked-in-tier1.jpg)