Embed Size (px)
Citation preview
1
What is Synchro?
A platform that brings schedules and 3D objects together for a 4D solution
A scheduling software that allows you to make changes to your schedule
• within Synchro• within another scheduling software of your choice and import
those changes into Synchro
A scheduling software that allows you to import 3D models and link the 3D objects to your schedule for a 4D visualisation
2
Project schedules can be imported into Synchro from several different schedule software:
ASTA Power ProjectMicrosoft Project xmlPMA Net PointPrimavera P3Primavera P6
There are basic rules for importing; exporting; and synchronizing for each type of scheduling software
3
Prior to importing a P6 Schedule into Synchro you need
• the proper P6 API installed• access to the P6 database where the schedule resides
How do I get the API?
Synchro will provide you the API based on the version of P6 being used and how it is set up – server versus stand-a- lone
4
How do I import a P6 Schedule into Synchro?
Open Synchro and save the blank untitled Synchro project to a new file
5
6
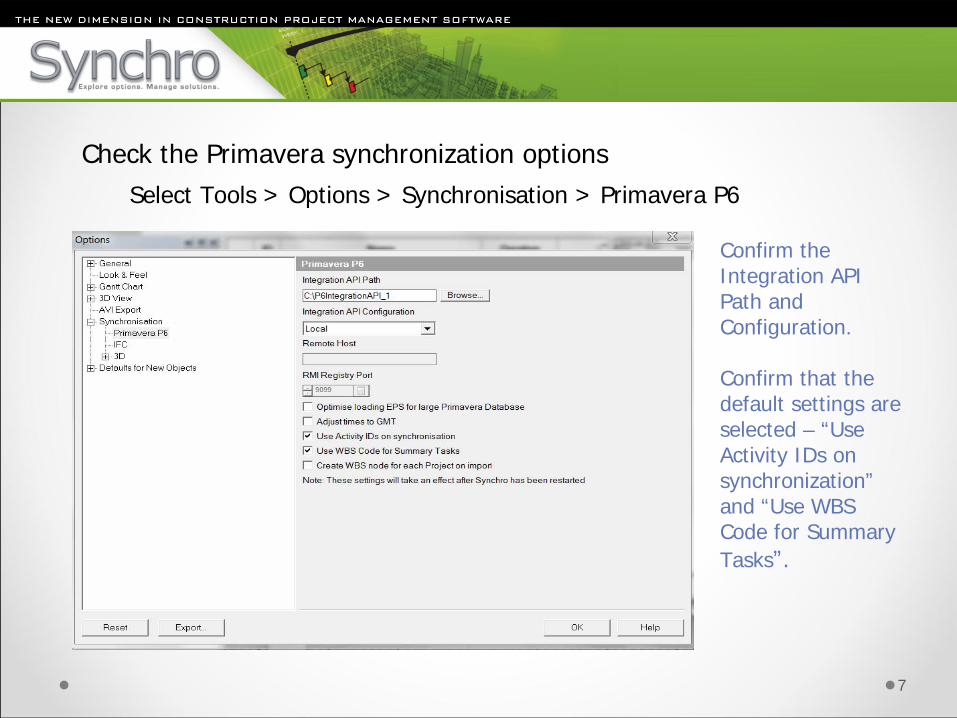
Check the Primavera synchronization optionsSelect Tools > Options > Synchronisation > Primavera P6
Confirm the Integration API Path and Configuration.
Confirm that the default settings are selected – “Use Activity IDs on synchronization” and “Use WBS Code for Summary Tasks”.
7
• If the original schedule and P6 database are used, Synchro will look for GUID’s when synchronizing.
• If the original schedule has been copied then updated or a different P6 DB has been used, if the then Activity ID’s will be compared provided they have not been changed.
• It is possible to change the ID’s in both P6 and Synchro. • The schedules can be synchronized using a different computer and can have a different file
name • Choose the command that best suits what information will be added and what information will
remain in the Synchro file.
8
P6 Synchronization Rules:
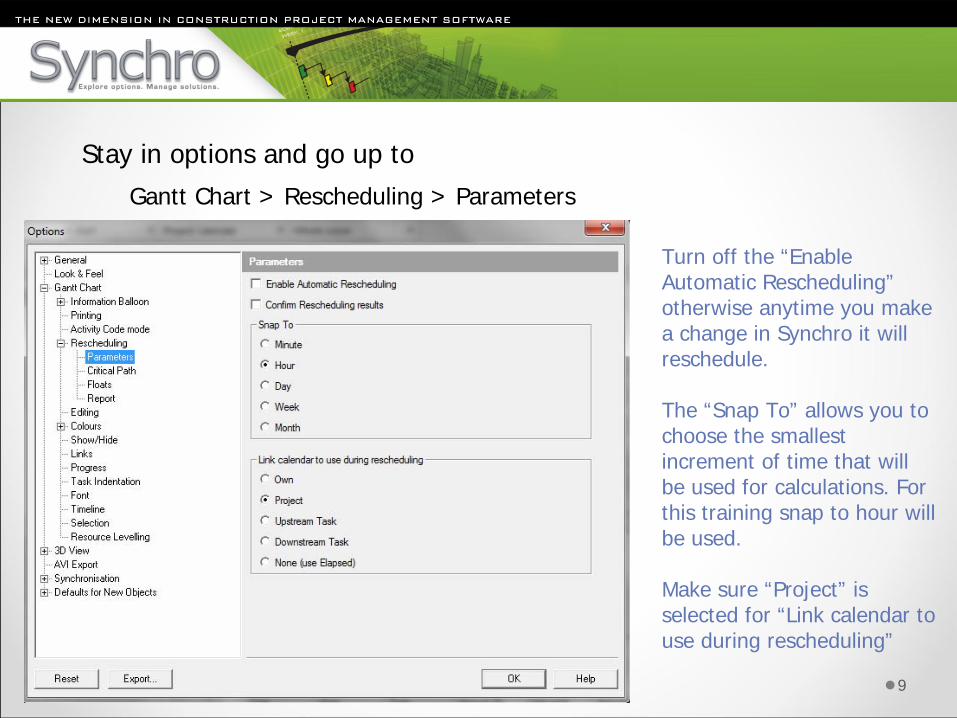
Stay in options and go up to
Gantt Chart > Rescheduling > Parameters
Turn off the “Enable Automatic Rescheduling” otherwise anytime you make a change in Synchro it will reschedule.
The “Snap To” allows you to choose the smallest increment of time that will be used for calculations. For this training snap to hour will be used.
Make sure “Project” is selected for “Link calendar to use during rescheduling”
9
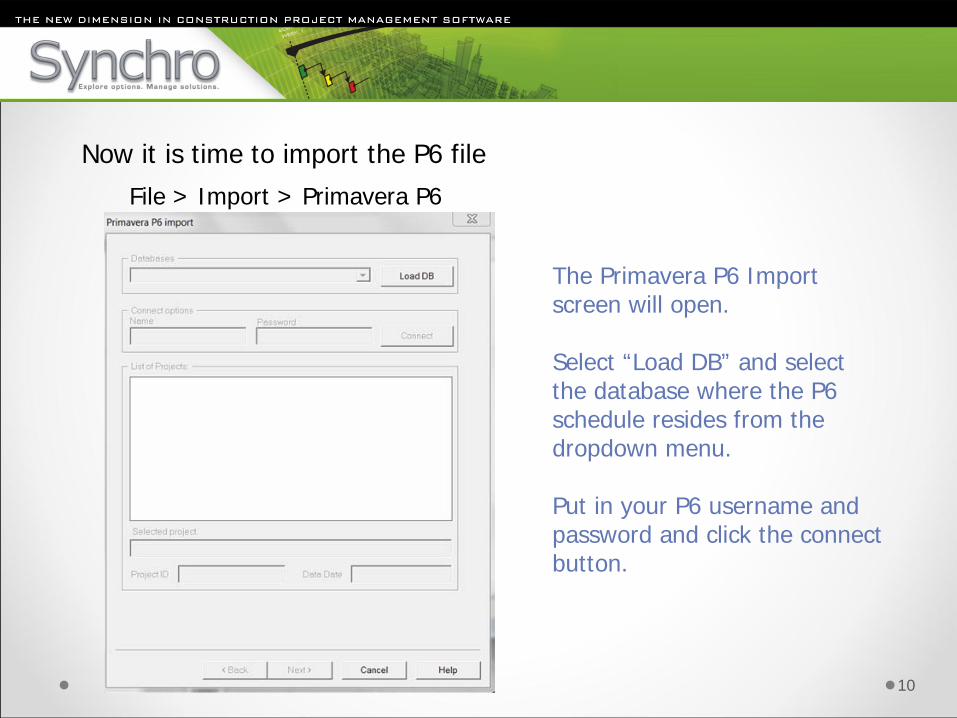
Now it is time to import the P6 file
File > Import > Primavera P6
The Primavera P6 Import screen will open.
Select “Load DB” and select the database where the P6 schedule resides from the dropdown menu.
Put in your P6 username and password and click the connect button.
10
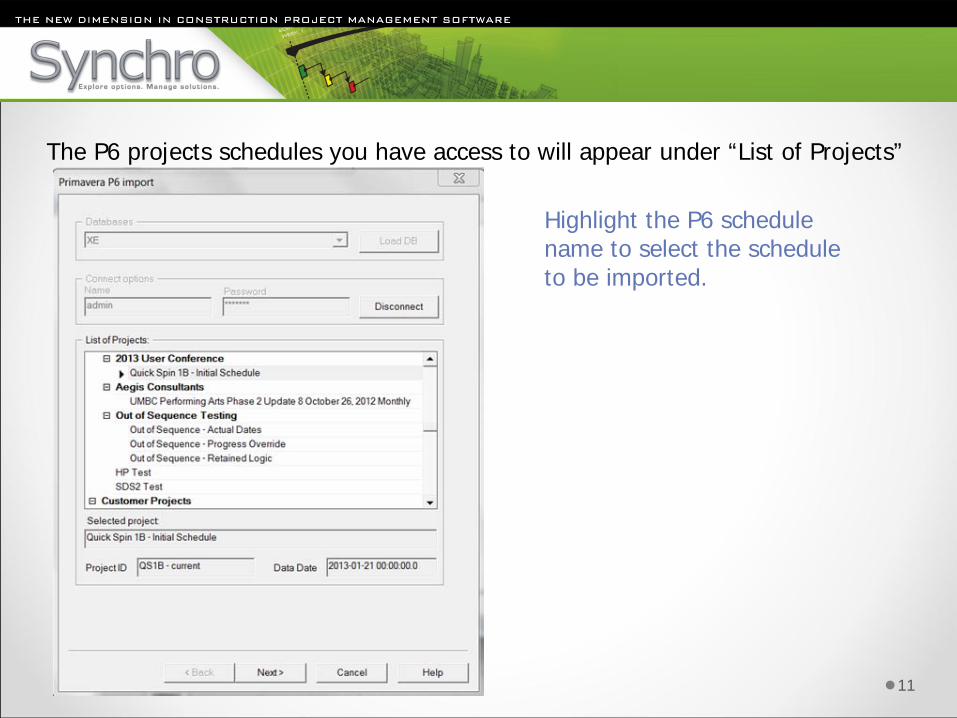
The P6 projects schedules you have access to will appear under “List of Projects”
Highlight the P6 schedule name to select the schedule to be imported.
11
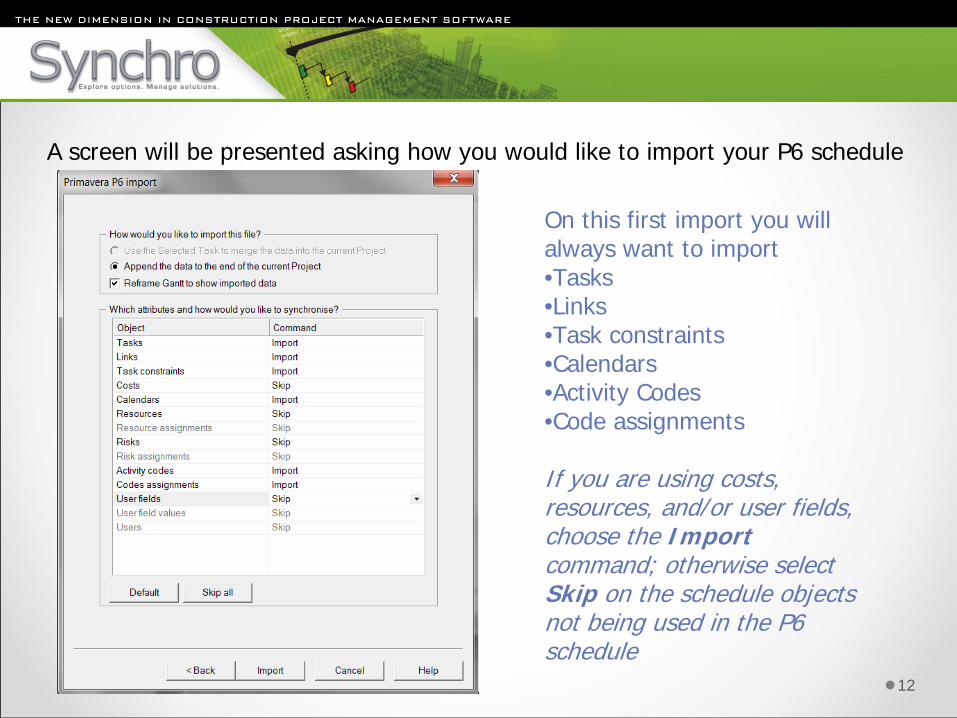
A screen will be presented asking how you would like to import your P6 schedule
On this first import you will always want to import •Tasks•Links•Task constraints•Calendars•Activity Codes•Code assignments
If you are using costs, resources, and/or user fields, choose the Import command; otherwise select Skip on the schedule objects not being used in the P6 schedule
12
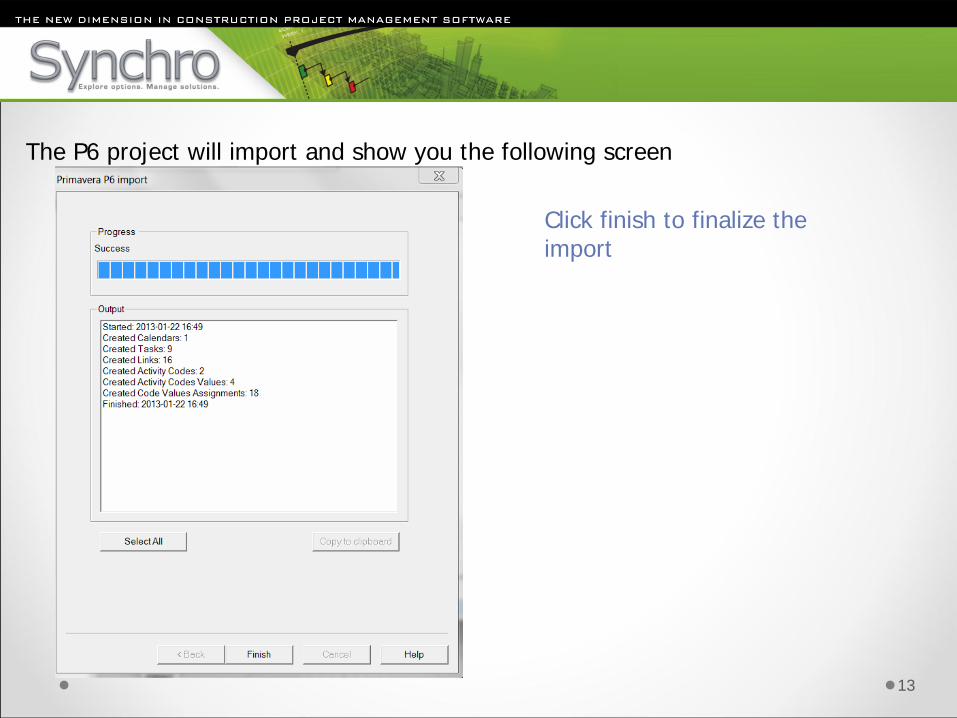
The P6 project will import and show you the following screen
Click finish to finalize the import
13
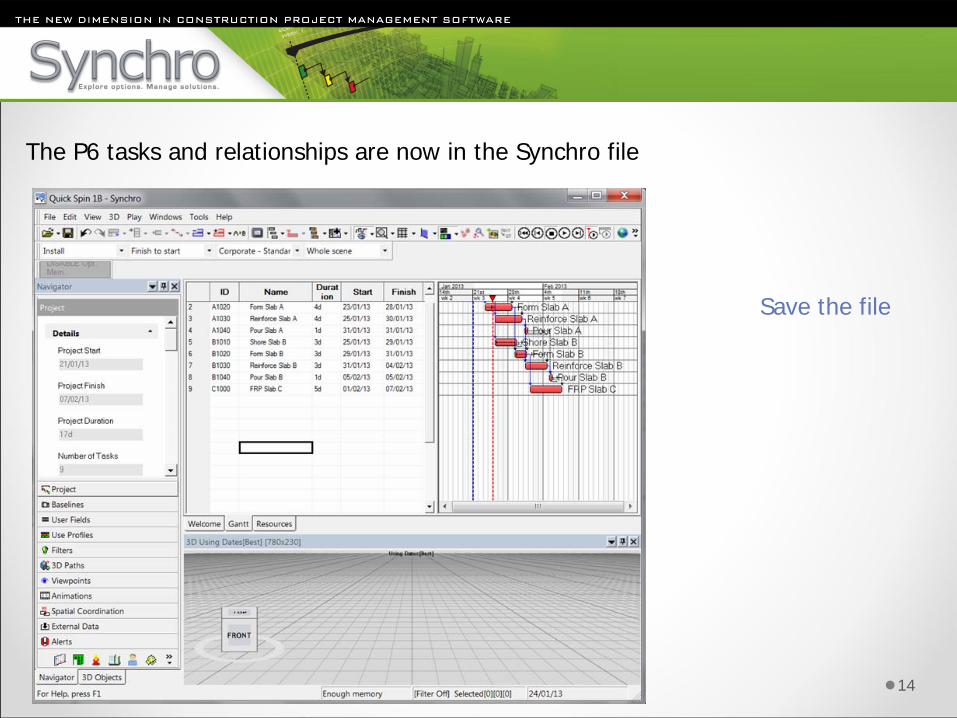
The P6 tasks and relationships are now in the Synchro file
Save the file
14
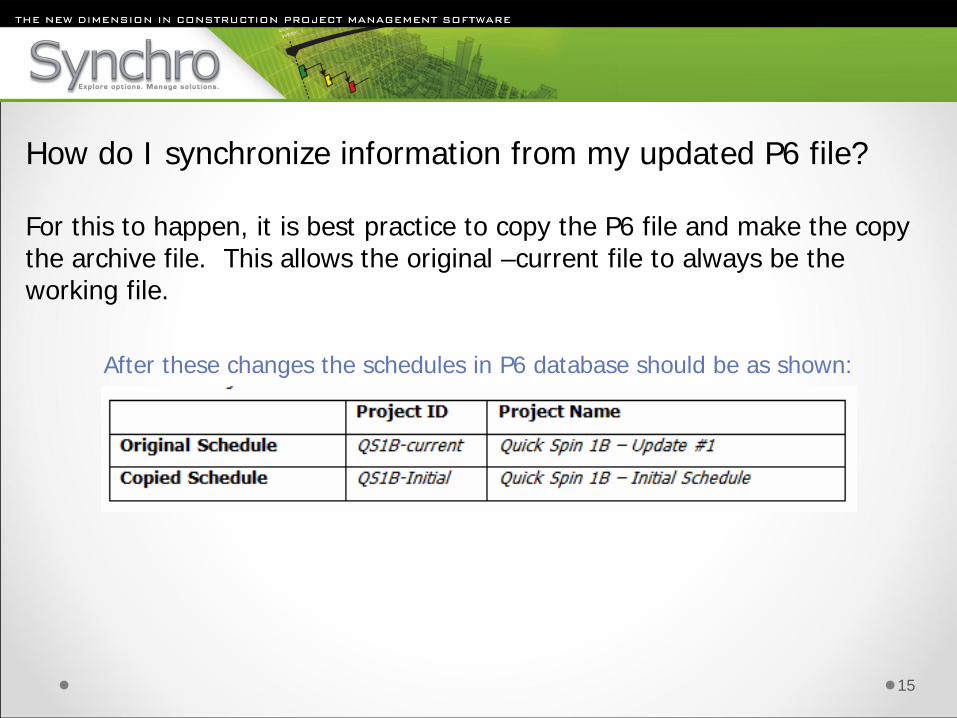
How do I synchronize information from my updated P6 file?
For this to happen, it is best practice to copy the P6 file and make the copy the archive file. This allows the original –current file to always be the working file.
After these changes the schedules in P6 database should be as shown:
15

• Select the “External Data” on the “Navigator” tab
• Highlight the P6 project schedule under Primavera
• Right click and select “Synchronize From”.
16
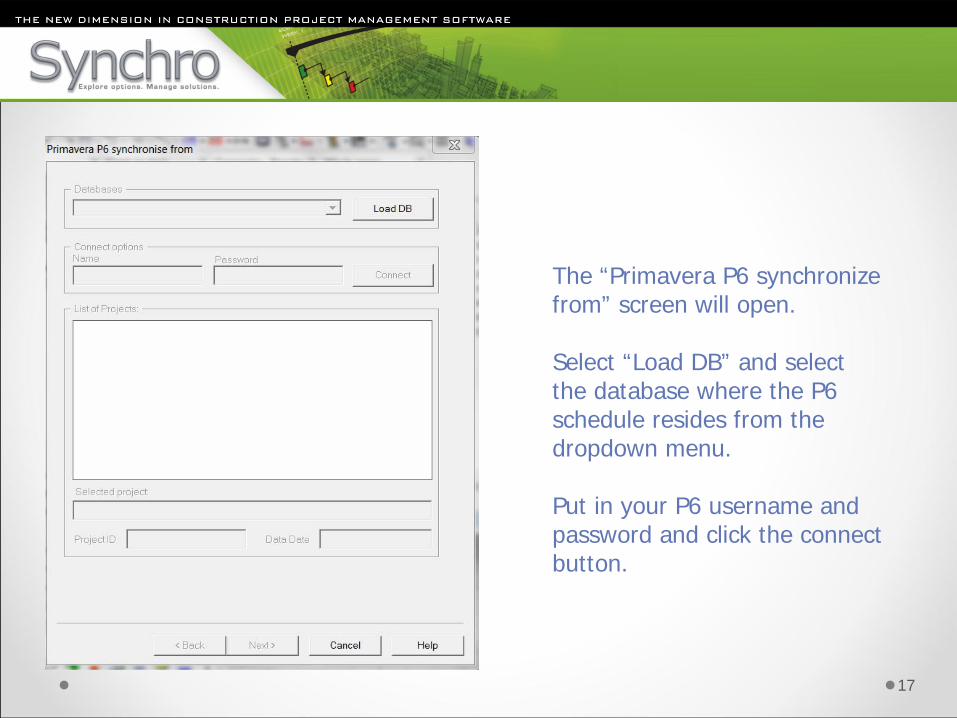
The “Primavera P6 synchronize from” screen will open.
Select “Load DB” and select the database where the P6 schedule resides from the dropdown menu.
Put in your P6 username and password and click the connect button.
17
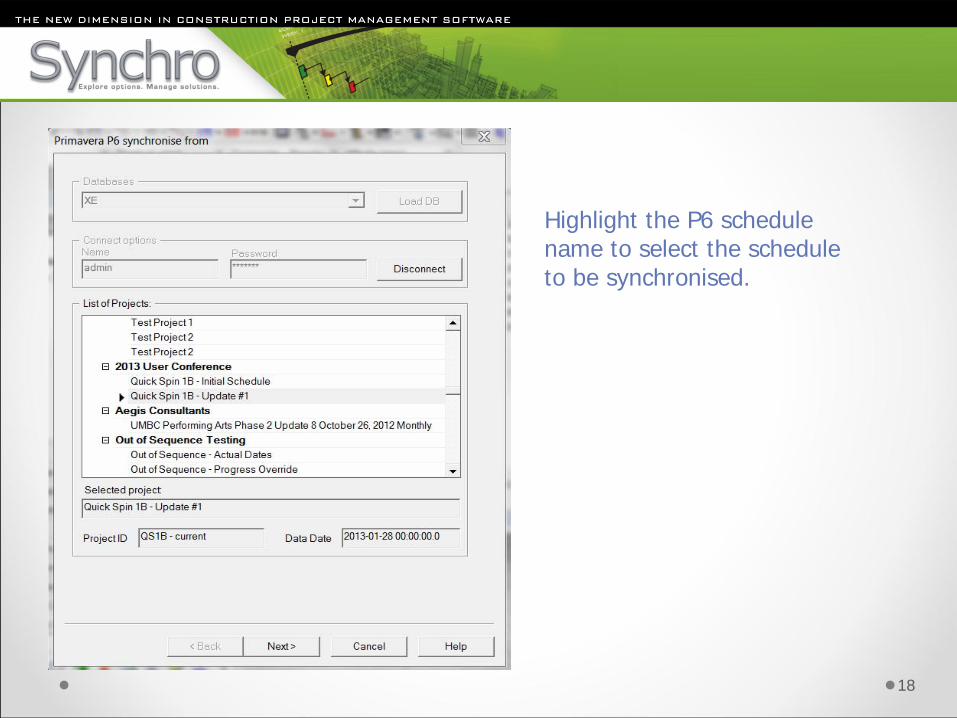
Highlight the P6 schedule name to select the schedule to be synchronised.
18
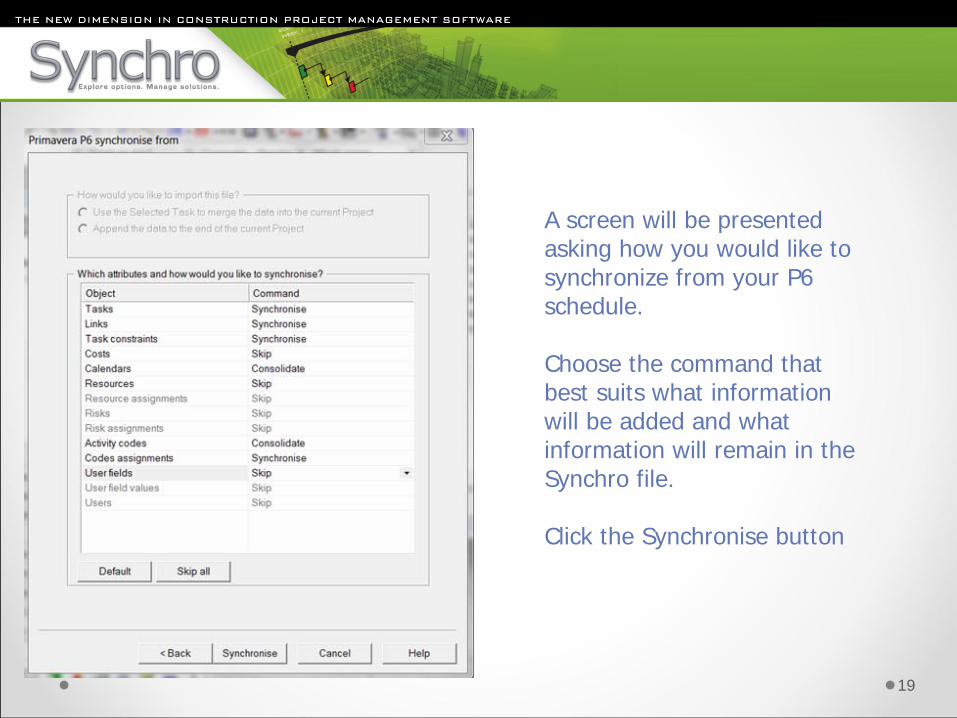
A screen will be presented asking how you would like to synchronize from your P6 schedule.
Choose the command that best suits what information will be added and what information will remain in the Synchro file.
Click the Synchronise button
19
• Skip
This type of object will not be processed
The schedule in Synchro it will be ignore the new updated schedule when synchronising.
• Synchronise - objects will be synchronised according to the following rules:
All added attributes in the new schedule will be added to the existing schedule in Synchro
All modified attributes will be modified accordingly
All deleted attributes in the new schedule will be deleted from the existing schedule in Synchro
Note: The option to Synchronize is not available for P6 global objects (such as Calendars, Resources, Risks and Activity Codes) since these can not be deleted. The schedule in Synchro will be replaced with the new updated schedule when synchronizing.
20
P6 Synchronization Options:
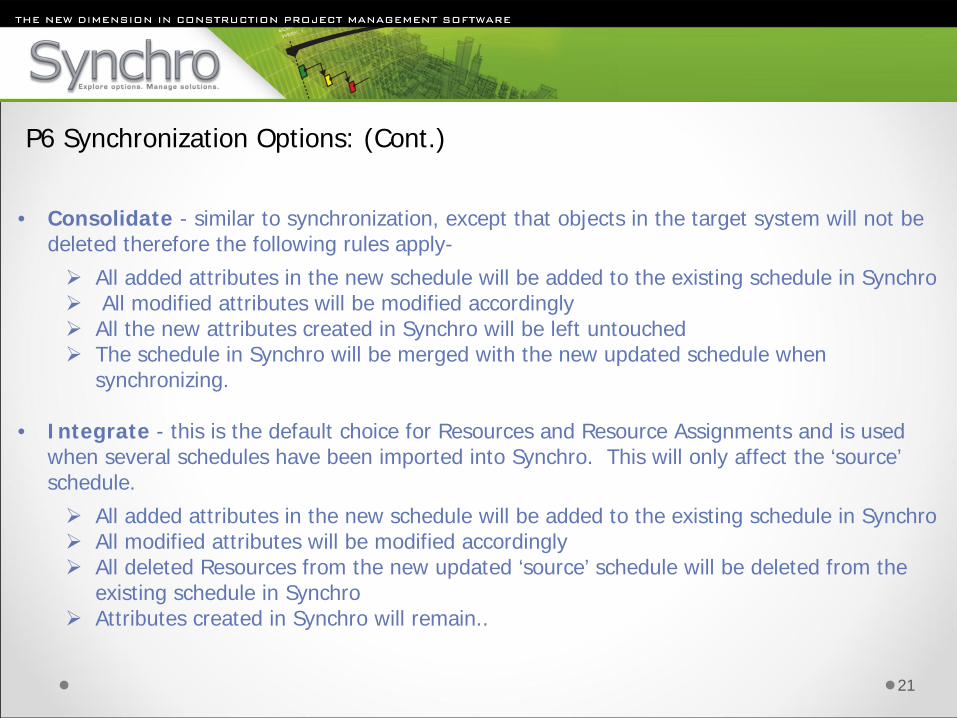
• Consolidate - similar to synchronization, except that objects in the target system will not be deleted therefore the following rules apply-
All added attributes in the new schedule will be added to the existing schedule in Synchro
All modified attributes will be modified accordingly
All the new attributes created in Synchro will be left untouched
The schedule in Synchro will be merged with the new updated schedule when synchronizing.
• Integrate - this is the default choice for Resources and Resource Assignments and is used when several schedules have been imported into Synchro. This will only affect the ‘source’ schedule.
All added attributes in the new schedule will be added to the existing schedule in Synchro
All modified attributes will be modified accordingly
All deleted Resources from the new updated ‘source’ schedule will be deleted from the existing schedule in Synchro
Attributes created in Synchro will remain..
21
P6 Synchronization Options: (Cont.)

Once the synchronization is complete the progress/output screen will pop up listing what was synchronized.
Click finish to finalize the synchronization.
22
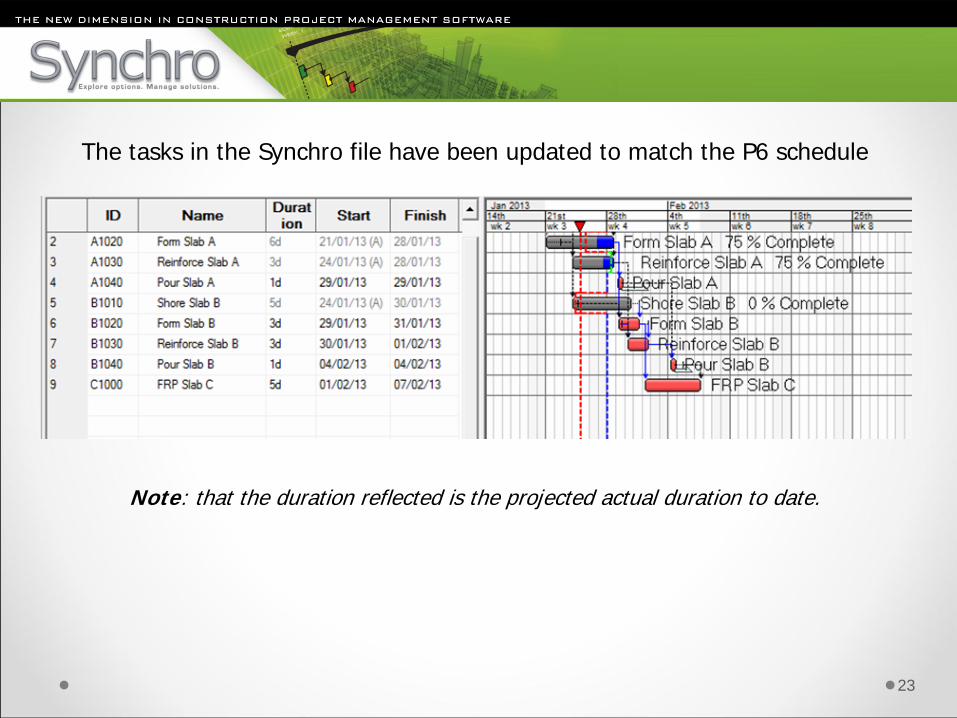
The tasks in the Synchro file have been updated to match the P6 schedule
Note: that the duration reflected is the projected actual duration to date.
23
24
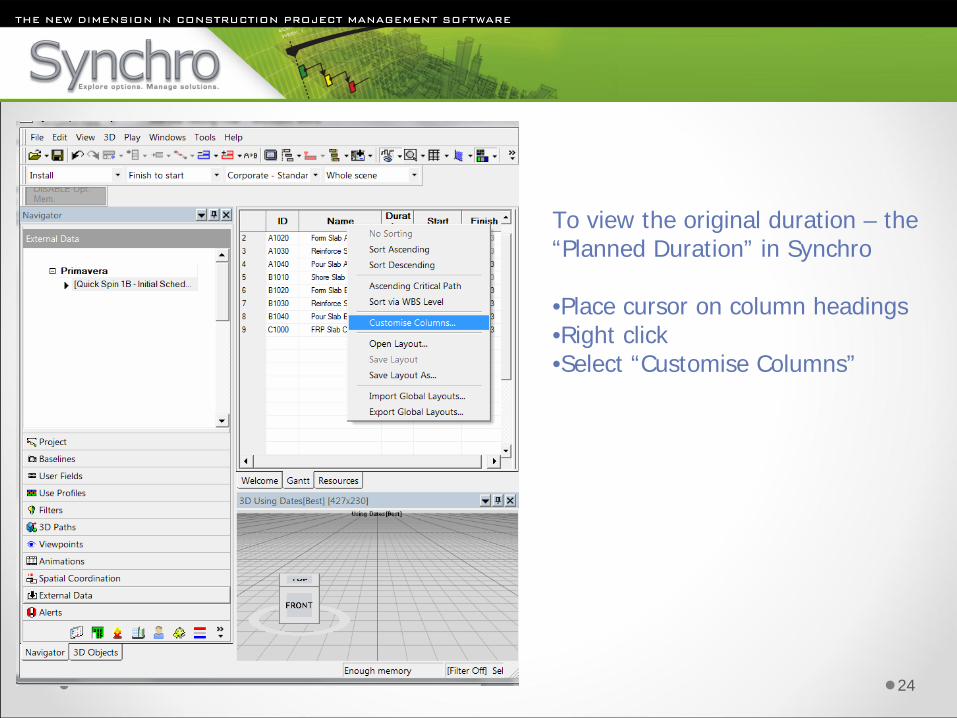
To view the original duration – the “Planned Duration” in Synchro
•Place cursor on column headings•Right click•Select “Customise Columns”
25
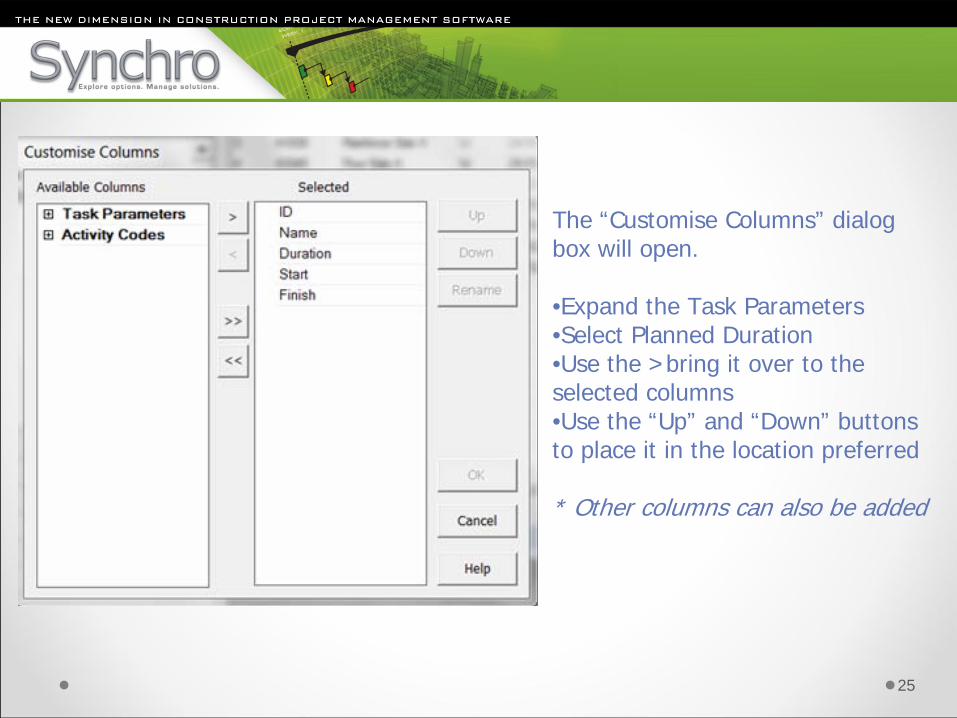
The “Customise Columns” dialog box will open.
•Expand the Task Parameters•Select Planned Duration•Use the >bring it over to the selected columns•Use the “Up” and “Down” buttons to place it in the location preferred
* Other columns can also be added
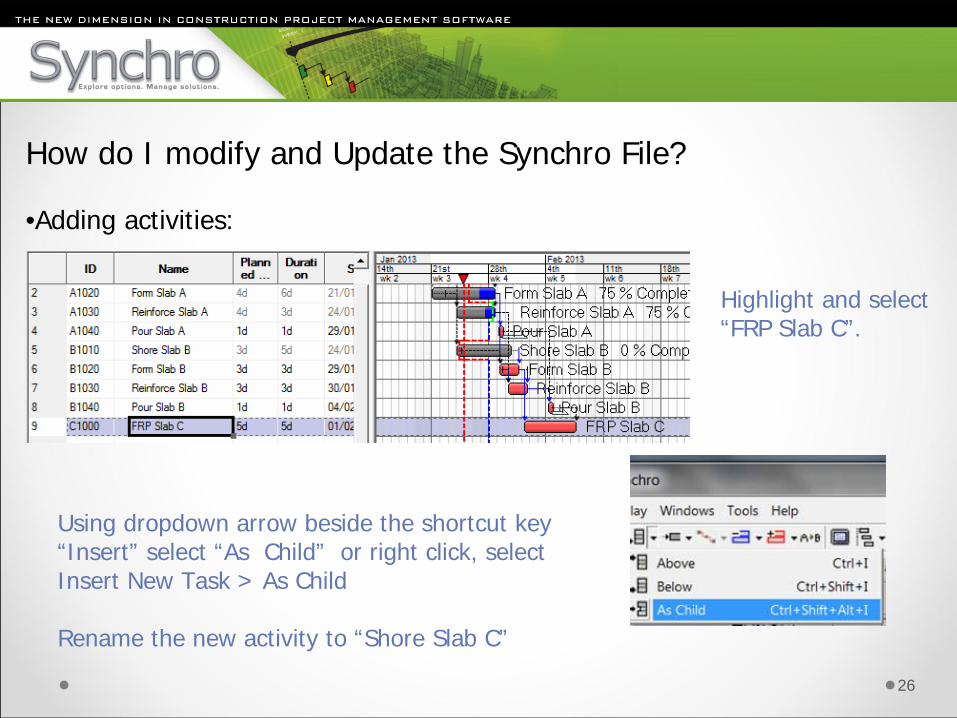
How do I modify and Update the Synchro File?
•Adding activities:
26
Highlight and select “FRP Slab C”.
Using dropdown arrow beside the shortcut key “Insert” select “As Child” or right click, select Insert New Task > As Child
Rename the new activity to “Shore Slab C”
27
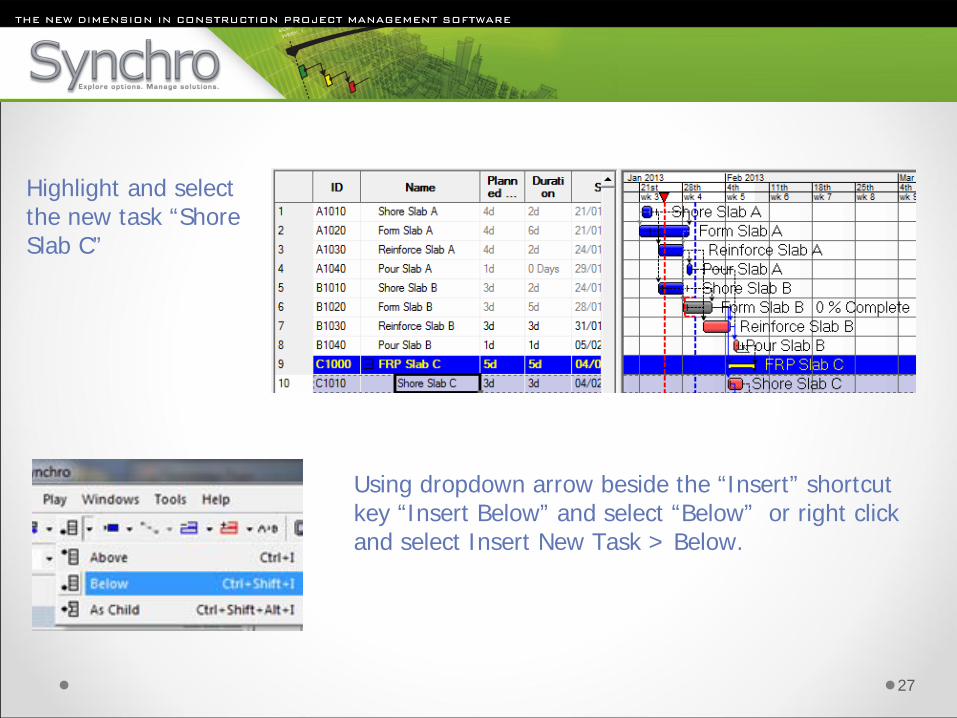
Highlight and select the new task “Shore Slab C”
Using dropdown arrow beside the “Insert” shortcut key “Insert Below” and select “Below” or right click and select Insert New Task > Below.
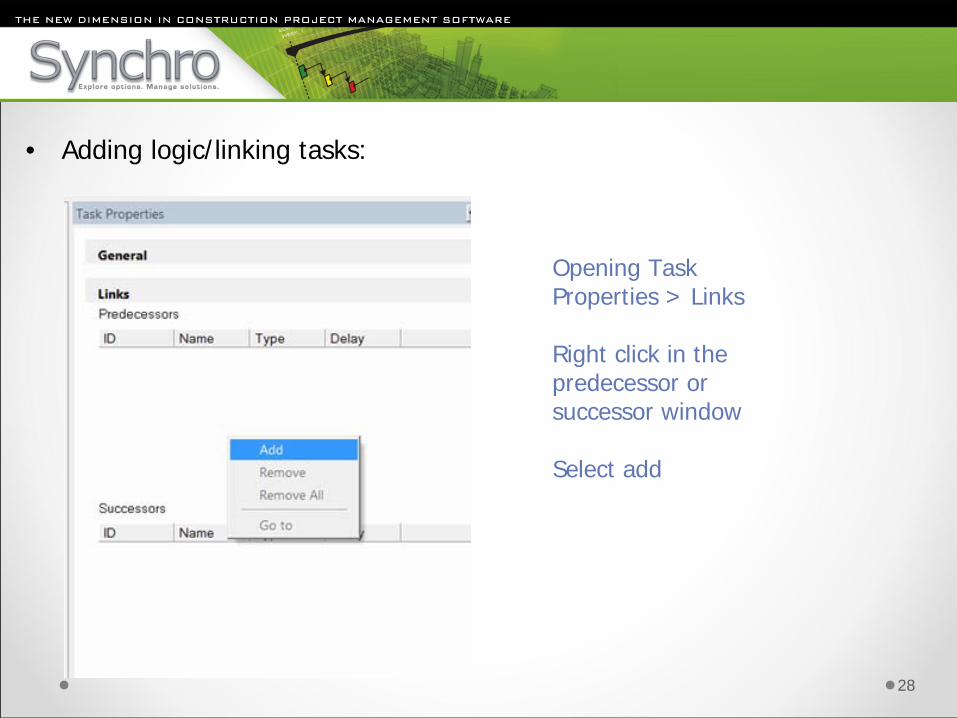
• Adding logic/linking tasks:
28
Opening Task Properties > Links
Right click in the predecessor or successor window
Select add
29
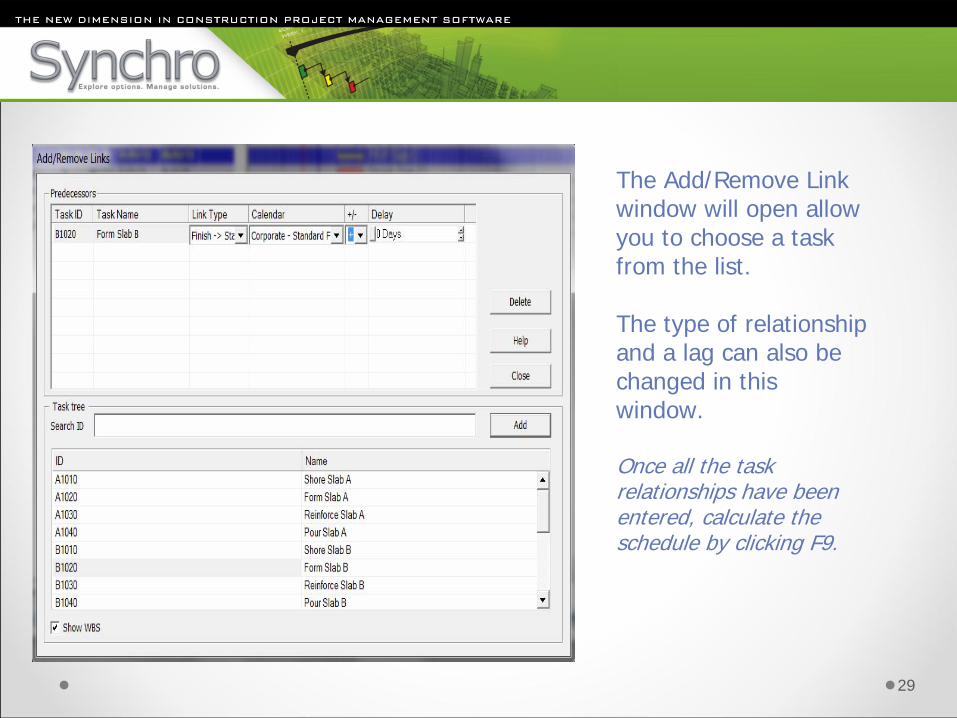
The Add/Remove Link window will open allow you to choose a task from the list.
The type of relationship and a lag can also be changed in this window.
Once all the task relationships have been entered, calculate the schedule by clicking F9.
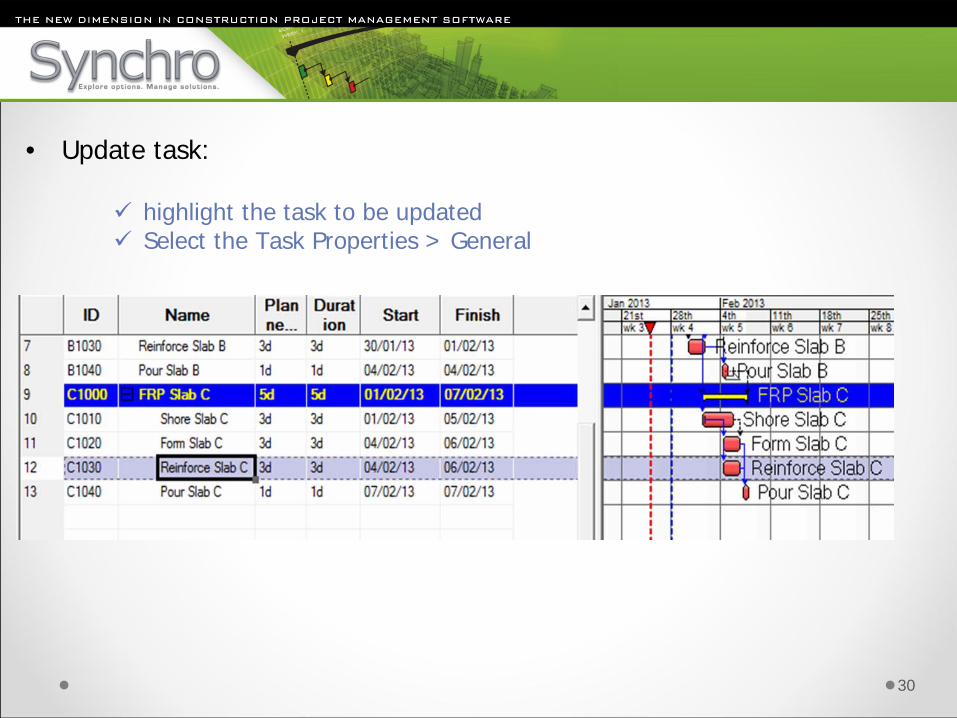
• Update task:
30
highlight the task to be updated
Select the Task Properties > General
31
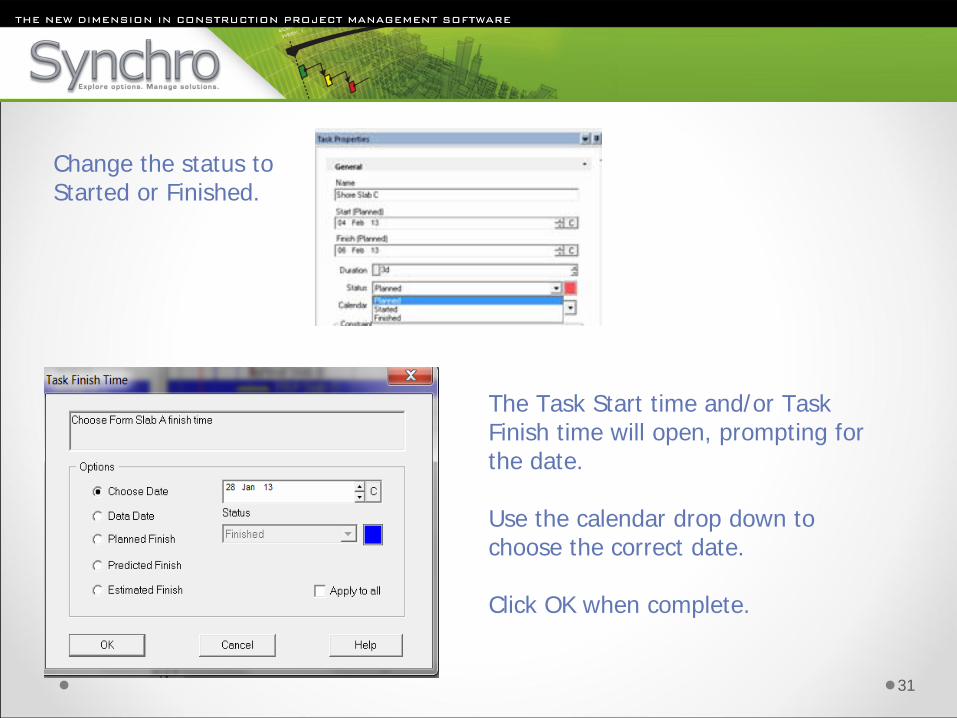
Change the status to Started or Finished.
The Task Start time and/or Task Finish time will open, prompting for the date.
Use the calendar drop down to choose the correct date.
Click OK when complete.
32
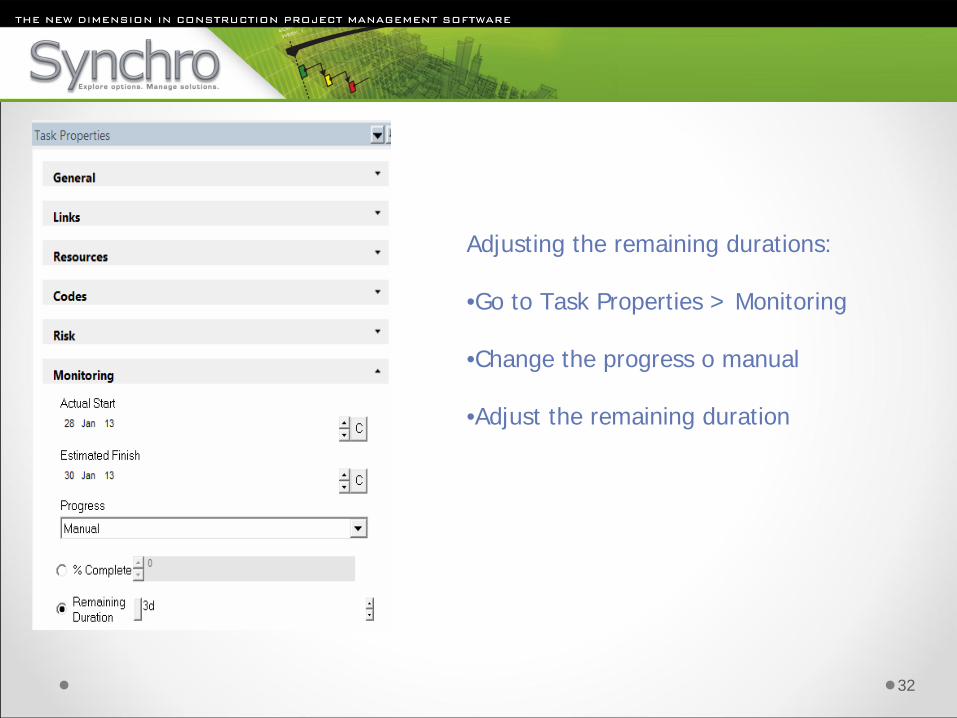
Adjusting the remaining durations:
•Go to Task Properties > Monitoring
•Change the progress o manual
•Adjust the remaining duration
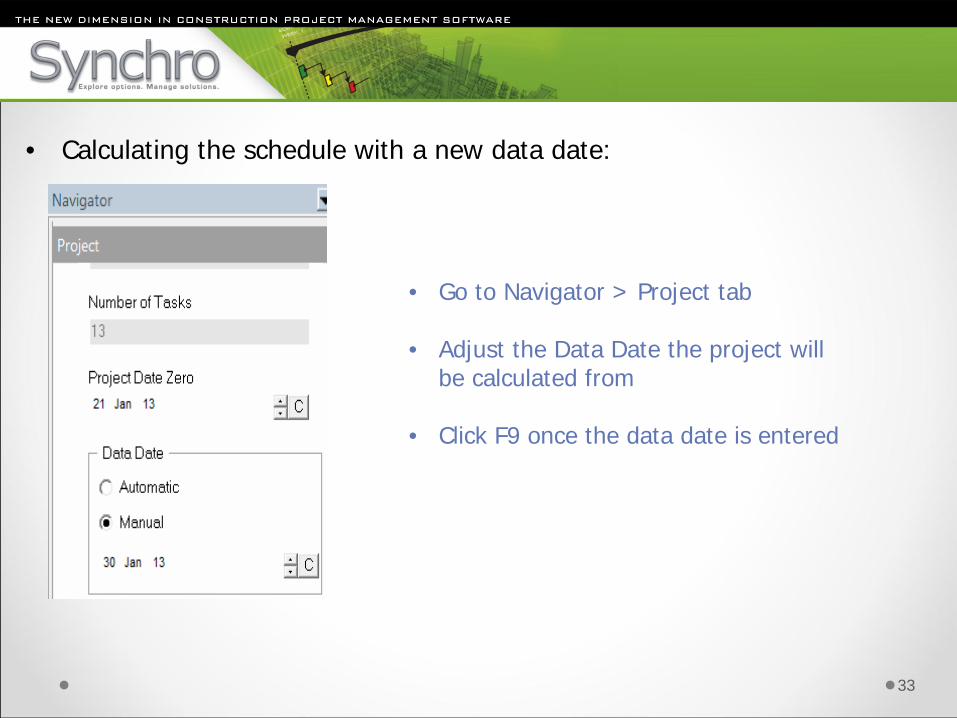
• Calculating the schedule with a new data date:
33
• Go to Navigator > Project tab
• Adjust the Data Date the project will be calculated from
• Click F9 once the data date is entered
34
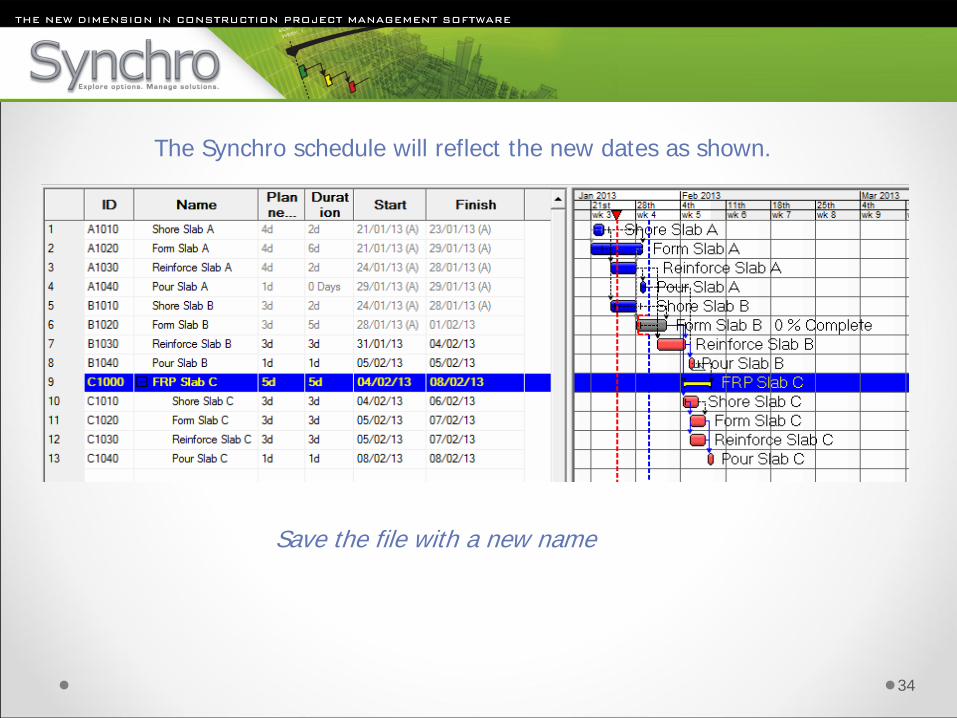
The Synchro schedule will reflect the new dates as shown.
Save the file with a new name
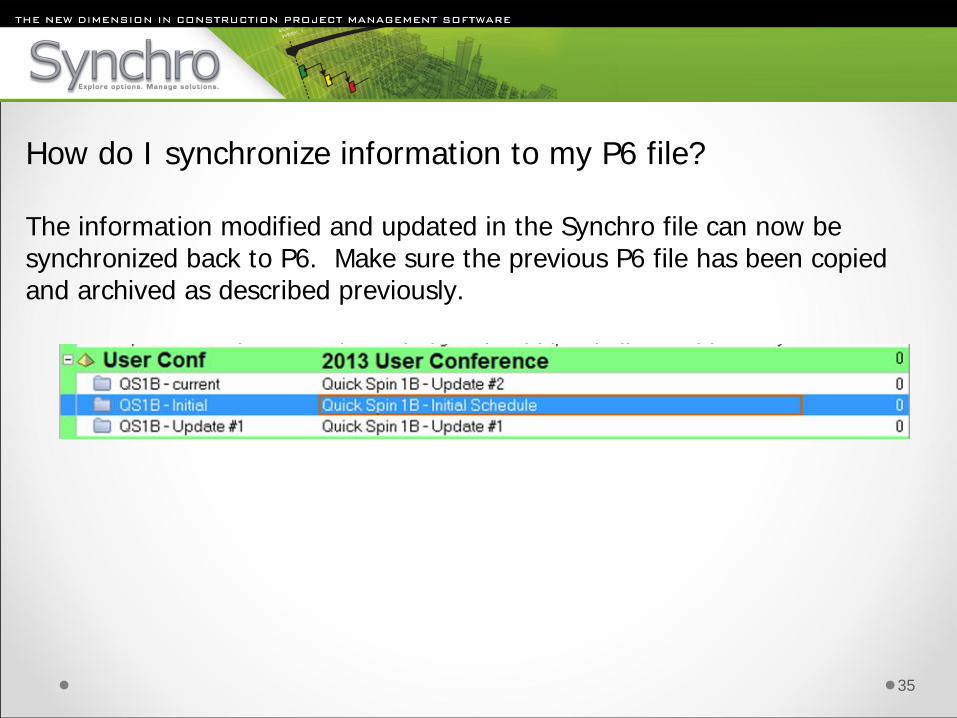
How do I synchronize information to my P6 file?
The information modified and updated in the Synchro file can now be synchronized back to P6. Make sure the previous P6 file has been copied and archived as described previously.
The P6 project window should be similar to this:
35
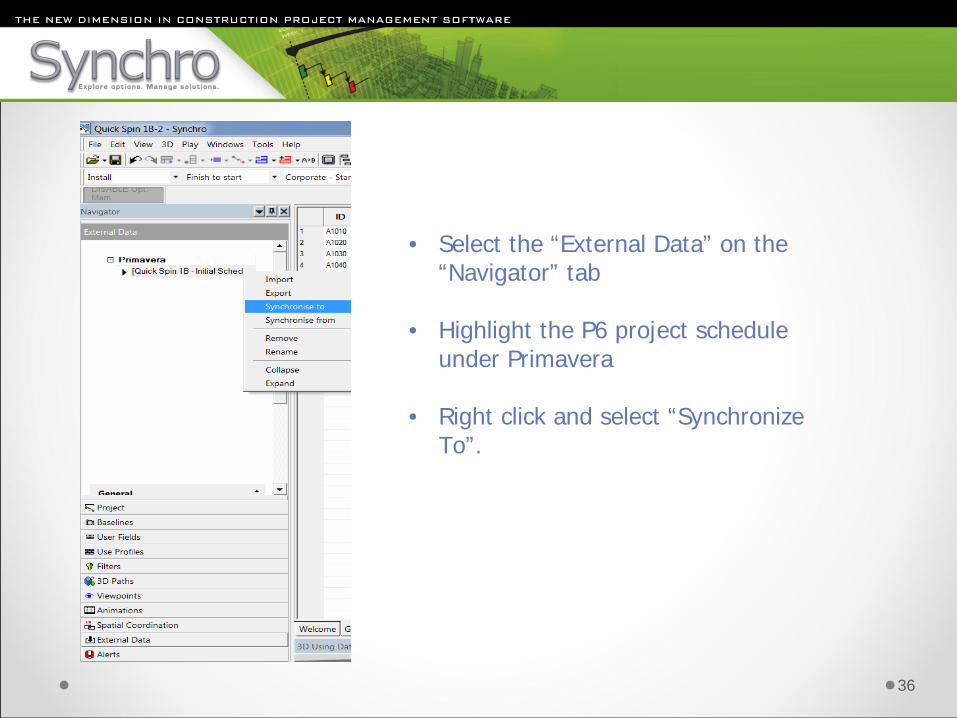
• Select the “External Data” on the “Navigator” tab
• Highlight the P6 project schedule under Primavera
• Right click and select “Synchronize To”.
36
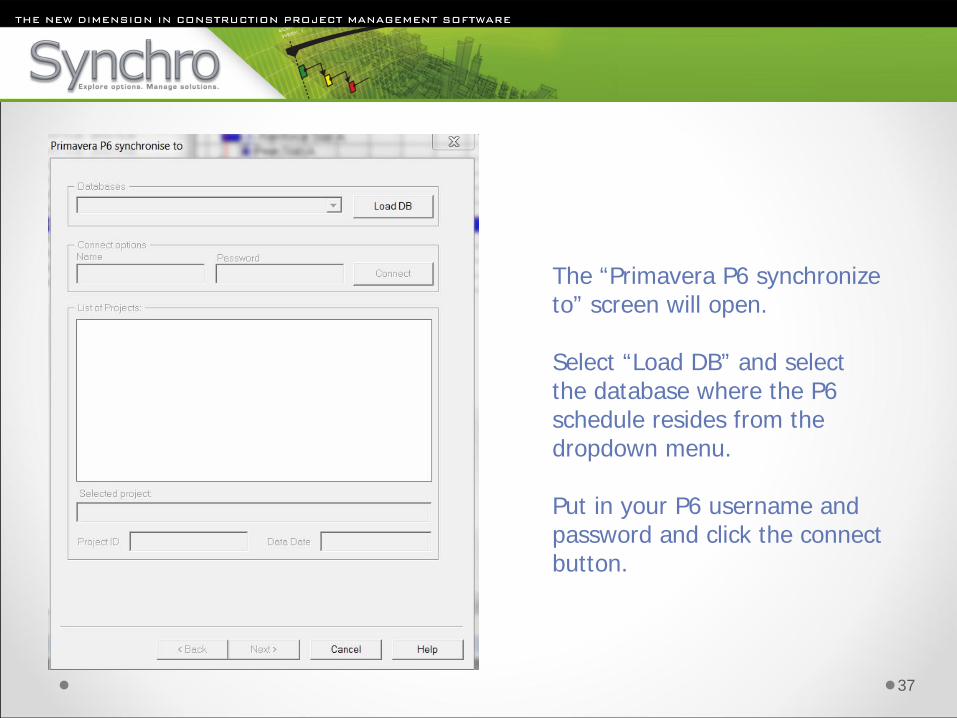
The “Primavera P6 synchronize to” screen will open.
Select “Load DB” and select the database where the P6 schedule resides from the dropdown menu.
Put in your P6 username and password and click the connect button.
37

Highlight the P6 schedule name to select the schedule to be synchronized.
(This is the file you just renamed in P6)
Click next
38

A screen will be presented asking how you would like to synchronize to your P6 schedule.
Choose the command that best suits what information will be added and what information will remain in the Synchro file.
Click the Synchronise button
39
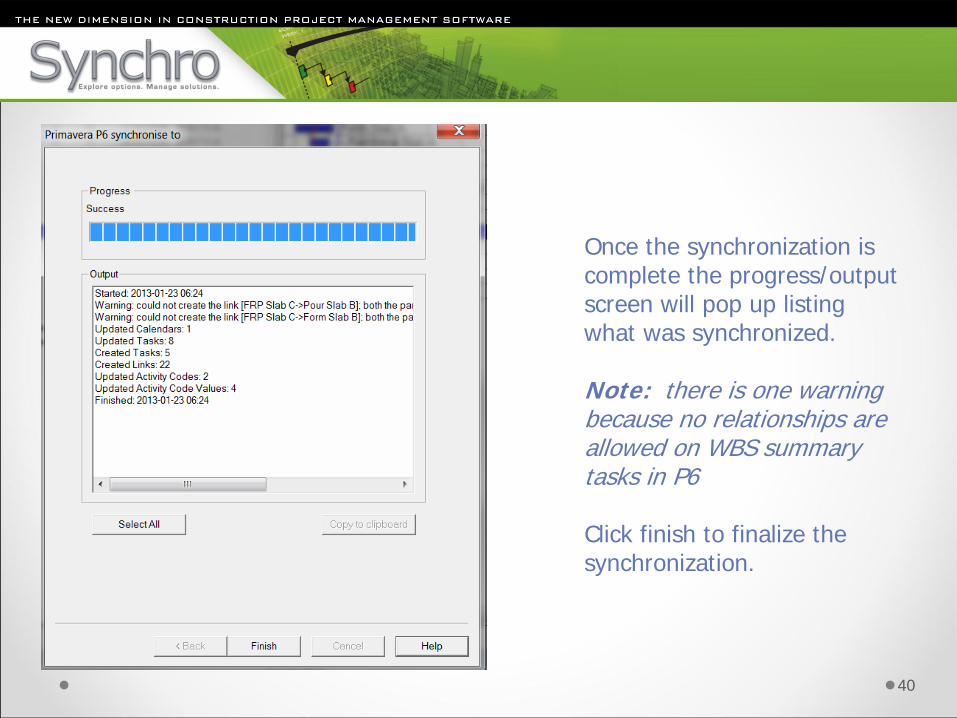
Once the synchronization is complete the progress/output screen will pop up listing what was synchronized.
Note: there is one warning because no relationships are allowed on WBS summary tasks in P6
Click finish to finalize the synchronization.
40
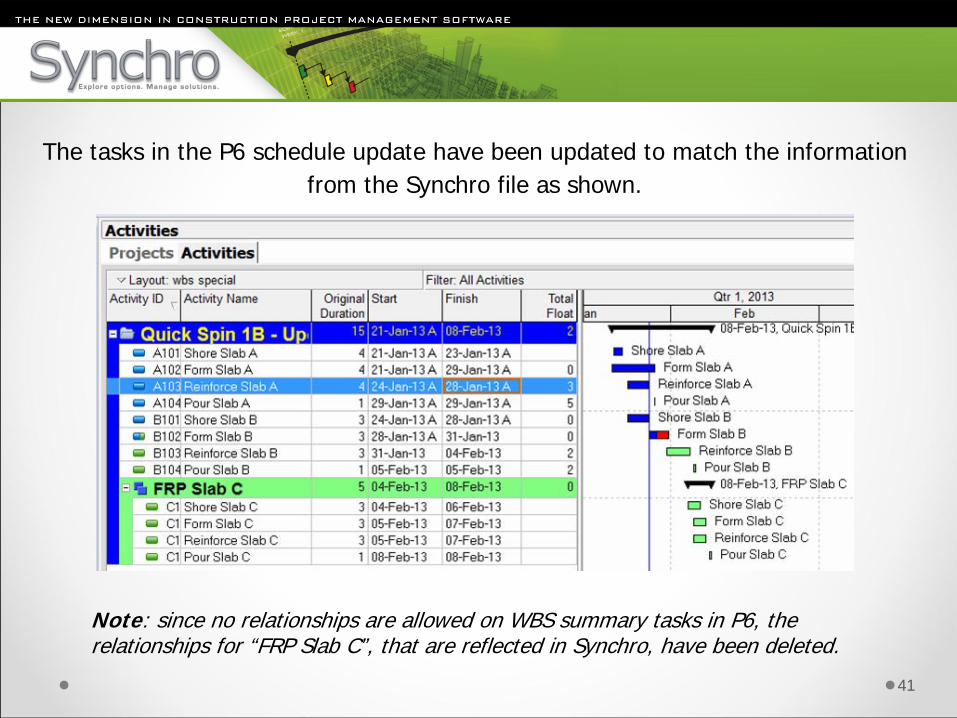
The tasks in the P6 schedule update have been updated to match the information from the Synchro file as shown.
Note: since no relationships are allowed on WBS summary tasks in P6, the relationships for “FRP Slab C”, that are reflected in Synchro, have been deleted.
41