Embed Size (px)
Citation preview

1
WHAT EINSTEIN KEPT UNDER HIS HAT
SECRETS OF SCIENCE IN THE KITCHEN
BY ROBERT L. WOLKE
RECIPES BY MARLENE PARRISH
Recipes © 2005 by Marlene Parrish

2
Contents
Chapter One: Something to Drink? My Chai 4 Figure 1 5 Beer Batter Bread 6 Sherry-Browned Chicken with Garlic 7 Jack Daniel’s Rib-Ticklin’ Barbecue Sauce 8 Chapter Two: Down on the Farm Table 1: Commercial milk and cream products 9 Pillowcase Sweets 10 Yogurt Cheese 11 DIY Sour Cream 12 Best Damn Cheesecake 13 Fresh Orange Sponge Cake 15 Instant Vanilla Custard Sauce (Crème Anglaise) 17 Chapter Three: Whatsoever a Man Soweth . . . Spanish Mashed Potatoes 19 Rhubarb Coulis 20 Not-Very-Indian Pudding 21 Miso-Glazed Black Bass 22 Chapter Four: Above the Fruited Plain Table 2: Fruits that don’t ripen after picking and fruits that do 24 Poached Italian Prune Plums 25 Bananas Byczewski 26 Beignets Soufflés 27 Sidebar Science: Kinky molecules 29 Table 3: Average fatty acid composition of olive oils 32 Sidebar Science: Fatty acid chains 33 Citrus Brioche Loaf 34 Substituting olive oil for butter in baking 36
Sidebar Science: Osmosis 37 Strawberry Preserves 38 Cider Sauce 39 Chapter Five: For Amber Waves of Grain Table 4: What sugars and starches are made of 40 Table 5: Some pasta shapes and their recommended sauces 41 Polenta Two Ways 42 Chapter Six: From Sea to Shining Sea Blistered Wild Salmon 44 Hot Wok Mussels 45 Ultimate Oven Paella 46 Scampi Scampi 49
3
Chapter Seven: A Carnival for Carnivores Marinated Skirt Steak Fajitas 50 Osso Buco 51 Chapter Eight: Spice Is the Variety of Life Spicy Chocolate Crinkle Monsters 53 Table 6: Where the heat comes from 55 Chili Pepper Hash Browns 56 Wasabi Guacamole 57 Chapter Nine: Galley Gear Smoky Garlic Mayonnaise 58
Paula Wolfert’s Slow-Roasted Leg of Lamb with Pomegranate Glaze and Red Onion–Parsley Relish
59
Chapter Ten: A Few Lagniappes for the Insatiable Inquiring Mind Marshmallow Zaps 61 Table 7: The six crystal forms of cocoa butter 62 Figure 2 63 Ganache 64 Grilled Chocolate Sandwich 65

Chapter One: Something to Drink?
4
MY CHAI
Makes 4 servings
Chai (rhymes with “pie”) is the word for tea in many parts of Asia, where the tea plant originated. Tea’s use spread over Asia by land and ultimately conquered Europe (especially England) by sea.
When the ships of the Dutch East India Company brought tea from China to Europe in the seventeenth century, the Dutch changed the Chinese dialectical word t’e to tee. The English then changed the spelling to tea. Back in Asia, where tea was being transported by overland routes, some regions along the way called it ch’a (the Mandarin name) or chai. Today, if your ancestors first obtained their tea by overland trade, you probably call it chai; if it first arrived by sea, you call it tea. Or as Paul Revere might have put it: “Chai if by land and tea if by sea.”
One Indian version of chai is a sweet and spicy milk tea that has become increasingly popular throughout the world. Chai is so mainstream in the United States today that it can be found not only on the menu at Starbucks but also in aseptic cartons in many supermarkets. Ingredients:
• 2 cups water • 2 teaspoons loose black tea or 2 tea bags • 1 small cinnamon stick, about 2 inches long • 1 cardamom pod, lightly crushed • 1 small whole clove • 1 slice fresh ginger, the size of a nickel, peeled • 2 cups whole milk, soy milk, or rice milk • Honey, to taste
1. Place all the ingredients except the honey in a saucepan and slowly bring to a boil. Swirl the
mixture around for about 3 minutes, or until it reaches the desired strength and the spices release their aromas.
2. Strain into teacups and add honey to taste. Chai tastes best when very strong and very sweet. Some people prefer to add the milk after the tea has been strained and sweetened.
Chapter One: Something to Drink?
5
Figure 1
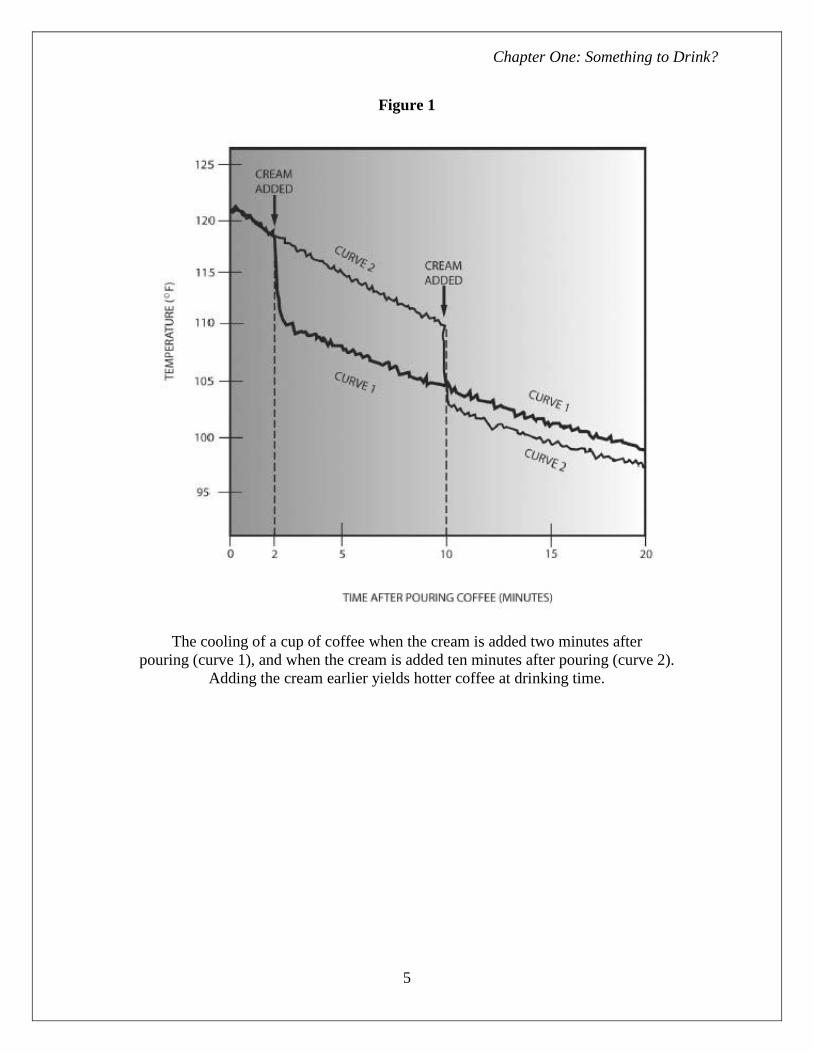
The cooling of a cup of coffee when the cream is added two minutes after pouring (curve 1), and when the cream is added ten minutes after pouring (curve 2).
Adding the cream earlier yields hotter coffee at drinking time.

Chapter One: Something to Drink?
6
BEER BATTER BREAD
Makes 1 loaf
So you think beer is just for drinking? Think again. This beer bread makes excellent toast and wonderful toasted cheese sandwiches. The flavor varies, depending on the beer you use. I tested this recipe with Pittsburgh’s hearty local brew, Penn Pilsner Dark. The bread tastes best the day it is made. Ingredients:
• 3 cups self-rising flour • 3 tablespoons sugar • 1 can or bottle (12 ounces) of beer, preferably not light
1. Place an oven rack in the lower third of the oven. Preheat the oven to 350°F. Spray a 9-by-5-
by-3-inch loaf pan with nonstick cooking spray. 2. In a large bowl, mix the flour and sugar thoroughly. Gradually add the beer while stirring
with a wooden spoon until no patches of dry flour are visible. (Do not overbeat or the bread will toughen.) The batter will be sticky. Transfer it to the loaf pan and spread it into the corners.
3. Bake for 50 to 60 minutes, or until a skewer or cake tester plunged deep into the middle of the bread comes out clean. The top of the loaf will have a cobbled appearance.
4. Turn the bread out of the pan onto a wire rack and let it cool for at least an hour. Use a sharp, serrated knife to slice. The crust will be crunchy and the interior soft and moist.
Chapter One: Something to Drink?
7
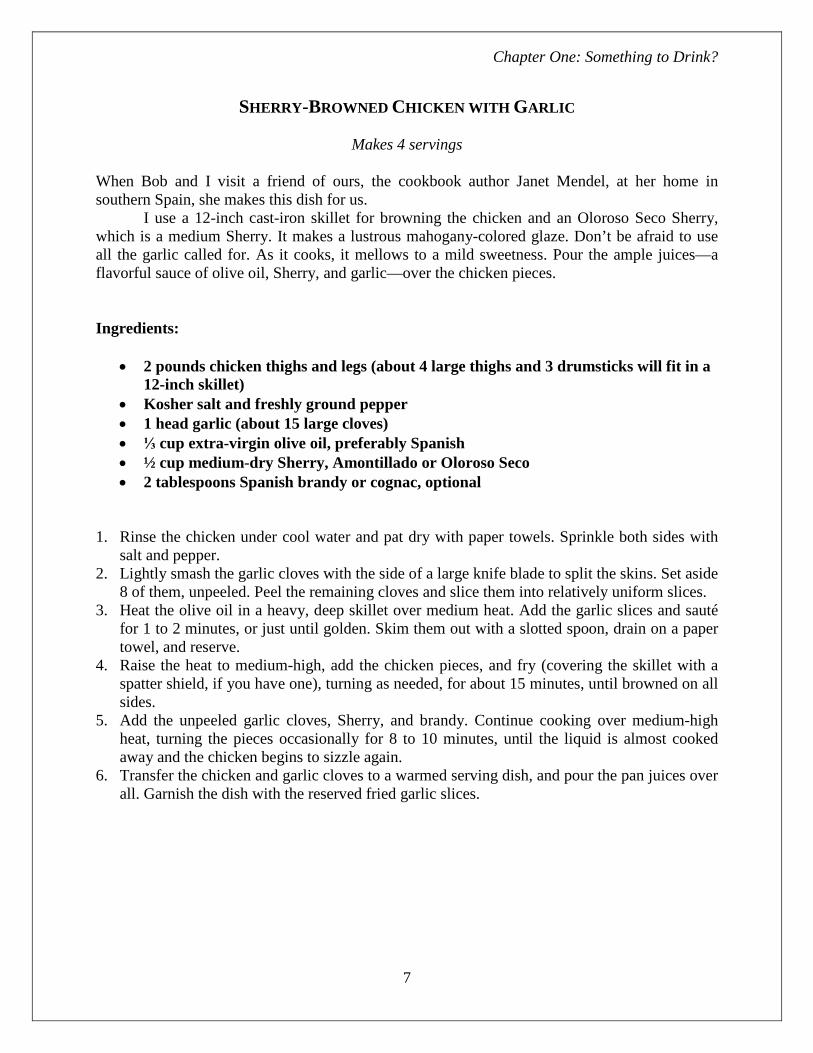
SHERRY-BROWNED CHICKEN WITH GARLIC
Makes 4 servings
When Bob and I visit a friend of ours, the cookbook author Janet Mendel, at her home in southern Spain, she makes this dish for us.
I use a 12-inch cast-iron skillet for browning the chicken and an Oloroso Seco Sherry, which is a medium Sherry. It makes a lustrous mahogany-colored glaze. Don’t be afraid to use all the garlic called for. As it cooks, it mellows to a mild sweetness. Pour the ample juices—a flavorful sauce of olive oil, Sherry, and garlic—over the chicken pieces. Ingredients:
• 2 pounds chicken thighs and legs (about 4 large thighs and 3 drumsticks will fit in a 12-inch skillet)
• Kosher salt and freshly ground pepper • 1 head garlic (about 15 large cloves) • ⅓ cup extra-virgin olive oil, preferably Spanish • ½ cup medium-dry Sherry, Amontillado or Oloroso Seco • 2 tablespoons Spanish brandy or cognac, optional
1. Rinse the chicken under cool water and pat dry with paper towels. Sprinkle both sides with
salt and pepper. 2. Lightly smash the garlic cloves with the side of a large knife blade to split the skins. Set aside
8 of them, unpeeled. Peel the remaining cloves and slice them into relatively uniform slices. 3. Heat the olive oil in a heavy, deep skillet over medium heat. Add the garlic slices and sauté
for 1 to 2 minutes, or just until golden. Skim them out with a slotted spoon, drain on a paper towel, and reserve.
4. Raise the heat to medium-high, add the chicken pieces, and fry (covering the skillet with a spatter shield, if you have one), turning as needed, for about 15 minutes, until browned on all sides.
5. Add the unpeeled garlic cloves, Sherry, and brandy. Continue cooking over medium-high heat, turning the pieces occasionally for 8 to 10 minutes, until the liquid is almost cooked away and the chicken begins to sizzle again.
6. Transfer the chicken and garlic cloves to a warmed serving dish, and pour the pan juices over all. Garnish the dish with the reserved fried garlic slices.

Chapter One: Something to Drink?
8
JACK DANIEL’S RIB-TICKLIN’ BARBECUE SAUCE
Makes about 2 cups
It would be a waste to limit a bottle of Jack’s to simply sipping, when it can add a kick to this sauce. For 2 racks of baby back ribs, you will need about 1 cup of barbecue sauce. Save the other cup to slather over broiled chicken later in the week. You’ll want to add this sauce to your collection of good BBQ recipes. Ingredients:
• 1 cup ketchup • ¼ cup Jack Daniel’s black label whiskey • ¼ cup dark molasses • ¼ cup cider vinegar • 1 tablespoon Worcestershire sauce • 1 tablespoon freshly squeezed lemon juice • 1 tablespoon soy sauce • ½ teaspoon freshly ground pepper • ½ teaspoon dry mustard • 1 clove garlic, crushed
Mix all the ingredients together in a small saucepan. Place over medium-high heat, bring to a boil, and then reduce the heat to low and simmer for 10 minutes, stirring occasionally.

Chapter Two: Down on the Farm
9

Chapter Two: Down on the Farm
10
PILLOWCASE SWEETS
Makes about 48 pieces
This is an adaptation of a handwritten recipe by American painter Mary Cassatt (1844–1926). She made these soft caramels for company when she and the impressionist painter Edgar Degas entertained in Paris. Cassatt’s recipe books have not survived, and this is the only recipe attributed to her. These homemade cocoa-covered caramels, each shaped like a tiny pillow, were placed on guests’ bed pillows during turn-down service at the grand opening of the Renaissance Hotel in Pittsburgh. (Cassatt was born in Allegheny City, Pennsylvania, now part of Pittsburgh.)
Follow the recipe exactly. If the kitchen is too warm, the candies tend to soften and spread. In a cooler room, they keep their shape. If you like fudge, you’ll love these pillows. Ingredients:
• 6 ounces bittersweet chocolate • 1½ cups confectioners’ sugar • 6 tablespoons (¾ stick) unsalted butter • 1 cup honey • 1 cup heavy cream • ¼ cup unsweetened cocoa powder for dusting
1. Lightly oil a marble or granite surface or a cookie sheet. Do not use a Teflon or similarly
coated cookie sheet. Set aside until needed. 2. On the large holes of a handheld grater, grate the chocolate into a medium bowl or pie tin. 3. Place the grated chocolate and all the remaining ingredients except the cocoa in a heavy,
medium saucepan and mix them together with a wooden spoon. 4. Stirring occasionally, bring to a boil over medium-high heat and continue cooking until the
mixture reaches 238°F on a candy thermometer. This will take about 10 minutes. 5. Carefully pour the hot mixture onto the oiled surface—do not spread it—and allow it to cool. 6. Using a bench scraper, gather the candy into 4 balls and dust them lightly with some of the
cocoa powder. Roll them into logs about 1 inch in diameter. Dust again with the cocoa powder, place on a cookie sheet, and cover with plastic wrap. Refrigerate for several hours until firm, or up to overnight.
7. Uncover the logs and slice them into 1-inch-wide pieces. As you slice, the knife blade will drag each piece into a pillow shape. Place candies flat in a tin or candy box and cover tightly.
8. Refrigerate until ready to serve. The candies will keep for about a week. To serve, lay pieces in individual candy papers or foil cups.
Chapter Two: Down on the Farm
11
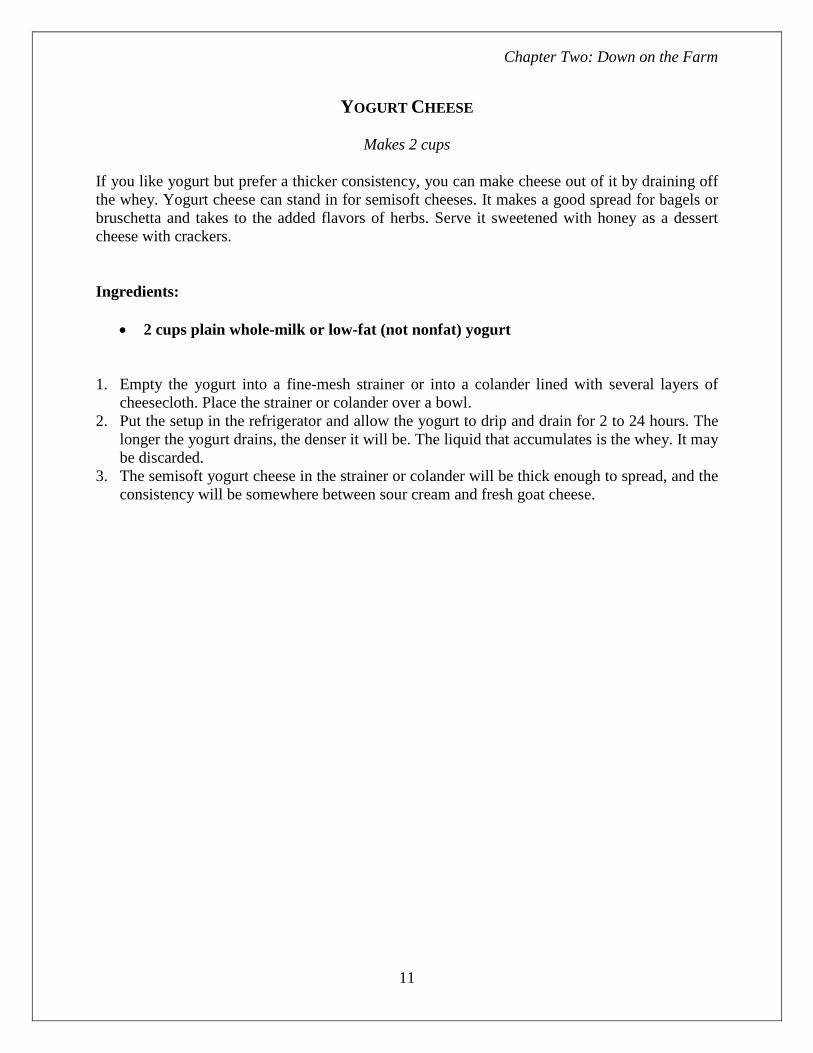
YOGURT CHEESE
Makes 2 cups
If you like yogurt but prefer a thicker consistency, you can make cheese out of it by draining off the whey. Yogurt cheese can stand in for semisoft cheeses. It makes a good spread for bagels or bruschetta and takes to the added flavors of herbs. Serve it sweetened with honey as a dessert cheese with crackers. Ingredients:
• 2 cups plain whole-milk or low-fat (not nonfat) yogurt 1. Empty the yogurt into a fine-mesh strainer or into a colander lined with several layers of
cheesecloth. Place the strainer or colander over a bowl. 2. Put the setup in the refrigerator and allow the yogurt to drip and drain for 2 to 24 hours. The
longer the yogurt drains, the denser it will be. The liquid that accumulates is the whey. It may be discarded.
3. The semisoft yogurt cheese in the strainer or colander will be thick enough to spread, and the consistency will be somewhere between sour cream and fresh goat cheese.

Chapter Two: Down on the Farm
12
DIY SOUR CREAM
Makes 2 cups You can make Do-It-Yourself sour cream using the “good bugs” in buttermilk: Streptococcus lactis, S. cremoris, and/or S. diacetylactis, with some Leuconostoc thrown in for good measure (and flavor). They’ll feed on the cream’s lactose, producing pleasantly sour lactic acid. While buttermilk is made from skim or partially skimmed milk, turning these bacteria loose on high-fat cream will produce a much richer product.
Unlike commercial sour cream, the homemade kind—provided you’ve made it with heavy cream—can be whipped. When whipping it, be careful not to overwhip, because it can turn suddenly to butter. Homemade sour cream, whipped or plain, makes a delicious topping for fruit tarts and for many chocolate desserts.
Old-fashioned pasteurized cream will thicken in 24 hours and will have a delicious tang. Ultrapasteurized cream will take a little longer to thicken and will have a softer texture. Both can be kept in the refrigerator for a whole month; the sour cream will get thicker and more flavorful. Ingredients:
• 2 cups heavy cream • 5 teaspoons buttermilk
1. Combine the cream and buttermilk in a screw-top glass jar. Shake the jar for 1 minute. 2. Let the jar stand at room temperature for 24 hours while the liquid thickens to the consistency
of sour cream. If the room is especially cool, you may need to let it stand an additional 12 to 24 hours.
3. Refrigerate for at least 24 hours, or preferably longer for better flavor and consistency, before using.

Chapter Two: Down on the Farm
13
BEST DAMN CHEESECAKE
Makes 10 to 12 servings
This velvety, creamy cheesecake is a cinch to make and never cracks in the oven. Serve with fresh berries, Rhubarb Coulis (p. 20), or bottled fruit syrup. For best results, use regular Philadelphia brand cream cheese. Do not use a whipped or low-fat variety. Ingredients:
Crust: • About 10 long graham crackers • 1 tablespoon sugar • 2 tablespoons (¼ stick) unsalted butter, melted
Filling: • 3 packages (8 ounces each) regular cream cheese, at room temperature • 4 large eggs, at room temperature • 1 teaspoon vanilla extract • 1 cup sugar • Pinch of salt
Topping: • 2 cups (16-ounce container) sour cream (not low-fat) • 1 tablespoon sugar • 1 teaspoon vanilla extract
1. Place a rack in the middle of the oven. Preheat the oven to 375°F. Spray a 9-inch springform
pan with nonstick cooking spray. 2. Make the crust: Place the graham crackers in a food processor or in a zipper-top plastic bag.
Whirl to make crumbs, or finely crush with a rolling pin. Measure 1 cup crumbs and place in a small bowl. (Discard any remaining crumbs.) Add the sugar and butter and toss with a fork to mix and moisten the crumbs evenly.
3. Spread the crumbs evenly over the bottom and about ½ inch up the sides of a springform pan, pressing lightly with your fingertips. Refrigerate the crust while you prepare the filling.
4. Make the filling: In a large bowl, using an electric mixer on medium-high speed, beat the cheese for 1 minute. Add the eggs, vanilla, and sugar and continue beating for 2 minutes, or until the mixture is creamy.
5. Pour the batter into the crust-lined pan. Place the pan on a baking sheet or pizza pan for stability. Place in the oven and bake for 35 minutes.
6. Make the topping: In a medium bowl, mix together the sour cream, sugar, and vanilla with a rubber spatula until smooth.
7. Remove the cheesecake from the oven. It will be somewhat wobbly in the center. Using a tablespoon, drop portions of the topping over the surface of the cheesecake, working from the

Chapter Two: Down on the Farm
14
outer rim toward the center, until it is evenly distributed and covers the entire top. Return the cake to the oven and bake for 5 minutes.
8. Remove the cheesecake from the oven, and let it cool in the pan on a wire rack. Cover the pan with plastic wrap and refrigerate for at least 6 hours or up to overnight.
9. To serve, run a knife blade between the pan sides and the cake to loosen the edges, then unclasp and remove the pan sides. Cut the cheesecake into wedges.

Chapter Two: Down on the Farm
15
FRESH ORANGE SPONGE CAKE
Makes 12 servings
One great thing about eggs is that you can separate the yolks from the whites and take advantage of their unique characteristics separately. In this cake, the yolks act as a binder and contribute fat, color, and rich flavor, while the whipped whites produce a light, foamy structure.
Delicate in texture and magnificent to behold, this cake is classic company fare. Sponge-type, also known as foam, cakes are springy and light. They include chiffon, angel food, and sponge cakes. All have one thing in common: stiffly beaten egg whites, on which their fluffiness depends.
Important: Never grease the cake pan for any foam-type cake. If it has been used before to bake a cake with shortening, scour it and dry it thoroughly before using. The batter needs a clean, dry wall to cling to.
The texture and flavor of sponge cakes are so delightful that the cakes are usually eaten without frosting, which can weigh them down. But a little lily-gilding—a shower of confectioners’ sugar—does no harm.
This cake can be made in advance and stored at room temperature for 2 days, in the refrigerator for 5 days, or in the freezer for 2 months. But bring it back to room temperature for serving. Leftover cake? (You should be so lucky.) Serve slices, lightly toasted, for breakfast. Ingredients:
• 6 large egg whites • 1¾ cups all-purpose flour • ½ teaspoon salt • 1½ cups sugar • 6 large egg yolks • Orange oil, optional* • 6 tablespoons freshly squeezed orange juice • 1 tablespoon freshly grated orange zest • Confectioners’ sugar, for dusting, optional
1. In a medium bowl, allow the egg whites to warm to room temperature, about 1 hour. 2. Meanwhile, place a rack in the lower level of the oven. Preheat the oven to 350°F. Have
ready a 10-inch tube pan. 3. Using a fine-mesh strainer or a sifter, sift together the flour and salt in a medium bowl. Set
aside. 4. With an electric mixer on medium speed, beat the egg whites until foamy. Gradually add ½
cup of the sugar, beating after each addition. Continue beating until soft peaks form when the beater is slowly raised. Set aside.
5. In a large bowl, using the electric mixer with the same beaters on high speed, beat the egg yolks while gradually adding the remaining 1 cup of sugar until the mixture is thick and

Chapter Two: Down on the Farm
16
lemon colored. This will take 5 to 8 minutes in all. Add 1 or 2 drops orange oil, if using—a little goes a long way—and beat until combined.
6. Remove the beaters from the bowl, shake to free any adhering yolk, and continue with the recipe using a whisk and rubber spatula.
7. Add the orange juice and orange zest to the egg yolk mixture and whisk to combine. Add the flour mixture and whisk just until no white patches are visible.
8. With the whisk or spatula, and using an under-and-over motion, stir one-third of the egg whites into the yolk mixture to lighten it. Then fold in another half of the remaining egg whites. Finally, fold in the remaining egg whites just until blended.
9. Gently pour the fluffy batter into the tube pan. Bake for 35 to 40 minutes, or until the cake has risen to the top of the pan, the top is browned, and a cake tester inserted into the center of the cake comes out clean.
10. If your pan has feet, invert the pan over a wire rack. Alternatively, invert the pan over the neck of a bottle. Don’t worry, it won’t fall out. Let the cake hang for about 1 hour to cool completely.
11. Place the pan on a work surface. With a metal spatula, carefully loosen the cake from the pan and transfer to a platter. Serve plain or sift a dusting of confectioners’ sugar over the top. Use a serrated knife to cut the cake.
*Orange oil is available in the baking areas of some supermarkets or at Williams-Sonoma or other cookware stores.

Chapter Two: Down on the Farm
17
INSTANT VANILLA CUSTARD SAUCE (CRÈME ANGLAISE)
Makes 3 cups sauce, or four ¾-cup servings of eggnog
Here’s a trick I learned from Seattle chef Jerry Traunfeld of the Herbfarm. Early in his career, when he was a pastry chef at Stars, Jeremiah Towers’ restaurant in San Francisco, Traunfeld had to make gallons and gallons of crème anglaise every day. It took way too much time, he said, when he’d rather be creating pastries. So he developed a reverse-cooking method for the sauce that is risk-free and speedy.
Instead of adding egg yolks to boiling milk, he adds boiling hot milk directly and quickly to slightly warmed egg yolks. The milk cooks them instantly with no risk of curdling. The custard immediately coats a spoon, which is the standard test for the finished sauce. It thickens further as it cools in the refrigerator. Hard to believe, until you try it.
Called by either its English or its French name, this sauce is wonderful warm or cold, served over apple dumplings or pie, strudel, chocolate cake, gingerbread, bread pudding, or even baked fruit. To dress it up for company, substitute 1 tablespoon Grand Marnier or Cointreau for the vanilla. And in season, transform it into eggnog by adding freshly grated nutmeg and rum. Ingredients:
• 6 large egg yolks, at room temperature • ½ cup sugar • ⅛ teaspoon salt • 2 cups whole milk • ¾ teaspoon vanilla extract
For Eggnog: • ¼ teaspoon freshly grated nutmeg • 1 tablespoon rum, or more to taste
1. Warm a medium bowl by rinsing it under hot tap water; dry. Place the egg yolks in the
warmed bowl and place the bowl over barely warm water in a larger bowl. (You just want to take the chill off the yolks.)
2. Before proceeding to the next step, pick up the yolk bowl from the warming bowl and place it on a damp, flat washcloth. This will prevent the bowl from skidding on the counter when you start to whisk.
3. In a medium saucepan, combine the sugar, salt, and milk. Place over medium heat and stir constantly until the sugar has dissolved and the milk is coming to a boil.
4. As soon as the milk boils and as it rises in the pan, immediately remove the pan from the heat and quickly whisk the milk into the egg yolks, whisking briskly for the first 3 to 5 seconds and then switching to a slow stirring motion until all the milk is in (takes about 15 seconds). Continue to stir slowly and blend without any aeration for another 10 seconds. The yolks will cook without further heating.
5. Stir in the vanilla.

Chapter Two: Down on the Farm
18
6. Pour the mixture through a fine-mesh strainer into a container to remove those thick, cordlike strands of egg white (chalazae) that anchor the yolk in the center of the egg. Refrigerate until ready to serve. The mixture will thicken as it cools.

Chapter Three: Whatsoever a Man Soweth . . .
19
SPANISH MASHED POTATOES
Makes 4 servings
When garlic is sizzled in olive oil, the intensity of the garlic is toned down while the oil is flavored. To make this recipe for a crowd, use this formula: For each 2 cups mashed potatoes, add 2 to 4 tablespoons extra-virgin olive oil, 2 sauteed cloves garlic, ½ teaspoon coarse salt, ½ teaspoon smoked sweet Spanish paprika (pimentón), ¼ teaspoon ground cumin, ⅛ teaspoon cayenne pepper, 2 slices bacon, and 1 scallion. Leftover mashed potatoes are wonderful warmed up the next day as potato pancakes with a fried egg on the side. Serve with Sherry-Browned Chicken with Garlic (p. 7). Ingredients:
• 4 large russet baking potatoes or 4 Yukon Gold or all-purpose potatoes, enough to make about 4 cups mashed potatoes
• ¼ cup extra-virgin olive oil, or more to taste • 4 cloves garlic • 4 slices bacon • 1 teaspoon coarse salt • 1 teaspoon smoked sweet Spanish paprika (pimentón) • ½ teaspoon ground cumin • ¼ teaspoon cayenne pepper • 2 scallions, both white and green parts, thinly sliced
1. Make the mashed potatoes: If using russet potatoes, place a rack in the middle of the oven.
Preheat the oven to 400°F. Prick the potatoes with a fork, place on the rack, and bake for 1 hour, or until tender when poked with a knife. If using Yukon Gold or all-purpose potatoes, peel them, cut into 1-inch chunks, and simmer in salted water for 12 to 15 minutes, or until barely fork-tender. When the baked potatoes are done, remove from the oven, cut them in half lengthwise, and scoop the flesh out into a pot. When the simmered potatoes are done, drain and leave in the pot.
2. While the potatoes are cooking, pour the olive oil into a small skillet and add the chopped garlic. Cook over medium-low heat until the garlic sizzles and begins to take on faint color. Remove from the heat before it browns.
3. In a medium skillet, fry the bacon over low heat until done and crisp. Chop the slices into ¼-inch bits.
4. Add the olive oil and garlic, salt, paprika, cumin, and cayenne pepper to the hot potatoes. Mash the potatoes coarsely using a potato masher. Taste for seasoning.
5. Pile the mashed potatoes into a warmed serving dish. (Or scoop the mashed potatoes back into the potato shells.) Top with the bacon and scallions.

Chapter Three: Whatsoever a Man Soweth . . .
20
RHUBARB COULIS
Makes about 2 cups
Rhubarb is not a fruit, although some people think of it that way because they make fruitlike pies out of it. It comes into season early and is often paired “half and half” with strawberries in pies and other desserts. Used here as a sauce, its tartness is a good foil for sweet desserts such as cheesecake (p. 13). In shopping, look for the deepest pink stalks. Ingredients:
• 1 pound rhubarb (about 6 stalks, each 12 inches long) • 1 cup sugar • ¼ cup water
1. Cut the rhubarb into ½-inch pieces. You will have about 4 cups. 2. Place the rhubarb, sugar, and water in a medium saucepan over medium-low heat. Cover and
cook gently for about 20 minutes, or until just tender and juicy. The mixture will get very watery as it cooks.
3. Let the mixture cool, and transfer 1 cup of it to a blender or food processor, purée it, and then pour it into a jar. Repeat with the remainder, 1 cup at a time. When all of the rhubarb has been puréed, store the jar in the refrigerator until ready to use. The coulis keeps for about 1 week.

Chapter Three: Whatsoever a Man Soweth . . .
21
NOT-VERY-INDIAN PUDDING
Makes 8 or more servings
Imagine soft polenta that tastes like gingerbread. That’s Indian pudding. The eighteenth-century New England colonists referred to the New World’s maize as
“Indian corn,” and a pudding containing cornmeal eventually became known as Indian pudding. Of course, Native Americans didn’t have soybeans, and neither did the colonists, but vanilla soy milk is an effective stand-in for the milk used in recipes for one kind of Indian pudding.
When ice cream is melted and stirred into the pudding, it is just as good as, and maybe better than, the milk or light cream that is usually called for in recipes for Indian pudding. The recipe is also delicious made with cow’s milk and cow’s-milk ice cream. The leftover pudding will thicken overnight, and it is delicious cold or hot. Try it for breakfast. Ingredients:
• 4 cups (1 quart) vanilla soy milk • ⅓ cup yellow cornmeal • 1 tablespoon unsalted butter • ½ cup dark molasses • 1 teaspoon ground cinnamon • ½ teaspoon ground ginger • ½ teaspoon salt • ½ cup vanilla soy ice cream, melted
Vanilla soy ice cream for serving
1. Place a rack in the lower part of the oven. Preheat the oven to 300°F. In a small bowl, mix 1
cup of the soy milk with the cornmeal. Let stand. 2. In a medium saucepan, slowly heat 2 cups of the soy milk over medium-high heat until
bubbles form around the edge of the pan. Gradually stir the cornmeal mixture into the hot soy milk. Reduce the heat to medium and cook, stirring, for 10 minutes. The mixture will be thin.
3. Add the remaining 1 cup soy milk and the butter, molasses, cinnamon, ginger, and salt, and stir just until the butter is melted. The mixture will be thin.
4. Turn the pudding into an ungreased 1½-quart casserole. Bake, uncovered, for 2 hours. The pudding will have a slightly dark film on the top.
5. Remove the pudding from the oven. Stir in the melted ice cream, combining it thoroughly until the pudding is smooth. Return the pudding to the oven and bake, uncovered, for 30 minutes longer.
6. Let the pudding cool on a wire rack for 2 hours. It will thicken as it cools, and a light skin will form. Just before serving, stir in the skin, then spoon the pudding into dessert dishes and serve slightly warm with a scoop of vanilla soy ice cream.

Chapter Three: Whatsoever a Man Soweth . . .
22
MISO-GLAZED BLACK BASS
Makes 4 servings
The most common type of miso found in American markets is a thick paste that looks like crunchy peanut butter and comes in a range of colors, from beige to very dark brown. This salty, richly flavored condiment perks up the flavor of soups and marinades.
Because it is so thick, miso must always be blended with a bit of liquid before being added to a dish. Miso is available in most supermarkets and in Asian groceries. Any shade of light-colored miso will work fine in this recipe.
Tommy Klauber, owner-chef of Pattigeorge Restaurant on Florida’s Longboat Key, serves this dish to rave reviews. Because he always has lobster on hand (doesn’t everybody?), he uses lobster consommé as his poaching liquid. We’ll use mirin and sake. You will need to marinate the fish for at least 2 hours or even overnight before broiling it. Have the vegetable garnish ready before you begin to cook the fish. Ingredients:
Marinade: • 6 tablespoons white or yellow miso • ⅓ cup sugar • ¼ cup mirin (Japanese sweet rice cooking wine) • ¼ cup sake • 4 black sea bass or black cod fillets, each about 6 ounces and ¾ to 1 inch thick
Garnish: • 1 tablespoon peanut oil • ½ teaspoon toasted sesame oil • 1 cup each julienned carrot, fennel, and sweet red pepper
Poaching Liquid: • 1 cup water • 3 tablespoons mirin • 2 tablespoons sake
1. Make the marinade: In a small bowl, whisk together the miso, sugar, mirin, and sake until
smooth. Transfer the mixture to a 1-quart zipper-top plastic bag. Add the fish fillets, turning them to coat, seal the bag, and refrigerate for 2 to 4 hours or up to overnight.
2. Make the garnish: In a large skillet, combine the peanut oil and sesame oil over low heat. Add the carrot, fennel, and sweet red pepper and cook for about 5 minutes, or until softened but not browned. Set aside.
3. Bring the fish and marinade to room temperature. Preheat the broiler.

Chapter Three: Whatsoever a Man Soweth . . .
23
4. Remove the fish fillets from the marinade. Place them, along with any marinade that clings to them, in a 9-inch pie pan or small baking pan with sides. Do not crowd the pan. Discard the remaining marinade.
5. Make the poaching liquid: Measure the water in a microwave-safe measuring pitcher and stir in the mirin and sake. Heat in the microwave for 1 minute. Pour enough poaching liquid into the pan to come about one-third up the sides of the fillets, about ¼ inch. This steams the fish a bit while allowing the top of the fillets to brown lightly under the broiler.
6. Broil for 5 to 6 minutes, or just until opaque in the center. For the most succulent results, the fish should be barely done in the center, and moist.
7. Serve the fish in warmed, wide, shallow bowls. Spoon some of the cooking liquid, about ¼ cup per serving, into each bowl. Garnish with the softened julienned vegetables, arranged alongside the fillets.

Chapter Four: Above the Fruited Plain
24

Chapter Four: Above the Fruited Plain
25
POACHED ITALIAN PRUNE PLUMS
Makes about 8 servings
Raw Italian prune plums are dusky purple and bland, with a mere hint of sweetness that won’t improve much on standing at room temperature. But when poached in sugar syrup, they rev up their color and flavor, becoming crimson and tart-sweet. Look for them in the market from late summer through early fall. Poached prune plums are both delicious and beautiful served either plain or with vanilla ice cream. Ingredients:
• 1 pound Italian prune plums • 1 cup sugar • 1 cup water • 1 small cinnamon stick, about 2 inches long • 1 teaspoon vanilla extract
1. Wash the plums and halve them, but do not peel. Remove the pits. 2. In a large saucepan, combine the sugar, water, and cinnamon stick and bring to a boil over
medium heat. Cook for about 5 minutes, stirring often, until the sugar dissolves and a light syrup forms.
3. Add the plum halves, reduce the heat to low, and poach gently, spooning the liquid over the plums occasionally and turning them once during the cooking, for 3 to 4 minutes, or until tender. Stir in the vanilla.
4. Serve the plums warm or cool with their syrup.

Chapter Four: Above the Fruited Plain
26
BANANAS BYCZEWSKI
Makes 4 servings
When your bananas are beginning to look like Chiquita’s worst nightmare and there’s no time to make banana bread, the fix is easy. Make sautéed Bananas, a simple but widely unappreciated dessert.
If that’s not fancy enough for you, make the pride of New Orleans, Bananas Foster. Its banana liqueur enhances the fruit’s flavor.
In 1951, as the story goes, Owen Brennan, owner of the still-famous Brennan’s Restaurant in New Orleans, was asked to come up with a new dessert for a magazine feature story on the restaurant. His chef, Paul Blangé, created Bananas Foster, which today is perhaps even more famous than the restaurant.
But who was Foster? Richard Foster was a friend and good customer of Brennan’s, and Brennan named the dish after him. There is no truth to the rumor that Mr. Brennan’s even closer friend, Flawiusz Byczewski, committed suicide after losing out on the naming rights. Nevertheless, we have named our version of this dessert in his honor. Ingredients:
• 2 tablespoons (¼ stick) unsalted butter • ¼ cup honey • ¼ teaspoon freshly grated nutmeg • ¼ teaspoon ground ginger • 2 tablespoons banana liqueur, optional • Freshly squeezed lemon juice to taste • 4 firm, ripe bananas, peeled and cut lengthwise into quarters • Vanilla or butter pecan ice cream for serving • ¼ cup dark rum
1. In a 12-inch skillet, melt the butter over low heat. Add the honey, nutmeg, and ginger and stir
until the honey liquefies and the ingredients are well blended. Add the banana liqueur, bring to a boil, and simmer for 2 minutes. (The recipe may be made ahead to this point. Reheat the sauce before continuing.)
2. Taste the sauce. If it is too sweet for your taste, squeeze in a few drops of lemon juice. 3. Add the banana pieces to the simmering sauce. Cook them, basting and turning, for about 3
minutes, or until they begin to soften. Do not overcook. 4. Meanwhile, place scoops of ice cream into each of 4 bowls or soup plates. 5. Pour the rum into a microwave-safe container such as a glass measuring cup and warm it for
about 30 seconds on high. Pour the rum over the bananas, stand back, and ignite the vapors with a match.
6. When the flames have subsided, lift the bananas out of the pan and arrange them around the ice cream. Spoon the warm sauce generously over the top of the ice cream and serve immediately.

Chapter Four: Above the Fruited Plain
27
BEIGNETS SOUFFLÉS
Makes about 20 golf ball–sized beignets
Virtually any cooking oil can be used for deep-frying, a wonderful cooking method for crisping and browning the outer surfaces of foods while leaving them moist and succulent inside.
The first time Bob realized that deep-frying could be used for desserts and pastries other than doughnuts was as a (relatively) young man visiting friends in Belgium and being treated to fruit beignets—inch-or-so chunks of fruit (almost any kind) dipped in a flour-and-beer batter (ah, that Belgian beer!), deep-fried, and dusted with confectioners’ sugar just before serving.
This is the deep-fried dessert to make if you have no fear of frying but a fear of yeast dough. Pâte à choux, or cream-puff dough, is one of the easiest, most risk-free doughs in the pastry cook’s repertoire. But instead of being dropped onto a baking sheet to make cream puffs, this soft dough is dropped into hot fat, where it swells, puffs, and browns.
To serve, pour a pool of fresh or bottled fruit syrup onto a dessert plate and top it with three sugared beignets. Ingredients:
• ½ cup water • 4 tablespoons (½ stick) unsalted butter, at room temperature • Pinch of salt • ½ cup all-purpose flour • 2 large eggs, at room temperature • ⅛ teaspoon orange oil or 1 tablespoon dark rum, optional • Vegetable oil for deep-frying • Confectioners’ sugar for dusting
1. Combine the water, butter, and salt in a medium saucepan and bring to a boil. Remove from
the heat and add the flour all at once. Stir vigorously until the mixture leaves the sides of the pan and forms a ball around the spoon. (If a ball does not form almost immediately, place the saucepan over low heat and beat briskly for a few seconds.) Let the dough cool slightly.
2. Add the eggs one at a time, beating vigorously until the paste is smooth and glossy before adding the second egg. Add the optional flavoring and beat again.
3. Add the oil to a wok, heavy skillet, or deep fryer to a depth of about 1½ inches. Heat the oil to 365°F. It’s a good idea to fry just 1 beignet at first to determine the approximate cooking time, so drop in a tablespoon of dough and fry it before you proceed with frying the rest.
4. Working in batches, drop the dough by tablespoons into the hot oil. Fry, turning as needed, until browned on all sides and the center is cooked through, about 2 minutes per side. Drain on paper towels.
5. Serve hot, dusted with confectioners’ sugar.

Chapter Four: Above the Fruited Plain
28
VARIATION: BAKED BEIGNETS SOUFFLÉS
Makes about fourteen 2-inch puffs If you have a fear of frying, you can bake beignets using the same dough.
Preheat the oven to 375°F. Place large rounded tablespoons of the dough on an ungreased cookie sheet, spacing them 2 inches apart. Bake for 30 minutes, or until the puffs are golden. When the puffs are cool enough to handle, carefully slice off the tops, their lids, and scoop out the unbaked dough at the centers. Let cool on a wire rack.
To serve, fill with ice cream, sweetened whipped cream, or vanilla pudding. Replace the lids and dust the puffs with confectioners’ sugar before serving.

Chapter Four: Above the Fruited Plain
29

Chapter Four: Above the Fruited Plain
30

Chapter Four: Above the Fruited Plain
31

Chapter Four: Above the Fruited Plain
32

Chapter Four: Above the Fruited Plain
33

Chapter Four: Above the Fruited Plain
34
CITRUS BRIOCHE LOAF
Makes 1 loaf
May the brioche police forgive me, but this loaf is made with olive oil instead of butter. It is scented with the zest of orange and lemon and bakes up airy and flavorful.
Many recipes for brioche call for double risings of the dough and a rest overnight in the refrigerator. This version is quick and easy to mix in the food processor with no overnight rise. It can also be stirred together conventionally in a large bowl. It is not kneaded. Bake the brioche in a loaf pan if you want even slices, or use a fluted pan to give the classic brioche shape. Serve plain or toasted with sweet butter and jam, such as the Strawberry Preserves on page 38. Day-old brioche makes excellent French toast or bread pudding. Ingredients:
• 1½ teaspoons active dry yeast • 3 tablespoons warm whole milk • ¼ cup sugar • 2 cups all-purpose flour • 3 large eggs, at room temperature • Grated zest of 1 orange • Grated zest of 1 lemon • ¾ teaspoon salt • 6 tablespoons mild (not “light”) extra-virgin olive oil
1. Lightly oil a 9-by-3-inch loaf pan or a 4½-cup fluted brioche mold, or spray with nonstick
cooking spray. 2. Sprinkle the yeast over the bottom of a food processor work bowl and add the warm milk
along with a small pinch of the sugar, ⅓ cup of the flour, and 1 egg. Pulse 8 to 10 times, or until the mixture, or starter, is creamy. Scrape down the sides of the work bowl.
3. Put the remaining flour on top of this starter, but do not mix it in. Cover the work bowl with the top of the food processor. Allow the mixture to stand until you can see that the starter has begun to foam and that the yeast is activated. Depending on the conditions in your kitchen, it can take from 15 minutes to 1 hour.
4. Add the remaining 2 eggs, the remaining sugar, the salt, and the orange and lemon zests to the work bowl of the processor. Turn the machine on and whirl for 10 to 15 seconds, or until the dough comes together to form a ball. Leave the machine on, and pour the olive oil in a fine stream through the feed tube. The stream should be fine enough so that the ball will not lose its shape as you pour. The movement of the ball of dough around the edge of the work bowl will incorporate the oil into the dough. The dough is fairly forgiving. It will be sticky, wet, and creamy.
5. Spoon and scrape the dough into the loaf pan or brioche mold. The pan will be about one-third full. Although a topknot is traditional on individual brioches, it gets in the way of slicing on a larger loaf such as this one. I prefer to leave it off.

Chapter Four: Above the Fruited Plain
35
6. Allow the dough to rise almost to the top of the pan. Depending on the temperature of the kitchen, this can take from 1 to 2 hours. The risen, leavened dough will be very light and about three times its original volume. Preheat the oven to 375°F about 15 minutes before the dough is ready.
7. Bake the brioche for about 30 minutes, or until golden brown. 8. Remove the loaf from the oven. Allow to rest in the pan on a wire rack for 5 minutes, then
turn out onto the rack and let cool completely before slicing.

Chapter Four: Above the Fruited Plain
36

Chapter Four: Above the Fruited Plain
37
Sidebar Science: Osmosis
A dilute sugar solution (left side of the water-permeable membrane) and a more concentrated sugar solution (right side of membrane). Because there are relatively more water molecules in the dilute solution (left) than in the concentrated one (right), there is a net tendency (osmotic pressure) for water molecules to move through the membrane from
the dilute solution into the more concentrated solution (from left to right).*
*For simplicity, I have portrayed the membrane as if it has holes big enough for water molecules to fit through, but not big enough for sugar molecules to pass. In reality, the mechanisms by
which animal and plant membranes selectively permit water, but not other kinds of molecules, to pass through are more complicated and in many cases not completely understood.

Chapter Four: Above the Fruited Plain
38
STRAWBERRY PRESERVES
Makes six half-pints
In much of the country, locally grown strawberries can be found in farmers’ markets for only a few weeks in late spring. Make the most of this window. Select small, firm but ripe berries in perfect condition. In this method, standing periods alternating with short cooking times yield a preserve with deep red color and fresh flavor.
In making preserves, jams, and jellies, the proportions of the three primary ingredients, fruit pectin, sugar, and acid (lemon juice), are crucial. The gel is formed by the action of the acid on the pectin, so too little pectin or acid will prevent gel formation and you’ll have syrup instead. Too little sugar will make a tough jelly, while too much sugar will make a weak one. Simply put, the ingredients must be measured carefully. That’s why in this recipe the sugar and berries are weighed, rather than measured by bulk.
I usually start this recipe in the late afternoon and finish it up the next morning. Do not double the recipe, because the longer cooking time will break down the berries’ pectin and prevent gelling. Ingredients:
• About 2¼ pounds strawberries • 2 pounds (5 cups) sugar • ¼ cup freshly squeezed lemon juice
1. Wash and hull the strawberries. Keep smaller berries whole, but slice larger ones in half. 2. Weigh out 2 pounds strawberries and place them in a large stainless-steel saucepan or heavy
preserving kettle. (I use an enameled cast-iron Le Creuset Dutch oven.) Add the sugar and, using a rubber spatula, gently mix it with the strawberries. Let stand for 4 hours, stirring occasionally.
3. Place over medium heat, bring to a boil, add the lemon juice, and cook rapidly for 12 minutes. Cover and let stand in a cool place overnight.
4. In the morning, bring the berry mixture to a boil over high heat, then turn down the heat to low. Remove the berries with a slotted spoon, draining them thoroughly, and spoon them into sterilized half-pint jelly jars, filling them only halfway. Thorough draining is important, because too much liquid in the jars at this stage will thin the jelly.
5. Bring the syrup remaining in the pan to a boil and cook until thickened or until it registers 224°F (107°C) on a candy thermometer. To test if the syrup is ready, dip a soup spoon into the syrup and hold it horizontally over the pan; the syrup should fall from the spoon’s surface in “sheets.”
6. Pour the hot syrup over the berries to fill within ½ inch of the rim. Wipe the rims clean and seal with rubber-rimmed self-sealing tops and metal ring bands. As each jar is filled and sealed, turn it upside down. Allow it to cool in that position.

Chapter Four: Above the Fruited Plain
39
CIDER SAUCE
Makes 1 generous cup
This sauce is equally at home with the flavors of a roasted pork loin or warm gingerbread. You can make it with either hard or “soft” cider. If you use the hard stuff, some of the alcohol will remain in the sauce. Ingredients:
• 1 cup apple cider or apple juice • ⅓ cup firmly packed brown sugar • 1 tablespoon unsalted butter • 1 tablespoon freshly squeezed lemon juice • Pinch of ground cloves • 1 tablespoon cornstarch • 1 tablespoon water
1. In a 1-quart saucepan, combine the cider or juice, brown sugar, butter, lemon juice, and
cloves. Place over medium heat and cook, stirring occasionally, until the mixture comes to a full boil. Boil for 3 minutes or until somewhat reduced.
2. In a small bowl, mix together the cornstarch and water. Stir the starch mixture into the hot cider mixture. Continue cooking, stirring constantly, for 1 to 2 minutes, or until the sauce has thickened. Serve warm.

Chapter Five: For Amber Waves of Grain
40

Chapter Five: For Amber Waves of Grain
41
Chapter Five: For Amber Waves of Grain
42
POLENTA TWO WAYS Some home cooks shy away from making polenta because the traditional Italian method (adding cornmeal to boiling water over direct heat with continual stirring) takes too much of the cook’s attention. Your Italian grandmother may be shocked, but there are other ways to make polenta that are easier on the cook. You can make it in a double boiler or in the oven. When the polenta is ready, it will be thick and smooth, with no sign of grittiness.
DOUBLE-BOILER POLENTA
Makes about 4 cups, or 4 servings
Ingredients: • 4 cups water • 1 teaspoon salt • 1 cup yellow cornmeal, coarse or fine • Butter to taste
1. Bring 2½ cups of the water to a boil in the top part of a double boiler over direct heat. Add
the salt. 2. In a medium bowl, mix the cornmeal with the remaining 1½ cups water. Add the mixture to
the boiling water and stir well. Reduce the heat to medium and cook, stirring constantly, until the mixture boils.
3. Place the cornmeal mixture over boiling water in the bottom part of the double boiler. Cover and cook, stirring occasionally, for about 45 minutes, or until smooth and thick. Stir in butter to taste.
BAKED POLENTA
Makes about 8 cups, or 8 servings
Ingredients:
• 2 tablespoons olive oil • 2 cups yellow cornmeal • 6½ cups water • 1½ teaspoons salt
1. Preheat the oven to 400°F. Grease a 9-by-13-inch baking pan. 2. In a large bowl, mix together the olive oil, cornmeal, water, and salt. 3. Transfer the mixture to the baking pan. Carefully place the pan in the oven. (It will want to
slosh over.)

Chapter Five: For Amber Waves of Grain
43
4. Bake uncovered for 45 minutes. With a fork or a wooden spoon, stir the polenta until evenly combined and smooth. Bake for 5 minutes longer, or until slightly puffy.
VARIATIONS ON THE THEME Polenta with Gorgonzola: Spoon soft, cooked polenta into a warmed serving dish. Make a well in the center and fill it with, say, 3 tablespoons unsalted butter and 3 ounces crumbled Gorgonzola cheese. Amounts will vary according to the amount of polenta you have made. Spoon some of the butter and cheese onto each serving of polenta. Broiled Polenta Slices: Spoon soft, cooked polenta into a greased 9-inch square pan. Spread to make a layer about ½ inch thick. Chill. Turn the polenta out of the pan onto a work surface, and cut into squares or rectangles. Place the pieces on a greased cookie sheet. Brush with melted butter and broil, turning once, until browned and crisp on both sides. Leftover Polenta: Spoon soft, cooked polenta into a greased loaf pan. Smooth the surface with a wooden spoon, cover with plastic wrap, and refrigerate. Cold polenta, sometimes called mush, is delicious for breakfast. Cut into slices, fry in butter or bacon fat, and top with maple syrup.

Chapter Six: From Sea to Shining Sea
44
BLISTERED WILD SALMON
Makes 4 servings
When leading chefs cook wild salmon, they like to keep it simple. For best results, they caution, don’t overwhelm the fish with exotic sauces and ingredients. Just season it and cook it until the center is barely opaque. This oven method is a favorite at our house. Bob loves the crisp skin and keeps reminding me that it contains all those healthful omega-3 fatty acids. Ingredients:
• 2 tablespoons olive oil • 4 wild king salmon fillets, skin on, 6 to 8 ounces each • Salt and freshly ground pepper
1. Preheat the oven to 275°F. 2. Heat the olive oil in a large, ovenproof nonstick sauté pan. Add the fillets, skin side down.
When the skin blisters, after about 1 minute, place the pan in the oven and roast for 8 to 12 minutes for medium-rare.
3. Remove the pan from the oven and place it over high heat for about 2 minutes, or until the skin crisps. Think undercooked and it will be perfect. Serve the salmon skin side up.

Chapter Six: From Sea to Shining Sea
45
HOT WOK MUSSELS
Makes 4 appetizer servings or 2 main-course servings
It doesn’t get much easier than this. Chuck the mussels into a hot wok and shovel them around until they open and plump in their own juices. Period. They are perfect when dipped into a velvety sauce such as Smoky Garlic Mayonnaise. Serve these mussels as an appetizer or light supper, with crusty peasant bread for sopping up the flavorful juices. Ingredients:
• 2 pounds mussels, scrubbed and beards removed • Kosher or coarse sea salt • Freshly ground pepper • 1 or 2 lemons, halved • Smoky Garlic Mayonnaise (p. 58)
1. Heat a large wok over high heat for about 2 minutes, or until very hot. Test the heat by
flicking a few drops of water into the wok. If the drops bead and dance across the surface, the pan is ready.
2. Discard any mussels that do not close when tapped. Add the remaining mussels to the hot wok all at once. Using a wok shovel or a large wooden or stainless-steel spoon, toss and turn the mussels for 4 or 5 minutes, or until they open and release their juices. Shovel and mix vigorously, so that all the mussels are exposed to the same amount of time on the bottom of the pile. The more noise you make with the shells clattering against the metal, the better. That appetizing sound is dear to the heart of every shellfish lover.
3. When all the mussels have opened and plumped—discard any that failed to open—sprinkle them with salt and pepper and divide them and their juices between 2 large bowls or 4 smaller bowls. Tuck a lemon half into each bowl, so that each person can squeeze juice over the mussels to taste. Spoon Smoky Garlic Mayonnaise into ramekins for dipping.

Chapter Six: From Sea to Shining Sea
46
ULTIMATE OVEN PAELLA
Makes 6 to 8 servings
Paella might seem difficult to make, but it is really just a series of easy steps. This step-by-step method is for beginners. Later, you can experiment to your heart’s content, because paella is not so much a dish as it is a rice-based concoction of local seafood and/or poultry and/or rabbit, depending on what part of Spain you’re making it in. But more than anything, paella is all about the saffron-flavored rice.
Do all the advance cooking in a large, preferably black cast-iron skillet rather than in the paella pan. The skillet’s idiosyncrasies will be familiar to you and therefore the pan more reliable. Also, the skillet fits better than an unwieldy paella pan on a stove-top burner. About a half hour before your guests arrive, turn on the oven, assemble the dish in the paella pan, and allow it to bake until the rice is cooked.
This recipe is designed for a 14- to 16-inch paella pan. Bob and I bought ours in Valencia, the home of seafood paella. Why that size? Because it was the biggest we could fit into our suitcase. Ingredients:
• 24 small clams • 12 mussels • 1¼ pounds medium shrimp • 5 to 6 cups chicken broth • A good pinch of saffron threads • ½ pound chorizo sausage • 6 to 8 chicken drumsticks, skin on • Salt and freshly ground pepper • About ⅓ cup olive oil • 1 large onion, finely chopped • 1 sweet red pepper, finely chopped • 1 sweet yellow pepper, finely chopped • 6 cloves garlic, finely chopped • ½ teaspoon paprika, preferably smoked sweet • Spanish paprika (pimentón) • 1 cup ripe cherry tomatoes, pierced with a knife • 1 cup frozen peas, defrosted • 2½ cups Spanish short-grain rice, preferrably the bomba variety • Lemon wedges for garnish • Smoky Garlic Mayonnaise (p. 58) for serving

Chapter Six: From Sea to Shining Sea
47
Advance Preparation: 1. Discard any clams that do not close when tapped. Scrub the remainder under running water.
Discard any mussels that do not close when tapped. Scrub the remainder under running water. Place them together in a bowl and refrigerate. Peel the shrimp, reserving the shells, then devein (remove the black vein down the back). Place in another bowl and refrigerate.
2. To enhance the flavor of the broth, place the reserved shrimp shells in a sauté pan with a little olive oil. Cook over medium-high heat for about 8 minutes, or until they turn red. Add 1½ cups of the chicken broth to the pan and let it simmer quietly for about 5 minutes. Strain the broth into a glass measure. Discard the shells.
3. Crush enough of the saffron between 2 spoons or with your fingers to yield ½ teaspoon crushed. Add it, along with a few whole saffron threads, to the hot broth to steep. Add enough additional chicken broth to make 5 cups. Place 1 cup additional plain broth off to the side. You may or may not need some of it.
4. Cut the chorizo into 4-inch lengths and simmer in water for 15 minutes. Let cool and slice into ¼-inch-thick slices. Set aside.
5. Rinse the chicken pieces and pat dry. Sprinkle all over with salt and pepper. Place a heavy cast-iron skillet or paella pan over high heat and add the olive oil. It should just film the bottom of the pan. When hot, add the chicken and brown for about 15 minutes on all sides. The chicken should be barely over half cooked. Transfer the chicken to a plate, leaving the oil behind in the pan, and set aside.
6. Add the onion and sweet peppers to the oil remaining in the pan and sauté over medium-low heat for about 10 minutes, or until the vegetables are softened but not browned. Add the garlic and paprika and cook for another 2 minutes, but do not let the garlic brown. Add the cherry tomatoes and cook for 2 minutes longer. Set the vegetables (this is called the sofrito) aside to cool.
Finish the Dish: 1. About 35 minutes before serving, place a rack in the lowest position in the oven. Preheat the
oven to 400°F. 2. Place the sofrito in a 16-inch paella pan, spreading it out. Distribute the rice over the
vegetables and stir to coat with the oil in the pan. 3. Bring the 5 cups broth to a boil in a saucepan. Place the paella pan on the stovetop over
medium-high heat. Pour the boiling broth over the rice and vegetables. Bring to a boil, reduce the heat to low, and simmer, without stirring, for 10 minutes.
4. Turn off the heat. Add the sausage slices, pushing them into the rice. Add the shrimp. Add the clams and mussels, hinge side down.
5. If there is room, add the chicken pieces. If not, place the drumsticks in a shallow baking dish and bake them on the top oven shelf while the paella is on the bottom shelf.
6. Carefully place the paella in the oven and bake for 10 to 12 minutes. Check the dish. If the rice seems too dry, add some of the reserved broth. Do not stir the rice. When done, the mollusks will be open, the shrimp will be pink, and the rice should have a bit of a bite. If necessary, bake for 3 minutes longer.

Chapter Six: From Sea to Shining Sea
48
7. Remove the paella from the oven. Scatter the defrosted peas over the surface. Cover the paella with a tea towel or foil and allow it to rest for 5 minutes. As it stands, the remaining liquid will be absorbed and the rice will become tender. This is a very important step.
8. Garnish with lemon wedges. Place the paella in its pan in the center of the table and allow guests to help themselves. Pass the chicken legs, if you didn’t fit them in the paella pan, and pass the garlic mayonnaise.

Chapter Six: From Sea to Shining Sea
49
SCAMPI SCAMPI
Makes 4 appetizer servings or 2 generous main-course servings
Shrimp scampi (or in Italian, scampi scampi) is a popular dish in Italian American restaurants, perhaps more so than in Italy. Top the garlicky shrimp with crisp, buttered bread crumbs for crunch. You can make your own, but I prefer to use the extra-crunchy Japanese bread crumbs called panko. Many non-Japanese markets carry panko these days. Ingredients:
Crumb Topping: • 1 tablespoon unsalted butter • ¼ cup coarse, dried bread crumbs, preferably panko
Shrimp: • 3 tablespoons unsalted butter • 1 tablespoon extra-virgin olive oil • 1 pound shrimp, peeled, with tails removed, and deveined • 4 large cloves garlic, sliced • Kosher salt • Freshly ground pepper • ¼ cup dry white wine • 2 tablespoons chopped fresh flat-leaf parsley • 2 tablespoons freshly squeezed lemon juice Lemon wedges for garnish
1. Make the crumb topping: Heat a small sauté pan over medium heat. Add the butter. When it
is hot, add the bread crumbs and stir until they become tan. Immediately remove the pan from the heat and set aside.
2. Make the shrimp: Heat a large sauté pan over high heat, and add the butter and olive oil. When the mixture is sizzling, add the shrimp and sauté, tossing constantly, for 1 minute. Add the garlic and sauté for about 1 minute longer, or until the shrimp turn opaque and pink. Do not let the garlic brown. Season to taste with salt and pepper.
3. Reduce the heat to medium and add the wine. Bring to a boil, then reduce the heat to low and simmer for 2 minutes. Remove the pan from the heat. Sprinkle the shrimp with the parsley and drizzle with the lemon juice, then toss to coat.
4. Divide the shrimp among individual-serving casserole dishes and top with the crisp bread crumbs. Serve right away. Pass the lemon wedges for added spritzing.

Chapter Seven: A Carnival for Carnivores
50
MARINATED SKIRT STEAK FAJITAS
Makes 4 servings
Skirt steak, which is the diaphragm that separates the chest and abdominal cavities of the animal, has a rich, beefy flavor. It used to be hard to find, but since fajitas have become popular, the cut is readily available at the supermarket. The thinness and loose grain of this rather tough cut make it a good choice for marinating.
In Mexican slang, a fajita is a small “belly band,” girdle, or cummerbund. Edible fajitas are so named because of how the meat and other ingredients are wrapped into a tortilla.
A pile of corn chips on the side and a bowl of warm black beans or cool black bean salad are good companions to this dish. Ingredients:
• 2 tablespoons olive oil • 2 tablespoons freshly squeezed lime juice • 2 cloves garlic, coarsely chopped • 1 jalapeño pepper, seeds and ribs removed, coarsely chopped • 2 small or 1 large skirt steak, about 2 pounds total • 2 large, mild onions, sliced • 12 flour or corn tortillas, 8 inches in diameter • Coarse salt and freshly ground pepper • Guacamole for serving • Salsa for serving
1. In a mini–food processor or blender, combine the olive oil, lime juice, garlic, and jalapeño.
Whirl until smooth and puréed. Place the steaks in a nonreactive dish or zipper-top plastic bag. Spread the mixture on both sides of the steak. Cover or seal closed and marinate in the refrigerator for at least 2 hours and up to 8 hours. Return to room temperature before cooking.
2. Preheat the grill or broiler. Preheat the oven to 300°F. 3. Broil or grill the onion slices and keep warm in the oven. Wrap the tortillas in a slightly
dampened tea towel, put in a pie pan or on a cookie sheet, and place in the oven to warm and steam.
4. Grill or broil the steak, turning once, for about 5 minutes per side, or less, for medium-rare. Transfer it to a cutting board and allow the meat to rest for at least 5 minutes.
5. Holding the knife at an angle to the cutting board, cut the meat across the grain into thin slices. Season the slices with coarse salt and pepper. (Coarse salt adds a nice crunch to the meat.)
6. Guests can build fajitas to their own liking. Holding a tortilla in one hand, add strips of meat, a helping of grilled onions, and a few spoons each of guacamole and salsa. Then roll the tortilla around the filling for a handheld meal.

Chapter Seven: A Carnival for Carnivores
51
OSSO BUCO
Makes 4 generous servings
This is one of the best (and most delicious) illustrations of how collagen in the tough connective tissues in meat surrounding a bone turns into soft, smooth gelatin under the influence of moist heat.
Use your heaviest Dutch oven, preferably of enameled cast iron, to make this dish. When shopping, make sure that the bone of each piece of veal has a soft center full of marrow. Some bones do not. Give each diner a small, narrow knife (a lobster pick works in a pinch) to use for removing the creamy marrow. When spread on toast and sprinkled with salt and pepper, marrow is a treat. Serve the shanks with Baked Polenta (p. 42) and pass crusty peasant bread. Ingredients:
• 4 to 6 meaty, bone-in veal shanks, each 8 to 12 ounces and about 2 inches thick • About ½ cup all-purpose flour • About 4 tablespoons olive oil • Salt and freshly ground pepper • 1 anchovy fillet • 4 cloves garlic, sliced • 2 small carrots, peeled and sliced • 1 onion, sliced • 1 celery stalk, diced • ½ cup dry white wine • ½ cup tomato purée
Gremolata: • 2 tablespoons chopped fresh parsley • 1 clove garlic, finely minced • 1 tablespoon grated lemon zest • Salt and freshly ground pepper
1. Preheat the oven to 325°F. 2. Coat the veal shanks with flour on both sides, shaking off any excess. Place a large, heavy
Dutch oven over medium heat for 1 minute. Add 2 tablespoons of the olive oil and 2 veal shanks and brown for 4 to 5 minutes on each side, seasoning them with salt and pepper as they brown. Do not crowd the pan. Remove them to a plate, add the remaining 2 veal shanks to the pot, and repeat. The browning for all 4 shanks will take a total of 15 to 20 minutes.
3. Add the remaining 2 tablespoons oil and the anchovy filet to the pot, mashing the anchovy into the oil. Add the garlic, carrots, onion, and celery, reduce the heat to medium-low, and cook the vegetables, stirring occasionally, for about 10 minutes, or until soft.

Chapter Seven: A Carnival for Carnivores
52
4. Add the veal shanks in a single layer, nestling them into the vegetables. Combine the wine and tomato purée in a small bowl, then pour the mixture over the meat and vegetables.
5. Cover the Dutch oven with a tight-fitting lid and place in the oven. Cook for 1 ½ to 2 hours, or until the meat is tender and falling off the bone and the juices are reduced. If the mixture starts to dry out during cooking, add a small amount of wine or water.
6. Make the gremolata: Just before serving, combine the parsley, garlic, and lemon zest in a small bowl.
7. When ready to serve, remove the meat to a warmed deep platter and cover to keep warm. Some cooks like to strain the sauce, but others prefer to keep the vegetables as they are, so strain it if you like. Stir the gremolata into the sauce and correct the seasoning with salt and pepper. Place the pot over medium heat and simmer for 2 minutes.
8. Pour the sauce over the meat. Serve right away.

Chapter Eight: Spice is the Variety of Life
53
SPICY CHOCOLATE CRINKLE MONSTERS
Makes 16 large cookies
Sugar and spice and everything nice—that’s what these dramatic cookies are made of. They owe their appeal to their monstrous size, a hit of black pepper on the tongue, and an after-burn of cayenne. They look like the oversized cookies that you see on bakery shelves or in coffee shops at outrageous prices. Commercial coarsely ground black pepper is okay to use instead of grinding it fresh, because of the consistent size of the commercial grind. Note that olive oil stands in for butter in the recipe. A spring-loaded ice cream scoop is ideal for portioning the cookie dough. Ingredients:
• 2 cups granulated sugar • ¾ cup mild olive oil • 4 large eggs • 2 teaspoons vanilla extract • 2⅓ cups all-purpose flour • ¾ cup unsweetened cocoa powder, preferably Dutch process • 2 teaspoons baking powder • 2 teaspoons coarse black pepper • ½ teaspoon salt • ½ teaspoon ground allspice • ¼ teaspoon ground cinnamon • ⅛ teaspoon cayenne pepper • About 1 cup confectioners’ sugar
1. Preheat the oven to 350°F. Spray 2 cookie sheets with nonstick cooking spray. 2. In a large bowl, stir together the granulated sugar and olive oil. Whisk in the eggs and
vanilla. In a medium bowl, stir together the flour, cocoa, baking powder, pepper, salt, and spices, mixing well to combine. Sifting is not necessary.
3. Add the dry ingredients to the egg mixture all at once and stir with a wooden spoon until no patches of the dry flour mixture are visible.
4. Place the confectioners’ sugar in a wide dish with shallow sides, like a soup plate. You will need this when you shape the cookies.
5. Note on shaping the cookies: To measure the volume of your ice cream scoop, fill it with water, then pour the water into a glass measure. It should measure ¼ cup. If you don’t have a scoop, use a ¼-cup measuring cup to portion out the dough. Because there is oil in the recipe, the dough will not stick to your hands or utensils. To make a smaller cookie, shape the dough into balls the size of a large walnut.
6. To shape the first cookie, scoop out the dough with the ice cream scoop and release it onto the confectioners’ sugar. Using 2 spoons or your fingers, roll the ball around in the sugar to

Chapter Eight: Spice is the Variety of Life
54
coat well. Transfer the ball to the cookie sheet. Repeat with the rest of the dough, placing the balls 2 to 3 inches apart.
7. Bake for 12 to 15 minutes, or until the cookies have crinkled tops and are no longer soft to the touch. Remove from the oven and allow the cookies to rest on the cookie sheet on a wire rack for 2 minutes, then transfer them with a pancake turner to the rack to cool completely.

Chapter Eight: Spice is the Variety of Life
55

Chapter Eight: Spice is the Variety of Life
56
CHILI PEPPER HASH BROWNS
Makes 4 servings
Chili peppers, even of the same variety, are not all created equal. Some of them may be quite hot, others relatively mild. If yours turns out to be mild and will not lend enough oomph to the dish, add a sprinkling of hot red pepper flakes to taste. This dish should be definitely spicy.
Preparation of the peppers and potatoes can be done in advance, allowing only about 12 minutes to finish the dish before serving. Try these hash browns alongside roasted chicken. In the unlikely event that you have leftovers, reheat the hash for breakfast for serving with a softly poached or over-easy fried egg. Ingredients:
• 2 large sweet potatoes, scrubbed but not peeled • 1 tablespoon olive oil • 1 tablespoon unsalted butter • 1 small onion, finely diced (about ⅓ cup) • ½ small sweet red pepper, finely diced (about ½ cup) • ½ small sweet green pepper, finely diced (about ½ cup) • ¼ cup chopped fresh chili pepper (ancho, serrano, poblano, or jalapeño), stemmed
and seeded • Kosher salt • Red pepper flakes, optional
1. Bring a large saucepan of salted water to a boil. Add the whole sweet potatoes and simmer
for 10 minutes; they will be quite firm. Drain. (Don’t even think about cutting them in half or cooking any longer, or they will go to mush.)
2. When the potatoes are cool enough to handle, peel them, cut lengthwise into slabs, and then cut the slabs into ¼-inch dice. You should have roughly 3 cups.
3. In a large skillet, heat the olive oil and butter over medium heat. Add the onion and all the peppers and cook, stirring, for 1 to 2 minutes, or until softened. Add the sweet potatoes and cook, shaking the pan and flipping the potatoes occasionally for about 10 minutes, or until they are nicely brown and tender.
4. Season to taste with kosher salt and, if necessary, red pepper flakes. Serve hot.

Chapter Eight: Spice is the Variety of Life
57
WASABI GUACAMOLE
Makes about 1 cup Even if you could lay your chopsticks on the real thing, it would be a shame to use real wasabi in this recipe, diluted as it would be by the other ingredients. So pick up some ordinary, freshly made “wasabi” paste and pickled ginger at any sushi bar or at a large supermarket. Powdered wasabi that can be reconstituted with water is available in cans. I have found that wasabi paste in plastic tubes varies in quality. Wasabi tends to lose its kick the longer it stands, so make the appetizer only an hour or so before serving. Serve the guacamole with deep-fried wonton or tortilla triangles as an appetizer with any menu with pan-Asian or Pacific rim accents. Ingredients:
• 1 large, ripe Hass avocado • Juice of 1 lime (about 1½ tablespoons) • 1 teaspoon wasabi paste • 1 teaspoon minced pickled ginger, optional • 1 small clove garlic, crushed and minced • Big pinch of kosher salt • 1 scallion, both white and green parts, trimmed and minced • 1 tablespoon chopped fresh cilantro
1. Halve the avocado lengthwise and remove the seed. With a paring knife, cut a grid pattern in
the flesh of each half, down to the skin. Using a teaspoon, scoop out the diced flesh into a medium bowl. Add the lime juice.
2. Using a fork or pastry blender, mash the avocado, but leave it chunky. Add the wasabi paste, ginger, garlic, and salt. Mix until well combined. (Warning: Because wasabi and avocado are the same color, be sure to mix the ingredients well. A hit of pure wasabi paste would be an unwelcome surprise.)
3. Adjust the seasoning to your taste, adding more wasabi and salt if necessary, and stir in scallion and cilantro.

Chapter Nine: Galley Gear
58
SMOKY GARLIC MAYONNAISE
Makes about 1¼ cups
Smoked Spanish paprika, pimentón, adds a subtle hint of wood fire to this garlic mayonnaise. It is a classic accompaniment to paella (p. 46), and is also good with Hot Wok Mussels (p. 45). You can use it as a dip for raw vegetables, or serve it with steamed fish, especially with fresh cod. If the flavor is too intense, half olive oil and half peanut oil makes a delicious dressing.
For herb mayonnaise, add ½ cup minced fresh herbs (parsley, chives, chervil, tarragon) in place of the garlic in step 2. A blender does the best job of blending the herbs into the emulsion. Ingredients:
• 1 large egg • 1 teaspoon smoked Spanish paprika (pimentón) • ½ teaspoon dry mustard • ½ teaspoon salt • 2 tablespoons cider, sherry, or wine vinegar • 1 cup mild extra-virgin olive oil • 1 large clove garlic, coarsely chopped
1. Break the egg into the blender container. Add the pimentón, mustard, salt, and vinegar. Add
¼ cup of the oil. Cover the container and turn the motor on to low speed. 2. Immediately uncover and pour in the remaining oil in a fine, steady stream. Do not hurry.
When all the oil has been incorporated, add the garlic (or the herbs, if using). Continue to blend for 1 minute, or until smooth.
3. Allow the mayonnaise to rest in the refrigerator for at least 1 hour before using, so the flavors will mellow and soften. Refrigerate for up to 4 days. Don’t serve it cold, because chilling dulls the olive oil flavor.

Chapter Nine: Galley Gear
59
PAULA WOLFERT’S SLOW-ROASTED LEG OF LAMB WITH POMEGRANATE GLAZE AND RED ONION–PARSLEY RELISH
Makes 6 to 8 servings
Low-temperature cooking delivers meltingly tender, rare meat. The lamb is first browned in a hot oven, then the temperature is reduced to 225°F. Roasting continues until the internal temperature of the meat reaches 130 to 135°F. The roast must rest before carving. The temperature will slowly rise to 135 to 140°F for a rare and juicy roast.
When carving, start at the shank end and slice perpendicular to the main bone. To obtain tender meat, always slice across the grain. Serve this Turkish-style lamb with the traditional Red Onion–Parsley Relish. Ingredients:
• 1 bone-in leg of lamb, 5 to 6 pounds • 2 tablespoons pomegranate concentrate or molasses • ⅓ cup water • 1½ tablespoons extra-virgin olive oil • ½ cup finely chopped onion • 4 large cloves garlic, crushed • 2 teaspoons tomato paste • 1 teaspoon crushed red pepper flakes, preferably Aleppo or Turkish • Pinch of sugar • Salt and freshly ground black pepper • 1 cup chicken or vegetable broth • 1 to 2 tablespoons unsalted butter • Red Onion–Parsley Relish (recipe follows)
1. Five to 6 hours before you plan to serve the lamb, trim off the excess fat, leaving about a ¼-
inch layer. In a large, deep bowl, dilute the pomegranate concentrate or molasses with the water. Stir in the olive oil, onion, garlic, tomato paste, red pepper, and sugar. Add the lamb and turn to coat. Let stand for no longer than 2 to 3 hours at room temperature, turning once or twice.
2. About 3 hours before serving, place a rack in the lower third of the oven. Preheat the oven to 450°F.
3. Set the lamb, fattiest side up, on a rack in an oiled shallow roasting pan. Season the lamb with plenty of salt and black pepper and set in the oven. Immediately reduce the oven temperature to 250°F. Roast the lamb, basting occasionally with the pan drippings, for 1¾ hours. Turn the roast over and continue roasting and basting for about 30 minutes longer, or until the lamb reaches an internal temperature of 130 to 135°F.
4. Remove the lamb to a carving board, cover loosely with foil, and let rest for 15 to 20 minutes. (During this time, the temperature will rise to 135 to 140°F.) Meanwhile, defat the

Chapter Nine: Galley Gear
60
pan juices. Add the broth, set the pan over medium heat, and stir to scrape up all the brown bits that cling to the bottom. Boil until reduced to napping consistency. Adjust the seasoning and keep hot.
5. Carve the lamb and serve with the sauce and the accompanying onion–parsley relish.
RED ONION–PARSLEY RELISH
Makes about 1 cup
Ingredients:
• 2 red onions, thinly sliced • 1 teaspoon coarse salt • ½ cup chopped fresh flat-leaf parsley • 1 teaspoon ground sumac*
Toss the red onions with the coarse salt. Rub the salt into the slices and let stand for 5 minutes. Rinse the onions under cold running water and drain thoroughly. Mix the onions with the parsley and sumac. Serve within 30 minutes. *Sumac is a nonpoisonous red berry that gives a distinctive, tangy-lemony flavor to dishes. Purchase ground sumac from a spice specialty store. If you have a choice, choose the best-quality sumac, which comes from Jordan. Store in the freezer to maintain quality.

Chapter Ten: A Few Lagniappes for the Insatiable Inquiring Mind
61
MARSHMALLOW ZAPS
These marshmallow-caramel treats, crisp on the outside and soft on the inside, are not only a unique treat, but fun to watch while you’re making them. Look, Ma, no hands! Ingredients:
• 6 large (not miniature) marshmallows • About 2 tablespoons confectioners’ sugar
1. Arrange the marshmallows in a Stonehenge-style ring, placing them upright and well
separated, on a microwave-safe dinner plate. 2. Zap the marshmallows in the microwave oven on high, watching through the window as they
balloon to several times their size. Stop the oven when they have developed brown, volcano-like holes on top, after about 1½ minutes. (The time depends on the power of your microwave oven.)
3. Remove the plate carefully (it may be quite hot) and place it on the counter to cool completely, during which time the marshmallows will deflate and flatten.
4. Remove each Zap from the plate (it will be quite sticky), dip its bottom into confectioners’ sugar, and place it on a serving dish or platter. It will be crisp as a meringue on the outside and chewy on the inside, with a layer of brown caramelized sugar in the middle as if it were an inside-out fire-roasted marshmallow. They may not look pretty, but you’ll sure want s’more.

Chapter Ten: A Few Lagniappes for the Insatiable Inquiring Mind
62

Chapter Ten: A Few Lagniappes for the Insatiable Inquiring Mind
63
Figure 2
Tempering chocolate. The chocolate is first heated to 120°F (50°C) to melt all crystal forms, then slowly cooled to 80°F (27°C) and reheated to 90°F (32°C), so that all crystal forms are melted
except the desired form V. (See Table 7.) (Temperatures are approximate.)

Chapter Ten: A Few Lagniappes for the Insatiable Inquiring Mind
64
GANACHE
Makes 1½ cups
A ganache is a mixture of melted chocolate and heated heavy cream, blended together until very smooth. The relative amounts of the two ingredients may vary, but equal amounts give good results and are easy to remember. Ganache is often cooled and shaped into balls to form the soft centers for truffles. Here, lukewarm ganache is poured over a cake to make a smooth and luscious shiny glaze.
For a 1-layer 8- or 9-inch round cake, you will need about 1 cup ganache. Use the leftover ganache as a sauce for poached pears, ice cream, or other dessert. It will keep for up to 2 months in a well-covered container in the refrigerator—if you can keep from eating it with a spoon, that is. Ingredients:
• 8 ounces semisweet or bittersweet chocolate, finely chopped • 1 cup heavy cream
1. Put the chopped chocolate in a medium heatproof bowl. 2. In a small saucepan, bring the cream to a boil. Pour the hot cream over the chocolate and
whisk gently until the chocolate is completely melted and smooth. Allow to cool to warm. 3. Place a cool 8- or 9-inch cake layer on a rack over a baking sheet or a piece of foil. Pour the
warm ganache over the cake and use a metal icing spatula to coax and spread it over the top of the cake and down the sides. Let the iced cake set for about 1 hour before serving.

Chapter Ten: A Few Lagniappes for the Insatiable Inquiring Mind
65
GRILLED CHOCOLATE SANDWICH
Serves 1 or 2 indulgently
This sandwich makes a surprising and delicious dessert, afternoon snack, or indulgent breakfast. It is a semi-incestuous marriage, if you will, of transatlantic cousins, the American grilled cheese sandwich with the French pain au chocolat. In the latter pâtisserie classic, batons of chocolate are wrapped in rectangles of flaky pastry.
Bob and I prefer dark chocolate, but you can make yours with milk chocolate if you wish. Ingredients:
• 2 teaspoons unsalted butter, at room temperature • 2 slices plain white or sourdough bread, each about ½ inch thick or less • 1 ounce bittersweet chocolate, coarsely chopped
1. Spread 1 teaspoon softened butter on 1 side of each slice of bread. Place 1 slice, butter side
down, in the center of a small, cold nonstick skillet. Carefully scatter the chocolate over the surface of the bread to within ¼ inch of the edge. Top with the other slice of bread, buttered side up, to make a sandwich.
2. Place the skillet over medium-high heat. Put a flat weight, such as a small plate, on top of the sandwich. Cook for 2 to 3 minutes, or until the bottom slice is lightly browned. The chocolate should be barely melted, not oozing out the sides. Turn the sandwich over and cook for about 2 minutes longer, or until the second side is browned.
3. Remove the sandwich to a plate, cut into quarters, and serve warm.


![EINSTEIN Fluch [Kompatibilitätsmodus]research.ncl.ac.uk/.../TEM_in_food_drink_industry_EINSTEIN_Fluch.pdf · EINSTEIN Overview Introduction EINSTEIN: Idea and approach EINSTEIN:](https://img.pdfslide.us/doc/110x75/5f9187855f5fa327341aa419/einstein-fluch-kompatibilittsmodus-einstein-overview-introduction-einstein.jpg)