Embed Size (px)
Citation preview
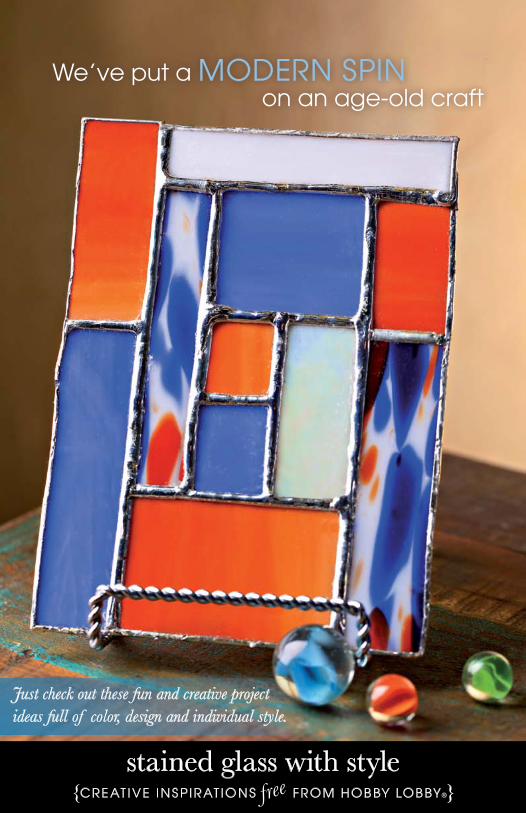
Just check out these fun and creative project ideas full of color, design and individual style.
We’ve put a modern spin on an age-old craft
stained glass with style{Cr eAT iVe in s p i r AT ion s From HoB BY LoB BY®}free
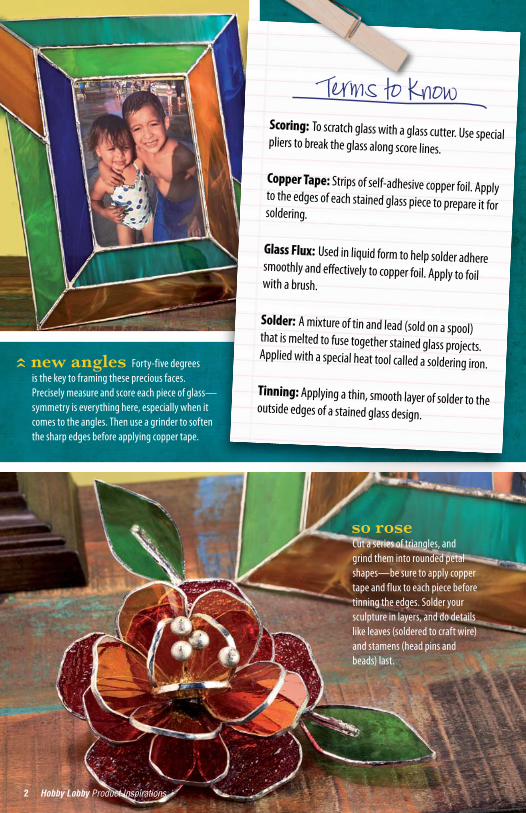
so rose Cut a series of triangles, and grind them into rounded petal shapes—be sure to apply copper tape and flux to each piece before tinning the edges. Solder your sculpture in layers, and do details like leaves (soldered to craft wire) and stamens (head pins and beads) last.
new angles Forty-five degrees is the key to framing these precious faces. Precisely measure and score each piece of glass—symmetry is everything here, especially when it comes to the angles. Then use a grinder to soften the sharp edges before applying copper tape.
«
Terms to KnowScoring: To scratch glass with a glass cutter. Use special pliers to break the glass along score lines.
Copper Tape: Strips of self-adhesive copper foil. Apply to the edges of each stained glass piece to prepare it for soldering.
Glass Flux: Used in liquid form to help solder adhere smoothly and effectively to copper foil. Apply to foil with a brush.
Solder: A mixture of tin and lead (sold on a spool) that is melted to fuse together stained glass projects. Applied with a special heat tool called a soldering iron.
Tinning: Applying a thin, smooth layer of solder to the outside edges of a stained glass design.
2 Hobby Lobby Product Inspirations
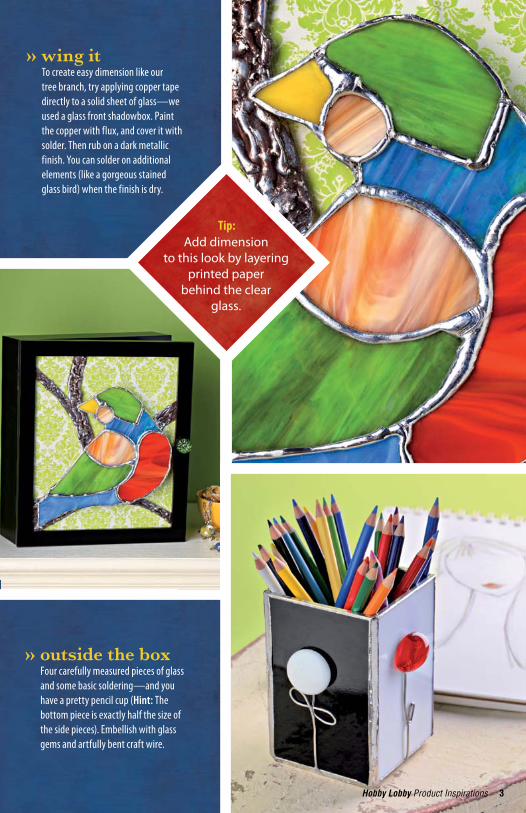
» wing it To create easy dimension like our tree branch, try applying copper tape directly to a solid sheet of glass—we used a glass front shadowbox. Paint the copper with flux, and cover it with solder. Then rub on a dark metallic finish. You can solder on additional elements (like a gorgeous stained glass bird) when the finish is dry.
» outside the box Four carefully measured pieces of glass and some basic soldering—and you have a pretty pencil cup (Hint: The bottom piece is exactly half the size of the side pieces). Embellish with glass gems and artfully bent craft wire.
Tip: Add dimension
to this look by layering printed paper
behind the clear glass.
Hobby Lobby Product Inspirations 3
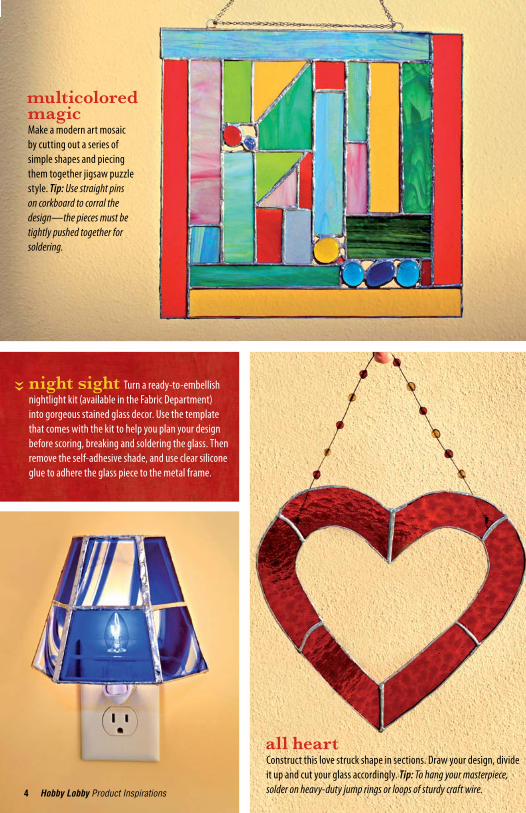
night sight Turn a ready-to-embellish nightlight kit (available in the Fabric Department) into gorgeous stained glass decor. Use the template that comes with the kit to help you plan your design before scoring, breaking and soldering the glass. Then remove the self-adhesive shade, and use clear silicone glue to adhere the glass piece to the metal frame.
«
multicolored magic Make a modern art mosaic by cutting out a series of simple shapes and piecing them together jigsaw puzzle style. Tip: Use straight pins on corkboard to corral the design—the pieces must be tightly pushed together for soldering.
all heart Construct this love struck shape in sections. Draw your design, divide it up and cut your glass accordingly. Tip: To hang your masterpiece, solder on heavy-duty jump rings or loops of sturdy craft wire.4 Hobby Lobby Product Inspirations
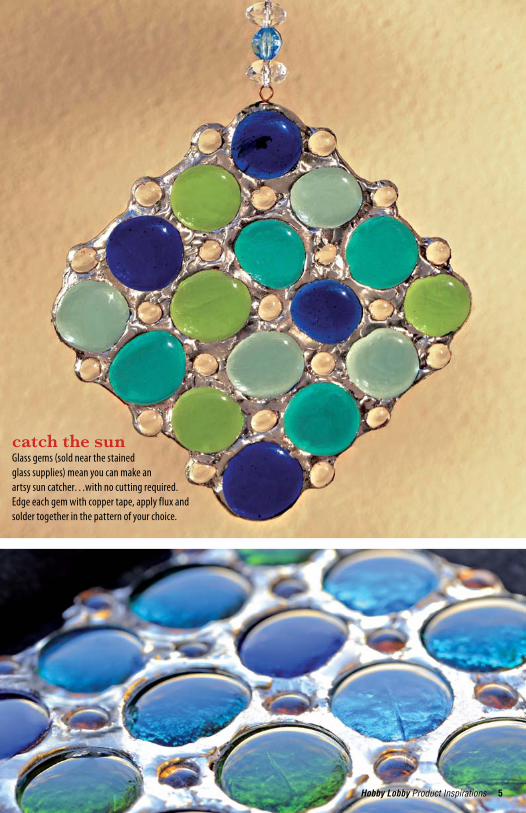
catch the sun Glass gems (sold near the stained glass supplies) mean you can make an artsy sun catcher…with no cutting required. Edge each gem with copper tape, apply flux and solder together in the pattern of your choice.
Hobby Lobby Product Inspirations 5
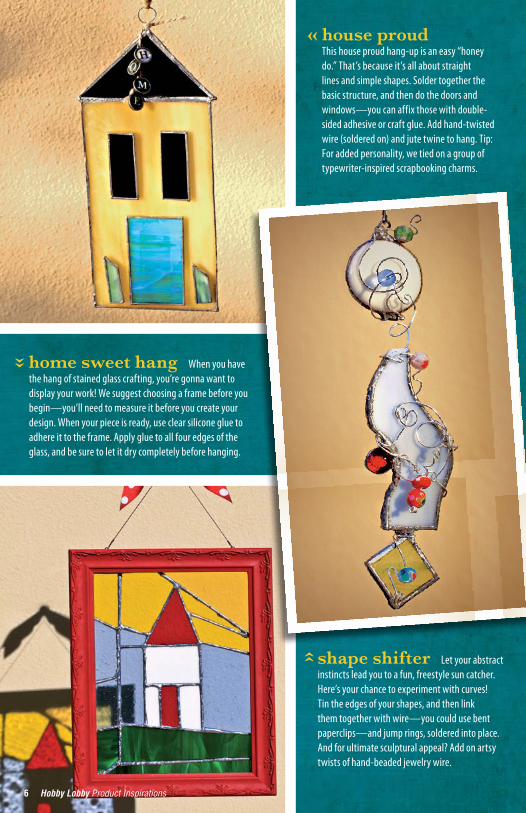
« house proud This house proud hang-up is an easy “honey do.” That’s because it’s all about straight lines and simple shapes. Solder together the basic structure, and then do the doors and windows—you can affix those with double-sided adhesive or craft glue. Add hand-twisted wire (soldered on) and jute twine to hang. Tip: For added personality, we tied on a group of typewriter-inspired scrapbooking charms.
shape shifter Let your abstract instincts lead you to a fun, freestyle sun catcher. Here’s your chance to experiment with curves! Tin the edges of your shapes, and then link them together with wire—you could use bent paperclips—and jump rings, soldered into place. And for ultimate sculptural appeal? Add on artsy twists of hand-beaded jewelry wire.
«
home sweet hang When you have the hang of stained glass crafting, you’re gonna want to display your work! We suggest choosing a frame before you begin—you’ll need to measure it before you create your design. When your piece is ready, use clear silicone glue to adhere it to the frame. Apply glue to all four edges of the glass, and be sure to let it dry completely before hanging.
«
6 Hobby Lobby Product Inspirations
Hobby Lobby Product Inspirations 7
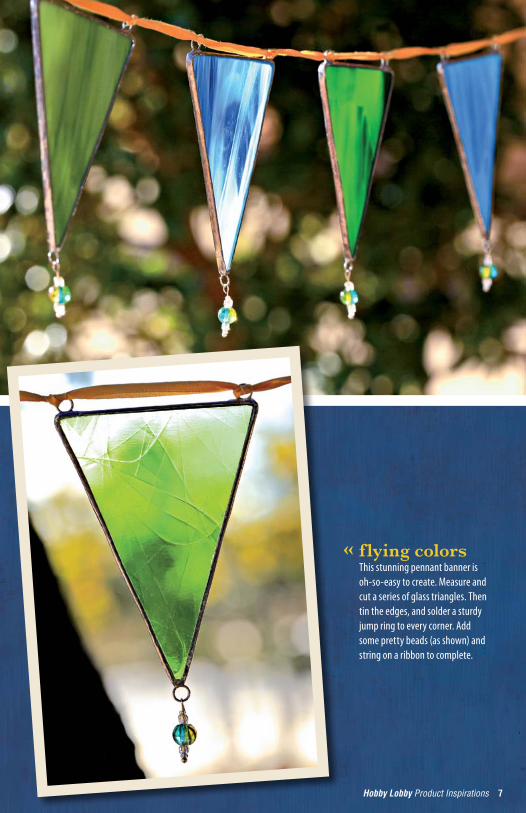
flying colors This stunning pennant banner is oh-so-easy to create. Measure and cut a series of glass triangles. Then tin the edges, and solder a sturdy jump ring to every corner. Add some pretty beads (as shown) and string on a ribbon to complete.
«
8 Hobby Lobby Product Inspirations
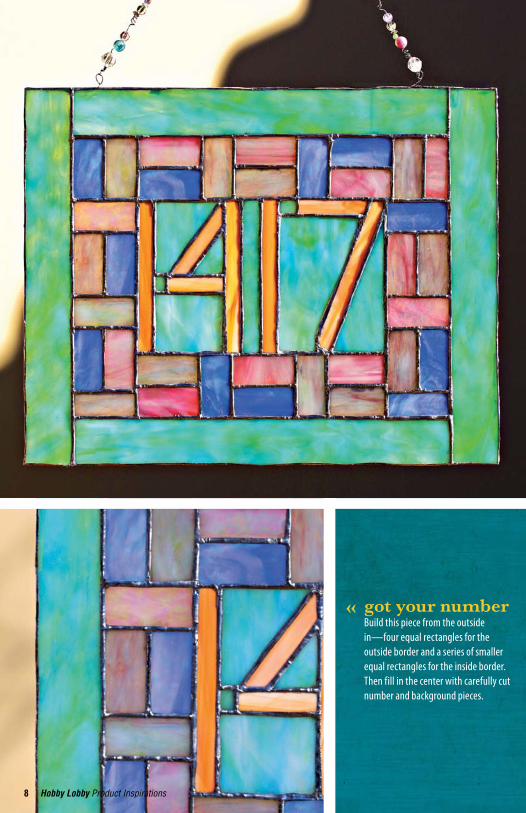
got your numberBuild this piece from the outside in—four equal rectangles for the outside border and a series of smaller equal rectangles for the inside border. Then fill in the center with carefully cut number and background pieces.
«
8 Hobby Lobby Product Inspirations
Hobby Lobby Product Inspirations 9
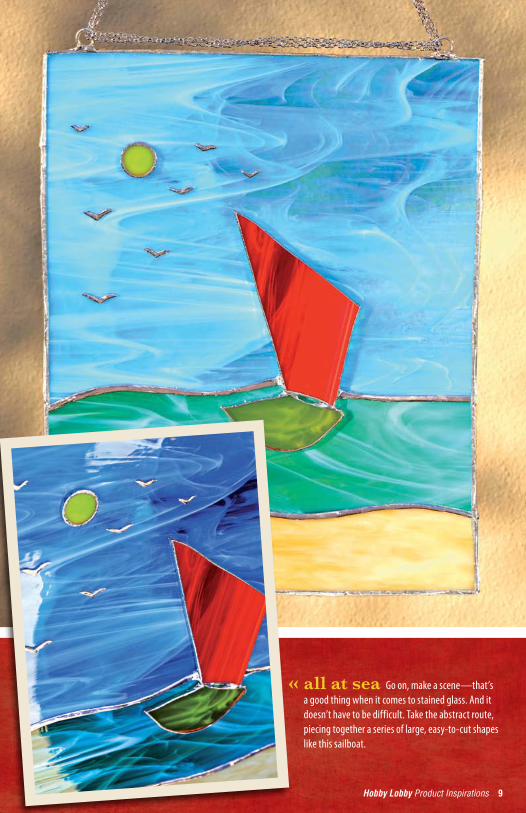
all at sea Go on, make a scene—that’s a good thing when it comes to stained glass. And it doesn’t have to be difficult. Take the abstract route, piecing together a series of large, easy-to-cut shapes like this sailboat.
«
Hobby Lobby Product Inspirations 10
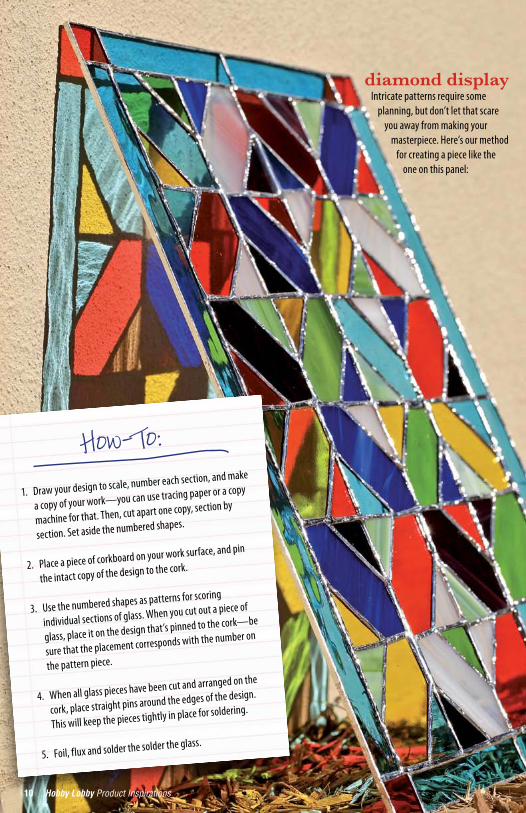
diamond display Intricate patterns require some
planning, but don’t let that scare you away from making your
masterpiece. Here’s our method for creating a piece like the
one on this panel:
1. Draw your design to scale, number each section, and make
a copy of your work—you can use tracing paper or a copy
machine for that. Then, cut apart one copy, section by
section. Set aside the numbered shapes.
2. Place a piece of corkboard on your work surface, and pin
the intact copy of the design to the cork.
3. Use the numbered shapes as patterns for scoring
individual sections of glass. When you cut out a piece of
glass, place it on the design that’s pinned to the cork—be
sure that the placement corresponds with the number on
the pattern piece.
4. When all glass pieces have been cut and arranged on the
cork, place straight pins around the edges of the design.
This will keep the pieces tightly in place for soldering.
5. Foil, flux and solder the solder the glass.
How-To:
10 Hobby Lobby Product Inspirations
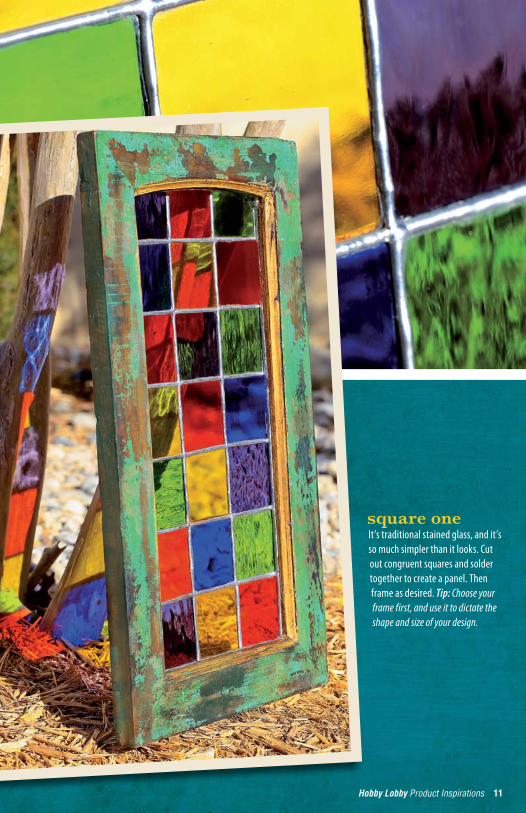
square one It’s traditional stained glass, and it’s so much simpler than it looks. Cut out congruent squares and solder together to create a panel. Then frame as desired. Tip: Choose your frame first, and use it to dictate the shape and size of your design.
Hobby Lobby Product Inspirations 11
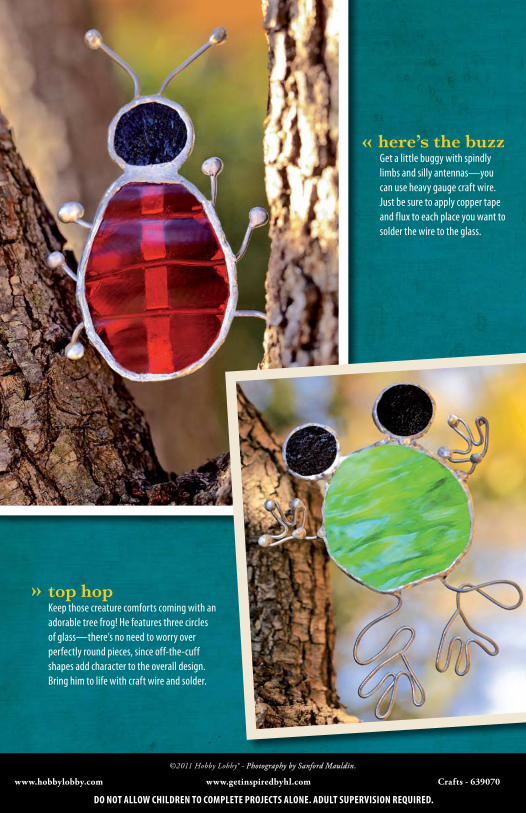
« here’s the buzzGet a little buggy with spindly limbs and silly antennas—you can use heavy gauge craft wire. Just be sure to apply copper tape and flux to each place you want to solder the wire to the glass.
top hopKeep those creature comforts coming with an adorable tree frog! He features three circles of glass—there’s no need to worry over perfectly round pieces, since off-the-cuff shapes add character to the overall design. Bring him to life with craft wire and solder.
«
www.hobbylobby.com www.getinspiredbyhl.com Crafts - 639070
Do noT allow ChilDren To CompleTe projeCTS alone. aDulT SuperviSion requireD.
©2011 Hobby Lobby® - Photography by Sanford Mauldin.