Embed Size (px)
Citation preview

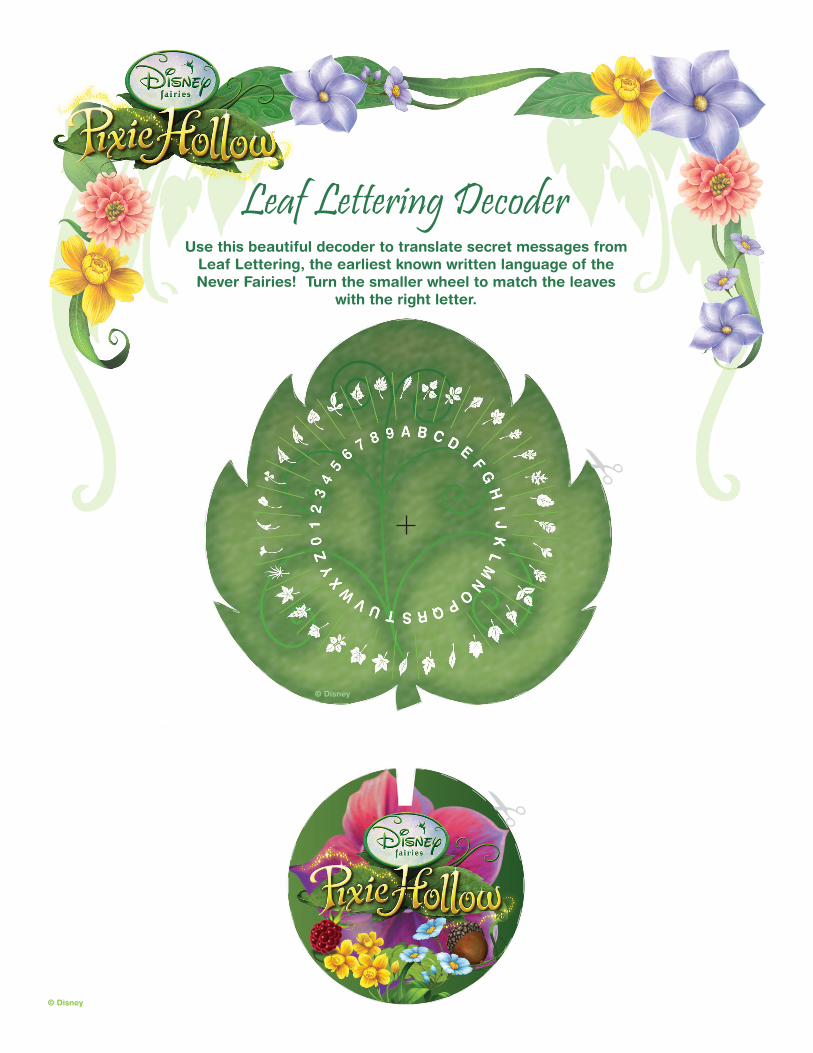
Leaf Lettering Decoder
Invitations
Crafts
Welcome KitFly with you! The Never Council is so happy to welcome you to
Pixie Hollow! Arrival Day is a very special occasion – it’s when Never Land welcomes a brand-new Fairy.
To celebrate your Arrival Day, we’ve put together this set of fun printables. This pack includes the following:
Have fun and see you in Pixie Hollow!
Instructions for making “Pixie Beads” and a flitterific gift box.
Fold-up flower invitations that are perfect for inviting all your
friends to create their own Fairies and meet you in Pixie Hollow!
A tool to translate hidden messages fromLeaf Lettering -- the written language of the Never Fairies.
© Disney
Leaf Lettering DecoderUse this beautiful decoder to translate secret messages from
Leaf Lettering, the earliest known written language of the Never Fairies! Turn the smaller wheel to match the leaves
with the right letter.
© Disney

© Disney
Things included with kit:Decoder
Things you need:White 8 1/2” x 11” paper
Scissors1 fastening brad
Instructions for making the Leaf Lettering DecoderStep 1: Print the decoder on white paper, preferably using colored ink.
Step 2: Have a parent cut out the two circles.
Step 3: Take the smaller circle with the word Pixie Hollow on it and place it on top of the larger one so the holes are aligned.
Step 4: Push the fastening brad through the middle and secure it by pressing the two arms flat against the back of the paper.
Leaf Lettering Decoder

© Disney
Pixie Bead NecklaceThis special friendship necklace is perfect to wear to school
or a party. Make it smaller to wear as a bracelet.
© Disney
Pixie BeadStencil
© Disney
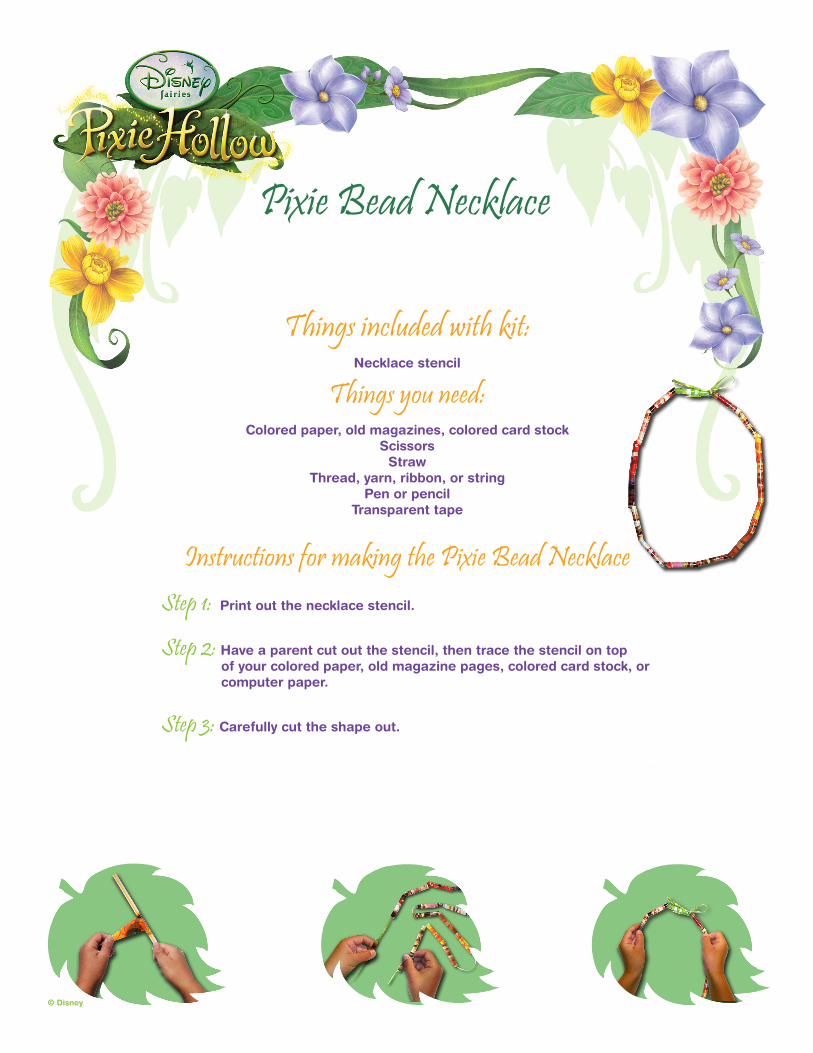
Things included with kit:Necklace stencil
Things you need:Colored paper, old magazines, colored card stock
ScissorsStraw
Thread, yarn, ribbon, or stringPen or pencil
Transparent tape
Instructions for making the Pixie Bead Necklace Step 1: Print out the necklace stencil.
Step 2: Have a parent cut out the stencil, then trace the stencil on top of your colored paper, old magazine pages, colored card stock, or computer paper.
Step 3: Carefully cut the shape out.
Pixie Bead Necklace
© Disney
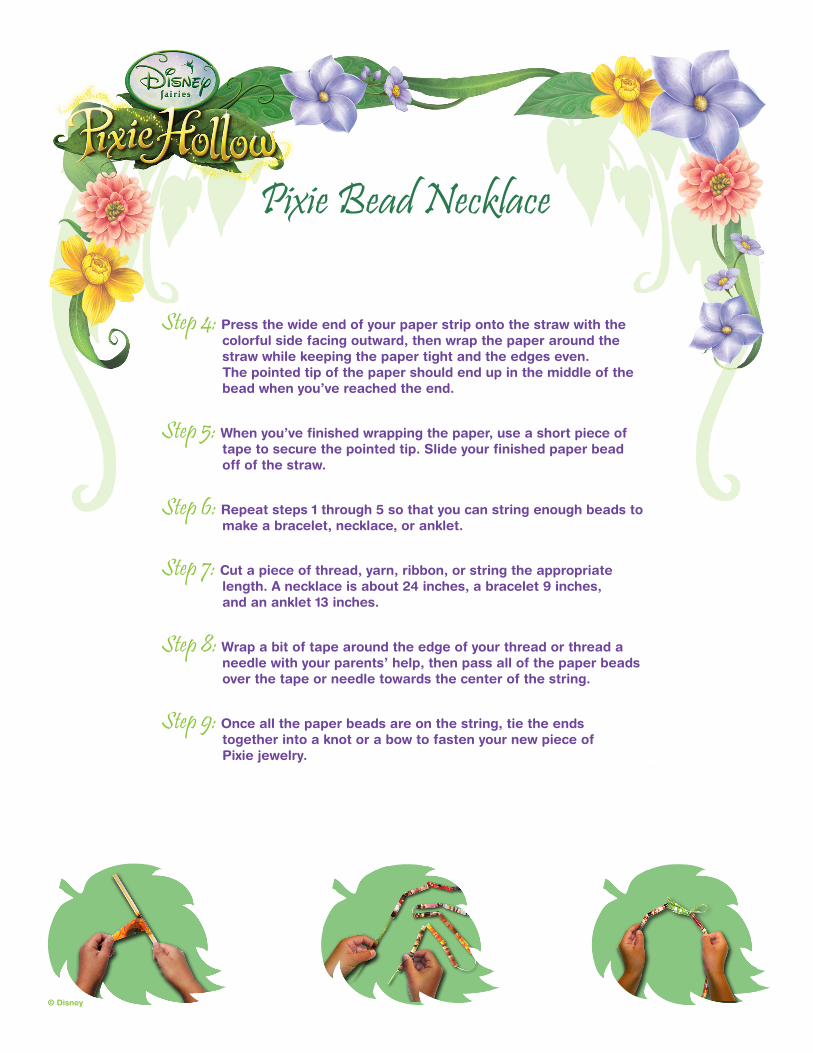
Step 4: Press the wide end of your paper strip onto the straw with the colorful side facing outward, then wrap the paper around the straw while keeping the paper tight and the edges even. The pointed tip of the paper should end up in the middle of the bead when you’ve reached the end.
Step 5: When you’ve finished wrapping the paper, use a short piece of tape to secure the pointed tip. Slide your finished paper bead off of the straw.
Step 6: Repeat steps 1 through 5 so that you can string enough beads to make a bracelet, necklace, or anklet.
Step 7: Cut a piece of thread, yarn, ribbon, or string the appropriate length. A necklace is about 24 inches, a bracelet 9 inches, and an anklet 13 inches.
Step 8: Wrap a bit of tape around the edge of your thread or thread a needle with your parents’ help, then pass all of the paper beads over the tape or needle towards the center of the string.
Step 9: Once all the paper beads are on the string, tie the ends together into a knot or a bow to fasten your new piece of Pixie jewelry.
Pixie Bead Necklace

PixieHollow.com
© Disney
To:
From:
Date:
Time:
Meadow:
Server:
Pixie Petal Invitation
Let’s Fly Together
This fold-up flower invitation is perfect for inviting all of your friends to create their own Fairies, and meet you in
Pixie Hollow for fun and games!
© Disney

© Disney
Things included with kit:Printable Petal Invitation
Things you need:White 8 1/2” x 11” paper
Scissors
Instructions for making the Pixie Petal Invitation Step 1: Print out the invitation on white paper.
Step 2: Have a parent cut out the invitation.
Step 3: Starting with the left petal, fold each one going counter clockwise so that they overlap as shown in the pictures below.
Step 4: Fold the invitation to form a pinwheel. Begin by folding down the left petal, then fold the bottom petal on top of the left petal. Continue by folding the right petal on top of the bottom petal. Finally, lock the invitation by folding the top petal above the right petal, but slide the left half of the top petal underneath the left petal you began with as shown in the pictures below.
Pixie Petal Invitation
© Disney
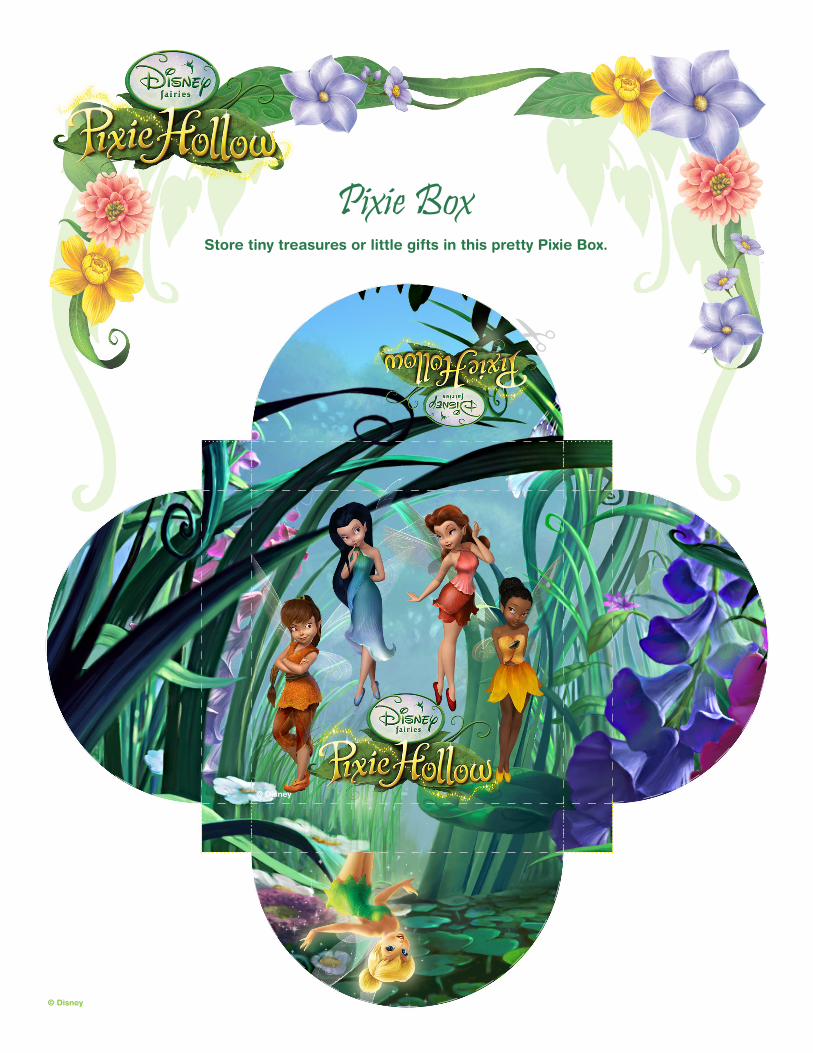
Pixie BoxStore tiny treasures or little gifts in this pretty Pixie Box.
© Disney
© Disney
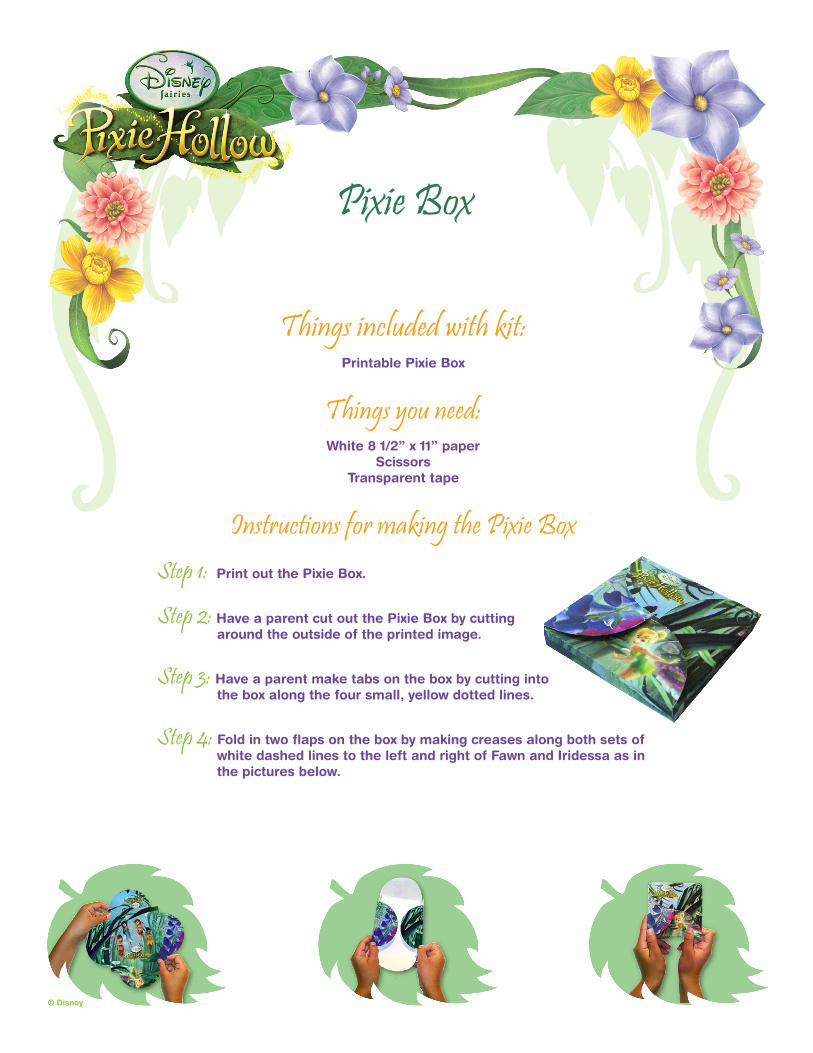
Things included with kit:
Printable Pixie Box
Things you need:White 8 1/2” x 11” paper
ScissorsTransparent tape
Instructions for making the Pixie Box Step 1: Print out the Pixie Box.
Step 2: Have a parent cut out the Pixie Box by cutting around the outside of the printed image.
Step 3: Have a parent make tabs on the box by cutting into the box along the four small, yellow dotted lines.
Step 4: Fold in two flaps on the box by making creases along both sets of white dashed lines to the left and right of Fawn and Iridessa as in the pictures below.
Pixie Box

Pixie Box
© Disney
Step 5: Fold in two more flaps on the box by making creases along both sets of white dashed lines below and above the famous Fairies.
Step 6: Pull each tab inside the flap beside it and secure with tape on the outside to create a sturdy corner for the box.
Step 7: To close the box, hold down the flap with the Pixie Hollow logo and fold the flap with tall grass on top of it. Fold the flap with Tinker Bell on top of the tall grass and fold the flap with bluebells on top of Tinker Bell.
Step 8: To lock the box, tuck the top half of the flap with bluebells under the left side of the flap with the Pixie Hollow logo.


![WELCOME [enoggera.scoutsqld.com.au]enoggera.scoutsqld.com.au/Welcome Kit/Welcome Kit.pdfROVER CREW (18-26 yrs) ... WELCOME KIT LIST OF CONTENTS 1. WELCOME LETTER ... Proficiency Badges](https://img.pdfslide.us/doc/110x75/5ab4ec247f8b9ab47e8c5e81/welcome-kitwelcome-kitpdfrover-crew-18-26-yrs-welcome-kit-list-of-contents.jpg)