Embed Size (px)
Citation preview
WEBEDGE CONTENT MANAGEMENT SYSTEM
Fortechs Blog Administration – Council Members Access
Administration Guide
Volume
1

W E B E D G E C O N T E N T M A N A M G E N T S Y S T E M F O R T E C H S B L O G A D M I N I S T R A T I O N
Administration Guide
Device Media Inc. 10426 – 81 Avenue • Suite 101B
Edmonton, AB T5E1X6
Manual Version 1.20100819
Table of Contents
Overview and Best Practices ............................................... 1
Best Practices .......................................................................... 1
Administration Access ......................................................... 3
How to Access your Administration Section ............................. 3
Your Dashboard ....................................................................... 3
The Interface ............................................................................ 4
Blog Article/Web Page Management ........................................ 5
How to Use the Document Tree ...................................................... 5
How to Delete Web Pages and Sections ........................................ 6
How to Change the Sort Order ........................................................ 6
How to Add new Pages/Blog Articles and Sections ........................ 6
Adding New Articles ................................................................. 7
Editing Articles/Web Pages .................................................... 10
WYSIWIG Text Editor – Special Functions ............................. 11
How to Upload an Image using the Text Editor ...................... 11
How to Link and Upload Documents for Download................. 14
W E B E D G E A D M I N I S T R A T I O N
1
Overview and
Best Practices
The WebEdge Content management system is your tool for managing content on your website.
ebEdge is a module based application that includes an array of standard modules and is easily extendible to include custom modules, if required, to fit your needs. It will give you the tools you and your staff need to make timely updates to your website content when and where you need to.
This manual is built to be used as a reference guide when working with the website administration section. The system is built to be intuitive and easy to use, but some of the processes outlined here, will allow for a streamlined editing process.
Best Practices
When using this or any content management system there are a few simple techniques that will ensure your work is accurate and efficient.
Set up your workspace – When using any content management system, it is a good idea to open the live site in one browser tab and the administration section for the site in another tab. This way you can find the page you want to edit in its live environment, determine your edits and then make your changes in the administration section as needed.
Now that you have your tabs set up with the page you are working on, you can easily flip back and forth as you make your edits to check your work.
Always Check your Work – Remember to always check review your changes on the live site once you’ve made them. Some elements may flow or layout slightly different form the administrative environment.
W
2
Create a Working Folder on your Local Computer – It’s a good idea to create a single directory on your local computer for all of your web files. Inside this folder you can store all of the documents and images that your upload to the website. This way, whenever you go to upload a file you know exactly where to find that file on you computer.
Don’t Forget to Save – Whenever you’re working in the administration environment, you must always click the “Save” button before moving on to the next or previous item. Simply clicking a link on the page or the back or forward buttons may cause you to lose the work that you’ve just done.
Follow Policies on Web Content – If your administration has developed policies around web content please be sure to follow this internal structure. This structure is likely effective for ensuring consistency in theme and structure of web content and can include a web content approval process, appropriate content outlines, who editors are and who is authorized to approve content for the web site.
3
Administration
Access
How to Access your Administration Section
Access for administrators can be done online in any web browser. Use the following URL to access the login page of your administration section:
http://www.capft.ca/admin
On this page you will be prompted for the username and password you were given by Device Media. Enter in your username and password and press Submit.
When correct login credentials are entered here, you will be taken to the WebEdge dashboard. If you have entered an incorrect user name or password you will be prompted to try again.
Note
If you are having trouble accessing the site, please click on the “Forgot Your Password” link and follow the instructions to reset your password.
Your Dashboard
Upon logging in to your administration area you will be presented with your website administration dashboard. From here, you can access all of the management areas of your site.
For council members your only point of access will be Web Pages. This is where you will find the Fortechs Blog.
4
The Interface
The top menu area is common to every page and provides links to every area of the management system. No matter where you are in the administration area, you can always use this menu to jump to a different area of mananagement.
The left hand navigation column is used for three things:
1. To provide you with secondary navigation depending on which screen you are on.
2. To provide you with quick reference information on the edit pages.
3. Provide a method to search the different documents on the site.
The main body area is always specific to the page you are viewing. It will display edit forms, manamgent lists and on the main page, it simply lists all of the available applications.
5
Blog Article/Web Page Management
Web pages are what hold the written and visual content of your site. Forthech blog articles fall into this category. They are organized by folders, called sections, and can be navigated by either the left hand column menu or by the main content area in a similar manner to how you would navigate folders on your computer.
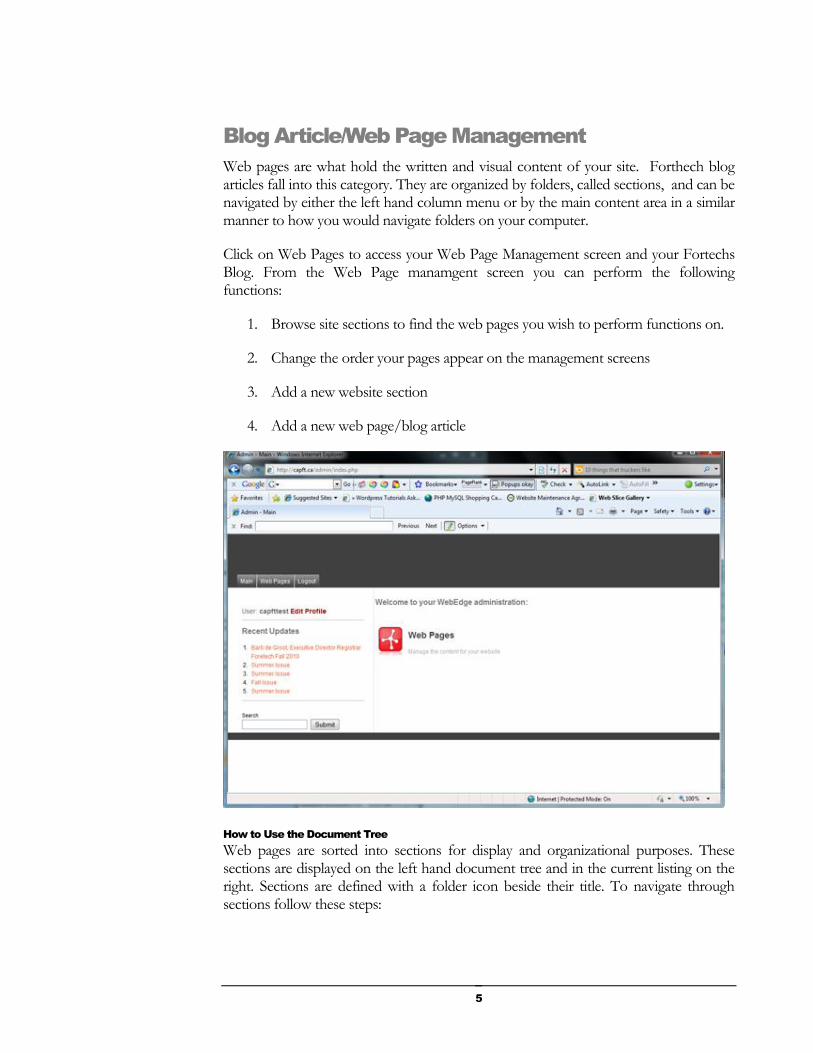
Click on Web Pages to access your Web Page Management screen and your Fortechs Blog. From the Web Page manamgent screen you can perform the following functions:
1. Browse site sections to find the web pages you wish to perform functions on.
2. Change the order your pages appear on the management screens
3. Add a new website section
4. Add a new web page/blog article
How to Use the Document Tree
Web pages are sorted into sections for display and organizational purposes. These sections are displayed on the left hand document tree and in the current listing on the right. Sections are defined with a folder icon beside their title. To navigate through sections follow these steps:
6
1. Click on the + sign beside a section on the left to open a section that contains more sections inside.
2. Click on the title or folder icon beside a section to see the contents of that section in the listing on the right. This will make items within this section available to edit.
Note
*Note: You can return the top level section by clicking on the section titled “Web Pages”
How to Delete Web Pages and Sections
1. Use the document tree to find the section that contains the pages you wish to delete.
2. Click the checkbox to the left of the page and section titles that you would like to delete.
3. Click the Delete button at the top right of the screen.
4. Click OK on the confirmation dialogue.
5. Click Cancel on the confirmation dialogue if you wish to cancel your selection.
How to Change the Sort Order
1. Use the document tree to find the section that contains the pages you wish to sort.
2. Enter in numbers in the sort column that correspond to the order in which you’d like to sort these pages.
3. Click the “sort” link at the top of the column to commit the changes.
How to Add new Pages/Blog Articles and Sections
1. Use the document tree to find the section that you would like to add a page or section to.
2. Click on the “Add New Section” or “Add new Page” links at the top of the screen.

7
Adding New Articles
To add new articles to your website, click on the Web Pages icon (on the homepage) or the Web Pages tab (in the top navigation menu). You will see a page similar to the one below. Once there, select the section you would like to add an article to from the left category tree (ie “2010 Issues of the Fortechs Newsletter”) then click New Web Page in the top right of the main body area.
Once on the Add New Page screen complete the following steps:
1. Enter the title for your new web page/article.
2. Set viewing permissions to viewable by everyone if this is a public page.
3. Make sure you have the published checkbox selected if you want the page to be published immediately.

8
4. Enter your page content in the Content section. Notice the WYSIWYG (What You See Is What You Get) content editor. The buttons will mimic the appearance and function of popular word processing applications such as Microsoft Word or Apple's iWork. (For more information on the text editor and its capabilities please see the section entitled WYSIWIG Text Editor)

9
5. If you want the article to be published on a certain date, or available publicly for a limited amount of time, set the appropriate dates in YYYY-MM-DD HH:MM:SS format.
6. Click Save to save all changes.
Notes
*Note: Viewing permissions allow you to hide content from certain user groups. If a page is set to “Published AND viewable by Administrators”, the item will be hidden from all users who are not in the Administrators group.
10
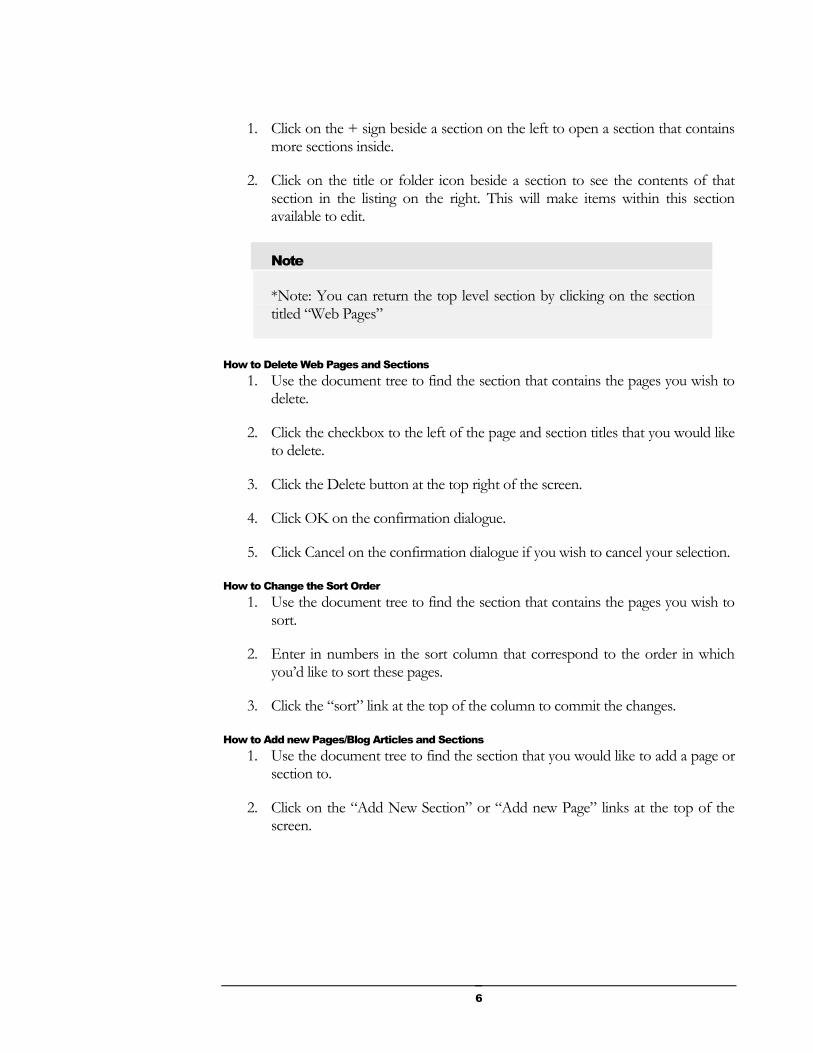
Editing Articles/Web Pages
To find a web page that you wish to edit, first click on the Web Pages link in your administration menu. From this section you can use the folder tree on the left to navigate through the website sections and find the page you’re looking for. Click on the title of the page you would like to edit to open the Edit Page screen.
Try this: Open your live website in a new tab in your browser. Open the webpage you are editing in this tab so you can quickly jump back and forth between tabs to proof your edits as you do them.
The Edit Page screen has an interface which is identical to the new page screen. The only difference is that when editing a page you will see the existing page content. Edit only the items that you would like to change and click Save at the bottom of the screen to save your changes to the website.
If you make a mistake and would like to cancel your changes, click the Cancel button at the bottom of the screen. Any changes that you have made will be removed and you will be returned to the previous management screen.

11
WYSIWIG Text Editor – Special Functions
For the most part, the text editor that you see on description fields throughout the WebEdge administration system performs as any standard text editor would. It allows you to format text as bulleted lists, bold, headings types and many other ways. These functions are self explanatory for users of standard word processing programs.
The text editor also allows for some more advanced features explained below.
How to Upload an Image using the Text Editor
1. Click the Insert/edit image button (the one with the tree picture icon)
2. A popup window will appear. Click Browse to see the images on the server.
12
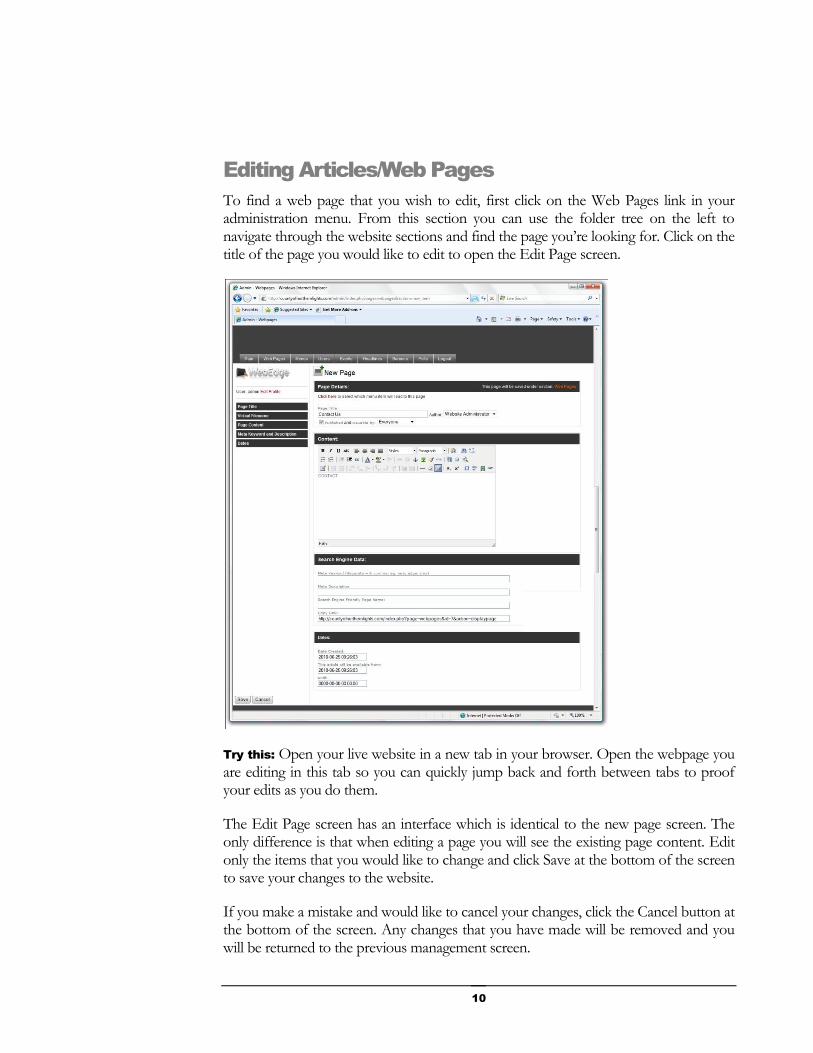
3. You can choose to upload an existing image or upload a new one. Click Upload if you have a new image that you'd like to upload
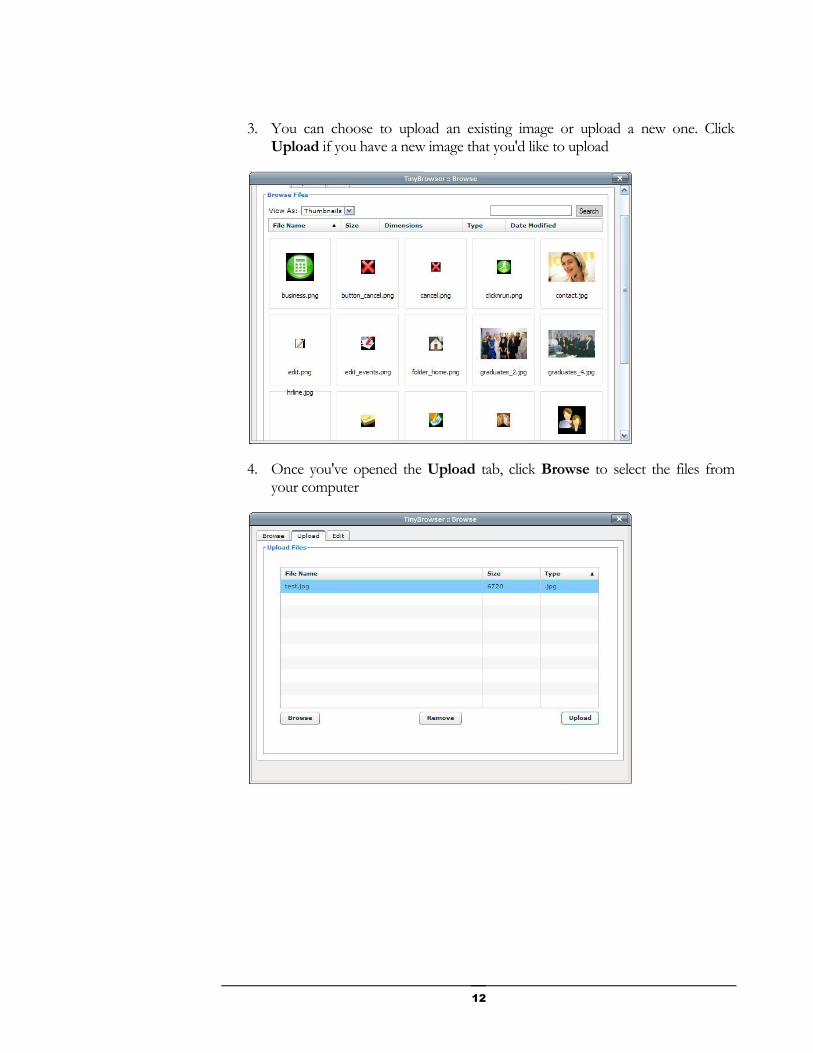
4. Once you've opened the Upload tab, click Browse to select the files from your computer
13
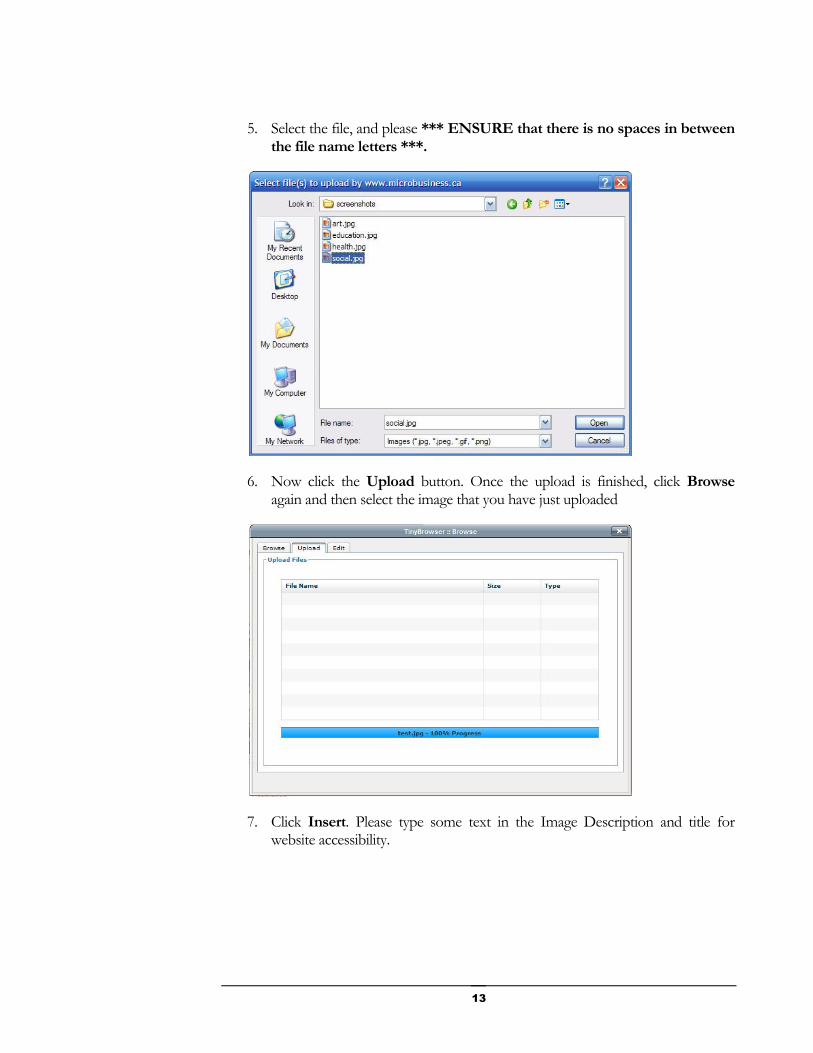
5. Select the file, and please *** ENSURE that there is no spaces in between the file name letters ***.
6. Now click the Upload button. Once the upload is finished, click Browse again and then select the image that you have just uploaded
7. Click Insert. Please type some text in the Image Description and title for website accessibility.
14
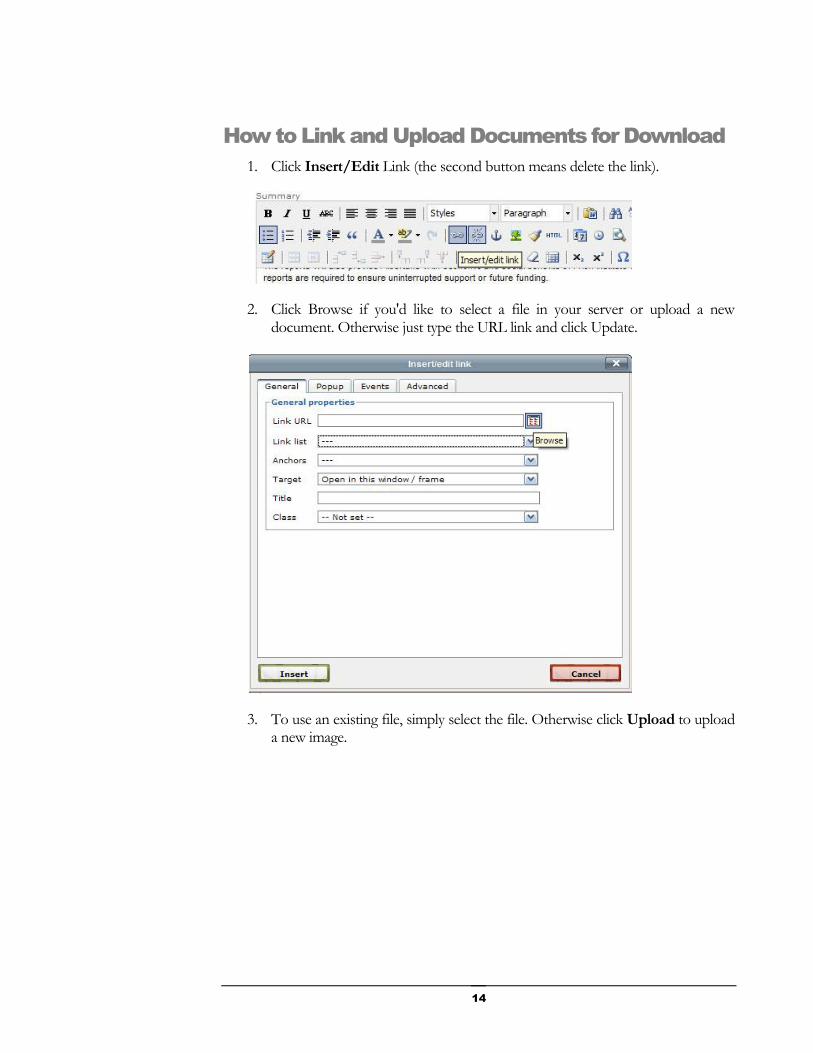
How to Link and Upload Documents for Download
1. Click Insert/Edit Link (the second button means delete the link).
2. Click Browse if you'd like to select a file in your server or upload a new document. Otherwise just type the URL link and click Update.
3. To use an existing file, simply select the file. Otherwise click Upload to upload a new image.

15
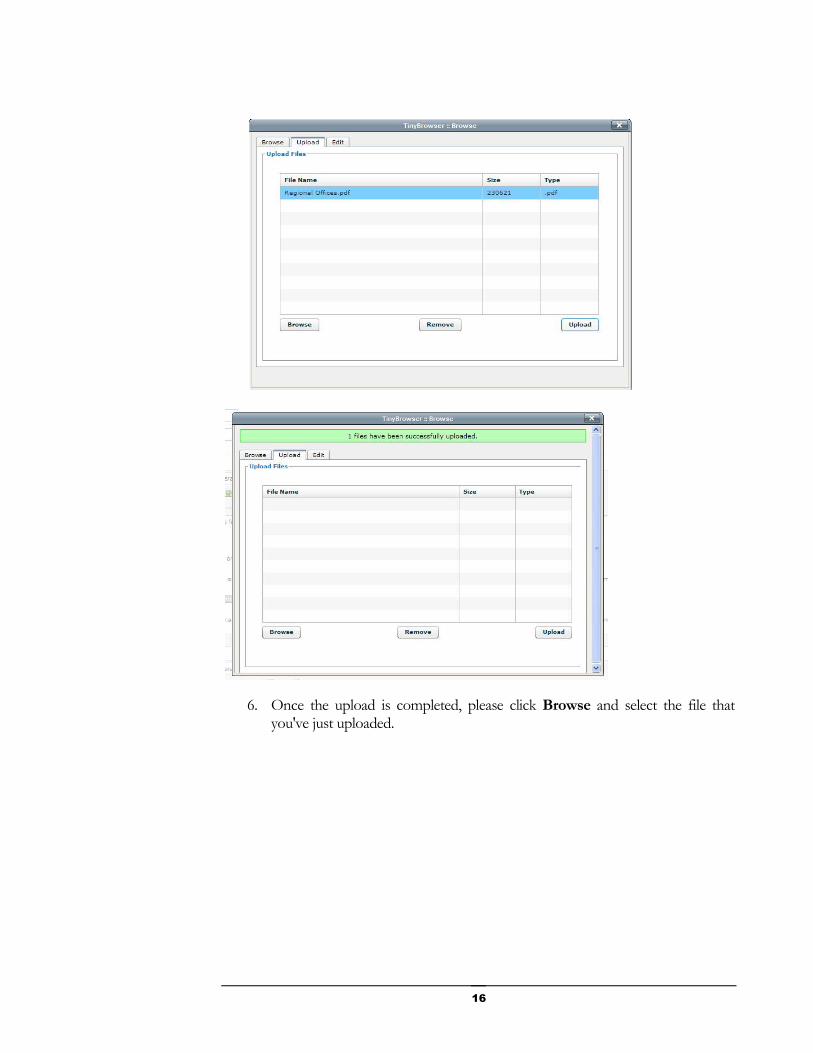
4. Select the file(s) that you'd like to upload.
5. Click Upload and wait.
16
6. Once the upload is completed, please click Browse and select the file that you've just uploaded.
17
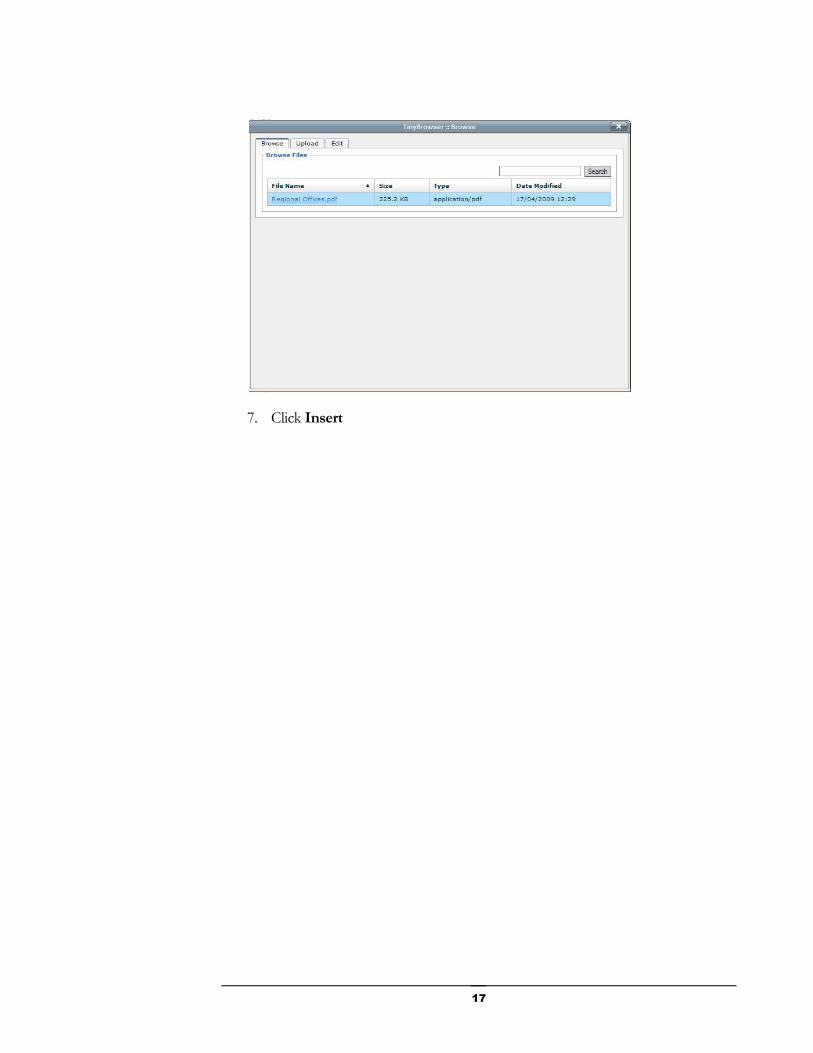
7. Click Insert