Embed Size (px)
Citation preview

Valley Christian Academy
SAFETY PLAN General Safety, Woods & Finishing
OVERVIEW An important part of your experience in woodworking will be learning to follow
practices and procedures that will prevent injuries to YOURSELF and OTHERS. Develop a good attitude toward safety. This means that you have a strong
feeling toward the importance of safety and are willing to give time and attention to learning the safest way to perform your work. It means that you will be certain to work carefully and follow the rules – even when no one is watching you.
Carefully study the safety rules which follow. Your instructor may also recommend some additional rules. If you follow the rules and directions carefully, many of them will soon become safety habits that you will perform almost automatically.
Please note that experience in a wood shop does not equal good safety awareness. Most accidents occur not to beginners but from experienced workers that feel more comfortable in the shop and therefore become more casual in their approach to safety guidelines.
Safety training and shop tour, noting fire extinguishers and first aid equipment, is conducted each quarter during classes offered by Shop staff.
NEVER be afraid to ask a supervisor for help.
NEVER use a new machine without first asking for assistance from a supervisor unless you have been approved to do so.
Failure to observe proper safety procedures and guidelines may result in damage to tools, projects and facility.
Failure to observe proper safety procedures can also lead to serious injury, dismemberment or even death.
Students who do not observe proper safety guidelines may be excluded from working in the IA Lab.

GENERAL SAFETY RULES Work procedures and shop practices described are effective methods of
performing given operations. Use special tools and equipment as recommended. Carefully follow all safety warnings and cautions. Note that these warnings are
not exhaustive. Proceed with care and under proper supervision to minimize the risk of
personal injury or injury to others. Most power tool accidents can be avoided. Roughly 80% of accidents are
caused by workers without the right safety attitude. These workers do not take safety seriously. Instead of being safe, they put everyone in danger.
BENCH ORGANIZATION Keep your project materials carefully organized on your bench with tools
located near the center. Do not pile tools on top of each other. Never allow edged or pointed tools to extend out over the edge of the bench. Close your vise when it is not in use and see that the handle is turned down. Keep drawers and cabinet doors closed.
CARRYING TOOLS Keep sharp-edged and pointed tools turned down. Do not swing or raise your arms over your head while carrying tools. Carry only a few tools at one time, unless they are in a special holder. Do not carry sharp tools in the pocket of your clothes.
CLAMPING STOCK Whenever possible, mount the work in a vise, clamp, or special holder. This is
especially important when using chisels, gouges, or portable electric tools.
CLEANLINESS Keep your hands clean and free of oil or grease. You will do better and safer
work, and the tools and your project will stay in good condition. Keep the machine clean. Remove all tools, lumber, and unnecessary
materials. Objects left on the machine can vibrate into revolving cutters. They can then be thrown from the machine with great force.
Never clean a machine while it is running.
CONFIDENCE As you learn to operate a machine, you will gain confidence. Do not become
too confident. Overconfidence leads to carelessness, and carelessness causes accidents. This does not mean you should be afraid of machinery; however a safe attitude is one of respect for what machines can do.
CONSIDERATION OF OTHERS Be thoughtful and helpful toward other students in the class.
Be sure that the work you are doing does not endanger someone else. Caution other students if they are violating a safety rule.
ELECTRICITY Before you plug in a machine, make sure the switch is in the “off” position.
You do not want the machine to start unexpectedly. If you use an extension cord, use the correct wire size. This is determined by
the length of cord and size of motor. Using a wire size that is too small will cause the tool to overheat.
Keep all power cords away from blades and cutters while you work. Make sure the power tool is grounded. One with a double-insulated case need not be grounded. If you are unsure about this, check with your instructor.
If anything unusual happens, turn off the machine immediately. If the machine does not sound right, turn it off immediately. As soon as it stops completely, check with your instructor.
EYE PROTECTION Wear safety glasses or a face shield when doing any operation that may
endanger your eyes. Be sure you have enough good light to see what you are doing without
straining your eyes. Always keep your eyes on the cutting action. Concentrate on what you are doing at all times.
FIRE PROTECTION Secure the instructor’s approval before you bring any flammable
liquids into the shop. Re-familiarize yourself with the location of all fire alarms and fire
extinguishers. Many finishing materials, thinners, etc. are highly flammable. Others are toxic.
Because of this, it is important that these materials be used only in approved areas.
Make sure you are in a project space that allows such materials to be used. Close cans of finishing materials and thinners immediately after use. Use flammable liquids in very small quantities. Be sure the container is
labeled. Consult workers near you to determine whether any potential crossover
hazards might be present. Dispose of oily rags and other combustible materials immediately, or store
them in an approved container.
FLOOR SAFETY The floor should be clear of scrap blocks and excessive litter. Keep projects, sawhorses, and other equipment and materials you are using
out of traffic lanes. Immediately wipe up any liquids spilled on the floor.
HAIR & CLOTHING Dress properly for your work. Remove coats and jackets, and roll up loose sleeves. It is advisable to wear a
shop apron that is snugly tied. Long hair should be tied back away from face and not allowed to “fall” into
your work.
INJURIES Report all injuries, regardless of severity to your instructor.
LIFTING Protect your back muscles when lifting heavy or awkward sized objects. Have
someone help you. Lift with your arm and leg muscles. Secure help with long boards, even if they are not heavy.
MATERIAL AND PROJECT STORAGE Store and stack your project work carefully in assigned areas. If the storage is overhead, be sure the material will not fall off. Straighten the lumber rack when you remove a board. Do not leave narrow strips protruding from the end of the storage rack,
especially at or near eye level.
ODORS Be alert for any odors that might indicate overheating of the machine or
stock.
SAFETY GUARDS Make sure all safety guards are in place. Never remove a safety guard without your instructor's permission. Have your instructor check each setup before you begin working.
SECURE APPROVAL Get your instructor’s approval for all work you plan to do in the shop. He or
she is the one to decide if the work can and should be done, and will be able to suggest the best, easiest, and safest way to do it.
STANCE Stand in a comfortable, balanced position when working with power tools. Both feet should be firmly on the floor. Try to be as relaxed as comfortable: if you are unsure about your comfort with
the equipment, consult a supervisor.
SUPERVISOR ON DUTY Never use the Industrial Arts lab unless the teacher is present or you have
been given permission by the IA teacher or school administration.
TOOL SELECTION
Select the proper size and type of tool for your work. An expert never uses a tool unless it is sharp and in good condition.
Inform your instructor if tools are broken, have loose handles, or need adjustments.
USING TOOLS Hold a tool in the correct position while using it. Most edged tools should be
held in both hands with the cutting motion away from yourself and other students.
Be careful when using your hand or fingers as a guide to start a cut. Test the sharpness of a tool with a strip of paper or a scrap or wood.
DO NOT USE YOUR FINGERS. Always keep your hands a safe distance from cutters and blades.
VISITORS The shop is not an appropriate place for visitors. People that do not have any official reason to be in the shop should stay out
unless specifically invited by the supervisor.
WATER Never work in or around water with power tools. Water increases the chances
of severe electrical shock or slipping.
WOOD Defects in the wood can be dangerous. Check the stock carefully for knots,
splits, metal and other defects.
WORKING SPEED Do not “rush and tear” through your work. The good crafter knows that a
steady, unhurried pace is safest and produces the best work.

POWER EQUIPMENT SAFETY RULES Modern power woodworking machines can save large amounts of time.
Learning how to use them safely will be an important part of your experience in the shop. Whether or not you are permitted to use power equipment will depend on your maturity and ability, along with policies established by your instructor.
Before operating any power tool or machine you must become thoroughly familiar with the way it works and the correct procedures to follow in its use. As you learn to use a machine the correct way, you will also be learning to use it the safe way.
Study the procedures outlined below carefully. Pay close attention to the demonstrations and directions given by your instructor. Know and understand the following general safety rules that apply to power machine operation. You must also learn the specific safety rules that apply to each machine.
GENERAL POWER SAFETY GUIDELINES Wear appropriate clothing. Remove coats or jackets, and roll up loose sleeves. You must be wide awake and alert. Never operate a machine when you are
tired or ill. Think through the operation before performing it. Know what you are going to
do, and what the machine will do. Always be sure you have the instructor’s approval to operate a machine. Your
instructor knows you and the machine, and can best decide whether you are qualified to safely operate the machine.
Machines should not be used for trivial operations, especially on small pieces of stock. Do not play with machines.
When you are operating the machine, you are the only one to control it. Start and stop the machine yourself. If someone is helping you, be sure they understand that they are expected to know what to do and how to do it.
Make all the necessary adjustments before turning on the machine. Some adjustments on certain machines will require the instructor’s approval.
Never remove or adjust a safety guard without the instructor’s permission. Use approved push sticks, push blocks, feather boards, and other safety
devices. Some operations may require the use of a special jig or fixture. Keep the machine tables and working surfaces clear of tools, stock, and
project materials. Also keep the floor free of scraps and excessive litter. Do not allow your attention to be distracted while operating a machine. Also,
be certain that you do not distract the attention of other machine operators.
Allow the machine to reach its full operating speed before starting to feed the work.
Never leave a machine running while unattended. Feed the work carefully and only as fast as the machine will easily cut. Maintain the MARGIN OF SAFETY specified for the machine. This is the
minimum distance your hands should ever come to the cutting tool while in operation.
If a machine is dull, out of adjustment, or not working properly, shut off the power immediately and inform the instructor.
When you have completed an operation on a machine, shut off the power. Wait until it stops before leaving the machine or setting up another cut.
Stay clear of machines being operated by other students. See that other students are “out of the way” when you are operating a machine.
Do not “crowd around” or wait in line to use a machine. Ask the present operator to inform you at your work station when finished. Common standards of courtesy may slow you down, but they will make the shop a safer and more pleasant place to work.
General Shop Safety Questions

1. What are two important things to remember in keeping your work area organized?
2. Why is it important to place work materials in a vise or clamp when you’re working?
3. Why is it important to keep your hands clean while you’re working?
4. What often leads to carelessness resulting in accidents?
5. What must you do before plugging in a power tool?
6. What must always be worn while you are in the shop?
7. What should be closed immediately after they’re used and why?
8. What should never be moved without the instructor’s permission?9. How should most edged tools be held?
10. How can you tell if a tool is sharp and ready for use?
11. What should be done before performing an operation with any power tool?
12. Name three types of safety devices that should commonly be used with power tools.
13. When you are done using a tool, what must you do before you leave the tool?
14. What does “margin of safety” mean?

SPECIFIC POWER EQUIPMENT SAFETY GUIDELINES To operate a machine safely, you must know more than just how to turn it on and off. You must know how to perform basic operations. You also need to know how to make simple adjustments. Above all, you must know the machine’s limits. Always keep the machine at a safe, steady speed. Never use the machine for a job the machine was not designed to do.
Safety Rules for Band Saws Wheel guard doors must be closed, and the blade
properly adjusted, before turning on the machine. Adjust the upper guide assembly so it is ¼ in. above
the work. Allow the saw to reach full speed before feeding the
work. The stock must be held flat on the table. Feed the saw only as fast as the teeth can easily
remove the wood. Maintain a 2 in. margin of safety. Plan saw cuts to avoid backing out of curves
whenever possible. Make turns carefully and do not cut radii so small that
the blade is twisted. Stop the machine before backing out of a long, curved
cut. Plan cuts carefully; lay out and make relief cuts
before cutting long curves and curves of small radii. Turning holes should be made where required. Plan work so that all cuts will be made in the forward direction.
Round stock should not be cut unless mounted securely in a jig or hand screw. If you hear a clicking noise, turn off the machine at once. This indicates a
crack in the blade. If the blade breaks, shut off the power and move away from the machine until both wheels stop.
Turn off the machine as soon as you have finished your work. If the machine has a brake, apply it smoothly. Do not leave the machine until it has stopped running.
Never stand or allow others to stand to the right of the band saw when it is running.
If it is necessary to back the saw out of a long cut, turn the power off and wait for the blade to stop. Then seek assistance from the instructor.
Never make adjustments to the saw while it is running.
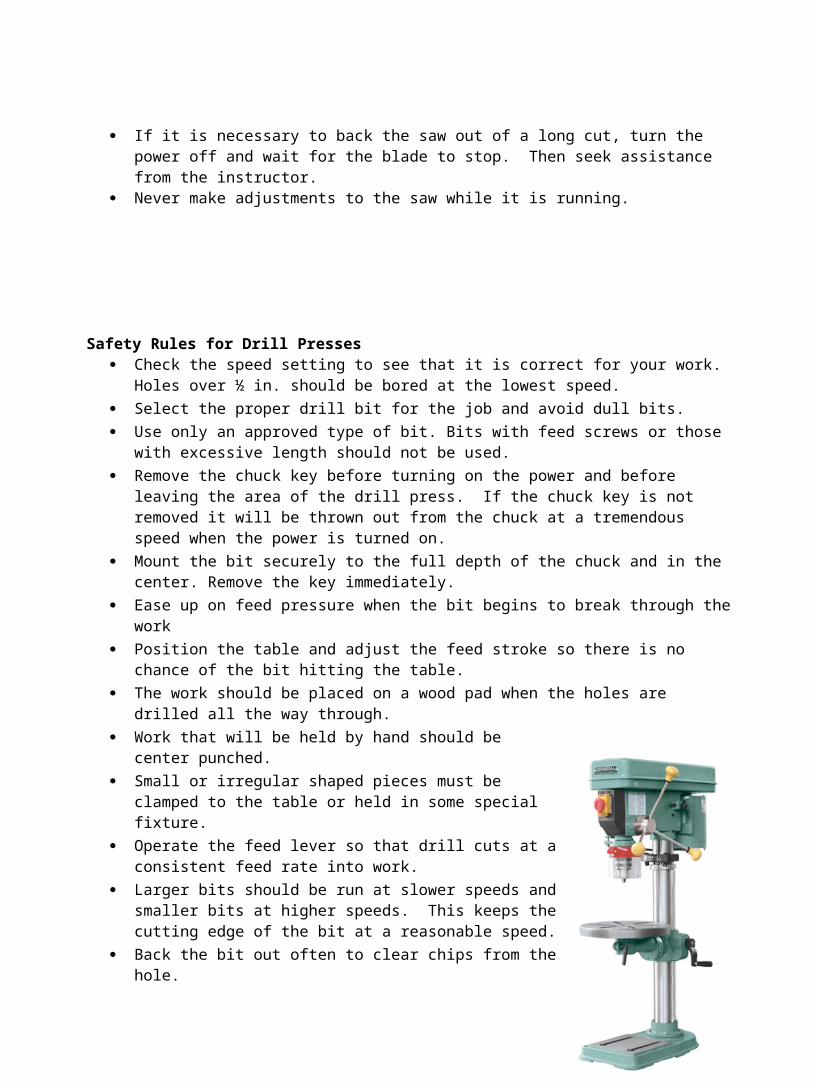
Safety Rules for Drill Presses Check the speed setting to see that it is correct for your work. Holes over ½
in. should be bored at the lowest speed. Select the proper drill bit for the job and avoid dull bits. Use only an approved type of bit. Bits with feed screws or those with
excessive length should not be used. Remove the chuck key before turning on the power and before leaving the
area of the drill press. If the chuck key is not removed it will be thrown out from the chuck at a tremendous speed when the power is turned on.
Mount the bit securely to the full depth of the chuck and in the center. Remove the key immediately.
Ease up on feed pressure when the bit begins to break through the work Position the table and adjust the feed stroke so there is no chance of the bit
hitting the table. The work should be placed on a wood pad when the holes are drilled all the
way through. Work that will be held by hand should be center punched. Small or irregular shaped pieces must be clamped to
the table or held in some special fixture. Operate the feed lever so that drill cuts at a consistent
feed rate into work. Larger bits should be run at slower speeds and smaller
bits at higher speeds. This keeps the cutting edge of the bit at a reasonable speed.
Back the bit out often to clear chips from the hole. Be certain that the table and head of the drill press are secure. When boring to a given depth, use the depth
adjustment nut or feature. Feed the bit smoothly into the work. When the hold is
deep, withdraw it frequently to clear the shavings and cool the bit.
If work comes loose and is seized by the drill press, shut off the power immediately if you can do so without endangering yourself. If it is impossible to shut off the power, move away from the machine and move others away. Notify the instructor immediately.
Safety Rules for Jig Saws

Use a 1/2-inch drill bit to make a pilot hole to use as a starting point when cutting out shapes. If you use a drill bit that's any smaller, you might not be able to fit the jigsaw blade into the pilot hole.
Keep a firm grip on the jigsaw to maintain control and get the cleanest cut If a blade breaks or bends, or if teeth are snapped off, insert a new blade. Always unplug an electric jigsaw or remove the batteries from a cordless
jigsaw before making any adjustments. Before changing a blade, unplug or remove the batteries from the jigsaw.
Loosen the set screw(s) that holds the blade. Pull the blade from jaws and discard safely. Insert a new blade and tighten the set screw(s). Some jigsaws feature a quick blade release.
Teeth on the blade should point up.
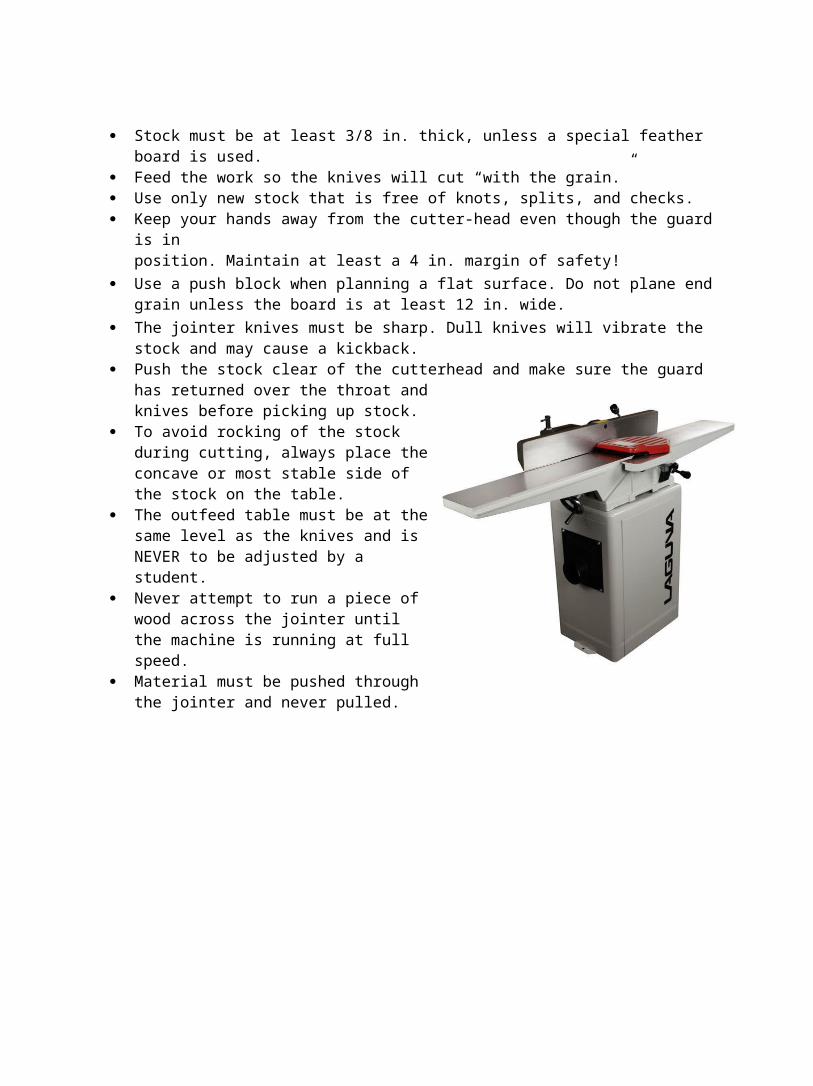
Safety Rules for Jointer Be sure you have the instructor’s approval to operate the machine.

Before turning on the machine, make adjustments for depth of cut and position of fence.
Do not adjust out-feed tables or remove guard without the instructor’s approval.
The maximum cut for jointing an edge is 1/8 in.; for a flat surface, 1/16 in. Stock must be at least 3/8 in. thick, unless a special feather board is used. Feed the work so the knives will cut “with the grain.” Use only new stock that is free of knots, splits, and checks. Keep your hands away from the cutter-head even though the guard is in
position. Maintain at least a 4 in. margin of safety! Use a push block when planning a flat surface. Do not plane end grain unless
the board is at least 12 in. wide. The jointer knives must be sharp. Dull knives will vibrate the stock and may
cause a kickback. Push the stock clear of the cutterhead and make sure the guard has returned
over the throat and knives before picking up stock.
To avoid rocking of the stock during cutting, always place the concave or most stable side of the stock on the table.
The outfeed table must be at the same level as the knives and is NEVER to be adjusted by a student.
Never attempt to run a piece of wood across the jointer until the machine is running at full speed.
Material must be pushed through the jointer and never pulled.
Safety Rules for Wood Lathe Never wear loose clothing or a tie. Tie back long hair. Wear goggles or a face shield.

Stand to the side when starting the lathe. Check the wood to make sure it has no defects that would cause it to break
when turning. Check all glue joints before mounting the stock. A weak joint may come apart
when revolving at high speeds. Make sure glued-up stock is completely dry before turning.
Fasten stock securely between centers. Make sure the tailstock is locked before turning on the power.
Adjust the tool rest as close to the stock as possible. Then revolve the stock by hand to make sure it clears the rest.
Run the lathe at slow speed when beginning any turning operation. When the stock is balanced and does not vibrate the speed may be increased.
Always stop the lathe before making any adjustments such as changing the position of the tool rest.
Keep the tool rest as close as reasonably possible to the stock by frequently stopping the lathe and adjusting the tool rest.
Run all stock at the slowest speed until it is rounded. Hold turning tools firmly in both hands. Keep the tool rest as close to the work as possible. At intervals, stop the lathe
and readjust. Make sure the stock is firmly fastened to the faceplate before turning. Remove the tool rest when sanding or polishing. If you don’t, your fingers may
get caught between the tool rest and the stock. Sand and polish only on the underside of the work. Remove the tool rest when sanding, polishing, or finishing the workpiece.
Safety Rules for Planers
Be sure you have the instructor’s permission to operate the machine. Adjust the machine to the correct thickness of cut before turning on the
power. Stock should be at least 12 in. long, or several inches longer than the distance
between the centers of the feed rolls.

Do not remove more than 1/32” of wood at one time. Adjust the initial depth of cut to the thickest part of the board. Do not plane stock to less than 1/4” thick. To plane thinner stock, run it
through the planer with a backer board. For this special setup, obtain the instructor’s permission.
Plane pieces of varying thickness in progressive order, starting with the thickest first.
Because of the possibility of flying particles, do not look into the planer while the machine is running. Stand in an upright position and to one side while you are operating this machine.
Surface only new lumber that is free of loose knots and serious defects. Plane with the grain, or at a slight angle with the grain. Never attempt to
plane cross grain. Stand to one side of the work being fed through the machine. Do not look into the throat of the planer while it is running. Do not feed stock of different thicknesses side by side through the machine,
unless it is equipped with a sectional in-feed roll. Handle and hold the stock only in an area beyond the ends of the table. If the machine is not working properly, shut off the power at once and inform
the instructor.
Safety Rules for Portable Circular Saws Stock must be supported in such a way that the kerf will not close and bind
the blade during the cut or at the end of the cut. Thin materials should be supported on benches. Small pieces should be
clamped in a vise or onto a bench top or sawhorse. Be careful not to cut into the bench, sawhorse, or other supporting devices. Adjust the depth of cut to the thickness of the stock, and add about 1/8 in. Check the base and angle adjustment to be sure they are tight. Plug in the
cord to a grounded outlet and be sure it will not become fouled in the work. Always place the saw base on the stock, with the blade clear, before turning
on the switch. During the cut, stand to one side of the cutting line. Large saws will have two handles. Keep both hands on them during the
cutting operation. Small saws should also be guided with both hands when possible.
Always unplug the machine to change blades or make major adjustments. Always use a sharp blade with plenty of set.
Safety Rules for Portable Electric Drills
Select the correct drill or bit. Mount it securely to the full depth of the chuck. Either clamp a scrap piece under work to prevent splintering the underside, or
drill from both sides. Stock to be drilled must be held in a stationary position so it cannot be moved
during the operation. Connect the drill to a properly grounded outlet. Turn on the switch for a moment to see if the bit is properly centered and
running true. With the switch off, place the point of the bit in the punched layout hole. Hold the drill firmly in one or both hands and at the correct drilling angle. Turn on the switch and feed the drill into the work. The pressure required will
vary with the size of the drill and the kind of wood. During the operation, keep the drill aligned with the direction of the hole. When drilling deep holes, especially with a twist drill, withdraw the drill
several times to clear the shavings. Follow the same precautions and procedures as when drilling holes with the
drill press.
Safety Rules for Router Know and follow the general safety rules for operating power tools. Disconnect the power before changing router bits. Clamp router bits securely in the chuck. At least 1/2 inch (12 mm) of the
shank should be inserted. Make sure the router switch is in the off position before connecting the power. Do not make any router cuts unless the stock is securely clamped. The router
can throw loose stock with great force.

Before you start cutting, make sure nothing is in the router’s path. Hold the router tightly when starting the motor. Always feed the router against the rotation of the bit. If you feed with the
rotation the bit can dig into the stock. This can cause the router to kick back or throw the stock.
After finishing a cut, wait for the router to completely stop. Then lay the router down. The bit should point away from you.
Safety Rules for Sanding Machines Be certain the belt or disc is correctly mounted. The belt must track in the
center of the drums and platen. Do not operate the disc sander if the abrasive paper is loose.
Check the guards and table adjustments to see that they are in the correct position and locked securely in place.
Use the table, fence, and other guides to control the position of the work, whenever possible.
Small or irregular-shaped pieces should be held in a hand clamp, or a special jig or fixture.
When sanding the end grain of narrow pieces on the belt sander, always support the work against the table.
Sand only on the side of the disc sander that is moving toward the table. Move work along this surface so it will not burn.
Always use a pad or push block when sanding thin pieces on the belt sander. Do not use power sanders to form and shape parts when the operations could
be better performed on other machines. Sand only clean new wood. Do not sand work that has excess glue or finish on
the surface. These materials will load and foul the abrasive.
Safety Rules for Scroll Saw

Know and follow the general safety rules for operating power tools. Make all setups and adjustments with the power off. Use the correct blade for the stock (thickness) and curve (sharpness) being
cut. Never try to turn a small radius with a wide blade. The radius should not be
more than three times the blade width. Clamp the blade securely in both chucks with the teeth pointing down. Adjust the guides so they properly support the blade. Adjust the hold down so that it applies light pressure to the stock. Rotate the motor by hand to check that all adjustments have been made
properly. Plan cuts to avoid backing out of curves. Do not force the work into the blade. This can cause the blade to bend the
break. Keep your fingers out of line with the saw.
Safety Rules for Sliding Miter Saw Know and follow the general safety rules for operating power tools.
Make all adjustments while the machine is turned off. Never reach across the path of the blade. When the machine is running,
always keep your hands at least 6 inches (150 mm) from the blade. Keep the safety guard in position at all times. Wait until the blade is running full speed to start a cut. Never stand in line with the blade. If you push the blade with your right hand,
stand to the left. If you push the blade with your left hand, stand to the right. Use one hand to push the saw through the stock. Use the other hand to hold
the stock against the fence. Keep both hands away from the cutting line. Cut only one piece of wood at a time. Feed the blade slowly.
Safety Rules for Table Saws Be certain the blade is sharp and the right one for your work. The saw is equipped with a guard and a splitter. Be sure to use them.

Set the blade so it extends about ¼ in. above the stock to be cut. Stand to one side of the operating blade and do not reach across it. Maintain a 4 in. margin of safety. E.g. clamp a small piece of stock to a larger
piece to cut safely. Stock should be surfaced, with at least one edge jointed before being cut on
the saw. The position of the stock must be controlled either by the fence or the miter
gauge. NEVER CUT STOCK FREE HAND. Use only new stock that is free of knots, splits, and warp. Stop the saw before making adjustments to the fence or blade. Do not let small scrap cuttings accumulate around the saw blade. Use a push
stick to move them away. Re-sawing and other special setups must be inspected by the instructor
before power is turned on. The dado or any special blades should be removed from the saw after use. Students helping to “tail-off” the saw should not push or pull on the stock but
only support it. The operator must control the feed and direction of the cut. As you complete your work, turn off the machine and remain until the blade
has stopped. Clear the saw table and place waste cuttings in the scrap box.
Safety Rules for Grinders Before working with a bench grinder, make sure the tool and its accessories
are in the proper working order.

Inspect the wheels for a hairline crack before using. DO NOT USE A CRACKED WHEEL.
Make sure the wheel housing guards are in place. New grinding wheels should be balanced by dressing and truing to eliminate
vibration. Used wheels should be trued and dressed when worn out of round, or the
surface face is clogged or worn smooth. Dress the wheel on the face only. Don’t operate a grinder unless it is securely mounted to the workbench. Do not heavy grind on the side of the wheel. A two foot perimeter around the grinder should be kept clear of people, debris
that impair traction or footing to avoid slips and falls. Safety glasses with side shields and a face shield must be worn. Remove loose fitting clothing, jewelry, and tie back long hair. Adjustments need to be made when the grinder is unplugged & stopped. Adjust tool rests 1/8” from the wheels and slightly below center. Stand to one side of the wheel when turning on power. DO NOT use a wheel
that vibrates. Bring the object into contact with the grinding wheel slowly and smoothly
avoiding impact or bumping motions. Move the object being ground, back and forth across the face of the wheel
only. Never grind small stock. Do not attempt to grind or sharpen anything that
cannot be adequately supported by the tool rest. Use clamping pliers when grinding parts that cannot be held easily by hand.
Do not touch the ground portion of the work piece until cooled. Keep bystanders a
safe distance away from the work area. Anyone entering the work area must wear his/her safety equipment.
Turn off grinder and wait until comes to a complete stop. Never stick an object into the wheel to stop the grinder quicker. Let it stop on its own.
Safety Rules for Air Nailers
Read and follow the manufacturer’s instructions and warning labels. Wear appropriate personal protective equipment such as safety footwear,
safety glasses and hearing protection. Always operate the compressor in a well-ventilated area that is free of
combustible materials. Always use the appropriate tool attachments. Use caution when connecting tools to the compressed air supply. When unplugging electrical equipment pull on the plug, not on the cord. Keep hoses and power cords away from heat, water and oil. Only use extension cords that are in good condition with proper grounding. Ensure the work area is clear of debris. Disconnect any broken or unsafe tools, hoses or equipment, attach a
warning tag, take it out-of-service and advise your supervisor. Ensure there is adequate lighting in the work area. Do not use tape or any other means to bypass the safety interlock. Do not modify or alter a pneumatic tool. Do not blow compressed air at anyone as it may cause soft-tissue damage
to exposed skin and can propel dirt, loose particles, etc at high speed. Do not use compressed air for general purpose cleaning. Do not use compressed air to clean yourself or others. Do not operate any equipment if you feel drowsy or unwell. Do not drive a fastener on top of another fastener. Do not drive a fastener at too steep an angle. Do not drive a fastener too
close to the edge of the work piece.
Do not restrict the ventilation openings on the compressor.
Do not touch any hot exposed metal parts on a compressor.
Do not operate at a pressure above the manufacturer’s rating.
Never carry the nailer with your finger on the trigger.
Never point the nailer at yourself or another person.
Never pull the compressor by the hose or power cord.


![Building Regs 1997_TGD-B_Fire Safety_[May05 Reprint]](https://img.pdfslide.us/doc/110x75/577cc4ca1a28aba7119a73dc/building-regs-1997tgd-bfire-safetymay05-reprint.jpg)

