Embed Size (px)
Citation preview

Instruction Manual
CONTENTS Unpacking Instructions ........... 2 Package Contents .................. 2 Product Registration ............... 2 Features & Benefits................. 3 Setup .................................... 4 Install or Replace Batteries...... 4 Power Dock ........................... 5 Quick Setup........................... 6 Set the SAME #/FIPS Code .... 6 Set the Channel ..................... 6 Set the Time Zone .................. 6 Set DST Preference ................ 6 Set the Time........................... 7 Set the Date .......................... 7
Manual Setup........................ 7 Edit SAME #/FIPS Code ........ 7 Edit the Channel ................... 7 Edit the Time & Date ............. 8 Edit Alerts ............................. 8 Placement Guidelines ............. 8 Using the Radio ..................... 9 Troubleshooting ....................10 Alert Descriptions..................11 Care & Maintenance.............14 Specifications........................14 FCC Information ...................14 Customer Support .................15 Warranty..............................15
Weather Alert Radio models 08525 / 08535 /
08550W / 08551W / 08552W / 08553W
Questions? Contact Customer Support at (877) 221-1252 or visit www.AcuRite.com.
SAVE THIS MANUAL FOR FUTURE REFERENCE.

Archived Products
Congratulations on your new AcuRite product. To ensure the best possible product performance, please read this manual in its entirety and retain it for future reference.
Unpacking Instructions Remove the protective film that is applied to the LCD screen prior to using this product. Locate the tab and peel off to remove.
Package Contents 1. Weather alert radio with removable belt clip 2. Power dock 3. AC power adapter 4. Instruction Manual
IMPORTANT PRODUCT MUST BE REGISTERED TO RECEIVE WARRANTY SERVICE
PRODUCT REGISTRATION Register online
to receive 1 year warranty protection
www.AcuRite.com ►Register a Product
2

Features & Benefits
Weather Radio 1. Current Channel 2. Alert Message Display Area
Displays alert type, alert issued, and menu text.
3. Menu Mode Indicator 4. History Mode Indicator
Indicates previous alerts are being viewed.
5. Listen Mode: Silenced Radio WILL NOT alert for advisories or watches. Warnings cannot be silenced.
6. Menu Button 7. Navigation Buttons 8. Speaker 9. Power Dock 10. Yellow Light: Advisory 11. Lanyard / Attachment Point 12. Orange Light: Watch 13. Headphone Jack 14. Red Light: Warning 15. Volume Control Buttons 16. Radio Ready Indicator
Indicates optimal channel reception.
17. Docked Power Indicator Indicates unit is securely docked; power contacts are connected.
18. Low Battery Indicator 19. Volume Indicator
Indicates volume level; disabled when radio is silenced.
20. Listen Mode: On Listen to the weather report.
MENU
READY
HISTORYSILENCED AUTO ON
CH 16
19 20
18 17
21 22
1 2 3
6
8
9
4 5
10 11 12 14 1513
7
21. Listen Mode: Auto Radio alerts for all advisories, watches and warnings that it is programmed to receive.
22. Listen Button Toggles between SILENCED, AUTO & ON modes.
3

SETUP
Install or Replace Batteries AcuRite recommends high quality alkaline batteries for the best product performance. Heavy duty or rechargeable batteries are not recommended.
Batteries provide backup power in the event of a power outage. They provide portable power so you can take the radio with you for outdoor activities, such as ball games, hiking, skiing, boating, hunting, fishing, etc. You can also quickly take your radio with you to a safe location during an emergency.
The power dock is the main power source for this weather radio. The radio is always “listening” for alerts, even when the audio speaker is silenced. This function requires substantial power and, as a result, the weather radio will last approximately 3 days on battery power alone.
Install Batteries FIRST, RELEASE CLIP
THEN, SLIDE OFF
1. Release clip and slide off the clip on the back of the radio.
2. Slide off battery compartment cover. 3. Insert 3 x AA batteries into the
battery compartment. Follow the polarity (+/-) diagram in the battery compartment.
4. Replace the battery cover.
After installing batteries, the weather report audio will automatically turn on. To silence, press the “LISTEN” button.
4

Power Dock Plug-in the power dock as the main power source for the weather radio. Place the weather radio into the power dock and the “ ” icon appears, indicating the radio is docked correctly.
NOTE: The weather radio and power dock do NOT contain charging circuits and will NOT charge or supply power to the batteries.
AC adapter
“DOCKED” indicator
PLEASE DISPOSE OF OLD OR DEFECTIVE BATTERIES IN AN ENVIRONMENTALLY SAFE WAY AND IN ACCORDANCE WITH YOUR LOCAL LAWS AND REGULATIONS. BATTERY SAFETY: Clean the battery contacts and also those of the device prior to battery installation. Remove batteries from equipment which is not to be
used for an extended period of time. Follow the polarity (+/-) diagram in the battery compartment. Promptly remove dead batteries from the device. Dispose of used batteries properly. Only batteries of the same or equivalent type as recommended are to be used. DO NOT incinerate used batteries. DO NOT dispose of batteries in fre, as batteries may explode or leak. DO NOT mix old and new batteries or types of batteries (alkaline/standard). DO NOT use rechargeable batteries. DO NOT recharge non-rechargeable batteries. DO NOT short-circuit the supply terminals.
5
<-SELECT-)
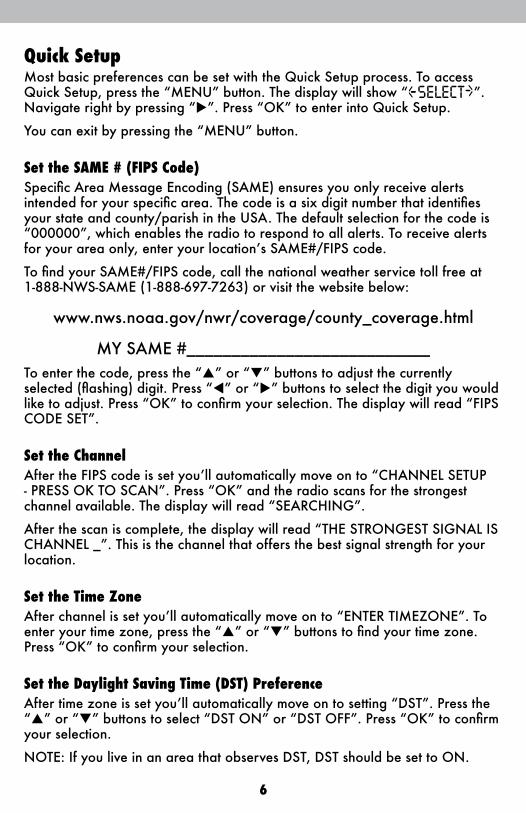
Quick Setup Most basic preferences can be set with the Quick Setup process. To access Quick Setup, press the “MENU” button. The display will show “ ”. Navigate right by pressing “u”. Press “OK” to enter into Quick Setup.
You can exit by pressing the “MENU” button.
Set the SAME # (FIPS Code) Specific Area Message Encoding (SAME) ensures you only receive alerts intended for your specific area. The code is a six digit number that identifies your state and county/parish in the USA. The default selection for the code is “000000”, which enables the radio to respond to all alerts. To receive alerts for your area only, enter your location’s SAME#/FIPS code.
To find your SAME#/FIPS code, call the national weather service toll free at 1-888-NWS-SAME (1-888-697-7263) or visit the website below:
www.nws.noaa.gov/nwr/coverage/county_coverage.html
MY SAME #___________________________ To enter the code, press the “p” or “q” buttons to adjust the currently selected (flashing) digit. Press “t” or “u” buttons to select the digit you would like to adjust. Press “OK” to confirm your selection. The display will read “FIPS CODE SET”.
Set the Channel After the FIPS code is set you’ll automatically move on to “CHANNEL SETUP - PRESS OK TO SCAN”. Press “OK” and the radio scans for the strongest channel available. The display will read “SEARCHING”.
After the scan is complete, the display will read “THE STRONGEST SIGNAL IS CHANNEL _”. This is the channel that offers the best signal strength for your location.
Set the Time Zone After channel is set you’ll automatically move on to “ENTER TIMEZONE”. To enter your time zone, press the “p” or “q” buttons to find your time zone. Press “OK” to confirm your selection.
Set the Daylight Saving Time (DST) Preference After time zone is set you’ll automatically move on to setting “DST”. Press the “p” or “q” buttons to select “DST ON” or “DST OFF”. Press “OK” to confirm your selection.
NOTE: If you live in an area that observes DST, DST should be set to ON.
6

<-SELECT->
Set the Time After the DST preference is set you will automatically move on to “ENTER CURRENT TIME” setting. Press the “p” or “q” buttons to adjust the hour. Press the “u ” button to set the minutes. Press the “p” or “q” buttons to adjust the minutes, then press the “u ” button to set AM or PM. Press the “p” or “q” buttons to select “AM” or “PM”. Press “OK” to confirm your selection.
NOTE: To receive correct starting and ending times of advisories, watches, and warnings the time MUST be set to the current time.
Set the Date After the time is set you will automatically move on to the “EDIT DATE” setting. The display will read “MONTH 01”. Press the “p” or “q” buttons to adjust the MONTH. Press “OK” to confirm your selection.
Next, set the DATE by pressing the “p” or “q” buttons. Press “OK” to confirm your selection.
Finally, set the YEAR by pressing the “p” or “q” buttons to adjust the first (flashing) digit, then press the “u” button to move to the last digit. Press the “p” or “q” buttons to adjust the last digit of the current year, then press “OK” to confirm your selection.
Quick Setup is Complete The display will read “SETUP COMPLETE” and will display the default clock screen.
Manual Setup Advanced preferences can be set with the Manual Setup process. To access Manual Setup, press the “MENU” button. The display will show “ ”. Navigate left by pressing “t”. Press “OK” to enter into Manual Setup. Use the “t” or “u” buttons to scroll through the following options: EDIT FIPS CODE, EDIT CHANNEL, EDIT TIME/DATE, EDIT ALERTS.
You can exit by pressing the “MENU” button.
Edit the SAME # (FIPS Code) To edit the code, press the “p” or “q” buttons to adjust the currently selected (flashing) digit. Press “t” or “u” buttons to select the digit you would like to adjust. Press “OK” to confirm your selection. The display will read “ADD ANOTHER FIPS CODE”. You can enter up to 10 codes.
Note: The SAME/FIPS code narrows the area from which you receive alerts. If none are entered you will receive alerts from anything within your local range.
7

.,
Edit the Channel To manually select a channel, when the display reads “EDIT CHANNEL” press the “p” or “q” buttons to select one of the 7 NOAA broadcast channels. Press “OK” to confirm your selection.
Edit Time & Date Preferences To edit the time zone, DST preference, Time and/or Date, enter into the “EDIT TIME/DATE” menu. Use the navigation buttons to adjust each selection and press “OK” to confirm your selections.
Edit Alerts Enter into the “EDIT ALERTS” menu to remove or add ADVISORY and WATCH alert messages. While each alert type scrolls across the display, press the “p” button to turn the alert ON ( bell icon displayed) or OFF ( no bell icon).
The “Alert Descriptions” on page 11 provide additional details on the alerts available. Note: Warnings cannot be turned off or edited.
Placement Guidelines Place the radio in a location you are most likely to hear the alert tone or see the alert indicator lights. It is critical to choose a location where the radio can receive the emergency alert signal broadcast. The radio and power dock are designed for tabletop placement on a level, dry surface away from moisture.
Keep the radio away from sources of electronic interference, such as computer monitors and TV’s, other radios, motors, microwaves, etc.
The display reads “READY” when radio reception is optimal. Press the “LISTEN” button to verify your reception. If you do not have good reception, relocate the radio near a window and away from objects that may limit the radio signal.
TEST YOUR SIGNAL RECEPTION PRIOR TO RELYING ON THIS DEVICE IN AN EMERGENCY. Verify radio reception during the National Weather Service (NWS) Required Weekly Test (RWT). This test typically occurs every Wednesday between 11:00 AM and 12:00 PM (CT), when weather permits.
The test consists of the RWT SAME code, a short tone and message explaining the test. If adverse weather prevents the test from being broadcast on Wed., it is postponed until the next day with good weather. If the test is not conducted by Friday, it is postponed until the following Wednesday.
You can verify the test time with your local station.
8

OPERATION
Using the Weather Radio
Alerts When an alert is issued by the NWS, the weather radio will sound an alert, a text readout of the alert type (advisory, watch or warning) will scroll across the display and the corresponding alert light will illuminate.
Press the “LISTEN” button to silence an alert. The radio will then enter silent mode and the display will read “SILENCED”.
The weather alert radio will hold up to 4 messages in its memory at a time, in sequence of when they were received.
Alert History To cycle through the last 4 alerts stored in the radio, press “p” or “q” when the default clock is displayed. The HISTORY Mode Indicator displays to confirm you are viewing previous alerts.
If no alerts have been received, “NO MESSAGES” will display.
Alert Text Scrolling Rate To adjust the text alert scrolling speed: When the default clock is displayed press the “u” button until “SCROLLING RATE _” is displayed. Press “p” or “q” to select a scrolling rate from 1 (slowest) to 3 (fastest). Press “OK” to confirm your selection.
Backlight The backlight will automatically turn ON for several seconds when an alert is received or for every button press.
During power dock use, the backlight remains ON by default. To turn the backlight OFF, press AND HOLD the “OK” button. Repeat this step to turn the backlight back ON.
9

+
Troubleshooting
No power
� Verify AC power adapter is securely plugged into power dock.
� Verify radio is securely docked in power dock. The “ ” indicator confirms radio is being powered by the dock.
� Verify you are using fresh batteries. If the radio is powered by batteries alone, battery life is approximately 3 days.
No sound � Verify volume is adjusted up to an audible level. � If external speaker/headphones are plugged into the
headphone jack the main speaker will NOT sound until external speaker/headphones are unplugged.
Static when LISTEN button is pressed
� Relocate the radio for better reception. If you are in a weak reception area, position radio near a window and as high up as possible for best reception.
� Verify radio is set to correct channel for proper reception. You may need to change the channel (page 7).
� Contact the National Weather Service to verify they are currently broadcasting.
Radio not responding to alerts
� Make sure you have programmed the correct SAME # (FIPS code) for your area.
� Contact the NWS to make certain they are currently broadcasting.
If your AcuRite product does not operate properly after trying the troubleshooting steps, visit www.AcuRite.com or call (877) 221-1252 for assistance.
10

Alert Descriptions
NOAA Code
Default Setting Alert Type Alert Message
ADR Off Advisory Administrative Message
AVA Off Watch Avalanche Watch
AVW On Warning Avalanche Warning
BHW On Warning Biological Hazard Warning
BWW On Warning Boil Water Warning
BZW On Warning Blizzard Warning
CAE Off Advisory Child Abduction Emergency
CDW On Warning Civil Danger Warning
CEM On Warning Civil Emergency Message
CFA Off Watch Coastal Flood Watch
CFW On Warning Coastal Flood Warning
CHW On Warning Chemical Hazard Warning
CWW On Warning Contaminated Water Warning
DBA Off Watch Dam Watch
DBW On Warning Dam Break Warning
DEW On Warning Contagious Disease Warning
DMO Off Advisory Practice Demo
DSW On Warning Dust Storm Warning
EAN On Warning Emergency Action Notification
EAT On Advisory Emergency Action Termination
EQW On Warning Earth Quake Warning
EVA Off Watch Evacuation Watch
EVI On Warning Immediate Evacuation
FCW On Warning Food Contamination Warning
FFA Off Watch Flash Flood Watch
FFS Off Advisory Flash Flood Statement
FFW On Warning Flash Flood Warning
FLA Off Watch Flood Watch
FLS Off Advisory Flood Statement
FLW On Warning Flood Warning
FRW On Warning Fire Warning
FSW On Warning Flash Freeze Warning
11

NOAA Code
Default Setting Alert Type Alert Message
FZW On Warning Freeze Warning
HLS Off Advisory Hurricane Statement
HMW On Warning Hazardous Material Warning
HUA Off Watch Hurricane Watch
HUW On Warning Hurricane Warning
HWA Off Watch High Wind Watch
HWW On Warning High Wind Warning
IBW On Warning Iceberg Warning
IFW On Warning Industrial Fire Warning
LAE On Advisory Local Area Emergency
LEW On Warning Law Enforcement Warning
LSW On Warning Land Slide Warning
NAT Off Advisory National Audible Test
NIC Off Advisory National Information Center
NMN Off Advisory Network Notification
NPT Off Advisory National Periodic Test
NST Off Advisory National Silent Test
NUW On Warning Nuclear Power Plant Warning
POS Off Advisory Power Outage Advisory
RHW On Warning Radiological Hazard Warning
RMT Off Advisory Required Monthly Test
RWT On Advisory Required Weekly Test
SMW On Warning Special Marine Warning
SPS Off Advisory Special Weather Statement
SPW On Warning Shelter In Place Warning
SVA Off Watch Severe Thunderstorm Watch
SVR On Warning Severe Thunderstorm Warning
SVS Off Advisory Severe Weather Statement
TOA Off Watch Tornado Watch
TOE Off Advisory 911 Telephone Outage Emergency
TOR On Warning Tornado Warning
TRA Off Watch Tropical Storm Watch
TRW On Warning Tropical Storm Warning
12

NOAA Code
Default Setting Alert Type Alert Message
TSA On Watch Tsunami Watch
TSW On Warning Tsunami Warning
TXB Off Advisory Transmitter Backup On
TXF Off Advisory Transmitter Carrier Off
TXO Off Advisory Transmitter Carrier On
TXP Off Advisory Transmitter Primary On
VOW On Warning Volcano Warning
WFA Off Watch Wild Fire Watch
WFW On Warning Wild Fire Warning
WSA Off Watch Winter Storm Watch
WSW On Warning Winter Storm Warning
??A Off Watch Unrecognized Watch
??E Off Advisory Unrecognized Emergency
??S Off Advisory Unrecognized Statement
??W On Warning Unrecognized Warning
13

Care & Maintenance Clean with a soft, damp cloth. Do not use caustic cleaners or abrasives. This product is NOT waterproof. To reduce the risk of fire, electric shock, or damage, do not expose to rain, moisture, or immerse in water. To reduce the risk of electric shock, DO NOT disassemble or modify this product. Take this product to the manufacturer when repair work is required. Opening the case of the radio or the power dock/adapter voids the warranty. This product contains NO user serviceable parts.
Specifications POWER 3 x AA alkaline batteries (not included)
AC power adapter (included)Voltage: 4.5V; Current: 300mAStandard: UL/CUL: E149533; CEC: Yes
CHANNELS Digital PLL tuning for 7 NOAA channels:Channel 1 - 162.400 MHz Channel 2 - 162.425 MHz Channel 3 - 162.450 MHz Channel 4 - 162.475 MHz Channel 5 - 162.500 MHz Channel 6 - 162.525 MHz Channel 7 - 162.550 MHz
WIRELESS RANGE Up to 50 miles (80 km)
VOICE OUTPUT 77dB/1m ( 1 KHz )
SENSITIVITY ( -5dB )
FCC Information This device complies with part 15 of FCC rules. Operation is subject to the following two conditions: 1- This device may NOT cause harmful interference, and 2- This device must accept any interference received, including interference that may cause undesired operation. This equipment has been tested and found to comply with the limits for a Class B digital device, pursuant to Part 15 of the FCC rules. These limits are designed to provide reasonable protection against harmful interference in a residential installation. This equipment generates, uses and can radiate radio frequency energy and, if not installed and used in accordance with the instructions, may cause harmful interference to radio communications. However, there is no guarantee that interference will not occur in a particular installation. If this equipment does cause harmful interference to radio or television reception, which can be determined by turning the equipment off and on, the user is encouraged to try to correct the interference by one or more of the following measures: • Reorient or relocate the receiving antenna. • Increase the separation between the equipment and the receiver. • Connect the equipment into an outlet on a circuit different from that to which the receiver is connected. • Consult the dealer or an experienced radio/TV technician for help. NOTE: The manufacturer is not responsible for any radio or TV interference caused by unauthorized modifcations to this equipment. Such modifcations could void the user authority to operate the equipment. This device complies with Industry Canada licence-exempt RSS standard(s). Operation is subject to the following two conditions: (1) This device may not cause interference, and (2) This device must accept any interference received, including interference that may cause undesired operation of the device.
14

(()
Archived Products
Customer Support AcuRite customer support is committed to providing you with best-in-class service. For assistance, please have the model number of this product available and contact us in any of the following ways:
(877) 221-1252 [email protected]
24/7 support at www.AcuRite.com ► Installation Videos ► Register your Product
► Instruction Manuals ► Support User Forum
► Replacement Parts ► Submit Feedback & Ideas
IMPORTANT PRODUCT MUST BE REGISTERED TO RECEIVE WARRANTY SERVICE
PRODUCT REGISTRATION Register online
to receive 1 year warranty protection
www.AcuRite.com ►Register a Product
Limited One Year Warranty At AcuRite, we proudly uphold our commitment to quality technology. Chaney Instrument Co. warrants that all products it manufactures to be of good material and workmanship, and to be free of defects when properly installed and operated for a period of one year from the date of purchase. We recommend that you visit us at www.AcuRite.com for the fastest way to register your product. However, product registration does not eliminate the need to retain your original proof of purchase in order to obtain warranty benefits. Chaney Instrument Co. warrants that all products it manufactures to be of good material and workmanship, and to be free of defects when properly installed and operated for a period of one year from the date of purchase. Remedy for breach of this warranty is limited to repair or replacement of the defective item(s). Any product which, under normal use and service, is proven to breach the warranty contained herein within ONE YEAR from date of sale will, upon examination by Chaney, and at its sole option, be repaired or replaced by Chaney. Transportation costs and charges for returned goods shall be paid for by the purchaser. Chaney hereby disclaims all responsibility for such transportation costs and charges. This
warranty will not be breached, and Chaney will give no credit for products it manufactures which have received normal wear and tear, been damaged (including by acts of nature), tampered, abused, improperly installed, damaged in shipping, or repaired or altered by others than authorized representatives of Chaney. The above-described warranty is expressly in lieu of all other warranties, express or implied, and all other warranties are hereby expressly disclaimed, including without limitation the implied warranty of merchantability and the implied warranty of fitness for a particular purpose. Chaney expressly disclaims all liability for special, consequential or incidental damages, whether arising in tort or by contract from any breach of this warranty. Some states do not allow the exclusion or limitation of incidental or consequential damages, so the above limitation or exclusion may not apply to you. Chaney further disclaims all liability from personal injury relating to its products to the extent permitted by law. By acceptance of any of Chaney’s products, the purchaser assumes all liability for the consequences arising from their use or misuse. No person, firm or corporation is authorized to assume for Chaney any other liability in connection with the sale of its products. Furthermore, no person, firm or corporation is authorized to modify or waive the terms of this paragraph, and the preceding paragraph, unless done in writing and signed by a duly authorized agent of Chaney. This warranty gives you specific legal rights, and you may also have other rights which vary from state to state.
For in-warranty claims: Chaney Instrument Co. 965 Wells St., Lake Geneva, WI 53147
15

ACU►RITE®
ACU►RITE.
Weather Temperature Weather Kitchen Clocks Stations & Humidity Alert Radio Thermometers
& Timers
It’s more than accurate, it’s AcuRite offers an extensive assortment of precision instruments, designed to provide you with information you can depend on to
Plan your day with confidence™.
www.AcuRite.com
©Chaney Instrument Co. All rights reserved. AcuRite is a registered trademark of the Chaney Instrument Co., Lake Geneva, WI 53147. All other trademarks and copy-
Printed in China rights are the property of their respective owners. AcuRite uses patented technology. 08550 INST 061615 Visit www.AcuRite.com/patents for details.