Embed Size (px)
Citation preview
Work Sample: User Friendly Software and Records Procedures
Vanessa Prejean Hebert 2009/2015
Norfolk Public Schools
Human Resources Records Preparation & Laserfiche
Scanning Applications
User Friendly Instructions
Human Resources
Norfolk Public Schools
n.p.s_LF_prep_2009
Laserfiche 8 *UON=unless otherwise noted *Bar codes will not be read in GREY SCALE, they must be scanned in black and white only, Page 2 *Reference to the Menu Bar 1st row and the Tool Bar 2nd row and action icon *Be sure to verify all Employee Name and the I.D number scanned
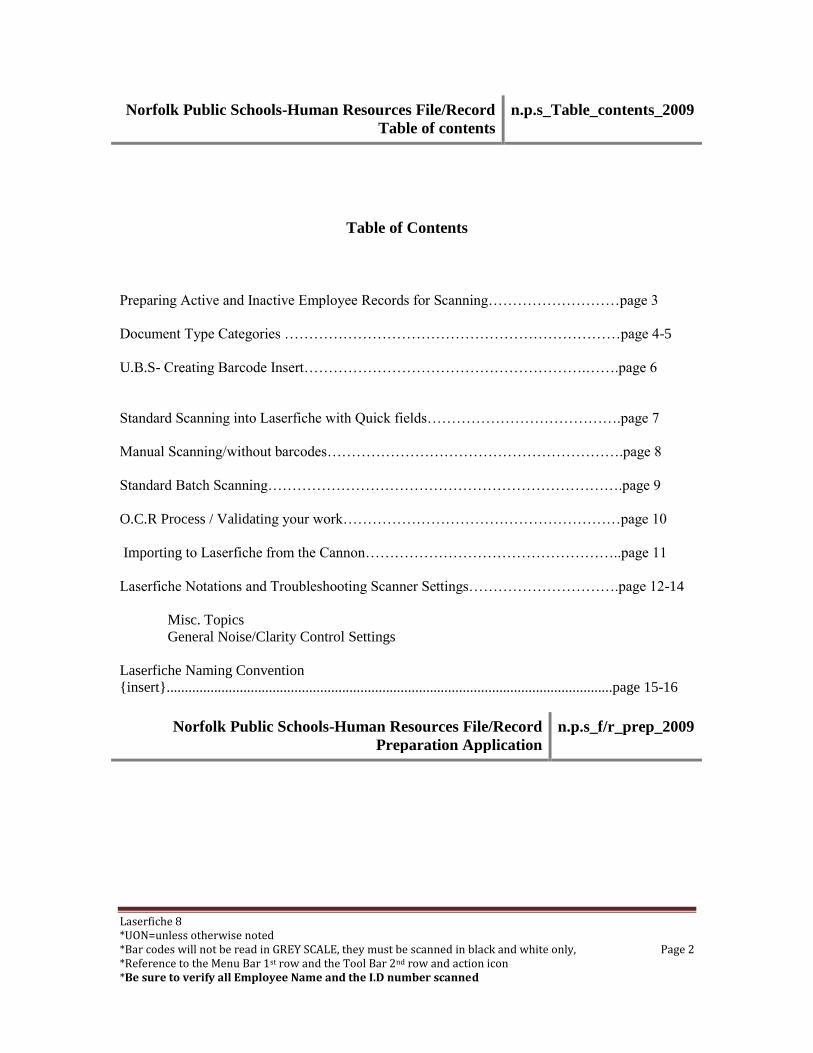
Norfolk Public Schools-Human Resources File/Record
Table of contents
n.p.s_Table_contents_2009
Table of Contents
Preparing Active and Inactive Employee Records for Scanning………………………page 3
Document Type Categories ……………………………………………………………page 4-5
U.B.S- Creating Barcode Insert………………………………………………….…….page 6g
Active a
Standard Scanning into Laserfiche with Quick fields………………………………….page 7
Manual Scanning/without barcodes…………………………………………………….page 8
Standard Batch Scanning……………………………………………………………….page 9
O.C.R Process / Validating your work…………………………………………………page 10
Importing to Laserfiche from the Cannon……………………………………………..page 11
Laserfiche Notations and Troubleshooting Scanner Settings………………………….page 12-14
Misc. Topics
General Noise/Clarity Control Settings
Laserfiche Naming Convention
{insert}..........................................................................................................................page 15-16
Norfolk Public Schools-Human Resources File/Record
Preparation Application
n.p.s_f/r_prep_2009
Laserfiche 8 *UON=unless otherwise noted *Bar codes will not be read in GREY SCALE, they must be scanned in black and white only, Page 3 *Reference to the Menu Bar 1st row and the Tool Bar 2nd row and action icon *Be sure to verify all Employee Name and the I.D number scanned
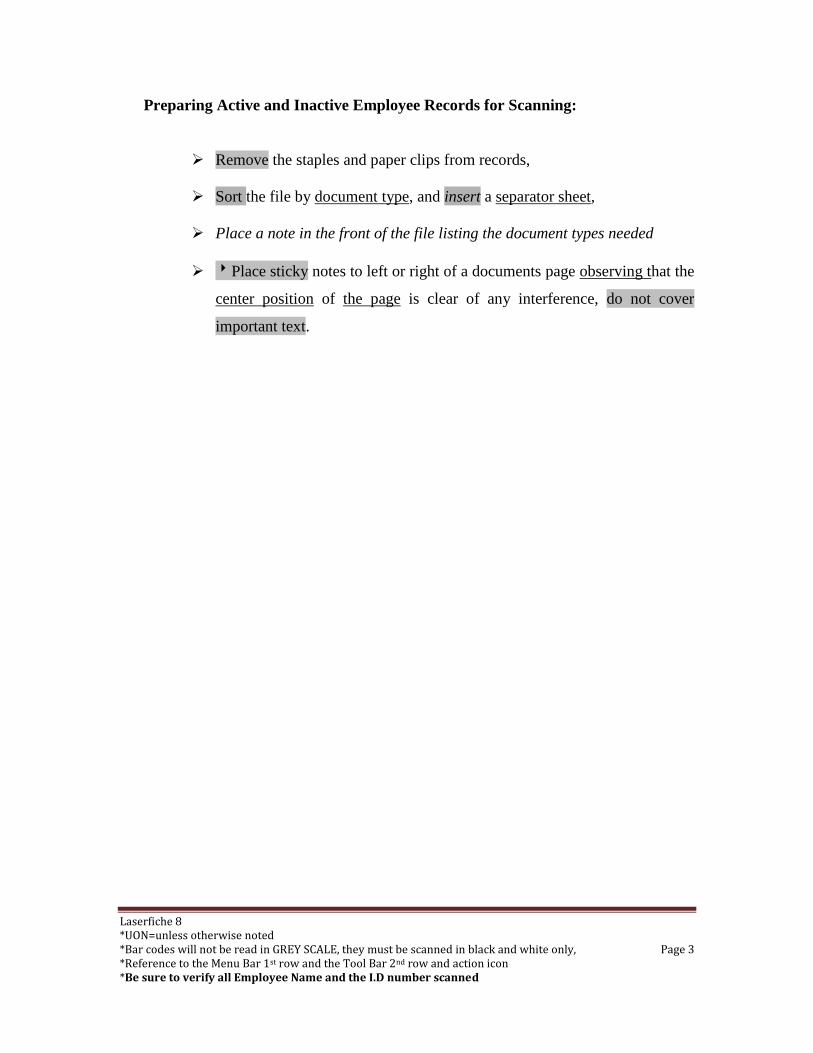
Preparing Active and Inactive Employee Records for Scanning:
Remove the staples and paper clips from records,
Sort the file by document type, and insert a separator sheet,
Place a note in the front of the file listing the document types needed
Place sticky notes to left or right of a documents page observing that the
center position of the page is clear of any interference, do not cover
important text.
Laserfiche 8 *UON=unless otherwise noted *Bar codes will not be read in GREY SCALE, they must be scanned in black and white only, Page 4 *Reference to the Menu Bar 1st row and the Tool Bar 2nd row and action icon *Be sure to verify all Employee Name and the I.D number scanned
Norfolk Public Schools-Human Resources
Document Types Categories
n.p.s_doc_type_2009
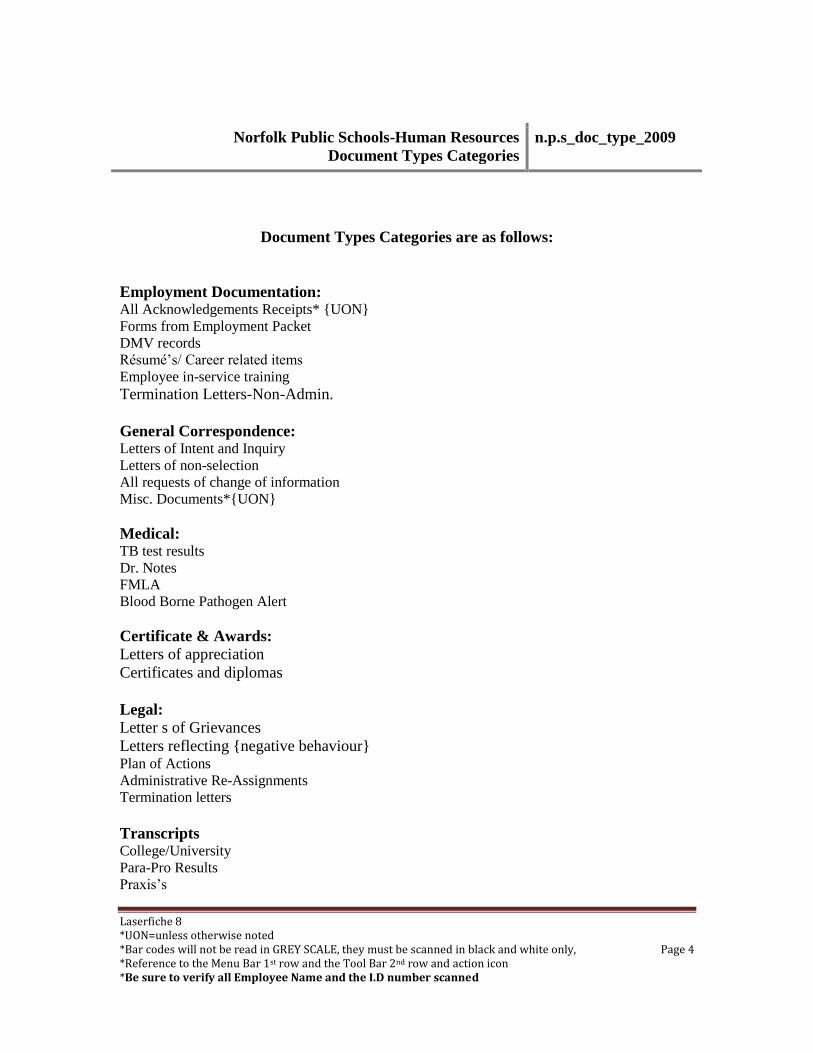
Document Types Categories are as follows:
Employment Documentation: All Acknowledgements Receipts* {UON}
Forms from Employment Packet
DMV records
Résumé’s/ Career related items
Employee in-service training
Termination Letters-Non-Admin.
General Correspondence: Letters of Intent and Inquiry
Letters of non-selection
All requests of change of information
Misc. Documents*{UON}
Medical: TB test results
Dr. Notes
FMLA
Blood Borne Pathogen Alert
Certificate & Awards:
Letters of appreciation
Certificates and diplomas
Legal:
Letter s of Grievances
Letters reflecting {negative behaviour} Plan of Actions
Administrative Re-Assignments
Termination letters
Transcripts College/University
Para-Pro Results
Praxis’s
*UON=unless otherwise noted *Bar codes will not be read in GREY SCALE, they must be scanned in black and white only, Page 5 *Reference to the Menu Bar 1st row and the Tool Bar 2nd row and action icon *Be sure to Indicate all Employee I.D’s scanned
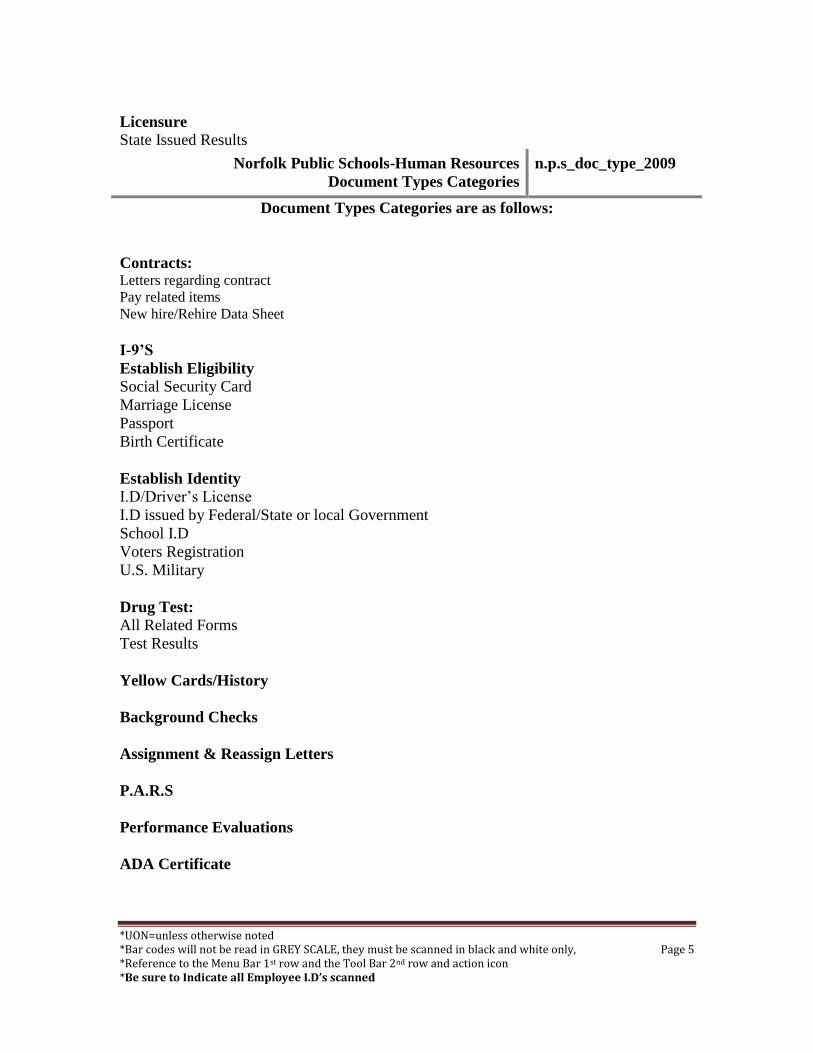
Licensure
State Issued Results
Norfolk Public Schools-Human Resources
Document Types Categories
n.p.s_doc_type_2009
Document Types Categories are as follows:
Contracts: Letters regarding contract
Pay related items
New hire/Rehire Data Sheet
I-9’S
Establish Eligibility
Social Security Card
Marriage License
Passport
Birth Certificate
Establish Identity
I.D/Driver’s License
I.D issued by Federal/State or local Government
School I.D
Voters Registration
U.S. Military
Drug Test:
All Related Forms
Test Results
Yellow Cards/History
Background Checks
Assignment & Reassign Letters
P.A.R.S
Performance Evaluations
ADA Certificate
*UON=unless otherwise noted *Bar codes will not be read in GREY SCALE, they must be scanned in black and white only, Page 6 *Reference to the Menu Bar 1st row and the Tool Bar 2nd row and action icon *Be sure to Indicate all Employee I.D’s scanned
Central Registry release
Part-time Data Card
Norfolk Public Schools-Human Resources
Creating Barcodes
n.p.s_empl_brcds_2009
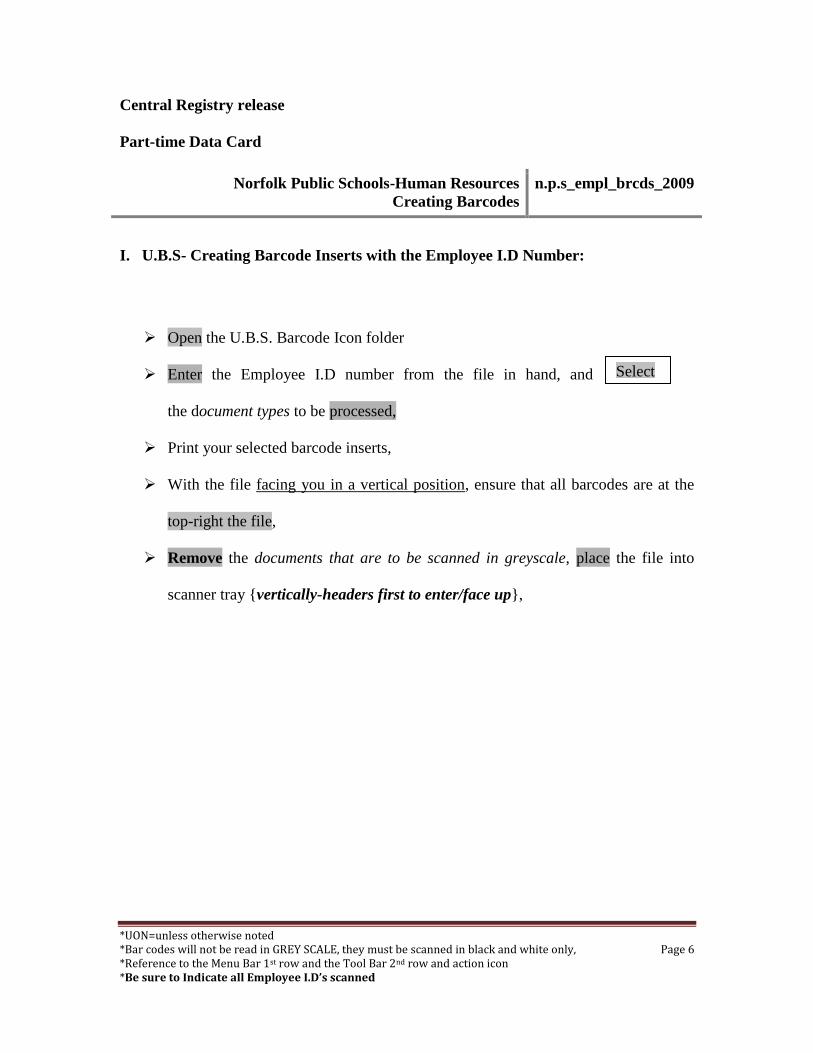
I. U.B.S- Creating Barcode Inserts with the Employee I.D Number:
Open the U.B.S. Barcode Icon folder
Enter the Employee I.D number from the file in hand, and
the document types to be processed,
Print your selected barcode inserts,
With the file facing you in a vertical position, ensure that all barcodes are at the
top-right the file,
Remove the documents that are to be scanned in greyscale, place the file into
scanner tray {vertically-headers first to enter/face up},
Select

*UON=unless otherwise noted *Bar codes will not be read in GREY SCALE, they must be scanned in black and white only, Page 7 *Reference to the Menu Bar 1st row and the Tool Bar 2nd row and action icon *Be sure to Indicate all Employee I.D’s scanned
Norfolk Public Schools-Human Resources
Standard Scanning Quickfields
n.p.s_stndrd_scan_qckfld_2009
Terms of Usage: Normal Scanning of Files, Hand delivered Files, New Hires, Single
Page/Document Type, these applications are Always performed with Barcode Inserts
I. Standard Scanning into Laserfiche with Quick fields:
Quick fields Icon folder→Employee Files C→ Open existing→OK
From the menu bar, Choose the scan tab, and allow the screen to populate, to verify the
scanner options, Click the scanner options and then the scanner properties box will appear
DEFAULT settings should be as follows:
Under advance settings, enable
blank page removal, and set your
noise control settings.
AGAIN, place the file into the tray,
Select the green⇒Scan button in the
toolbar and, scan your file, when the
scanner stops, if there are no issues,
Once the documents have completed scanning, view for quality control and rescan as needed
or remove any blank or unneeded pages, oncethe documents are acceptable
Select the SEND all ▶ {blue white arrow-box in, toolbar, send
Proceed with the next file, and repeat the steps as necessary
Source ADF
Resolution 300
Paper Size Letter Size
Orientation Portrait
Color Mode Black & White
Sides Duplex
ADVANCE
*UON=unless otherwise noted *Bar codes will not be read in GREY SCALE, they must be scanned in black and white only, Page 8 *Reference to the Menu Bar 1st row and the Tool Bar 2nd row and action icon *Be sure to Indicate all Employee I.D’s scanned
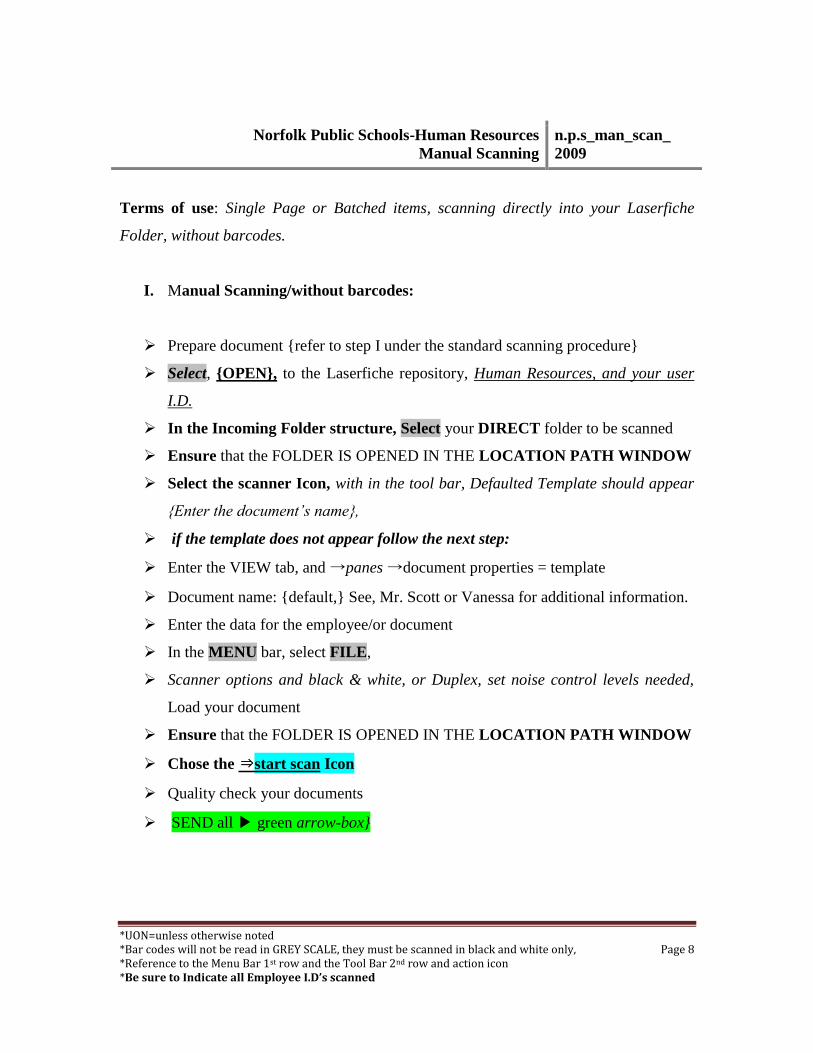
Norfolk Public Schools-Human Resources
Manual Scanning
n.p.s_man_scan_
2009
Terms of use: Single Page or Batched items, scanning directly into your Laserfiche
Folder, without barcodes.
I. Manual Scanning/without barcodes:
Prepare document {refer to step I under the standard scanning procedure}
Select, {OPEN}, to the Laserfiche repository, Human Resources, and your user
I.D.
In the Incoming Folder structure, Select your DIRECT folder to be scanned
Ensure that the FOLDER IS OPENED IN THE LOCATION PATH WINDOW
Select the scanner Icon, with in the tool bar, Defaulted Template should appear
{Enter the document’s name},
if the template does not appear follow the next step:
Enter the VIEW tab, and →panes →document properties = template
Document name: {default,} See, Mr. Scott or Vanessa for additional information.
Enter the data for the employee/or document
In the MENU bar, select FILE,
Scanner options and black & white, or Duplex, set noise control levels needed,
Load your document
Ensure that the FOLDER IS OPENED IN THE LOCATION PATH WINDOW
Chose the ⇒start scan Icon
Quality check your documents
SEND all ▶ green arrow-box}
*UON=unless otherwise noted *Bar codes will not be read in GREY SCALE, they must be scanned in black and white only, Page 9 *Reference to the Menu Bar 1st row and the Tool Bar 2nd row and action icon *Be sure to Indicate all Employee I.D’s scanned
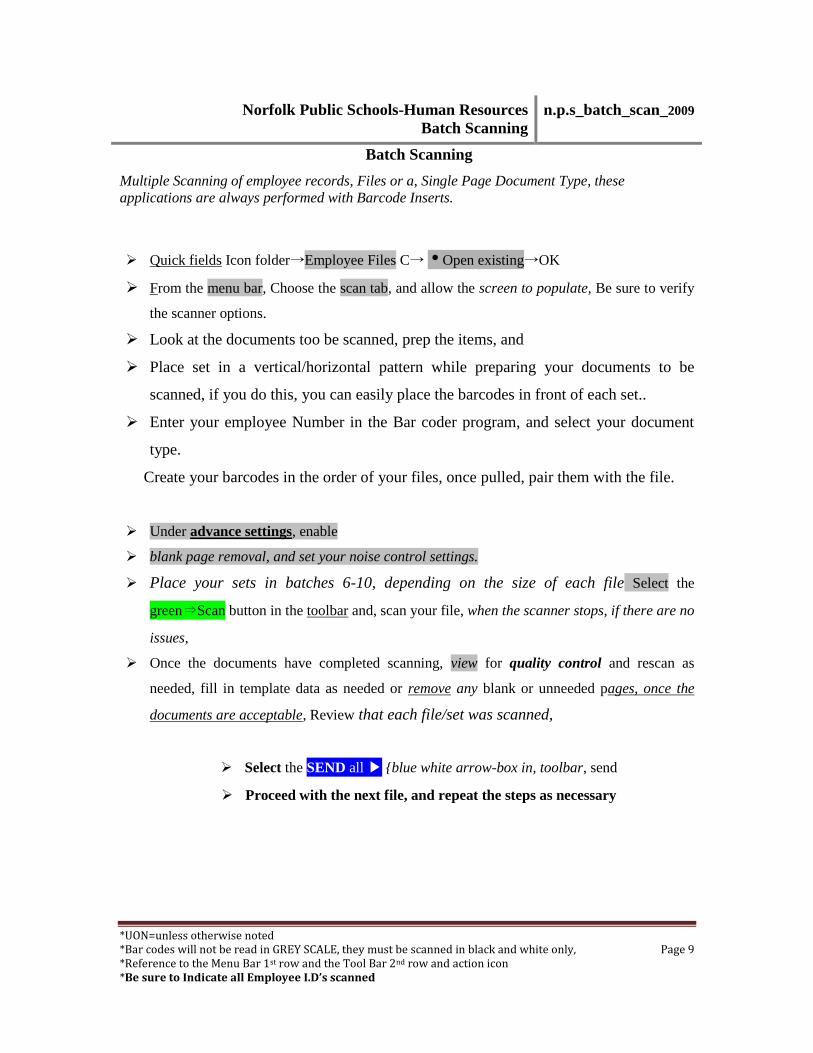
Norfolk Public Schools-Human Resources
Batch Scanning
n.p.s_batch_scan_2009
Batch Scanning
Multiple Scanning of employee records, Files or a, Single Page Document Type, these
applications are always performed with Barcode Inserts.
Quick fields Icon folder→Employee Files C→ Open existing→OK
From the menu bar, Choose the scan tab, and allow the screen to populate, Be sure to verify
the scanner options.
Look at the documents too be scanned, prep the items, and
Place set in a vertical/horizontal pattern while preparing your documents to be
scanned, if you do this, you can easily place the barcodes in front of each set..
Enter your employee Number in the Bar coder program, and select your document
type.
Create your barcodes in the order of your files, once pulled, pair them with the file.
Under advance settings, enable
blank page removal, and set your noise control settings.
Place your sets in batches 6-10, depending on the size of each file Select the
green⇒Scan button in the toolbar and, scan your file, when the scanner stops, if there are no
issues,
Once the documents have completed scanning, view for quality control and rescan as
needed, fill in template data as needed or remove any blank or unneeded pages, once the
documents are acceptable, Review that each file/set was scanned,
Select the SEND all ▶ {blue white arrow-box in, toolbar, send
Proceed with the next file, and repeat the steps as necessary
*UON=unless otherwise noted *Bar codes will not be read in GREY SCALE, they must be scanned in black and white only, Page 10 *Reference to the Menu Bar 1st row and the Tool Bar 2nd row and action icon *Be sure to Indicate all Employee I.D’s scanned
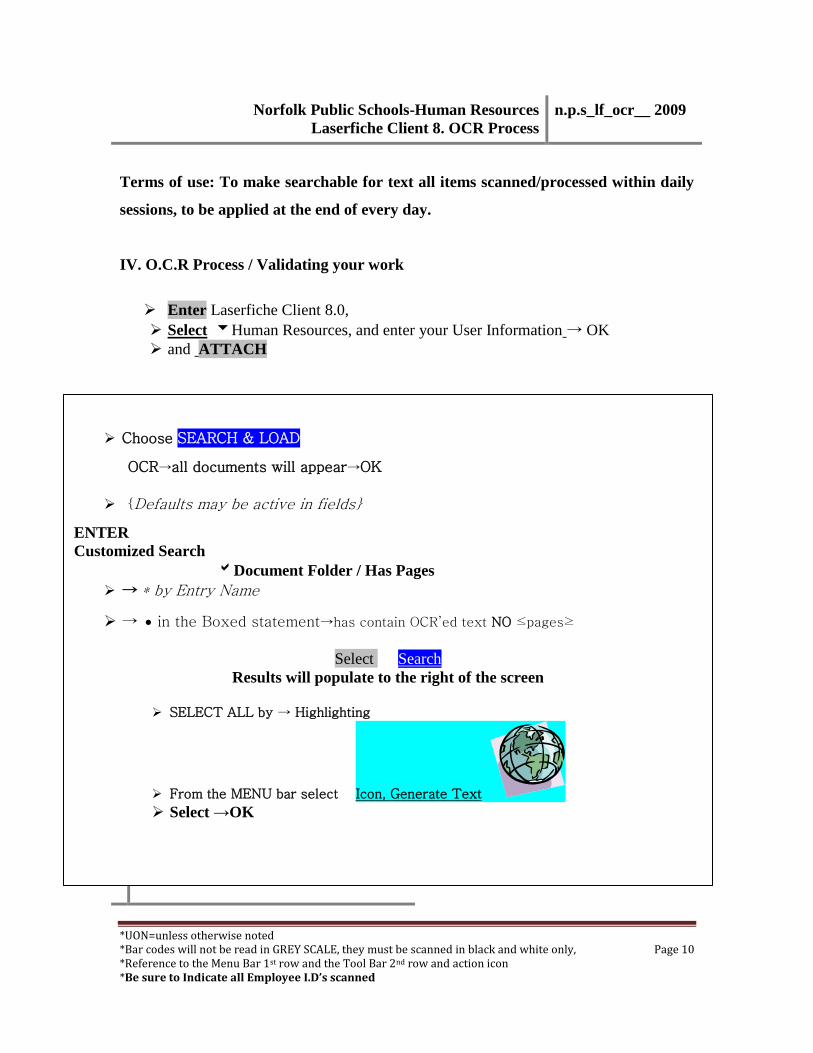
Norfolk Public Schools-Human Resources
Laserfiche Client 8. OCR Process
n.p.s_lf_ocr__ 2009
Terms of use: To make searchable for text all items scanned/processed within daily
sessions, to be applied at the end of every day.
IV. O.C.R Process / Validating your work
Enter Laserfiche Client 8.0,
Select Human Resources, and enter your User Information → OK
and ATTACH
Search Results will
Choose SEARCH & LOAD
OCR→all documents will appear→OK
{Defaults may be active in fields}
ENTER
Customized Search
Document Folder / Has Pages
→ * by Entry Name
→ in the Boxed statement→has contain OCR’ed text NO ≤pages≥
Select → Search
Results will populate to the right of the screen
SELECT ALL by → Highlighting
From the MENU bar select Icon, Generate Text
Select →OK
*UON=unless otherwise noted *Bar codes will not be read in GREY SCALE, they must be scanned in black and white only, Page 11 *Reference to the Menu Bar 1st row and the Tool Bar 2nd row and action icon *Be sure to Indicate all Employee I.D’s scanned
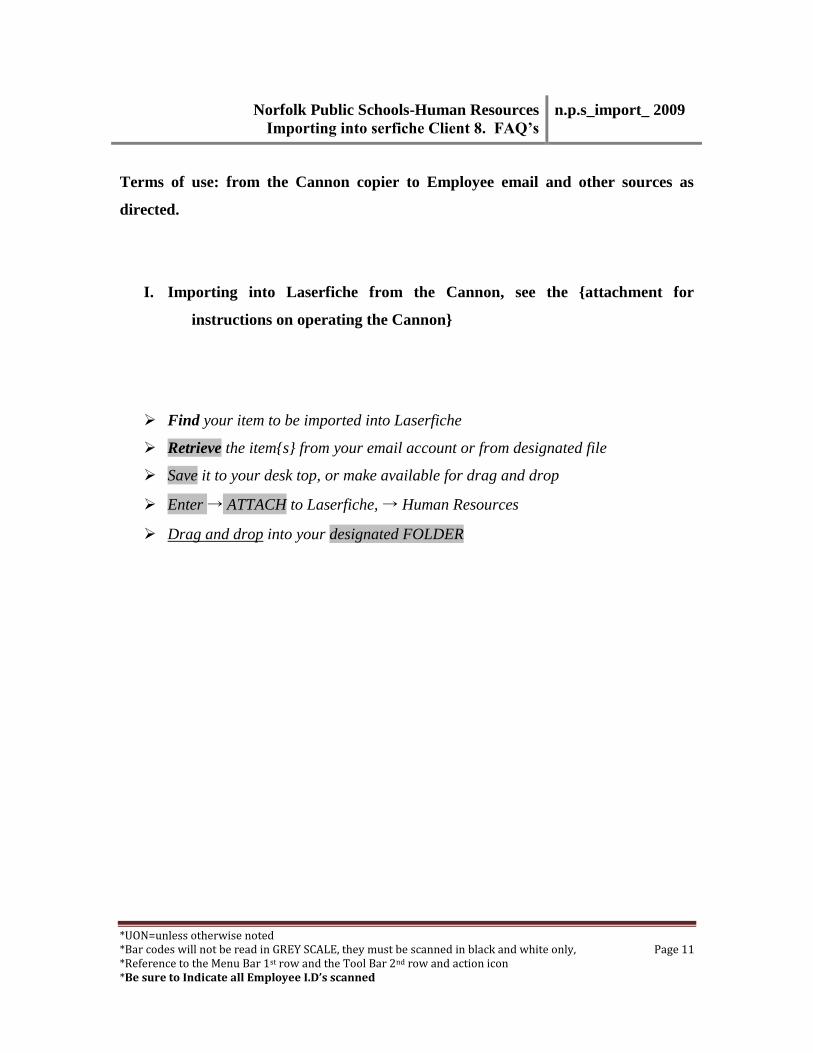
Norfolk Public Schools-Human Resources
Importing into serfiche Client 8. FAQ’s
n.p.s_import_ 2009
Terms of use: from the Cannon copier to Employee email and other sources as
directed.
I. Importing into Laserfiche from the Cannon, see the {attachment for
instructions on operating the Cannon}
Find your item to be imported into Laserfiche
Retrieve the item{s} from your email account or from designated file
Save it to your desk top, or make available for drag and drop
Enter → ATTACH to Laserfiche, → Human Resources
Drag and drop into your designated FOLDER
*UON=unless otherwise noted *Bar codes will not be read in GREY SCALE, they must be scanned in black and white only, Page 12 *Reference to the Menu Bar 1st row and the Tool Bar 2nd row and action icon *Be sure to Indicate all Employee I.D’s scanned
Norfolk Public Schools-Human Resources
Notes & Troubleshooting
n.p.s_trlb__nts___
2009
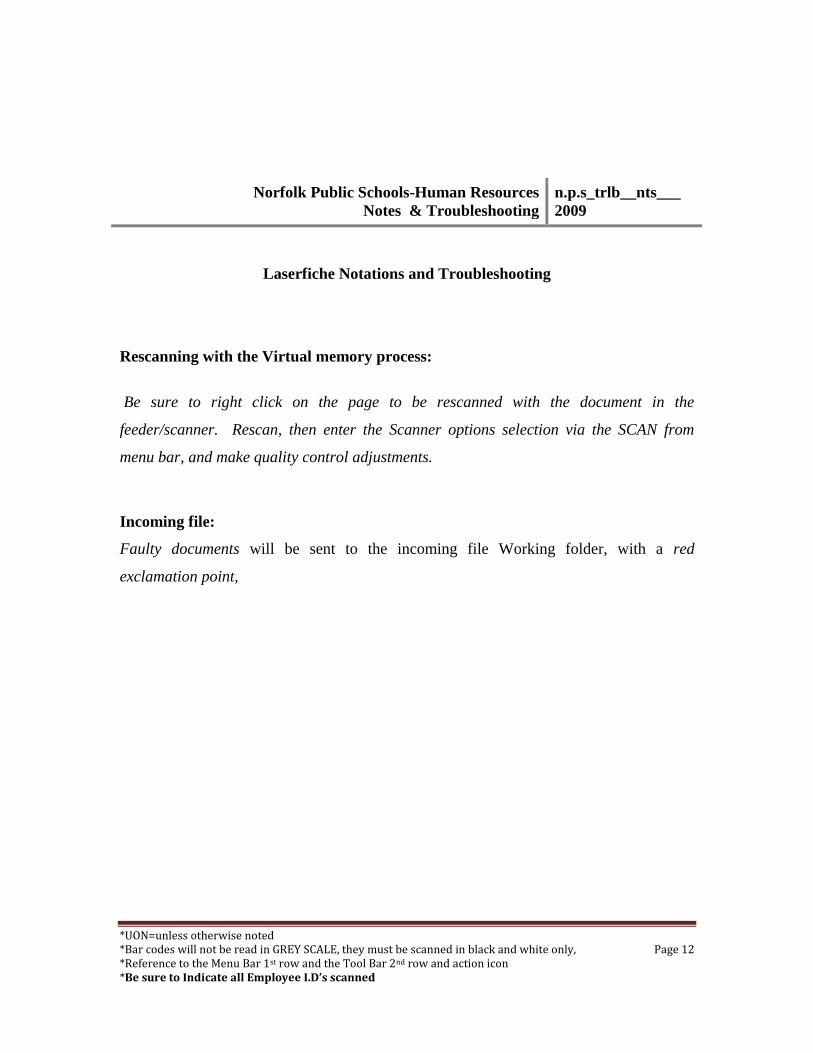
Laserfiche Notations and Troubleshooting
Rescanning with the Virtual memory process:
Be sure to right click on the page to be rescanned with the document in the
feeder/scanner. Rescan, then enter the Scanner options selection via the SCAN from
menu bar, and make quality control adjustments.
Incoming file:
Faulty documents will be sent to the incoming file Working folder, with a red
exclamation point,
*UON=unless otherwise noted *Bar codes will not be read in GREY SCALE, they must be scanned in black and white only, Page 13 *Reference to the Menu Bar 1st row and the Tool Bar 2nd row and action icon *Be sure to Indicate all Employee I.D’s scanned
Norfolk Public Schools-Human Resources
Notes & Troubleshooting
n.p.s_trlb__nts___
2009
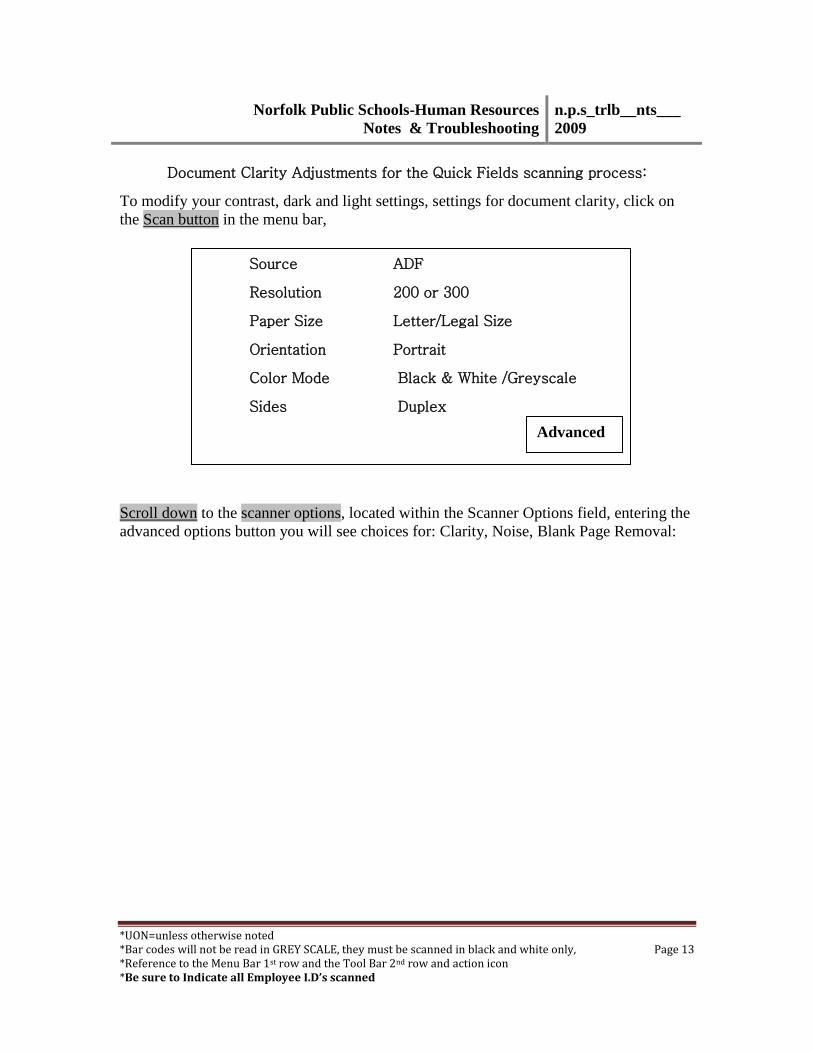
Document Clarity Adjustments for the Quick Fields scanning process:
To modify your contrast, dark and light settings, settings for document clarity, click on
the Scan button in the menu bar,
Scroll down to the scanner options, located within the Scanner Options field, entering the
advanced options button you will see choices for: Clarity, Noise, Blank Page Removal:
Source ADF
Resolution 200 or 300
Paper Size Letter/Legal Size
Orientation Portrait
Color Mode Black & White /Greyscale
Sides Duplex
Advanced
Advanced
*UON=unless otherwise noted *Bar codes will not be read in GREY SCALE, they must be scanned in black and white only, Page 14 *Reference to the Menu Bar 1st row and the Tool Bar 2nd row and action icon *Be sure to Indicate all Employee I.D’s scanned
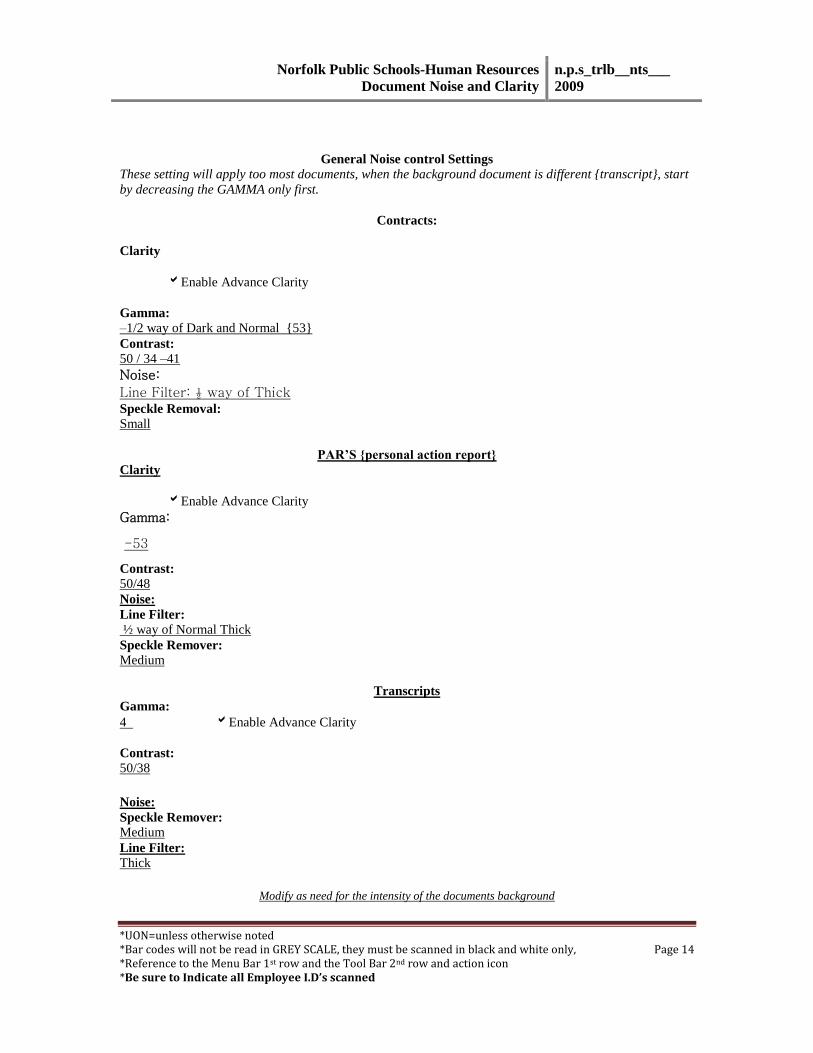
General Noise control Settings
These setting will apply too most documents, when the background document is different {transcript}, start
by decreasing the GAMMA only first.
Contracts:
Clarity
Enable Advance Clarity
Gamma: –1/2 way of Dark and Normal {53}
Contrast:
50 / 34 –41
Noise:
Line Filter: ½ way of Thick Speckle Removal:
Small
PAR’S {personal action report}
Clarity
Enable Advance Clarity
Gamma:
-53
Contrast: 50/48
Noise:
Line Filter:
½ way of Normal Thick
Speckle Remover:
Medium
Transcripts
Gamma:
4 Enable Advance Clarity
Contrast:
50/38
Noise:
Speckle Remover:
Medium
Line Filter:
Thick
Modify as need for the intensity of the documents background
Norfolk Public Schools-Human Resources
Document Noise and Clarity
n.p.s_trlb__nts___
2009
*UON=unless otherwise noted *Bar codes will not be read in GREY SCALE, they must be scanned in black and white only, Page 15 *Reference to the Menu Bar 1st row and the Tool Bar 2nd row and action icon *Be sure to Indicate all Employee I.D’s scanned
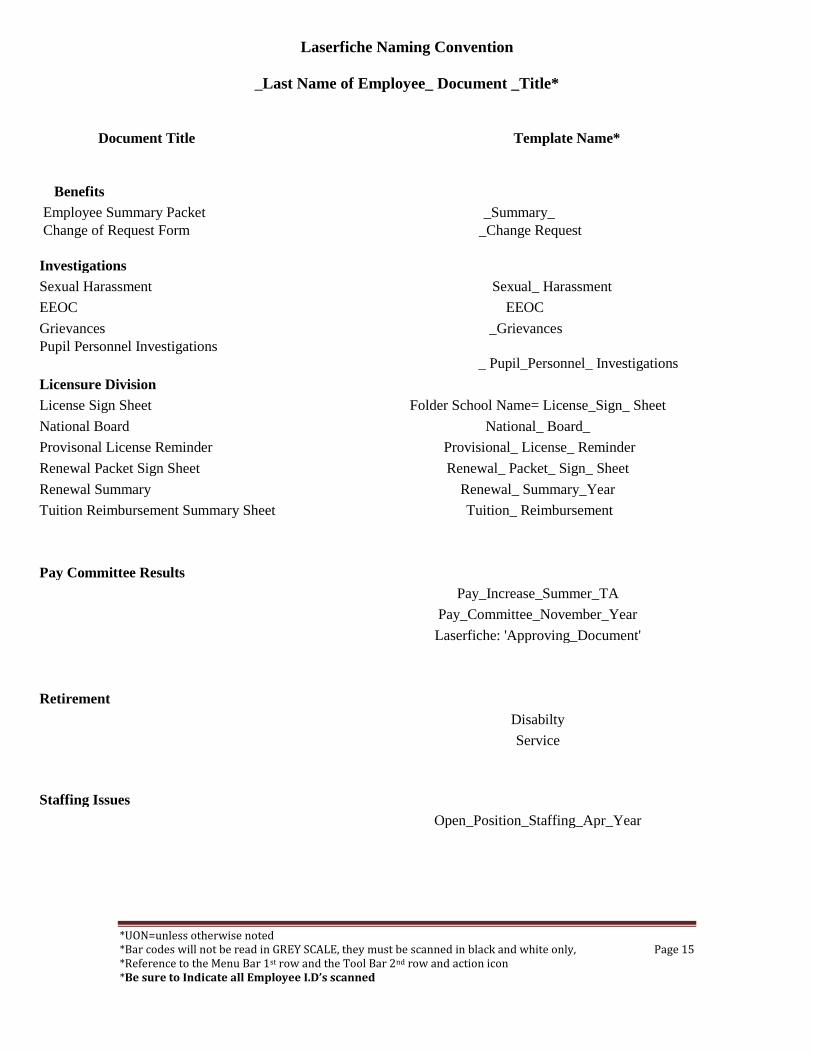
Laserfiche Naming Convention
_Last Name of Employee_ Document _Title*
Document Title Template Name*
Benefits
Employee Summary Packet _Summary_ Change of Request Form _Change Request Investigations
Sexual Harassment Sexual_ Harassment
EEOC EEOC
Grievances _Grievances Pupil Personnel Investigations
_ Pupil_Personnel_ Investigations
Licensure Division
License Sign Sheet Folder School Name= License_Sign_ Sheet
National Board National_ Board_
Provisonal License Reminder Provisional_ License_ Reminder
Renewal Packet Sign Sheet Renewal_ Packet_ Sign_ Sheet
Renewal Summary Renewal_ Summary_Year
Tuition Reimbursement Summary Sheet Tuition_ Reimbursement
Pay Committee Results
Pay_Increase_Summer_TA
Pay_Committee_November_Year
Laserfiche: 'Approving_Document'
Retirement
Disabilty
Service
Staffing Issues
Open_Position_Staffing_Apr_Year
Voluntary Transfer Request
*UON=unless otherwise noted *Bar codes will not be read in GREY SCALE, they must be scanned in black and white only, Page 16 *Reference to the Menu Bar 1st row and the Tool Bar 2nd row and action icon *Be sure to Indicate all Employee I.D’s scanned
Voluntary Transfer Request
2009_2010 Voluntary_ Transfer_ Request_Year_Year
Voluntary_Transfer_Request_Revised_2009-2010
Personnel_Laws_Regs_Policies
American_Disability_Act


![FIU SEMINAR 3-28-2017.ppt [Read-Only]...2017/03/28 · Week 2 May 16 (Monday) Not Activated ----May 17 (Tuesday) 7214 vph 6672 vph -7.51% May 18 (Wednesday) 7109 vph 6493 vph -8.67%](https://img.pdfslide.us/doc/110x75/5f0f9fcd7e708231d445164e/fiu-seminar-3-28-2017ppt-read-only-20170328-week-2-may-16-monday-not.jpg)