Embed Size (px)
Citation preview
Volume 37, Issue 5 May 2017
Newsletter of the Sonoma County Woodworkers Association
www.sonomawoodworkers.com
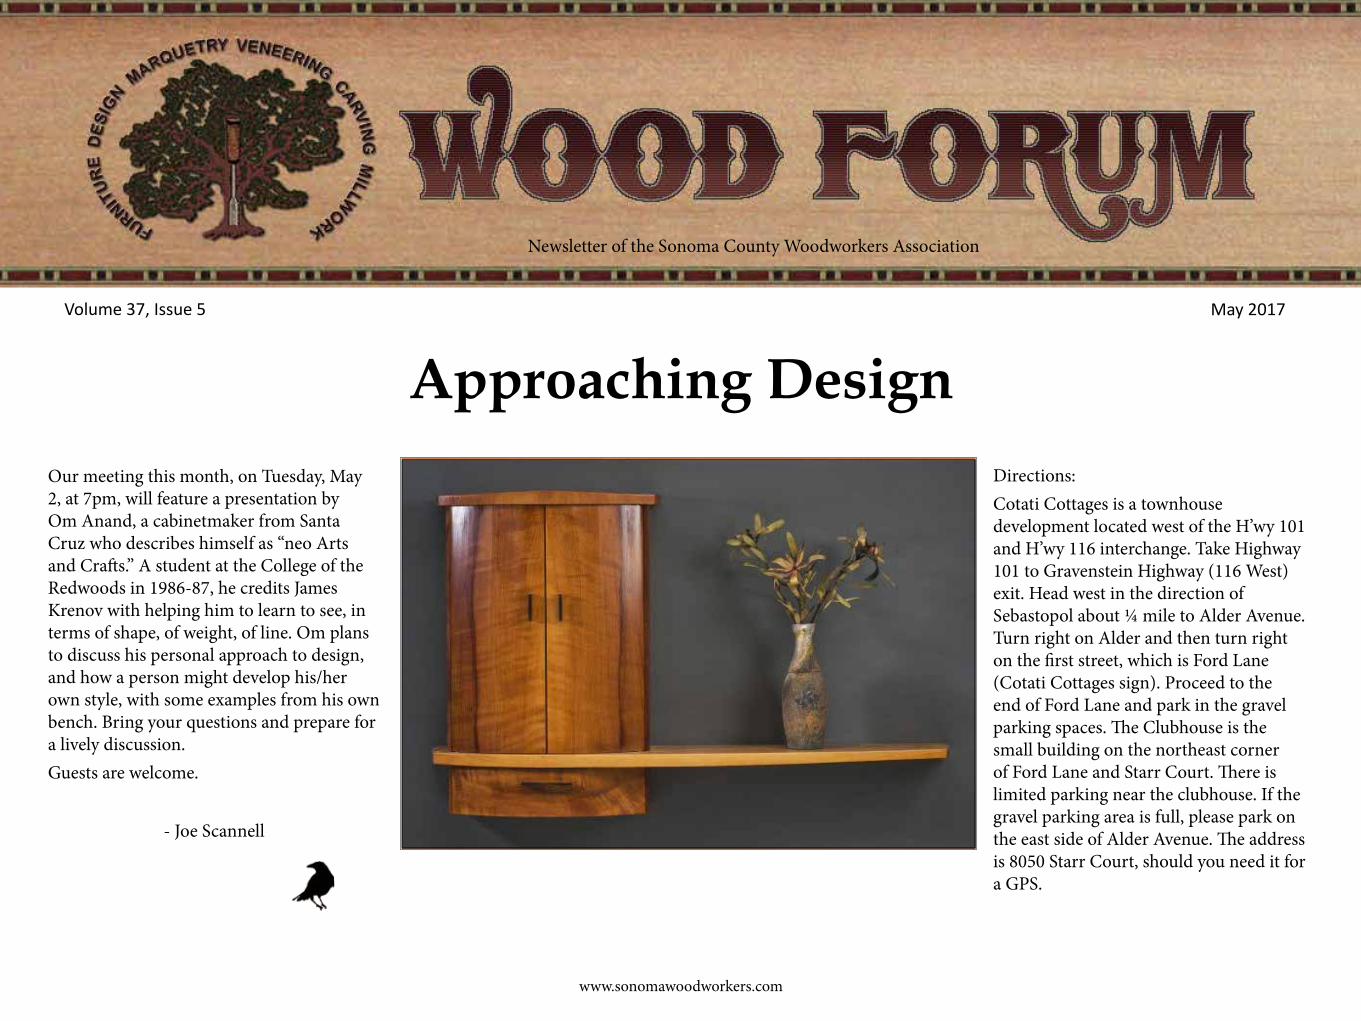
Approaching DesignDirections:Cotati Cottages is a townhouse development located west of the H’wy 101 and H’wy 116 interchange. Take Highway 101 to Gravenstein Highway (116 West) exit. Head west in the direction of Sebastopol about ¼ mile to Alder Avenue. Turn right on Alder and then turn right on the first street, which is Ford Lane (Cotati Cottages sign). Proceed to the end of Ford Lane and park in the gravel parking spaces. The Clubhouse is the small building on the northeast corner of Ford Lane and Starr Court. There is limited parking near the clubhouse. If the gravel parking area is full, please park on the east side of Alder Avenue. The address is 8050 Starr Court, should you need it for a GPS.
Our meeting this month, on Tuesday, May 2, at 7pm, will feature a presentation by Om Anand, a cabinetmaker from Santa Cruz who describes himself as “neo Arts and Crafts.” A student at the College of the Redwoods in 1986-87, he credits James Krenov with helping him to learn to see, in terms of shape, of weight, of line. Om plans to discuss his personal approach to design, and how a person might develop his/her own style, with some examples from his own bench. Bring your questions and prepare for a lively discussion.Guests are welcome.
- Joe Scannell
SCWA Wood Forum May 2017 Page 2
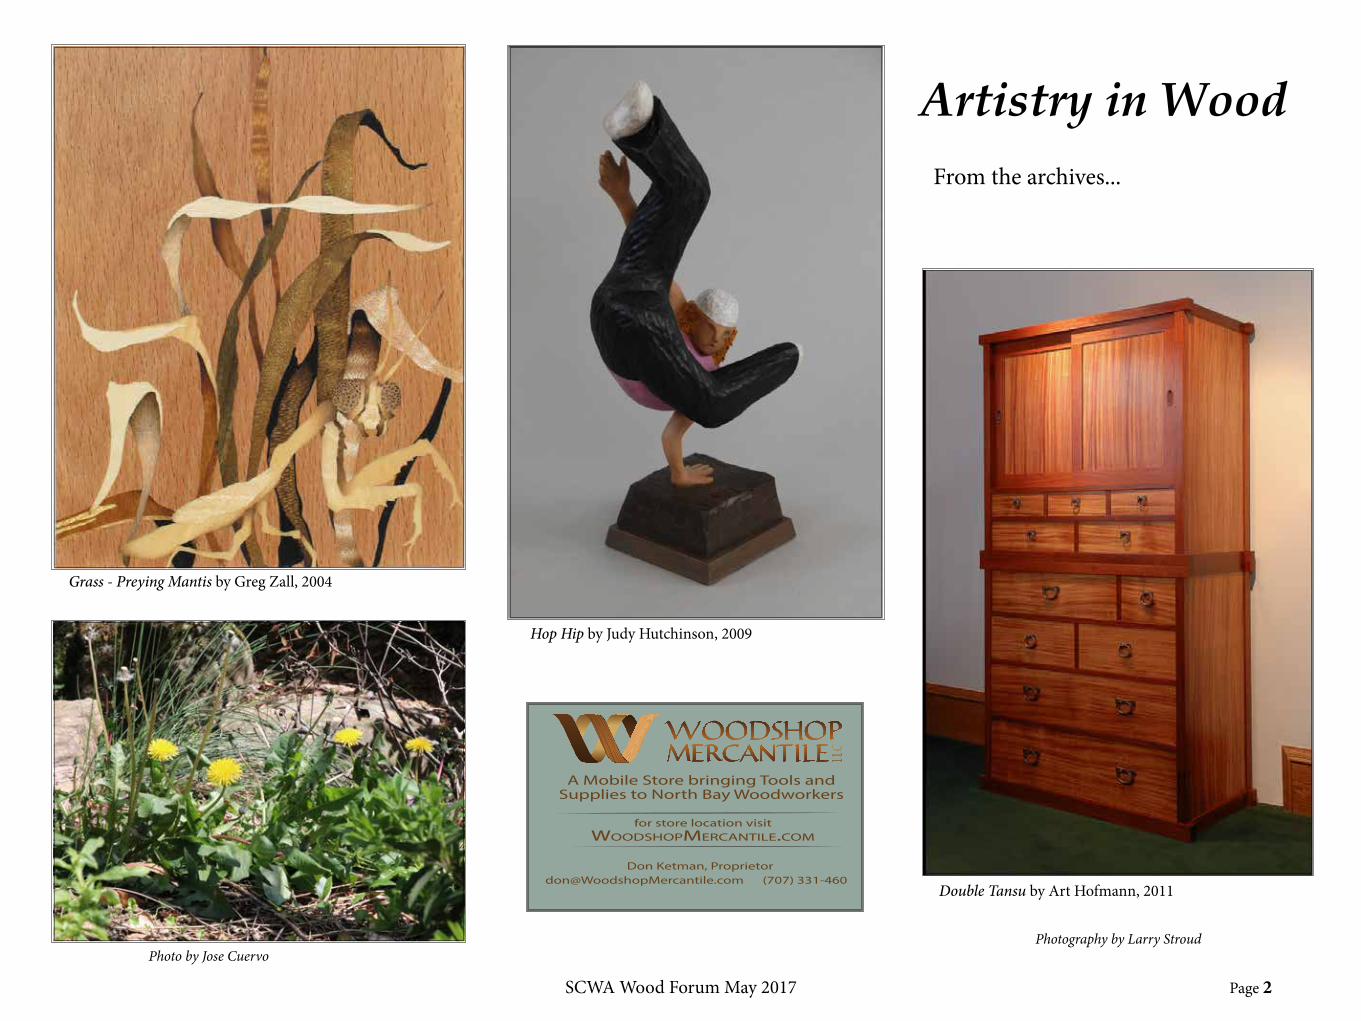
Photo by Jose Cuervo
Double Tansu by Art Hofmann, 2011
Grass - Preying Mantis by Greg Zall, 2004
Artistry in WoodFrom the archives...
Photography by Larry Stroud
Don Ketman, [email protected] (707) 331-4609
A Mobile Store bringing Tools andSupplies to North Bay Woodworkers
for store location visitWOODSHOPMERCANTILE.COM
Hop Hip by Judy Hutchinson, 2009
SCWA Wood Forum May 2017 Page 3
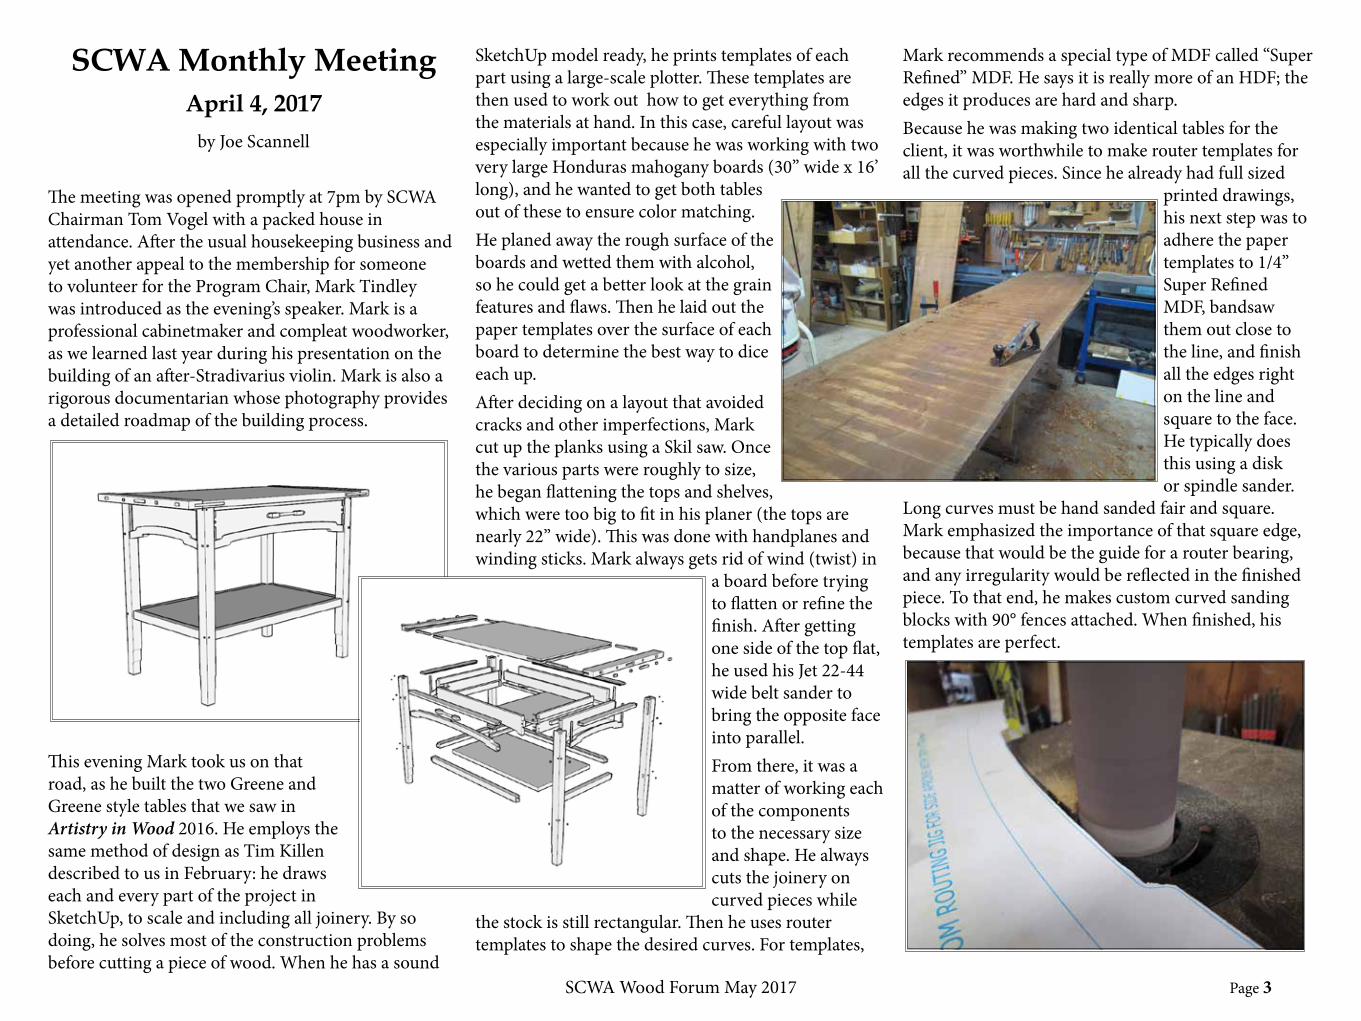
SketchUp model ready, he prints templates of each part using a large-scale plotter. These templates are then used to work out how to get everything from the materials at hand. In this case, careful layout was especially important because he was working with two very large Honduras mahogany boards (30” wide x 16’ long), and he wanted to get both tables out of these to ensure color matching.He planed away the rough surface of the boards and wetted them with alcohol, so he could get a better look at the grain features and flaws. Then he laid out the paper templates over the surface of each board to determine the best way to dice each up.After deciding on a layout that avoided cracks and other imperfections, Mark cut up the planks using a Skil saw. Once the various parts were roughly to size, he began flattening the tops and shelves, which were too big to fit in his planer (the tops are nearly 22” wide). This was done with handplanes and winding sticks. Mark always gets rid of wind (twist) in
a board before trying to flatten or refine the finish. After getting one side of the top flat, he used his Jet 22-44 wide belt sander to bring the opposite face into parallel.From there, it was a matter of working each of the components to the necessary size and shape. He always cuts the joinery on curved pieces while
the stock is still rectangular. Then he uses router templates to shape the desired curves. For templates,
SCWA Monthly MeetingApril 4, 2017
by Joe Scannell
The meeting was opened promptly at 7pm by SCWA Chairman Tom Vogel with a packed house in attendance. After the usual housekeeping business and yet another appeal to the membership for someone to volunteer for the Program Chair, Mark Tindley was introduced as the evening’s speaker. Mark is a professional cabinetmaker and compleat woodworker, as we learned last year during his presentation on the building of an after-Stradivarius violin. Mark is also a rigorous documentarian whose photography provides a detailed roadmap of the building process.
This evening Mark took us on that road, as he built the two Greene and Greene style tables that we saw in Artistry in Wood 2016. He employs the same method of design as Tim Killen described to us in February: he draws each and every part of the project in SketchUp, to scale and including all joinery. By so doing, he solves most of the construction problems before cutting a piece of wood. When he has a sound
Mark recommends a special type of MDF called “Super Refined” MDF. He says it is really more of an HDF; the edges it produces are hard and sharp.Because he was making two identical tables for the client, it was worthwhile to make router templates for all the curved pieces. Since he already had full sized
printed drawings, his next step was to adhere the paper templates to 1/4” Super Refined MDF, bandsaw them out close to the line, and finish all the edges right on the line and square to the face. He typically does this using a disk or spindle sander.
Long curves must be hand sanded fair and square. Mark emphasized the importance of that square edge, because that would be the guide for a router bearing, and any irregularity would be reflected in the finished piece. To that end, he makes custom curved sanding blocks with 90° fences attached. When finished, his templates are perfect.
SCWA Wood Forum May 2017 Page 4
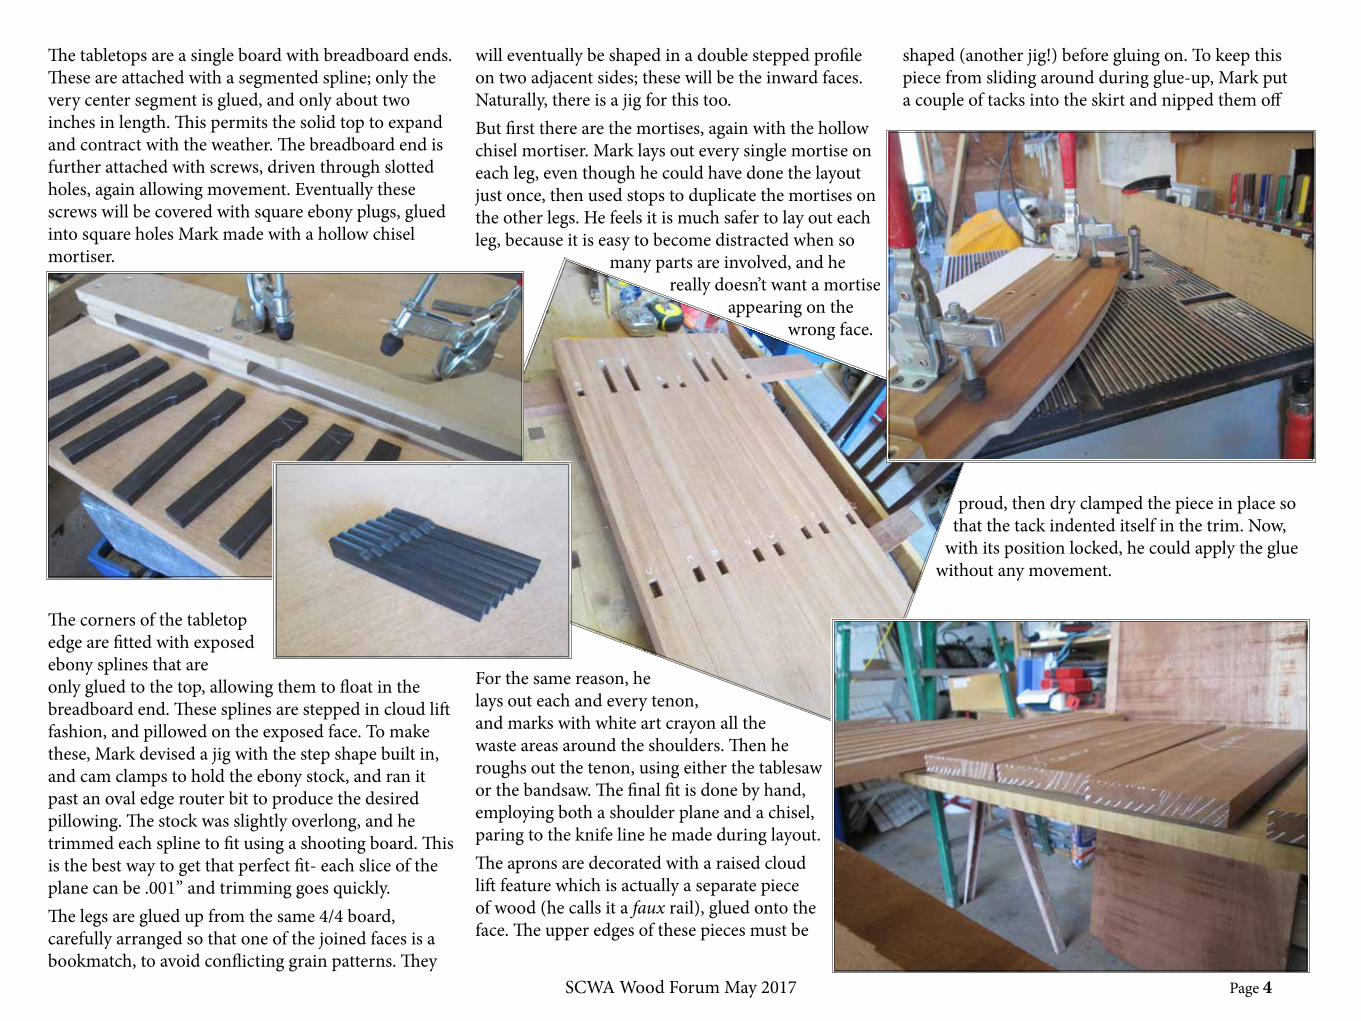
The tabletops are a single board with breadboard ends. These are attached with a segmented spline; only the very center segment is glued, and only about two inches in length. This permits the solid top to expand and contract with the weather. The breadboard end is further attached with screws, driven through slotted holes, again allowing movement. Eventually these screws will be covered with square ebony plugs, glued into square holes Mark made with a hollow chisel mortiser.
The corners of the tabletop edge are fitted with exposed ebony splines that are only glued to the top, allowing them to float in the breadboard end. These splines are stepped in cloud lift fashion, and pillowed on the exposed face. To make these, Mark devised a jig with the step shape built in, and cam clamps to hold the ebony stock, and ran it past an oval edge router bit to produce the desired pillowing. The stock was slightly overlong, and he trimmed each spline to fit using a shooting board. This is the best way to get that perfect fit- each slice of the plane can be .001” and trimming goes quickly.The legs are glued up from the same 4/4 board, carefully arranged so that one of the joined faces is a bookmatch, to avoid conflicting grain patterns. They
will eventually be shaped in a double stepped profile on two adjacent sides; these will be the inward faces. Naturally, there is a jig for this too.But first there are the mortises, again with the hollow chisel mortiser. Mark lays out every single mortise on each leg, even though he could have done the layout just once, then used stops to duplicate the mortises on the other legs. He feels it is much safer to lay out each leg, because it is easy to become distracted when so
many parts are involved, and he really doesn’t want a mortise
appearing on the wrong face.
shaped (another jig!) before gluing on. To keep this piece from sliding around during glue-up, Mark put a couple of tacks into the skirt and nipped them off
For the same reason, he lays out each and every tenon, and marks with white art crayon all the waste areas around the shoulders. Then he roughs out the tenon, using either the tablesaw or the bandsaw. The final fit is done by hand, employing both a shoulder plane and a chisel, paring to the knife line he made during layout.The aprons are decorated with a raised cloud lift feature which is actually a separate piece of wood (he calls it a faux rail), glued onto the face. The upper edges of these pieces must be
proud, then dry clamped the piece in place so that the tack indented itself in the trim. Now,
with its position locked, he could apply the glue without any movement.
SCWA Wood Forum May 2017 Page 5
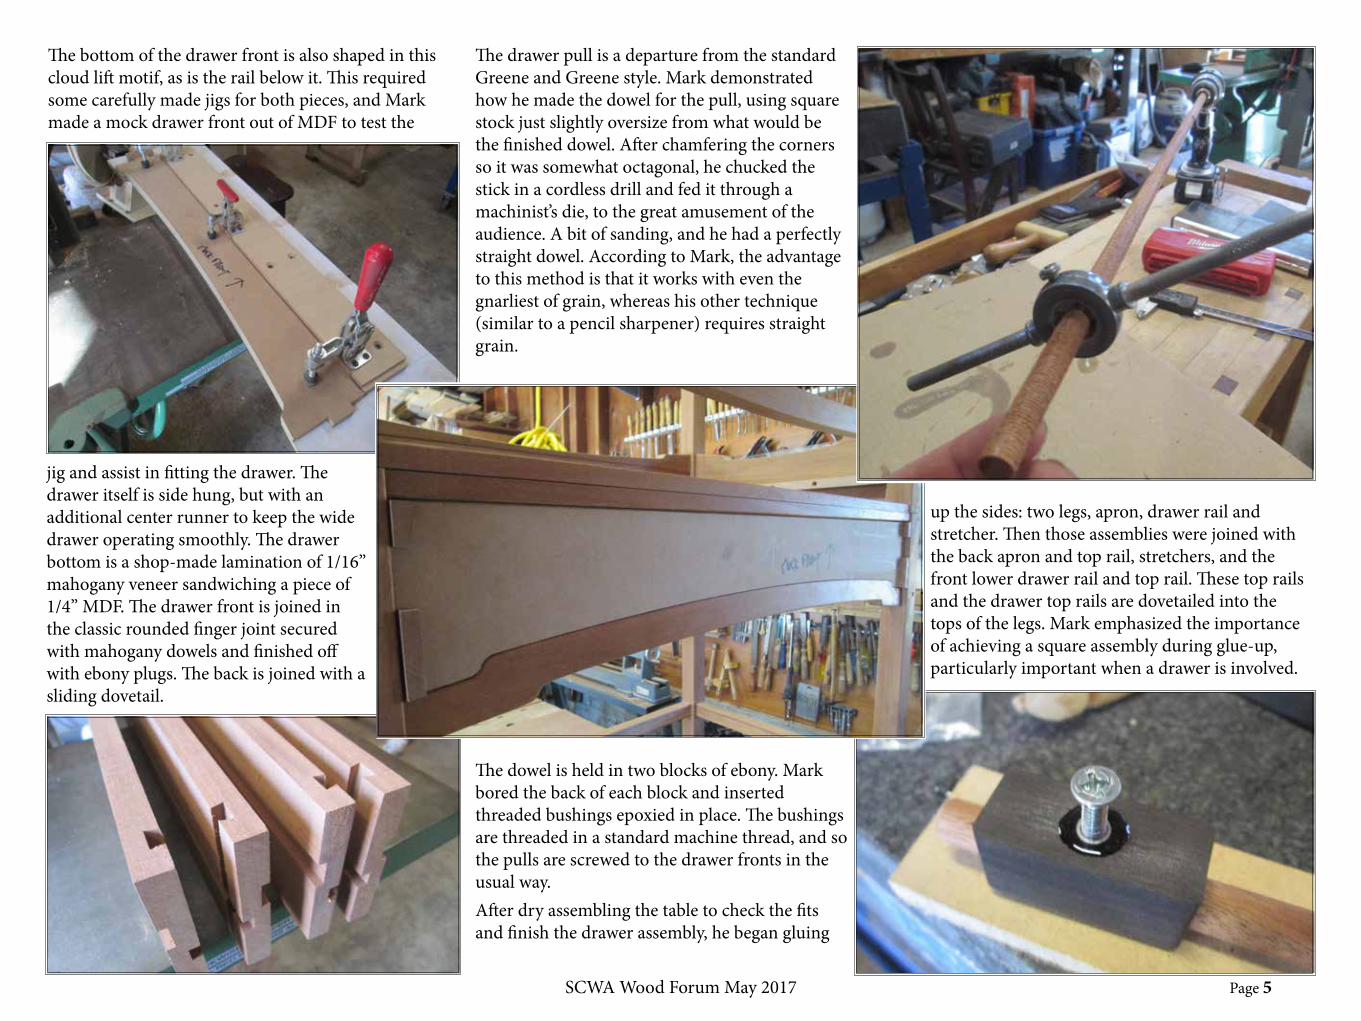
The bottom of the drawer front is also shaped in this cloud lift motif, as is the rail below it. This required some carefully made jigs for both pieces, and Mark made a mock drawer front out of MDF to test the
The drawer pull is a departure from the standard Greene and Greene style. Mark demonstrated how he made the dowel for the pull, using square stock just slightly oversize from what would be the finished dowel. After chamfering the corners so it was somewhat octagonal, he chucked the stick in a cordless drill and fed it through a machinist’s die, to the great amusement of the audience. A bit of sanding, and he had a perfectly straight dowel. According to Mark, the advantage to this method is that it works with even the gnarliest of grain, whereas his other technique (similar to a pencil sharpener) requires straight grain.
up the sides: two legs, apron, drawer rail and stretcher. Then those assemblies were joined with the back apron and top rail, stretchers, and the front lower drawer rail and top rail. These top rails and the drawer top rails are dovetailed into the tops of the legs. Mark emphasized the importance of achieving a square assembly during glue-up, particularly important when a drawer is involved.
jig and assist in fitting the drawer. The drawer itself is side hung, but with an additional center runner to keep the wide drawer operating smoothly. The drawer bottom is a shop-made lamination of 1/16” mahogany veneer sandwiching a piece of 1/4” MDF. The drawer front is joined in the classic rounded finger joint secured with mahogany dowels and finished off with ebony plugs. The back is joined with a sliding dovetail.
The dowel is held in two blocks of ebony. Mark bored the back of each block and inserted threaded bushings epoxied in place. The bushings are threaded in a standard machine thread, and so the pulls are screwed to the drawer fronts in the usual way.After dry assembling the table to check the fits and finish the drawer assembly, he began gluing
SCWA Wood Forum May 2017 Page 6
He tests squareness by comparing diagonals, and if adjustment is needed he simply skews one or more of the clamps to alter clamping pressure.
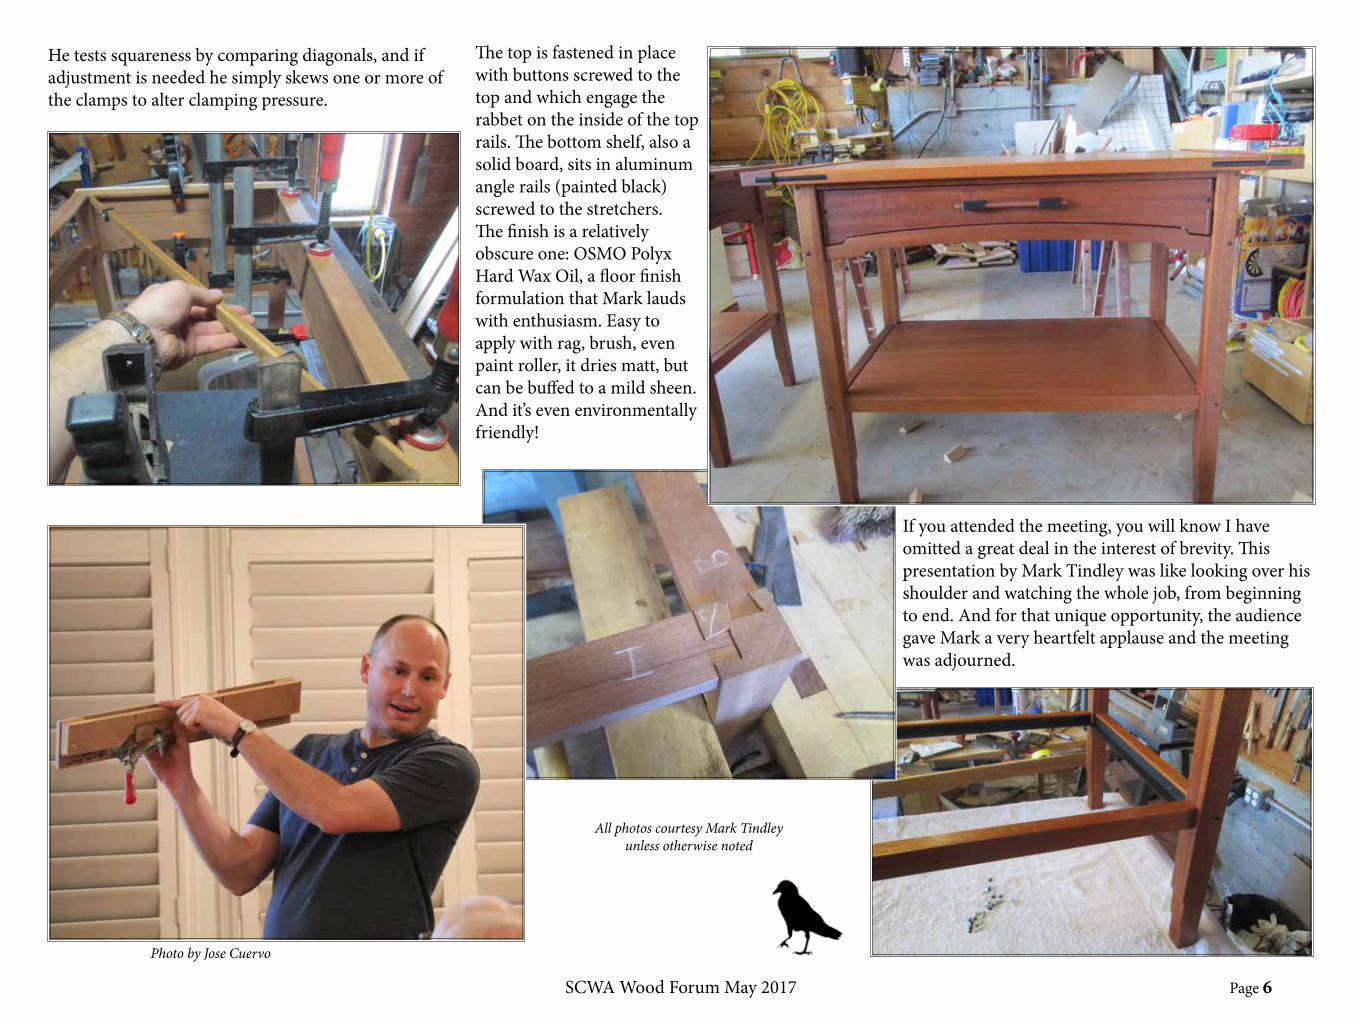
The top is fastened in place with buttons screwed to the top and which engage the rabbet on the inside of the top rails. The bottom shelf, also a solid board, sits in aluminum angle rails (painted black) screwed to the stretchers. The finish is a relatively obscure one: OSMO Polyx Hard Wax Oil, a floor finish formulation that Mark lauds with enthusiasm. Easy to apply with rag, brush, even paint roller, it dries matt, but can be buffed to a mild sheen. And it’s even environmentally friendly!
If you attended the meeting, you will know I have omitted a great deal in the interest of brevity. This presentation by Mark Tindley was like looking over his shoulder and watching the whole job, from beginning to end. And for that unique opportunity, the audience gave Mark a very heartfelt applause and the meeting was adjourned.
Photo by Jose Cuervo
All photos courtesy Mark Tindleyunless otherwise noted
SCWA Wood Forum May 2017 Page 7
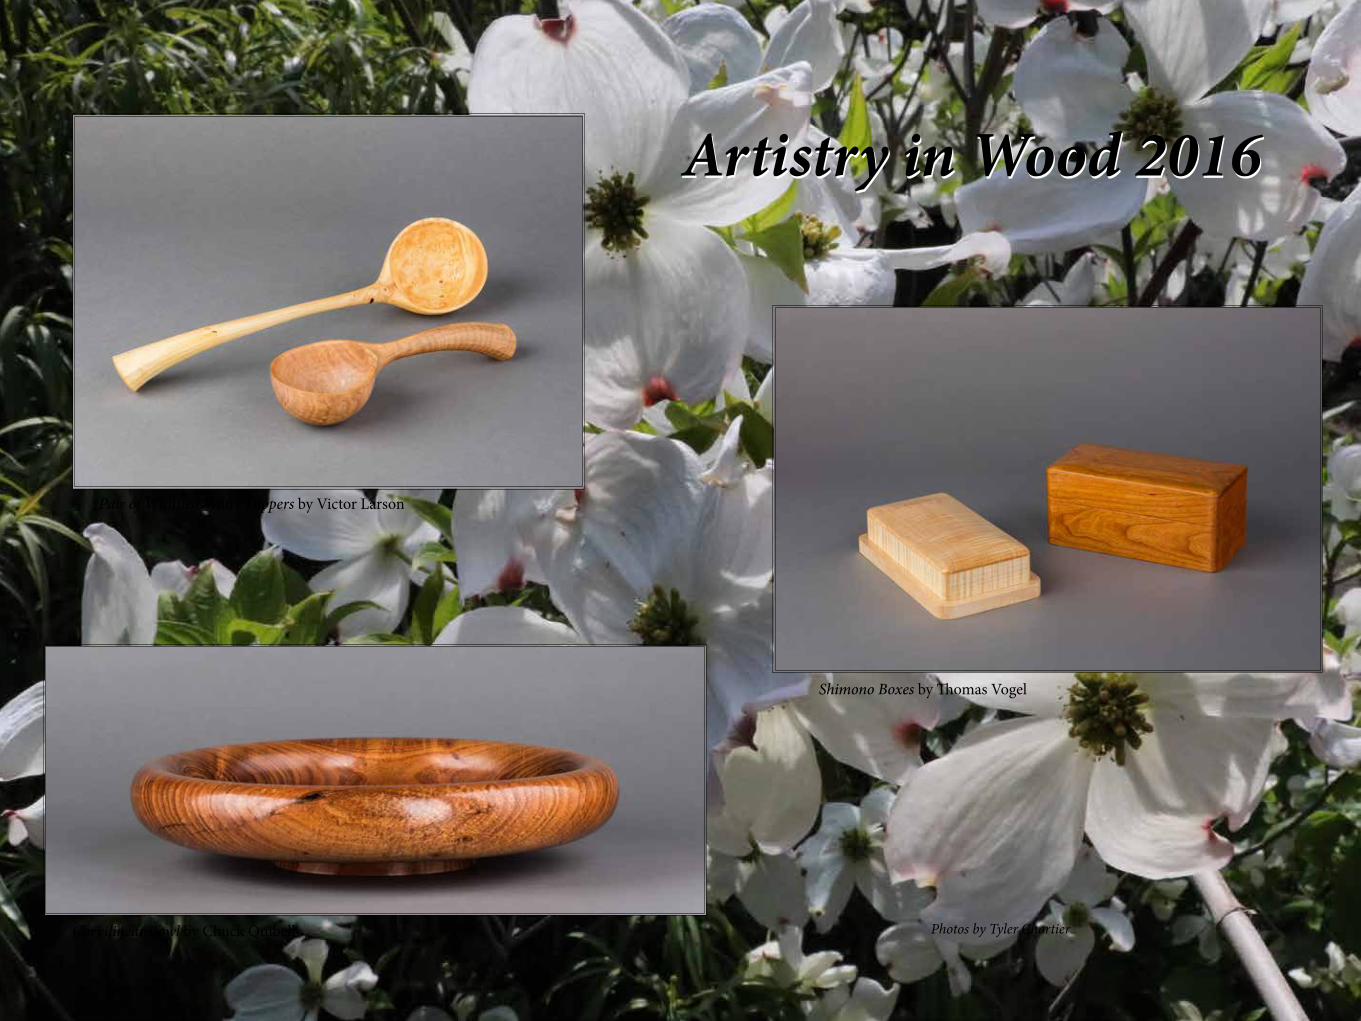
Pair of Whittled Water Dippers by Victor Larson
Shimono Boxes by Thomas Vogel
Curvilinear Bowl by Chuck Quibell Photos by Tyler Chartier
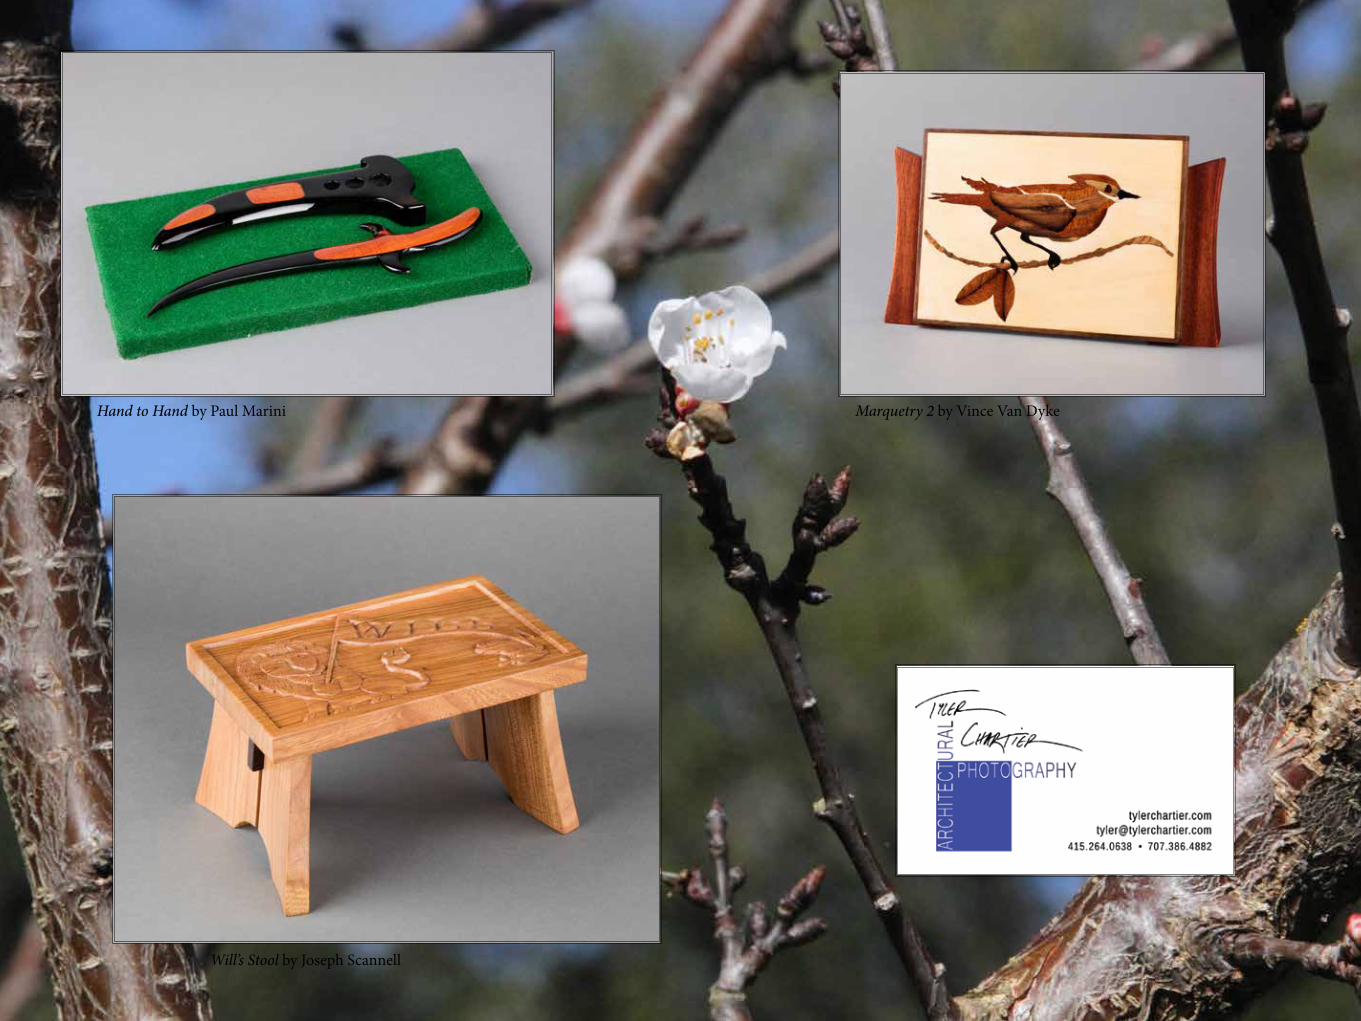
Artistry in Wood 2016Artistry in Wood 2016
SCWA Wood Forum May 2017 Page 8
Hand to Hand by Paul Marini Marquetry 2 by Vince Van Dyke
Will’s Stool by Joseph Scannell
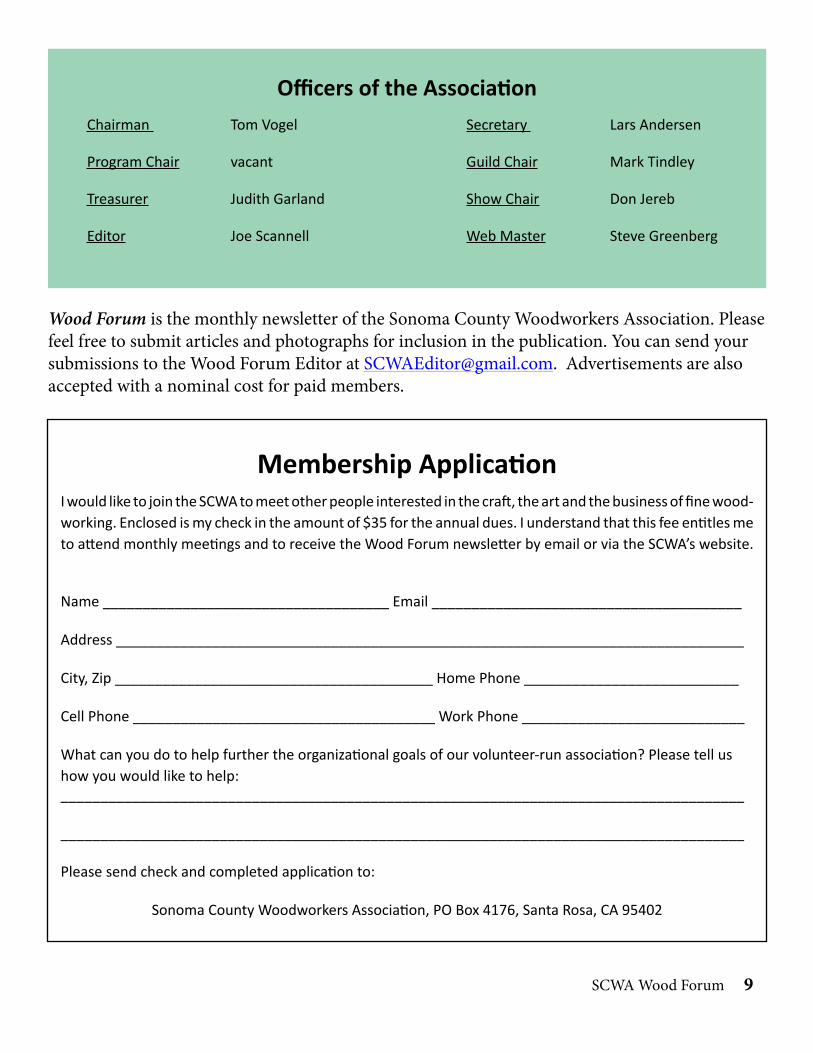
Membership ApplicationI would like to join the SCWA to meet other people interested in the craft, the art and the business of fine wood-working. Enclosed is my check in the amount of $35 for the annual dues. I understand that this fee entitles me to attend monthly meetings and to receive the Wood Forum newsletter by email or via the SCWA’s website.
Name ____________________________________ Email _______________________________________
Address _______________________________________________________________________________
City, Zip ________________________________________ Home Phone ___________________________
Cell Phone ______________________________________ Work Phone ____________________________
What can you do to help further the organizational goals of our volunteer-run association? Please tell us how you would like to help:______________________________________________________________________________________
______________________________________________________________________________________
Please send check and completed application to:
Sonoma County Woodworkers Association, PO Box 4176, Santa Rosa, CA 95402
Wood Forum is the monthly newsletter of the Sonoma County Woodworkers Association. Please feel free to submit articles and photographs for inclusion in the publication. You can send your submissions to the Wood Forum Editor at [email protected]. Advertisements are also accepted with a nominal cost for paid members.
Officers of the AssociationSecretary Lars Andersen
Guild Chair Mark Tindley
Show Chair Don Jereb
Web Master Steve Greenberg
Chairman Tom Vogel
Program Chair vacant
Treasurer Judith Garland
Editor Joe Scannell
SCWA Wood Forum 9