Embed Size (px)
Citation preview
Visitor Management System
User Manual Guideline
Version 1.0.0.1
HALL PASS
Corporate Office
15950 N. Dallas Pkwy., Ste. 400 Dallas, TX 75248
Hall Pass User Manual Guide
Confidential to CompuData Solutions, LLC VMS Guide Version 1.0.0.0 Page 2 of 53
Table of Contents
Part I: Installation Instructions .................................................................................................................................. 4 1.1 Hardware Interface ................................................................................................................................................. 4 1.2 Software Interface .................................................................................................................................................. 4
Part II: Introduction ...................................................................................................................................................... 5 2.1 Purpose & Scope of the Application ....................................................................................................................... 5 2.2 Key Features .......................................................................................................................................................... 5
Part III: Working with the application .................................................................................................................... 6 3.1 Login Module ........................................................................................................................................................ 6
3.1.1 Login screen ................................................................................................................................................... 6 3.1.2 Forgot Password ............................................................................................................................................. 7
3.2 Hall Pass Tab ......................................................................................................................................................... 8 3.2.1 Selecting School ............................................................................................................................................. 8 3.2.2 Search Previously Scanned Visitor. ................................................................................................................. 9 3.2.3 Scan/Print Badge New/Existing Visitor. ........................................................................................................ 13
3.3 Visitor Tab ........................................................................................................................................................... 18 3.3.1 Visitor List ................................................................................................................................................... 18
3.4 Visitor Restriction Tab ......................................................................................................................................... 20 3.4.1 Visitor Restriction List .................................................................................................................................. 20 3.4.2 Add New SRL .............................................................................................................................................. 21
3.5 Criminal Tab ........................................................................................................................................................ 25 3.5.1 Criminal List ................................................................................................................................................ 25 3.5.2 Criminal Details ........................................................................................................................................... 27
3.6 Sex Offender Registry .......................................................................................................................................... 28 3.6.1 SOR List ...................................................................................................................................................... 28 3.6.2 SOR Details .................................................................................................................................................. 29
3.7 Transaction Tab ................................................................................................................................................... 30 3.7.1 Transaction Report........................................................................................................................................ 30
3.8 Backgroungd Tab ................................................................................................................................................. 32 3.8.1 Background tab. ............................................................................................................................................ 32
3.9 My Account Tab .................................................................................................................................................. 33 3.9.1 My Account .................................................................................................................................................. 33
3.10 User Tab (Visible to admin only) ......................................................................................................................... 34 3.10.1 User List ....................................................................................................................................................... 34 3.10.2 Add/Edit User .............................................................................................................................................. 35
3.11 Groups Tab .......................................................................................................................................................... 37 3.11.1 Group List .................................................................................................................................................... 37 3.11.2 Add/Edit Group. ........................................................................................................................................... 38
3.12 Schools Tab ......................................................................................................................................................... 40 3.12.1 Schools List .................................................................................................................................................. 40 3.12.2 View School Details ..................................................................................................................................... 41 3.12.3 Add New School (only Admin can add new school) .......................................................................................... 42
3.13 Billing Contacts Tab ............................................................................................................................................. 43 3.13.1 Billing Contacts List ..................................................................................................................................... 43 3.13.2 View billing contact ...................................................................................................................................... 44 3.13.3 Add New Billing Contact .............................................................................................................................. 45
3.14 Alarm Contact Tab ............................................................................................................................................... 46 3.14.1 Alarm contact List ........................................................................................................................................ 46 3.14.2 Add Alarm Contact ....................................................................................................................................... 47
3.15 Destination Tab .................................................................................................................................................... 48 3.15.1 Destination List ............................................................................................................................................ 48 3.15.2 Add School Destination ................................................................................................................................ 49
3.16 Visiting Purpose Tab ............................................................................................................................................ 50
Hall Pass User Manual Guide
Confidential to CompuData Solutions, LLC VMS Guide Version 1.0.0.0 Page 3 of 53
3.16.1 Visiting Purpose List .................................................................................................................................... 50 3.16.2 Add Visiting Purpose .................................................................................................................................... 51
Part IV: Support ............................................................................................................................................................ 52
Hall Pass User Manual Guide
Confidential to CompuData Solutions, LLC VMS Guide Version 1.0.0.0 Page 4 of 53
Part I: Installation Instructions
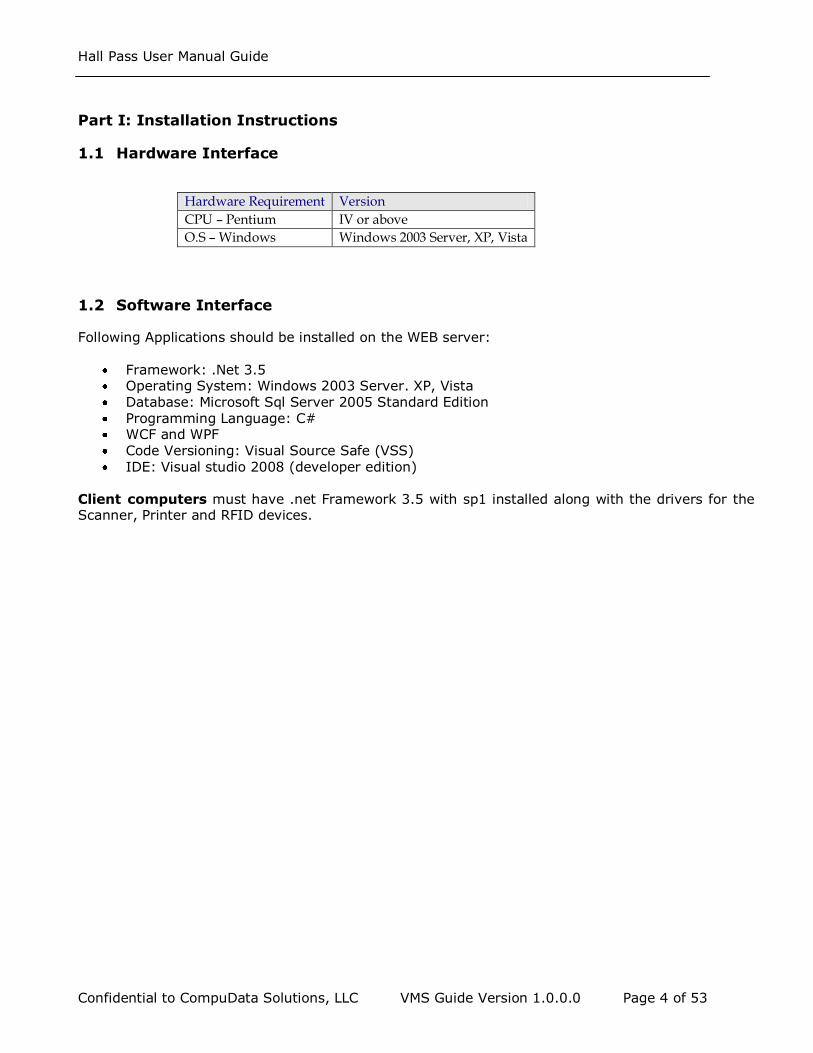
1.1 Hardware Interface
Hardware Requirement Version
CPU – Pentium IV or above
O.S – Windows Windows 2003 Server, XP, Vista
1.2 Software Interface
Following Applications should be installed on the WEB server:
Framework: .Net 3.5 Operating System: Windows 2003 Server. XP, Vista Database: Microsoft Sql Server 2005 Standard Edition Programming Language: C# WCF and WPF Code Versioning: Visual Source Safe (VSS)
IDE: Visual studio 2008 (developer edition) Client computers must have .net Framework 3.5 with sp1 installed along with the drivers for the Scanner, Printer and RFID devices.
Hall Pass User Manual Guide
Confidential to CompuData Solutions, LLC VMS Guide Version 1.0.0.0 Page 5 of 53
Part II: Introduction
2.1 Purpose & Scope of the Application
Keeping schools and educational facilities safe is a major challenge in society today. To help ensure students are learning in a secure environment, Hall Pass will verify each visitor’s identity and flag potential predators to your office and the proper authorities. These identity records are stored in our datacenter which can be conveniently accessed and printed at the touch of a button. By utilizing our automated screening process,
Hall Pass provides a more secure educational experience and maintains a safe working and learning atmosphere.
2.2 Key Features
Hall Pass is a WPF windows application with WCF integration. Some of the salient features include:
1. Scanning the Driver License of the visitor. 2. Integrating RFID with the visitor. 3. Printing badge. 4. School Restricted List.
5. Sex Offender Registry. 6. Criminal Search. 7. Export Data/Reports in PDF and Excel format. 8. Role based Security. 9. Maintaining master data. 10. Sending alarms for HITS.
Hall Pass User Manual Guide
Confidential to CompuData Solutions, LLC VMS Guide Version 1.0.0.0 Page 6 of 53
Part III: Working with the application
3.1 Login Module
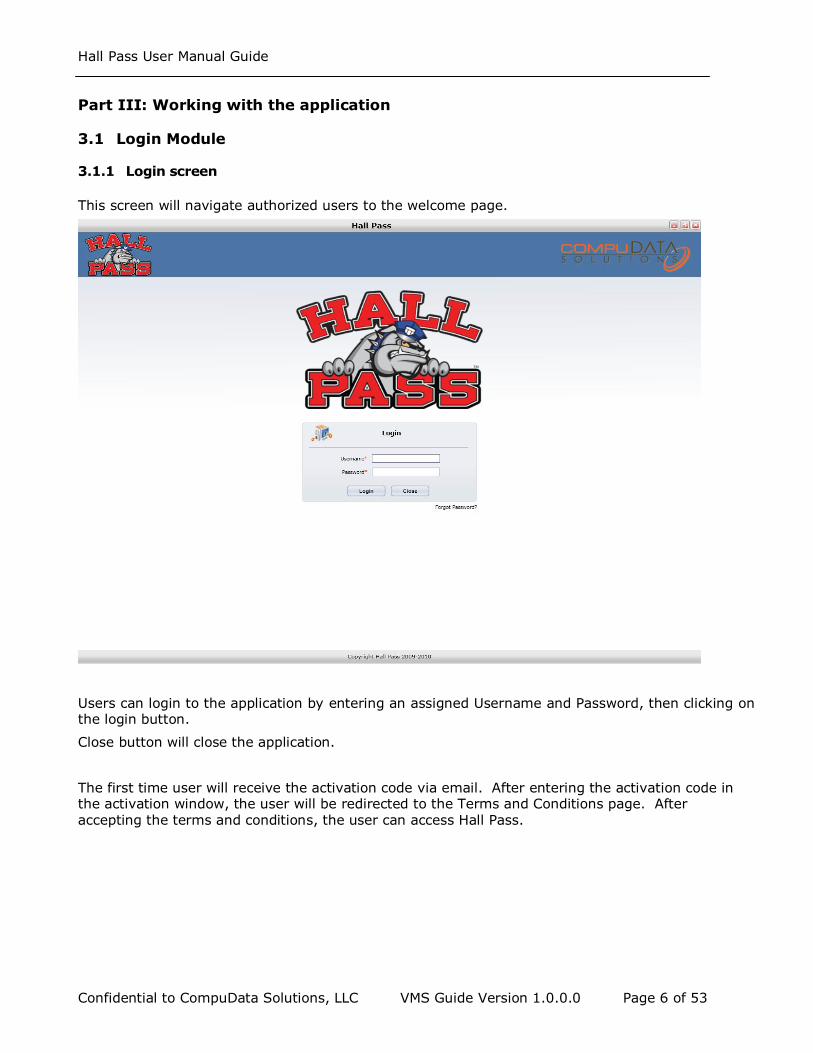
3.1.1 Login screen
This screen will navigate authorized users to the welcome page.
Users can login to the application by entering an assigned Username and Password, then clicking on the login button.
Close button will close the application.
The first time user will receive the activation code via email. After entering the activation code in the activation window, the user will be redirected to the Terms and Conditions page. After accepting the terms and conditions, the user can access Hall Pass.
Hall Pass User Manual Guide
Confidential to CompuData Solutions, LLC VMS Guide Version 1.0.0.0 Page 7 of 53
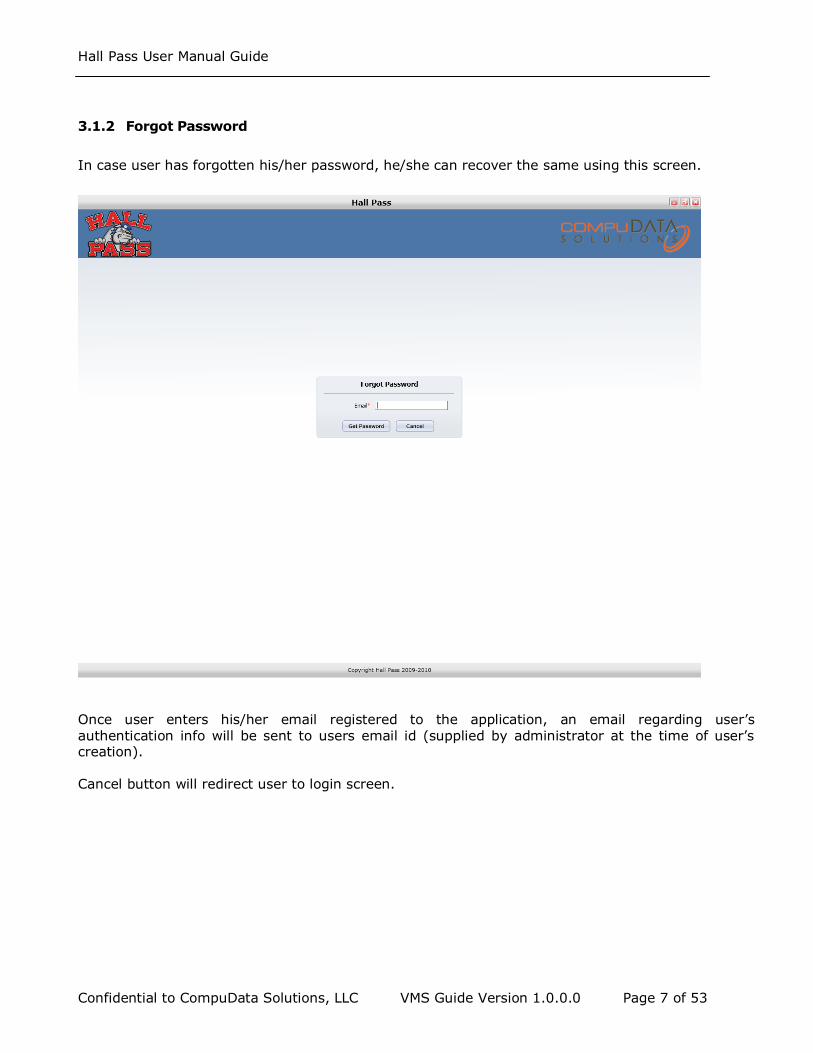
3.1.2 Forgot Password
In case user has forgotten his/her password, he/she can recover the same using this screen.
Once user enters his/her email registered to the application, an email regarding user’s authentication info will be sent to users email id (supplied by administrator at the time of user’s creation). Cancel button will redirect user to login screen.
Hall Pass User Manual Guide
Confidential to CompuData Solutions, LLC VMS Guide Version 1.0.0.0 Page 8 of 53
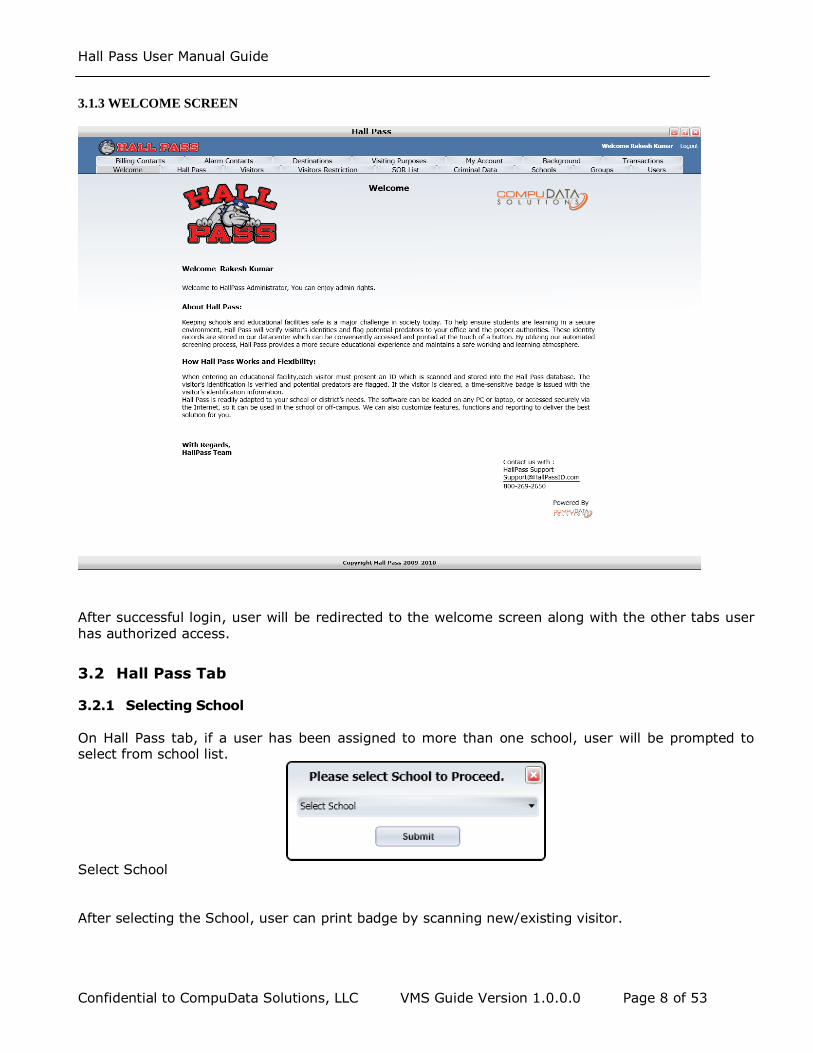
3.1.3 WELCOME SCREEN
After successful login, user will be redirected to the welcome screen along with the other tabs user has authorized access.
3.2 Hall Pass Tab
3.2.1 Selecting School On Hall Pass tab, if a user has been assigned to more than one school, user will be prompted to select from school list.
Select School
After selecting the School, user can print badge by scanning new/existing visitor.
Hall Pass User Manual Guide
Confidential to CompuData Solutions, LLC VMS Guide Version 1.0.0.0 Page 9 of 53
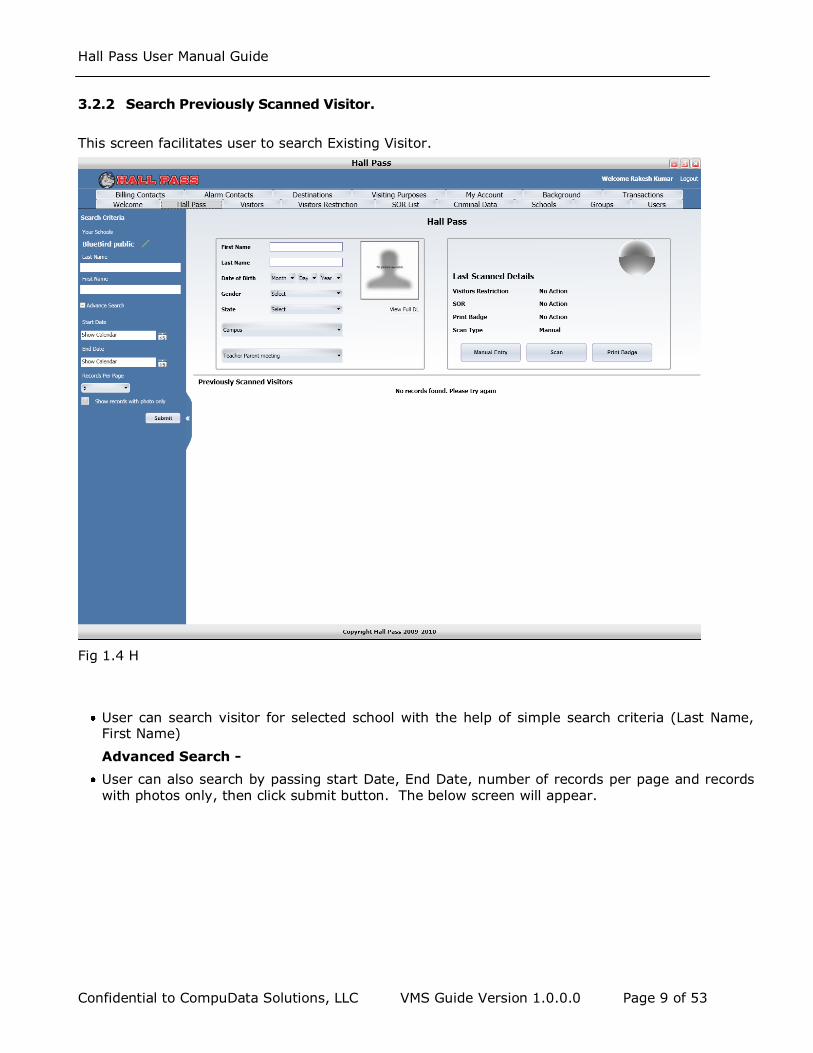
3.2.2 Search Previously Scanned Visitor.
This screen facilitates user to search Existing Visitor.
Fig 1.4 H
User can search visitor for selected school with the help of simple search criteria (Last Name, First Name)
Advanced Search -
User can also search by passing start Date, End Date, number of records per page and records with photos only, then click submit button. The below screen will appear.

Hall Pass User Manual Guide
Confidential to CompuData Solutions, LLC VMS Guide Version 1.0.0.0 Page 10 of 53
Previously Scanned Visitors grid enables the following tasks: Lens Image Click
User can click on the Lens Image to view the Visitor Details.
This screen displays the Visitor Details.
Hall Pass User Manual Guide
Confidential to CompuData Solutions, LLC VMS Guide Version 1.0.0.0 Page 11 of 53
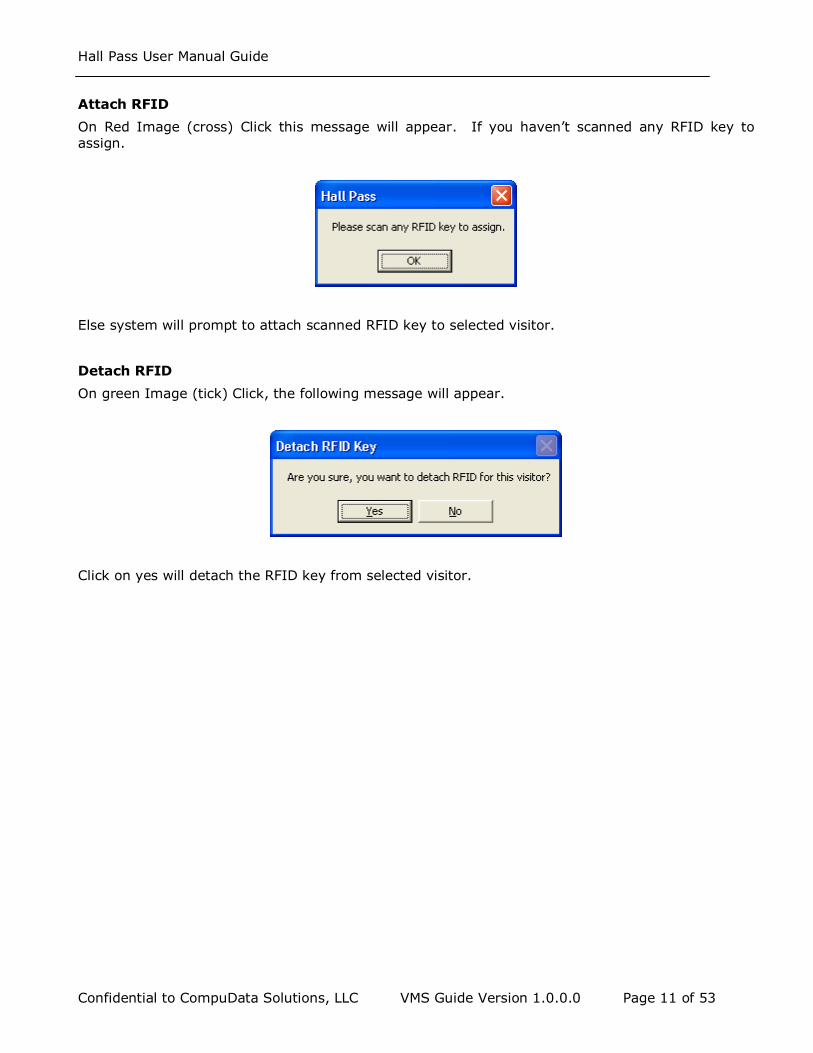
Attach RFID
On Red Image (cross) Click this message will appear. If you haven’t scanned any RFID key to assign.
Else system will prompt to attach scanned RFID key to selected visitor.
Detach RFID
On green Image (tick) Click, the following message will appear.
Click on yes will detach the RFID key from selected visitor.
Hall Pass User Manual Guide
Confidential to CompuData Solutions, LLC VMS Guide Version 1.0.0.0 Page 12 of 53
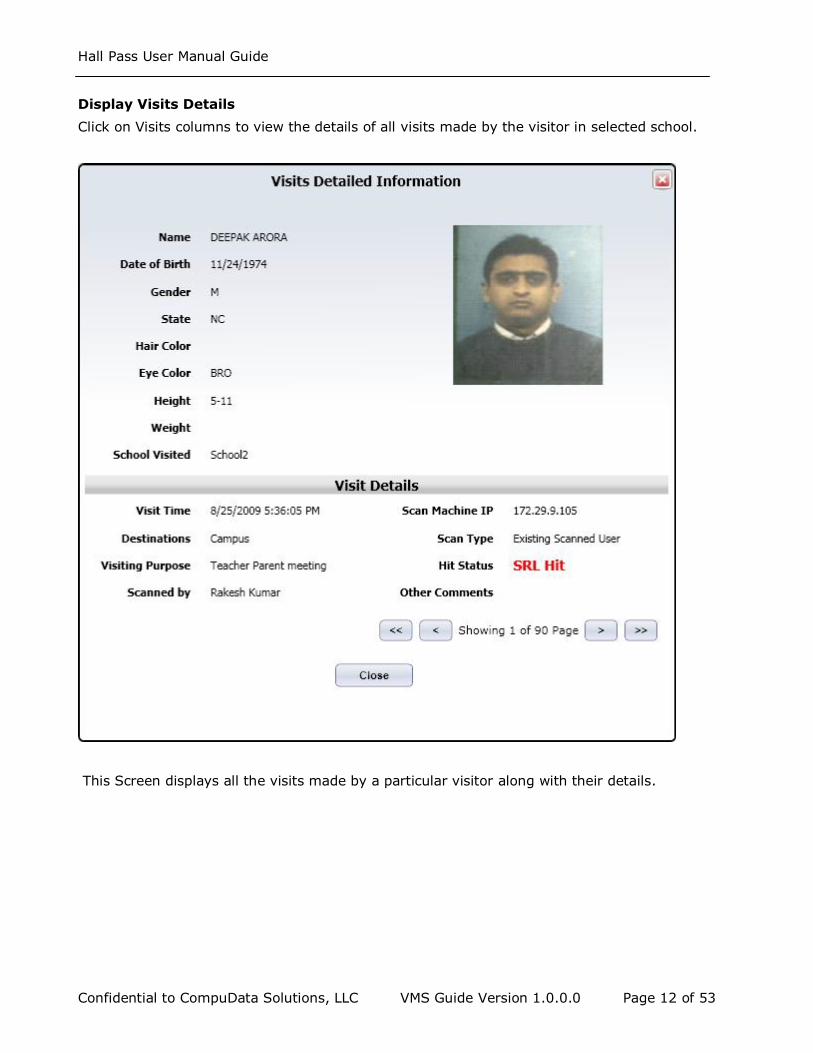
Display Visits Details
Click on Visits columns to view the details of all visits made by the visitor in selected school.
This Screen displays all the visits made by a particular visitor along with their details.
Hall Pass User Manual Guide
Confidential to CompuData Solutions, LLC VMS Guide Version 1.0.0.0 Page 13 of 53
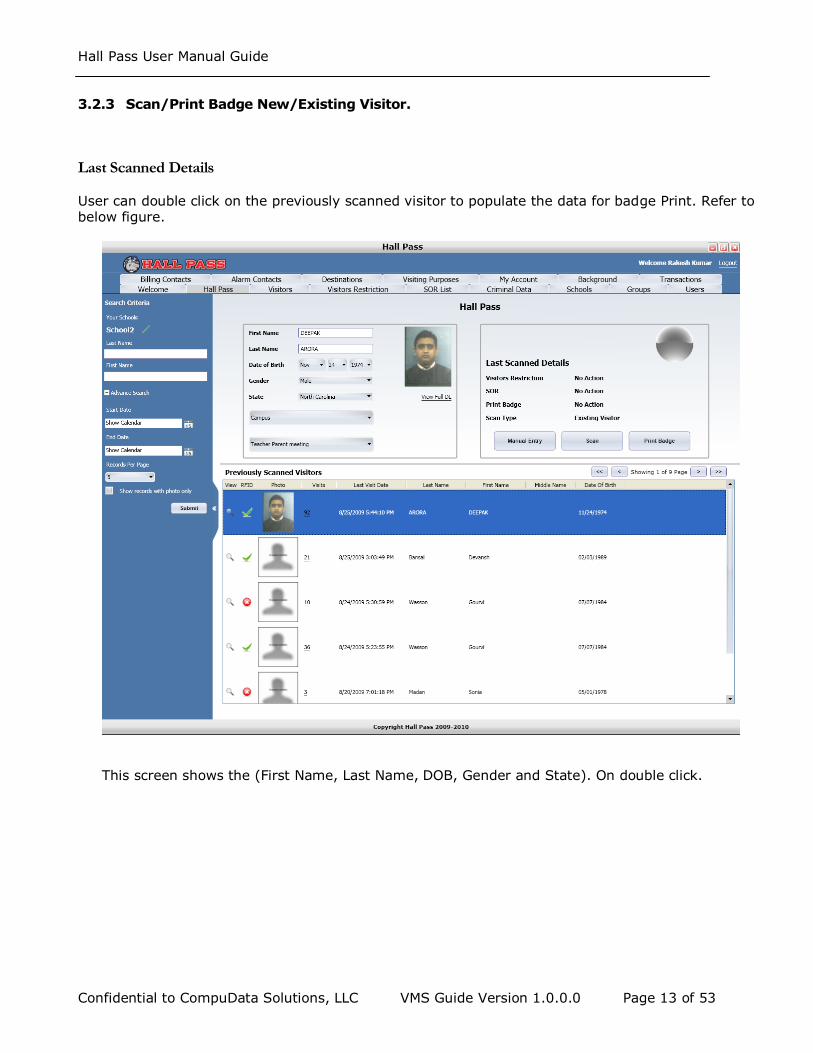
3.2.3 Scan/Print Badge New/Existing Visitor.
Last Scanned Details
User can double click on the previously scanned visitor to populate the data for badge Print. Refer to below figure.
This screen shows the (First Name, Last Name, DOB, Gender and State). On double click.
Hall Pass User Manual Guide
Confidential to CompuData Solutions, LLC VMS Guide Version 1.0.0.0 Page 14 of 53
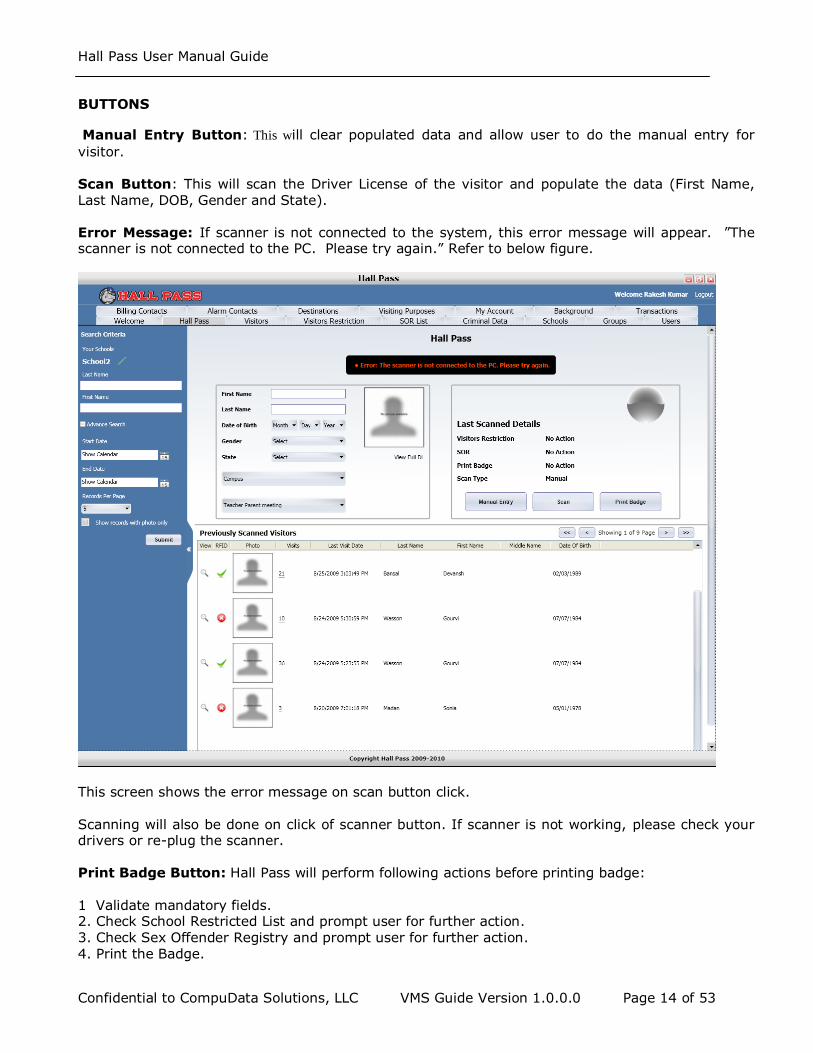
BUTTONS
Manual Entry Button: This will clear populated data and allow user to do the manual entry for
visitor. Scan Button: This will scan the Driver License of the visitor and populate the data (First Name, Last Name, DOB, Gender and State). Error Message: If scanner is not connected to the system, this error message will appear. ”The scanner is not connected to the PC. Please try again.” Refer to below figure.
This screen shows the error message on scan button click. Scanning will also be done on click of scanner button. If scanner is not working, please check your drivers or re-plug the scanner. Print Badge Button: Hall Pass will perform following actions before printing badge: 1 Validate mandatory fields. 2. Check School Restricted List and prompt user for further action. 3. Check Sex Offender Registry and prompt user for further action. 4. Print the Badge.
Hall Pass User Manual Guide
Confidential to CompuData Solutions, LLC VMS Guide Version 1.0.0.0 Page 15 of 53
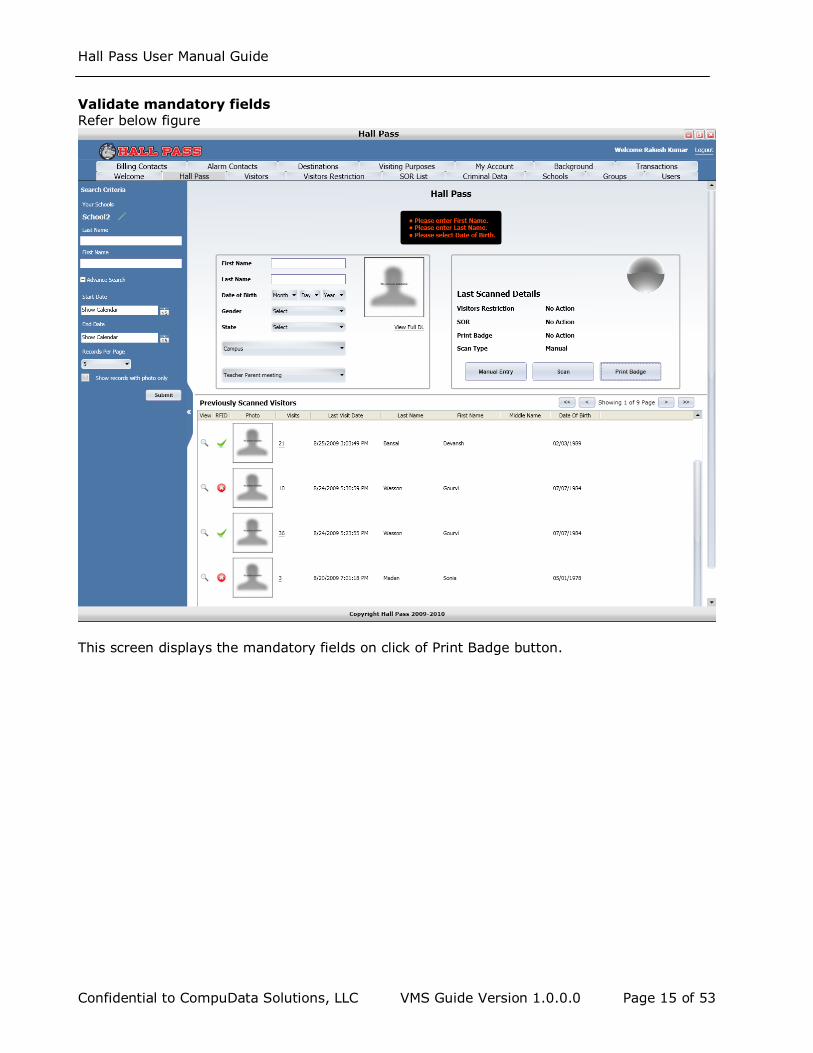
Validate mandatory fields Refer below figure
This screen displays the mandatory fields on click of Print Badge button.
Hall Pass User Manual Guide
Confidential to CompuData Solutions, LLC VMS Guide Version 1.0.0.0 Page 16 of 53
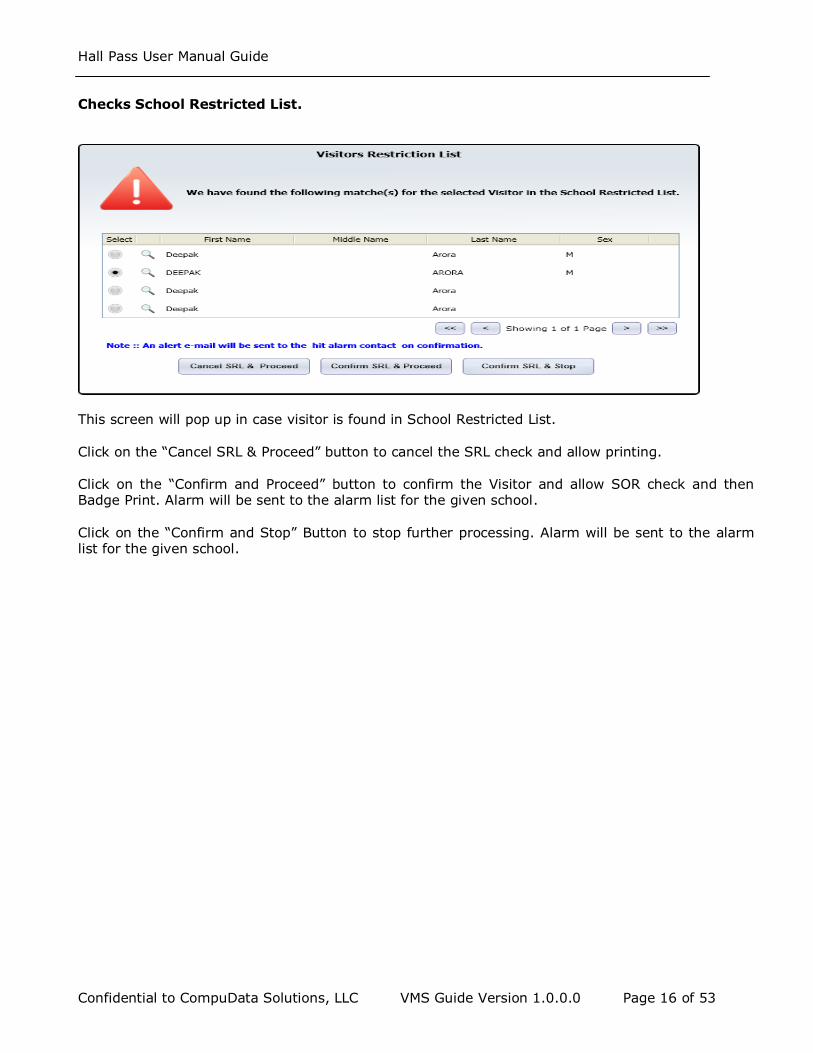
Checks School Restricted List.
This screen will pop up in case visitor is found in School Restricted List. Click on the “Cancel SRL & Proceed” button to cancel the SRL check and allow printing. Click on the “Confirm and Proceed” button to confirm the Visitor and allow SOR check and then Badge Print. Alarm will be sent to the alarm list for the given school. Click on the “Confirm and Stop” Button to stop further processing. Alarm will be sent to the alarm list for the given school.
Hall Pass User Manual Guide
Confidential to CompuData Solutions, LLC VMS Guide Version 1.0.0.0 Page 17 of 53
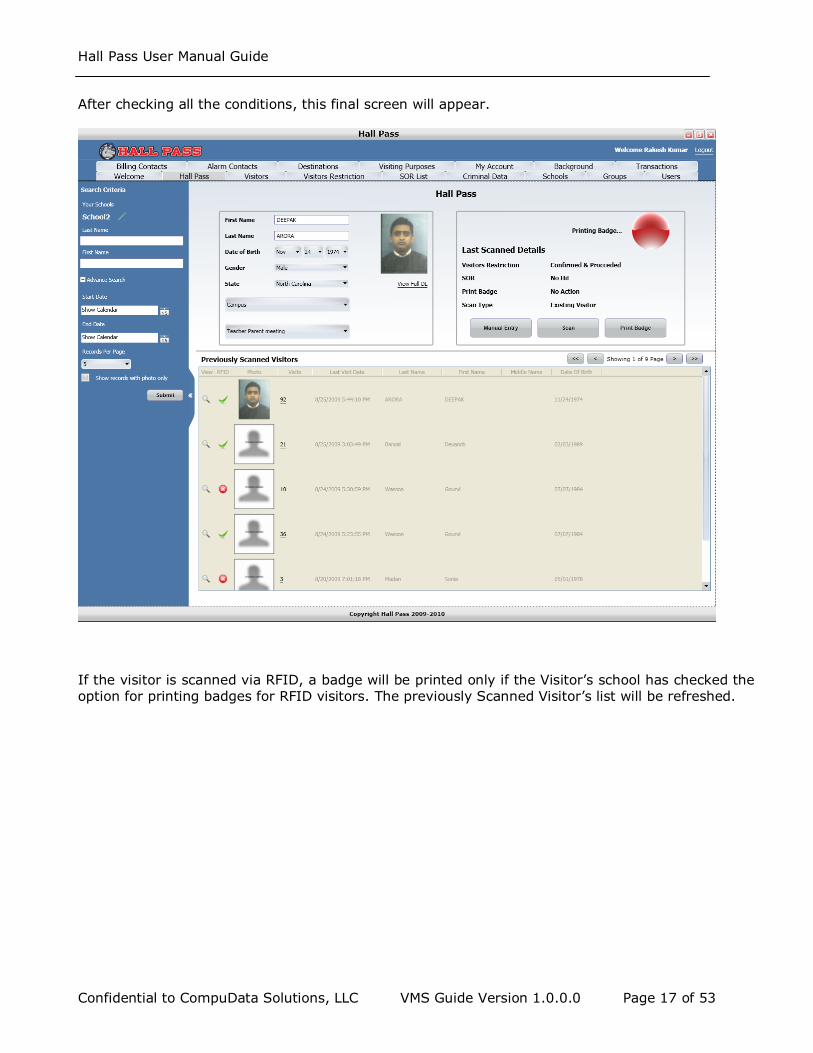
After checking all the conditions, this final screen will appear.
If the visitor is scanned via RFID, a badge will be printed only if the Visitor’s school has checked the option for printing badges for RFID visitors. The previously Scanned Visitor’s list will be refreshed.
Hall Pass User Manual Guide
Confidential to CompuData Solutions, LLC VMS Guide Version 1.0.0.0 Page 18 of 53
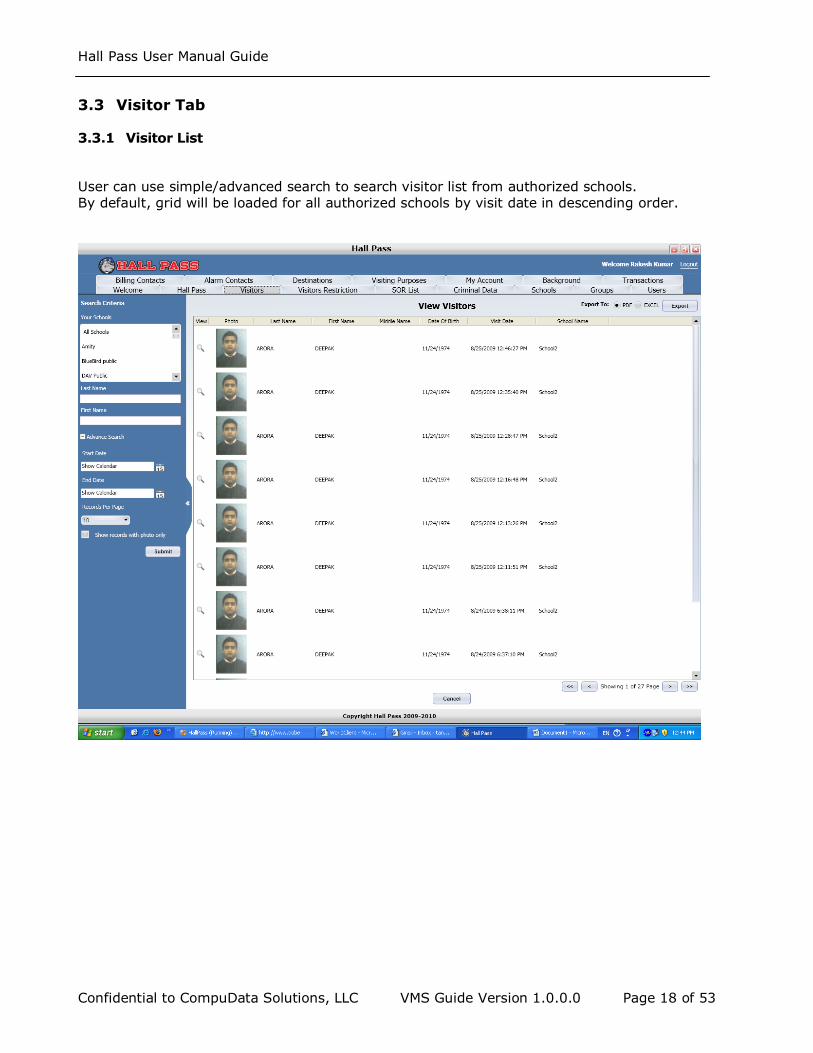
3.3 Visitor Tab 3.3.1 Visitor List
User can use simple/advanced search to search visitor list from authorized schools. By default, grid will be loaded for all authorized schools by visit date in descending order.
Hall Pass User Manual Guide
Confidential to CompuData Solutions, LLC VMS Guide Version 1.0.0.0 Page 19 of 53
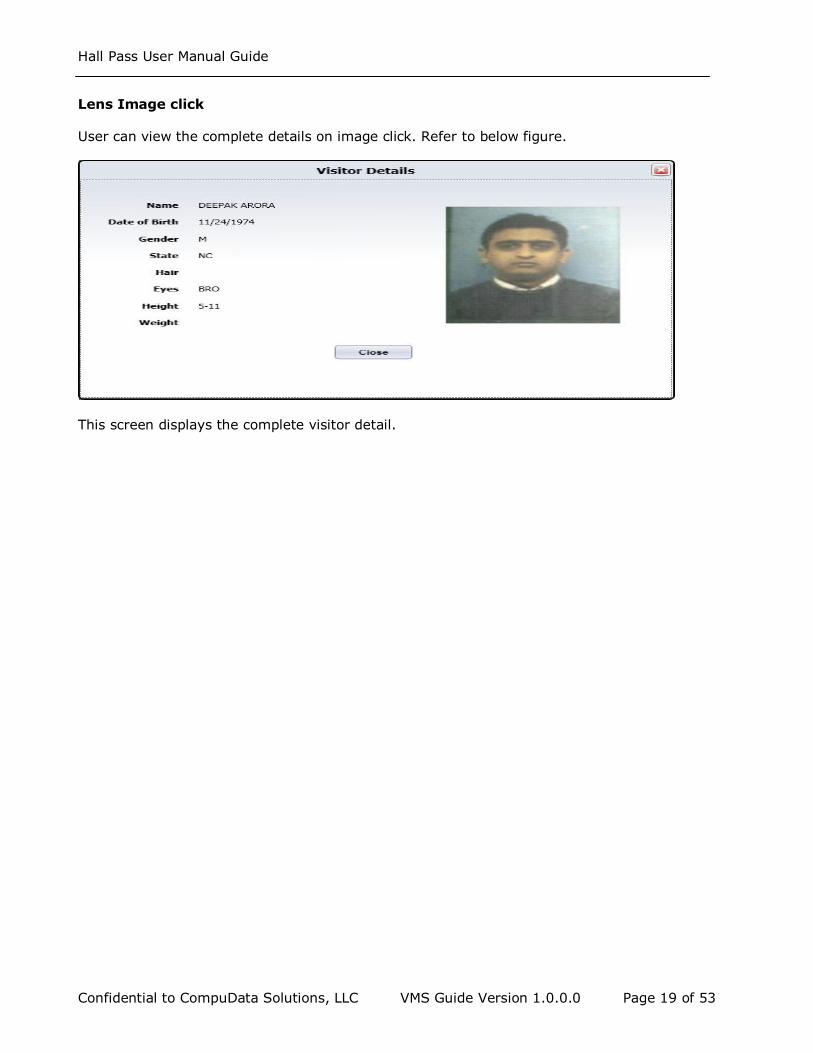
Lens Image click User can view the complete details on image click. Refer to below figure.
This screen displays the complete visitor detail.
Hall Pass User Manual Guide
Confidential to CompuData Solutions, LLC VMS Guide Version 1.0.0.0 Page 20 of 53
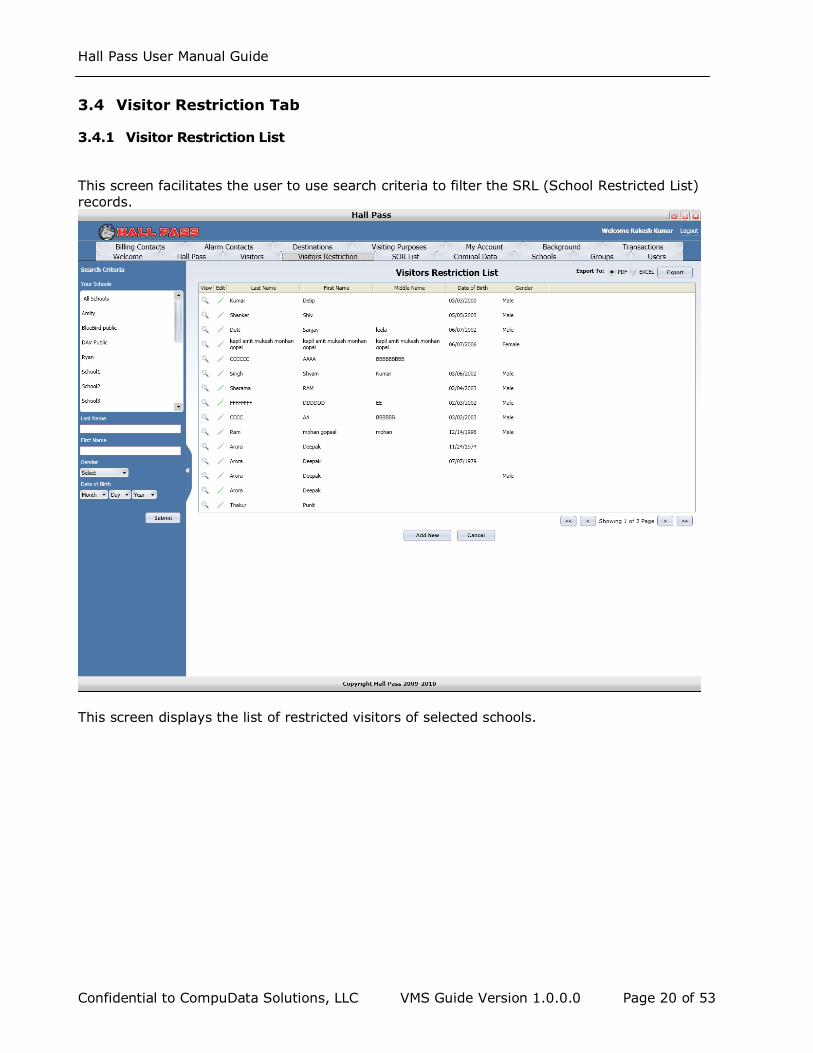
3.4 Visitor Restriction Tab
3.4.1 Visitor Restriction List
This screen facilitates the user to use search criteria to filter the SRL (School Restricted List) records.
This screen displays the list of restricted visitors of selected schools.
Hall Pass User Manual Guide
Confidential to CompuData Solutions, LLC VMS Guide Version 1.0.0.0 Page 21 of 53
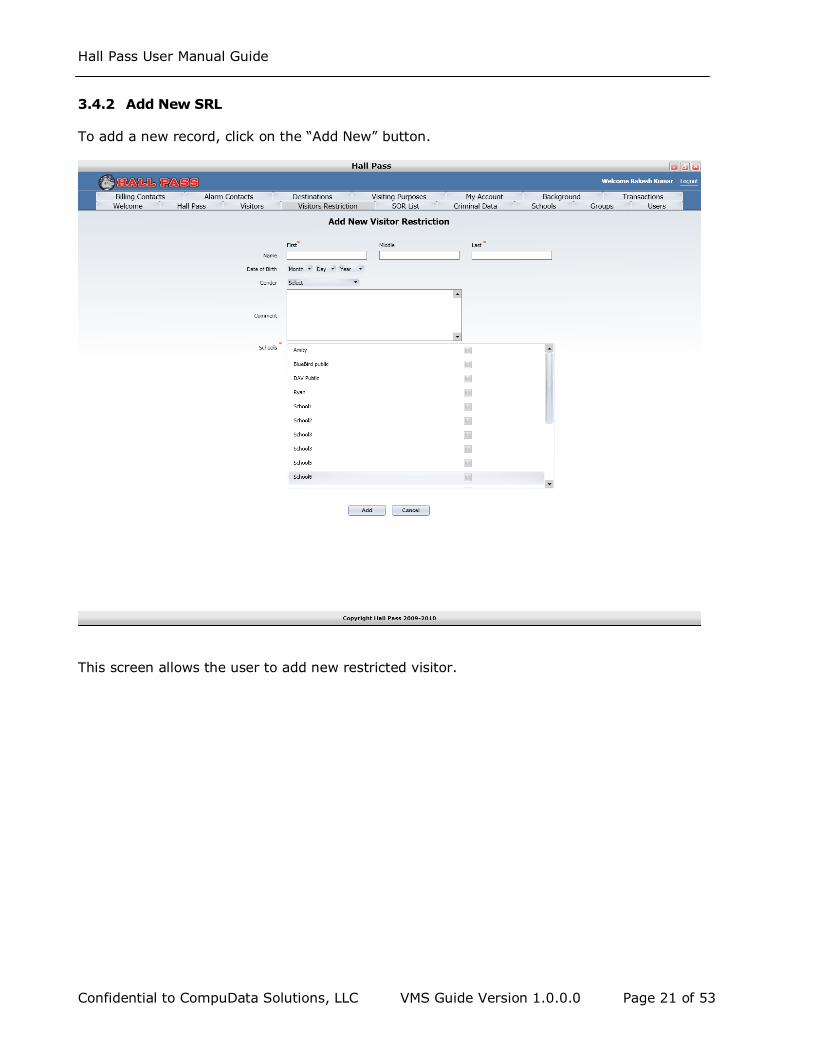
3.4.2 Add New SRL To add a new record, click on the “Add New” button.
This screen allows the user to add new restricted visitor.
Hall Pass User Manual Guide
Confidential to CompuData Solutions, LLC VMS Guide Version 1.0.0.0 Page 22 of 53
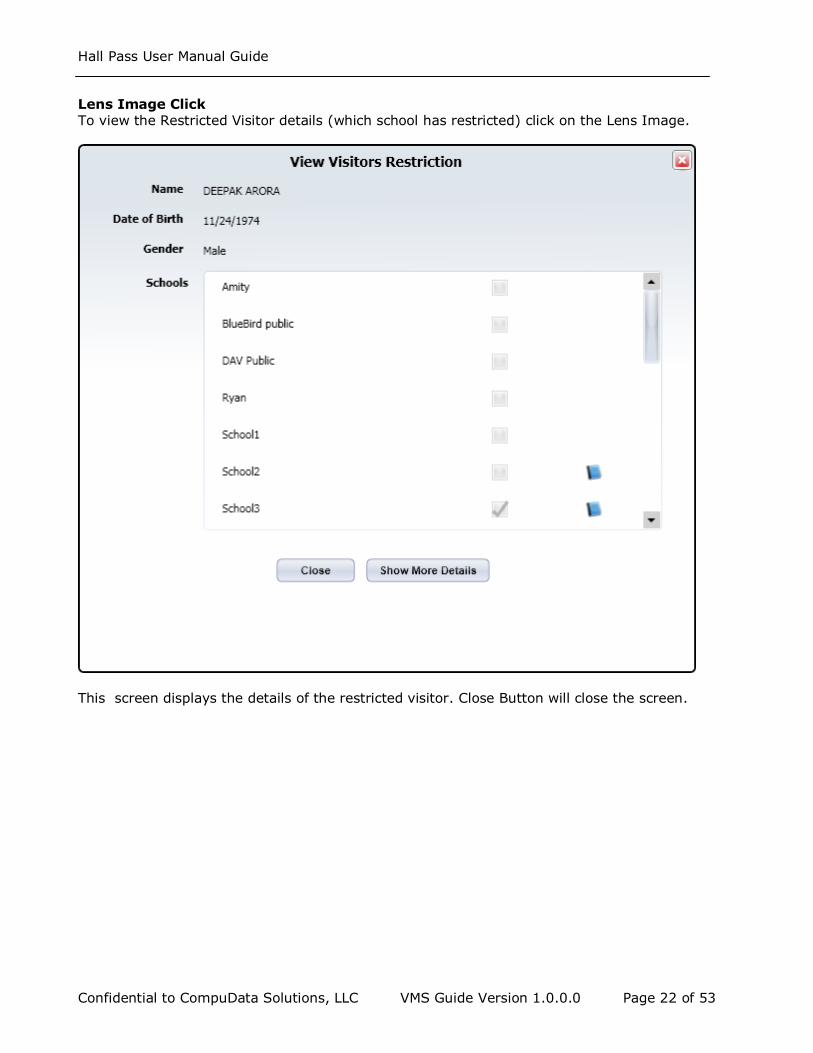
Lens Image Click To view the Restricted Visitor details (which school has restricted) click on the Lens Image.
This screen displays the details of the restricted visitor. Close Button will close the screen.
Hall Pass User Manual Guide
Confidential to CompuData Solutions, LLC VMS Guide Version 1.0.0.0 Page 23 of 53
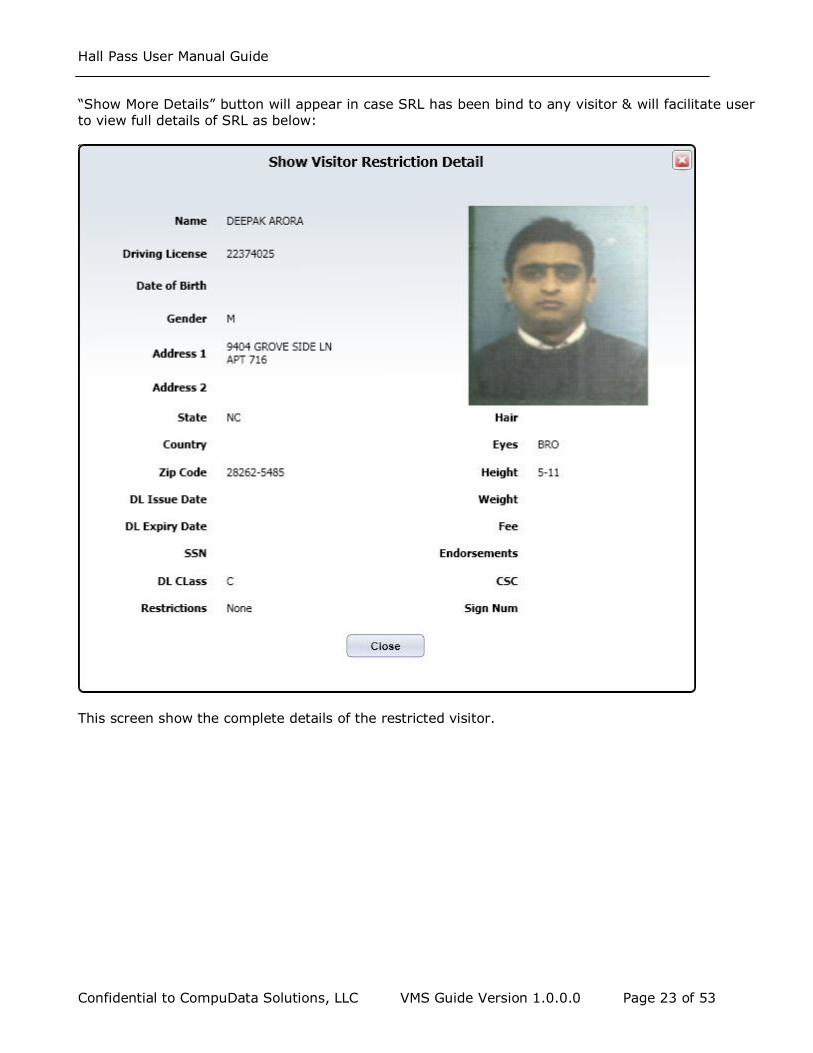
“Show More Details” button will appear in case SRL has been bind to any visitor & will facilitate user to view full details of SRL as below:
This screen show the complete details of the restricted visitor.
Hall Pass User Manual Guide
Confidential to CompuData Solutions, LLC VMS Guide Version 1.0.0.0 Page 24 of 53
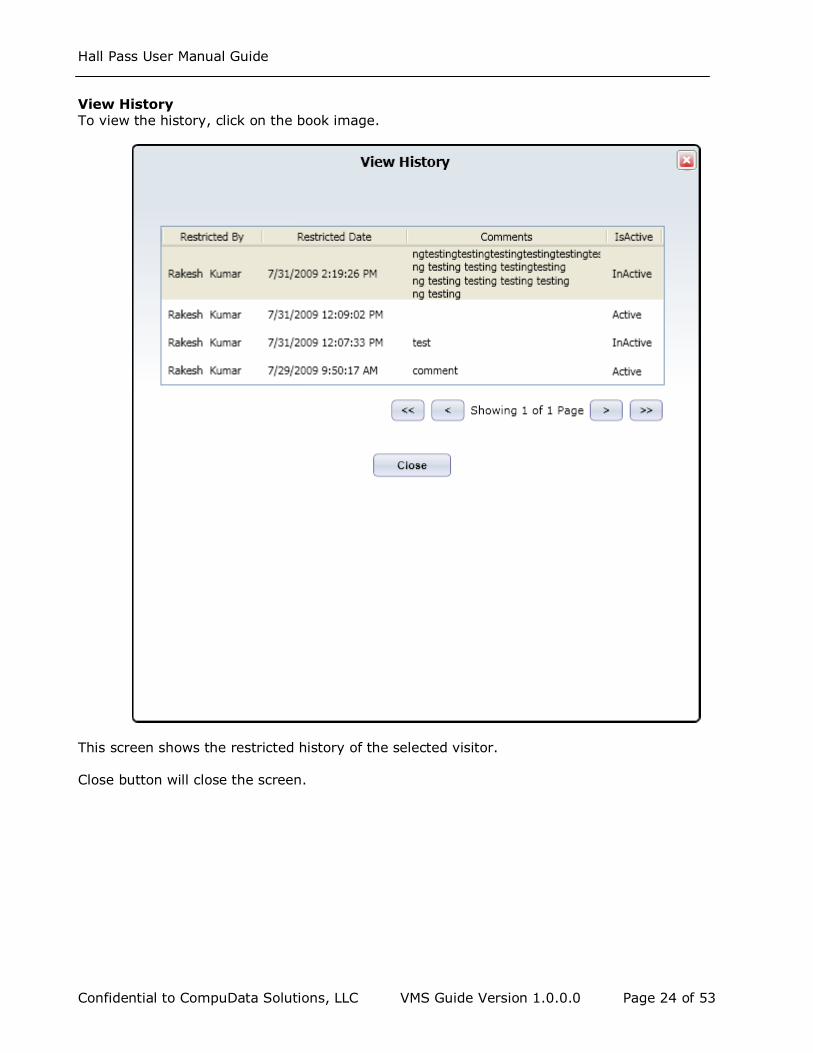
View History To view the history, click on the book image.
This screen shows the restricted history of the selected visitor. Close button will close the screen.
Hall Pass User Manual Guide
Confidential to CompuData Solutions, LLC VMS Guide Version 1.0.0.0 Page 25 of 53
3.5 Criminal Tab
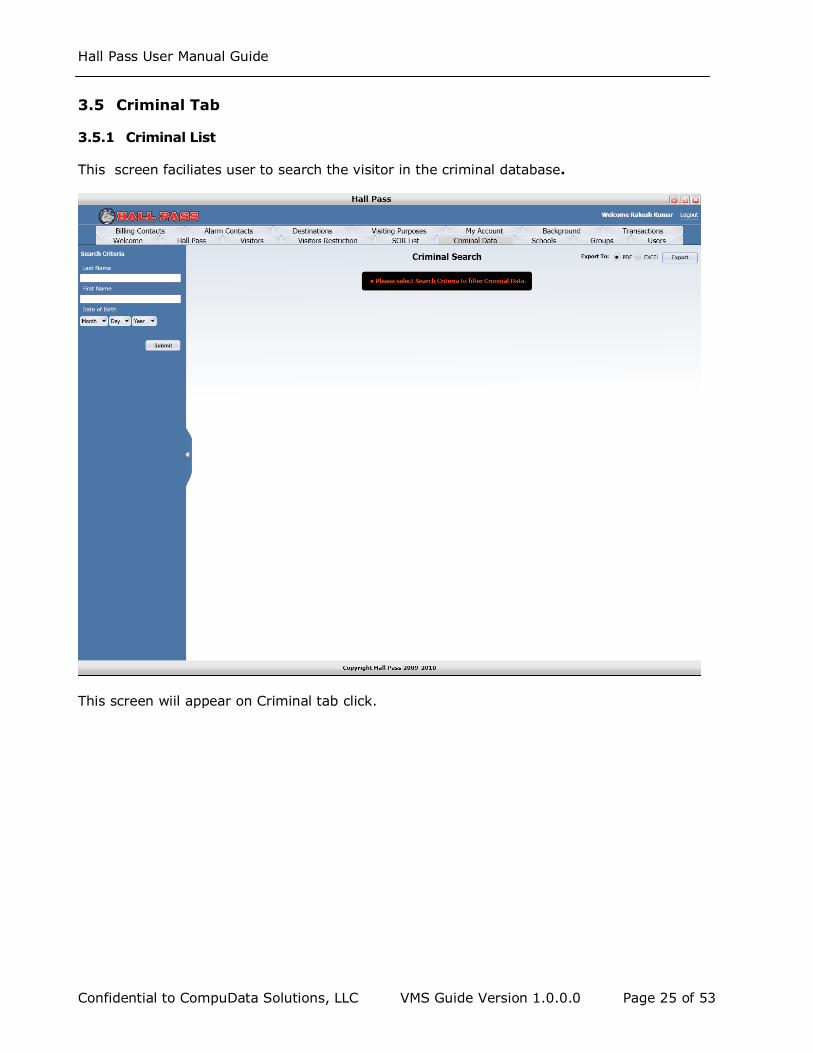
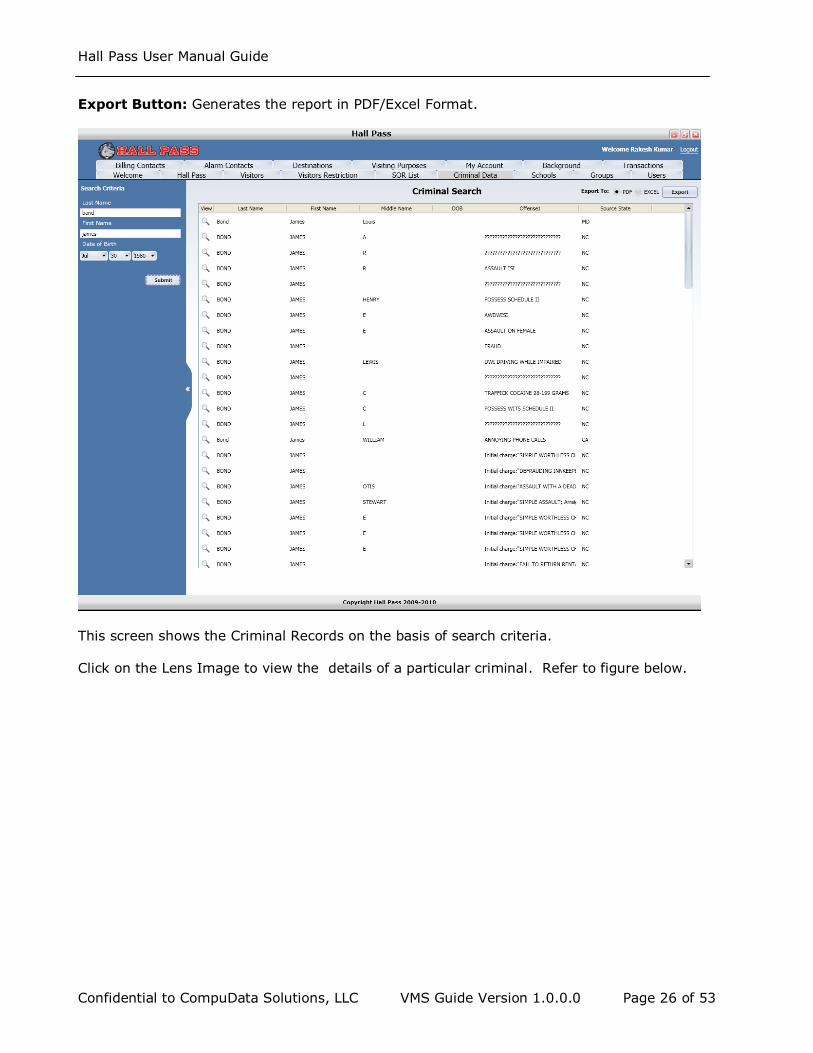
3.5.1 Criminal List
This screen faciliates user to search the visitor in the criminal database.
This screen wiil appear on Criminal tab click.
Hall Pass User Manual Guide
Confidential to CompuData Solutions, LLC VMS Guide Version 1.0.0.0 Page 26 of 53
Export Button: Generates the report in PDF/Excel Format.
This screen shows the Criminal Records on the basis of search criteria.
Click on the Lens Image to view the details of a particular criminal. Refer to figure below.
Hall Pass User Manual Guide
Confidential to CompuData Solutions, LLC VMS Guide Version 1.0.0.0 Page 27 of 53
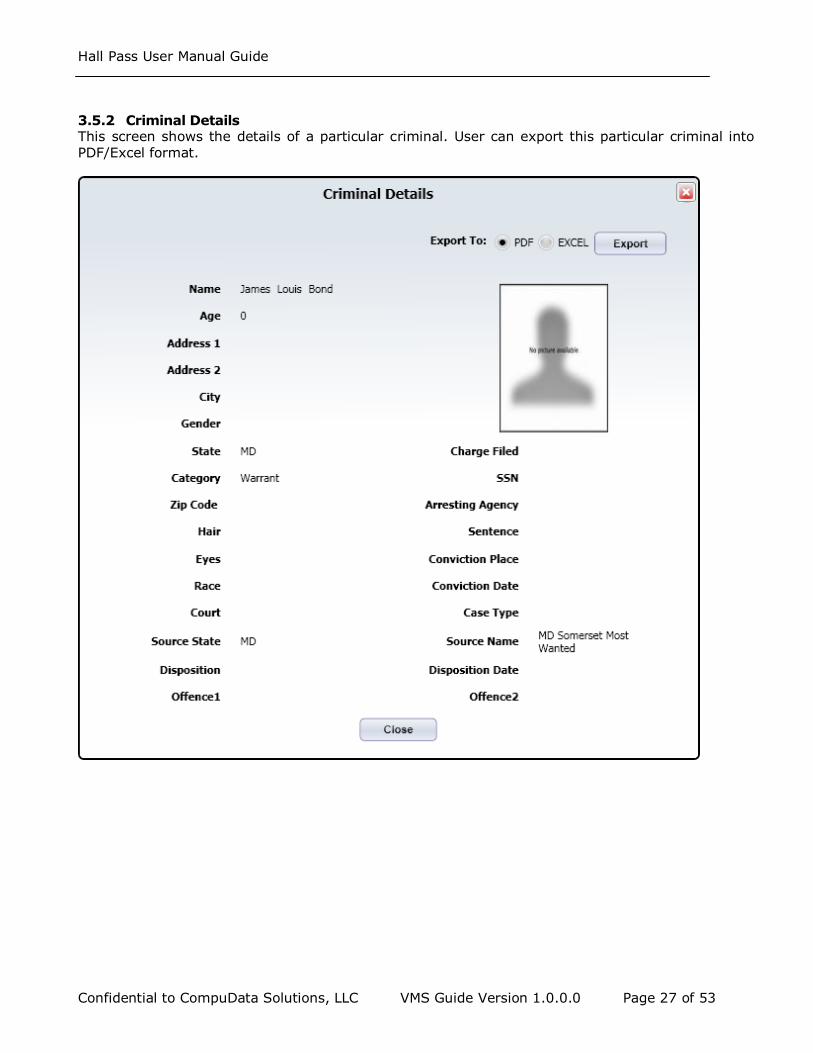
3.5.2 Criminal Details This screen shows the details of a particular criminal. User can export this particular criminal into
PDF/Excel format.
Hall Pass User Manual Guide
Confidential to CompuData Solutions, LLC VMS Guide Version 1.0.0.0 Page 28 of 53
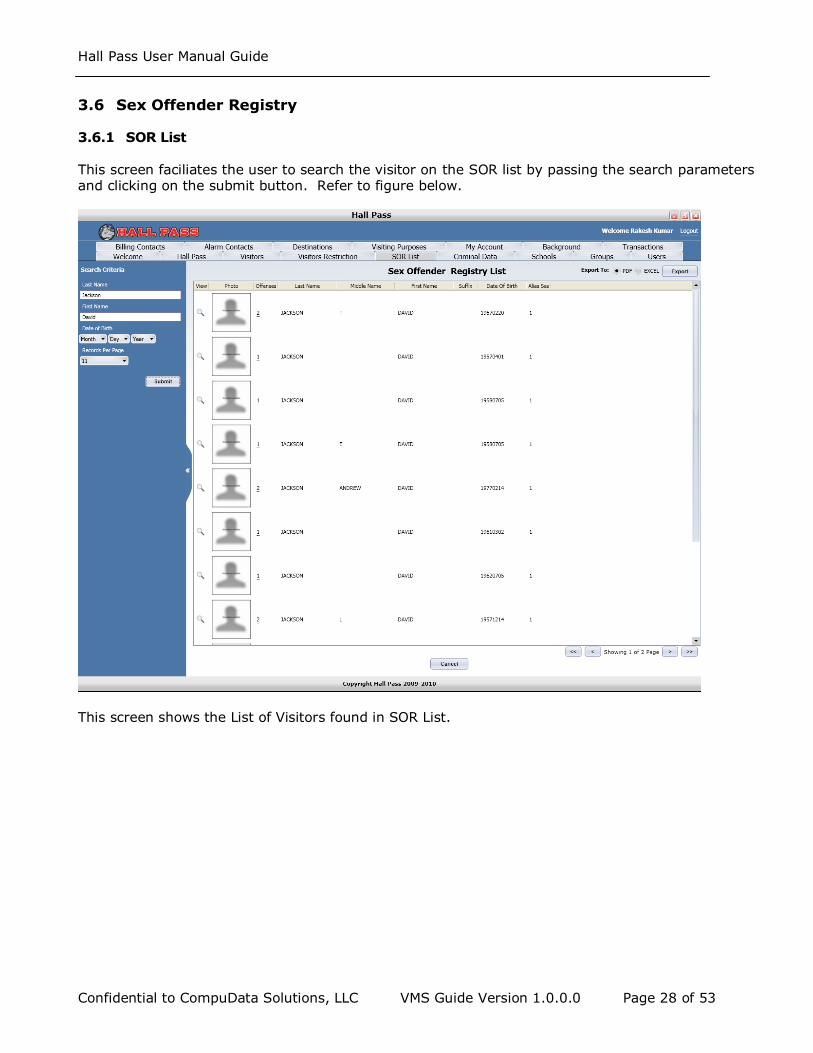
3.6 Sex Offender Registry
3.6.1 SOR List This screen faciliates the user to search the visitor on the SOR list by passing the search parameters and clicking on the submit button. Refer to figure below.
This screen shows the List of Visitors found in SOR List.
Hall Pass User Manual Guide
Confidential to CompuData Solutions, LLC VMS Guide Version 1.0.0.0 Page 29 of 53
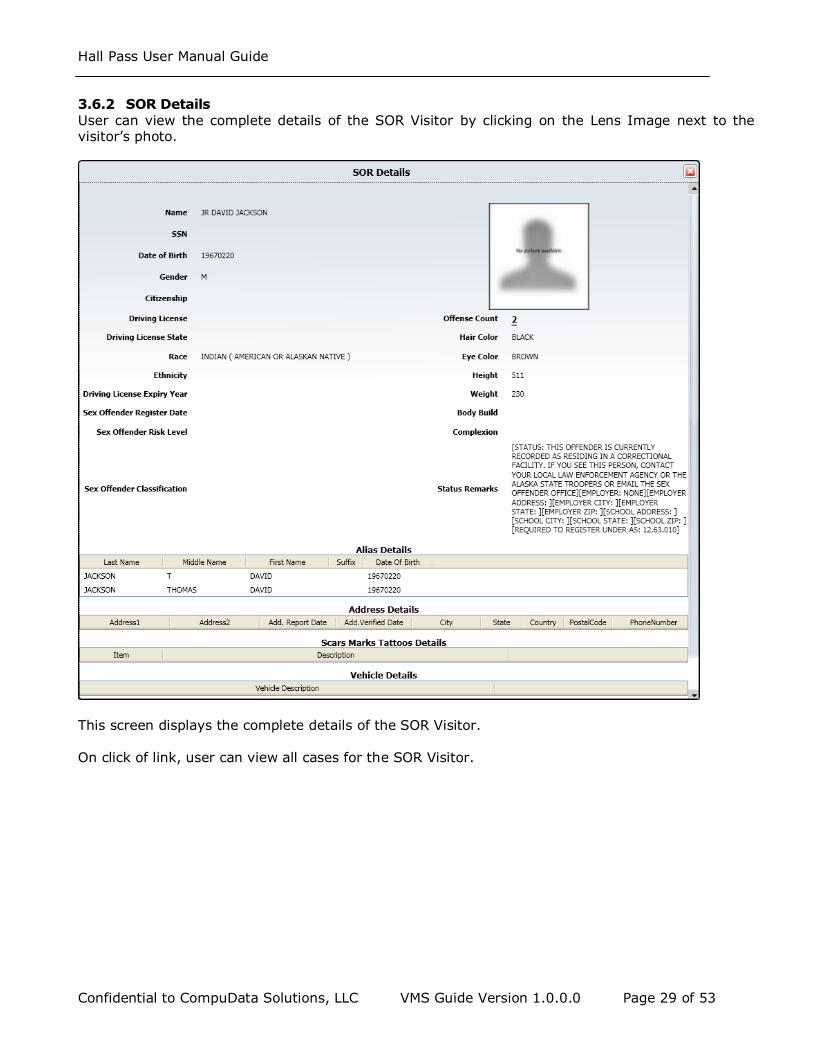
3.6.2 SOR Details User can view the complete details of the SOR Visitor by clicking on the Lens Image next to the visitor’s photo.
This screen displays the complete details of the SOR Visitor. On click of link, user can view all cases for the SOR Visitor.
Hall Pass User Manual Guide
Confidential to CompuData Solutions, LLC VMS Guide Version 1.0.0.0 Page 30 of 53
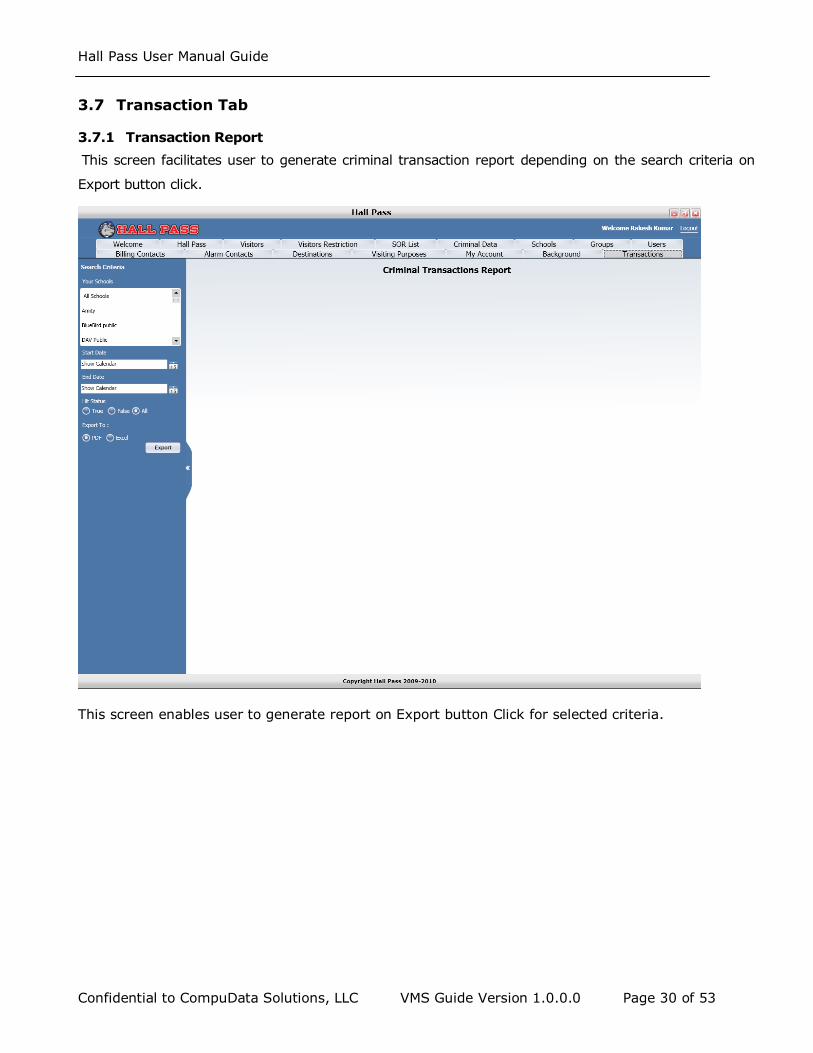
3.7 Transaction Tab
3.7.1 Transaction Report
This screen facilitates user to generate criminal transaction report depending on the search criteria on
Export button click.
This screen enables user to generate report on Export button Click for selected criteria.
Hall Pass User Manual Guide
Confidential to CompuData Solutions, LLC VMS Guide Version 1.0.0.0 Page 31 of 53
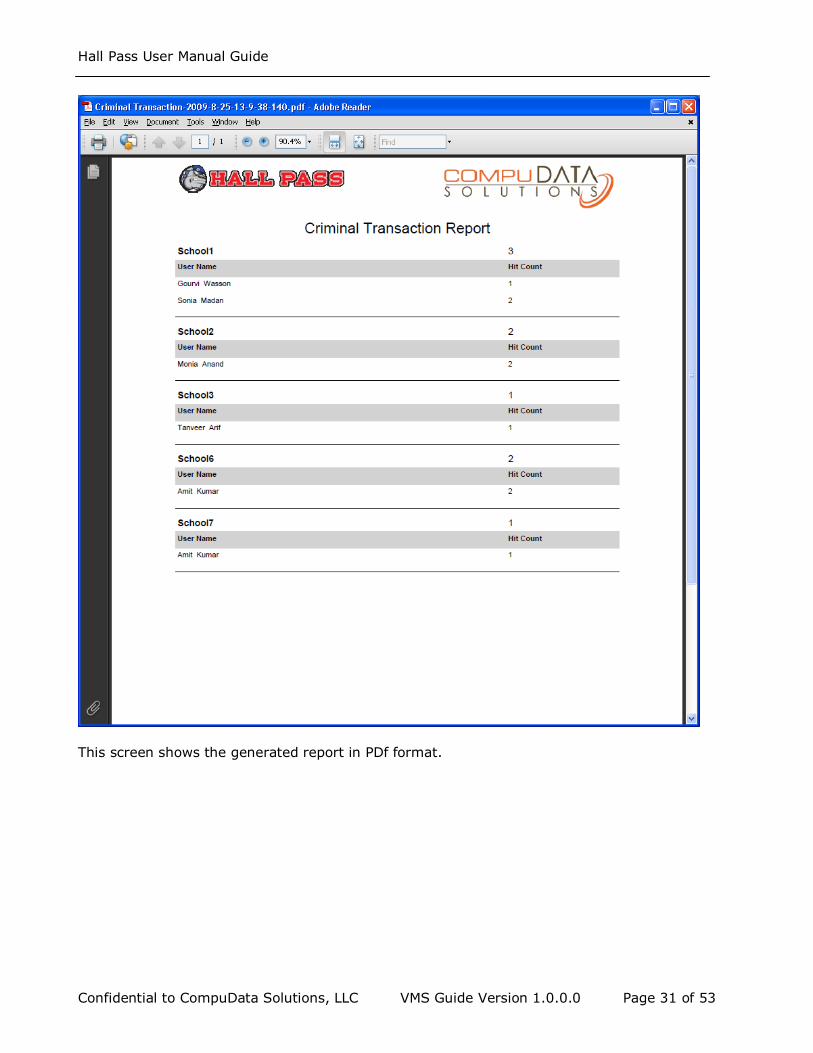
This screen shows the generated report in PDf format.

Hall Pass User Manual Guide
Confidential to CompuData Solutions, LLC VMS Guide Version 1.0.0.0 Page 32 of 53
3.8 Backgroungd Tab
3.8.1 Background tab. This screen facilitates the user to go CompuDataCheck.com.
Hall Pass User Manual Guide
Confidential to CompuData Solutions, LLC VMS Guide Version 1.0.0.0 Page 33 of 53
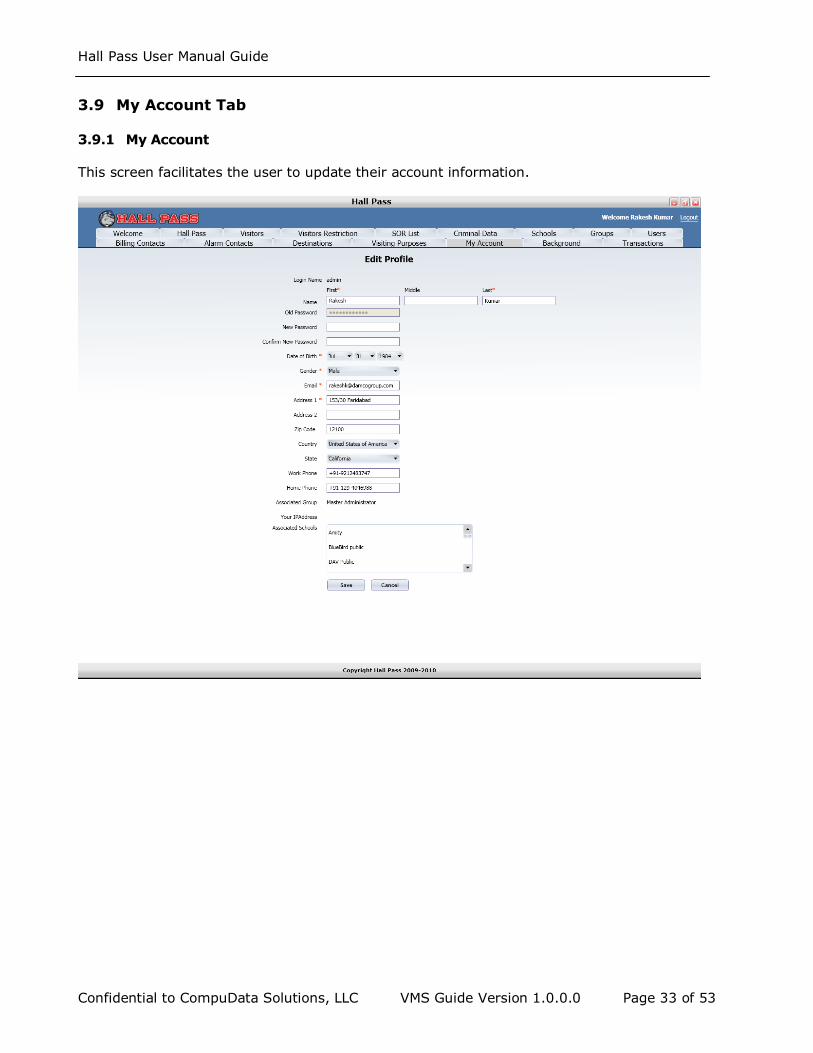
3.9 My Account Tab
3.9.1 My Account
This screen facilitates the user to update their account information.
Hall Pass User Manual Guide
Confidential to CompuData Solutions, LLC VMS Guide Version 1.0.0.0 Page 34 of 53
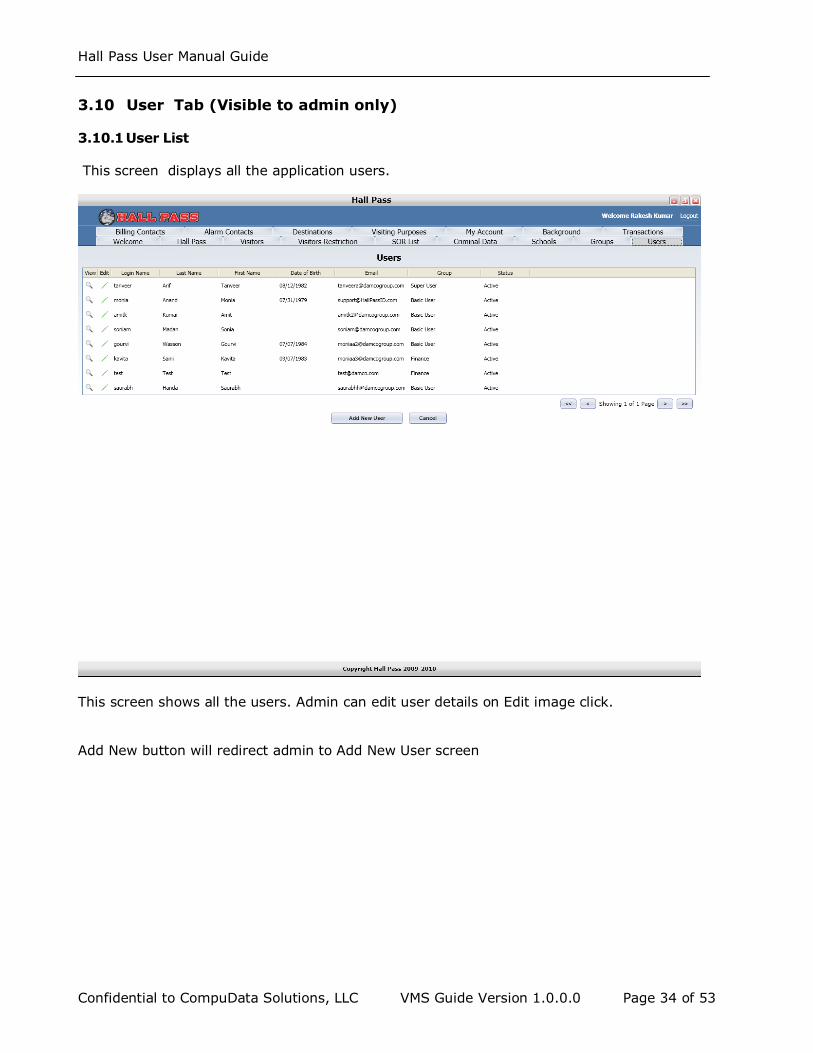
3.10 User Tab (Visible to admin only) 3.10.1 User List
This screen displays all the application users.
This screen shows all the users. Admin can edit user details on Edit image click. Add New button will redirect admin to Add New User screen
Hall Pass User Manual Guide
Confidential to CompuData Solutions, LLC VMS Guide Version 1.0.0.0 Page 35 of 53
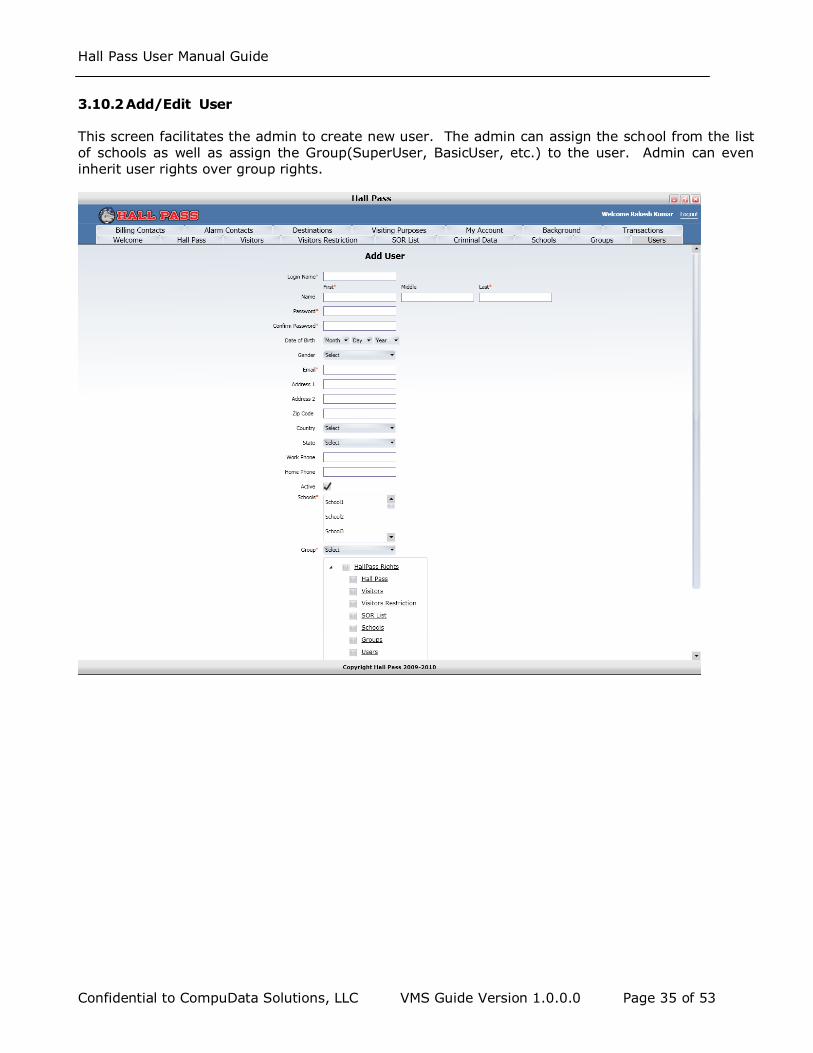
3.10.2 Add/Edit User This screen facilitates the admin to create new user. The admin can assign the school from the list
of schools as well as assign the Group(SuperUser, BasicUser, etc.) to the user. Admin can even inherit user rights over group rights.
Hall Pass User Manual Guide
Confidential to CompuData Solutions, LLC VMS Guide Version 1.0.0.0 Page 36 of 53
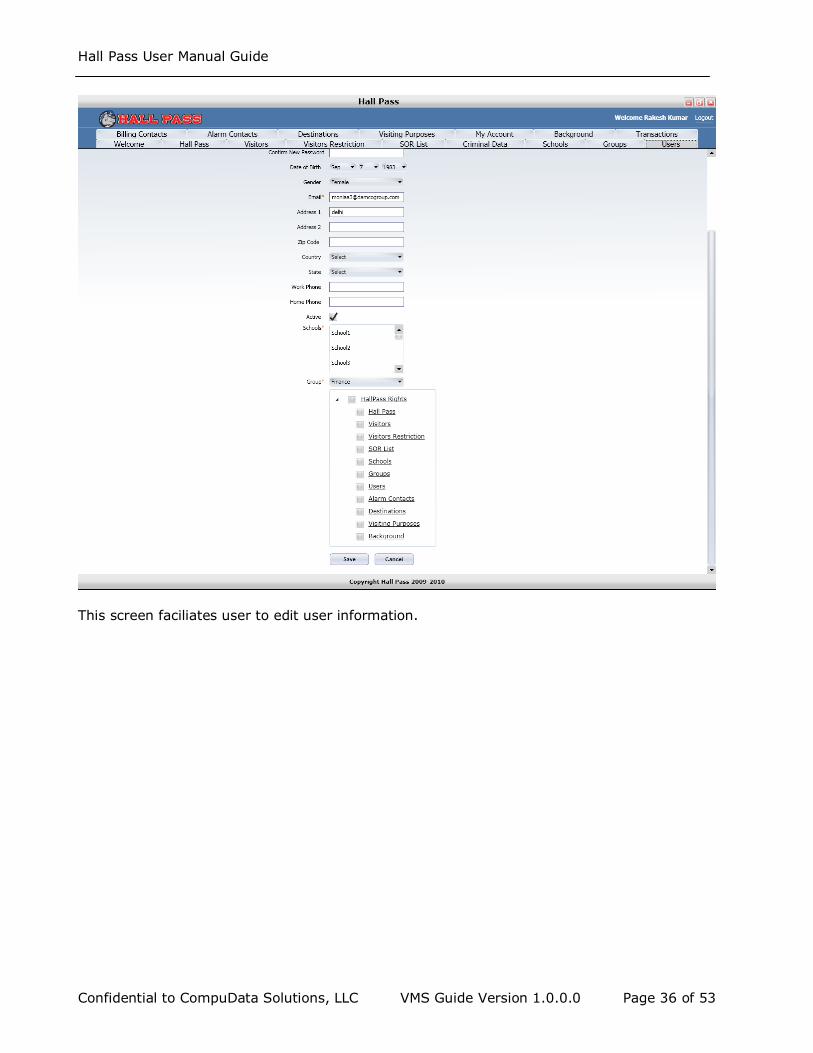
This screen faciliates user to edit user information.
Hall Pass User Manual Guide
Confidential to CompuData Solutions, LLC VMS Guide Version 1.0.0.0 Page 37 of 53
3.11 Groups Tab
3.11.1 Group List
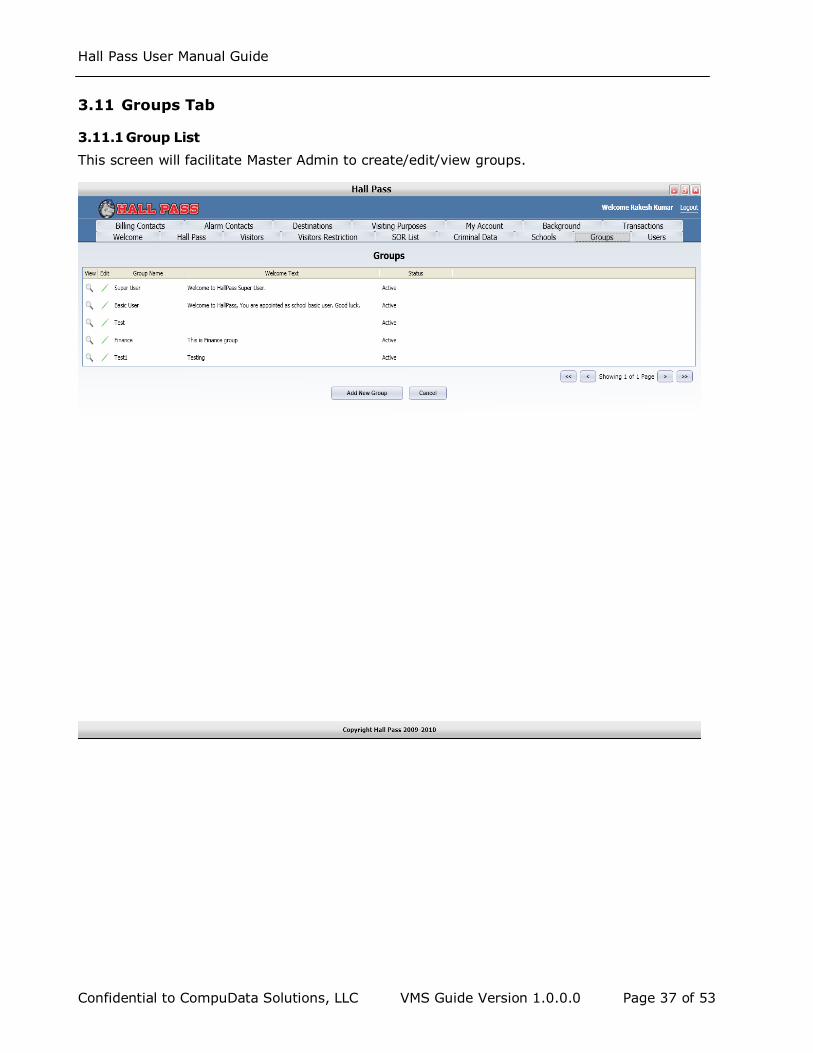
This screen will facilitate Master Admin to create/edit/view groups.
Hall Pass User Manual Guide
Confidential to CompuData Solutions, LLC VMS Guide Version 1.0.0.0 Page 38 of 53
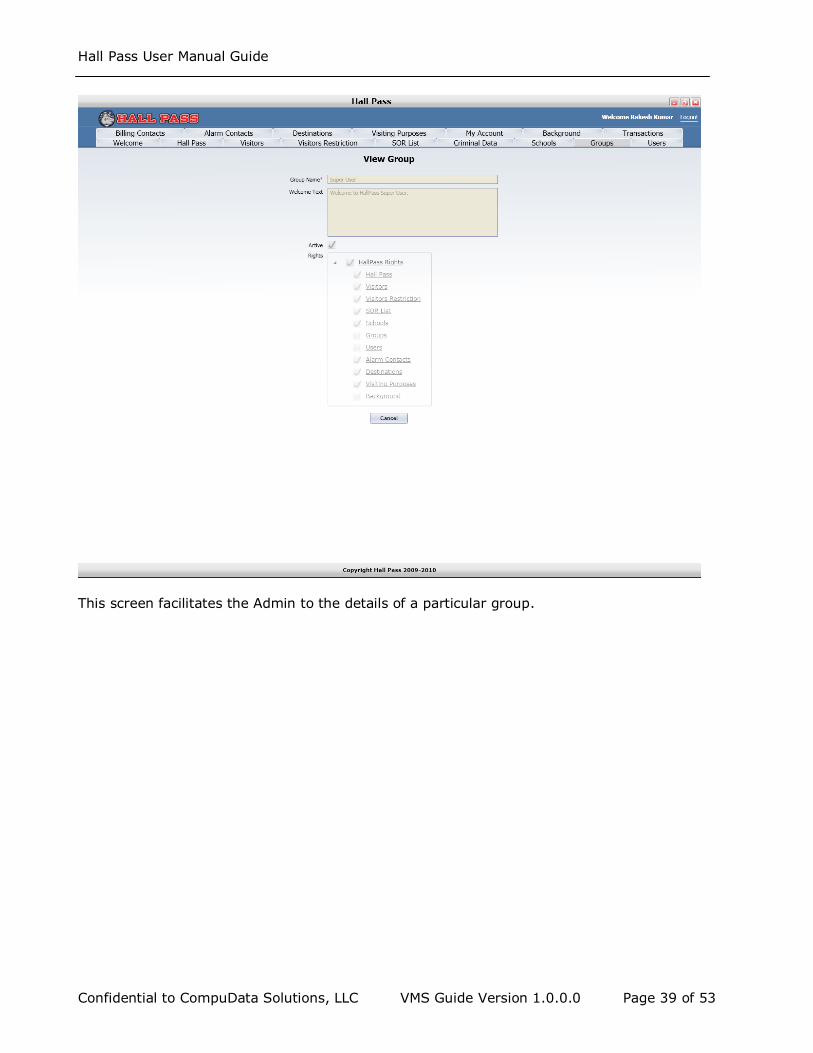
3.11.2 Add/Edit Group.
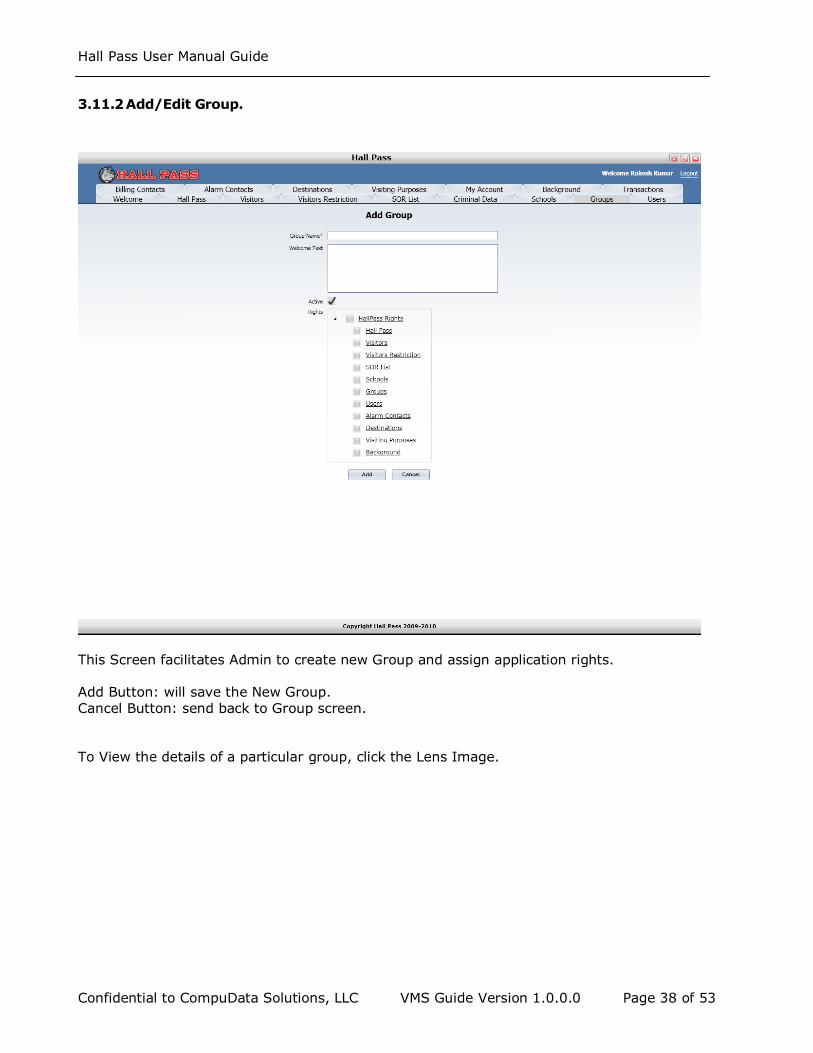
This Screen facilitates Admin to create new Group and assign application rights.
Add Button: will save the New Group. Cancel Button: send back to Group screen. To View the details of a particular group, click the Lens Image.
Hall Pass User Manual Guide
Confidential to CompuData Solutions, LLC VMS Guide Version 1.0.0.0 Page 39 of 53
This screen facilitates the Admin to the details of a particular group.
Hall Pass User Manual Guide
Confidential to CompuData Solutions, LLC VMS Guide Version 1.0.0.0 Page 40 of 53
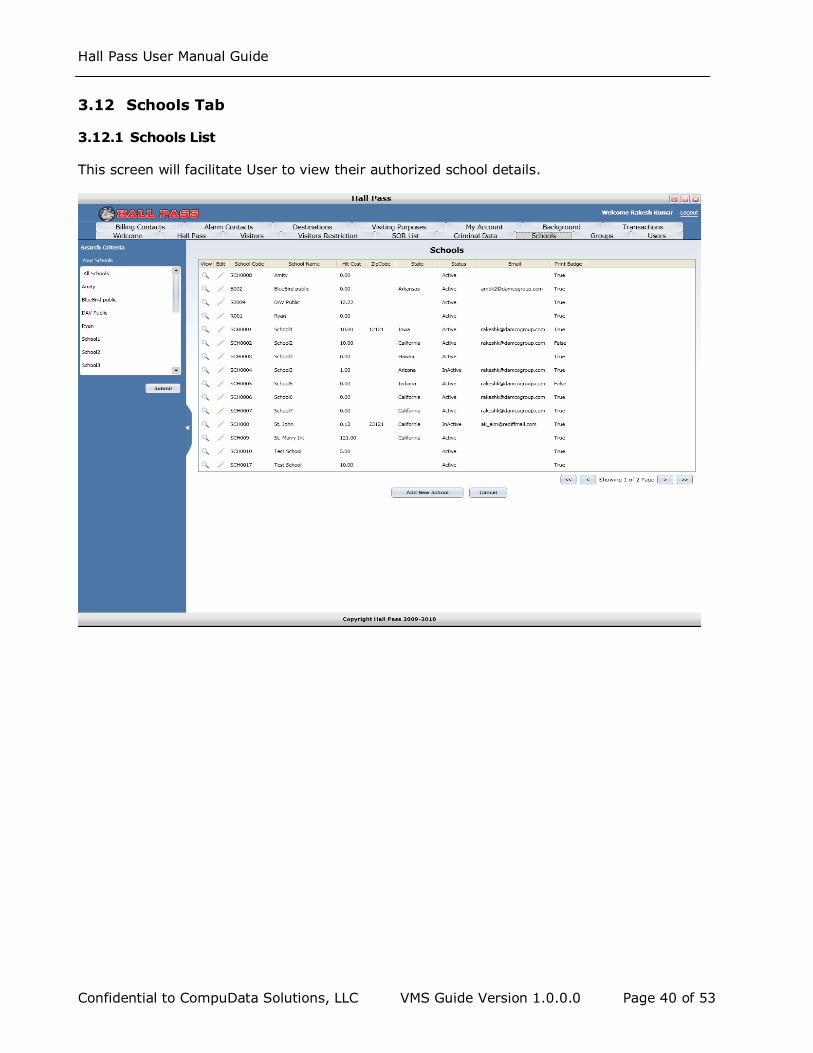
3.12 Schools Tab
3.12.1 Schools List This screen will facilitate User to view their authorized school details.
Hall Pass User Manual Guide
Confidential to CompuData Solutions, LLC VMS Guide Version 1.0.0.0 Page 41 of 53
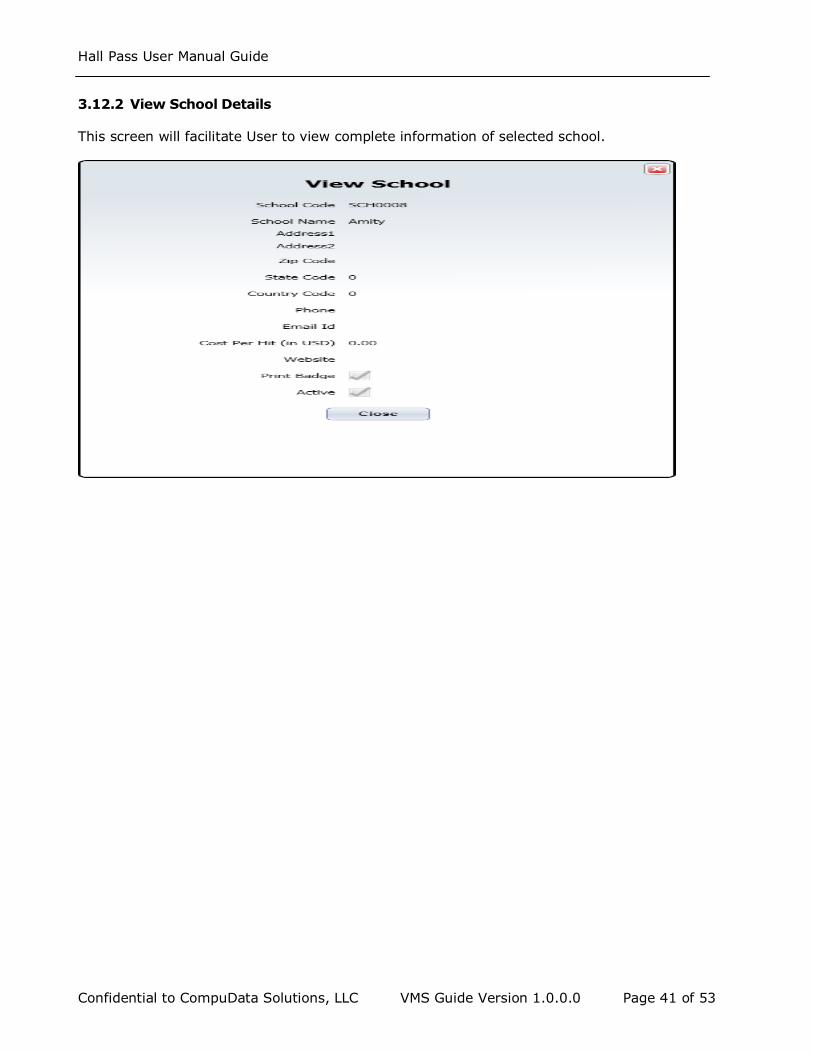
3.12.2 View School Details
This screen will facilitate User to view complete information of selected school.
Hall Pass User Manual Guide
Confidential to CompuData Solutions, LLC VMS Guide Version 1.0.0.0 Page 42 of 53
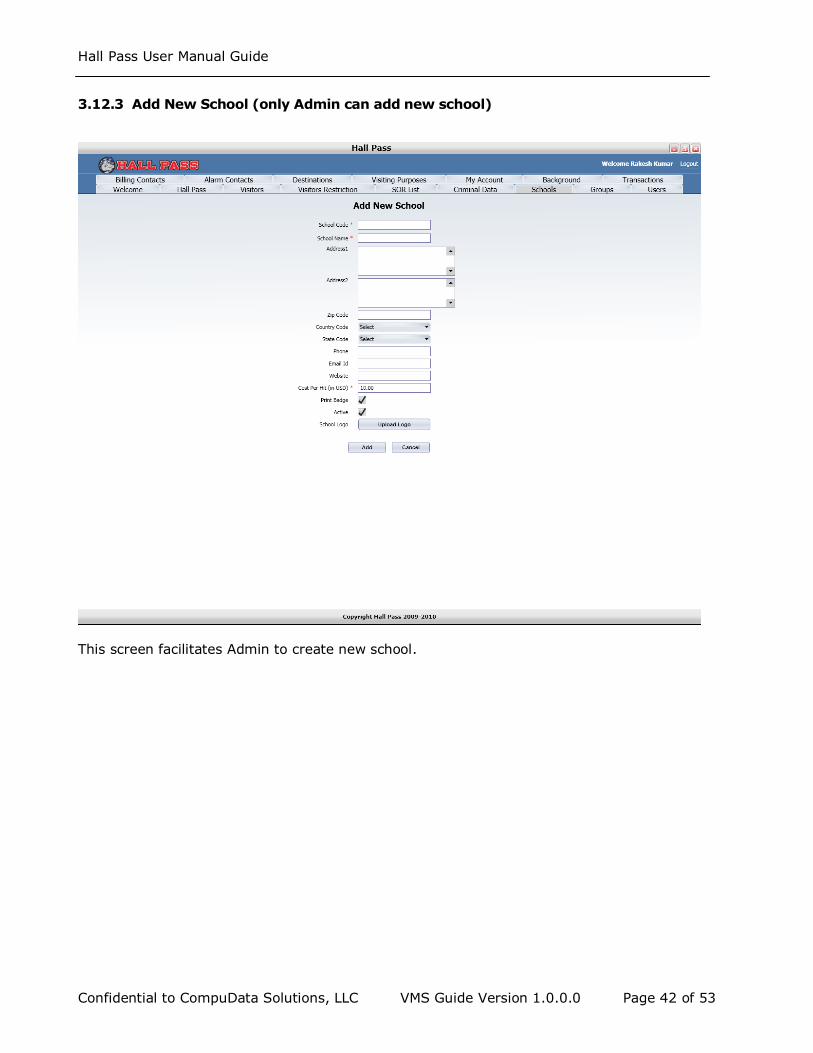
3.12.3 Add New School (only Admin can add new school)
This screen facilitates Admin to create new school.
Hall Pass User Manual Guide
Confidential to CompuData Solutions, LLC VMS Guide Version 1.0.0.0 Page 43 of 53
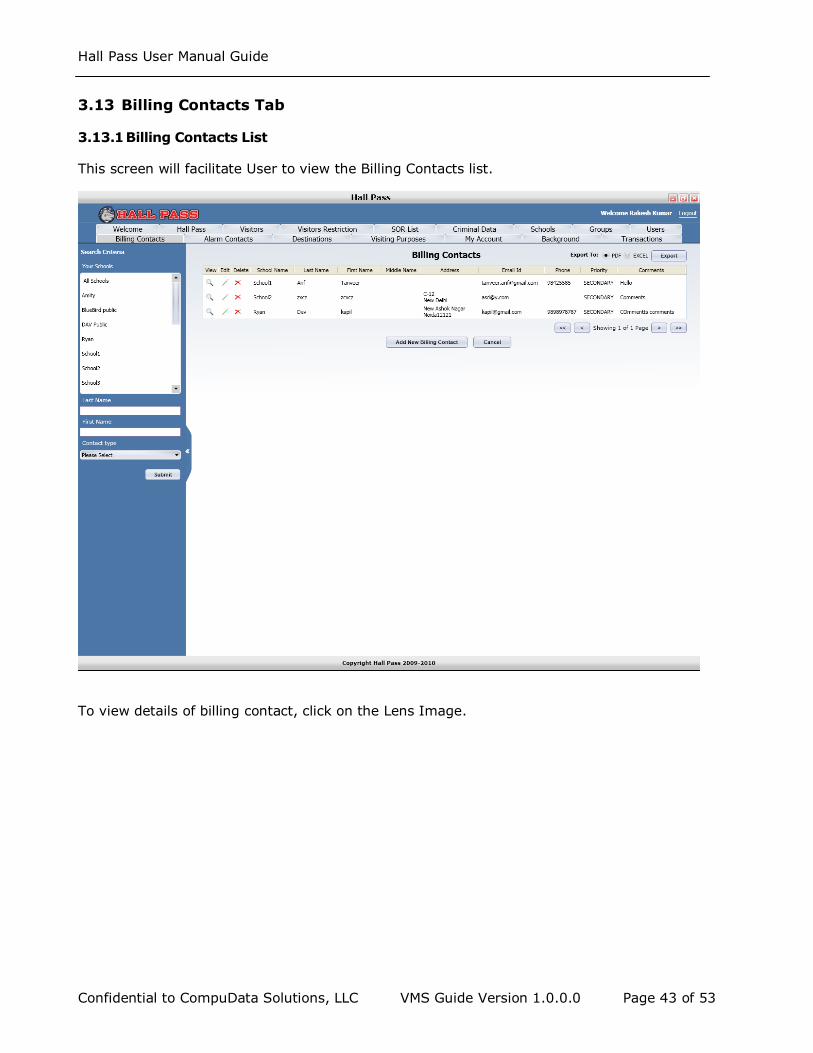
3.13 Billing Contacts Tab
3.13.1 Billing Contacts List
This screen will facilitate User to view the Billing Contacts list.
To view details of billing contact, click on the Lens Image.
Hall Pass User Manual Guide
Confidential to CompuData Solutions, LLC VMS Guide Version 1.0.0.0 Page 44 of 53
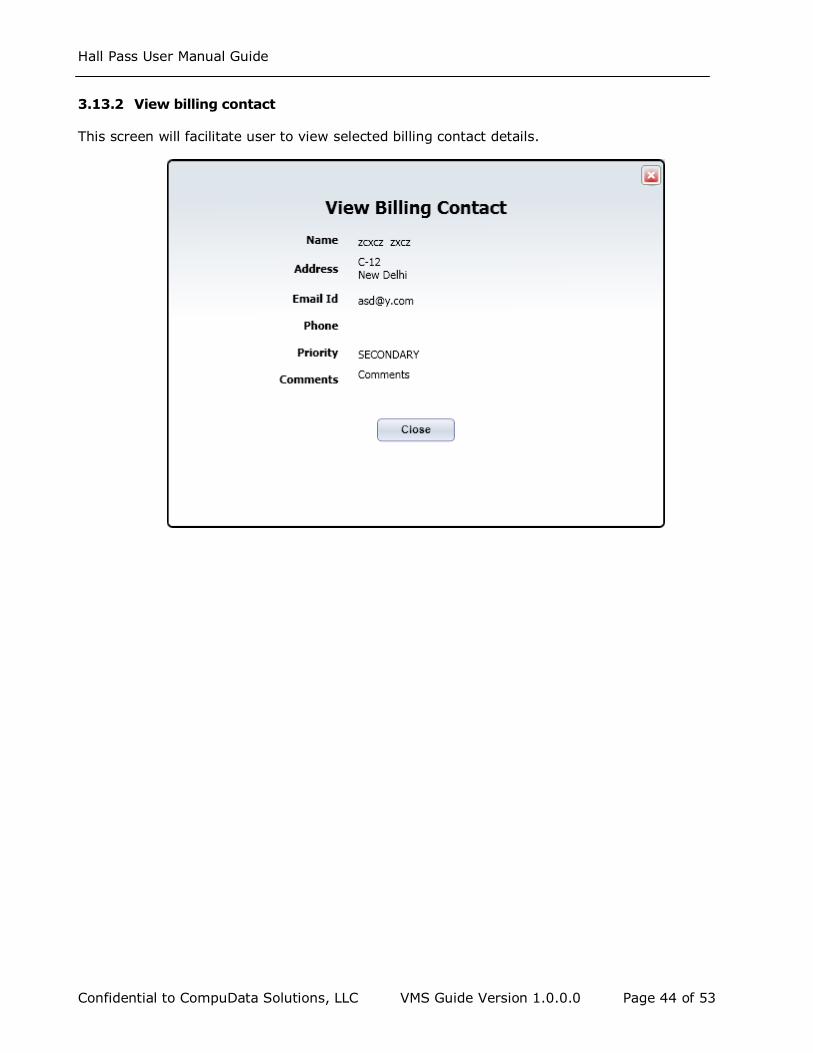
3.13.2 View billing contact
This screen will facilitate user to view selected billing contact details.
Hall Pass User Manual Guide
Confidential to CompuData Solutions, LLC VMS Guide Version 1.0.0.0 Page 45 of 53
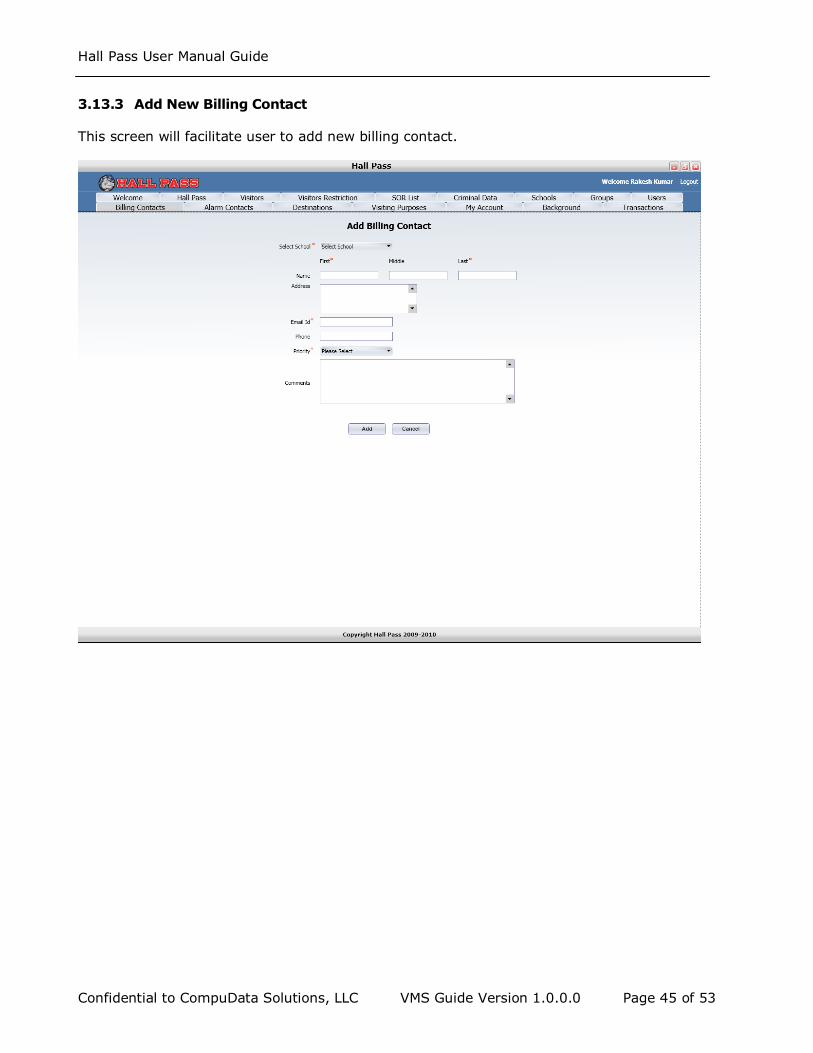
3.13.3 Add New Billing Contact
This screen will facilitate user to add new billing contact.
Hall Pass User Manual Guide
Confidential to CompuData Solutions, LLC VMS Guide Version 1.0.0.0 Page 46 of 53
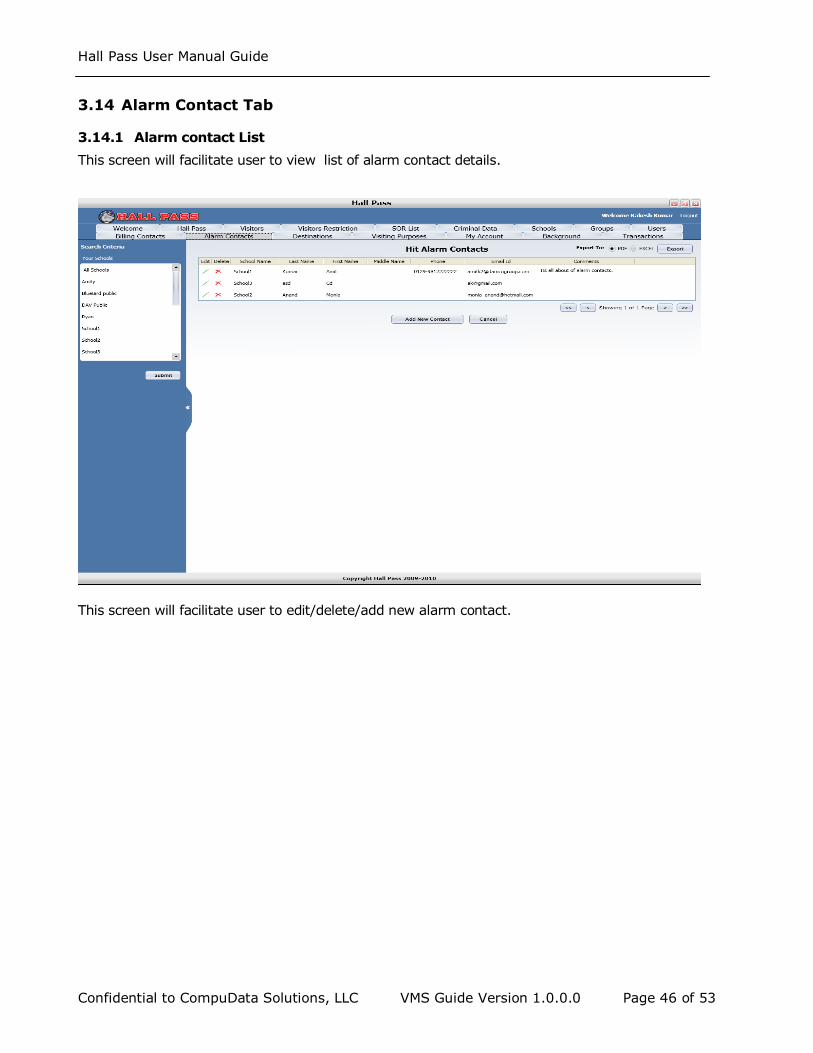
3.14 Alarm Contact Tab
3.14.1 Alarm contact List
This screen will facilitate user to view list of alarm contact details.
This screen will facilitate user to edit/delete/add new alarm contact.
Hall Pass User Manual Guide
Confidential to CompuData Solutions, LLC VMS Guide Version 1.0.0.0 Page 47 of 53
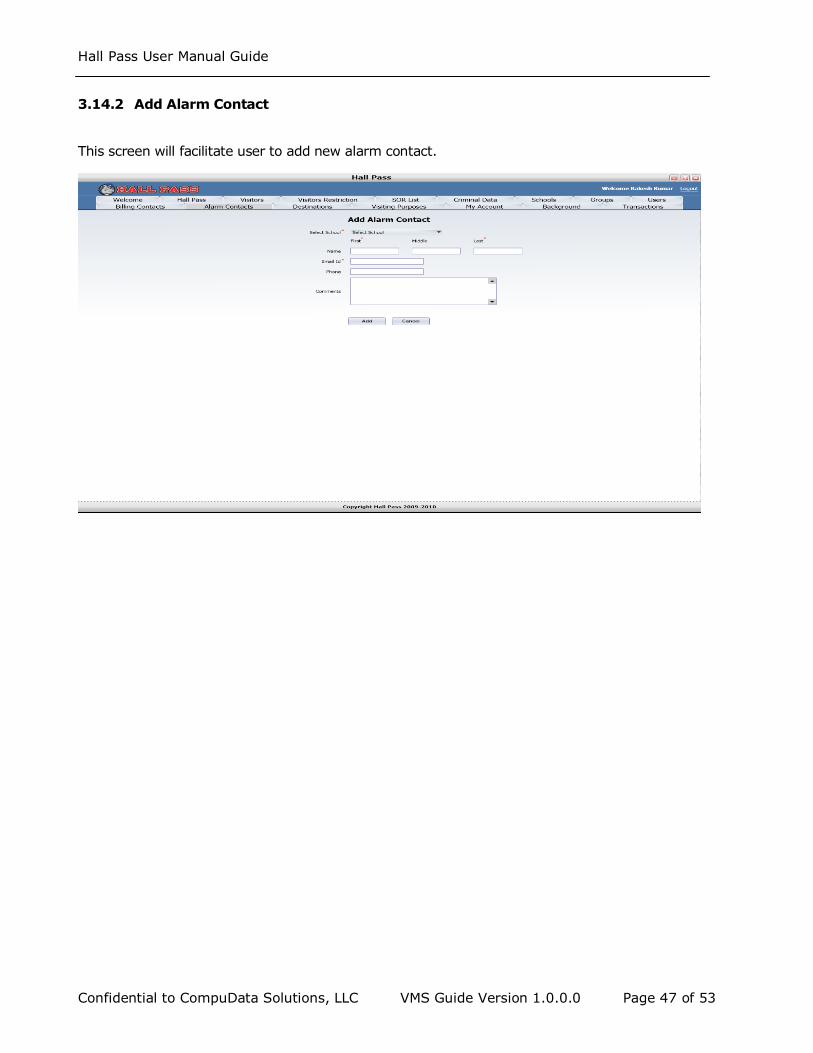
3.14.2 Add Alarm Contact
This screen will facilitate user to add new alarm contact.
Hall Pass User Manual Guide
Confidential to CompuData Solutions, LLC VMS Guide Version 1.0.0.0 Page 48 of 53
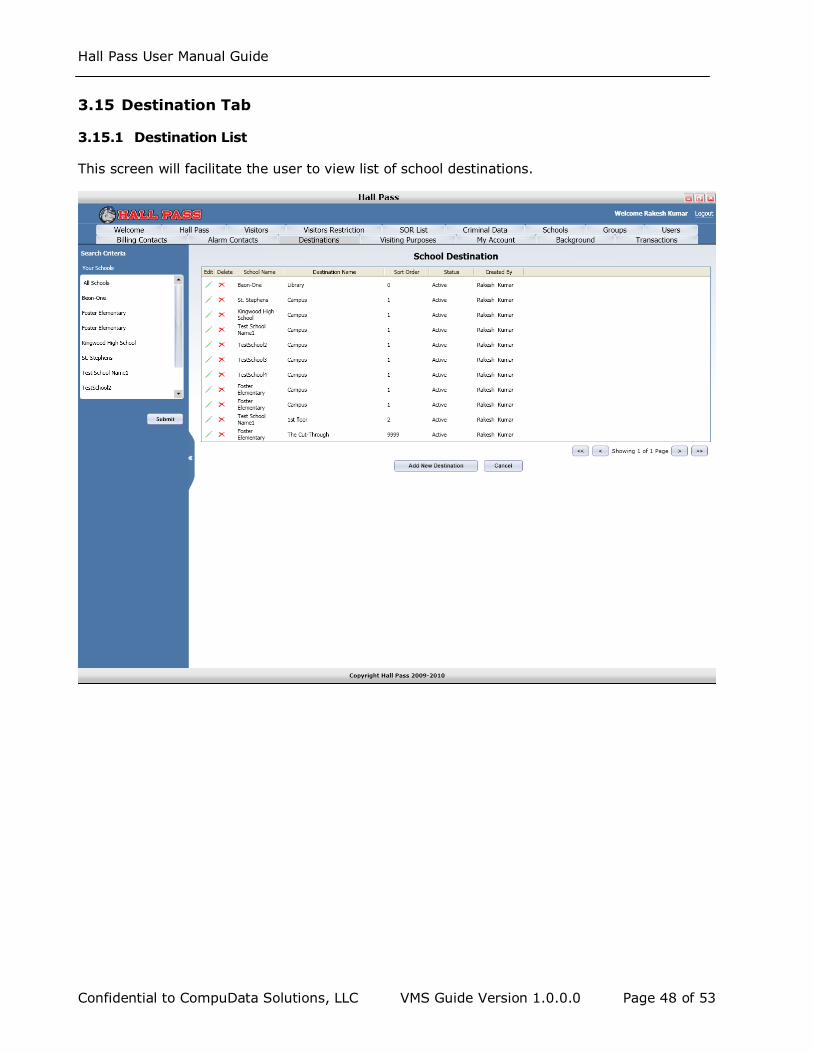
3.15 Destination Tab
3.15.1 Destination List
This screen will facilitate the user to view list of school destinations.

Hall Pass User Manual Guide
Confidential to CompuData Solutions, LLC VMS Guide Version 1.0.0.0 Page 49 of 53
3.15.2 Add School Destination
This screen will facilitate the user to add new school destination.
Hall Pass User Manual Guide
Confidential to CompuData Solutions, LLC VMS Guide Version 1.0.0.0 Page 50 of 53
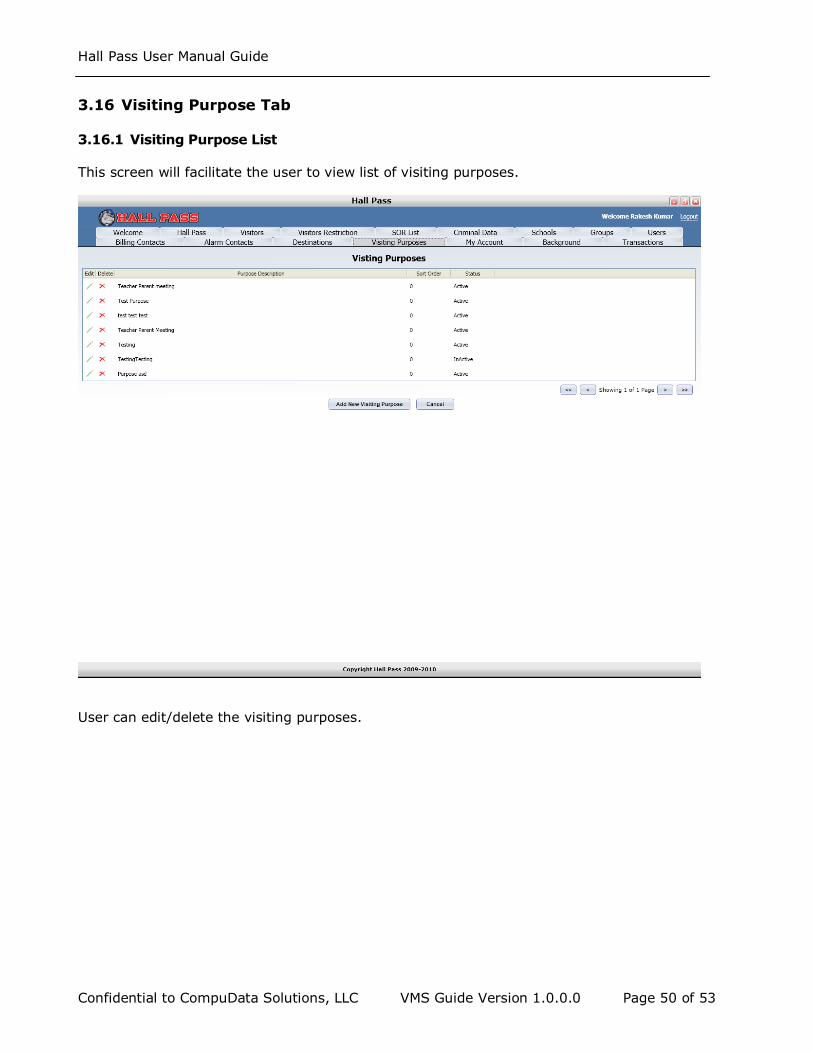
3.16 Visiting Purpose Tab
3.16.1 Visiting Purpose List
This screen will facilitate the user to view list of visiting purposes.
User can edit/delete the visiting purposes.
Hall Pass User Manual Guide
Confidential to CompuData Solutions, LLC VMS Guide Version 1.0.0.0 Page 51 of 53
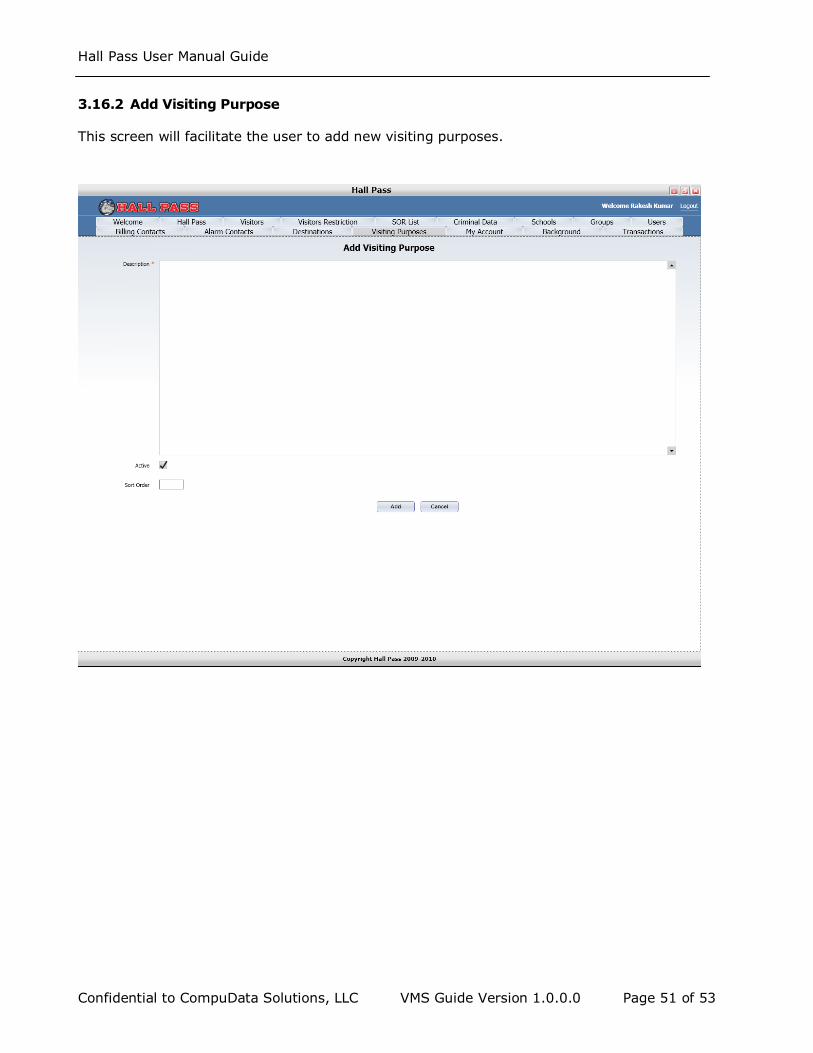
3.16.2 Add Visiting Purpose
This screen will facilitate the user to add new visiting purposes.
Hall Pass User Manual Guide
Confidential to CompuData Solutions, LLC VMS Guide Version 1.0.0.0 Page 52 of 53
Part IV: Support
4.1 Frequently Asked Questions:
Why does the scanner stop working after a set amount of time?
Option 1: Open Power Options (within Control Panel) to change settings Turn Off Hard-Disk,
System Standby and System Hibernates to Never. Then select the Hibernate tab and disable
Hibernate.
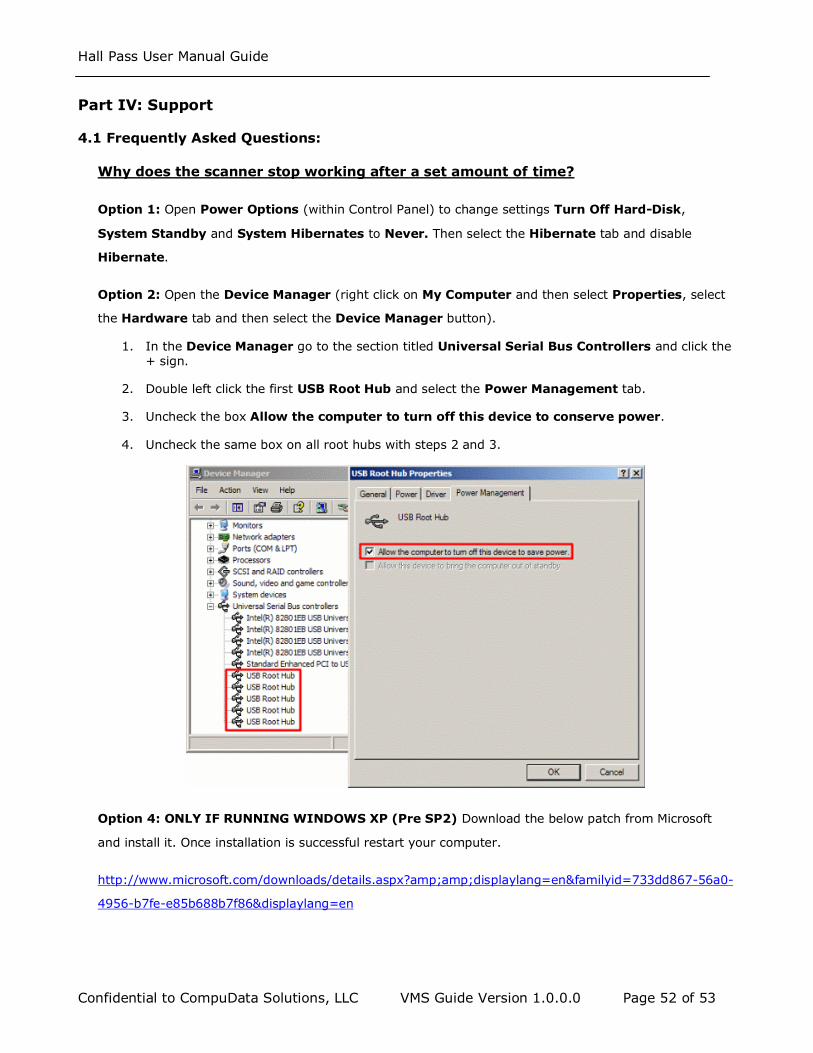
Option 2: Open the Device Manager (right click on My Computer and then select Properties, select
the Hardware tab and then select the Device Manager button).
1. In the Device Manager go to the section titled Universal Serial Bus Controllers and click the + sign.
2. Double left click the first USB Root Hub and select the Power Management tab.
3. Uncheck the box Allow the computer to turn off this device to conserve power.
4. Uncheck the same box on all root hubs with steps 2 and 3.
Option 4: ONLY IF RUNNING WINDOWS XP (Pre SP2) Download the below patch from Microsoft
and install it. Once installation is successful restart your computer.
http://www.microsoft.com/downloads/details.aspx?amp;amp;displaylang=en&familyid=733dd867-56a0-
4956-b7fe-e85b688b7f86&displaylang=en
Hall Pass User Manual Guide
Confidential to CompuData Solutions, LLC VMS Guide Version 1.0.0.0 Page 53 of 53
Page Left Blank