Embed Size (px)
Citation preview
10/11/2010
INSTALLATION AND
OPERATING INSTRUCTIONS
Melbourne: 03 8796 8600 Gold Coast: 07 5552 2600 Perth: 08 9350 2600 Sydney: 02 9853 2100 Townsville: 07 4750 3100 [email protected] Brisbane: 07 3308 5400 Adelaide: 08 8152 7600 www.astralpool.com.au
Bolero ND Cleaner
Viron Cartridge Filter
INSTALLATION AND OPERATING INSTRUCTIONS I INSTALLATION AND OPERATING INSTRUCTIONS
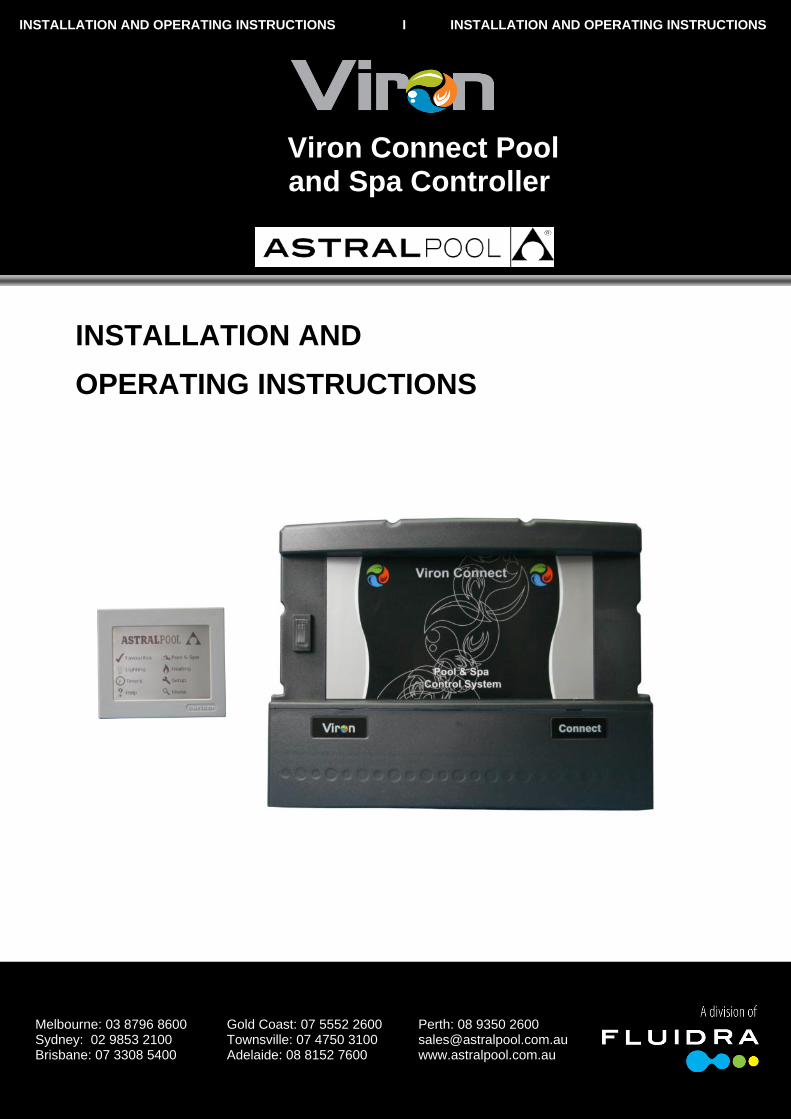
Viron Connect Pool and Spa Controller

Inst 276 - Viron Connect Pool & Spa Controller V0610
2

Inst 276 - Viron Connect Pool & Spa Controller V0610
3
INDEX
OPERATION INTRODUCTION
Introduction ………………………………………………………………………………………………………….. 3 Components ……………………………………………………………………………………...…………………. 3 Touchscreen Controller…………………………..…………………………………………………………………. 3 Operation …………………………………………………………………………………………………………….. 4 Initial Set up………..……………………………………………………………………………………….. 4 …………………………………………………………………………………………………………………..5 Setting timer periods…….………………………………………………………………………………….. 6 Setting favorites…………………………….………………………………………………………………. 6 Setting the temperature…………………………………………………………………………………….. 7 Lighting operation…..………………………………………………………………………………………. 7 3 Speed Pump Control ..……….……………………………………………………………………………………. 7 Channel 1 Over ride switch….………………………………………………………………………………………. 8 LCD Display ………………………………………………………………………………………………………….. 8 Fault Indication ………………………………………………………………………………………………………. 8 Remote (second) touch pad console…………………………………………………………………………….. 8
INSTALLATION & CONFIGURATION INSTRUCTIONS
Heater/Pump Connection …………………………………………………………………………………………… 9 Chlorinator Connection ……………………………………………………………………………………………… 10 RolaChem Connection ……………………………………………………………………………………………… 11 Product Compatibility ……………………………………………………………………………………………… 11 Valve Connection and Configuration ………………………………………………………………………………. 12 Warranty ………………………………………………………………………………………………………………. 13

Inst 276 - Viron Connect Pool & Spa Controller V0610
4
INTRODUCTION
Congratulations! You have purchased a high quality Viron Connect Pool and Spa Equipment Centre. Please read the instructions carefully and your purchase will provide you with years of trouble free use. Viron Connect allows you to personalise your pool or spa operation and is designed for “ONE TOUCH FAVOURITE MODE” control. In other words, simply turn on the equipment you want to operate, set the pool temperature (if heater is installed) save to “FAVOURITES”, name your favourite (eg: Spa at Night, or “School Holidays” and press save. From then on you simply select your favourite setting and all equipment will operate as you want – (heater on, light on, waterfall on etc) – all at the touch of one button. Note: The appliance is not intended for use by young children or infirm person without supervision. Please ensure that young children are supervised to ensure that they do not play with the appliance.
COMPONENTS INCLUDED
1 x Power Module / Equipment Centre 1 x Touchscreen controller 1 x 15m Cable for Touchscreen Connection 1 x Installation and Operation Manual 1 x Set of mounting Screws and bracket
OPTIONAL ACCESSORIES
1. Connect 8 Expansion Module/Equipment Centre – adds an additional 4 functions for equipment control 2. Temperature Sensor – 50mm Socket and thermistor. Provides pool temperature reading for pools without
an AstralPool Gas Heater 3. 4/8 Channel FM control module – Allows on/off control of up to 8 equipment outlets via hand held water
resistant FM Remote 4. RJ 12 Cable in 3m, 10m 20m and 50m lengths – for connecting AstralPool gas heaters, Salt Chlorinators,
FM remote modules and additional outdoor controllers 5. 7 button LCD control for outdoor installation – operates as a slave device to touchscreen controller 6. 4 button LCD control for outdoor installation – operates the connect 8 equipment centre as slave to
touchscreen controller
TOUCHSCREEN CONSOLE
The touchscreen console will display the status of all equipment connected to the power module. The touchscreen Console has a time clock function with inbuilt timers to control the filter pump and any other appliances connected to the system. You can use up to four timer periods per day.
Inst 276 - Viron Connect Pool & Spa Controller V0610
5
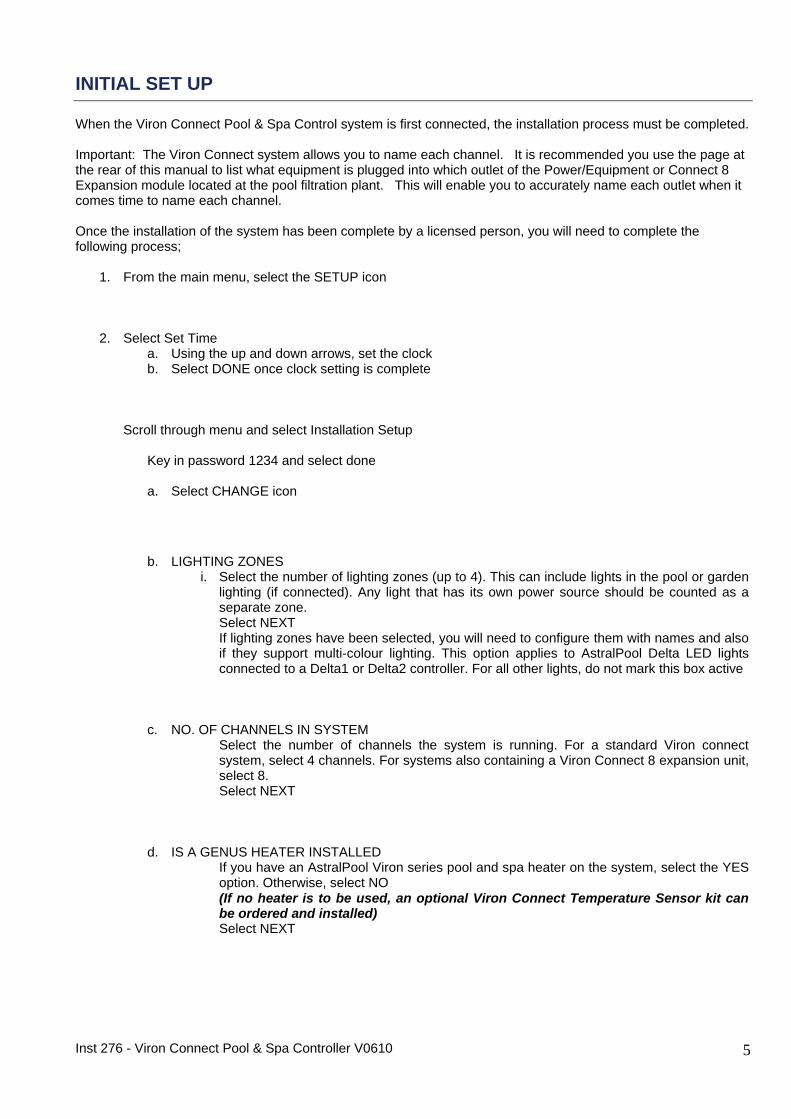
INITIAL SET UP
When the Viron Connect Pool & Spa Control system is first connected, the installation process must be completed. Important: The Viron Connect system allows you to name each channel. It is recommended you use the page at the rear of this manual to list what equipment is plugged into which outlet of the Power/Equipment or Connect 8 Expansion module located at the pool filtration plant. This will enable you to accurately name each outlet when it comes time to name each channel. Once the installation of the system has been complete by a licensed person, you will need to complete the following process;
1. From the main menu, select the SETUP icon 2. Select Set Time
a. Using the up and down arrows, set the clock b. Select DONE once clock setting is complete
3. Scroll through menu and select Installation Setup
Key in password 1234 and select done a. Select CHANGE icon
b. LIGHTING ZONES i. Select the number of lighting zones (up to 4). This can include lights in the pool or garden
lighting (if connected). Any light that has its own power source should be counted as a separate zone.
ii. Select NEXT iii. If lighting zones have been selected, you will need to configure them with names and also
if they support multi-colour lighting. This option applies to AstralPool Delta LED lights connected to a Delta1 or Delta2 controller. For all other lights, do not mark this box active.
c. NO. OF CHANNELS IN SYSTEM i. Select the number of channels the system is running. For a standard Viron connect
system, select 4 channels. For systems also containing a Viron Connect 8 expansion unit, select 8.
ii. Select NEXT
d. IS A GENUS HEATER INSTALLED i. If you have an AstralPool Viron series pool and spa heater on the system, select the YES
option. Otherwise, select NO. ii. (If no heater is to be used, an optional Viron Connect Temperature Sensor kit can
be ordered and installed) iii. Select NEXT
Inst 276 - Viron Connect Pool & Spa Controller V0610
6
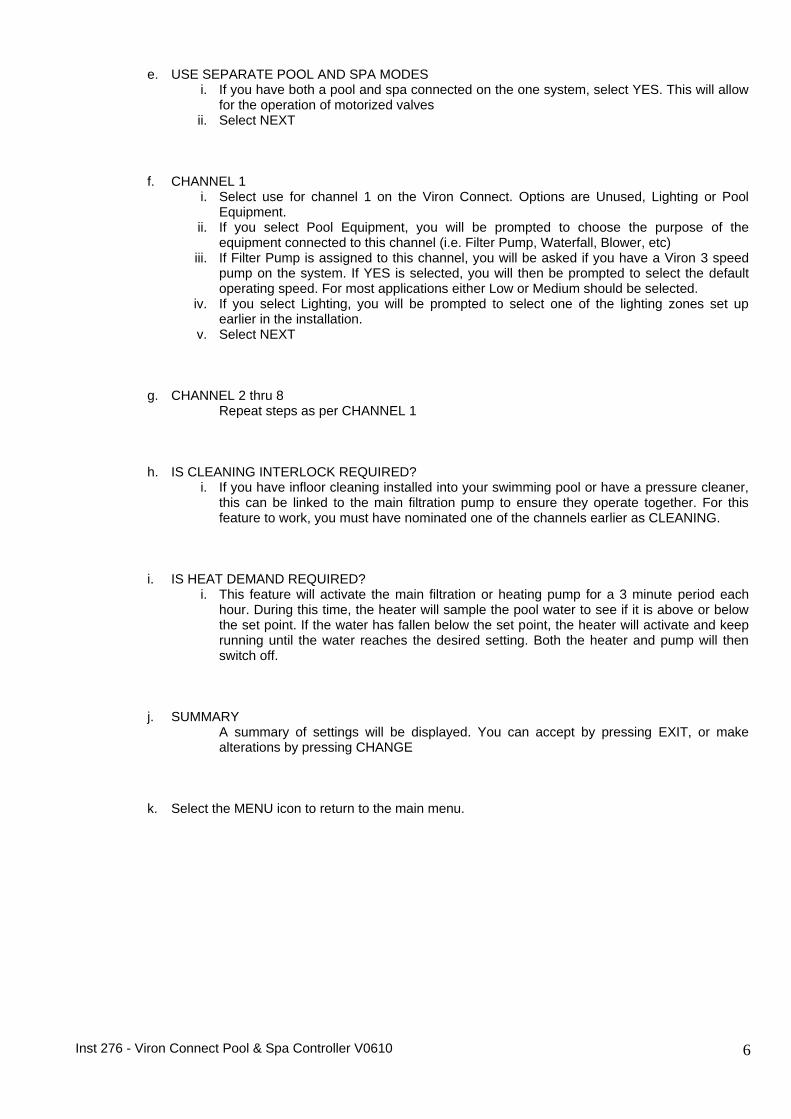
e. USE SEPARATE POOL AND SPA MODES i. If you have both a pool and spa connected on the one system, select YES. This will allow
for the operation of motorized valves ii. Select NEXT
f. CHANNEL 1 i. Select use for channel 1 on the Viron Connect. Options are Unused, Lighting or Pool
Equipment. ii. If you select Pool Equipment, you will be prompted to choose the purpose of the
equipment connected to this channel (i.e. Filter Pump, Waterfall, Blower, etc) iii. If Filter Pump is assigned to this channel, you will be asked if you have a Viron 3 speed
pump on the system. If YES is selected, you will then be prompted to select the default operating speed. For most applications either Low or Medium should be selected.
iv. If you select Lighting, you will be prompted to select one of the lighting zones set up earlier in the installation.
v. Select NEXT
g. CHANNEL 2 thru 8 i. Repeat steps as per CHANNEL 1
h. IS CLEANING INTERLOCK REQUIRED? i. If you have infloor cleaning installed into your swimming pool or have a pressure cleaner,
this can be linked to the main filtration pump to ensure they operate together. For this feature to work, you must have nominated one of the channels earlier as CLEANING.
i. IS HEAT DEMAND REQUIRED? i. This feature will activate the main filtration or heating pump for a 3 minute period each
hour. During this time, the heater will sample the pool water to see if it is above or below the set point. If the water has fallen below the set point, the heater will activate and keep running until the water reaches the desired setting. Both the heater and pump will then switch off.
j. SUMMARY i. A summary of settings will be displayed. You can accept by pressing EXIT, or make
alterations by pressing CHANGE
k. Select the MENU icon to return to the main menu.
Inst 276 - Viron Connect Pool & Spa Controller V0610
7
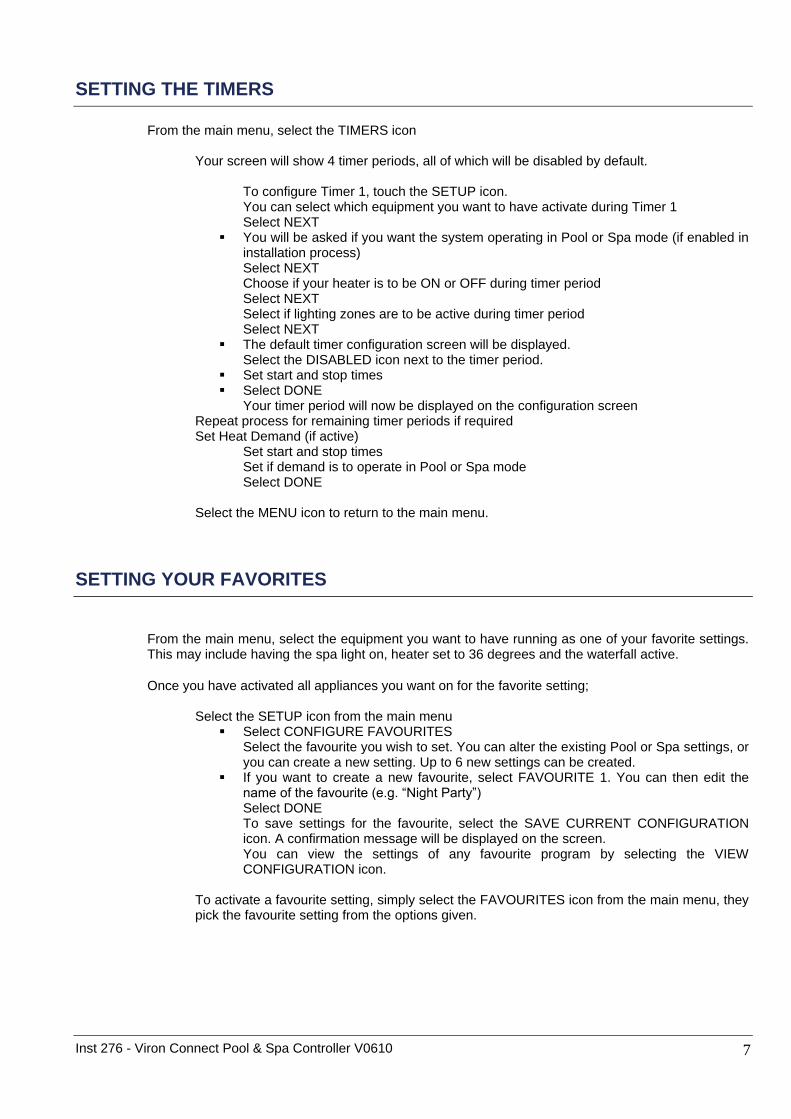
SETTING THE TIMERS
From the main menu, select the TIMERS icon
o Your screen will show 4 timer periods, all of which will be disabled by default.
To configure Timer 1, touch the SETUP icon. You can select which equipment you want to have activate during Timer 1 Select NEXT You will be asked if you want the system operating in Pool or Spa mode (if enabled in
installation process) Select NEXT Choose if your heater is to be ON or OFF during timer period Select NEXT Select if lighting zones are to be active during timer period Select NEXT The default timer configuration screen will be displayed. Select the DISABLED icon next to the timer period. Set start and stop times Select DONE Your timer period will now be displayed on the configuration screen
o Repeat process for remaining timer periods if required o Set Heat Demand (if active)
Set start and stop times Set if demand is to operate in Pool or Spa mode Select DONE
o Select the MENU icon to return to the main menu.
SETTING YOUR FAVORITES
From the main menu, select the equipment you want to have running as one of your favorite settings.
This may include having the spa light on, heater set to 36 degrees and the waterfall active.
Once you have activated all appliances you want on for the favorite setting;
o Select the SETUP icon from the main menu Select CONFIGURE FAVOURITES Select the favourite you wish to set. You can alter the existing Pool or Spa settings, or
you can create a new setting. Up to 6 new settings can be created. If you want to create a new favourite, select FAVOURITE 1. You can then edit the
name of the favourite (e.g. “Night Party”) Select DONE To save settings for the favourite, select the SAVE CURRENT CONFIGURATION
icon. A confirmation message will be displayed on the screen. You can view the settings of any favourite program by selecting the VIEW
CONFIGURATION icon.
o To activate a favourite setting, simply select the FAVOURITES icon from the main menu, they pick the favourite setting from the options given.

Inst 276 - Viron Connect Pool & Spa Controller V0610
8
SETTING THE TEMPERATURE
From the main menu, select the HEATING icon
o Your screen will show current and set temperatures
To change pool temperature setting, select POOL and use up and down arrows to set temperature
To change spa temperature setting, select SPA and use up and down arrows to set temperature.
LIGHTING OPERATION
From the main menu, select the LIGHTING icon
o Your screen with show all available lighting zones. You can select ON / OFF or AUTO modes for the lights.
o For systems using AstralPool Delta LED lighting, you can change colour settings from this menu also.
3 SPEED VIRON P300 (OPTIONAL - NOT INCLUDED)
The Genus IV control system has the ability to control the speed of the Viron P300 3 speed high efficiency pump. The advantage of the Viron P 300 is its extremely low operating costs, reduced CO2 emissions and low operating noise. The speed of the Viron pump is controlled via the touch pad on the motor of the pump. However, your Viron Connect Control system will allow speed control of your pump via the touchscreen console. When a Viron P300 pump is installed, the filter timeclock period should ideally be set for 12 hours per day. For example, set the on period for 0800 hours and the operating hours for 12 hour operating period. In this case, the pump will turn on at 8.00 am and turn off at 8.00 pm. Do not set the pump timer period to span midnight.
Refer to Viron Pump instructions for explanation of the operation and speed settings of the Viron Pump.
1. The Viron P 300 has 3 speed settings – low, medium and high. High Speed should be used when
vacuuming the pool or operating spa jets or some water features such as water falls. Medium speed can be used for gentle spa jet action, or filtration for the pool. Low speed is the recommended setting for everyday filtration of your pool.
2. The Viron P300 will automatically start on high speed for the first 5 minutes to assist in priming and
substantially fill the hair and lint pot with water. After 5 minutes the pump will revert to the last speed it was set at before it was turned off.
3. During normal operation, it is recommended that the pump be operated on low speed for 12 hours per day.
This will achieve the lowest operating costs with the lowest noise level. Should your pool have areas where water is not turning over when pump is on low speed, increase the speed setting.
Inst 276 - Viron Connect Pool & Spa Controller V0610
9
When selecting Spa mode on the Genus Touchscreen Console the Viron Pump will automatically switch to High Speed to allow effective spa jet action. If you have a gas heater connected to the Viron Connect System, the Viron Pump will automatically switch to medium speed when the heater ignites. This ensures there is sufficient water flow to efficiently operate your gas heater. When selecting backwash mode on your Hurlcon VX or E Series Chlorinator (if installed) the Viron Pump will automatically switch to high speed to ensure ideal backflow velocity through the filter media bed.
CHANNEL 1 EQUIPMENT CENTRE OVERRIDE SWITCH
The Channel 1 (Filtration Pump) override switch is located on the front of the control unit in case you should require manual control of the pump for the purposes of backwashing, maintenance, etc. This switch should be in the “Auto” position for normal remote and timer control. The “On” position turns the pump on regardless of the timer and remote control settings. The “Off” position prevents the Channel 1 operating regardless of the timer and remote control settings. When a VX S model is connected to the system, The Overide switch should remain in the on position during normal operation. When backwashing, the pump can be operated using the On/Off/Auto button of the Salt Chlorinator
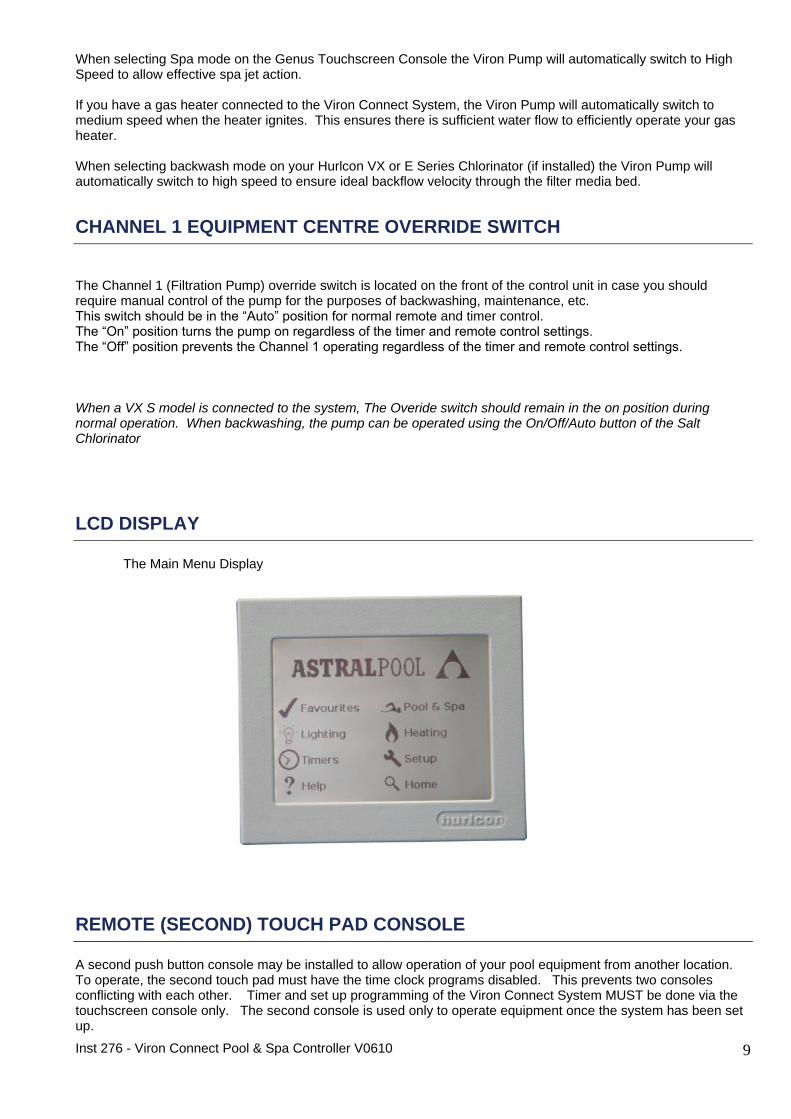
LCD DISPLAY
o The Main Menu Display
REMOTE (SECOND) TOUCH PAD CONSOLE
A second push button console may be installed to allow operation of your pool equipment from another location. To operate, the second touch pad must have the time clock programs disabled. This prevents two consoles conflicting with each other. Timer and set up programming of the Viron Connect System MUST be done via the touchscreen console only. The second console is used only to operate equipment once the system has been set up.
Inst 276 - Viron Connect Pool & Spa Controller V0610
10
POOL AND SPA EQUIPMENT CENTRE
INSTALLATION AND CONFIGURATION WARNING!
This appliance must be installed in accordance with AS/NZS 3000:2007
The Viron Connect touchscreen console, additional console, FM remote and Viron Connect 8 consoles are connected to the Power Supply Module, AstralPool Heater and Salt Chlorinator and Viron P300 Pump by 6 wire flat cable with RJ12 connectors.
The Cable with RJ12 Connection to the Pool Heater and Handset must be installed before power is supplied to the Power Supply Module.
The combined load of equipment operated must not exceed 40 Amps.
The Power Supply Module must be hard wired by a licensed electrician. To avoid a safety hazard, the supply cord if damaged, must only be replaced by Hurlcon, or its service agent or a suitably qualified person.
- Supplied by an isolating transformer - Supplied through a residual current device (RCD) with a rated residual
operating current not exceeding 30mA
An approved Isolation Switch must be installed in the electrical supply to the Power Supply Module.
The Pool and Spa Equipment Centre is not intended for use by young children or infirm persons without supervision. Please ensure that young children are supervised to ensure that they do not play with the Pool and Spa Equipment Centre.
The FM Control handset is not water resistant. Therefore water must be avoided.
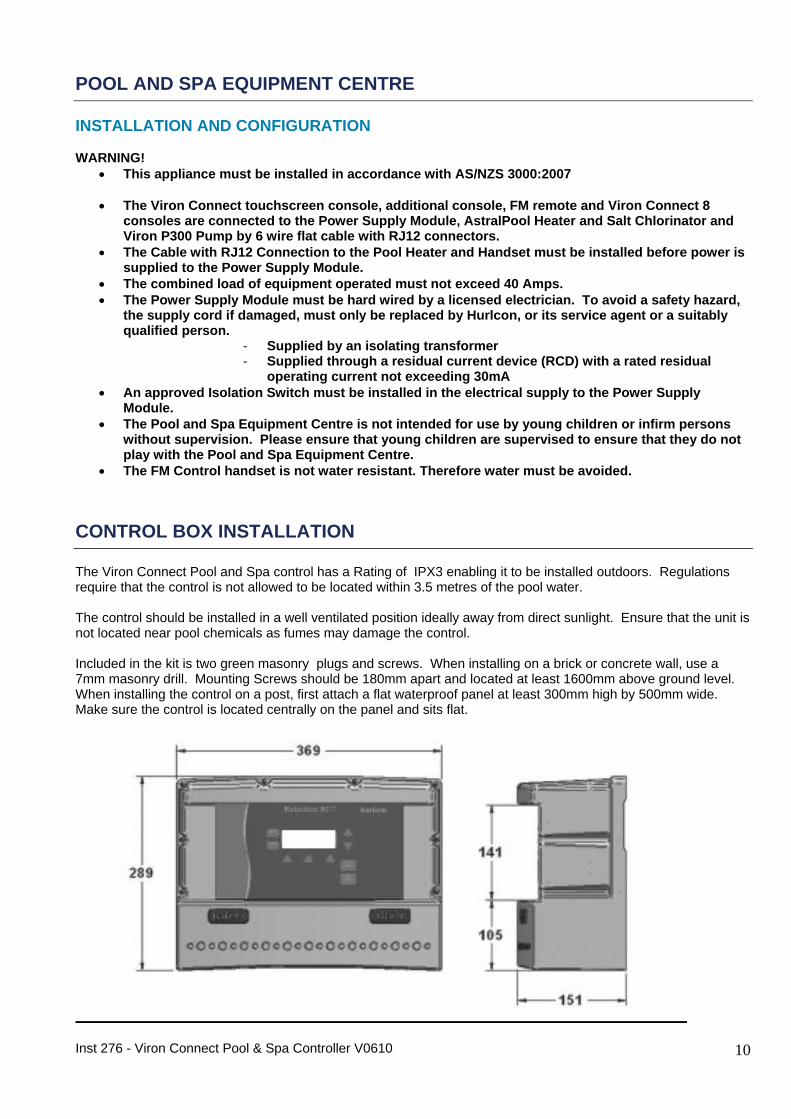
CONTROL BOX INSTALLATION
The Viron Connect Pool and Spa control has a Rating of IPX3 enabling it to be installed outdoors. Regulations require that the control is not allowed to be located within 3.5 metres of the pool water. The control should be installed in a well ventilated position ideally away from direct sunlight. Ensure that the unit is not located near pool chemicals as fumes may damage the control. Included in the kit is two green masonry plugs and screws. When installing on a brick or concrete wall, use a 7mm masonry drill. Mounting Screws should be 180mm apart and located at least 1600mm above ground level. When installing the control on a post, first attach a flat waterproof panel at least 300mm high by 500mm wide. Make sure the control is located centrally on the panel and sits flat.

Inst 276 - Viron Connect Pool & Spa Controller V0610
11
CONNECTION TO VIRON P300 3 SPEED PUMPS
1. Turn power off to Pump. 2. Loosen gland at rear of capacitor cover on P300 pump. 3. Connect RJ12 cable in connection socket (Cable not supplied) 4. Your Remote Control is now ready for operation.
CONNECTION TO ASTRALPOOL SALT CHLORINATORS
The VX s Model Chlorinator control needs to be connected to the equipment centre via a remote cable. To connect the cable from the Chlorinator Control to the equipment centre, do the following:
1. Turn off the mains supply to the equipment centre. 2. Plug one end of the RJ12 cable into the RJ12 socket that can be found on the underside of the Power
Supply Module. (Cable not supplied) 3. The other end of the cable must be plugged into the VX „S‟ model chlorinator. 4. Connect the chlorinator mains plug into the pump outlet of the Power Supply Module. 5. Plug the pump into the power socket located on the underside of the VX chlorinator. 6. Set the Pump override switch to the Off position. 7. Turn on the mains to the Equipment centre. 8. Whilst holding down the Backwash and Power level down buttons, turn the Pump override switch to ON.
The Chlorinator should indicate a standalone setting. Refer to page 13 section labelled VX chlorinators.
NOTE: The pump Override switch should no longer be used in the “Auto” Position. It should be left in the On position for normal operation and off for maintenance.
CONNECTION TO ASTRALPOOL ROLACHEM SYSTEMS
The RolaChem dosing system needs to be connected to the equipment centre via a remote cable. To connect the cable from the dosing system to the equipment centre, do the following:
1. Turn off the mains supply to the equipment centre. 2. Plug one end of the RJ12 cable into the RJ12 socket that can be found on the underside of the Power
Supply Module. (Cable not supplied) 3. The other end of the cable must be plugged into the Rolachem dosing system. 4. Connect the chlorinator mains plug into the pump outlet of the Power Supply Module. 5. Plug the pump into the power socket located on the underside of the Rolachem dosing system. 6. Set the Pump override switch to the ON position. 7. Turn on the mains to the Equipment centre. 8. Refer to the programming guide for the RolaChem dosing system for configuration to suit operation with
Genus control systems.
NOTE: The pump Override switch should no longer be used in the “Auto” Position. It should be left in the On position for normal operation and off for maintenance.
INTERFACE FOR NON ASTRALPOOL SALT CHLORINATORS (OPTION)
1. Connect the male 4 pin plug into one of the female 4 pin sockets of the Power Supply Module. 2. Cut the sense wire on Salt Chlorinator and crimp in blue wires from Salt Chlorinator Interface.
Note: If Chlorinator output is disabled when in Pool mode, swap white and red leads inside Salt Chlorinator Interface.

Inst 276 - Viron Connect Pool & Spa Controller V0610
12
PRODUCT COMPATIBILITY
Heater Requirements Only the Viron series Pool and Spa heaters are fully compatible with the Viron Connect control system. To control a Viron Pool and Spa heater using the Viron Connect system, you must configure the communication system to Fast Comms on the Viron heater (heaters manufactured from March 2010 are compatible). This is done by;
With the heater powered but indicating OFF on the screen
Press and hold in the ON/OFF button
Press in sequence (while holding in ON/OFF button) WARM / COOL / WARM / WARM
Release the ON/OFF button
Using the button located under the word next, scroll through the menu until you arrive at the option “Use Fast Comms”
Select change and make settings fast comms
Next in the menu an option “POOL/SPA MASTER” is displayed. Select change
Change setting to P/S Master Off If no heater is to be installed on the system (or a different model, manufacturers heater is to be used), the Viron Connect must be configured to operate in LOCAL mode. You must also purchase a Viron Connect Temp Sensor Pack. To change the controller to local mode;
Remove from cover from the controller electrical box (ensure power is isolated)
Reposition jumper on CN4 from SYSTEM (top and middle pins) to LOCAL (middle and bottom) setting

Inst 276 - Viron Connect Pool & Spa Controller V0610
13
Viron 3 Speed Pump Requirements The Viron Connect controller is capable of controlling all aspects of the Viron P300 pump. Pumps with manufacture dates after 1
st March 2010 are compatible with the Viron Connect control system. To configure the
P300 pump to operate on the control system, you must switch the controls to Fast Comms. This is done by;
Switch on power to the Viron P300 pump.
Within 2 seconds of powering the pump up, press and hold in the medium speed button.
While holding in the medium speed button, press and release the high speed button.
Release the medium speed button.
To confirm you have configured the pump correctly, switch the pump off and wait 30 seconds. Power the pump back on and within 2 seconds, press and hold the medium speed button. The LED next to the medium button should be flashing and the LED next to the high speed button should be constant on. If not, repeat process above.
VX “S” Series Salt Chlorinators To configure the VX series salt chlorinators into Fast Comms;
Power unit up in normal stand alone mode.
With unit powered, press and hold in chlorine increase and decrease output buttons.
While holding in chlorine output buttons, press and hold in Pool Mode button
Release chlorine output buttons
Release Pool Mode button
Unit will display “Installer Mode – Press Backwash”
Press backwash button
Use Pool Mode and Spa Mode buttons to select SYSTEM setting
Press backwash button
Use Pool Mode and Spa Mode buttons to select Fast Comms setting
Press backwash button
RolaChem Chemical Dosing Systems To configure the RolaChem RC8 to Fast Comms;
Through the MAINT option, enter installation mode.
In the installation menu, scroll through options until timer option
Select timers DISABLED
Select G4 system INSTALLED
Select Fast Comms ENABLED

Inst 276 - Viron Connect Pool & Spa Controller V0610
14
E Series Salt Chlorinators To configure the E Series salt chlorinator to Fast Comms;
Through the MAINT option, enter installation mode.
In the installation menu, scroll through options until timer option
Select timers DISABLED
Select G4 system INSTALLED
Select Fast Comms ENABLED
FM Remote Control Module To configure the FM received to Fast Comms;
Remove cover of FM receiver enclosure
Change jumper from slow comms (pins 4 & 5) to fast comms (pins 3 & 4)
Additional touchpad(s) If using additional 7 button (G4) or 4 button (Plus4) touchpad‟s, these need to be configured to Fast Comms also;
For the 7 button remote, enter standard programming menu by holding in the ON/OFF button and pressing in sequence WARM / COOL / WARM
Configure control based on prompted options
When option for slow or fast comms is displayed, select Fast Comms “YES”
You will also be prompted if you wish to use channel 3 button on the touchpad for AUX 3 or for changing valve actuators
For the 4 button (Plus4) remote, change jumper from slow comms (pins 4 & 5) to fast comms (pins 3 & 4)
If you have any issues with the installation or set up of the Viron Connect control system, please contact your local Astral Pool sales and service office on the number below;
Victoria: New South Wales: Queensland: South Australia: Western Australia: Gold Coast: Townsville:
Ph: (03) 8796 8600 Ph: (02) 9853 2100 Ph: (07) 3308 5400 Ph: (08) 8152 7600 Ph: (08) 9350 2600 Ph: (07) 5552 2600 Ph: (07) 4750 3100
Fax: (03) 8796 8670 Fax: (02) 98532170 Fax: (07) 3308 5470 Fax: (08) 81527670 Fax: (08) 9350 2670 Fax: (07) 5552 2670 Fax: (07) 4750 3170
Inst 276 - Viron Connect Pool & Spa Controller V0610
15
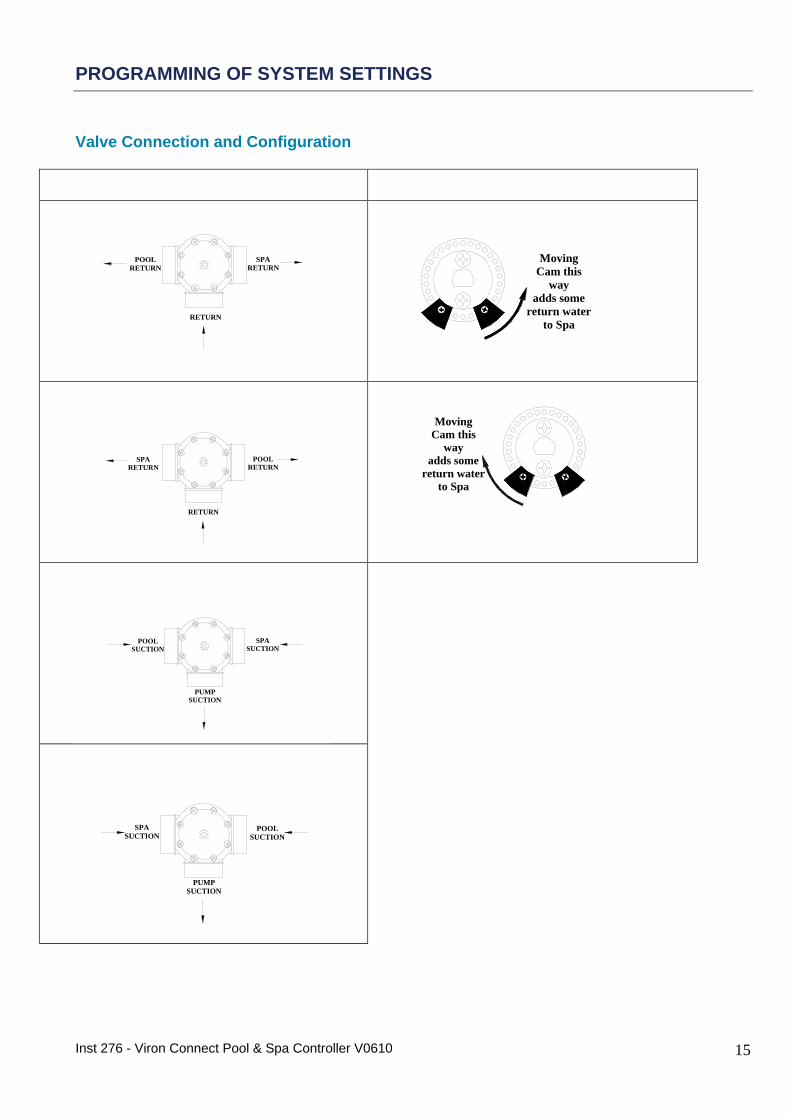
PROGRAMMING OF SYSTEM SETTINGS
Valve Connection and Configuration
Valve Configuration
Cam Adjustment
RETURN SIDE
RETURN SIDE
SUCTION SIDE
SUCTION SIDE
SPA
RETURNPOOL
RETURN
RETURN
SPA
RETURN
RETURN
POOL
RETURN
POOL
SUCTION
SPA
SUCTION
PUMP
SUCTION
POOL
SUCTION
SPA
SUCTION
PUMP
SUCTION
Moving
Cam this
way
adds some
return water
to Spa
Moving
Cam this
way
adds some
return water
to Spa

Inst 276 - Viron Connect Pool & Spa Controller V0610
16
WARRANTY
Your Viron Connect Pool and Spa Controller is covered by a limited 12 month warranty against defective parts and faulty workmanship (plus 30 days to allow for installation). To make a warranty claim you must return your Viron Connect Pool and Spa Controller to Astral Pool‟s factory freight prepaid and Astral Pool will repair or replace it (at its option) and return it to you. Should a fault occur, call Astral Pool or an Authorised Hurlcon Service Agent. There are no user serviceable parts. Always turn off and disconnect power supply when removing Power Supply Module.
Limitations All warranties only apply if the equipment is installed and operated in complete compliance with the installation and operating instructions. Specific limitations and exclusions include but are not limited to, water ingress into Power Supply Module and Remote Control, excessive appliance current load on any one or number of power outlets, misuse or abuse whether intentional or accidental. Astral Pool assumes no liability for consequential damages of any kind. In field labour warranty is applicable in capital city metropolitan areas and within a 20 km radius of Astral Pool Authorised Service Agents. Should you request a warranty service call and the problem is diagnosed as non-warrantable, you will be charged for a diagnostic service call plus any parts and labour required to repair the Viron Connect Controller. No person is authorised to make any representations on behalf of Astral Pool.
Commercial Installation On Commercial Installations, such as health clubs, motels/hotels and hydrotherapy facilities, parts and in field labour warranty (in capital city metropolitan areas and within a 20 km radius of Astral Pool Authorised Service Agents) is 12 months from the date of purchase plus 30 days to allow for installation.

Inst 276 - Viron Connect Pool & Spa Controller V0610
17
Equipment Outlet Names Record what equipment is plugged into the Equipment Centre and Connect 8 Expansion Module. This will enable you to name each channel when you set up the touch screen control Example: Channel 1 Viron 3 speed Pump Channel 2 Arc underwater Light Channel 1 _________________________________________________________________ Channel 2 _________________________________________________________________ Channel 3 _________________________________________________________________ Channel 4 _________________________________________________________________ Channel 5 _________________________________________________________________ Channel 6 _________________________________________________________________ Channel 7 _________________________________________________________________ Channel 8 _________________________________________________________________ Notes: _________________________________________________________________ _________________________________________________________________ _________________________________________________________________ _________________________________________________________________ _________________________________________________________________ _________________________________________________________________

Inst 276 - Viron Connect Pool & Spa Controller V0610
18

Inst 276 - Viron Connect Pool & Spa Controller V0610
19

Inst 276 - Viron Connect Pool & Spa Controller V0610
20
ASTRALPOOL Pty. Limited. A.B.N. 97 007 284 504
www.astralpool.com.au email: [email protected]
Information and specifications subject to change without notice.
Victoria: New South Wales: Queensland: South Australia: Western Australia: Gold Coast: Townsville:
Ph: (03) 8796 8600 Ph: (02) 9853 2100 Ph: (07) 3308 5400 Ph: (08) 8152 7600 Ph: (08) 9350 2600 Ph: (07) 5552 2600 Ph: (07) 4750 3100
Fax: (03) 8796 8670 Fax: (02) 98532170 Fax: (07) 3308 5470 Fax: (08) 81527670 Fax: (08) 9350 2670 Fax: (07) 5552 2670 Fax: (07) 4750 3170
INSTALLATION AND OPERATING INSTRUCTIONS I INSTALLATION AND OPERATING INSTRUCTIONS
INSTALLATION AND OPERATING INSTRUCTIONS I INSTALLATION AND OPERATING INSTRUCTIONS