Embed Size (px)
Citation preview

V-TOUCH PRO MANUAL905L Series

Copyright©2011 Visual Land Inc. www.visual-land.com 2
Table Of ContentsButtonsBasic FeaturesCautionTurning On/Off the PlayerCharging the PlayerInserting the MicroSD CardRemoving the McroSD CardConnecting and Loading FilesMain MenuMusicVideoCameraPhotoRadioRecordE-bookExtrasFlashBrowserSettingsStandbyTroubleshooting
23446677788
111415171819202122222424
TABLE OF CONTENTS

Copyright©2011 Visual Land Inc. www.visual-land.com 3
ON/OFF SwitchWhile player is on, can be used as a “back” button, by sliding to the right once
Volume Buttons
SelectButton

Copyright©2011 Visual Land Inc. www.visual-land.com 4
BASIC FEATURES• 3.0-inch Touch Screen • Support for MP3, WMA, WAV, FLAC, OGG, MP2
music formats• Support for AVI, FLV, RM, RMVB, MP4, 3GP, SWF
video formats• Support for JPEG, BMP, GIF picture formats • Built-In 2.0MP Camera for Still Photos and
720x480 Video Resolution• FM Radio• 200-Hour Voice Recorder• E-Book Reader support for TXT formats• MicroSD Card Slot, supports up to 16GB SD
Card
CAUTION• Do not use the player in exceptionally cold or
hot, dusty, damp or dry environments.• Do not drop, strike, or throw your player. Physi-
cal damage to your player will void ALL warran-ties.
• Please charge your battery when:• Battery power icon shows an empty icon• The system automatically shuts down and
the power is soon off when you switch on the unit once again
• There is no response if you operate on any

Copyright©2011 Visual Land Inc. www.visual-land.com 5
key• Please always follow the correct disconnect
procedures for your operating system. Do not disconnect power abruptly when the player is being formatted or in the process of uploading ordownloadingfiles.Otherwiseitmayleadtofilecorruption,firmwarefailure,andevenhard-ware damage.
• We are not liable for any loss of data stored on this device.
• Please do not dismantle this player. Any disas-sembly not done by an authorized technician will void ALL warranties.
• This product and manual are subject to change without notice.
NOTE:The playback times listed refer to the maximum playback times possible, using the best power sav-ings. The actual playback time may differ as adjust-ments to screen brightness, power saving modes, volume, etc are made.As there are many brands of Micro SD cards in the market, every card uses different quality and speed standards. Therefore, we are unable to guarantee that our product will be compatible with all types or brands of Micro SD cards, but will be compatible withthoseMicroSDcardswithmainstreamspecifi-

Copyright©2011 Visual Land Inc. www.visual-land.com 6
cations in the market.As parameters such as formats, bit rate, codecs, frame rates, and resolutions differ, the player will notbecompatiblewithalllistedfiles.Ifyouareexperiencingissueswithplayingyourfilesonthisplayer, we recommend using a supported conver-siontooltoreconvertyourfilestothespecificationsof this device.Modificationsnotapprovedbythepartyresponsiblefor compliance could void the user’s authority to operate the equipment.
TURNING ON/OFF THE PLAYERHold the power switch to the right for 2-3 seconds and the unit will power on. Hold the power switch to the right for 2-3 seconds again and the unit will power off. Moving the power switch to the left will lock the player and prevent accidental press of but-tons/functions.
CHARGING THE PLAYERTo charge the player, connect it to a powered USB port, or external AC adapter. If you choose to use a third party adapter, please ensure that it is 5V and between 350 and 500mA output.
Copyright©2011 Visual Land Inc. www.visual-land.com 7
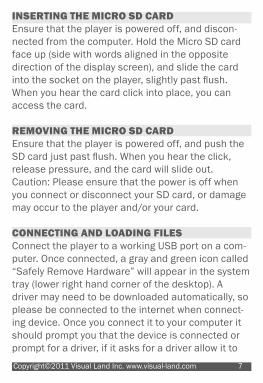
INSERTING THE MICRO SD CARDEnsure that the player is powered off, and discon-nected from the computer. Hold the Micro SD card face up (side with words aligned in the opposite direction of the display screen), and slide the card intothesocketontheplayer,slightlypastflush.When you hear the card click into place, you can access the card.
REMOVING THE MICRO SD CARDEnsure that the player is powered off, and push the SDcardjustpastflush.Whenyouheartheclick,release pressure, and the card will slide out.Caution: Please ensure that the power is off when you connect or disconnect your SD card, or damage may occur to the player and/or your card.
CONNECTING AND LOADING FILESConnect the player to a working USB port on a com-puter. Once connected, a gray and green icon called “Safely Remove Hardware” will appear in the system tray (lower right hand corner of the desktop). A driver may need to be downloaded automatically, so please be connected to the internet when connect-ing device. Once you connect it to your computer it should prompt you that the device is connected or prompt for a driver, if it asks for a driver allow it to

Copyright©2011 Visual Land Inc. www.visual-land.com 8
searchautomaticallyitshouldfindthecorrectdriver.After it installs and the computer detects it, go to My Computer.Inthere,youwillfindtwonewRemovableDisk drives, one being the player’s internal memory, the other being the memory card slot. From here, youcancopyandpasteyourmusicfilesfromyourcomputer to the respective music/audio folder in the removable disk.Note: MAC Computers: When connected to your MAC computer, the device will act as a removable drive. Simplydragyourfilestothedevice.
MAIN MENUOnce you power the player on, the Main Menu will be displayed with icons for the different modes of the player. Tap the icon corresponding with the mode you want to enter.
1. MUSIC The music player supports MP3, WMA, WAV, FLAC, OGG, and MP2 formats. From the main music menu you can browse music according to Artist, Album, Genre,etc.Selectingamusicfilewillautomaticallystart playback.The bottom bar contains sorting options for the songs on the player. You can scroll the bar to access the latter options.
Copyright©2011 Visual Land Inc. www.visual-land.com 9
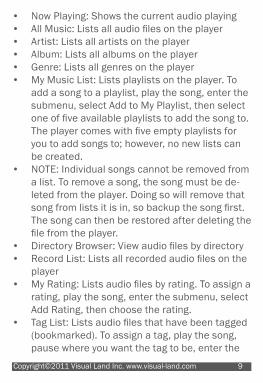
• Now Playing: Shows the current audio playing• AllMusic:Listsallaudiofilesontheplayer• Artist: Lists all artists on the player• Album: Lists all albums on the player• Genre: Lists all genres on the player• My Music List: Lists playlists on the player. To
add a song to a playlist, play the song, enter the submenu, select Add to My Playlist, then select oneoffiveavailableplayliststoaddthesongto.Theplayercomeswithfiveemptyplaylistsforyou to add songs to; however, no new lists can be created.
• NOTE: Individual songs cannot be removed from a list. To remove a song, the song must be de-leted from the player. Doing so will remove that songfromlistsitisin,sobackupthesongfirst.The song can then be restored after deleting the filefromtheplayer.
• DirectoryBrowser:Viewaudiofilesbydirectory• RecordList:Listsallrecordedaudiofilesonthe
player• MyRating:Listsaudiofilesbyrating.Toassigna
rating, play the song, enter the submenu, select Add Rating, then choose the rating.
• TagList:Listsaudiofilesthathavebeentagged(bookmarked). To assign a tag, play the song, pause where you want the tag to be, enter the

Copyright©2011 Visual Land Inc. www.visual-land.com 10
submenu, then select Add Tag. This will tag the song and add it to the Tag List, which functions as an Ad Hoc playlist.
NOTE: Individual tags cannot be deleted. To remove a tag, the song must be deleted from the player. Doing so will remove all tags of that song, so backup thesongfirst.Thesongcanthenberestoredafterdeletingthefilefromtheplayer.
The playback screen will have the Play/Pause, Forward and Backward buttons at the bottom of the screen. Tapping Forward or Backward will go to the next or previous song, while holding the button rewinds or fast forwards. There are icons at the top of the screen that correspond to go back, submenu, equalizer,shuffle,andrepeat.Doubletapthecenterof the screen to toggle between album art, visual-izer, and lyrics.
In the submenu, you can choose the repeat and play modes, select different equalizer settings (even customize your own), and more.• VariableSpeedPlayback:Foraudiofilesthat
have this feature enabled, this changes the playbackspeedofthefile
• Add Tag: Marks the current location of the song playing and adds it to the Ad Hoc playlist. See

Copyright©2011 Visual Land Inc. www.visual-land.com 11
the previous section for more details.• Delete:Permanentlydeletesthefilefromthe
player. Note: This is irreversible!• Information: Shows the IDv3 tag of the current
playing audio• Set Rating: Allows you to rate the current playing
audio• Add to My Playlist: Allows you to add the current
playing audio to a playlist• User EQ: Shows the custom equalizer settings• SRS user mode: Shows the advanced audio
options• Advanced: Shows replay and fader optionsTo adjust the volume during music playback from the current play screen, press either the + or – buttons at the bottom of the player.
2. Video The video player supports AVI, RM, RMVB, WMV, 3GP, MP4, FLV, and SWF formats. Most formats do not require any conversion; however, video resolu-tion must be 720x480 or under, and audio quality must be 128kbps bit rate or under in order to be played back on this player.Upon entering the video player you can browse your folderstofindthevideofileyouwishtoplay.Select-ingthefilewillbeginautomaticplayback.

Copyright©2011 Visual Land Inc. www.visual-land.com 12
The bottom bar contains sorting options for the vid-eos on the player. You can scroll the bar to access the latter options.• Now Playing: Shows the current video playing• AllVideos:Listsallvideofilesontheplayer• DirectoryBrowser:Viewvideofilesbydirectory• TagList:Listsvideofilesthathavebeentagged
(bookmarked). To assign a tag, play the video, pause where you want the tag to be, enter the submenu, then select Add Tag. This will tag the song and add it to the Tag List, which functions as an Ad Hoc playlist. NOTE: Individual tags cannot be deleted. To remove a tag, the video must be deleted from the player. Doing so will remove all tags of that video,sobackupthevideofirst.Thevideocanthenberestoredafterdeletingthefilefromtheplayer.
• MyDV:Listsallrecordedvideofilesontheplayer
During video playback, controls will be at the bottom of the screen. After a few seconds of not touching the screen, they will disappear so the video can be viewed in full. You can also double tap the screen to hide the controls. To bring back the controls, simply touch any part of the screen.

Copyright©2011 Visual Land Inc. www.visual-land.com 13
In the submenu, you can choose the repeat and play modes, adjust the display options, and more.• Playbackmode:Adjuststherepeatorshuffle
options• Add Tag: Marks the current location of the video
playing and adds it to the Ad Hoc playlist. See the previous section for more details.
• Screen Size: Adjusts the size of the video rela-tive to the screen
• Resume: Adjusts resume options• Delete:Permanentlydeletesthefilefromthe
player. Note: This is irreversible!• Information: Shows the media information of
the current playing video
To adjust the volume during music playback, press either the + or – buttons at the bottom of the player. Toreturntothemainmenu,selectthefirsticononthe left. To forward/rewind within a video, press and hold the |<< or >>| icons until you are where you want to be.Videos can be viewed on a TV using the provided cables. Connect the cable from the headphone jack on the media player. See the Settings section below for TVOUT.

Copyright©2011 Visual Land Inc. www.visual-land.com 14
3. CAMERAThe built-in camera can record both still pictures andvideofiles.Uponenteringthecamerafunctionthe screen to landscape view for photo mode.Picture Mode:• The bar on the left adjusts the zoom level.• The camera icon on the bottom left switches
between still photo and video modes.• The next icon is for timed photos.• The center icon adjusts the brightness of
photos.• The second to last icon adds festive borders to
the picture.• The bottom right icon opens the picture browser
so you can view your current collection of pictures.
• The camera icon on the right will take pictures.• The top right icon opens the submenu, where
you can edit all sorts of options for taking photos.
• The arrow at the top left goes back to the Main Menu.
Video Mode:• The bar on the left adjusts the zoom level.• The camera icon on the bottom left will switch
between still photo and video modes.• The next icon adjusts the brightness of the

Copyright©2011 Visual Land Inc. www.visual-land.com 15
video.• The center icon should be adjusted depending
on where the video is shot, and can be set to auto, indoors, or outdoors.
• The second to last icon changes the lighting of the video depending on surrounding light conditions.
• The bottom right icon opens the video browser so you can view your current collection of videos.
• The camera icons on the right will start and stop the video recording.
• The top right icon opens the submenu, where you can edit all sorts of options for taking photos.
• The arrow at the top left goes back to the Main Menu.
4. PHOTO The photo viewer supports JPG, GIF and BMP picture formats. Entering the photo browser function will allow you to select the photo you wish to view from thevariousfolders.Selectingafilewillbringupthephoto.The bottom bar contains sorting options for the pic-tures on the player. You can scroll the bar to access the latter options.

Copyright©2011 Visual Land Inc. www.visual-land.com 16
• Now Browsing: Shows all pictures in the direc-tory currently browsing
• All Pics: Lists all pictures on the player• Directory Browser: View pictures by directory• Camera Pic: Lists all camera pictures taken by
the player
While viewing a picture, a bar along the bottom of the screen holds four buttons.• Slideshow: Initiates a slideshow, which will
automatically scroll pictures• Set as Wallpaper: Sets the current picture as
the Main Menu background• Fit to Screen: Adjusts the zoom of the photo to
fittoscreen• Rotate: Rotates the photo
In the submenu you can adjust settings for viewing the pictures.• Slide Effect: Adjusts the slideshow scrolling
visual effect• Delete:Permanentlydeletesthefilefromthe
player. Note: This is irreversible!• Information: Shows the information of the cur-
rent picture• Screen Size: Adjusts the zoom level of the
picture
Copyright©2011 Visual Land Inc. www.visual-land.com 17
5. RADIOYour headphones work as your antenna. In order to get reception for the radio, you will need to have them plugged in.When you open the FM Radio app, the radio will immediately begin playing. The channel and volume meters are shown at the top half, while the preset stations are shown at the bottom half. The bottom bar contains options for the radio.Auto Search: Automatically searches for stations and programs them as presets. Note: This will replace any presets that you have set.• FM Recorder: Records an audio selection from
the current station• Delete: Deletes the selected preset• Mute: Mutes/unmutes the radio In the submenu you can adjust various settings for the radio.• Channel List: Lists all saved station lists• Tuner Region: Adjusts the region where the
player is being used• FM Sensitivity: Adjusts the sensitivity of the
antenna• Record Quality: Adjusts the quality of the FM
recording (can be adjusted in the Recorder screen)
• Record Gain: Adjusts the amplitude of the FM

Copyright©2011 Visual Land Inc. www.visual-land.com 18
recording (can be adjusted in the Recorder screen)
• Save Path: Adjusts where the FM recordings are saved
The FM Recorder has its own submenu. Please see the next section for descriptions of the options in the submenu.
6. RECORD The built-in voice recorder allows you to record and saveaudioMP3andWAVfilesusingthebuilt-inmicrophone. You can also record an audio clip from an FM station. The screen will show you how many minute remain for recording. The more space you have available on your player, the longer you can record.In the submenu you can adjust the recording op-tions.• Record Format: Adjusts the format the record-
ings are saved as• Record Mode: Adjusts the input to record from• Save Path: Adjusts where the FM records are
savedThe bottom bar contains options for the recorder.• Record/Pause: Beings recording and pauses
the recorder• Stop:Endsrecordingandsavestherecordedfile
Copyright©2011 Visual Land Inc. www.visual-land.com 19
• Record Quality: Adjusts the quality of the FM recording
• Record Gain: Adjusts the amplitude of the FM recording
7. E-BOOK Thee-bookreadersupportssimpleTXTfiles.The bottom bar contains sorting options for the e-books on the player.• Now Reading: Shows the current e-book dis-
played• AllEbooks:Listsalle-bookfilesontheplayer• Directory Browsing: View e-books by directory• TagList:Listse-bookfilesthathavebeen
tagged (bookmarked). To assign a tag, open the e-book, scroll to where you want the tag to be, enter the submenu, then select Add Tag. This will tag the page and add it to the Tag List, which functions as an Ad Hoc playlist.
NOTE: Individual tags cannot be deleted. To remove a tag, the e-book must be deleted from the player. Doing so will remove all tags of that e-book, so backupthee-bookfirst.Thee-bookcanthenberestoredafterdeletingthefilefromtheplayer.
The bottom bar has four buttons to adjust reading conditions.

Copyright©2011 Visual Land Inc. www.visual-land.com 20
• Automatic Scrolling: Starts/Stops automatic page scrolling
• Add Tag: Marks the current location of the e-book and adds it to the Ad Hoc playlist. See the previous section for more details.
• Font Size: Adjusts the size of the font• Font Color: Adjusts the color of the font• While Automatic Scrolling is on, the Add Tag but-
ton gets replaced. Scrolling Interval: Adjusts how long a page is displayed before scrolling
The submenu contains a few options for the e-book.• Effect Setting: Adjusts the page scrolling visual
effect• Delete:Permanentlydeletesthefilefromthe
player. Note: This is irreversible!
8. EXTRASStopwatch, Calculator, Calendar, PC CameraThese four functions found on the Main Menu are part of the Extras function, and while one of these functions is open, you can easily switch to another.• Stopwatch:
Press ‘Start’ to start the stopwatch. Press ‘Reset’ to clear all numbers. After starting, the ‘Start’ button will be replaced with ‘Stop,’ which will end the timer, while the ‘Reset’ but-

Copyright©2011 Visual Land Inc. www.visual-land.com 21
ton will be replaced with “Lap,” which will keep track of laps while keeping the timer running.
• Calculator: The Calculator functions as a standard calcula-tor.
• Calendar: This is a standard calendar for viewing dates. The date of the selected day is shown at the top, while the actual calendar is below it. Pressing the arrows on the sides of the date will go to the previous or next month, respec-tively.
• PC Camera: The PC Camera uses the built-in camera of the player to function as a webcam for a computer. The driver for the camera is on the player, and willautomaticallyinstallwhenfirstconnectedto a computer. You will need software that uses a webcam in order to use the PC camera.
9. FLASHThe V-Touch Pro also comes with Flash Player that canplaySWFandSWDfiles.Itcanplaybothgamesand animations, which can be toggled at the bottom bar.

Copyright©2011 Visual Land Inc. www.visual-land.com 22
10. BROWSERThe browser function allows you to browse and ac-cessallthefilesstoredonyourplayer.Youcanalsodelete them from here as well.
11. SETTINGS From here you can adjust the player’s system set-tings.• Display Settings:
From here you can adjust how long the backlight stays on before turning off, and you can adjust the brightness of the screen. Set the Backlight timer to zero seconds to prevent the screen from turning off.
• Calibrate: Use this function to reset the touch screen’s sensor. Press the cross exactly where shown to calibrate the screen.
• Off Time: Idle Time will adjust when the player will automatically power off when not in use. Sleep Time does the same but will reset to zero after it sleeps. Set either option to zero to disable it.
• Date & Time: Use this function to set the date and time. Set Date will set the date. Adjust Date & Time only adjusts the time.

Copyright©2011 Visual Land Inc. www.visual-land.com 23
• Language: From here you can choose from a large list of different languages to set your V-Touch Pro into.
• TV OUT: Use this option to adjust the TV setting when using a TV output. Set to Off to save battery.
• Select Key Tone: Use this to set a tone for whenever you press a button on the player.
• Set as Desktop: This option lets you choose the desktop back-ground for the Main Menu.
• Advanced:• Player Info: lets you view specs, such as the
firmwareversion,diskspace,filecount,etc• Select Font: lets you select the font for the
player• Set User Name: lets you enter a name for
the player• Check System: runs a self-diagnostic on the
player. This may take a few minutes.• Reset: returns the player to factory default.
Note: This will ERASE ALL DATA from the player and is irreversible!
• Format Internal Memory: erases all data from the player. Note: This is irreversible!
• Format Card: erases all data from the SD

Copyright©2011 Visual Land Inc. www.visual-land.com 24
Card. Note: This is irreversible!
12. STANDBYTouch this icon to lock the screen. Unlock the screen by sliding the on-screen bar to the right.
TROUBLESHOOTINGPlayer does not power on.Check if the battery power is out. If it is, connect the player via USB or wall charger, then try to power on.
No sound or loud noises in earphonesCheck if the volume has been set to zero. Check if the earphones are fully plugged in. Check whether the earphone plug is clean, dirt can cause noise. Checkwhetherthemusicfileisdamaged.Tryplay-inganothermusicfiletodetermineifthatistheproblem.Ifthefilehasbeendamaged,itcancauseserious noise.
Poor FM receptionTry to adjust the direction and location of player, try stretching the headphone cable. Check whether there are electronic devices near that’s jamming the signal.

Copyright©2011 Visual Land Inc. www.visual-land.com 25
Cannot fit more than 99 files onto the playerTofixthisproblem,createanewfolderonyourplayerandinsertyourfilesinthere.Pleasedonotinsert subfolders within a subfolder, as it may cause problems with your player.
Short battery lifeThe screen can drain the battery life of your player. To increase the battery life, decrease the bright-ness, and the time it takes for the player screen to turn off when idle.
Firmware UpgradeWe strongly recommend that you only download VisualLandapprovedfirmwarefromourwebsite.Downloadinganyotherfirmwaremayharmyourplayer.
FCC Part 15: This device complies with Part 15 of the FCC Rules. Operation of this product is subject to the following two conditions: (1) this device may not cause harmful interference, and (2) this device must accept any interference received, including interference that may cause undesired operation.FCCWarning:Changesormodificationsnotexpresslyapprovedbythe party responsible to compliance with the FCC Rules could void the user’s authority to operate this equipment.
DISCLAIMER1. Without the company’s written permission, any form of repro-

Copyright©2011 Visual Land Inc. www.visual-land.com 26
duction, transmission, distribution and storage of any of the contents of this manual is prohibited.
2. In the course of the preparation of this manual the contents are accurate and complete, but we do not guarantee this manual is without any errors or omissions.
3. The company is not responsible for errors or omissions. 4. We reserve the right to make changes to this manual without
prior notice. 5. In any case, we are not responsible for any losses or damages
caused by this manual.
NOTESThis manual is intended to inform users of the proper use of player to ensure that the player’s in good condition, please read carefully and follow.• Do not severely impact (by dropping, hitting, etc.) the player.• Do not clean player with benzene, thinner and other chemicals.• Pleasedonotputtheplayerclosetoastrongmagneticfieldor
electricfield.• Please avoid direct light or heating appliances.• Do not attempt to repair or modify the player.• Do not attempt to replace the battery.• Do not listen to the player using headphones at a high volume,
so as to avoid adverse effects on hearing.• Please dispose of packaging waste, batteries, old electronic
productsaccordingtoitsclassification.
If you have a problem with your player please visit our website and view our support pages.http://www.visual-land.com
Copyright © 2011 Visual Land Inc.

www.visual-land.com Copyright©2011 Visual Land Inc.